Springy Spores: Difference between revisions
Gamefreak75 (talk | contribs) (Created page with "{{construction}} {{image}} {{level |title=Springy Spores |image= |code=5 - 6 |game=''Donkey Kong Country Returns |notes=This level is covered ins springy mushrooms and flora.…") |
Nintendo101 (talk | contribs) mNo edit summary |
||
| (57 intermediate revisions by 32 users not shown) | |||
| Line 1: | Line 1: | ||
{{level infobox | |||
{{level | |||
|title=Springy Spores | |title=Springy Spores | ||
|image= | |image=[[File:SpringySpores.png|250px]] | ||
|code=5 - 6 | |code=5-6 | ||
|game=''[[Donkey Kong Country Returns]] | |world=[[Forest (Donkey Kong Country Returns)|Forest]] | ||
| | |game=''[[Donkey Kong Country Returns]]'' (''[[Donkey Kong Country Returns 3D|3D]]'') | ||
|before=[[ | |before=[[Clingy Swingy|<<]] | ||
|after=[[Wigglevine Wonders|>>]] | |after=[[Wigglevine Wonders|>>]] | ||
|track=King of Cling | |||
}} | }} | ||
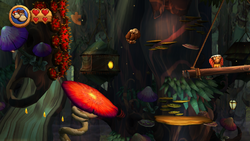
'''Springy Spores''' is the thirty-fourth level in ''[[Donkey Kong Country Returns]]'' and ''[[Donkey Kong Country Returns 3D]]'', as well as the sixth level in the [[Forest (Donkey Kong Country Returns)|Forest]] world. A key from [[Cranky Kong's Shop]] is required to access this level. Finishing this level will give the player access to [[Wigglevine Wonders]]. | |||
This level is set in a forest where many springy mushrooms and flora grow. The [[Kong]]s need to use these to get across gaps and get to higher places. The level also brings back vines from [[Vine Valley (level)|Vine Valley]] and turf-covered objects from [[Clingy Swingy]]. [[Donkey Kong]] and [[Diddy Kong]] need to perform small jumps or large jumps, depending on the obstacles around the vicinity. Enemies here include [[Frogoon]]s, [[Tiki Buzz]]es, [[Flaming Tiki Buzz]]es, and [[Tiki Goon]]s. | |||
In the [[Donkey Kong Country Returns#Time Attack|Time Attack]] mode of the game, a time of 1:35:00 is needed to get a gold medal, a time of 1:38:00 for silver, and a time of 1:43:00 for bronze. | |||
==Overview== | |||
The level starts out on a platform that is connected to a tree found behind it. A [[Banana Coin]] is in a hidden alcove in the tree. The Kongs can progress by heading to the east, where there is a dandelion and a Tiki Goon. The dandelion reveals an item if it is blown on. Three bouncy mushrooms are ahead. The primates must bounce on them to travel over a large gap. A Tiki Buzz is between the first two mushrooms, while a low wall with spikes on top of it is between the last two. More mushrooms are ahead, but before the Kongs reach them, they have to pass a Chomp and a Frogoon enemy. The Chomp has a spring in its mouth that they can bounce on, while the Frogoon stands on a thin pillar. When the heroes reach the mushrooms, they can find a Tiki Buzz and a Flaming Tiki Buzz in their way. The letter K of the [[KONG Letters|K-O-N-G Letters]] is under the Flaming Tiki Buzz. The final mushroom here can help the duo access a higher platform with the first [[DK Barrel]] on it. A Tiki Goon and some item-bearing plants are here as well. An area full of spikes is ahead. The spikes line the bottom of the section, so Donkey and Diddy must rely on swinging ropes to avoiding landing on them. | |||
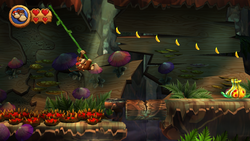
[[File:DKCR Springy Spores 2.png|thumb|left|250px|The Kongs swing on a vine so they can cross some spikes safely]] | |||
After they swing along two vine ropes, they come up to another bouncy mushroom with a Frogoon on it. It is placed before another line of spikes that the Kongs must pass safely by using a [[swinging vine|hanging vine]]. The vine swings them onto a platform with some [[banana]]s above it. A Tiki Goon and an item-bearing plant are on the platform as well. A trail of bananas then leads over a nearby Chomp enemy that has a spring in its mouth. Under the end of the banana trail is another platform with a Tiki Goon on it. A mushroom is after this platform, and it is tilted towards a stationary mushroom platform ahead. Under this platform is another bouncy mushroom, and next to it above a large abyss is another, which is tilted so that it bounces the heroes onto another fungus platform when they bounce on it. This platform allows them to reach another bouncy mushroom that is placed near a wall of spikes. When they bounce on it, they are thrown over to a hanging wood platform nearby. Tiki Goons are on this platform, as well as on the similar platform following it, which the letter O hovers under. | |||
== | Another springy mushroom is ahead that bounces the heroes onto a small, hanging platform that sways back and forth slightly. Two Frogoons hop around it, making it harder for the primates to reach a bouncy mushroom nearby that can help them bounce over a low wall with some spikes on it. A bouncy mushroom is on the other side of the wall, followed by two more. A ceiling covered in spikes is above these two mushrooms, so the Kongs must try not to jump too high on them. More springy mushrooms are ahead, but a wide gap separates them from the Kongs. So, the duo must use the green, grassy turf handing on a nearby ceiling to climb across it and reach the fungus springs. There are two bouncy mushrooms on the other side of the abyss, and a Flaming Tiki Buzz is placed between them. More climbable turf is also above the second mushroom, aiding Donkey and Diddy in traveling over a group of sharp spikes and another Flaming Tiki Buzz. Three [[Bopapodamus]]es are under the end of the turf in an abyss, and they can be bounced on in order to reach an area with the letter N high in the air, the second DK Barrel, and the [[Professor Chops|Tutorial Pig]] at the checkpoint. | ||
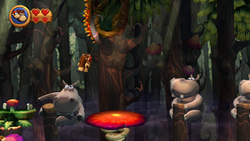
[[File:DKCR Springy Spores 3.png|thumb|250px|Donkey Kong takes out a Bopapodamus]] | |||
There is a large gap ahead with a giant, swinging object covered in climbable turf hanging above it. The heroes can climb around the object to reach a springy mushroom that can help them hop to another swinging object. Once they finish climbing around it using the grassy turf growing on it, they can access a solid area of land with a few Tiki Goons and plants containing items. A line of five bouncy mushrooms are ahead above a wide abyss. They all have a rather wide gap between each of them, so the Kongs must make sure their jumps are big enough to get to each of them. However, most of the five mushrooms have spikes hanging above them, so the primates cannot jump to high. Additionally, a Tiki Buzz is above the first mushroom, while a Flaming Tiki Buzz is between the last two. A solid platform is located after the group of mushrooms, being followed by three Bopapodamuses. Before each of the hippos in the trio are small springs that the Kongs can use to progress safely. However, the last spring is in the mouth of a dangerous Chomp. The third Bopapodamus is placed near a wall covered in spikes. The primates must push the hippo creature farther downwards so they can head under the wall safely. | |||
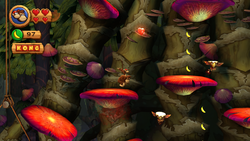
[[File:DKCR Springy Spores 4.png|thumb|250px|left|The duo in the area full of springy mushrooms]] | |||
They can find another bouncy mushroom and two more Bopapodamuses after this, which all help them reach a thin platform in a large pit. When the heroes pound on the platform, a spring appears that can bounce them onto a hanging platform above. A trail of bananas floating in the air near here leads to another handing platform with the letter G on it. Under this trail of bananas is a springy mushroom and a solid platform with two Tiki Goons on it. Following the Tiki enemies is an area full of bouncy mushrooms that are growing out of the wall. Around the mushrooms are many collectibles, including bananas, [[Banana|Banana Bunch]]es, and even [[Puzzle Piece (Donkey Kong Country Returns)|Puzzle Pieces]]. Many Tiki Buzzes also fly around the area. If the primates jump to the top of the area using the mushroom, they can find the [[Slot Machine Barrel]]. | |||
{{br}} | |||
==Enemies== | |||
{|class="wikitable dk" | |||
!Image | |||
!Name | |||
!Count | |||
|- | |||
|align="center"|[[File:Bopapodamus.png|50px]] | |||
|align="center"|[[Bopapodamus]] | |||
|8 | |||
|- | |||
|align="center"|[[File:Flaming Tiki Buzz DKCR.png|50px]] | |||
|align="center"|[[Flaming Tiki Buzz]] | |||
|5 | |||
|- | |||
|align="center"|[[File:Frogoon screenshot.png|50px]] | |||
|align="center"|[[Frogoon]] | |||
|5 | |||
|- | |||
|align="center"|[[File:Green Chomp.png|50px]] | |||
|align="center"|[[Green Chomp]] | |||
|7 | |||
|- | |||
|align="center"|[[File:TikiBuzz.png|50px]] | |||
|align="center"|[[Tiki Buzz]] | |||
|11 | |||
|- | |||
|align="center"|[[File:TikiGoon.png|50px]] | |||
|align="center"|[[Tiki Goon]] | |||
|14 | |||
|} | |||
==Items== | |||
{|class="wikitable dk" width=15% | |||
|- | |||
!Image | |||
!Name | |||
!Count | |||
|- | |||
|align="center"|[[File:BananacoinDKCR.png|x50px]] | |||
|align="center"|[[Banana Coin]] | |||
|18 | |||
|- | |||
|align="center"|[[File:DKBarrelDKCR.png|x50px]] | |||
|align="center"|[[DK Barrel]] | |||
|2 | |||
|- | |||
|align="center"|[[File:Heart.png|x50px]] | |||
|align="center"|[[Heart (item)|Heart]] | |||
|6 | |||
|} | |||
===K-O-N-G Letters=== | |||
{|class="wikitable dk"width=70% | |||
|- | |||
!Image | |||
!Letter | |||
!Location | |||
|- | |||
|align="center"|[[File:DKCR Springy Spores Letter K.png|250px]] | |||
|align="center"|K | |||
|Just before the first DK Barrel, the Kongs can find the letter K between the last two mushrooms in the area under a Flaming Tiki Buzz. They should perform a small jump between the two mushrooms as the Flaming Tiki Buzz moves upwards to get it. | |||
|- | |||
|align="center"|[[File:DKCR Springy Spores Letter O.png|250px]] | |||
|align="center"|O | |||
|The letter O is under the second platform after the first area that features tilted mushroom springs. A roll-jump is needed to reach it safely. | |||
|- | |||
|align="center"|[[File:DKCR Springy Spores Letter N.png|250px]] | |||
|align="center"|N | |||
|The heroes should perform a high-jump off of the last [[Bopapodamus]] before the checkpoint to reach the letter N high in the air nearby. | |||
|- | |||
|align="center"|[[File:DKCR Springy Spores Letter G.png|250px]] | |||
|align="center"|G | |||
|If the primates high-bounce from the last Bopapodamus in the level, the can reach a hanging platform. If they follow the floating trail of bananas nearby, they can access another platform with the letter G on it. | |||
|} | |||
== | ===Puzzle Pieces=== | ||
{|class="wikitable dk"width=70% | |||
|- | |||
!Image | |||
!Number | |||
!Location | |||
|- | |||
|align="center"|[[File:DKCR Springy Spores Puzzle Piece 1.png|250px]] | |||
|align="center"|1 | |||
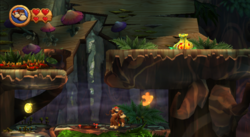
|Once the primates jump off of the third vine in the level, they can find a cracked, wooden object placed in a small gap. If they break through it, they land in a lower area, where the first Puzzle Piece is hidden behind some leaves in an alcove. | |||
|- | |||
|align="center"|[[File:DKCR Springy Spores Puzzle Piece 2.png|250px]] | |||
|align="center"|2 | |||
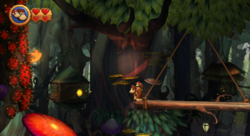
|Immediately before the letter O, the primates should notice the second Puzzle Piece against a wall covered in spikes above the last tilted mushroom. They should roll-jump from the nearest platform to reach it. | |||
|- | |||
|align="center"|[[File:DKCR Springy Spores Puzzle Piece 3.png|250px]] | |||
|align="center"|3 | |||
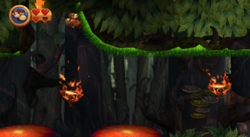
|When the primates reach the first area that has climbable turf in it, they should climb onto the second set of turf that is placed immediately after a Flaming Tiki Buzz. If they climb to the right on this ceiling of turf and reach the end of it, they find a Puzzle Piece parallel to them that they can jump to. | |||
|- | |||
|align="center"|[[File:DKCR Springy Spores Puzzle Piece 4.png|250px]] | |||
|align="center"|4 | |||
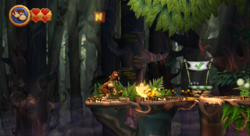
|The Kongs should knock down the three Bopapodamuses located just before the checkpoint to make a Puzzle Piece appear on the platform after them with some Banana Coins. | |||
|- | |||
|align="center"|[[File:DKCR Springy Spores Bonus Room.png|250px]] | |||
|align="center"|5 | |||
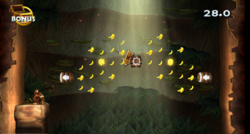
|The duo can find two swinging, turf-covered structures hanging over the first abyss after the checkpoint. They should drop down from the second structure towards a banana trail to land in a [[Barrel Cannon]] that shoots them into a [[Bonus room]]. There, they must shoot between two other Barrel Cannons so they can collect 80 bananas and two Banana Coins within thirty seconds to make a Puzzle Piece appear. As they try to collect everything, an Auto Fire Barrel moves in the center of the area between the two Barrel Cannons. It can shoot the Kongs out of the bonus before they are done collecting, so they must try to avoid it. | |||
|- | |||
|align="center"|[[File:DKCR Springy Spores Puzzle Piece 6.png|250px]] | |||
|align="center"|6 | |||
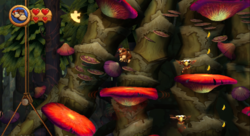
|After the letter G, the Kongs should bounce high in the air in the left side of the large area of mushrooms to find the sixth Puzzle Piece. | |||
|- | |||
|align="center"|[[File:DKCR Springy Spores Puzzle Piece 7.png|250px]] | |||
|align="center"|7 | |||
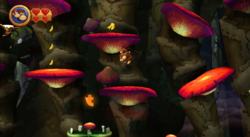
|In the bottom-center part of the large, mushroom-filled area at the end of the level, the Kongs can find the seventh and final Puzzle Piece above a hidden spring that is placed on a Chomp enemy. | |||
|} | |||
==Names in | ==Names in other languages== | ||
{{ | {{foreign names | ||
|Spa= | |Jap=きのこトランポリン | ||
|SpaM= | |JapR=Kinoko Toranporin | ||
|JapM=Mushroom Trampoline | |||
|Spa=Fungitrampolines | |||
|SpaM=Fungi-Trampolines | |||
|FreA=Flore à Ressorts | |||
|FreAM=Springed Flora | |||
|Ger=Sporen-Trampolin | |||
|GerM=Spore Trampoline | |||
|Ita=Selva saltafungo | |||
|ItaM=Jumping-mushroom Jungle | |||
}} | |||
{{DKCR}} | {{DKCR}} | ||
[[Category: | [[Category:Forests]] | ||
[[Category: | [[Category:Secret levels]] | ||
[[Category:Donkey Kong | [[Category:Donkey Kong Country Returns levels]] | ||
Latest revision as of 00:40, December 15, 2024
| Level | |
|---|---|
| Springy Spores | |
| |
| Level code | 5-6 |
| World | Forest |
| Game | Donkey Kong Country Returns (3D) |
| Music track | King of Cling |
| << Directory of levels >> | |
Springy Spores is the thirty-fourth level in Donkey Kong Country Returns and Donkey Kong Country Returns 3D, as well as the sixth level in the Forest world. A key from Cranky Kong's Shop is required to access this level. Finishing this level will give the player access to Wigglevine Wonders.
This level is set in a forest where many springy mushrooms and flora grow. The Kongs need to use these to get across gaps and get to higher places. The level also brings back vines from Vine Valley and turf-covered objects from Clingy Swingy. Donkey Kong and Diddy Kong need to perform small jumps or large jumps, depending on the obstacles around the vicinity. Enemies here include Frogoons, Tiki Buzzes, Flaming Tiki Buzzes, and Tiki Goons.
In the Time Attack mode of the game, a time of 1:35:00 is needed to get a gold medal, a time of 1:38:00 for silver, and a time of 1:43:00 for bronze.
Overview[edit]
The level starts out on a platform that is connected to a tree found behind it. A Banana Coin is in a hidden alcove in the tree. The Kongs can progress by heading to the east, where there is a dandelion and a Tiki Goon. The dandelion reveals an item if it is blown on. Three bouncy mushrooms are ahead. The primates must bounce on them to travel over a large gap. A Tiki Buzz is between the first two mushrooms, while a low wall with spikes on top of it is between the last two. More mushrooms are ahead, but before the Kongs reach them, they have to pass a Chomp and a Frogoon enemy. The Chomp has a spring in its mouth that they can bounce on, while the Frogoon stands on a thin pillar. When the heroes reach the mushrooms, they can find a Tiki Buzz and a Flaming Tiki Buzz in their way. The letter K of the K-O-N-G Letters is under the Flaming Tiki Buzz. The final mushroom here can help the duo access a higher platform with the first DK Barrel on it. A Tiki Goon and some item-bearing plants are here as well. An area full of spikes is ahead. The spikes line the bottom of the section, so Donkey and Diddy must rely on swinging ropes to avoiding landing on them.
After they swing along two vine ropes, they come up to another bouncy mushroom with a Frogoon on it. It is placed before another line of spikes that the Kongs must pass safely by using a hanging vine. The vine swings them onto a platform with some bananas above it. A Tiki Goon and an item-bearing plant are on the platform as well. A trail of bananas then leads over a nearby Chomp enemy that has a spring in its mouth. Under the end of the banana trail is another platform with a Tiki Goon on it. A mushroom is after this platform, and it is tilted towards a stationary mushroom platform ahead. Under this platform is another bouncy mushroom, and next to it above a large abyss is another, which is tilted so that it bounces the heroes onto another fungus platform when they bounce on it. This platform allows them to reach another bouncy mushroom that is placed near a wall of spikes. When they bounce on it, they are thrown over to a hanging wood platform nearby. Tiki Goons are on this platform, as well as on the similar platform following it, which the letter O hovers under.
Another springy mushroom is ahead that bounces the heroes onto a small, hanging platform that sways back and forth slightly. Two Frogoons hop around it, making it harder for the primates to reach a bouncy mushroom nearby that can help them bounce over a low wall with some spikes on it. A bouncy mushroom is on the other side of the wall, followed by two more. A ceiling covered in spikes is above these two mushrooms, so the Kongs must try not to jump too high on them. More springy mushrooms are ahead, but a wide gap separates them from the Kongs. So, the duo must use the green, grassy turf handing on a nearby ceiling to climb across it and reach the fungus springs. There are two bouncy mushrooms on the other side of the abyss, and a Flaming Tiki Buzz is placed between them. More climbable turf is also above the second mushroom, aiding Donkey and Diddy in traveling over a group of sharp spikes and another Flaming Tiki Buzz. Three Bopapodamuses are under the end of the turf in an abyss, and they can be bounced on in order to reach an area with the letter N high in the air, the second DK Barrel, and the Tutorial Pig at the checkpoint.
There is a large gap ahead with a giant, swinging object covered in climbable turf hanging above it. The heroes can climb around the object to reach a springy mushroom that can help them hop to another swinging object. Once they finish climbing around it using the grassy turf growing on it, they can access a solid area of land with a few Tiki Goons and plants containing items. A line of five bouncy mushrooms are ahead above a wide abyss. They all have a rather wide gap between each of them, so the Kongs must make sure their jumps are big enough to get to each of them. However, most of the five mushrooms have spikes hanging above them, so the primates cannot jump to high. Additionally, a Tiki Buzz is above the first mushroom, while a Flaming Tiki Buzz is between the last two. A solid platform is located after the group of mushrooms, being followed by three Bopapodamuses. Before each of the hippos in the trio are small springs that the Kongs can use to progress safely. However, the last spring is in the mouth of a dangerous Chomp. The third Bopapodamus is placed near a wall covered in spikes. The primates must push the hippo creature farther downwards so they can head under the wall safely.
They can find another bouncy mushroom and two more Bopapodamuses after this, which all help them reach a thin platform in a large pit. When the heroes pound on the platform, a spring appears that can bounce them onto a hanging platform above. A trail of bananas floating in the air near here leads to another handing platform with the letter G on it. Under this trail of bananas is a springy mushroom and a solid platform with two Tiki Goons on it. Following the Tiki enemies is an area full of bouncy mushrooms that are growing out of the wall. Around the mushrooms are many collectibles, including bananas, Banana Bunches, and even Puzzle Pieces. Many Tiki Buzzes also fly around the area. If the primates jump to the top of the area using the mushroom, they can find the Slot Machine Barrel.
Enemies[edit]
| Image | Name | Count |
|---|---|---|

|
Bopapodamus | 8 |
| Flaming Tiki Buzz | 5 | |
| Frogoon | 5 | |
| Green Chomp | 7 | |
| Tiki Buzz | 11 | |

|
Tiki Goon | 14 |
Items[edit]
| Image | Name | Count |
|---|---|---|
| Banana Coin | 18 | |
| DK Barrel | 2 | |

|
Heart | 6 |
K-O-N-G Letters[edit]
| Image | Letter | Location |
|---|---|---|
|
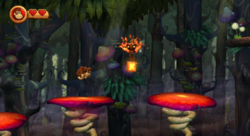
K | Just before the first DK Barrel, the Kongs can find the letter K between the last two mushrooms in the area under a Flaming Tiki Buzz. They should perform a small jump between the two mushrooms as the Flaming Tiki Buzz moves upwards to get it. |
|
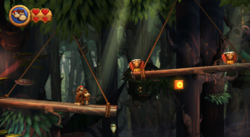
O | The letter O is under the second platform after the first area that features tilted mushroom springs. A roll-jump is needed to reach it safely. |
|
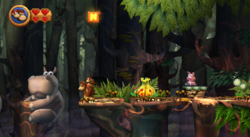
N | The heroes should perform a high-jump off of the last Bopapodamus before the checkpoint to reach the letter N high in the air nearby. |
|
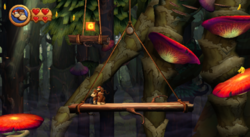
G | If the primates high-bounce from the last Bopapodamus in the level, the can reach a hanging platform. If they follow the floating trail of bananas nearby, they can access another platform with the letter G on it. |
Puzzle Pieces[edit]
| Image | Number | Location |
|---|---|---|
|
1 | Once the primates jump off of the third vine in the level, they can find a cracked, wooden object placed in a small gap. If they break through it, they land in a lower area, where the first Puzzle Piece is hidden behind some leaves in an alcove. |
|
2 | Immediately before the letter O, the primates should notice the second Puzzle Piece against a wall covered in spikes above the last tilted mushroom. They should roll-jump from the nearest platform to reach it. |
|
3 | When the primates reach the first area that has climbable turf in it, they should climb onto the second set of turf that is placed immediately after a Flaming Tiki Buzz. If they climb to the right on this ceiling of turf and reach the end of it, they find a Puzzle Piece parallel to them that they can jump to. |
|
4 | The Kongs should knock down the three Bopapodamuses located just before the checkpoint to make a Puzzle Piece appear on the platform after them with some Banana Coins. |
|
5 | The duo can find two swinging, turf-covered structures hanging over the first abyss after the checkpoint. They should drop down from the second structure towards a banana trail to land in a Barrel Cannon that shoots them into a Bonus room. There, they must shoot between two other Barrel Cannons so they can collect 80 bananas and two Banana Coins within thirty seconds to make a Puzzle Piece appear. As they try to collect everything, an Auto Fire Barrel moves in the center of the area between the two Barrel Cannons. It can shoot the Kongs out of the bonus before they are done collecting, so they must try to avoid it. |
|
6 | After the letter G, the Kongs should bounce high in the air in the left side of the large area of mushrooms to find the sixth Puzzle Piece. |
|
7 | In the bottom-center part of the large, mushroom-filled area at the end of the level, the Kongs can find the seventh and final Puzzle Piece above a hidden spring that is placed on a Chomp enemy. |
Names in other languages[edit]
| Language | Name | Meaning | Notes |
|---|---|---|---|
| Japanese | きのこトランポリン[?] Kinoko Toranporin |
Mushroom Trampoline | |
| French (NOA) | Flore à Ressorts[?] | Springed Flora | |
| German | Sporen-Trampolin[?] | Spore Trampoline | |
| Italian | Selva saltafungo[?] | Jumping-mushroom Jungle | |
| Spanish | Fungitrampolines[?] | Fungi-Trampolines |
