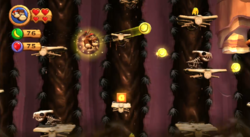
Sticky Situation (level): Difference between revisions
mNo edit summary |
Nintendo101 (talk | contribs) mNo edit summary |
||
| (56 intermediate revisions by 31 users not shown) | |||
| Line 1: | Line 1: | ||
{{level | {{level infobox | ||
|image=[[File:DKCR Sticky Situation 1.png|250px]] | |||
|image=[[File:Sticky Situation. | |code=6-1 | ||
|code=6 - 1 | |world=[[Cliff (Donkey Kong Country Returns)|Cliff]] | ||
|game=''[[Donkey Kong Country Returns]] | |game=''[[Donkey Kong Country Returns]]'' (''[[Donkey Kong Country Returns 3D|3D]]'') | ||
| | |before=[[Mangoruby Run|<<]] | ||
|before=[[ | |||
|after=[[Prehistoric Path|>>]] | |after=[[Prehistoric Path|>>]] | ||
|track=Sticky Situation | |||
}} | }} | ||
'''Sticky Situation''' is the thirty-eighth level in ''[[Donkey Kong Country Returns]]'', as well as the first area of the [[Cliff]] world. | '''Sticky Situation''' is the thirty-eighth level in ''[[Donkey Kong Country Returns]]'' and ''[[Donkey Kong Country Returns 3D]]'', as well as the first area of the [[Cliff (Donkey Kong Country Returns)|Cliff]] world. | ||
This level takes place on a high mountain, where there is tar filling gaps in the rock floors. Many of the bone platforms seen in this level float in the tar, but they sink in with [[Donkey Kong|Donkey]] and [[Diddy Kong | This level takes place on a high mountain, where there is tar filling gaps in the rock floors. Many of the bone platforms seen in this level float in the tar, but they sink in with [[Donkey Kong|Donkey]] and [[Diddy Kong]]'s weight, making them tilt. If the [[Kong]]s are to fall into this, they cannot [[jump]] high until the tar falls off by them [[Ground Pound]]ing. Another major obstacle in this level is its many falling platforms that seem to ride along the tar. The platforms all fall at different rates, so the Kongs have to be careful of where they step. The enemies in this level consist mostly of [[Skellirex]]es, [[Skullyrex]]es, [[Bonehead Jed]]s, and [[Hothead Jed]]s who all take a maximum of one or two hits to defeat. | ||
In the [[Donkey Kong Country Returns#Time Attack|Time Attack]] mode of the game, a time of 1:03:00 is needed to get a gold medal, a time of 1:16:00 for silver, and a time of 2:03:00 for bronze. | In the [[Donkey Kong Country Returns#Time Attack|Time Attack]] mode of the game, a time of 1:03:00 is needed to get a gold medal, a time of 1:16:00 for silver, and a time of 2:03:00 for bronze. | ||
==Overview== | |||
[[File:DKCR Sticky Situation 2.png|thumb|250px|left|The Kongs travel on some descending platforms.]] | |||
The level begins on a large rock area with a dandelion and a wooden platform at the end of it. Two small platforms, one with a Skellirex and another with a Skullyrex, are ahead, with a single row of falling platforms sticking out of tar between each of them. The letter K of the [[KONG Letters|K-O-N-G Letters]] is at the end of the last of these falling platforms high in the air. A short trail of bananas after a cactus leads the Kongs above a tar pit and onto a large dinosaur bone that is floating on it. A Skellirex is on this bone, while a pair of Skullyrexes are on the following bone platform in the tar pit that appears to be part of a rib cage. There is a skull-shaped platform farther ahead with a cactus and a Hothead Jed on it. Another trail of bananas then leads over the end of the tar pit to some falling platforms being pulled down by tar. Five rows of these platforms are present, and each platform has a [[Banana|Banana Bunch]] on it. The fourth and fifth row are separated by a small wall of spikes that the primates must jump over. After this is the [[Professor Chops|Tutorial Pig]] with the checkpoint. | |||
Ahead is a single row of falling platforms that can help the heroes reach a high ledge and a wooden platform with the first [[DK Barrel]] on it. A Hothead Jed is on the raised area of land next to the barrel, who is in front of a cactus. Two more rows of falling platforms are after this, leading the heroes to a wooden plank with two Skullyrexes and a dandelion on it. Two more rows are farther ahead of this place, and the Kongs must climb up the level with these two rows to reach a passage that goes between the remains of a dinosaur skeleton. On the other side of the slanted passage is a wooden plank with Skullyrexes on it. A Barrel Cannon is near here that can shoot the Kongs towards another tar pit. They land on the skull of a dinosaur that is followed by another platform that appears to be part of a rib cage. Skullyrexes are on it. The platform that is located after this has rib-like bones that support another platform above it with a Hothead Jed on it. A wooden bridge with the letter O under it is after this with some Skellirexes on it, and a raised plank is above this with a [[barrel]] on it. A longer wooden plank follows this that stretches out over a gap that has platforms and tar falling into it. The Kongs must climb up the two rows of tar to reach the Tutorial Pig again and another checkpoint. If they climb the platforms fast enough, they can reach a [[Red Balloon]] that is between the two rows. | |||
[[ | |||
At the edge of the wooden platform that the pig is on is a Barrel Cannon that can blast the group in the air. While in mid air, they Kongs must maneuver over a wall with spikes on it and dodge a Tiki Zing that is orbiting it to reach another barrel that can shoot them to a solid rock platform with a Skullyrex and a cactus on it. More Barrel Cannons are ahead that, like before, must blast the primates over walls that are being orbited by Tiki Zings. The letter N is above the first of two cannons here, and after shooting out of the second Barrel Cannon, the heroes can reach an area with a steep passage in the mouth of a dinosaur skull. The passage leads into a cave, where there are many rows of falling platforms with tar. Skellirexes, [[Banana Coin]]s, and the letter G are on some of these platforms, while many walls are placed around the room to get in the Kongs' way. The last row of platforms, which is placed right after a low wall with spikes on it, takes the primates to a passage with to Skullyrexes and a Barrel Cannon nearby. The cannon shoots them above ground, where there is a bone platform with two bone parts raised above its base part being supported by rib-like structures. Skullyrexes are on the bottom base section of the large bone, which floats in a pool of tar. The primates must tilt the bone to give them a lift to a wooden platform on a wall, which can be roll-jumped off of to reach the level's [[Slot Machine Barrel]]. The level is completed when this is hit. | |||
==Enemies== | |||
{|class="wikitable dk" | |||
!Image | |||
!Name | |||
!Count | |||
|- | |||
|align="center"|[[File:Bonehead_Jed.png|50px]] | |||
|align="center"|[[Bonehead Jed]] | |||
|4 | |||
|- | |||
|align="center"|[[File:DKCR_Skellirex_Screenshot.png|50px]] | |||
|align="center"|[[Skellirex]] | |||
|8 | |||
|- | |||
|align="center"|[[File:Skullyrex.png|50px]] | |||
|align="center"|[[Skullyrex]] | |||
|16 | |||
|- | |||
|align="center"|[[File:Tiki_Zing.png|50px]] | |||
|align="center"|[[Tiki Zing]] | |||
|4 | |||
|} | |||
==Items== | |||
== | {|class="wikitable dk"width=15% | ||
|- | |||
!Image | |||
!Name | |||
!Count | |||
|- | |||
|align="center"|[[File:BananacoinDKCR.png|x50px]] | |||
|align="center"|[[Banana Coin]] | |||
|19 | |||
|- | |||
|align="center"|[[File:BarrelDKCR.png|x50px]] | |||
|align="center"|[[Barrel]] | |||
|1 | |||
|- | |||
|align="center"|[[File:DKBarrelDKCR.png|x50px]] | |||
|align="center"|[[DK Barrel]] | |||
|1 | |||
|- | |||
|align="center"|[[File:BalloonDKCR.png|x50px]] | |||
|align="center"|[[Red Balloon]] | |||
|3 | |||
|- | |||
|align="center"|[[File:Heart.png|x50px]] | |||
|align="center"|[[Heart (item)|Heart]] | |||
|2 | |||
|} | |||
===K-O-N-G Letters=== | ===K-O-N-G Letters=== | ||
{|class="wikitable dk"width=70% | |||
|- | |||
!Image | |||
!Letter | |||
!Location | |||
|- | |||
|align="center"|[[File:DKCR Sticky Situation K Letter.png|250px]] | |||
|align="center"|K | |||
|If they Kongs jump off of a platform in the second row of falling platforms before it moves to low, they can reach the letter K high in the air. | |||
|- | |||
|align="center"|[[File:DKCR Sticky Situation Letter O.png|250px]] | |||
|align="center"|O | |||
|The letter O is under the bridge that is placed over the tar pit just before the second checkpoint. The Kongs can reach it by traveling under the bridge, jumping through the tar pits without sinking, and then touching the item. | |||
|- | |||
|align="center"|[[File:DKCR Sticky Situation N Letter.png|250px]] | |||
|align="center"|N | |||
|In the third-to-last Barrel Cannon in the level, which is located in the second area of Tiki Zings, the heroes should shoot upwards and move a little to the left while in mid-air to collect the letter N. | |||
|- | |||
|align="center"|[[File:DKCR Sticky Situation G Letter.png|250px]] | |||
|align="center"|G | |||
|In the last group of falling platforms, the Kongs should quickly jump to a certain platform in the third row to find the letter G, before it descends off the screen. | |||
|} | |||
===Puzzle Pieces=== | ===Puzzle Pieces=== | ||
[[File: | {|class="wikitable dk"width=70% | ||
|- | |||
!Image | |||
!Number | |||
!Location | |||
|- | |||
|align="center"|[[File:DKCR Sticky Situation Puzzle Piece 1.png|250px]] | |||
|align="center"|1 | |||
|On the second bone platform in tar, which has some Skullyrexes on it, the heroes should walk to the right to tilt it. This causes the left side of the platform to rise. If the primates jump off of this side of the bone, they can reach some green, grassy turf that they can climb to reach a [[Puzzle Piece (Donkey Kong Country Returns)|Puzzle Piece]]. | |||
|- | |||
|align="center"|[[File:DKCR Sticky Situation Puzzle Piece 2.png|250px]] | |||
|align="center"|2 | |||
|When the Kongs approach the first Barrel Cannon in the level, they should drop off of the wooden bridge under it to find a hidden area on the other side of a pit of tar. A cracked piece of land is here that they can smash to access an alcove with the second Puzzle Piece in it. | |||
|- | |||
|align="center"|[[File:DKCR Sticky Situation Puzzle Piece 3.png|250px]] | |||
|align="center"|3 | |||
|On the row of tar just before the second checkpoint, the Kongs should slowly descend to the bottom of the area to spot a Puzzle Piece hidden behind some smoke. | |||
|- | |||
|align="center"|[[File:DKCR Sticky Situation Puzzle Piece 4.png|250px]] | |||
|align="center"|4 | |||
|After the second checkpoint is a dandelion that can be blown on the reveal the fourth Puzzle Piece. | |||
|- | |||
|align="center"|[[File:DKCR Sticky Situation Puzzle Piece 5.png|250px]] | |||
|align="center"|5 | |||
|On the platform just after the letter N, the Kongs should roll-jump off of the ledge to reach another platform on the other side of the area. Here, there is a Barrel Cannon that can shoot them in the background to another cannon. This barrel then shoots them to a Puzzle Piece. | |||
|- | |||
|align="center"|[[File:DKCR Sticky Situation Bonus Room.png|250px]] | |||
|align="center"|6 | |||
|Before entering the dinosaur skull after the letter N, the primates can see a zebra sticking its head out of a hole. They should jump through the skull and into the hole to find a [[Bonus Level]]. There, they must shoot between four barrels to grab sixty-five bananas, three Banana Coins, and a Red Balloon. If everything is collected within thirty seconds, a Puzzle Piece appears. | |||
|- | |||
|align="center"|[[File:DKCR Sticky Situation Puzzle Piece 7.png|250px]] | |||
|align="center"|7 | |||
|In the fifth row of the last group of descending platforms, the Kongs can find a Puzzle Piece on one of the platforms after the letter G. They should grab it before the platform it is on leaves the screen. | |||
|- | |||
|align="center"|[[File:DKCR Sticky Situation Puzzle Piece 8.png|250px]] | |||
|align="center"|8 | |||
|On the final falling platform in the level, the Kongs can find a cactus. They should pound on it to reveal the eighth Puzzle Piece. | |||
|- | |||
|align="center"|[[File:DKCR Sticky Situation Puzzle Piece 9.png|250px]] | |||
|align="center"|9 | |||
|At the end of the level before the Kongs roll-jump to the Slot Machine Barrel, they can find the final Puzzle Piece hidden in the top-left corner of the area. | |||
|} | |||
==Names in | ==Names in other languages== | ||
{{ | {{foreign names | ||
|Jap=ドロドロタールフォール | |||
|JapR=Dorodoro Tāru Fōru | |||
|JapM=Muddy/Sludgy Tar Fall | |||
|Spa=Paseo Pegajoso | |Spa=Paseo Pegajoso | ||
|SpaM=Sticky Trip}} | |SpaM=Sticky Trip | ||
|FreA=Goudron Gluant | |||
|FreAM=Sticky Tar | |||
|Ger=In Klebriger Mission | |||
|GerM=Sticky Mission | |||
|Ita=Roccia appiccicosa | |||
|ItaM=Sticky Rock | |||
}} | |||
{{DKCR}} | {{DKCR}} | ||
[[Category:Mountains]] | [[Category:Mountains]] | ||
[[Category:Donkey Kong Country Returns levels]] | |||
Revision as of 10:20, December 2, 2024
| Level | |
|---|---|
| Sticky Situation | |
| |
| Level code | 6-1 |
| World | Cliff |
| Game | Donkey Kong Country Returns (3D) |
| Music track | Sticky Situation |
| << Directory of levels >> | |
Sticky Situation is the thirty-eighth level in Donkey Kong Country Returns and Donkey Kong Country Returns 3D, as well as the first area of the Cliff world.
This level takes place on a high mountain, where there is tar filling gaps in the rock floors. Many of the bone platforms seen in this level float in the tar, but they sink in with Donkey and Diddy Kong's weight, making them tilt. If the Kongs are to fall into this, they cannot jump high until the tar falls off by them Ground Pounding. Another major obstacle in this level is its many falling platforms that seem to ride along the tar. The platforms all fall at different rates, so the Kongs have to be careful of where they step. The enemies in this level consist mostly of Skellirexes, Skullyrexes, Bonehead Jeds, and Hothead Jeds who all take a maximum of one or two hits to defeat.
In the Time Attack mode of the game, a time of 1:03:00 is needed to get a gold medal, a time of 1:16:00 for silver, and a time of 2:03:00 for bronze.
Overview
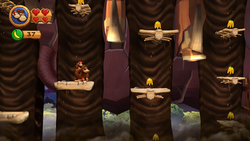
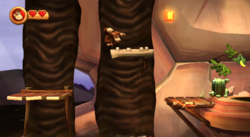
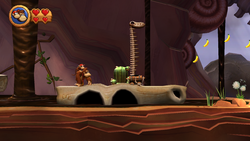
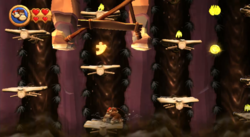
The level begins on a large rock area with a dandelion and a wooden platform at the end of it. Two small platforms, one with a Skellirex and another with a Skullyrex, are ahead, with a single row of falling platforms sticking out of tar between each of them. The letter K of the K-O-N-G Letters is at the end of the last of these falling platforms high in the air. A short trail of bananas after a cactus leads the Kongs above a tar pit and onto a large dinosaur bone that is floating on it. A Skellirex is on this bone, while a pair of Skullyrexes are on the following bone platform in the tar pit that appears to be part of a rib cage. There is a skull-shaped platform farther ahead with a cactus and a Hothead Jed on it. Another trail of bananas then leads over the end of the tar pit to some falling platforms being pulled down by tar. Five rows of these platforms are present, and each platform has a Banana Bunch on it. The fourth and fifth row are separated by a small wall of spikes that the primates must jump over. After this is the Tutorial Pig with the checkpoint.
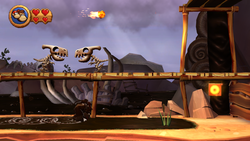
Ahead is a single row of falling platforms that can help the heroes reach a high ledge and a wooden platform with the first DK Barrel on it. A Hothead Jed is on the raised area of land next to the barrel, who is in front of a cactus. Two more rows of falling platforms are after this, leading the heroes to a wooden plank with two Skullyrexes and a dandelion on it. Two more rows are farther ahead of this place, and the Kongs must climb up the level with these two rows to reach a passage that goes between the remains of a dinosaur skeleton. On the other side of the slanted passage is a wooden plank with Skullyrexes on it. A Barrel Cannon is near here that can shoot the Kongs towards another tar pit. They land on the skull of a dinosaur that is followed by another platform that appears to be part of a rib cage. Skullyrexes are on it. The platform that is located after this has rib-like bones that support another platform above it with a Hothead Jed on it. A wooden bridge with the letter O under it is after this with some Skellirexes on it, and a raised plank is above this with a barrel on it. A longer wooden plank follows this that stretches out over a gap that has platforms and tar falling into it. The Kongs must climb up the two rows of tar to reach the Tutorial Pig again and another checkpoint. If they climb the platforms fast enough, they can reach a Red Balloon that is between the two rows.
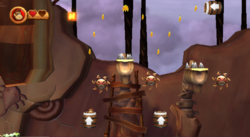
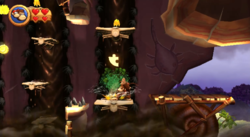
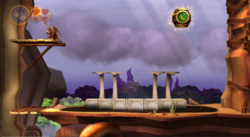
At the edge of the wooden platform that the pig is on is a Barrel Cannon that can blast the group in the air. While in mid air, they Kongs must maneuver over a wall with spikes on it and dodge a Tiki Zing that is orbiting it to reach another barrel that can shoot them to a solid rock platform with a Skullyrex and a cactus on it. More Barrel Cannons are ahead that, like before, must blast the primates over walls that are being orbited by Tiki Zings. The letter N is above the first of two cannons here, and after shooting out of the second Barrel Cannon, the heroes can reach an area with a steep passage in the mouth of a dinosaur skull. The passage leads into a cave, where there are many rows of falling platforms with tar. Skellirexes, Banana Coins, and the letter G are on some of these platforms, while many walls are placed around the room to get in the Kongs' way. The last row of platforms, which is placed right after a low wall with spikes on it, takes the primates to a passage with to Skullyrexes and a Barrel Cannon nearby. The cannon shoots them above ground, where there is a bone platform with two bone parts raised above its base part being supported by rib-like structures. Skullyrexes are on the bottom base section of the large bone, which floats in a pool of tar. The primates must tilt the bone to give them a lift to a wooden platform on a wall, which can be roll-jumped off of to reach the level's Slot Machine Barrel. The level is completed when this is hit.
Enemies
| Image | Name | Count |
|---|---|---|
| Bonehead Jed | 4 | |

|
Skellirex | 8 |
| Skullyrex | 16 | |

|
Tiki Zing | 4 |
Items
| Image | Name | Count |
|---|---|---|
| Banana Coin | 19 | |
| Barrel | 1 | |
| DK Barrel | 1 | |
| Red Balloon | 3 | |

|
Heart | 2 |
K-O-N-G Letters
Puzzle Pieces
| Image | Number | Location |
|---|---|---|
|
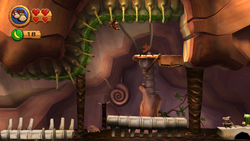
1 | On the second bone platform in tar, which has some Skullyrexes on it, the heroes should walk to the right to tilt it. This causes the left side of the platform to rise. If the primates jump off of this side of the bone, they can reach some green, grassy turf that they can climb to reach a Puzzle Piece. |
|
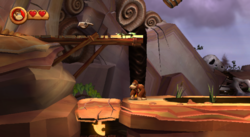
2 | When the Kongs approach the first Barrel Cannon in the level, they should drop off of the wooden bridge under it to find a hidden area on the other side of a pit of tar. A cracked piece of land is here that they can smash to access an alcove with the second Puzzle Piece in it. |
|
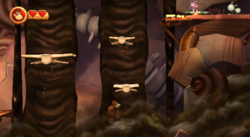
3 | On the row of tar just before the second checkpoint, the Kongs should slowly descend to the bottom of the area to spot a Puzzle Piece hidden behind some smoke. |
|
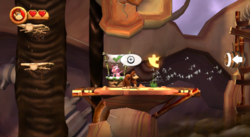
4 | After the second checkpoint is a dandelion that can be blown on the reveal the fourth Puzzle Piece. |
|
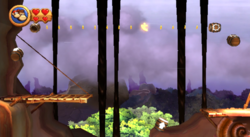
5 | On the platform just after the letter N, the Kongs should roll-jump off of the ledge to reach another platform on the other side of the area. Here, there is a Barrel Cannon that can shoot them in the background to another cannon. This barrel then shoots them to a Puzzle Piece. |
|
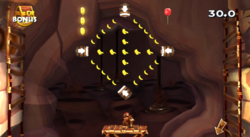
6 | Before entering the dinosaur skull after the letter N, the primates can see a zebra sticking its head out of a hole. They should jump through the skull and into the hole to find a Bonus Level. There, they must shoot between four barrels to grab sixty-five bananas, three Banana Coins, and a Red Balloon. If everything is collected within thirty seconds, a Puzzle Piece appears. |
|
7 | In the fifth row of the last group of descending platforms, the Kongs can find a Puzzle Piece on one of the platforms after the letter G. They should grab it before the platform it is on leaves the screen. |
|
8 | On the final falling platform in the level, the Kongs can find a cactus. They should pound on it to reveal the eighth Puzzle Piece. |
|
9 | At the end of the level before the Kongs roll-jump to the Slot Machine Barrel, they can find the final Puzzle Piece hidden in the top-left corner of the area. |
Names in other languages
| Language | Name | Meaning | Notes |
|---|---|---|---|
| Japanese | ドロドロタールフォール[?] Dorodoro Tāru Fōru |
Muddy/Sludgy Tar Fall | |
| French (NOA) | Goudron Gluant[?] | Sticky Tar | |
| German | In Klebriger Mission[?] | Sticky Mission | |
| Italian | Roccia appiccicosa[?] | Sticky Rock | |
| Spanish | Paseo Pegajoso[?] | Sticky Trip |
