Ninja Tour (2021): Difference between revisions
No edit summary |
LinkTheLefty (talk | contribs) mNo edit summary |
||
| Line 13: | Line 13: | ||
Starting from this tour, the [[Butterfly Wings]] are available in regular tour pipes, including the All-Clear Pipe. | Starting from this tour, the [[Butterfly Wings]] are available in regular tour pipes, including the All-Clear Pipe. | ||
==Spotlights== | ==Spotlights== | ||
{| align=center width=75% cellspacing=0 border=1 cellpadding=3 style="border-collapse:collapse; font-family:Arial; text-align:center" | {|align=center width=75% cellspacing=0 border=1 cellpadding=3 style="border-collapse:collapse;font-family:Arial;text-align:center" | ||
|-style="background: #89A" | |-style="background: #89A" | ||
|colspan=3|'''Ninja Pipe 1'''<br>April 6, 2021, 11:00 p.m. (PT) – <br>April 20, 2021, 10:59 p.m. (PT) | |colspan=3|'''Ninja Pipe 1'''<br>April 6, 2021, 11:00 p.m. (PT) – <br>April 20, 2021, 10:59 p.m. (PT) | ||
| Line 23: | Line 22: | ||
|colspan=3|[[File:MKT Tour41 NinjaPipe2.png|x150px]] | |colspan=3|[[File:MKT Tour41 NinjaPipe2.png|x150px]] | ||
|-style="background: #ABC" | |-style="background: #ABC" | ||
! style="width: 15%;"|Driver | !style="width: 15%;"|Driver | ||
! style="width: 15%;"|Kart | !style="width: 15%;"|Kart | ||
! style="width: 15%;"|Glider | !style="width: 15%;"|Glider | ||
! style="width: 15%;"|Drivers | !style="width: 15%;"|Drivers | ||
! style="width: 15%;"|Karts | !style="width: 15%;"|Karts | ||
! style="width: 15%;"|Gliders | !style="width: 15%;"|Gliders | ||
|- | |- | ||
|[[File:MKT Artwork ShyGuyNinja.png|100x100px]] | |[[File:MKT Artwork ShyGuyNinja.png|100x100px]] | ||
| Line 46: | Line 45: | ||
==Special pipe== | ==Special pipe== | ||
{| align=center width=65% cellspacing=0 border=1 cellpadding=3 style="border-collapse:collapse; font-family:Arial; text-align:center" | {|align=center width=65% cellspacing=0 border=1 cellpadding=3 style="border-collapse:collapse;font-family:Arial;text-align:center" | ||
|-style="background: #89A" | |-style="background: #89A" | ||
|colspan=3|'''Gold Pipe'''<br>April 10, 2021, 11:00 p.m. (PT) – <br>April 15, 2021, 10:59 p.m. (PT) | |colspan=3|'''Gold Pipe'''<br>April 10, 2021, 11:00 p.m. (PT) – <br>April 15, 2021, 10:59 p.m. (PT) | ||
| Line 52: | Line 51: | ||
|colspan=3|[[File:MKT Tour41 GoldPipe.png|x150px]] | |colspan=3|[[File:MKT Tour41 GoldPipe.png|x150px]] | ||
|-style="background: #ABC" | |-style="background: #ABC" | ||
! style="width: 100%;"|High-End Spotlight driver | !style="width: 100%;"|High-End Spotlight driver | ||
|- | |- | ||
|[[File:MKT Artwork KingBobombGold.png|130x130px]] | |[[File:MKT Artwork KingBobombGold.png|130x130px]] | ||
| Line 59: | Line 58: | ||
|- | |- | ||
|-style="background: #ABC" | |-style="background: #ABC" | ||
! style="width: 100%;"|High-End drivers | !style="width: 100%;"|High-End drivers | ||
|- | |- | ||
|[[File:MKT Artwork GoldKoopaFreerunning.png|100x100px]][[File:MKT Artwork ShyGuyGold.png|100x100px]][[File:MKT Artwork DryBonesGold.png|105x105px]][[File:MKT Artwork DryBowserGold.png|100x100px]][[File:MKT Artwork KingBooGold.png|100x100px]] | |[[File:MKT Artwork GoldKoopaFreerunning.png|100x100px]][[File:MKT Artwork ShyGuyGold.png|100x100px]][[File:MKT Artwork DryBonesGold.png|105x105px]][[File:MKT Artwork DryBowserGold.png|100x100px]][[File:MKT Artwork KingBooGold.png|100x100px]] | ||
| Line 67: | Line 66: | ||
==Cups== | ==Cups== | ||
{| align=center width=90% cellspacing=0 border=1 cellpadding=3 style="border-collapse:collapse; font-family:Arial; text-align:center" | {|align=center width=90% cellspacing=0 border=1 cellpadding=3 style="border-collapse:collapse;font-family:Arial;text-align:center" | ||
{{MKT cup table row | {{MKT cup table row | ||
|C=Rosalina||Ra=1 | |C=Rosalina||Ra=1 | ||
| Line 153: | Line 152: | ||
}} | }} | ||
|} | |} | ||
===Signature kart sets=== | ===Signature kart sets=== | ||
Drivers with a corresponding cup in the tour were bumped one rank up in every course of their cup. | Drivers with a corresponding cup in the tour were bumped one rank up in every course of their cup. | ||
{| class="wikitable" style="text-align: center" width=50% | {|class="wikitable"style="text-align:center"width=50% | ||
!width=10%|Cup | !width=10%|Cup | ||
!width=20%|Driver | !width=20%|Driver | ||
| Line 240: | Line 238: | ||
==Rewards== | ==Rewards== | ||
Gold cells indicate rewards that are exclusive to Gold Pass members. | Gold cells indicate rewards that are exclusive to Gold Pass members. | ||
{|class="wikitable" style="margin:auto; text-align:center" | {|class="wikitable"style="margin:auto;text-align:center" | ||
|- | |- | ||
![[File:MKT Icon GrandStar.png|20x20px]] 15 | ![[File:MKT Icon GrandStar.png|20x20px]] 15 | ||
| Line 276: | Line 274: | ||
|} | |} | ||
<br> | <br> | ||
{|class="wikitable" style="margin:auto; text-align:center" | {|class="wikitable"style="margin:auto;text-align:center" | ||
|- | |- | ||
!Grand Stars!![[File:MKT Icon GrandStar.png|20x20px]]!!15!!30!!45!!60!!70!!80!!100!!120!!130!!140!!150!!160!!170!!180!!190!!200!!205!!210!!215!!220!!225!!230!!235!!240!!245!!250!!255!!Total!!Grand total | !Grand Stars!![[File:MKT Icon GrandStar.png|20x20px]]!!15!!30!!45!!60!!70!!80!!100!!120!!130!!140!!150!!160!!170!!180!!190!!200!!205!!210!!215!!220!!225!!230!!235!!240!!245!!250!!255!!Total!!Grand total | ||
| Line 341: | Line 339: | ||
===1.5 Year Anniv. Log-In Bonus=== | ===1.5 Year Anniv. Log-In Bonus=== | ||
To commemorate the 1.5-year anniversary since the official global launch of ''Mario Kart Tour'', a second 14-day "1.5 Year Anniv. Log-In Bonus" served as the log-in bonus of this tour. | To commemorate the 1.5-year anniversary since the official global launch of ''Mario Kart Tour'', a second 14-day "1.5 Year Anniv. Log-In Bonus" served as the log-in bonus of this tour. | ||
{|class="wikitable" style="margin:auto; text-align:center" width=25% | {|class="wikitable"style="margin:auto;text-align:center"width=25% | ||
|- | |- | ||
!Day | !Day | ||
| Line 415: | Line 413: | ||
==Paid banners== | ==Paid banners== | ||
{| align=center width=960px cellspacing=0 border=1 cellpadding=3 style="border-collapse:collapse; font-family:Arial; text-align:center" | {|align=center width=960px cellspacing=0 border=1 cellpadding=3 style="border-collapse:collapse;font-family:Arial;text-align:center" | ||
|-style="background: #ABC" | |-style="background: #ABC" | ||
!Name | !Name | ||
| Line 558: | Line 556: | ||
}} | }} | ||
<br> | <br> | ||
{| align=center width=30% cellspacing=0 border=1 cellpadding=3 style="border-collapse:collapse; font-family:Arial; text-align:center" | {|align=center width=30% cellspacing=0 border=1 cellpadding=3 style="border-collapse:collapse;font-family:Arial;text-align:center" | ||
|- | |- | ||
!colspan=3 style="background: #EEEEFF"|'''Premium Challenges''' | !colspan=3 style="background:#EEEEFF"|'''Premium Challenges''' | ||
|- | |- | ||
|colspan=3 style="background: #EEEEFF"|'''Cost:''' US$4.99 | |colspan=3 style="background:#EEEEFF"|'''Cost:''' US$4.99 | ||
|- | |- | ||
|colspan=3 style="background: #EEEEFF"|'''Three in a row reward:''' [[File:MKT Icon Coins 2.png|70px]] [[Coin|Coins]] ×300 | |colspan=3 style="background:#EEEEFF"|'''Three in a row reward:''' [[File:MKT Icon Coins 2.png|70px]] [[Coin|Coins]] ×300 | ||
|- | |- | ||
|colspan=3 style="background: #EEEEFF"|'''Completion reward:''' [[File:MKT Artwork PinkGoldPeach.png|x80px]] [[Pink Gold Peach]] ×1 | |colspan=3 style="background:#EEEEFF"|'''Completion reward:''' [[File:MKT Artwork PinkGoldPeach.png|x80px]] [[Pink Gold Peach]] ×1 | ||
|-style="height: 80px" | |-style="height: 80px" | ||
|width=10% style="background:linear-gradient(#F2E18F,#B9800F)"|[[File:MSS Red Shy Guy Artwork.png|50x80px]] | |width=10% style="background:linear-gradient(#F2E18F,#B9800F)"|[[File:MSS Red Shy Guy Artwork.png|50x80px]] | ||
| Line 572: | Line 570: | ||
|width=10% style="background:linear-gradient(#F2E18F,#B9800F)"|[[File:MKT Icon WaluigiWing.png|50x80px]] | |width=10% style="background:linear-gradient(#F2E18F,#B9800F)"|[[File:MKT Icon WaluigiWing.png|50x80px]] | ||
|-style="color: #FFF" | |-style="color: #FFF" | ||
|style="background:linear-gradient(#864D00,#A26000); border-top:1px solid #B9800F;"|{{Color-link|Shy Guy|#A1A1FF}} ×1 | |style="background:linear-gradient(#864D00,#A26000);border-top:1px solid #B9800F;"|{{Color-link|Shy Guy|#A1A1FF}} ×1 | ||
|style="background:linear-gradient(#864D00,#A26000); border-top:1px solid #B9800F;"|{{Color-link|Birthday Girl Daisy|#A1A1FF}} ×1 | |style="background:linear-gradient(#864D00,#A26000);border-top:1px solid #B9800F;"|{{Color-link|Birthday Girl Daisy|#A1A1FF}} ×1 | ||
|style="background:linear-gradient(#864D00,#A26000); border-top:1px solid #B9800F;"|{{Color-link|Waluigi Wing|#A1A1FF}} ×1 | |style="background:linear-gradient(#864D00,#A26000);border-top:1px solid #B9800F;"|{{Color-link|Waluigi Wing|#A1A1FF}} ×1 | ||
|-style="color: #FFF" | |-style="color: #FFF" | ||
|style="background:linear-gradient(#A26000,#C88512); border-top:1px solid #A26000;"|''Land 5 hits with Green Shells.'' | |style="background:linear-gradient(#A26000,#C88512);border-top:1px solid #A26000;"|''Land 5 hits with Green Shells.'' | ||
|style="background:linear-gradient(#A26000,#C88512); border-top:1px solid #A26000;"|''Land 10 hits with Bananas.'' | |style="background:linear-gradient(#A26000,#C88512);border-top:1px solid #A26000;"|''Land 10 hits with Bananas.'' | ||
|style="background:linear-gradient(#A26000,#C88512); border-top:1px solid #A26000;"|''Land 10 hits with Bob-ombs.'' | |style="background:linear-gradient(#A26000,#C88512);border-top:1px solid #A26000;"|''Land 10 hits with Bob-ombs.'' | ||
|-style="height: 80px" | |-style="height: 80px" | ||
|width=10% style="background:linear-gradient(#F2E18F,#B9800F)"|[[File:MKT Icon Coins 3.png|70px]] | |width=10% style="background:linear-gradient(#F2E18F,#B9800F)"|[[File:MKT Icon Coins 3.png|70px]] | ||
| Line 584: | Line 582: | ||
|width=10% style="background:linear-gradient(#F2E18F,#B9800F)"|[[File:MKT Icon Point-boostticket1.png|70px]] | |width=10% style="background:linear-gradient(#F2E18F,#B9800F)"|[[File:MKT Icon Point-boostticket1.png|70px]] | ||
|-style="color: #FFF" | |-style="color: #FFF" | ||
|style="background:linear-gradient(#864D00,#A26000); border-top:1px solid #B9800F;"|{{Color-link|Coins|#A1A1FF}} ×3,000 | |style="background:linear-gradient(#864D00,#A26000);border-top:1px solid #B9800F;"|{{Color-link|Coins|#A1A1FF}} ×3,000 | ||
|style="background:linear-gradient(#864D00,#A26000); border-top:1px solid #B9800F;"|{{Color-link|Ruby|#A1A1FF|Rubies}} ×10 | |style="background:linear-gradient(#864D00,#A26000);border-top:1px solid #B9800F;"|{{Color-link|Ruby|#A1A1FF|Rubies}} ×10 | ||
|style="background:linear-gradient(#864D00,#A26000); border-top:1px solid #B9800F;"|Driver {{Color-link|point-boost ticket|#A1A1FF}} ×3 | |style="background:linear-gradient(#864D00,#A26000);border-top:1px solid #B9800F;"|Driver {{Color-link|point-boost ticket|#A1A1FF}} ×3 | ||
|-style="color: #FFF" | |-style="color: #FFF" | ||
|style="background:linear-gradient(#A26000,#C88512); border-top:1px solid #A26000;"|''Do 50 Jump Boosts.'' | |style="background:linear-gradient(#A26000,#C88512);border-top:1px solid #A26000;"|''Do 50 Jump Boosts.'' | ||
|style="background:linear-gradient(#A26000,#C88512); border-top:1px solid #A26000;"|''Participate in a race.'' | |style="background:linear-gradient(#A26000,#C88512);border-top:1px solid #A26000;"|''Participate in a race.'' | ||
|style="background:linear-gradient(#A26000,#C88512); border-top:1px solid #A26000;"|''Do 100 Mini-Turbo boosts.'' | |style="background:linear-gradient(#A26000,#C88512);border-top:1px solid #A26000;"|''Do 100 Mini-Turbo boosts.'' | ||
|-style="height: 80px" | |-style="height: 80px" | ||
|width=10% style="background:linear-gradient(#F2E18F,#B9800F)"|[[File:MKT Icon Level-boostticket1.png|70px]] | |width=10% style="background:linear-gradient(#F2E18F,#B9800F)"|[[File:MKT Icon Level-boostticket1.png|70px]] | ||
| Line 596: | Line 594: | ||
|width=10% style="background:linear-gradient(#F2E18F,#B9800F)"|[[File:MKT Icon Level-boostticket7.png|70px]] | |width=10% style="background:linear-gradient(#F2E18F,#B9800F)"|[[File:MKT Icon Level-boostticket7.png|70px]] | ||
|-style="color: #FFF" | |-style="color: #FFF" | ||
|style="background:linear-gradient(#864D00,#A26000); border-top:1px solid #B9800F;"|Normal driver {{Color-link|level-boost ticket|#A1A1FF}} ×1 | |style="background:linear-gradient(#864D00,#A26000);border-top:1px solid #B9800F;"|Normal driver {{Color-link|level-boost ticket|#A1A1FF}} ×1 | ||
|style="background:linear-gradient(#864D00,#A26000); border-top:1px solid #B9800F;"|Super driver level-boost ticket ×1 | |style="background:linear-gradient(#864D00,#A26000);border-top:1px solid #B9800F;"|Super driver level-boost ticket ×1 | ||
|style="background:linear-gradient(#864D00,#A26000); border-top:1px solid #B9800F;"|High-End driver level-boost ticket ×1 | |style="background:linear-gradient(#864D00,#A26000);border-top:1px solid #B9800F;"|High-End driver level-boost ticket ×1 | ||
|-style="color: #FFF" | |-style="color: #FFF" | ||
|style="background:linear-gradient(#A26000,#C88512); border-top:1px solid #A26000;"|''Get 1st place in a race 10 times.'' | |style="background:linear-gradient(#A26000,#C88512);border-top:1px solid #A26000;"|''Get 1st place in a race 10 times.'' | ||
|style="background:linear-gradient(#A26000,#C88512); border-top:1px solid #A26000;"|''Get 1st place in a race 15 times.'' | |style="background:linear-gradient(#A26000,#C88512);border-top:1px solid #A26000;"|''Get 1st place in a race 15 times.'' | ||
|style="background:linear-gradient(#A26000,#C88512); border-top:1px solid #A26000;"|''Get 1st place in a race 20 times.'' | |style="background:linear-gradient(#A26000,#C88512);border-top:1px solid #A26000;"|''Get 1st place in a race 20 times.'' | ||
|} | |} | ||
<br> | <br> | ||
{|class="wikitable" style="margin:auto; text-align:center" width=30% | {|class="wikitable"style="margin:auto;text-align:center"width=30% | ||
!colspan=2|Total Points Challenge | !colspan=2|Total Points Challenge | ||
|- | |- | ||
| Line 645: | Line 643: | ||
===All-Clear Pipe=== | ===All-Clear Pipe=== | ||
The All-Clear Pipe randomly shot out one of the following regular High-End items. | The All-Clear Pipe randomly shot out one of the following regular High-End items. | ||
{|class="wikitable" style="margin:auto; text-align:center" | {|class="wikitable"style="margin:auto;text-align:center" | ||
!colspan=2|High-End items obtainable from the All-Clear Pipe during the Ninja Tour | !colspan=2|High-End items obtainable from the All-Clear Pipe during the Ninja Tour | ||
|- | |- | ||
| Line 660: | Line 658: | ||
===Ninja Pipe 1=== | ===Ninja Pipe 1=== | ||
{|class="wikitable" style="margin:auto; text-align:center" | {|class="wikitable"style="margin:auto;text-align:center" | ||
!colspan=16|Items obtained from a new Ninja Pipe 1 | !colspan=16|Items obtained from a new Ninja Pipe 1 | ||
|- | |- | ||
| Line 697: | Line 695: | ||
|} | |} | ||
<br> | <br> | ||
{|class="wikitable"style="margin:auto;text-align:center" | |||
{|class="wikitable" style="margin:auto; text-align:center" | |||
!Class | !Class | ||
!Parts | !Parts | ||
| Line 728: | Line 725: | ||
|- | |- | ||
!Super drivers | !Super drivers | ||
|[[Donkey Kong]], [[Toad]], [[Bowser]], [[Luigi]], [[Mario]], [[Peach]], [[Yoshi]], [[Daisy]], [[Lakitu]], [[King Boo]], [[Toadette]], [[Bowser Jr.]], [[Waluigi]], [[Wario]], [[Rosalina]], [[Birdo]], [[Diddy Kong]], [[Hammer Bro]], [[Boomerang Bro]], [[Fire Bro]], [[Ice Bro]], [[Red Yoshi]], [[Black Shy Guy]], [[Pink Shy Guy]], [[Toad|Toad (Pit Crew)]], [[Monty Mole]], [[Birdo | |[[Donkey Kong]], [[Toad]], [[Bowser]], [[Luigi]], [[Mario]], [[Peach]], [[Yoshi]], [[Daisy]], [[Lakitu]], [[King Boo]], [[Toadette]], [[Bowser Jr.]], [[Waluigi]], [[Wario]], [[Rosalina]], [[Birdo]], [[Diddy Kong]], [[Hammer Bro]], [[Boomerang Bro]], [[Fire Bro]], [[Ice Bro]], [[Red Yoshi]], [[Black Shy Guy]], [[Pink Shy Guy]], [[Toad|Toad (Pit Crew)]], [[Monty Mole]], [[Birdo|Birdo (Light Blue)]], [[Birdo|Birdo (Yellow)]], [[Roving Racers|Red Koopa (Freerunning)]] | ||
|0.3103% | |0.3103% | ||
|- | |- | ||
| Line 754: | Line 751: | ||
===Ninja Pipe 2=== | ===Ninja Pipe 2=== | ||
{|class="wikitable" style="margin:auto; text-align:center" | {|class="wikitable"style="margin:auto;text-align:center" | ||
!colspan=16|Items obtained from a new Ninja Pipe 2 | !colspan=16|Items obtained from a new Ninja Pipe 2 | ||
|- | |- | ||
| Line 791: | Line 788: | ||
|} | |} | ||
<br> | <br> | ||
{|class="wikitable"style="margin:auto;text-align:center" | |||
{|class="wikitable" style="margin:auto; text-align:center" | |||
!Class | !Class | ||
!Parts | !Parts | ||
| Line 822: | Line 818: | ||
|- | |- | ||
!Super drivers | !Super drivers | ||
|[[Donkey Kong]], [[Toad]], [[Bowser]], [[Luigi]], [[Mario]], [[Peach]], [[Yoshi]], [[Daisy]], [[Lakitu]], [[King Boo]], [[Toadette]], [[Bowser Jr.]], [[Waluigi]], [[Wario]], [[Rosalina]], [[Birdo]], [[Diddy Kong]], [[Hammer Bro]], [[Boomerang Bro]], [[Fire Bro]], [[Ice Bro]], [[Red Yoshi]], [[Black Shy Guy]], [[Pink Shy Guy]], [[Toad|Toad (Pit Crew)]], [[Monty Mole]], [[Birdo | |[[Donkey Kong]], [[Toad]], [[Bowser]], [[Luigi]], [[Mario]], [[Peach]], [[Yoshi]], [[Daisy]], [[Lakitu]], [[King Boo]], [[Toadette]], [[Bowser Jr.]], [[Waluigi]], [[Wario]], [[Rosalina]], [[Birdo]], [[Diddy Kong]], [[Hammer Bro]], [[Boomerang Bro]], [[Fire Bro]], [[Ice Bro]], [[Red Yoshi]], [[Black Shy Guy]], [[Pink Shy Guy]], [[Toad|Toad (Pit Crew)]], [[Monty Mole]], [[Birdo|Birdo (Light Blue)]], [[Birdo|Birdo (Yellow)]], [[Roving Racers|Red Koopa (Freerunning)]] | ||
|0.3103% | |0.3103% | ||
|- | |- | ||
| Line 848: | Line 844: | ||
===Gold Pipe=== | ===Gold Pipe=== | ||
{|class="wikitable" style="margin:auto; text-align:center" | {|class="wikitable"style="margin:auto;text-align:center" | ||
!colspan=16|Items obtained from a new Gold Pipe in the Ninja Tour | !colspan=16|Items obtained from a new Gold Pipe in the Ninja Tour | ||
|- | |- | ||
| Line 885: | Line 881: | ||
|} | |} | ||
<br> | <br> | ||
{|class="wikitable"style="margin:auto;text-align:center" | |||
{|class="wikitable" style="margin:auto; text-align:center" | |||
!Class | !Class | ||
!Parts | !Parts | ||
| Line 900: | Line 895: | ||
|- | |- | ||
!Super drivers | !Super drivers | ||
|[[Donkey Kong]], [[Toad]], [[Bowser]], [[Luigi]], [[Mario]], [[Peach]], [[Yoshi]], [[Daisy]], [[Lakitu]], [[King Boo]], [[Toadette]], [[Bowser Jr.]], [[Waluigi]], [[Wario]], [[Rosalina]], [[Birdo]], [[Diddy Kong]], [[Hammer Bro]], [[Boomerang Bro]], [[Fire Bro]], [[Ice Bro]], [[Red Yoshi]], [[Black Shy Guy]], [[Pink Shy Guy]], [[Toad|Toad (Pit Crew)]], [[Monty Mole]], [[Birdo | |[[Donkey Kong]], [[Toad]], [[Bowser]], [[Luigi]], [[Mario]], [[Peach]], [[Yoshi]], [[Daisy]], [[Lakitu]], [[King Boo]], [[Toadette]], [[Bowser Jr.]], [[Waluigi]], [[Wario]], [[Rosalina]], [[Birdo]], [[Diddy Kong]], [[Hammer Bro]], [[Boomerang Bro]], [[Fire Bro]], [[Ice Bro]], [[Red Yoshi]], [[Black Shy Guy]], [[Pink Shy Guy]], [[Toad|Toad (Pit Crew)]], [[Monty Mole]], [[Birdo|Birdo (Light Blue)]], [[Birdo|Birdo (Yellow)]], [[Roving Racers|Red Koopa (Freerunning)]] | ||
|0.3448% | |0.3448% | ||
|- | |- | ||
| Line 927: | Line 922: | ||
==Token Shop== | ==Token Shop== | ||
The limited-time event where [[event token]]s appeared began on April 7, 2021 and ended on April 20, 2021. Event tokens could be earned from collecting them in courses. | The limited-time event where [[event token]]s appeared began on April 7, 2021 and ended on April 20, 2021. Event tokens could be earned from collecting them in courses. | ||
{|class="wikitable"style="margin:auto;text-align:center"width=50% | |||
{|class="wikitable" style="margin:auto; text-align:center" width=50% | |||
!colspan=3|'''Token Shop''' (April 7, 2021 - April 20, 2021) | !colspan=3|'''Token Shop''' (April 7, 2021 - April 20, 2021) | ||
|- | |- | ||
| Line 974: | Line 968: | ||
==Tier Shop== | ==Tier Shop== | ||
The shop featured a variety of set and randomized items available for purchase. The item slots in the shop are unlocked based on the highest tier of players. | The shop featured a variety of set and randomized items available for purchase. The item slots in the shop are unlocked based on the highest tier of players. | ||
{|class="wikitable"style="margin:auto;text-align:center"width=50% | |||
{| class="wikitable" style="margin:auto; text-align:center" width=50% | |||
!colspan=3|Items available in Tier Shop (April 7, 2021 - April 13, 2021) | !colspan=3|Items available in Tier Shop (April 7, 2021 - April 13, 2021) | ||
|- | |- | ||
Revision as of 10:44, January 2, 2024
| Ninja Tour | |
|---|---|
| |
| Start date | April 6, 2021 11:00 p.m. (PT)[?] |
| End date | April 20, 2021 10:59 p.m. (PT)[?] |
| Number of cups | 12 |
| Ranked cups | Rosalina Cup (week 1) Larry Cup (week 2) |
| Coin Rush course | SNES Rainbow Road |
| << List of tours >> | |
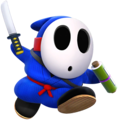
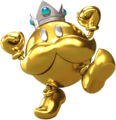
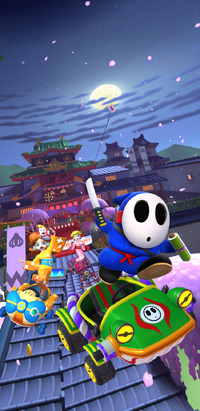
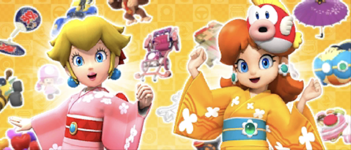
The Ninja Tour was the forty-first tour of Mario Kart Tour, which began on April 7, 2021 and ended on April 20, 2021. This tour introduced a brand new course based on a Japanese dojo, Ninja Hideaway (making this the first tour since the 2020 Winter Tour nine tours prior to introduce a new course not based on a city, introducing Merry Mountain), and drivers Shy Guy (Ninja), Green Shy Guy, and King Bob-omb (Gold). Peach (Kimono) and Daisy (Yukata) also returned as spotlight drivers for the second week. This tour's Coin Rush course was SNES Rainbow Road, which was reused from the beta test and the Tokyo Tour. The menu's background featured Ninja Manor from Ninja Hideaway as the landmark for this tour. This tour's trailer featured shurikens during its opening splash screen.
Starting from this tour, the Butterfly Wings are available in regular tour pipes, including the All-Clear Pipe.
Spotlights
| Ninja Pipe 1 April 6, 2021, 11:00 p.m. (PT) – April 20, 2021, 10:59 p.m. (PT) |
Ninja Pipe 2 April 13, 2021, 11:00 p.m. (PT) – April 20, 2021, 10:59 p.m. (PT) | ||||
|
| ||||
| Driver | Kart | Glider | Drivers | Karts | Gliders |
|---|---|---|---|---|---|

|
|||||
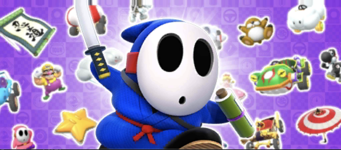
| Shy Guy (Ninja) | Jade Hop Rod | Ninja Scroll | Daisy (Yukata) and Peach (Kimono) | Festival Girl and Sakura Quickshaw | Festival Wings and Purple Oilpaper Umbrella |
Special pipe
| Gold Pipe April 10, 2021, 11:00 p.m. (PT) – April 15, 2021, 10:59 p.m. (PT) | ||
| ||
| High-End Spotlight driver | ||
|---|---|---|
| ||
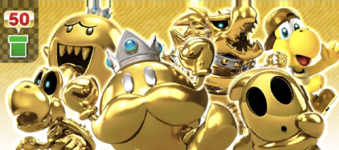
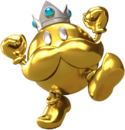
| King Bob-omb (Gold) | ||
| High-End drivers | ||
    
| ||
| Gold Koopa (Freerunning), Shy Guy (Gold), Dry Bones (Gold), Dry Bowser (Gold), and King Boo (Gold) | ||
Cups
Rosalina Cup Ranked cup (week 1) |
Ninja Hideaway |
SNES Koopa Troopa Beach 2 |
SNES Rainbow Road R/T |
Combo Attack | ||||
 GCN Yoshi Circuit T |
Donkey Kong | |||||||
Hammer Bro Cup |
N64 Choco Mountain R |
3DS Mario Circuit T |
GCN Yoshi Circuit |
Ring Race | ||||
 3DS Neo Bowser City |
Bowser Jr. | |||||||
Larry Cup Ranked cup (week 2) |
Ninja Hideaway T |
3DS Neo Bowser City T |
RMX Rainbow Road 2T |
Time Trial | ||||
 SNES Rainbow Road |
Lemmy | |||||||
Baby Mario Cup |
DS Waluigi Pinball T |
SNES Choco Island 2R |
GCN Yoshi Circuit R |
Snap a Photo | ||||
 Ninja Hideaway |
Shy Guy (Ninja) | |||||||
Toadette Cup |
RMX Rainbow Road 2 |
Ninja Hideaway R |
3DS Mario Circuit |
Steer Clear of Obstacles | ||||
 SNES Choco Island 2 |
Bowser Jr. | |||||||
Roy Cup |
SNES Donut Plains 2T |
DS Waluigi Pinball |
3DS Neo Bowser City R |
Glider Challenge | ||||
 SNES Koopa Troopa Beach 2 |
Koopa Troopa | |||||||
Diddy Kong Cup |
SNES Choco Island 2T |
GCN Yoshi Circuit T |
Ninja Hideaway |
Smash Small Dry Bones | ||||
 3DS Toad Circuit |
Daisy | |||||||
Birdo Cup |
N64 Choco Mountain |
SNES Donut Plains 2R |
RMX Rainbow Road 2R |
Time Trial | ||||
 3DS Mario Circuit R |
Red Yoshi | |||||||
Waluigi Cup |
DS Waluigi Pinball R |
Ninja Hideaway T |
SNES Koopa Troopa Beach 2T |
Break Item Boxes | ||||
 3DS Cheep Cheep Lagoon |
Peach | |||||||
Pauline Cup |
SNES Choco Island 2 |
SNES Donut Plains 2 |
3DS Neo Bowser City |
Do Jump Boosts | ||||
 DS Waluigi Pinball |
Waluigi | |||||||
Koopa Troopa Cup |
Ninja Hideaway R |
N64 Choco Mountain T |
3DS Cheep Cheep Lagoon R/T |
Goomba Takedown | ||||
 SNES Donut Plains 2 |
Toadette | |||||||
Wario Cup |
3DS Mario Circuit R |
SNES Koopa Troopa Beach 2R |
3DS Toad Circuit R/T |
Big Reverse Race | ||||
 N64 Choco Mountain |
Any character | |||||||
Signature kart sets
Drivers with a corresponding cup in the tour were bumped one rank up in every course of their cup.
| Cup | Driver | Kart | Glider |
|---|---|---|---|
| First course of every cup | — | — | |
| Second course of every cup | |||
| Third course of every cup | |||
| — | — | ||
| — | — | ||
| — | — | ||
| — | — | ||
| — | — | ||
| — | — | ||
| — | — | ||
| — | — | ||
| — | — | ||
| — | — | ||
| — | — | ||
| — | — |
Rewards
Gold cells indicate rewards that are exclusive to Gold Pass members.

|
|||||||||
| Koopa Troopa | Lightning Oilpaper | Cheep Charger | Droplet Glider | Black Shy Guy | Yoshi | Black B Dasher | Dark Clown | Crimson Crane | Shell Parachute |
| Grand Stars | 15 | 30 | 45 | 60 | 70 | 80 | 100 | 120 | 130 | 140 | 150 | 160 | 170 | 180 | 190 | 200 | 205 | 210 | 215 | 220 | 225 | 230 | 235 | 240 | 245 | 250 | 255 | Total | Grand total | |
|---|---|---|---|---|---|---|---|---|---|---|---|---|---|---|---|---|---|---|---|---|---|---|---|---|---|---|---|---|---|---|
| Free pipe launch | 1 | 1 | 1 | 1 | 1 | 1 | 6 | |||||||||||||||||||||||
| Coin | 100 | 100 | 100 | 100 | 100 | 500 | 1600 | |||||||||||||||||||||||
| 300 | 300 | 500 | 1100 | |||||||||||||||||||||||||||
| Rubies | 5 | 3 | 3 | 3 | 3 | 3 | 20 | 50 | ||||||||||||||||||||||
| 5 | 5 | 5 | 5 | 5 | 5 | 30 | ||||||||||||||||||||||||
| Item tickets | 2 | 2 | 2 | 2 | 8 | 23 | ||||||||||||||||||||||||
| 2 | 2 | 2 | 3 | 3 | 3 | 15 | ||||||||||||||||||||||||
| Star tickets | 1 | 1 | 2 | 3 | ||||||||||||||||||||||||||
| 1 | 1 | |||||||||||||||||||||||||||||
| Point-boost tickets | 1 | 1 | 1 | 3 | 5 | |||||||||||||||||||||||||
| 1 | 1 | 2 | ||||||||||||||||||||||||||||
| 1 | 1 | 1 | 3 | 5 | ||||||||||||||||||||||||||
| 1 | 1 | 2 | ||||||||||||||||||||||||||||
| 1 | 1 | 1 | 3 | 5 | ||||||||||||||||||||||||||
| 1 | 1 | 2 | ||||||||||||||||||||||||||||
| Level-boost ticket | 3 | 12 | ||||||||||||||||||||||||||||
| 9 | ||||||||||||||||||||||||||||||
1.5 Year Anniv. Log-In Bonus
To commemorate the 1.5-year anniversary since the official global launch of Mario Kart Tour, a second 14-day "1.5 Year Anniv. Log-In Bonus" served as the log-in bonus of this tour.
| Day | Reward |
|---|---|
| 1 | Rubies ×5 |
| 2 | Coins ×1,000 |
| 3 | Item tickets ×5 |
| 4 | Point-boost ticket (glider) ×3 |
| 5 | Coins ×1,000 |
| 6 | Rubies ×5 |
| 7 | Point-boost ticket (kart) ×3 |
| 8 | Coin Rush ticket ×1 |
| 9 | Point-boost ticket (driver) ×3 |
| 10 | Rubies ×5 |
| 11 | Level-boost ticket (High-End glider) ×1 |
| 12 | Level-boost ticket (High-End kart) ×1 |
| 13 | Level-boost ticket (High-End driver) ×1 |
| 14 | Coins ×1,000 |
New content
Drivers
Karts
Gliders
Courses
Ninja Hideaway (N, R, T)
Paid banners
| Name | Availability | Cost | Contents | Banner image |
|---|---|---|---|---|
| Value Pack | April 7, 2021 – April 20, 2021 | US$1.99 |
|

|
| Celebrating the Ninja Tour! It's the Crimson Hop Rod! | April 7, 2021 – April 20, 2021 | US$3.99 | 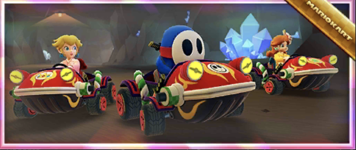
| |
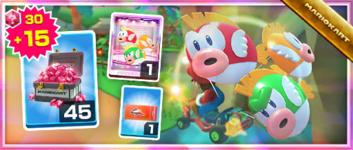
| Cheep Cheep Masks Pack | April 7, 2021 – April 20, 2021 | US$19.99 |
|
|
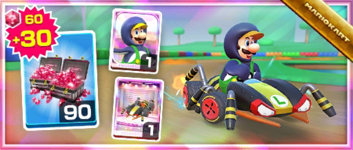
| Crawly Kart Pack | April 7, 2021 – April 20, 2021 | US$39.99 |
|
|
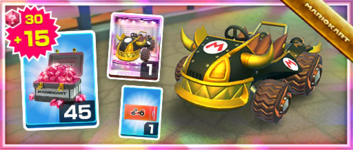
| Gilded King Pack | April 14, 2021 – April 20, 2021 | US$19.99 |
|
|
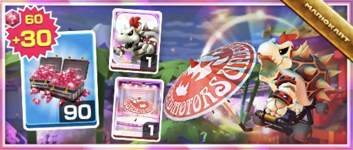
| Dry Bowser Umbrella Pack | April 14, 2021 – April 20, 2021 | US$39.99 |
|
|
Challenges
| Tour Challenges 1 | Tour Challenges 2 | Gold Challenges | ||||||||
|---|---|---|---|---|---|---|---|---|---|---|
| Completion reward: |
Completion reward: |
Completion reward: | ||||||||
 |
 |
 |
 |
 |
 |
 |
 |
 | ||
| Do 50 Template:Color-link boosts. | Land 5 hits with Template:Color-link. | Land 3 hits with Template:Color-link. | Get a Fantastic combo a total of 3 times. | Use 10 Template:Color-link. | Get 1st place in a 150cc or higher race 3 times. | Do 100 Template:Color-link. | Land 10 hits with Template:Color-link. | Do 20 Ultra Mini-Turbo boosts. | ||
 |
 |
 |
 |
 |
 |
 |
 |
 | ||
| Earn a score of 7,000 or higher on 3 T courses. | Activate Template:Color-link mode 5 times using a driver with a hat. | Use Template:Color-link 3 times. | Get an item from the Tier Shop. | Do 20 Template:Color-link in a single race using a driver with a ribbon. | Race in auto mode. | Use a Template:Color-link. | Earn a score of 9,000 or higher using a driver wearing a shell. | Cause opponents to crash in Frenzy mode. | ||
 |
 |
 |
 |
 |
 |
 |
 |
 | ||
| Drive a distance of 16,000 or more on a 3DS course. | Earn a total score of 20,000 or higher in the Template:Color-link. | Take out 5 Template:Color-link. | Earn a score of 9,000 or higher using a driver with a mustache. | Earn a total score of 20,000 or higher in the Template:Color-link. | Race in every course of every cup, including bonus challenges. | Land a hit with a Bob-omb using a driver with a ribbon. | Earn a total score of 20,000 or higher in the Template:Color-link. | Take out 5 Template:Color-link. | ||
| Premium Challenges | ||
|---|---|---|
| Cost: US$4.99 | ||
| Three in a row reward: | ||
Completion reward:  Pink Gold Peach ×1 Pink Gold Peach ×1
| ||

|
||
| Template:Color-link ×1 | Template:Color-link ×1 | Template:Color-link ×1 |
| Land 5 hits with Green Shells. | Land 10 hits with Bananas. | Land 10 hits with Bob-ombs. |
| Template:Color-link ×3,000 | Template:Color-link ×10 | Driver Template:Color-link ×3 |
| Do 50 Jump Boosts. | Participate in a race. | Do 100 Mini-Turbo boosts. |
| Normal driver Template:Color-link ×1 | Super driver level-boost ticket ×1 | High-End driver level-boost ticket ×1 |
| Get 1st place in a race 10 times. | Get 1st place in a race 15 times. | Get 1st place in a race 20 times. |
| Total Points Challenge | |
|---|---|
| Points | Rewards |
| 600,000 |
|
| 550,000 |
|
| 500,000 |
|
| 400,000 |
|
| 300,000 | |
| 150,000 | |
Initial pipe appearance rates
All-Clear Pipe
The All-Clear Pipe randomly shot out one of the following regular High-End items.
| High-End items obtainable from the All-Clear Pipe during the Ninja Tour | |
|---|---|
| High-End drivers | Dry Bowser, Metal Mario, Pink Gold Peach, Cat Peach, Pauline, King Bob-omb, Peachette, Black Yoshi, Funky Kong, Ice Mario |
| High-End karts | B Dasher, Badwagon, Cat Cruiser, Sports Coupe, Circuit Special, Bruiser, Wild Wing, Bumble V, Steel Driver, Macharon, Wildfire Flyer, Red B Dasher, P-Wing, Green Apple Kart, Poison Apple Kart, Dozer Dasher, Banana Master, Offroader, Head Honcho, Pink Wing, Koopa King, Cact-X, Sushi Racer, Green Circuit, Crawly Kart, Cact-Ice |
| High-End gliders | Swooper, Cloud Glider, Gold Glider, Pink Gold Paper Glider, Dry Bowser Umbrella, Blizzard Balloons, Starchute, Silver Starchute, Butterfly Wings, Butterfly Sunset, Crimson Crane, Strawberry Donut, Heart Balloons, Great Sail, Tropical Glider, 8-Bit Star, Silver Bells, Cheep Cheep Masks |
Ninja Pipe 1
| Items obtained from a new Ninja Pipe 1 | |||||||||||||||
|---|---|---|---|---|---|---|---|---|---|---|---|---|---|---|---|
| Item | Normal |
Super |
High-End |
Featured High-End | |||||||||||
| Driver | Kart | Glider | Driver | Kart | Glider | Driver | Kart | Glider | Driver | Kart | Glider | ||||
| Amount | 32 | 26 | 16 | 9 | 7 | 4 | 1 | 1 | 1 | 1 | 1 | 1 | |||
Ninja Pipe 2
| Items obtained from a new Ninja Pipe 2 | |||||||||||||||
|---|---|---|---|---|---|---|---|---|---|---|---|---|---|---|---|
| Item | Normal |
Super |
High-End |
Featured High-End | |||||||||||
| Driver | Kart | Glider | Driver | Kart | Glider | Driver | Kart | Glider | Driver | Kart | Glider | ||||
| Amount | 31 | 25 | 15 | 9 | 7 | 4 | 1 | 1 | 1 | 2 | 2 | 2 | |||
Gold Pipe
Token Shop
The limited-time event where event tokens appeared began on April 7, 2021 and ended on April 20, 2021. Event tokens could be earned from collecting them in courses.
| Token Shop (April 7, 2021 - April 20, 2021) | ||
|---|---|---|

|
||
| Pink Shy Guy Amount: 1 |
Flame Flyer Amount: 1 |
Oilpaper Umbrella Amount: 1 |
| Ruby ×3 Amount: 5 |
Coin ×500 Amount: 10 |
Coin Rush ticket Amount: 1 |
| Point-boost ticket (driver) Amount: 5 |
Point-boost ticket (kart) Amount: 5 |
Point-boost ticket (glider) Amount: 5 |
| Item ticket Amount: 10 |
Level-boost ticket (Normal driver) Amount: 3 |
Level-boost ticket (Super driver) Amount: 1 |
| Star ticket Amount: 5 |
Points-cap ticket (Normal glider) Amount: 1 |
Points-cap ticket (Super glider) Amount: 1 |
Tier Shop
The shop featured a variety of set and randomized items available for purchase. The item slots in the shop are unlocked based on the highest tier of players.
| Items available in Tier Shop (April 7, 2021 - April 13, 2021) | ||
|---|---|---|

|
||
| Monty Mole Amount: 1 |
Poltergust 4000 Amount: 1 |
Starchute Amount: 1 |
| Items available in Tier Shop (April 14, 2021 - April 20, 2021) | ||

|
||
| Bowser Jr. Amount: 1 |
P-Wing Amount: 1 |
Wario Wing Amount: 1 |
| Items available in Tier Shop (April 7, 2021 - April 20, 2021) | ||
| Level-boost ticket (Normal) Amount: 3 per week |
Level-boost ticket (Normal) Amount: 3 per week |
Level-boost ticket (Normal) Amount: 3 per week |
OR |
OR |
OR |
| Level-boost ticket (Super) Amount: 2 per week OR Level-boost ticket (High-End) Amount: 1 per week |
Level-boost ticket (Super) Amount: 2 per week OR Level-boost ticket (High-End) Amount: 1 per week |
Level-boost ticket (Super) Amount: 2 per week OR Level-boost ticket (High-End) Amount: 1 per week |
OR OR |
OR OR |
OR OR |
| Points-cap ticket (Normal) Amount: 1 per week |
Points-cap ticket (Super) Amount: 1 per week |
Points-cap ticket (High-End) Amount: 1 per week |
Profiles
- Mario Kart Tour Twitter:
- "The Yoshi Tour is wrapping up in blue. Next up is the Ninja Tour! Beware the traps in the new course Ninja Hideaway!"[1]
- "Race under cover of darkness, illuminated just by the light of an ominous moon. The new Ninja Hideaway course debuts in blue! Dodge the falling ceiling and keep an eye out for stray ninja... It'll take a keen eye to get 1st place!"[2]
Names in other languages
| Language | Name | Meaning | Notes |
|---|---|---|---|
| Chinese (simplified) | 忍者巡回赛[?] Rěnzhě Xúnhuísài |
Ninja Tour | |
| Chinese (traditional) | 忍者巡迴賽[?] Rěnzhě Xúnhuísài |
Ninja Tour | |
| French | Saison des ninjas[?] | Ninjas' season | |
| German | Ninja-Tour-Saison[?] | Ninja Tour Season | |
| Italian | Tour dei ninja[?] | Ninjas' tour | |
| Korean | 닌자 투어[?] Ninja Tueo |
Ninja Tour | |
| Portuguese | Temporada Ninja[?] | Ninja Season | |
| Spanish | Temporada ninja[?] | Ninja Season |
Trivia
- In the Wario Cup, 3DS Toad Circuit R/T depicted Gold Koopa (Freerunning) on its course icon despite it only being treated as a favored course (unless Gold Koopa (Freerunning) is upgraded to level 3).

