Tokyo Blur: Difference between revisions
SonicSpeed48 (talk | contribs) m (→Gallery) |
SonicSpeed48 (talk | contribs) |
||
| Line 12: | Line 12: | ||
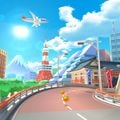
In the standard layout, all of the racers start the course on the central span of the {{wp|Rainbow Bridge (Tokyo)|Rainbow Bridge}}. Just after the starting line, the road curves to the right through {{wp|Ginza}}, then makes a slight left before the {{wp|Wako (retailer)|Wako}} store. Not long after, the course makes a right U-turn near the {{wp|National Diet Building}} and the {{wp|Miraikan}}, then goes through a tunnel. As the {{wp|Tokyo Skytree}} and {{wp|Asahi Beer Hall}} come into view, the road makes a wide right turn back onto Rainbow Bridge. | In the standard layout, all of the racers start the course on the central span of the {{wp|Rainbow Bridge (Tokyo)|Rainbow Bridge}}. Just after the starting line, the road curves to the right through {{wp|Ginza}}, then makes a slight left before the {{wp|Wako (retailer)|Wako}} store. Not long after, the course makes a right U-turn near the {{wp|National Diet Building}} and the {{wp|Miraikan}}, then goes through a tunnel. As the {{wp|Tokyo Skytree}} and {{wp|Asahi Beer Hall}} come into view, the road makes a wide right turn back onto Rainbow Bridge. | ||
== | ==Appearances== | ||
===Tokyo Tour=== | |||
In the [[Tokyo Tour]], Tokyo Blur serves as the tour's signature course. It appears as the second course in the [[Bowser Jr. Cup]], the third course in the [[Baby Rosalina Cup]], and the location of the challenges in the [[Lakitu Cup]] and the [[Peachette Cup]]. It also has a Trick variant which appears as the first course in the [[Rosalina Cup]] and the second course in the [[Dry Bowser Cup]], a Reverse variant which appears as the third course in the [[Mario Cup]] and the second course in the [[Toadette Cup]], and a Reverse/Trick variant which appears as the second course in the [[Wario Cup]] and the third course in the Peachette Cup. | |||
<div class="contentbox mw-collapsible mw-collapsed" data-expandtext="Show stats" data-collapsetext="Hide stats"> | |||
{| class="wikitable" style="text-align: center" | {| class="wikitable" style="text-align: center" | ||
!colspan=4|[[File:MKT Icon | !colspan=4|[[File:MKT Icon Rosalina Cup.png|32px|link=Rosalina Cup]] Rosalina Cup<br>Tokyo Blur T | ||
|- | |- | ||
| | | | ||
| Line 22: | Line 26: | ||
|- | |- | ||
!Three Star | !Three Star | ||
| | |[[File:MKT Icon PeachKimono.png|32px|link=Princess Peach|Peach (Kimono)]] | ||
|[[File:MKT Icon | |[[File:MKT Icon Cloud9.png|32px|link=Cloud 9]][[File:MKT Icon SodaJet.png|32px|link=Soda Jet]] | ||
|[[File:MKT Icon PurpleOilpaperUmbrella.png|32px|link=Purple Oilpaper Umbrella]] | |[[File:MKT Icon PurpleOilpaperUmbrella.png|32px|link=Purple Oilpaper Umbrella]] | ||
|- | |- | ||
!Two Star | !Two Star | ||
|[[File:MKT Icon BabyPeach.png|32px|link=Baby Peach]][[File:MKT Icon | |[[File:MKT Icon BabyPeach.png|32px|link=Baby Peach]][[File:MKT Icon Lakitu.png|32px|link=Lakitu]][[File:MKT Icon Rosalina.png|32px|link=Rosalina]][[File:MKT Icon MarioHakama.png|32px|link=Mario|Mario (Hakama)]] | ||
|[[File:MKT Icon BlueBiddybuggy.png|32px|link=Blue Biddybuggy]][[File:MKT Icon ChromeDKJumbo.png|32px|link=Chrome DK Jumbo]][[File:MKT Icon KabukiDasher.png|32px|link=Kabuki Dasher]][[File:MKT Icon Quickshaw.png|32px|link=Quickshaw]] | |||
|[[File:MKT Icon OilpaperUmbrella.png|32px|link=Oilpaper Umbrella]][[File:MKT Icon PeachParasol.png|32px|link=Peach Parasol (glider)|Peach Parasol]][[File:MKT Icon FullFlight.png|32px|link=Full Flight]] | |||
|- | |- | ||
!colspan=4|[[File:MKT Icon | !colspan=4|[[File:MKT Icon Bowser Jr Cup.png|32px|link=Bowser Jr. Cup]] Bowser Jr. Cup<br>Tokyo Blur | ||
|- | |- | ||
| | | | ||
| Line 39: | Line 43: | ||
|- | |- | ||
!Three Star | !Three Star | ||
|[[File:MKT Icon MarioHakama.png|32px|link=Mario|Mario (Hakama)]] | |[[File:MKT Icon MarioHakama.png|32px|link=Mario|Mario (Hakama)]][[File:MKT Icon PeachKimono.png|32px|link=Princess Peach|Peach (Kimono)]] | ||
|[[File:MKT Icon SodaJet.png|32px|link=Soda Jet]][[File:MKT Icon Quickshaw.png|32px|link=Quickshaw]] | |[[File:MKT Icon SodaJet.png|32px|link=Soda Jet]][[File:MKT Icon Quickshaw.png|32px|link=Quickshaw]] | ||
| | |[[File:MKT Icon PurpleOilpaperUmbrella.png|32px|link=Purple Oilpaper Umbrella]] | ||
|- | |- | ||
!Two Star | !Two Star | ||
|[[File:MKT Icon BabyPeach.png|32px|link=Baby Peach]][[File:MKT Icon | |[[File:MKT Icon BabyPeach.png|32px|link=Baby Peach]][[File:MKT Icon BowserJr.png|32px|link=Bowser Jr.]][[File:MKT Icon Lakitu.png|32px|link=Lakitu]] | ||
|[[File:MKT Icon Biddybuggy.png|32px|link=Biddybuggy]][[File:MKT Icon BlueBiddybuggy.png|32px|link=Blue Biddybuggy]][[File:MKT Icon KoopaClown.png|32px|link=Koopa Clown]][[File:MKT Icon BlackCircuit.png|32px|link=Black Circuit]] | |||
|[[File:MKT Icon BBIAParafoil.png|32px|link=BBIA Parafoil]][[File:MKT Icon FullFlight.png|32px|link=Full Flight]][[File:MKT Icon Swooper.png|32px|link=Swooper (glider)|Swooper]] | |||
|- | |- | ||
!colspan=4|[[File:MKT Icon Mario Cup.png|32px]] Mario Cup<br>Tokyo Blur R | !colspan=4|[[File:MKT Icon Mario Cup.png|32px|link=Mario Cup]] Mario Cup<br>Tokyo Blur R | ||
|- | |- | ||
| | | | ||
| Line 65: | Line 69: | ||
|[[File:MKT Icon SuperGliderRed.png|32px|link=Super Glider]][[File:MKT Icon OilpaperUmbrella.png|32px|link=Oilpaper Umbrella]][[File:MKT Icon PurpleOilpaperUmbrella.png|32px|link=Purple Oilpaper Umbrella]] | |[[File:MKT Icon SuperGliderRed.png|32px|link=Super Glider]][[File:MKT Icon OilpaperUmbrella.png|32px|link=Oilpaper Umbrella]][[File:MKT Icon PurpleOilpaperUmbrella.png|32px|link=Purple Oilpaper Umbrella]] | ||
|- | |- | ||
!colspan=4|[[File:MKT Icon Toadette Cup.png|32px]] Toadette Cup<br>Tokyo Blur R | !colspan=4|[[File:MKT Icon Toadette Cup.png|32px|link=Toadette Cup]] Toadette Cup<br>Tokyo Blur R | ||
|- | |- | ||
| | | | ||
| Line 82: | Line 86: | ||
|[[File:MKT Icon PaperGlider.png|32px|link=Paper Glider]][[File:MKT Icon OilpaperUmbrella.png|32px|link=Oilpaper Umbrella]] | |[[File:MKT Icon PaperGlider.png|32px|link=Paper Glider]][[File:MKT Icon OilpaperUmbrella.png|32px|link=Oilpaper Umbrella]] | ||
|- | |- | ||
!colspan=4|[[File:MKT Icon Rosalina Cup.png|32px]] Rosalina Cup<br>Tokyo Blur | !colspan=4|[[File:MKT Icon Baby Rosalina Cup.png|32px|link=Baby Rosalina Cup]] Baby Rosalina Cup<br>Tokyo Blur | ||
|- | |- | ||
| | | | ||
| Line 90: | Line 94: | ||
|- | |- | ||
!Three Star | !Three Star | ||
|[[File:MKT Icon | |[[File:MKT Icon MarioHakama.png|32px|link=Mario|Mario (Hakama)]] | ||
|[[File:MKT Icon | |[[File:MKT Icon SodaJet.png|32px|link=Soda Jet]][[File:MKT Icon Quickshaw.png|32px|link=Quickshaw]] | ||
|[[File:MKT Icon PurpleOilpaperUmbrella.png|32px|link=Purple Oilpaper Umbrella]] | |[[File:MKT Icon FullFlight.png|32px|link=Full Flight]][[File:MKT Icon PurpleOilpaperUmbrella.png|32px|link=Purple Oilpaper Umbrella]] | ||
|- | |- | ||
!Two Star | !Two Star | ||
|[[File:MKT Icon BabyPeach.png|32px|link=Baby Peach]][[File:MKT Icon | |[[File:MKT Icon BabyPeach.png|32px|link=Baby Peach]][[File:MKT Icon BabyRosalina.png|32px|link=Baby Rosalina]][[File:MKT Icon Lakitu.png|32px|link=Lakitu]][[File:MKT Icon PeachKimono.png|32px|link=Princess Peach|Peach (Kimono)]] | ||
|[[File:MKT Icon | |[[File:MKT Icon Biddybuggy.png|32px|link=Biddybuggy]][[File:MKT Icon BlueBiddybuggy.png|32px|link=Blue Biddybuggy]][[File:MKT Icon BlackCircuit.png|32px|link=Black Circuit]][[File:MKT Icon KabukiDasher.png|32px|Link=Kabuki Dasher]] | ||
|[[File:MKT Icon | |[[File:MKT Icon BBIAParafoil.png|32px|link=BBIA Parafoil]][[File:MKT Icon PaperGlider.png|32px|link=Paper Glider]] | ||
|- | |- | ||
!colspan=4|[[File:MKT Icon | !colspan=4|[[File:MKT Icon Wario Cup.png|32px|link=Wario Cup]] Wario Cup<br>Tokyo Blur R/T | ||
|- | |- | ||
| | | | ||
| Line 107: | Line 111: | ||
|- | |- | ||
!Three Star | !Three Star | ||
|[[File:MKT Icon PeachKimono.png|32px|link=Princess Peach|Peach (Kimono)]] | |[[File:MKT Icon MarioHakama.png|32px|link=Mario|Mario (Hakama)]][[File:MKT Icon PeachKimono.png|32px|link=Princess Peach|Peach (Kimono)]] | ||
|[[File:MKT Icon | |[[File:MKT Icon ChromeDKJumbo.png|32px|link=Chrome DK Jumbo]][[File:MKT Icon KabukiDasher.png|32px|link=Kabuki Dasher]][[File:MKT Icon Quickshaw.png|32px|link=Quickshaw]] | ||
|[[File:MKT Icon | |[[File:MKT Icon WarioWing.png|32px|link=Wario Wing]][[File:MKT Icon FullFlight.png|32px|link=Full Flight]] | ||
|- | |- | ||
!Two Star | !Two Star | ||
|[[File:MKT Icon | |[[File:MKT Icon BabyDaisy.png|32px|link=Baby Daisy]][[File:MKT Icon DiddyKong.png|32px|link=Diddy Kong]][[File:MKT Icon Wario.png|32px|link=Wario]] | ||
|[[File:MKT Icon | |[[File:MKT Icon Cloud9.png|32px|link=Cloud 9]][[File:MKT Icon Badwagon.png|32px|link=Badwagon]][[File:MKT Icon BlackCircuit.png|32px|link=Black Circuit]] | ||
|[[File:MKT Icon | |[[File:MKT Icon BBIAParafoil.png|32px|link=BBIA Parafoil]][[File:MKT Icon LightningOilpaper.png|32px|link=Lightning Oilpaper]][[File:MKT Icon PurpleOilpaperUmbrella.png|32px|link=Purple Oilpaper Umbrella]] | ||
|- | |- | ||
!colspan=4|[[File:MKT Icon | !colspan=4|[[File:MKT Icon Dry Bowser Cup.png|32px|link=Dry Bowser Cup]] Dry Bowser Cup<br>Tokyo Blur T | ||
|- | |- | ||
| | | | ||
| Line 124: | Line 128: | ||
|- | |- | ||
!Three Star | !Three Star | ||
| | |[[File:MKT Icon PeachKimono.png|32px|link=Princess Peach|Peach (Kimono)]] | ||
|[[File:MKT Icon | |[[File:MKT Icon Cloud9.png|32px|link=Cloud 9]][[File:MKT Icon Quickshaw.png|32px|link=Quickshaw]] | ||
|[[File:MKT Icon | |[[File:MKT Icon PurpleOilpaperUmbrella.png|32px|link=Purple Oilpaper Umbrella]] | ||
|- | |- | ||
!Two Star | !Two Star | ||
|[[File:MKT Icon | |[[File:MKT Icon BabyPeach.png|32px|link=Baby Peach]][[File:MKT Icon Lakitu.png|32px|link=Lakitu]][[File:MKT Icon DryBowser.png|32px|link=Dry Bowser]][[File:MKT Icon MarioHakama.png|32px|link=Mario|Mario (Hakama)]] | ||
|[[File:MKT Icon | |[[File:MKT Icon BlueBiddybuggy.png|32px|link=Blue Biddybuggy]][[File:MKT Icon ChromeDKJumbo.png|32px|link=Chrome DK Jumbo]][[File:MKT Icon FlameFlyer.png|32px|link=Flame Flyer]][[File:MKT Icon SodaJet.png|32px|link=Soda Jet]][[File:MKT Icon KabukiDasher.png|32px|link=Kabuki Dasher]] | ||
|[[File:MKT Icon | |[[File:MKT Icon BobombParafoil.png|32px|link=Bob-omb Parafoil]][[File:MKT Icon OilpaperUmbrella.png|32px|link=Oilpaper Umbrella]][[File:MKT Icon FullFlight.png|32px|link=Full Flight]] | ||
|- | |- | ||
!colspan=4|[[File:MKT Icon Peachette Cup.png|32px]] Peachette Cup<br>Tokyo Blur R/T | !colspan=4|[[File:MKT Icon Peachette Cup.png|32px|link=Peachette Cup]] Peachette Cup<br>Tokyo Blur R/T | ||
|- | |- | ||
| | | | ||
| Line 150: | Line 154: | ||
|[[File:MKT Icon BBIAParafoil.png|32px|link=BBIA Parafoil]][[File:MKT Icon LightningOilpaper.png|32px|link=Lightning Oilpaper]][[File:MKT Icon WarioWing.png|32px|link=Wario Wing]] | |[[File:MKT Icon BBIAParafoil.png|32px|link=BBIA Parafoil]][[File:MKT Icon LightningOilpaper.png|32px|link=Lightning Oilpaper]][[File:MKT Icon WarioWing.png|32px|link=Wario Wing]] | ||
|} | |} | ||
</div> | |||
==Profiles== | ==Profiles== | ||
Revision as of 17:40, August 26, 2020
Template:Racecourse Tokyo Blur (referred to as Tokyo Blur 1 from version 1.2.0 to 1.4.0) is a race course in Mario Kart Tour. It is named after and inspired by Tokyo, Japan; due to this, it is the signature course of the Tokyo Tour. The course also appears as Tokyo Blur R (reverse), Tokyo Blur T (with ramps), and Tokyo Blur R/T (reverse and with ramps). The BGM theme of the track is based on the theme of Toad Circuit.
Course layout
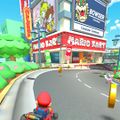
In the standard layout, all of the racers start the course on the central span of the Rainbow Bridge. Just after the starting line, the road curves to the right through Ginza, then makes a slight left before the Wako store. Not long after, the course makes a right U-turn near the National Diet Building and the Miraikan, then goes through a tunnel. As the Tokyo Skytree and Asahi Beer Hall come into view, the road makes a wide right turn back onto Rainbow Bridge.
Appearances
Tokyo Tour
In the Tokyo Tour, Tokyo Blur serves as the tour's signature course. It appears as the second course in the Bowser Jr. Cup, the third course in the Baby Rosalina Cup, and the location of the challenges in the Lakitu Cup and the Peachette Cup. It also has a Trick variant which appears as the first course in the Rosalina Cup and the second course in the Dry Bowser Cup, a Reverse variant which appears as the third course in the Mario Cup and the second course in the Toadette Cup, and a Reverse/Trick variant which appears as the second course in the Wario Cup and the third course in the Peachette Cup.
Tokyo Blur T | |||
|---|---|---|---|
| Characters | Karts | Gliders | |
| Three Star | |||
| Two Star | |||
Tokyo Blur | |||
| Characters | Karts | Gliders | |
| Three Star | |||
| Two Star | |||
Tokyo Blur R | |||
| Characters | Karts | Gliders | |
| Three Star | |||
| Two Star | |||
Tokyo Blur R | |||
| Characters | Karts | Gliders | |
| Three Star | |||
| Two Star | |||
Tokyo Blur | |||
| Characters | Karts | Gliders | |
| Three Star | |||
| Two Star | |||
Tokyo Blur R/T | |||
| Characters | Karts | Gliders | |
| Three Star | |||
| Two Star | |||
Tokyo Blur T | |||
| Characters | Karts | Gliders | |
| Three Star | |||
| Two Star | |||
Tokyo Blur R/T | |||
| Characters | Karts | Gliders | |
| Three Star | |||
| Two Star | |||
Profiles
Mario Kart Tour
- Mario Kart Tour Twitter:
- "Take a tour of a Japanese city in the Tokyo Blur course! Enjoy the sights as you take in iconic landmarks, including Mt. Fuji off in the distance!"[1]
- "A giant dinosaur stomping around in the middle of a city? The Tokyo Blur course is like something straight out of a movie! The tricked-out Tokyo Blur R/T is waiting for you in the Peachette Cup!"[2]
Sponsors
- Mario Electrical Equipment (Posters)
- Bowser Technology (Posters)
- Shell Books (Posters)
- Kingdom Café (Posters)
- Galaxy Air (Signs)
- Mario Work Gear (Signs)
- Bullet Bill Speed Trial (Signs)
- Mushroom Piston (Signs)
- Princess Orange (Signs, vending machines)
- Boomerang Bros. International Airlines (Signs)
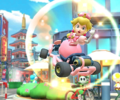
Gallery
The course icon of the Reverse variant
The course icon of the Trick variant
The course icon of the Reverse/Trick variant
The course icon of the challenge in the Lakitu Cup (Tokyo Tour)
The course icon of the challenge in the Peachette Cup (Tokyo Tour)
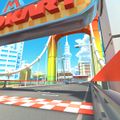
View of the starting line
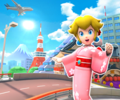
View of Tokyo Tower
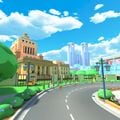
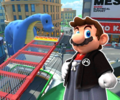
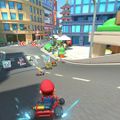
View of the National Diet Building
View of various sponsors
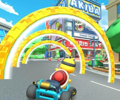
Ginza section
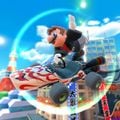
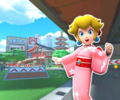
Mario (Hakama) tricking
Peach (Kimono) tricking
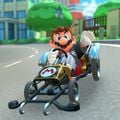
Mario (Hakama) cheering


Names in other languages
| Language | Name | Meaning | Notes |
|---|---|---|---|
| Chinese (simplified) | 东京赛道[?] | Tokyo Track | |
| Chinese (traditional) | 東京賽道[?] | Tokyo Track | |
| German | Tokyo-Tempotour[?] | Tokyo Speed Tour | |
| Italian | Neon di Tokyo[?] | Tokyo Neon | |
| Portuguese | Velocidade em Tóquio[?] | Speed in Tokyo | |
| Spanish | Circuito Tokio[?] | Tokyo Circuit |
Trivia
- The Noshis in the R/T version of this course references the Kaiju.[2]
- Before the start of the Summer Festival Tour, no kart had Tokyo Blur R listed as a three-star course; instead, its appearances in the Mario Cup and Toadette Cup rely on the spotlight bonus to raise the Kabuki Dasher and the Quickshaw, respectively, to the three-star tier. This was the only course in the game to completely lack either drivers, karts, or gliders in the three-star tier by default.