Tour London Loop: Difference between revisions
BBQ Turtle (talk | contribs) m (I think someone was overdoing the "the"s a bit here- and someone might want to check that trivia point, it seems a bit questionable but I don't know enough to say.) |
Tag: Mobile edit |
||
| Line 12: | Line 12: | ||
The course begins to the left of [[Big Ben]], followed by a gradual right next to a double-decker bus. The road then weaves its way around {{wp|Nelson's Column}}, then makes another gradual right through {{wp|Charing Cross}} and a part of {{wp|Trafalgar Square}} before making a sharp left at {{wp|St Paul's Cathedral}}. The player then reaches {{wp|Leadenhall Market}}, which they exit after making a single slight right. After another sharp right with a [[Chain Chomp]] in a green space in front of the [[Tower of London]], the player crosses {{wp|Tower Bridge}}, then takes another sharp right to bypass {{wp|City Hall, London|City Hall}} and {{wp|The Shard}} with the {{wp|London Eye}} in the background. After a left sigmoid curve, the player returns to the finish line. | The course begins to the left of [[Big Ben]], followed by a gradual right next to a double-decker bus. The road then weaves its way around {{wp|Nelson's Column}}, then makes another gradual right through {{wp|Charing Cross}} and a part of {{wp|Trafalgar Square}} before making a sharp left at {{wp|St Paul's Cathedral}}. The player then reaches {{wp|Leadenhall Market}}, which they exit after making a single slight right. After another sharp right with a [[Chain Chomp]] in a green space in front of the [[Tower of London]], the player crosses {{wp|Tower Bridge}}, then takes another sharp right to bypass {{wp|City Hall, London|City Hall}} and {{wp|The Shard}} with the {{wp|London Eye}} in the background. After a left sigmoid curve, the player returns to the finish line. | ||
==Favored | ==Favored Characters== | ||
{| class="wikitable" style="text-align: center" | {| class="wikitable" style="text-align: center" | ||
!colspan=4|[[File:MKT Icon Daisy Cup.png|32px]] [[Daisy Cup]]<br>London Loop | !colspan=4|[[File:MKT Icon Daisy Cup.png|32px]] [[Daisy Cup]]<br>London Loop 1 | ||
|- | |- | ||
| | | | ||
| Line 22: | Line 22: | ||
|- | |- | ||
!Three Star | !Three Star | ||
|[[File:MKT Icon | |[[File:MKT Icon RosalinaHalloween.png|32px|link=Rosalina|Rosalina]][[File:MKT Icon DaisyHolidayCheer.png|32px|link=Princess Daisy|Daisy (Holiday Cheer)]] | ||
|[[File:MKT Icon RibbonRider.png|32px|link=Ribbon Rider]] | |[[File:MKT Icon RibbonRider.png|32px|link=Ribbon Rider]] | ||
|[[File:MKT Icon GlitterGlider.png|32px|link=Glitter Glider]] | |[[File:MKT Icon GlitterGlider.png|32px|link=Glitter Glider]] | ||
|- | |- | ||
!Two Star | !Two Star | ||
|[[File:MKT Icon BabyRosalina.png|32px|link=Baby Rosalina]][[File:MKT Icon KoopaTroopa.png|32px|link=Koopa Troopa]][[File:MKT Icon Daisy.png|32px|link=Princess Daisy|Daisy]][[File:MKT Icon | |[[File:MKT Icon BabyRosalina.png|32px|link=Baby Rosalina]][[File:MKT Icon KoopaTroopa.png|32px|link=Koopa Troopa]][[File:MKT Icon Daisy.png|32px|link=Princess Daisy|Daisy]][[File:MKT Icon Toadette.png|32px|link=Toadette]][[File:MKT Icon WaluigiBusDriver.png|32px|link=Waluigi|Waluigi (Bus Driver)]] | ||
|[[File:MKT Icon PinkMushmellow.png|32px|link=Pink Mushmellow]][[File:MKT Icon WhiteRoyale.png|32px|link=White Royale]][[File:MKT Icon BumbleV.png|32px|link=Bumble V]][[File:MKT Icon DoubleDecker.png|32px|link=Double-Decker]][[File:MKT Icon RadishRider.png|32px|link=Radish Rider]][[File:MKT Icon RedBDasher.png|32px|link=Red B Dasher]] | |[[File:MKT Icon PinkMushmellow.png|32px|link=Pink Mushmellow]][[File:MKT Icon WhiteRoyale.png|32px|link=White Royale]][[File:MKT Icon BumbleV.png|32px|link=Bumble V]][[File:MKT Icon DoubleDecker.png|32px|link=Double-Decker]][[File:MKT Icon RadishRider.png|32px|link=Radish Rider]][[File:MKT Icon RedBDasher.png|32px|link=Red B Dasher]] | ||
|[[File:MKT Icon PistonGlider.png|32px|link=Piston Glider]][[File:MKT Icon FlowerGlider.png|32px|link=Flower Glider]][[File:MKT Icon LeTricolore.png|32px|link=Le Tricolore]][[File:MKT Icon SoaringJack.png|32px|link=Soaring Jack]] | |[[File:MKT Icon PistonGlider.png|32px|link=Piston Glider]][[File:MKT Icon FlowerGlider.png|32px|link=Flower Glider]][[File:MKT Icon LeTricolore.png|32px|link=Le Tricolore]][[File:MKT Icon SoaringJack.png|32px|link=Soaring Jack]] | ||
|- | |- | ||
!colspan=4|[[File:MKT Icon | !colspan=4|[[File:MKT Icon Toadette Cup.png|32px]] [[Toadette Cup]]<br>London Loop 1 | ||
|- | |- | ||
| | | | ||
| Line 39: | Line 39: | ||
|- | |- | ||
!Three Star | !Three Star | ||
|[[File:MKT Icon | |[[File:MKT Icon Toadette.png|32px|link=Toadette Cup]][[File:MKT Icon RosalinaHalloween.png|32px|link=Rosalina|Rosalina]][[File:MKT Icon DaisyHolidayCheer.png|32px|link=Princess Daisy|Daisy (Holiday Cheer)]] | ||
|[[File:MKT Icon RibbonRider.png|32px|link=Ribbon Rider]] | |[[File:MKT Icon RibbonRider.png|32px|link=Ribbon Rider]] | ||
|[[File:MKT Icon GlitterGlider.png|32px|link=Glitter Glider]] | |[[File:MKT Icon GlitterGlider.png|32px|link=Glitter Glider]] | ||
|- | |- | ||
!Two Star | !Two Star | ||
|[[File:MKT Icon BabyRosalina.png|32px|link=Baby Rosalina]][[File:MKT Icon | |[[File:MKT Icon BabyRosalina.png|32px|link=Baby Rosalina]][[File:MKT Icon KoopaTroopa.png|32px|link=Kooopa Troopa]][[File:MKT Icon WaluigiBusDriver.png|32px|link=Waluigi|Waluigi (Bus Driver)]] | ||
|[[File:MKT Icon KoopaDasher.png|32px|link=Koopa Dasher]][[File:MKT Icon PinkMushmellow.png|32px|link=Pink Mushmellow]][[File:MKT Icon BumbleV.png|32px|link=Bumble V]][[File:MKT Icon DoubleDecker.png|32px|link=Double-Decker]][[File:MKT Icon RadishRider.png|32px|link=Radish Rider]][[File:MKT Icon RedBDasher.png|32px|link=Red B Dasher]] | |[[File:MKT Icon KoopaDasher.png|32px|link=Koopa Dasher]][[File:MKT Icon PinkMushmellow.png|32px|link=Pink Mushmellow]][[File:MKT Icon BumbleV.png|32px|link=Bumble V]][[File:MKT Icon DoubleDecker.png|32px|link=Double-Decker]][[File:MKT Icon RadishRider.png|32px|link=Radish Rider]][[File:MKT Icon RedBDasher.png|32px|link=Red B Dasher]] | ||
|[[File:MKT Icon PistonGlider.png|32px|link=Piston Glider]][[File:MKT Icon ShellParachute.png|32px|link=Shell Parachute]][[File:MKT Icon LeTricolore.png|32px|link=Le Tricolore]][[File:MKT Icon SoaringJack.png|32px|link=Soaring Jack]] | |[[File:MKT Icon PistonGlider.png|32px|link=Piston Glider]][[File:MKT Icon ShellParachute.png|32px|link=Shell Parachute]][[File:MKT Icon LeTricolore.png|32px|link=Le Tricolore]][[File:MKT Icon SoaringJack.png|32px|link=Soaring Jack]] | ||
|- | |- | ||
!colspan=4|[[File:MKT Icon Shy Guy Cup.png|32px]] [[Shy Guy Cup]]<br>London Loop | !colspan=4|[[File:MKT Icon Shy Guy Cup.png|32px]] [[Shy Guy Cup]]<br>London Loop 1R | ||
|- | |- | ||
| | | | ||
| Line 65: | Line 65: | ||
|[[File:MKT Icon PistonGlider.png|32px|link=Piston Glider]][[File:MKT Icon BobombParafoil.png|32px|link=Bob-omb Parafoil]][[File:MKT Icon CloudGlider.png|32px|link=Cloud Glider]][[File:MKT Icon RoyalParachute.png|32px|link=Royal Parachute]] | |[[File:MKT Icon PistonGlider.png|32px|link=Piston Glider]][[File:MKT Icon BobombParafoil.png|32px|link=Bob-omb Parafoil]][[File:MKT Icon CloudGlider.png|32px|link=Cloud Glider]][[File:MKT Icon RoyalParachute.png|32px|link=Royal Parachute]] | ||
|- | |- | ||
!colspan=4|[[File:MKT Icon Waluigi Cup.png|32px]] [[Waluigi Cup]]<br>London Loop | !colspan=4|[[File:MKT Icon Waluigi Cup.png|32px]] [[Waluigi Cup]]<br>London Loop 1R | ||
|- | |- | ||
| | | | ||
| Line 82: | Line 82: | ||
|[[File:MKT Icon DropletGlider.png|32px|link=Droplet Glider]][[File:MKT Icon WaluigiWing.png|32px|link=Waluigi Wing]][[File:MKT Icon CloudGlider.png|32px|link=Cloud Glider]][[File:MKT Icon GlitterGlider.png|32px|link=Glitter Glider]][[File:MKT Icon RoyalParachute.png|32px|link=Royal Parachute]] | |[[File:MKT Icon DropletGlider.png|32px|link=Droplet Glider]][[File:MKT Icon WaluigiWing.png|32px|link=Waluigi Wing]][[File:MKT Icon CloudGlider.png|32px|link=Cloud Glider]][[File:MKT Icon GlitterGlider.png|32px|link=Glitter Glider]][[File:MKT Icon RoyalParachute.png|32px|link=Royal Parachute]] | ||
|- | |- | ||
!colspan=4|[[File:MKT Icon Peach Cup.png|32px]] [[Peach Cup]]<br>London Loop | !colspan=4|[[File:MKT Icon Peach Cup.png|32px]] [[Peach Cup]]<br>London Loop 1T | ||
|- | |- | ||
| | | | ||
| Line 99: | Line 99: | ||
|[[File:MKT Icon PeachParasol.png|32px|link=Peach Parasol (glider)|Peach Parasol]][[File:MKT Icon WarioWing.png|32px|link=Wario Wing]][[file:MKT Icon SoaringJack.png|32px|link=Soaring Jack]][[File:MKT Icon Starchute.png|32px|link=Starchute]] | |[[File:MKT Icon PeachParasol.png|32px|link=Peach Parasol (glider)|Peach Parasol]][[File:MKT Icon WarioWing.png|32px|link=Wario Wing]][[file:MKT Icon SoaringJack.png|32px|link=Soaring Jack]][[File:MKT Icon Starchute.png|32px|link=Starchute]] | ||
|- | |- | ||
!colspan=4|[[File:MKT Icon Donkey Kong Cup.png|32px]] [[Donkey Kong Cup]]<br>London Loop | !colspan=4|[[File:MKT Icon Donkey Kong Cup.png|32px]] [[Donkey Kong Cup]]<br>London Loop 1T | ||
|- | |- | ||
| | | | ||
| Line 116: | Line 116: | ||
|[[File:MKT Icon BaNaNaParafoil.png|32px|link=BaNaNa Parafoil]][[File:MKT Icon WarioWing.png|32px|link=Wario Wing]][[File:MKT Icon GlitterGlider.png|32px|link=Glitter Glider]][[File:MKT Icon Starchute.png|32px|link=Starchute]] | |[[File:MKT Icon BaNaNaParafoil.png|32px|link=BaNaNa Parafoil]][[File:MKT Icon WarioWing.png|32px|link=Wario Wing]][[File:MKT Icon GlitterGlider.png|32px|link=Glitter Glider]][[File:MKT Icon Starchute.png|32px|link=Starchute]] | ||
|- | |- | ||
!colspan=4|[[File:MKT Icon Dry Bones Cup.png|32px]] [[Dry Bones Cup]]<br>London Loop | !colspan=4|[[File:MKT Icon Dry Bones Cup.png|32px]] [[Dry Bones Cup]]<br>London Loop 1R/T | ||
|- | |- | ||
| | | | ||
| Line 133: | Line 133: | ||
|[[File:MKT Icon Parafoil.png|32px|link=Parafoil]][[File:MKT Icon LeTricolore.png|32px|link=Le Tricolore]] | |[[File:MKT Icon Parafoil.png|32px|link=Parafoil]][[File:MKT Icon LeTricolore.png|32px|link=Le Tricolore]] | ||
|- | |- | ||
!colspan=4|[[File:MKT Icon Wario Cup.png|32px]] [[Wario Cup]]<br>London Loop | !colspan=4|[[File:MKT Icon Wario Cup.png|32px]] [[Wario Cup]]<br>London Loop 1R/T | ||
|- | |- | ||
| | | | ||
Revision as of 10:45, June 1, 2020
Template:Racecourse London Loop is a race course in Mario Kart Tour. It is named after and inspired by London, England; due to this, it is the signature course of the London Tour. The course also appears as London Loop R (reverse), London Loop T (with ramps), and London Loop R/T (reverse and with ramps).
Course layout
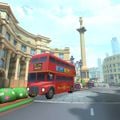
The course begins to the left of Big Ben, followed by a gradual right next to a double-decker bus. The road then weaves its way around Nelson's Column, then makes another gradual right through Charing Cross and a part of Trafalgar Square before making a sharp left at St Paul's Cathedral. The player then reaches Leadenhall Market, which they exit after making a single slight right. After another sharp right with a Chain Chomp in a green space in front of the Tower of London, the player crosses Tower Bridge, then takes another sharp right to bypass City Hall and The Shard with the London Eye in the background. After a left sigmoid curve, the player returns to the finish line.
Favored Characters
London Loop 1 | |||
|---|---|---|---|
| Characters | Karts | Gliders | |
| Three Star | |||
| Two Star | |||
London Loop 1 | |||
| Characters | Karts | Gliders | |
| Three Star | |||
| Two Star | |||
London Loop 1R | |||
| Characters | Karts | Gliders | |
| Three Star | |||
| Two Star | |||
London Loop 1R | |||
| Characters | Karts | Gliders | |
| Three Star | |||
| Two Star | |||
London Loop 1T | |||
| Characters | Karts | Gliders | |
| Three Star | |||
| Two Star | |||
London Loop 1T | |||
| Characters | Karts | Gliders | |
| Three Star | |||
| Two Star | |||
London Loop 1R/T | |||
| Characters | Karts | Gliders | |
| Three Star | |||
| Two Star | |||
London Loop 1R/T | |||
| Characters | Karts | Gliders | |
| Three Star | |||
| Two Star | |||
Gallery
Icons
Screenshots
Official Twitter
- MKT London View.jpg
View of Big Ben
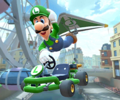
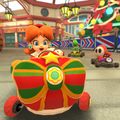
Daisy (Holiday Cheer) in the Ribbon Rider
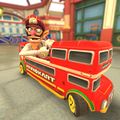
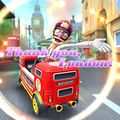
Waluigi (Bus Driver) in the Double-Decker
Peachette in the Swift Jack
Other
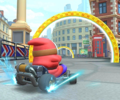
Waluigi (Bus Driver) approaching Nelson's Column at the start of a race in London Loop
In front of St Paul's Cathedral
Approaching a row of Item Boxes at the entrance in Leadenhall Market
Around the park with the Chain Chomp
Preparing to cross Tower Bridge
At the curve from where the London Eye can be seen
On the last curve before the finish line
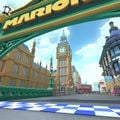
Approaching the finish line with Big Ben in sight
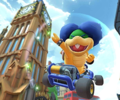
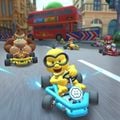
Diddy Kong on London Loop T, driving on a large ramp near Nelson's Column
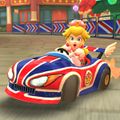
Peach on London Loop R/T
Names in other languages
| Language | Name | Meaning | Notes |
|---|---|---|---|
| Chinese (simplified) | 伦敦环线[?] | - | |
| Chinese (traditional) | 倫敦環線[?] | - | |
| German | London-Tour[?] | London Tour | |
| Italian | Giro di Londra[?] | London Loop | |
| Portuguese | Arrancada em Londres[?] | London Sprint | |
| Spanish | Ronda por Londres[?] | London Round |
Trivia
- The music for this course bears similarities to that of Rock Rock Mountain, as well as being a reference to 1960s British rock music.
