Donkey Kong Country 3 (Game Boy Advance)
| Donkey Kong Country 3 | |||||||||||
|---|---|---|---|---|---|---|---|---|---|---|---|
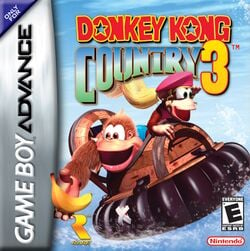 For alternate box art, see the game's gallery. | |||||||||||
| Developer | Rare Ltd. | ||||||||||
| Publisher | Nintendo | ||||||||||
| Platform(s) | Game Boy Advance | ||||||||||
| Release date | |||||||||||
| Language(s) | English (United Kingdom) English (United States) French (France) German Spanish (Spain) Italian Japanese | ||||||||||
| Genre | Platformer | ||||||||||
| Rating(s) |
| ||||||||||
| Mode(s) | 1–2 players | ||||||||||
| Format | Game Boy Advance: | ||||||||||
| Input | Game Boy Advance:
| ||||||||||
| Serial code(s) | |||||||||||
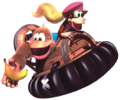
Donkey Kong Country 3 is a 2005 remake of Donkey Kong Country 3: Dixie Kong's Double Trouble! for the Game Boy Advance. It features a new world and a new soundtrack composed by David Wise.
Story
The story is the same as the original's. Unlike the first two Donkey Kong Country games, the remake has no opening sequence, a distinction of which is shared with Super Mario Advance.
Months after the events of Donkey Kong Country 2: Diddy's Kong Quest, the Kongs were back at DK Island, still celebrating their victory over the Kremling Krew And Kaptain K. Rool. Donkey Kong and Diddy Kong often slung up a hammock, played some music, and drank banana milkshakes while soaking up the sun. Dixie often joined alongside them.
One morning, Dixie found that Diddy was not in his room. This surprised her as it was unusual for Diddy to be up so early. She found a note on a table that read:
- Dear Dixie, Gone exploring the islands with DK, Back tomorrow! --Diddy
Dixie recalled a few other times where Donkey Kong and Diddy had the same plan, and every time the two Kongs would never travel farther than the beach. Dixie went to look for them at the beach, soon realizing that it was too quiet for them to be nearby. As the sun set, Dixie went to bed. The next morning, Dixie checked Diddy's place and found that he had still not returned. She began worrying over what trouble that Donkey Kong and Diddy got into. The entire day passed and the Kongs still did not return. The third morning, Donkey Kong and Diddy had still not returned, so Dixie went to the southern shores of DK Island and swam to the nearest mainland at the Northern Kremisphere, looking for them.
Dixie briefly visited Wrinkly Kong, who confirmed that she saw Donkey Kong and Diddy pass, but Wrinkly did not know where they went. She suggested that Donkey Kong and Diddy visited Funky's Rentals. As Dixie left, Wrinkly asked her to search for Banana Birds along the way.
When Dixie visited Funky, he was busy working on an invention, making use of the various unusual items in the shop. Funky explained to Dixie that Kiddy was the only visitor that he had all week. He pointed across to Kiddy, who was chewing on an old spare tire. Dixie agreed to take Kiddy along with her, and they left. Funky told them to look out for any random items which he can make use of, and he also told them to visit the Brothers Bear for help.1
As they traveled through the worlds, Dixie and Kiddy encounter different Kremlings than before. At the end of Mekanos, the Kongs first encounter KAOS, who was believed to be the new leader of the Kremling Krew at the time. Later during their adventure, Dixie and Kiddy encounter KAOS again at Kastle Kaos, which is at the end of Kaos Kore. During the battle, it is revealed that KAOS was a puppet of Baron K. Roolenstein all along. After defeating Baron K. Roolenstein, KAOS breaks down and releases Donkey Kong and Diddy. It is revealed that they were trapped to be used as a power source.
The Kongs eventually discover the lost world, Krematoa, where they meet the local Brother Bear, Boomer. Dixie and Kiddy must recover the five cogs found in each level of Krematoa and return them to Boomer's Bomb Shelter. Boomer inserts them on a machine, which causes the Knautilus to rise from the center lake. Dixie and Kiddy enter it and engage in a second boss fight against Baron K. Roolenstein. The Kongs defeat him again, but Baron K. Roolenstein manages to escape again.
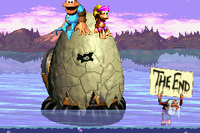
After acquiring every DK Coin, the Kongs return to Funky's Rentals, and he builds the Gyrocopter for them. With the Gyrocopter, the Kongs can access the remaining few secret caves to the last of the Banana Birds. After freeing every Banana Bird, they carry the Kongs up in the sky to the Banana Queen. All of the Banana Birds sing to destroy the evil barrier that imprisoned the Banana Queen. Dixie and Kiddy's adventure ends with the Banana Queen chasing after Baron K. Roolenstein and dropping a large eggshell on him.
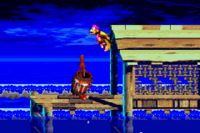
The remake's start-up sequence might show how Donkey Kong and Diddy were captured because it starts underwater from the perspective of a diving mask; the Knautilus suddenly charges into the Nintendo logo, then the Rare logo, and closes in and "swallows" the camera. The next shot shows the title screen and the Knautilus partially submerged in the waters of the Northern Kremisphere.
1 - At the very start of the game itself, Dixie goes to Wrinkly's Retreat. During the start of the game, neither Wrinkly nor Funky mention Donkey Kong and Diddy. During the first interaction with Funky, he does not mention for Dixie to be on the lookout for random items, nor does he mention the Brothers Bear. This information is found in the instruction booklet only.
Characters
Kong family
| Playable | ||
|---|---|---|
| Image | Name | Description |
| Dixie Kong | Dixie is the girlfriend of Diddy and is the main character of the game. Dixie's main attribute is her ponytail, which she can use to glide across the air. | |
| Kiddy Kong | Kiddy is the toddler cousin and sidekick of Dixie. He is both stronger and heavier than Dixie, and can throw her to higher areas. | |
| Supporting | ||
| Image | Name | Description |
| Candy Kong, Chunky Kong, Lanky Kong, and Tiny Kong | Four members of the Kong family that make a cameo with the others in the Protect mission of Funky's Rentals. | |
| Cranky Kong | While only a minor character in the original, the remake gives Cranky a larger role like in previous games. Cranky runs his own personal dojo to train himself for a new adventure. There, the Kongs can play a minigame in which Cranky must deflect curled-up Bristles that bounce toward him. If successful, the Kongs are rewarded a Banana Bird. Addditionally, he explains how the secret cave minigame works and has the same role of directing the player following boss fights as in the previous Game Boy Advance games. | |
| Donkey Kong and Diddy Kong | Donkey Kong and Diddy have the same role. During a fishing trip, they get captured and become a power source for KAOS. Dixie and Kiddy go on an adventure to save both of them. | |
| Funky Kong | Funky runs a vehicle rental service, Funky's Rentals, where Dixie and Kiddy can lease a vehicle to travel around the main Northern Kremisphere map. At first, the Kongs can only rent the Motor Boat from Funky, but as they obtain certain items, Funky uses them to construct more vehicles, allowing Dixie and Kiddy to access more worlds. | |
| Swanky Kong | Swanky runs a virtual reality running game for Dixie (he does not allow Kiddy to participate due to his age). | |
| Wrinkly Kong | Wrinkly resides in a sanctuary, titled Wrinkly's Retreat, where she provides refuge for the rescued Banana Birds. | |
Animal Friends
The Animal Friends return to help the Kongs along their journey. There are a few returning Animal Friends, such as Enguarde, Squawks, and Squitter, but a few others, such as Ellie and Parry, make their debut. Every Animal Friend has their own set of abilities.
| Image | Name | Description | First level appearance | Last level appearance |
|---|---|---|---|---|
| Ellie | Ellie the elephant is a new Animal Friend that replaces Rambi from the first two games. Although she is not as strong, Ellie is able to pick up barrels with her trunk and draw them toward her. She can also use her trunk to draw in water and shoot water projectiles at enemies. Ellie is afraid of Sneeks and runs away whenever she sees one. Ellie is used in the boss fight against Squirt. | Lakeside Limbo | Stampede Sprint | |
| Enguarde | Enguarde the swordfish returns from the first two Donkey Kong Country games and retains his role and supercharge attack from Donkey Kong Country 2: Diddy's Kong Quest. Enguarde can defeat most underwater enemies with his pointed bill. He is encountered in most levels with a body of water, even ones that take place on a boardwalk. Enguarde is used in the boss fight against Barbos. | Tidal Trouble | Poisonous Pipeline | |
| Nibbla | Although usually an enemy, there is a Nibbla in Fish Food Frenzy which somewhat has the role of being an Animal Friend. Nibbla's mood is represented by its color. As Dixie and Kiddy go through the level, they must keep Nibbla fed with Kocos, otherwise it slowly becomes angrier until becoming bright red and biting the lead Kong. | Fish Food Frenzy | ||
| Parry | Parry the parallel bird is a small Animal Friend who flies directly above Dixie and Kiddy. It can defeat Booty Birds by flying into them, although any other enemy, especially Buzzes, instantly defeat Parry upon contact with it. If Dixie and Kiddy pass the No Animal Sign with Parry, they earn a large reward, such as a Blue Balloon or a Bonus Barrel. | Squeals on Wheels | Stampede Sprint | |
| Squawks | Squawks the parrot can fly the Kongs through a level. Most enemies, including green Buzzes, can be defeated from Squawks's eggs. Squawks is often required to reach high areas where the Kongs cannot go by themselves. | Springin' Spiders | Swoopy Salvo | |
| A purple relative of Squawks who cannot spit eggs, but is able to carry a barrel in its talons. | Low-G Labyrinth | Buzzer Barrage | ||
| Squitter | Squitter the spider can shoot web projectiles to attack enemies and create temporary web platforms and jump from them to reach hidden areas. Squitter appears in every factory level, and is prominently featured throughout Krack Shot Kroc. | Fire-Ball Frenzy | Tyrant Twin Tussle | |
Brothers Bear
Throughout their adventure, Dixie and Kiddy come across several cabins, each having a Brother Bear. Each world has a Brother Bear, usually no more than one. Most Brothers Bear either are facing an issue, and ask the Kongs for their help, or they help them access a Banana Bird Cave. In the Game Boy Advance remake, every Brother Bear and their locations have been redesigned entirely.
| Image | Name | Description | Location |
|---|---|---|---|
| Bachelor | This Brother Bear lives on a small island in the center of Lake Orangatanga (where Barnacle is found in the original version). He wants a rose and a box of chocolates for his girlfriend, but needs Dixie and Kiddy's help to get them. In doing so, the Kongs are rewarded with a Banana Bird. | Bachelor Pad | |
| Baffle | This code-breaker resides in Kaos Kore. The Kongs can help him solve a puzzle by giving the mirror to him. The code reveals the location of Kaos Kore's Banana Bird Cave. | Baffle's Code Room | |
| Barnacle | Barnacle is a shell collector who lives in Pacifica. The Kongs can trade him a Shell for his Banana Bird. | Barnacle's Island | |
| Barter | Barter is a Brother Bear who lives in a swap shop near K3. The Kongs can trade the mirror to him for a No.6 wrench, which Björn needs to repair his chairlifts. | Barter's Swap Shop | |
| Bazaar | Bazaar runs a general store to the left of Funky's Rentals. He sells a few items, including a shell and a mirror. | Bazaar's General Store | |
| Bazooka | Bazooka is a war veteran who lives in Mekanos. He owns a cannon named Big Bessie, which can be loaded with a bowling ball to blast the Kongs up to a Banana Bird Cave. | Brigadier Bazooka Bear | |
| Benny | The twin brother of Björn, Benny runs the chairlifts in Razor Ridge. He allows the Kongs to freely use his chairlifts to cross to the other side of the world. | Benny's Chairlift | |
| Björn | The twin brother of Benny, Björn runs the second set of chairlifts in Razor Ridge. When the Kongs visit Björn, they find that his chairlifts are not operational. With the No.6 wrench, Björn is able to fix his chairlifts, and the Kongs can go up to a Banana Bird Cave. | Björn's Chairlift | |
| Blizzard | Blizzard lives in the snowy mountains of K3. Because he lives far away, Blizzard cannot make it to Blue's birthday party, so he gives a present for the Kongs to deliver to Blue. | Blizzard's Basecamp | |
| Blue | Blue lives in a beach house in Cotton Top Cove. He is depressed because nobody came to his birthday party, so when they Kongs arrive to his house with Blizzard's present, he cheers up and unwraps it, only to find a bowling ball. Having no use for it, Blue returns it to Dixie and Kiddy. | Blue's Beach Hut | |
| Blunder | Blunder is found in a cabin to the west of the Kremwood Forest. Like Baffle, visiting him is optional, although Blunder provides hints of where Krematoa is located. | Blunder's Booth | |
| Boomer | Boomer is found at a bomb shelter in Krematoa. Each time the Kongs pay a certain number of Bonus Coins to Boomer, he detonates a pile of boulders that blocks the path to one of the levels. | Boomer's Bomb Shelter | |
| Bramble | Bramble is a botanist found on the main Northern Kremisphere map, near Cotton-Top Cove. He is not happy about the air pollution caused from Mekanos' factories, but after defeating KAOS the first time, the factories are shut down, and he gives the Kongs a Banana Bird. If the Kongs give Bramble a Flupperius Petallus Pongus, he gives them a rose. | Bramble's Bungalow | |
| Brash | Brash is an athletic jock who lives in Kremwood Forest, and boasts a record of completing Riverside Race in the fastest time. When Dixie and Kiddy beat Brash's time, he becomes furious and starts throwing a tantrum, causing a log to fall into the riverbank and form a bridge to a Banana Bird Cave. | Brash's Stadium |
Other
| Image | Name | Description |
|---|---|---|
|
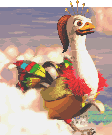
Banana Queen | The Banana Queen is the mother of the Banana Birds. She can only be encountered once Dixie and Kiddy earn the Gyrocopter and fly into the clouds, where she was sealed away by Baron K. Roolenstein. Once the Kongs return with every Banana Bird, they sing and free the Banana Queen from her barrier. |
Enemies
| Image | Name | Description | First level appearance | Last level appearance |
|---|---|---|---|---|
| Bazuka | These Kremlings carry large round bazookas from which they fire barrels. Switch Barrels can change the type of barrels they shoot. In Criss Kross Cliffs, there is a Bazuka who vertically shoots barrels, which Dixie and Kiddy must bounce on to progress up the level. | Blazing Bazukas | Tyrant Twin Tussle | |
| Bazza | Underwater fish enemies who move between holes in the coral reef in unlimited numbers. | Bazza's Blockade | Ripcurl Reef | |
| Bomb | Eyed explosives that appear in the battle against Kroctopus. | Kroctopus Krush | ||
| Booty Bird | A pudgy bird enemy that flies in the air during many levels. Some Booty Birds remain in a single position while others move back and forth in a straight line. Most Booty Birds release an item when defeated, such as a Banana Bunch or a K-O-N-G Letter. The Kongs can defeat a Booty Bird by either jumping on it or by using a barrel. Most Animal Friends can also defeat them. | Lakeside Limbo | Swoopy Salvo | |
| Bounty Bass | A pudgy fish that is the underwater equivalent to Booty Birds. Bounty Bass can only be defeated by Enguarde, and they release an item when defeated. In Pacifica, they sometimes appear without Enguarde and simply act as large Kocos. | Bazza's Blockade | Ripcurl Reef | |
| Bristles | A spiky hedgehog enemy that appears in many levels. If Dixie or Kiddy touch a Bristles's spikes, they get injured. Because of this, the Kongs can only defeat Bristles by either using a barrel or a frontal roll attack, as doing one from behind injures the Kongs instead. Some Bristles roll, and as such are invulnerable to all non-barrel attacks. | Springin' Spiders | Swoopy Salvo | |
| Buzz | Mechanical wasps who serve as the replacement of Zingers and one of the most common enemies in the game. Buzzes either remain in one place or move in a pattern. If a Kong touches a Buzz, they get injured. Buzzes come in both green and red variations; green Buzzes can only be defeated from a barrel or an Animal Friend, while red ones can only be defeated by a TNT Barrel or an Invincibility Barrel. | Doorstop Dash | Rocket Rush | |
| Gleamin' Bream | Gleamin' Breams are a variant of Bounty Basses. They are plump, yellow fish who give off a beam of light around them. Gleamin' Breams are featured throughout and only appear in the level Floodlit Fish. If Enguarde attacks a Gleamin' Bream, it does not get defeated but rather illuminates the dark surrounding area temporarily. | Floodlit Fish | ||
| Karbine | Owls that wield large, fireball-shooting cannons. Karbines only appear and are featured in the level Fire-Ball Frenzy. Karbines often follow the Kongs when they are in sight, and attempt to shoot fireballs at them. Karbines also shoot in a certain pattern, giving the Kongs a chance to figure out how to dodge them. Karbines are always in the background and therefore cannot be defeated. | Fire-Ball Frenzy | ||
| Killer bees | An invincible swarm of aggressive red bees that pursues the Kongs relentlessly. | Riverside Race | ||
| Klasp | Klasps are Kremlings who hide in a TNT Barrel while holding on to horizontal ropes. Klasps either go back-and-forth or move in the direction of the Kongs, and some Klasps are faster than others. | Kreeping Klasps | Criss Kross Cliffs | |
| Knik-Knak | Knik-Knaks are common beetle-like enemies which are featured in two variations: red and yellow. The red Knik-Knaks are the most common, and are almost always found in midair, usually staying in a single position. The rarer yellow variety are only encountered on the ground. | Tidal Trouble | Criss Kross Cliffs | |
| Knocka | These Kremlings in green barrels are the successor to Klobbers from Donkey Kong Country 2: Diddy's Kong Quest. Knockas act the exact same as Klobbers: they try to bump the Kongs into a gap or pit. | Tidal Trouble | Creepy Caverns | |
| Kobble | A generic Kremling enemy which is very similar to Kritters from Donkey Kong Country. Kobbles move back and forth in a consistent pattern. Kobbles are one of the weakest enemies, leaving them vulnerable to any attack. | Lakeside Limbo | Kreeping Klasps | |
| Koco | Kocos are literal clown fish and are one of the most common underwater enemies. They have red and green variants, each with slightly different behavior: red Kocos swim around but green Kocos only swim back and forth in place. In most levels, Kocos can only be defeated by Enguarde, but in Fish Food Frenzy, they can also be defeated if eaten by the Nibbla ally. | Tidal Trouble | Poisonous Pipeline | |
| Koin | One of these Kremlings appear in each level, guarding a DK Coin. To defeat Koin and thus obtain the DK Coin, the Kongs must throw a Steel Barrel at a wall behind Koin so that it bounces off and hits Koin in the back, defeating it. Dixie and Kiddy can only obtain a DK Coin from each Koin once. | Lakeside Limbo | Rocket Rush | |
| Koindozer | Koindozers are a variant of Koin, although their behavior is completely different and they only appear in Koindozer Klamber, where they are featured. Unlike Koins, Koindozers are not stationary; they chase after the Kongs while holding a shield in front to try and knock them into gaps and other foes, much like Knockas. If the Kongs are above ground, Koindozer lifts up its shield, which they can use as a small platform. | Koindozer Klamber | ||
| Kopter | These Kremling enemies are usually seen propelling around mountain areas. Kopters attack by spinning downwards with their blades, trying to hit the Kongs. Kopters cannot be defeated and must be avoided by the Kongs. | Buzzer Barrage | Pot Hole Panic | |
| Kracka | This rare Kremling enemy only appears in Stormy Seas, a level exclusive to the remake. Krackas are similar to Knockas except they hide in a TNT Barrel, so touching a Kracka results in an explosion that injures the Kongs but simultaneously defeats the Kracka. A Kracka can also be defeated if Dixie or Kiddy pick it up and throw it on the ground. | Stormy Seas | ||
| Kremling | Speedboat-operating Kremlings that appear in all of Funky's missions. | Funky's Rentals | ||
| Krimp | Krimps are the game's equivalent for Klaptraps and Klampons from the first two Donkey Kong Country games respectively. Krimps are common enemies who move back and forth through areas, repeatedly opening and closing their jaws. Because of Krimps' sharp teeth, the Kongs cannot walk or roll into them from the front or else they take damage. Besides this, Krimps can be defeated using any other method. | Skidda's Row | Tyrant Twin Tussle | |
| Kroc | Only one Kroc appears throughout the game, in the level Krack Shot Kroc, where it is the main obstacle. Kroc attacks by shooting fireballs at Squitter, whom the Kongs are transformed into during the entire level. Kroc is never shown physically, although a crosshair on the screen indicates where Kroc targets and is about to shoot fireballs. Like Karbines, because Kroc is in the background, it cannot be defeated. | Krack Shot Kroc | ||
| Krumple | These muscular Kremlings replace Krushas and Krunchas from the first two respective Donkey Kong Country games. If either the Kongs touch a Krumple or if Dixie jumps onto its head, it pushes the Kongs out of the way, possibly hitting them into an obstacle. Krumples can only be defeated in three ways: having a barrel thrown at it, being jumped on by Kiddy Kong, or having an Animal Friend attack it. | Rocket Barrel Ride | Creepy Caverns | |
| Kuchuka | Kuchukas are a variant of Knockas that hide in a purple barrel while throwing bombs. Kuchukas can only be defeated by a TNT Barrel, and must usually be avoided. Kuchukas only appear in one level, Pot Hole Panic. | Pot Hole Panic | ||
| Kuff 'n' Klout | Kuff 'n' Klouts are a pair of muscular Kremlings who are only found in Krematoa. They either jump in a leapfrog-like pattern or try to ram into Dixie and Kiddy. Kuff 'n' Klouts can only be defeated from either Squitter's webs or if the Kongs throw a barrel at them. | Stampede Sprint | Tyrant Twin Tussle | |
| Lemguin | These penguin enemies only appear in the level Lemguin Lunge, where they are featured throughout. Lemguins slide down slopes on their bellies. Their beak protects them from frontal roll attacks, which cause the Kongs to be injured. Lemguins can be defeated from a jump attack. | Lemguin Lunge | ||
| Lurchin | These sea urchin enemies are found in bodies of water. Lurchins repeatedly open and close their body. To defeat a Lurchin, Enguarde must stab its body while it is exposed. If the Kongs or Enguarde touch a Lurchin's spiky shell, they take damage. | Tidal Trouble | Poisonous Pipeline | |
| Minkey | These are monkey enemies who poke their head out of the sides within hollow trees. Minkeys attack by trying to throw acorns at the Kongs. Along the way, the Kongs can hide behind Barrel Shields, which protect them from the acorns. Minkeys cannot be defeated. | Barrel Shield Bust-Up | Sunken Spruce | |
| Missile shell | This underwater enemy only appears in Barbos's Barrier. A missile shell can be defeated by either luring it at the wall or on a Lurchin. | Barbos's Barrier | ||
| Nibbla | Besides the Nibbla who is somewhat an Animal Friend, Nibblas appear as enemies in lake and riverside levels. Nibblas are like Snapjaws and Lockjaws from Donkey Kong Country 2: Diddy's Kong Quest, as they swim in the water beneath the Kongs and follow them around. If the Kongs land in the same body of water that the Nibbla is in, the fish quickly bites them. Nibblas cannot be defeated. | Bobbing Barrel Brawl | Lightning Lookout | |
| Nid | Nids are spider-like creatures with a plank of wood on their back. They either jump up and down in place or in an arc formation. The Kongs can stand on a Nid's plank to reach higher areas. Unlike most enemies, Nids cannot hurt the Kongs, although they can sometimes bounce them into Buzzes in the air. Nids have two variations: purple and yellow; the yellow ones hop constantly, but the purple ones only start hopping when the Kongs are on their plank. | Springin' Spiders | Barrel Shield Bust-Up | |
| Re-Koil | Re-Koils are orange Kremlings who bounce on their tail. They can be defeated from most attacks. | Murky Mill | Criss Kross Cliffs | |
| Skidda | Skiddas are a purple variant of Kobbles that appear in snow levels. They move back and forth on icy surfaces, including rooftops, causing them to slip. Like Kobbles, Skiddas can be defeated from any attack. | Skidda's Row | Lemguin Lunge | |
| Sneek | These enemies are much like Neeks from Donkey Kong Country 2: Diddy's Kong Quest. They walk back and forth through areas and try to hit into the Kongs. Sneeks are featured in the level Squeals on Wheels, where the Kongs defeat them in order to progress. Ellie is afraid of Sneeks, and if she encounters one, Ellie quickly runs away. | Lakeside Limbo | Stampede Sprint | |
| Swoopy | Like Bazzas, an unlimited number of Swoopys move from one hole to the next. Swoopys are only found in tree levels, where they swoop through holes to try and attack the Kongs. Dixie and Kiddy can defeat a Swoopy by jumping on it. Sometimes a Swoopy crashes into the side of a tree, allowing the Kongs to use it as a platform. | Springin' Spiders | Swoopy Salvo | |
Bosses
| Image | Name | Description | Level appearance |
|---|---|---|---|
| Belcha | This giant barrel resides inside an old barn at the end of Lake Orangatanga. Belcha has a tendency to burp, hence its name. It attacks by spitting barrels out of its mouth. Inside each barrel is a yellow Knik-Knak, which Dixie or Kiddy must throw into Belcha's mouth so that it burps itself backward. If done enough times, Belcha falls into a pit, although if the Kongs are not quick enough, they fall into a pit instead. | Belcha's Barn | |
| Arich | Arich is a large, red spider and the boss of Kremwood Forest. It hangs on a thread of web and has a pattern of bouncing up and down. Arich attacks by spitting venom at Dixie and Kiddy. Either Kong can attack Arich by throwing a barrel at its face. If this is done four times, Arich is defeated. | Arich's Ambush | |

|
Squirt | Squirt is a large, rocky slug who lives on a waterfall at the end of Cotton-Top Cove. The Kongs are transformed into Ellie during the entire battle. Squirt attacks by spitting water at Ellie to try to knock her off the stage. Ellie can attack Squirt by sucking water from the waterfall and spitting it into Squirt's eyes. If this is done enough times, Squirt is defeated. | Squirt's Showdown |
|
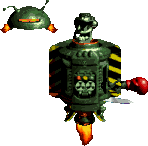
KAOS | KAOS is fought in a factory at the end of Mekanos. He attacks by exhausting flames to scorch the Kongs. Eventually, KAOS stops and spins blades around him. Dixie and Kiddy can use them as platforms to jump up them and onto KAOS's head. KAOS punches out his robotic arms to try and stop them from reaching his head. After enough hits, KAOS's head floats off his body, and he fights against the Kongs separately. Meanwhile, his head tries to blast the Kongs with a quick laser. | Kaos Karnage |
| Bleak | Bleak appears in the snowy mountain, K3, and his battle consists of a snowball fight. His method of attacking is popping up in random areas and throwing snowballs at the Kongs. Later during the battle, Bleak uses his hat to blast giant snowballs out at the Kongs. The Kongs can attack Bleak by throwing snowballs at his amulet. | Bleak's House | |
|
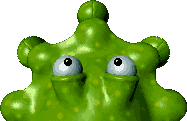
Kroctopus | Kroctopus is a giant green sea monster who replaces Barbos as the boss of Razor Ridge in the Game Boy Advance version. The Kongs cannot directly attack Kroctopus, so they must instead stand at a bomb to trick Kroctopus into extending one of its clawed tentacles at it. The more times Kroctopus is hit, the redder and angrier it gets. Kroctopus is defeated once it claws at bombs enough times. | Kroctopus Krush |
| Barbos | Barbos is a giant Lurchin and the boss of Pacifica. The Kongs are transformed into Enguarde for the entire battle. Barbos attacks by sending out Lurchins at Enguarde. He must counterattack by stabbing the Lurchin into Barbos's shell, exposing its squished body, which Enguarde must then stab to deliver an attack. Barbos is also capable of firing missile shells at Enguarde and shooting spikes in every direction. | Barbos's Barrier | |
 
|
KAOS MK. II | KAOS is fought a second time in Kastle Kaos, with different tactics and moves. KAOS no longer uses his blade attack, and he reveals a new head during this battle, which uses a bomb-launcher on the top. Instead of jumping on KAOS's head, Dixie and Kiddy must attack him by using barrels. Both phases go down after a single hit in this battle. | Kastle Kaos |
 |
Baron K. Roolenstein | The game's final boss, Baron K. Roolenstein, is first fought in Kastle Kaos shortly after the Kongs defeat KAOS. Baron K. Roolenstein uses his jetpack to fly around and uses blasts of electricity to attack the Kongs. Dixie and Kiddy must pull a lever on the ceiling to make a barrel appear. They must then throw the barrel at Baron K. Roolenstein's jetpack to attack him. Baron K. Roolenstein is fought again at Krematoa, where he uses a fireball launching cannon and bolts of electricity to attack the Kongs. | Kastle Kaos Knautilus |
Items
Donkey Kong Country 3 is filled with many different collectibles.
| Image | Name | Description |
|---|---|---|
| Bananas | Bananas are the most commonly found item in the game, and collecting 100 of them gives the Kongs an extra life. Bananas can also help direct the Kongs to their destinations in a level. | |
| Banana Bunches | Banana Bunches are similar to normal bananas, however, they are worth ten bananas instead of one and are uncommon. Because of this, collecting the bunches can allow the Kongs to get extra lives much faster. | |
| Extra-Life Balloons | Extra-Life Balloons are important items in the game. When collected, they give the Kongs extra lives. There are three color variations: red, green, and blue. The Red Balloons give the Kongs one extra life, while the uncommon Green Balloons give them two. The rare Blue Balloons give them three extra lives. | |
| DK Coins | These items are found in every level, except for boss levels. Each of them are guarded by Koins, whom the Kongs must defeat to get the coin. With all the coins, Funky Kong can make a Gyrocopter to take the Kongs to the Banana Queen. | |
| Bonus Coin | These items are earned by completing bonuses that are hidden throughout each level of the game, while others are earned by defeating certain bosses. They are vital for accessing the levels in Krematoa. | |
| Cogs | Each level in Krematoa gives the player a cog when it is completed. There are five cogs total, which are used to operate a machine inside Boomer's cabin. When each one is given to the bear, the Kong can fight Baron K. Roolenstein in his submarine, Knautilus. | |
| Bear coins | These items replace the Banana Bunch Coins from Donkey Kong Country 2. Their main use is paying for items owned by the Brothers Bears and playing Cranky's Dojo and Swanky's Dash. | |
| Banana Birds | Banana Birds are very important creatures in the game that must be collected to free the Banana Queen. They are found in secret caves or with characters residing in the Northern Kremisphere. | |
| K-O-N-G Letters | Just like in the previous titles, collecting these four letters awards the player an extra life. All four can be collected in every level, and they appear in order. | |
| Green bananas | Green bananas are important types of bananas only found in Bonus Levels. In some of these Bonus Levels, the Kongs have to collect fifteen green bananas in order to win a Bonus Coin. However, the bananas appear and disappear at random, making it tougher to grab the objects. | |
| Stars | Like green bananas, stars can only be found in Bonus Levels and Swanky's Dash. In many bonuses, stars must be collected to earn the Bonus Coin. They are usually scattered around the special stages' obstacles. |
Trade items
The game features several items that must be traded between the Brothers Bears in order for the Kongs to collect all of the Banana Birds. They are required to trade if the Kongs want to complete their adventure completely. Note that some items are earned from defeating bosses and do not need to be traded with the bears. Below shows the items and descriptions on them, as well as what the Kongs should do with the objects.
| Image | Name | Description |
|---|---|---|
| Bowling ball | A gift received by Blue. When Blue is given this gift, he decides he has no use for it and gives it to the Kongs to use. The bowling ball can be used as ammunition for Bazooka's cannon, "Big Bessie," to get to the secret cave of Mekanos. | |
| Box of chocolates | The box of chocolates, an item exclusive to the Game Boy Advance remake of the game, must be purchased from Bazaar for twenty bear coins. After the Kongs buy it, they should give it to Bachelor along with the rose in exchange for a Banana Bird. | |
| Flower | A specimen of "Flupperius Petallus Pongus," a rare flower wanted greatly by Bramble. This item is given to the Kongs from Bachelor after talking to him on his island. The flower must then be traded with Bramble for the rose. | |
| Mirror | This mirror, which was once owned by Cranky Kong's great grandfather, must be bought from Bazaar for fifty bear coins. Once the Kongs have it, they can to give it to Baffle to unscramble his message (which hints towards accessing Kaos Kore's secret cave), or Barter in exchange for a No.6 wrench. They can also take back the mirror from either bear for the other's use. | |
| No.6 wrench | The No.6 wrench is given to the Kongs by Barter in exchange for a mirror. It must be given to Björn so he can fix his chairlifts. Once they are fixed, a new secret cave is accessed. | |
| Patch | The patch is earned after the Kongs defeat Arich in Kremwood Forest. Once obtained, it must be given to Funky Kong as he can make a Hover Craft. | |
| Present | A present for Blue. Blue's brother, Blizzard, who is unable to take the gift to him, gives the present for the Kongs to deliver. It contains a bowling ball. | |
| Rose | The rose is obtained after the Kongs give Bramble the Flupperius Petallus Pongus flower from Bachelor. The rose can then be traded with Bachelor in exchange for a Banana Bird. | |
| Shell | This shell, found at the bottom of Lake Orangatanga, must be bought by Bazaar for five bear coins. Once owned, the Kongs can give it to Barnacle in exchange for a Banana Bird. | |
| Skis | The pair of skis are earned once both KAOS and Squirt are defeated. They must be given to Funky in order for him to make a Turbo Ski. |
Objects
Mechanisms
| Image | Name | Description |
|---|---|---|
| Animal crates | Like in the previous titles, these crates contain an Animal Friend. The picture shown on the crate clues the player as to which Animal Friend is in it. They are very similar to Animal Barrels, although they do not actually turn the Kongs into the animal. | |
| Big Bessie | An enormous cannon owned by Bazooka, it can launch the Kongs to the Sky-High Secret. | |
| Boulders | Boulders block the path through Krematoa, and can only be destroyed with Boomer's explosives. | |
|
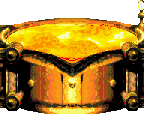
Bubbling cauldrons | Tubs of molten metal found in factory stages. |
| Chairlifts | Two sets of chairlifts are used on the overworld to cross Razor Ridge. | |
| Conveyor Belt | A single Conveyor Belt makes up the floor of the Knautilus, and is activated by Baron K. Roolenstein as one of his traps. | |
| Cracked planks | Appearing rarely in boardwalk stages, Kiddy can destroy these weak spots in the floor when Dixie throws him. | |
| Crystals | Four differently colored clusters of crystals are found in each secret cave. The player needs to light them in the order shown when first entering. | |

|
Current | Pushes the Kongs forcefully in the waters of Ripcurl Reef. |
| Electricity | Enormous arcs of electricity used as weapons by Baron K. Roolenstein. | |
|
Evil barrier | Keeps the Banana Queen imprisoned, and can only be opened by collecting all the Banana Birds. |
| Flame | Burns through a rope in Kong-Fused Cliffs. | |

|
Grinder | This machine constantly spins in Belcha's Barn, where Belcha tries to push the Kongs into it. If both Kongs are present, walking on it instantly takes out the lead Kong. If only Dixie or Kiddy is present, it acts as a bottomless pit. |
| Handles | Levers that can be hung from to trigger an event. | |
| Krem Flags | Mark non-beaten levels on the overworld. | |
| Kroc signs | Designate the beginning and ending points of Kroc's shooting range. | |
| Level Flags | Mark a level's finishing point, as well as who cleared it and if all secrets were completed. | |
| Lifts | Floating wooden platforms that appear primarily in mill stages. | |
|
Lightning | Appearing in Lightning Lookout, lightning flashes briefly, signaling where it will appear, then strikes. |
| Metal doors | Mechanical doors that appear in mill stages and must be opened by using another mechanism. | |
| Mines | Weapons that must be stolen in the "Disarm" mission of Funky's Rentals. | |
| No Animal Signs | Prevent Animal Buddies from crossing, but may reward the player with an item if the animal reaches the sign. | |
| Overhead vent | This vent appears on the ceiling of the Knautilus, activating after his traps run out of energy. By throwing a Steel Barrel into it, the barrel is delivered to the front of the submarine and may land on K. Rool to damage him. | |
| Ripsaw | An upwards-moving saw that is the main obstacle in Ripsaw Rage. | |
| Ropes | Ropes can be climbed on vertically or horizontally. Some move the Kongs automatically. | |

|
Shields | Protect against Kroc's fire. |

|
Spiky obstructions | Stationary obstacles in Swanky's Dash. |
| Toboggans | Sleds that travel on multiple terrains. | |
| Trapdoors | Trapdoors appear in mill stages and open when stood upon unless locked. Sometimes they lead to a Bonus Barrel. | |
| Turret | A single turret appears as one of Baron K. Roolenstein's weapons aboard the Knautilus, shooting rounds of fireballs from the background. | |
| Wheels | Keep doors shut as long as Sneeks walk in them. |
Projectiles
| Image | Name | Description |
|---|---|---|
| Acorns | Projectiles thrown by Minkeys. | |
| Bombs | Small projectiles launched by Kuchukas and KAOS which explode upon landing. | |
| Eggs | Projectiles used by Squawks. | |
| Fireballs | Projectiles launched from the background by Karbines and K. Rool's turret and from the foreground by Kroc. | |
| Snowballs | Projectiles thrown from the background by Bleak, as well as at him by the Kongs. | |
| Stingers | Quills shot by Barbos. | |
| Venom | Small, bouncy balls of toxins spat by Arich. | |
| Water jets | Projectiles shot by Ellie to defeat enemies after she sucks water in her trunk, and by Squirt to push Ellie away. | |
| Webs | Squitter can create these as temporary platforms or projectiles. |
Barrels
Various barrels appear throughout the game. They are the main objects in the Donkey Kong Country series, and they have many different purposes. Below is a list of each barrel and a brief description on them.
| Throwable barrels | ||||
|---|---|---|---|---|
| Image | Name | Description | ||
| Normal Barrel | The most common barrels of the game, these can be used to defeat enemies and sometimes find hidden Bonus Areas. They can be picked up by Ellie and Quawks, who can then roll them on the ground to hit some enemies. Ellie can also suck the barrels in towards her if the player presses Y. | |||
| DK Barrel | These common barrels returning from the first two games help revive a Kong who has been injured. There are at least two in each level, although some later levels have even more. They are often found at the very beginning of levels and right after the Star Barrel. | |||
| Steel Barrel | Steel Barrels previously appeared in the original Donkey Kong Country. Unlike the regular barrels, Steel Barrels do not break if they hit a wall. The Kongs can ride a Steel Barrel if they jump on one as it is rolling. Steel Barrels are required to defeat Koins. | |||
| TNT Barrel | TNT Barrels are similar to normal barrels, however, they are explosive. If they are thrown into a sensitive wall, they can blast it away, creating an opening. They can also defeat powerful enemies like red Buzzes, Bazukas, and Kuff 'n' Klout. | |||
| Enterable barrels | ||||
| Image | Name | Description | ||
| Animal Barrel | These common barrels return from Donkey Kong Country 2, and they have the exact same function. They transform the Kongs into the Animal Friend pictured. The bottom left side of the screen should hold a picture of the Animal Friend, signaling that the helper can take two hits before being defeated. | |||
| Auto-Fire Barrel | These semi-common barrels shoot the Kongs in a particular direction after they jump inside. | |||
| Barrel Cannons | These barrels shoot the Kongs out after they jump inside and the player triggers it to fire. | |||
| Blast Barrel | These Auto-Fire Barrels shoot the Kongs upwards, or forwards if the barrel is turned. They are often found in levels taking place by a waterfall and are commonly needed to jump over Buzzes. | |||
| Bonus Barrel | Two or three of these special barrels appear in every level, except for Rocket Rush, sending the Kongs to Bonus Levels. They are usually well hidden or hard to reach, due to the fact that their reward is so big. The Kongs also break out of these barrels once they exit the bonus. | |||
| Boo Barrel | These barrels are similar to the arrowed Barrel Cannons, except that they disappear and reappear at various occasions. Sometimes, they appear in different positions, so if the Kongs jump in them at the wrong time, they can be shot into an enemy. These barrels only appear in the level Creepy Caverns. | |||
| Booster Barrel | These uncommon barrels shoot out flames from the bottom, which send the Kongs upwards. Once the barrel reaches its highest point, it blasts them out. They commonly appear in levels near waterfalls, and are often seen as access to Bonus Areas. | |||
| Rocket Barrel | This special barrel only appear in the level Rocket Rush, where the Kongs must use this barrel to fly up cliffs infested with Buzzes. It can be controlled by maneuvering left and right. As the Kongs use the exhaust, it depletes fuel and it can be replenished by Fuel Drums. Depletion occurs quicker if the Kongs make contact with the walls. The Kongs can then get out of the Rocket Barrel after they have landed on a landing platform. | |||
| Tracker Barrel | This uncommon barrel appears in only one level, Tracker Barrel Trek. In this level, the Kongs must use the barrels to traverse the falls. Luckily, the barrels follow the Kongs' movements to ensure that they cannot fall. The only danger of these barrels is that they often lead to Buzzes. | |||
| Warp Barrel | These uncommon, invisible barrels hide in every level in the first two worlds. They can warp the Kongs to the end of some levels. All, but two require a team throw to reach, and most of them require Kiddy to throw Dixie. The ones in Barrel Shield Bust-Up and Springin' Spiders can be reached by both Kiddy and Dixie. | |||
| Triggerable barrels | ||||
| Image | Name | Description | ||
| Fuel Drum | These uncommon barrels refill the fuel tank for the Rocket Barrel in Rocket Rush. There are only a few in the whole game, but they can replenish a great amount of fuel for the rocket. | |||
| Ignition Barrel | Only one of this barrel exclusively appears in this level, Rocket Rush. Once the Barrel Rocket hits this barrel, the Rocket Barrel ignites, causing the Kongs to soar upwards, and thus enabling them to finish this level. | |||
| Invincibility Barrel | These uncommon barrels temporarily give the Kongs invincibility and they are often found hidden in hard to reach places. The Kongs can use the effects of the barrel to jump on red Buzzes, Kuff 'n' Klouts, and other invincible enemies. | |||
| Star Barrel | These barrels return from the first two Donkey Kong Country games, doing exactly as before. They appear at the middle of every level, and when hit, sparkle, signaling that a checkpoint has been activated. If both Kongs are lost, or they fall into a pit, the Kongs are returned to the Star Barrel. | |||
| Switch Barrel | These rare barrels only appear in three levels: Blazing Bazukas, Criss Kross Cliffs, and Koindozer Klamber. They must be touched to change the type of barrel that the Bazukas fire. Usually, it turns TNT Barrels into normal barrels, although it sometimes turns into Steel Barrels or TNT Barrels instead, which are needed to defeat Koins and red Buzzes. | |||
| Other barrels | ||||
| Image | Name | Description | ||
| Barrel Shield | Barrel Shields are the main gimmick of Barrel Shield Bust-Up, and protect against the nuts thrown by Minkeys. | |||
| Tumbling barrel | Tumbling barrels travel down the falls at Barrel Drop Bounce, where they are used as platforms. | |||
Funky's Rentals' vehicles
These vehicles can be loaned from Funky Kong to help explore the overworld.
| Image | Name | Description | |
|---|---|---|---|
| Motor Boat | The basic vehicle, it can travel over water faster than swimming. | ||

|
Hover Craft | A faster vehicle that can move over rocks, obtainable once the patch is collected. | |
| Turbo Ski | An even quicker vehicle that can travel up waterfalls, obtainable once both skis are recovered. | ||

|
Gyrocopter | The final vehicle and only one capable of flight, it can only be obtained by collecting all DK Coins. | |
Supporting locations
Donkey Kong Country 3: Dixie Kong's Double Trouble! is filled with various special areas, where the Kongs can meet the other Kongs and Brothers Bears around the island to help out.
| Image | Name | Description |
|---|---|---|
|
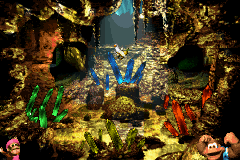
Secret caves | Each of these caves contain a Banana Bird. However, the only way to get the bird is to hit a series of crystals in the right order. |
|
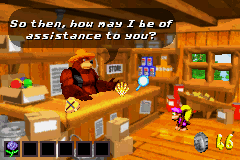
Brothers Bear cabins | There are several cabins in the game, one for each of the Brothers Bears. In them, the Kongs can talk to the bears and help them complete a trade to earn Banana Birds. |
|
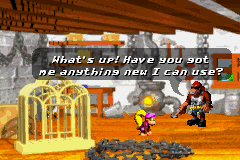
Funky's Rentals | This is where the Kongs can rent vehicles made by Funky Kong to travel through the Northern Kremisphere. He allows them to use his Motor Boat at the beginning of the game, but after the Kongs gather up special items for him, he is able to make a Hover Craft, a Turbo Ski, and a Gyrocopter for them to ride in. In the remake of the game, Funky hosts Bonus Games with some of those vehicles. If they are all completed, a Banana Bird is earned. |
|
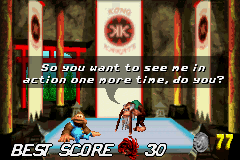
Cranky's Dojo | Exclusive to the remake, Cranky's Dojo replaces the submap Wrinkly's Save Caves from the original version of the game. The Kongs can meet Cranky Kong here and play a special Bonus Game for a Banana Bird at the price of two bear coins. The game involves moving Cranky Kong so that he can block the incoming Bristles. |
|
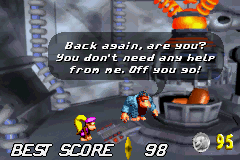
Swanky's Dash | Another area exclusive to the remake replaces Swanky's Sideshow from the original game. At Swanky's Dash, Dixie Kong can play a Bonus Game for a few bear coins, where she must run through a pipeline, avoiding obstacles and trying to collect a certain number of stars. If the Bonus Game is completed, the Kongs earn some special collectibles. |
|
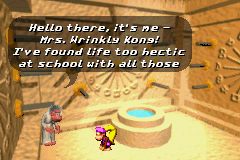
Wrinkly's Retreat | This area is located just before Funky's Rentals, where Wrinkly resides throughout the game. The Kongs' Banana Birds are kept here. |
Levels
The game features many levels in which the Kongs must travel through to complete the game. The Kongs have to get to the end of each level, excluding the secret levels in Krematoa, in order to meet Baron K. Roolenstein at Kastle Kaos and rescue Donkey Kong and Diddy Kong. Every level, excluding boss stages and Rocket Rush, have at least two or three Bonus Levels in them, which are hidden throughout the levels.
| Levels and Bonus Areas | ||||
|---|---|---|---|---|
| Template:Color-link | ||||
| # | Level | Bonus Areas | Type of level | Music theme |
| 1 | Lakeside Limbo | 2 | Stilt | Stilt Village |
| 2 | Doorstop Dash | 2 | Mill | Mill Fever |
| 3 | Tidal Trouble | 2 | Stilt | Stilt Village |
| 4 | Skidda's Row | 2 | Snow | Frosty Frolics |
| 5 | Murky Mill | 2 | Mill | Mill Fever |
| 6 | BOSS LEVEL: Belcha's Barn | 0 | Mill | Boss Boogie |
| Template:Color-link | ||||
| # | Level | Bonus Areas | Type of level | Music theme |
| 7 | Springin' Spiders1 | 2 | Tree | Treetop Tumble |
| 8 | Riverside Race | 2 | Riverbank | River Ambience2 Enchanted Riverbank2 |
| 9 | Squeals on Wheels | 2 | Mill | Mill Fever |
| 10 | Barrel Shield Bust-Up1 | 2 | Tree | Treetop Tumble |
| 11 | Bobbing Barrel Brawl | 2 | Riverbank | River Ambience2 Enchanted Riverbank |
| 12 | BOSS LEVEL: Arich's Ambush | 0 | Tree | Arich Boss2 |
| Template:Color-link | ||||
| # | Level | Bonus Areas | Type of level | Music theme |
| 13 | Bazza's Blockade | 2 | Coral | Water World |
| Cave | Cave Ambience2 | |||
| 14 | Rocket Barrel Ride | 2 | Falls | Cascade Capers |
| 15 | Kreeping Klasps | 2 | Stilt | Stilt Village |
| 16 | Tracker Barrel Trek | 2 | Falls | Cascade Capers |
| 17 | Fish Food Frenzy | 2 | Coral | Water World |
| Cave | Cave Ambience2 | |||
| 18 | BOSS LEVEL: Squirt's Showdown | 0 | Falls | Boss Boogie |
| Template:Color-link | ||||
| # | Level | Bonus Areas | Type of level | Music theme |
| 19 | Fire-Ball Frenzy | 2 | Machine | Nuts and Bolts |
| 20 | Demolition Drain-Pipe | 2 | Tube | Jangle Bells2 |
| 21 | Ripsaw Rage | 2 | Tree | Treetop Tumble |
| 22 | Blazing Bazukas | 2 | Machine | Nuts and Bolts |
| 23 | Low-G Labyrinth | 2 | Tube | Pokey Pipes |
| 24 | BOSS LEVEL: Kaos Karnage | 0 | Machine | Boss Boogie |
| Template:Color-link | ||||
| # | Level | Bonus Areas | Type of level | Music theme |
| 25 | Krevice Kreepers | 2 | Cliff | Rockface Rumble |
| 26 | Tearaway Toboggan | 2 | Snow | Jangle Bells2 |
| 27 | Barrel Drop Bounce | 2 | Falls | Cascade Capers |
| 28 | Krack Shot Kroc | 2 | Machine | Nuts and Bolts |
| 29 | Lemguin Lunge | 2 | Snow | Frosty Frolics |
| 30 | BOSS LEVEL: Bleak's House | 0 | Snow | Boss Boogie |
| Template:Color-link | ||||
| # | Level | Bonus Areas | Type of level | Music theme |
| 31 | Buzzer Barrage | 2 | Cave | Cavern Caprice |
| 32 | Kong-Fused Cliffs | 2 | Cliff | Rockface Rumble |
| 33 | Floodlit Fish | 2 | Coral | Water World |
| Cave | Cave Ambience2 | |||
| 34 | Pot Hole Panic | 2 | Cave | Cavern Caprice |
| 35 | Ropey Rumpus | 2 | Cliff | Rockface Rumble |
| 36 | BOSS LEVEL: Kroctopus Krush3 | 0 | Falls | Arich Boss |
| Template:Color-link3 | ||||
| # | Level | Bonus Areas | Type of level | Music theme |
| 37 | Dingy Drain-Pipe3 | 2 | Tube | Pokey Pipes |
| 38 | Stormy Seas3 | 2 | Stilt | Stilt Village |
| 39 | Sunken Spruce3 | 2 | Tree | Treetop Tumble |
| 40 | Cliffside Blast3 | 2 | Cliff | Rockface Rumble |
| 41 | Ripcurl Reef3 | 2 | Coral | Water World |
| Cave | Cave Ambience | |||
| 42 | Surf's Up3 | 2 | Tube | Jangle Bells2 |
| 43 | BOSS LEVEL: Barbos's Barrier | 0 | Coral | Boss Boogie |
| Template:Color-link | ||||
| # | Level | Bonus Areas | Type of level | Music theme |
| 44 | Konveyor Rope Klash | 2 | Jungle | Jungle Jitter |
| 45 | Creepy Caverns | 2 | Cave | Cavern Caprice |
| 46 | Lightning Lookout | 2 | Riverbank | River Ambience2 Enchanted Riverbank |
| 47 | Koindozer Klamber | 2 | Jungle | Jungle Jitter |
| 48 | Poisonous Pipeline | 2 | Tube | Pokey Pipes |
| 49 | BOSS LEVEL: Kastle Kaos | 0 | Kastle Kaos | Boss Boogie2 |
| Template:Color-link | ||||
| # | Level | Bonus Areas | Type of level | Music theme |
| 50 | Stampede Sprint | 3 | Jungle | Banana Queen2 Chase2 |
| 51 | Criss Kross Cliffs | 2 | Cliff | Rockface Rumble |
| 52 | Tyrant Twin Tussle | 3 | Cave | Cavern Caprice |
| 53 | Swoopy Salvo | 3 | Tree | Treetop Tumble |
| 54 | Rocket Rush | 0 | Cliff | Jangle Bells2 |
| 55 | BOSS LEVEL: Knautilus | 0 | The Knautilus | Boss Boogie2 |
- 1 - Indicates swapped from original.
- 2 - Replaced a different track in the original; note the composition of all tracks are different from the original's, but the titles are kept.
- 3 - Did not exist in the original.
Codes
Players can enter codes by pressing "Enter Cheat" in the "Options" menu.
- EXTRAS – Players can play all of the minigames included in the game from the main menu.
- AQUA – Players get all the 98 Bonus Coins for any new game file.
- MUSIC – The game opens the music test, where players can choose any in-game music to listen to.
- MONKEY – Players get 50 additional lives when used.
- HARDER – Star Barrels are removed.
- TUFFER – DK Barrels and Star Barrels are removed if the player starts a new game.
- KREDITS – The credits play.
Differences in the Game Boy Advance version
Gameplay changes
- Players are now able to save at any time.
- The game also saves whether a player has reached the checkpoint or not, while the original game did not.
- The game introduces the new area, Pacifica, which is the seventh world of the game, located in the northwestern region of the map. The world carries six new levels, as well as all new Bonus Level locations. The boss of this area is Barbos, who was the boss of Razor Ridge in the original game and has been replaced with a new boss, Kroctopus, in this version.
- The Brother Bear Barnacle has also been relocated to the new Pacifica world, with the replacement Lake Orangatanga bear being a new Brother Bear named Bachelor. As such, new objects, such as the box of chocolates, have been added to trade amongst the Brothers Bear. Some items must also be traded differently.
- Wrinkly Kong is now only located in Wrinkly's Retreat, which replaces the first Wrinkly's Save Cave from the original, between Funky's Rentals and Bazaar's General Store. Banana Birds are kept in this area. All other Save Caves are replaced with Cranky's Dojo.
- Dixie's Photo Album was entirely scrapped, despite the previous two GBA games having a comparable Scrapbook. No cast roll replaces it, and as such, most enemies and the Animal Buddies are not named in-game whatsoever.
- Like in the first two Game Boy Advance remakes for the series, the supporting Kongs have Bonus Games for the Kongs to complete, this time for Banana Birds. Funky Kong has four new Bonus Games, all of which must be cleared to get his Banana Bird (although the types of games available depends on how many vehicles the Kongs can rent), while Cranky (whose Dojo replaces all the other Wrinkly's Save Caves from the original Donkey Kong Country 3) and Swanky (whose Bonus Game and locale are replaced) both have a single Bonus Game.
- After beating Mekanos and Cotton Top Cove, the player has the option of playing through either K3, Razor Ridge, or Pacifica to progress, although they all must be completed to beat the game.
- There are now five extra Banana Birds to collect, increasing the total to twenty, and five more DK Coins to collect, making that total forty-six.
- Anytime after completing Mekanos, the player can visit Bramble to earn his Banana Bird. Originally, he would only give it to the Kongs if they gave him the Flupperius Petallus Pongus.
- Similar to Donkey Kong Land III, when a Koin is defeated, their DK Coin is automatically collected. In addition, when a DK Coin is collected, it tells the player how many out of the total amount they have.
- In the original version, after defeating each boss (except in Kaos Kore and Krematoa, where this applies after beating Rocket Rush instead), the player can take a one-way trip from those levels back to the world's entrance or the main world map. This is only true in Cotton Top Cove in the GBA version.
- Squirt has more attacks and has been made harder to defeat.
- The DK Coin gained from beating K. Rool in the Knautilus has been removed. As such, all the DK Coins and Banana Birds can be collected before facing him. If this is done, the scene where the Banana Birds fly the Kongs to the Banana Queen, dispel the barrier, and allow her to take revenge on K. Rool does not play until immediately after Knautilus is completed.
- The final level, Rocket Rush, has an increased difficulty, as red Buzzes damage the Rocket Barrel when touched, and the Star Barrel is removed.
Graphical changes
- As with Donkey Kong Country 2: Diddy's Kong Quest, in the original, when Dixie does her Helicopter Spin, Kiddy would float behind her, motionless. In the remake, he somersaults behind her.
- Upon completing a bonus level, the Kongs stand idle instead of exiting the screen.
- The last level in Lake Orangatanga, Belcha's Barn, which takes place inside of a mill, had a factory background in the original SNES version for some reason. The background was changed in the Game Boy Advance version to a mill background to match with where the battle takes place.
- Swanky Kong wears the same attire that he wears in Donkey Kong Country 2.
- The world maps have been redrawn, they now have banana peels on the ground, and are more zoomed in than in the original.
- When Knautilus is unlocked in the Super Nintendo version, the background of stages in Krematoa turns red. However, this does not happen in the Game Boy Advance version.
- The outside of Kastle Kaos is redesigned, and it no longer has a pink glow emitting from its highest tower.
- The houses that the Brothers Bear live in, as well as the bears themselves, have been redesigned; the most notable change is Blizzard, who in this version of the game is a grizzly bear as opposed to a polar bear.
- Squawks hurt sprite from Donkey Kong Country 2 gets used in the Game Boy Advance version. It went unused in the Super Nintendo version.
Sound changes
- The original soundtrack of the game, which is notably darker in tone in most of the levels, has been replaced by a completely new, lighter-toned soundtrack composed by David Wise, who composed the soundtrack of the first two Donkey Kong Country games, but only had a limited involvement with the soundtrack of the third on the Super Nintendo, which was in majority composed by Eveline Novakovic.
- Arich now has a different battle theme than the other bosses. He shares this theme with Kroctopus. Both K. Rool battles use the same battle theme as the other bosses.
- The same track now plays for all of the Brother Bear houses, meaning that Blue no longer has a unique theme. This same track plays in Funky's Rentals, Wrinkly's Retreat, Swanky's Dash, and when meeting the Banana Queen.
- There is no death jingle. Music which is heard when the player loses a life only plays in the original SNES version, depending on the level.
- As in other GBA remakes, the Kong noises are different, mostly reused from Donkey Kong 64.
- Most enemies have reused sound effects from the two previous Game Boy Advance remakes, such as Sneeks having the same voice as Neeks from Donkey Kong Country 2 as opposed to their own sound in the original SNES version.
Other changes
- A completely new intro sequence and title screen have been created for this game.
- In the original, the Bonus Barrels either shoot the Kongs upward or make a warp sound and the "B" shrinks. In the GBA version, similar to the other two game remakes, only the latter happens.
Glitches
Quotes
Baron K. Roolenstein
- "NOOO! What have you done? My wife's going to kill me! I used all of her best pots and pans to make him... And then you just cast him aside as if he were a stack of empty tins!"
- "WHAT!? How dare you! KAOS was my ticket to world domination... And I'd have gotten away with it, if it weren't for you meddling kids!"
- "Well, you may have roasted my robot, but I'M the master chef around here, and I reckon it's about time your goose was cooked!"
- "What the blazes!? So, YOU'RE the one who's been scuttling my super secret submarine! This is the LAST time you'll spoil my plans! I'm gonna bash you good!"
- "Right!!! Look out, you cheeky monkeys!"
Blue
- "H-h-hello there, Dixie/Kiddy/Kongs, how are you? My name's Blue, p-p-pleased to meet you."
- "You wouldn't have brought... Oh, I can see you haven't. Never mind."
- "I-I'm afraid you're a little early for the party, Dixie/Kiddy/Kongs. That's if anybody bothers to come at all."
- "I get lots of post you know, but it's all bills - not a single card."
- "What's that red circle on the calendar? Oh - sigh - It's nothing of importance."
References to other games
- Donkey Kong Country: The underwater theme is an arrangement of the one from this game and the Game Over theme is an arrangement of this game's main theme.
- Donkey Kong Country 2: Diddy's Kong Quest: The "Cavern Caprice" theme briefly riffs "Stickerbush Symphony".
- Donkey Kong 64: Some Kongs first appearing in this game, such as Lanky Kong and Tiny Kong, are seen in Funky's Bonus Games. Diddy Kong's fall scream in its normal pitch from this game is used for Cranky in Cranky's Dojo when he gets hit, as well as Kiddy Kong when falling in a toboggan level. Baron K. Roolenstein and Bleak's voice clips are Chunky Kong's recycled. The laugh heard in Krack Shot Kroc is King K. Rool's recycled.
Development
As with the other Donkey Kong Country remakes on the Game Boy Advance, the Donkey Kong Country 3 remake was coded from scratch.[3] Though the developers tried to be as true to the original version as possible, some changes were made to improve some mechanics and the level design. Ellie's and the toboggan controls were specifically cited by Rare employee Paul Rahme as elements the team tried to improve.[3]
At one point, Eveline Fischer's original soundtrack was meant to be included alongside David Wise's score. However, time and space limitations prevented it from being included.[3]
Staff
David Wise composed the whole GBA soundtrack.
Promotion
In tandem with the Game Boy Advance release of Donkey Kong Country 3, Nintendo of America held the "Where's DK? Search Event" which began on October 31, 2005.[4] By going to whereisdonkeykong.com and other participating websites, participants could follow clues that helped them find Donkey Kong. Each time Donkey Kong was located by a participant, Nintendo donated one dollar to the Animal Protection Institute's Primate Sanctuary.[5] Up to ten-thousand dollars were given to the institution. The event ended on November 21, 2005. In addition, an online, Flash-powered game, Barrel-Blastapalooza, was released on the Nintendo-hosted donkeykongcountry.com website to promote the game. The website's servers were eventually shut down along with the Flash game.
Gallery
- For this subject's image gallery, see Gallery:Donkey Kong Country 3 (Game Boy Advance).
Dixie Kong and Kiddy Kong
Media
- For a complete list of media for this subject, see List of Donkey Kong Country 3: Dixie Kong's Double Trouble! media.
| File info 0:30 |
| File info 0:30 |
| File info 0:30 |
| File info 0:30 |
Names in other languages
| Language | Name | Meaning | Notes |
|---|
Trivia
- Despite the American version being released after the European version, it appears to have been based on an earlier build as it contains more bugs.[citation needed]
References
- ^ Donkey Kong Country 3 | Game Boy Advance - Nintendo UK. Nintendo (British English).
- ^ a b Super Smash Bros. Brawl Chronicle
- ^ a b c DK Vine: The Donkey Kong Country GBA Trilogy
- ^ WHERE'S DK? SEARCH EVENT PARTICIPATION TERMS. Nintendo via the Wayback Machine. Retrieved April 13, 2022.
- ^ Robert Graves. (November 11, 2005). Wanted: Kong!. Nintendo World Report. Retrieved April 13, 2022.
