User:Nintendo101/flowerpot: Difference between revisions
Nintendo101 (talk | contribs) m (→SMB3) |
Nintendo101 (talk | contribs) |
||
| (314 intermediate revisions by 2 users not shown) | |||
| Line 1: | Line 1: | ||
== | ==NSMB== | ||
=== | ===Playable characters from NSMB=== | ||
{|class="wikitable" style="width:100%;text-align:center" | {|class="wikitable" style="width:100%;text-align:center" | ||
|-style="color:white;background: | |-style="color:white;background:red" | ||
!width= | !width=6%|Image | ||
!width=8%|Name | |||
!Description | |||
|- | |||
|style="background:white"|[[File:MarioNSMB.png]] | |||
|[[Mario]] | |||
|align=left|Mario retains his conventional role in the [[Super Mario (series)|''Super Mario'' series]] as the game's main protagonist in his adventure to once again rescue [[Princess Peach]] from the clutches of [[Bowser]] and his son [[Bowser Jr.]] He is the default playable character in the Story Mode. | |||
|- | |||
|style="background:white"|[[File:NSMB Asset Sprite Super Luigi.png]] | |||
|[[Luigi]] | |||
|align=left|Luigi, Mario's brother, returns to the [[Super Mario (series)|''Super Mario'' series]] as a playable character. The method to play as Luigi is not revealed until the game's completion, but he can be played as at any time by pressing and holding {{button|ds|L}} + {{button|ds|R}} + {{button|ds|A}} on the file selection screen. | |||
|} | |||
===Non-playable characters from NSMB=== | |||
{|class="wikitable" style="width:100%;text-align:center" | |||
|-style="color:white;background:red" | |||
!width=6%|Image | |||
!width=8%|Name | !width=8%|Name | ||
!Description | !Description | ||
|- | |- | ||
|style="background:white"|[[File: | |style="background:white"|[[File:NSMB Asset Sprite Peach.png]] | ||
|[[ | |[[Princess Peach]] | ||
|align=left| | |align=left|The damsel in distress, who was kidnapped by Bowser Jr. | ||
|- | |||
|style="background:white"|[[File:NSMBintro.png|100x100px]] | |||
|[[Toad (species)|Toads]] | |||
|align=left|TBW | |||
|- | |||
|style="background:white"|[[File:NSMB Toadsworth.png]] | |||
|[[Toadsworth]] | |||
|align=left|An ally who appears in [[Toad House]]s. | |||
|- | |||
|style="background:white"|[[File:NSMBDorrie.PNG|100x100px]] | |||
|[[Dorrie]] | |||
|align=left|A large {{wp|plesiosaur}}-like creature that the player can ride over poisoned water. | |||
|- | |||
|style="background:white"|[[File:7-3 NSMB.png|100x100px]] | |||
|[[Big Wiggler|Giant Wiggler]] | |||
|align=left|A giant Wiggler made up of many segments that the player can ride over pits. | |||
|} | |} | ||
===Enemies=== | ===Enemies from NSMB=== | ||
The enemies listed in this table match those in the ''[[Super Mario Bros. Encyclopedia]]''.<ref>{{cite|author=Sakai, Kazuya (Ambit), kikai, Akinori Sao, Junko Fukuda, Kunio Takayama, and Ko Nakahara (Shogakukan), editors|title="New Super Mario Bros." in『[[Super Mario Bros. Encyclopedia|スーパーマリオブラザーズ百科: 任天堂公式ガイドブック]]』|language=ja|location=Tokyo|publisher=[[Shogakukan]]|date=2015|page=114–15|isbn=4-091065-69-4}}</ref> The default order they are listed derives from the official guidebook<ref>{{cite|author=Shogakukan editors|title=「敵キャラクターリスト」in『ニュー・スーパーマリオブラザーズ: 任天堂公式ガイドブック』|date=2006|language=ja|location=Tokyo|publisher=[[Shogakukan]]|page=14–19|isbn=4-091063-07-1}}</ref> with adjustments that ensure enemies are listed next to their immediate relatives. Some listed enemies – namely Super Piranha Plant, Mega Cheep-Cheep, Mega Deep-Cheep, and Big Whomp – are lumped with their smaller counterparts in the guidebook, but are recognized as distinct in the encyclopedia. The leaping Cheep-Cheep variant named トビプク (''Tobipuku'') in the guide is lumped with its underwater counterpart in the encyclopedia and this is followed suit here. The blue-shelled Koopa Troopa is not listed in either source. | |||
{|class="wikitable sortable" style="width:100%;text-align:center" | {|class="wikitable sortable" style="width:100%;text-align:center" | ||
|-style="color:white;background: | |-style="color:white;background:red" | ||
!class="unsortable" width=5% rowspan=2|Image | !class="unsortable" width=5% rowspan=2|Image | ||
!width=8% rowspan=2|Name | !width=8% rowspan=2|Name | ||
!class="unsortable" rowspan=2|Description | !class="unsortable" rowspan=2|Description | ||
!class="unsortable" colspan=2| | !class="unsortable" colspan=2|Levels | ||
!rowspan=2| | !rowspan=2|Pts. | ||
!rowspan=2| | !rowspan=2|New | ||
|-style="color:white;background: | |-style="color:white;background:red" | ||
!width=8%|First | !width=8%|First | ||
!width=8%|Last | !width=8%|Last | ||
|- | |- | ||
|style="background:white"|[[File: | |style="background:white"|[[File:Goomba NSMB sprite.png]] | ||
|[[ | |[[Goomba]] | ||
|align=left|[[ | |align=left|Simplest enemy. Brown mushroom-like creature with feet. Can be defeated with anything. | ||
|[[World 1-1 (Super Mario Bros. 2)|World 1-1]] | |[[World 1-1 (New Super Mario Bros.)|World 1-1]] | ||
|[[World 7-2 (Super Mario Bros. 2)|World 7-2]] | |[[World 8-6 (New Super Mario Bros.)|World 8-6]] | ||
|Ground | |200 | ||
| | |— | ||
|- | |||
|style="background:white"|[[File:NSMB Paragoomba.png]] | |||
|[[Paragoomba]] | |||
|align=left|This Goomba has wings. One stomp makes it lose its wings, and turns it into a Goomba. It can also be defeated with a fireball. | |||
|colspan=2|[[World 2-4 (New Super Mario Bros.)|World 2-4]] | |||
|200 | |||
|— | |||
|- | |||
|style="background:white"|[[File:Micro-GoombaNSMB.png]] | |||
|[[Mini Goomba]] | |||
|align=left|This small Goomba works the same as its bigger cousins. Only appears in Mini Pipes, and is the only enemy [[Mini Mario (form)|Mini Mario]] can defeat them with one stomp. Other versions of Mario can defeat them by just touching them. | |||
|[[World 3-A (New Super Mario Bros.)|World 3-A]] | |||
|[[World 8-4 (New Super Mario Bros.)|World 8-4]] | |||
|200 | |||
|— | |||
|- | |||
|style="background:white"|[[File:NSMBDS Green Koopa Troopa Sprite.png]] | |||
|[[Koopa Troopa]] (Green) | |||
|align=left|A basic form of Koopa. The green-shelled Koopa Troopas walk into bottomless pits. By stomping on it, it retreats into its shell. The shell can slide when kicked, and can also be used to defeat enemies or destroy bricks. | |||
|[[World 1-1 (New Super Mario Bros.)|World 1-1]] | |||
|[[World 8-7 (New Super Mario Bros.)|World 8-7]] | |||
|200 | |||
|— | |||
|- | |||
|style="background:white"|[[File:RedKoopaTroopaNSMB.png]] | |||
|Koopa Troopa (Red) | |||
|align=left|The red-shelled Koopa Troopa turns around when its reaches the edge of a platform. | |||
|[[World 1-1 (New Super Mario Bros.)|World 1-1]] | |||
|[[World 8-7 (New Super Mario Bros.)|World 8-7]] | |||
|200 | |||
|— | |||
|- | |||
|style="background:white"|[[File:BlueKoopaTroopaNSMB.png]] | |||
|Koopa Troopa (Blue) | |||
|align=left|Ground pounding a Blue Koopa makes Mario gain his Shell power. | |||
|data-sort-value=X colspan=2|Ice | |||
|200 | |||
|— | |||
|- | |||
|style="background:white"|[[File:KoopaParatroopaNSMB.png]] | |||
|[[Koopa Paratroopa]] (Green) | |||
|align=left|This Koopa Troopa has wings. It either flies back and forth or bounces all around. One stomp makes it lose its wings, and turns it into a Koopa Troopa. It can also be defeated by a fireball. | |||
|[[World 1-4 (New Super Mario Bros.)|World 1-4]] | |||
|[[World 8-7 (New Super Mario Bros.)|World 8-7]] | |||
|200 | |||
|— | |||
|- | |||
|style="background:white"|[[File:RedKoopaParatroopaNSMB.png]] | |||
|Koopa Paratroopa (Red) | |||
|align=left|TBW | |||
|[[World 2-A (New Super Mario Bros.)|World 2-A]] | |||
|[[World 8-7 (New Super Mario Bros.)|World 8-7]] | |||
|200 | |||
|— | |||
|- | |||
|style="background:white"|[[File:NSMB Asset Sprite Climbing Koopa (Green).png]] | |||
|[[Climbing Koopa]] (Green) | |||
|align=left|TBW | |||
|colspan=2|{{world-link|3|towern|World 3-Tower (New Super Mario Bros.)}} | |||
|200 | |||
|— | |||
|- | |||
|style="background:white"|[[File:NSMB Asset Sprite Climbing Koopa (Red).png]] | |||
|Climbing Koopa (Red) | |||
|align=left|TBW | |||
|colspan=2|{{world-link|3|towern|World 3-Tower (New Super Mario Bros.)}} | |||
|200 | |||
|— | |||
|- | |||
|style="background:white"|[[File:NSMB Lakitu.png]] | |||
|[[Lakitu]] | |||
|align=left|Throws Spiny Eggs and has his own cloud. One stomp and it is defeated, and the cloud disappears. If defeated with a shell or fireball, the cloud stays, so Mario can take to the skies in it for a while. | |||
|[[World 2-2 (New Super Mario Bros.)|World 2-2]] | |||
|[[World 6-A (New Super Mario Bros.)|World 6-A]] | |||
|1000 | |||
|— | |||
|- | |||
|style="background:white"|[[File:NSMB Spiny Egg.png]] | |||
|[[Spiny Egg]] | |||
|align=left|Spike balls thrown by Lakitus, turning into Spinies upon landing. When a Spiny touches water, its turns back into a Spiny Egg, only returning to normal once the water recedes. [[Lakithunder]]'s Spiny Eggs instead bounce around the arena. | |||
|[[World 2-1 (New Super Mario Bros.)|World 2-1]] | |||
|{{world-link|7|castlen|World 7-Castle (New Super Mario Bros.)}} | |||
|200 | |||
|— | |||
|- | |||
|style="background:white"|[[File:NSMB Spiny.png]] | |||
|[[Spiny]] | |||
|align=left|These hatch from Spiny Eggs. Any stomp, even the Ground Pound, harms Mario. Also found on ceilings, and comes down when Mario passes, but can collide with other moving Spinies and knock each other out. If a Spiny falls upside down from a ceiling, they behave similarly to Koopa Troopas and Buzzy Beetles. Fireballs and the Super Star can defeat them. | |||
|[[World 2-1 (New Super Mario Bros.)|World 2-1]] | |||
|[[World 8-6 (New Super Mario Bros.)|World 8-6]] | |||
|200 | |||
|— | |||
|- | |||
|style="background:white"|[[File:NSMB Buzzy Beetle.png]] | |||
|[[Buzzy Beetle]] | |||
|align=left|Just like Koopa Troopas, it retreats into its shell once stomped on. One difference is that it is not affected by [[fireball]]s. | |||
|[[World 5-C]] | |||
|{{world-link|6|towern|World 6-Tower 2 (New Super Mario Bros.)}} | |||
|200 | |||
|— | |||
|- | |||
|style="background:white"|[[File:NSMB Spike Top.png]] | |||
|[[Spike Top]] | |||
|align=left|Buzzy Beetles with spikes on their shells which walk on walls. Hitting the block they are on defeats them. | |||
|[[World 5-2 (New Super Mario Bros.)|World 5-2]] | |||
|{{world-link|8|towern|World 8-Tower (New Super Mario Bros.)}} | |||
|200 | |||
|— | |||
|- | |||
|style="background:white"|[[File:DryBonesNSMB.png]] | |||
|[[Dry Bones]] | |||
|align=left|One stomp, and it falls apart. It can reassemble, however. Invincible to fireballs. | |||
|{{world-link|1|towern|World 1-Tower (New Super Mario Bros.)}} | |||
|{{world-link|8|bowsern|World 8-Bowser's Castle (New Super Mario Bros.)}} | |||
|200 | |||
|— | |||
|- | |||
|style="background:white"|[[File:SuperDryBonesNSMB.png]] | |||
|[[Big Dry Bones|Super Dry Bones]] | |||
|align=left|A big Dry Bones. Requires a Ground Pound to cause it to fall apart. | |||
|{{world-link|5|castlen|World 5-Castle (New Super Mario Bros.)}} | |||
|{{world-link|6|towern|World 6-Tower 2 (New Super Mario Bros.)}} | |||
|200 | |||
|{{chart icon|new}} | |||
|- | |||
|style="background:white"|[[File:NSMBHammerBro.png]] | |||
|[[Hammer Bro]] | |||
|align=left|Koopa with headgear that throws hammers. It can be defeated by a stomp or fireball or hitting a block from below. | |||
|[[World 2-4 (New Super Mario Bros.)|World 2-4]] | |||
|[[World 8 (New Super Mario Bros.)|World 8]] | |||
|1000 | |||
|— | |||
|- | |||
|style="background:white"|[[File:NSMBDS Fire Bro Sprite.png]] | |||
|[[Fire Bro]] | |||
|align=left|A variation of the Hammer Bro that throws fireballs. A fireball or stomp or hitting a block from below defeats it. | |||
|colspan=2|[[World 8-7 (New Super Mario Bros.)|World 8-7]] | |||
|1000 | |||
|— | |||
|- | |||
|style="background:white"|[[File:NSMBDS Boomerang Bro Sprite.png]] | |||
|[[Boomerang Bro]] | |||
|align=left|A variation of the Hammer Bro that throws boomerangs. Stomp, fireball, hitting a block from below or invincibility defeats it. | |||
|[[World 2-5 (New Super Mario Bros.)|World 2-5]] | |||
|[[World 8-7 (New Super Mario Bros.)|World 8-7]] | |||
|1000 | |||
|— | |||
|- | |||
|style="background:white"|[[File:NSMBSumoBro.png]] | |||
|[[Sledge Bro]] | |||
|align=left|A large Hammer Bro that carries sledgehammers. When Mario does not jump, he can stun him. It can be defeated with a stomp, a fireball or a block from below. | |||
|colspan=2|[[World 8-7 (New Super Mario Bros.)|World 8-7]] | |||
|1000 | |||
|— | |||
|- | |||
|style="background:white"|[[File:PokeyNSMB.png]] | |||
|[[Pokey]] | |||
|align=left|A cactus with a flower and face. Its segments can be destroyed with fireballs, and defeated when hit in the head. | |||
|colspan=2|[[World 2-1 (New Super Mario Bros.)|World 2-1]] | |||
|{{hover|200|per segment}} | |||
|— | |||
|- | |||
|style="background:white"|[[File:PiranhaPlantNSMB.png]] | |||
|[[Piranha Plant]] | |||
|align=left|This plant comes out of pipes, but is also found on the ground trying to bite Mario. Throw fireballs or avoid it. | |||
|[[World 1-2 (New Super Mario Bros.)|World 1-2]] | |||
|[[World 7-A]] | |||
|200 | |||
|— | |||
|- | |||
|style="background:white"|[[File:Super Piranha Plant.png]] | |||
|[[Big Piranha Plant|Super Piranha Plant]] | |||
|align=left|A big Piranha Plant. It requires three fireballs to defeat, and gives up eight [[coin]]s if killed with fireballs. | |||
|[[World 2-3 (New Super Mario Bros.)|World 2-3]] | |||
|[[World 6-B (New Super Mario Bros.)|World 6-B]] | |||
|200 | |||
|— | |||
|- | |||
|style="background:white"|[[File:VenusFireTrapNSMB.png]] | |||
|[[Fire Piranha Plant|Venus Fire Trap]] | |||
|align=left|A Piranha Plant that spits fireballs. Defeated with fireballs. | |||
|[[World 2-6 (New Super Mario Bros.)|World 2-6]] | |||
|[[World 6-3 (New Super Mario Bros.)|World 6-3]] | |||
|200 | |||
|— | |||
|- | |||
|style="background:white"|[[File:BlockHopperNSMB.png]] | |||
|[[Blockhopper]] | |||
|align=left|Imitates 1-3 [[Brick Block|brick]]s and a [[? Block]], stacked on each other. When Mario approaches, it comes to life and hops around. Easily distinguished by the fact that the ? does not turn. Mario can defeat it by ground pounding all the blocks down to the ? Block. | |||
|colspan=2|[[World 2-5 (New Super Mario Bros.)|World 2-5]] | |||
|200 | |||
|{{chart icon|new}} | |||
|- | |||
|style="background:white"|[[File:NSMBDS Cheep Cheep Sprite.png]] | |||
|[[Cheep Cheep|Cheep-Cheep]] | |||
|align=left|A swimming fish. It sometimes hops on land. On land it is defeated with a stomp, but underwater it must be hit with a fireball. | |||
|[[World 1-A (New Super Mario Bros.)|World 1-A]] | |||
|[[World 8-3 (New Super Mario Bros.)|World 8-3]] | |||
|200 | |||
|— | |||
|- | |||
|style="background:white"|[[File:NSMB MegaCheep-Cheep.png]] | |||
|[[Big Cheep Cheep|Mega Cheep-Cheep]] | |||
|align=left|A bigger Cheep-Cheep that acts the same as the small form, Defeated with [[Fire Mario]]'s fireballs. | |||
|colspan=2|[[World 3-1 (New Super Mario Bros.)|World 3-1]] | |||
|200 | |||
|— | |||
|- | |- | ||
|style="background:white"|[[File: | |style="background:white"|[[File:NSMB Mega Deep-Cheep.png]] | ||
| | |[[Deep Cheep|Deep-Cheep]] | ||
|align=left| | |align=left|A green Cheep-Cheep that follows Mario when it sees him. Use a fireball to defeat it. | ||
|[[World | |colspan=2|[[World 6-5 (New Super Mario Bros.)|World 6-5]] | ||
|[[World | |200 | ||
| | |{{chart icon|new}} | ||
| | |- | ||
|style="background:white"|[[File:NSMB Deep-Cheep.png]] | |||
|[[Big Deep Cheep|Mega Deep-Cheep]] | |||
|align=left|A bigger Deep-Cheep that acts the same as the small form. Defeated with [[Fire Mario]]'s fireballs. | |||
|colspan=2|[[World 6-5 (New Super Mario Bros.)|World 6-5]] | |||
|200 | |||
|{{chart icon|new}} | |||
|- | |- | ||
|style="background:white"|[[File: | |style="background:white"|[[File:CheepChompNSMB.png]] | ||
|[[ | |[[Cheep Chomp|Cheep-Chomp]] | ||
|align=left| | |align=left|A big, purple Cheep-Cheep. Approaches Mario to attempt to chomp him down. | ||
|[[World | |colspan=2|[[World 3-1 (New Super Mario Bros.)|World 3-1]] | ||
| | |200 | ||
|— | |||
| | |||
|- | |- | ||
|style="background:white"|[[File: | |style="background:white"|[[File:SpikeBassNSMB.png]] | ||
|[[ | |[[Spike Bass]] | ||
|align=left| | |align=left|A brown giant fish, with spikes all over. It jumps for some time, similar to [[Big Cheep Cheep|Boss Bass]]. It can be defeated with a fireball, a Koopa Shell, a Starman, and a Mega Mushroom, but returns after a few seconds. | ||
|[[World 2-A (New Super Mario Bros.)|World 2-A]] | |||
| | |[[World 3-C]] | ||
| | |200 | ||
|{{chart icon|new}} | |||
|- | |- | ||
|style="background:white"|[[File: | |style="background:white"|[[File:NSMB Skeeter.png]] | ||
| | |[[Skeeter (New Super Mario Bros.)|Skeeter]] | ||
|align=left| | |align=left|This bug skates on water and deploys bombs. One stomp or fireball defeats it, and its bombs can be obliterated with fireballs. | ||
|[[World | |[[World 3-A (New Super Mario Bros.)|World 3-A]] | ||
|[[World | |[[World 8-2 (New Super Mario Bros.)|World 8-2]] | ||
| | |200 | ||
| | |{{chart icon|new}} | ||
|- | |- | ||
|style="background:white"|[[File: | |style="background:white"|[[File:SushiNSMB.png]] | ||
| | |[[Sushi]] | ||
|align=left| | |align=left|Long sharks that are defeated by fireballs. They only appear in 1-A. | ||
|[[World 1- | |colspan=2|[[World 1-A (New Super Mario Bros.)|World 1-A]] | ||
|200 | |||
| | |— | ||
| | |||
|- | |- | ||
|style="background:white"|[[File: | |style="background:white"|[[File:NSMB Blooper Sprite.png]] | ||
|[[ | |[[Blooper]] | ||
|align=left| | |align=left|Swims in an irregular manner. Can be defeated by fireballs or invincibility. | ||
|[[World | |colspan=2|[[World 3-3 (New Super Mario Bros.)|World 3-3]] | ||
|[[World | |200 | ||
| | |— | ||
| | |- | ||
|style="background:white"|[[File:NSMB Blooper Nanny.png]] | |||
|[[Blooper Nanny]] | |||
|align=left|Swims in an irregular manner, as [[Blooper Baby|Blooper Babies]] swim after it. Can be beat with a fireball or invincibility. | |||
|colspan=2|[[World 3-3 (New Super Mario Bros.)|World 3-3]] | |||
|200 | |||
|— | |||
|- | |||
|style="background:white"|[[File:Unagi.png]] | |||
|[[Maw-Ray|Unagi]] | |||
|align=left|An eel that lives in gaps, and tries to bite Mario. Occasionally, they can be found swimming back and forth. They can be defeated with a [[Mega Mushroom]] or [[Super Star|Starman]]. | |||
|[[World 4-3 (New Super Mario Bros.)|World 4-3]] | |||
|[[World 8-3 (New Super Mario Bros.)|World 8-3]] | |||
|200 | |||
|— | |||
|- | |||
|style="background:white"|[[File:NSMB Mega Unagi.png]] | |||
|[[Mega Unagi]] | |||
|align=left|A bigger Unagi. Cannot be defeated, but can be swam through with a [[Mega Mushroom]] or [[Super Star|Starman]] (except through the face, in which case Mario gets knocked back instead). In World 8-3, one chases Mario at the second half of the level. | |||
|[[World 4-3 (New Super Mario Bros.)|World 4-3]] | |||
|[[World 8-3 (New Super Mario Bros.)|World 8-3]] | |||
|data-sort-value=2000|{{chart icon|cross}} | |||
|{{chart icon|new}} | |||
|- | |||
|style="background:white"|[[File:Whomp.PNG]] | |||
|[[Whomp]] | |||
|align=left|Attempts to crush Mario when he gets close. Before it gets up, players should execute a Ground Pound on it, causing it to drop four coins. | |||
|colspan=2|{{world-link|3|castlen|World 3-Castle (New Super Mario Bros.)}} | |||
|200 | |||
|— | |||
|- | |||
|style="background:white"|[[File:NSMBDS Big Whomp.png]] | |||
|[[Big Whomp]] | |||
|align=left|Larger versions of normal Whomps that walk around instead of standing in the background. When they fall on the ground, the player can ground pound them to defeat them. | |||
|colspan=2|{{world-link|3|castlen|World 3-Castle (New Super Mario Bros.)}} | |||
|200 | |||
|{{chart icon|new}} | |||
|- | |||
|style="background:white"|[[File:ThwompNSMB.png]] | |||
|[[Thwomp]] | |||
|align=left|Tries to crush Mario when he gets close. It is defeated with a Blue Shell, Starman or a Mega Mushroom. | |||
|{{world-link|4|castlen|World 4-Castle (New Super Mario Bros.)}} | |||
|{{world-link|8|bowsern|World 8-Bowser's Castle (New Super Mario Bros.)}} | |||
|200 | |||
|— | |||
|- | |||
|style="background:white"|[[File:SuperThwompNSMB.png]] | |||
|[[Big Thwomp|Super Thwomp]] | |||
|align=left|A big Thwomp. The only other difference is that Super Thwomp can crush through bricks and used blocks and stair blocks. | |||
|{{world-link|4|castlen|World 4-Castle (New Super Mario Bros.)}} | |||
|{{world-link|8|bowsern|World 8-Bowser's Castle (New Super Mario Bros.)}} | |||
|200 | |||
|— | |||
|- | |||
|style="background:white"|[[File:FireChompNSMB.png]] | |||
|[[Flame Chomp]] | |||
|align=left|Spits a fireball that follows Mario, causing its tail, made of fireballs, to decrease in length. It self-destructs when it does not have any fireballs left, which can hurt Mario. Can be defeated with a stomp or a fireball. | |||
|colspan=2|[[World 7-1 (New Super Mario Bros.)|World 7-1]] | |||
|200 | |||
|— | |||
|- | |||
|style="background:white"|[[File:PodobooNSMB.png]] | |||
|[[Lava Bubble|Podoboo]] | |||
|align=left|Lava balls that jump out of lava. | |||
|{{world-link|1|castlen|World 1-Castle (New Super Mario Bros.)}} | |||
|{{world-link|8|bowsern|World 8-Bowser's Castle (New Super Mario Bros.)}} | |||
|data-sort-value=2000|{{chart icon|cross}} | |||
|— | |||
|- | |- | ||
|style="background:white"|[[File: | |style="background:white"|[[File:FireSnake NSMB.png]] | ||
| | |[[Fire Snake]] | ||
|align=left| | |align=left|An eyed flame with a tail of smaller flames. It can hop on blocks and follow Mario. | ||
| | |colspan=2|[[World 2-5 (New Super Mario Bros.)|World 2-5]] | ||
|[[World | |200 | ||
| | |— | ||
| | |||
|- | |- | ||
|style="background:white"|[[File: | |style="background:white"|[[File:NSMBDS Boo Sprite.gif]] | ||
|[[ | |[[Boo]] | ||
|align=left| | |align=left|Facing it stops it. Looking away from it causes it to pursue Mario. It is vulnerable to [[Super Star|Starmen]] and [[Blue Shell]]s. | ||
|[[World | |{{world-link|3|ghostn|World 3-Ghost House (New Super Mario Bros.)}} | ||
|[[World | |[[World 8-1 (New Super Mario Bros.)|World 8-1]] | ||
| | |200 | ||
| | |— | ||
|- | |- | ||
|style="background:white"|[[File: | |style="background:white"|[[File:NSMBDS Balloon Boo Sprite.png|100x100px]] | ||
| | |[[Balloon Boo]] | ||
|align=left| | |align=left|Approaches Mario if his back is turned. When looked at, it stops to inhale air to grow. Shrinks to the normal size of a Boo when it attacks. A [[Super Star|Starman]], [[Blue Shell]] or [[Mega Mushroom]] can defeat Balloon Boos. | ||
|[[ | |colspan=2|{{world-link|4|ghostn|World 4-Ghost House (New Super Mario Bros.)}} | ||
| | |200 | ||
| | |{{chart icon|new}} | ||
| | |||
|- | |- | ||
|style="background:white"|[[File: | |style="background:white"|[[File:Broozer Punch.png]] | ||
|[[ | |[[Broozer]] | ||
|align=left| | |align=left|Boxing ghoul-like monster. Can break [[Brick Block|brick]]s and other blocks that are normally indestructible. Mario can defeat it by jumping on it three times, or hitting it with a fireball. | ||
| | |{{world-link|5|ghostn|World 5-Ghost House (New Super Mario Bros.)}} | ||
|[[World | |[[World 5-C]] | ||
| | |200 | ||
| | |{{chart icon|new}} | ||
|- | |- | ||
|style="background:white"|[[File: | |style="background:white"|[[File:Splunkin NSMB.png]] | ||
|[[ | |[[Splunkin]] | ||
|align=left| | |align=left|Walking [[Jack-o'-lantern]] enemies. One stomp causes it to become angry and speed up; a second stomp destroys it. A fireball also defeats it. | ||
| | |{{world-link|3|ghostn|World 3-Ghost House (New Super Mario Bros.)}} | ||
|[[World | |[[World 8-1 (New Super Mario Bros.)|World 8-1]] | ||
| | |200 | ||
| | |{{chart icon|new}} | ||
|- | |- | ||
|style="background:white"|[[File: | |style="background:white"|[[File:SwooperNSMB.png]] | ||
|[[ | |[[Swoop]] | ||
|align=left| | |align=left|This bat hangs on ceilings. Flies at Mario when he approaches. Fireballs or a stomp defeats it. | ||
|[[World | |[[World 2-3 (New Super Mario Bros.)|World 2-3]] | ||
|[[World 5-2 (Super Mario Bros. | |[[World 5-2 (New Super Mario Bros.)|World 5-2]] | ||
| | |200 | ||
| | |— | ||
|- | |- | ||
|style="background:white"|[[File: | |style="background:white"|[[File:NSMB Moneybag.png]] | ||
|[[ | |[[Moneybag (enemy)|Moneybags]] | ||
|align=left| | |align=left|A hopping pest that at first looks like a coin. Stomp on it or hit it with a [[Fire Ball]] to get coins, and if it is jumped on or hit enough times, Mario gets a [[1-Up Mushroom]]. | ||
|[[World | |[[World 5-2 (New Super Mario Bros.)|World 5-2]] | ||
|[[World | |[[World 6-3 (New Super Mario Bros.)|World 6-3]] | ||
| | |200 | ||
| | |— | ||
|- | |- | ||
|style="background:white"|[[File: | |style="background:white"|[[File:CrowberNSMB.png]] | ||
|[[ | |[[Crowber]] | ||
|align=left| | |align=left|Swoops at high speeds at Mario. It is defeated with any attack. | ||
| | |colspan=2|[[World 8-1 (New Super Mario Bros.)|World 8-1]] | ||
|[[World | |200 | ||
| | |{{chart icon|new}} | ||
| | |||
|- | |- | ||
|style="background:white"|[[File: | |style="background:white"|[[File:Bob-ombNSMB.png]] | ||
|[[ | |[[Bob-omb]] | ||
|align=left| | |align=left|Legged bombs with eyes. Stomping/shooting on a Bob-omb makes it explode after a certain time. | ||
|[[World | |[[World 4-5 (New Super Mario Bros.)|World 4-5]] | ||
|[[World 7- | |[[World 7-5 (New Super Mario Bros.)|World 7-5]] | ||
| | |200 | ||
| | |— | ||
|- | |- | ||
|style="background:white"|[[File: | |style="background:white"|[[File:NormalKab-Omb.png]] | ||
|[[ | |[[Kab-omb]] | ||
|align=left| | |align=left|A Bob-omb that lights and explodes when touched by [[volcanic debris]] or one of Fire Mario's fireballs. It can be defeated by stomping it. | ||
| | |colspan=2|[[World 8-8 (New Super Mario Bros.)|World 8-8]] | ||
|[[World | |200 | ||
| | |{{chart icon|new}} | ||
| | |||
|- | |- | ||
|style="background:white"|[[File: | |style="background:white"|[[File:ScuttleBug.PNG]] | ||
|[[ | |[[Scuttlebug]] | ||
|align=left| | |align=left|This spider appears from upwards via its web. One stomp or fireball drops it off its string and defeats it. Also, some can detach from their strings and walk along the ground in World 8-4. | ||
|[[World | |[[World 4-1 (New Super Mario Bros.)|World 4-1]] | ||
|[[World | |[[World 8-4 (New Super Mario Bros.)|World 8-4]] | ||
| | |200 | ||
| | |— | ||
|- | |- | ||
|style="background:white"|[[File: | |style="background:white"|[[File:Squiggler.png]] | ||
|[[ | |[[Squiggler]] | ||
|align=left| | |align=left|A tiny Wiggler that comes out of pipes and crawls on walls. A stomp on the head defeats it, but only a ground pound gives up points. | ||
| | |colspan=2|[[World 7-A]] | ||
|[[World 7- | |200 | ||
| | |{{chart icon|new}} | ||
| | |||
|- | |- | ||
|style="background:white"|[[File: | |style="background:white"|[[File:WigglerNSMB.png]] | ||
| | |[[Wiggler]] | ||
|align=left| | |align=left|Normally just walks slowly, but becomes angry and red when stomped on. Can only be defeated with a shell, Starman or Mega Mushroom. | ||
|[[World | |[[World 4-4 (New Super Mario Bros.)|World 4-4]] | ||
|[[World 7- | |[[World 7-3 (New Super Mario Bros.)|World 7-3]] | ||
| | |200 | ||
| | |— | ||
|- | |- | ||
|style="background:white"|[[File: | |style="background:white"|[[File:AmpNSMB.png]] | ||
| | |[[Amp]] | ||
|align=left| | |align=left|An electric enemy. Can be destroyed with a Mega Mushroom or Starman. | ||
| | |{{world-link|3|towern|World 3-Tower (New Super Mario Bros.)}} | ||
| | |{{world-link|7|castlen|World 7-Castle (New Super Mario Bros.)}} | ||
| | |200 | ||
| | |— | ||
|- | |- | ||
|style="background:white"|[[File: | |style="background:white"|[[File:ChainChompNSMB.png]] | ||
|[[ | |[[Chain Chomp]] | ||
|align=left| | |align=left|It attacks Mario by moving its head and lunging. Mario must ground pound the post it is tied to three times to free it. | ||
| | |colspan=2|[[World 6-6 (New Super Mario Bros.)|World 6-6]] | ||
|[[World | |200 | ||
| | |— | ||
| | |||
|- | |- | ||
|style="background:white"|[[File: | |style="background:white"|[[File:NSMBDS Bullet Bill Sprite.png]] | ||
|[[ | |[[Bullet Bill]] | ||
|align=left| | |align=left|It is launched by [[Bill Blaster]]s and [[Bill Blaster Turret]]s. Mario must stomp on it to defeat it. | ||
| | |{{world-link|2|castlen|World 2-Castle (New Super Mario Bros.)}} | ||
|[[World | |[[World 8-1 (New Super Mario Bros.)|World 8-1]] | ||
| | |200 | ||
| | |— | ||
|- | |- | ||
|style="background:white"|[[File: | |style="background:white"|[[File:NSMBDS Banzai Bill Sprite.png]] | ||
|[[ | |[[Banzai Bill]] | ||
|align=left| | |align=left|An enormous Bullet Bill. Mario can jump on a Banzai Bill to defeat it, just like Bullet Bills. | ||
|[[World | |[[World 7-5 (New Super Mario Bros.)|World 7-5]] | ||
|[[World | |[[World 8-1 (New Super Mario Bros.)|World 8-1]] | ||
| | |200 | ||
| | |— | ||
|- | |- | ||
|style="background:white"|[[File: | |style="background:white"|[[File:NSMB Snailicorn.png]] | ||
|[[ | |[[Snailicorn]] | ||
|align=left| | |align=left|Creature with a snail's shell, a horn, and feet. Invincible to stomps, but can be pushed off cliffs. | ||
|[[World | |[[World 5-3 (New Super Mario Bros.)|World 5-3]] | ||
|[[World | |[[World 5-B (New Super Mario Bros.)|World 5-B]] | ||
| | |200 | ||
| | |{{chart icon|new}} | ||
|- | |- | ||
|style="background:white"|[[File: | |style="background:white"|[[File:Snow Spike.png]] | ||
|[[ | |[[Snow Spike]] | ||
|align=left| | |align=left|The normal [[Spike]] does not appear, but this one does. Instead of Spiked Balls, it throws Snowballs. It can be defeated by a stomp or fireballs. | ||
| | |colspan=2|[[World 5-1 (New Super Mario Bros.)|World 5-1]] | ||
|[[World | |200 | ||
| | |{{chart icon|new}} | ||
| | |||
|} | |} | ||
===Obstacles=== | ===Obstacles from NSMB=== | ||
{|class="wikitable" style="width:100%;text-align:center" | {|class="wikitable" style="width:100%;text-align:center" | ||
|-style="color:white;background: | |-style="color:white;background:red" | ||
!width=5% rowspan=2|Image | !width=5% rowspan=2|Image | ||
!width=8% rowspan=2|Name | !width=8% rowspan=2|Name | ||
!rowspan=2|Description | !rowspan=2|Description | ||
!colspan=2| | !colspan=2|Levels | ||
|-style="color:white;background: | |-style="color:white;background:red" | ||
!width=8%|First | !width=8%|First | ||
!width=8%|Last | !width=8%|Last | ||
|- | |- | ||
|style="background:white"|[[File: | |style="background:white"|[[File:NSMB Ball 'N' Chain.png]] | ||
|[[Spinner|Ball 'N' Chain]] | |||
|align=left|[[Spike Ball|Spiked Ball]] attached to a chain on a block. It spins around and cannot be destroyed. | |||
|{{world-link|7|castlen|World 7-Castle (New Super Mario Bros.)}} | |||
|{{world-link|7|castlen|World 7-Castle (New Super Mario Bros.)}} | |||
|- | |||
|style="background:white"|[[File:NSMB Banzai Bill Cannon.png]] | |||
|[[Banzai Bill Cannon]] | |||
|align=left|Giant launchers that shoot unending Banzai Bills. | |||
|{{world-link|7|5|World 7-5 (New Super Mario Bros.)}} | |||
|{{world-link|8|1|World 8-1 (New Super Mario Bros.)}} | |||
|- | |||
|style="background:white"|[[File:NSMB Bill Blaster.png]] | |||
|[[Bill Blaster]] | |||
|align=left|Fires endless amounts of [[Bullet Bill]]s from either side. Can be destroyed with a Mega Mushroom. | |||
|{{world-link|2|castlen|World 2-Castle (New Super Mario Bros.)}} | |||
|{{world-link|8|1|World 8-1 (New Super Mario Bros.)}} | |||
|- | |||
|style="background:white"|[[File:NSMB Bill Blaster Turret.png]] | |||
|[[Bill Blaster Turret]] | |||
|align=left|Stacked Bill Blasters that rotate between firings. Can be destroyed with a Mega Mushroom. | |||
|{{world-link|6|1|World 6-1 (New Super Mario Bros.)}} | |||
|{{world-link|7|5|World 7-5 (New Super Mario Bros.)}} | |||
|- | |||
|style="background:white"|[[File:BurnerNSMB.png]] | |||
|[[Burner]] | |||
|align=left|A rocket engine that blows long flames for several seconds before a break. They are indestructible. There are also shorter ones that never stop. | |||
|{{world-link|7|castlen|World 7-Castle (New Super Mario Bros.)}} | |||
|{{world-link|8|bowsern|World 8-Bowser's Castle (New Super Mario Bros.)}} | |||
|- | |||
|style="background:white"|[[File:FireBarNSMB.png]] | |||
|[[Fire Bar]] | |||
|align=left|A long stick of fireballs rotating around a block. The amount of fireballs vary, and there can be two bars in one block. | |||
|{{world-link|6|4|World 6-4 (New Super Mario Bros.)}} | |||
|{{world-link|8|bowsern|World 8-Bowser's Castle (New Super Mario Bros.)}} | |||
|- | |||
|style="background:white"|[[File:GiantSpikedBall NSMB.png]] | |||
|[[Giant Spiked Ball]] | |||
|align=left|Larger versions of Spiked Balls that destroy blocks, enemies, and even smaller Spiked Balls. Can only be destroyed with Mega Mario. | |||
|{{world-link|2|castlen|World 2-Castle (New Super Mario Bros.)}} | |||
|{{world-link|5|towern|World 5-Tower (New Super Mario Bros.)}} | |||
|- | |||
|style="background:white"|[[File:NSMB W1-Castle.png|100x100px]] | |||
|[[Lava]] | |||
|align=left|Molten rock that causes the player to instantly lose a life if touched. | |||
|{{world-link|1|castlen|World 1-Castle (New Super Mario Bros.)}} | |||
|{{world-link|8|bowsern|World 8-Bowser's Castle (New Super Mario Bros.)}} | |||
|- | |||
|style="background:white"|[[File:NsmbPlatform.png|25x25px]] | |||
|Moving rock | |||
|align=left|Stone platforms that move in set patterns and come in various sizes with some containing spikes. They can either help or hinder the player. Often found in [[tower]]s. | |||
|TBD | |||
|TBD | |||
|- | |||
|style="background:white"|[[File:4-1 NSMB.png|100x100px]] | |||
|[[Poison (obstacle)|Poison]] | |||
|align=left|A liquid hazard that causes the player to instantly lose a life if touched, similar to [[lava]]. | |||
|{{world-link|4|1|World 4-1 (New Super Mario Bros.)}} | |||
|{{world-link|6|3|World 6-3 (New Super Mario Bros.)}} | |||
|- | |||
|style="background:white"|[[File:6-A NSMB.png|100x100px]] | |||
|[[Quicksand]] | |[[Quicksand]] | ||
|align=left| | |align=left|Sand that sinks the player if they fall in. Jumping repeatedly is required to escape. | ||
| | |{{world-link|2|1|World 2-1 (New Super Mario Bros.)}} | ||
|[[World 6-1 (Super Mario Bros. | |{{world-link|6|A|World 6-A (New Super Mario Bros.)}} | ||
|- | |||
|style="background:white"|[[File:SpikePillar-NSMB.png]] | |||
|[[Skewer]] | |||
|align=left|Giant spiked pillars that shoot out at high speeds before retracting. | |||
|{{world-link|3|castlen|World 3-Castle (New Super Mario Bros.)}} | |||
|{{world-link|6|towern|World 6-Tower (New Super Mario Bros.)}} | |||
|- | |||
|style="background:white"|[[File:5-1 NSMB.png|100x100px]] | |||
|Snow | |||
|align=left|Deep snow that causes the player to sink, reducing jump height. | |||
|{{world-link|5|1|World 5-1 (New Super Mario Bros.)}} | |||
|{{world-link|5|1|World 5-1 (New Super Mario Bros.)}} | |||
|- | |||
|style="background:white"|[[File:NsmbSnowTrap.png]] | |||
|Snow branch | |||
|align=left|Snow that hangs on branches and falls once the player passes underneath. It traps them for a moment if it lands on them, and makes them vulnerable to enemies. | |||
|{{world-link|5|1|World 5-1 (New Super Mario Bros.)}} | |||
|{{world-link|5|1|World 5-1 (New Super Mario Bros.)}} | |||
|- | |- | ||
|style="background:white"|[[File: | |style="background:white"|[[File:SpikedBallNSMB.png]] | ||
|[[ | |[[Spike Ball]] | ||
|align=left| | |align=left|Ball with spikes that rolls along the floor, destroying almost everything in its way. They can be destroyed by Mega Mario, or their larger counterpart [[Giant Spiked Ball]]. | ||
| | |{{world-link|2|castlen|World 2-Castle (New Super Mario Bros.)}} | ||
| | |{{world-link|8|towern|World 8-Tower 2 (New Super Mario Bros.)}} | ||
|- | |- | ||
|style="background:white"|[[File: | |style="background:white"|[[File:NsmbSpikeLine.png]] | ||
|[[Spike Trap | |[[Spike Trap]] | ||
|align=left| | |align=left|Pointy obstacles that damage the player if touched. | ||
|[[World | |{{world-link|1|towern|World 1-Tower (New Super Mario Bros.)}} | ||
|[[World | |{{world-link|8|bowsern|World 8-Bowser's Castle (New Super Mario Bros.)}} | ||
|- | |||
|style="background:white"|[[File:RainingDebrisNSMB.png]] | |||
|[[Volcanic debris]] | |||
|align=left|Lava rocks shot from a volcano. Can be destroyed with a Starman or Mega Mushroom. | |||
|{{world-link|8|8|World 8-8 (New Super Mario Bros.)}} | |||
|{{world-link|8|8|World 8-8 (New Super Mario Bros.)}} | |||
|- | |||
|style="background:white"|[[File:WhirlpoolNSMB.png|100x100px]] | |||
|[[Whirlpool]] | |||
|align=left|A swirling vortex of water that can sink the player to the pit. | |||
|{{world-link|6|5|World 6-5 (New Super Mario Bros.)}} | |||
|{{world-link|6|5|World 6-5 (New Super Mario Bros.)}} | |||
|} | |} | ||
===Bosses=== | ===Bosses from NSMB=== | ||
{|class="wikitable"style="width:100%;text-align:center" | |||
{|class="wikitable" style="width:100%;text-align:center" | |-style="color:white;background:red" | ||
|-style="color:white;background: | |||
!width=5% rowspan=2|Image | !width=5% rowspan=2|Image | ||
!width=8% rowspan=2|Name | !width=8% rowspan=2|Name | ||
!rowspan=2|Description | !rowspan=2|Description | ||
!colspan=2| | !colspan=2|Levels | ||
|-style="color:white;background: | |-style="color:white;background:red" | ||
!width=8%|First | !width=8%|First | ||
!width=8%|Last | !width=8%|Last | ||
|- | |- | ||
|style="background:white"|[[File:NSMBDS Bowser Jr Bandanna.png]] | |||
|[[Bowser Jr.]] | |||
|align=left|Bowser Jr. is fought in all [[tower]]s and in {{world-link|8|bowsern|World 8-Bowser's Castle (New Super Mario Bros.)}}. Mario needs to jump on him three times. When he has his bandanna on his face, he hides in his shell when he gets close to Mario, so he needs to jump on the [[Green Shell]]s he throws and throw them back at him, then jump on him, three times. A ground pound counts as two hits, or Mario can defeat him with nine fireballs, which do not stun him like jumping on him does. | |||
|{{world-link|1|towern|World 1-Tower (New Super Mario Bros.)}} | |||
|{{world-link|8|bowsern|World 8-Bowser's Castle (New Super Mario Bros.)}} | |||
|- | |- | ||
|style="background:white"|[[File: | |style="background:white"|[[File:BowserNSMB.png]] | ||
|[[ | |[[Bowser]] | ||
|align=left| | |align=left|Mario needs to jump on the [[skull switch]] to send him falling down beneath the bridge into the lava. | ||
| | |{{world-link|1|castlen|World 1-Tower (New Super Mario Bros.)}} | ||
| | |{{world-link|8|bowsern|World 8-Bowser's Castle (New Super Mario Bros.)}} | ||
|- | |- | ||
|style="background:white"|[[File: | |style="background:white"|[[File:MummipokeyNSMB.png]] | ||
| | |[[Mummipokey]] | ||
|align=left| | |align=left|Mario needs to jump on this [[Pokey]] three times to go to World 3 or ground pound him three times with [[Mini Mario (form)|Mini Mario]] to go to [[World 4 (New Super Mario Bros.)|World 4]]. | ||
|[[World | |colspan=2|{{world-link|2|castlen|World 2-Castle (New Super Mario Bros.)}} | ||
| | |||
|- | |- | ||
|style="background:white"|[[File: | |style="background:white"|[[File:NSMB-cheep.png]] | ||
| | |[[Cheepskipper]] | ||
|align=left| | |align=left|Mario needs to jump on him three times when he jumps out of the water, while dodging his [[Cheep Cheep|Cheep-Cheep]]s. | ||
|colspan=2|{{world-link|3|castlen|World 3-Castle (New Super Mario Bros.)}} | |||
| | |||
|- | |- | ||
|style="background:white"|[[File: | |style="background:white"|[[File:MegaGoomba.png]] | ||
|[[ | |[[Mega Goomba (boss)|Mega Goomba]] | ||
|align=left| | |align=left|Mario should hit the switch in hole in the middle, and ride up the platforms so he can ground pound the Mega Goomba three times. | ||
|colspan=2| | |colspan=2|{{world-link|4|castlen|World 4-Castle (New Super Mario Bros.)}} | ||
|- | |- | ||
|style="background:white"|[[File:NSMB-petey.png]] | |||
|[[Petey Piranha]] | |||
|align=left|Mario should run around so that Petey tries to squish Mario. If he moves out of the way in time, Petey should slip and land on his back. Mario should then jump on Petey three times to go to World 6 or ground pound him three times with [[Mini Mario (form)|Mini Mario]] to get to [[World 7 (New Super Mario Bros.)|World 7]]. | |||
|colspan=2|{{world-link|5|castlen|World 5-Castle (New Super Mario Bros.)}} | |||
|- | |- | ||
|style="background:white"|[[File: | |style="background:white"|[[File:MontyTank.png]] | ||
|[[ | |[[Monty Tank]] | ||
|align=left| | |align=left|Mario should crouch in the corner, then jump on the [[Monty Mole]]'s head when he stops firing [[Bullet Bill]]s. Each time he is hit, his tank gets higher. | ||
| | |colspan=2|{{world-link|6|castlen|World 6-Castle (New Super Mario Bros.)}} | ||
| | |||
|- | |- | ||
|style="background:white"|[[File: | |style="background:white"|[[File:LakithunderNSMB.png]] | ||
|[[ | |[[Lakithunder]] | ||
|align=left| | |align=left|Mario should jump on him three times when he swoops down. | ||
| | |colspan=2|{{world-link|7|castlen|World 7-Castle (New Super Mario Bros.)}} | ||
| | |||
|- | |- | ||
|style="background:white"|[[File: | |style="background:white"|[[File:NSMB-Dry.png]] | ||
|[[ | |[[Dry Bowser]] | ||
|align=left| | |align=left|Mario needs to jump on the skull switch to send him falling down beneath the bridge. | ||
|colspan=2| | |colspan=2|{{world-link|8|castlen|World 8-Castle}} | ||
| | |||
|} | |} | ||
===Items=== | ===Items from NSMB=== | ||
These are collectibles, pickups, and health-restoring objects. | These are collectibles, pickups, and health-restoring objects. | ||
{|class="wikitable" style="width:100%;text-align:center" | {|class="wikitable"style="width:100%;text-align:center" | ||
|-style="color:white;background: | |-style="color:white;background:red" | ||
!width=5%|Image | !width=5%|Image | ||
!width=8%|Name | !width=8%|Name | ||
! | !Description | ||
|- | |||
|style="background:white"|[[File:Coin Spinning NSMB.gif]] | |||
|[[Coin]] | |||
|align=left|Collecting 100 of these give Mario or Luigi an extra life. In Mario Vs. Luigi mode, collecting 8 coins gives Mario or Luigi an item. | |||
|- | |||
|style="background:white"|[[File:NSMB Hidden Coin.png]] | |||
|[[Hidden Coin]] | |||
|align=left|An outline of a coin that becomes a coin once Mario or Luigi passes through it. | |||
|- | |||
|style="background:white"|[[File:Red Coin Spinning NSMB.gif]] | |||
|[[Red Coin]] | |||
|align=left|Collecting all 8 Red Coins that appear after passing through a Red Ring gives Mario a Super Mushroom, Fire Flower or 1-Up Mushroom, depending on what power-up Mario or Luigi is currently using. | |||
|- | |||
|style="background:white"|[[File:Silverbluecoin.gif]] | |||
|[[Blue Coin]] | |||
|align=left|Just like normal Coins, but appear by hitting a [[P Switch]]. | |||
|- | |- | ||
|style="background:white"|[[File: | |style="background:white"|[[File:NSMB StarCoinAnimated.gif]] | ||
|[[Coin]] | |[[Star Coin]] | ||
|align=left| | |align=left|Three of these are located in every course in hard-to-reach or hidden areas. They are used to remove [[Star Coin Sign]]s and purchase different touch screen background skins. | ||
|- | |- | ||
|style="background:white"|[[File: | |style="background:white"|[[File:NSMB 1-up.png]] | ||
|[[ | |[[1-Up Mushroom]] | ||
|align=left|Gives Mario or Luigi an extra life. | |||
|align=left| | |||
|- | |- | ||
|style="background:white"|[[File: | |style="background:white"|[[File:GreenShellNSMB.png]] [[File:RedShellNSMB.png]] | ||
|[[Koopa Shell]] | |||
|align=left|TBW | |||
|[[ | |||
|align=left| | |||
|- | |- | ||
|style="background:white"|[[File: | |style="background:white"|[[File:NSMB Buzzy Shell.png]] | ||
|[[ | |[[Buzzy Shell]] | ||
|align=left| | |align=left|TBW | ||
|- | |- | ||
|style="background:white"|[[File: | |style="background:white"|[[File:NSMB Tram.png]] | ||
|[[ | |[[Trampoline|Springboard]] | ||
|align=left| | |align=left|Bounces the player high into the air when jumped on. | ||
|- | |- | ||
|style="background:white"|[[File: | |style="background:white"|[[File:NSMB Asset Sprite Key.png]] | ||
|[[ | |[[Key]] | ||
|align=left| | |align=left|TBW | ||
|- | |- | ||
|style="background:white"|[[File: | |style="background:white"|[[File:StarBig.png]] | ||
|[[ | |[[Big Star]] | ||
|align=left| | |align=left|A set number of these must be collected to win in Mario Vs. Luigi mode. | ||
|} | |} | ||
===Power-ups=== | ===Power-ups from NSMB=== | ||
{|class="wikitable"style="width:100%;text-align:center" | |||
{|class="wikitable" style="width:100%;text-align:center" | |||
|-style="color:white;background:#FF2400" | |-style="color:white;background:#FF2400" | ||
!width=5% rowspan= | !width=5% rowspan=2|Power-up | ||
!colspan=2|Form | !colspan=2|Form | ||
!rowspan= | !rowspan=2|Description | ||
|-style="color:white;background:#FF2400" | |-style="color:white;background:#FF2400" | ||
!width=8%|Mario | !width=8%|{{Chart icon|NSMB-Mario}} | ||
!width=8%|Luigi | !width=8%|{{Chart icon|NSMB-Luigi}} | ||
|-style=" | |- | ||
|style="background:white"|N/A | |||
|style="background:white"|[[File:SmallMariostandingNSMB.png]]<br>[[Small Mario|Mario]] | |||
|style="background:white"|[[File:NSMB Asset Sprite Small Luigi.png]]<br>[[Small Mario|Luigi]] | |||
|align=left|TBW | |||
|- | |- | ||
| | |style="background:white"|[[File:Mushroom nsmb.png]]<br>[[Super Mushroom]] | ||
|style="background:white"|[[File: | |style="background:white"|[[File:MariojumpingNSMB.png]]<br>[[Super Mario (form)|Super Mario]] | ||
|style="background:white"|[[File: | |style="background:white"|[[File:NSMB Asset Sprite Super Luigi.png]]<br>[[Super Mario (form)|Super Luigi]] | ||
| | |align=left|Turns [[Small Mario]] or Small Luigi into [[Super Mario (form)|Super Mario]] or Super Luigi, respectively. | ||
|- | |- | ||
|style="background:white"|[[File: | |style="background:white"|[[File:NSMB Fire Flower.png]]<br>[[Fire Flower]] | ||
|style="background:white"|[[File: | |style="background:white"|[[File:FireMarioJumpNSMB.png]]<br>[[Fire Mario]] | ||
|style="background:white"|[[File:FireLuigiNSMB.png]]<br>[[Fire Mario|Fire Luigi]] | |||
|align=left|Turns Mario or Luigi into [[Fire Mario]] or Fire Luigi, respectively. | |||
|- | |- | ||
| | |style="background:white"|[[File:NSMB Star.gif]]<br>[[Super Star|Starman]] | ||
|style="background:white"|[[File: | |style="background:white"|[[File:InvincibleMarioNSMB.png]]<br>[[Invincible Mario]] | ||
|style="background:white"|[[File:Luigi | |style="background:white"|[[File:NSMB Invincible Luigi.png]]<br>[[Invincible Mario|Invincible Luigi]] | ||
| | |align=left|Turns Mario or Luigi into [[Invincible Mario]] or Invincible Luigi. | ||
|- | |- | ||
|style="background:white"|[[File: | |style="background:white"|[[File:MegaMushroomNSMB.png]]<br>[[Mega Mushroom]] | ||
|style="background:white"|[[File: | |style="background:white"|[[File:MegaMarioNSMB.png]]<br>[[Mega Mario]] | ||
|style="background:white"|[[File:NSMB Asset Sprite Mega Luigi.png]]<br>[[Mega Mario|Mega Luigi]] | |||
|align=left|Turns Mario or Luigi into [[Mega Mario]] or Mega Luigi, respectively. | |||
|- | |- | ||
| | |style="background:white"|[[File:NSMBMiniMushroom.png]]<br>[[Mini Mushroom]] | ||
|style="background:white"|[[File: | |style="background:white"|[[File:MiniMarioNSMB.png]]<br>[[Mini Mario]] | ||
|style="background:white"|[[File: | |style="background:white"|[[File:NSMB Asset Sprite Mini Luigi.png]]<br>[[Mini Mario|Mini Luigi]] | ||
| | |align=left|Turns Mario or Luigi into [[Mini_Mario_(form)|Mini Mario]] or Mini Luigi, respectively. | ||
|- | |- | ||
|style="background:white"|[[File: | |style="background:white"|[[File:NSMB Blue Shell.png]]<br>[[Blue Shell]] | ||
|style="background:white"|[[File: | |style="background:white"|[[File:ShellMarioNSMB.png]]<br>[[Shell Mario]] | ||
|style="background:white"|[[File:NSMB Asset Sprite Shell Luigi.png]]<br>[[Shell Mario|Shell Luigi]] | |||
|align=left|Turns Mario or Luigi into [[Shell Mario]] or Shell Luigi, respectively. | |||
|} | |} | ||
===Objects=== | ===Objects from NSMB=== | ||
{|class="wikitable"style="width:100%;text-align:center" | |||
{|class="wikitable" style="width:100%;text-align:center" | |-style="color:white;background:red" | ||
|-style="color:white;background: | |||
!width=5%|Image | !width=5%|Image | ||
!width=8%|Name | !width=8%|Name | ||
!Description | !Description | ||
|- | |- | ||
!colspan=3 style="background:#FF7733 | !colspan=3 style="background:#FF7733"|Blocks and containers | ||
|- | |||
|style="background:white"|[[File:QuestionMarkBlockNSMB.png]] | |||
|[[? Block]] | |||
|align=left|Gives Mario or Luigi a coin or an item. '''(inc. [[Coin Block]] and [[Hidden Block]])''' | |||
|- | |||
|[[File:NSMB Asset Sprite Question Block (Silk).png]] | |||
|? Block (silk) | |||
|align=left|TBW | |||
|- | |||
|style="background:white"|[[File:Brick NSMB sprite.png]] | |||
|[[Brick Block|Brick]] | |||
|align=left|When broken, this block releases a coin or an item. | |||
|- | |||
|style="background:white"|[[File:NewDonutLifts.png]] | |||
|[[Donut Block]] | |||
|align=left|Falls if stood on too long. | |||
|- | |||
|style="background:white"|[[File:NSMB Asset Sprite Dotted-Line Block.png]] [[File:NSMB Asset Sprite Red Block.png]] | |||
|[[Dotted-Line Block]] | |||
|align=left|TBW | |||
|- | |||
|style="background:white"|[[File:Platform Blocks NSMB.png]] | |||
|[[Face block (platform)|Face block]] | |||
|align=left|Becomes a taller stack every time they are hit. | |||
|- | |||
|style="background:white"|[[File:NSMB Asset Sprite Flying Question Block.png]] | |||
|[[Flying ? Block]] | |||
|align=left|? Blocks that fly around levels and give a coin or an item. | |||
|- | |||
|style="background:white"|[[File:NSMB Flying Block.png]] | |||
|[[Red Winged ? Block]] | |||
|align=left|The red ones fly between levels on the map and give better items when hit. | |||
|- | |||
|style="background:white"|[[File:NSMB Rouletteblock.gif]] | |||
|[[Roulette Block]] | |||
|align=left|Gives a random item to Mario or Luigi. | |||
|- | |||
|style="background:white"|[[File:NSMB Asset Sprite Snake Block.png]] | |||
|[[Snake Block]] | |||
|align=left|Travels along winding paths, but do not move anything on top of them directly. It falls quickly when it reaches its destination. | |||
|- | |||
|style="background:white"|[[File:SpikedQBlockNSMB.png]] | |||
|[[Spiked ? Block]] | |||
|align=left|Gives the player a coin or an item when hit. The block spins, alternating between the spiked side and the safe side. The spiked side can damage the player. | |||
|- | |||
|style="background:white"|[[File:SpinBlockNSMB.png]] | |||
|[[Spin Block (New Super Mario Bros.)|Spin Block]] | |||
|align=left|Lets Mario or Luigi perform a high, gliding [[Spin Jump]]. | |||
|- | |||
|style="background:white"|[[File:NSMB Asset Sprite Stone Block.png]] | |||
|[[Stone Block]] | |||
|align=left|Can only be destroyed by [[Big Thwomp]]s, [[Bob-omb]]s, [[Mega Mario]], or Mega Luigi. | |||
|- | |||
!colspan=3 style="background:#FF7733"|Trigger objects | |||
|- | |||
|style="background:white"|[[File:NSMBDS Exclamation Switch.png]] | |||
|[[! Switch]] | |||
|align=left|Turns [[Dotted-Line Block]]s into solid [[Red Block]]s when pushed. | |||
|- | |||
|style="background:white"|[[File:QuestionSwitchNSMB.png]] | |||
|[[? Switch]] | |||
|align=left|Changes something in the level when pushed. | |||
|- | |||
|style="background:white"|[[File:NsmbManholeLid2.png|25x25px]] | |||
|[[Manhole]] | |||
|align=left|A lid that prevents access. The only way to enter is to Ground-Pound. | |||
|- | |||
|style="background:white"|[[File:PSwitchNSMB.png]] | |||
|[[P Switch]] | |||
|align=left|Switches the positions of coins and bricks and spawns Blue Coins. | |||
|- | |||
|style="background:white"|[[File:Red Ring NSMB.png]] | |||
|[[Red Ring]] | |||
|align=left|Makes 8 [[Red Coins]] appear for a limited time. | |||
|- | |- | ||
|style="background:white"|[[File: | |style="background:white"|[[File:NSMB Asset Sprite Red-and-yellow Block.png]] | ||
|[[ | |[[Red-and-yellow block]]<ref>p. 109</ref> | ||
|align=left| | |align=left|TBW | ||
|- | |- | ||
|style="background:white"|[[File: | |style="background:white"|[[File:NSMB Skullswitch.png]] | ||
|[[ | |[[Skull switch]] | ||
|align=left| | |align=left|Immediately defeats [[Bowser]] when pressed. | ||
|- | |- | ||
!colspan=3 style="background:#FF7733 | !colspan=3 style="background:#FF7733"|Pipes | ||
|- | |- | ||
|style="background:white"|[[File: | |style="background:white"|[[File:NSMB Asset Sprite Corked Pipe.png]] | ||
|[[ | |[[Cork]]<ref>Louey</ref> | ||
|align=left| | |align=left|TBW | ||
|- | |- | ||
|style="background:white"|[[File: | |style="background:white"|[[File:NSMB Pipe current.png|100x100px]] | ||
|[[ | |[[Jet Pipe]] | ||
|align=left| | |align=left|Currents that push the player. | ||
|- | |- | ||
|style="background:white"|[[File:Super Mario Bros | |style="background:white"|[[File:Warp PipeNSMB.png]] | ||
|[[Warp Pipe|Pipe]] | |||
|align=left|Can often be entered to warp elsewhere. '''(inc. [[Pipe Cannon]])''' | |||
|- | |||
|style="background:white"|[[File:MiniWarpPipe NSMB.png]] | |||
|[[Small pipe]] | |||
|align=left|Can only be entered by [[Mini Mario]] and Mini Luigi. | |||
|- | |||
!colspan=3 style="background:#FF7733"|Climbabale objects | |||
|- | |||
|style="background:white"|[[File:NSMB fence.png]] | |||
|[[Chain-Link]] | |||
|align=left|A large fence that can be climbed on. [[Climbing Koopa]]s can often be found climbing on them. | |||
|- | |||
|style="background:white"|[[File:NSMB Screenshot Cliff.png]] | |||
|Cliff | |||
|align=left|TBW | |||
|- | |||
|style="background:white"|[[File:NsmbFlipPanel.png]] | |||
|[[Flip Panel (Chain-Link)|Flip Panel]] | |||
|align=left|Sections of Chain-Links that can be punched to flip to the other side. | |||
|- | |||
|style="background:white"|[[File:NSMB Asset Sprite Big Flip Panel.png|100x100px]] | |||
|Flip Panel (big) | |||
|align=left|TBW | |||
|- | |||
|style="background:white"|[[File:NsmbPole.png|100x100px]] | |||
|[[Pole]] | |||
|align=left|A climbable, yellow striped pole with a red base. Only one pole appears in the game, located in {{world-link|3|castlen|World 3-Castle (New Super Mario Bros.)}} near a group of [[Whomp]]s. | |||
|- | |||
|style="background:white"|[[File:NsmbTightrope.png]] | |||
|Pole<ref>p. 84</ref> (moving) | |||
|align=left|Yellow, striped ropes that move in a continuous pattern on [[Track]]s. They can be grabbed by the player and swung back and forth with momentum. | |||
|- | |||
|style="background:white"|[[File:NSMB Asset Sprite Rope.png]] | |||
|[[Rope]] | |||
|align=left|TBW | |||
|- | |||
|style="background:white"|[[File:NSMB Asset Sprite Strung Rope.png|100x100px]] | |||
|Rope (strung) | |||
|align=left|TBW | |||
|- | |||
|style="background:white"|[[File:NSMB Asset Sprite Hanging Rope.png]] | |||
|Rope (untied) | |||
|align=left|TBW | |||
|- | |||
|style="background:white"|[[File:Bean Stalk NSMB.png]] | |||
|[[Vine]] | |[[Vine]] | ||
|align=left| | |align=left|Can be climbed, sometimes leading to bonuses. '''(inc. [[Vine Block]])''' | ||
|- | |- | ||
|style="background:white"|[[File:NSMB Asset Sprite Hanging Vine.png|100x100px]] | |||
|Vine (hanging) | |||
|align=left|TBW | |||
|- | |- | ||
!colspan=3 style="background:#FF7733"|Doorways | |||
|- | |- | ||
|style="background:white"|[[File: | |style="background:white"|[[File:BowserBossDoorNSMB.png]] | ||
| | |Boss door | ||
|align=left| | |align=left|TBW | ||
|- | |- | ||
|style="background:white"|[[File: | |style="background:white"|[[File:Castle Door.png]] | ||
| | |Castle door | ||
|align=left| | |align=left|TBW | ||
|- | |- | ||
|style="background:white"|[[File: | |style="background:white"|[[File:DoorNSMB.png]] | ||
|[[ | |[[Warp Door|Door]] | ||
|align=left| | |align=left|TBW | ||
|- | |- | ||
!colspan=3 style="background:#FF7733"|Platforms | |||
|- | |- | ||
|style="background:white"|[[File: | |style="background:white"|[[File:NSMB Asset Sprite Barrel.png]] | ||
|[[ | |[[Barrel]] | ||
|align=left| | |align=left|TBW | ||
|- | |||
|style="background:white"|[[File:NSMB conveyor belt.png]] | |||
|[[Conveyor Belt]] | |||
|align=left|Quickly moves anything on them. | |||
|- | |||
|style="background:white"|[[File:NSMB Asset Sprite Drawbridge.png|100x100px]] | |||
|[[Drawbridge]]<ref>p. 58</ref> | |||
|align=left|Two yellow platforms that opens and closes. | |||
|- | |||
|style="background:white"|[[File:NSMB Asset Sprite Flatbed Ferry.png|100x100px]] | |||
|[[Lift|Flatbed Ferry]] | |||
|align=left|TBW | |||
|- | |||
|style="background:white"|[[File:NSMB Asset Sprite Floating Platform.png|100x100px]] | |||
|[[Floating platform]]<ref>p. 93</ref> | |||
|align=left|TBW | |||
|- | |||
|style="background:white"|[[File:NsmbFloor.png]] | |||
|[[Floor (Mario Bros.)]] | |||
|align=left|TBW | |||
|- | |||
|style="background:white"|[[File:NSMB Screenshot Gelatin.png]] | |||
|[[Jelly|Gelatin]] | |||
|align=left|Encapsulates terrain and coins. Can be ground-pounded. | |||
|- | |||
|style="background:white"|[[File:NSMB Asset Sprite Green Platform.png]] | |||
|[[Green platform]]<ref>p. 60</ref> | |||
|align=left|TBW | |||
|- | |||
|style="background:white"|[[File:NSMB Asset Sprite Hanging Platform.png|100x100px]] | |||
|[[Hanging platform]] | |||
|align=left|TBW | |||
|- | |||
|style="background:white"|[[File:NSMB Asset Sprite Ghost Lift.png|100x100px]] | |||
|[[Haunted Lift]] | |||
|align=left|TBW | |||
|- | |- | ||
|style="background:white"|[[File: | |style="background:white"|[[File:NSMB Asset Sprite Ghost Staircase.png|100x100px]] | ||
|[[ | |[[Haunted Stairs]] | ||
|align=left| | |align=left|TBW | ||
|- | |- | ||
|style="background:white"|[[File: | |style="background:white"|[[File:NSMB Asset Sprite Turn Lift.png]] | ||
|[[ | |[[Hinged device]]<ref>p. 56</ref> | ||
|align=left| | |align=left|A striped platform that flips the player to the other side of a wall when stepped on. | ||
|- | |- | ||
|style="background:white"|[[File:NSMBPlatform.png]] | |||
|[[Lift]] | |||
|align=left|Floating, moving platforms. '''(inc. Flatbed Ferry)''' | |||
|- | |- | ||
|style="background:white"|[[File: | |style="background:white"|[[File:NSMB Asset Sprite Log.png]] | ||
|[[ | |Log | ||
|align=left|A | |align=left|TBW | ||
|- | |||
|style="background:white"|[[File:NSMB Asset Sprite Moving Mushroom.png]] | |||
|[[Moving Mushroom]] | |||
|align=left|TBW | |||
|- | |||
|style="background:white"|[[File:NSMB Red Thin Mushroom Platform.png]] | |||
|[[Mushroom Platform]] | |||
|align=left|TBW | |||
|- | |||
|style="background:white"|[[File:NSMB Asset Sprite Mushroom Trampoline.png]] | |||
|[[Mushroom Trampoline]] | |||
|align=left|TBW | |||
|- | |||
|style="background:white"|[[File:NsmbPaddlePlatform.png]] | |||
|[[Paddle Platform|Paddle wheel]] | |||
|align=left|A paddle wheel-like device made of four small Lifts that move in a wheel on tracks. | |||
|- | |||
|style="background:white"|[[File:NSMB Asset Sprite Big Paddle Platform.png|100x100px]] | |||
|Paddle wheel (big) | |||
|align=left|TBW | |||
|- | |||
|style="background:white"|[[File:NSMB Asset Sprite Rolling Log.png|100x100px]] | |||
|[[Rolling log]] | |||
|align=left|TBW | |||
|- | |||
|style="background:white"|[[File:NsmbRotatingPlatform.png]] | |||
|[[Rotating platform]]<ref name=loue35>p. 35</ref> | |||
|align=left|Platforms that rotate in a 90 degree axis. It comes in three different shapes: a triangle, a square, and a rectangle. | |||
|- | |||
|style="background:white"|[[File:NSMB W2-Castle.png|100x100px]] | |||
|[[Sand Dune]] | |||
|align=left|TBW | |||
|- | |||
|style="background:white"|[[File:NSMB Asset Sprite Scale Lift.png|100x100px]] | |||
|[[Scale Lift]] | |||
|align=left|TBW | |||
|- | |||
|style="background:white"|[[File:NsmbSeesaw.png|100x100px]] | |||
|[[Seesaw]] | |||
|align=left|A long platform that tilts left or right depending on where the player walks. | |||
|- | |||
|style="background:white"|[[File:NSMB Asset Sprite Seesaw Shroom.png]] | |||
|[[Seesaw Shroom]] | |||
|align=left|TBW | |||
|- | |||
|style="background:white"|[[File:Red Updown Mushroom sprite NSMB.png|50x50px]][[File:Yellow Updown Mushroom sprite NSMB.png|50x50px]] | |||
|[[Sinking and Rising Mushrooms]] | |||
|align=left|Mushroom Platforms that act as elevators. | |||
|- | |||
|style="background:white"|[[File:NSMB Asset Sprite Stretch Shroom.png]] | |||
|[[Stretch Shroom]] | |||
|align=left|TBW | |||
|- | |||
|style="background:white"|[[File:NSMB Asset Sprite Swing.png|100x100px]] | |||
|[[Swing]] | |||
|align=left|TBW | |||
|- | |||
|style="background:white"|[[File:NSMB Asset Sprite Unstable Mushroom.png|100x100px]] | |||
|[[Unstable mushroom]] | |||
|align=left|TBW | |||
|- | |||
|style="background:white"|[[File:NSMBDS WallJumpPlatform.png|100x100px]] | |||
|[[Bell-shaped contraption]]<ref name=loue35/> | |||
|align=left|Golden blocks in the shape of an "n" that activate once the player wall jumps. | |||
|- | |||
|style="background:white"|[[File:NSMB Jelly.png]] | |||
|[[Rippling Floor]] | |||
|align=left|Ground that moves in waves. | |||
|- | |||
|style="background:white"|[[File:NSMB Asset Sprite Wobble Rock.png]] | |||
|[[Wobble Rock]] | |||
|align=left|TBW | |||
|- | |||
!colspan=3 style="background:#FF7733"|Other objects | |||
|- | |||
|style="background:white"|[[File:NSMBDS Bumper Sprite.png]] | |||
|[[Bumper (Super Mario series)|Bumper]] | |||
|align=left|Giant bubbles that bounce the player away. | |||
|- | |||
|style="background:white"|[[File:NsmbFlipper.png]] | |||
|[[Flipper]] | |||
|align=left|Wooden gates with red arrows, indicating which way they open to. | |||
|- | |||
|style="background:white"|[[File:NSMB Flagpole.png|100x100px]] | |||
|[[Goal Pole]] | |||
|align=left|A flag post bearing a black flag with a white skull emblem. Must be touched by the player to complete the level. Only appears in levels with no bosses. | |||
|- | |||
|style="background:white"|[[File:NsmbGoalPoleSecret.png|100x100px]] | |||
|[[Goal Pole (secret)]] | |||
|align=left|Similar to Goal Poles, but are well hidden, and act as secret exits for some levels. Instead of bearing black flags, secret Goal Poles' flags are red. | |||
|- | |||
|style="background:white"|[[File:Midway Point.PNG]] | |||
|[[Checkpoint Flag|Midway point]] | |||
|align=left|Marks each stage's checkpoint. | |||
|- | |||
|style="background:white"|[[File:NSMB Phantom Hand Screenshot.png]] | |||
|[[Phantom Hand]] | |||
|align=left|Harmless, floating hands that point to secrets. | |||
|- | |||
|style="background:white"|[[File:No image.png|25x25px]] | |||
|[[Tornado]] | |||
|align=left|TBW | |||
|} | |||
==NSMBW== | |||
===Playable characters from NSMBW=== | |||
{|class="wikitable" style="width:100%;text-align:center" | |||
|-style="color:white;background:red" | |||
!width=12%|Name | |||
!Description | |||
|- | |||
|style="background:white"|[[File:NSMBW Mario Jumping Artwork.png|100x100px]]<br>[[Mario]] | |||
|align=left|Mario returns from his appearance in ''[[New Super Mario Bros.]]'' as the game's main protagonist, with his goal being to save [[Princess Peach]] from [[Bowser]]'s clutches. He is the default playable character, and is the only playable character in story mode. | |||
|- | |||
|style="background:white"|[[File:NSMBW Luigi Jumping Artwork.png|100x100px]]<br>[[Luigi]] | |||
|align=left|Luigi, Mario's brother, also returns from his appearance in ''New Super Mario Bros.'' as a playable character in this game, however, he can played only in multiplayer and [[Super Guide]]. | |||
|- | |||
|style="background:white"|[[File:NSMBW Yellow Toad Artwork.png|100x100px]] [[File:NSMBW Blue Toad Main Artwork.png|100x100px]]<br>[[Yellow Toad and Blue Toad]] | |||
|align=left|[[Toad (species)|Toad]]s make their second playable role in the [[Super Mario (series)|''Super Mario'' series]] (the first being [[Toad]] in ''[[Super Mario Bros. 2]]'') as two separate playable characters in this game, Yellow Toad and Blue Toad, who are exclusive to multiplayer. | |||
|} | |||
===Yoshis from NSMBW=== | |||
{|class="wikitable" style="width:100%;text-align:center" | |||
|-style="color:white;background:#FF2400" | |||
!width=5% colspan=2|Name | |||
!rowspan=3|Description | |||
|-style="color:white;background:red" | |||
!width=12%|{{Chart icon|NSMBW-Mario}} | |||
!width=12%|{{Chart icon|NSMBW-Luigi}} | |||
|-style="color:white;background:red" | |||
!width=12%|{{Chart icon|NSMBW-ToadY}} | |||
!width=12%|{{Chart icon|NSMBW-ToadB}} | |||
|- | |- | ||
|style="background:white"|[[File: | |style="background:white"|[[File:NSMBW Mario and Yoshi Jumping Artwork.png|100x100px]]<br>[[Yoshi]] | ||
|[[ | |style="background:white"|[[File:Luigi and Yellow Yoshi NSMBWii artwork.png|100x100px]]<br>[[Yoshi (species)|Yellow Yoshi]] | ||
|align=left| | |align=left rowspan=2|It is possible to ride on [[Yoshi (species)|Yoshi]] as well. In addition to his usual ability to consume most enemies, he can retain many different objects in the game in his mouth, including [[hammer]]s, fireballs, ice balls, shells, Toads, power-ups, and other players. Yoshi can also use his [[Flutter Jump]], a move first introduced in ''[[Super Mario World 2: Yoshi's Island]]''. Similar to in ''[[Super Mario World]]'', Yoshi can eat five [[apple]]s in a course to produce an [[Yoshi's Egg|egg]] with a power-up or 1-Up. Yoshi cannot be harmed by sharp objects and enemies such as [[Spiny|Spinies]] and [[Piranha Plant]]s as long as he lands on them. Yoshi(s) brought to the end of the course must be abandoned, and therefore there are only certain levels in which players can ride Yoshis. | ||
A species of [[dinosaur]]-like creatures that make their return to the [[Super Mario (series)|''Super Mario'' series]] in this game, and allow Mario and company to ride on them in a couple of [[level]]s. They can eat most things such as enemies and [[Fruit (Yoshi food)|fruit]]s, and can [[Flutter Jump]]. Green Yoshi is the default Yoshi color in single player, while Yellow, Light Blue, and Pink Yoshi are exclusive to multiplayer. | |||
|- | |- | ||
|style="background:white"|[[File: | |style="background:white"|[[File:YellowToadLightBlueYoshi.jpg|100x100px]]<br>[[Yoshi (species)|Light Blue Yoshi]] | ||
|[[ | |style="background:white"|[[File:NSMBW Blue Toad and Pink Yoshi Artwork.png|100x100px]]<br>[[Yoshi (species)|Pink Yoshi]] | ||
|align= | |} | ||
===Non-playable characters from NSMBW=== | |||
{|class="wikitable" style="width:100%;text-align:center" | |||
|-style="color:white;background:red" | |||
!width=12%|Name | |||
!Description | |||
!width=15%|Locations | |||
|- | |- | ||
|style="background:white"|[[File:NSMBW Peach Artwork.png|100x100px]]<br>[[Princess Peach]] | |||
|align=left|Princess Peach retains her role from ''New Super Mario Bros.'' as being the damsel in distress. She was celebrating her birthday when Bowser Jr. and the Koopalings suddenly emerge from a birthday cake and kidnap her, forcing Mario and company to rescue her. | |||
|TBD | |||
|- | |- | ||
|style="background:white"|[[File: | |style="background:white"|[[File:NSMBW Toad Artwork.png|100x100px]]<br>[[Toad (species)|Toads]] | ||
|align=left|Allies that replace [[Toadsworth]] in this game and help the main protagonists throughout the story mode by hosting [[minigame]]s in [[Toad House]]s for players to collect [[extra life|extra live]]s and [[power-up]]s. They can also be rescued in levels and [[Enemy Course]]s for the same rewards. | |||
|align=left| | |TBD | ||
|- | |- | ||
|style="background:white"|[[File: | |style="background:white"|[[File:NSMBW Asset Model Jumbo Ray.png|100x100px]]<br>[[Jumbo Ray]] | ||
|align=left|Harmless, large green variants of [[manta]]s that [[fly]] through the air in large arcs, allowing players to stand on them as long as they remain on-screen. | |||
|align=left| | |TBD | ||
|} | |} | ||
== | ===Enemies from NSMBW=== | ||
=== | The enemies listed in this table match those in the ''[[Super Mario Bros. Encyclopedia]]''<ref>{{cite|author=Sakai, Kazuya (Ambit), kikai, Akinori Sao, Junko Fukuda, Kunio Takayama, and Ko Nakahara (Shogakukan), editors|title="New Super Mario Bros. Wii" in『[[Super Mario Bros. Encyclopedia|スーパーマリオブラザーズ百科: 任天堂公式ガイドブック]]』|language=ja|location=Tokyo|publisher=[[Shogakukan]]|date=2015|page=144–46|isbn=4-091065-69-4}}</ref> and Mario Portal Game Archive.<ref>{{cite|author=[[Nintendo|Nintendo Co., Ltd.]]|title=New Super Mario Bros. Wii|url=nintendo.com/jp/character/mario/en/history/new_smb_wii/index.html|publisher=Mario Portal Game Archive|date=2023|accessdate=14 Aug. 2024}}</ref> The default order they are listed derives from their occurrence in-game with adjustments to ensure enemies are listed next to their immediate relatives. The Mega Deep-Cheep is lumped with its smaller counterpart in both sources, but it is recognized as distinct in the original ''New Super Mario Bros.'' and this is followed suit here. | ||
The displayed English names appear in the [[Prima Games]] guidebook,<ref>{{cite|author=Bueno, Fernando|title=''New Super Mario Bros. Wii: PRIMA Official Game Guide''|location=Roseville|publisher=[[Prima Games]]|date=2009|isbn=978-0-3074-6767-6}}</ref> the [[List of New Super Mario Bros. Wii trading cards|EnterPlay trading cards]], and officially-licensed sources published before ''New Super Mario Bros. Wii''. Several localization choices made are deviated from here: Fishbones are referred to as "Wet Bones" in the guidebook, Sledge Bros are erroneously referred to as "[[Sumo Bro]]s," and all large-bodied Bullet Bills are referred to as "King Bills." Mechakoopas are referred to as "Windup Koopas" in the guidebook but are recognized under their original name on their trading card and this is followed in paratexts for succeeding games. Several enemies wholly new to the franchise did not have names published at the time of the game's release and are incorporated here in retrospect. These are Hefty Goomba, Scaredy Rat, Bull's-Eye Banzai, and Big Fuzzy. | |||
{|class="wikitable sortable" style="width:100%;text-align:center" | {|class="wikitable sortable" style="width:100%;text-align:center" | ||
|-style="color:white;background: | |-style="color:white;background:red" | ||
! | !rowspan=2 width=10%|Name | ||
!class="unsortable" rowspan=2|Description | !class="unsortable" rowspan=2|Description | ||
!class="unsortable" colspan=2| | !class="unsortable" colspan=2 |Levels | ||
!rowspan=2| | !rowspan=2|Pts. | ||
!rowspan=2|New | !rowspan=2|New | ||
|-style="color:white;background:#FF2400" | |-style="color:white;background:#FF2400" | ||
| Line 538: | Line 1,221: | ||
!width=8%|Last | !width=8%|Last | ||
|- | |- | ||
|style="background:white"|[[File: | |style="background:white"|[[File:NSMBW Goomba Artwork.png|100x100px]]<br>[[Goomba]] | ||
|align=left|Common enemies that walk in a single direction, turning when they encounter an obstacle. They can be defeated with a single stomp. | |||
|align=left| | |[[World 1-1 (New Super Mario Bros. Wii)|World 1-1]] | ||
|[[World 1-1 (Super Mario Bros. | |[[World 9-8 (New Super Mario Bros. Wii)|World 9-8]] | ||
|[[World 7- | |200 | ||
| | |— | ||
|- | |||
|style="background:white"|[[File:MSSParagomba.PNG|100x100px]]<br>[[Paragoomba]] | |||
|align=left|Winged Goombas that hop as they walk and are capable of turning around to pursue the player. They turn into regular Goombas when stomped. | |||
|[[World 7-5 (New Super Mario Bros. Wii)|World 7-5]] | |||
|[[World 8-2 (New Super Mario Bros. Wii)|World 8-2]] | |||
|200 | |||
|— | |— | ||
|- | |- | ||
|style="background:white"|[[File: | |style="background:white"|[[File:NSMBW Asset Model Hefty Goomba.png|100x100px]]<br>[[Hefty Goomba]] | ||
|align=left|A large, slow-moving Goomba that is the middling size of a Goomba, being smaller than a Giant Goomba but bigger than a regular Goomba. This enemy splits into two Goombas when jumped on. | |||
|align=left| | |{{world|1|balloon}} | ||
| | |[[World 8-2 (New Super Mario Bros. Wii)|World 8-2]] | ||
|[[World 8-2 (Super Mario Bros. | |200 | ||
| | |||
|{{chart icon|new}} | |{{chart icon|new}} | ||
|- | |- | ||
|style="background:white"|[[File: | |style="background:white"|[[File:NSMBW Giant Goomba Render.png|100x100px]]<br>[[Big Goomba|Giant Goomba]] | ||
| | |align=left|Large, slow-moving Goombas that split into two Hefty Goombas once stomped on. | ||
|align=left| | |colspan=2|{{world|1|balloon}} | ||
| | |200 | ||
| | |— | ||
| | |||
| | |||
|- | |- | ||
|style="background:white"|[[File: | |style="background:white"|[[File:NSMBW Asset Model Mini Goomba.png|100x100px]]<br>[[Mini Goomba]] | ||
|align=left|Small Goombas that attach themselves to the player, weighing them down until they either perform a [[Spin Jump]] or walk for a few seconds. They hop about erratically and can turn to pursue the player. | |||
|align=left| | |[[World 5-4 (New Super Mario Bros. Wii)|World 5-4]] | ||
|[[World | |[[World 7-5 (New Super Mario Bros. Wii)|World 7-5]] | ||
|[[World | |200 | ||
| | |— | ||
| | |||
|- | |- | ||
|style="background:white"|[[File: | |style="background:white"|[[File:Pricklygoomba.png|100x100px]]<br>[[Prickly Goomba]] | ||
|align=left|A Goomba that hides inside a spiked chestnut shell until it is hit with a [[fireball]], upon which it jumps out and turns into a regular Goomba. | |||
|align=left| | |colspan=2|[[World 9-7 (New Super Mario Bros. Wii)|World 9-7]] | ||
| | |200 | ||
|[[World | |||
| | |||
|{{chart icon|new}} | |{{chart icon|new}} | ||
|- | |- | ||
|style="background:white"|[[File: | |style="background:white"|[[File:NSMB Green Koopa Troopa Artwork.png|100x100px]]<br>[[Koopa Troopa]] (Green) | ||
|align=left|Turtle enemies that that walk in a single direction, turning when they encounter an obstacle. They temporarily retreat into their shells when stomped, which can then be kicked, picked up, or thrown. Green Koopa Troopas walk off ledges. | |||
|align=left| | |[[World 1-1 (New Super Mario Bros. Wii)|World 1-1]] | ||
|[[World | |[[World 9-5 (New Super Mario Bros. Wii)|World 9-5]] | ||
|[[World | |200 | ||
| | |— | ||
| | |||
|- | |- | ||
|style="background:white"|[[File: | |style="background:white"|[[File:NSMBW Asset Model Koopa Troopa (Red) 1.png|100x100px]]<br>Koopa Troopa (Red) | ||
| | |align=left|Red Koopa Troopas turn around. | ||
|align=left| | |[[World 1-1 (New Super Mario Bros. Wii)|World 1-1]] | ||
|[[World 9-5 (New Super Mario Bros. Wii)|World 9-5]] | |||
| | |200 | ||
| | |— | ||
|- | |- | ||
|style="background:white"|[[File: | |style="background:white"|[[File:NSMBW Asset Model Koopa Paratroopa (Green).png|100x100px]]<br>[[Koopa Paratroopa]] (Green) | ||
|align=left|Winged Koopa Troopas that either jump forward in high arcs or fly up and down or side to side in the air. They turn into regular Koopa Troopas when stomped. | |||
|align=left|Koopa Troopas | |[[World 1-4 (New Super Mario Bros. Wii)|World 1-4]] | ||
|[[World 1- | |[[World 9-3 (New Super Mario Bros. Wii)|World 9-3]] | ||
|[[World | |200 | ||
| | |||
|— | |— | ||
|- | |- | ||
|style="background:white"|[[File: | |style="background:white"|[[File:Paratroopa NSMB artwork.png|100x100px]]<br>Koopa Paratroopa (Red) | ||
|align=left|TBW | |align=left|TBW | ||
|[[World 1-1 (Super Mario Bros. | |[[World 1-4 (New Super Mario Bros. Wii)|World 1-4]] | ||
|[[World | |[[World 9-2 (New Super Mario Bros. Wii)|World 9-2]] | ||
| | |200 | ||
|— | |||
|- | |||
|style="background:white"|[[File:NSMBW Asset Model Climbing Koopa.png|100x100px]]<br>[[Climbing Koopa]] | |||
|align=left|Koopa Troopas that move either horizontally or vertically along [[Chain-Link|fences]], climbing to the other side once they reach an edge. They can be defeated by punching them from the opposite side of the fence they are climbing. | |||
|colspan=2|{{world-link|4|castle|World 4-Castle (New Super Mario Bros. Wii)}} | |||
|200 | |||
|— | |||
|- | |||
|style="background:white"|[[File:MP8 DryBones.png|100x100px]]<br>[[Dry Bones]] | |||
|align=left|Skeletal Koopa Troopas that briefly collapse when attacked before reassembling themselves. They turn at ledges, like Red Koopa Troopas. | |||
|{{world-link|1|tower|World 1-Tower (New Super Mario Bros. Wii)}} | |||
|{{world-link|8|bowser|World 8-Bowser's Castle (New Super Mario Bros. Wii)}} | |||
|200 | |||
|— | |— | ||
|- | |- | ||
|style="background:white"|[[File: | |style="background:white"|[[File:NSMBW Dry Bones Model.png|100x100px]]<br>[[Big Dry Bones]] | ||
|align=left|Large variants of Dry Bones that are momentarily stunned when jumped on. They can be forced to collapse with a Ground Pound. | |||
|align=left| | |{{world-link|6|castle|World 6-Castle (New Super Mario Bros. Wii)}} | ||
| | |{{world-link|7|castle|World 7-Castle (New Super Mario Bros. Wii)}} | ||
| | |200 | ||
| | |||
|— | |— | ||
|- | |- | ||
|style="background:white"|[[File: | |style="background:white"|[[File:MP8 Hammer Bro Artwork.png|100x100px]]<br>[[Hammer Bro]] | ||
|align=left|Enemies that throw hammers in arcs at the player and periodically jump between platforms. | |||
|align=left| | |colspan=2|[[World 1-3 (New Super Mario Bros. Wii)|World 1-3]] | ||
|[[World 1- | |1000 | ||
| | |||
|— | |— | ||
|- | |- | ||
|style="background:white"|[[File: | |style="background:white"|[[File:NSMBW Asset Model Boomerang Bro.png|100x100px]]<br>[[Boomerang Bro]] | ||
|[[ | |align=left|Hammer Bro relatives that use damaging boomerangs, which return to them after being thrown. | ||
|align=left| | |colspan=2|[[World 2-1 (New Super Mario Bros. Wii)|World 2-1]] | ||
|[[World | |1000 | ||
|[[World | |— | ||
| | |- | ||
|style="background:white"|[[File:NSMBW Asset Model Fire Bro.png|100x100px]]<br>[[Fire Bro]] | |||
|align=left|Hammer Bro relatives that throw fireballs which bounce along the ground. | |||
|[[World 2-3 (New Super Mario Bros. Wii)|World 2-3]] | |||
|[[World 9-7 (New Super Mario Bros. Wii)|World 9-7]] | |||
|1000 | |||
|— | |||
|- | |||
|style="background:white"|[[File:NSMBW Asset Model Ice Bro.png|100x100px]]<br>[[Ice Bro]] | |||
|align=left|Hammer Bro relatives that throws [[Ice Ball|ice ball]]s at the ground, which can freeze the player and even other enemies. | |||
|[[World 3-2 (New Super Mario Bros. Wii)|World 3-2]] | |||
|{{world|3|balloon}} | |||
|1000 | |||
|{{chart icon|new}} | |{{chart icon|new}} | ||
|- | |- | ||
|style="background:white"|[[File: | |style="background:white"|[[File:SledgebrosNSMBW.png|100x100px]]<br>[[Sledge Bro]] | ||
| | |align=left|Hammer Bro relatives that throw large hammers in arcs. They can also stun the player by generating earthquakes when they jump. | ||
|[[World 6-2 (New Super Mario Bros. Wii)|World 6-2]] | |||
|{{world-link|7|castle|World 7-Castle (New Super Mario Bros. Wii)}} | |||
|200 | |||
|— | |||
|- | |||
|style="background:white"|[[File:NSMBW Lakitu Artwork.jpg|100x100px]]<br>[[Lakitu]] | |||
|align=left|Cloud-riding enemies that throw Spiny Eggs at the player, stopping when there are four Spinies on-screen at once. If a player defeats a Lakitu, they can ride on its cloud until it disappears. Lakitus contained within [[square cloud]]s throw coins for a short period of time before moving off screen. | |||
|[[World 2-5 (New Super Mario Bros. Wii)|World 2-5]] | |||
|{{world|7|balloon}} | |||
|1000 | |||
|— | |||
|- | |||
|style="background:white"|[[File:Spiny Egg NSMBW.png|100x100px]]<br>[[Spiny Egg]] | |||
|align=left|TBW | |align=left|TBW | ||
|[[World | |[[World 2-5 (New Super Mario Bros. Wii)|World 2-5]] | ||
|[[World | |{{world|7|balloon}} | ||
| | |200 | ||
|— | |||
|- | |||
|style="background:white"|[[File:NSMBW Spiny Artwork.png|100x100px]]<br>[[Spiny]] | |||
|align=left|Turtles with spiny shells that prevent the player from jumping on them. Some hatch from Spiny Eggs thrown by Lakitus. Like Buzzy Beetles, some are also found walking on ceilings and can drop down to attack the player when approached. These upside-down individuals can be stomped and used like other shells. | |||
|[[World 2-2 (New Super Mario Bros. Wii)|World 2-2]] | |||
|{{world-link|8|tower|World 8-Tower (New Super Mario Bros. Wii)}} | |||
|200 | |||
|— | |||
|- | |||
|style="background:white"|[[File:Spike Top.png|100x100px]]<br>[[Spike Top]] | |||
|align=left|Buzzy Beetle variants that have spikes on their shells, preventing them from being jumped on. They can slowly climb around blocks and rock formations. | |||
|colspan=2|[[World 2-3 (New Super Mario Bros. Wii)|World 2-3]] | |||
|200 | |||
|— | |||
|- | |||
|style="background:white"|[[File:NSMBDS Buzzy Beetle Artwork.png|100x100px]]<br>[[Buzzy Beetle]] | |||
|align=left|Shelled enemies that can be kicked, picked up, or thrown after being jumped on, and are impervious to fireballs. Some walk on ceilings and drop down to attack the player when approached. | |||
|[[World 6-3 (New Super Mario Bros. Wii)|World 6-3]] | |||
|{{world-link|8|tower|World 8-Tower (New Super Mario Bros. Wii)}} | |||
|200 | |||
|— | |||
|- | |||
|style="background:white"|[[File:NSMBW Asset Model Para-Beetle.png|100x100px]]<br>[[Para-Beetle]] | |||
|align=left|A winged Buzzy Beetle that ascends when used as a platform and descends back to its original position when not ridden. They appear flying at various speeds. Jumping on eight Heavy Para-Beetles or Para-Beetles consecutively without touching the ground will cause a 1-Up Mushroom to fall from the sky. | |||
|colspan=2|[[World 7-6 (New Super Mario Bros. Wii)|World 7-6]] | |||
|{{chart icon|cross}} | |||
|— | |||
|- | |||
|style="background:white"|[[File:NSMBW Asset Model Heavy Para-Beetle.png|100x100px]]<br>[[Heavy Para-Beetle]] | |||
|align=left|A Para-Beetle that descends when used as a platform and ascends back to its original position when not ridden. Jumping on eight Heavy Para-Beetles or Para-Beetles consecutively without touching the ground will cause a 1-Up Mushroom to fall from the sky. | |||
|colspan=2|[[World 7-6 (New Super Mario Bros. Wii)|World 7-6]] | |||
|{{chart icon|cross}} | |||
|{{chart icon|new}} | |{{chart icon|new}} | ||
|- | |- | ||
|style="background:white"|[[File: | |style="background:white"|[[File:Spike NSMBW Artwork.png|100x100px]]<br>[[Spike]] | ||
|[[ | |align=left|Stationary green turtles that periodically pull spiked balls out of their mouths to throw at the player, which roll downwards from the ledges upon which they stand. | ||
|align=left| | |colspan=2|[[World 2-2 (New Super Mario Bros. Wii)|World 2-2]] | ||
|[[World | |200 | ||
|[[World 4 | |— | ||
| | |- | ||
|style="background:white"|[[File:NSMBWStone Spike.png|100x100px]]<br>[[Stone Spike]] | |||
|align=left|A stationary Spike that throws stone rocks downwards periodically. | |||
|[[World 6-1 (New Super Mario Bros. Wii)|World 6-1]] | |||
|[[World 8-4 (New Super Mario Bros. Wii)|World 8-4]] | |||
|200 | |||
|{{chart icon|new}} | |{{chart icon|new}} | ||
|- | |- | ||
|style="background:white"|[[File: | |style="background:white"|[[File:NSMBW Piranha Plant Artwork.png|100x100px]]<br>[[Piranha Plant]] | ||
|align=left|Plants that either move in and out of Warp Pipes or lunge at the player from the ground. Warp-Pipe-dwelling Piranha Plant do not emerge if the player is nearby. | |||
|align=left| | |[[World 1-2 (New Super Mario Bros. Wii)|World 1-2]] | ||
|[[World 1- | |[[World 9-7 (New Super Mario Bros. Wii)|World 9-7]] | ||
|[[World | |200 | ||
| | |— | ||
|- | |||
|style="background:white"|[[File:NSMBW Asset Model Piranha Plant.png|100x100px]]<br>[[Big Piranha Plant|Super Piranha Plant]] | |||
|align=left|Large variants of Piranha Plant that lunge at the player from the ground. | |||
|[[World 2-5 (New Super Mario Bros. Wii)|World 2-5]] | |||
|[[World 6-3 (New Super Mario Bros. Wii)|World 6-3]] | |||
|200 | |||
|— | |||
|- | |||
|style="background:white"|[[File:NSMBW Asset Model Fire Piranha Plant.png|100x100px]]<br>[[Fire Piranha Plant|Venus Fire Trap]] | |||
|align=left|Piranha Plants that aim at the player and shoot a single fireball. Some move in and out of Warp Pipes like normal Piranha Plants and hide when the player is nearby while others are grounded. A single Warp-Pipe-dwelling Venus Fire Trap in [[World 9-7 (New Super Mario Bros. Wii)|World 9-7]] has the ability to shoot three fireballs in a row. | |||
|[[World 1-3 (New Super Mario Bros. Wii)|World 1-3]] | |||
|[[World 9-7 (New Super Mario Bros. Wii)|World 9-7]] | |||
|200 | |||
|— | |||
|- | |||
|style="background:white"|[[File:NSMBW Asset Model Fire Piranha Plant 2.png|100x100px]]<br>[[Big Fire Piranha|Piranha Flower]] | |||
|align=left|Large Venus Fire Traps that shoot big fireballs. | |||
|colspan=2|[[World 2-3 (New Super Mario Bros. Wii)|World 2-3]] | |||
|200 | |||
|— | |— | ||
|- | |- | ||
|style="background:white"|[[File: | |style="background:white"|[[File:StalkingPPlantNSMBW.png|100x100px]]<br>[[Stalking Piranha Plant]] | ||
|align=left|A Piranha Plant that paces back and forth and stretches its neck upward periodically. | |||
|align=left| | |[[World 5-1 (New Super Mario Bros. Wii)|World 5-1]] | ||
|[[World | |[[World 6-3 (New Super Mario Bros. Wii)|World 6-3]] | ||
|[[World | |200 | ||
| | |||
|{{chart icon|new}} | |{{chart icon|new}} | ||
|- | |- | ||
|style="background:white"|[[File: | |style="background:white"|[[File:NSMBW Asset Model River Piranha Plant.png|100x100px]]<br>[[River Piranha Plant]] | ||
|align=left|A stationary, aquatic Piranha Plant that blows a green spiked seed up and down. They cannot regenerate their spiked ball if it is destroyed. | |||
|align=left| | |colspan=2|[[World 5-1 (New Super Mario Bros. Wii)|World 5-1]] | ||
|[[World | |200 | ||
| | |||
|{{chart icon|new}} | |{{chart icon|new}} | ||
|- | |- | ||
|style="background:white"|[[File: | |style="background:white"|[[File:NSMBW Muncher Model.png|100x100px]]<br>[[Muncher]] | ||
| | |align=left|An invincible black plant that is exclusively found frozen within ice blocks. They can be thawed by fireballs, including those of other enemies. | ||
|align=left| | |colspan=2|[[World 9-7 (New Super Mario Bros. Wii)|World 9-7]] | ||
|colspan=2|[[World 4- | |{{chart icon|cross}} | ||
| | |— | ||
|- | |||
|style="background:white"|[[File:NSMBDS Cheep Cheep Artwork.png|100x100px]]<br>[[Cheep Cheep]] | |||
|align=left|Slow-moving fish that are either found swimming endlessly forward or back and forth. In [[World 4-2 (New Super Mario Bros. Wii)|World 4-2]], they constantly jump from the water to attack player, leaving them vulnerable to being stomped. | |||
|[[World 1-4 (New Super Mario Bros. Wii)|World 1-4]] | |||
|[[World 8-4 (New Super Mario Bros. Wii)|World 8-4]] | |||
|200 | |||
|— | |||
|- | |||
|style="background:white"|[[File:NSMBW Asset Model Big Cheep Cheep.png|100x100px]]<br>[[Big Cheep Cheep|Mega Cheep-Cheep]] | |||
|align=left|Big Cheep Cheeps that are either found swimming endlessly forward or back and forth, like their smaller counterparts. | |||
|[[World 1-4 (New Super Mario Bros. Wii)|World 1-4]] | |||
|[[World 6-6 (New Super Mario Bros. Wii)|World 6-6]] | |||
|200 | |||
|— | |||
|- | |||
|style="background:white"|[[File:NSMBW Asset Model Deep Cheep.png|100x100px]]<br>[[Deep Cheep|Deep-Cheep]] | |||
|align=left|Fish that endlessly swim forward in a sine-wave-like pattern. They briefly give chase when approached, though stop once they move past the player. | |||
|[[World 1-4 (New Super Mario Bros. Wii)|World 1-4]] | |||
|[[World 8-4 (New Super Mario Bros. Wii)|World 8-4]] | |||
|200 | |||
|— | |||
|- | |||
|style="background:white"|[[File:NSMBW Asset Model Big Deep Cheep.png|100x100px]]<br>[[Big Deep Cheep|Mega Deep-Cheep]] | |||
|align=left|Big Deep-Cheeps that retain the chasing behavior of their smaller counterparts. | |||
|colspan=2|[[World 1-4 (New Super Mario Bros. Wii)|World 1-4]] | |||
|200 | |||
|— | |||
|- | |||
|style="background:white"|[[File:NSMBW Asset Model Eep Cheep.png|100x100px]]<br>[[Eep Cheep]] | |||
|align=left|A Cheep Cheep that swims endlessly forward in a school with other Eep Cheeps and swims out of the way of approaching players. | |||
|colspan=2|[[World 1-4 (New Super Mario Bros. Wii)|World 1-4]] | |||
|200 | |||
|{{chart icon|new}} | |{{chart icon|new}} | ||
|- | |- | ||
|style="background:white"|[[File: | |style="background:white"|[[File:NSMBW Asset Model Spiny Cheep Cheep.png|100x100px]]<br>[[Spiny Cheep Cheep]] | ||
|[[ | |align=left|Fish that are normally found swimming back and forth, but speed up to chase the player when approached. They can only be frozen temporarily, after which they will gain an angry expression. | ||
|align=left| | |[[World 1-4 (New Super Mario Bros. Wii)|World 1-4]] | ||
|[[World | |[[World 8-4 (New Super Mario Bros. Wii)|World 8-4]] | ||
|[[World | |200 | ||
| | |— | ||
|- | |||
|style="background:white"|[[File:NSMBW Asset Model Cheep Chomp.png|100x100px]]<br>[[Cheep Chomp|Cheep-Chomp]] | |||
|align=left|A large fish that, once approached, begins pursuing the player indefinitely, periodically lunging at the player in an attempt to eat them. When defeated, it drops three 1-Up Mushrooms. | |||
|[[World 4-4 (New Super Mario Bros. Wii)|World 4-4]] | |||
|[[World 9-2 (New Super Mario Bros. Wii)|World 9-2]] | |||
|200 | |||
|— | |||
|- | |||
|style="background:white"|[[File:NSMBW Artwork Porcupuffer.png|100x100px]]<br>[[Porcupuffer]] | |||
|align=left|An aggressive fish that moves along the surface of water bodies, following the player's horizontal position and occasionally leaping from the water to attack. | |||
|{{world|4|balloon}} | |||
|[[World 9-2 (New Super Mario Bros. Wii)|World 9-2]] | |||
|200 | |||
|— | |||
|- | |||
|style="background:white"|[[File:NSMBW Asset Model Fish Bone.png|100x100px]]<br>[[Fish Bone|Wet Bones]] | |||
|align=left|Skeletal fish that swim back and forth, charging towards the player when approached. Their eyes faintly glow in the dark. | |||
|{{world-link|4|castle|World 4-Castle (New Super Mario Bros. Wii)}} | |||
|{{world-link|5|ghost|World 5-Ghost House (New Super Mario Bros. Wii)}} | |||
|200 | |||
|— | |||
|- | |||
|style="background:white"|[[File:NSMBW Clampy Artwork.png|100x100px]]<br>[[Clampy]] | |||
|align=left|Clams that open and close their mouths, which sometimes contain items. If a Clampy closes its mouth on the player, they take damage. If placed above a solid surface, they will sink. | |||
|[[World 1-4 (New Super Mario Bros. Wii)|World 1-4]] | |||
|[[World 4-1 (New Super Mario Bros. Wii)|World 4-1]] | |||
|{{chart icon|cross}} | |||
|— | |||
|- | |||
|style="background:white"|[[File:NSMBW Artwork Urchin.png|100x100px]]<br>[[Urchin]] | |||
|align=left|Aquatic enemies that either float motionlessly or move back and forth in the water. They can only be frozen temporarily, after which they will sink, blocking [[current]]s they fall on top of. | |||
|[[World 1-4 (New Super Mario Bros. Wii)|World 1-4]] | |||
|[[World 4-3 (New Super Mario Bros. Wii)|World 4-3]] | |||
|200 | |||
|— | |||
|- | |||
|style="background:white"|[[File:NSMBW Asset Model Big Urchin.png|100x100px]]<br>[[Big Urchin]] | |||
|align=left|A gigantic [[Urchin]] that either floats motionlessly or moves back and forth in the water. It can be defeated only with a Star. | |||
|[[World 4-1 (New Super Mario Bros. Wii)|World 4-1]] | |||
|[[World 4-3 (New Super Mario Bros. Wii)|World 4-3]] | |||
|200 | |||
|{{chart icon|new}} | |{{chart icon|new}} | ||
|- | |- | ||
|style="background:white"|[[File: | |style="background:white"|[[File:NSMBW Artwork Thwomp.png|100x100px]]<br>[[Thwomp]] | ||
|[[ | |align=left|Large rocks that fall when the player gets close before returning to their original position. | ||
|align=left| | |{{world-link|1|castle|World 1-Castle (New Super Mario Bros. Wii)}} | ||
|World | |{{world-link|8|tower|World 8-Tower (New Super Mario Bros. Wii)}} | ||
|{{world-link|8| | |200 | ||
| | |— | ||
|- | |||
|style="background:white"|[[File:SuperThwomp NSMBW.png|100x100px]]<br>[[Big Thwomp]] | |||
|align=left|Large Thwomps that can break through stone tiles. | |||
|colspan=2|{{world-link|1|castle|World 1-Castle (New Super Mario Bros. Wii)}} | |||
|200 | |||
|— | |||
|- | |||
|style="background:white"|[[File:NSMBW Asset Model Fire Snake.png|100x100px]]<br>[[Fire Snake]] | |||
|align=left|Flames that jump in a high arc, chasing the player across Semisolid Platforms. They temporarily enlarge after every few hops. | |||
|colspan=2|[[World 2-3 (New Super Mario Bros. Wii)|World 2-3]] | |||
|200 | |||
|— | |||
|- | |||
|style="background:white"|[[File:NSMBW Artwork Pokey.png|100x100px]]<br>[[Pokey]] | |||
|align=left|Cactus enemies that slide back and forth at varying speeds, becoming slower the taller they get. They are normally defeated when their head segment is destroyed. | |||
|colspan=2|[[World 2-5 (New Super Mario Bros. Wii)|World 2-5]] | |||
|200 | |||
|— | |||
|- | |||
|style="background:white"|[[File:NSMBW Asset Model Flame Chomp.png|100x100px]]<br>[[Flame Chomp]] | |||
|align=left|Flying black spheres that chase the player. They carry four fireballs in tow, which they periodically spit at the player. Once they run out of fireballs, they begin to glow and pursue the player with increased speed before exploding. | |||
|[[World 2-6 (New Super Mario Bros. Wii)|World 2-6]] | |||
|[[World 9-6 (New Super Mario Bros. Wii)|World 9-6]] | |||
|200 | |||
|— | |||
|- | |||
|style="background:white"|[[File:NSMBW Asset Model Lava Bubble.png|100x100px]]<br>[[Lava Bubble]] | |||
|align=left|Fireballs that jump out of lava at regular intervals. They are vulnerable to Ice Balls, like other fire-based enemies. | |||
|{{world-link|2|castle|World 2-Castle (New Super Mario Bros. Wii)}} | |||
|{{world-link|8|bowser|World 8-Bowser's Castle (New Super Mario Bros. Wii)}} | |||
|200 | |||
|— | |— | ||
|- | |- | ||
|style="background:white"|[[File: | |style="background:white"|[[File:NSMBW Cooligan Model.png|100x100px]]<br>[[Cooligan]] | ||
|align=left|A penguin enemy that slides on ice and snow and slows down when stomped, requiring another stomp to defeat. It continues to slide when frozen, allowing it to be used as a moving platform. | |||
|align=left| | |[[World 3-1 (New Super Mario Bros. Wii)|World 3-1]] | ||
|[[World 1 | |[[World 9-5 (New Super Mario Bros. Wii)|World 9-5]] | ||
| | |200 | ||
| | |||
|{{chart icon|new}} | |{{chart icon|new}} | ||
|- | |- | ||
|style="background:white"|[[File: | |style="background:white"|[[File:BulletBillWii.png|100x100px]]<br>[[Bullet Bill]] | ||
|align=left|Bullets that fly straight forward, moving out of the way when they make contact with one another. They are shot from Bill Blasters and Bill Blaster Turrets or appear from the edges of the screen. | |||
|align=left| | |[[World 3-2 (New Super Mario Bros. Wii)|World 3-2]] | ||
| | |[[World 7-4 (New Super Mario Bros. Wii)|World 7-4]] | ||
|{{world-link| | |200 | ||
| | |— | ||
|- | |||
|style="background:white"|[[File:NSMBW Asset Model Bull's-Eye Bill.png|100x100px]]<br>[[Bull's-Eye Bill|Missile Bill]] | |||
|align=left|Bullet Bills that target the player after being shot. | |||
|colspan=2|[[World 9-3 (New Super Mario Bros. Wii)|World 9-3]] | |||
|200 | |||
|— | |||
|- | |||
|style="background:white"|[[File:NSMBW Asset Model Banzai Bill.png|100x100px]]<br>[[Banzai Bill]] | |||
|align=left|Large Bullet Bills that fly straight forward, defeating regular Bullet Bills in their path. They are always found being shot from Banzai Bill Cannons. | |||
|{{world-link|7|tower|World 7-Tower (New Super Mario Bros. Wii)}} | |||
|[[World 7-4 (New Super Mario Bros. Wii)|World 7-4]] | |||
|200 | |||
|— | |||
|- | |||
|style="background:white"|[[File:NSMBW Asset Model Bull's-Eye Banzai.png|100x100px]]<br>[[Bull's-Eye Banzai]] | |||
|align=left|Banzai Bills that endlessly rise from the bottom of the screen and home in on the player’s vertical position before continuing forward once they reach the designated height. | |||
|colspan=2|[[World 9-3 (New Super Mario Bros. Wii)|World 9-3]] | |||
|200 | |||
|{{chart icon|new}} | |{{chart icon|new}} | ||
|- | |- | ||
|style="background:white"|[[File: | |style="background:white"|[[File:NSMBW King Bill Render.png|100x100px]]<br>[[King Bill]] | ||
|align=left|An enormous, invincible Bullet Bill that charges from the edges of the screen, destroying blocks in its path. | |||
|align=left| | |colspan=2|[[World 9-8 (New Super Mario Bros. Wii)|World 9-8]] | ||
|[[World | |200 | ||
| | |||
|{{chart icon|new}} | |{{chart icon|new}} | ||
|- | |- | ||
|style="background:white"|[[File: | |style="background:white"|[[File:NSMBW Boo Artwork.png|100x100px]]<br>[[Boo]] | ||
|[[ | |align=left|Ghosts that follow the player when their back is turned, but hide their faces when they look at them. They can only be defeated with a Star. They normally cannot be seen in the dark, though they produce a glowing trail when pursuing the player. In {{world-link|5|ghost|World 5-Ghost House (New Super Mario Bros. Wii)}}, [[Boo Buddies|some Boos]] swirl together in circles. These ones do not shield their eyes when faced, and can be defeated with a [[Drill Spin]]. | ||
|align=left| | |{{world-link|3|ghost|World 3-Ghost House (New Super Mario Bros. Wii)}} | ||
|{{World-link| | |{{world-link|7|ghost|World 7-Ghost House (New Super Mario Bros. Wii)}} | ||
|{{world-link| | |200 | ||
| | |— | ||
|- | |||
|style="background:white"|[[File:NSMBW Asset Model Boo.png|100x100px]]<br>[[Big Boo]] | |||
|align=left|Large Boos that retain the same behavior and properties as their smaller counterparts. Their large size allows them to obscure objects placed behind them. | |||
|{{world-link|3|ghost|World 3-Ghost House (New Super Mario Bros. Wii)}} | |||
|{{world-link|7|ghost|World 7-Ghost House (New Super Mario Bros. Wii)}} | |||
|200 | |||
|— | |||
|- | |||
|style="background:white"|[[File:NSMBW Asset Model Amp.png|100x100px]]<br>[[Amp]] | |||
|align=left|Stationary, electric balls that shock the player upon contact. | |||
|colspan=2|{{world-link|3|tower|World 3-Tower (New Super Mario Bros. Wii)}} | |||
|200 | |||
|— | |||
|- | |||
|style="background:white"|[[File:Bob-omb - Mario Kart Wii.png|100x100px]]<br>[[Bob-omb]] | |||
|align=left|Bombs that ignite if they are jumped on or come into contact with fireballs, then explode shortly after. When ignited, they can be picked up and thrown to defeat other enemies. Some are found being shot from [[cannon]]s while other are found locked in ice and require nearby explosions to detonate. | |||
|{{world-link|3|castle|World 3-Castle (New Super Mario Bros. Wii)}} | |||
|[[World 9-4 (New Super Mario Bros. Wii)|World 9-4]] | |||
|200 | |||
|— | |||
|- | |||
|style="background:white"|[[File:NSMBW Asset Model Parabomb.png|100x100px]]<br>[[Parabomb]] | |||
|align=left|Parachuting Bob-ombs that descend from the sky, transforming into normal Bob-ombs once they land. | |||
|colspan=2|[[World 8-5 (New Super Mario Bros. Wii)|World 8-5]] | |||
|200 | |||
|— | |— | ||
|- | |- | ||
|style="background:white"|[[File: | |style="background:white"|[[File:NSMBW Asset Model Huckit Crab.png|100x100px]]<br>[[Huckit Crab]] | ||
|align=left|A crab that throws sand balls on loop, jumping backwards every time it does so. These balls can be jumped on and used as a temporary platform. | |||
|align=left| | |colspan=2|[[World 4-3 (New Super Mario Bros. Wii)|World 4-3]] | ||
| | |200 | ||
| | |||
|{{chart icon|new}} | |{{chart icon|new}} | ||
|- | |- | ||
|style="background:white"|[[File: | |style="background:white"|[[File:Blooper.png|100x100px]]<br>[[Blooper]] | ||
|align=left|Squid-like enemies that move in an erratic pattern and follow the player. They are often found concealed behind foreground elements, emerging once the player draws near. | |||
|align=left| | |[[World 4-4 (New Super Mario Bros. Wii)|World 4-4]] | ||
|[[World | |[[World 8-4 (New Super Mario Bros. Wii)|World 8-4]] | ||
|[[World 4- | |200 | ||
| | |— | ||
|- | |||
|style="background:white"|[[File:NSMBW Asset Model Blooper Nanny.png|100x100px]]<br>[[Blooper Nanny]] | |||
|align=left|Bloopers that have [[Blooper Baby|Blooper Babies]] swimming in a trail behind them. They normally chase the player like an ordinary Blooper, though they will occasionally pause and deploy their Blooper Babies before spawning a new set. | |||
|colspan=2|[[World 4-4 (New Super Mario Bros. Wii)|World 4-4]] | |||
|200 | |||
|— | |— | ||
|- | |- | ||
|style="background:white"|[[File: | |style="background:white"|[[File:LilMouserNSMBW.png|100x100px]]<br>[[Scaredy Rat]] | ||
|align=left|An enemy that walks forward in a group. When one of the rats is jumped on, the rest panic and run around, calming back down once they encounter a calm rat. | |||
|align=left| | |colspan=2|{{world-link|4|ghost|World 4-Ghost House (New Super Mario Bros. Wii)}} | ||
| | |200 | ||
| | |||
|{{chart icon|new}} | |{{chart icon|new}} | ||
|- | |- | ||
|style="background:white"|[[File: | |style="background:white"|[[File:NewMechaKoopa.jpg|100x100px]]<br>[[Mechakoopa]] | ||
|[[ | |align=left|A mechanical version of Bowser found in Airship levels. After stomping on it, it becomes stunned and can be picked up and thrown to defeat other enemies before it wakes up. | ||
|align=left| | |{{world-link|4|airship|World 4-Airship (New Super Mario Bros. Wii)}} | ||
|colspan=2|[[World 5- | |{{world-link|8|airship|World 8-Airship (New Super Mario Bros. Wii)}} | ||
| | |200 | ||
|— | |||
|- | |||
|style="background:white"|[[File:NSMBW Artwork Wiggler.png|100x100px]]<br>[[Wiggler]] | |||
|align=left|Caterpillars that become agitated and move faster after being jumped on. | |||
|colspan=2|[[World 5-2 (New Super Mario Bros. Wii)|World 5-2]] | |||
|200 | |||
|— | |||
|- | |||
|style="background:white"|[[File:MegaWiggler.png|100x100px]]<br>[[Big Wiggler]] | |||
|align=left|Large variants of Wigglers that can traverse [[poison (obstacle)|poison]] and defeat enemies they run into. They do not become agitated when stomped and can be bounced off of like a [[trampoline|spring]]. | |||
|colspan=2|[[World 5-2 (New Super Mario Bros. Wii)|World 5-2]] | |||
|{{chart icon|cross}} | |||
|— | |||
|- | |||
|style="background:white"|[[File:NSMBW Asset Model Swoop.png|100x100px]]<br>[[Swoop]] | |||
|align=left|Bats that hang onto the ceiling, then swoop towards the player when approached. In [[World 6-6 (New Super Mario Bros. Wii)|World 6-6]] they have eyes that glow in the dark. | |||
|[[World 5-2 (New Super Mario Bros. Wii)|World 5-2]] | |||
|[[World 6-6 (New Super Mario Bros. Wii)|World 6-6]] | |||
|200 | |||
|— | |||
|- | |||
|style="background:white"|[[File:NSMBW Bramball Render.png|100x100px]]<br>[[Bramball]] | |||
|align=left|A forest enemy that lurches between available platforms. It is mostly covered in spikes, with the head being the only safe part to jump on. It can also be forced to move if jumped into from below. Fast-moving individuals appear at the end of their respective level. | |||
|colspan=2|[[World 5-3 (New Super Mario Bros. Wii)|World 5-3]] | |||
|200 | |||
|{{chart icon|new}} | |{{chart icon|new}} | ||
|- | |- | ||
|style="background:white"|[[File: | |style="background:white"|[[File:Monty Mole Super Sluggers.png|100x100px]]<br>[[Monty Mole]] | ||
|[[ | |align=left|A mole that pops out of the ground and gives chase, bouncing off of other moles they come in contact with. | ||
|align=left| | |[[World 6-4 (New Super Mario Bros. Wii)|World 6-4]] | ||
|{{world-link| | |{{world-link|8|tower|World 8-Tower (New Super Mario Bros. Wii)}} | ||
|{{world-link| | |200 | ||
| | |— | ||
|- | |||
|style="background:white"|[[File:NSMBW Rocky Wrench Artwork.png|100x100px]]<br>[[Rocky Wrench]] | |||
|align=left|Monty Moles that periodically pop out of holes in Airships to throw damaging wrenches at the player. | |||
|colspan=2|{{world-link|6|airship|World 6-Airship (New Super Mario Bros. Wii)}} | |||
|200 | |||
|— | |||
|- | |||
|style="background:white"|[[File:NSMBW Chain Chomp Artwork.png|100x100px]]<br>[[Chain Chomp]] | |||
|align=left|Enemies tied to posts that lunge at players at regular intervals. If their post is ground pounded three times, they are set free and can be used to break through blocks. | |||
|colspan=2|[[World 7-2 (New Super Mario Bros. Wii)|World 7-2]] | |||
|200 | |||
|— | |||
|- | |||
|style="background:white"|[[File:NSMBW Asset Model Big Chain Chomp.png|100x100px]]<br>[[Big Chain Chomp]] | |||
|align=left|This Chain Chomp was enlarged by the [[Kamek|Magikoopa]] before the second boss battle with him. It is fastened to a chariot that holds Iggy and is screwed to a track. The Big Chain Chomp lunges at Mario during the boss battle and drags Iggy with it. Hitting Iggy causes the Big Chain Chomp to become enraged and lung at Mario more quickly. Defeating the Koopaling causes the Big Chain Chomp to revert to its original size before disappearing. | |||
|colspan=2|{{world-link|5|castle|World 5-Castle (New Super Mario Bros. Wii)}} | |||
|200 | |||
|— | |||
|- | |||
|style="background:white"|[[File:NSMBW Asset Model Fuzzy 2.png|100x100px]]<br>[[Fuzzy]] | |||
|align=left|Enemies that follow tracks and hurt players upon contact. If they fall off a track, they will twirl in the air. | |||
|[[World 7-3 (New Super Mario Bros. Wii)|World 7-3]] | |||
|[[World 9-8 (New Super Mario Bros. Wii)|World 9-8]] | |||
|200 | |||
|— | |||
|- | |||
|style="background:white"|[[File:NSMBW Asset Model Fuzzy 1.png|100x100px]]<br>[[Big Fuzzy]] | |||
|align=left|A large Fuzzy that follows tracks and hurts players upon contact, like its smaller counterpart. | |||
|[[World 7-3 (New Super Mario Bros. Wii)|World 7-3]] | |||
|[[World 9-8 (New Super Mario Bros. Wii)|World 9-8]] | |||
|200 | |||
|{{chart icon|new}} | |{{chart icon|new}} | ||
|- | |- | ||
|style="background:white"|[[File: | |style="background:white"|[[File:NSMBW Asset Model Broozer.png|100x100px]]<br>[[Broozer]] | ||
|[[ | |align=left|A boxing ghoul-like monster that clumsily charges towards the player's horizontal position, breaking through blocks in its path. The player can defeat it by jumping on it three times, or by hitting it with a fireball. It functions similarly to [[Chargin' Chuck]]s in Super Mario World. | ||
|align=left| | |colspan=2|{{world-link|7|ghost|World 7-Ghost House (New Super Mario Bros. Wii)}} | ||
|{{world-link| | |200 | ||
|[[World 8- | |— | ||
| | |- | ||
|style="background:white"|[[File:CrowberModelNSMBWII.png|100x100px]]<br>[[Crowber]] | |||
|align=left|Birds that circle above the player before swooping down to attack and leaving the screen. | |||
|{{world-link|7|ghost|World 7-Ghost House (New Super Mario Bros. Wii)}} | |||
|[[World 8-5 (New Super Mario Bros. Wii)|World 8-5]] | |||
|200 | |||
|— | |— | ||
|- | |- | ||
|style="background:white"|[[File: | |style="background:white"|[[File:NSMBW Asset Model Foo.png|100x100px]]<br>[[Foo]] | ||
|align=left|A cloud enemy that blows temporary fog in order to obscure the player's view. | |||
|align=left| | |colspan=2|[[World 7-5 (New Super Mario Bros. Wii)|World 7-5]] | ||
|colspan=2|[[World | |200 | ||
| | |||
|{{chart icon|new}} | |{{chart icon|new}} | ||
|- | |- | ||
|style="background:white"|[[File: | |style="background:white"|[[File:NSMBW Bulber Model.png|100x100px]]<br>[[Bulber]] | ||
|align=left|An aquatic enemy with a glowing esca that illuminates the [[dark]] immediately surrounding it. It swims forward endlessly. | |||
|align=left| | |colspan=2|[[World 8-4 (New Super Mario Bros. Wii)|World 8-4]] | ||
| | |200 | ||
|[[World | |||
| | |||
|{{chart icon|new}} | |{{chart icon|new}} | ||
|- | |- | ||
|style="background:white"|[[File: | |style="background:white"|[[File:Jellybeam.png|100x100px]]<br>[[Jellybeam]] | ||
|align=left|An aquatic enemy that produces a beam of light that illuminates the dark below it. They periodically descend and widen their light beams, speeding up when the player approaches. | |||
|align=left| | |colspan=2|[[World 8-4 (New Super Mario Bros. Wii)|World 8-4]] | ||
| | |200 | ||
|[[World 8- | |||
| | |||
|{{chart icon|new}} | |{{chart icon|new}} | ||
|} | |||
===Obstacles from NSMBW=== | |||
{|class="wikitable" style="width:100%;text-align:center" | |||
|-style="color:white;background:red" | |||
!rowspan=2 width=10%|Name | |||
!rowspan=2|Description | |||
!colspan=2|Galaxies | |||
|-style="color:white;background:red" | |||
!width=8%|First | |||
!width=8%|Last | |||
|- | |||
|style="background:white"|[[File:Banzai Bill Blaster NSMBW.png|100x100px]]<br>[[Banzai Bill Cannon]] | |||
|align=left|TBW | |||
|TBD | |||
|TBD | |||
|- | |||
|style="background:white"|[[File:Skull Blaster.png|100x100px]]<br>[[Bill Blaster]] | |||
|align=left|TBW | |||
|TBD | |||
|TBD | |||
|- | |||
|style="background:white"|[[File:Multi Bill Blaster NSMBU Sprite.png|100x100px]]<br>[[Bill Blaster Turret]] | |||
|align=left|TBW | |||
|TBD | |||
|TBD | |||
|- | |||
|style="background:white"|[[File:No image.png|100x100px]]<br>[[Fire Breath|Bowser's Flames]] | |||
|align=left|TBW | |||
|TBD | |||
|TBD | |||
|- | |- | ||
|style="background:white"|[[File: | |style="background:white"|[[File:Rocketengine.png|100x100px]]<br>[[Burner]] | ||
|[[ | |align=left|TBW | ||
|align=left| | |TBD | ||
|{{world-link| | |TBD | ||
|{{world-link|6| | |- | ||
| | |style="background:white"|[[File:NSMBW Bob-omb Cannon Render.png|100x100px]]<br>[[Cannon]] | ||
|align=left|TBW | |||
|TBD | |||
|TBD | |||
|- | |||
|style="background:white"|[[File:NSMBW Mariocar.png|100x100px]]<br>[[Electric Current]] | |||
|align=left|TBW | |||
|TBD | |||
|TBD | |||
|- | |||
|style="background:white"|[[File:FireBarNSMBW.png|100x100px]]<br>[[Fire Bar]] | |||
|align=left|TBW | |||
|TBD | |||
|TBD | |||
|- | |||
|style="background:white"|[[File:GhostQuestionBlock.png|100x100px]]<br>[[Ghost Block]] | |||
|align=left|TBW | |||
|TBD | |||
|TBD | |||
|- | |||
|style="background:white"|[[File:Ghost house stand.png|100x100px]]<br>[[Ghost Vase]] | |||
|align=left|TBW | |||
|TBD | |||
|TBD | |||
|- | |||
|style="background:white"|[[File:NSMBW World 8-A Giant Cannonball.png|100x100px]]<br>[[Giant cannon]] | |||
|align=left|TBW | |||
|TBD | |||
|TBD | |||
|- | |||
|style="background:white"|[[File:No image.png|100x100px]]<br>[[Giant Skewer]] | |||
|align=left|TBW | |||
|TBD | |||
|TBD | |||
|- | |||
|style="background:white"|[[File:Giant spike ball.png|100x100px]]<br>[[Giant Spiked Ball]] | |||
|align=left|TBW | |||
|TBD | |||
|TBD | |||
|- | |||
|style="background:white"|[[File:Mega icicle.png|100x100px]]<br>[[Huge Icicle]] | |||
|align=left|TBW | |||
|TBD | |||
|TBD | |||
|- | |||
|style="background:white"|[[File:IceSpikeLongNSMBW.png|100x100px]]<br>[[Icicle]] | |||
|align=left|TBW | |||
|TBD | |||
|TBD | |||
|- | |||
|style="background:white"|[[File:NSMBW World 1-C Screenshot.png|100x100px]]<br>[[Lava]] | |||
|align=left|TBW | |||
|TBD | |||
|TBD | |||
|- | |||
|style="background:white"|[[File:LavaGeyserNSMBW.png|100x100px]]<br>[[Lava Geyser]] | |||
|align=left|TBW | |||
|TBD | |||
|TBD | |||
|- | |||
|style="background:white"|[[File:NSMBW World 5-3 Screenshot.png|100x100px]]<br>[[Poison (obstacle)|Poison]] | |||
|align=left|TBW | |||
|TBD | |||
|TBD | |||
|- | |||
|style="background:white"|[[File:NSMBW World 8-1 Level Preview Icon.png|100x100px]]<br>[[Poison fog]] | |||
|align=left|TBW | |||
|TBD | |||
|TBD | |||
|- | |||
|style="background:white"|[[File:NSMBW 4-Way Cannon Sprite.png|100x100px]]<br>[[Quartet-cannon]] | |||
|align=left|TBW | |||
|TBD | |||
|TBD | |||
|- | |||
|style="background:white"|[[File:NSMBW World 2-5 Screenshot.png|100x100px]]<br>[[Quicksand]] | |||
|align=left|TBW | |||
|TBD | |||
|TBD | |||
|- | |||
|style="background:white"|[[File:No image.png|100x100px]]<br>[[Rotating Burner]] | |||
|align=left|TBW | |||
|TBD | |||
|TBD | |||
|- | |||
|style="background:white"|[[File:NSMBW World 2-1 Screenshot.png|100x100px]]<br>[[Sand Geyser]] | |||
|align=left|TBW | |||
|TBD | |||
|TBD | |||
|- | |||
|style="background:white"|[[File:NSMBW World 2-4 Screenshot.png|100x100px]]<br>[[Sandstorm]] | |||
|align=left|TBW | |||
|TBD | |||
|TBD | |||
|- | |||
|style="background:white"|[[File:Pillar NSMBW.png|100x100px]]<br>[[Skewer]] | |||
|align=left|TBW | |||
|TBD | |||
|TBD | |||
|- | |||
|style="background:white"|[[File:NSMBW Larry Fireball.png|100x100px]]<br>[[Spell]] | |||
|align=left|TBW | |||
|TBD | |||
|TBD | |||
|- | |||
|style="background:white"|[[File:NSMBW Spike Ball Artwork.png|100x100px]]<br>[[Spike Ball]] | |||
|align=left|TBW | |||
|TBD | |||
|TBD | |||
|- | |||
|style="background:white"|[[File:Spike down.png|100x100px]]<br>[[Spike Trap|Spikes]] | |||
|align=left|TBW | |||
|TBD | |||
|TBD | |||
|- | |||
|style="background:white"|[[File:Chainball up.png|100x100px]]<br>[[Spinner]] | |||
|align=left|TBW | |||
|TBD | |||
|TBD | |||
|- | |||
|style="background:white"|[[File:NSMBW Volcanic Debris Sprite.png|100x100px]]<br>[[Volcanic debris]] | |||
|align=left|TBW | |||
|TBD | |||
|TBD | |||
|} | |||
===Bosses from NSMBW=== | |||
The [[Koopalings]] return to the [[Super Mario (series)|''Super Mario'' series]] as the main antagonists in this game. They are fought in all of the [[Tower]] and [[Castle]] levels, with their [[magic wand]]s being their main way of attack, and utilizing obstacles. | |||
{|class="wikitable"style="width:100%;text-align:center" | |||
|-style="color:white;background:red" | |||
!rowspan=2 width=10%|Name | |||
!rowspan=2|Description | |||
!colspan=2|Levels | |||
|-style="color:white;background:red" | |||
!width=8%|First | |||
!width=8%|Last | |||
|- | |||
!colspan=4 style="background:#FF7733"|The Koopalings | |||
|- | |||
|style="background:white"|[[File:Larry Koopa NSMBW artwork.jpg|100x100px]]<br>[[Larry Koopa]] | |||
|align=left|The player needs to jump on Larry three times while dodging his magic blasts. In the second fight, he is on rising platforms that make it harder to gauge jumping. | |||
|{{world-link|1|tower|World 1-Tower (New Super Mario Bros. Wii)}} | |||
|{{world-link|1|castle|World 1-Castle (New Super Mario Bros. Wii)}} | |||
|- | |||
|style="background:white"|[[File:NSMBW Roy Artwork.png|100x100px]]<br>[[Roy Koopa]] | |||
|align=left|The player needs to jump on Roy three times while jumping to avoid getting stunned. In the second fight, he hides in pipes. | |||
|{{world-link|2|tower|World 2-Tower (New Super Mario Bros. Wii)}} | |||
|{{world-link|2|castle|World 2-Castle (New Super Mario Bros. Wii)}} | |||
|- | |||
|style="background:white"|[[File:NSMBW Lemmy Artwork.png|100x100px]]<br>[[Lemmy Koopa]] | |||
|align=left|The player needs to dodge Lemmy's balls and jump on him three times in both fights. In the second fight, the ball he is on is bigger, so the player has to jump higher. | |||
|{{world-link|3|tower|World 3-Tower (New Super Mario Bros. Wii)}} | |||
|{{world-link|3|castle|World 3-Castle (New Super Mario Bros. Wii)}} | |||
|- | |||
|style="background:white"|[[File:NSMBW Wendy Artwork.png|100x100px]]<br>[[Wendy O. Koopa]] | |||
|align=left|The player needs to jump on Wendy three times while avoiding rings, and in the second fight she should be avoided when the water is up. | |||
|{{world-link|4|tower|World 4-Tower (New Super Mario Bros. Wii)}} | |||
|{{world-link|4|castle|World 4-Castle (New Super Mario Bros. Wii)}} | |||
|- | |||
|style="background:white"|[[File:NSMBW Iggy Artwork.jpg|100x100px]]<br>[[Iggy Koopa]] | |||
|align=left|The player needs to jump on Iggy three times while dodging his fast magic blasts. The second fight is very different—a [[Big Chain Chomp]] pulls Iggy on a chariot. | |||
|{{world-link|5|tower|World 5-Tower (New Super Mario Bros. Wii)}} | |||
|{{world-link|5|castle|World 5-Castle (New Super Mario Bros. Wii)}} | |||
|- | |||
|style="background:white"|[[File:MKT Artwork Morton.png|100x100px]]<br>[[Morton Koopa Jr.]] | |||
|align=left|The player needs to jump on Morton three times while dodging the pillars and jumping to avoid getting stunned. In the next fight, Morton causes columns to rise up using a Ground Pound, and the player instantly loses a life if it flattens them. | |||
|{{world-link|6|tower|World 6-Tower (New Super Mario Bros. Wii)}} | |||
|{{world-link|6|castle|World 6-Castle (New Super Mario Bros. Wii)}} | |||
|- | |||
|style="background:white"|[[File:NSMBW Ludwig Artwork.png|100x100px]]<br>[[Ludwig von Koopa]] | |||
|align=left|The player should jump on Ludwig three times when he comes down from his flight. In the next fight, there are elevators, making the fight more convoluted. Ludwig is very skilled, using homing magic blasts and multiple magic blasts at the same time. | |||
|{{world-link|7|tower|World 7-Tower (New Super Mario Bros. Wii)}} | |||
|{{world-link|7|castle|World 7-Castle (New Super Mario Bros. Wii)}} | |||
|- | |||
!colspan=4 style="background:#FF7733"|Other | |||
|- | |||
|style="background:white"|[[File:NSMBW Bowser Jr Artwork.png|100x100px]]<br>[[Bowser Jr.]] | |||
|align=left|Bowser Jr. returns from his appearance in ''New Super Mario Bros.'', this time as a secondary antagonist in this game. Instead of fighting on his own, he uses his [[Junior Clown Car|Koopa Clown Car]] in battles. He is the boss of [[Airship]] levels. | |||
|{{world-link|4|airship|World 4-Airship (New Super Mario Bros. Wii)}} | |||
|{{world-link|8|airship|World 8-Airship (New Super Mario Bros. Wii)}} | |||
|- | |||
|style="background:white"|[[File:NSMBW Kamek Artwork.png|100x100px]]<br>[[Kamek|Magikoopa]] | |||
|align=left|Magikoopa appears as a secondary antagonist in this game. He mainly assists the villains in the beginning of their fights by using his magic wand to either transform the arena, or to enlarge obstacles and enemies. He is the boss of [[World 8 (New Super Mario Bros. Wii)|World 8]]'s tower. The player needs to jump on Magikoopa three times while dodging many enemies and magic blasts. | |||
|colspan=2|{{world-link|8|airship|World 8-Tower (New Super Mario Bros. Wii)}} | |||
|- | |||
|style="background:white"|[[File:NSMBW Bowser Artwork.png|100x100px]]<br>[[Bowser]] | |||
|align=left|Bowser, like his son, returns from his appearance in ''New Super Mario Bros.'' as the main antagonist and final boss in this game. He is the second boss fought in [[World 8 (New Super Mario Bros. Wii)|World 8]] and the final boss, where he is fought in two phases: the first phase is fought in the same manner as the original ''Super Mario Bros.'', and the second is a chase where Bowser is turned into a giant by Magikoopa. | |||
|colspan=2|{{world-link|8|bowser|World 8-Bowser's Castle (New Super Mario Bros. Wii)}} | |||
|} | |||
===Items from NSMBW=== | |||
===Power-ups from NSMBW=== | |||
===Objects from NSMBW=== | |||
==NSMB2== | |||
===Playable characters from NSMB2=== | |||
{|class="wikitable" style="width:100%;text-align:center" | |||
|-style="color:white;background:red" | |||
!width=12%|Name | |||
!Description | |||
|- | |||
|style="background:white"|[[File:MarioNSMB2.png|100x100px]]<br>[[Mario]] | |||
|align=left|The main protagonist who sets out to save Princess Peach. | |||
|- | |||
|style="background:white"|[[File:LuigiNSMB2.png|100x100px]]<br>[[Luigi]] | |||
|align=left|The second player in Co-op mode and unlockable for Solo Play by holding {{button|3ds|L}} + {{button|3ds|R}} + {{button|3ds|A}} on the file select screen after clearing {{world-link|6|bowsern2|World 6-Bowser's Castle}}. | |||
|} | |||
===Non-playable characters from NSMB2=== | |||
{|class="wikitable" style="width:100%;text-align:center" | |||
|-style="color:white;background:red" | |||
!width=12%|Name | |||
!Description | |||
!width=15%|Locations | |||
|- | |||
|style="background:white"|[[File:Peach FS.png|100x100px]]<br>[[Princess Peach]] | |||
|align=left|The damsel-in-distress, who was kidnapped by Bowser's Koopalings in the [[Koopa Clown Car]]. | |||
|TBD | |||
|- | |||
|style="background:white"|[[File:NSMBW Toad Artwork.png|100x100px]]<br>[[Toad (species)|Toads]] | |||
|align=left|Toad appears in [[Toad House]]s and gives Mario items. | |||
|TBD | |||
|} | |||
===Enemies from NSMB2=== | |||
The enemies listed in this table match those in the ''[[Super Mario Bros. Encyclopedia]]''.<ref>{{cite|author=Sakai, Kazuya (Ambit), kikai, Akinori Sao, Junko Fukuda, Kunio Takayama, and Ko Nakahara (Shogakukan), editors|title="New Super Mario Bros. 2" in『[[Super Mario Bros. Encyclopedia|スーパーマリオブラザーズ百科: 任天堂公式ガイドブック]]』|language=ja|location=Tokyo|publisher=[[Shogakukan]]|date=2015|page=194–15|isbn=4-091065-69-4}}</ref> The default order they are listed derives from the official guidebook<ref>{{cite|author=Weekly Famitsu Editorial Department|date=2012|title=「{{ruby|敵|てき}}キャラクター」in『New スーパーマリオブラザーズ2 パーフェクトガイド』|language=ja|publisher=Famitsu|location=Tokyo|page=26–34|isbn=4-047284-30-0}}</ref> with adjustments that ensure enemies are listed next to their immediate relatives. The gold variants of listed enemies are lumped with their normal counterparts and the Big Chain Chomp is absent in the guidebook, but they are recognized as distinct in the encyclopedia. | |||
{|class="wikitable sortable" style="width:100%;text-align:center" | |||
|-style="color:white;background:#FF2400" | |||
!rowspan=2 width=10%|Name | |||
!class="unsortable" rowspan=2|Description | |||
!class="unsortable" colspan=2|Levels | |||
!rowspan=2|Pts. | |||
!rowspan=2|New | |||
|-style="color:white;background:#FF2400" | |||
!width=8%|First | |||
!width=8%|Last | |||
|- | |||
|style="background:white"|[[File:Goomba NSMB2 Prima.jpg|100x100px]]<br>[[Goomba]] | |||
|align=left|Common enemies that can be defeated by jumping on them. | |||
|[[World 1-1 (New Super Mario Bros. 2)|World 1-1]] | |||
|{{world-link|star|1|World Star-1 (New Super Mario Bros. 2)}} | |||
|200 | |||
|— | |||
|- | |||
|style="background:white"|[[File:Gold Goomba NSMB2 Prima.jpg|100x100px]]<br>[[Gold Goomba]] | |||
|align=left|Golden Goombas that give extra coins when stomped. | |||
|[[World 1-4 (New Super Mario Bros. 2)|World 1-4]] | |||
|[[World 5-3 (New Super Mario Bros. 2)|World 5-3]] | |||
|200 | |||
|{{chart icon|new}} | |{{chart icon|new}} | ||
|- | |- | ||
|style="background:white"|[[File: | |style="background:white"|[[File:Goomba Tower NSMB2 Prima.jpg|100x100px]]<br>[[Goomba Tower]] | ||
|align=left|Stacks of Goombas that must be defeated individually. | |||
|align=left| | |[[World 1-1 (New Super Mario Bros. 2)|World 1-1]] | ||
| | |[[World 6-2 (New Super Mario Bros. 2)|World 6-2]] | ||
| | |200 | ||
| | |— | ||
|- | |||
|style="background:white"|[[File:Gold Goomba Tower NSMB2 Prima.jpg|100x100px]]<br>[[Gold Goomba Tower]] | |||
|align=left|Stacks of Gold Goombas that must be jumped on one by one. | |||
|colspan=2|[[World 1-A (New Super Mario Bros. 2)|World 1-A]] | |||
|200 | |||
|{{chart icon|new}} | |{{chart icon|new}} | ||
|- | |- | ||
|style="background:white"|[[File: | |style="background:white"|[[File:Paragoomba NSMB2 Prima.jpg|100x100px]]<br>[[Paragoomba]] | ||
|align=left|Winged Goombas that hop as they walk. | |||
|align=left| | |[[World 2-2 (New Super Mario Bros. 2)|World 2-2]] | ||
|{{world-link| | |{{world-link|star|1|World Star-1 (New Super Mario Bros. 2)}} | ||
|[[World | |200 | ||
| | |— | ||
|- | |||
|style="background:white"|[[File:Golden Patakuribo NSMB2 Prima.jpg|100x100px]]<br>[[Gold Paragoomba]] | |||
|align=left|Gold Goombas with wings that jump as they walk. | |||
|colspan=2|[[World 2-2 (New Super Mario Bros. 2)|World 2-2]] | |||
|200 | |||
|{{chart icon|new}} | |{{chart icon|new}} | ||
|- | |- | ||
|style="background:white"|[[File: | |style="background:white"|[[File:Mini Goomba NSMB2 Prima.jpg|100x100px]]<br>[[Mini Goomba]] | ||
|align=left|Small Goombas that weigh Mario down until he either attacks or walks for a few seconds. | |||
|align=left| | |[[World 4-1 (New Super Mario Bros. 2)|World 4-1]] | ||
|[[World 2- | |[[World 6-2 (New Super Mario Bros. 2)|World 6-2]] | ||
|[[World | |200 | ||
| | |— | ||
|- | |||
|style="background:white"|[[File:GoldMiniGoomba-nsmb2-render.png|50x50px]]<br>[[Gold Mini Goomba]] | |||
|align=left|Small Gold Goombas that weigh Mario down. | |||
|[[World 4-1 (New Super Mario Bros. 2)|World 4-1]] | |||
|[[World 5-3 (New Super Mario Bros. 2)|World 5-3]] | |||
|200 | |||
|{{chart icon|new}} | |{{chart icon|new}} | ||
|- | |- | ||
|style="background:white"|[[File: | |style="background:white"|[[File:Bone Goomba NSMB2 Prima.jpg|100x100px]]<br>[[Bone Goomba]] | ||
|align=left|Goombas with skull helmets, identical to regular Goombas gameplay-wise. | |||
|align=left| | |{{world-link|1|towern2|World 1-Tower (New Super Mario Bros. 2)}} | ||
| | |{{world-link|flower|castlen2|World Flower-Castle}} | ||
| | |200 | ||
| | |||
|{{chart icon|new}} | |{{chart icon|new}} | ||
|- | |- | ||
|style="background:white"|[[File: | |style="background:white"|[[File:Green Koopa Troopa NSMB2 Prima.jpg|100x100px]]<br>[[Koopa Troopa]] (Green) | ||
|[[ | |align=left|Turtle enemies that go into their shells when attacked, then can be picked up or thrown. Green Koopa Troopas walk off ledges. | ||
|align=left| | |[[World 1-1 (New Super Mario Bros. 2)|World 1-1]] | ||
|{{world-link| | |{{world-link|star|5|World Star-5 (New Super Mario Bros. 2)}} | ||
|{{world-link| | |200 | ||
| | |— | ||
|- | |||
|style="background:white"|[[File:Red Koopa Troopa NSMB2 Prima.jpg|100x100px]]<br>Koopa Troopa (Red) | |||
|align=left|Red Koopa Troopas turn around. | |||
|[[World 1-1 (New Super Mario Bros. 2)|World 1-1]] | |||
|{{world-link|star|5|World Star-5 (New Super Mario Bros. 2)}} | |||
|200 | |||
|— | |||
|- | |||
|style="background:white"|[[File:Gold Koopa NSMB2 Prima.jpg|100x100px]]<br>[[Gold Koopa]] | |||
|align=left|Koopa Troopas with golden shells. When attacked, they go into their shells, which can be thrown to create coins. | |||
|[[World 1-4 (New Super Mario Bros. 2)|World 1-4]] | |||
|{{world-link|star|5|World Star-5 (New Super Mario Bros. 2)}} | |||
|200 | |||
|{{chart icon|new}} | |{{chart icon|new}} | ||
|- | |- | ||
|style="background:white"|[[File: | |style="background:white"|[[File:NSMB2 Artwork Koopa Paratroopa (Green).jpg|100x100px]]<br>[[Koopa Paratroopa]] (Green) | ||
|align=left|Winged Koopa Troopas that either jump in high arcs or fly up and down in the air. | |||
|align=left| | |[[World 1-3 (New Super Mario Bros. 2)|World 1-3]] | ||
|[[World 3 | |{{world-link|star|1|World Star-1 (New Super Mario Bros. 2)}} | ||
|[[World | |200 | ||
| | |— | ||
|- | |||
|style="background:white"|[[File:NSMB2 Artwork Koopa Paratroopa (Red).jpg|100x100px]]<br>Koopa Paratroopa (Red) | |||
|align=left|TBW | |||
|[[World 1-3 (New Super Mario Bros. 2)|World 1-3]] | |||
|{{world-link|star|1|World Star-1 (New Super Mario Bros. 2)}} | |||
|200 | |||
|— | |— | ||
|- | |- | ||
|style="background:white"|[[File: | |style="background:white"|[[File:Gold Koopa Paratroopa NSMB2 Prima.jpg|100x100px]]<br>[[Gold Koopa Paratroopa]] | ||
|align=left|Koopa Paratroopas that have a trail of coins following them. | |||
|align=left| | |[[World 1-4 (New Super Mario Bros. 2)|World 1-4]] | ||
|[[World | |[[World 5-A (New Super Mario Bros. 2)|World 5-A]] | ||
|[[World | |200 | ||
| | |||
|{{chart icon|new}} | |{{chart icon|new}} | ||
|- | |- | ||
|style="background:white"|[[File: | |style="background:white"|[[File:NSMB2 Asset Model Climbing Koopa.png|100x100px]]<br>[[Climbing Koopa]] | ||
|[[ | |align=left|Koopa Troopas that climb on both sides of fences. | ||
|align=left| | |{{world-link|5|towern2|World 5-Tower (New Super Mario Bros. 2)}} | ||
|[[World | |{{world-link|5|castlen2|World 5-Castle (New Super Mario Bros. 2)}} | ||
|[[World | |200 | ||
| | |— | ||
|- | |||
|style="background:white"|[[File:Dry Bones NSMB2 Prima.jpg|100x100px]]<br>[[Dry Bones]] | |||
|align=left|Skeleton Koopa Troopas that collapse when attacked, but later rebuild themselves. | |||
|{{world-link|1|towern2|World 1-Tower (New Super Mario Bros. 2)}} | |||
|{{world-link|star|castlen2|World Star-Castle}} | |||
|200 | |||
|— | |||
|- | |||
|style="background:white"|[[File:Big Dry Bones NSMB2 Prima.jpg|100x100px]]<br>[[Big Dry Bones]] | |||
|align=left|Larger versions of Dry Bones that appear in castle levels. | |||
|{{world-link|2|towern2|World 2-Tower (New Super Mario Bros. 2)}} | |||
|{{world-link|6|bowsern2|World 6-Bowser's Castle}} | |||
|200 | |||
|— | |||
|- | |||
|style="background:white"|[[File:Hammer Bro NSMB2 Prima.jpg|100x100px]]<br>[[Hammer Bro]] | |||
|align=left|Enemies that throw hammers and jump. | |||
|colspan=2|[[World 2-2 (New Super Mario Bros. 2)|World 2-2]] | |||
|1000 | |||
|— | |||
|- | |||
|style="background:white"|[[File:NSMB2 Boomerang Bro Prima.jpg|100x100px]]<br>[[Boomerang Bro]] | |||
|align=left|Hammer Bros that use boomerangs, which return to them after being thrown. | |||
|[[World 2-2 (New Super Mario Bros. 2)|World 2-2]] | |||
|{{world-link|mushroom|cannonn2|World Mushroom-Warp Cannon}} | |||
|1000 | |||
|— | |||
|- | |||
|style="background:white"|[[File:Fire Bro NSMB2 Prima.jpg|100x100px]]<br>[[Fire Bro]] | |||
|align=left|Hammer Bros that throw fireballs. | |||
|colspan=2|[[World 6-3 (New Super Mario Bros. 2)|World 6-3]] | |||
|1000 | |||
|— | |||
|- | |||
|style="background:white"|[[File:Gold Bro NSMB2 Prima.jpg|100x100px]]<br>[[Gold Bro]] | |||
|align=left|A variant of Hammer Bro that throws coins. | |||
|[[World 2-2 (New Super Mario Bros. 2)|World 2-2]] | |||
|[[World 6-3 (New Super Mario Bros. 2)|World 6-3]] | |||
|1000 | |||
|{{chart icon|new}} | |{{chart icon|new}} | ||
|- | |- | ||
|style="background: | |style="background:white"|[[File:Sledge Bro NSMB2 Prima.jpg|100x100px]]<br>[[Sledge Bro]] | ||
|[[ | |align=left|Hammer Bro variants that stun Mario after they jump. | ||
|align=left| | |colspan=2|[[World 2-2 (New Super Mario Bros. 2)|World 2-2]] | ||
|[[World 3-1 (Super Mario Bros. | |200 | ||
|[[World | |— | ||
| | |- | ||
|style="background:white"|[[File:Buzzy Beetle NSMB2 Prima.jpg|100x100px]]<br>[[Buzzy Beetle]] | |||
|align=left|Shelled enemies that can be kicked or thrown after being jumped on, and can walk on ceilings. | |||
|[[World 2-3 (New Super Mario Bros. 2)|World 2-3]] | |||
|[[World 6-1 (New Super Mario Bros. 2)|World 6-1]] | |||
|200 | |||
|— | |||
|- | |||
|style="background:white"|[[File:Spike Top NSMB2 Prima.jpg|100x100px]]<br>[[Spike Top]] | |||
|align=left|Buzzy Beetle variants that have spikes on their shells, preventing them from being jumped on. | |||
|[[World 2-3 (New Super Mario Bros. 2)|World 2-3]] | |||
|[[World 6-1 (New Super Mario Bros. 2)|World 6-1]] | |||
|200 | |||
|— | |||
|- | |||
|style="background:white"|[[File:Lakitu NSMB2 Prima.jpg|100x100px]]<br>[[Lakitu]] | |||
|align=left|Enemies that throw Spiny Eggs. If Mario defeats a Lakitu, he can ride on its cloud until it disappears. | |||
|[[World 5-2 (New Super Mario Bros. 2)|World 5-2]] | |||
|{{world-link|star|5|World Star-5 (New Super Mario Bros. 2)}} | |||
|1000 | |||
|— | |||
|- | |||
|style="background:white"|[[File:Gold Lakitu NSMB2 Prima.jpg|100x100px]]<br>[[Gold Lakitu]] | |||
|align=left|Lakitus with yellow shells riding in golden clouds, who throw coins. | |||
|[[World 5-2 (New Super Mario Bros. 2)|World 5-2]] | |||
|{{world-link|star|5|World Star-5 (New Super Mario Bros. 2)}} | |||
|1000 | |||
|{{chart icon|new}} | |{{chart icon|new}} | ||
|- | |- | ||
|style="background:white"|[[File: | |style="background:white"|[[File:Spiny NSMB2 Prima.jpg|100x100px]]<br>[[Spiny]] | ||
|[[ | |align=left|Enemies that hatch from Spiny Eggs and cannot be jumped on. | ||
|align=left| | |[[World 2-4 (New Super Mario Bros. 2)|World 2-4]] | ||
|[[World | |{{world-link|star|5|World Star-5 (New Super Mario Bros. 2)}} | ||
|{{world-link| | |200 | ||
| | |— | ||
|- | |||
|style="background:white"|[[File:Spiny Egg NSMB2 Prima.jpg|100x100px]]<br>[[Spiny Egg]] | |||
|align=left|Eggs thrown by Lakitu that hatch into Spinies when they hit the ground. | |||
|[[World 5-2 (New Super Mario Bros. 2)|World 5-2]] | |||
|{{world-link|star|5|World Star-5 (New Super Mario Bros. 2)}} | |||
|200 | |||
|— | |||
|- | |||
|style="background:white"|[[File:Piranha Plant NSMB2 Prima.jpg|100x100px]]<br>[[Piranha Plant]] | |||
|align=left|Plants that move in and out of Warp Pipes. | |||
|[[World 1-2 (New Super Mario Bros. 2)|World 1-2]] | |||
|[[World 6-2 (New Super Mario Bros. 2)|World 6-2]] | |||
|200 | |||
|— | |— | ||
|- | |- | ||
|style="background:white"|[[File: | |style="background:white"|[[File:Gold Piranha Plant NSMB2 Prima.jpg|100x100px]]<br>[[Gold Piranha Plant]] | ||
|align=left|Gold versions of Piranha Plants that come out of pipes. When defeated, their pipe shoots coins into the air. | |||
|align=left| | |[[World 1-A (New Super Mario Bros. 2)|World 1-A]] | ||
|[[World | |[[World 6-2 (New Super Mario Bros. 2)|World 6-2]] | ||
|[[World 6- | |200 | ||
| | |||
|{{chart icon|new}} | |{{chart icon|new}} | ||
|- | |- | ||
|style="background:white"|[[File: | |style="background:white"|[[File:Big Piranha Plant NSMB2 Prima.jpg|100x100px]]<br>[[Big Piranha Plant]] | ||
|align=left|Big Piranha Plants that appear outside of pipes, thrashing towards Mario. | |||
|align=left| | |[[World 1-A (New Super Mario Bros. 2)|World 1-A]] | ||
|[[World | |[[World 5-6 (New Super Mario Bros. 2)|World 5-6]] | ||
|[[World | |200 | ||
| | |— | ||
|- | |||
|style="background:white"|[[File:NSMB2-Gold Big Piranha Plant.png|100x100px]]<br>[[Gold Big Piranha Plant]] | |||
|align=left|A larger variant of [[Gold Piranha Plant]]s. | |||
|colspan=2|[[World 1-A (New Super Mario Bros. 2)|World 1-A]] | |||
|200 | |||
|{{chart icon|new}} | |{{chart icon|new}} | ||
|- | |- | ||
|style="background:white"|[[File: | |style="background:white"|[[File:Fire Piranha Plant NSMB2 Prima.jpg|100x100px]]<br>[[Fire Piranha Plant]] | ||
|[[Big | |align=left|Piranha Plants that aim at Mario and shoot fireballs. | ||
|align=left| | |[[World 5-6 (New Super Mario Bros. 2)|World 5-6]] | ||
|[[World | |[[World 6-2 (New Super Mario Bros. 2)|World 6-2]] | ||
|[[World | |200 | ||
| | |— | ||
|- | |||
|style="background:white"|[[File:Big Fire Piranha Plant NSMB2 Prima.jpg|100x100px]]<br>[[Big Fire Piranha]] | |||
|align=left|Large Venus Fire Traps that shoot big fireballs. | |||
|colspan=2|[[World 5-6 (New Super Mario Bros. 2)|World 5-6]] | |||
|200 | |||
|— | |||
|- | |||
|style="background:white"|[[File:Bone Piranha Plant NSMB2 Prima.jpg|100x100px]]<br>[[Bone Piranha Plant]] | |||
|align=left|Skeletal Piranha Plants that are immune to fire. The player can defeat them by attacking them with Raccoon Mario's tail. | |||
|{{world-link|1|towern2|World 1-Tower (New Super Mario Bros. 2)}} | |||
|{{world-link|5|castlen2|World 5-Castle (New Super Mario Bros. 2)}} | |||
|200 | |||
|{{chart icon|new}} | |{{chart icon|new}} | ||
|- | |- | ||
|style="background:white"|[[File: | |style="background:white"|[[File:Big Bone Piranha Plant NSMB2 Prima.jpg|100x100px]]<br>[[Big Bone Piranha Plant]] | ||
|align=left|Larger versions of Bone Piranha Plants. They appear in castles and fortresses and thrash towards Mario. | |||
|align=left| | |{{world-link|mushroom|castlen2|World Mushroom-Castle}} | ||
| | |{{world-link|5|castlen2|World 5-Castle (New Super Mario Bros. 2)}} | ||
| | |200 | ||
| | |||
|{{chart icon|new}} | |{{chart icon|new}} | ||
|- | |- | ||
|style="background:white"|[[File: | |- | ||
|style="background:white"|[[File:Cheep Cheep NSMB2 Prima.jpg|100x100px]]<br>[[Cheep Cheep]] | |||
|align=left| | |align=left|Fish that are found swimming aimlessly in underwater levels. | ||
|colspan=2|[[World | |[[World 1-5 (New Super Mario Bros. 2)|World 1-5]] | ||
| | |[[World 4-5 (New Super Mario Bros. 2)|World 4-5]] | ||
|200 | |||
|— | |||
|- | |||
|style="background:white"|[[File:Gold Cheep Cheep NSMB2 Prima.jpg|100x100px]]<br>[[Gold Cheep Cheep]] | |||
|align=left|Gold-colored Cheep Cheeps that jump out of water with coins behind them. | |||
|colspan=2|[[World 3-1 (New Super Mario Bros. 2)|World 3-1]] | |||
|200 | |||
|{{chart icon|new}} | |{{chart icon|new}} | ||
|- | |- | ||
|style="background:white"|[[File: | |style="background:white"|[[File:Big Cheep Cheep NSMB2 Prima.jpg|100x100px]]<br>[[Big Cheep Cheep]] | ||
|[[ | |align=left|Big Cheep Cheeps that are found in underwater levels. | ||
|align=left| | |[[World 1-5 (New Super Mario Bros. 2)|World 1-5]] | ||
|[[World 3- | |[[World 3-B (New Super Mario Bros. 2)|World 3-B]] | ||
|[[World | |200 | ||
| | |— | ||
|- | |||
|style="background:white"|[[File:Deep Cheep NSMB2 Prima.jpg|100x100px]]<br>[[Deep Cheep]] | |||
|align=left|Fish that chase Mario as they swim. | |||
|colspan=2|{{world-link|mushroom|2|World Mushroom-2 (New Super Mario Bros. 2)}} | |||
|200 | |||
|— | |||
|- | |||
|style="background:white"|[[File:Big Deep Cheep NSMB2 Prima.jpg|100x100px]]<br>[[Big Deep Cheep]] | |||
|align=left|Big Deep Cheeps that chase after Mario. | |||
|{{world-link|mushroom|2|World Mushroom-2 (New Super Mario Bros. 2)}} | |||
|{{world-link|mushroom|2|World Mushroom-2 (New Super Mario Bros. 2)}} | |||
|200 | |||
|— | |||
|- | |||
|style="background:white"|[[File:Spiny Cheep Cheep NSMB2 Prima.jpg|100x100px]]<br>[[Spiny Cheep Cheep]] | |||
|align=left|Fast-swimming fish that chase Mario. | |||
|[[World 1-5 (New Super Mario Bros. 2)|World 1-5]] | |||
|[[World 3-2 (New Super Mario Bros. 2)|World 3-2]] | |||
|200 | |||
|— | |||
|- | |||
|style="background:white"|[[File:Cheep Chomp NSMB2 Prima.jpg|100x100px]]<br>[[Cheep Chomp]] | |||
|align=left|Large fish that attempt to eat Mario. | |||
|[[World 1-5 (New Super Mario Bros. 2)|World 1-5]] | |||
|[[World 4-5 (New Super Mario Bros. 2)|World 4-5]] | |||
|200 | |||
|— | |||
|- | |||
|style="background:white"|[[File:Porcupuffer NSMB2 Prima.jpg|100x100px]]<br>[[Porcupuffer]] | |||
|align=left|Fish that jump out of the water and follow Mario. | |||
|{{world-link|flower|2|World Flower-2 (New Super Mario Bros. 2)}} | |||
|{{world-link|star|4|World Star-4 (New Super Mario Bros. 2)}} | |||
|200 | |||
|— | |||
|- | |||
|style="background:white"|[[File:Fishbones NSMB2 Prima.jpg|100x100px]]<br>[[Fish Bone|Fishbones]] | |||
|align=left|Skeletal fish that charge towards Mario. | |||
|{{world-link|3|towern2|World 3-Tower (New Super Mario Bros. 2)}} | |||
|{{world-link|star|6|World Star-6 (New Super Mario Bros. 2)}} | |||
|200 | |||
|— | |||
|- | |||
|style="background:white"|[[File:Urchin NSMB2 Prima.jpg|100x100px]]<br>[[Urchin]] | |||
|align=left|Stationary enemies that appear in underwater levels. | |||
|{{world-link|mushroom|2|World Mushroom-2 (New Super Mario Bros. 2)}} | |||
|[[World 3-A (New Super Mario Bros. 2)|World 3-A]] | |||
|200 | |||
|— | |||
|- | |||
|style="background:white"|[[File:Small Urchin NSMB2 Prima.jpg|100x100px]]<br>[[Small Urchin]] | |||
|align=left|Stationary underwater enemies that can be defeated with the Fire Flower, Super Leaf, Gold Flower, or Super Star. | |||
|[[World 3-2 (New Super Mario Bros. 2)|World 3-2]] | |||
|[[World 3-A (New Super Mario Bros. 2)|World 3-A]] | |||
|200 | |||
|— | |||
|- | |||
|style="background:white"|[[File:Blooper NSMB2 Prima.jpg|100x100px]]<br>[[Blooper]] | |||
|align=left|Underwater enemies that move in an erratic pattern and follow Mario. | |||
|colspan=2|[[World 3-5 (New Super Mario Bros. 2)|World 3-5]] | |||
|200 | |||
|— | |||
|- | |||
|style="background:white"|[[File:Blooper Nanny NSMB2 Prima.jpg|100x100px]]<br>[[Blooper Nanny]] | |||
|align=left|Bloopers that have [[Blooper Baby|Blooper Babies]] swimming in a trail behind them. | |||
|colspan=2|[[World 3-5 (New Super Mario Bros. 2)|World 3-5]] | |||
|200 | |||
|— | |||
|- | |||
|style="background:white"|[[File:Thwomp NSMB2 Prima.jpg|100x100px]]<br>[[Thwomp]] | |||
|align=left|Large rocks that fall when Mario gets close. | |||
|{{world-link|1|castlen2|World 1-Castle (New Super Mario Bros. 2)}} | |||
|{{world-link|mushroom|castlen2|World Mushroom-Castle}} | |||
|200 | |||
|— | |— | ||
|- | |- | ||
|style="background:white"|[[File: | |style="background:white"|[[File:Big Thwomp NSMB2 Prima.jpg|100x100px]]<br>[[Big Thwomp]] | ||
|align=left|Large Thwomps that can break through stone tiles. | |||
|align=left| | |{{world-link|1|castlen2|World 1-Castle (New Super Mario Bros. 2)}} | ||
| | |{{world-link|mushroom|castlen2|World Mushroom-Castle}} | ||
| | |200 | ||
| | |— | ||
|- | |- | ||
|style="background:white"|[[File: | |style="background:white"|[[File:Whomp NSMB2 Prima.jpg|100x100px]]<br>[[Whomp]] | ||
|align=left|Walking Thwomp variants that fall face-first. | |||
|align=left| | |{{world-link|mushroom|castlen2|World Mushroom-Castle}} | ||
| | |{{world-link|star|3|World Star-3 (New Super Mario Bros. 2)}} | ||
| | |200 | ||
| | |||
|— | |— | ||
|- | |- | ||
|style="background:white"|[[File: | |style="background:white"|[[File:Big Whomp NSMB2 Prima.jpg|100x100px]]<br>[[Big Whomp]] | ||
|align=left|Big Whomps that may reveal objects behind them after they fall. | |||
|align=left| | |{{world-link|mushroom|castlen2|World Mushroom-Castle}} | ||
| | |{{world-link|star|3|World Star-3 (New Super Mario Bros. 2)}} | ||
| | |200 | ||
| | |||
|— | |— | ||
|- | |- | ||
|style="background: | |style="background:white"|[[File:Boo NSMB2 Prima.jpg|100x100px]]<br>[[Boo]] | ||
|align=left|Ghosts that follow Mario when his back is turned, but hide their face when he looks at them. | |||
|align=left| | |{{world-link|2|ghosthousen2|World 2-Ghost House}} | ||
| | |[[World 6-4 (New Super Mario Bros. 2)|World 6-4]] | ||
|[[World | |200 | ||
| | |— | ||
| | |||
|- | |- | ||
|style="background:white"|[[File: | |style="background:white"|[[File:Gold Boo NSMB2 Prima.jpg|100x100px]]<br>[[Gold Boo]] | ||
|align=left|Boo variants that leave a trail of coins behind as they move. | |||
|align=left| | |{{world-link|mushroom|ghosthousen2|World Mushroom-Ghost House}} | ||
| | |{{world-link|6|ghosthousen2|World 6-Ghost House (New Super Mario Bros. 2)}} | ||
| | |200 | ||
| | |||
|{{chart icon|new}} | |{{chart icon|new}} | ||
|- | |- | ||
|style="background:white"|[[File: | |style="background:white"|[[File:Big Boo NSMB2 Prima.jpg|100x100px]]<br>[[Big Boo]] | ||
|align=left|Bigger variants of Boos that have the same behavior. | |||
|align=left| | |{{world-link|mushroom|ghosthousen2|World Mushroom-Ghost House}} | ||
| | |{{world-link|6|ghosthousen2|World 6-Ghost House (New Super Mario Bros. 2)}} | ||
|{{world-link| | |200 | ||
| | |||
|— | |— | ||
|- | |- | ||
|style="background:white"|[[File: | |style="background:white"|[[File:Gold Big Boo NSMB2 Prima.jpg|100x100px]]<br>[[Gold Big Boo]] | ||
|align=left|Large Boos that go in the opposite direction of Mario, leaving coins behind them. | |||
|align=left| | |{{world-link|mushroom|ghosthousen2|World Mushroom-Ghost House}} | ||
|{{world-link| | |{{world-link|6|ghosthousen2|World 6-Ghost House (New Super Mario Bros. 2)}} | ||
|{{world| | |200 | ||
| | |||
|{{chart icon|new}} | |{{chart icon|new}} | ||
|- | |- | ||
|style="background:white"|[[File: | |style="background:white"|[[File:Boohemoth NSMB2 Prima.jpg|100x100px]]<br>[[Boohemoth]] | ||
|align=left|A gigantic Boo who chases Mario in certain Ghost House levels. | |||
|align=left| | |{{world-link|2|ghosthousen2|World 2-Ghost House}} | ||
| | |{{world-link|flower|ghosthousen2|World Flower-Ghost House}} | ||
| | |data-sort-value=2000|{{chart icon|cross}} | ||
| | |||
|{{chart icon|new}} | |{{chart icon|new}} | ||
|- | |- | ||
|style="background:white"|[[File: | |style="background:white"|[[File:Peepa NSMB2 Prima.jpg|100x100px]]<br>[[Peepa]] | ||
|[[ | |align=left|Ghosts that move in circles and sometimes carry platforms. | ||
|align=left| | |{{world-link|2|ghosthousen2|World 2-Ghost House}} | ||
|colspan=2|[[World | |{{world-link|star|3|World Star-3 (New Super Mario Bros. 2)}} | ||
| | |200 | ||
|— | |||
|- | |||
|style="background:white"|[[File:Bob-omb NSMB2 Prima.jpg|100x100px]]<br>[[Bob-omb]] | |||
|align=left|Bombs that ignite if they are jumped on or have a fireball thrown at them, then explode shortly after. | |||
|[[World 2-B (New Super Mario Bros. 2)|World 2-B]] | |||
|[[World 6-2 (New Super Mario Bros. 2)|World 6-2]] | |||
|200 | |||
|— | |||
|- | |||
|style="background:white"|[[File:Para-bomb NSMB2 Prima.jpg|100x100px]]<br>[[Parabomb|Para-bomb]] | |||
|align=left|Parachuting Bob-ombs that are sometimes shot out of cannons. | |||
|[[World 2-B (New Super Mario Bros. 2)|World 2-B]] | |||
|[[World 6-2 (New Super Mario Bros. 2)|World 6-2]] | |||
|200 | |||
|— | |||
|- | |||
|style="background:white"|[[File:Pokey NSMB2 Prima.jpg|100x100px]]<br>[[Pokey]] | |||
|align=left|Cactus enemies that appear in desert levels and move slowly. | |||
|[[World 2-3 (New Super Mario Bros. 2)|World 2-3]] | |||
|[[World 2-B (New Super Mario Bros. 2)|World 2-B]] | |||
|200 | |||
|— | |||
|- | |||
|style="background:white"|[[File:Fuzzy NSMB2 Prima.jpg|100x100px]]<br>[[Fuzzy]] | |||
|align=left|Enemies that follow tracks and hurt Mario upon contact. | |||
|[[World 2-A (New Super Mario Bros. 2)|World 2-A]] | |||
|[[World 4-C]] | |||
|200 | |||
|— | |||
|- | |||
|style="background:white"|[[File:Big Fuzzy NSMB2 Prima.jpg|100x100px]]<br>[[Big Fuzzy]] | |||
|align=left|Larger variants of Fuzzies. | |||
|colspan=2|[[World 4-C]] | |||
|200 | |||
|— | |||
|- | |||
|style="background:white"|[[File:Fire Snake NSMB2 Prima.jpg|100x100px]]<br>[[Fire Snake]] | |||
|align=left|Flames that jump in a high arc. | |||
|[[World 2-4 (New Super Mario Bros. 2)|World 2-4]] | |||
|{{world-link|star|7|World Star-7 (New Super Mario Bros. 2)}} | |||
|200 | |||
|— | |||
|- | |||
|style="background:white"|[[File:Chain Chomp NSMB2 Prima.jpg|100x100px]]<br>[[Chain Chomp]] | |||
|align=left|Enemies tied to posts that lunge at Mario. If Mario ground pounds their post, they are set free. | |||
|[[World 2-5 (New Super Mario Bros. 2)|World 2-5]] | |||
|{{world-link|mushroom|B|World Mushroom-B}} | |||
|200 | |||
|— | |||
|- | |||
|style="background:white"|[[File:NSMB2 Asset Model Big Chain Chomp.png|100x100px]]<br>[[Big Chain Chomp]] | |||
|align=left|TBW | |||
|colspan=2|{{world-link|2|castlen2|World 2-Castle (New Super Mario Bros. 2)}} | |||
|None | |||
|— | |||
|- | |||
|style="background:white"|[[File:Crowber NSMB2 Prima.jpg|100x100px]]<br>[[Crowber]] | |||
|align=left|Birds that swoop towards Mario. | |||
|{{world-link|mushroom|cannonn2|World Mushroom-Warp Cannon}} | |||
|[[World 6-4 (New Super Mario Bros. 2)|World 6-4]] | |||
|200 | |||
|— | |||
|- | |||
|style="background:white"|[[File:Bullet Bill NSMB2 Prima.jpg|100x100px]]<br>[[Bullet Bill]] | |||
|align=left|Bullets that fly straight forward and are shot from Bill Blasters and Bill Blaster Turrets. | |||
|[[World 3-B (New Super Mario Bros. 2)|World 3-B]] | |||
|[[World 6-B (New Super Mario Bros. 2)|World 6-B]] | |||
|200 | |||
|— | |||
|- | |||
|style="background:white"|[[File:Gold Bullet Bill NSMB2 Prima.jpg|100x100px]]<br>[[Gold Bullet Bill]] | |||
|align=left|Golden Bullet Bills that leave trails of coins behind them. | |||
|[[World 5-5 (New Super Mario Bros. 2)|World 5-5]] | |||
|[[World 6-B (New Super Mario Bros. 2)|World 6-B]] | |||
|200 | |||
|— | |||
|- | |||
|style="background:white"|[[File:Banzai Bill NSMB2 Prima.jpg|100x100px]]<br>[[Banzai Bill]] | |||
|align=left|Large Bullet Bills that fly straight forward. | |||
|[[World 5-5 (New Super Mario Bros. 2)|World 5-5]] | |||
|[[World 6-B (New Super Mario Bros. 2)|World 6-B]] | |||
|200 | |||
|— | |||
|- | |||
|style="background:white"|[[File:Gold Banzai Bill NSMB2 Prima.jpg|100x100px]]<br>[[Gold Banzai Bill]] | |||
|align=left|Golden-colored Banzai Bills that fly forward, leaving behind a trail of coins. | |||
|colspan=2|[[World 6-B (New Super Mario Bros. 2)|World 6-B]] | |||
|200 | |||
|{{chart icon|new}} | |{{chart icon|new}} | ||
|- | |- | ||
|style="background:white"|[[File: | |style="background:white"|[[File:Wiggler NSMB2 Prima.jpg|100x100px]]<br>[[Wiggler]] | ||
|[[ | |align=left|Caterpillars that move faster after being jumped on. | ||
|align=left| | |{{world-link|3|cannonn2|World 3-Warp Cannon (New Super Mario Bros. 2)}} | ||
|[[World | |[[World 3-4 (New Super Mario Bros. 2)|World 3-4]] | ||
| | |200 | ||
| | |— | ||
|{{ | |- | ||
|style="background:white"|[[File:Swooper NSMB2 Prima.jpg|100x100px]]<br>[[Swoop]] | |||
|align=left|Bats that hang onto the ceiling, then swoop towards Mario. | |||
|colspan=2|{{world-link|5|ghosthousen2|World 5-Ghost House (New Super Mario Bros. 2)}} | |||
|200 | |||
|— | |||
|- | |||
|style="background:white"|[[File:Lava Bubble NSMB2 Prima.jpg|100x100px]]<br>[[Lava Bubble]] | |||
|align=left|Fireballs that jump out of lava. | |||
|{{world-link|1|castlen2|World 1-Castle (New Super Mario Bros. 2)}} | |||
|{{world-link|star|7|World Star-7 (New Super Mario Bros. 2)}} | |||
|200 | |||
|— | |||
|- | |||
|style="background:white"|[[File:Scuttle Bug NSMB2 Prima.jpg|100x100px]]<br>[[Scuttlebug]] | |||
|align=left|Spiders that hang down from webs and can be defeated by jumping on them. | |||
|[[World 3-3 (New Super Mario Bros. 2)|World 3-3]] | |||
|{{world-link|flower|2|World Flower-2 (New Super Mario Bros. 2)}} | |||
|200 | |||
|— | |||
|- | |||
|style="background:white"|[[File:GrinderNSMB2.png|100x100px]]<br>[[Grinder]] | |||
|align=left|Buzzsaws that move along tracks. | |||
|{{world-link|3|castlen2|World 3-Castle (New Super Mario Bros. 2)}} | |||
|{{world-link|star|castlen2|World Star-Castle}} | |||
|200 | |||
|— | |||
|- | |- | ||
|style="background: | |style="background:white"|[[File:Amp NSMB2 Prima.jpg|100x100px]]<br>[[Amp]] | ||
|align=left|Electric balls that shock Mario upon contact. | |||
|align=left| | |[[World 4-B (New Super Mario Bros. 2)|World 4-B]] | ||
| | |{{world-link|flower|cannonn2|World Flower-Warp Cannon}} | ||
| | |200 | ||
|— | |— | ||
|- | |- | ||
|style="background: | |style="background:white"|[[File:Flame Chomp NSMB2 Prima.jpg|100x100px]]<br>[[Flame Chomp]] | ||
|align=left|Black spheres that spit fireballs at Mario. | |||
|align=left| | |colspan=2|[[World 6-B (New Super Mario Bros. 2)|World 6-B]] | ||
|colspan=2 | |200 | ||
| | |||
|— | |— | ||
|- | |- | ||
|style="background: | |style="background:white"|[[File:Coin Coffer NSMB2 Prima.jpg|100x100px]]<br>[[Coin Coffer]] | ||
|align=left|Enemies that cough out coins when attacked. | |||
|align=left| | |{{world-link|star|1|World Star-1 (New Super Mario Bros. 2)}} | ||
| | |{{world-link|star|7|World Star-7 (New Super Mario Bros. 2)}} | ||
| | |200 | ||
|— | |— | ||
|} | |} | ||
===Obstacles=== | ===Obstacles from NSMB2=== | ||
{|class="wikitable" style="width:100%;text-align:center" | |||
|-style="color:white;background: | ===Bosses from NSMB2=== | ||
! | {|class="wikitable"style="width:100%;text-align:center" | ||
|-style="color:white;background:red" | |||
!rowspan=2 width=10%|Name | |||
!rowspan=2|Description | !rowspan=2|Description | ||
!colspan=2| | !colspan=2|Levels | ||
|-style="color:white;background: | |-style="color:white;background:red" | ||
!width=8%|First | !width=8%|First | ||
!width=8%|Last | !width=8%|Last | ||
|- | |- | ||
|style="background:white"|[[File: | !colspan=4 style="background:#FF7733"|The Koopalings | ||
|[[ | |- | ||
|align=left| | |style="background:white"|[[File:NSMBW Roy Artwork.png|100x100px]]<br>[[Roy Koopa]] | ||
|colspan=2|{{world-link| | |align=left|Roy's strategy is charging at the player, eventually ramming into a wall and being temporarily stunned (at which point he is vulnerable), as well as spinning in his shell and casting magic attacks. His room becomes increasingly narrower during battle. He takes three hits to defeat. | ||
|colspan=2|{{world-link|1|castlen2|World 1-Castle (New Super Mario Bros. 2)}} | |||
|- | |||
|style="background:white"|[[File:NSMBW Iggy Artwork.jpg|100x100px]]<br>[[Iggy Koopa]] | |||
|align=left|Like in ''New Super Mario Bros. Wii'', Iggy rides a [[Big Chain Chomp]] carriage, which transports him around the arena. Mario has to avoid both the Chain Chomp's lunges and Iggy's magic attacks. He takes three hits to defeat. | |||
|colspan=2|{{world-link|2|castlen2|World 2-Castle (New Super Mario Bros. 2)}} | |||
|- | |||
|style="background:white"|[[File:Larry Koopa NSMBW artwork.jpg|100x100px]]<br>[[Larry Koopa]] | |||
|align=left|Larry's attacks include jumping and shooting magic balls that bounce diagonally. His room has four shifting walls protuding from the floor and ceiling. He takes three hits to defeat. | |||
|colspan=2|{{world-link|mushroom|castlen2|World Mushroom-Castle}} | |||
|- | |||
|style="background:white"|[[File:NSMBW Wendy Artwork.png|100x100px]]<br>[[Wendy O. Koopa]] | |||
|align=left|Like in ''New Super Mario Bros. Wii'', Wendy's battle takes place in a flooded room. Mario must wait for the water to be drained so he can stomp Wendy, while avoiding Cheep Cheeps and bouncing magic rings. She takes three hits to defeat. | |||
|colspan=2|{{world-link|3|castlen2|World 3-Castle (New Super Mario Bros. 2)}} | |||
|- | |||
|style="background:white"|[[File:MKT Artwork Morton.png|100x100px]]<br>[[Morton Koopa Jr.]] | |||
|align=left|Morton attacks the player with spiked balls he creates from his wand, as well as shell attacks. He takes three hits to defeat. | |||
|colspan=2|{{world-link|4|castlen2|World 4-Castle (New Super Mario Bros. 2)}} | |||
|- | |||
|style="background:white"|[[File:NSMBW Lemmy Artwork.png|100x100px]]<br>[[Lemmy Koopa]] | |||
|align=left|Lemmy's battle takes place on a conveyor belt. He rides a circus ball and creates miniature ones with his magic, which bounce down the belt and can push Mario off. He takes three hits to defeat. | |||
|colspan=2|{{world-link|flower|castlen2|World Flower-Castle}} | |||
|- | |||
|style="background:white"|[[File:NSMBW Ludwig Artwork.png|100x100px]]<br>[[Ludwig von Koopa]] | |||
|align=left|Mario or Luigi must use the five gray [[Pipe Cannon]]s on the floor to blast against Ludwig, causing him to fall onto the floor, dizzy and vulnerable to attacks. He takes three hits to defeat. | |||
|colspan=2|{{world-link|5|castlen2|World 5-Castle (New Super Mario Bros. 2)}} | |||
|- | |||
!colspan=4 style="background:#FF7733"|Other | |||
|- | |- | ||
|style="background:white"|[[File: | |style="background:white"|[[File:Reznors.png|100x100px]]<br>[[Reznor]] | ||
|align=left|Reznors originate from ''[[Super Mario World]]'' and are fought as mini-bosses in every main world, standing on top of [[Coin Block|Rectangular Coin Block]]s above a collapsing bridge. The basic way of defeating them is to hit the blocks under their feet. | |||
|align=left|Mario | |{{world-link|1|towern2|World 1-Tower (New Super Mario Bros. 2)}} | ||
| | |{{world-link|6|towern2|World 6-Tower (New Super Mario Bros. 2)}} | ||
|[[World 6- | |- | ||
|style="background:white"|[[File:Nsmb2 bowser.png|100x100px]]<br>[[Bowser]] | |||
|align=left|Mario or Luigi must jump on the [[! Switch]] to send Bowser falling down beneath the bridge into the lava. After that, the Koopalings enlarge him, and Mario or Luigi must go onto the roof and hit a massive ! Switch to defeat him. The latter part does not occur in the Gold Classics Pack. | |||
|colspan=2|{{world-link|6|bowsern2|World 6-Bowser's Castle}} | |||
|- | |||
|style="background:white"|[[File:Dry Bowser Artwork.png|100x100px]]<br>[[Dry Bowser]] | |||
|align=left|Dry Bowser is fought in much the same way as Bowser, though Dry Bowser moves faster, breathes blue fireballs instead of orange ones, throws bones instead of sledgehammers, and is immune to fireballs, while the platforms in the second phase are also smaller. Mario or Luigi must jump on a ! Switch for Dry Bowser to fall off the bridge into the lava. The Koopalings then enlarge Dry Bowser, and Mario or Luigi must go onto the roof and hit a massive ! Switch to defeat Dry Bowser. | |||
|colspan=2|{{world-link|6|castlen2|World Star-Castle}} | |||
|} | |} | ||
=== | ===Items from NSMB2=== | ||
=== | ===Power-ups from NSMB2=== | ||
=== | ===Objects from NSMB2=== | ||
=== | ==NSMBU== | ||
===Playable characters from NSMBU=== | |||
{|class="wikitable" style="width:100%;text-align:center" | |||
|-style="color:white;background:red" | |||
!width=12%|Name | |||
!Description | |||
|- | |||
|style="background:white"|[[File:NSMBU Mario Jumping Artwork.png|100x100px]]<br>[[Mario]] | |||
|align=left|Mario returns from his appearance in ''[[New Super Mario Bros.]]'' as the game's main protagonist, with his goal being to save [[Princess Peach]] from [[Bowser]]'s clutches. He is the default playable character, and is the only playable character in story mode. | |||
|- | |||
|style="background:white"|[[File:NSMBU Luigi Jumping Artwork.png|100x100px]]<br>[[Luigi]] | |||
|align=left|Luigi, Mario's brother, also returns from his appearance in ''New Super Mario Bros.'' as a playable character in this game, however, he can played only in multiplayer and [[Super Guide]]. | |||
|- | |||
|style="background:white"|[[File:NSMBUYellowToad.png|80x80px]][[File:NSMBUBlueToad.png|80x80px]]<br>[[Yellow Toad and Blue Toad]] | |||
|align=left|[[Toad (species)|Toad]]s make their second playable role in the [[Super Mario (series)|''Super Mario'' series]] (the first being [[Toad]] in ''[[Super Mario Bros. 2]]'') as two separate playable characters in this game, Yellow Toad and Blue Toad, who are exclusive to multiplayer. | |||
|- | |||
|style="background:white"|[[File:NSMBU Three Miis Artwork.png|100x100px]]<br>[[Mii]]s | |||
|align=left|TBW | |||
|} | |||
===Yoshis from NSMBU=== | |||
''New Super Mario Bros. U'' features the return of [[Baby Yoshi]]s, having been absent from the ''Super Mario'' series since their debut in ''Super Mario World''. The game features three differently-colored Baby Yoshis, each one with a special ability. They differ from the adult Green Yoshi in terms of gameplay. Being babies, they cannot be ridden, so characters must carry them throughout the levels. Baby Yoshis also instantly eat almost any enemy that is in front of them. Unlike in ''Super Mario World'', however, Baby Yoshis no longer grow into adults after eating several enemies, instead remaining as babies. Two types of Baby Yoshis found on the overworld can be taken into any course, with the exception of [[Fortress]]es, [[Airship]]s, and [[Castle]]s. | |||
{|class="wikitable" style="width:100%;text-align:center" | |||
|-style="color:white;background:red" | |||
!width=12%|Name | |||
!Description | |||
!width=15%|Locations | |||
|- | |||
|style="background:white"|[[File:NSMBU Mario and Yoshi Jumping Artwork.png|100x100px]]<br>[[Yoshi]] | |||
|align=left|[[Yoshi (species)|Green Yoshi]]s make a return, acting like in ''New Super Mario Bros Wii''. Green is the only color available for Yoshis that the players ride on, unlike ''New Super Mario Bros. Wii''. [[Yoshi]] now has a meter that tracks how many fruits he eats, instead of showing a number each time he eats one. As usual, eating 5 makes him lay an egg containing an item. Like in ''New Super Mario Bros. Wii'', Yoshi cannot leave the courses that he appears in. | |||
|[[Yoshi Hill]], (and other levels that do not seem to be explicitly outlined anywhere) | |||
|- | |||
|style="background:white"|[[File:WiiU NewMarioU 3 char03 E3.png|100x100px]]<br>[[Balloon Baby Yoshi]]s | |||
|align=left|Magenta Baby Yoshis that expand like balloons and gently float in the air. These Baby Yoshis are similar to the [[Blimp Yoshi]] power-up, found in ''[[Super Mario Galaxy 2]]''. They first appear on the Acorn Plains map area. Additionally, up to 4 players can grab onto one Baby Yoshi, by grabbing their legs. This slows the player down though. | |||
|[[Acorn Plains]], [[Sparkling Waters]] | |||
|- | |||
|style="background:white"|[[File:NSMBU Glowing Baby Yoshi With Mario Artwork 2.png|100x100px]]<br>[[Glowing Baby Yoshi]]s | |||
|align=left|Yellow Baby Yoshis that light up dark areas and can stun enemies with their light attack. These Baby Yoshis act similar to the [[Light Block]]s, found in ''New Super Mario Bros. Wii'', and also [[Bulb Yoshi]] from ''[[Super Mario Galaxy 2]]''. Unlike the other two Baby Yoshis, the Glowing Baby Yoshis are not found on the world map and are only found in courses such as [[Perilous Pokey Cave]]. Instead of following the characters throughout the courses, they give an [[extra life]] when reach the end of the levels that they appear in. | |||
|[[Fire Snake Cavern]], [[Which-Way Labyrinth]] | |||
|- | |||
|style="background:white"|[[File:Toad and Blue Baby Yoshi.png|100x100px]]<br>[[Bubble Baby Yoshi]]s | |||
|align=left|Blue Baby Yoshis that blow bubbles from their mouths. Enemies caught in these bubbles will turn into 3 [[Coin]]s, a power-up, or a [[1-Up Mushroom]]. These bubbles can also be used as miniature platforms. They first appear on the Frosted Glacier map area. | |||
|[[Frosted Glacier]], [[Rock-Candy Mines]] | |||
|} | |||
===Non-playable characters in NSMBU=== | |||
{|class="wikitable" style="width:100%;text-align:center" | |||
|-style="color:white;background:red" | |||
!width=12%|Name | |||
!Description | |||
!width=15%|Locations | |||
|- | |||
|style="background:white"|[[File:PeachtoadsNSMBU.png|100x100px]]<br>[[Princess Peach]] | |||
|align=left|TBW | |||
|[[The Final Battle (New Super Mario Bros. U)|The Final Battle]] | |||
|- | |||
|style="background:white"|[[File:NSMBU Red Toad Render.png|100x100px]]<br>[[Toad (species)|Toads]] | |||
|align=left|Toads appear throughout the game in Toad Houses, at the end of the level when the player catches Nabbit, and past the end-of-level castles to give Mario a power-up if they complete a stage with the last two digits of the [[Time Limit]] being the same. | |||
|[[Toad House]]s, [[Acorn Plains Way]], [[Lemmy's Swingback Castle]], [[Blooming Lakitus]], [[Morton's Compactor Castle]], [[Urchin Shoals]], [[Larry's Torpedo Castle]], [[Prickly Goombas!]], [[Wendy's Shifting Castle]], [[Jungle of the Giants]], [[Iggy's Volcanic Castle]], [[Walking Piranha Plants!]], [[Roy's Conveyor Castle]], [[Seesaw Shrooms (level)|Seesaw Shrooms]], [[Ludwig's Clockwork Castle]], [[The Final Battle (New Super Mario Bros. U)|The Final Battle]] | |||
|- | |||
|style="background:white"|[[File:NabbitNSMBU.png|100x100px]]<br>[[Nabbit]] | |||
|align=left|A character that steals items from the map and must be defeated to retrieve the items. | |||
|[[Acorn Plains Way]], [[Blooming Lakitus]], [[Urchin Shoals]], [[Prickly Goombas!]], [[Jungle of the Giants]], [[Walking Piranha Plants!]], [[Seesaw Shrooms (level)|Seesaw Shrooms]] | |||
|} | |||
== | ===Enemies in NSMBU=== | ||
The enemies listed in this table match those in the companion [[Prima Games]] guidebook,<ref>{{cite|author=Stratton, Steve|title=''New Super Mario Bros. U: PRIMA Official Game Guide''|location=Roseville|publisher=[[Prima Games]]|date=2012|page=28–35|isbn=978-0-307-89690-2}}</ref> the ''[[Super Mario Bros. Encyclopedia]]'',<ref>{{cite|author=Sakai, Kazuya (Ambit), kikai, Akinori Sao, Junko Fukuda, Kunio Takayama, and Ko Nakahara (Shogakukan), editors|title="New Super Mario Bros. U" in『[[Super Mario Bros. Encyclopedia|スーパーマリオブラザーズ百科: 任天堂公式ガイドブック]]』|language=ja|location=Tokyo|publisher=[[Shogakukan]]|date=2015|page=204–19|isbn=4-091065-69-4}}</ref> and Mario Portal Game Archive.<ref>{{cite|author=[[Nintendo|Nintendo Co., Ltd.]]|title=New Super Mario Bros. U|url=nintendo.com/jp/character/mario/en/history/new_smb_u/index.html|publisher=Mario Portal Game Archive|date=2022|accessdate=28 Aug. 2024}}</ref> The default order they are listed derives from their occurrence in-game with adjustments to ensure enemies are listed next to their immediate relatives. The blue Dragoneel is only recognized in the guidebook<ref>Stratton, p. 90.</ref> and is unmentioned in the other two sources, but it is listed here in recognition of its mechanical and physiological distinctiveness from the red one. | |||
{|class="wikitable sortable" style="width:100%;text-align:center" | {|class="wikitable sortable" style="width:100%;text-align:center" | ||
|-style="color:white;background: | |-style="color:white;background:red" | ||
! | !rowspan=2 width=10%|Name | ||
!class="unsortable" rowspan=2|Description | !class="unsortable" rowspan=2|Description | ||
!class="unsortable" colspan=2| | !class="unsortable" colspan=2 |Levels | ||
!rowspan=2| | !rowspan=2|Pts. | ||
!rowspan=2|Exc. | |||
!rowspan=2|New | !rowspan=2|New | ||
|-style="color:white;background: | |-style="color:white;background:red" | ||
!width=8%|First | !width=8%|First | ||
!width=8%|Last | !width=8%|Last | ||
|- | |- | ||
|style="background:white"|[[File: | |style="background:white"|[[File:NSMBU Goomba Alternate Artwork.png|100x100px]]<br>[[Goomba]] | ||
|[[ | |align=left|Common enemies that can be defeated by jumping on them. Some Goombas in [[Skyward Stalk]] float on balloons. | ||
|align=left|A | |[[Acorn Plains Way]] | ||
|[[ | |[[Follow That Shell!]] | ||
|[[ | |200 | ||
| | |— | ||
|— | |||
|- | |||
|style="background:white"|[[File:ParagoombaNSMBU.png|100x100px]]<br>[[Paragoomba]] | |||
|align=left|Winged Goombas that hop as they walk. | |||
|colspan=2|[[Seesaw Shrooms (level)|Seesaw Shrooms]] | |||
|200 | |||
|{{chart icon|NSMBU-exc}} | |||
|— | |||
|- | |||
|style="background:white"|[[File:NSMBU Hefty Goomba.jpg|100x100px]]<br>[[Hefty Goomba]] | |||
|align=left|A large Goomba that is the middling size of a Goomba, being smaller than a Big Goomba but bigger than a regular Goomba. This enemy splits into two Goombas when jumped on. | |||
|colspan=2|[[Jungle of the Giants]] | |||
|200 | |||
|{{chart icon|NSMBU-exc}} | |||
|— | |||
|- | |||
|style="background:white"|[[File:NSMBU Big Goomba.jpg|100x100px]]<br>[[Big Goomba]] | |||
|align=left|Large variants of Goombas. They split into two Hefty Goombas once stomped on. | |||
|colspan=2|[[Jungle of the Giants]] | |||
|200 | |||
|{{chart icon|NSMBU-exc}} | |||
|— | |||
|- | |||
|style="background:white"|[[File:NSMBU Screenshot Mini Goomba.png|100x100px]]<br>[[Mini Goomba]] | |||
|align=left|Small Goombas that weigh Mario down until he either attacks or walks for a few seconds. | |||
|[[Slide Lift Tower]] | |||
|[[Magma-River Cruise]] | |||
|200 | |||
|— | |||
|— | |||
|- | |||
|style="background:white"|[[File:NSMBU Screenshot Prickly Goomba.png|100x100px]]<br>[[Prickly Goomba]] | |||
|align=left|A Goomba that hides inside a spiked chestnut shell until it is hit with a [[fireball]], which is when it turns into a regular Goomba. | |||
|colspan=2|[[Prickly Goombas!]] | |||
|200 | |||
|— | |||
|— | |||
|- | |||
|style="background:white"|[[File:NSMBU Asset Model Goombrat.png|100x100px]]<br>[[Goombrat]] | |||
|align=left|A [[Goomba]] that resembles a {{wp|persimmon}} and turns at ledges. | |||
|colspan=2|[[Mushroom Heights]] | |||
|200 | |||
|— | |||
|{{chart icon|new}} | |{{chart icon|new}} | ||
|- | |- | ||
|style="background:white"|[[File: | |style="background:white"|[[File:NSMBU Waddlewing Walking Artwork.png|100x100px]]<br>[[Waddlewing]] | ||
|align=left|Orange flying-squirrel enemies that glide through stages. | |||
|align=left| | |[[Acorn Plains Way]] | ||
|[[ | |[[Land of Flying Blocks]] | ||
|[[ | |200 | ||
| | |— | ||
|{{chart icon|new}} | |{{chart icon|new}} | ||
|- | |- | ||
|style="background:white"|[[File: | |style="background:white"|[[File:KoopaTroopaNSMBU.png|100x100px]]<br>[[Koopa Troopa]] (Green) | ||
|[[ | |align=left|Turtle enemies that go into their shells when attacked, then can be picked up or thrown. Green Koopa Troopas walk off ledges. | ||
|align=left| | |[[Acorn Plains Way]] | ||
|[[ | |[[Follow That Shell!]] | ||
|[[ | |200 | ||
| | |— | ||
|{{chart icon| | |— | ||
|- | |||
|style="background:white"|[[File:KoopatroopaNSMBU.png|100x100px]]<br>Koopa Troopa (Red) | |||
|align=left|Red Koopa Troopas turn around. | |||
|[[Tilted Tunnel]] | |||
|[[Follow That Shell!]] | |||
|200 | |||
|— | |||
|— | |||
|- | |||
|style="background:white"|[[File:ParatroopaNSMBU.png|100x100px]]<br>[[Koopa Paratroopa]] (Green) | |||
|align=left|Winged Koopa Troopas that either jump in high arcs or fly up and down in the air. | |||
|[[Stone-Eye Zone]] | |||
|[[Run for It]] | |||
|200 | |||
|— | |||
|— | |||
|- | |||
|style="background:white"|[[File:KoopaParatroopa NSMBU.png|100x100px]]<br>Koopa Paratroopa (Red) | |||
|align=left|TBW | |||
|[[Stone-Eye Zone]] | |||
|[[Hammerswing Caverns]] | |||
|200 | |||
|— | |||
|— | |||
|- | |||
|style="background:white"|[[File:NSMBU Big Green Koopa Troopa.jpg|100x100px]]<br>[[Big Koopa Troopa]] (Green) | |||
|align=left|Large variants of Koopa Troopas. | |||
|colspan=2|[[Jungle of the Giants]] | |||
|200 | |||
|{{chart icon|NSMBU-exc}} | |||
|— | |||
|- | |||
|style="background:white"|[[File:NSMBU Red Big Koopa Troopa Render.png|100x100px]]<br>Big Koopa Troopa (Red) | |||
|align=left|TBW | |||
|colspan=2|[[Jungle of the Giants]] | |||
|200 | |||
|— | |||
|— | |||
|- | |||
|style="background:white"|[[File:MP8 DryBones.png|100x100px]]<br>[[Dry Bones]] | |||
|align=left|Skeleton Koopa Troopas that collapse when attacked, but later rebuild themselves. | |||
|[[Crushing-Cogs Tower]] | |||
|[[Ludwig's Clockwork Castle]] | |||
|200 | |||
|— | |||
|— | |||
|- | |||
|style="background:white"|[[File:NSMBU Asset Model Dry Bones.png|100x100px]]<br>[[Big Dry Bones]] | |||
|align=left|Large variants of Dry Bones that appear in castle levels. | |||
|[[Stoneslide Tower]] | |||
|[[Ludwig's Clockwork Castle]] | |||
|200 | |||
|— | |||
|— | |||
|- | |||
|style="background:white"|[[File:NSMBU Buzzy Beetle Artwork.png|100x100px]]<br>[[Buzzy Beetle]] | |||
|align=left|Shelled enemies that can be kicked or thrown after being jumped on, and can walk on ceilings. | |||
|[[Tilted Tunnel]] | |||
|[[Fire Bar Cliffs]] | |||
|200 | |||
|— | |||
|— | |||
|- | |||
|style="background:white"|[[File:NSMBU Buzzy Beetle Render.png|100x100px]]<br>[[Big Buzzy Beetle]] | |||
|align=left|Bigger variants of Buzzy Beetles. | |||
|colspan=2|[[Rising Tides of Lava]] | |||
|200 | |||
|{{chart icon|NSMBU-exc}} | |||
|— | |||
|- | |||
|style="background:white"|[[File:NSMBU Asset Model Spike Top.png|100x100px]]<br>[[Spike Top]] | |||
|align=left|Buzzy Beetle variants that have spikes on their shells, preventing them from being jumped on. | |||
|[[Stoneslide Tower]] | |||
|[[Rising Tides of Lava]] | |||
|200 | |||
|— | |||
|— | |||
|- | |||
|style="background:white"|[[File:NSMBU Asset Model Para-Beetle.png|100x100px]]<br>[[Para-Beetle]] | |||
|align=left|Para-Beetles are winged Buzzy Beetles. However, Mario can hop on their back for a ride, unlike with other winged foes. | |||
|colspan=2|[[Flight of the Para-Beetles]] | |||
|data-sort-value=2000|{{chart icon|cross}} | |||
|— | |||
|— | |||
|- | |||
|style="background:white"|[[File:NSMBU Asset Model Heavy Para-Beetle.png|100x100px]]<br>[[Heavy Para-Beetle]] | |||
|align=left|A Para-Beetle that descends when used as a platform. | |||
|colspan=2|[[Flight of the Para-Beetles]] | |||
|data-sort-value=2000|{{chart icon|cross}} | |||
|— | |||
|— | |||
|- | |||
|style="background:white"|[[File:NSMBU Bony Beetle Artwork.png|100x100px]]<br>[[Bony Beetle]] | |||
|align=left|Skeleton variants of Buzzy Beetles that walk around and suddenly stop to stick out their spikes. | |||
|[[Grinding-Stone Tower]] | |||
|[[Pendulum Castle]] | |||
|200 | |||
|— | |||
|— | |||
|- | |||
|style="background:white"|[[File:NSMBU Hammer Bro Artwork.png|100x100px]]<br>[[Hammer Bro]] | |||
|align=left|Enemies that throw hammers and jump. | |||
|colspan=2|[[Rise of the Piranha Plants]] | |||
|1000 | |||
|— | |||
|— | |||
|- | |||
|style="background:white"|[[File:NSMBU Fire Bro Artwork.png|100x100px]]<br>[[Fire Bro]] | |||
|align=left|Hammer Bros that throw fireballs. | |||
|[[Fire Snake Cavern]] | |||
|[[Ludwig's Clockwork Castle]] | |||
|1000 | |||
|— | |||
|— | |||
|- | |||
|style="background:white"|[[File:NSMBU Boomerang Bro Artwork.png|100x100px]]<br>[[Boomerang Bro]] | |||
|align=left|Hammer Bros that use boomerangs, which return to them after being thrown. | |||
|colspan=2|[[Bouncy Cloud Boomerangs]] | |||
|1000 | |||
|— | |||
|— | |||
|- | |||
|style="background:white"|[[File:NSMBU Ice Bro Artwork.png|100x100px]]<br>[[Ice Bro]] | |||
|align=left|An enemy that throws [[Ice Ball|ice ball]]s at the ground, which can freeze the player and even other enemies. | |||
|colspan=2|[[Icicle Caverns]] | |||
|1000 | |||
|— | |||
|— | |||
|- | |||
|style="background:white"|[[File:NSMBU Sledge Bro Screenshot.png|100x100px]]<br>[[Sledge Bro]] | |||
|align=left|Hammer Bro variants that stun Mario after they jump. | |||
|colspan=2|[[Ludwig's Clockwork Castle]] | |||
|1000 | |||
|— | |||
|— | |||
|- | |||
|style="background:white"|[[File:NSMBU Sumo Bro Artwork.png|100x100px]]<br>[[Sumo Bro]] | |||
|align=left|Giant Koopas that stomp the ground and create electric waves in two directions. | |||
|colspan=2|[[Screwtop Tower]] | |||
|200 | |||
|— | |||
|— | |||
|- | |- | ||
|style="background:white"|[[File: | |style="background:white"|[[File:NSMBU Lakitu Artwork.png|100x100px]]<br>[[Lakitu]] | ||
|align=left|Enemies that throw Spiny Eggs. If Mario defeats a Lakitu, he can ride on its cloud until it disappears. | |||
|align=left| | |[[Blooming Lakitus]] | ||
|[[ | |[[Lakitu! Lakitu! Lakitu!]] | ||
|[[ | |1000 | ||
| | |— | ||
|— | |— | ||
|- | |- | ||
|style="background:white"|[[File:Spiny | |style="background:white"|[[File:NSMBU Asset Model Spiny.png|100x100px]]<br>[[Spiny]] | ||
|align=left|Enemies that hatch from Spiny Eggs and cannot be jumped on. | |||
|align=left| | |[[Seesaw Shrooms (level)|Seesaw Shrooms]] | ||
|[[ | |[[Lakitu! Lakitu! Lakitu!]] | ||
|[[ | |200 | ||
| | |— | ||
|— | |— | ||
|- | |- | ||
|style="background:white"|[[File: | |style="background:white"|[[File:NSMBU Screenshot Spiny Egg.png|100x100px]]<br>[[Spiny Egg]] | ||
|align=left|TBW | |||
|align=left| | |[[Seesaw Shrooms (level)|Seesaw Shrooms]] | ||
|[[ | |[[Lakitu! Lakitu! Lakitu!]] | ||
|[[ | |200 | ||
| | |— | ||
|— | |— | ||
|- | |- | ||
|style="background:white"|[[File: | |style="background:white"|[[File:NSMBU Spike Render.png|100x100px]]<br>[[Spike]] | ||
|align=left|Green turtles which pull spiked balls out of their mouths and throw them directly downwards from the ledges on which they stand | |||
|align=left| | |colspan=2|[[Spike's Spouting Sands]] | ||
| | |200 | ||
|[[ | |— | ||
| | |— | ||
| | |||
|- | |- | ||
|style="background:white"|[[File: | |style="background:white"|[[File:NSMBU Asset Model Stone Spike.png|100x100px]]<br>[[Stone Spike]] | ||
|align=left|A Spike that throws stone rocks downwards. | |||
|align=left|A | |colspan=2|[[Dry Desert Mushrooms]] | ||
|[[ | |200 | ||
| | |— | ||
| | |— | ||
| | |||
|- | |- | ||
|style="background:white"|[[File: | |style="background:white"|[[File:NSMBU Piranha Plant Cropped Artwork.png|100x100px]]<br>[[Piranha Plant]] | ||
|align=left|Plants that move in and out of Warp Pipes and some grounded. | |||
|align=left| | |[[Acorn Plains Way]] | ||
|[[ | |[[Spinning Platforms of Doom]] | ||
|[[ | |200 | ||
| | |— | ||
| | |— | ||
|- | |- | ||
|style="background:white"|[[File: | |style="background:white"|[[File:NSMBUD Piranha Pod model.png|100x100px]]<br>[[Piranha Pod]] | ||
|align=left|A projectile thrown by a [[Lakitu]] that turns into a [[Piranha Plant]]. | |||
|align=left|A | |colspan=2|[[Blooming Lakitus]] | ||
|[[ | |200 | ||
| | |— | ||
| | |||
|{{chart icon|new}} | |{{chart icon|new}} | ||
|- | |- | ||
|style="background:white"|[[File: | |style="background:white"|[[File:GroundedPiranhaPlantNSMBU.png|100x100px]]<br>[[Big Piranha Plant]] | ||
|align=left|Large variants of Piranha Plants. | |||
|align=left| | |[[Mushroom Heights]] | ||
|[[ | |[[A Quick Dip in the Sky]] | ||
|[[ | |200 | ||
| | |— | ||
| | |— | ||
|- | |- | ||
|style="background:white"|[[File: | |style="background:white"|[[File:FirepiranhaNSMBU.png|100x100px]]<br>[[Fire Piranha Plant]] | ||
|align=left|Piranha Plants that aim at Mario and shoot fireballs. | |||
|align=left| | |[[Yoshi Hill]] | ||
| | |[[Prickly Goombas!]] | ||
| | |200 | ||
|— | |||
|— | |— | ||
|- | |- | ||
|style="background:white"|[[File: | |style="background:white"|[[File:Ice PiranhaNSMBU.png|100x100px]]<br>[[Frost Piranha|Ice Piranha Plant]] | ||
|align=left|A Piranha Plant that can shoot ice balls from its mouth, like Fire Piranha Plants. | |||
|align=left|A | |colspan=2|[[Fuzzy Clifftop]] | ||
|[[ | |200 | ||
| | |— | ||
| | |— | ||
| | |||
|- | |- | ||
|style="background:white"|[[File: | |style="background:white"|[[File:NSMBU River Piranha Plant Render.png|100x100px]]<br>[[River Piranha Plant]] | ||
|align=left|A stationary Piranha Plant that blows a green spiked ball up and down, similar to a [[Ptooie]]. | |||
|align=left| | |[[Fliprus Lake]] | ||
A | |[[Seesaw Bridge]] | ||
|[[ | |200 | ||
|[[ | |— | ||
| | |— | ||
| | |||
|- | |- | ||
|style="background:white"|[[File: | |style="background:white"|[[File:NSMBU Screenshot Stalking Piranha Plant.png|100x100px]]<br>[[Stalking Piranha Plant]] | ||
|align=left|A Piranha Plant that walks around and stretches up and down on a regular basis. | |||
|align=left|A | |[[Bramball Woods]] | ||
|[[ | |[[Walking Piranha Plants!]] | ||
|[[ | |200 | ||
| | |— | ||
| | |— | ||
|- | |- | ||
|style="background:white"|[[File: | |style="background:white"|[[File:NSMBU Muncher Artwork.png|100x100px]]<br>[[Muncher]] | ||
|align=left|An invincible black plant. | |||
|align=left| | |[[Spinning-Star Sky]] | ||
|[[ | |[[Thrilling Spine Coaster]] | ||
|[[ | |data-sort-value=2000|{{chart icon|cross}} | ||
| | |— | ||
|— | |— | ||
|- | |- | ||
|style="background:white"|[[File: | |style="background:white"|[[File:MontymoleNSMBU.png|100x100px]]<br>[[Monty Mole]] | ||
|align=left|A mole that pops out of mountains and the ground and gives chase. | |align=left|A mole that pops out of mountains and the ground and gives chase. | ||
|[[Yoshi | |[[Yoshi Hill]] | ||
|[[ | |[[Magma-River Cruise]] | ||
| | |200 | ||
| | |— | ||
|— | |||
|- | |- | ||
|style="background:white"|[[File: | |style="background:white"|[[File:NSMBU Asset Model Rocky Wrench.png|100x100px]]<br>[[Rocky Wrench]] | ||
|align=left|Monty Moles that pop out of its hole in an airship throw wrenches. | |||
|align=left| | |colspan=2|[[Boarding the Airship]] | ||
| | |200 | ||
|[[ | |{{chart icon|NSMBU-exc}} | ||
| | |— | ||
|{{chart icon| | |||
|- | |- | ||
|style="background:white"|[[File: | |style="background:white"|[[File:NSMBW Asset Model Lava Bubble.png|100x100px]]<br>[[Lava Bubble]] | ||
|align=left|Fireballs that jump out of lava. | |||
|align=left| | |[[Lemmy's Swingback Castle]] | ||
|[[ | |[[The Final Battle (New Super Mario Bros. U)|The Final Battle]] | ||
|[[ | |200 | ||
| | |— | ||
| | |— | ||
|- | |- | ||
|style="background:white"|[[File: | |style="background:white"|[[File:NSMBU Pokey Artwork.png|100x100px]]<br>[[Pokey]] | ||
|align=left|Living cacti that appear in desert levels and move slowly. | |||
|align=left| | |colspan=2|[[Perilous Pokey Cave]] | ||
|[[ | |200 | ||
| | |— | ||
| | |— | ||
| | |||
|- | |- | ||
|style="background:white"|[[File: | |style="background:white"|[[File:NSMBU Screenshot Big Pokey.png|100x100px]]<br>[[Big Pokey]] | ||
|align=left|Large variants of Pokeys. | |||
|align=left| | |colspan=2|[[Morton's Compactor Castle]] | ||
|[[ | |None | ||
| | |— | ||
| | |— | ||
| | |||
|- | |- | ||
|style="background:white"|[[File: | |style="background:white"|[[File:NSMBU Asset Model Swoop.png|100x100px]]<br>[[Swoop]] | ||
|align=left|Bats that hang onto the ceiling, then swoop towards Mario. | |||
|align=left| | |[[Perilous Pokey Cave]] | ||
|[[ | |[[Shifting-Floor Cave]] | ||
|[[ | |200 | ||
| | |{{chart icon|NSMBU-exc}} | ||
|— | |— | ||
|- | |- | ||
|style="background:white"|[[File: | |style="background:white"|[[File:NSMBU Asset Model Fire Snake.png|100x100px]]<br>[[Fire Snake]] | ||
|align=left|Flames that jump in a high arc. | |||
|align=left| | |colspan=2|[[Fire Snake Cavern]] | ||
|[[ | |200 | ||
| | |— | ||
| | |||
|— | |— | ||
|- | |- | ||
|style="background:white"|[[File: | |style="background:white"|[[File:NSMBU Grrrol Artwork.png|100x100px]]<br>[[Grrrol]] | ||
|align=left|Round, Thwomp-like enemies that roll on the ground. | |||
|align=left| | |[[Stoneslide Tower]] | ||
|[[ | |[[Grinding-Stone Tower]] | ||
|[[ | |200 | ||
| | |— | ||
|{{chart icon|new}} | |{{chart icon|new}} | ||
|- | |- | ||
|style="background:white"|[[File: | |style="background:white"|[[File:Dai Goro model.png|100x100px]]<br>[[Mega Grrrol]] | ||
|align=left|A bigger Grrrol with the same behavior. | |||
|align=left| | |colspan=2|[[Grinding-Stone Tower]] | ||
|[[ | |200 | ||
| | |— | ||
| | |||
|{{chart icon|new}} | |{{chart icon|new}} | ||
|- | |- | ||
|style="background:white"|[[File: | |style="background:white"|[[File:NSMBU Huckit Crab Artwork.png|100x100px]]<br>[[Huckit Crab]] | ||
|align=left|A crab that throws rocks on loop. These can be jumped on and used as a temporary platform. | |||
|align=left|A | |colspan=2|[[Waterspout Beach]] | ||
|[[ | |200 | ||
|[[ | |— | ||
| | |— | ||
| | |- | ||
|style="background:white"|[[File:CheepCheepNSMBU.png|100x100px]]<br>[[Cheep Cheep]] | |||
|align=left|Fish that are found swimming aimlessly in underwater levels. | |||
|[[Waterspout Beach]] | |||
|[[Swim for Your Life!]] | |||
|200 | |||
|— | |||
|— | |||
|- | |- | ||
|style="background:white"|[[File: | |style="background:white"|[[File:NSMBU Asset Model Big Cheep Cheep.png|100x100px]]<br>[[Big Cheep Cheep]] | ||
|align=left|Large variants of Cheep Cheeps that are found in underwater levels. | |||
|align=left| | |colspan=2|[[Tropical Refresher]] | ||
| | |200 | ||
|[[ | |— | ||
| | |— | ||
| | |||
|- | |- | ||
|style="background:white"|[[File: | |style="background:white"|[[File:NSMBU Eep Cheep Artwork.png|100x100px]]<br>[[Eep Cheep]] | ||
|align=left|A Cheep Cheep that lives in a school with other Eep Cheeps and swims away when the player comes near it. | |||
|align=left| | |colspan=2|[[Dragoneel's Undersea Grotto]] | ||
|[[ | |200 | ||
| | |— | ||
| | |— | ||
| | |||
|- | |- | ||
|style="background:white"|[[File: | |style="background:white"|[[File:NSMBU Spiny Cheep Artwork.png|100x100px]]<br>[[Spiny Cheep Cheep]] | ||
|align=left|Fast-swimming fish that chase Mario. | |||
|align=left| | |[[Tropical Refresher]] | ||
|[[ | |[[Swim for Your Life!]] | ||
|[[ | |200 | ||
| | |— | ||
| | |— | ||
|- | |- | ||
|style="background:white"|[[File: | |style="background:white"|[[File:NSMBU Asset Model Cheep Chomp.png|100x100px]]<br>[[Cheep Chomp]] | ||
|align=left|Large fish that attempt to eat Mario. | |||
|align=left| | |colspan=2|[[Swim for Your Life!]] | ||
|[[ | |200 | ||
| | |— | ||
| | |— | ||
| | |||
|- | |- | ||
|style="background:white"|[[File: | |style="background:white"|[[File:NSMBU Porcupuffer Artwork.png|100x100px]]<br>[[Porcupuffer]] | ||
|align=left|Fish that jump out of the water and follow Mario. | |||
|align=left| | |colspan=2|[[Porcupuffer Falls]] | ||
| | |200 | ||
|[[ | |— | ||
| | |— | ||
| | |||
|- | |- | ||
|style="background:white"|[[File: | |style="background:white"|[[File:FishboneNSMBU.png|100x100px]]<br>[[Fish Bone]] | ||
|align=left|Skeletal fish that charge towards Mario. | |||
|align=left| | |[[Haunted Shipwreck]] | ||
|[[ | |[[Deepsea Ruins]] | ||
|[[ | |200 | ||
| | |— | ||
| | |— | ||
|- | |- | ||
|style="background:white"|[[File: | |style="background:white"|[[File:NSMBU Asset Model Clampy.png|100x100px]]<br>[[Clampy]] | ||
|align=left|Clams that open and close their mouths. | |||
|align=left| | |colspan=2|[[Waterspout Beach]] | ||
|[[ | |data-sort-value=2000|{{chart icon|cross}} | ||
| | |{{chart icon|NSMBU-exc}} | ||
| | |||
|— | |— | ||
|- | |- | ||
|style="background:white"|[[File: | |style="background:white"|[[File:NSMBU Urchin Artwork.png|100x100px]]<br>[[Urchin]] | ||
|align=left|Stationary enemies that appear in underwater levels. | |||
|align=left| | |[[Tropical Refresher]] | ||
|[[ | |[[Swim for Your Life!]] | ||
|[[ | |200 | ||
| | |— | ||
|— | |— | ||
|- | |- | ||
|style="background:white"|[[File: | |style="background:white"|[[File:NSMBU Asset Model Big Urchin.png|100x100px]]<br>[[Big Urchin]] | ||
|align=left|A gigantic Urchin that can be defeated only with a Star. | |||
|align=left|A | |[[Tropical Refresher]] | ||
|[[ | |[[Urchin Shoals]] | ||
|[[ | |200 | ||
| | |— | ||
| | |— | ||
|- | |- | ||
|style="background:white"|[[File: | |style="background:white"|[[File:NSMBUDX Dragoneel model.png|100x100px]]<br>[[Dragoneel]] (Red) | ||
|align=left|A long eel that attacks [[Mario]] by chasing him. | |||
|align=left| | |colspan=2|[[Dragoneel's Undersea Grotto]] | ||
|[[ | |200 | ||
| | |— | ||
| | |||
|{{chart icon|new}} | |{{chart icon|new}} | ||
|- | |- | ||
|style="background:white"|[[File: | |style="background:white"|[[File:NSMBUDX twin Dragoneel model.png|100x100px]]<br>Dragoneel (Blue) | ||
|align=left|Shorter, purple ones also exist that move slower, but make sharper turns. | |||
|align=left| | |colspan=2|[[Dragoneel's Undersea Grotto]] | ||
|[[ | |200 | ||
| | |— | ||
| | |||
|{{chart icon|new}} | |{{chart icon|new}} | ||
|- | |- | ||
|style="background:white"|[[File: | |style="background:white"|[[File:NSMBU Asset Model Blooper.png|100x100px]]<br>[[Blooper]] | ||
|align=left|Underwater enemies that move in an erratic pattern and follow Mario. | |||
|align=left| | |[[Blooper's Secret Lair]] | ||
|[[ | |[[Tropical Refresher]] | ||
|[[ | |200 | ||
| | |— | ||
|— | |— | ||
|- | |- | ||
|style="background:white"|[[File: | |style="background:white"|[[File:BloopernannyNSMBU.png|100x100px]]<br>[[Blooper Nanny]] | ||
|align=left|Bloopers that have [[Blooper Baby|Blooper Babies]] swimming in a trail behind them. | |||
|align=left| | |colspan=2|[[Blooper's Secret Lair]] | ||
|colspan= | |200 | ||
| | |{{chart icon|NSMBU-exc}} | ||
|{{chart icon| | |— | ||
|- | |- | ||
|style="background:white"|[[File: | |style="background:white"|[[File:NSMBU Asset Model Bullet Bill.png|100x100px]]<br>[[Bullet Bill]] | ||
|align=left|Bullets that fly straight forward and are shot from Bill Blasters and Bill Blaster Turrets. | |||
|align=left| | |[[Scaling the Mountainside]] | ||
|[[Switchback Hill]] | |||
| | |200 | ||
| | |— | ||
|— | |||
|- | |- | ||
|style="background:white"|[[File: | |style="background:white"|[[File:NSMBU Asset Model Bull's-Eye Bill.png|100x100px]]<br>[[Bull's-Eye Bill|Missile Bill]] | ||
|align=left|Bullet Bills that target Mario. | |||
|align=left| | |colspan=2|[[Roy's Conveyor Castle]] | ||
|[[ | |200 | ||
| | |— | ||
| | |||
|— | |— | ||
|- | |- | ||
|style="background:white"|[[File: | |style="background:white"|[[File:BanzaibillNSMBU.png|100x100px]]<br>[[Banzai Bill]] | ||
|align=left|Large Bullet Bills that fly straight forward. | |||
|align=left| | |colspan="2"|[[Scaling the Mountainside]] | ||
|[[ | |200 | ||
| | |— | ||
| | |— | ||
| | |||
|- | |- | ||
|style="background:white"|[[File: | |style="background:white"|[[File:NSMBU Asset Model King Bill.png|100x100px]]<br>[[King Bill]] | ||
|align=left|A nearly invincible enemy that charges forward, taking up most of the screen. | |||
|align=left|A | |colspan=2|[[Flight of the Para-Beetles]] | ||
|[[ | |200 | ||
| | |— | ||
| | |||
|— | |— | ||
|- | |- | ||
|style="background:white"|[[File: | |style="background:white"|[[File:NSMBU Asset Model Torpedo Ted.png|100x100px]]<br>[[Torpedo Ted]] | ||
|align=left|A slow-moving torpedo that flies in one direction. | |||
|align=left|A | |[[Larry's Torpedo Castle]] | ||
|[[ | |[[The Mighty Cannonship]] | ||
|[[ | |200 | ||
| | |— | ||
| | |— | ||
|- | |- | ||
|style="background:white"|[[File: | |style="background:white"|[[File:NSMBU Asset Model Targeting Ted.png|100x100px]]<br>[[Targeting Ted]] | ||
|align=left|Red Torpedo Teds that home into their target, much like Bull's-Eye Bills. | |||
|align=left| | |colspan=2|[[The Mighty Cannonship]] | ||
|[[ | |200 | ||
| | |— | ||
| | |||
|{{chart icon|new}} | |{{chart icon|new}} | ||
|- | |- | ||
|style="background:white"|[[File: | |style="background:white"|[[File:CooliganNSMBU.png|100x100px]]<br>[[Cooligan]] | ||
|align=left|An enemy that slides on ice and slows down when hit. | |||
|align=left| | |colspan=2|[[Cooligan Fields]] | ||
|[[ | |200 | ||
| | |— | ||
| | |||
|— | |— | ||
|- | |- | ||
|style="background:white"|[[File: | |style="background:white"|[[File:FliprusModelNSMBU.png|100x100px]]<br>[[Fliprus]] | ||
|align=left|A walrus-like creature that throws snowballs that can be jumped on. | |||
|align=left|A | |colspan=2|[[Fliprus Lake]] | ||
|[[ | |200 | ||
| | |— | ||
| | |||
|{{chart icon|new}} | |{{chart icon|new}} | ||
|- | |- | ||
|style="background:white"|[[File: | |style="background:white"|[[File:NSMBU Thwomp Artwork.png|100x100px]]<br>[[Thwomp]] | ||
|align=left|Large rocks that fall when Mario gets close. | |||
|align=left| | |colspan=2|[[Wendy's Shifting Castle]] | ||
|[[ | |200 | ||
| | |— | ||
| | |— | ||
| | |||
|- | |- | ||
|style="background:white"|[[File: | |style="background:white"|[[File:NSMBU Asset Model Big Thwomp.png|100x100px]]<br>[[Big Thwomp]] | ||
|align=left|Large Thwomps that can break through stone tiles. | |||
|align=left| | |colspan=2|[[Wendy's Shifting Castle]] | ||
|[[ | |200 | ||
| | |— | ||
| | |||
|— | |— | ||
|- | |- | ||
|style="background:white"|[[File: | |style="background:white"|[[File:NSMBU Thwimp Model.png|100x100px]]<br>[[Thwimp]] | ||
|align=left|A tiny Thwomp that hops around. | |||
|align=left|A | |colspan=2|[[Wendy's Shifting Castle]] | ||
| | |200 | ||
|[[ | |{{chart icon|NSMBU-exc}} | ||
| | |— | ||
|{{chart icon| | |||
|- | |- | ||
|style="background:white"|[[File: | |style="background:white"|[[File:NSMBU Asset Model Mechakoopa.png|100x100px]]<br>[[Mechakoopa]] | ||
|align=left|A mechanical Koopa. After stomping it, Mario can pick it up and use it as a weapon. | |||
|align=left|A | |colspan=2|[[The Mighty Cannonship]] | ||
|[[ | |200 | ||
| | |— | ||
| | |— | ||
| | |||
|- | |- | ||
|style="background:white"|[[File: | |style="background:white"|[[File:NSMBU Asset Model Mecha Cheep.png|100x100px]]<br>[[Mecha Cheep]] | ||
|align=left|Robotic Cheep Cheeps that are immune to fireballs. | |||
|align=left| | |colspan=2|[[The Mighty Cannonship]] | ||
|colspan= | |200 | ||
| | |{{chart icon|NSMBU-exc}} | ||
|{{chart icon|new}} | |{{chart icon|new}} | ||
|- | |- | ||
|style="background:white"|[[File: | |style="background:white"|[[File:NSMBU Bramball Artwork.png|100x100px]]<br>[[Bramball]] | ||
|align=left|An enemy that moves around in a set pattern and is mostly covered in spikes, with the head being the only safe part to jump on. It can be forced to move if jumped into from below. | |||
|align=left| | |colspan=2|[[Bramball Woods]] | ||
|[[ | |200 | ||
| | |— | ||
| | |— | ||
| | |||
|- | |- | ||
|style="background:white"|[[File: | |style="background:white"|[[File:Amp NSMBU model.png|100x100px]]<br>[[Amp]] | ||
|align=left|Electric balls that shock Mario upon contact. | |||
|align=left| | |[[Snake Block Tower]] | ||
| | |[[Ludwig's Clockwork Castle]] | ||
| | |200 | ||
|{{chart icon| | |{{chart icon|NSMBU-exc}} | ||
|— | |||
|- | |- | ||
|style="background:white"|[[File: | |style="background:white"|[[File:NSMBU Big Amp Close-up Screenshot.png|100x100px]]<br>[[Big Amp]] | ||
|align=left|Larger variants of Amps. | |||
|align=left| | |colspan=2|[[Snake Block Tower]] | ||
| | |200 | ||
| | |{{chart icon|NSMBU-exc}} | ||
| | |||
|— | |— | ||
|- | |- | ||
|style="background:white"|[[File: | |style="background:white"|[[File:BooNSMBU.png|100x100px]]<br>[[Boo]] | ||
|align=left|Ghosts that follow Mario when his back is turned, but hide their face when he looks at them. [[Boo Buddies|Groups of Boos]] occur floating in circles in some levels. | |||
|align=left| | |[[Haunted Shipwreck]] | ||
| | |[[Spinning Spirit House]] | ||
| | |200 | ||
| | |— | ||
|— | |||
|- | |- | ||
|style="background:white"|[[File: | |style="background:white"|[[File:BooNSMBU sprite.png|100x100px]]<br>[[Big Boo]] | ||
|align=left|Bigger variants of Boos that have the same behavior. | |||
|align=left| | |[[Swaying Ghost House]] | ||
|[[ | |[[Spinning Spirit House]] | ||
|[[ | |200 | ||
| | |— | ||
| | |— | ||
|- | |- | ||
|style="background:white"|[[File: | |style="background:white"|[[File:BroozerNSMBU.png|100x100px]]<br>[[Broozer]] | ||
|align=left|A walking, boxing Boo. Can break [[Brick Block|brick]]s and other blocks that are normally indestructible. Mario can defeat it by jumping on it three times, or hitting him with a fireball. | |||
|align=left|A | |[[Which-Way Labyrinth]] | ||
| | |[[Spinning Spirit House]] | ||
| | |200 | ||
| | |— | ||
|— | |||
|- | |- | ||
|style="background:white"|[[File: | |style="background:white"|[[File:NSMBU Asset Model Scaredy Rat.png|100x100px]]<br>[[Scaredy Rat]] | ||
|align=left|An enemy that walks around in a group. When one of the rats is jumped on, the rest panic and run around. | |||
|align=left| | |colspan=2|[[Which-Way Labyrinth]] | ||
| | |200 | ||
|[[ | |{{chart icon|NSMBU-exc}} | ||
| | |— | ||
|{{chart icon| | |||
|- | |- | ||
|style="background:white"|[[File: | |style="background:white"|[[File:BulberNSMBU.png|100x100px]]<br>[[Bulber]] | ||
|align=left|An enemy that illuminates a dark area and swims in a set pattern. | |||
|align=left|An | |colspan=2|[[Deepsea Ruins]] | ||
|[[ | |200 | ||
| | |{{chart icon|NSMBU-exc}} | ||
| | |||
|— | |— | ||
|- | |- | ||
|style="background:white"|[[File: | |style="background:white"|[[File:NSMBU Screenshot Jellybeam.png|100x100px]]<br>[[Jellybeam]] | ||
|align=left|An enemy that illuminates a dark cave. | |||
|align=left| | |colspan=2|[[Deepsea Ruins]] | ||
|colspan= | |200 | ||
| | |{{chart icon|NSMBU-exc}} | ||
|— | |— | ||
|- | |- | ||
|style="background:white"|[[File: | |style="background:white"|[[File:NSMBU Screenshot Wiggler.png|100x100px]]<br>[[Wiggler]] | ||
|align=left|Caterpillars that move faster after being jumped on. | |||
|align=left| | |[[Seesaw Bridge]] | ||
|[[ | |[[Wiggler Stampede]] | ||
|[[ | |200 | ||
| | |— | ||
|— | |— | ||
|- | |- | ||
|style="background:white"|[[File: | |style="background:white"|[[File:NSMBU Screenshot Big Wiggler.png|100x100px]]<br>[[Big Wiggler]] | ||
|align=left|Large variants of Wigglers. | |||
|align=left| | |colspan=2|[[Wiggler Stampede]] | ||
| | |data-sort-value=2000|{{chart icon|cross}} | ||
|[[ | |— | ||
| | |— | ||
|{{chart icon| | |||
|- | |- | ||
|style="background:white"|[[File: | |style="background:white"|[[File:NSMBU Magmaargh Render.png|100x100px]]<br>[[Magmaargh]] | ||
|align=left|Lava monsters that attacks by moving towards the players in a wave-like movement. | |||
|align=left| | |colspan=2|[[Iggy's Volcanic Castle]] | ||
| | |data-sort-value=2000|{{chart icon|cross}} | ||
|[[ | |— | ||
| | |— | ||
|{{chart icon| | |||
|- | |- | ||
|style="background:white"|[[File: | |style="background:white"|[[File:MagmawNSMBU.png|100x100px]]<br>[[Magmaw]] | ||
|align=left|Lava monsters that lunges at the player and dips back into the lava. | |||
|align=left| | |colspan=2|[[Magma-River Cruise]] | ||
| | |data-sort-value=2000|{{chart icon|cross}} | ||
|[[ | |— | ||
| | |— | ||
|{{chart icon| | |||
|- | |- | ||
|style="background:white"|[[File: | |style="background:white"|[[File:NSMBU Screenshot Flame Chomp.png|100x100px]]<br>[[Flame Chomp]] | ||
|align=left|Black spheres that spit fireballs at Mario. They explode after they're out of fireballs. | |||
|align=left| | |colspan=2|[[Rising Tides of Lava]] | ||
|[[ | |200 | ||
| | |— | ||
| | |— | ||
| | |||
|- | |- | ||
|style="background:white"|[[File: | |style="background:white"|[[File:NSMBU Fuzzy Artwork.png|100x100px]]<br>[[Fuzzy]] | ||
|align=left|Enemies that follow tracks and hurt Mario upon contact. | |||
|align=left| | |[[Fuzzy Clifftop]] | ||
|[[ | |[[A Quick Dip in the Sky]] | ||
|[[ | |200 | ||
| | |— | ||
|— | |— | ||
|- | |- | ||
|style="background:white"|[[File: | |style="background:white"|[[File:MegaFuzzyNSMBU.png|100x100px]]<br>[[Big Fuzzy]] | ||
|align=left|Large variants of Fuzzies. | |||
|align=left| | |colspan=2|[[Spine-Tingling Spine Coaster]] | ||
| | |200 | ||
|[[ | |— | ||
| | |— | ||
| | |||
|- | |- | ||
|style="background:white"|[[File: | |style="background:white"|[[File:NSMBU Screenshot Chain Chomp.png|100x100px]]<br>[[Chain Chomp]] | ||
|align=left|Enemies tied to posts that lunge at Mario. If Mario ground pounds their post, they are set free. | |||
|align=left| | |colspan=2|[[Waddlewing's Nest]] | ||
| | |200 | ||
|[[ | |— | ||
| | |— | ||
| | |||
|- | |- | ||
|style="background:white"|[[File: | |style="background:white"|[[File:BobombNSMBU.png|100x100px]]<br>[[Bob-omb]] | ||
|align=left|Bombs that ignite if they are jumped on or have a fireball thrown at them, then explode shortly after. | |||
|align=left| | |[[Light Blocks, Dark Tower]] | ||
|[[ | |[[The Final Battle (New Super Mario Bros. U)|The Final Battle]] | ||
|[[ | |200 | ||
| | |— | ||
| | |— | ||
|- | |- | ||
|style="background:white"|[[File: | |style="background:white"|[[File:ParabombNSMBU.png|100x100px]]<br>[[Parabomb]] | ||
|align=left|Parachuting Bob-ombs that are sometimes shot out of cannons. | |||
|align=left| | |colspan=2|[[Red-Hot Elevator Ride]] | ||
|[[ | |200 | ||
| | |— | ||
| | |— | ||
| | |||
|- | |- | ||
|style="background:white"|[[File: | |style="background:white"|[[File:FooNSMBU.png|100x100px]]<br>[[Foo]] | ||
|align=left|An enemy that creates fog in order to obscure the player's view. | |||
|align=left| | |colspan=2|[[Snaking above Mist Valley]] | ||
| | |200 | ||
|[[ | |||
| | |||
|— | |— | ||
|— | |||
|} | |||
===Obstacles from NSMBU=== | |||
===Bosses from NSMBU=== | |||
{|class="wikitable"style="width:100%;text-align:center" | |||
|-style="color:white;background:red" | |||
!rowspan=2 width=10%|Name | |||
!rowspan=2|Description | |||
!colspan=2|Levels | |||
|-style="color:white;background:red" | |||
!width=8%|First | |||
!width=8%|Last | |||
|- | |- | ||
|style="background:white"|[[File: | !colspan=4 style="background:#FF7733"|Tower bosses | ||
| | |- | ||
|align=left| | |style="background:white"|[[File:Boom Boom NSMBU Model.png|100x100px]]<br>[[Boom Boom]] | ||
|[[ | |align=left|The tower boss from [[Crushing-Cogs Tower]] in [[Acorn Plains]] to [[Grinding-Stone Tower]] in [[Rock-Candy Mines]]. He does not change in the first battle, especially on [[Crushing-Cogs Tower]] in [[Acorn Plains]]. However, following his first defeat, [[Kamek|Magikoopa]] gives him special abilities. In [[Stoneslide Tower]] from [[Layer-Cake Desert]], Magikoopa will grant him the ability to spin jump. In [[Giant Skewer Tower]] from [[Sparkling Waters]] and [[Freezing-Rain Tower]] from [[Frosted Glacier]], Magikoopa will grant him the ability to jump, similar to ''Super Mario Bros. 3''. In [[Snake Block Tower]] from [[Soda Jungle]], Magikoopa will make him larger. In [[Grinding-Stone Tower]] from [[Rock-Candy Mines]], Magikoopa will transform his arms into wings, similar to ''Super Mario Bros. 3''. | ||
|[[ | |[[Crushing-Cogs Tower]] | ||
| | |[[Grinding-Stone Tower]] | ||
| | |- | ||
|style="background:white"|[[File:NSMBU Boss Sumo Bro Artwork.png|100x100px]]<br>[[Boss Sumo Bro]] | |||
|align=left|Boss Sumo Bro was a regular [[Sumo Bro]] until Magikoopa made him grow in size. He is normally immune to attacks from the top due to the spike on his head, but he will jump between platforms which the player can hit from the bottom. Knocking him off a platform makes him vulnerable to jump attacks. He is fought on [[Screwtop Tower]]. | |||
|colspan=2|[[Screwtop Tower]] | |||
|- | |||
|style="background:white"|[[File:NSMBW Kamek Artwork.png|100x100px]]<br>[[Kamek|Magikoopa]] | |||
|align=left|Magikoopa is fought on [[Slide Lift Tower]] and teleports most of the time when Mario gets too close. However, when he stops to attack Mario, he is left vulnerable to Mario's jumping. He also casts spells on Boom Boom, Boss Sumo Bro, and Bowser granting them extra power before their battles, such as causing them to grow in size. | |||
|colspan=2|[[Slide Lift Tower]] | |||
|- | |||
!colspan=4 style="background:#FF7733"|The Koopalings | |||
|- | |||
|style="background:white"|[[File:Lemmy Koopa NSMBU.png|100x100px]]<br>[[Lemmy Koopa]] | |||
|align=left|Lemmy Koopa is fought on [[Lemmy's Swingback Castle]] in [[Acorn Plains]] and attempts to throw [[bomb]]s at Mario. | |||
|colspan=2|[[Lemmy's Swingback Castle]] | |||
|- | |||
|style="background:white"|[[File:MortonNSMBU.png|100x100px]]<br>[[Morton Koopa Jr.]] | |||
|align=left|Morton Koopa Jr. is fought on [[Morton's Compactor Castle]] in [[Layer-Cake Desert]] and uses a large hammer that is apparently filled with magic to knock [[Big Pokey]] segments in the player's way after shaking the ground by stomping on it. He can knock Pokey segments straight at the player or knock them in high arcs. | |||
|colspan=2|[[Morton's Compactor Castle]] | |||
|- | |||
|style="background:white"|[[File:NSMBU Larry Koopa Artwork.png|100x100px]]<br>[[Larry Koopa]] | |||
|align=left|Larry Koopa is fought on [[Larry's Torpedo Castle]] in [[Sparkling Waters]] and blasts fireballs and use water blasts from the pool below the arena. When Larry is spinning in his shell, the water geysers give his shell a boost upwards, making it a bit tricky to avoid. After two stomps, Larry begins to cast two fireballs in quick succession. | |||
|colspan=2|[[Larry's Torpedo Castle]] | |||
|- | |||
|style="background:white"|[[File:NSMBU Wendy Koopa Artwork.png|100x100px]]<br>[[Wendy O. Koopa]] | |||
|align=left|Wendy O. Koopa is fought on [[Wendy's Shifting Castle]] in [[Frosted Glacier]] and skates around the arena, shooting out two energy rings that ricochet off of walls and can knock down the [[icicle]]s at the ceiling of the airship. She also spin jumps from walls. After she is jumped on twice, she will shoot out three rings instead. | |||
|colspan=2|[[Wendy's Shifting Castle]] | |||
|- | |||
|style="background:white"|[[File:NSMBU Iggy Artwork.png|100x100px]]<br>[[Iggy Koopa]] | |||
|align=left|Iggy Koopa is fought on [[Iggy's Volcanic Castle]] in [[Soda Jungle]] and uses the four warp pipes to run around the room and on the ceiling to make it trickier for the player to stomp on him as he uses his Magic Wand to shoot three fireballs, with some being his usual green flame, and the other being red skeleton orbs that generate [[Magmaargh]]s when they land into the lava below. When Iggy is stomped on, he will dash around the room in his shell using the pipes on the walls, which will switch him to the other side of the room. Unlike the other Koopalings where they spin in their shells and change directions at the edges or walls of the room, Iggy can actually change directions anywhere around the room during his duration in his shell. | |||
|colspan=2|[[Iggy's Volcanic Castle]] | |||
|- | |||
|style="background:white"|[[File:NSMBU Roy Artwork.png|100x100px]]<br>[[Roy Koopa]] | |||
|align=left|Roy Koopa is fought on [[Roy's Conveyor Castle]] in [[Rock-Candy Mines]] and shoots [[Bullet Bill]]s with his cannon and jump between platforms that move around during the fight. Occasionally, he shoots [[Bull's-Eye Bill|Missile Bill]]s. He can also jump high in the air and ground pound the floor or platform, which makes him fire Bullet Bills on both sides of his blaster. The ground pound can also make the floating platforms appear after he comes out of his shell. | |||
|colspan=2|[[Roy's Conveyor Castle]] | |||
|- | |||
|style="background:white"|[[File:LudwigNSMBU.png|100x100px]]<br>[[Ludwig von Koopa]] | |||
|align=left|Ludwig von Koopa is fought on [[Ludwig's Clockwork Castle]] in [[Meringue Clouds]] and levitates in the air while making two clones of himself, and all three Ludwigs will blast fireballs at Mario before dropping onto the ground. If one of the clones is jumped on, it will simply disappear. There are four ways to find out which is the real one. The one that is the real one fires three fireballs, while the clones fire two. The clones keep their eyes half-open, and tend to assume the real Ludwig's pre-battle idle pose while not levitating. The real Ludwig will also drop to the ground last, after the clones, as well as laugh while dropping. Finally, Mario always looks at the real Ludwig if he can see him directly, just as he does with the other bosses. When the fight starts off, after shooting their fireballs, the clones disappear before landing. After the first stomp, the clones do not disappear. After the second stomp, not only do all three Ludwigs shoot faster, but swap positions, though the real Ludwig still shoots three fireballs. | |||
|colspan=2|[[Ludwig's Clockwork Castle]] | |||
|- | |||
!colspan=4 style="background:#FF7733"|Other | |||
|- | |||
|style="background:white"|[[File:Bowserjr NSMBU.png|100x100px]]<br>[[Bowser Jr.]] | |||
|align=left|Bowser Jr. is fought on [[airship]]s. In Soda Jungle's [[The Mighty Cannonship]], Bowser Jr. uses his [[Junior Clown Car]] as a submarine underwater, in which the player must guide the Targeting Teds that Bowser Jr. shoots into his submarine. With every hit, he summons three Torpedo Teds from the left and right or from the ceiling and the floor. In Meringue Clouds' [[Boarding the Airship]], Bowser Jr.'s boss battle involves him in his Clown Car equipped with boxing gloves, which he uses to destroy the blocks the player is standing on. Bowser Jr. periodically throws Bob-ombs, which the player can use against him. However, in [[Peach's Castle (world)|Peach's Castle]]'s [[The Final Battle (New Super Mario Bros. U)|The Final Battle]], he cannot be defeated. | |||
|[[The Mighty Cannonship]] | |||
|[[The Final Battle (New Super Mario Bros. U)|The Final Battle]] | |||
|- | |- | ||
|style="background:white"|[[File: | |style="background:white"|[[File:BowserNSMBU.png|100x100px]]<br>[[Bowser]] | ||
|align=left|Bowser is fought in [[The Final Battle (New Super Mario Bros. U)|The Final Battle]] in [[Peach's Castle (world)|Peach's Castle]]. The first part of his battle is similar to ''[[Super Mario Bros.]]'', where the player has to get to the other side and press the switch; alternatively, shooting several fireballs also works. This causes the axe to fall and make the bridge collapse, making Bowser fall. The gate then opens and Mario moves on. When Mario reaches the top of the castle, Peach is being held up in the tower. After this, Bowser Jr. shows up in his Junior Clown Car, and Bowser hops on top of the castle while he is huge. Bowser Jr. also fights the player. In order to defeat them, the player must jump on Bowser Jr., causing him to fall out of his Junior Clown Car. This allows the player to jump in and hover over Bowser to harm him. Like the Koopalings, he curls into his shell and spins around when hit. He is defeated after being hit three times by the Clown Car. | |||
|align=left| | |colspan=2|[[The Final Battle (New Super Mario Bros. U)|The Final Battle]] | ||
|colspan= | |||
|} | |} | ||
== | ===Items from NSMBU=== | ||
===Power-ups from NSMBU=== | |||
===Objects from NSMBU=== | |||
==NSLU== | |||
===Playable characters from NSLU=== | |||
===Yoshis from NSLU=== | |||
===Non-playable characters from NSLU=== | |||
{|class="wikitable" style="width:100%;text-align:center" | |||
|-style="color:white;background:#78c829" | |||
!width=12%|Name | |||
!Description | |||
!width=15%|Locations | |||
|- | |||
|style="background:white"|[[File:PeachtoadsNSMBU.png|100x100px]]<br>[[Princess Peach]] | |||
|align=left|TBW | |||
|[[The Final Battle (New Super Luigi U)|The Final Battle]] | |||
|- | |||
|style="background:white"|[[File:NSMBU Red Toad Render.png|100x100px]]<br>[[Toad (species)|Toads]] | |||
|align=left|Toads appear throughout the game in Toad Houses, at the end of the level when the player catches Nabbit, and past the end-of-level castles to give Mario a power-up if they complete a stage with the last two digits of the [[Time Limit]] being the same. | |||
|[[Toad House]]s, TBD | |||
|} | |||
===Enemies in NSLU=== | |||
{|class="wikitable sortable" style="width:100%;text-align:center" | {|class="wikitable sortable" style="width:100%;text-align:center" | ||
|-style="color:white;background:# | |-style="color:white;background:#78c829" | ||
! | !rowspan=2 width=10%|Name | ||
!class="unsortable" rowspan=2|Description | !class="unsortable" rowspan=2|Description | ||
!class="unsortable" colspan=2| | !class="unsortable" colspan=2 |Levels | ||
!rowspan=2| | !rowspan=2|Pts. | ||
!rowspan=2|Exc. | |||
!rowspan=2|New | !rowspan=2|New | ||
|-style="color:white;background:# | |-style="color:white;background:#78c829" | ||
!width=8%|First | !width=8%|First | ||
!width=8%|Last | !width=8%|Last | ||
|- | |- | ||
|style="background:white"|[[File: | |style="background:white"|[[File:NSMBU Gliding Waddlewing Artwork.png|100x100px]]<br>[[Waddlewing]] | ||
|[[ | |align=left|Orange flying-squirrel enemies that glide through stages. | ||
|align=left| | |[[Waddlewing Warning!]] | ||
|[[ | |[[Flying Squirrel Ovation]] | ||
|[[ | |200 | ||
| | |— | ||
|— | |||
|- | |||
|style="background:white"|[[File:NSMBU Piranha Plant Cropped Artwork.png|100x100px]]<br>[[Piranha Plant]] | |||
|align=left|Plants that move in and out of Warp Pipes and some grounded. | |||
|[[Waddlewing Warning!]] | |||
|[[Above the Bouncy Clouds]] | |||
|200 | |||
|— | |||
|— | |||
|- | |||
|style="background:white"|[[File:NSMBUD Piranha Pod model.png|100x100px]]<br>[[Piranha Pod]] | |||
|align=left|A projectile thrown by a [[Lakitu]] that turns into a [[Piranha Plant]]. | |||
|[[Spinning Sandstones]] | |||
|[[Beanstalk Jungle]] | |||
|200 | |||
|— | |||
|— | |||
|- | |||
|style="background:white"|[[File:GroundedPiranhaPlantNSMBU.png|100x100px]]<br>[[Big Piranha Plant]] | |||
|align=left|Large variants of Piranha Plants. | |||
|[[Piranha Heights]] | |||
|[[Flame Chomp Ferris Wheel]] | |||
|200 | |||
|— | |||
|— | |||
|- | |||
|style="background:white"|[[File:FirepiranhaNSMBU.png|100x100px]]<br>[[Fire Piranha Plant]] | |||
|align=left|Piranha Plants that aim at Mario and shoot fireballs. | |||
|[[Slippery Rope Ladders]] | |||
|[[Spine Coaster Stowaways]] | |||
|200 | |||
|— | |||
|— | |||
|- | |||
|style="background:white"|[[File:NSMBU Asset Model Fire Piranha Plant.png|100x100px]]<br>[[Big Fire Piranha]] | |||
|align=left|Large variants of Piranha Plants. | |||
|[[Piranhas in the Dark]] | |||
|[[Rising Piranhas]] | |||
|200 | |||
|{{chart icon|NSLU-exc}} | |||
|— | |||
|- | |||
|style="background:white"|[[File:NSLU Screenshot Frost Piranha.png|100x100px]]<br>[[Frost Piranha|Ice Piranha Plant]] | |||
|align=left|A Piranha Plant that can shoot ice balls from its mouth, like Fire Piranha Plants. | |||
|colspan=2|[[Broozers and Barrels]] | |||
|200 | |||
|— | |||
|— | |||
|- | |||
|style="background:white"|[[File:NSLU StalkPlant.png|100x100px]]<br>[[Stalking Piranha Plant]] | |||
|align=left|A Piranha Plant that walks around and stretches up and down on a regular basis. | |||
|[[Spinning Sandstones]] | |||
|[[Rising Piranhas]] | |||
|200 | |||
|— | |||
|— | |||
|- | |||
|style="background:white"|[[File:NSMBU River Piranha Plant Render.png|100x100px]]<br>[[River Piranha Plant]] | |||
|align=left|A stationary Piranha Plant that blows a green spiked ball up and down, similar to a [[Ptooie]]. | |||
|[[Spinning Sandstones]] | |||
|[[Fliprus Floes]] | |||
|200 | |||
|— | |||
|— | |||
|- | |||
|style="background:white"|[[File:NSMBU Muncher Artwork.png|100x100px]]<br>[[Muncher]] | |||
|align=left|An invincible black plant. | |||
|[[Lemmy's Lights-Out Castle]] | |||
|[[Wiggler Rodeo]] | |||
|data-sort-value=2000|{{chart icon|cross}} | |||
|— | |||
|— | |||
|- | |||
|style="background:white"|[[File:KoopatroopaNSMBU.png|100x100px]]<br>[[Koopa Troopa]] (Red) | |||
|align=left|Turtle enemies that go into their shells when attacked, then can be picked up or thrown. Red Koopa Troopas turn around. | |||
|[[Crooked Cavern]] | |||
|[[Magma Moat]] | |||
|200 | |||
|— | |||
|— | |||
|- | |||
|style="background:white"|[[File:NSLU Screenshot Koopa Troopa (Green).png|100x100px]]<br>Koopa Troopa (Green) | |||
|align=left|Green Koopa Troopas walk off ledges. | |||
|[[Piranha Gardens]] | |||
|[[Magmaw River Cruise]] | |||
|200 | |||
|— | |||
|— | |||
|- | |||
|style="background:white"|[[File:KoopaParatroopa NSMBU.png|100x100px]]<br>[[Koopa Paratroopa]] (Red) | |||
|align=left|TBW | |||
|colspan=2|[[Dancing Blocks, Poison Swamp]] | |||
|200 | |||
|— | |||
|— | |||
|- | |||
|style="background:white"|[[File:ParatroopaNSMBU.png|100x100px]]<br>Koopa Paratroopa (Green) | |||
|align=left|Winged Koopa Troopas that either jump in high arcs or fly up and down in the air. | |||
|colspan=2|[[Stonecrush Tower]] | |||
|200 | |||
|— | |||
|— | |||
|- | |||
|style="background:white"|[[File:NSMBU Red Big Koopa Troopa Render.png|100x100px]]<br>[[Big Koopa Troopa]] | |||
|align=left|Large variants of Koopa Troopas. | |||
|colspan=2|[[Giant Swing-Along]] | |||
|200 | |||
|— | |||
|— | |||
|- | |||
|style="background:white"|[[File:MP8 DryBones.png|100x100px]]<br>[[Dry Bones]] | |||
|align=left|Skeleton Koopa Troopas that collapse when attacked, but later rebuild themselves. | |||
|[[Flame-Gear Tower]] | |||
|[[Stonecrush Tower]] | |||
|200 | |||
|— | |||
|— | |||
|- | |||
|style="background:white"|[[File:NSMBU Asset Model Dry Bones.png|100x100px]]<br>[[Big Dry Bones]] | |||
|align=left|Large variants of Dry Bones that appear in castle levels. | |||
|colspan=2|[[Iggy's Swinging-Chains Castle]] | |||
|200 | |||
|— | |||
|— | |||
|- | |||
|style="background:white"|[[File:NSMBU Hammer Bro Artwork.png|100x100px]]<br>[[Hammer Bro]] | |||
|align=left|Enemies that throw hammers and jump. | |||
|[[Piranha Gardens]] | |||
|[[All Aboard!]] | |||
|1000 | |||
|— | |||
|— | |||
|- | |||
|style="background:white"|[[File:NSMBU Fire Bro Artwork.png|100x100px]]<br>[[Fire Bro]] | |||
|align=left|Hammer Bros that throw fireballs. | |||
|[[Piranhas in the Dark]] | |||
|[[Magmaw River Cruise]] | |||
|1000 | |||
|— | |||
|— | |||
|- | |||
|style="background:white"|[[File:NSMBU Boomerang Bro Artwork.png|100x100px]]<br>[[Boomerang Bro]] | |||
|align=left|Hammer Bros that use boomerangs, which return to them after being thrown. | |||
|[[All Aboard!]] | |||
|[[Above the Bouncy Clouds]] | |||
|1000 | |||
|— | |||
|— | |||
|- | |||
|style="background:white"|[[File:NSMBU Ice Bro Artwork.png|100x100px]]<br>[[Ice Bro]] | |||
|align=left|An enemy that throws [[Ice Ball|ice ball]]s at the ground, which can freeze the player and even other enemies. | |||
|[[All Aboard!]] | |||
|[[Frozen Fuzzies]] | |||
|1000 | |||
|— | |||
|— | |||
|- | |||
|style="background:white"|[[File:NSLU Screenshot Sledge Bro.png|100x100px]]<br>[[Sledge Bro]] | |||
|align=left|Hammer Bro variants that stun Mario after they jump. | |||
|colspan=2|[[All Aboard!]] | |||
|1000 | |||
|— | |||
|— | |||
|- | |||
|style="background:white"|[[File:NSMBU Sumo Bro Artwork.png|100x100px]]<br>[[Sumo Bro]] | |||
|align=left|Giant Koopas that stomp the ground and create electric waves in two directions. | |||
|[[Sumo Bro Bridge]] | |||
|[[Sumo Bro's Spinning Tower]] | |||
|200 | |||
|— | |||
|— | |||
|- | |||
|style="background:white"|[[File:NSMBU Lakitu Artwork.png|100x100px]]<br>[[Lakitu]] | |||
|align=left|Enemies that throw Spiny Eggs. If Mario defeats a Lakitu, he can ride on its cloud until it disappears. | |||
|[[Spinning Sandstones]] | |||
|[[Cloudy Capers]] | |||
|1000 | |||
|— | |||
|— | |||
|- | |||
|style="background:white"|[[File:NSMBU Asset Model Spiny.png|100x100px]]<br>[[Spiny]] | |||
|align=left|Enemies that hatch from Spiny Eggs and cannot be jumped on. | |||
|colspan=2|[[Cloudy Capers]] | |||
|200 | |||
|— | |||
|— | |||
|- | |||
|style="background:white"|[[File:NSLU Screenshot Spiny Egg.png|100x100px]]<br>[[Spiny Egg]] | |||
|align=left|TBW | |||
|colspan=2|[[Cloudy Capers]] | |||
|200 | |||
|— | |||
|— | |||
|- | |||
|style="background:white"|[[File:NSMBU Bony Beetle Artwork.png|100x100px]]<br>[[Bony Beetle]] | |||
|align=left|Skeleton variants of Buzzy Beetles that walk around and suddenly stop to stick out their spikes. | |||
|[[Icicle Tower]] | |||
|[[Impossible Pendulums]] | |||
|200 | |||
|— | |||
|— | |||
|- | |||
|style="background:white"|[[File:NSMBU Buzzy Beetle Artwork.png|100x100px]]<br>[[Buzzy Beetle]] | |||
|align=left|Shelled enemies that can be kicked or thrown after being jumped on, and can walk on ceilings. | |||
|colspan=2|[[Ice-Slide Expressway]] | |||
|200 | |||
|— | |||
|— | |||
|- | |||
|style="background:white"|[[File:NSMBU Asset Model Spike Top.png|100x100px]]<br>[[Spike Top]] | |||
|align=left|Buzzy Beetle variants that have spikes on their shells, preventing them from being jumped on. | |||
|colspan=2|[[Switch-Lift Express]] | |||
|200 | |||
|— | |||
|— | |||
|- | |||
|style="background:white"|[[File:NSMBU Asset Model Para-Beetle.png|100x100px]]<br>[[Para-Beetle]] | |||
|align=left|Para-Beetles are winged Buzzy Beetles. However, Mario can hop on their back for a ride, unlike with other winged foes. | |||
|colspan=2|[[Para-Beetle Parade]] | |||
|data-sort-value=2000|{{chart icon|cross}} | |||
|— | |||
|— | |— | ||
|- | |- | ||
|style="background:white"|[[File: | |style="background:white"|[[File:NSMBU Asset Model Heavy Para-Beetle.png|100x100px]]<br>[[Heavy Para-Beetle]] | ||
|align=left|A Para-Beetle that descends when used as a platform. | |||
|align=left| | |colspan=2|[[Para-Beetle Parade]] | ||
|[[ | |data-sort-value=2000|{{chart icon|cross}} | ||
| | |— | ||
| | |||
|— | |— | ||
|- | |- | ||
|style="background:white"|[[File: | |style="background:white"|[[File:NSMBU Spike Render.png|100x100px]]<br>[[Spike]] | ||
|align=left|Green turtles which pull spiked balls out of their mouths and throw them directly downwards from the ledges on which they stand | |||
|align=left| | |[[Spike's Tumbling Desert]] | ||
| | |[[Spike's Seesaws]] | ||
| | |200 | ||
| | |— | ||
|— | |||
|- | |- | ||
|style="background:white"|[[File: | |style="background:white"|[[File:NSMBU Asset Model Stone Spike.png|100x100px]]<br>[[Stone Spike]] | ||
|align=left|A Spike that throws stone rocks downwards. | |||
|align=left| | |colspan=2|[[Stone Spike Conveyors]] | ||
|[[ | |200 | ||
| | |— | ||
| | |||
|— | |— | ||
|- | |- | ||
|style="background:white"|[[File: | |style="background:white"|[[File:CheepCheepNSMBU.png|100x100px]]<br>[[Cheep Cheep]] | ||
|align=left|Fish that are found swimming aimlessly in underwater levels. | |||
|align=left| | |[[Cheep Chomp Chase]] | ||
|[[ | |[[Star Coin Deep Dive]] | ||
|[[ | |200 | ||
| | |— | ||
|— | |— | ||
|- | |- | ||
|style="background:white"|[[File: | |style="background:white"|[[File:NSMBU Asset Model Big Cheep Cheep.png|100x100px]]<br>[[Big Cheep Cheep]] | ||
|align=left|Large variants of Cheep Cheeps that are found in underwater levels. | |||
|align=left| | |[[Cheep Chomp Chase]] | ||
|[[ | |[[Star Coin Deep Dive]] | ||
|[[ | |200 | ||
| | |— | ||
|— | |— | ||
|- | |- | ||
|style="background:white"|[[File: | |style="background:white"|[[File:NSMBU Eep Cheep Artwork.png|100x100px]]<br>[[Eep Cheep]] | ||
|align=left|A Cheep Cheep that lives in a school with other Eep Cheeps and swims away when the player comes near it. | |||
|align=left| | |colspan=2|[[Cheep Chomp Chase]] | ||
|colspan=2|[[ | |200 | ||
| | |— | ||
| | |— | ||
|- | |- | ||
|style="background:white"|[[File: | |style="background:white"|[[File:NSLU Asset Model Eep Cheep.png|100x100px]]<br>[[Big Eep Cheep]] | ||
|align=left|Large variants of Cheep Cheeps that are found in underwater levels. | |||
|align=left| | |[[Cheep Chomp Chase]] | ||
| | |[[Urchin Reef Romp]] | ||
| | |200 | ||
|{{chart icon|NSLU-exc}} | |||
|{{chart icon|new}} | |{{chart icon|new}} | ||
|- | |- | ||
|style="background:white"|[[File: | |style="background:white"|[[File:NSLU Deep Cheep Artwork.png|100x100px]]<br>[[Deep Cheep]] | ||
|align=left|Large variants of Cheep Cheeps that are found in underwater levels. | |||
|align=left| | |colspan=2|[[Cheep Chomp Chase]] | ||
|colspan=2|[[ | |200 | ||
| | |{{chart icon|NSLU-exc}} | ||
|{{chart icon| | |— | ||
|- | |- | ||
|style="background:white"|[[File: | |style="background:white"|[[File:NSLU Asset Model Big Deep Cheep.png|100x100px]]<br>[[Big Deep Cheep]] | ||
|align=left|Large variants of Cheep Cheeps that are found in underwater levels. | |||
|align=left| | |colspan=2|[[Cheep Chomp Chase]] | ||
|colspan=2|[[ | |200 | ||
| | |{{chart icon|NSLU-exc}} | ||
|{{chart icon| | |— | ||
|- | |- | ||
|style="background:white"|[[File: | |style="background:white"|[[File:NSMBU Spiny Cheep Artwork.png|100x100px]]<br>[[Spiny Cheep Cheep]] | ||
|align=left|Fast-swimming fish that chase Mario. | |||
|align=left| | |[[Haunted Cargo Hold]] | ||
| | |[[Star Coin Deep Dive]] | ||
| | |200 | ||
| | |— | ||
|— | |||
|- | |- | ||
|style="background:white"|[[File: | |style="background:white"|[[File:NSMBU Asset Model Cheep Chomp.png|100x100px]]<br>[[Cheep Chomp]] | ||
|align=left|Large fish that attempt to eat Mario. | |||
|align=left| | |[[Cheep Chomp Chase]] | ||
| | |[[Star Coin Deep Dive]] | ||
| | |200 | ||
| | |— | ||
|— | |||
|- | |- | ||
|style="background:white"|[[File: | |style="background:white"|[[File:NSMBU Porcupuffer Artwork.png|100x100px]]<br>[[Porcupuffer]] | ||
|align=left|Fish that jump out of the water and follow Mario. | |||
|align=left| | |colspan=2|[[Porcupuffer Cavern]] | ||
|[[ | |200 | ||
| | |— | ||
| | |— | ||
| | |||
|- | |- | ||
|style="background:white"|[[File: | |style="background:white"|[[File:FishboneNSMBU.png|100x100px]]<br>[[Fish Bone]] | ||
|align=left|Skeletal fish that charge towards Mario. | |||
|align=left| | |[[Haunted Cargo Hold]] | ||
| | |[[Deepsea Stone-Eyes]] | ||
| | |200 | ||
| | |— | ||
|— | |||
|- | |- | ||
|style="background:white"|[[File: | |style="background:white"|[[File:MontymoleNSMBU.png|100x100px]]<br>[[Monty Mole]] | ||
|align=left|A mole that pops out of mountains and the ground and gives chase. | |||
|align=left| | |[[Rolling Yoshi Hills]] | ||
| | |[[Stonecrush Tower]] | ||
| | |200 | ||
| | |— | ||
|— | |||
|- | |- | ||
|style="background:white"|[[File: | |style="background:white"|[[File:NSMBU Pokey Artwork.png|100x100px]]<br>[[Pokey]] | ||
|align=left|Living cacti that appear in desert levels and move slowly. | |||
|align=left| | |colspan=2|[[Underground Grrrols]] | ||
|colspan=2|[[ | |200 | ||
| | |— | ||
| | |— | ||
|- | |- | ||
|style="background:white"|[[File: | |style="background:white"|[[File:NSLU Screenshot Big Pokey.png|100x100px]]<br>[[Big Pokey]] | ||
|align=left|Large variants of Pokeys. | |||
|align=left| | |colspan=2|[[Morton's Lava-Block Castle]] | ||
|[[ | |None | ||
| | |— | ||
| | |— | ||
| | |||
|- | |- | ||
|style="background:white"|[[File: | |style="background:white"|[[File:NSMBU Grrrol Artwork.png|100x100px]]<br>[[Grrrol]] | ||
|align=left|Round, Thwomp-like enemies that roll on the ground. | |||
|align=left| | |[[Underground Grrrols]] | ||
|[[ | |[[Smashing-Stone Tower]] | ||
|[[ | |200 | ||
| | |— | ||
| | |— | ||
|- | |- | ||
|style="background:white"|[[File: | |style="background:white"|[[File:Dai Goro model.png|100x100px]]<br>[[Mega Grrrol]] | ||
|align=left|A bigger Grrrol with the same behavior. | |||
|align=left| | |[[Underground Grrrols]] | ||
| | |[[Smashing-Stone Tower]] | ||
| | |200 | ||
| | |— | ||
|— | |||
|- | |- | ||
|style="background:white"|[[File: | |style="background:white"|[[File:NSMBU Huckit Crab Artwork.png|100x100px]]<br>[[Huckit Crab]] | ||
|align=left|A crab that throws rocks on loop. These can be jumped on and used as a temporary platform. | |||
|align=left| | |[[Huckit Beach Resort]] | ||
| | |[[Porcupuffer Cavern]] | ||
| | |200 | ||
| | |— | ||
|— | |||
|- | |- | ||
|style="background:white"|[[File: | |style="background:white"|[[File:NSMBU Urchin Artwork.png|100x100px]]<br>[[Urchin]] | ||
|align=left|Stationary enemies that appear in underwater levels. | |||
|align=left| | |colspan=2|[[Urchin Reef Romp]] | ||
|colspan=2|[[ | |200 | ||
| | |— | ||
| | |— | ||
|- | |- | ||
|style="background:white"|[[File: | |style="background:white"|[[File:NSMBU Asset Model Big Urchin.png|100x100px]]<br>[[Big Urchin]] | ||
|align=left|A gigantic Urchin that can be defeated only with a Star. | |||
|align=left| | |colspan=2|[[Urchin Reef Romp]] | ||
|colspan=2|[[ | |200 | ||
| | |— | ||
| | |— | ||
|- | |- | ||
|style="background:white"|[[File: | |style="background:white"|[[File:BooNSMBU.png|100x100px]]<br>[[Boo]] | ||
|align=left|Ghosts that follow Mario when his back is turned, but hide their face when he looks at them. [[Boo Buddies|Groups of Boos]] occur floating in circles in some levels. | |||
|align=left| | |[[Peek-a-Boo Ghost House]] | ||
| | |[[Vanishing Ghost House]] | ||
| | |200 | ||
| | |— | ||
|— | |||
|- | |- | ||
|style="background:white"|[[File: | |style="background:white"|[[File:BooNSMBU sprite.png|100x100px]]<br>[[Big Boo]] | ||
|align=left|Bigger variants of Boos that have the same behavior. | |||
|align=left| | |colspan=2|[[Peek-a-Boo Ghost House]] | ||
|colspan=2|[[ | |200 | ||
| | |— | ||
| | |— | ||
|- | |- | ||
|style="background:white"|[[File: | |style="background:white"|[[File:NSMBU Asset Model Goombrat.png|100x100px]]<br>[[Goombrat]] | ||
|align=left|A Goomba that resembles a {{wp|persimmon}} and turns at ledges. | |||
|align=left| | |[[Wiggler Rodeo]] | ||
|[[ | |[[Hot Cogs]] | ||
|[[ | |200 | ||
| | |— | ||
| | |— | ||
|- | |- | ||
|style="background:white"|[[File: | |style="background:white"|[[File:NSMBU Goomba Artwork.png|100x100px]]<br>[[Goomba]] | ||
|align=left|Common enemies that can be defeated by jumping on them. Some Goombas in [[Skyward Stalk]] float on balloons. | |||
|align=left| | |[[Stonecrush Tower]] | ||
| | |[[Magmaw River Cruise]] | ||
| | |200 | ||
| | |— | ||
|— | |||
|- | |- | ||
|style="background:white"|[[File: | |style="background:white"|[[File:NSLU Screenshot Mini Goomba.png|100x100px]]<br>[[Mini Goomba]] | ||
|align=left|Small Goombas that weigh Mario down until he either attacks or walks for a few seconds. | |||
|align=left| | |[[Stonecrush Tower]] | ||
|[[ | |[[Magmaw River Cruise]] | ||
|[[ | |200 | ||
| | |— | ||
|— | |— | ||
|- | |- | ||
|style="background:white"|[[File: | |style="background:white"|[[File:NSLU Screenshot Prickly Goomba.png|100x100px]]<br>[[Prickly Goomba]] | ||
|align=left|A Goomba that hides inside a spiked chestnut shell until it is hit with a [[fireball]], which is when it turns into a regular Goomba. | |||
|align=left| | |colspan=2|[[Fire and Ice]] | ||
|200 | |||
|[[ | |— | ||
| | |— | ||
| | |||
|- | |- | ||
|style="background:white"|[[File: | |style="background:white"|[[File:NSMBUDX Dragoneel model.png|100x100px]]<br>[[Dragoneel]] (Red) | ||
|align=left|A long eel that attacks [[Mario]] by chasing him. | |||
|align=left| | |colspan=2|[[Dragoneel Depths]] | ||
|200 | |||
|[[ | |— | ||
| | |— | ||
| | |||
|- | |- | ||
|style="background:white"|[[File: | |style="background:white"|[[File:NSMBUDX twin Dragoneel model.png|100x100px]]<br>Dragoneel (Blue) | ||
| | |align=left|Shorter, purple ones also exist that move slower, but make sharper turns. | ||
|align=left| | |colspan=2|[[Dragoneel Depths]] | ||
|colspan=2|[[ | |200 | ||
| | |— | ||
| | |— | ||
|- | |- | ||
|style="background:white"|[[File: | |style="background:white"|[[File:NSMBU Asset Model Bullet Bill.png|100x100px]]<br>[[Bullet Bill]] | ||
|align=left|Bullets that fly straight forward and are shot from Bill Blasters and Bill Blaster Turrets. | |||
|align=left| | |[[Larry's Trigger-Happy Castle]] | ||
|[[ | |[[Rainbow Skywalk]] | ||
|[[ | |200 | ||
| | |— | ||
| | |— | ||
|- | |- | ||
|style="background:white"|[[File: | |style="background:white"|[[File:NSMBU Asset Model Bull's-Eye Bill.png|100x100px]]<br>[[Bull's-Eye Bill|Missile Bill]] | ||
|align=left|Bullet Bills that target Mario. | |||
|align=left| | |colspan=2|[[Roy's Ironclad Castle]] | ||
|[[ | |200 | ||
| | |— | ||
| | |— | ||
| | |||
|- | |- | ||
|style="background:white"|[[File: | |style="background:white"|[[File:BanzaibillNSMBU.png|100x100px]]<br>[[Banzai Bill]] | ||
|align=left|Large Bullet Bills that fly straight forward. | |||
|align=left| | |[[Larry's Trigger-Happy Castle]] | ||
|[[Para-Beetle Parade]] | |||
| | |200 | ||
| | |— | ||
|— | |||
|- | |- | ||
|style="background:white"|[[File: | |style="background:white"|[[File:NSMBU Asset Model King Bill.png|100x100px]]<br>[[King Bill]] | ||
|align=left|A nearly invincible enemy that charges forward, taking up most of the screen. | |||
|align=left| | |[[Larry's Trigger-Happy Castle]] | ||
|[[ | |[[Para-Beetle Parade]] | ||
|[[ | |200 | ||
| | |— | ||
|— | |— | ||
|- | |- | ||
|style="background:white"|[[File: | |style="background:white"|[[File:NSMBU Asset Model Torpedo Ted.png|100x100px]]<br>[[Torpedo Ted]] | ||
|align=left|A slow-moving torpedo that flies in one direction. | |||
|align=left| | |[[Larry's Trigger-Happy Castle]] | ||
| | |[[All Aboard!]] | ||
| | |200 | ||
|— | |||
|— | |— | ||
|- | |- | ||
|style="background:white"|[[File: | |style="background:white"|[[File:NSMBU Asset Model Targeting Ted.png|100x100px]]<br>[[Targeting Ted]] | ||
|align=left|Red Torpedo Teds that home into their target, much like Bull's-Eye Bills. | |||
|align=left| | |[[Larry's Trigger-Happy Castle]] | ||
|[[ | |[[All Aboard!]] | ||
|[[ | |200 | ||
| | |— | ||
| | |— | ||
|- | |- | ||
|style="background:white"|[[File: | |style="background:white"|[[File:BroozerNSMBU.png|100x100px]]<br>[[Broozer]] | ||
|align=left|A walking, boxing Boo. Can break [[Brick Block|brick]]s and other blocks that are normally indestructible. Mario can defeat it by jumping on it three times, or hitting him with a fireball. | |||
|align=left| | |[[Which-Way Labyrinth]] | ||
| | |[[Spinning Spirit House]] | ||
| | |200 | ||
| | |— | ||
|— | |||
|- | |- | ||
|style="background:white"|[[File: | |style="background:white"|[[File:CooliganNSMBU.png|100x100px]]<br>[[Cooligan]] | ||
|align=left|An enemy that slides on ice and slows down when hit. | |||
|align=left| | |colspan=2|[[Cooligan Shrooms]] | ||
|[[ | |200 | ||
| | |— | ||
| | |— | ||
| | |||
|- | |- | ||
|style="background:white"|[[File: | |style="background:white"|[[File:FliprusModelNSMBU.png|100x100px]]<br>[[Fliprus]] | ||
|align=left|A walrus-like creature that throws snowballs that can be jumped on. | |||
|align=left| | |[[Fliprus Floes]] | ||
|[[ | |[[Hammerswing Hangout]] | ||
|[[ | |200 | ||
| | |— | ||
| | |— | ||
|- | |- | ||
|style="background:white"|[[File: | |style="background:white"|[[File:NSMBU Thwomp Artwork.png|100x100px]]<br>[[Thwomp]] | ||
|align=left|Large rocks that fall when Mario gets close. | |||
|align=left| | |colspan=2|[[Wendy's Thwomp Castle]] | ||
|colspan=2|[[ | |200 | ||
| | |— | ||
|— | |— | ||
|- | |- | ||
|style="background:white"|[[File: | |style="background:white"|[[File:NSMBU Asset Model Big Thwomp.png|100x100px]]<br>[[Big Thwomp]] | ||
|align=left|Large Thwomps that can break through stone tiles. | |||
|align=left| | |colspan=2|[[Wendy's Thwomp Castle]] | ||
| | |200 | ||
|[[ | |— | ||
| | |||
|— | |— | ||
|- | |- | ||
|style="background:white"|[[File: | |style="background:white"|[[File:NSMBU Asset Model Mechakoopa.png|100x100px]]<br>[[Mechakoopa]] | ||
|align=left|A mechanical Koopa. After stomping it, Mario can pick it up and use it as a weapon. | |||
|align=left| | |colspan=2|[[All Aboard!]] | ||
|colspan=2|[[ | |200 | ||
| | |— | ||
| | |— | ||
|- | |- | ||
|style="background:white"|[[File: | |style="background:white"|[[File:NSMBU Bramball Artwork.png|100x100px]]<br>[[Bramball]] | ||
|align=left|An enemy that moves around in a set pattern and is mostly covered in spikes, with the head being the only safe part to jump on. It can be forced to move if jumped into from below. | |||
|align=left| | |colspan=2|[[Heart of Bramball Woods]] | ||
|colspan=2|[[ | |200 | ||
| | |— | ||
| | |— | ||
|- | |- | ||
|style="background:white"|[[File: | |style="background:white"|[[File:NSLU Screenshot Big Wiggler.png|100x100px]]<br>[[Big Wiggler]] | ||
|align=left|Large variants of Wigglers. | |||
|align=left| | |colspan=2|[[Wiggler Floodlands]] | ||
|colspan=2|[[ | |data-sort-value=2000|{{chart icon|cross}} | ||
| | |— | ||
|{{chart icon| | |— | ||
|- | |- | ||
|style="background:white"|[[File: | |style="background:white"|[[File:NSLU Screenshot Wiggler.png|100x100px]]<br>[[Wiggler]] | ||
|align=left|Caterpillars that move faster after being jumped on. | |||
|align=left| | |colspan=2|[[Wiggler Rodeo]] | ||
|colspan=2|[[ | |200 | ||
| | |— | ||
| | |— | ||
|- | |- | ||
|style="background:white"|[[File: | |style="background:white"|[[File:NSMBU Magmaargh Render.png|100x100px]]<br>[[Magmaargh]] | ||
|align=left|Lava monsters that attacks by moving towards the players in a wave-like movement. | |||
|align=left| | |colspan=2|[[Iggy's Swinging-Chains Castle]] | ||
|colspan=2|[[ | |data-sort-value=2000|{{chart icon|cross}} | ||
| | |— | ||
|{{chart icon| | |— | ||
|- | |- | ||
|style="background:white"|[[File: | |style="background:white"|[[File:MagmawNSMBU.png|100x100px]]<br>[[Magmaw]] | ||
|align=left|Lava monsters that lunges at the player and dips back into the lava. | |||
|align=left| | |[[Magmaw River Cruise]] | ||
| | |[[The Final Battle (New Super Luigi U)|The Final Battle]] | ||
| | |data-sort-value=2000|{{chart icon|cross}} | ||
|{{chart icon| | |— | ||
|— | |||
|- | |- | ||
|style="background:white"|[[File: | |style="background:white"|[[File:NSMBU Fuzzy Artwork.png|100x100px]]<br>[[Fuzzy]] | ||
|align=left|Enemies that follow tracks and hurt Mario upon contact. | |||
|align=left| | |[[Mount Fuzzy]] | ||
| | |[[Cloudy Capers]] | ||
| | |200 | ||
| | |— | ||
|— | |||
|- | |- | ||
|style="background:white"|[[File: | |style="background:white"|[[File:MegaFuzzyNSMBU.png|100x100px]]<br>[[Big Fuzzy]] | ||
|align=left|Large variants of Fuzzies. | |||
|align=left| | |[[Frozen Fuzzies]] | ||
| | |[[Spine Coaster Connections]] | ||
| | |200 | ||
| | |— | ||
|— | |||
|- | |- | ||
|style="background:white"|[[File: | |style="background:white"|[[File:NSMBU Asset Model Fire Snake.png|100x100px]]<br>[[Fire Snake]] | ||
|align=left|Flames that jump in a high arc. | |||
|align=left| | |colspan=2|[[Light-Up-Lift Tower]] | ||
|colspan=2|[[ | |200 | ||
| | |— | ||
| | |— | ||
|- | |- | ||
|style="background:white"|[[File: | |style="background:white"|[[File:NSMBW Asset Model Lava Bubble.png|100x100px]]<br>[[Lava Bubble]] | ||
|align=left|Fireballs that jump out of lava. | |||
|align=left| | |[[Roy's Ironclad Castle]] | ||
| | |[[Hot Cogs]] | ||
| | |200 | ||
| | |— | ||
|— | |||
|- | |- | ||
|style="background:white"|[[File: | |style="background:white"|[[File:NSLU Screenshot Chain Chomp.png|100x100px]]<br>[[Chain Chomp]] | ||
|align=left|Enemies tied to posts that lunge at Mario. If Mario ground pounds their post, they are set free. | |||
|align=left| | |colspan=2|[[Wiggler Rodeo]] | ||
|colspan=2|[[ | |200 | ||
| | |— | ||
| | |— | ||
|- | |- | ||
|style="background:white"|[[File: | |style="background:white"|[[File:NSLU Screenshot Flame Chomp.png|100x100px]]<br>[[Flame Chomp]] | ||
|align=left|Black spheres that spit fireballs at Mario. They explode after they're out of fireballs. | |||
|align=left| | |colspan=2|[[Flame Chomp Ferris Wheel]] | ||
|colspan=2|[[ | |200 | ||
| | |— | ||
| | |— | ||
|- | |- | ||
|style="background:white"|[[File: | |style="background:white"|[[File:FooNSMBU.png|100x100px]]<br>[[Foo]] | ||
|align=left|An enemy that creates fog in order to obscure the player's view. | |||
|align=left| | |colspan=2|[[Three-Headed Snake Block]] | ||
|colspan=2|[[ | |200 | ||
| | |— | ||
| | |— | ||
|- | |- | ||
|style="background:white"|[[File: | |style="background:white"|[[File:BobombNSMBU.png|100x100px]]<br>[[Bob-omb]] | ||
|align=left|Bombs that ignite if they are jumped on or have a fireball thrown at them, then explode shortly after. | |||
|align=left| | |[[Bowser Jr. Showdown]] | ||
| | |[[The Final Battle (New Super Luigi U)|The Final Battle]] | ||
| | |200 | ||
| | |— | ||
|— | |||
|- | |- | ||
|style="background:white"|[[File: | |style="background:white"|[[File:ParabombNSMBU.png|100x100px]]<br>[[Parabomb]] | ||
|align=left|Parachuting Bob-ombs that are sometimes shot out of cannons. | |||
|align=left| | |[[Bowser Jr. Showdown]] | ||
|[[Current Event]] | |||
| | |200 | ||
| | |— | ||
|— | |||
|- | |- | ||
|style="background:white"|[[File: | |style="background:white"|[[File:NSMBU Asset Model Blooper.png|100x100px]]<br>[[Blooper]] | ||
|align=left|Underwater enemies that move in an erratic pattern and follow Mario. | |||
|align=left| | |colspan=2|[[Star Coin Deep Dive]] | ||
|[[ | |200 | ||
| | |— | ||
| | |||
|— | |— | ||
|} | |||
===Obstacles from NSLU=== | |||
===Bosses from NSLU=== | |||
{|class="wikitable"style="width:100%;text-align:center" | |||
|-style="color:white;background:#78c829" | |||
!rowspan=2 width=10%|Name | |||
!rowspan=2|Description | |||
!colspan=2|Levels | |||
|-style="color:white;background:#78c829" | |||
!width=8%|First | |||
!width=8%|Last | |||
|- | |||
!colspan=4 style="background:#D3EB9D"|Tower bosses | |||
|- | |||
|style="background:white"|[[File:Boom Boom NSMBU Model.png|100x100px]]<br>[[Boom Boom]] | |||
|align=left|The tower boss from [[Flame-Gear Tower]] in [[Acorn Plains]] to [[Grinding-Stone Tower]] in [[Rock-Candy Mines]]. He does not change in the first battle, especially on [[Crushing-Cogs Tower]] in [[Acorn Plains]]. However, following his first defeat, [[Kamek|Magikoopa]] gives him special abilities. In [[Stoneslide Tower]] from [[Layer-Cake Desert]], Magikoopa will grant him the ability to spin jump. In [[Giant Skewer Tower]] from [[Sparkling Waters]] and [[Freezing-Rain Tower]] from [[Frosted Glacier]], Magikoopa will grant him the ability to jump, similar to ''Super Mario Bros. 3''. In [[Snake Block Tower]] from [[Soda Jungle]], Magikoopa will make him larger. In [[Grinding-Stone Tower]] from [[Rock-Candy Mines]], Magikoopa will transform his arms into wings, similar to ''Super Mario Bros. 3''. | |||
|[[Flame-Gear Tower]] | |||
|[[Smashing-Stone Tower]] | |||
|- | |||
|style="background:white"|[[File:NSMBU Boss Sumo Bro Artwork.png|100x100px]]<br>[[Boss Sumo Bro]] | |||
|align=left|Boss Sumo Bro was a regular [[Sumo Bro]] until Magikoopa made him grow in size. He is normally immune to attacks from the top due to the spike on his head, but he will jump between platforms which the player can hit from the bottom. Knocking him off a platform makes him vulnerable to jump attacks. He is fought on [[Screwtop Tower]]. | |||
|colspan=2|[[Sumo Bro's Spinning Tower]] | |||
|- | |||
|style="background:white"|[[File:NSMBW Kamek Artwork.png|100x100px]]<br>[[Kamek|Magikoopa]] | |||
|align=left|Magikoopa is fought on [[Slide Lift Tower]] and teleports most of the time when Mario gets too close. However, when he stops to attack Mario, he is left vulnerable to Mario's jumping. He also casts spells on Boom Boom, Boss Sumo Bro, and Bowser granting them extra power before their battles, such as causing them to grow in size. | |||
|colspan=2|[[Stonecrush Tower]] | |||
|- | |||
!colspan=4 style="background:#D3EB9D"|The Koopalings | |||
|- | |- | ||
|style="background:white"|[[File: | |style="background:white"|[[File:Lemmy Koopa NSMBU.png|100x100px]]<br>[[Lemmy Koopa]] | ||
|[[ | |align=left|Lemmy Koopa is fought on [[Lemmy's Swingback Castle]] in [[Acorn Plains]] and attempts to throw [[bomb]]s at Mario. | ||
|align=left| | |colspan=2|[[Lemmy's Lights-Out Castle]] | ||
|colspan=2|[[ | |- | ||
| | |style="background:white"|[[File:MortonNSMBU.png|100x100px]]<br>[[Morton Koopa Jr.]] | ||
| | |align=left|Morton Koopa Jr. is fought on [[Morton's Compactor Castle]] in [[Layer-Cake Desert]] and uses a large hammer that is apparently filled with magic to knock [[Big Pokey]] segments in the player's way after shaking the ground by stomping on it. He can knock Pokey segments straight at the player or knock them in high arcs. | ||
|colspan=2|[[Morton's Lava-Block Castle]] | |||
|- | |||
|style="background:white"|[[File:NSMBU Larry Koopa Artwork.png|100x100px]]<br>[[Larry Koopa]] | |||
|align=left|Larry Koopa is fought on [[Larry's Torpedo Castle]] in [[Sparkling Waters]] and blasts fireballs and use water blasts from the pool below the arena. When Larry is spinning in his shell, the water geysers give his shell a boost upwards, making it a bit tricky to avoid. After two stomps, Larry begins to cast two fireballs in quick succession. | |||
|colspan=2|[[Larry's Trigger-Happy Castle]] | |||
|- | |- | ||
|style="background:white"|[[File: | |style="background:white"|[[File:NSMBU Wendy Koopa Artwork.png|100x100px]]<br>[[Wendy O. Koopa]] | ||
|align=left|Wendy O. Koopa is fought on [[Wendy's Shifting Castle]] in [[Frosted Glacier]] and skates around the arena, shooting out two energy rings that ricochet off of walls and can knock down the [[icicle]]s at the ceiling of the airship. She also spin jumps from walls. After she is jumped on twice, she will shoot out three rings instead. | |||
|align=left| | |colspan=2|[[Wendy's Thwomp Castle]] | ||
|colspan=2|[[ | |||
|- | |- | ||
|style="background:white"|[[File: | |style="background:white"|[[File:NSMBU Iggy Artwork.png|100x100px]]<br>[[Iggy Koopa]] | ||
|align=left|Iggy Koopa is fought on [[Iggy's Volcanic Castle]] in [[Soda Jungle]] and uses the four warp pipes to run around the room and on the ceiling to make it trickier for the player to stomp on him as he uses his Magic Wand to shoot three fireballs, with some being his usual green flame, and the other being red skeleton orbs that generate [[Magmaargh]]s when they land into the lava below. When Iggy is stomped on, he will dash around the room in his shell using the pipes on the walls, which will switch him to the other side of the room. Unlike the other Koopalings where they spin in their shells and change directions at the edges or walls of the room, Iggy can actually change directions anywhere around the room during his duration in his shell. | |||
|align=left| | |colspan=2|[[Iggy's Swinging-Chains Castle]] | ||
|[[ | |||
|- | |- | ||
|style="background:white"|[[File: | |style="background:white"|[[File:NSMBU Roy Artwork.png|100x100px]]<br>[[Roy Koopa]] | ||
|align=left|Roy Koopa is fought on [[Roy's Conveyor Castle]] in [[Rock-Candy Mines]] and shoots [[Bullet Bill]]s with his cannon and jump between platforms that move around during the fight. Occasionally, he shoots [[Bull's-Eye Bill|Missile Bill]]s. He can also jump high in the air and ground pound the floor or platform, which makes him fire Bullet Bills on both sides of his blaster. The ground pound can also make the floating platforms appear after he comes out of his shell. | |||
|align=left| | |colspan=2|[[Roy's Ironclad Castle]] | ||
|colspan=2|[[ | |||
|- | |- | ||
|style="background:white"|[[File: | |style="background:white"|[[File:LudwigNSMBU.png|100x100px]]<br>[[Ludwig von Koopa]] | ||
|align=left|Ludwig von Koopa is fought on [[Ludwig's Clockwork Castle]] in [[Meringue Clouds]] and levitates in the air while making two clones of himself, and all three Ludwigs will blast fireballs at Mario before dropping onto the ground. If one of the clones is jumped on, it will simply disappear. There are four ways to find out which is the real one. The one that is the real one fires three fireballs, while the clones fire two. The clones keep their eyes half-open, and tend to assume the real Ludwig's pre-battle idle pose while not levitating. The real Ludwig will also drop to the ground last, after the clones, as well as laugh while dropping. Finally, Mario always looks at the real Ludwig if he can see him directly, just as he does with the other bosses. When the fight starts off, after shooting their fireballs, the clones disappear before landing. After the first stomp, the clones do not disappear. After the second stomp, not only do all three Ludwigs shoot faster, but swap positions, though the real Ludwig still shoots three fireballs. | |||
|align=left| | |colspan=2|[[Ludwig's Block-Press Castle]] | ||
|colspan=2|[[ | |||
|- | |- | ||
!colspan=4 style="background:#D3EB9D"|Other | |||
|- | |- | ||
|style="background:white"|[[File: | |style="background:white"|[[File:Bowserjr NSMBU.png|100x100px]]<br>[[Bowser Jr.]] | ||
|align=left|Bowser Jr. is fought on [[airship]]s. In Soda Jungle's [[The Mighty Cannonship]], Bowser Jr. uses his [[Junior Clown Car]] as a submarine underwater, in which the player must guide the Targeting Teds that Bowser Jr. shoots into his submarine. With every hit, he summons three Torpedo Teds from the left and right or from the ceiling and the floor. In Meringue Clouds' [[Boarding the Airship]], Bowser Jr.'s boss battle involves him in his Clown Car equipped with boxing gloves, which he uses to destroy the blocks the player is standing on. Bowser Jr. periodically throws Bob-ombs, which the player can use against him. However, in [[Peach's Castle (world)|Peach's Castle]]'s [[The Final Battle (New Super Mario Bros. U)|The Final Battle]], he cannot be defeated. | |||
|align=left| | |[[The Mighty Cannonship]] | ||
|[[The Final Battle (New Super Luigi U)|The Final Battle]] | |||
| | |||
| | |||
|- | |- | ||
|style="background:white"|[[File: | |style="background:white"|[[File:BowserNSMBU.png|100x100px]]<br>[[Bowser]] | ||
|align=left|Bowser is fought in [[The Final Battle (New Super Luigi U)|The Final Battle]] in [[Peach's Castle (world)|Peach's Castle]]. The first part of his battle is similar to ''[[Super Mario Bros.]]'', where the player has to get to the other side and press the switch; alternatively, shooting several fireballs also works. This causes the axe to fall and make the bridge collapse, making Bowser fall. The gate then opens and Mario moves on. When Mario reaches the top of the castle, Peach is being held up in the tower. After this, Bowser Jr. shows up in his Junior Clown Car, and Bowser hops on top of the castle while he is huge. Bowser Jr. also fights the player. In order to defeat them, the player must jump on Bowser Jr., causing him to fall out of his Junior Clown Car. This allows the player to jump in and hover over Bowser to harm him. Like the Koopalings, he curls into his shell and spins around when hit. He is defeated after being hit three times by the Clown Car. | |||
|align=left| | |colspan=2|[[The Final Battle (New Super Luigi U)|The Final Battle]] | ||
|colspan=2|[[ | |||
|} | |} | ||
===Items from NSLU=== | |||
===Power-ups from NSLU=== | |||
===Objects from NSLU=== | |||
==References== | ==References== | ||
<references/> | <references/> | ||
Latest revision as of 02:16, September 10, 2024
NSMB
Playable characters from NSMB
| Image | Name | Description |
|---|---|---|
| Mario | Mario retains his conventional role in the Super Mario series as the game's main protagonist in his adventure to once again rescue Princess Peach from the clutches of Bowser and his son Bowser Jr. He is the default playable character in the Story Mode. | |
| Luigi | Luigi, Mario's brother, returns to the Super Mario series as a playable character. The method to play as Luigi is not revealed until the game's completion, but he can be played as at any time by pressing and holding |
Non-playable characters from NSMB
| Image | Name | Description |
|---|---|---|
| Princess Peach | The damsel in distress, who was kidnapped by Bowser Jr. | |

|
Toads | TBW |
| Toadsworth | An ally who appears in Toad Houses. | |

|
Dorrie | A large plesiosaur-like creature that the player can ride over poisoned water. |

|
Giant Wiggler | A giant Wiggler made up of many segments that the player can ride over pits. |
Enemies from NSMB
The enemies listed in this table match those in the Super Mario Bros. Encyclopedia.[1] The default order they are listed derives from the official guidebook[2] with adjustments that ensure enemies are listed next to their immediate relatives. Some listed enemies – namely Super Piranha Plant, Mega Cheep-Cheep, Mega Deep-Cheep, and Big Whomp – are lumped with their smaller counterparts in the guidebook, but are recognized as distinct in the encyclopedia. The leaping Cheep-Cheep variant named トビプク (Tobipuku) in the guide is lumped with its underwater counterpart in the encyclopedia and this is followed suit here. The blue-shelled Koopa Troopa is not listed in either source.
| Image | Name | Description | Levels | Pts. | New | |
|---|---|---|---|---|---|---|
| First | Last | |||||
| Goomba | Simplest enemy. Brown mushroom-like creature with feet. Can be defeated with anything. | World 1-1 | World 8-6 | 200 | — | |
| Paragoomba | This Goomba has wings. One stomp makes it lose its wings, and turns it into a Goomba. It can also be defeated with a fireball. | World 2-4 | 200 | — | ||
| Mini Goomba | This small Goomba works the same as its bigger cousins. Only appears in Mini Pipes, and is the only enemy Mini Mario can defeat them with one stomp. Other versions of Mario can defeat them by just touching them. | World 3-A | World 8-4 | 200 | — | |
| Koopa Troopa (Green) | A basic form of Koopa. The green-shelled Koopa Troopas walk into bottomless pits. By stomping on it, it retreats into its shell. The shell can slide when kicked, and can also be used to defeat enemies or destroy bricks. | World 1-1 | World 8-7 | 200 | — | |
| Koopa Troopa (Red) | The red-shelled Koopa Troopa turns around when its reaches the edge of a platform. | World 1-1 | World 8-7 | 200 | — | |
| Koopa Troopa (Blue) | Ground pounding a Blue Koopa makes Mario gain his Shell power. | Ice | 200 | — | ||
| Koopa Paratroopa (Green) | This Koopa Troopa has wings. It either flies back and forth or bounces all around. One stomp makes it lose its wings, and turns it into a Koopa Troopa. It can also be defeated by a fireball. | World 1-4 | World 8-7 | 200 | — | |
| Koopa Paratroopa (Red) | TBW | World 2-A | World 8-7 | 200 | — | |
| Climbing Koopa (Green) | TBW | World 3- |
200 | — | ||
| Climbing Koopa (Red) | TBW | World 3- |
200 | — | ||
| Lakitu | Throws Spiny Eggs and has his own cloud. One stomp and it is defeated, and the cloud disappears. If defeated with a shell or fireball, the cloud stays, so Mario can take to the skies in it for a while. | World 2-2 | World 6-A | 1000 | — | |
| Spiny Egg | Spike balls thrown by Lakitus, turning into Spinies upon landing. When a Spiny touches water, its turns back into a Spiny Egg, only returning to normal once the water recedes. Lakithunder's Spiny Eggs instead bounce around the arena. | World 2-1 | World 7- |
200 | — | |
| Spiny | These hatch from Spiny Eggs. Any stomp, even the Ground Pound, harms Mario. Also found on ceilings, and comes down when Mario passes, but can collide with other moving Spinies and knock each other out. If a Spiny falls upside down from a ceiling, they behave similarly to Koopa Troopas and Buzzy Beetles. Fireballs and the Super Star can defeat them. | World 2-1 | World 8-6 | 200 | — | |
| Buzzy Beetle | Just like Koopa Troopas, it retreats into its shell once stomped on. One difference is that it is not affected by fireballs. | World 5-C | World 6- |
200 | — | |
| Spike Top | Buzzy Beetles with spikes on their shells which walk on walls. Hitting the block they are on defeats them. | World 5-2 | World 8- |
200 | — | |
| Dry Bones | One stomp, and it falls apart. It can reassemble, however. Invincible to fireballs. | World 1- |
World 8- |
200 | — | |
| Super Dry Bones | A big Dry Bones. Requires a Ground Pound to cause it to fall apart. | World 5- |
World 6- |
200 | ||
| Hammer Bro | Koopa with headgear that throws hammers. It can be defeated by a stomp or fireball or hitting a block from below. | World 2-4 | World 8 | 1000 | — | |
| Fire Bro | A variation of the Hammer Bro that throws fireballs. A fireball or stomp or hitting a block from below defeats it. | World 8-7 | 1000 | — | ||
| Boomerang Bro | A variation of the Hammer Bro that throws boomerangs. Stomp, fireball, hitting a block from below or invincibility defeats it. | World 2-5 | World 8-7 | 1000 | — | |
| Sledge Bro | A large Hammer Bro that carries sledgehammers. When Mario does not jump, he can stun him. It can be defeated with a stomp, a fireball or a block from below. | World 8-7 | 1000 | — | ||
| Pokey | A cactus with a flower and face. Its segments can be destroyed with fireballs, and defeated when hit in the head. | World 2-1 | 200 | — | ||
| Piranha Plant | This plant comes out of pipes, but is also found on the ground trying to bite Mario. Throw fireballs or avoid it. | World 1-2 | World 7-A | 200 | — | |

|
Super Piranha Plant | A big Piranha Plant. It requires three fireballs to defeat, and gives up eight coins if killed with fireballs. | World 2-3 | World 6-B | 200 | — |
| Venus Fire Trap | A Piranha Plant that spits fireballs. Defeated with fireballs. | World 2-6 | World 6-3 | 200 | — | |
| Blockhopper | Imitates 1-3 bricks and a ? Block, stacked on each other. When Mario approaches, it comes to life and hops around. Easily distinguished by the fact that the ? does not turn. Mario can defeat it by ground pounding all the blocks down to the ? Block. | World 2-5 | 200 | |||
| Cheep-Cheep | A swimming fish. It sometimes hops on land. On land it is defeated with a stomp, but underwater it must be hit with a fireball. | World 1-A | World 8-3 | 200 | — | |

|
Mega Cheep-Cheep | A bigger Cheep-Cheep that acts the same as the small form, Defeated with Fire Mario's fireballs. | World 3-1 | 200 | — | |
| Deep-Cheep | A green Cheep-Cheep that follows Mario when it sees him. Use a fireball to defeat it. | World 6-5 | 200 | |||

|
Mega Deep-Cheep | A bigger Deep-Cheep that acts the same as the small form. Defeated with Fire Mario's fireballs. | World 6-5 | 200 | ||
| Cheep-Chomp | A big, purple Cheep-Cheep. Approaches Mario to attempt to chomp him down. | World 3-1 | 200 | — | ||

|
Spike Bass | A brown giant fish, with spikes all over. It jumps for some time, similar to Boss Bass. It can be defeated with a fireball, a Koopa Shell, a Starman, and a Mega Mushroom, but returns after a few seconds. | World 2-A | World 3-C | 200 | |
| Skeeter | This bug skates on water and deploys bombs. One stomp or fireball defeats it, and its bombs can be obliterated with fireballs. | World 3-A | World 8-2 | 200 | ||
| Sushi | Long sharks that are defeated by fireballs. They only appear in 1-A. | World 1-A | 200 | — | ||
| Blooper | Swims in an irregular manner. Can be defeated by fireballs or invincibility. | World 3-3 | 200 | — | ||
| Blooper Nanny | Swims in an irregular manner, as Blooper Babies swim after it. Can be beat with a fireball or invincibility. | World 3-3 | 200 | — | ||
| Unagi | An eel that lives in gaps, and tries to bite Mario. Occasionally, they can be found swimming back and forth. They can be defeated with a Mega Mushroom or Starman. | World 4-3 | World 8-3 | 200 | — | |

|
Mega Unagi | A bigger Unagi. Cannot be defeated, but can be swam through with a Mega Mushroom or Starman (except through the face, in which case Mario gets knocked back instead). In World 8-3, one chases Mario at the second half of the level. | World 4-3 | World 8-3 | ||

|
Whomp | Attempts to crush Mario when he gets close. Before it gets up, players should execute a Ground Pound on it, causing it to drop four coins. | World 3- |
200 | — | |

|
Big Whomp | Larger versions of normal Whomps that walk around instead of standing in the background. When they fall on the ground, the player can ground pound them to defeat them. | World 3- |
200 | ||
| Thwomp | Tries to crush Mario when he gets close. It is defeated with a Blue Shell, Starman or a Mega Mushroom. | World 4- |
World 8- |
200 | — | |

|
Super Thwomp | A big Thwomp. The only other difference is that Super Thwomp can crush through bricks and used blocks and stair blocks. | World 4- |
World 8- |
200 | — |
| Flame Chomp | Spits a fireball that follows Mario, causing its tail, made of fireballs, to decrease in length. It self-destructs when it does not have any fireballs left, which can hurt Mario. Can be defeated with a stomp or a fireball. | World 7-1 | 200 | — | ||
| Podoboo | Lava balls that jump out of lava. | World 1- |
World 8- |
— | ||
| Fire Snake | An eyed flame with a tail of smaller flames. It can hop on blocks and follow Mario. | World 2-5 | 200 | — | ||
| Boo | Facing it stops it. Looking away from it causes it to pursue Mario. It is vulnerable to Starmen and Blue Shells. | World 3- |
World 8-1 | 200 | — | |
| Balloon Boo | Approaches Mario if his back is turned. When looked at, it stops to inhale air to grow. Shrinks to the normal size of a Boo when it attacks. A Starman, Blue Shell or Mega Mushroom can defeat Balloon Boos. | World 4- |
200 | |||
| Broozer | Boxing ghoul-like monster. Can break bricks and other blocks that are normally indestructible. Mario can defeat it by jumping on it three times, or hitting it with a fireball. | World 5- |
World 5-C | 200 | ||
| Splunkin | Walking Jack-o'-lantern enemies. One stomp causes it to become angry and speed up; a second stomp destroys it. A fireball also defeats it. | World 3- |
World 8-1 | 200 | ||
| Swoop | This bat hangs on ceilings. Flies at Mario when he approaches. Fireballs or a stomp defeats it. | World 2-3 | World 5-2 | 200 | — | |
| Moneybags | A hopping pest that at first looks like a coin. Stomp on it or hit it with a Fire Ball to get coins, and if it is jumped on or hit enough times, Mario gets a 1-Up Mushroom. | World 5-2 | World 6-3 | 200 | — | |
| Crowber | Swoops at high speeds at Mario. It is defeated with any attack. | World 8-1 | 200 | |||
| Bob-omb | Legged bombs with eyes. Stomping/shooting on a Bob-omb makes it explode after a certain time. | World 4-5 | World 7-5 | 200 | — | |
| Kab-omb | A Bob-omb that lights and explodes when touched by volcanic debris or one of Fire Mario's fireballs. It can be defeated by stomping it. | World 8-8 | 200 | |||
| Scuttlebug | This spider appears from upwards via its web. One stomp or fireball drops it off its string and defeats it. Also, some can detach from their strings and walk along the ground in World 8-4. | World 4-1 | World 8-4 | 200 | — | |
| Squiggler | A tiny Wiggler that comes out of pipes and crawls on walls. A stomp on the head defeats it, but only a ground pound gives up points. | World 7-A | 200 | |||
| Wiggler | Normally just walks slowly, but becomes angry and red when stomped on. Can only be defeated with a shell, Starman or Mega Mushroom. | World 4-4 | World 7-3 | 200 | — | |
| Amp | An electric enemy. Can be destroyed with a Mega Mushroom or Starman. | World 3- |
World 7- |
200 | — | |
| Chain Chomp | It attacks Mario by moving its head and lunging. Mario must ground pound the post it is tied to three times to free it. | World 6-6 | 200 | — | ||
| Bullet Bill | It is launched by Bill Blasters and Bill Blaster Turrets. Mario must stomp on it to defeat it. | World 2- |
World 8-1 | 200 | — | |
| Banzai Bill | An enormous Bullet Bill. Mario can jump on a Banzai Bill to defeat it, just like Bullet Bills. | World 7-5 | World 8-1 | 200 | — | |
| Snailicorn | Creature with a snail's shell, a horn, and feet. Invincible to stomps, but can be pushed off cliffs. | World 5-3 | World 5-B | 200 | ||
| Snow Spike | The normal Spike does not appear, but this one does. Instead of Spiked Balls, it throws Snowballs. It can be defeated by a stomp or fireballs. | World 5-1 | 200 | |||
Obstacles from NSMB
| Image | Name | Description | Levels | |
|---|---|---|---|---|
| First | Last | |||

|
Ball 'N' Chain | Spiked Ball attached to a chain on a block. It spins around and cannot be destroyed. | World 7- |
World 7- |

|
Banzai Bill Cannon | Giant launchers that shoot unending Banzai Bills. | World 7-5 | World 8-1 |
| Bill Blaster | Fires endless amounts of Bullet Bills from either side. Can be destroyed with a Mega Mushroom. | World 2- |
World 8-1 | |
| Bill Blaster Turret | Stacked Bill Blasters that rotate between firings. Can be destroyed with a Mega Mushroom. | World 6-1 | World 7-5 | |
| Burner | A rocket engine that blows long flames for several seconds before a break. They are indestructible. There are also shorter ones that never stop. | World 7- |
World 8- | |
| Fire Bar | A long stick of fireballs rotating around a block. The amount of fireballs vary, and there can be two bars in one block. | World 6-4 | World 8- | |

|
Giant Spiked Ball | Larger versions of Spiked Balls that destroy blocks, enemies, and even smaller Spiked Balls. Can only be destroyed with Mega Mario. | World 2- |
World 5- |

|
Lava | Molten rock that causes the player to instantly lose a life if touched. | World 1- |
World 8- |
| Moving rock | Stone platforms that move in set patterns and come in various sizes with some containing spikes. They can either help or hinder the player. Often found in towers. | TBD | TBD | |

|
Poison | A liquid hazard that causes the player to instantly lose a life if touched, similar to lava. | World 4-1 | World 6-3 |

|
Quicksand | Sand that sinks the player if they fall in. Jumping repeatedly is required to escape. | World 2-1 | World 6-A |

|
Skewer | Giant spiked pillars that shoot out at high speeds before retracting. | World 3- |
World 6- |

|
Snow | Deep snow that causes the player to sink, reducing jump height. | World 5-1 | World 5-1 |
| Snow branch | Snow that hangs on branches and falls once the player passes underneath. It traps them for a moment if it lands on them, and makes them vulnerable to enemies. | World 5-1 | World 5-1 | |
| Spike Ball | Ball with spikes that rolls along the floor, destroying almost everything in its way. They can be destroyed by Mega Mario, or their larger counterpart Giant Spiked Ball. | World 2- |
World 8- | |
| Spike Trap | Pointy obstacles that damage the player if touched. | World 1- |
World 8- | |
| Volcanic debris | Lava rocks shot from a volcano. Can be destroyed with a Starman or Mega Mushroom. | World 8-8 | World 8-8 | |

|
Whirlpool | A swirling vortex of water that can sink the player to the pit. | World 6-5 | World 6-5 |
Bosses from NSMB
| Image | Name | Description | Levels | |
|---|---|---|---|---|
| First | Last | |||
| Bowser Jr. | Bowser Jr. is fought in all towers and in World 8- |
World 1- |
World 8- | |

|
Bowser | Mario needs to jump on the skull switch to send him falling down beneath the bridge into the lava. | World 1- |
World 8- |
| Mummipokey | Mario needs to jump on this Pokey three times to go to World 3 or ground pound him three times with Mini Mario to go to World 4. | World 2- | ||

|
Cheepskipper | Mario needs to jump on him three times when he jumps out of the water, while dodging his Cheep-Cheeps. | World 3- | |
|
Mega Goomba | Mario should hit the switch in hole in the middle, and ride up the platforms so he can ground pound the Mega Goomba three times. | World 4- | |

|
Petey Piranha | Mario should run around so that Petey tries to squish Mario. If he moves out of the way in time, Petey should slip and land on his back. Mario should then jump on Petey three times to go to World 6 or ground pound him three times with Mini Mario to get to World 7. | World 5- | |

|
Monty Tank | Mario should crouch in the corner, then jump on the Monty Mole's head when he stops firing Bullet Bills. Each time he is hit, his tank gets higher. | World 6- | |
| Lakithunder | Mario should jump on him three times when he swoops down. | World 7- | ||

|
Dry Bowser | Mario needs to jump on the skull switch to send him falling down beneath the bridge. | World 8- | |
Items from NSMB
These are collectibles, pickups, and health-restoring objects.
| Image | Name | Description |
|---|---|---|
| Coin | Collecting 100 of these give Mario or Luigi an extra life. In Mario Vs. Luigi mode, collecting 8 coins gives Mario or Luigi an item. | |
| Hidden Coin | An outline of a coin that becomes a coin once Mario or Luigi passes through it. | |
| Red Coin | Collecting all 8 Red Coins that appear after passing through a Red Ring gives Mario a Super Mushroom, Fire Flower or 1-Up Mushroom, depending on what power-up Mario or Luigi is currently using. | |
| Blue Coin | Just like normal Coins, but appear by hitting a P Switch. | |
| Star Coin | Three of these are located in every course in hard-to-reach or hidden areas. They are used to remove Star Coin Signs and purchase different touch screen background skins. | |
| 1-Up Mushroom | Gives Mario or Luigi an extra life. | |
| Koopa Shell | TBW | |
| Buzzy Shell | TBW | |
| Springboard | Bounces the player high into the air when jumped on. | |
| Key | TBW | |
| Big Star | A set number of these must be collected to win in Mario Vs. Luigi mode. |
Power-ups from NSMB
| Power-up | Form | Description | |
|---|---|---|---|
| N/A | Mario |
Luigi |
TBW |
Super Mushroom |
Super Mario |
Super Luigi |
Turns Small Mario or Small Luigi into Super Mario or Super Luigi, respectively. |
Fire Flower |
Fire Mario |
Fire Luigi |
Turns Mario or Luigi into Fire Mario or Fire Luigi, respectively. |
Starman |
Invincible Mario |
Invincible Luigi |
Turns Mario or Luigi into Invincible Mario or Invincible Luigi. |
Mega Mushroom |
 Mega Mario |
Mega Luigi |
Turns Mario or Luigi into Mega Mario or Mega Luigi, respectively. |
Mini Mushroom |
Mini Mario |
Mini Luigi |
Turns Mario or Luigi into Mini Mario or Mini Luigi, respectively. |
Blue Shell |
Shell Mario |
Shell Luigi |
Turns Mario or Luigi into Shell Mario or Shell Luigi, respectively. |
Objects from NSMB
| Image | Name | Description |
|---|---|---|
| Blocks and containers | ||
| ? Block | Gives Mario or Luigi a coin or an item. (inc. Coin Block and Hidden Block) | |
| ? Block (silk) | TBW | |
| Brick | When broken, this block releases a coin or an item. | |
| Donut Block | Falls if stood on too long. | |
| Dotted-Line Block | TBW | |
| Face block | Becomes a taller stack every time they are hit. | |
| Flying ? Block | ? Blocks that fly around levels and give a coin or an item. | |
| Red Winged ? Block | The red ones fly between levels on the map and give better items when hit. | |
| Roulette Block | Gives a random item to Mario or Luigi. | |
| Snake Block | Travels along winding paths, but do not move anything on top of them directly. It falls quickly when it reaches its destination. | |
| Spiked ? Block | Gives the player a coin or an item when hit. The block spins, alternating between the spiked side and the safe side. The spiked side can damage the player. | |
| Spin Block | Lets Mario or Luigi perform a high, gliding Spin Jump. | |
| Stone Block | Can only be destroyed by Big Thwomps, Bob-ombs, Mega Mario, or Mega Luigi. | |
| Trigger objects | ||
| ! Switch | Turns Dotted-Line Blocks into solid Red Blocks when pushed. | |
| ? Switch | Changes something in the level when pushed. | |
| Manhole | A lid that prevents access. The only way to enter is to Ground-Pound. | |
| P Switch | Switches the positions of coins and bricks and spawns Blue Coins. | |
| Red Ring | Makes 8 Red Coins appear for a limited time. | |
| Red-and-yellow block[3] | TBW | |
| Skull switch | Immediately defeats Bowser when pressed. | |
| Pipes | ||
| Cork[4] | TBW | |
| Jet Pipe | Currents that push the player. | |
| Pipe | Can often be entered to warp elsewhere. (inc. Pipe Cannon) | |
| Small pipe | Can only be entered by Mini Mario and Mini Luigi. | |
| Climbabale objects | ||
| Chain-Link | A large fence that can be climbed on. Climbing Koopas can often be found climbing on them. | |

|
Cliff | TBW |
| Flip Panel | Sections of Chain-Links that can be punched to flip to the other side. | |
| Flip Panel (big) | TBW | |
| Pole | A climbable, yellow striped pole with a red base. Only one pole appears in the game, located in World 3- | |
| Pole[5] (moving) | Yellow, striped ropes that move in a continuous pattern on Tracks. They can be grabbed by the player and swung back and forth with momentum. | |
| Rope | TBW | |
| Rope (strung) | TBW | |
| Rope (untied) | TBW | |
| Vine | Can be climbed, sometimes leading to bonuses. (inc. Vine Block) | |
| Vine (hanging) | TBW | |
| Doorways | ||

|
Boss door | TBW |
| Castle door | TBW | |
| Door | TBW | |
| Platforms | ||
| Barrel | TBW | |
| Conveyor Belt | Quickly moves anything on them. | |
| Drawbridge[6] | Two yellow platforms that opens and closes. | |
| Flatbed Ferry | TBW | |
| Floating platform[7] | TBW | |
| Floor (Mario Bros.) | TBW | |

|
Gelatin | Encapsulates terrain and coins. Can be ground-pounded. |
| Green platform[8] | TBW | |
| Hanging platform | TBW | |
| Haunted Lift | TBW | |
| Haunted Stairs | TBW | |
| Hinged device[9] | A striped platform that flips the player to the other side of a wall when stepped on. | |
| Lift | Floating, moving platforms. (inc. Flatbed Ferry) | |
| Log | TBW | |
| Moving Mushroom | TBW | |
| Mushroom Platform | TBW | |
| Mushroom Trampoline | TBW | |

|
Paddle wheel | A paddle wheel-like device made of four small Lifts that move in a wheel on tracks. |
| Paddle wheel (big) | TBW | |
| Rolling log | TBW | |
|
Rotating platform[10] | Platforms that rotate in a 90 degree axis. It comes in three different shapes: a triangle, a square, and a rectangle. |

|
Sand Dune | TBW |
| Scale Lift | TBW | |
| Seesaw | A long platform that tilts left or right depending on where the player walks. | |
| Seesaw Shroom | TBW | |
| Sinking and Rising Mushrooms | Mushroom Platforms that act as elevators. | |
| Stretch Shroom | TBW | |
| Swing | TBW | |
| Unstable mushroom | TBW | |

|
Bell-shaped contraption[10] | Golden blocks in the shape of an "n" that activate once the player wall jumps. |

|
Rippling Floor | Ground that moves in waves. |
| Wobble Rock | TBW | |
| Other objects | ||
| Bumper | Giant bubbles that bounce the player away. | |
| Flipper | Wooden gates with red arrows, indicating which way they open to. | |
| Goal Pole | A flag post bearing a black flag with a white skull emblem. Must be touched by the player to complete the level. Only appears in levels with no bosses. | |
| Goal Pole (secret) | Similar to Goal Poles, but are well hidden, and act as secret exits for some levels. Instead of bearing black flags, secret Goal Poles' flags are red. | |
| Midway point | Marks each stage's checkpoint. | |
| Phantom Hand | Harmless, floating hands that point to secrets. | |
| Tornado | TBW | |
NSMBW
Playable characters from NSMBW
| Name | Description |
|---|---|
 Mario |
Mario returns from his appearance in New Super Mario Bros. as the game's main protagonist, with his goal being to save Princess Peach from Bowser's clutches. He is the default playable character, and is the only playable character in story mode. |
 Luigi |
Luigi, Mario's brother, also returns from his appearance in New Super Mario Bros. as a playable character in this game, however, he can played only in multiplayer and Super Guide. |
  Yellow Toad and Blue Toad |
Toads make their second playable role in the Super Mario series (the first being Toad in Super Mario Bros. 2) as two separate playable characters in this game, Yellow Toad and Blue Toad, who are exclusive to multiplayer. |
Yoshis from NSMBW
| Name | Description | |
|---|---|---|
 Yoshi |
 Yellow Yoshi |
It is possible to ride on Yoshi as well. In addition to his usual ability to consume most enemies, he can retain many different objects in the game in his mouth, including hammers, fireballs, ice balls, shells, Toads, power-ups, and other players. Yoshi can also use his Flutter Jump, a move first introduced in Super Mario World 2: Yoshi's Island. Similar to in Super Mario World, Yoshi can eat five apples in a course to produce an egg with a power-up or 1-Up. Yoshi cannot be harmed by sharp objects and enemies such as Spinies and Piranha Plants as long as he lands on them. Yoshi(s) brought to the end of the course must be abandoned, and therefore there are only certain levels in which players can ride Yoshis.
A species of dinosaur-like creatures that make their return to the Super Mario series in this game, and allow Mario and company to ride on them in a couple of levels. They can eat most things such as enemies and fruits, and can Flutter Jump. Green Yoshi is the default Yoshi color in single player, while Yellow, Light Blue, and Pink Yoshi are exclusive to multiplayer. |
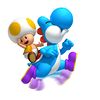 Light Blue Yoshi |
 Pink Yoshi | |
Non-playable characters from NSMBW
| Name | Description | Locations |
|---|---|---|
 Princess Peach |
Princess Peach retains her role from New Super Mario Bros. as being the damsel in distress. She was celebrating her birthday when Bowser Jr. and the Koopalings suddenly emerge from a birthday cake and kidnap her, forcing Mario and company to rescue her. | TBD |
 Toads |
Allies that replace Toadsworth in this game and help the main protagonists throughout the story mode by hosting minigames in Toad Houses for players to collect extra lives and power-ups. They can also be rescued in levels and Enemy Courses for the same rewards. | TBD |
Jumbo Ray |
Harmless, large green variants of mantas that fly through the air in large arcs, allowing players to stand on them as long as they remain on-screen. | TBD |
Enemies from NSMBW
The enemies listed in this table match those in the Super Mario Bros. Encyclopedia[11] and Mario Portal Game Archive.[12] The default order they are listed derives from their occurrence in-game with adjustments to ensure enemies are listed next to their immediate relatives. The Mega Deep-Cheep is lumped with its smaller counterpart in both sources, but it is recognized as distinct in the original New Super Mario Bros. and this is followed suit here.
The displayed English names appear in the Prima Games guidebook,[13] the EnterPlay trading cards, and officially-licensed sources published before New Super Mario Bros. Wii. Several localization choices made are deviated from here: Fishbones are referred to as "Wet Bones" in the guidebook, Sledge Bros are erroneously referred to as "Sumo Bros," and all large-bodied Bullet Bills are referred to as "King Bills." Mechakoopas are referred to as "Windup Koopas" in the guidebook but are recognized under their original name on their trading card and this is followed in paratexts for succeeding games. Several enemies wholly new to the franchise did not have names published at the time of the game's release and are incorporated here in retrospect. These are Hefty Goomba, Scaredy Rat, Bull's-Eye Banzai, and Big Fuzzy.
| Name | Description | Levels | Pts. | New | |
|---|---|---|---|---|---|
| First | Last | ||||
 Goomba |
Common enemies that walk in a single direction, turning when they encounter an obstacle. They can be defeated with a single stomp. | World 1-1 | World 9-8 | 200 | — |
 Paragoomba |
Winged Goombas that hop as they walk and are capable of turning around to pursue the player. They turn into regular Goombas when stomped. | World 7-5 | World 8-2 | 200 | — |
 Hefty Goomba |
A large, slow-moving Goomba that is the middling size of a Goomba, being smaller than a Giant Goomba but bigger than a regular Goomba. This enemy splits into two Goombas when jumped on. | World 1- |
World 8-2 | 200 | |
 Giant Goomba |
Large, slow-moving Goombas that split into two Hefty Goombas once stomped on. | World 1- |
200 | — | |
 Mini Goomba |
Small Goombas that attach themselves to the player, weighing them down until they either perform a Spin Jump or walk for a few seconds. They hop about erratically and can turn to pursue the player. | World 5-4 | World 7-5 | 200 | — |
 Prickly Goomba |
A Goomba that hides inside a spiked chestnut shell until it is hit with a fireball, upon which it jumps out and turns into a regular Goomba. | World 9-7 | 200 | ||
 Koopa Troopa (Green) |
Turtle enemies that that walk in a single direction, turning when they encounter an obstacle. They temporarily retreat into their shells when stomped, which can then be kicked, picked up, or thrown. Green Koopa Troopas walk off ledges. | World 1-1 | World 9-5 | 200 | — |
 Koopa Troopa (Red) |
Red Koopa Troopas turn around. | World 1-1 | World 9-5 | 200 | — |
 Koopa Paratroopa (Green) |
Winged Koopa Troopas that either jump forward in high arcs or fly up and down or side to side in the air. They turn into regular Koopa Troopas when stomped. | World 1-4 | World 9-3 | 200 | — |
 Koopa Paratroopa (Red) |
TBW | World 1-4 | World 9-2 | 200 | — |
 Climbing Koopa |
Koopa Troopas that move either horizontally or vertically along fences, climbing to the other side once they reach an edge. They can be defeated by punching them from the opposite side of the fence they are climbing. | World 4- |
200 | — | |
 Dry Bones |
Skeletal Koopa Troopas that briefly collapse when attacked before reassembling themselves. They turn at ledges, like Red Koopa Troopas. | World 1- |
World 8- |
200 | — |
 Big Dry Bones |
Large variants of Dry Bones that are momentarily stunned when jumped on. They can be forced to collapse with a Ground Pound. | World 6- |
World 7- |
200 | — |
![Artwork of Hammer Bro in Mario Party 8 (also used in Mario Super Sluggers, New Super Mario Bros. Wii, Super Mario 3D Land,[1] Super Mario Party and Mario Kart Tour)](https://mario.wiki.gallery/images/thumb/4/4c/MP8_Hammer_Bro_Artwork.png/83px-MP8_Hammer_Bro_Artwork.png) Hammer Bro |
Enemies that throw hammers in arcs at the player and periodically jump between platforms. | World 1-3 | 1000 | — | |
 Boomerang Bro |
Hammer Bro relatives that use damaging boomerangs, which return to them after being thrown. | World 2-1 | 1000 | — | |
 Fire Bro |
Hammer Bro relatives that throw fireballs which bounce along the ground. | World 2-3 | World 9-7 | 1000 | — |
 Ice Bro |
Hammer Bro relatives that throws ice balls at the ground, which can freeze the player and even other enemies. | World 3-2 | World 3- |
1000 | |
 Sledge Bro |
Hammer Bro relatives that throw large hammers in arcs. They can also stun the player by generating earthquakes when they jump. | World 6-2 | World 7- |
200 | — |
 Lakitu |
Cloud-riding enemies that throw Spiny Eggs at the player, stopping when there are four Spinies on-screen at once. If a player defeats a Lakitu, they can ride on its cloud until it disappears. Lakitus contained within square clouds throw coins for a short period of time before moving off screen. | World 2-5 | World 7- |
1000 | — |
 Spiny Egg |
TBW | World 2-5 | World 7- |
200 | — |
 Spiny |
Turtles with spiny shells that prevent the player from jumping on them. Some hatch from Spiny Eggs thrown by Lakitus. Like Buzzy Beetles, some are also found walking on ceilings and can drop down to attack the player when approached. These upside-down individuals can be stomped and used like other shells. | World 2-2 | World 8- |
200 | — |
 Spike Top |
Buzzy Beetle variants that have spikes on their shells, preventing them from being jumped on. They can slowly climb around blocks and rock formations. | World 2-3 | 200 | — | |
 Buzzy Beetle |
Shelled enemies that can be kicked, picked up, or thrown after being jumped on, and are impervious to fireballs. Some walk on ceilings and drop down to attack the player when approached. | World 6-3 | World 8- |
200 | — |
 Para-Beetle |
A winged Buzzy Beetle that ascends when used as a platform and descends back to its original position when not ridden. They appear flying at various speeds. Jumping on eight Heavy Para-Beetles or Para-Beetles consecutively without touching the ground will cause a 1-Up Mushroom to fall from the sky. | World 7-6 | — | ||
 Heavy Para-Beetle |
A Para-Beetle that descends when used as a platform and ascends back to its original position when not ridden. Jumping on eight Heavy Para-Beetles or Para-Beetles consecutively without touching the ground will cause a 1-Up Mushroom to fall from the sky. | World 7-6 | |||
 Spike |
Stationary green turtles that periodically pull spiked balls out of their mouths to throw at the player, which roll downwards from the ledges upon which they stand. | World 2-2 | 200 | — | |
 Stone Spike |
A stationary Spike that throws stone rocks downwards periodically. | World 6-1 | World 8-4 | 200 | |
 Piranha Plant |
Plants that either move in and out of Warp Pipes or lunge at the player from the ground. Warp-Pipe-dwelling Piranha Plant do not emerge if the player is nearby. | World 1-2 | World 9-7 | 200 | — |
 Super Piranha Plant |
Large variants of Piranha Plant that lunge at the player from the ground. | World 2-5 | World 6-3 | 200 | — |
 Venus Fire Trap |
Piranha Plants that aim at the player and shoot a single fireball. Some move in and out of Warp Pipes like normal Piranha Plants and hide when the player is nearby while others are grounded. A single Warp-Pipe-dwelling Venus Fire Trap in World 9-7 has the ability to shoot three fireballs in a row. | World 1-3 | World 9-7 | 200 | — |
 Piranha Flower |
Large Venus Fire Traps that shoot big fireballs. | World 2-3 | 200 | — | |
Stalking Piranha Plant |
A Piranha Plant that paces back and forth and stretches its neck upward periodically. | World 5-1 | World 6-3 | 200 | |
River Piranha Plant |
A stationary, aquatic Piranha Plant that blows a green spiked seed up and down. They cannot regenerate their spiked ball if it is destroyed. | World 5-1 | 200 | ||
 Muncher |
An invincible black plant that is exclusively found frozen within ice blocks. They can be thawed by fireballs, including those of other enemies. | World 9-7 | — | ||
 Cheep Cheep |
Slow-moving fish that are either found swimming endlessly forward or back and forth. In World 4-2, they constantly jump from the water to attack player, leaving them vulnerable to being stomped. | World 1-4 | World 8-4 | 200 | — |
 Mega Cheep-Cheep |
Big Cheep Cheeps that are either found swimming endlessly forward or back and forth, like their smaller counterparts. | World 1-4 | World 6-6 | 200 | — |
 Deep-Cheep |
Fish that endlessly swim forward in a sine-wave-like pattern. They briefly give chase when approached, though stop once they move past the player. | World 1-4 | World 8-4 | 200 | — |
 Mega Deep-Cheep |
Big Deep-Cheeps that retain the chasing behavior of their smaller counterparts. | World 1-4 | 200 | — | |
 Eep Cheep |
A Cheep Cheep that swims endlessly forward in a school with other Eep Cheeps and swims out of the way of approaching players. | World 1-4 | 200 | ||
 Spiny Cheep Cheep |
Fish that are normally found swimming back and forth, but speed up to chase the player when approached. They can only be frozen temporarily, after which they will gain an angry expression. | World 1-4 | World 8-4 | 200 | — |
 Cheep-Chomp |
A large fish that, once approached, begins pursuing the player indefinitely, periodically lunging at the player in an attempt to eat them. When defeated, it drops three 1-Up Mushrooms. | World 4-4 | World 9-2 | 200 | — |
 Porcupuffer |
An aggressive fish that moves along the surface of water bodies, following the player's horizontal position and occasionally leaping from the water to attack. | World 4- |
World 9-2 | 200 | — |
 Wet Bones |
Skeletal fish that swim back and forth, charging towards the player when approached. Their eyes faintly glow in the dark. | World 4- |
World 5- |
200 | — |
 Clampy |
Clams that open and close their mouths, which sometimes contain items. If a Clampy closes its mouth on the player, they take damage. If placed above a solid surface, they will sink. | World 1-4 | World 4-1 | — | |
 Urchin |
Aquatic enemies that either float motionlessly or move back and forth in the water. They can only be frozen temporarily, after which they will sink, blocking currents they fall on top of. | World 1-4 | World 4-3 | 200 | — |
 Big Urchin |
A gigantic Urchin that either floats motionlessly or moves back and forth in the water. It can be defeated only with a Star. | World 4-1 | World 4-3 | 200 | |
 Thwomp |
Large rocks that fall when the player gets close before returning to their original position. | World 1- |
World 8- |
200 | — |
 Big Thwomp |
Large Thwomps that can break through stone tiles. | World 1- |
200 | — | |
 Fire Snake |
Flames that jump in a high arc, chasing the player across Semisolid Platforms. They temporarily enlarge after every few hops. | World 2-3 | 200 | — | |
Pokey |
Cactus enemies that slide back and forth at varying speeds, becoming slower the taller they get. They are normally defeated when their head segment is destroyed. | World 2-5 | 200 | — | |
 Flame Chomp |
Flying black spheres that chase the player. They carry four fireballs in tow, which they periodically spit at the player. Once they run out of fireballs, they begin to glow and pursue the player with increased speed before exploding. | World 2-6 | World 9-6 | 200 | — |
 Lava Bubble |
Fireballs that jump out of lava at regular intervals. They are vulnerable to Ice Balls, like other fire-based enemies. | World 2- |
World 8- |
200 | — |
 Cooligan |
A penguin enemy that slides on ice and snow and slows down when stomped, requiring another stomp to defeat. It continues to slide when frozen, allowing it to be used as a moving platform. | World 3-1 | World 9-5 | 200 | |
 Bullet Bill |
Bullets that fly straight forward, moving out of the way when they make contact with one another. They are shot from Bill Blasters and Bill Blaster Turrets or appear from the edges of the screen. | World 3-2 | World 7-4 | 200 | — |
 Missile Bill |
Bullet Bills that target the player after being shot. | World 9-3 | 200 | — | |
 Banzai Bill |
Large Bullet Bills that fly straight forward, defeating regular Bullet Bills in their path. They are always found being shot from Banzai Bill Cannons. | World 7- |
World 7-4 | 200 | — |
 Bull's-Eye Banzai |
Banzai Bills that endlessly rise from the bottom of the screen and home in on the player’s vertical position before continuing forward once they reach the designated height. | World 9-3 | 200 | ||
 King Bill |
An enormous, invincible Bullet Bill that charges from the edges of the screen, destroying blocks in its path. | World 9-8 | 200 | ||
 Boo |
Ghosts that follow the player when their back is turned, but hide their faces when they look at them. They can only be defeated with a Star. They normally cannot be seen in the dark, though they produce a glowing trail when pursuing the player. In World 5- |
World 3- |
World 7- |
200 | — |
 Big Boo |
Large Boos that retain the same behavior and properties as their smaller counterparts. Their large size allows them to obscure objects placed behind them. | World 3- |
World 7- |
200 | — |
 Amp |
Stationary, electric balls that shock the player upon contact. | World 3- |
200 | — | |
 Bob-omb |
Bombs that ignite if they are jumped on or come into contact with fireballs, then explode shortly after. When ignited, they can be picked up and thrown to defeat other enemies. Some are found being shot from cannons while other are found locked in ice and require nearby explosions to detonate. | World 3- |
World 9-4 | 200 | — |
 Parabomb |
Parachuting Bob-ombs that descend from the sky, transforming into normal Bob-ombs once they land. | World 8-5 | 200 | — | |
 Huckit Crab |
A crab that throws sand balls on loop, jumping backwards every time it does so. These balls can be jumped on and used as a temporary platform. | World 4-3 | 200 | ||
 Blooper |
Squid-like enemies that move in an erratic pattern and follow the player. They are often found concealed behind foreground elements, emerging once the player draws near. | World 4-4 | World 8-4 | 200 | — |
 Blooper Nanny |
Bloopers that have Blooper Babies swimming in a trail behind them. They normally chase the player like an ordinary Blooper, though they will occasionally pause and deploy their Blooper Babies before spawning a new set. | World 4-4 | 200 | — | |
 Scaredy Rat |
An enemy that walks forward in a group. When one of the rats is jumped on, the rest panic and run around, calming back down once they encounter a calm rat. | World 4- |
200 | ||
 Mechakoopa |
A mechanical version of Bowser found in Airship levels. After stomping on it, it becomes stunned and can be picked up and thrown to defeat other enemies before it wakes up. | World 4- |
World 8- |
200 | — |
Wiggler |
Caterpillars that become agitated and move faster after being jumped on. | World 5-2 | 200 | — | |
Big Wiggler |
Large variants of Wigglers that can traverse poison and defeat enemies they run into. They do not become agitated when stomped and can be bounced off of like a spring. | World 5-2 | — | ||
 Swoop |
Bats that hang onto the ceiling, then swoop towards the player when approached. In World 6-6 they have eyes that glow in the dark. | World 5-2 | World 6-6 | 200 | — |
 Bramball |
A forest enemy that lurches between available platforms. It is mostly covered in spikes, with the head being the only safe part to jump on. It can also be forced to move if jumped into from below. Fast-moving individuals appear at the end of their respective level. | World 5-3 | 200 | ||
 Monty Mole |
A mole that pops out of the ground and gives chase, bouncing off of other moles they come in contact with. | World 6-4 | World 8- |
200 | — |
Rocky Wrench |
Monty Moles that periodically pop out of holes in Airships to throw damaging wrenches at the player. | World 6- |
200 | — | |
 Chain Chomp |
Enemies tied to posts that lunge at players at regular intervals. If their post is ground pounded three times, they are set free and can be used to break through blocks. | World 7-2 | 200 | — | |
 Big Chain Chomp |
This Chain Chomp was enlarged by the Magikoopa before the second boss battle with him. It is fastened to a chariot that holds Iggy and is screwed to a track. The Big Chain Chomp lunges at Mario during the boss battle and drags Iggy with it. Hitting Iggy causes the Big Chain Chomp to become enraged and lung at Mario more quickly. Defeating the Koopaling causes the Big Chain Chomp to revert to its original size before disappearing. | World 5- |
200 | — | |
 Fuzzy |
Enemies that follow tracks and hurt players upon contact. If they fall off a track, they will twirl in the air. | World 7-3 | World 9-8 | 200 | — |
 Big Fuzzy |
A large Fuzzy that follows tracks and hurts players upon contact, like its smaller counterpart. | World 7-3 | World 9-8 | 200 | |
 Broozer |
A boxing ghoul-like monster that clumsily charges towards the player's horizontal position, breaking through blocks in its path. The player can defeat it by jumping on it three times, or by hitting it with a fireball. It functions similarly to Chargin' Chucks in Super Mario World. | World 7- |
200 | — | |
 Crowber |
Birds that circle above the player before swooping down to attack and leaving the screen. | World 7- |
World 8-5 | 200 | — |
 Foo |
A cloud enemy that blows temporary fog in order to obscure the player's view. | World 7-5 | 200 | ||
 Bulber |
An aquatic enemy with a glowing esca that illuminates the dark immediately surrounding it. It swims forward endlessly. | World 8-4 | 200 | ||
 Jellybeam |
An aquatic enemy that produces a beam of light that illuminates the dark below it. They periodically descend and widen their light beams, speeding up when the player approaches. | World 8-4 | 200 | ||
Obstacles from NSMBW
| Name | Description | Galaxies | |
|---|---|---|---|
| First | Last | ||
 Banzai Bill Cannon |
TBW | TBD | TBD |
 Bill Blaster |
TBW | TBD | TBD |
Bill Blaster Turret |
TBW | TBD | TBD |
 Bowser's Flames |
TBW | TBD | TBD |
Burner |
TBW | TBD | TBD |
 Cannon |
TBW | TBD | TBD |
 Electric Current |
TBW | TBD | TBD |
Fire Bar |
TBW | TBD | TBD |
 Ghost Block |
TBW | TBD | TBD |
 Ghost Vase |
TBW | TBD | TBD |
 Giant cannon |
TBW | TBD | TBD |
 Giant Skewer |
TBW | TBD | TBD |
 Giant Spiked Ball |
TBW | TBD | TBD |
 Huge Icicle |
TBW | TBD | TBD |
 Icicle |
TBW | TBD | TBD |
 Lava |
TBW | TBD | TBD |
Lava Geyser |
TBW | TBD | TBD |
 Poison |
TBW | TBD | TBD |
Poison fog |
TBW | TBD | TBD |
Quartet-cannon |
TBW | TBD | TBD |
 Quicksand |
TBW | TBD | TBD |
 Rotating Burner |
TBW | TBD | TBD |
 Sand Geyser |
TBW | TBD | TBD |
 Sandstorm |
TBW | TBD | TBD |
 Skewer |
TBW | TBD | TBD |
 Spell |
TBW | TBD | TBD |
 Spike Ball |
TBW | TBD | TBD |
 Spikes |
TBW | TBD | TBD |
Spinner |
TBW | TBD | TBD |
Volcanic debris |
TBW | TBD | TBD |
Bosses from NSMBW
The Koopalings return to the Super Mario series as the main antagonists in this game. They are fought in all of the Tower and Castle levels, with their magic wands being their main way of attack, and utilizing obstacles.
| Name | Description | Levels | |
|---|---|---|---|
| First | Last | ||
| The Koopalings | |||
 Larry Koopa |
The player needs to jump on Larry three times while dodging his magic blasts. In the second fight, he is on rising platforms that make it harder to gauge jumping. | World 1- |
World 1- |
 Roy Koopa |
The player needs to jump on Roy three times while jumping to avoid getting stunned. In the second fight, he hides in pipes. | World 2- |
World 2- |
Lemmy Koopa |
The player needs to dodge Lemmy's balls and jump on him three times in both fights. In the second fight, the ball he is on is bigger, so the player has to jump higher. | World 3- |
World 3- |
 Wendy O. Koopa |
The player needs to jump on Wendy three times while avoiding rings, and in the second fight she should be avoided when the water is up. | World 4- |
World 4- |
 Iggy Koopa |
The player needs to jump on Iggy three times while dodging his fast magic blasts. The second fight is very different—a Big Chain Chomp pulls Iggy on a chariot. | World 5- |
World 5- |
 Morton Koopa Jr. |
The player needs to jump on Morton three times while dodging the pillars and jumping to avoid getting stunned. In the next fight, Morton causes columns to rise up using a Ground Pound, and the player instantly loses a life if it flattens them. | World 6- |
World 6- |
 Ludwig von Koopa |
The player should jump on Ludwig three times when he comes down from his flight. In the next fight, there are elevators, making the fight more convoluted. Ludwig is very skilled, using homing magic blasts and multiple magic blasts at the same time. | World 7- |
World 7- |
| Other | |||
 Bowser Jr. |
Bowser Jr. returns from his appearance in New Super Mario Bros., this time as a secondary antagonist in this game. Instead of fighting on his own, he uses his Koopa Clown Car in battles. He is the boss of Airship levels. | World 4- |
World 8- |
 Magikoopa |
Magikoopa appears as a secondary antagonist in this game. He mainly assists the villains in the beginning of their fights by using his magic wand to either transform the arena, or to enlarge obstacles and enemies. He is the boss of World 8's tower. The player needs to jump on Magikoopa three times while dodging many enemies and magic blasts. | World 8- | |
 Bowser |
Bowser, like his son, returns from his appearance in New Super Mario Bros. as the main antagonist and final boss in this game. He is the second boss fought in World 8 and the final boss, where he is fought in two phases: the first phase is fought in the same manner as the original Super Mario Bros., and the second is a chase where Bowser is turned into a giant by Magikoopa. | World 8- | |
Items from NSMBW
Power-ups from NSMBW
Objects from NSMBW
NSMB2
Playable characters from NSMB2
| Name | Description |
|---|---|
 Mario |
The main protagonist who sets out to save Princess Peach. |
 Luigi |
The second player in Co-op mode and unlockable for Solo Play by holding |
Non-playable characters from NSMB2
| Name | Description | Locations |
|---|---|---|
 Princess Peach |
The damsel-in-distress, who was kidnapped by Bowser's Koopalings in the Koopa Clown Car. | TBD |
 Toads |
Toad appears in Toad Houses and gives Mario items. | TBD |
Enemies from NSMB2
The enemies listed in this table match those in the Super Mario Bros. Encyclopedia.[14] The default order they are listed derives from the official guidebook[15] with adjustments that ensure enemies are listed next to their immediate relatives. The gold variants of listed enemies are lumped with their normal counterparts and the Big Chain Chomp is absent in the guidebook, but they are recognized as distinct in the encyclopedia.
| Name | Description | Levels | Pts. | New | |
|---|---|---|---|---|---|
| First | Last | ||||
 Goomba |
Common enemies that can be defeated by jumping on them. | World 1-1 | World |
200 | — |
 Gold Goomba |
Golden Goombas that give extra coins when stomped. | World 1-4 | World 5-3 | 200 | |
 Goomba Tower |
Stacks of Goombas that must be defeated individually. | World 1-1 | World 6-2 | 200 | — |
 Gold Goomba Tower |
Stacks of Gold Goombas that must be jumped on one by one. | World 1-A | 200 | ||
 Paragoomba |
Winged Goombas that hop as they walk. | World 2-2 | World |
200 | — |
 Gold Paragoomba |
Gold Goombas with wings that jump as they walk. | World 2-2 | 200 | ||
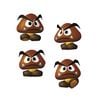 Mini Goomba |
Small Goombas that weigh Mario down until he either attacks or walks for a few seconds. | World 4-1 | World 6-2 | 200 | — |
 Gold Mini Goomba |
Small Gold Goombas that weigh Mario down. | World 4-1 | World 5-3 | 200 | |
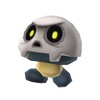 Bone Goomba |
Goombas with skull helmets, identical to regular Goombas gameplay-wise. | World 1- |
World |
200 | |
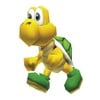 Koopa Troopa (Green) |
Turtle enemies that go into their shells when attacked, then can be picked up or thrown. Green Koopa Troopas walk off ledges. | World 1-1 | World |
200 | — |
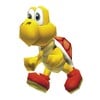 Koopa Troopa (Red) |
Red Koopa Troopas turn around. | World 1-1 | World |
200 | — |
 Gold Koopa |
Koopa Troopas with golden shells. When attacked, they go into their shells, which can be thrown to create coins. | World 1-4 | World |
200 | |
 Koopa Paratroopa (Green) |
Winged Koopa Troopas that either jump in high arcs or fly up and down in the air. | World 1-3 | World |
200 | — |
 Koopa Paratroopa (Red) |
TBW | World 1-3 | World |
200 | — |
 Gold Koopa Paratroopa |
Koopa Paratroopas that have a trail of coins following them. | World 1-4 | World 5-A | 200 | |
 Climbing Koopa |
Koopa Troopas that climb on both sides of fences. | World 5- |
World 5- |
200 | — |
 Dry Bones |
Skeleton Koopa Troopas that collapse when attacked, but later rebuild themselves. | World 1- |
World |
200 | — |
 Big Dry Bones |
Larger versions of Dry Bones that appear in castle levels. | World 2- |
World 6- |
200 | — |
 Hammer Bro |
Enemies that throw hammers and jump. | World 2-2 | 1000 | — | |
 Boomerang Bro |
Hammer Bros that use boomerangs, which return to them after being thrown. | World 2-2 | World |
1000 | — |
 Fire Bro |
Hammer Bros that throw fireballs. | World 6-3 | 1000 | — | |
 Gold Bro |
A variant of Hammer Bro that throws coins. | World 2-2 | World 6-3 | 1000 | |
 Sledge Bro |
Hammer Bro variants that stun Mario after they jump. | World 2-2 | 200 | — | |
 Buzzy Beetle |
Shelled enemies that can be kicked or thrown after being jumped on, and can walk on ceilings. | World 2-3 | World 6-1 | 200 | — |
 Spike Top |
Buzzy Beetle variants that have spikes on their shells, preventing them from being jumped on. | World 2-3 | World 6-1 | 200 | — |
 Lakitu |
Enemies that throw Spiny Eggs. If Mario defeats a Lakitu, he can ride on its cloud until it disappears. | World 5-2 | World |
1000 | — |
 Gold Lakitu |
Lakitus with yellow shells riding in golden clouds, who throw coins. | World 5-2 | World |
1000 | |
 Spiny |
Enemies that hatch from Spiny Eggs and cannot be jumped on. | World 2-4 | World |
200 | — |
 Spiny Egg |
Eggs thrown by Lakitu that hatch into Spinies when they hit the ground. | World 5-2 | World |
200 | — |
 Piranha Plant |
Plants that move in and out of Warp Pipes. | World 1-2 | World 6-2 | 200 | — |
 Gold Piranha Plant |
Gold versions of Piranha Plants that come out of pipes. When defeated, their pipe shoots coins into the air. | World 1-A | World 6-2 | 200 | |
 Big Piranha Plant |
Big Piranha Plants that appear outside of pipes, thrashing towards Mario. | World 1-A | World 5-6 | 200 | — |
 Gold Big Piranha Plant |
A larger variant of Gold Piranha Plants. | World 1-A | 200 | ||
 Fire Piranha Plant |
Piranha Plants that aim at Mario and shoot fireballs. | World 5-6 | World 6-2 | 200 | — |
 Big Fire Piranha |
Large Venus Fire Traps that shoot big fireballs. | World 5-6 | 200 | — | |
 Bone Piranha Plant |
Skeletal Piranha Plants that are immune to fire. The player can defeat them by attacking them with Raccoon Mario's tail. | World 1- |
World 5- |
200 | |
 Big Bone Piranha Plant |
Larger versions of Bone Piranha Plants. They appear in castles and fortresses and thrash towards Mario. | World |
World 5- |
200 | |
 Cheep Cheep |
Fish that are found swimming aimlessly in underwater levels. | World 1-5 | World 4-5 | 200 | — |
 Gold Cheep Cheep |
Gold-colored Cheep Cheeps that jump out of water with coins behind them. | World 3-1 | 200 | ||
 Big Cheep Cheep |
Big Cheep Cheeps that are found in underwater levels. | World 1-5 | World 3-B | 200 | — |
 Deep Cheep |
Fish that chase Mario as they swim. | World |
200 | — | |
 Big Deep Cheep |
Big Deep Cheeps that chase after Mario. | World |
World |
200 | — |
 Spiny Cheep Cheep |
Fast-swimming fish that chase Mario. | World 1-5 | World 3-2 | 200 | — |
 Cheep Chomp |
Large fish that attempt to eat Mario. | World 1-5 | World 4-5 | 200 | — |
 Porcupuffer |
Fish that jump out of the water and follow Mario. | World |
World |
200 | — |
 Fishbones |
Skeletal fish that charge towards Mario. | World 3- |
World |
200 | — |
 Urchin |
Stationary enemies that appear in underwater levels. | World |
World 3-A | 200 | — |
 Small Urchin |
Stationary underwater enemies that can be defeated with the Fire Flower, Super Leaf, Gold Flower, or Super Star. | World 3-2 | World 3-A | 200 | — |
 Blooper |
Underwater enemies that move in an erratic pattern and follow Mario. | World 3-5 | 200 | — | |
 Blooper Nanny |
Bloopers that have Blooper Babies swimming in a trail behind them. | World 3-5 | 200 | — | |
 Thwomp |
Large rocks that fall when Mario gets close. | World 1- |
World |
200 | — |
 Big Thwomp |
Large Thwomps that can break through stone tiles. | World 1- |
World |
200 | — |
 Whomp |
Walking Thwomp variants that fall face-first. | World |
World |
200 | — |
 Big Whomp |
Big Whomps that may reveal objects behind them after they fall. | World |
World |
200 | — |
 Boo |
Ghosts that follow Mario when his back is turned, but hide their face when he looks at them. | World 2- |
World 6-4 | 200 | — |
 Gold Boo |
Boo variants that leave a trail of coins behind as they move. | World |
World 6- |
200 | |
 Big Boo |
Bigger variants of Boos that have the same behavior. | World |
World 6- |
200 | — |
 Gold Big Boo |
Large Boos that go in the opposite direction of Mario, leaving coins behind them. | World |
World 6- |
200 | |
 Boohemoth |
A gigantic Boo who chases Mario in certain Ghost House levels. | World 2- |
World |
||
 Peepa |
Ghosts that move in circles and sometimes carry platforms. | World 2- |
World |
200 | — |
 Bob-omb |
Bombs that ignite if they are jumped on or have a fireball thrown at them, then explode shortly after. | World 2-B | World 6-2 | 200 | — |
 Para-bomb |
Parachuting Bob-ombs that are sometimes shot out of cannons. | World 2-B | World 6-2 | 200 | — |
 Pokey |
Cactus enemies that appear in desert levels and move slowly. | World 2-3 | World 2-B | 200 | — |
 Fuzzy |
Enemies that follow tracks and hurt Mario upon contact. | World 2-A | World 4-C | 200 | — |
 Big Fuzzy |
Larger variants of Fuzzies. | World 4-C | 200 | — | |
 Fire Snake |
Flames that jump in a high arc. | World 2-4 | World |
200 | — |
 Chain Chomp |
Enemies tied to posts that lunge at Mario. If Mario ground pounds their post, they are set free. | World 2-5 | World |
200 | — |
Big Chain Chomp |
TBW | World 2- |
None | — | |
 Crowber |
Birds that swoop towards Mario. | World |
World 6-4 | 200 | — |
 Bullet Bill |
Bullets that fly straight forward and are shot from Bill Blasters and Bill Blaster Turrets. | World 3-B | World 6-B | 200 | — |
 Gold Bullet Bill |
Golden Bullet Bills that leave trails of coins behind them. | World 5-5 | World 6-B | 200 | — |
 Banzai Bill |
Large Bullet Bills that fly straight forward. | World 5-5 | World 6-B | 200 | — |
 Gold Banzai Bill |
Golden-colored Banzai Bills that fly forward, leaving behind a trail of coins. | World 6-B | 200 | ||
 Wiggler |
Caterpillars that move faster after being jumped on. | World 3- |
World 3-4 | 200 | — |
 Swoop |
Bats that hang onto the ceiling, then swoop towards Mario. | World 5- |
200 | — | |
 Lava Bubble |
Fireballs that jump out of lava. | World 1- |
World |
200 | — |
 Scuttlebug |
Spiders that hang down from webs and can be defeated by jumping on them. | World 3-3 | World |
200 | — |
 Grinder |
Buzzsaws that move along tracks. | World 3- |
World |
200 | — |
 Amp |
Electric balls that shock Mario upon contact. | World 4-B | World |
200 | — |
 Flame Chomp |
Black spheres that spit fireballs at Mario. | World 6-B | 200 | — | |
 Coin Coffer |
Enemies that cough out coins when attacked. | World |
World |
200 | — |
Obstacles from NSMB2
Bosses from NSMB2
| Name | Description | Levels | |
|---|---|---|---|
| First | Last | ||
| The Koopalings | |||
 Roy Koopa |
Roy's strategy is charging at the player, eventually ramming into a wall and being temporarily stunned (at which point he is vulnerable), as well as spinning in his shell and casting magic attacks. His room becomes increasingly narrower during battle. He takes three hits to defeat. | World 1- | |
 Iggy Koopa |
Like in New Super Mario Bros. Wii, Iggy rides a Big Chain Chomp carriage, which transports him around the arena. Mario has to avoid both the Chain Chomp's lunges and Iggy's magic attacks. He takes three hits to defeat. | World 2- | |
 Larry Koopa |
Larry's attacks include jumping and shooting magic balls that bounce diagonally. His room has four shifting walls protuding from the floor and ceiling. He takes three hits to defeat. | World | |
 Wendy O. Koopa |
Like in New Super Mario Bros. Wii, Wendy's battle takes place in a flooded room. Mario must wait for the water to be drained so he can stomp Wendy, while avoiding Cheep Cheeps and bouncing magic rings. She takes three hits to defeat. | World 3- | |
 Morton Koopa Jr. |
Morton attacks the player with spiked balls he creates from his wand, as well as shell attacks. He takes three hits to defeat. | World 4- | |
Lemmy Koopa |
Lemmy's battle takes place on a conveyor belt. He rides a circus ball and creates miniature ones with his magic, which bounce down the belt and can push Mario off. He takes three hits to defeat. | World | |
 Ludwig von Koopa |
Mario or Luigi must use the five gray Pipe Cannons on the floor to blast against Ludwig, causing him to fall onto the floor, dizzy and vulnerable to attacks. He takes three hits to defeat. | World 5- | |
| Other | |||
 Reznor |
Reznors originate from Super Mario World and are fought as mini-bosses in every main world, standing on top of Rectangular Coin Blocks above a collapsing bridge. The basic way of defeating them is to hit the blocks under their feet. | World 1- |
World 6- |
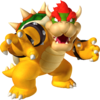 Bowser |
Mario or Luigi must jump on the ! Switch to send Bowser falling down beneath the bridge into the lava. After that, the Koopalings enlarge him, and Mario or Luigi must go onto the roof and hit a massive ! Switch to defeat him. The latter part does not occur in the Gold Classics Pack. | World 6- | |
 Dry Bowser |
Dry Bowser is fought in much the same way as Bowser, though Dry Bowser moves faster, breathes blue fireballs instead of orange ones, throws bones instead of sledgehammers, and is immune to fireballs, while the platforms in the second phase are also smaller. Mario or Luigi must jump on a ! Switch for Dry Bowser to fall off the bridge into the lava. The Koopalings then enlarge Dry Bowser, and Mario or Luigi must go onto the roof and hit a massive ! Switch to defeat Dry Bowser. | World 6- | |
Items from NSMB2
Power-ups from NSMB2
Objects from NSMB2
NSMBU
Playable characters from NSMBU
| Name | Description |
|---|---|
 Mario |
Mario returns from his appearance in New Super Mario Bros. as the game's main protagonist, with his goal being to save Princess Peach from Bowser's clutches. He is the default playable character, and is the only playable character in story mode. |
 Luigi |
Luigi, Mario's brother, also returns from his appearance in New Super Mario Bros. as a playable character in this game, however, he can played only in multiplayer and Super Guide. |
  Yellow Toad and Blue Toad |
Toads make their second playable role in the Super Mario series (the first being Toad in Super Mario Bros. 2) as two separate playable characters in this game, Yellow Toad and Blue Toad, who are exclusive to multiplayer. |
Miis |
TBW |
Yoshis from NSMBU
New Super Mario Bros. U features the return of Baby Yoshis, having been absent from the Super Mario series since their debut in Super Mario World. The game features three differently-colored Baby Yoshis, each one with a special ability. They differ from the adult Green Yoshi in terms of gameplay. Being babies, they cannot be ridden, so characters must carry them throughout the levels. Baby Yoshis also instantly eat almost any enemy that is in front of them. Unlike in Super Mario World, however, Baby Yoshis no longer grow into adults after eating several enemies, instead remaining as babies. Two types of Baby Yoshis found on the overworld can be taken into any course, with the exception of Fortresses, Airships, and Castles.
| Name | Description | Locations |
|---|---|---|
 Yoshi |
Green Yoshis make a return, acting like in New Super Mario Bros Wii. Green is the only color available for Yoshis that the players ride on, unlike New Super Mario Bros. Wii. Yoshi now has a meter that tracks how many fruits he eats, instead of showing a number each time he eats one. As usual, eating 5 makes him lay an egg containing an item. Like in New Super Mario Bros. Wii, Yoshi cannot leave the courses that he appears in. | Yoshi Hill, (and other levels that do not seem to be explicitly outlined anywhere) |
 Balloon Baby Yoshis |
Magenta Baby Yoshis that expand like balloons and gently float in the air. These Baby Yoshis are similar to the Blimp Yoshi power-up, found in Super Mario Galaxy 2. They first appear on the Acorn Plains map area. Additionally, up to 4 players can grab onto one Baby Yoshi, by grabbing their legs. This slows the player down though. | Acorn Plains, Sparkling Waters |
 Glowing Baby Yoshis |
Yellow Baby Yoshis that light up dark areas and can stun enemies with their light attack. These Baby Yoshis act similar to the Light Blocks, found in New Super Mario Bros. Wii, and also Bulb Yoshi from Super Mario Galaxy 2. Unlike the other two Baby Yoshis, the Glowing Baby Yoshis are not found on the world map and are only found in courses such as Perilous Pokey Cave. Instead of following the characters throughout the courses, they give an extra life when reach the end of the levels that they appear in. | Fire Snake Cavern, Which-Way Labyrinth |
 Bubble Baby Yoshis |
Blue Baby Yoshis that blow bubbles from their mouths. Enemies caught in these bubbles will turn into 3 Coins, a power-up, or a 1-Up Mushroom. These bubbles can also be used as miniature platforms. They first appear on the Frosted Glacier map area. | Frosted Glacier, Rock-Candy Mines |
Non-playable characters in NSMBU
| Name | Description | Locations |
|---|---|---|
 Princess Peach |
TBW | The Final Battle |
 Toads |
Toads appear throughout the game in Toad Houses, at the end of the level when the player catches Nabbit, and past the end-of-level castles to give Mario a power-up if they complete a stage with the last two digits of the Time Limit being the same. | Toad Houses, Acorn Plains Way, Lemmy's Swingback Castle, Blooming Lakitus, Morton's Compactor Castle, Urchin Shoals, Larry's Torpedo Castle, Prickly Goombas!, Wendy's Shifting Castle, Jungle of the Giants, Iggy's Volcanic Castle, Walking Piranha Plants!, Roy's Conveyor Castle, Seesaw Shrooms, Ludwig's Clockwork Castle, The Final Battle |
 Nabbit |
A character that steals items from the map and must be defeated to retrieve the items. | Acorn Plains Way, Blooming Lakitus, Urchin Shoals, Prickly Goombas!, Jungle of the Giants, Walking Piranha Plants!, Seesaw Shrooms |
Enemies in NSMBU
The enemies listed in this table match those in the companion Prima Games guidebook,[16] the Super Mario Bros. Encyclopedia,[17] and Mario Portal Game Archive.[18] The default order they are listed derives from their occurrence in-game with adjustments to ensure enemies are listed next to their immediate relatives. The blue Dragoneel is only recognized in the guidebook[19] and is unmentioned in the other two sources, but it is listed here in recognition of its mechanical and physiological distinctiveness from the red one.
| Name | Description | Levels | Pts. | Exc. | New | |
|---|---|---|---|---|---|---|
| First | Last | |||||
 Goomba |
Common enemies that can be defeated by jumping on them. Some Goombas in Skyward Stalk float on balloons. | Acorn Plains Way | Follow That Shell! | 200 | — | — |
 Paragoomba |
Winged Goombas that hop as they walk. | Seesaw Shrooms | 200 | — | ||
 Hefty Goomba |
A large Goomba that is the middling size of a Goomba, being smaller than a Big Goomba but bigger than a regular Goomba. This enemy splits into two Goombas when jumped on. | Jungle of the Giants | 200 | — | ||
 Big Goomba |
Large variants of Goombas. They split into two Hefty Goombas once stomped on. | Jungle of the Giants | 200 | — | ||
 Mini Goomba |
Small Goombas that weigh Mario down until he either attacks or walks for a few seconds. | Slide Lift Tower | Magma-River Cruise | 200 | — | — |
 Prickly Goomba |
A Goomba that hides inside a spiked chestnut shell until it is hit with a fireball, which is when it turns into a regular Goomba. | Prickly Goombas! | 200 | — | — | |
 Goombrat |
A Goomba that resembles a persimmon and turns at ledges. | Mushroom Heights | 200 | — | ||
 Waddlewing |
Orange flying-squirrel enemies that glide through stages. | Acorn Plains Way | Land of Flying Blocks | 200 | — | |
 Koopa Troopa (Green) |
Turtle enemies that go into their shells when attacked, then can be picked up or thrown. Green Koopa Troopas walk off ledges. | Acorn Plains Way | Follow That Shell! | 200 | — | — |
 Koopa Troopa (Red) |
Red Koopa Troopas turn around. | Tilted Tunnel | Follow That Shell! | 200 | — | — |
 Koopa Paratroopa (Green) |
Winged Koopa Troopas that either jump in high arcs or fly up and down in the air. | Stone-Eye Zone | Run for It | 200 | — | — |
 Koopa Paratroopa (Red) |
TBW | Stone-Eye Zone | Hammerswing Caverns | 200 | — | — |
 Big Koopa Troopa (Green) |
Large variants of Koopa Troopas. | Jungle of the Giants | 200 | — | ||
 Big Koopa Troopa (Red) |
TBW | Jungle of the Giants | 200 | — | — | |
 Dry Bones |
Skeleton Koopa Troopas that collapse when attacked, but later rebuild themselves. | Crushing-Cogs Tower | Ludwig's Clockwork Castle | 200 | — | — |
 Big Dry Bones |
Large variants of Dry Bones that appear in castle levels. | Stoneslide Tower | Ludwig's Clockwork Castle | 200 | — | — |
 Buzzy Beetle |
Shelled enemies that can be kicked or thrown after being jumped on, and can walk on ceilings. | Tilted Tunnel | Fire Bar Cliffs | 200 | — | — |
 Big Buzzy Beetle |
Bigger variants of Buzzy Beetles. | Rising Tides of Lava | 200 | — | ||
 Spike Top |
Buzzy Beetle variants that have spikes on their shells, preventing them from being jumped on. | Stoneslide Tower | Rising Tides of Lava | 200 | — | — |
 Para-Beetle |
Para-Beetles are winged Buzzy Beetles. However, Mario can hop on their back for a ride, unlike with other winged foes. | Flight of the Para-Beetles | — | — | ||
 Heavy Para-Beetle |
A Para-Beetle that descends when used as a platform. | Flight of the Para-Beetles | — | — | ||
 Bony Beetle |
Skeleton variants of Buzzy Beetles that walk around and suddenly stop to stick out their spikes. | Grinding-Stone Tower | Pendulum Castle | 200 | — | — |
 Hammer Bro |
Enemies that throw hammers and jump. | Rise of the Piranha Plants | 1000 | — | — | |
 Fire Bro |
Hammer Bros that throw fireballs. | Fire Snake Cavern | Ludwig's Clockwork Castle | 1000 | — | — |
 Boomerang Bro |
Hammer Bros that use boomerangs, which return to them after being thrown. | Bouncy Cloud Boomerangs | 1000 | — | — | |
 Ice Bro |
An enemy that throws ice balls at the ground, which can freeze the player and even other enemies. | Icicle Caverns | 1000 | — | — | |
 Sledge Bro |
Hammer Bro variants that stun Mario after they jump. | Ludwig's Clockwork Castle | 1000 | — | — | |
 Sumo Bro |
Giant Koopas that stomp the ground and create electric waves in two directions. | Screwtop Tower | 200 | — | — | |
 Lakitu |
Enemies that throw Spiny Eggs. If Mario defeats a Lakitu, he can ride on its cloud until it disappears. | Blooming Lakitus | Lakitu! Lakitu! Lakitu! | 1000 | — | — |
 Spiny |
Enemies that hatch from Spiny Eggs and cannot be jumped on. | Seesaw Shrooms | Lakitu! Lakitu! Lakitu! | 200 | — | — |
 Spiny Egg |
TBW | Seesaw Shrooms | Lakitu! Lakitu! Lakitu! | 200 | — | — |
 Spike |
Green turtles which pull spiked balls out of their mouths and throw them directly downwards from the ledges on which they stand | Spike's Spouting Sands | 200 | — | — | |
 Stone Spike |
A Spike that throws stone rocks downwards. | Dry Desert Mushrooms | 200 | — | — | |
 Piranha Plant |
Plants that move in and out of Warp Pipes and some grounded. | Acorn Plains Way | Spinning Platforms of Doom | 200 | — | — |
 Piranha Pod |
A projectile thrown by a Lakitu that turns into a Piranha Plant. | Blooming Lakitus | 200 | — | ||
 Big Piranha Plant |
Large variants of Piranha Plants. | Mushroom Heights | A Quick Dip in the Sky | 200 | — | — |
 Fire Piranha Plant |
Piranha Plants that aim at Mario and shoot fireballs. | Yoshi Hill | Prickly Goombas! | 200 | — | — |
 Ice Piranha Plant |
A Piranha Plant that can shoot ice balls from its mouth, like Fire Piranha Plants. | Fuzzy Clifftop | 200 | — | — | |
 River Piranha Plant |
A stationary Piranha Plant that blows a green spiked ball up and down, similar to a Ptooie. | Fliprus Lake | Seesaw Bridge | 200 | — | — |
 Stalking Piranha Plant |
A Piranha Plant that walks around and stretches up and down on a regular basis. | Bramball Woods | Walking Piranha Plants! | 200 | — | — |
Muncher |
An invincible black plant. | Spinning-Star Sky | Thrilling Spine Coaster | — | — | |
 Monty Mole |
A mole that pops out of mountains and the ground and gives chase. | Yoshi Hill | Magma-River Cruise | 200 | — | — |
 Rocky Wrench |
Monty Moles that pop out of its hole in an airship throw wrenches. | Boarding the Airship | 200 | — | ||
 Lava Bubble |
Fireballs that jump out of lava. | Lemmy's Swingback Castle | The Final Battle | 200 | — | — |
Pokey |
Living cacti that appear in desert levels and move slowly. | Perilous Pokey Cave | 200 | — | — | |
 Big Pokey |
Large variants of Pokeys. | Morton's Compactor Castle | None | — | — | |
 Swoop |
Bats that hang onto the ceiling, then swoop towards Mario. | Perilous Pokey Cave | Shifting-Floor Cave | 200 | — | |
 Fire Snake |
Flames that jump in a high arc. | Fire Snake Cavern | 200 | — | — | |
 Grrrol |
Round, Thwomp-like enemies that roll on the ground. | Stoneslide Tower | Grinding-Stone Tower | 200 | — | |
 Mega Grrrol |
A bigger Grrrol with the same behavior. | Grinding-Stone Tower | 200 | — | ||
Huckit Crab |
A crab that throws rocks on loop. These can be jumped on and used as a temporary platform. | Waterspout Beach | 200 | — | — | |
 Cheep Cheep |
Fish that are found swimming aimlessly in underwater levels. | Waterspout Beach | Swim for Your Life! | 200 | — | — |
 Big Cheep Cheep |
Large variants of Cheep Cheeps that are found in underwater levels. | Tropical Refresher | 200 | — | — | |
 Eep Cheep |
A Cheep Cheep that lives in a school with other Eep Cheeps and swims away when the player comes near it. | Dragoneel's Undersea Grotto | 200 | — | — | |
 Spiny Cheep Cheep |
Fast-swimming fish that chase Mario. | Tropical Refresher | Swim for Your Life! | 200 | — | — |
 Cheep Chomp |
Large fish that attempt to eat Mario. | Swim for Your Life! | 200 | — | — | |
 Porcupuffer |
Fish that jump out of the water and follow Mario. | Porcupuffer Falls | 200 | — | — | |
 Fish Bone |
Skeletal fish that charge towards Mario. | Haunted Shipwreck | Deepsea Ruins | 200 | — | — |
 Clampy |
Clams that open and close their mouths. | Waterspout Beach | — | |||
 Urchin |
Stationary enemies that appear in underwater levels. | Tropical Refresher | Swim for Your Life! | 200 | — | — |
 Big Urchin |
A gigantic Urchin that can be defeated only with a Star. | Tropical Refresher | Urchin Shoals | 200 | — | — |
Dragoneel (Red) |
A long eel that attacks Mario by chasing him. | Dragoneel's Undersea Grotto | 200 | — | ||
 Dragoneel (Blue) |
Shorter, purple ones also exist that move slower, but make sharper turns. | Dragoneel's Undersea Grotto | 200 | — | ||
 Blooper |
Underwater enemies that move in an erratic pattern and follow Mario. | Blooper's Secret Lair | Tropical Refresher | 200 | — | — |
 Blooper Nanny |
Bloopers that have Blooper Babies swimming in a trail behind them. | Blooper's Secret Lair | 200 | — | ||
 Bullet Bill |
Bullets that fly straight forward and are shot from Bill Blasters and Bill Blaster Turrets. | Scaling the Mountainside | Switchback Hill | 200 | — | — |
 Missile Bill |
Bullet Bills that target Mario. | Roy's Conveyor Castle | 200 | — | — | |
 Banzai Bill |
Large Bullet Bills that fly straight forward. | Scaling the Mountainside | 200 | — | — | |
 King Bill |
A nearly invincible enemy that charges forward, taking up most of the screen. | Flight of the Para-Beetles | 200 | — | — | |
 Torpedo Ted |
A slow-moving torpedo that flies in one direction. | Larry's Torpedo Castle | The Mighty Cannonship | 200 | — | — |
 Targeting Ted |
Red Torpedo Teds that home into their target, much like Bull's-Eye Bills. | The Mighty Cannonship | 200 | — | ||
 Cooligan |
An enemy that slides on ice and slows down when hit. | Cooligan Fields | 200 | — | — | |
 Fliprus |
A walrus-like creature that throws snowballs that can be jumped on. | Fliprus Lake | 200 | — | ||
 Thwomp |
Large rocks that fall when Mario gets close. | Wendy's Shifting Castle | 200 | — | — | |
 Big Thwomp |
Large Thwomps that can break through stone tiles. | Wendy's Shifting Castle | 200 | — | — | |
 Thwimp |
A tiny Thwomp that hops around. | Wendy's Shifting Castle | 200 | — | ||
 Mechakoopa |
A mechanical Koopa. After stomping it, Mario can pick it up and use it as a weapon. | The Mighty Cannonship | 200 | — | — | |
 Mecha Cheep |
Robotic Cheep Cheeps that are immune to fireballs. | The Mighty Cannonship | 200 | |||
 Bramball |
An enemy that moves around in a set pattern and is mostly covered in spikes, with the head being the only safe part to jump on. It can be forced to move if jumped into from below. | Bramball Woods | 200 | — | — | |
 Amp |
Electric balls that shock Mario upon contact. | Snake Block Tower | Ludwig's Clockwork Castle | 200 | — | |
 Big Amp |
Larger variants of Amps. | Snake Block Tower | 200 | — | ||
 Boo |
Ghosts that follow Mario when his back is turned, but hide their face when he looks at them. Groups of Boos occur floating in circles in some levels. | Haunted Shipwreck | Spinning Spirit House | 200 | — | — |
Big Boo |
Bigger variants of Boos that have the same behavior. | Swaying Ghost House | Spinning Spirit House | 200 | — | — |
 Broozer |
A walking, boxing Boo. Can break bricks and other blocks that are normally indestructible. Mario can defeat it by jumping on it three times, or hitting him with a fireball. | Which-Way Labyrinth | Spinning Spirit House | 200 | — | — |
 Scaredy Rat |
An enemy that walks around in a group. When one of the rats is jumped on, the rest panic and run around. | Which-Way Labyrinth | 200 | — | ||
 Bulber |
An enemy that illuminates a dark area and swims in a set pattern. | Deepsea Ruins | 200 | — | ||
 Jellybeam |
An enemy that illuminates a dark cave. | Deepsea Ruins | 200 | — | ||
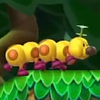 Wiggler |
Caterpillars that move faster after being jumped on. | Seesaw Bridge | Wiggler Stampede | 200 | — | — |
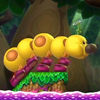 Big Wiggler |
Large variants of Wigglers. | Wiggler Stampede | — | — | ||
 Magmaargh |
Lava monsters that attacks by moving towards the players in a wave-like movement. | Iggy's Volcanic Castle | — | — | ||
 Magmaw |
Lava monsters that lunges at the player and dips back into the lava. | Magma-River Cruise | — | — | ||
 Flame Chomp |
Black spheres that spit fireballs at Mario. They explode after they're out of fireballs. | Rising Tides of Lava | 200 | — | — | |
 Fuzzy |
Enemies that follow tracks and hurt Mario upon contact. | Fuzzy Clifftop | A Quick Dip in the Sky | 200 | — | — |
 Big Fuzzy |
Large variants of Fuzzies. | Spine-Tingling Spine Coaster | 200 | — | — | |
 Chain Chomp |
Enemies tied to posts that lunge at Mario. If Mario ground pounds their post, they are set free. | Waddlewing's Nest | 200 | — | — | |
 Bob-omb |
Bombs that ignite if they are jumped on or have a fireball thrown at them, then explode shortly after. | Light Blocks, Dark Tower | The Final Battle | 200 | — | — |
 Parabomb |
Parachuting Bob-ombs that are sometimes shot out of cannons. | Red-Hot Elevator Ride | 200 | — | — | |
 Foo |
An enemy that creates fog in order to obscure the player's view. | Snaking above Mist Valley | 200 | — | — | |
Obstacles from NSMBU
Bosses from NSMBU
| Name | Description | Levels | |
|---|---|---|---|
| First | Last | ||
| Tower bosses | |||
 Boom Boom |
The tower boss from Crushing-Cogs Tower in Acorn Plains to Grinding-Stone Tower in Rock-Candy Mines. He does not change in the first battle, especially on Crushing-Cogs Tower in Acorn Plains. However, following his first defeat, Magikoopa gives him special abilities. In Stoneslide Tower from Layer-Cake Desert, Magikoopa will grant him the ability to spin jump. In Giant Skewer Tower from Sparkling Waters and Freezing-Rain Tower from Frosted Glacier, Magikoopa will grant him the ability to jump, similar to Super Mario Bros. 3. In Snake Block Tower from Soda Jungle, Magikoopa will make him larger. In Grinding-Stone Tower from Rock-Candy Mines, Magikoopa will transform his arms into wings, similar to Super Mario Bros. 3. | Crushing-Cogs Tower | Grinding-Stone Tower |
 Boss Sumo Bro |
Boss Sumo Bro was a regular Sumo Bro until Magikoopa made him grow in size. He is normally immune to attacks from the top due to the spike on his head, but he will jump between platforms which the player can hit from the bottom. Knocking him off a platform makes him vulnerable to jump attacks. He is fought on Screwtop Tower. | Screwtop Tower | |
 Magikoopa |
Magikoopa is fought on Slide Lift Tower and teleports most of the time when Mario gets too close. However, when he stops to attack Mario, he is left vulnerable to Mario's jumping. He also casts spells on Boom Boom, Boss Sumo Bro, and Bowser granting them extra power before their battles, such as causing them to grow in size. | Slide Lift Tower | |
| The Koopalings | |||
 Lemmy Koopa |
Lemmy Koopa is fought on Lemmy's Swingback Castle in Acorn Plains and attempts to throw bombs at Mario. | Lemmy's Swingback Castle | |
 Morton Koopa Jr. |
Morton Koopa Jr. is fought on Morton's Compactor Castle in Layer-Cake Desert and uses a large hammer that is apparently filled with magic to knock Big Pokey segments in the player's way after shaking the ground by stomping on it. He can knock Pokey segments straight at the player or knock them in high arcs. | Morton's Compactor Castle | |
 Larry Koopa |
Larry Koopa is fought on Larry's Torpedo Castle in Sparkling Waters and blasts fireballs and use water blasts from the pool below the arena. When Larry is spinning in his shell, the water geysers give his shell a boost upwards, making it a bit tricky to avoid. After two stomps, Larry begins to cast two fireballs in quick succession. | Larry's Torpedo Castle | |
 Wendy O. Koopa |
Wendy O. Koopa is fought on Wendy's Shifting Castle in Frosted Glacier and skates around the arena, shooting out two energy rings that ricochet off of walls and can knock down the icicles at the ceiling of the airship. She also spin jumps from walls. After she is jumped on twice, she will shoot out three rings instead. | Wendy's Shifting Castle | |
 Iggy Koopa |
Iggy Koopa is fought on Iggy's Volcanic Castle in Soda Jungle and uses the four warp pipes to run around the room and on the ceiling to make it trickier for the player to stomp on him as he uses his Magic Wand to shoot three fireballs, with some being his usual green flame, and the other being red skeleton orbs that generate Magmaarghs when they land into the lava below. When Iggy is stomped on, he will dash around the room in his shell using the pipes on the walls, which will switch him to the other side of the room. Unlike the other Koopalings where they spin in their shells and change directions at the edges or walls of the room, Iggy can actually change directions anywhere around the room during his duration in his shell. | Iggy's Volcanic Castle | |
 Roy Koopa |
Roy Koopa is fought on Roy's Conveyor Castle in Rock-Candy Mines and shoots Bullet Bills with his cannon and jump between platforms that move around during the fight. Occasionally, he shoots Missile Bills. He can also jump high in the air and ground pound the floor or platform, which makes him fire Bullet Bills on both sides of his blaster. The ground pound can also make the floating platforms appear after he comes out of his shell. | Roy's Conveyor Castle | |
 Ludwig von Koopa |
Ludwig von Koopa is fought on Ludwig's Clockwork Castle in Meringue Clouds and levitates in the air while making two clones of himself, and all three Ludwigs will blast fireballs at Mario before dropping onto the ground. If one of the clones is jumped on, it will simply disappear. There are four ways to find out which is the real one. The one that is the real one fires three fireballs, while the clones fire two. The clones keep their eyes half-open, and tend to assume the real Ludwig's pre-battle idle pose while not levitating. The real Ludwig will also drop to the ground last, after the clones, as well as laugh while dropping. Finally, Mario always looks at the real Ludwig if he can see him directly, just as he does with the other bosses. When the fight starts off, after shooting their fireballs, the clones disappear before landing. After the first stomp, the clones do not disappear. After the second stomp, not only do all three Ludwigs shoot faster, but swap positions, though the real Ludwig still shoots three fireballs. | Ludwig's Clockwork Castle | |
| Other | |||
 Bowser Jr. |
Bowser Jr. is fought on airships. In Soda Jungle's The Mighty Cannonship, Bowser Jr. uses his Junior Clown Car as a submarine underwater, in which the player must guide the Targeting Teds that Bowser Jr. shoots into his submarine. With every hit, he summons three Torpedo Teds from the left and right or from the ceiling and the floor. In Meringue Clouds' Boarding the Airship, Bowser Jr.'s boss battle involves him in his Clown Car equipped with boxing gloves, which he uses to destroy the blocks the player is standing on. Bowser Jr. periodically throws Bob-ombs, which the player can use against him. However, in Peach's Castle's The Final Battle, he cannot be defeated. | The Mighty Cannonship | The Final Battle |
 Bowser |
Bowser is fought in The Final Battle in Peach's Castle. The first part of his battle is similar to Super Mario Bros., where the player has to get to the other side and press the switch; alternatively, shooting several fireballs also works. This causes the axe to fall and make the bridge collapse, making Bowser fall. The gate then opens and Mario moves on. When Mario reaches the top of the castle, Peach is being held up in the tower. After this, Bowser Jr. shows up in his Junior Clown Car, and Bowser hops on top of the castle while he is huge. Bowser Jr. also fights the player. In order to defeat them, the player must jump on Bowser Jr., causing him to fall out of his Junior Clown Car. This allows the player to jump in and hover over Bowser to harm him. Like the Koopalings, he curls into his shell and spins around when hit. He is defeated after being hit three times by the Clown Car. | The Final Battle | |
Items from NSMBU
Power-ups from NSMBU
Objects from NSMBU
NSLU
Playable characters from NSLU
Yoshis from NSLU
Non-playable characters from NSLU
| Name | Description | Locations |
|---|---|---|
 Princess Peach |
TBW | The Final Battle |
 Toads |
Toads appear throughout the game in Toad Houses, at the end of the level when the player catches Nabbit, and past the end-of-level castles to give Mario a power-up if they complete a stage with the last two digits of the Time Limit being the same. | Toad Houses, TBD |
Enemies in NSLU
| Name | Description | Levels | Pts. | Exc. | New | |
|---|---|---|---|---|---|---|
| First | Last | |||||
 Waddlewing |
Orange flying-squirrel enemies that glide through stages. | Waddlewing Warning! | Flying Squirrel Ovation | 200 | — | — |
 Piranha Plant |
Plants that move in and out of Warp Pipes and some grounded. | Waddlewing Warning! | Above the Bouncy Clouds | 200 | — | — |
 Piranha Pod |
A projectile thrown by a Lakitu that turns into a Piranha Plant. | Spinning Sandstones | Beanstalk Jungle | 200 | — | — |
 Big Piranha Plant |
Large variants of Piranha Plants. | Piranha Heights | Flame Chomp Ferris Wheel | 200 | — | — |
 Fire Piranha Plant |
Piranha Plants that aim at Mario and shoot fireballs. | Slippery Rope Ladders | Spine Coaster Stowaways | 200 | — | — |
 Big Fire Piranha |
Large variants of Piranha Plants. | Piranhas in the Dark | Rising Piranhas | 200 | — | |
 Ice Piranha Plant |
A Piranha Plant that can shoot ice balls from its mouth, like Fire Piranha Plants. | Broozers and Barrels | 200 | — | — | |
 Stalking Piranha Plant |
A Piranha Plant that walks around and stretches up and down on a regular basis. | Spinning Sandstones | Rising Piranhas | 200 | — | — |
 River Piranha Plant |
A stationary Piranha Plant that blows a green spiked ball up and down, similar to a Ptooie. | Spinning Sandstones | Fliprus Floes | 200 | — | — |
Muncher |
An invincible black plant. | Lemmy's Lights-Out Castle | Wiggler Rodeo | — | — | |
 Koopa Troopa (Red) |
Turtle enemies that go into their shells when attacked, then can be picked up or thrown. Red Koopa Troopas turn around. | Crooked Cavern | Magma Moat | 200 | — | — |
 Koopa Troopa (Green) |
Green Koopa Troopas walk off ledges. | Piranha Gardens | Magmaw River Cruise | 200 | — | — |
 Koopa Paratroopa (Red) |
TBW | Dancing Blocks, Poison Swamp | 200 | — | — | |
 Koopa Paratroopa (Green) |
Winged Koopa Troopas that either jump in high arcs or fly up and down in the air. | Stonecrush Tower | 200 | — | — | |
 Big Koopa Troopa |
Large variants of Koopa Troopas. | Giant Swing-Along | 200 | — | — | |
 Dry Bones |
Skeleton Koopa Troopas that collapse when attacked, but later rebuild themselves. | Flame-Gear Tower | Stonecrush Tower | 200 | — | — |
 Big Dry Bones |
Large variants of Dry Bones that appear in castle levels. | Iggy's Swinging-Chains Castle | 200 | — | — | |
 Hammer Bro |
Enemies that throw hammers and jump. | Piranha Gardens | All Aboard! | 1000 | — | — |
 Fire Bro |
Hammer Bros that throw fireballs. | Piranhas in the Dark | Magmaw River Cruise | 1000 | — | — |
 Boomerang Bro |
Hammer Bros that use boomerangs, which return to them after being thrown. | All Aboard! | Above the Bouncy Clouds | 1000 | — | — |
 Ice Bro |
An enemy that throws ice balls at the ground, which can freeze the player and even other enemies. | All Aboard! | Frozen Fuzzies | 1000 | — | — |
 Sledge Bro |
Hammer Bro variants that stun Mario after they jump. | All Aboard! | 1000 | — | — | |
 Sumo Bro |
Giant Koopas that stomp the ground and create electric waves in two directions. | Sumo Bro Bridge | Sumo Bro's Spinning Tower | 200 | — | — |
 Lakitu |
Enemies that throw Spiny Eggs. If Mario defeats a Lakitu, he can ride on its cloud until it disappears. | Spinning Sandstones | Cloudy Capers | 1000 | — | — |
 Spiny |
Enemies that hatch from Spiny Eggs and cannot be jumped on. | Cloudy Capers | 200 | — | — | |
 Spiny Egg |
TBW | Cloudy Capers | 200 | — | — | |
 Bony Beetle |
Skeleton variants of Buzzy Beetles that walk around and suddenly stop to stick out their spikes. | Icicle Tower | Impossible Pendulums | 200 | — | — |
 Buzzy Beetle |
Shelled enemies that can be kicked or thrown after being jumped on, and can walk on ceilings. | Ice-Slide Expressway | 200 | — | — | |
 Spike Top |
Buzzy Beetle variants that have spikes on their shells, preventing them from being jumped on. | Switch-Lift Express | 200 | — | — | |
 Para-Beetle |
Para-Beetles are winged Buzzy Beetles. However, Mario can hop on their back for a ride, unlike with other winged foes. | Para-Beetle Parade | — | — | ||
 Heavy Para-Beetle |
A Para-Beetle that descends when used as a platform. | Para-Beetle Parade | — | — | ||
 Spike |
Green turtles which pull spiked balls out of their mouths and throw them directly downwards from the ledges on which they stand | Spike's Tumbling Desert | Spike's Seesaws | 200 | — | — |
 Stone Spike |
A Spike that throws stone rocks downwards. | Stone Spike Conveyors | 200 | — | — | |
 Cheep Cheep |
Fish that are found swimming aimlessly in underwater levels. | Cheep Chomp Chase | Star Coin Deep Dive | 200 | — | — |
 Big Cheep Cheep |
Large variants of Cheep Cheeps that are found in underwater levels. | Cheep Chomp Chase | Star Coin Deep Dive | 200 | — | — |
 Eep Cheep |
A Cheep Cheep that lives in a school with other Eep Cheeps and swims away when the player comes near it. | Cheep Chomp Chase | 200 | — | — | |
 Big Eep Cheep |
Large variants of Cheep Cheeps that are found in underwater levels. | Cheep Chomp Chase | Urchin Reef Romp | 200 | ||
 Deep Cheep |
Large variants of Cheep Cheeps that are found in underwater levels. | Cheep Chomp Chase | 200 | — | ||
 Big Deep Cheep |
Large variants of Cheep Cheeps that are found in underwater levels. | Cheep Chomp Chase | 200 | — | ||
 Spiny Cheep Cheep |
Fast-swimming fish that chase Mario. | Haunted Cargo Hold | Star Coin Deep Dive | 200 | — | — |
 Cheep Chomp |
Large fish that attempt to eat Mario. | Cheep Chomp Chase | Star Coin Deep Dive | 200 | — | — |
 Porcupuffer |
Fish that jump out of the water and follow Mario. | Porcupuffer Cavern | 200 | — | — | |
 Fish Bone |
Skeletal fish that charge towards Mario. | Haunted Cargo Hold | Deepsea Stone-Eyes | 200 | — | — |
 Monty Mole |
A mole that pops out of mountains and the ground and gives chase. | Rolling Yoshi Hills | Stonecrush Tower | 200 | — | — |
Pokey |
Living cacti that appear in desert levels and move slowly. | Underground Grrrols | 200 | — | — | |
 Big Pokey |
Large variants of Pokeys. | Morton's Lava-Block Castle | None | — | — | |
 Grrrol |
Round, Thwomp-like enemies that roll on the ground. | Underground Grrrols | Smashing-Stone Tower | 200 | — | — |
 Mega Grrrol |
A bigger Grrrol with the same behavior. | Underground Grrrols | Smashing-Stone Tower | 200 | — | — |
Huckit Crab |
A crab that throws rocks on loop. These can be jumped on and used as a temporary platform. | Huckit Beach Resort | Porcupuffer Cavern | 200 | — | — |
 Urchin |
Stationary enemies that appear in underwater levels. | Urchin Reef Romp | 200 | — | — | |
 Big Urchin |
A gigantic Urchin that can be defeated only with a Star. | Urchin Reef Romp | 200 | — | — | |
 Boo |
Ghosts that follow Mario when his back is turned, but hide their face when he looks at them. Groups of Boos occur floating in circles in some levels. | Peek-a-Boo Ghost House | Vanishing Ghost House | 200 | — | — |
Big Boo |
Bigger variants of Boos that have the same behavior. | Peek-a-Boo Ghost House | 200 | — | — | |
 Goombrat |
A Goomba that resembles a persimmon and turns at ledges. | Wiggler Rodeo | Hot Cogs | 200 | — | — |
 Goomba |
Common enemies that can be defeated by jumping on them. Some Goombas in Skyward Stalk float on balloons. | Stonecrush Tower | Magmaw River Cruise | 200 | — | — |
 Mini Goomba |
Small Goombas that weigh Mario down until he either attacks or walks for a few seconds. | Stonecrush Tower | Magmaw River Cruise | 200 | — | — |
 Prickly Goomba |
A Goomba that hides inside a spiked chestnut shell until it is hit with a fireball, which is when it turns into a regular Goomba. | Fire and Ice | 200 | — | — | |
Dragoneel (Red) |
A long eel that attacks Mario by chasing him. | Dragoneel Depths | 200 | — | — | |
 Dragoneel (Blue) |
Shorter, purple ones also exist that move slower, but make sharper turns. | Dragoneel Depths | 200 | — | — | |
 Bullet Bill |
Bullets that fly straight forward and are shot from Bill Blasters and Bill Blaster Turrets. | Larry's Trigger-Happy Castle | Rainbow Skywalk | 200 | — | — |
 Missile Bill |
Bullet Bills that target Mario. | Roy's Ironclad Castle | 200 | — | — | |
 Banzai Bill |
Large Bullet Bills that fly straight forward. | Larry's Trigger-Happy Castle | Para-Beetle Parade | 200 | — | — |
 King Bill |
A nearly invincible enemy that charges forward, taking up most of the screen. | Larry's Trigger-Happy Castle | Para-Beetle Parade | 200 | — | — |
 Torpedo Ted |
A slow-moving torpedo that flies in one direction. | Larry's Trigger-Happy Castle | All Aboard! | 200 | — | — |
 Targeting Ted |
Red Torpedo Teds that home into their target, much like Bull's-Eye Bills. | Larry's Trigger-Happy Castle | All Aboard! | 200 | — | — |
 Broozer |
A walking, boxing Boo. Can break bricks and other blocks that are normally indestructible. Mario can defeat it by jumping on it three times, or hitting him with a fireball. | Which-Way Labyrinth | Spinning Spirit House | 200 | — | — |
 Cooligan |
An enemy that slides on ice and slows down when hit. | Cooligan Shrooms | 200 | — | — | |
 Fliprus |
A walrus-like creature that throws snowballs that can be jumped on. | Fliprus Floes | Hammerswing Hangout | 200 | — | — |
 Thwomp |
Large rocks that fall when Mario gets close. | Wendy's Thwomp Castle | 200 | — | — | |
 Big Thwomp |
Large Thwomps that can break through stone tiles. | Wendy's Thwomp Castle | 200 | — | — | |
 Mechakoopa |
A mechanical Koopa. After stomping it, Mario can pick it up and use it as a weapon. | All Aboard! | 200 | — | — | |
 Bramball |
An enemy that moves around in a set pattern and is mostly covered in spikes, with the head being the only safe part to jump on. It can be forced to move if jumped into from below. | Heart of Bramball Woods | 200 | — | — | |
 Big Wiggler |
Large variants of Wigglers. | Wiggler Floodlands | — | — | ||
 Wiggler |
Caterpillars that move faster after being jumped on. | Wiggler Rodeo | 200 | — | — | |
 Magmaargh |
Lava monsters that attacks by moving towards the players in a wave-like movement. | Iggy's Swinging-Chains Castle | — | — | ||
 Magmaw |
Lava monsters that lunges at the player and dips back into the lava. | Magmaw River Cruise | The Final Battle | — | — | |
 Fuzzy |
Enemies that follow tracks and hurt Mario upon contact. | Mount Fuzzy | Cloudy Capers | 200 | — | — |
 Big Fuzzy |
Large variants of Fuzzies. | Frozen Fuzzies | Spine Coaster Connections | 200 | — | — |
 Fire Snake |
Flames that jump in a high arc. | Light-Up-Lift Tower | 200 | — | — | |
 Lava Bubble |
Fireballs that jump out of lava. | Roy's Ironclad Castle | Hot Cogs | 200 | — | — |
 Chain Chomp |
Enemies tied to posts that lunge at Mario. If Mario ground pounds their post, they are set free. | Wiggler Rodeo | 200 | — | — | |
 Flame Chomp |
Black spheres that spit fireballs at Mario. They explode after they're out of fireballs. | Flame Chomp Ferris Wheel | 200 | — | — | |
 Foo |
An enemy that creates fog in order to obscure the player's view. | Three-Headed Snake Block | 200 | — | — | |
 Bob-omb |
Bombs that ignite if they are jumped on or have a fireball thrown at them, then explode shortly after. | Bowser Jr. Showdown | The Final Battle | 200 | — | — |
 Parabomb |
Parachuting Bob-ombs that are sometimes shot out of cannons. | Bowser Jr. Showdown | Current Event | 200 | — | — |
 Blooper |
Underwater enemies that move in an erratic pattern and follow Mario. | Star Coin Deep Dive | 200 | — | — | |
Obstacles from NSLU
Bosses from NSLU
| Name | Description | Levels | |
|---|---|---|---|
| First | Last | ||
| Tower bosses | |||
 Boom Boom |
The tower boss from Flame-Gear Tower in Acorn Plains to Grinding-Stone Tower in Rock-Candy Mines. He does not change in the first battle, especially on Crushing-Cogs Tower in Acorn Plains. However, following his first defeat, Magikoopa gives him special abilities. In Stoneslide Tower from Layer-Cake Desert, Magikoopa will grant him the ability to spin jump. In Giant Skewer Tower from Sparkling Waters and Freezing-Rain Tower from Frosted Glacier, Magikoopa will grant him the ability to jump, similar to Super Mario Bros. 3. In Snake Block Tower from Soda Jungle, Magikoopa will make him larger. In Grinding-Stone Tower from Rock-Candy Mines, Magikoopa will transform his arms into wings, similar to Super Mario Bros. 3. | Flame-Gear Tower | Smashing-Stone Tower |
 Boss Sumo Bro |
Boss Sumo Bro was a regular Sumo Bro until Magikoopa made him grow in size. He is normally immune to attacks from the top due to the spike on his head, but he will jump between platforms which the player can hit from the bottom. Knocking him off a platform makes him vulnerable to jump attacks. He is fought on Screwtop Tower. | Sumo Bro's Spinning Tower | |
 Magikoopa |
Magikoopa is fought on Slide Lift Tower and teleports most of the time when Mario gets too close. However, when he stops to attack Mario, he is left vulnerable to Mario's jumping. He also casts spells on Boom Boom, Boss Sumo Bro, and Bowser granting them extra power before their battles, such as causing them to grow in size. | Stonecrush Tower | |
| The Koopalings | |||
 Lemmy Koopa |
Lemmy Koopa is fought on Lemmy's Swingback Castle in Acorn Plains and attempts to throw bombs at Mario. | Lemmy's Lights-Out Castle | |
 Morton Koopa Jr. |
Morton Koopa Jr. is fought on Morton's Compactor Castle in Layer-Cake Desert and uses a large hammer that is apparently filled with magic to knock Big Pokey segments in the player's way after shaking the ground by stomping on it. He can knock Pokey segments straight at the player or knock them in high arcs. | Morton's Lava-Block Castle | |
 Larry Koopa |
Larry Koopa is fought on Larry's Torpedo Castle in Sparkling Waters and blasts fireballs and use water blasts from the pool below the arena. When Larry is spinning in his shell, the water geysers give his shell a boost upwards, making it a bit tricky to avoid. After two stomps, Larry begins to cast two fireballs in quick succession. | Larry's Trigger-Happy Castle | |
 Wendy O. Koopa |
Wendy O. Koopa is fought on Wendy's Shifting Castle in Frosted Glacier and skates around the arena, shooting out two energy rings that ricochet off of walls and can knock down the icicles at the ceiling of the airship. She also spin jumps from walls. After she is jumped on twice, she will shoot out three rings instead. | Wendy's Thwomp Castle | |
 Iggy Koopa |
Iggy Koopa is fought on Iggy's Volcanic Castle in Soda Jungle and uses the four warp pipes to run around the room and on the ceiling to make it trickier for the player to stomp on him as he uses his Magic Wand to shoot three fireballs, with some being his usual green flame, and the other being red skeleton orbs that generate Magmaarghs when they land into the lava below. When Iggy is stomped on, he will dash around the room in his shell using the pipes on the walls, which will switch him to the other side of the room. Unlike the other Koopalings where they spin in their shells and change directions at the edges or walls of the room, Iggy can actually change directions anywhere around the room during his duration in his shell. | Iggy's Swinging-Chains Castle | |
 Roy Koopa |
Roy Koopa is fought on Roy's Conveyor Castle in Rock-Candy Mines and shoots Bullet Bills with his cannon and jump between platforms that move around during the fight. Occasionally, he shoots Missile Bills. He can also jump high in the air and ground pound the floor or platform, which makes him fire Bullet Bills on both sides of his blaster. The ground pound can also make the floating platforms appear after he comes out of his shell. | Roy's Ironclad Castle | |
 Ludwig von Koopa |
Ludwig von Koopa is fought on Ludwig's Clockwork Castle in Meringue Clouds and levitates in the air while making two clones of himself, and all three Ludwigs will blast fireballs at Mario before dropping onto the ground. If one of the clones is jumped on, it will simply disappear. There are four ways to find out which is the real one. The one that is the real one fires three fireballs, while the clones fire two. The clones keep their eyes half-open, and tend to assume the real Ludwig's pre-battle idle pose while not levitating. The real Ludwig will also drop to the ground last, after the clones, as well as laugh while dropping. Finally, Mario always looks at the real Ludwig if he can see him directly, just as he does with the other bosses. When the fight starts off, after shooting their fireballs, the clones disappear before landing. After the first stomp, the clones do not disappear. After the second stomp, not only do all three Ludwigs shoot faster, but swap positions, though the real Ludwig still shoots three fireballs. | Ludwig's Block-Press Castle | |
| Other | |||
 Bowser Jr. |
Bowser Jr. is fought on airships. In Soda Jungle's The Mighty Cannonship, Bowser Jr. uses his Junior Clown Car as a submarine underwater, in which the player must guide the Targeting Teds that Bowser Jr. shoots into his submarine. With every hit, he summons three Torpedo Teds from the left and right or from the ceiling and the floor. In Meringue Clouds' Boarding the Airship, Bowser Jr.'s boss battle involves him in his Clown Car equipped with boxing gloves, which he uses to destroy the blocks the player is standing on. Bowser Jr. periodically throws Bob-ombs, which the player can use against him. However, in Peach's Castle's The Final Battle, he cannot be defeated. | The Mighty Cannonship | The Final Battle |
 Bowser |
Bowser is fought in The Final Battle in Peach's Castle. The first part of his battle is similar to Super Mario Bros., where the player has to get to the other side and press the switch; alternatively, shooting several fireballs also works. This causes the axe to fall and make the bridge collapse, making Bowser fall. The gate then opens and Mario moves on. When Mario reaches the top of the castle, Peach is being held up in the tower. After this, Bowser Jr. shows up in his Junior Clown Car, and Bowser hops on top of the castle while he is huge. Bowser Jr. also fights the player. In order to defeat them, the player must jump on Bowser Jr., causing him to fall out of his Junior Clown Car. This allows the player to jump in and hover over Bowser to harm him. Like the Koopalings, he curls into his shell and spins around when hit. He is defeated after being hit three times by the Clown Car. | The Final Battle | |
Items from NSLU
Power-ups from NSLU
Objects from NSLU
References
- ^ Sakai, Kazuya (Ambit), kikai, Akinori Sao, Junko Fukuda, Kunio Takayama, and Ko Nakahara (Shogakukan), editors (2015). "New Super Mario Bros." in『スーパーマリオブラザーズ百科: 任天堂公式ガイドブック』. Tokyo: Shogakukan (Japanese). ISBN 4-091065-69-4. Page 114–15.
- ^ Shogakukan editors (2006). 「敵キャラクターリスト」in『ニュー・スーパーマリオブラザーズ: 任天堂公式ガイドブック』. Tokyo: Shogakukan (Japanese). ISBN 4-091063-07-1. Page 14–19.
- ^ p. 109
- ^ Louey
- ^ p. 84
- ^ p. 58
- ^ p. 93
- ^ p. 60
- ^ p. 56
- ^ a b p. 35
- ^ Sakai, Kazuya (Ambit), kikai, Akinori Sao, Junko Fukuda, Kunio Takayama, and Ko Nakahara (Shogakukan), editors (2015). "New Super Mario Bros. Wii" in『スーパーマリオブラザーズ百科: 任天堂公式ガイドブック』. Tokyo: Shogakukan (Japanese). ISBN 4-091065-69-4. Page 144–46.
- ^ Nintendo Co., Ltd. (2023). New Super Mario Bros. Wii. Mario Portal Game Archive. Retrieved 14 Aug. 2024.
- ^ Bueno, Fernando (2009). New Super Mario Bros. Wii: PRIMA Official Game Guide. Roseville: Prima Games. ISBN 978-0-3074-6767-6.
- ^ Sakai, Kazuya (Ambit), kikai, Akinori Sao, Junko Fukuda, Kunio Takayama, and Ko Nakahara (Shogakukan), editors (2015). "New Super Mario Bros. 2" in『スーパーマリオブラザーズ百科: 任天堂公式ガイドブック』. Tokyo: Shogakukan (Japanese). ISBN 4-091065-69-4. Page 194–15.
- ^ Weekly Famitsu Editorial Department (2012). 「
敵 キャラクター」in『New スーパーマリオブラザーズ2 パーフェクトガイド』. Tokyo: Famitsu (Japanese). ISBN 4-047284-30-0. Page 26–34. - ^ Stratton, Steve (2012). New Super Mario Bros. U: PRIMA Official Game Guide. Roseville: Prima Games. ISBN 978-0-307-89690-2. Page 28–35.
- ^ Sakai, Kazuya (Ambit), kikai, Akinori Sao, Junko Fukuda, Kunio Takayama, and Ko Nakahara (Shogakukan), editors (2015). "New Super Mario Bros. U" in『スーパーマリオブラザーズ百科: 任天堂公式ガイドブック』. Tokyo: Shogakukan (Japanese). ISBN 4-091065-69-4. Page 204–19.
- ^ Nintendo Co., Ltd. (2022). New Super Mario Bros. U. Mario Portal Game Archive. Retrieved 28 Aug. 2024.
- ^ Stratton, p. 90.