Paper Mario: The Origami King: Difference between revisions
Scrooge200 (talk | contribs) |
m (Text replacement - "(\| *)Jap([RMCN\d]* *=)" to "$1Jpn$2") |
||
| (368 intermediate revisions by 96 users not shown) | |||
| Line 1: | Line 1: | ||
{{italic title}} | {{italic title}} | ||
{{redirect|The Origami King|the eponymous villain|[[King Olly]]}} | {{redirect|The Origami King|the eponymous villain|[[King Olly]]}} | ||
{{infobox | {{game infobox | ||
|image=[[File:Paper Mario The Origami King Boxart.png|250px]]<br>North American box art | |image=[[File:Paper Mario The Origami King Boxart.png|250px]]<br>North American box art | ||
|developer=[[Intelligent Systems]] | |developer=[[Intelligent Systems]] | ||
|publisher=[[Nintendo]] | |publisher=[[Nintendo]] | ||
| | |release={{flag list|Japan|July 17, 2020|USA|July 17, 2020|Mexico|July 17, 2020<ref>https://www.nintendo.com/es_LA/games/detail/paper-mario-the-origami-king-switch/</ref>|Europe|July 17, 2020|Australia|July 17, 2020|South Korea|July 17, 2020|HK|July 17, 2020|ROC|July 17, 2020}} | ||
|genre=Role-playing, action-adventure | |languages={{languages|en_us=y|fr_fr=y|fr_ca=y|es_es=y|es_latam=y|de=y|it=y|nl=y|jp=y|kr=y|zh_simp=y|zh_trad=y}} | ||
|genre=[[Genre#Role-playing|Role-playing]], action-adventure | |||
|modes= | |modes= | ||
|ratings={{ratings|esrb=E|pegi=7|acb=PG|cero=A|usk=6| | |ratings={{ratings|esrb=E|pegi=7|acb=PG|cero=A|usk=6|classind=l|smeccv=A|rars=6+|grac=all|gsrr=p|fpb=13|gcam=7|nmc=7}} | ||
|platforms=[[Nintendo Switch]] | |platforms=[[Nintendo Switch]] | ||
| | |format={{format|switch=1|switchdl=1}} | ||
|input={{input|joy-con=1| | |input={{input|joy-con=1|switchpro=1}} | ||
|serials={{flag list|Europe|LA-H-ARUUA-EUR}} | |||
}} | }} | ||
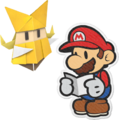
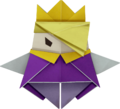
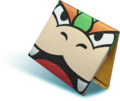
'''''Paper Mario: The Origami King''''' is an action-adventure, turn-based [[Genre#Role-playing games|role-playing game]] and the sixth installment in the ''[[Paper Mario (series)|Paper Mario]]'' series, released on the [[Nintendo Switch]] worldwide on July 17, 2020. The game follows [[Mario]] and a new companion, [[Olivia]], opposing the villainous [[King Olly]] and his army of familiar characters turned into origami soldiers, which have taken over the [[Mushroom Kingdom]]. | |||
'' | The title follows the gameplay style of its two predecessors, ''[[Paper Mario: Sticker Star]]'', and ''[[Paper Mario: Color Splash]]'', in which role-playing elements are deemphasized in favor of action-adventure mechanics, which focus on exploration and puzzle-solving instead of character-driven plotlines and [[Experience Point|experience]]-based stat optimization. Also similar to those predecessors is the focus on specific arts and crafts; while the story of ''The Origami King'' is centered around {{wp|origami}} itself, comparable to stickers from ''Sticker Star'' and paint from ''Color Splash'', other materials such as {{wp|confetti}} and {{wp|papier-mâché}} feature in the gameplay. Conversely, this game abandons the format of self-contained levels used by the later installments, using an interconnected world akin to the first two ''Paper Mario'' games. In terms of combat, ''Paper Mario: The Origami King'' does not feature a battle system which uses finite items like ''Sticker Star'' and ''Color Splash'', as it instead uses an original ring-based system that prioritizes puzzle-solving instead of strategy, and also introduces real-time combat to the series in the form of the [[Paper Macho Soldier]]s. | ||
==Plot== | ==Plot== | ||
===Prologue=== | ===Prologue=== | ||
[[File:PMTOK Peach Castle streamers.png | [[File:PMTOK Peach Castle streamers.png|thumb|left|King Olly wrapping Peach's castle in [[streamer]]s]] | ||
[[Mario]] and [[Luigi]] drive to [[Toad Town]] for the Origami Festival after being invited by [[Princess Peach]]. The brothers arrive to discover the town and [[Peach's Castle]] are deserted. Upon entering the castle, they are locked inside and split up, Luigi heading to search for the castle key and Mario heading into the castle foyer. Peach enters the foyer, having been folded into origami, and drops Mario into a dungeon where several of [[Bowser]]'s minions are being held. Mario discovers a [[Magic Circle]] and initiates the [[1,000-Fold Arms]] technique, using them to free an origami girl named [[Olivia]]. After escaping their cell, Mario and Olivia free Bowser, who was square-folded, restricting his mobility. | |||
Escaping | Escaping to the upper terrace of Peach's Castle, Mario is attacked by a group of Bowser's Minions that were also folded into origami, known as [[Folded Soldiers]]. After defeating the minions, the leader of the origami reveals himself as Olivia's older brother, [[King Olly]]. He summons five streamers from across the [[Mushroom Kingdom]] to wrap around Peach's Castle and rip it out of the ground. Mario, Olivia, and Bowser escape the castle in a [[Koopa Clown Car]] piloted by a [[Shy Guy]], but are quickly knocked out of the Clown Car by the red streamer. Bowser is saved by the Shy Guy, while Mario and Olivia fall into a nearby forest. Olly sets Peach's Castle down atop the peak of a far-off volcano. | ||
{{br|left}} | |||
===Red streamer=== | ===Red streamer=== | ||
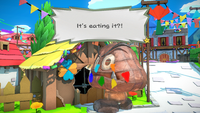
[[File:PMTOK Paper Macho Goomba Eating House.png|thumb|200px| | [[File:PMTOK Paper Macho Goomba Eating House.png|thumb|200px|A Paper Macho Goomba eating a house]] | ||
Mario | Mario and Olivia land in [[Whispering Woods]] and notice that Olly moved Peach's Castle. They set out to unravel the five streamers, find Luigi, and defeat Olly. Eventually, they get back to the abandoned Toad Town, now being destroyed by [[Paper Macho Goomba]]s. After defeating the Goombas and finding some Toad Town citizens, they go to search the remains of Peach's Castle and find Luigi. He quickly sets off to find the key to Peach's Castle. | ||
Following the red streamer, Mario and Olivia travel to [[Picnic Road]]. They find the door to the [[Earth Vellumental Temple]], which is locked due to four of the five [[Shell Stone]]s required to open it being stolen by Folded Soldiers. They rescue the stones and return them to the door, giving them access to the turtle-like god known as the [[Earth Vellumental]]. However, the Vellumental had been folded into origami, forcing Mario to fight it. Upon defeating, Olivia gains the ability to transform into the Vellumental and manipulate earth, allowing Mario and her to access [[Overlook Tower]], where the source of the red streamer lies. At the top of the tower, the duo confronts [[Colored Pencils]], one of Olly's generals. After defeating the boss, Mario unravels the red streamer. | |||
===Blue streamer=== | ===Blue streamer=== | ||
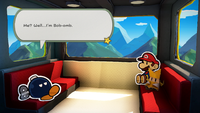
[[File:PMTOK | [[File:PMTOK Meeting Bob omb.png|thumb|left|Mario and Olivia meeting Bob-omb on the tram]] | ||
Mario and Olivia next follow the blue streamer and take a tram station to [[Autumn Mountain]]. On the tram, they meet [[Bob-omb (Paper Mario: The Origami King)|Bob-omb]], a happy-go-lucky amnesiac, whom Olivia nicknames Bobby. He tags along with them as they travel to the [[Water Vellumental Shrine]]. Upon defeating the origami [[Water Vellumental]], Olivia gains the ability to fold into the Vellumental and create water. She uses this power to refill a dry lake and the [[Eddy River]], which the trio travel down to reach [[Shogun Studios]], a popular theme park. | |||
Mario, Olivia, and Bob-omb enter the park, finding it almost entirely deserted. They are tasked with finding the park's master key to rescue the park staff, who are trapped in the high castle tower. After traveling through the whole park, they rescue Luigi in the employee area of the [[Ninja Attraction]], who found the master key, mistaking it for the key to Peach's Castle. The trio unlocks the tower gates and enter [[Big Sho' Theatre]]. After participating in three performances, they face off against [[Rubber Band]], another one of Olly's generals. After defeating Rubber Band, Mario destroys the blue streamer, saving the park and bringing them closer to saving Peach's Castle. The park celebrates with a fireworks ceremony, which jogs Bob-omb's memories. | |||
{{br|left}} | |||
===Yellow streamer=== | ===Yellow streamer=== | ||
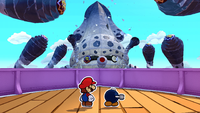
[[File:PMTOK Gooper Blooper.png|thumb|Mario and Bob-omb confront the Paper Macho Gooper Blooper]] | |||
Mario, Olivia, and Bob-omb continue down the Eddy River, no longer blocked by the blue streamer, to [[Sweetpaper Valley]]. They are confronted by Olly and Olivia gets crushed by a massive boulder. Bob-omb recalls a way to save Olivia and takes Mario to [[the Great Sea]]. They sail out to a deserted cruise ship known as [[the Princess Peach]]. The duo find the suite Bob-omb originally stayed in. The lockbox inside, which Bob-omb was looking for, is snatched by Paper Macho [[Gooper Blooper]], which Mario fights off at the deck of the ship. Retrieving the lockbox, the duo return to Sweetpaper Valley, where Bob-omb reveals the lockbox contains his late friend's fuse. He uses the fuse to blow himself up, destroying the boulder and freeing Olivia. Olivia runs off, devastated by Bob-omb's sacrifice, and is only cheered up by Mario donning a [[Goomba Mask]] after the suggestion of Bob-omb's ghost. | |||
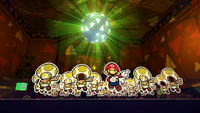
[[File:PMTOK Faceless Toads.png|thumb| | [[File:PMTOK Faceless Toads.png|thumb|left|Mario dancing with the faceless Toads]] | ||
Mario and Olivia | Mario and Olivia head into the [[Scorching Sandpaper Desert]], where the sun is cut out of the sky. After traveling through the desert and obtaining information in [[Shroom City (Paper Mario: The Origami King)|Snif City]], they rescue the ancient historian [[Professor Toad]] from the insides of a [[Mega Paper Macho Pokey]]. The professor is pursuing the legend of [[Captain T. Ode|Khap'taan Teeowed]] and tags along with the duo, utilizing his ability to reach ancient writings to solve the ruins' puzzles. The trio perform an ancient ritual in the desert to open the [[Fire Vellumental Cave]] and defeat the origami [[Fire Vellumental]] within. Olivia gains the ability to fold into the Vellumental and light fires, which she uses to light fires in [[Scorching Sandpaper West|three]] [[Scorching Sandpaper Far West|Toad]] [[Scorching Sandpaper West|monoliths]] and unearth the [[Temple of Shrooms]]. | ||
Inside, the | Inside the temple, the Mario, Olivia, and Professor Toad discovers many zombie-like faceless Toads and [[DJ Toad|a DJ]] being held hostage. The trio find the [["Thrills at Night"]] disc, round up the faceless Toads, and summon the next of Olly's enforcers: [[Hole Punch]]. After defeating Hole Punch, Mario destroys the yellow streamer and frees the desert sun. The trio head to the newly-opened [[Sun Altar]], and find Captain T. Ode preserved in a block of ice. Olivia frees the captain, who heads off in search of his old submarine, the [[Super Marino]]. Mario and Olivia follow the captain, while Professor Toad stays behind in the desert. | ||
{{br}} | |||
===Purple streamer=== | ===Purple streamer=== | ||
Returning | [[File:PMTOK Sea Tower entrance.png|thumb|Mario arrives at the [[Sea Tower]]]] | ||
Returning the Toad Town, Mario and Olivia find Captain T. Ode, who reclaims ownership of his own submarine. The sub is attached to Sea Captain Toad's ship, and T. Ode, Mario, and Olivia head out into the Great Sea. After clearing the thick fog that covers the sea, they discover the source of the purple streamer at the [[Sea Tower]], but are unable to enter without the three orbs located in [[Diamond Island (Paper Mario: The Origami King)|Diamond Island]]. They travel between many islands, eventually meeting up with Luigi on [[Mushroom Island]], who holds the key to Diamond Island. The brothers decide to find the island's resident and free the [[Origami Craftsman]] from the walls of his workshop. The craftsman reveals he created King Olly for the Origami Festival using the forbidden Fold of Life. Olly turned on his creator and set out to fold the world in his image, using the Origami Craftsman's notes to fold Olivia. The craftsman shares a set of notes with Olivia before she heads back to the ship with Mario. | |||
Mario and Olivia use the key Luigi obtained to access the submerged Diamond Island, where three temples stand, housing the Trials of Power, Wisdom, and Courage; and the nearby [[Ice Vellumental Mountain]]. The duo must travel up the mountain and defeat the [[Ice Vellumental]] at its peak. After defeating the final Vellumental, Olivia gains the ability to fold into it and utilize its ice powers to access the Trials of Wisdom and Courage. After completing all three trials, Mario and Olivia turn to the Sea Tower and climb up to its peak. At the top, they face off against [[Tape (boss)|Tape]], and upon the stationery's defeat, Mario destroys the purple streamer. | |||
Mario and Olivia use the | |||
===Green streamer=== | ===Green streamer=== | ||
[[File:PMTOK Bowser Jr hot spring.png|thumb|200px|Bowser Jr., Kamek, Mario and Olivia | [[File:PMTOK Bowser Jr hot spring.png|thumb|left|200px|Bowser Jr., Kamek, Mario, and Olivia resting in the hot spring]] | ||
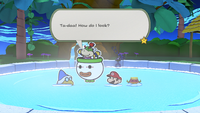
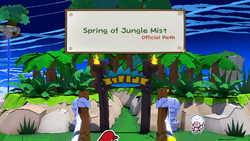
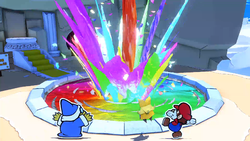
Mario and Olivia notice the green streamer peeking out from above the clouds. A mysterious light appears on top of the Sea Tower, and stepping into it transports them to [[Shangri-Spa]], where [[Bowser's Castle]] had crash-landed. The duo meets up with [[Kamek]], who is unable to return to the castle due to the folded [[Boss Sumo Bro]] guarding the entrance. [[Bowser Jr.]] flies in, whose [[Junior Clown Car]] would allow access to Boss Sumo Bro, but is shredded by another one of Olly's generals: [[Scissors (boss)|Scissors]]. Kamek reluctantly joins up with Mario and Olivia, and the group travels to four of the spa's springs in order to revive Jr. However, when Jr. soaks in the [[Spring of Jungle Mist]] for too long, he ends up losing his color. The group travels to the [[Spring of Rainbows]], which involves winning the game show [[Shy Guys Finish Last]]. The spring restores Bowser Jr.'s color, allowing him to take Mario up to Boss Sumo Bro. The boss is defeated, allowing the group and all of Bowser's minion access to Bowser's Castle again. | |||
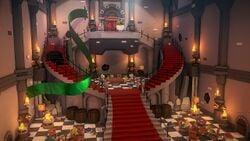
Bowser's minions start a large clash with the Folded Soldiers, while Mario, Olivia, and Kamek search for the key to the throne room, which Kamek believes to be in his quarters. Along the way, Kamek disappears, but Mario is able to find the castle key in the hands of Luigi, who once again mistook it for the key to Peach's Castle. Soon after, Olivia is snatched by a shadowy hand and all of Bowser's minions disappear as well. On the way to the throne room, Mario battles [[Big Cutout Soldier|Big]] and [[Li'l Cutout Soldier]]s, until reaching the creature that captured Olivia, the [[Handaconda]], whom Mario defeats in a game of {{wp|rock paper scissors}}. In the following room, the duo finds the cut-up remains of Bowser's minions. They then face off against the [[Paper Mistake Buzzy Beetle]], created by Scissors, before fighting Scissors itself. After defeating both bosses, Mario is able to revive Bowser's minions, free Bowser, and destroy the green streamer. | |||
===Origami Castle=== | ===Origami Castle=== | ||
[[File: | [[File:PMTOK Origami Castle.jpg|thumb|200px|King Olly transforms Peach's Castle into the Origami Castle]] | ||
Bowser mobilizes his army, along with Mario and Olivia, onto a new [[airship]], which they use to travel to Peach's Castle. However, they are intercepted by the [[Paper Plane Squadron]], and one large jet dives into the airship, causing the ship to crash into Hotfoot Crater. Mario, Olivia, Kamek, and Bowser Jr. are chased up the volcano by a horde of Paper Macho Goombas, with Kamek and Bowser Jr. staying behind to keep back the horde. Mario and Olivia meet up with Bowser, and the three use the airship cannon to launch to the ground outside of Peach's Castle. Luigi meets up with them, who inadvertently had the key to the castle lodged in his kart's tailpipe. Inside, the group is greeted by Origami Peach, before Olly refolds Peach's Castle into Origami Castle. | |||
Mario, Olivia, and Bowser travel through the newly folded castle and eventually reach Olly, who summons the [[Stapler (boss)|Stapler]]. After defeating the final Legion of Stationary member, Bowser finally manages to unfold himself. After a pep talk from Bowser to raise Olivia's spirits, the trio confronts King Olly in his throne room. Inside, they attempt to reason with Olly, before realizing Peach has been folded into the rear wall of the throne room. Olly reveals that his grudge against the Toads originates from a scribble the Origami Craftsman left, which Olly believes was left carelessly. He has already folded 999 origami cranes and intends to use Mario to create the final crane, which will grant him his wish to turn every Toad into blank scraps. Olly engages in battle against Mario and Olivia, using his own versions of the Vellumentals. After being defeated by Olivia's Vellumentals, Olly folds himself into a large sumo wrestler, which Olivia counteracts by folding Bowser into a giant origami sumo wrestler. Mario assists Bowser in knocking Olly off the platform, but Olly rises again as a giant version of his normal self and unleashes his inner rage which turns into a poisonous gas. Olivia summons a massive Magic Circle, which when completed, transforms Olivia into the design given to her by the Origami Craftsman: a giant hammer, defeating Olly for good. | |||
In Olly's final moments, Olivia discovers the scribble on him and reveals it was actually a hopeful message that he become a good king. Repentant, Olly entrusts his 999 cranes to Olivia and allows her to use his body as the final one. Luigi, Kamek, and Bowser Jr. arrive with the Origami Craftsman who instructs Olivia on how to make a paper crane. She then wishes to undo all the origami her brother folded, including herself. The thousand cranes grant her wish and carry Peach's Castle back to its proper place in Toad Town. Everyone lands outside the castle along with a restored Princess Peach, and realizes that Olivia is absent. | |||
[[File:PMTOK Thank You.jpg|thumb|Everyone prepares to release paper lanterns to give thanks to all the origami.]] | |||
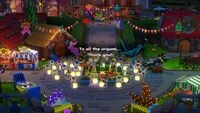
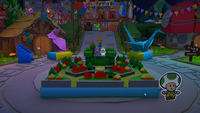
That night, the Mushroom Kingdom and Bowser's army celebrate the Origami Festival together. The Origami Craftsman reveals his contribution: the original, scaled-down Origami Castle, complete with thrones for the two origami siblings. Mario expresses his sadness over Olivia's sacrifice, but Peach insists that she is still with them in spirit. To finish the celebrations, everyone releases paper lanterns into the night sky in honor of origami. Afterwards, the Mario Bros. drive home as the credits roll. | |||
[[File:PMTOK Secret Ending.png|thumb|left|Olivia and Olly sit on their thrones if the game is completed 100%]] | |||
If the player achieves 100% completion and defeats the final boss, the photos receive golden frames, and a post-credits scene plays in which the Origami Craftsman places miniatures of Olly and Olivia beside each other on his castle in the center of Toad Town. | |||
{{br}} | |||
If the player | |||
==Gameplay== | ==Gameplay== | ||
| Line 93: | Line 81: | ||
|align=right | |align=right | ||
|direction=vertical | |direction=vertical | ||
|width= | |width=200 | ||
|image1=PMTOK battle attack power up.png | |image1=PMTOK battle attack power up.png | ||
|caption1=[[Mario]] fighting origami [[Goomba]]s and origami [[Shy Guy]]s in a ring | |caption1=[[Mario]] fighting origami [[Goomba]]s and origami [[Shy Guy]]s in a ring | ||
|image2=PMTOK | |image2=PMTOK Earth Vellumental fight.jpg | ||
|caption2=Mario navigates a puzzle-like ring | |caption2=Mario navigates a puzzle-like ring in a battle against the [[Earth Vellumental]] | ||
}} | }} | ||
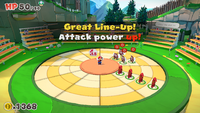
The overworld exploration is quite different from the series' standard; whereas the previous three games were either sorted into individual chapters or levels, ''The Origami King'' switches to a completely open-world style of progression, with Mario being able to travel to any of the game's locales completely on foot like the first two games. The game's combat system has also been overhauled: at the start of each turn, Mario can rotate and slide rings of a circular battle arena, lining up enemies for consecutive attacks, although the number of ring moves and allotted time are limited. Mario has permanent Boots and Hammer attacks | The overworld exploration is quite different from the series' standard; whereas the previous three games were either sorted into individual chapters or levels, ''Paper Mario: The Origami King'' switches to a completely open-world style of progression, with Mario being able to travel to any of the game's locales completely on foot like the first two games. The game's combat system has also been overhauled: at the start of each turn, Mario can rotate and slide rings of a circular battle arena, lining up enemies for consecutive attacks, although the number of ring moves and allotted time are limited. Performing a [[First Strike]] deals preemptive damage to a single enemy, and as Mario's HP increases, First Strikes will be able to defeat certain enemies without going into battle against them. Mario has permanent Boots and Hammer attacks and may equip stronger variants that break after a while, and timed button presses can increase damage when attacking. Lining up the enemies successfully will [[POW-Up|increase Mario's attack power]] by a factor of 1.5. [[Coin]]s can be spent to extend the time limit (at a rate of 10 coins per second), or call the [[Toad (species)|Toad]]s [[List of hidden Toads in Paper Mario: The Origami King|that have been saved]] to assist Mario in battle. Boss battles use a different system in which the player rotates and slides the rings to line up arrows, making a path for Mario to attack. | ||
[[Olivia]], a character new to the franchise, has a role similar to [[Kersti]] and [[Huey]] from ''[[Paper Mario: Sticker Star]]'' and ''[[Paper Mario: Color Splash]]'' respectively. Once a [[Vellumentals|Vellumental]] is defeated, Olivia can transform into the Vellumental while standing on [[Magic Circle]]s, an ability that carries over into battle. Additionally, partners return to ally with Mario and aid him in battles, including [[Bob-omb (Paper Mario: The Origami King)|Bob-omb]] and [[Kamek]]. They will automatically attack enemies after Mario has used up all his given moves, although there is a chance their attacks will be unsuccessful. Various partners join and leave Mario's party at various points in the story. | |||
Accessories grant Mario benefits both in battle and on the overworld. Toads can be found on the overworld, folded into various shapes. Hitting these Toads with the hammer will cause them to unfold and return to [[Toad Town]], some of which open shops. The Toads that have been saved can even help in battle if the player spends coins using the Cheer command. These Toads will fight enemies, heal Mario, give items, and solve puzzles. Mario can gain confetti by using his [[Hammer]] on trees, grass, and enemies. This confetti can be used to fill [[Not-Bottomless Hole]]s torn in the landscape, revealing Coins or restoring objects. | |||
In the settings menu, there is an option to control certain aspects of the game with motion controls or entirely with the controller buttons. This applies to the 1,000-Fold Arms, [[fishing spot|fishing]], and the [[Super Marino]]. Three settings are locked with four question marks. They are unlocked by going to the [[Battle Lab]]. The first unlockable setting offers hints for battles with the [[Puzzle Solver]], the second adds time to each battle's clock with the [[Timer Extender]], and the third lets the player control the amount added. | |||
===Controls=== | ===Controls=== | ||
{|class="wikitable" style="width:40%; text-align:center" | {|class="wikitable"style="width:40%;text-align:center" | ||
|+Field | |+Field | ||
|- | |- | ||
| Line 114: | Line 101: | ||
!width=25%|Controls | !width=25%|Controls | ||
|- | |- | ||
|Check Notes | |Check Notes (with Professor Toad present)<br>Open Sea Chart (in The Great Sea) | ||
|{{button| | |{{button|switch|L}} or {{button|switch|R}} | ||
|- | |- | ||
|Toss Confetti | |Toss Confetti | ||
|{{button| | |{{button|switch|ZL}} or {{button|switch|ZR}} | ||
|- | |- | ||
|Help | |Help | ||
|{{button| | |{{button|switch|MINUS}} | ||
|- | |- | ||
|Menu | |Menu | ||
|{{button| | |{{button|switch|PLUS}} | ||
|- | |- | ||
|Move | |Move | ||
|{{button| | |{{button|switch|LEFTSTICK}} | ||
|- | |- | ||
|Dig | |Dig (with Professor Toad present)<br>Dive underwater (in The Great Sea) | ||
|{{button| | |{{button|switch|PAD|200x}} | ||
|- | |- | ||
|Ask Olivia | |Ask Olivia | ||
|{{button| | |{{button|switch|X}} | ||
|- | |- | ||
|Jump | |Jump | ||
|{{button| | |{{button|switch|A}} | ||
|- | |- | ||
|Hammer | |Hammer | ||
|{{button| | |{{button|switch|B}} | ||
|- | |- | ||
|Items | |Items | ||
|{{button| | |{{button|switch|Y}} | ||
|- | |- | ||
|} | |} | ||
{|class="wikitable"style="width:40%; text-align:center" | |||
{|class="wikitable" style="width:40%; text-align:center" | |||
|+Battles | |+Battles | ||
|- | |- | ||
| Line 155: | Line 138: | ||
!width=25%|Controls | !width=25%|Controls | ||
|- | |- | ||
|Switch | |Switch between Rotate and Slide (lineup phase)<br>Switch between Weapons and Items (attack phase) | ||
|{{button| | |{{button|switch|L}} / {{button|switch|R}} or {{button|switch|ZL}} / {{button|switch|ZR}} | ||
|- | |- | ||
|Help | |Help | ||
|{{button| | |{{button|switch|MINUS}} | ||
|- | |- | ||
|Buy Time | |Buy Time (lineup phase)<br>Change Weapons (attack phase) | ||
|{{button| | |{{button|switch|PLUS}} | ||
|- | |- | ||
|Select | |Select | ||
|{{button| | |{{button|switch|LEFTSTICK}} / {{button|switch|PAD}} | ||
|- | |- | ||
|Change View | |Change View | ||
|{{button| | |{{button|switch|RIGHTSTICK}} | ||
|- | |- | ||
|Hints from Olivia | |Hints from Olivia | ||
|{{button| | |{{button|switch|X}} | ||
|- | |- | ||
|Confirm Action Commands | |Confirm Action Commands | ||
|{{button| | |{{button|switch|A}} | ||
|- | |- | ||
|Flee | |Flee | ||
|{{button| | |{{button|switch|B}} | ||
|- | |- | ||
|Cheers from Toads | |Cheers from Toads | ||
|{{button| | |{{button|switch|Y}} | ||
|} | |||
===Mario's stats=== | |||
<!--Find Origami King HP Icon--> | |||
{|class="wikitable"style="margin:auto;text-align:center" | |||
|- | |||
!width=18%| | |||
!Stat | |||
!Initial value | |||
!Max. value | |||
!Function | |||
|- | |||
|rowspan=6|[[File:PMTOK Mario jumping sprite.png|120px]]<br>[[File:PMCS Eyecatch Mario.png|100px|link=Mario]] | |||
|[[File:PMTOK coin UI icon.png|50px|link=Coin]] | |||
|0 | |||
|999,999 | |||
|The amount of coins Mario currently has. | |||
|- | |||
|[[File:PMTOK Confetti Bag full icon.png|50px|link=Confetti]] | |||
|500 | |||
|2000 | |||
|The amount of confetti Mario can carry, which increases after each [[streamer]] is destroyed. | |||
|- | |||
|[[File:PMCS HP Text.png|50px|link=Heart Point]] | |||
|50 | |||
|{{hover|200|Can be raised in battles with Heart Plus accessories}} | |||
|The maximum health Mario can have. Each multiple of 20 HP reached increases damage by one. | |||
|- | |||
|[[File:Toad Point PMTOK sprite.png|50px|link=Toad Point]] | |||
|0 | |||
|416 | |||
|The number of Toads Mario has rescued, visible after entering the [[Musée_Champignon#Art_Gallery|Art Gallery]]. | |||
|- | |||
|[[File:Boots PMTOK icon.png|50px|link=Jump]] | |||
|3 | |||
|11 | |||
|The amount of damage Mario can do with the jump [[First Strike]]. | |||
|- | |||
|[[File:Hammer PMTOK icon.png|50px|link=Hammer]] | |||
|4 | |||
|12 | |||
|The amount of damage Mario can do with the hammer First Strike. | |||
|} | |||
====Stats after each streamer==== | |||
{|class="wikitable"style="margin:auto;text-align:center" | |||
!width=22%|Streamer<br>destroyed | |||
!width=13%|None | |||
![[File:PMTOK red streamer complete icon.png|60px|Red streamer|link=streamer]] | |||
![[File:PMTOK blue streamer complete icon.png|60px|Blue streamer|link=streamer]] | |||
![[File:PMTOK yellow streamer complete icon.png|60px|Yellow streamer|link=streamer]] | |||
![[File:PMTOK purple streamer complete icon.png|60px|Purple streamer|link=streamer]] | |||
![[File:PMTOK green streamer complete icon.png|60px|Green streamer|link=streamer]] | |||
|-style="height:5.5em"| | |||
!Confetti<br>capacity | |||
|500<br>[[File:PMTOK Confetti Bag empty icon.png|32px]] | |||
|800<br>[[File:PMTOK Confetti Bag low icon.png|32px]] | |||
|1100<br>[[File:PMTOK Confetti Bag low icon.png|32px]] | |||
|1400<br>[[File:PMTOK Confetti Bag big icon.png|32px]] | |||
|1700<br>[[File:PMTOK Confetti Bag big icon.png|32px]] | |||
|2000<br>[[File:PMTOK Confetti Bag full icon.png|32px]] | |||
|} | |} | ||
| Line 192: | Line 234: | ||
===Allies=== | ===Allies=== | ||
====Battle==== | ====Battle==== | ||
{|class="wikitable" style="width:100%; border="4px solid black" background-color:white;" | {|class="wikitable"style="width:100%;border="4px solid black"background-color:white;" | ||
|- | |- | ||
! style="background-color:#74A5ED"|Icon | !style="background-color:#74A5ED"|Icon | ||
! style="background-color:#74A5ED"|Name | !style="background-color:#74A5ED"|Name | ||
! style="background-color:#74A5ED"|Move | !style="background-color:#74A5ED"|Move | ||
! style="background-color:#74A5ED"|Attack power (Normal/[[Ally Tambourine]]) | !style="background-color:#74A5ED"|Attack power (Normal/[[Ally Tambourine]]) | ||
! style="background-color:#74A5ED"|Attack range | !style="background-color:#74A5ED"|Attack range | ||
! style="background-color:#74A5ED"|Availability | !style="background-color:#74A5ED"|Availability | ||
|- | |- | ||
|[[File:Bob-omb PMTOK party icon.png|100px]] | |||
|[[Bob-omb (Paper Mario: The Origami King)|Bob-omb]] | |||
|Bomb Bump | |||
|20/30 | |||
|One enemy | |||
|After boarding the cable car to Autumn Mountain until his sacrifice in Sweetpaper Valley. Unavailable in the Earth Vellumental Temple, Water Vellumental Shrine, Ninja Attraction, and Scuffle Island. | |||
|- | |- | ||
|[[File:Spike PMTOK party icon.png|100px]] | |||
|[[Spike]] | |||
|Up-Chuck | |||
|25 | |||
|Line formation | |||
|After being found in the grassy field in Autumn Mountain, until being brought to the "canned-food par-tay". | |||
|- | |- | ||
|[[File:Bone Goomba PMTOK party icon.png|100px]] | |||
|[[Bone Goomba]] | |||
|Skullbonk | |||
|20 | |||
|One enemy | |||
|After being found in the grassy field in Autumn Mountain, until being brought to the "canned-food par-tay". | |||
|- | |- | ||
|[[File:Professor Toad PMTOK party icon.png|100px]] | |||
|[[Professor Toad]] | |||
|Dig This | |||
|24/36 | |||
|Up to four enemies in any formation | |||
|After defeating [[Mega Paper Macho Pokey]], permanently available in all locations of the yellow streamer area excluding Sweetpaper Valley, Breezy Tunnel, and the Fire Vellumental Cave. | |||
|- | |- | ||
|[[File:Kamek PMTOK party icon.png|100px]] | |||
|[[Kamek]] | |||
|Magic | |||
|38/57 | |||
|Up to four enemies in any formation | |||
|After meeting him in Shangri-Spa, until vanishing in Bowser's Castle. Cannot be taken outside of the green streamer area. Unavailable in the Spring of Jungle Mist and Spring of Rainbows after Bowser Jr. is restored in the latter. Briefly available in Hotfoot Crater until he attempts to stop the Paper Macho Mini Goomba horde. | |||
|- | |- | ||
|[[File:Bowser Jr PMTOK party icon.png|100px]] | |||
|[[Bowser Jr.]] | |||
|Tantrum | |||
|50/75 | |||
|Line formation | |||
|After being restored in the Spring of Rainbows, until arriving in the great hall of Bowser's Castle. Cannot be taken outside of the green streamer area. Unavailable in the Spring of Jungle Mist and Spring of Rainbows. Briefly available in Hotfoot Crater until he attempts to stop the Paper Macho Mini Goomba horde. | |||
|- | |- | ||
|[[File:Bowser folded PMTOK party icon.png|100px]] | |||
|[[Bowser]] | |||
|Fire Breath | |||
|50/75<br>25/37 (Fire Bros)<br>75/112 (Ice Bros) | |||
|Line formation | |||
|After being saved in Peach's Castle until escaping the castle, available again in Peach's Castle/Origami Castle after escaping from Hotfoot Crater. Only available in the last two rooms of the castle after being unfolded. | |||
|} | |} | ||
====Other==== | ====Other==== | ||
<gallery widths=88px heights=88px> | <gallery widths=88px heights=88px> | ||
Olivia PMTOK party icon.png|'''[[Olivia]]''' - Mario's main ally | Olivia PMTOK party icon.png|'''[[Olivia]]''' - Mario's main ally, who gives him hints and grants him the power to use the [[1,000-Fold Arms]] | ||
Luigi PMTOK party icon.png|'''[[Luigi]]''' - Mario's follower at [[Mushroom Island]] and Peach's Castle | Luigi PMTOK party icon.png|'''[[Luigi]]''' - Mario's follower at [[Mushroom Island]] and Peach's Castle | ||
Toad faceless PMTOK sprite.png|'''Faceless [[Toad (species)|Toads]]'''{{footnote|main|2}} - Forty of Mario's followers in the [[Temple of Shrooms]] right before the fight with [[Hole Punch]] | Toad faceless PMTOK sprite.png|'''Faceless [[Toad (species)|Toads]]'''{{footnote|main|2}} - Forty of Mario's followers in the [[Temple of Shrooms]] right before the fight with [[Hole Punch]] | ||
| Line 263: | Line 305: | ||
===Supporting=== | ===Supporting=== | ||
{|class="wikitable" style="width:100%; border="4px solid black" background-color:white;" | {|class="wikitable"style="width:100%;border="4px solid black"background-color:white;" | ||
|- | |- | ||
! style="background-color:#74A5ED"|Image | !style="background-color:#74A5ED"|Image | ||
! style="background-color:#74A5ED"|Name | !style="background-color:#74A5ED"|Name | ||
! style="background-color:#74A5ED"|Description | !style="background-color:#74A5ED"|Description | ||
|- | |- | ||
|[[File:PMTOK Peach sprite.png|100px]] | |[[File:PMTOK Peach sprite.png|100px]] | ||
|[[Princess Peach]] | |[[Princess Peach]] | ||
|Invites Mario to the Origami Festival | |Invites Mario to the Origami Festival but is later folded by King Olly. In origami form, Princess Peach asks Mario if he thinks Toads should be destroyed and wiped out, then banishes him to the castle's dungeon. She reappears to introduce Mario to [[Origami Castle]] and appears in regular paper form after Olly is defeated. | ||
|- | |- | ||
|[[File:Whispering Tree | |[[File:PMTOK Whispering Tree.png|100px]] | ||
|style="white-space:nowrap"|[[Whispering Tree]]s | |style="white-space:nowrap"|[[Whispering Tree]]s | ||
|Many sentient trees that inhabit the [[Whispering Woods]]. They comment on Mario's activities while he explores. | |Many sentient trees that inhabit the [[Whispering Woods]]. They comment on Mario's activities while he explores. They can be hit for confetti. | ||
|- | |- | ||
|[[File:Ol Grandsappy | |[[File:PMTOK Ol Grandsappy.png|100px]] | ||
|[[Ol' Grandsappy]] | |[[Ol' Grandsappy]] | ||
|An old tree stump who lives in the Whispering Woods. He needs the [[Soul Seed]] to be revitalized, and after such, sings [[Happy & Sappy|a song]] and grows into a taller, younger form known as Sweet Sap Loggins. | |An old tree stump who lives in the Whispering Woods. He needs the [[Soul Seed]] to be revitalized, and after such, sings [[Happy & Sappy|a song]] and grows into a taller, younger form known as Sweet Sap Loggins. | ||
|- | |- | ||
|[[File:Sap Sisters.png|100px]] | |[[File:PMTOK Sap Sisters.png|100px]] | ||
|[[Sap Sisters]] | |[[Sap Sisters]] | ||
|Three female Whispering Trees who watch over Ol' Grandsappy. They serve as backup singers in his song. | |Three female Whispering Trees who watch over Ol' Grandsappy. They serve as backup singers in his song. | ||
| Line 287: | Line 329: | ||
|[[File:Chain Chomp PMTOK sprite.png|100px]] | |[[File:Chain Chomp PMTOK sprite.png|100px]] | ||
|[[Princess (Paper Mario: The Origami King)|Princess]] | |[[Princess (Paper Mario: The Origami King)|Princess]] | ||
|A Chain Chomp who resides in the petting zoo at Shogun Studios. While Princess is initially vicious, she calms | |A Chain Chomp who resides in the petting zoo at Shogun Studios. While Princess is initially vicious, she calms down once Mario gives her a Bone, and Olivia pets her. | ||
|- | |- | ||
|[[File:PMTOK Birdo sprite.png|100px]] | |[[File:PMTOK Birdo sprite.png|100px]] | ||
|[[Birdo]] | |[[Birdo]] | ||
|An infrequently | |An infrequently appearing character, Birdo is first seen being dropped into the spring in the Whispering Woods. She plays a major role in [[Big Sho' Theater]], acting in a play involving two [[Paper Macho Koopa Troopa]] gangs fighting over her. Birdo also appears in the cafe at the [[Spring of Rainbows]] when Mario orders the "special." | ||
|} | |} | ||
====Toads==== | ====Toads==== | ||
{|class="wikitable" style="width:100%; border="4px solid black" background-color:white;" | {|class="wikitable"style="width:100%;border="4px solid black"background-color:white;" | ||
|- | |- | ||
! style="background-color:#74A5ED"|Image | !style="background-color:#74A5ED"|Image | ||
! style="background-color:#74A5ED"|Name | !style="background-color:#74A5ED"|Name | ||
! style="background-color:#74A5ED"|Description | !style="background-color:#74A5ED"|Description | ||
|- | |- | ||
|[[File:Musee Champignon owner PMTOK sprite.png|100px]] | |[[File:Musee Champignon owner PMTOK sprite.png|100px]] | ||
| Line 323: | Line 365: | ||
|[[File:Chef Kinopio PMTOK sprite.png|100px]] | |[[File:Chef Kinopio PMTOK sprite.png|100px]] | ||
|[[Chef Kinopio]] | |[[Chef Kinopio]] | ||
|A Toad who runs the cafe on [[Overlook Tower]]. He cowers between boxes until Mario has defeated all the [[ | |A Toad who runs the cafe on [[Overlook Tower]]. He cowers between boxes until Mario has defeated all the [[Mini Goomba]]s, then rewards him with a bag of confetti. | ||
|- | |- | ||
|[[File:Toad Researcher PMTOK sprite.png|100px]] | |[[File:Toad Researcher PMTOK sprite.png|100px]] | ||
| Line 371: | Line 413: | ||
|[[File:Shangri-Spa Toad PMTOK sprite.png|100px]] | |[[File:Shangri-Spa Toad PMTOK sprite.png|100px]] | ||
|[[Shangri-Spa Toad]] | |[[Shangri-Spa Toad]] | ||
|Toads resembling angels who are found in [[Shangri-Spa]]. When Bowser's Castle crashes into the spa and destroys their banquet hall, they put Bowser's minions to work | |Toads resembling angels who are found in [[Shangri-Spa]]. When Bowser's Castle crashes into the spa and destroys their banquet hall, they put Bowser's minions to work to pay off the damages. | ||
|} | |} | ||
| Line 377: | Line 419: | ||
<gallery widths=88px heights=88px> | <gallery widths=88px heights=88px> | ||
Goomba PMTOK sprite.png|[[Goomba]]s | Goomba PMTOK sprite.png|[[Goomba]]s | ||
Goomba costume PMTOK sprite.png|A Goomba wearing a {{wp| | Goomba costume PMTOK sprite.png|A Goomba wearing a {{wp|nihongami|katsura}} | ||
Shy Guy PMTOK sprite.png|[[Shy Guy]]s (Red) | Shy Guy PMTOK sprite.png|[[Shy Guy]]s (Red) | ||
Emcee Shy Guy PMTOK sprite.png|[[Emcee Shy Guy]] | Emcee Shy Guy PMTOK sprite.png|[[Emcee Shy Guy]] | ||
| Line 387: | Line 429: | ||
Koopa Troopa costume PMTOK sprite.png|A Koopa Troopa with a white mustache and goatee, hat, and staff | Koopa Troopa costume PMTOK sprite.png|A Koopa Troopa with a white mustache and goatee, hat, and staff | ||
PMTOK Monty Mole Sprite.png|[[Monty Mole]]s | PMTOK Monty Mole Sprite.png|[[Monty Mole]]s | ||
Monty Mole auctioneer PMTOK sprite.png|[[Monty Mole auctioneer]] | |||
PMTOK Dry Bones sprite.png|[[Dry Bones]] | PMTOK Dry Bones sprite.png|[[Dry Bones]] | ||
Sombrero Guy PMTOK sprite.png|[[Sombrero Guy]]s | Sombrero Guy PMTOK sprite.png|[[Sombrero Guy]]s | ||
| Line 401: | Line 444: | ||
===[[Folded Soldiers]]=== | ===[[Folded Soldiers]]=== | ||
{| | {| | ||
|style="vertical-align:top; width:180px"| | |style="vertical-align:top;width:180px"| | ||
*'''Red streamer''' | *'''Red streamer''' | ||
**[[Goomba]] | **[[Goomba]] | ||
| Line 412: | Line 455: | ||
**[[Koopa Troopa]] | **[[Koopa Troopa]] | ||
**[[Mechakoopa]] | **[[Mechakoopa]] | ||
|style="vertical-align:top; width:180px"| | |style="vertical-align:top;width:180px"| | ||
*'''Blue streamer''' | *'''Blue streamer''' | ||
**[[Spiny]] | **[[Spiny]] | ||
| Line 429: | Line 471: | ||
**[[Scaredy Rat]] | **[[Scaredy Rat]] | ||
**[[Mechakoopa]] | **[[Mechakoopa]] | ||
|style="vertical-align:top; width:180px"| | |style="vertical-align:top;width:180px"| | ||
*'''Yellow streamer''' | *'''Yellow streamer''' | ||
**Goomba | **Goomba | ||
| Line 449: | Line 490: | ||
**[[Shoe Goomba]] | **[[Shoe Goomba]] | ||
**Mechakoopa | **Mechakoopa | ||
|style="vertical-align:top; width:180px"| | |style="vertical-align:top;width:180px"| | ||
*'''Purple streamer''' | *'''Purple streamer''' | ||
**Goomba | **Goomba | ||
| Line 479: | Line 519: | ||
**[[Sledge Bro]] | **[[Sledge Bro]] | ||
**Mechakoopa | **Mechakoopa | ||
|style="vertical-align:top; width:180px"| | |style="vertical-align:top;width:180px"| | ||
*'''Green streamer''' | *'''Green streamer''' | ||
**Goomba | **Goomba | ||
| Line 507: | Line 546: | ||
**[[Big Cutout Soldier]] | **[[Big Cutout Soldier]] | ||
**[[Li'l Cutout Soldier]] | **[[Li'l Cutout Soldier]] | ||
|style="vertical-align:top; width:180px"| | |style="vertical-align:top;width:180px"| | ||
*'''Origami Castle''' | *'''Origami Castle''' | ||
**Goomba | **Goomba | ||
**Koopa Troopa | **Koopa Troopa | ||
**Spiny | |||
**Ninji | |||
**Buzzy Beetle | |||
**Hammer Bro | **Hammer Bro | ||
**Boomerang Bro | **Boomerang Bro | ||
| Line 518: | Line 559: | ||
**Sledge Bro | **Sledge Bro | ||
**Sumo Bro | **Sumo Bro | ||
|style="vertical-align:top; width:180px"| | **Mechakoopa | ||
|style="vertical-align:top;width:180px"| | |||
===[[Paper Macho Soldier]]s=== | ===[[Paper Macho Soldier]]s=== | ||
*[[Paper Macho Goomba]] | *[[Paper Macho Goomba]] | ||
| Line 543: | Line 584: | ||
===Bosses=== | ===Bosses=== | ||
====Vellumentals==== | ====Vellumentals==== | ||
The [[Vellumentals]] are a group of four mid-bosses. After defeating one, it releases a [[Bibliofold]] that Olivia reads to learn how to fold herself into the Vellumental. | The [[Vellumentals]] are a group of four bosses that act as mid-bosses for their respective streamers. After defeating one, it releases a [[Bibliofold]] that Olivia reads to learn how to fold herself into the Vellumental. | ||
{|class="wikitable" style="width:100%; border="4px solid black" background-color:white;" | {|class="wikitable"style="width:100%;border="4px solid black"background-color:white;" | ||
|- | |- | ||
! style="background-color:#74A5ED"|Image | !style="background-color:#74A5ED"|Image | ||
! style="background-color:#74A5ED"|Name | !style="background-color:#74A5ED"|Name | ||
! style="background-color:#74A5ED"|Description | !style="background-color:#74A5ED"|Description | ||
|- | |- | ||
|[[File: | |[[File:PMTOK Earth Vellumental.png|200px]] | ||
|[[Earth Vellumental]] | |[[Earth Vellumental]] | ||
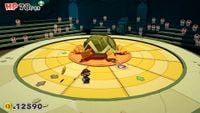
|A giant quadrupedal turtle that can spew sand and manipulate earth, similar to the {{wp|Black Tortoise}}. It is fought in the [[Earth Vellumental Temple]]. To defeat it, Mario must hammer each of its limbs, then its tail. It flips over and is vulnerable to [[1,000-Fold Arms]] attacks. | |A giant quadrupedal turtle that can spew sand and manipulate earth, similar to the {{wp|Black Tortoise}}. It is fought in the [[Earth Vellumental Temple]]. To defeat it, Mario must hammer each of its limbs, then its tail. It flips over and is vulnerable to [[1,000-Fold Arms]] attacks. | ||
|- | |- | ||
|[[File: | |[[File:PMTOK Water Vellumental.png|200px]] | ||
|[[Water Vellumental]] | |[[Water Vellumental]] | ||
|A water-spouting dragon similar to the {{wp|Azure Dragon}}, found in the [[Water Vellumental Shrine]]. It absorbs more water each round | |A water-spouting dragon similar to the {{wp|Azure Dragon}}, found in the [[Water Vellumental Shrine]]. It absorbs more water each round and eventually charges up a big wave attack, which Mario can avoid by using Olivia's Earth Vellumental's ability. The Water Vellumental is weak to jump attacks, which cause it to collapse and make it vulnerable to hammers. | ||
|- | |- | ||
|[[File: | |[[File:PMTOK Fire Vellumental.png|200px]] | ||
|[[Fire Vellumental]] | |[[Fire Vellumental]] | ||
|A phoenix similar to the {{wp|Vermilion Bird}}, located in the [[Fire Vellumental Cave]]. Each round, it sheds some of its burning feathers onto the arena, and Mario takes damage if he walks over them. The Water Vellumental's ability can extinguish the feathers and make the Fire Vellumental vulnerable to the 1,000-Fold Arms. | |A phoenix similar to the {{wp|Vermilion Bird}}, located in the [[Fire Vellumental Cave]]. Each round, it sheds some of its burning feathers onto the arena, and Mario takes damage if he walks over them. The Water Vellumental's ability can extinguish the feathers and make the Fire Vellumental vulnerable to the 1,000-Fold Arms. | ||
|- | |- | ||
|[[File: | |[[File:PMTOK Ice Vellumental.png|200px]] | ||
|[[Ice Vellumental]] | |[[Ice Vellumental]] | ||
|A giant polar bear with large claws similar to the {{wp|White Tiger (mythology)|White Tiger}}. It resides in the [[Ice Vellumental Mountain]] on [[Diamond Island]]. It can freeze panels on the arena and make them unusable, only thawing with the Fire Vellumental's power or through sliding them. When it is low on health, the Ice Vellumental uses its Ice Maze ability, creating slush on the board and forcing Mario to navigate it to reach the 1,000-Fold Arms panel. | |A giant polar bear with large claws similar to the {{wp|White Tiger (mythology)|White Tiger}}. It resides in the [[Ice Vellumental Mountain]] on [[Diamond Island (Paper Mario: The Origami King)|Diamond Island]]. It can freeze panels on the arena and make them unusable, only thawing with the Fire Vellumental's power or through sliding them. When it is low on health, the Ice Vellumental uses its Ice Maze ability, creating slush on the board and forcing Mario to navigate it to reach the 1,000-Fold Arms panel. | ||
|} | |} | ||
====Legion of Stationery==== | ====Legion of Stationery==== | ||
The [[Legion of Stationery]] are sentient tools. They guard the ends of each streamer, besides Stapler. Notably, each member of the Legion of Stationery has a color representing the streamer they guard, such as [[Colored Pencils]] guarding the red streamer spool and having a red lid. | The [[Legion of Stationery]] are sentient tools. They guard the ends of each [[streamer]] and act as the primary bosses for their respective streamers, besides Stapler. Notably, each member of the Legion of Stationery has a color representing the streamer they guard, such as [[Colored Pencils]] guarding the red streamer spool and having a red lid. | ||
{|class="wikitable" style="width:100%; border="4px solid black" background-color:white;" | {|class="wikitable"style="width:100%;border="4px solid black"background-color:white;" | ||
|- | |- | ||
! style="background-color:#74A5ED"|Image | !style="background-color:#74A5ED"|Image | ||
! style="background-color:#74A5ED"|Name | !style="background-color:#74A5ED"|Name | ||
! style="background-color:#74A5ED"|Description | !style="background-color:#74A5ED"|Description | ||
|- | |- | ||
|[[File:PMTOK Colored Pencils. | |[[File:PMTOK Colored Pencils.jpg|200px]] | ||
|[[Colored Pencils]] | |[[Colored Pencils]] (The Missile Maestro) | ||
|The guardian of the red streamer | |The guardian of the red streamer fought on [[Overlook Tower]]. Colored Pencils has crosshairs on its battle arena, firing pencil missiles at Mario if he crosses them. To defeat it, Mario has to navigate behind it and slam its lid shut with the 1,000-Fold Arms or a hammer attack. When it has taken enough damage, Colored Pencils charges a Rainbow Roll attack. Mario must grab the pencils and slam them into the case to defeat the boss. | ||
|- | |- | ||
|[[File:PMTOK Rubber Band.png|200px]] | |[[File:PMTOK Rubber Band.png|200px]] | ||
|[[Rubber Band]] | |[[Rubber Band]] (The Elastic Entertainer) | ||
|A yellow rubber band wrapped in many other rubber bands. It guards the blue streamer at [[Big Sho' Theater]]. Rubber Band shoots its rubber bands on the arena, pushing Mario if he walks over them. To defeat the boss, Mario must get close to it and use the 1,000-Fold Arms to pull bands off of its head; using regular attacks removes the rubber bands, but Rubber Band pulls them back onto its body to nullify the attack. | |A yellow rubber band wrapped in many other rubber bands. It guards the blue streamer at [[Big Sho' Theater]]. Rubber Band shoots its rubber bands on the arena, pushing Mario if he walks over them. To defeat the boss, Mario must get close to it and use the 1,000-Fold Arms to pull bands off of its head; using regular attacks removes the rubber bands, but Rubber Band pulls them back onto its body to nullify the attack. | ||
|- | |- | ||
|[[File:PMTOK Hole Punch.png|200px]] | |[[File:PMTOK Hole Punch.png|200px]] | ||
|[[Hole Punch]] | |[[Hole Punch]] (The Disco Devil) | ||
|The guardian of the yellow streamer in the [[Temple of Shrooms]]. Hole Punch can punch out panels on the board, trapping Mario if he falls in the holes. Additionally, it can remove parts of Mario's body, lowering his maximum HP. Hitting the backside of Hole Punch frees some of the holes it has removed. To defeat Hole Punch, Mario has to peel off its lid with the 1,000-Fold Arms. | |The guardian of the yellow streamer in the [[Temple of Shrooms]]. Hole Punch can punch out panels on the board, trapping Mario if he falls in the holes. Additionally, it can remove parts of Mario's body, lowering his maximum HP. Hitting the backside of Hole Punch frees some of the holes it has removed. To defeat Hole Punch, Mario has to peel off its lid with the 1,000-Fold Arms. | ||
|- | |- | ||
|[[File:PMTOK Tape.png|200px]] | |[[File:PMTOK Tape.png|200px]] | ||
|[[Tape (boss)|Tape]] | |[[Tape (boss)|Tape]] (The Shifty Sticker) | ||
|Tape is the boss of the purple streamer area, found on top of the [[Sea Tower]]. Mario must destroy its dispenser with hammer attacks, reducing the boss to just the roll of tape. It then rolls around the arena, taping together panels to prevent them from being slid, and taping certain rings so they are rotated together. The tape can be removed with the Fire Vellumental's ability. When using the 1,000-Fold Arms, Mario flips Tape upside down and pulls the tape away. | |Tape is the boss of the purple streamer area, found on top of the [[Sea Tower]]. Mario must destroy its dispenser with hammer attacks, reducing the boss to just the roll of tape. It then rolls around the arena, taping together panels to prevent them from being slid, and taping certain rings so they are rotated together. The tape can be removed with the Fire Vellumental's ability. When using the 1,000-Fold Arms, Mario flips Tape upside down and pulls the tape away. | ||
|- | |- | ||
|[[File:PMTOK Scissors.png|200px]] | |[[File:PMTOK Scissors.png|200px]] | ||
|[[Scissors (boss)|Scissors]] | |[[Scissors (boss)|Scissors]] (The Dual-Bladed Duelist) | ||
|Scissors is the last streamer boss, fought in [[Bowser's Castle]] at the green streamer. At first, Scissors has its blades covered | |Scissors is the last streamer boss, fought in [[Bowser's Castle]] at the green streamer. At first, Scissors has its blades covered and warns Mario not to break them. After taking enough damage, it unsheathes on its own, and Mario instantly gets a [[Game Over]] if he jumps on it. Scissors will also remove panels from the board by cutting them apart. To damage Scissors, Mario must freeze it with the Ice Vellumental power, then use the 1,000-Fold Arms to break the ice chunk. | ||
|- | |- | ||
|[[File:PMTOK Stapler.png|200px]] | |[[File:PMTOK Stapler.png|200px]] | ||
|[[Stapler (boss)|Stapler]] | |[[Stapler (boss)|Stapler]] (The Fanged Fastener) | ||
|Unlike the other Legion of Stationary bosses, Stapler does not guard a streamer, instead being fought in [[Origami Castle]] before [[King Olly]]. Stapler attempts to staple Mario the board, preventing him from moving and allowing it to deal more damage. When attacked, Stapler loses some of its staples. Eventually, it fires all of its staples in succession at Mario, being equipped with a stronger tier of staples afterwards. Stapler is weak to the 1,000-Fold Arms, which can remove over half of its staples. | |Unlike the other Legion of Stationary bosses, Stapler does not guard a streamer, instead being fought in [[Origami Castle]] before [[King Olly]]. Stapler attempts to staple Mario on the board, preventing him from moving and allowing it to deal more damage. When attacked, Stapler loses some of its staples. Eventually, it fires all of its staples in succession at Mario, being equipped with a stronger tier of staples afterwards. Stapler is weak to the 1,000-Fold Arms, which can remove over half of its staples. | ||
|} | |} | ||
====Other==== | ====Other==== | ||
{|class="wikitable" style="width:100%; border="4px solid black" background-color:white;" | {|class="wikitable"style="width:100%;border="4px solid black"background-color:white;" | ||
|- | |- | ||
! style="background-color:#74A5ED"|Image | !style="background-color:#74A5ED"|Image | ||
! style="background-color:#74A5ED"|Name | !style="background-color:#74A5ED"|Name | ||
! style="background-color:#74A5ED"|Description | !style="background-color:#74A5ED"|Description | ||
|- | |- | ||
|[[File: | |[[File:PMTOK Boss Sumo Bro appears.png|200px]] | ||
|[[Boss Sumo Bro]] | |[[Boss Sumo Bro]] | ||
|Boss Sumo Bro guards [[Bowser's Castle]] and is fought in [[Shangri-Spa]]. It fights alongside six [[Sumo Bro]]s.: four who have stolen panels on the arena and two who ride on thunderclouds. When Mario defeats the four Sumo Bros., the Boss Sumo Bro and the other two thundercloud Sumo Bros. drop down onto the arena and charge a thunder attack. They can be defeated with the Earth and Fire Vellumental powers. | |Boss Sumo Bro guards [[Bowser's Castle]] and is fought in [[Shangri-Spa]] as the first mid-boss for the green streamer. It fights alongside six [[Sumo Bro]]s.: four who have stolen panels on the arena and two who ride on thunderclouds. When Mario defeats the four Sumo Bros., the Boss Sumo Bro and the other two thundercloud Sumo Bros. drop down onto the arena and charge a thunder attack. They can be defeated with the Earth and Fire Vellumental powers. | ||
|- | |- | ||
|[[File:Handaconda.png|200px]] | |[[File:Handaconda.png|200px]] | ||
|[[Handaconda]] | |[[Handaconda]] | ||
|Handaconda is a black, cutout hand that is fought in Bowser's Castle. It harms Mario when jumped on, and can only be attacked while in the second and third rows of rings. Mid-battle, Handaconda transforms panels into Rock-Paper-Scissors icons. When Mario wins the match, he uses a rush attack on Handaconda to damage it. | |Handaconda is a black, cutout hand that is fought in Bowser's Castle, acting as the second mid-boss for the green streamer. It harms Mario when jumped on, and can only be attacked while in the second and third rows of rings. Mid-battle, Handaconda transforms panels into Rock-Paper-Scissors icons. When Mario wins the match, he uses a rush attack on Handaconda to damage it. | ||
|- | |- | ||
|[[File:PMOK King Olly Final Form.png|200px]] | |[[File:PMOK King Olly Final Form.png|200px]] | ||
|[[King Olly]] | |[[King Olly]] | ||
|King Olly is the game's main antagonist and final boss, battled in [[Origami Castle]]. In his first phase, he transforms into the Vellumentals and must be countered with Olivia's Vellumental powers. In the second phase, he turns into | |King Olly is the game's main antagonist and final boss, battled in [[Origami Castle]]. In his first phase, he transforms into the Vellumentals and must be countered with Olivia's Vellumental powers. In the second phase, he turns into origami sumo, and Olivia transforms Bowser to help fight him. Mario must run around the arena and use the 1,000-Fold Arms to pound the ground where Bowser is, allowing him to overpower Olly and push him off the edge. In the third phase, Olivia uses a special Magic Circle that Olly scrambles. Mario must arrange the circle while Olly attacks him every five seconds; Mario can dodge these attacks with proper timing. Finally, Olivia turns into the Olivia Hammer, and Mario must rush attack Olly to send him off the arena and defeat him. | ||
|} | |||
==Obstacles== | |||
{|class="wikitable"style="width:100%;border="4px solid black"background-color:white;" | |||
|- | |||
!style="background-color:#74A5ED"|Image | |||
!style="background-color:#74A5ED"|Name | |||
!style="background-color:#74A5ED"|Description | |||
|- | |||
|[[File:PMTOK Basin.png|128px]] | |||
|[[Basin (Thing)|Basin]] | |||
|An obstacle appearing in [[Trial of Courage]]. | |||
|- | |||
|[[File:PMTOK River Boulder.png|128px]] | |||
|[[Boulder]] | |||
|Large rocks that fall from above and land in [[Eddy River]]. They cause Mario to take damage if he steers the boat into one. | |||
|- | |||
|[[File:PMTOK Chestnut.png|128px]] | |||
|[[Chestnut]] | |||
|Obstacles found in [[Chestnut Valley]], often rolling down hills. | |||
|- | |||
|[[File:Bois.jpg|128px]] | |||
|{{conjectural|Driftwood}} | |||
|Obstacles found in Eddy River that cause Mario to take damage if he steers the boat into one. | |||
|- | |||
|[[File:PMOK Run Away.png|128px]] | |||
|{{conjectural|Earth Vellumental stone}} | |||
|Large, shell-shaped obstacles that come in big and small variants, which act as a boulder and are equipped with flamethrowers respectively. | |||
|- | |||
|[[File:PMTOK Collectible Treasure 72 (Fire Vellumental Statue).jpg|128px]] | |||
|Fire Vellumental statue | |||
|Bird statues that acts as either flamethrowers or pivot to crush Mario, found throughout the [[Fire Vellumental Cave]]. During the battles against Mini Paper Macho Shy Guys a statue head will appear to incinerate a [[Mushroom]] should Mario attempt to use one, though after the battle these statues will reward Mario with a [[Heart (item)|Heart]]. | |||
|- | |||
|[[File:PMTOK Mountain Icicles.png|128px]] | |||
|[[Icicle]] | |||
|Frozen water drops that fall caused by a [[Sledge Bro]] appearing in [[Ice Vellumental Mountain]]. [[Huge Icicle]]s act as platforms after falling. | |||
|- | |||
|[[File:PMTOK The Princess Peach Question Block 2.png|128px]] | |||
|[[Goop|Ink]] | |||
|A thick and slimy residue that slows down Mario. Also produced by [[Paper Macho Gooper Blooper]]. | |||
|- | |||
|[[File:PMTOK Hotfoot Crater.jpg|128px]] | |||
|[[Lava]] | |||
|Molten rock found in [[Fire Vellumental Cave]], [[Sea Tower]] and [[Hotfoot Crater]] that damages Mario. | |||
|- | |||
|[[File:PMTOK Whispering Woods Not-Bottomless Hole 1.jpg|128px]] | |||
|[[Not-Bottomless Hole]] | |||
|Falling causes Mario to lose seven HP. Covering it with confetti usually rewards the player with coins. | |||
|- | |||
|[[File:PMTOK Mistake Skull.png|128px]] | |||
|{{conjectural|Paper Mistake Dry Bones skull}} | |||
|Summoned by [[Paper Mistake Buzzy Beetle]]. It flies towards Mario and circles him, eventually targeting him after stalling long enough. The red variants are faster than their regular variants. It can be destroyed by hitting it with a hammer. | |||
|- | |||
|[[File:PMTOK Fortune Teller.png|128px]] | |||
|{{conjectural|Paper fortune teller}} | |||
|An obstacle that resembles paper fortune tellers found in [[Origami Castle]]. Falling into them causes Mario to lose 100 HP or a Game Over if his HP is less than that amount. Some can levitate after King Olly redirects the paths. | |||
|- | |||
|[[File:PMTOK Quicksand.png|128px]] | |||
|[[Quicksand]] | |||
|Found in the [[Trial of Wisdom]] if Mario chooses the wrong answer. | |||
|- | |||
|[[File:RotatingBridge.jpg|128px]] | |||
|{{conjectural|Rotating bridge}} | |||
|A bridge that rotates, causing Mario to fall. They are spun by [[Sumo Bro]]s in [[Origami Castle]]. | |||
|- | |||
|[[File:PMTOK Earth Vellumental Temple Collectible Treasure 1.png|128px]]<br>[[File:PMTOK Temple of Shrooms Not-Bottomless Hole 3.png|128px]]<br>[[File:PMTOK Ice Vellumental Mountain Not-Bottomless Holes 1-4.png|128px]]<br>[[File:PMTOK Ninja Attraction Toad Signs 6.png|128px]] | |||
|[[Spike Trap|Spikes]] | |||
|Pointy obstacles that damage Mario. Retractable spikes are found in the [[Ninja Attraction]] with some revealing Ninja Toads. | |||
|- | |||
|[[File:SpringofRainbowsHoleA.jpg|128px]] | |||
|{{conjectural|Steam spout}} | |||
|Blows Mario back. One large spout blows on a platform leading to the treasure chest. | |||
|- | |||
|[[File:PMTOK shuriken.png|128px]] | |||
|[[Throwing Star]] | |||
|A projectile mainly thrown by [[Ninji]]s. A purple one is summoned by King Olly during the second phase of his battle. | |||
|- | |||
|[[File:PMTOK Tornado.png|128px]] | |||
|[[Tornado]] | |||
|A vortex of desert winds that appears during the [[Mega Paper Macho Pokey]] battle. | |||
|- | |||
|[[File:PMTOK Whirlpool (small).png|128px]] | |||
|[[Whirlpool]] | |||
|Rapid rotating mass of water found in Eddy River. | |||
|- | |||
|[[File:PMTOK Spring of Rainbows Block 2.jpg|128px]] | |||
|[[Wind]] | |||
|Blows Mario away. It can only be avoided if Mario holds onto a chain. | |||
|} | |} | ||
| Line 622: | Line 752: | ||
*[[Cheep Cheep]]s: Fish swimming at [[Overlook Mountain]], the [[Shogun Studios]] moat, and [[the Great Sea]] that can be fished at fishing spots. | *[[Cheep Cheep]]s: Fish swimming at [[Overlook Mountain]], the [[Shogun Studios]] moat, and [[the Great Sea]] that can be fished at fishing spots. | ||
**[[Big Cheep Cheep]]s: Rare fish that can be fished and recorded in the museum. A [[Legendary Cheep Cheep|legendary one]] can also be fished out at the Great Sea. | **[[Big Cheep Cheep]]s: Rare fish that can be fished and recorded in the museum. A [[Legendary Cheep Cheep|legendary one]] can also be fished out at the Great Sea. | ||
*[[ | *[[Thwomp]]: Can crush Mario when he gets a fortune cookie at [[Picnic Road]]. Another one drops on him in the final test at the [[Trial of Courage]]. | ||
*[[Blooper]]s: | *[[Blooper]]s: Squid swimming at [[the Great Sea]] that can be fished at fishing spots. | ||
**[[Big Blooper]]s: Rare squid that can be fished and recorded in the museum. A [[Legendary Blooper|legendary one]] can also be fished out at the Great Sea. Additionally, a Big Blooper with a sign appears to block Mario if he goes to the edges of the Great Sea. | **[[Big Blooper]]s: Rare squid that can be fished and recorded in the museum. A [[Legendary Blooper|legendary one]] can also be fished out at the Great Sea. Additionally, a Big Blooper with a sign appears to block Mario if he goes to the edges of the Great Sea. | ||
*[[Bullet Bill]]s: Bullets fired from Bowser's airship. | *[[Bullet Bill]]s: Bullets fired from Bowser's airship. | ||
| Line 635: | Line 765: | ||
*[[Whale]]s: Minor, harmless characters found in the Great Sea. | *[[Whale]]s: Minor, harmless characters found in the Great Sea. | ||
*[[Whistle Snifit]]s: NPCs found in the cafe at the Spring of Rainbows. | *[[Whistle Snifit]]s: NPCs found in the cafe at the Spring of Rainbows. | ||
*[[Paper Plane Squadron]]: A fleet of paper planes dispatched to prevent Bowser's airship reaching [[Peach's Castle]]. | |||
**'''Blue:''' Flies in one direction targeting the airship. | |||
**'''Light-blue:''' Flies in a zigzag pattern. | |||
**'''Black:''' Launched by the purple paper plane. Shares similarities with the blue paper airplane. | |||
**'''Purple:''' The boss of the Paper Plane Squadron. Fires black paper airplanes. Once damaged, it will attempt to fly straight into the airship. | |||
**'''Giant:''' Largest paper airplane of the Paper Plane Squadron. Collides into the airship, causing it to miss its destination. It is the only paper plane that cannot be fought. | |||
==Locations== | ==Locations== | ||
===Red streamer=== | ===Red streamer=== | ||
{| border=1 cellspacing=0 cellpadding=3 style="border-collapse:collapse" | {|border=1 cellspacing=0 cellpadding=3 style="border-collapse:collapse" | ||
|-style="color:black;background:lightgray" | |-style="color:black;background:lightgray" | ||
!width="2%"|Name | !width="2%"|Name and description | ||
!width="2%"|Image | !width="2%"|Image | ||
!width="1%"|Bosses | !width="1%"|Bosses | ||
!width="1%"|Enemies | !width="1%"|Enemies | ||
!width="1%"|# of [[ | !width="1%"|# of [[List of hidden Toads in Paper Mario: The Origami King|Toads]] | ||
!width="1%"|# of [[Not-Bottomless Hole]]s | !width="1%"|# of [[Not-Bottomless Hole]]s | ||
!width="1%"|# of [[ | !width="1%"|# of [[List of Collectible Treasures in Paper Mario: The Origami King|Collectible Treasures]] | ||
!width="1%"|# of [[? | !width="1%"|# of [[List of ? Blocks in Paper Mario: The Origami King|? Blocks]] | ||
|- | |- | ||
|<center>'''[[Whispering Woods]]'''<br><br>A lush, green forest in the mountains, which contains sentient trees.</center> | |<center>'''[[Whispering Woods]]'''<br><br>A lush, green forest in the mountains, which contains sentient trees.</center> | ||
|<center>[[File: | |<center>[[File:PMTOK Mario in Whispering Woods.png|250px]]</center> | ||
|<center>-</center> | |<center>-</center> | ||
|<center>[[Goomba]]s</center> | |<center>[[Goomba]]s</center> | ||
| Line 661: | Line 797: | ||
|<center>[[File:PMTOK Toad Town entry.jpg|250px]]</center> | |<center>[[File:PMTOK Toad Town entry.jpg|250px]]</center> | ||
|<center>-</center> | |<center>-</center> | ||
|<center>[[Paper Macho Goomba]]s</center> | |<center>[[Paper Macho Goomba]]s<br><br>[[Goomba]]s</center> | ||
|<center>1</center> | |<center>1</center> | ||
|<center>16</center> | |<center>16</center> | ||
|<center> | |<center>14</center> | ||
|<center>9</center> | |<center>9</center> | ||
|- | |- | ||
|<center>'''[[Graffiti Underground]]'''<br><br>An underground sewer that has graffiti and a valve that controls the drain. It is used to reach Peach's Castle from Toad Town.</center> | |<center>'''[[Graffiti Underground]]'''<br><br>An underground sewer that has graffiti and a valve that controls the drain. It is used to reach Peach's Castle from Toad Town.</center> | ||
|<center>[[File: | |<center>[[File:PMTOK Graffiti Underground.png|250px]]</center> | ||
|<center>-</center> | |<center>-</center> | ||
|<center>[[Swoop]]s<br><br>[[Scaredy Rat]]s</center> | |<center>[[Swoop]]s<br><br>[[Scaredy Rat]]s</center> | ||
| Line 677: | Line 813: | ||
|- | |- | ||
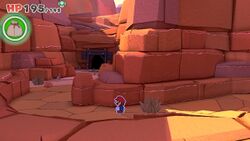
|<center>'''[[Picnic Road]]'''<br><br>A road that connects Toad Town, Overlook Mountain and the Earth Vellumental Temple.</center> | |<center>'''[[Picnic Road]]'''<br><br>A road that connects Toad Town, Overlook Mountain and the Earth Vellumental Temple.</center> | ||
|<center>[[File: | |<center>[[File:PMTOK Picnic Road.png|250px]]</center> | ||
|<center>-</center> | |<center>-</center> | ||
|<center>[[Goomba]]s<br><br>[[Shy Guy]]s</center> | |<center>[[Goomba]]s<br><br>[[Shy Guy]]s</center> | ||
| Line 686: | Line 822: | ||
|- | |- | ||
|<center>'''[[Overlook Mountain]]'''<br><br>A mountain trail full of greenery.</center> | |<center>'''[[Overlook Mountain]]'''<br><br>A mountain trail full of greenery.</center> | ||
|<center>[[File: | |<center>[[File:PMTOK Overlook Mountain.jpg|250px]]</center> | ||
|<center>-</center> | |<center>-</center> | ||
|<center>[[Goomba]]s<br><br>[[Shy Guy]]s<br><br>[[Paragoomba]]s<br><br>[[Spiny]] | |<center>[[Goomba]]s<br><br>[[Shy Guy]]s<br><br>[[Paragoomba]]s<br><br>[[Spiny|Spinies]]<br><br>[[Paper Macho Shy Guy]]s</center> | ||
|<center> | |<center>36</center> | ||
|<center>19</center> | |<center>19</center> | ||
|<center>5</center> | |<center>5</center> | ||
| Line 695: | Line 831: | ||
|- | |- | ||
|<center>'''[[Earth Vellumental Temple]]'''<br><br>An underground temple that houses the Earth Vellumental.</center> | |<center>'''[[Earth Vellumental Temple]]'''<br><br>An underground temple that houses the Earth Vellumental.</center> | ||
|<center>[[File: | |<center>[[File:PMTOK Earth Vellumental Temple inside.png|250px]]</center> | ||
|<center>[[Earth Vellumental]]</center> | |<center>[[Earth Vellumental]]</center> | ||
|<center>[[Koopa Troopa]]s<br><br>[[Swoop]]s<br><br>[[Mechakoopa]]s</center> | |<center>[[Koopa Troopa]]s<br><br>[[Swoop]]s<br><br>[[Mechakoopa]]s</center> | ||
| Line 704: | Line 840: | ||
|- | |- | ||
|<center>'''[[Overlook Tower]]'''<br><br>A tall tower located on Overlook Mountain. [[Colored Pencils]] is battled here.</center> | |<center>'''[[Overlook Tower]]'''<br><br>A tall tower located on Overlook Mountain. [[Colored Pencils]] is battled here.</center> | ||
|<center>[[File: | |<center>[[File:PMTOK Overlook Tower outside.png|250px]]</center> | ||
|<center>[[Colored Pencils]]</center> | |<center>[[Colored Pencils]]</center> | ||
|<center>[[Goomba]]s<br><br>[[Paragoomba]]s<br><br>[[Mini Goomba]]s</center> | |<center>[[Goomba]]s<br><br>[[Paragoomba]]s<br><br>[[Mini Goomba]]s</center> | ||
| Line 714: | Line 850: | ||
===Blue streamer=== | ===Blue streamer=== | ||
{| border=1 cellspacing=0 cellpadding=3 style="border-collapse:collapse" | {|border=1 cellspacing=0 cellpadding=3 style="border-collapse:collapse" | ||
|-style="color:black;background:lightgray" | |-style="color:black;background:lightgray" | ||
!width="2%"|Name | !width="2%"|Name and description | ||
!width="2%"|Image | !width="2%"|Image | ||
!width="1%"|Bosses | !width="1%"|Bosses | ||
!width="1%"|Enemies | !width="1%"|Enemies | ||
!width="1%"|# of [[ | !width="1%"|# of [[List of hidden Toads in Paper Mario: The Origami King|Toads]] | ||
!width="1%"|# of [[Not-Bottomless Hole]]s | !width="1%"|# of [[Not-Bottomless Hole]]s | ||
!width="1%"|# of [[ | !width="1%"|# of [[List of Collectible Treasures in Paper Mario: The Origami King|Collectible Treasures]] | ||
!width="1%"|# of [[? | !width="1%"|# of [[List of ? Blocks in Paper Mario: The Origami King|? Blocks]] | ||
|- | |- | ||
|<center>'''[[Autumn Mountain]]'''<br><br>A mountain filled with autumn-colored trees and tall, grassy fields.</center> | |<center>'''[[Autumn Mountain]]'''<br><br>A mountain filled with autumn-colored trees and tall, grassy fields.</center> | ||
|<center>[[File:PMTOK fall trees.png|250px]]</center> | |<center>[[File:PMTOK fall trees.png|250px]]</center> | ||
|<center>-</center> | |<center>-</center> | ||
|<center>[[Spiny]] | |<center>[[Spiny|Spinies]]<br><br>[[Cheep Cheep]]s<br><br>[[Goomba]]s<br><br>[[Paragoomba]]s<br><br>[[Shy Guy]]s<br><br>[[Koopa Troopa]]s<br><br>[[Paper Macho Goomba]]s</center> | ||
|<center>22</center> | |<center>22</center> | ||
|<center>18</center> | |<center>18</center> | ||
| Line 735: | Line 871: | ||
|- | |- | ||
|<center>'''[[Chestnut Valley]]'''<br><br>An area containing rolling chestnuts that damage Mario and Bob-omb.</center> | |<center>'''[[Chestnut Valley]]'''<br><br>An area containing rolling chestnuts that damage Mario and Bob-omb.</center> | ||
|<center>[[File: | |<center>[[File:PMTOK Chestnut Valley.png|250px]]</center> | ||
|<center>-</center> | |<center>-</center> | ||
|<center>[[Goomba]]s<br><br>[[Spiny]] | |<center>[[Goomba]]s<br><br>[[Spiny|Spinies]]<br><br>[[Galoomba]]s</center> | ||
|<center>8</center> | |<center>8</center> | ||
|<center>12</center> | |<center>12</center> | ||
| Line 765: | Line 901: | ||
|<center>-</center> | |<center>-</center> | ||
|<center>[[Ninji]]s<br><br>[[Snifit]]s<br><br>[[Shy Guy]]s<br><br>[[Koopa Troopa]]s<br><br>[[Goomba]]s<br><br>[[Galoomba]]s<br><br>[[Paper Macho Koopa Troopa]]s</center> | |<center>[[Ninji]]s<br><br>[[Snifit]]s<br><br>[[Shy Guy]]s<br><br>[[Koopa Troopa]]s<br><br>[[Goomba]]s<br><br>[[Galoomba]]s<br><br>[[Paper Macho Koopa Troopa]]s</center> | ||
|<center> | |<center>45</center> | ||
|<center> | |<center>21</center> | ||
|<center>10</center> | |<center>10</center> | ||
|<center>9</center> | |<center>9</center> | ||
|- | |- | ||
|<center>'''[[Ninja Attraction]]'''<br><br>An area of Shogun Studios in which Mario has to find cutouts of ninja Toads.</center> | |<center>'''[[Ninja Attraction]]'''<br><br>An area of Shogun Studios in which Mario has to find cutouts of ninja Toads.</center> | ||
|<center>[[File: | |<center>[[File:PMTOK dojo.png|250px]]</center> | ||
|<center>-</center> | |<center>-</center> | ||
|<center>[[Ninji]]s<br><br>[[Scaredy Rat]]s</center> | |<center>[[Ninji]]s<br><br>[[Scaredy Rat]]s</center> | ||
|<center> | |<center>4</center> | ||
|<center>2</center> | |<center>2</center> | ||
|<center>3</center> | |<center>3</center> | ||
|<center>7</center> | |<center>7</center> | ||
|- | |- | ||
|<center>'''[[Big Sho' Theater]]'''<br><br>A four-story castle where stage productions are held. Rubber Band is battled here.</center> | |<center>'''[[Big Sho' Theater]]'''<br><br>A four-story castle where stage productions are held. [[Rubber Band]] is battled here.</center> | ||
|<center>[[File:Big Sho Theater.jpg|250px]]</center> | |<center>[[File:PMTOK Big Sho Theater inside.jpg|250px]]</center> | ||
|<center>[[Rubber Band]]</center> | |<center>[[Rubber Band]]</center> | ||
|<center>[[Paper Macho Goomba Outlaw]]s<br><br>[[Paper Macho Spike Outlaw]]s<br><br>[[Paper Macho Snifit Outlaw]]<br><br>[[Paper Macho Koopa Troopa]]s<br><br>[[Paper Macho Shy Guy]]s</center> | |<center>[[Paper Macho Goomba Outlaw]]s<br><br>[[Paper Macho Spike Outlaw]]s<br><br>[[Paper Macho Snifit Outlaw]]<br><br>[[Paper Macho Koopa Troopa]]s<br><br>[[Paper Macho Shy Guy]]s</center> | ||
|<center> | |<center>67</center> | ||
|<center>-</center> | |<center>-</center> | ||
|<center>1</center> | |<center>1</center> | ||
| Line 790: | Line 926: | ||
===Yellow streamer=== | ===Yellow streamer=== | ||
{| border=1 cellspacing=0 cellpadding=3 style="border-collapse:collapse" | {|border=1 cellspacing=0 cellpadding=3 style="border-collapse:collapse" | ||
|-style="color:black;background:lightgray" | |-style="color:black;background:lightgray" | ||
!width="2%"|Name | !width="2%"|Name and description | ||
!width="2%"|Image | !width="2%"|Image | ||
!width="1%"|Bosses | !width="1%"|Bosses | ||
!width="1%"|Enemies | !width="1%"|Enemies | ||
!width="1%"|# of [[ | !width="1%"|# of [[List of hidden Toads in Paper Mario: The Origami King|Toads]] | ||
!width="1%"|# of [[Not-Bottomless Hole]]s | !width="1%"|# of [[Not-Bottomless Hole]]s | ||
!width="1%"|# of [[ | !width="1%"|# of [[List of Collectible Treasures in Paper Mario: The Origami King|Collectible Treasures]] | ||
!width="1%"|# of [[? | !width="1%"|# of [[List of ? Blocks in Paper Mario: The Origami King|? Blocks]] | ||
|- | |- | ||
|<center>'''[[Sweetpaper Valley]]'''<br><br>A small valley that connects to Eddy River and Breezy Tunnel.</center> | |<center>'''[[Sweetpaper Valley]]'''<br><br>A small valley that connects to Eddy River and Breezy Tunnel.</center> | ||
|<center>[[File:Sweetpaper Valley.jpg|250px]]</center> | |<center>[[File:PMTOK Sweetpaper Valley.jpg|250px]]</center> | ||
|<center>-</center> | |<center>-</center> | ||
|<center>-</center> | |<center>-</center> | ||
| Line 813: | Line 949: | ||
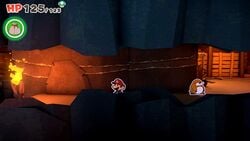
|<center>[[File:PMTOK Breezy Tunnel.jpg|250px]]</center> | |<center>[[File:PMTOK Breezy Tunnel.jpg|250px]]</center> | ||
|<center>-</center> | |<center>-</center> | ||
|<center>[[Spiny]] | |<center>[[Spiny|Spinies]]<br><br>[[Buzzy Beetle]]s<br><br>[[Shoe Goomba]]s</center> | ||
|<center>2</center> | |<center>2</center> | ||
|<center>-</center> | |<center>-</center> | ||
| Line 820: | Line 956: | ||
|- | |- | ||
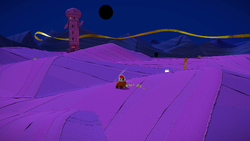
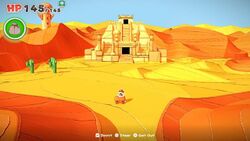
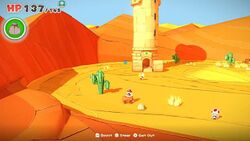
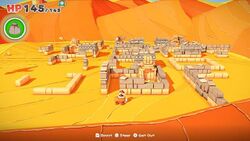
|<center>'''[[Scorching Sandpaper Desert]]'''<br><br>A desert that has been shrouded in darkness. A large hole is visible in the sky where the sun used to be.</center> | |<center>'''[[Scorching Sandpaper Desert]]'''<br><br>A desert that has been shrouded in darkness. A large hole is visible in the sky where the sun used to be.</center> | ||
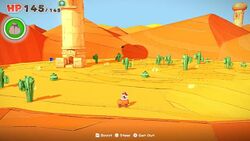
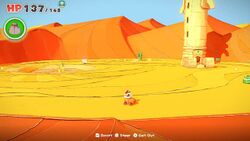
|<center>[[File: | |<center>[[File:PMTOK Scorching Sandpaper Desert.png|250px]]</center> | ||
|<center>[[Mega Paper Macho Pokey]]</center> | |<center>[[Mega Paper Macho Pokey]]</center> | ||
|<center>[[Boo]]s<br><br>[[Dry Bones]]<br><br>[[Paper Macho Boo]]s<br><br>[[Pokey]]s<br><br>[[Bone Goomba]]s<br><br>[[Paper Macho Paratroopa]]s</center> | |<center>[[Boo]]s<br><br>[[Dry Bones]]<br><br>[[Paper Macho Boo]]s<br><br>[[Pokey]]s<br><br>[[Bone Goomba]]s<br><br>[[Paper Macho Paratroopa]]s</center> | ||
|<center>10</center> | |<center>10</center> | ||
|<center> | |<center>12</center> | ||
|<center>3</center> | |<center>3</center> | ||
|<center>7</center> | |<center>7</center> | ||
|- | |- | ||
|<center>'''[[Scorching Sandpaper Minor]]'''<br><br>A secondary area of Scorching Sandpaper Desert that connects the main desert area to Shroom City.</center> | |<center>'''[[Scorching Sandpaper Minor]]'''<br><br>A secondary area of Scorching Sandpaper Desert that connects the main desert area to Shroom City.</center> | ||
|<center>[[File: | |<center>[[File:PMTOK Scorching Sandpaper Minor.jpg|250px]]</center> | ||
|<center>-</center> | |<center>-</center> | ||
|<center>-</center> | |<center>-</center> | ||
| Line 838: | Line 974: | ||
|- | |- | ||
|<center>'''[[Scorching Sandpaper West]]'''</center> | |<center>'''[[Scorching Sandpaper West]]'''</center> | ||
|<center>[[File: | |<center>[[File:PMTOK Scorching Sandpaper West.jpg|250px]]</center> | ||
|<center>-</center> | |<center>-</center> | ||
|<center>[[Crowber]]s<br><br>[[Pokey]]s<br><br>[[Dry Bones]]<br><br>[[Black Shy Guy]]s</center> | |<center>[[Crowber]]s<br><br>[[Pokey]]s<br><br>[[Dry Bones]]<br><br>[[Black Shy Guy]]s</center> | ||
| Line 847: | Line 983: | ||
|- | |- | ||
|<center>'''[[Scorching Sandpaper East]]'''</center> | |<center>'''[[Scorching Sandpaper East]]'''</center> | ||
|<center>[[File: | |<center>[[File:PMTOK Scorching Sandpaper East.jpg|250px]]</center> | ||
|<center>-</center> | |<center>-</center> | ||
|<center>[[Boo]]s<br><br>[[Dry Bones]]<br><br>[[Paper Macho Boo]]s</center> | |<center>[[Boo]]s<br><br>[[Dry Bones]]<br><br>[[Paper Macho Boo]]s</center> | ||
| Line 855: | Line 991: | ||
|<center>-</center> | |<center>-</center> | ||
|- | |- | ||
|<center>'''[[Shroom City (Paper Mario: The Origami King)|Shroom City]]/Snif City'''<br><br>A desert town | |<center>'''[[Shroom City (Paper Mario: The Origami King)|Shroom City]]/Snif City'''<br><br>A desert town owned by Toads but overtaken by [[Snifit]]s with an oasis and a large hotel.</center> | ||
|<center>[[File:PMTOK | |<center>[[File:PMTOK Snif City.png|250px]]</center> | ||
|<center>-</center> | |<center>-</center> | ||
|<center>[[Scaredy Rat]]s</center> | |<center>[[Scaredy Rat]]s</center> | ||
|<center> | |<center>23</center> | ||
|<center>6</center> | |<center>6</center> | ||
|<center>6</center> | |<center>6</center> | ||
| Line 865: | Line 1,001: | ||
|- | |- | ||
|<center>'''[[Scorching Sandpaper Far West]]'''</center> | |<center>'''[[Scorching Sandpaper Far West]]'''</center> | ||
|<center>[[File: | |<center>[[File:PMTOK Scorching Sandpaper Far West.jpg|250px]]</center> | ||
|<center>-</center> | |<center>-</center> | ||
|<center>[[Boo]]s<br><br>[[Pokey]]s</center> | |<center>[[Boo]]s<br><br>[[Pokey]]s</center> | ||
| Line 874: | Line 1,010: | ||
|- | |- | ||
|<center>'''[[Scorching Sandpaper Far East]]'''</center> | |<center>'''[[Scorching Sandpaper Far East]]'''</center> | ||
|<center>[[File: | |<center>[[File:PMTOK Scorching Sandpaper Far East.jpg|250px]]</center> | ||
|<center>-</center> | |<center>-</center> | ||
|<center>[[Pokey]]s</center> | |<center>[[Pokey]]s</center> | ||
| Line 889: | Line 1,025: | ||
|<center>10</center> | |<center>10</center> | ||
|<center>1</center> | |<center>1</center> | ||
|<center> | |<center>16</center> | ||
|- | |- | ||
|<center>'''[[Temple of Shrooms]]'''<br><br>King Shroomses' temple, and where [[Hole Punch]] is fought.</center> | |<center>'''[[Temple of Shrooms]]'''<br><br>King Shroomses' temple, and where [[Hole Punch]] is fought.</center> | ||
|<center>[[File:Temple of | |<center>[[File:PMTOK Temple of Shrooms.jpg|250px]]</center> | ||
|<center>[[Hole Punch]]</center> | |<center>[[Hole Punch]]</center> | ||
|<center>[[Boo]]s<br><br>[[Scuttlebug]]s<br><br>[[Shy Guy]]s<br><br>[[Black Shy Guy]]s<br><br>[[Dry Bones]]<br><br>[[Bone Goomba]]s<br><br>[[Goomba]]s</center> | |<center>[[Boo]]s<br><br>[[Scuttlebug]]s<br><br>[[Shy Guy]]s<br><br>[[Black Shy Guy]]s<br><br>[[Dry Bones]]<br><br>[[Bone Goomba]]s<br><br>[[Goomba]]s</center> | ||
|<center> | |<center>41</center> | ||
|<center> | |<center>21</center> | ||
|<center>2</center> | |<center>2</center> | ||
|<center>6</center> | |<center>6</center> | ||
| Line 902: | Line 1,038: | ||
===Purple streamer=== | ===Purple streamer=== | ||
{| border=1 cellspacing=0 cellpadding=3 style="border-collapse:collapse" | {|border=1 cellspacing=0 cellpadding=3 style="border-collapse:collapse" | ||
|-style="color:black;background:lightgray" | |-style="color:black;background:lightgray" | ||
!width="2%"|Name | !width="2%"|Name and description | ||
!width="2%"|Image | !width="2%"|Image | ||
!width="1%"|Bosses | !width="1%"|Bosses | ||
!width="1%"|Enemies | !width="1%"|Enemies | ||
!width="1%"|# of [[ | !width="1%"|# of [[List of hidden Toads in Paper Mario: The Origami King|Toads]] | ||
!width="1%"|# of [[Not-Bottomless Hole]]s | !width="1%"|# of [[Not-Bottomless Hole]]s | ||
!width="1%"|# of [[ | !width="1%"|# of [[List of Collectible Treasures in Paper Mario: The Origami King|Collectible Treasures]] | ||
!width="1%"|# of [[? | !width="1%"|# of [[List of ? Blocks in Paper Mario: The Origami King|? Blocks]] | ||
|- | |- | ||
|<center>'''[[The Great Sea]]'''<br><br>An open sea that Mario can explore by boat.</center> | |<center>'''[[The Great Sea]]'''<br><br>An open sea that Mario can explore by boat.</center> | ||
| Line 923: | Line 1,059: | ||
|- | |- | ||
|<center>'''[[The Princess Peach]]'''<br><br>A cruise ship named after [[Princess Peach]].</center> | |<center>'''[[The Princess Peach]]'''<br><br>A cruise ship named after [[Princess Peach]].</center> | ||
|<center>[[File: | |<center>[[File:PMTOK The Princess Peach.png|250px]]</center> | ||
|<center>[[Paper Macho Gooper Blooper]]</center> | |<center>[[Paper Macho Gooper Blooper]]</center> | ||
|<center>[[Cheep Cheep]]s<br><br>[[Fire Bro]]s<br><br>[[Snifit]]s<br><br>[[Scuttlebug]]s</center> | |<center>[[Cheep Cheep]]s<br><br>[[Fire Bro]]s<br><br>[[Snifit]]s<br><br>[[Scuttlebug]]s</center> | ||
|<center> | |<center>17</center> | ||
|<center> | |<center>20</center> | ||
|<center>3</center> | |<center>3</center> | ||
|<center>2</center> | |<center>2</center> | ||
|- | |- | ||
|<center>'''[[Bonehead Island]]'''<br><br>An island with a large, white skull cave.</center> | |<center>'''[[Bonehead Island]]'''<br><br>An island with a large, white skull cave.</center> | ||
|<center>[[File: | |<center>[[File:PMTOK Bonehead Island.jpg|250px]]</center> | ||
|<center>-</center> | |<center>-</center> | ||
|<center>[[Crowber]]s<br><br>[[Bone Goomba]]s</center> | |<center>[[Crowber]]s<br><br>[[Bone Goomba]]s</center> | ||
| Line 941: | Line 1,077: | ||
|- | |- | ||
|<center>'''[[Mushroom Island]]'''<br><br>An island in the shape of a mushroom that contains a Toad house. The Origami Craftsman resides here.</center> | |<center>'''[[Mushroom Island]]'''<br><br>An island in the shape of a mushroom that contains a Toad house. The Origami Craftsman resides here.</center> | ||
|<center>[[File: | |<center>[[File:PMTOK Mushroom Island.jpg|250px]]</center> | ||
|<center>-</center> | |<center>-</center> | ||
|<center>-</center> | |<center>-</center> | ||
| Line 949: | Line 1,085: | ||
|<center>-</center> | |<center>-</center> | ||
|- | |- | ||
|<center>'''[[Heart Island]]'''<br><br>An island consisting of multiple shrubs with buttons on the back, with each causing a different | |<center>'''[[Heart Island]]'''<br><br>An island consisting of multiple shrubs with buttons on the back, with each causing a different occurrence around the island.</center> | ||
|<center>[[File: | |<center>[[File:PMTOK Heart Island.jpg|250px]]</center> | ||
|<center>-</center> | |<center>-</center> | ||
|<center>[[Nipper Plant]]s<br><br>[[Cheep Cheep]]s</center> | |<center>[[Nipper Plant]]s<br><br>[[Cheep Cheep]]s</center> | ||
|<center> | |<center>2</center> | ||
|<center>5</center> | |<center>5</center> | ||
|<center>-</center> | |<center>-</center> | ||
| Line 959: | Line 1,095: | ||
|- | |- | ||
|<center>'''[[Spade Island]]'''<br><br>An island where Mario must find four Toads to rescue a shirtless Toad stuck in a barrel.</center> | |<center>'''[[Spade Island]]'''<br><br>An island where Mario must find four Toads to rescue a shirtless Toad stuck in a barrel.</center> | ||
|<center>[[File: | |<center>[[File:PMTOK Spade Island.jpg|250px]]</center> | ||
|<center>-</center> | |<center>-</center> | ||
|<center>[[Cheep Cheep]]s</center> | |<center>[[Cheep Cheep]]s</center> | ||
| Line 968: | Line 1,104: | ||
|- | |- | ||
|<center>'''[[Club Island]]'''<br><br>A grass field island where Mario must find the [[Feelin' Fungi]].</center> | |<center>'''[[Club Island]]'''<br><br>A grass field island where Mario must find the [[Feelin' Fungi]].</center> | ||
|<center>[[File: | |<center>[[File:PMTOK Club Island.png|250px]]</center> | ||
|<center>-</center> | |<center>-</center> | ||
|<center>[[Paragoomba]]s<br><br>[[Koopa Paratroopa]]s<br><br>[[Hammer Bro]]s<br><br>[[Snifit]]s<br><br>[[Nipper Plant]]s<br><br>[[Spiny]] | |<center>[[Paragoomba]]s<br><br>[[Koopa Paratroopa]]s<br><br>[[Hammer Bro]]s<br><br>[[Snifit]]s<br><br>[[Nipper Plant]]s<br><br>[[Spiny|Spinies]]</center> | ||
|<center>4</center> | |<center>4</center> | ||
|<center>1</center> | |<center>1</center> | ||
| Line 977: | Line 1,113: | ||
|- | |- | ||
|<center>'''Crescent Moon Island''' / '''[[Full Moon Island]]'''<br><br>A small island with a fishing spot.</center> | |<center>'''Crescent Moon Island''' / '''[[Full Moon Island]]'''<br><br>A small island with a fishing spot.</center> | ||
|<center>[[File: | |<center>[[File:PMTOK_Full_Moon_Island.jpg|250px]]</center> | ||
|<center>-</center> | |<center>-</center> | ||
|<center>[[Cheep Cheep]]s</center> | |<center>[[Cheep Cheep]]s</center> | ||
| Line 986: | Line 1,122: | ||
|- | |- | ||
|<center>'''[[? Island]]'''<br><br>An island in the shape of a question mark that contains several ? Blocks.</center> | |<center>'''[[? Island]]'''<br><br>An island in the shape of a question mark that contains several ? Blocks.</center> | ||
|<center>[[File: | |<center>[[File:PMTOK Question Island.jpg|250px]]</center> | ||
|<center>-</center> | |<center>-</center> | ||
|<center>[[Stone Spike]]s<br><br>[[Sidesteppers]]<br><br>[[Paper Macho Stone Spike]]</center> | |<center>[[Stone Spike]]s<br><br>[[Sidesteppers]]<br><br>[[Paper Macho Stone Spike]]</center> | ||
|<center>2</center> | |<center>2</center> | ||
|<center>6</center> | |<center>6</center> | ||
|<center> | |<center>2</center> | ||
|<center>5</center> | |<center>5</center> | ||
|- | |- | ||
|<center>'''[[Hammer Island]]'''<br><br>An island where the [[Legendary Hammer]] is found.</center> | |<center>'''[[Hammer Island]]'''<br><br>An island where the [[Legendary Hammer]] is found.</center> | ||
|<center>[[File:Hammer_Island.jpg|250px]]</center> | |<center>[[File:PMTOK Hammer_Island.jpg|250px]]</center> | ||
|<center>- | |<center>- | ||
|<center>[[Fire Bro]]s</center> | |<center>[[Fire Bro]]s</center> | ||
|<center>1</center> | |<center>1</center> | ||
|<center>-</center> | |<center>-</center> | ||
|<center> | |<center>2</center> | ||
|<center>4</center> | |<center>4</center> | ||
|- | |- | ||
|<center>'''[[Scuffle Island]]'''<br><br>An island where Mario must battle seven Paper Macho soldiers.</center> | |<center>'''[[Scuffle Island]]'''<br><br>An island where Mario must battle seven Paper Macho soldiers.</center> | ||
|<center>[[File:Scuffle Island. | |<center>[[File:PMTOK Scuffle Island.jpg|250px]]</center> | ||
|<center>[[Paper Macho Goomba]]<br><br>[[Paper Macho Shy Guy]]<br><br>[[Paper Macho Koopa Troopa]]<br><br>[[Paper Macho Boo]]<br><br>[[Paper Macho Paratroopa]]<br><br>[[Paper Macho Stone Spike]]<br><br>[[Paper Macho Buzzy Beetle]]</center> | |<center>[[Paper Macho Goomba]]<br><br>[[Paper Macho Shy Guy]]<br><br>[[Paper Macho Koopa Troopa]]<br><br>[[Paper Macho Boo]]<br><br>[[Paper Macho Paratroopa]]<br><br>[[Paper Macho Stone Spike]]<br><br>[[Paper Macho Buzzy Beetle]]</center> | ||
|<center>-</center> | |<center>-</center> | ||
| Line 1,012: | Line 1,148: | ||
|<center>-</center> | |<center>-</center> | ||
|- | |- | ||
|<center>'''[[Diamond Island]]'''<br><br>A secret underwater island with three trials.</center> | |<center>'''[[Diamond Island (Paper Mario: The Origami King)|Diamond Island]]'''<br><br>A secret underwater island with three trials.</center> | ||
|<center>[[File: | |<center>[[File:PMTOK Diamond Island.jpg|250px]]</center> | ||
|<center>-</center> | |<center>-</center> | ||
|<center>-</center> | |<center>-</center> | ||
| Line 1,026: | Line 1,162: | ||
|<center>[[Ice Bro]]s<br><br>[[Sledge Bro]]<br><br>[[Spike Top]]s<br><br>[[Snow Spike]]s<br><br>[[Sidestepper]]s</center> | |<center>[[Ice Bro]]s<br><br>[[Sledge Bro]]<br><br>[[Spike Top]]s<br><br>[[Snow Spike]]s<br><br>[[Sidestepper]]s</center> | ||
|<center>-</center> | |<center>-</center> | ||
|<center> | |<center>19</center> | ||
|<center>4</center> | |<center>4</center> | ||
|<center>10</center> | |<center>10</center> | ||
| Line 1,041: | Line 1,177: | ||
===Green streamer=== | ===Green streamer=== | ||
{| border=1 cellspacing=0 cellpadding=3 style="border-collapse:collapse" | {|border=1 cellspacing=0 cellpadding=3 style="border-collapse:collapse" | ||
|-style="color:black;background:lightgray" | |-style="color:black;background:lightgray" | ||
!width="2%"|Name | !width="2%"|Name and description | ||
!width="2%"|Image | !width="2%"|Image | ||
!width="1%"|Bosses | !width="1%"|Bosses | ||
!width="1%"|Enemies | !width="1%"|Enemies | ||
!width="1%"|# of [[ | !width="1%"|# of [[List of hidden Toads in Paper Mario: The Origami King|Toads]] | ||
!width="1%"|# of [[Not-Bottomless Hole]]s | !width="1%"|# of [[Not-Bottomless Hole]]s | ||
!width="1%"|# of [[ | !width="1%"|# of [[List of Collectible Treasures in Paper Mario: The Origami King|Collectible Treasures]] | ||
!width="1%"|# of [[? | !width="1%"|# of [[List of ? Blocks in Paper Mario: The Origami King|? Blocks]] | ||
|- | |- | ||
|<center>'''[[Shangri-Spa]]'''<br><br>A sky-spa area that contains several hot springs.</center> | |<center>'''[[Shangri-Spa]]'''<br><br>A sky-spa area that contains several hot springs.</center> | ||
|<center>[[File:PMTOK Shangri Spa.jpg|250px]]</center> | |<center>[[File:PMTOK Shangri Spa.jpg|250px]]</center> | ||
|<center>[[Boss Sumo Bro]]</center> | |<center>[[Boss Sumo Bro]]</center> | ||
|<center>[[Snifit]]s<br><br>[[Chargin' Chuck]]s<br><br>[[Goomba]]s<br><br>[[Spike Top]]s<br><br>[[Hammer Bro]]s</center> | |<center>[[Snifit]]s<br><br>[[Koopa Troopa]]s<br><br>[[Chargin' Chuck]]s<br><br>[[Goomba]]s<br><br>[[Spike Top]]s<br><br>[[Hammer Bro]]s</center> | ||
|<center>1</center> | |<center>1</center> | ||
|<center>5</center> | |<center>5</center> | ||
|<center>9</center> | |<center>9</center> | ||
|<center> | |<center>8</center> | ||
|- | |- | ||
|<center>'''[[Spring of Jungle Mist]]'''<br><br>A large jungle area that contains a hot spring at the other end.</center> | |<center>'''[[Spring of Jungle Mist]]'''<br><br>A large jungle area that contains a hot spring at the other end.</center> | ||
|<center>[[File: | |<center>[[File:PMTOK Spring of Jungle Mist.png|250px]]</center> | ||
|<center>-</center> | |<center>-</center> | ||
|<center>[[Paper Macho Chain Chomp]]<br><br>[[Paper Macho Piranha Plant]]s<br><br>[[Piranha Plant]]s<br><br>[[Jumping Piranha Plant]]s<br><br>[[Nipper Plant]]s<br><br>[[Ninji]]s<br><br>[[Stingby|Stingbies]]<br><br>[[Ptooie]]s</center> | |<center>[[Paper Macho Chain Chomp]]<br><br>[[Paper Macho Piranha Plant]]s<br><br>[[Piranha Plant]]s<br><br>[[Jumping Piranha Plant]]s<br><br>[[Nipper Plant]]s<br><br>[[Ninji]]s<br><br>[[Stingby|Stingbies]]<br><br>[[Ptooie]]s</center> | ||
|<center>-</center> | |<center>-</center> | ||
|<center> | |<center>11</center> | ||
|<center>4</center> | |<center>4</center> | ||
|<center> | |<center>5</center> | ||
|- | |- | ||
|<center>'''[[Spring of Rainbows]]'''<br><br>A hot spring that can only be accessed once the other four springs in Shangri-Spa have been visited. The ''[[Shy Guys Finish Last]]'' game show is played here, on the way to the hot spring.</center> | |<center>'''[[Spring of Rainbows]]'''<br><br>A hot spring that can only be accessed once the other four springs in Shangri-Spa have been visited. The ''[[Shy Guys Finish Last]]'' game show is played here, on the way to the hot spring.</center> | ||
|<center>[[File: | |<center>[[File:PMTOK Spring of Rainbows.png|250px]]</center> | ||
|<center>-</center> | |<center>-</center> | ||
|<center>[[Fuzzy|Fuzzies]]<br><br>[[Rocky Wrench]]es</center> | |<center>[[Fuzzy|Fuzzies]]<br><br>[[Rocky Wrench]]es</center> | ||
| Line 1,080: | Line 1,216: | ||
|- | |- | ||
|<center>'''[[Bowser's Castle]]'''<br><br>Bowser's castle that has crash-landed into the Shangri-Spa banquet hall. [[Handaconda]], [[Paper Mistake Buzzy Beetle]], and [[Scissors (boss)|Scissors]] are battled here.</center> | |<center>'''[[Bowser's Castle]]'''<br><br>Bowser's castle that has crash-landed into the Shangri-Spa banquet hall. [[Handaconda]], [[Paper Mistake Buzzy Beetle]], and [[Scissors (boss)|Scissors]] are battled here.</center> | ||
|<center>[[File: | |<center>[[File:PMTOK Bowsers Castle inside.jpg|250px]]</center> | ||
|<center>[[Handaconda]]<br><br>[[Paper Mistake Buzzy Beetle]]<br><br>[[Scissors (boss)|Scissors]]</center> | |<center>[[Handaconda]]<br><br>[[Paper Mistake Buzzy Beetle]]<br><br>[[Scissors (boss)|Scissors]]</center> | ||
|<center>[[Goomba]]s<br><br>[[Koopa Troopa]]s<br><br>[[Shy Guy]]s<br><br>[[Spiny]] | |<center>[[Goomba]]s<br><br>[[Koopa Troopa]]s<br><br>[[Shy Guy]]s<br><br>[[Spiny|Spinies]]<br><br>[[Hammer Bro]]<br><br>[[Buzzy Beetle]]s<br><br>[[Mechakoopa]]s<br><br>[[Spike]]s<br><br>[[Stone Spike]]s<br><br>[[Snow Spike]]s<br><br>[[Big Cutout Soldier]]s<br><br>[[Li'l Cutout Soldier]]s</center> | ||
|<center>-</center> | |<center>-</center> | ||
|<center>16</center> | |<center>16</center> | ||
| Line 1,090: | Line 1,226: | ||
===Origami Castle=== | ===Origami Castle=== | ||
{| border=1 cellspacing=0 cellpadding=3 style="border-collapse:collapse" | {|border=1 cellspacing=0 cellpadding=3 style="border-collapse:collapse" | ||
|-style="color:black;background:lightgray" | |-style="color:black;background:lightgray" | ||
!width="2%"|Name | !width="2%"|Name and description | ||
!width="2%"|Image | !width="2%"|Image | ||
!width="1%"|Bosses | !width="1%"|Bosses | ||
!width="1%"|Enemies | !width="1%"|Enemies | ||
!width="1%"|# of [[ | !width="1%"|# of [[List of hidden Toads in Paper Mario: The Origami King|Toads]] | ||
!width="1%"|# of [[Not-Bottomless Hole]]s | !width="1%"|# of [[Not-Bottomless Hole]]s | ||
!width="1%"|# of [[ | !width="1%"|# of [[List of Collectible Treasures in Paper Mario: The Origami King|Collectible Treasures]] | ||
!width="1%"|# of [[? | !width="1%"|# of [[List of ? Blocks in Paper Mario: The Origami King|? Blocks]] | ||
|- | |- | ||
|<center>'''[[Hotfoot Crater]]'''<br><br>A volcano found below [[Peach's Castle]].</center> | |<center>'''[[Hotfoot Crater]]'''<br><br>A volcano found below [[Peach's Castle]].</center> | ||
|<center>[[File: | |<center>[[File:PMTOK Hotfoot Crater.jpg|250px]]</center> | ||
|<center>-</center> | |<center>-</center> | ||
|<center>[[Paper Macho Goomba]]s<br><br>[[Paper Macho Bob-omb]]s<br><br>[[Paper Macho Lava Bubble]]s</center> | |<center>[[Paper Macho Goomba]]s<br><br>[[Paper Macho Bob-omb]]s<br><br>[[Paper Macho Lava Bubble]]s</center> | ||
| Line 1,111: | Line 1,247: | ||
|- | |- | ||
|<center>'''[[Peach's Castle]]''' / '''[[Origami Castle]]'''<br><br>A corrupted version of [[Peach's Castle]], created and ruled by [[King Olly]].</center> | |<center>'''[[Peach's Castle]]''' / '''[[Origami Castle]]'''<br><br>A corrupted version of [[Peach's Castle]], created and ruled by [[King Olly]].</center> | ||
|<center>[[File: | |<center>[[File:PMTOK Origami Castle.jpg|250px]]</center> | ||
|<center>[[Stapler (boss)|Stapler]]<br><br>[[King Olly]]</center> | |<center>[[Stapler (boss)|Stapler]]<br><br>[[King Olly]]</center> | ||
|<center>[[Goomba]]s<br><br>[[Koopa Troopa]]s<br><br>[[Hammer Bro]]s<br><br>[[Boomerang Bro]]s<br><br>[[Fire Bro]]s<br><br>[[Ice Bro]]s<br><br>[[Sledge Bro]]s<br><br>[[Sumo Bro]]s<br><br>[[Paper Macho Koopa Troopa]]s</center> | |<center>[[Goomba]]s<br><br>[[Koopa Troopa]]s<br><br>[[Spiny|Spinies]]<br><br>[[Ninji]]s<br><br>[[Buzzy Beetle]]s<br><br>[[Hammer Bro]]s<br><br>[[Boomerang Bro]]s<br><br>[[Fire Bro]]s<br><br>[[Ice Bro]]s<br><br>[[Sledge Bro]]s<br><br>[[Sumo Bro]]s<br><br>[[Mechakoopa]]s<br><br>[[Paper Macho Koopa Troopa]]s</center> | ||
|<center>-</center> | |<center>-</center> | ||
|<center>-</center> | |<center>-</center> | ||
| Line 1,124: | Line 1,260: | ||
{{main|List of Paper Mario: The Origami King weapons}} | {{main|List of Paper Mario: The Origami King weapons}} | ||
Mario's attacks are now weapons that can be bought or found alongside items. The player can also find stronger variants of weapons. | Mario's attacks are now weapons that can be bought or found alongside items. The player can also find stronger variants of weapons. | ||
*[[Boots]] | *[[File:Boots PMTOK icon.png|15px]] [[Boots]] | ||
**[[Shiny Boots]] | **[[File:Shiny Boots PMTOK icon.png|15px]] [[Shiny Boots]] | ||
**[[Flashy Boots]] | **[[File:Flashy Boots PMTOK icon.png|15px]] [[Flashy Boots]] | ||
**[[Legendary Boots]] | **[[File:Legendary Boots PMTOK icon.png|15px]] [[Legendary Boots]] | ||
**[[Gold Boots]] | **[[File:Gold Boots PMTOK icon.png|15px]] [[Gold Boots]] | ||
*[[Hammer]] | *[[File:Hammer PMTOK icon.png|15px]] [[Hammer]] | ||
**[[Shiny Hammer]] | **[[File:Shiny Hammer PMTOK icon.png|15px]] [[Shiny Hammer]] | ||
**[[Flashy Hammer]] | **[[File:Flashy Hammer PMTOK icon.png|15px]] [[Flashy Hammer]] | ||
**[[Legendary Hammer]] | **[[File:Legendary Hammer PMTOK icon.png|15px]] [[Legendary Hammer]] | ||
**[[Gold Hammer]] | **[[File:Gold Hammer PMTOK icon.png|15px]] [[Gold Hammer]] | ||
**[[Fire Hammer]] | **[[File:Fire Hammer PMTOK icon.png|15px]] [[Fire Hammer]] | ||
**[[Ice Hammer]] | **[[File:Ice Hammer PMTOK icon.png|15px]] [[Ice Hammer]] | ||
*[[Iron Boots]] | *[[File:Iron Boots PMTOK icon.png|15px]] [[Iron Boots]] | ||
**[[Shiny Iron Boots]] | **[[File:Shiny Iron Boots PMTOK icon.png|15px]] [[Shiny Iron Boots]] | ||
**[[Flashy Iron Boots]] | **[[File:Flashy Iron Boots PMTOK icon.png|15px]] [[Flashy Iron Boots]] | ||
**[[Legendary Iron Boots]] | **[[File:Legendary Iron Boots PMTOK icon.png|15px]] [[Legendary Iron Boots]] | ||
*[[Hurlhammer]] | *[[File:Hurlhammer PMTOK icon.png|15px]] [[Hurlhammer]] | ||
**[[Shiny Hurlhammer]] | **[[File:Shiny Hurlhammer PMTOK icon.png|15px]] [[Shiny Hurlhammer]] | ||
===Battle items=== | ===Battle items=== | ||
*[[Fire Flower]]: An item that allows Mario to throw [[fireball]]s and attack a row of enemies. | *[[File:Fire Flower PMTOK icon.png|15px]] [[Fire Flower#Paper Mario series|Fire Flower]]: An item that allows Mario to throw [[fireball]]s and attack a row of enemies. | ||
**[[Shiny Fire Flower]] | **[[File:Shiny Fire Flower PMTOK icon.png|15px]] [[Shiny Fire Flower]] | ||
*[[Ice Flower]]: An item that allows Mario to throw [[Ice Ball|ice ball]]s to attack a row of enemies. | *[[File:Ice Flower PMTOK icon.png|15px]] [[Ice Flower#Paper Mario series|Ice Flower]]: An item that allows Mario to throw [[Ice Ball|ice ball]]s to attack a row of enemies. | ||
**[[Shiny Ice Flower]] | **[[File:Shiny Ice Flower PMTOK icon.png|15px]] [[Shiny Ice Flower]] | ||
*[[Tail]]: An attack that deals damage in a 2x2 area. | *[[File:Tail PMTOK icon.png|15px]] [[Tail]]: An attack that deals damage in a 2x2 area. | ||
**[[Shiny Tail]] | **[[File:Shiny Tail PMTOK icon.png|15px]] [[Shiny Tail]] | ||
*[[POW Block]]: Deals damage to the entire board and stuns enemies. Mario can only hold three POW Blocks at a time. | *[[File:POW Block PMTOK icon.png|15px]] [[POW Block#Paper Mario series|POW Block]]: Deals damage to the entire board and stuns enemies. Mario can only hold three POW Blocks at a time. | ||
*[[Mushroom]]: An item that heals HP. This can be used on the overworld. | *[[File:Mushroom PMTOK icon.png|15px]] [[Mushroom#Paper Mario series|Mushroom]]: An item that heals HP. This can be used on the overworld. | ||
**[[Shiny Mushroom]] | **[[File:Shiny Mushroom PMTOK icon.png|15px]] [[Shiny Mushroom]] | ||
**[[Flashy Mushroom]] | **[[File:Flashy Mushroom PMTOK icon.png|15px]] [[Flashy Mushroom]] | ||
*[[1-Up Mushroom]]: Automatically and fully restores Mario's HP if he dies in battle. Only one can be carried at a time. | *[[File:1-Up Mushroom PMTOK icon.png|15px]] [[1-Up Mushroom#Paper Mario series|1-Up Mushroom]]: Automatically and fully restores Mario's HP if he dies in battle. Only one can be carried at a time. | ||
===Shop items=== | ===Shop items=== | ||
Certain items can be bought in bundles in shops, for a cheaper price than buying them individually. | Certain items can be bought in bundles in shops, for a cheaper price than buying them individually. | ||
{|class="wikitable" style="width:100%; border="4px solid black" background-color:white;" | {|class="wikitable"style="width:100%;border="4px solid black"background-color:white;" | ||
|- | |- | ||
! style="background-color:#74A5ED"|Image | !style="background-color:#74A5ED;width:50px"|Image | ||
! style="background-color:#74A5ED"|Name | !style="background-color:#74A5ED"|Name | ||
! style="background-color:#74A5ED"|Description | !style="background-color:#74A5ED"|Description | ||
|- | |- | ||
|[[File:Mushroom 3-Pack PMTOK icon.png|50px]] | |[[File:Mushroom 3-Pack PMTOK icon.png|50px]] | ||
| Line 1,174: | Line 1,310: | ||
|[[File:Shiny Mushroom 3-Pack PMTOK icon.png|50px]] | |[[File:Shiny Mushroom 3-Pack PMTOK icon.png|50px]] | ||
|[[Shiny Mushroom 3-Pack]] | |[[Shiny Mushroom 3-Pack]] | ||
|Three [[Shiny Mushroom]]s. Available in the [[Shroom City (Paper Mario: The Origami King)|Shroom City]] shop and from a Toad statue on [[Diamond Island]]. | |Three [[Shiny Mushroom]]s. Available in the [[Shroom City (Paper Mario: The Origami King)|Shroom City]] shop and from a Toad statue on [[Diamond Island (Paper Mario: The Origami King)|Diamond Island]]. | ||
|- | |- | ||
|[[File:Fire Flower Set PMTOK icon.png|50px]] | |[[File:Fire Flower Set PMTOK icon.png|50px]] | ||
| Line 1,186: | Line 1,322: | ||
===Overworld equipment=== | ===Overworld equipment=== | ||
{|class="wikitable" style="width:100%; border="4px solid black" background-color:white;" | {|class="wikitable"style="width:100%;border="4px solid black"background-color:white;" | ||
|- | |- | ||
! style="background-color:#74A5ED"|Image | !style="background-color:#74A5ED; width:50px"|Image | ||
! style="background-color:#74A5ED"|Name | !style="background-color:#74A5ED"|Name | ||
! style="background-color:#74A5ED"|Description | !style="background-color:#74A5ED"|Description | ||
|- | |- | ||
|[[File:Boot Whistle PMTOK icon.png|50px]] | |[[File:Boot Whistle PMTOK icon.png|50px]] | ||
| Line 1,211: | Line 1,347: | ||
===Accessories=== | ===Accessories=== | ||
Accessories are sold through the [[Fun, Funky, and Functional]] chain, found throughout the world in places such as [[Picnic Road]] and [[Bonehead Island]]. To activate their effect, Mario must equip them first. The Heart Plus, Guard Plus, and Time Plus have three variants of increasing effectiveness, but Mario can only equip one variant of each. The six other accessories have their own group, and Mario can only equip two from this group. After a certain point in the game, all accessories will be sold at an 80% discount. | Accessories are sold through the [[Fun, Funky, and Functional]] chain, found throughout the world in places such as [[Picnic Road]] and [[Bonehead Island]]. To activate their effect, Mario must equip them first. The Heart Plus, Guard Plus, and Time Plus have three variants of increasing effectiveness, but Mario can only equip one variant of each. The six other accessories have their own group, and Mario can only equip two from this group. After a certain point in the game, all accessories will be sold at an 80% discount. | ||
{|class="wikitable" style="width:100%; border="4px solid black" background-color:white;" | {|class="wikitable"style="width:100%;border="4px solid black"background-color:white;" | ||
|- | |- | ||
! style="background-color:#74A5ED"|Image | !style="background-color:#74A5ED;width:50px"|Image | ||
! style="background-color:#74A5ED"|Name | !style="background-color:#74A5ED"|Name | ||
! style="background-color:#74A5ED"|Description | !style="background-color:#74A5ED"|Description | ||
|- | |- | ||
|[[File:Heart Plus PMTOK icon.png|50px]]<br>[[File:Silver Heart Plus PMTOK icon.png|50px]]<br>[[File:Gold Heart Plus PMTOK icon.png|50px]] | |[[File:Heart Plus PMTOK icon.png|50px]]<br>[[File:Silver Heart Plus PMTOK icon.png|50px]]<br>[[File:Gold Heart Plus PMTOK icon.png|50px]] | ||
| Line 1,243: | Line 1,379: | ||
|[[File:Membership Card PMTOK icon.png|50px]]<br>[[File:Silver Membership Card PMTOK icon.png|50px]]<br>[[File:Gold Membership Card PMTOK icon.png|50px]] | |[[File:Membership Card PMTOK icon.png|50px]]<br>[[File:Silver Membership Card PMTOK icon.png|50px]]<br>[[File:Gold Membership Card PMTOK icon.png|50px]] | ||
|[[Membership Card (Paper Mario: The Origami King)|Membership Card]] | |[[Membership Card (Paper Mario: The Origami King)|Membership Card]] | ||
|When equipped, Mario gets discounted prices at stores | |When equipped, Mario gets discounted prices at stores. | ||
|- | |- | ||
|[[File:Confetti Vacuum PMTOK icon.png|50px]] | |[[File:Confetti Vacuum PMTOK icon.png|50px]] | ||
| Line 1,267: | Line 1,403: | ||
===Overworld collectibles and objects=== | ===Overworld collectibles and objects=== | ||
{|class="wikitable" style="width:100%; border="4px solid black" background-color:white;" | {{image|more=yes|section=y|A few objects still missing images}} | ||
{{rewrite-expand|section=y|More descriptive descriptions; missing non-hazardous objects like the various [[Magic Circle]]s}} | |||
{|class="wikitable"style="width:100%;border="4px solid black"background-color:white;" | |||
|- | |- | ||
! style="background-color:#74A5ED"|Image | !style="background-color:#74A5ED"|Image | ||
! style="background-color:#74A5ED"|Name | !style="background-color:#74A5ED"|Name | ||
! style="background-color:#74A5ED"|Description | !style="background-color:#74A5ED"|Description | ||
|- | |- | ||
|[[File:PMOK Mario Confetti.png| | !colspan=3 style="background:#74A5ED;"|'''Collectible items''' | ||
|- | |||
|[[File:PMTOK Bag of Confetti.jpg|128px]]<br>[[File:PMTOK Bag of Confetti.png|128px]] | |||
|[[Bag of Confetti]] | |||
|A bag filled with confetti that can be collected to completely refill Mario's confetti supply. There are two different sizes, with the larger ones restoring more confetti. | |||
|- | |||
|[[File:PMOK Mario Confetti.png|128px]] | |||
|[[Confetti]] | |[[Confetti]] | ||
|A common object used to fill in Not-Bottomless Holes. It is obtained from defeating enemies, finding bags of confetti in the overworld, or hammering bushes and trees. | |A common object used to fill in Not-Bottomless Holes. It is obtained from defeating enemies, finding bags of confetti in the overworld, or hammering bushes and trees. | ||
|- | |- | ||
|[[File:CoinPMTOK.png| | |[[File:CoinPMTOK.png|128px]] | ||
|[[Coin]] | |[[Coin]] | ||
|Coins are found on the overworld, obtained from Not-Bottomless Holes, | |Coins are found on the overworld, obtained from Not-Bottomless Holes, located in ? Blocks, and won from battles. Mario can use them to buy items and accessories, cheer the Toads on in battle, and purchase more time in the line-up phase. | ||
|- | |- | ||
|[[File:PMTOK 10 Coin.jpg| | |[[File:PMTOK 10 Coin.jpg|128px]] | ||
|[[10-Coin]] | |[[10-Coin]] | ||
|Larger coins that are worth 10 smaller coins. | |Larger coins that are worth 10 smaller coins. | ||
|- | |- | ||
|[[File:PMTOK Giant Coin.png| | |[[File:PMTOK Giant Coin.png|128px]] | ||
|[[100-Coin]] | |[[100-Coin]] | ||
|Giant coins that are equivalent to 100 coins. | |Giant coins that are equivalent to 100 coins. | ||
|- | |- | ||
|[[File:PMTOK | |[[File:PMTOK Coin Bag leaf icon.png|128px]] | ||
|[[ | |[[Coin Bag]] | ||
| | |A bag of coins that is worth 1000 coins. | ||
|- | |||
|[[File:Hint Envelope PMTOK.png|128px]] | |||
|[[Hint Envelope]] | |||
|Orange envelopes that appear during boss battles. Collecting one gives Mario a hint on how to defeat the boss. | |||
|- | |||
|[[File:PMTOK Small Heart.jpg|64px]]<br>[[File:PMTOK Medium Heart.jpg|64px]]<br>[[File:PMTOK Large Heart.jpg|64px]] | |||
|[[Heart (item)|Healing Heart]] | |||
|Hearts that appear both on the overworld and in boss battles, restoring Mario's HP depending on their size. | |||
|- | |- | ||
|[[File:PMTOK | |[[File:PMTOK MAX UP Heart.jpg|64px]] | ||
|[[ | |[[MAX UP Heart]] | ||
| | |Hearts that increase Mario's max HP by five, ten, or twenty. | ||
|- | |- | ||
|[[File:PMTOK Origami Super Star Artwork.png| | |[[File:PMTOK Origami Super Star Artwork.png|128px]] | ||
|[[Super Star]] | |[[Super Star]] | ||
|A rare item that makes Mario invincible, allowing him to safely walk through spikes and defeat enemies upon contact. | |A rare item that makes Mario [[Invincible Mario|invincible]], allowing him to safely walk through spikes and defeat enemies upon contact. | ||
|- | |- | ||
!colspan=3 style="background:#74A5ED;"|'''Trigger objects''' | |||
|- | |- | ||
|[[File:PMTOK | |[[File:PMTOK Magic Circle art close-up.png|128px]] | ||
|[[ | |[[1,000-Fold Arms]]<br>[[Magic Circle]] | ||
| | |Patterns that allow Mario to use the 1,000-Fold Arms technique when stood on, assuming Olivia is nearby. These Magic Circles take the form of glowing triangles of light when contained by objects or enemies. In boss battles, they may need to be activated by passing over an ON Panel. | ||
|- | |||
|[[File:Glowing Spot.jpg|128px]] | |||
|{{conjectural|Glowing spot}} | |||
|A shining spot in the ground where [[Professor Toad]] can dig, revealing coins, items, and treasure. | |||
|- | |||
|[[File:No image.png|128px]] | |||
|{{conjectural|Memory-game tile}} | |||
|A picture of a Magic Circle on a tile. Rewards Mario a Magic Circle when matched. | |||
|- | |||
|[[File:PMTOK Olly Tape.jpg|128px]] | |||
|{{conjectural|[[Olly Tape]]}} | |||
|Tape with Olly's insignia, often opening shortcuts or freeing Toads after being removed. | |||
|- | |||
|[[File:Pelmanism Leaves PMTOK.png|128px]] | |||
|[[Pelmanism Leaf]] | |||
|A picture of an item on a leaf. Rewards Mario an item when matched. | |||
|- | |||
|[[File:No image.png|128px]] | |||
|[[Vellumental]]<br>[[Magic Circle]] | |||
|Patterns that allow Mario to use the Vellumental technique when stood on, assuming Olivia is nearby. These Magic Circles take the form of glowing triangles of light when contained by objects or enemies. In battles they may need to be activated by passing over an ON Panel. | |||
|- | |||
!colspan=3 style="background:#74A5ED;"|'''Transportation objects''' | |||
|- | |- | ||
|[[File:PMTOK Boot Car. | |[[File:PMTOK Boot Car Render.png|128px]] | ||
|[[Boot Car]] | |[[Boot Car]] | ||
|A car resembling a [[Goomba's Shoe]] that Mario can ride in the [[Scorching Sandpaper Desert]]. | |A car resembling a [[Goomba's Shoe]] that Mario can ride in the [[Scorching Sandpaper Desert]]. | ||
|- | |- | ||
|[[File:PMTOK | |[[File:PMTOK Collectible Treasure 74 (Submarine Marino).jpg|128px]] | ||
|{{conjectural|[[ | |[[Super Marino]] | ||
| | |A submarine piloted by [[Captain T. Ode]]. This sub transported guests to [[Diamond Island (Paper Mario: The Origami King)|Diamond Island]], before T. Ode stole it. Later, it becomes the main display at the [[Musée Champignon]]. | ||
|- | |||
|[[File:No image.png|128px]] | |||
|{{conjectural|Temple teleporter}} | |||
|Warps Mario to a different area in the [[Trial of Power]], [[Trial of Courage]], and [[Trial of Wisdom]] temples. | |||
|- | |||
|[[File:PMTOK Collectible Treasure 31 (Toad Tram).jpg|128px]] | |||
|Toad Tram | |||
|An aerial cable car used to transport passengers via cables and a series of towers. The tram runs through [[Toad Town#Paper_Mario_series|Toad Town]], [[Overlook Mountain]], and [[Autumn Mountain]]. | |||
|- | |||
|[[File:PMTOK Green Warp Pipe.jpg|128px]] | |||
|[[Warp Pipe]] | |||
|Pipes that are used to quickly traverse the world. Six shiny, colored pipes are found in the Musée Champignon and take Mario to each of the different streamer areas. The [[Sensor Lab]] also contains three Warp Pipes that bring Mario to different testing rooms, so he can try out the [[Toad Researcher]]'s inventions. | |||
|- | |||
!colspan=3 style="background:#74A5ED;"|'''Strikable objects''' | |||
|- | |||
|[[File:No image.png|60px]] | |||
|[[Barrel]] | |||
|Wooden barrels that can be whacked with Mario's [[Hammer]]. They contain coins or confetti. | |||
|- | |||
|[[File:No image.png|60px]] | |||
|Breakable block | |||
|Blocks in the [[Water Vellumental Shrine]] that can be whacked with Mario's [[Hammer]]. | |||
|- | |||
|[[File:No image.png|60px]] | |||
|[[Crate]] | |||
|Wooden crates that can be whacked with Mario's [[Hammer]]. They contain coins and confetti. | |||
|- | |||
|[[File:PMOK Bush.png|60px]][[File:PMTOK Flower pair 1.png|60px]] | |||
|Flora and rocks | |||
|Objects that can be whacked with Mario's [[Hammer]] to produce confetti. These vary from flowers to bushes to rocks. | |||
|- | |||
|[[File:No image.png|60px]] | |||
|Ice rock | |||
|Rocks in the [[Ice Vellumental Mountain]] that can be whacked with Mario's [[Hammer]]. | |||
|- | |||
|[[File:PMOK Fall Tree.png|60px]] | |||
|[[Tree]] | |||
|Trees that can be whacked with Mario's [[Hammer]] to produce confetti. | |||
|- | |||
|[[File:No image.png|60px]] | |||
|Vase | |||
|Ceramic vases that can be whacked with Mario's [[Hammer]]. They contain coins and confetti. | |||
|- | |||
!colspan=3 style="background:#74A5ED;"|'''Blocks''' | |||
|- | |||
|[[File:PMTOK Question Block.png|128px]] | |||
|[[? Block]] | |||
|Blocks containing helpful items, usually coins or Collectible Treasures. | |||
|- | |||
|[[File:PMTOK Brick Block.jpg|128px]] | |||
|[[Brick Block]] | |||
|Common blocks that can be broken by either Mario hitting them with a hammer or jumping into them from below. | |||
|- | |||
|[[File:No image.png|128px]] | |||
|[[Empty Block]] | |||
|A block that cannot be broken. When a ? Block is hit, it turns into an Empty Block. | |||
|- | |||
|[[File:No image.png|128px]] | |||
|[[Hidden Block]] | |||
|? Blocks that are invisible. The [[Hidden Block Alert]] or the [[Hidden Block Unhider]] can be used to find Hidden Blocks. | |||
|- | |||
|[[File:PMTOK Save Block crop.png|128px]] | |||
|[[Save Block]] | |||
|Common, multicolored blocks with an "S" insignia. If Mario hits one, the game's progress is saved. | |||
|- | |||
!colspan=3 style="background:#74A5ED;"|'''Other objects''' | |||
|- | |||
|[[File:PMTOK MarioFishing.png|128px]] | |||
|[[Fishing spot|Fishing rod]] | |||
|Tools found at the [[fishing spot]]s of [[Overlook Mountain]], [[Shogun Studios]], and [[Full Moon Island]]. Casting the line will allow Mario to catch fish, [[Bloopers]], and [[Collectible Treasure]]s. | |||
|- | |||
|[[File:PMTOK Collectible Treasure 43 (Relaxing Bench).jpg|128px]] | |||
|[[Relaxing Bench]] | |||
|A bench where Mario can sit on to fully recover his HP. | |||
|- | |||
|[[File:No image.png|128px]] | |||
|[[Sign]] | |||
|Signboards that provide information relevant to the area when read. | |||
|- | |||
|[[File:PMTOK Chest.png|128px]]<br>[[File:PMTOK Chest (Gold).png|128px]] | |||
|[[Treasure chest]] | |||
|Chests that hold various rewards including [[Musée Champignon#Treasure Gallery|Collectible Treasures]]. Chests found in [[The Great Sea]] sparkle just like [[Coin]]s.<br>A golden-trim variant can be found throughout [[Shogun Studios]], which require either the [[Commoner Pass]] or [[Royalty Pass]] to unlock. | |||
|} | |} | ||
===Useful Items=== | ===Useful Items=== | ||
{|class="wikitable" style="width:100%; border="4px solid black" background-color:white;" | {|class="wikitable"style="width:100%;border="4px solid black"background-color:white;" | ||
|- | |- | ||
! style="background-color:#74A5ED"|Image | !style="background-color:#74A5ED"|Image | ||
! style="background-color:#74A5ED"|Name | !style="background-color:#74A5ED"|Name | ||
! style="background-color:#74A5ED"|Description | !style="background-color:#74A5ED"|Description | ||
|- | |- | ||
|[[File:Baseball PMTOK icon.png|50px]] | |[[File:Baseball PMTOK icon.png|50px]] | ||
| Line 1,371: | Line 1,625: | ||
|[[File:Diamond Key PMTOK icon.png|50px]] | |[[File:Diamond Key PMTOK icon.png|50px]] | ||
|[[Diamond Key]] | |[[Diamond Key]] | ||
|The key to [[Diamond Island]]. Luigi obtains it from [[Full Moon Island]] and gives it to Mario while on [[Mushroom Island]]. | |The key to [[Diamond Island (Paper Mario: The Origami King)|Diamond Island]]. Luigi obtains it from [[Full Moon Island]] and gives it to Mario while on [[Mushroom Island]]. | ||
|- | |- | ||
|[[File:Faded Fire Flower PMTOK icon.png|50px]] | |[[File:Faded Fire Flower PMTOK icon.png|50px]] | ||
| Line 1,387: | Line 1,641: | ||
|[[File:Groovier Panel PMTOK icon.png|50px]] | |[[File:Groovier Panel PMTOK icon.png|50px]] | ||
|[[Groovier Panel]] | |[[Groovier Panel]] | ||
|A tile in the Water Vellumental Shrine | |A tile in the Water Vellumental Shrine used to complete a 3x3 sliding puzzle. | ||
|- | |- | ||
|[[File:Heartbeat Skipper PMTOK icon.png|50px]] | |[[File:Heartbeat Skipper PMTOK icon.png|50px]] | ||
| Line 1,435: | Line 1,689: | ||
|[[File:Professors Room Key PMTOK icon.png|50px]] | |[[File:Professors Room Key PMTOK icon.png|50px]] | ||
|[[Professor's Room Key]] | |[[Professor's Room Key]] | ||
|The key to [[Professor Toad]]'s bottom-floor room at the | |The key to [[Professor Toad]]'s bottom-floor room at the Snif City Royal Hotel. | ||
|- | |- | ||
|[[File:Red Gem PMTOK icon.png|50px]] | |[[File:Red Gem PMTOK icon.png|50px]] | ||
| Line 1,479: | Line 1,733: | ||
|[[File:Space Warrior Mask PMTOK icon.png|50px]] | |[[File:Space Warrior Mask PMTOK icon.png|50px]] | ||
|[[Space Warrior Mask]] | |[[Space Warrior Mask]] | ||
|A mask in the Shogun Studios staff room, shaped like [[Samus Aran]]'s helmet. | |A mask in the Shogun Studios staff room, shaped like [[Samus|Samus Aran]]'s helmet. | ||
|- | |- | ||
|[[File:Spring of Rainbows VIP PMTOK icon.png|50px]] | |[[File:Spring of Rainbows VIP PMTOK icon.png|50px]] | ||
| Line 1,500: | Line 1,754: | ||
|[[Suite Key]] | |[[Suite Key]] | ||
|The key to Professor Toad's updated suite, found by Luigi near a rigged carnival game. | |The key to Professor Toad's updated suite, found by Luigi near a rigged carnival game. | ||
|- | |||
|[[File:Sun Incense PMTOK icon.png|50px]] | |||
|[[Sun Incense]] | |||
|An incense placed above the entrance to the frozen chamber in [[Scorching Sandpaper Desert]], which summons [[Mega Paper Macho Pokey]]. | |||
|- | |- | ||
|[[File:Thrills at Night PMTOK icon.png|50px]] | |[[File:Thrills at Night PMTOK icon.png|50px]] | ||
| Line 1,529: | Line 1,787: | ||
===Version 1.0.1=== | ===Version 1.0.1=== | ||
'''Release date:''' August 5, 2020 | '''Release date:''' August 5, 2020 | ||
;Patch notes | ;Patch notes | ||
<blockquote><i> | <blockquote><i> | ||
| Line 1,544: | Line 1,801: | ||
:Note: Previously registered scores will not change. New scores will be registered correctly after downloading this update data. | :Note: Previously registered scores will not change. New scores will be registered correctly after downloading this update data. | ||
*Fixed an issue in which you could obtain an item from outside of a certain coffin in the Temple of Shrooms. This fix also corrects a related error involving hints from the Love Toad in Toad Town. | *Fixed an issue in which you could obtain an item from outside of a certain coffin in the Temple of Shrooms. This fix also corrects a related error involving hints from the Love Toad in Toad Town. | ||
:Note: If | :Note: If you've already obtained the item from outside of the coffin, the Love Toad's hint error will be resolved. | ||
*Fixed an issue in Overlook Mountain in which the event of looking up at Overlook Tower would occasionally occur from the bottom of the hill. | *Fixed an issue in Overlook Mountain in which the event of looking up at Overlook Tower would occasionally occur from the bottom of the hill. | ||
</i></blockquote> | </i></blockquote> | ||
==Technical aspects== | |||
The game supports 5.1 surround. Mario's movements and attacks and all ambient noises are played on all speakers. | |||
The game is hard-locked to 30 frames per second. | |||
==Pre-release and unused content== | ==Pre-release and unused content== | ||
{{main|List of Paper Mario: The Origami King pre-release and unused content}} | {{main|List of Paper Mario: The Origami King pre-release and unused content}} | ||
[[File:PMTOK Color Splash Hammer.png|thumb|Sprites of the hammer from ''Paper Mario: Color Splash''|100px]] | [[File:PMTOK Color Splash Hammer.png|thumb|Sprites of the hammer from ''Paper Mario: Color Splash''|100px]] | ||
Before entering Peach's Castle for the first time, the player was originally going to have a 360-degree view of the castle as well as some models of Princess Peach, which appear unused in the game's files with different hair and jewels on her crown.<ref>https://www.youtube.com/watch?v=l8-kBSYafhs</ref> Some leftovers from ''Paper Mario: Color Splash'' in the game's code include Mario swinging his hammer, which is 2D, even though in the game it is 3D. The Monty Mole accessory vendor | [[File:PMTOK Bossotronic unused (Fire Vellumental Cave).png|thumb|left|Mario in an unused rematch against the [[Paper Macho Shy Guy]]s with fire buckets.]] | ||
Before entering Peach's Castle for the first time, the player was originally going to have a 360-degree view of the castle as well as some models of Princess Peach, which appear unused in the game's files with different hair and jewels on her crown.<ref>https://www.youtube.com/watch?v=l8-kBSYafhs</ref> Some leftovers from ''Paper Mario: Color Splash'' in the game's code include Mario swinging his hammer, which is 2D, even though in the game it is 3D. The Monty Mole accessory vendor has unused walking animations.<ref>https://tcrf.net/Paper_Mario:_The_Origami_King</ref> Additionally, there are unused sprites for Captain T. Ode, as well as Bowser and Bowser Jr. inside the Koopa Clown Car. | |||
<tt>\data\map\maplink.elf.zst</tt> contains nodes linking to unused [[Battle Lab|Bossotronic]] rematches against all three [[Big Sho' Theater]] Paper Macho battles, the second wave of Paper Macho Shy Guys with buckets in the [[Fire Vellumental Cave]], and the [[Paper Macho Mummy Goomba]]s in the [[Temple of Shrooms]]. However, when activated the bosses do not appear as the links are unfinished. | |||
{{br}} | {{br}} | ||
==References to other games== | ==References to other games== | ||
*''[[Donkey Kong (game)|Donkey Kong]]'': When Mario is equipped with the [[Retro Soundbox]], he makes the walking sound effect from this game. | *''[[Donkey Kong (game)|Donkey Kong]]'': When Mario is equipped with the [[Retro Soundbox]], he makes the walking sound effect from this game. | ||
*''[[Super Mario Bros.]]'': When Mario grabs the top of the [[Goal Pole]] and slides down it for the first time at [[Picnic Road]], a [[Fireworks|firework]] shoots into the sky while an arrangement of the "course cleared" fanfare plays, similar to when the player clears a level with the timer's last digit at 1, 3, or 6 in this game. One of Colored Pencils' | *''[[Mario Bros. (game)|Mario Bros.]]'': The effect of POW Blocks on Sidesteppers allude to this game, where both debuted. Hitting a POW Block causes a Sidestepper to flip over. If a red Sidestepper is left flipped for a certain amount of time, it turns blue. | ||
*[[zeldawiki:The Legend of Zelda (Series)| | *''[[Super Mario Bros.]]'': When Mario grabs the top of the [[Goal Pole]] and slides down it for the first time at [[Picnic Road]], a [[Fireworks|firework]] shoots into the sky while an arrangement of the "course cleared" fanfare plays, similar to when the player clears a level with the timer's last digit at 1, 3, or 6 in this game. One of Colored Pencils' drawings is of Mario's death sprite from this game. | ||
*''[[metroidwiki:Metroid (series)|Metroid]]'' series: | *''[[zeldawiki:The Legend of Zelda (Series)|The Legend of Zelda]]'' series: The three trials at Diamond Island are a reference to each of the three different parts of the Triforce. | ||
*''[[metroidwiki:Metroid (series)|Metroid]]'' series: A [[Space Warrior Mask|papier-mâché model]] of [[Samus]]'s helmet appears in the storeroom of Shogun Studios. | |||
*''[[Yume Kōjō: Doki Doki Panic]]'': When trying to recall the term "amnesia", Bob-omb mentions "Thinky Thinky Panic", a reference to this game's title. | *''[[Yume Kōjō: Doki Doki Panic]]'': When trying to recall the term "amnesia", Bob-omb mentions "Thinky Thinky Panic", a reference to this game's title. | ||
*''[[Super Mario Bros. 2]]'': After Mario rescues Birdo in [[Big Sho' Theater]], she says that she has "Mario madness." The English cover for ''Super Mario Bros. 2'' features the subtitle "Mario Madness," and the game was Birdo's first appearance. Additionally, the Musée Champignon description for the [[Black Shy Guy]] states that it throws [[turnip]]-like objects, referencing the throwing mechanic from this game. | *''[[Super Mario Bros. 2]]'': After Mario rescues Birdo in [[Big Sho' Theater]], she says that she has "Mario madness." The English cover for ''Super Mario Bros. 2'' features the subtitle "Mario Madness," and the game was Birdo's first appearance. Additionally, the Musée Champignon description for the [[Black Shy Guy]] states that it throws [[turnip]]-like objects, referencing the throwing mechanic from this game. | ||
*''[[Super Mario Bros. 3]]'': Olivia mentions [[Angry Sun|the sun being angry]] in Scorching Sandpaper Desert. | *''[[Super Mario Bros. 3]]'': Olivia mentions [[Angry Sun|the sun being angry]] in Scorching Sandpaper Desert. Portions of [[Chestnut Valley]]'s music are based on this game's athletic theme. Koopas are also depicted as religious, repeatedly praying to a deity as a sign of worship, referencing an image in this game's credits sequence depicting a green Koopa Troopa praying to [[Statue Mario]].<ref>{{cite|author=Supper Mario Broth|date=November 21, 2024|title=In Paper Mario: The Origami King, Koopa Troopas are explicitly religious, which is very rare for the Mario franchise. This might be a reference to an idea first proposed by Super Mario Bros. 3 32 years prior, whereby a Koopa Troopa was shown praying in the game's ending.|url=https://bsky.app/profile/mariobrothblog.bsky.social/post/3lbic4d24y22e|publisher=Bluesky|language=English|accessdate=November 27, 2024|archive=https://archive.ph/im2eg}}</ref> | ||
*''[[Super Mario World]]'': The fireball and spin jump sounds are reused from this game. | *''[[Super Mario World]]'': The fireball and spin jump sounds are reused from this game. | ||
*''[[Super Mario 64]]'': An arrangement of "[[Inside the Castle Walls]]" plays when Mario and Luigi arrive at Peach's Castle in the opening. | *''[[Super Mario 64]]'': An arrangement of "[[Inside the Castle Walls]]" plays when Mario and Luigi arrive at Peach's Castle in the opening. | ||
*''[[Paper Mario]]'': Peach's castle's interior looks similar to the one used in this game, and Peach's design from this game appears as a photo. | *''[[Paper Mario]]'': Peach's castle's interior looks similar to the one used in this game, and Peach's design from this game appears as a photo. The moves [[Headbonk]] and [[Shell Shot]] are reused from this game. In addition, enemy Koopas may team up to perform a Tower Attack nearly identical to the one the [[Koopa Bros.]] can use, and enemy Paratroopas can use a Dive Kick similar to [[Parakarry]]'s. | ||
*''[[zeldawiki:The Legend of Zelda: The Wind Waker|The Legend of Zelda: The Wind Waker]]'': The | *''[[zeldawiki:The Legend of Zelda: The Wind Waker|The Legend of Zelda: The Wind Waker]]'': [[The Great Sea]] is an overall reference to this game's main setting. The way that Mario navigates the Great Sea is a reference to this game's main navigation mechanic. A few islands in the Great Sea are references to a few islands from this game; [[Heart Island]] is a reference to each of the Fairy Islands, [[Scuffle Island]] is a reference to Star Island since both islands require the player to fight multiple enemies to earn a special item, and Crescent Moon Island (before it becomes [[Full Moon Island]]) is a reference to this game's Crescent Moon Island respectively. Mario having to collect the three orbs to enter the [[Sea Tower]] is a reference to how Link has to collect the three pearls to be able to enter the Tower of the Gods. | ||
*''[[Mario & Luigi: Superstar Saga]]'': To reach a book on the shelf in the [[Origami Craftsman]]'s workshop, Mario and Luigi perform a similar [[High Jump]] to that of this game. | |||
*''[[Paper Mario: The Thousand-Year Door]]'': Peach's design from this game appears as a photo. Additionally, when Mario and Bob-omb interact with the steering wheel on [[the Princess Peach]], the latter mentions that he dreams of being an admiral someday, in reference to [[Admiral Bobbery]]. | *''[[Paper Mario: The Thousand-Year Door]]'': Peach's design from this game appears as a photo. Additionally, when Mario and Bob-omb interact with the steering wheel on [[the Princess Peach]], the latter mentions that he dreams of being an admiral someday, in reference to [[Admiral Bobbery]]. | ||
*''[[Super Paper Mario]]'': Peach appears in a photo with her parasol and a background resembling [[Lineland]]. Some of the [[Sammer's Kingdom]]'s OST is incorporated into the music for Shogun Studios. | *''[[Super Paper Mario]]'': Peach appears in a photo with her parasol and a background resembling [[Lineland]]. Some of the [[Sammer's Kingdom]]'s OST is incorporated into the music for Shogun Studios. | ||
*''[[Mario Kart Wii]]'': A slow-paced arrangement of [[Maple Treeway]]'s music plays in the [[Tranquil Pipes Teahouse]] at Shogun Studios. | *''[[Mario Kart Wii]]'': A slow-paced arrangement of [[Wii Maple Treeway|Maple Treeway]]'s music plays in the [[Tranquil Pipes Teahouse]] at Shogun Studios. | ||
*''[[New Super Mario Bros. Wii]]'': Some of Bowser Jr.'s voice clips are reused from this game. | *''[[New Super Mario Bros. Wii]]'': Some of Bowser Jr.'s voice clips are reused from this game. | ||
*''[[metroidwiki:Metroid: Other M|Metroid: Other M]]'': If Mario tries on the Space Warrior Mask, Bob-omb comments on how the helmet would look better on "some other kind of M." | |||
*''[[Paper Mario: Sticker Star]]'': Shiny and flashy attacks return from this game. In addition, Peach appears in a photo, surrounded by stickers. Additionally, the fan that blows the fog away in Bonehead Island, the Scissors boss and the basin used in the Trial of Courage resemble their respective Things in the game. The music of the main boss introductions is incorporated into the music of the Vellumental's introductions. | *''[[Paper Mario: Sticker Star]]'': Shiny and flashy attacks return from this game. In addition, Peach appears in a photo, surrounded by stickers. Additionally, the fan that blows the fog away in Bonehead Island, the Scissors boss and the basin used in the Trial of Courage resemble their respective Things in the game. The music of the main boss introductions is incorporated into the music of the Vellumental's introductions. | ||
*''[[Super Mario 3D World]]'': Some of the voice clips are recycled from this game. The [[Goomba Mask]] returns from this game. Luigi's running pose and Peach's floating pose in the ending are based on their respective animations from this game. | *''[[Super Mario 3D World]]'': Some of the voice clips are recycled from this game. The [[Goomba Mask]] returns from this game. Luigi's running pose and Peach's floating pose in the ending are based on their respective animations from this game. | ||
*''[[Mario Kart 8]]'': Like in ''Paper Mario: Color Splash'', Luigi drives a [[Standard Kart]] resembling the ones in this game. | *''[[Mario Kart 8]]'': Like in ''Paper Mario: Color Splash'', Luigi drives a [[Standard Kart]] resembling the ones in this game. | ||
*''[[Paper Mario: Color Splash]]'': ''The Origami King'' runs on a very similar graphical engine to ''Color Splash''. The paint-coated graphic effect is used when a Toad aboard the Princess Peach is covered in ink. Mario can again hammer characters to temporarily crumple them. Princess Peach's design from that game also appears as a photo in the game. The [[Rescue Squad]]s return in the [[Battle Lab]]. [[The Emerald Circus]] and the [[Violet Passage captain]]'s pirate ship appear in paintings in [[Overlook Tower]]. When Captain T. Ode introduces himself after being thawed out by Olivia in her Fire Vellumental form, the [[Fortune Island]] music is reused, lacking the intro and bell quips of the tune. Additionally, steaks identical to the one fought in [[Tangerino Grill]] are found when T. Ode is freed. [[Bonehead Island]] looks very similar to Fortune Island, and includes multiple design similarities. The music on Bonehead Island is very similar to the Violet Passage theme. When the player completes Bonehead Island, a realistic fan that has the same appearance as the Fan Thing from this game (which actually originated from ''Sticker Star'') emerges from the sea and blows the mist away, similar to the scene when the Fan is being used in Violet Passage to get the ship to set sail. A [[Shy Guy]] with a straw similar to a [[Slurp Guy]] appears in the Tranquil Pipes Teahouse and gives Mario his straw. The [[Spring of Rainbows]] bears a resemblance to [[Prisma Fountain]], although in a more papercraft-like appearance. The way [[Bowser Jr.]] restores his colors from it also resembles the paint mechanic in this game. One Toad in Toad Town mentions that he needs to find "an expert on bridge experts", referencing the bridge builder and the bridge builder expert that appear in [[Port Prisma]]. Two [[Whistle Snifit]]s are found in the Spring of Rainbows' | *''[[Paper Mario: Color Splash]]'': ''The Origami King'' runs on a very similar graphical engine to ''Color Splash''. The paint-coated graphic effect is used when a Toad aboard the Princess Peach is covered in ink. Mario can again hammer characters to temporarily crumple them. Princess Peach's design from that game also appears as a photo in the game. The [[Rescue Squad]]s return in the [[Battle Lab]]. [[The Emerald Circus]] and the [[Violet Passage captain]]'s pirate ship appear in paintings in [[Overlook Tower]]. When Captain T. Ode introduces himself after being thawed out by Olivia in her Fire Vellumental form, the [[Fortune Island]] music is reused, lacking the intro and bell quips of the tune. Additionally, steaks identical to the one fought in [[Tangerino Grill]] are found when T. Ode is freed. [[Bonehead Island]] looks very similar to Fortune Island, and includes multiple design similarities. The music on Bonehead Island is very similar to the Violet Passage theme. When the player completes Bonehead Island, a realistic fan that has the same appearance as the Fan Thing from this game (which actually originated from ''Sticker Star'') emerges from the sea and blows the mist away, similar to the scene when the Fan is being used in Violet Passage to get the ship to set sail. A [[Shy Guy]] with a straw similar to a [[Slurp Guy]] appears in the Tranquil Pipes Teahouse and gives Mario his straw. The [[Spring of Rainbows]] bears a resemblance to [[Prisma Fountain]], although in a more papercraft-like appearance. The way [[Bowser Jr.]] restores his colors from it also resembles the paint mechanic in this game. One Toad in Toad Town mentions that he needs to find "an expert on bridge experts", referencing the bridge builder and the bridge builder expert that appear in [[Port Prisma]]. Two [[Whistle Snifit]]s are found in the Spring of Rainbows' cafe. The way the basin crushes Mario in the Trial of Courage is similar to how the Basin Thing crushes him at [[Fort Cobalt]]. The faceless Toads resemble the faceless cardboard cutout of the [[Mountain Sage]] on the top of [[Daffodil Peak]]. When approaching the [[Spring of Jungle Mist]], Kamek mentions that he has "dealt with giant trees before," a nod to the [[Mondo Woods]] area. | ||
*''[[zeldawiki:The Legend of Zelda: Breath of the Wild|The Legend of Zelda: Breath of the Wild]]'': | *''[[zeldawiki:The Legend of Zelda: Breath of the Wild|The Legend of Zelda: Breath of the Wild]]'': The climbing mechanic from this game is referenced when a Toad climbing a cliff in [[Autumn Mountain]] tells Mario that it would be more difficult to climb the cliff if it was raining, just like in this game where Link slides down cliffs if he climbs them while it is raining. | ||
==References in other games== | ==References in other games== | ||
*'' | *''[[Tetris 99]]'': A theme based on ''Origami King'' was made available during the 15th Maximus Cup. | ||
*''[[Super Smash Bros. Ultimate]]'': A [[Super Smash Bros. Ultimate#Spirit Board|Spirit Board]] [[smashwiki:Paper Mario: The Origami King|event]] themed after '' | *''[[Super Smash Bros. Ultimate]]'': A [[Super Smash Bros. Ultimate#Spirit Board|Spirit Board]] [[smashwiki:Paper Mario: The Origami King|event]] themed after ''Origami King'' ran from August 28, 2020 until September 2, 2020. Origami Peach, Olivia, and King Olly [[Spirit (Super Smash Bros. Ultimate)|spirits]] appear at random during the event. The 3 spirits were later available on the Spirit Board as normal spirits. | ||
*''[[WarioWare: Move It!]]'': A [[Paper Mario: The Origami King (microgame)|microgame]] based on ''Origami King'' appears in this game, in which Mario must use the 1,000-Fold Arms. | |||
==Similarities to other ''Paper Mario'' games== | ==Similarities to the other ''Paper Mario'' games== | ||
*Like the original game and [[Paper Mario: The Thousand-Year Door|its sequel]], Mario and Luigi receive an invitation from Princess Peach. | *Like the original game and [[Paper Mario: The Thousand-Year Door|its sequel]], Mario and Luigi receive an invitation from Princess Peach. | ||
**Although Peach gives Mario a letter in ''Color Splash'', said letter is actually a color-drained Toad. | **Although Peach gives Mario a letter in ''Color Splash'', said letter is actually a color-drained Toad. | ||
*In combat, Mario's basic jump and hammer attacks are permanent, like in the first two games. | *In combat, Mario's basic jump and hammer attacks are permanent, like in the first two games. | ||
*Like in the first and second games, Mario can use most types of recovery items outside of battle as well as in battle. | |||
*Partners return from the first three games. | *Partners return from the first three games. | ||
*Just like in the second and third games, Bowser is not the primary villain. Rather, Mario and Bowser team up, as they do in ''Super Paper Mario''. | *Just like in the second and third games, Bowser is not the primary villain. Rather, Mario and Bowser team up, as they do in ''Super Paper Mario''. | ||
*Just like in ''Paper Mario: The Thousand-Year Door'', Peach is turned evil by the main antagonist, similarly to the [[Shadow Queen]]. | *Just like in ''Paper Mario: The Thousand-Year Door'', Peach is turned evil by the main antagonist, similarly to the [[Shadow Queen]]. | ||
*Like the | *Like in ''Super Paper Mario'', Luigi has a significant role throughout the game’s plot and is a party member for parts of the game. | ||
* | *Like in all of the previous games, there is a quiz show, in this case, ''[[Shy Guys Finish Last]]''. | ||
*Mario can use confetti to fill in Non-Bottomless Holes, similarly to using paint to fill in colorless spots in ''Color Splash''. Like paint, confetti is limited. | *Mario can use confetti to fill in Non-Bottomless Holes, similarly to using paint to fill in colorless spots in ''Color Splash''. Like paint, confetti is limited. | ||
*Like the previous two games, there is a performance starring Birdo. | *Like the previous two games, there is a performance starring Birdo. | ||
*Like the first game, Peach's Castle gets taken over by the main antagonist, is lifted to a higher location, leaves a hole in the ground from where it normally sits | *Like the first game, Peach's Castle gets taken over by the main antagonist, is lifted to a higher location, leaves a hole in the ground from where it normally sits and requires finishing every chapter to return to it (as well as taking some kind of flying vehicle to get close to it). | ||
*Like in the first four games, Mario fights a [[Blooper]] as a boss. | *Like in the first four games, Mario fights a [[Blooper]] as a boss. | ||
*Like in ''Paper Mario: The Thousand-Year Door'', battles take place in front of an audience, and the audience can interact with Mario. | *Like in ''Paper Mario: The Thousand-Year Door'', battles take place in front of an audience, and the audience can interact with Mario. | ||
**However, the audience only consists of Toads, the number of audience members depends on the rescued Toads, they need to be paid | **However, the audience only consists of Toads, the number of audience members depends on the rescued Toads, they need to be paid to influence the battle, and they do not attack Mario for a bad "performance". | ||
*Like in the previous three games, Mario has a permanent travelling companion who can float and sacrifices | *Like in the previous three games, Mario has a permanent travelling companion who can float and sacrifices themselves in the end, in this case, Olivia. | ||
*Like in ''[[Super Paper Mario]]'', the main antagonist has taken control of some of Bowser's minions. | *Like in ''[[Super Paper Mario]]'', the main antagonist has taken control of some of Bowser's minions. | ||
*Shiny and Flashy variants of attacks return from ''Paper Mario: Sticker Star''. | *Shiny and Flashy variants of attacks return from ''Paper Mario: Sticker Star''. | ||
*Like the previous three games, in-game materials show the logos for Nintendo and Intelligent Systems. | *Like the previous three games, in-game materials show the logos for Nintendo and Intelligent Systems. | ||
*Like ''Sticker Star'', MAX UP Hearts are used as a level-up mechanic. | *Like ''Sticker Star'', MAX UP Hearts are used as a level-up mechanic. | ||
*Bowser's Castle floats | *Bowser's Castle floats as it does in the original game and the previous two games. | ||
* | *Like ''Color Splash'', each save file is tied to a user profile. Because of this, they cannot be copied or deleted within the game, and are tied to each user profile of the [[Nintendo Switch]]. Since the Switch can have up to eight user profiles, this translates to eight save files, compared to four from the first three games, three from the fourth installment, and twelve from ''Color Splash'' (since the [[Wii U]] can support up to twelve user profiles). The difference is that in ''Color Splash'', the user profile is loaded before the game is started, while in ''Origami King'', the user profile is selected past the title screen. | ||
*The Iron Boots, Hurlhammer, and Fire Hammer return from the previous two games. | *The Iron Boots, Hurlhammer, and Fire Hammer return from the previous two games. | ||
**The Ice Hammer returns from ''Sticker Star''. | **The Ice Hammer returns from ''Sticker Star''. | ||
*If Mario enters the area with [[Ol' Grandsappy]] for the first time and tries to leave the area, he ends up in the same place. This is similar to [[Forever Forest]] in ''Paper Mario'' and [[The Bafflewood]] in ''Paper Mario: Sticker Star'', which in itself | *If Mario enters the area with [[Ol' Grandsappy]] for the first time and tries to leave the area, he ends up in the same place. This is similar to [[Forever Forest]] in ''Paper Mario'' and [[The Bafflewood]] in ''Paper Mario: Sticker Star'', which in itself are references to the [[zeldawiki:Lost Woods|Lost Woods]] in ''[[zeldawiki:The Legend of Zelda (Series)|The Legend of Zelda]]'' series. | ||
*Much like in ''Super Paper Mario'', Mario | *Much like in ''Super Paper Mario'', Mario can optionally change his sound effects to old-school ones; in this case, it can be done via the [[Retro Soundbox]] accessory. | ||
*In Big Sho' Theater, one of the red and green Paper Macho Koopa Troopas respectively wear sunglasses similar to the enemy Koopa Troopas from the first three games. | *In Big Sho' Theater, one of the red and green Paper Macho Koopa Troopas respectively wear sunglasses similar to the enemy Koopa Troopas from the first three games. | ||
*Like in ''Color Splash'', Luigi has voice clips by Charles Martinet while Mario does not. | *Like in ''Color Splash'', Luigi has voice clips by Charles Martinet while Mario does not. | ||
==Differences from other ''Paper Mario'' games== | ==Differences from the other ''Paper Mario'' games== | ||
*This is the first game in the series and in ''Mario'' role-playing games overall in which Bowser is not fought in | *The battle system in this entry is puzzle-based rather than a more direct, turn-based system. | ||
*This is the first game in the series and in ''Super Mario'' role-playing games overall in which Bowser is not fought at any point in the game. | |||
*This is the first game in the series where the overall objective does not involve finding any major collectibles (e.g. the [[Crystal Stars]] or [[Pure Heart]]s), rather to destroy giant streamers blocking Peach's Castle. | *This is the first game in the series where the overall objective does not involve finding any major collectibles (e.g. the [[Crystal Stars]] or [[Pure Heart]]s), rather to destroy giant streamers blocking Peach's Castle. | ||
*Save prompts now have a distinctive look, separate from normal | *Save prompts now have a distinctive look, separate from normal text boxes. | ||
*When getting a [[Game Over]], an option to restart from the last save (or in the case | *When getting a [[Game Over]], an option to restart from the last save (or in the case of minigames and the final boss, to try again) is now available. | ||
*When Mario gets hit by a [[First Strike]], he can no longer block the attack. | *When Mario gets hit by a [[First Strike]], he can no longer block the attack. | ||
**A sound and impact effect do not play when this happens in the overworld. | **A sound and impact effect do not play when this happens in the overworld. | ||
| Line 1,622: | Line 1,891: | ||
*Mario's hammer is rendered as a three-dimensional object, rather than 2D. | *Mario's hammer is rendered as a three-dimensional object, rather than 2D. | ||
*The game saves automatically when moving between different locations, similar to the saving behavior in the world map from the previous two games. | *The game saves automatically when moving between different locations, similar to the saving behavior in the world map from the previous two games. | ||
*The touchscreen is no longer used as an alternative input for [[Action Command]]s, due to the Switch powering only one video source, | *The touchscreen is no longer used as an alternative input for [[Action Command]]s, due to the Switch powering only one video source, unlike the [[Wii U]]. | ||
*There are no defense items such as Spike Helmets. | *There are no defense items such as Spike Helmets. | ||
*This is the first game in the series that does not include an arrangement of the ''[[Super Mario Bros.]]'' [[Ground Theme (Super Mario Bros.)|Ground Theme]] in the main soundtrack. The only time this theme can be heard is when Mario buys the engine upgrade for Sea Captain Toad's boat; the sound effects of it being installed mimic the theme in question. | *This is the first game in the series that does not include an arrangement of the ''[[Super Mario Bros.]]'' [[Ground Theme (Super Mario Bros.)|Ground Theme]] in the main soundtrack. The only time this theme can be heard is when Mario buys the engine upgrade for Sea Captain Toad's boat; the sound effects of it being installed mimic the theme in question. | ||
*Unlike past ''Mario'' role-playing games, the entire game does not use the same regular battle theme for every location. A different arrangement of the battle theme is used for each streamer area. | *Unlike past ''Super Mario'' role-playing games, the entire game does not use the same regular battle theme for every location. A different arrangement of the battle theme is used for each streamer area. | ||
==Staff== | ==Staff== | ||
| Line 1,633: | Line 1,902: | ||
==Reception== | ==Reception== | ||
===Critical response=== | ===Critical response=== | ||
''Paper Mario: The Origami King'' received generally positive reviews from critics, who praised the expansive overworld, graphics, writing, and plot, but criticized | ''Paper Mario: The Origami King'' received generally positive reviews from critics, who praised the expansive overworld, graphics, writing, and plot, though its combat system received mixed reactions, being praised for its innovation but criticized for being tedious, unrewarding and lacking complexity. While considered an improvement over ''[[Paper Mario: Sticker Star|Sticker Star]]'' and ''[[Paper Mario: Color Splash|Color Splash]]'', it was also criticized for many of the same reasons as its predecessors: lack of originality, low variation in characters and their design, few original characters, the absence of traditional RPG elements, and little incentive on combat. | ||
{|class="wikitable reviews" | |||
{| class="wikitable | !colspan="4"style="font-size:120%;text-align:center; background-color:silver;"|Reviews | ||
!colspan="4" style="font-size:120%; text-align:center; background-color:silver;"|Reviews | |||
|-style="background-color:#E6E6E6" | |-style="background-color:#E6E6E6" | ||
|Release | |Release | ||
| Line 1,646: | Line 1,914: | ||
|Michael Goroff,<br>[https://egmnow.com/paper-mario-the-origami-king-review/ EGM] | |Michael Goroff,<br>[https://egmnow.com/paper-mario-the-origami-king-review/ EGM] | ||
|3/5 | |3/5 | ||
|''Despite everything, Paper Mario: The Origami King is a charming game. I wanted to fully explore every area of the Mushroom Kingdom. I wanted to find every Toad. I wanted to do everything except actually engage with the | |''Despite everything, Paper Mario: The Origami King is a charming game. I wanted to fully explore every area of the Mushroom Kingdom. I wanted to find every Toad. I wanted to do everything except actually engage with the game's combat system. In trying to rewrite the basic rules with every outing, Intelligent Systems keeps fans of the franchise on its toes. But that can also start to distort the identity of the series itself. How can you perfect a formula if you’re constantly pouring it out and starting again?'' | ||
|- | |- | ||
|Nintendo Switch | |Nintendo Switch | ||
|Cam Shea,<br>[https://www.ign.com/articles/paper-mario-the-origami-king-review IGN] | |Cam Shea,<br>[https://www.ign.com/articles/paper-mario-the-origami-king-review IGN] | ||
|7/10 | |7/10 | ||
|''The Origami King is a truly likeable game despite the shallowness of its new spin on gameplay. Its characters are winsome, its visual design is gorgeous, its world is fun to explore, and its storytelling is outside the box and playful. At the same time, however, it could be so much more. Combat is largely unfulfilling, and your journey as a whole lacks meaningful choices. For a series with RPG roots, | |''The Origami King is a truly likeable game despite the shallowness of its new spin on gameplay. Its characters are winsome, its visual design is gorgeous, its world is fun to explore, and its storytelling is outside the box and playful. At the same time, however, it could be so much more. Combat is largely unfulfilling, and your journey as a whole lacks meaningful choices. For a series with RPG roots, that's a real shame.'' | ||
|- | |- | ||
|Nintendo Switch | |Nintendo Switch | ||
|Chris Carter,<br>[https://www.destructoid.com/stories/review-paper-mario-the-origami-king-596029.phtml Destructoid] | |Chris Carter,<br>[https://www.destructoid.com/stories/review-paper-mario-the-origami-king-596029.phtml Destructoid] | ||
|8/10 | |8/10 | ||
|''There's room in my heart for both styles of | |''There's room in my heart for both styles of Paper Mario. The old games still exist and this newer, sometimes thinner formula is fine too. That said, it's possible Nintendo and Intelligent Systems have folded this subseries every which way they can at this point. I hope the next one is a little more fresh.'' | ||
|- | |- | ||
|Nintendo Switch | |Nintendo Switch | ||
| Line 1,668: | Line 1,936: | ||
|''That simplicity is overridden by originality and vigor, then – but I also know all too well that some fans of the older Paper Mario games will once again walk away a little disappointed. This is still undoubtedly no Thousand Year Door. Perhaps the next outing can bring back a little of that RPG depth – but regardless of that, this is still the best Paper Mario game in years.'' | |''That simplicity is overridden by originality and vigor, then – but I also know all too well that some fans of the older Paper Mario games will once again walk away a little disappointed. This is still undoubtedly no Thousand Year Door. Perhaps the next outing can bring back a little of that RPG depth – but regardless of that, this is still the best Paper Mario game in years.'' | ||
|- | |- | ||
!colspan="4" style="font-size:120%; text-align:center; background-color:silver;"|Aggregators | !colspan="4"style="font-size:120%;text-align:center;background-color:silver;"|Aggregators | ||
|-style="background-color:#E6E6E6" | |-style="background-color:#E6E6E6" | ||
|colspan=2|Compiler | |colspan=2|Compiler | ||
|colspan=2|{{ | |colspan=2|{{nw|Platform / Score}} | ||
|- | |- | ||
|colspan=2|Metacritic | |colspan=2|Metacritic | ||
|colspan=2 style="background-color:LimeGreen"|[https://www.metacritic.com/game/switch/paper-mario-the-origami-king 80] | |colspan=2 style="background-color:LimeGreen"|[https://www.metacritic.com/game/switch/paper-mario-the-origami-king 80] | ||
|} | |} | ||
===Sales=== | |||
By December 31, 2021, the game had sold 3.34 million units worldwide.<ref>https://www.perfectly-nintendo.com/cesa-white-book-2022-additional-shipment-data-for-nintendo-games-nintendo-switch/</ref> | |||
==Gallery== | ==Gallery== | ||
| Line 1,687: | Line 1,958: | ||
PMTOK Bowser Alt Artwork.png|[[Bowser]] | PMTOK Bowser Alt Artwork.png|[[Bowser]] | ||
PMOK Origami Minions.png|[[Folded Soldiers]] | PMOK Origami Minions.png|[[Folded Soldiers]] | ||
</gallery> | </gallery> | ||
==Glitches== | ==Glitches== | ||
{{main|List of Paper Mario: The Origami King glitches}} | {{main|List of Paper Mario: The Origami King glitches}} | ||
=== | ===Semi-dead enemy glitch=== | ||
If a wave battle is supposed to start, but only one enemy is alive and another is in their death animation, it will still initiate a wave battle and consider both enemies alive. | If a wave battle is supposed to start, but only one enemy is alive and another is in their death animation, it will still initiate a wave battle and consider both enemies alive. | ||
===Sumo Bro | ===Sumo Bro softlock=== | ||
During the second phase of the Boss Sumo Bro rematch in the Battle Lab, defeating the Boss Sumo Bro with a POW Block without defeating the two Sumo Bros beforehand will cause the game to | During the second phase of the Boss Sumo Bro rematch in the Battle Lab, defeating the Boss Sumo Bro with a POW Block without defeating the two Sumo Bros beforehand will cause the game to soft-lock. | ||
===VIP pass | ===VIP pass softlock=== | ||
Before the version 1.0.1 update,<ref>https://en-americas-support.nintendo.com/app/answers/detail/a_id/50130/~/how-to-update-paper-mario%3A-the-origami-king</ref> in Shangri-Spa, after obtaining the VIP pass to access the Spring of Rainbows, if the player left the path to the Spring of Rainbows after entering, the VIP pass would disappear from the menu. If the player then spoke to the Toad at the reception, they would not have the stamp card and there would be no way to get another one. Saving after this point would permanently prevent the player from progressing.<ref>https://youtu.be/4cLFZ9_S0GI</ref> | |||
==Quotes== | ==Quotes== | ||
{{main|List of Paper Mario: The Origami King quotes}} | {{main|List of Paper Mario: The Origami King quotes}} | ||
==Media== | |||
{{main-media|st=Musée Champignon#Sound Gallery}} | |||
{{media table | |||
|file1=PMTOK Paper Mario The Origami King.oga | |||
|title1=Paper Mario: The Origami King | |||
|description1=Plays on the title screen. | |||
|length1=0:30 | |||
|file2=PMTOK Red Streamer Battle.oga | |||
|title2=Red Streamer Battle | |||
|description2=Plays during battles in red streamer locations. | |||
|length2=0:30 | |||
|file3=PMTOK Overlook Mountain.oga | |||
|title3=Overlook Mountain | |||
|description3=Plays at [[Overlook Mountain]]. | |||
|length3=0:30 | |||
|file4=PMTOK Shogun Studios.oga | |||
|title4=Shogun Studios | |||
|description4=Plays at [[Shogun Studios]] after destroying the blue streamer. | |||
|length4=0:30 | |||
|file5=PMTOK Shroom City.oga | |||
|title5=Shroom City | |||
|description5=Plays at [[Shroom City (Paper Mario: The Origami King)|Shroom City]] after destroying the yellow streamer. | |||
|length5=0:30 | |||
|file6=PMTOK Exploring the Great Sea.oga | |||
|title6=Exploring the Great Sea | |||
|description6=Plays at [[the Great Sea]] before destroying the purple streamer. | |||
|length6=0:30 | |||
|file7=PMTOK Exploring Shangri-Spa.oga | |||
|title7=Exploring Shangri-Spa | |||
|description7=Plays at [[Shangri-Spa]] before destroying the green streamer. | |||
|length7=0:30 | |||
|file8=PMTOK Vellumental Battle.oga | |||
|title8=Vellumental Battle | |||
|description8=Plays while battling any of the four [[Vellumentals]]. | |||
|length8=0:30 | |||
}} | |||
==Names in other languages== | ==Names in other languages== | ||
<!-- Do not add any additional languages if it does not use an official title written differently from the English title. --> | <!--Do not add any additional languages if it does not use an official title written differently from the English title.--> | ||
{{Foreign names | {{Foreign names | ||
| | |Jpn=ペーパーマリオ オリガミキング | ||
| | |JpnR=Pēpā Mario Origami Kingu | ||
| | |JpnM=Paper Mario: Origami King | ||
|ChiS=纸片马力欧:折纸国王 | |ChiS=纸片马力欧:折纸国王 | ||
|ChiSR=Zhǐpiàn Mǎlìōu: Zhézhǐ Guówáng | |ChiSR=Zhǐpiàn Mǎlìōu: Zhézhǐ Guówáng | ||
| Line 1,718: | Line 2,024: | ||
|ChiTM=Paper Mario: Origami King | |ChiTM=Paper Mario: Origami King | ||
|Kor=페이퍼 마리오 종이접기 킹 | |Kor=페이퍼 마리오 종이접기 킹 | ||
|KorR=Peipeo | |KorR=Peipeo Mario Jong-ijeopgi King | ||
|KorM=Paper Mario: | |KorM=Paper Mario: King of Paper Folding | ||
}} | }} | ||
==References== | |||
<references/> | |||
==External links== | ==External links== | ||
{{NIWA | {{NIWA|StrategyWiki=1}} | ||
{{TCRF}} | |||
*[https://papermario.nintendo.com/ Official North American website] | *[https://papermario.nintendo.com/ Official North American website] | ||
*[https://www.nintendo.co.jp/switch/aruua/ Official Japanese website] | *[https://www.nintendo.co.jp/switch/aruua/ Official Japanese website] | ||
| Line 1,729: | Line 2,039: | ||
*[https://www.nintendo.tw/switch/aruua/ Official Taiwanese website] | *[https://www.nintendo.tw/switch/aruua/ Official Taiwanese website] | ||
*[https://www.nintendo.co.kr/software/switch/aruua/ Official South Korean website] | *[https://www.nintendo.co.kr/software/switch/aruua/ Official South Korean website] | ||
*[https://www.nintendo.com.au/games/nintendo-switch/paper-mario-the-origami-king Australian website] | |||
*[https://fs-prod-cdn.nintendo-europe.com/media/downloads/games_8/nswitch_papermariotheorigamiking_1/NSwitch_PaperMarioTheOrigamiKing_Origami_EN.pdf Origami folding instructions] | |||
{{PMTOK}} | {{PMTOK}} | ||
{{ | {{Super Mario games}} | ||
{{ | {{Switch}} | ||
[[Category:Paper Mario: The Origami King|*]] | [[Category:Paper Mario: The Origami King|*]] | ||
[[Category:Games]] | [[Category:Games]] | ||
[[Category: | [[Category:Role-playing games]] | ||
[[Category:Nintendo Switch | [[Category:Nintendo Switch games]] | ||
[[Category:2020 games]] | [[Category:2020 games]] | ||
[[de:Paper Mario: The Origami King]] | |||
[[it:Paper Mario: The Origami King]] | [[it:Paper Mario: The Origami King]] | ||
Latest revision as of 15:17, January 7, 2025
- "The Origami King" redirects here. For the eponymous villain, see King Olly.
| Paper Mario: The Origami King | |||||||||||||||||||||||||||
|---|---|---|---|---|---|---|---|---|---|---|---|---|---|---|---|---|---|---|---|---|---|---|---|---|---|---|---|
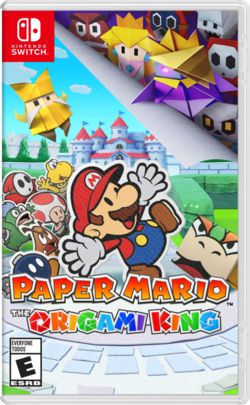 North American box art For alternate box art, see the game's gallery. | |||||||||||||||||||||||||||
| Developer | Intelligent Systems | ||||||||||||||||||||||||||
| Publisher | Nintendo | ||||||||||||||||||||||||||
| Platform(s) | Nintendo Switch | ||||||||||||||||||||||||||
| Release date | |||||||||||||||||||||||||||
| Language(s) | English (United States) French (France) French (Canada) German Spanish (Spain) Spanish (Latin America) Italian Dutch Japanese Simplified Chinese Traditional Chinese Korean | ||||||||||||||||||||||||||
| Genre | Role-playing, action-adventure | ||||||||||||||||||||||||||
| Rating(s) |
| ||||||||||||||||||||||||||
| Format | Nintendo Switch: | ||||||||||||||||||||||||||
| Input | Nintendo Switch:
| ||||||||||||||||||||||||||
| Serial code(s) | |||||||||||||||||||||||||||
Paper Mario: The Origami King is an action-adventure, turn-based role-playing game and the sixth installment in the Paper Mario series, released on the Nintendo Switch worldwide on July 17, 2020. The game follows Mario and a new companion, Olivia, opposing the villainous King Olly and his army of familiar characters turned into origami soldiers, which have taken over the Mushroom Kingdom.
The title follows the gameplay style of its two predecessors, Paper Mario: Sticker Star, and Paper Mario: Color Splash, in which role-playing elements are deemphasized in favor of action-adventure mechanics, which focus on exploration and puzzle-solving instead of character-driven plotlines and experience-based stat optimization. Also similar to those predecessors is the focus on specific arts and crafts; while the story of The Origami King is centered around origami itself, comparable to stickers from Sticker Star and paint from Color Splash, other materials such as confetti and papier-mâché feature in the gameplay. Conversely, this game abandons the format of self-contained levels used by the later installments, using an interconnected world akin to the first two Paper Mario games. In terms of combat, Paper Mario: The Origami King does not feature a battle system which uses finite items like Sticker Star and Color Splash, as it instead uses an original ring-based system that prioritizes puzzle-solving instead of strategy, and also introduces real-time combat to the series in the form of the Paper Macho Soldiers.
Plot[edit]
Prologue[edit]
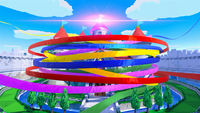
Mario and Luigi drive to Toad Town for the Origami Festival after being invited by Princess Peach. The brothers arrive to discover the town and Peach's Castle are deserted. Upon entering the castle, they are locked inside and split up, Luigi heading to search for the castle key and Mario heading into the castle foyer. Peach enters the foyer, having been folded into origami, and drops Mario into a dungeon where several of Bowser's minions are being held. Mario discovers a Magic Circle and initiates the 1,000-Fold Arms technique, using them to free an origami girl named Olivia. After escaping their cell, Mario and Olivia free Bowser, who was square-folded, restricting his mobility.
Escaping to the upper terrace of Peach's Castle, Mario is attacked by a group of Bowser's Minions that were also folded into origami, known as Folded Soldiers. After defeating the minions, the leader of the origami reveals himself as Olivia's older brother, King Olly. He summons five streamers from across the Mushroom Kingdom to wrap around Peach's Castle and rip it out of the ground. Mario, Olivia, and Bowser escape the castle in a Koopa Clown Car piloted by a Shy Guy, but are quickly knocked out of the Clown Car by the red streamer. Bowser is saved by the Shy Guy, while Mario and Olivia fall into a nearby forest. Olly sets Peach's Castle down atop the peak of a far-off volcano.
Red streamer[edit]
Mario and Olivia land in Whispering Woods and notice that Olly moved Peach's Castle. They set out to unravel the five streamers, find Luigi, and defeat Olly. Eventually, they get back to the abandoned Toad Town, now being destroyed by Paper Macho Goombas. After defeating the Goombas and finding some Toad Town citizens, they go to search the remains of Peach's Castle and find Luigi. He quickly sets off to find the key to Peach's Castle.
Following the red streamer, Mario and Olivia travel to Picnic Road. They find the door to the Earth Vellumental Temple, which is locked due to four of the five Shell Stones required to open it being stolen by Folded Soldiers. They rescue the stones and return them to the door, giving them access to the turtle-like god known as the Earth Vellumental. However, the Vellumental had been folded into origami, forcing Mario to fight it. Upon defeating, Olivia gains the ability to transform into the Vellumental and manipulate earth, allowing Mario and her to access Overlook Tower, where the source of the red streamer lies. At the top of the tower, the duo confronts Colored Pencils, one of Olly's generals. After defeating the boss, Mario unravels the red streamer.
Blue streamer[edit]
Mario and Olivia next follow the blue streamer and take a tram station to Autumn Mountain. On the tram, they meet Bob-omb, a happy-go-lucky amnesiac, whom Olivia nicknames Bobby. He tags along with them as they travel to the Water Vellumental Shrine. Upon defeating the origami Water Vellumental, Olivia gains the ability to fold into the Vellumental and create water. She uses this power to refill a dry lake and the Eddy River, which the trio travel down to reach Shogun Studios, a popular theme park.
Mario, Olivia, and Bob-omb enter the park, finding it almost entirely deserted. They are tasked with finding the park's master key to rescue the park staff, who are trapped in the high castle tower. After traveling through the whole park, they rescue Luigi in the employee area of the Ninja Attraction, who found the master key, mistaking it for the key to Peach's Castle. The trio unlocks the tower gates and enter Big Sho' Theatre. After participating in three performances, they face off against Rubber Band, another one of Olly's generals. After defeating Rubber Band, Mario destroys the blue streamer, saving the park and bringing them closer to saving Peach's Castle. The park celebrates with a fireworks ceremony, which jogs Bob-omb's memories.
Yellow streamer[edit]
Mario, Olivia, and Bob-omb continue down the Eddy River, no longer blocked by the blue streamer, to Sweetpaper Valley. They are confronted by Olly and Olivia gets crushed by a massive boulder. Bob-omb recalls a way to save Olivia and takes Mario to the Great Sea. They sail out to a deserted cruise ship known as the Princess Peach. The duo find the suite Bob-omb originally stayed in. The lockbox inside, which Bob-omb was looking for, is snatched by Paper Macho Gooper Blooper, which Mario fights off at the deck of the ship. Retrieving the lockbox, the duo return to Sweetpaper Valley, where Bob-omb reveals the lockbox contains his late friend's fuse. He uses the fuse to blow himself up, destroying the boulder and freeing Olivia. Olivia runs off, devastated by Bob-omb's sacrifice, and is only cheered up by Mario donning a Goomba Mask after the suggestion of Bob-omb's ghost.
Mario and Olivia head into the Scorching Sandpaper Desert, where the sun is cut out of the sky. After traveling through the desert and obtaining information in Snif City, they rescue the ancient historian Professor Toad from the insides of a Mega Paper Macho Pokey. The professor is pursuing the legend of Khap'taan Teeowed and tags along with the duo, utilizing his ability to reach ancient writings to solve the ruins' puzzles. The trio perform an ancient ritual in the desert to open the Fire Vellumental Cave and defeat the origami Fire Vellumental within. Olivia gains the ability to fold into the Vellumental and light fires, which she uses to light fires in three Toad monoliths and unearth the Temple of Shrooms.
Inside the temple, the Mario, Olivia, and Professor Toad discovers many zombie-like faceless Toads and a DJ being held hostage. The trio find the "Thrills at Night" disc, round up the faceless Toads, and summon the next of Olly's enforcers: Hole Punch. After defeating Hole Punch, Mario destroys the yellow streamer and frees the desert sun. The trio head to the newly-opened Sun Altar, and find Captain T. Ode preserved in a block of ice. Olivia frees the captain, who heads off in search of his old submarine, the Super Marino. Mario and Olivia follow the captain, while Professor Toad stays behind in the desert.
Purple streamer[edit]
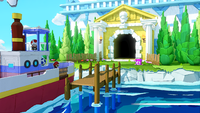
Returning the Toad Town, Mario and Olivia find Captain T. Ode, who reclaims ownership of his own submarine. The sub is attached to Sea Captain Toad's ship, and T. Ode, Mario, and Olivia head out into the Great Sea. After clearing the thick fog that covers the sea, they discover the source of the purple streamer at the Sea Tower, but are unable to enter without the three orbs located in Diamond Island. They travel between many islands, eventually meeting up with Luigi on Mushroom Island, who holds the key to Diamond Island. The brothers decide to find the island's resident and free the Origami Craftsman from the walls of his workshop. The craftsman reveals he created King Olly for the Origami Festival using the forbidden Fold of Life. Olly turned on his creator and set out to fold the world in his image, using the Origami Craftsman's notes to fold Olivia. The craftsman shares a set of notes with Olivia before she heads back to the ship with Mario.
Mario and Olivia use the key Luigi obtained to access the submerged Diamond Island, where three temples stand, housing the Trials of Power, Wisdom, and Courage; and the nearby Ice Vellumental Mountain. The duo must travel up the mountain and defeat the Ice Vellumental at its peak. After defeating the final Vellumental, Olivia gains the ability to fold into it and utilize its ice powers to access the Trials of Wisdom and Courage. After completing all three trials, Mario and Olivia turn to the Sea Tower and climb up to its peak. At the top, they face off against Tape, and upon the stationery's defeat, Mario destroys the purple streamer.
Green streamer[edit]
Mario and Olivia notice the green streamer peeking out from above the clouds. A mysterious light appears on top of the Sea Tower, and stepping into it transports them to Shangri-Spa, where Bowser's Castle had crash-landed. The duo meets up with Kamek, who is unable to return to the castle due to the folded Boss Sumo Bro guarding the entrance. Bowser Jr. flies in, whose Junior Clown Car would allow access to Boss Sumo Bro, but is shredded by another one of Olly's generals: Scissors. Kamek reluctantly joins up with Mario and Olivia, and the group travels to four of the spa's springs in order to revive Jr. However, when Jr. soaks in the Spring of Jungle Mist for too long, he ends up losing his color. The group travels to the Spring of Rainbows, which involves winning the game show Shy Guys Finish Last. The spring restores Bowser Jr.'s color, allowing him to take Mario up to Boss Sumo Bro. The boss is defeated, allowing the group and all of Bowser's minion access to Bowser's Castle again.
Bowser's minions start a large clash with the Folded Soldiers, while Mario, Olivia, and Kamek search for the key to the throne room, which Kamek believes to be in his quarters. Along the way, Kamek disappears, but Mario is able to find the castle key in the hands of Luigi, who once again mistook it for the key to Peach's Castle. Soon after, Olivia is snatched by a shadowy hand and all of Bowser's minions disappear as well. On the way to the throne room, Mario battles Big and Li'l Cutout Soldiers, until reaching the creature that captured Olivia, the Handaconda, whom Mario defeats in a game of rock paper scissors. In the following room, the duo finds the cut-up remains of Bowser's minions. They then face off against the Paper Mistake Buzzy Beetle, created by Scissors, before fighting Scissors itself. After defeating both bosses, Mario is able to revive Bowser's minions, free Bowser, and destroy the green streamer.
Origami Castle[edit]
Bowser mobilizes his army, along with Mario and Olivia, onto a new airship, which they use to travel to Peach's Castle. However, they are intercepted by the Paper Plane Squadron, and one large jet dives into the airship, causing the ship to crash into Hotfoot Crater. Mario, Olivia, Kamek, and Bowser Jr. are chased up the volcano by a horde of Paper Macho Goombas, with Kamek and Bowser Jr. staying behind to keep back the horde. Mario and Olivia meet up with Bowser, and the three use the airship cannon to launch to the ground outside of Peach's Castle. Luigi meets up with them, who inadvertently had the key to the castle lodged in his kart's tailpipe. Inside, the group is greeted by Origami Peach, before Olly refolds Peach's Castle into Origami Castle.
Mario, Olivia, and Bowser travel through the newly folded castle and eventually reach Olly, who summons the Stapler. After defeating the final Legion of Stationary member, Bowser finally manages to unfold himself. After a pep talk from Bowser to raise Olivia's spirits, the trio confronts King Olly in his throne room. Inside, they attempt to reason with Olly, before realizing Peach has been folded into the rear wall of the throne room. Olly reveals that his grudge against the Toads originates from a scribble the Origami Craftsman left, which Olly believes was left carelessly. He has already folded 999 origami cranes and intends to use Mario to create the final crane, which will grant him his wish to turn every Toad into blank scraps. Olly engages in battle against Mario and Olivia, using his own versions of the Vellumentals. After being defeated by Olivia's Vellumentals, Olly folds himself into a large sumo wrestler, which Olivia counteracts by folding Bowser into a giant origami sumo wrestler. Mario assists Bowser in knocking Olly off the platform, but Olly rises again as a giant version of his normal self and unleashes his inner rage which turns into a poisonous gas. Olivia summons a massive Magic Circle, which when completed, transforms Olivia into the design given to her by the Origami Craftsman: a giant hammer, defeating Olly for good.
In Olly's final moments, Olivia discovers the scribble on him and reveals it was actually a hopeful message that he become a good king. Repentant, Olly entrusts his 999 cranes to Olivia and allows her to use his body as the final one. Luigi, Kamek, and Bowser Jr. arrive with the Origami Craftsman who instructs Olivia on how to make a paper crane. She then wishes to undo all the origami her brother folded, including herself. The thousand cranes grant her wish and carry Peach's Castle back to its proper place in Toad Town. Everyone lands outside the castle along with a restored Princess Peach, and realizes that Olivia is absent.
That night, the Mushroom Kingdom and Bowser's army celebrate the Origami Festival together. The Origami Craftsman reveals his contribution: the original, scaled-down Origami Castle, complete with thrones for the two origami siblings. Mario expresses his sadness over Olivia's sacrifice, but Peach insists that she is still with them in spirit. To finish the celebrations, everyone releases paper lanterns into the night sky in honor of origami. Afterwards, the Mario Bros. drive home as the credits roll.
If the player achieves 100% completion and defeats the final boss, the photos receive golden frames, and a post-credits scene plays in which the Origami Craftsman places miniatures of Olly and Olivia beside each other on his castle in the center of Toad Town.
Gameplay[edit]
The overworld exploration is quite different from the series' standard; whereas the previous three games were either sorted into individual chapters or levels, Paper Mario: The Origami King switches to a completely open-world style of progression, with Mario being able to travel to any of the game's locales completely on foot like the first two games. The game's combat system has also been overhauled: at the start of each turn, Mario can rotate and slide rings of a circular battle arena, lining up enemies for consecutive attacks, although the number of ring moves and allotted time are limited. Performing a First Strike deals preemptive damage to a single enemy, and as Mario's HP increases, First Strikes will be able to defeat certain enemies without going into battle against them. Mario has permanent Boots and Hammer attacks and may equip stronger variants that break after a while, and timed button presses can increase damage when attacking. Lining up the enemies successfully will increase Mario's attack power by a factor of 1.5. Coins can be spent to extend the time limit (at a rate of 10 coins per second), or call the Toads that have been saved to assist Mario in battle. Boss battles use a different system in which the player rotates and slides the rings to line up arrows, making a path for Mario to attack.
Olivia, a character new to the franchise, has a role similar to Kersti and Huey from Paper Mario: Sticker Star and Paper Mario: Color Splash respectively. Once a Vellumental is defeated, Olivia can transform into the Vellumental while standing on Magic Circles, an ability that carries over into battle. Additionally, partners return to ally with Mario and aid him in battles, including Bob-omb and Kamek. They will automatically attack enemies after Mario has used up all his given moves, although there is a chance their attacks will be unsuccessful. Various partners join and leave Mario's party at various points in the story.
Accessories grant Mario benefits both in battle and on the overworld. Toads can be found on the overworld, folded into various shapes. Hitting these Toads with the hammer will cause them to unfold and return to Toad Town, some of which open shops. The Toads that have been saved can even help in battle if the player spends coins using the Cheer command. These Toads will fight enemies, heal Mario, give items, and solve puzzles. Mario can gain confetti by using his Hammer on trees, grass, and enemies. This confetti can be used to fill Not-Bottomless Holes torn in the landscape, revealing Coins or restoring objects.
In the settings menu, there is an option to control certain aspects of the game with motion controls or entirely with the controller buttons. This applies to the 1,000-Fold Arms, fishing, and the Super Marino. Three settings are locked with four question marks. They are unlocked by going to the Battle Lab. The first unlockable setting offers hints for battles with the Puzzle Solver, the second adds time to each battle's clock with the Timer Extender, and the third lets the player control the amount added.
Controls[edit]
| Actions | Controls |
|---|---|
| Check Notes (with Professor Toad present) Open Sea Chart (in The Great Sea) |
|
| Toss Confetti | |
| Help | |
| Menu | |
| Move | |
| Dig (with Professor Toad present) Dive underwater (in The Great Sea) |
|
| Ask Olivia | |
| Jump | |
| Hammer | |
| Items |
| Actions | Controls |
|---|---|
| Switch between Rotate and Slide (lineup phase) Switch between Weapons and Items (attack phase) |
|
| Help | |
| Buy Time (lineup phase) Change Weapons (attack phase) |
|
| Select | |
| Change View | |
| Hints from Olivia | |
| Confirm Action Commands | |
| Flee | |
| Cheers from Toads |
Mario's stats[edit]
| Stat | Initial value | Max. value | Function | |
|---|---|---|---|---|
| 0 | 999,999 | The amount of coins Mario currently has. | ||
| 500 | 2000 | The amount of confetti Mario can carry, which increases after each streamer is destroyed. | ||
| 50 | 200 | The maximum health Mario can have. Each multiple of 20 HP reached increases damage by one. | ||
| 0 | 416 | The number of Toads Mario has rescued, visible after entering the Art Gallery. | ||
| 3 | 11 | The amount of damage Mario can do with the jump First Strike. | ||
| 4 | 12 | The amount of damage Mario can do with the hammer First Strike. |
Stats after each streamer[edit]
| Streamer destroyed |
None | |||||
|---|---|---|---|---|---|---|
| Confetti capacity |
500 |
800 |
1100 |
1400 |
1700 |
2000 |
Characters[edit]
Playable[edit]
Mario - The protagonist of the game
Allies[edit]
Battle[edit]
| Icon | Name | Move | Attack power (Normal/Ally Tambourine) | Attack range | Availability |
|---|---|---|---|---|---|
| Bob-omb | Bomb Bump | 20/30 | One enemy | After boarding the cable car to Autumn Mountain until his sacrifice in Sweetpaper Valley. Unavailable in the Earth Vellumental Temple, Water Vellumental Shrine, Ninja Attraction, and Scuffle Island. | |
| Spike | Up-Chuck | 25 | Line formation | After being found in the grassy field in Autumn Mountain, until being brought to the "canned-food par-tay". | |
| Bone Goomba | Skullbonk | 20 | One enemy | After being found in the grassy field in Autumn Mountain, until being brought to the "canned-food par-tay". | |
| Professor Toad | Dig This | 24/36 | Up to four enemies in any formation | After defeating Mega Paper Macho Pokey, permanently available in all locations of the yellow streamer area excluding Sweetpaper Valley, Breezy Tunnel, and the Fire Vellumental Cave. | |
| Kamek | Magic | 38/57 | Up to four enemies in any formation | After meeting him in Shangri-Spa, until vanishing in Bowser's Castle. Cannot be taken outside of the green streamer area. Unavailable in the Spring of Jungle Mist and Spring of Rainbows after Bowser Jr. is restored in the latter. Briefly available in Hotfoot Crater until he attempts to stop the Paper Macho Mini Goomba horde. | |
| Bowser Jr. | Tantrum | 50/75 | Line formation | After being restored in the Spring of Rainbows, until arriving in the great hall of Bowser's Castle. Cannot be taken outside of the green streamer area. Unavailable in the Spring of Jungle Mist and Spring of Rainbows. Briefly available in Hotfoot Crater until he attempts to stop the Paper Macho Mini Goomba horde. | |
| Bowser | Fire Breath | 50/75 25/37 (Fire Bros) 75/112 (Ice Bros) |
Line formation | After being saved in Peach's Castle until escaping the castle, available again in Peach's Castle/Origami Castle after escaping from Hotfoot Crater. Only available in the last two rooms of the castle after being unfolded. |
Other[edit]
Olivia - Mario's main ally, who gives him hints and grants him the power to use the 1,000-Fold Arms
Luigi - Mario's follower at Mushroom Island and Peach's Castle
Faceless Toads2 - Forty of Mario's followers in the Temple of Shrooms right before the fight with Hole Punch
Feelin' Fungi1 - Four of Mario's temporary followers on Club Island
Shangri-Spa accessory vendor2 - Mario's follower on the platform on which he is found in Shangri-Spa
1 - Can be brought into battle, but does not attack enemies
2 - Not included in the party section of the pause menu
Supporting[edit]
| Image | Name | Description |
|---|---|---|
| Princess Peach | Invites Mario to the Origami Festival but is later folded by King Olly. In origami form, Princess Peach asks Mario if he thinks Toads should be destroyed and wiped out, then banishes him to the castle's dungeon. She reappears to introduce Mario to Origami Castle and appears in regular paper form after Olly is defeated. | |
|
Whispering Trees | Many sentient trees that inhabit the Whispering Woods. They comment on Mario's activities while he explores. They can be hit for confetti. |
| Ol' Grandsappy | An old tree stump who lives in the Whispering Woods. He needs the Soul Seed to be revitalized, and after such, sings a song and grows into a taller, younger form known as Sweet Sap Loggins. | |

|
Sap Sisters | Three female Whispering Trees who watch over Ol' Grandsappy. They serve as backup singers in his song. |
| Princess | A Chain Chomp who resides in the petting zoo at Shogun Studios. While Princess is initially vicious, she calms down once Mario gives her a Bone, and Olivia pets her. | |
| Birdo | An infrequently appearing character, Birdo is first seen being dropped into the spring in the Whispering Woods. She plays a major role in Big Sho' Theater, acting in a play involving two Paper Macho Koopa Troopa gangs fighting over her. Birdo also appears in the cafe at the Spring of Rainbows when Mario orders the "special." |
Toads[edit]
| Image | Name | Description |
|---|---|---|
| Kanchō Kinopio | A yellow Toad who wears glasses and is the curator of the Musée Champignon in Toad Town. | |
| Fun, Funky, and Functional vendors | Snifits, Toads, and a Monty Mole that are found around the world and sell accessories. They are distinguished by the large backpacks they wear. | |
| Battle Lab Toad | A Toad found on Picnic Road, initially folded into the shape of a dog. He operates the Battle Lab and allows Mario to use its services. | |
| Rescue Squad | Five Toads who are matched up in place of enemies while using The Ringer in the Battle Lab. | |
| Earth Vellumental Temple curator | A Toad who runs the Earth Vellumental Temple and is found being attacked by Swoops. | |
| Chef Kinopio | A Toad who runs the cafe on Overlook Tower. He cowers between boxes until Mario has defeated all the Mini Goombas, then rewards him with a bag of confetti. | |
| Toad Researcher | A yellow Toad holding a wrench. He is found in the Sensor Lab and gives Mario his new inventions, also offering to charge them for 500 coins. | |
| Sea Captain Toad | A blue Toad found on Autumn Mountain, folded as a fish. He allows Mario to use his boat to sail across the Great Sea. | |
| Oarsman | A Toad who ferries a boat between Autumn Mountain, Eddy River, Shogun Studios, and Sweetpaper Valley. He is folded as a monkey and must be attracted with an Opened Can of Tuna. | |
| Love Toad | A red Toad who is rescued at the Shogun Studios entrance. He stands next to a pole in Toad Town and hints Mario towards the locations of MAX UP Hearts he can collect. | |
| Shogun Studios staff | Toads in blue outfits who work at Shogun Studios. They must be rescued before certain activities can be done in the park. | |
| Senchō Kinopio | A purple Toad who is the captain of the Princess Peach. | |
| Toad mechanic | An engineer Toad who shows Mario the Boot Car in Breezy Tunnel. He reappears later to attach a new motor to Sea Captain Toad's boat. | |
| DJ Toad | A DJ for Hole Punch in the Temple of Shrooms. He plays various discs that Mario brings him, to see whether Hole Punch likes them. After Hole Punch's defeat, DJ Toad is found playing music in the Snif City Royal Hotel's lobby. | |
| Captain T. Ode | An ancient ship captain, rescued from under the Scorching Sandpaper Desert. Captain T. Ode then goes to the Musée Champignon to recover his Super Marino, attaching it to Sea Captain Toad's boat and giving Mario the ability to dive underwater. | |
| Toad's BBQ Foodeatery caretaker | A shirtless Toad found inside the Big Shell, which is recovered in the Great Sea and cooked in the Whispering Woods. | |
| Origami Craftsman | The creator of Olly and Olivia, residing on Mushroom Island. He wished for Olly to be a fair and kind king and wrote this message on his body, only for Olly to view writing on his paper as disrespectful and trap him behind a wall. The Origami Craftsman returns near the very end of the game, where he teaches Olivia how to fold Olly's body into a crane and make a wish. | |
| Shangri-Spa Toad | Toads resembling angels who are found in Shangri-Spa. When Bowser's Castle crashes into the spa and destroys their banquet hall, they put Bowser's minions to work to pay off the damages. |
Koopa Troop[edit]
Enemies[edit]
- Main article: Paper Mario: The Origami King bestiary
Folded Soldiers[edit]
Bosses[edit]
Vellumentals[edit]
The Vellumentals are a group of four bosses that act as mid-bosses for their respective streamers. After defeating one, it releases a Bibliofold that Olivia reads to learn how to fold herself into the Vellumental.
| Image | Name | Description |
|---|---|---|

|
Earth Vellumental | A giant quadrupedal turtle that can spew sand and manipulate earth, similar to the Black Tortoise. It is fought in the Earth Vellumental Temple. To defeat it, Mario must hammer each of its limbs, then its tail. It flips over and is vulnerable to 1,000-Fold Arms attacks. |
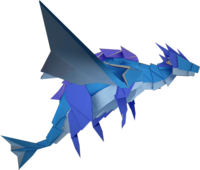
|
Water Vellumental | A water-spouting dragon similar to the Azure Dragon, found in the Water Vellumental Shrine. It absorbs more water each round and eventually charges up a big wave attack, which Mario can avoid by using Olivia's Earth Vellumental's ability. The Water Vellumental is weak to jump attacks, which cause it to collapse and make it vulnerable to hammers. |
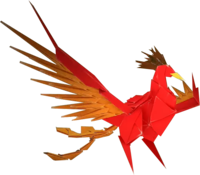
|
Fire Vellumental | A phoenix similar to the Vermilion Bird, located in the Fire Vellumental Cave. Each round, it sheds some of its burning feathers onto the arena, and Mario takes damage if he walks over them. The Water Vellumental's ability can extinguish the feathers and make the Fire Vellumental vulnerable to the 1,000-Fold Arms. |
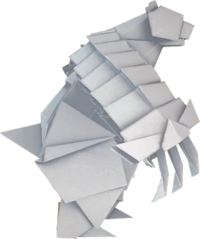
|
Ice Vellumental | A giant polar bear with large claws similar to the White Tiger. It resides in the Ice Vellumental Mountain on Diamond Island. It can freeze panels on the arena and make them unusable, only thawing with the Fire Vellumental's power or through sliding them. When it is low on health, the Ice Vellumental uses its Ice Maze ability, creating slush on the board and forcing Mario to navigate it to reach the 1,000-Fold Arms panel. |
Legion of Stationery[edit]
The Legion of Stationery are sentient tools. They guard the ends of each streamer and act as the primary bosses for their respective streamers, besides Stapler. Notably, each member of the Legion of Stationery has a color representing the streamer they guard, such as Colored Pencils guarding the red streamer spool and having a red lid.
| Image | Name | Description |
|---|---|---|

|
Colored Pencils (The Missile Maestro) | The guardian of the red streamer fought on Overlook Tower. Colored Pencils has crosshairs on its battle arena, firing pencil missiles at Mario if he crosses them. To defeat it, Mario has to navigate behind it and slam its lid shut with the 1,000-Fold Arms or a hammer attack. When it has taken enough damage, Colored Pencils charges a Rainbow Roll attack. Mario must grab the pencils and slam them into the case to defeat the boss. |
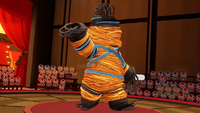
|
Rubber Band (The Elastic Entertainer) | A yellow rubber band wrapped in many other rubber bands. It guards the blue streamer at Big Sho' Theater. Rubber Band shoots its rubber bands on the arena, pushing Mario if he walks over them. To defeat the boss, Mario must get close to it and use the 1,000-Fold Arms to pull bands off of its head; using regular attacks removes the rubber bands, but Rubber Band pulls them back onto its body to nullify the attack. |

|
Hole Punch (The Disco Devil) | The guardian of the yellow streamer in the Temple of Shrooms. Hole Punch can punch out panels on the board, trapping Mario if he falls in the holes. Additionally, it can remove parts of Mario's body, lowering his maximum HP. Hitting the backside of Hole Punch frees some of the holes it has removed. To defeat Hole Punch, Mario has to peel off its lid with the 1,000-Fold Arms. |
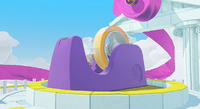
|
Tape (The Shifty Sticker) | Tape is the boss of the purple streamer area, found on top of the Sea Tower. Mario must destroy its dispenser with hammer attacks, reducing the boss to just the roll of tape. It then rolls around the arena, taping together panels to prevent them from being slid, and taping certain rings so they are rotated together. The tape can be removed with the Fire Vellumental's ability. When using the 1,000-Fold Arms, Mario flips Tape upside down and pulls the tape away. |
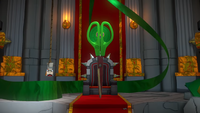
|
Scissors (The Dual-Bladed Duelist) | Scissors is the last streamer boss, fought in Bowser's Castle at the green streamer. At first, Scissors has its blades covered and warns Mario not to break them. After taking enough damage, it unsheathes on its own, and Mario instantly gets a Game Over if he jumps on it. Scissors will also remove panels from the board by cutting them apart. To damage Scissors, Mario must freeze it with the Ice Vellumental power, then use the 1,000-Fold Arms to break the ice chunk. |
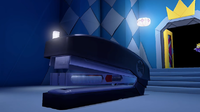
|
Stapler (The Fanged Fastener) | Unlike the other Legion of Stationary bosses, Stapler does not guard a streamer, instead being fought in Origami Castle before King Olly. Stapler attempts to staple Mario on the board, preventing him from moving and allowing it to deal more damage. When attacked, Stapler loses some of its staples. Eventually, it fires all of its staples in succession at Mario, being equipped with a stronger tier of staples afterwards. Stapler is weak to the 1,000-Fold Arms, which can remove over half of its staples. |
Other[edit]
| Image | Name | Description |
|---|---|---|
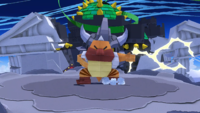
|
Boss Sumo Bro | Boss Sumo Bro guards Bowser's Castle and is fought in Shangri-Spa as the first mid-boss for the green streamer. It fights alongside six Sumo Bros.: four who have stolen panels on the arena and two who ride on thunderclouds. When Mario defeats the four Sumo Bros., the Boss Sumo Bro and the other two thundercloud Sumo Bros. drop down onto the arena and charge a thunder attack. They can be defeated with the Earth and Fire Vellumental powers. |
|
Handaconda | Handaconda is a black, cutout hand that is fought in Bowser's Castle, acting as the second mid-boss for the green streamer. It harms Mario when jumped on, and can only be attacked while in the second and third rows of rings. Mid-battle, Handaconda transforms panels into Rock-Paper-Scissors icons. When Mario wins the match, he uses a rush attack on Handaconda to damage it. |

|
King Olly | King Olly is the game's main antagonist and final boss, battled in Origami Castle. In his first phase, he transforms into the Vellumentals and must be countered with Olivia's Vellumental powers. In the second phase, he turns into origami sumo, and Olivia transforms Bowser to help fight him. Mario must run around the arena and use the 1,000-Fold Arms to pound the ground where Bowser is, allowing him to overpower Olly and push him off the edge. In the third phase, Olivia uses a special Magic Circle that Olly scrambles. Mario must arrange the circle while Olly attacks him every five seconds; Mario can dodge these attacks with proper timing. Finally, Olivia turns into the Olivia Hammer, and Mario must rush attack Olly to send him off the arena and defeat him. |
Obstacles[edit]
| Image | Name | Description |
|---|---|---|

|
Basin | An obstacle appearing in Trial of Courage. |

|
Boulder | Large rocks that fall from above and land in Eddy River. They cause Mario to take damage if he steers the boat into one. |
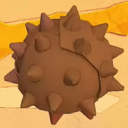
|
Chestnut | Obstacles found in Chestnut Valley, often rolling down hills. |

|
Driftwood | Obstacles found in Eddy River that cause Mario to take damage if he steers the boat into one. |

|
Earth Vellumental stone | Large, shell-shaped obstacles that come in big and small variants, which act as a boulder and are equipped with flamethrowers respectively. |
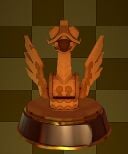
|
Fire Vellumental statue | Bird statues that acts as either flamethrowers or pivot to crush Mario, found throughout the Fire Vellumental Cave. During the battles against Mini Paper Macho Shy Guys a statue head will appear to incinerate a Mushroom should Mario attempt to use one, though after the battle these statues will reward Mario with a Heart. |

|
Icicle | Frozen water drops that fall caused by a Sledge Bro appearing in Ice Vellumental Mountain. Huge Icicles act as platforms after falling. |

|
Ink | A thick and slimy residue that slows down Mario. Also produced by Paper Macho Gooper Blooper. |

|
Lava | Molten rock found in Fire Vellumental Cave, Sea Tower and Hotfoot Crater that damages Mario. |

|
Not-Bottomless Hole | Falling causes Mario to lose seven HP. Covering it with confetti usually rewards the player with coins. |
|
Paper Mistake Dry Bones skull | Summoned by Paper Mistake Buzzy Beetle. It flies towards Mario and circles him, eventually targeting him after stalling long enough. The red variants are faster than their regular variants. It can be destroyed by hitting it with a hammer. |
|
Paper fortune teller | An obstacle that resembles paper fortune tellers found in Origami Castle. Falling into them causes Mario to lose 100 HP or a Game Over if his HP is less than that amount. Some can levitate after King Olly redirects the paths. |

|
Quicksand | Found in the Trial of Wisdom if Mario chooses the wrong answer. |
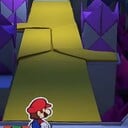
|
Rotating bridge | A bridge that rotates, causing Mario to fall. They are spun by Sumo Bros in Origami Castle. |
   
|
Spikes | Pointy obstacles that damage Mario. Retractable spikes are found in the Ninja Attraction with some revealing Ninja Toads. |

|
Steam spout | Blows Mario back. One large spout blows on a platform leading to the treasure chest. |

|
Throwing Star | A projectile mainly thrown by Ninjis. A purple one is summoned by King Olly during the second phase of his battle. |

|
Tornado | A vortex of desert winds that appears during the Mega Paper Macho Pokey battle. |

|
Whirlpool | Rapid rotating mass of water found in Eddy River. |

|
Wind | Blows Mario away. It can only be avoided if Mario holds onto a chain. |
Other species[edit]
- Cheep Cheeps: Fish swimming at Overlook Mountain, the Shogun Studios moat, and the Great Sea that can be fished at fishing spots.
- Big Cheep Cheeps: Rare fish that can be fished and recorded in the museum. A legendary one can also be fished out at the Great Sea.
- Thwomp: Can crush Mario when he gets a fortune cookie at Picnic Road. Another one drops on him in the final test at the Trial of Courage.
- Bloopers: Squid swimming at the Great Sea that can be fished at fishing spots.
- Big Bloopers: Rare squid that can be fished and recorded in the museum. A legendary one can also be fished out at the Great Sea. Additionally, a Big Blooper with a sign appears to block Mario if he goes to the edges of the Great Sea.
- Bullet Bills: Bullets fired from Bowser's airship.
- Co Gasagoso: Tiny Scuttlebugs that drop on Mario in the Temple of Shrooms.
- Fuzzies: Obstacles at the Spring of Rainbows.
- Dino Rhino: An NPC in the Singing Cafe at Shroom City.
- Gold Fish: A fish that gives coins, found while traveling across the Great Sea.
- Mini Goombas: Patrons at the Scorching Sandpaper Desert cafe, with origami versions serving as pests at the Overlook Tower café.
- Ptooie: An NPC in the Singing Cafe at Shroom City.
- Sledge Bro: A barista at the Scorching Sandpaper Desert cafe.
- Whales: Minor, harmless characters found in the Great Sea.
- Whistle Snifits: NPCs found in the cafe at the Spring of Rainbows.
- Paper Plane Squadron: A fleet of paper planes dispatched to prevent Bowser's airship reaching Peach's Castle.
- Blue: Flies in one direction targeting the airship.
- Light-blue: Flies in a zigzag pattern.
- Black: Launched by the purple paper plane. Shares similarities with the blue paper airplane.
- Purple: The boss of the Paper Plane Squadron. Fires black paper airplanes. Once damaged, it will attempt to fly straight into the airship.
- Giant: Largest paper airplane of the Paper Plane Squadron. Collides into the airship, causing it to miss its destination. It is the only paper plane that cannot be fought.
Locations[edit]
Red streamer[edit]
| Name and description | Image | Bosses | Enemies | # of Toads | # of Not-Bottomless Holes | # of Collectible Treasures | # of ? Blocks |
|---|---|---|---|---|---|---|---|
A lush, green forest in the mountains, which contains sentient trees. |
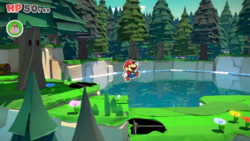 |
||||||
The main hub of the game, which is ravaged and deserted in the aftermath of King Olly's attack. It contains several shops, which can be reopened as Mario rescues more Toads, Peach's Castle, the Battle Lab, and the Musée Champignon. |
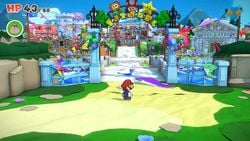 |
Goombas |
|||||
An underground sewer that has graffiti and a valve that controls the drain. It is used to reach Peach's Castle from Toad Town. |
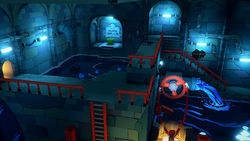 |
Scaredy Rats |
|||||
A road that connects Toad Town, Overlook Mountain and the Earth Vellumental Temple. |
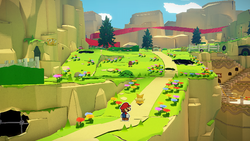 |
Shy Guys |
|||||
A mountain trail full of greenery. |
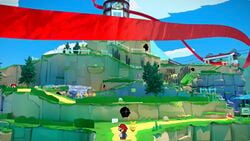 |
Shy Guys Paragoombas Spinies Paper Macho Shy Guys |
|||||
An underground temple that houses the Earth Vellumental. |
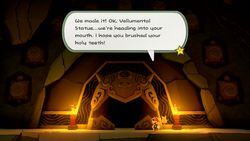 |
Swoops Mechakoopas |
|||||
A tall tower located on Overlook Mountain. Colored Pencils is battled here. |
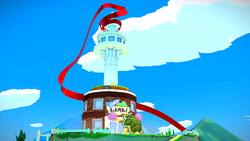 |
Paragoombas Mini Goombas |
Blue streamer[edit]
| Name and description | Image | Bosses | Enemies | # of Toads | # of Not-Bottomless Holes | # of Collectible Treasures | # of ? Blocks |
|---|---|---|---|---|---|---|---|
A mountain filled with autumn-colored trees and tall, grassy fields. |
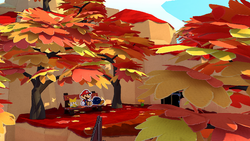 |
Cheep Cheeps Goombas Paragoombas Shy Guys Koopa Troopas Paper Macho Goombas |
|||||
An area containing rolling chestnuts that damage Mario and Bob-omb. |
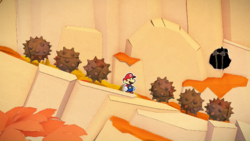 |
Spinies Galoombas |
|||||
A water shrine containing sliding puzzles and the Water Vellumental. |
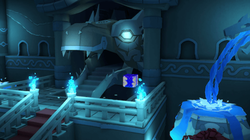 |
Koopa Troopas Swoops |
|||||
Rapids where Mario, Olivia, and Bob-omb ride a canoe. |
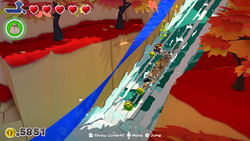 |
||||||
An Edo period Japan-inspired mountaintop theme park with a large castle as its main attraction. |
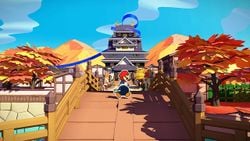 |
Snifits Shy Guys Koopa Troopas Goombas Galoombas Paper Macho Koopa Troopas |
|||||
An area of Shogun Studios in which Mario has to find cutouts of ninja Toads. |
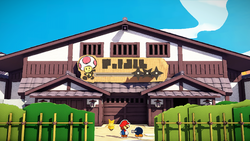 |
Scaredy Rats |
|||||
A four-story castle where stage productions are held. Rubber Band is battled here. |
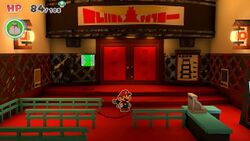 |
Paper Macho Spike Outlaws Paper Macho Snifit Outlaw Paper Macho Koopa Troopas Paper Macho Shy Guys |
Yellow streamer[edit]
Purple streamer[edit]
| Name and description | Image | Bosses | Enemies | # of Toads | # of Not-Bottomless Holes | # of Collectible Treasures | # of ? Blocks |
|---|---|---|---|---|---|---|---|
An open sea that Mario can explore by boat. |
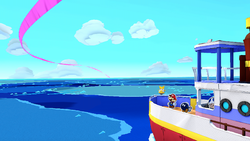 |
Bloopers Fly Guys |
|||||
A cruise ship named after Princess Peach. |
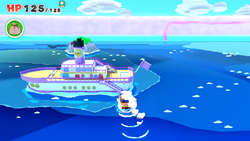 |
Fire Bros Snifits Scuttlebugs |
|||||
An island with a large, white skull cave. |
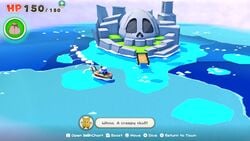 |
Bone Goombas |
|||||
An island in the shape of a mushroom that contains a Toad house. The Origami Craftsman resides here. |
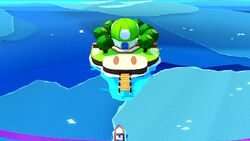 |
||||||
An island consisting of multiple shrubs with buttons on the back, with each causing a different occurrence around the island. |
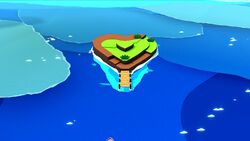 |
Cheep Cheeps |
|||||
An island where Mario must find four Toads to rescue a shirtless Toad stuck in a barrel. |
 |
||||||
A grass field island where Mario must find the Feelin' Fungi. |
 |
Koopa Paratroopas Hammer Bros Snifits Nipper Plants Spinies |
|||||
A small island with a fishing spot. |
 |
||||||
An island in the shape of a question mark that contains several ? Blocks. |
 |
Sidesteppers Paper Macho Stone Spike |
|||||
An island where the Legendary Hammer is found. |
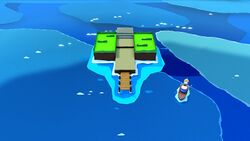 |
||||||
An island where Mario must battle seven Paper Macho soldiers. |
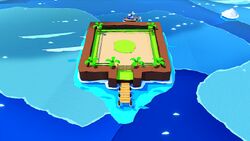 |
Paper Macho Shy Guy Paper Macho Koopa Troopa Paper Macho Boo Paper Macho Paratroopa Paper Macho Stone Spike Paper Macho Buzzy Beetle |
|||||
A secret underwater island with three trials. |
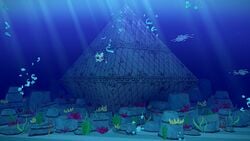 |
||||||
An icy mountain where the Ice Vellumental resides. |
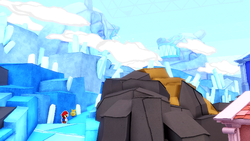 |
Sledge Bro Spike Tops Snow Spikes Sidesteppers |
|||||
A large tower at the northern end of the Great Sea honoring the four Vellumentals. The Tape is battled here. |
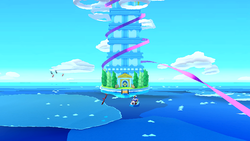 |
Hammer Bros Boomerang Bros Fire Bros Ice Bros Sledge Bros Sidesteppers |
Green streamer[edit]
Origami Castle[edit]
| Name and description | Image | Bosses | Enemies | # of Toads | # of Not-Bottomless Holes | # of Collectible Treasures | # of ? Blocks |
|---|---|---|---|---|---|---|---|
A volcano found below Peach's Castle. |
 |
Paper Macho Bob-ombs Paper Macho Lava Bubbles |
|||||
A corrupted version of Peach's Castle, created and ruled by King Olly. |
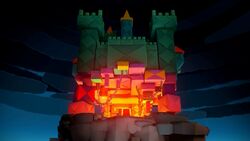 |
King Olly |
Koopa Troopas Spinies Ninjis Buzzy Beetles Hammer Bros Boomerang Bros Fire Bros Ice Bros Sledge Bros Sumo Bros Mechakoopas Paper Macho Koopa Troopas |
Weapons, items, and objects[edit]
Weapons[edit]
- Main article: List of Paper Mario: The Origami King weapons
Mario's attacks are now weapons that can be bought or found alongside items. The player can also find stronger variants of weapons.
Battle items[edit]
 Fire Flower: An item that allows Mario to throw fireballs and attack a row of enemies.
 Ice Flower: An item that allows Mario to throw ice balls to attack a row of enemies.
 Tail: An attack that deals damage in a 2x2 area.
 POW Block: Deals damage to the entire board and stuns enemies. Mario can only hold three POW Blocks at a time.
 Mushroom: An item that heals HP. This can be used on the overworld.
 1-Up Mushroom: Automatically and fully restores Mario's HP if he dies in battle. Only one can be carried at a time.
Shop items[edit]
Certain items can be bought in bundles in shops, for a cheaper price than buying them individually.
| Image | Name | Description |
|---|---|---|
| Mushroom 3-Pack | Three Mushrooms. Available in the Toad Town shop, Overlook Tower, and Big Sho' Theater. | |
| Mushroom 6-Pack | Six Mushrooms. Available in the Toad Town shop. | |
| Shiny Mushroom 3-Pack | Three Shiny Mushrooms. Available in the Shroom City shop and from a Toad statue on Diamond Island. | |
| Fire Flower Set | Three Fire Flowers. Available in the Toad Town shop. | |
| Ice Flower Set | Three Ice Flowers. Available in the Toad Town shop. |
Overworld equipment[edit]
| Image | Name | Description |
|---|---|---|
| Boot Whistle | Calls out the Boot Car when used (only works in areas where the car can be driven). | |
| Toad Radar | A battery-powered radar used to detect hidden Toads. | |
| Lamination Suit | A battery-powered suit that makes Mario invisible to enemies while standing still. | |
| Hidden Block Unhider | A battery-powered radar used to detect invisible ? Blocks. |
Accessories[edit]
Accessories are sold through the Fun, Funky, and Functional chain, found throughout the world in places such as Picnic Road and Bonehead Island. To activate their effect, Mario must equip them first. The Heart Plus, Guard Plus, and Time Plus have three variants of increasing effectiveness, but Mario can only equip one variant of each. The six other accessories have their own group, and Mario can only equip two from this group. After a certain point in the game, all accessories will be sold at an 80% discount.
| Image | Name | Description |
|---|---|---|
| Heart Plus | Increases Mario's max HP in battles. | |
| Guard Plus | Mario takes less damage while blocking. | |
| Time Plus | Mario is given more time to arrange rings in battle. | |
| Toad Alert | Sounds a chime when Mario is near a Toad. | |
| Treasure Alert | Sounds a chime when Mario is near a Collectible Treasure. | |
| Hidden Block Alert | Sounds a chime when Mario is near a ? Block. | |
| Membership Card | When equipped, Mario gets discounted prices at stores. | |
| Confetti Vacuum | Confetti can be collected from further away. | |
| Petal Bag | Mario's confetti is changed to flower petals. | |
| Ally Tambourine | Increases the power of allies in battle. | |
| Coin Step Counter | Counts Mario's steps while equipped, giving him 10,000 coins when he reaches 10,000. | |
| Retro Soundbox | A purely cosmetic accessory that changes Mario's sound effects. |
Overworld collectibles and objects[edit]
It has been requested that more images be uploaded for this section. Remove this notice only after the additional images have been added. Specifics: A few objects still missing images
It has been requested that this section be rewritten and expanded to include more information. Reason: More descriptive descriptions; missing non-hazardous objects like the various Magic Circles
| Image | Name | Description |
|---|---|---|
| Collectible items | ||
|
Bag of Confetti | A bag filled with confetti that can be collected to completely refill Mario's confetti supply. There are two different sizes, with the larger ones restoring more confetti. |
|
Confetti | A common object used to fill in Not-Bottomless Holes. It is obtained from defeating enemies, finding bags of confetti in the overworld, or hammering bushes and trees. |
|
Coin | Coins are found on the overworld, obtained from Not-Bottomless Holes, located in ? Blocks, and won from battles. Mario can use them to buy items and accessories, cheer the Toads on in battle, and purchase more time in the line-up phase. |

|
10-Coin | Larger coins that are worth 10 smaller coins. |

|
100-Coin | Giant coins that are equivalent to 100 coins. |
| Coin Bag | A bag of coins that is worth 1000 coins. | |

|
Hint Envelope | Orange envelopes that appear during boss battles. Collecting one gives Mario a hint on how to defeat the boss. |
  
|
Healing Heart | Hearts that appear both on the overworld and in boss battles, restoring Mario's HP depending on their size. |

|
MAX UP Heart | Hearts that increase Mario's max HP by five, ten, or twenty. |

|
Super Star | A rare item that makes Mario invincible, allowing him to safely walk through spikes and defeat enemies upon contact. |
| Trigger objects | ||

|
1,000-Fold Arms Magic Circle |
Patterns that allow Mario to use the 1,000-Fold Arms technique when stood on, assuming Olivia is nearby. These Magic Circles take the form of glowing triangles of light when contained by objects or enemies. In boss battles, they may need to be activated by passing over an ON Panel. |

|
Glowing spot | A shining spot in the ground where Professor Toad can dig, revealing coins, items, and treasure. |

|
Memory-game tile | A picture of a Magic Circle on a tile. Rewards Mario a Magic Circle when matched. |
|
Olly Tape | Tape with Olly's insignia, often opening shortcuts or freeing Toads after being removed. |

|
Pelmanism Leaf | A picture of an item on a leaf. Rewards Mario an item when matched. |

|
Vellumental Magic Circle |
Patterns that allow Mario to use the Vellumental technique when stood on, assuming Olivia is nearby. These Magic Circles take the form of glowing triangles of light when contained by objects or enemies. In battles they may need to be activated by passing over an ON Panel. |
| Transportation objects | ||
|
Boot Car | A car resembling a Goomba's Shoe that Mario can ride in the Scorching Sandpaper Desert. |
|
Super Marino | A submarine piloted by Captain T. Ode. This sub transported guests to Diamond Island, before T. Ode stole it. Later, it becomes the main display at the Musée Champignon. |

|
Temple teleporter | Warps Mario to a different area in the Trial of Power, Trial of Courage, and Trial of Wisdom temples. |
|
Toad Tram | An aerial cable car used to transport passengers via cables and a series of towers. The tram runs through Toad Town, Overlook Mountain, and Autumn Mountain. |
|
Warp Pipe | Pipes that are used to quickly traverse the world. Six shiny, colored pipes are found in the Musée Champignon and take Mario to each of the different streamer areas. The Sensor Lab also contains three Warp Pipes that bring Mario to different testing rooms, so he can try out the Toad Researcher's inventions. |
| Strikable objects | ||

|
Barrel | Wooden barrels that can be whacked with Mario's Hammer. They contain coins or confetti. |

|
Breakable block | Blocks in the Water Vellumental Shrine that can be whacked with Mario's Hammer. |

|
Crate | Wooden crates that can be whacked with Mario's Hammer. They contain coins and confetti. |
 
|
Flora and rocks | Objects that can be whacked with Mario's Hammer to produce confetti. These vary from flowers to bushes to rocks. |

|
Ice rock | Rocks in the Ice Vellumental Mountain that can be whacked with Mario's Hammer. |

|
Tree | Trees that can be whacked with Mario's Hammer to produce confetti. |

|
Vase | Ceramic vases that can be whacked with Mario's Hammer. They contain coins and confetti. |
| Blocks | ||

|
? Block | Blocks containing helpful items, usually coins or Collectible Treasures. |
|
Brick Block | Common blocks that can be broken by either Mario hitting them with a hammer or jumping into them from below. |

|
Empty Block | A block that cannot be broken. When a ? Block is hit, it turns into an Empty Block. |

|
Hidden Block | ? Blocks that are invisible. The Hidden Block Alert or the Hidden Block Unhider can be used to find Hidden Blocks. |
|
Save Block | Common, multicolored blocks with an "S" insignia. If Mario hits one, the game's progress is saved. |
| Other objects | ||
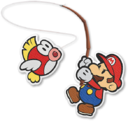
|
Fishing rod | Tools found at the fishing spots of Overlook Mountain, Shogun Studios, and Full Moon Island. Casting the line will allow Mario to catch fish, Bloopers, and Collectible Treasures. |

|
Relaxing Bench | A bench where Mario can sit on to fully recover his HP. |

|
Sign | Signboards that provide information relevant to the area when read. |
 
|
Treasure chest | Chests that hold various rewards including Collectible Treasures. Chests found in The Great Sea sparkle just like Coins. A golden-trim variant can be found throughout Shogun Studios, which require either the Commoner Pass or Royalty Pass to unlock. |
Useful Items[edit]
| Image | Name | Description |
|---|---|---|
| Baseball | A baseball signed by the owner of the Shuriken Dojo. It is given to two Dry Bones in Shogun Studios in exchange for the Bone. | |
| Bibliofolds | Books that Olivia reads to learn how to transform into a Vellumental and use their ability. There are four Bibliofolds in total, each one obtained after defeating its respective Vellumental. | |
| Big Shell | An item collected from the Great Sea. It is cooked on a campfire at Whispering Woods, revealing a shirtless Toad. | |
| Bone | A bone obtained from two Dry Bones at Shogun Studios. It is given to Princess to appease her. | |
| Canned Heart | An optional item found in the Great Sea. It can be brought to Autumn Mountain for the Bone Goomba to open it, releasing a MAX UP Heart. | |
| Canned Tuna | One of the many cans of tuna present on Autumn Mountain. When Mario collects it, he can give it to a Bone Goomba who will open it with his mouth. | |
| Commoner Pass | The cheaper, one-time pass to Shogun Studios. | |
| Confetti Bag | The bag that holds Mario's confetti. It gets upgraded to hold more confetti after the destruction of each streamer. | |
| Courage Orb | An orb obtained from beating the Trial of Courage, placed in the Sea Tower's door. | |
| "Deep, Deep Vibes" | One of DJ Toad's sound discs in the Temple of Shrooms. | |
| Diamond Jewel | A green jewel found near a statue's feet in Scorching Sandpaper Desert. | |
| Diamond Key | The key to Diamond Island. Luigi obtains it from Full Moon Island and gives it to Mario while on Mushroom Island. | |
| Faded Fire Flower | An item found in Whispering Woods that can be thrown into the spring to restore it into a regular Fire Flower. | |
| Goomba Mask | A mask found in the Shogun Studios staff room. It is used to sneak into Big Sho' Theater and later to cheer up Olivia in Breezy Tunnel. | |
| Groovy Panel | A tile in the Water Vellumental Shrine, used to complete a 2x2 sliding puzzle. | |
| Groovier Panel | A tile in the Water Vellumental Shrine used to complete a 3x3 sliding puzzle. | |
| "Heartbeat Skipper" | One of DJ Toad's sound discs in the Temple of Shrooms. | |
| Heavy Bag | An item belonging to a Shy Guy. It is found in the Great Sea, and returning it rewards Mario with 1000 coins. | |
| Jungle King Mask | A mask in the Shogun Studios staff room, shaped like Donkey Kong's head. | |
| Key to Bowser's Castle | The key to Bowser's throne room, found in Bowser's Castle by Luigi. | |
| Key to Peach's Castle | A key that Luigi seeks for the duration of the game. It is finally found stuck in his kart's tailpipe before entering Peach's Castle. | |
| Lever | A lever needed to turn on the electricity in the Princess Peach. | |
| Manhole Hook | An item found in Toad Town, obtained from a Shy Guy and used to access Graffiti Underground. | |
| "M-A-X Power!" | One of DJ Toad's sound discs in the Temple of Shrooms. | |
| Mushroom Handle | A doorknob needed to access the Origami Craftsman's workshop on Mushroom Island. It is found on Full Moon Island. | |
| Opened Can of Tuna | The can of tuna, opened by the Bone Goomba. It can be fed to the Oarsman, who has been folded into a monkey. | |
| Power Orb | An orb obtained from beating the Trial of Power, placed in the Sea Tower's door. | |
| Professor's Room Key | The key to Professor Toad's bottom-floor room at the Snif City Royal Hotel. | |
| Red Gem | A gem used to access the second floor of the Sea Tower, obtained from a blue Sidestepper. | |
| Round Jewel | A jewel needed for the tower in Scorching Sandpaper Far West, found by digging near the lake in Snif City. | |
| Royalty Pass | An infinite-use pass to Shogun Studios, allowing for bigger bonuses from treasure chests and being able to play the minigames for free. | |
| Shell Stones | Objects needed to open the Earth Vellumental Temple. They are found at Picnic Road and Overlook Mountain, appearing in five colors: purple, green, yellow, blue, and red. | |
| Shogun Studios Master Key | A key used to open every door at Shogun Studios, given to Mario by Luigi in the Ninja Attraction. | |
| Shriveled MAX UP Heart | A dried-up MAX UP Heart dug up by Professor Toad in the Scorching Sandpaper Desert. It can be restored at the spring in Whispering Woods. | |
| Shriveled Mushroom | An item in Whispering Woods that can be thrown into the spring, restoring it into a regular Mushroom. | |
| Shriveled Seed | A dried seed that can be put in the spring to restore it into the Soul Seed. | |
| Shuriken | An item given to Mario by a Ninji in exchange for the Straw. It is used to open the Shuriken Dojo. | |
| Soul Seed | A seed used to revitalize Ol' Grandsappy. | |
| Space Warrior Mask | A mask in the Shogun Studios staff room, shaped like Samus Aran's helmet. | |
| Spring of Rainbows - VIP | The VIP pass to Shangri-Spa, granting access to the Spring of Rainbows. | |
| Square Jewel | A jewel needed for the Scorching Sandpaper Far East tower, dug up near a fireplace in Scorching Sandpaper East. | |
| Stamp Card | A stamp card for visiting the hot springs at Shangri-Spa. | |
| Straw | A straw given to Mario by a Shy Guy in the Tranquil Pipes Teahouse, traded to a Ninji for the Shuriken. | |
| Suite Key | The key to Professor Toad's updated suite, found by Luigi near a rigged carnival game. | |
| Sun Incense | An incense placed above the entrance to the frozen chamber in Scorching Sandpaper Desert, which summons Mega Paper Macho Pokey. | |
| "Thrills at Night" | One of DJ Toad's sound discs in the Temple of Shrooms. This is the only one needed to complete the area, as Hole Punch likes it and comes out to dance. | |
| Triangle Jewel | A jewel used for the tower in Scorching Sandpaper West, dug from between two cacti. | |
| Wisdom Orb | An orb obtained from beating the Trial of Wisdom, placed in the Sea Tower's door. |
Nintendo eShop description[edit]
The kingdom has been ravaged by an origami menace! Join Mario and his new partner, Olivia, as they battle evil Folded Soldiers, repair the damaged landscape, and try to free Princess Peach's castle from the clutches of King Olly in this comedy-filled adventure, only on the Nintendo Switch system.
Mario and Luigi receive an invitation from Princess Peach to attend an origami festival and excitedly hurry to Toad Town...but something's amiss. After investigating the eerily empty town, the duo finds a fearsome (and folded) Princess Peach-she's been turned into origami by King Olly, ruler of the Origami Kingdom! With five giant streamers under his control, King Olly binds Princess Peach's Castle and transports it to a distant mountain as part of his plan to re-fold the world.
On his journey to liberate Peach's Castle and repair the ravaged paper landscape, Mario meets Olivia, King Olly's sister, and the two join forces to put a stop to Olly's origami onslaught. Even Bowser falls victim to Olly's plot when his minions are turned into origami Folded Soldiers and betray their Koopa king, forcing him to ally with Mario and Olivia!
Battle the Folded Soldiers in ring-based battles the challenge you to strategically line up enemies to maximize damage! Out of battle, Mario can use the arm-extending 1,000-Fold Arms ability in specific spots to interact with the landscape to pull, peel, hit, and more! Join Mario, Olivia, and their companions on a journey of laughter and emotion, thrills, and a whole lot of folding.
Update history[edit]
Version 1.0.1[edit]
Release date: August 5, 2020
- Patch notes
- Fixed an issue in which you would be unable to enter the Spring of Rainbows in Shangri-Spa.
- Note: If you have already encountered this issue, you will now be able to proceed normally.
- Fixed an issue in which players were unable to hit the Toad on top of the fountain in Shroom City.
- Note: If you have already encountered this issue, you will now be able to proceed normally.
- Fixed an issue where Black Shy Guy would not be registered in the Gallery of the Musée Champignon—even if you have previously defeated one.
- Note: If you have already encountered this issue, return to Scorching Sandpaper West after the sun has returned and defeat Black Shy Guy once more to add him to your Gallery.
- Fixed an issue in the Ninja Attraction in which, depending on the state of the player, certain Ninji enemies were undefeatable and halted progression.
- Note: If you have already encountered this issue, you will now be able to proceed normally.
- Fixed an issue in which the game would occasionally hard lock in the Rubber Band boss battle.
- Fixed an issue in the Battle Lab in which the score would not be properly registered after solving 33 or more lineups in Speed Rings in the Ring Trainer.
- Note: Previously registered scores will not change. New scores will be registered correctly after downloading this update data.
- Fixed an issue in which you could obtain an item from outside of a certain coffin in the Temple of Shrooms. This fix also corrects a related error involving hints from the Love Toad in Toad Town.
- Note: If you've already obtained the item from outside of the coffin, the Love Toad's hint error will be resolved.
- Fixed an issue in Overlook Mountain in which the event of looking up at Overlook Tower would occasionally occur from the bottom of the hill.
Technical aspects[edit]
The game supports 5.1 surround. Mario's movements and attacks and all ambient noises are played on all speakers.
The game is hard-locked to 30 frames per second.
Pre-release and unused content[edit]
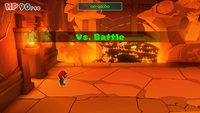
Before entering Peach's Castle for the first time, the player was originally going to have a 360-degree view of the castle as well as some models of Princess Peach, which appear unused in the game's files with different hair and jewels on her crown.[2] Some leftovers from Paper Mario: Color Splash in the game's code include Mario swinging his hammer, which is 2D, even though in the game it is 3D. The Monty Mole accessory vendor has unused walking animations.[3] Additionally, there are unused sprites for Captain T. Ode, as well as Bowser and Bowser Jr. inside the Koopa Clown Car.
\data\map\maplink.elf.zst contains nodes linking to unused Bossotronic rematches against all three Big Sho' Theater Paper Macho battles, the second wave of Paper Macho Shy Guys with buckets in the Fire Vellumental Cave, and the Paper Macho Mummy Goombas in the Temple of Shrooms. However, when activated the bosses do not appear as the links are unfinished.
References to other games[edit]
- Donkey Kong: When Mario is equipped with the Retro Soundbox, he makes the walking sound effect from this game.
- Mario Bros.: The effect of POW Blocks on Sidesteppers allude to this game, where both debuted. Hitting a POW Block causes a Sidestepper to flip over. If a red Sidestepper is left flipped for a certain amount of time, it turns blue.
- Super Mario Bros.: When Mario grabs the top of the Goal Pole and slides down it for the first time at Picnic Road, a firework shoots into the sky while an arrangement of the "course cleared" fanfare plays, similar to when the player clears a level with the timer's last digit at 1, 3, or 6 in this game. One of Colored Pencils' drawings is of Mario's death sprite from this game.
- The Legend of Zelda series: The three trials at Diamond Island are a reference to each of the three different parts of the Triforce.
- Metroid series: A papier-mâché model of Samus's helmet appears in the storeroom of Shogun Studios.
- Yume Kōjō: Doki Doki Panic: When trying to recall the term "amnesia", Bob-omb mentions "Thinky Thinky Panic", a reference to this game's title.
- Super Mario Bros. 2: After Mario rescues Birdo in Big Sho' Theater, she says that she has "Mario madness." The English cover for Super Mario Bros. 2 features the subtitle "Mario Madness," and the game was Birdo's first appearance. Additionally, the Musée Champignon description for the Black Shy Guy states that it throws turnip-like objects, referencing the throwing mechanic from this game.
- Super Mario Bros. 3: Olivia mentions the sun being angry in Scorching Sandpaper Desert. Portions of Chestnut Valley's music are based on this game's athletic theme. Koopas are also depicted as religious, repeatedly praying to a deity as a sign of worship, referencing an image in this game's credits sequence depicting a green Koopa Troopa praying to Statue Mario.[4]
- Super Mario World: The fireball and spin jump sounds are reused from this game.
- Super Mario 64: An arrangement of "Inside the Castle Walls" plays when Mario and Luigi arrive at Peach's Castle in the opening.
- Paper Mario: Peach's castle's interior looks similar to the one used in this game, and Peach's design from this game appears as a photo. The moves Headbonk and Shell Shot are reused from this game. In addition, enemy Koopas may team up to perform a Tower Attack nearly identical to the one the Koopa Bros. can use, and enemy Paratroopas can use a Dive Kick similar to Parakarry's.
- The Legend of Zelda: The Wind Waker: The Great Sea is an overall reference to this game's main setting. The way that Mario navigates the Great Sea is a reference to this game's main navigation mechanic. A few islands in the Great Sea are references to a few islands from this game; Heart Island is a reference to each of the Fairy Islands, Scuffle Island is a reference to Star Island since both islands require the player to fight multiple enemies to earn a special item, and Crescent Moon Island (before it becomes Full Moon Island) is a reference to this game's Crescent Moon Island respectively. Mario having to collect the three orbs to enter the Sea Tower is a reference to how Link has to collect the three pearls to be able to enter the Tower of the Gods.
- Mario & Luigi: Superstar Saga: To reach a book on the shelf in the Origami Craftsman's workshop, Mario and Luigi perform a similar High Jump to that of this game.
- Paper Mario: The Thousand-Year Door: Peach's design from this game appears as a photo. Additionally, when Mario and Bob-omb interact with the steering wheel on the Princess Peach, the latter mentions that he dreams of being an admiral someday, in reference to Admiral Bobbery.
- Super Paper Mario: Peach appears in a photo with her parasol and a background resembling Lineland. Some of the Sammer's Kingdom's OST is incorporated into the music for Shogun Studios.
- Mario Kart Wii: A slow-paced arrangement of Maple Treeway's music plays in the Tranquil Pipes Teahouse at Shogun Studios.
- New Super Mario Bros. Wii: Some of Bowser Jr.'s voice clips are reused from this game.
- Metroid: Other M: If Mario tries on the Space Warrior Mask, Bob-omb comments on how the helmet would look better on "some other kind of M."
- Paper Mario: Sticker Star: Shiny and flashy attacks return from this game. In addition, Peach appears in a photo, surrounded by stickers. Additionally, the fan that blows the fog away in Bonehead Island, the Scissors boss and the basin used in the Trial of Courage resemble their respective Things in the game. The music of the main boss introductions is incorporated into the music of the Vellumental's introductions.
- Super Mario 3D World: Some of the voice clips are recycled from this game. The Goomba Mask returns from this game. Luigi's running pose and Peach's floating pose in the ending are based on their respective animations from this game.
- Mario Kart 8: Like in Paper Mario: Color Splash, Luigi drives a Standard Kart resembling the ones in this game.
- Paper Mario: Color Splash: The Origami King runs on a very similar graphical engine to Color Splash. The paint-coated graphic effect is used when a Toad aboard the Princess Peach is covered in ink. Mario can again hammer characters to temporarily crumple them. Princess Peach's design from that game also appears as a photo in the game. The Rescue Squads return in the Battle Lab. The Emerald Circus and the Violet Passage captain's pirate ship appear in paintings in Overlook Tower. When Captain T. Ode introduces himself after being thawed out by Olivia in her Fire Vellumental form, the Fortune Island music is reused, lacking the intro and bell quips of the tune. Additionally, steaks identical to the one fought in Tangerino Grill are found when T. Ode is freed. Bonehead Island looks very similar to Fortune Island, and includes multiple design similarities. The music on Bonehead Island is very similar to the Violet Passage theme. When the player completes Bonehead Island, a realistic fan that has the same appearance as the Fan Thing from this game (which actually originated from Sticker Star) emerges from the sea and blows the mist away, similar to the scene when the Fan is being used in Violet Passage to get the ship to set sail. A Shy Guy with a straw similar to a Slurp Guy appears in the Tranquil Pipes Teahouse and gives Mario his straw. The Spring of Rainbows bears a resemblance to Prisma Fountain, although in a more papercraft-like appearance. The way Bowser Jr. restores his colors from it also resembles the paint mechanic in this game. One Toad in Toad Town mentions that he needs to find "an expert on bridge experts", referencing the bridge builder and the bridge builder expert that appear in Port Prisma. Two Whistle Snifits are found in the Spring of Rainbows' cafe. The way the basin crushes Mario in the Trial of Courage is similar to how the Basin Thing crushes him at Fort Cobalt. The faceless Toads resemble the faceless cardboard cutout of the Mountain Sage on the top of Daffodil Peak. When approaching the Spring of Jungle Mist, Kamek mentions that he has "dealt with giant trees before," a nod to the Mondo Woods area.
- The Legend of Zelda: Breath of the Wild: The climbing mechanic from this game is referenced when a Toad climbing a cliff in Autumn Mountain tells Mario that it would be more difficult to climb the cliff if it was raining, just like in this game where Link slides down cliffs if he climbs them while it is raining.
References in other games[edit]
- Tetris 99: A theme based on Origami King was made available during the 15th Maximus Cup.
- Super Smash Bros. Ultimate: A Spirit Board event themed after Origami King ran from August 28, 2020 until September 2, 2020. Origami Peach, Olivia, and King Olly spirits appear at random during the event. The 3 spirits were later available on the Spirit Board as normal spirits.
- WarioWare: Move It!: A microgame based on Origami King appears in this game, in which Mario must use the 1,000-Fold Arms.
Similarities to the other Paper Mario games[edit]
- Like the original game and its sequel, Mario and Luigi receive an invitation from Princess Peach.
- Although Peach gives Mario a letter in Color Splash, said letter is actually a color-drained Toad.
- In combat, Mario's basic jump and hammer attacks are permanent, like in the first two games.
- Like in the first and second games, Mario can use most types of recovery items outside of battle as well as in battle.
- Partners return from the first three games.
- Just like in the second and third games, Bowser is not the primary villain. Rather, Mario and Bowser team up, as they do in Super Paper Mario.
- Just like in Paper Mario: The Thousand-Year Door, Peach is turned evil by the main antagonist, similarly to the Shadow Queen.
- Like in Super Paper Mario, Luigi has a significant role throughout the game’s plot and is a party member for parts of the game.
- Like in all of the previous games, there is a quiz show, in this case, Shy Guys Finish Last.
- Mario can use confetti to fill in Non-Bottomless Holes, similarly to using paint to fill in colorless spots in Color Splash. Like paint, confetti is limited.
- Like the previous two games, there is a performance starring Birdo.
- Like the first game, Peach's Castle gets taken over by the main antagonist, is lifted to a higher location, leaves a hole in the ground from where it normally sits and requires finishing every chapter to return to it (as well as taking some kind of flying vehicle to get close to it).
- Like in the first four games, Mario fights a Blooper as a boss.
- Like in Paper Mario: The Thousand-Year Door, battles take place in front of an audience, and the audience can interact with Mario.
- However, the audience only consists of Toads, the number of audience members depends on the rescued Toads, they need to be paid to influence the battle, and they do not attack Mario for a bad "performance".
- Like in the previous three games, Mario has a permanent travelling companion who can float and sacrifices themselves in the end, in this case, Olivia.
- Like in Super Paper Mario, the main antagonist has taken control of some of Bowser's minions.
- Shiny and Flashy variants of attacks return from Paper Mario: Sticker Star.
- Like the previous three games, in-game materials show the logos for Nintendo and Intelligent Systems.
- Like Sticker Star, MAX UP Hearts are used as a level-up mechanic.
- Bowser's Castle floats as it does in the original game and the previous two games.
- Like Color Splash, each save file is tied to a user profile. Because of this, they cannot be copied or deleted within the game, and are tied to each user profile of the Nintendo Switch. Since the Switch can have up to eight user profiles, this translates to eight save files, compared to four from the first three games, three from the fourth installment, and twelve from Color Splash (since the Wii U can support up to twelve user profiles). The difference is that in Color Splash, the user profile is loaded before the game is started, while in Origami King, the user profile is selected past the title screen.
- The Iron Boots, Hurlhammer, and Fire Hammer return from the previous two games.
- The Ice Hammer returns from Sticker Star.
- If Mario enters the area with Ol' Grandsappy for the first time and tries to leave the area, he ends up in the same place. This is similar to Forever Forest in Paper Mario and The Bafflewood in Paper Mario: Sticker Star, which in itself are references to the Lost Woods in The Legend of Zelda series.
- Much like in Super Paper Mario, Mario can optionally change his sound effects to old-school ones; in this case, it can be done via the Retro Soundbox accessory.
- In Big Sho' Theater, one of the red and green Paper Macho Koopa Troopas respectively wear sunglasses similar to the enemy Koopa Troopas from the first three games.
- Like in Color Splash, Luigi has voice clips by Charles Martinet while Mario does not.
Differences from the other Paper Mario games[edit]
- The battle system in this entry is puzzle-based rather than a more direct, turn-based system.
- This is the first game in the series and in Super Mario role-playing games overall in which Bowser is not fought at any point in the game.
- This is the first game in the series where the overall objective does not involve finding any major collectibles (e.g. the Crystal Stars or Pure Hearts), rather to destroy giant streamers blocking Peach's Castle.
- Save prompts now have a distinctive look, separate from normal text boxes.
- When getting a Game Over, an option to restart from the last save (or in the case of minigames and the final boss, to try again) is now available.
- When Mario gets hit by a First Strike, he can no longer block the attack.
- A sound and impact effect do not play when this happens in the overworld.
- The text "The End" does not show up at all in the credits.
- Unlike most other installments, the game does not end with a parade, but rather a series of screenshots can be seen during the credits, like in Paper Mario: The Thousand-Year Door and Super Paper Mario. Unlike in these games, though, these photos take place after the events of the story, rather than during them.
- Mario's hammer is rendered as a three-dimensional object, rather than 2D.
- The game saves automatically when moving between different locations, similar to the saving behavior in the world map from the previous two games.
- The touchscreen is no longer used as an alternative input for Action Commands, due to the Switch powering only one video source, unlike the Wii U.
- There are no defense items such as Spike Helmets.
- This is the first game in the series that does not include an arrangement of the Super Mario Bros. Ground Theme in the main soundtrack. The only time this theme can be heard is when Mario buys the engine upgrade for Sea Captain Toad's boat; the sound effects of it being installed mimic the theme in question.
- Unlike past Super Mario role-playing games, the entire game does not use the same regular battle theme for every location. A different arrangement of the battle theme is used for each streamer area.
Staff[edit]
- Main article: List of Paper Mario: The Origami King staff
The game was directed by Masahiko Nagaya, who was the art director of the previous installment, the game's art was directed by Isamu Kamikokuryo, ex-Square art director of the Final Fantasy series, and produced by Kensuke Tanabe and Atsushi Ikuno.
Reception[edit]
Critical response[edit]
Paper Mario: The Origami King received generally positive reviews from critics, who praised the expansive overworld, graphics, writing, and plot, though its combat system received mixed reactions, being praised for its innovation but criticized for being tedious, unrewarding and lacking complexity. While considered an improvement over Sticker Star and Color Splash, it was also criticized for many of the same reasons as its predecessors: lack of originality, low variation in characters and their design, few original characters, the absence of traditional RPG elements, and little incentive on combat.
| Reviews | |||
|---|---|---|---|
| Release | Reviewer, Publication | Score | Comment |
| Nintendo Switch | Michael Goroff, EGM |
3/5 | Despite everything, Paper Mario: The Origami King is a charming game. I wanted to fully explore every area of the Mushroom Kingdom. I wanted to find every Toad. I wanted to do everything except actually engage with the game's combat system. In trying to rewrite the basic rules with every outing, Intelligent Systems keeps fans of the franchise on its toes. But that can also start to distort the identity of the series itself. How can you perfect a formula if you’re constantly pouring it out and starting again? |
| Nintendo Switch | Cam Shea, IGN |
7/10 | The Origami King is a truly likeable game despite the shallowness of its new spin on gameplay. Its characters are winsome, its visual design is gorgeous, its world is fun to explore, and its storytelling is outside the box and playful. At the same time, however, it could be so much more. Combat is largely unfulfilling, and your journey as a whole lacks meaningful choices. For a series with RPG roots, that's a real shame. |
| Nintendo Switch | Chris Carter, Destructoid |
8/10 | There's room in my heart for both styles of Paper Mario. The old games still exist and this newer, sometimes thinner formula is fine too. That said, it's possible Nintendo and Intelligent Systems have folded this subseries every which way they can at this point. I hope the next one is a little more fresh. |
| Nintendo Switch | Suriel Vazquez, GameSpot |
8/10 | With a newfound combat system that steals the show and offers a novel take on turn-based combat, its winking, nodding, and adventuring shine all the brighter. Its world and characters might not be the series' best, but it's still able to consistently throw left turns, good gags, and smart surprises at you. Each piece of The Origami King elegantly fits into its whole, taking its irreverent flair to new heights. The Paper Mario series has recently shown that being clever and being smart are two different things, but thankfully, it's once again managed to be both. |
| Nintendo Switch | Alex Donaldson, VG247 |
4/5 | That simplicity is overridden by originality and vigor, then – but I also know all too well that some fans of the older Paper Mario games will once again walk away a little disappointed. This is still undoubtedly no Thousand Year Door. Perhaps the next outing can bring back a little of that RPG depth – but regardless of that, this is still the best Paper Mario game in years. |
| Aggregators | |||
| Compiler | Platform / Score | ||
| Metacritic | 80 | ||
Sales[edit]
By December 31, 2021, the game had sold 3.34 million units worldwide.[5]
Gallery[edit]
- For this subject's image gallery, see Gallery:Paper Mario: The Origami King.
Origami Peach
Glitches[edit]
- Main article: List of Paper Mario: The Origami King glitches
Semi-dead enemy glitch[edit]
If a wave battle is supposed to start, but only one enemy is alive and another is in their death animation, it will still initiate a wave battle and consider both enemies alive.
Sumo Bro softlock[edit]
During the second phase of the Boss Sumo Bro rematch in the Battle Lab, defeating the Boss Sumo Bro with a POW Block without defeating the two Sumo Bros beforehand will cause the game to soft-lock.
VIP pass softlock[edit]
Before the version 1.0.1 update,[6] in Shangri-Spa, after obtaining the VIP pass to access the Spring of Rainbows, if the player left the path to the Spring of Rainbows after entering, the VIP pass would disappear from the menu. If the player then spoke to the Toad at the reception, they would not have the stamp card and there would be no way to get another one. Saving after this point would permanently prevent the player from progressing.[7]
Quotes[edit]
- Main article: List of Paper Mario: The Origami King quotes
Media[edit]
- For this subject's sound test, see Musée Champignon § Sound Gallery.
| File info 0:30 |
| File info 0:30 |
| File info 0:30 |
| File info 0:30 |
| File info 0:30 |
| File info 0:30 |
| File info 0:30 |
| File info 0:30 |
Names in other languages[edit]
| Language | Name | Meaning | Notes |
|---|---|---|---|
| Japanese | ペーパーマリオ オリガミキング[?] Pēpā Mario Origami Kingu |
Paper Mario: Origami King | |
| Chinese (simplified) | 纸片马力欧:折纸国王[?] Zhǐpiàn Mǎlìōu: Zhézhǐ Guówáng |
Paper Mario: Origami King | |
| Chinese (traditional) | 紙片瑪利歐:摺紙國王[?] Zhǐpiàn Mǎlìōu: Zhézhǐ Guówáng |
Paper Mario: Origami King | |
| Korean | 페이퍼 마리오 종이접기 킹[?] Peipeo Mario Jong-ijeopgi King |
Paper Mario: King of Paper Folding |
References[edit]
- ^ https://www.nintendo.com/es_LA/games/detail/paper-mario-the-origami-king-switch/
- ^ https://www.youtube.com/watch?v=l8-kBSYafhs
- ^ https://tcrf.net/Paper_Mario:_The_Origami_King
- ^ Supper Mario Broth (November 21, 2024). In Paper Mario: The Origami King, Koopa Troopas are explicitly religious, which is very rare for the Mario franchise. This might be a reference to an idea first proposed by Super Mario Bros. 3 32 years prior, whereby a Koopa Troopa was shown praying in the game's ending.. Bluesky (English). Retrieved November 27, 2024. (Archived via archive.today.)
- ^ https://www.perfectly-nintendo.com/cesa-white-book-2022-additional-shipment-data-for-nintendo-games-nintendo-switch/
- ^ https://en-americas-support.nintendo.com/app/answers/detail/a_id/50130/~/how-to-update-paper-mario%3A-the-origami-king
- ^ https://youtu.be/4cLFZ9_S0GI
External links[edit]
- Official North American website
- Official Japanese website
- Official Hong Kong website
- Official Taiwanese website
- Official South Korean website
- Australian website
- Origami folding instructions
