Pot Hole Panic (Donkey Kong Country 3): Difference between revisions
m (Just wanted to point out a small difference in entering the second bonus room between the SNES and GBA versions if the Kongs are riding Squitter.) |
m (Text replacement - "(\| *)Jap([RMCN\d]* *=)" to "$1Jpn$2") |
||
| (39 intermediate revisions by 17 users not shown) | |||
| Line 1: | Line 1: | ||
{{ | {{italic title|id=yes}} | ||
{{ | {{level infobox | ||
|image=[[File:Pot Hole Panic.png|256px]] | |image=[[File:Pot Hole Panic.png|256px]] | ||
|code=6 - 4 | |code=6 - 4 | ||
|world=[[Razor Ridge]] | |||
|game=''[[Donkey Kong Country 3: Dixie Kong's Double Trouble!]]'' | |game=''[[Donkey Kong Country 3: Dixie Kong's Double Trouble!]]'' | ||
| | |track=Cavern Caprice | ||
|before=[[Floodlit Fish|<<]] | |before=[[Floodlit Fish|<<]] | ||
|after=[[Ropey Rumpus|>>]] | |after=[[Ropey Rumpus|>>]] | ||
}} | }} | ||
'''Pot Hole Panic''' is the twenty-ninth [[level]] in | '''Pot Hole Panic''' is the twenty-ninth [[level]] in ''[[Donkey Kong Country 3: Dixie Kong's Double Trouble!]]'' It is also the fourth area of [[Razor Ridge]]. The level takes place in a purple cavern with four sections where [[Dixie Kong|Dixie]] and [[Kiddy Kong|Kiddy]] can ride on each of the four [[Animal Friends]]. In the first section, the [[Kong]]s get to ride [[Squawks]], who encounters [[Kopter]]s and [[Booty Bird]]s along the way. This is followed by a water portion, where the Kongs can optionally ride [[Enguarde]] by breaking his [[animal crate]] to the right of [[KONG Letters|the letter O]]. After this, the Kongs can ride [[Ellie]], who needs to avoid Kopters, as well as bombs thrown by [[Kuchuka]]s, which first appear in this level. Lastly, the Kongs can ride [[Squitter]], who can reach the letter G and the second [[Bonus Barrel]]. | ||
==Layout== | |||
[[File:Pot Hole Panic DKC3 GBA.png|thumb|left|Pot Hole Panic in the Game Boy Advance version]] | |||
When the Kongs begin the level, they must fall into a thin gap and land on a crate with Squawks in it. They should grab onto the parrot and ride to the east. As they fly through the mostly straight path, they are greeted by Kuchukas, whose bombs must be avoided at all costs. After passing four Kopters gliding in and out of small alcoves, the heroes must float downwards, and then hover to the west. As they travel in this area, they need to defeat a few Booty Birds. Soon, the heroes find an underwater area. There, Squawks drops them off and flies away. So, the monkeys need to swim over a few Kocos to find Enguarde. The large fish must be ridden through the water, beating many different species of foes. After the three swim through the narrow paths around several Lurchins and Bounty Basses, they enter an open area with more Lurchins. They need to swim around the foes and swim in a U shaped path to find the outside of the lake, where they must hop off of Enguarde and jump onto a ledge. There, they can find the [[Star Barrel]], as well as a crate. | |||
Halfway through the level, the group needs to break open the crate near them to find Ellie. The friend must be ridden through an area full of rowdy Kuchukas and Kopters. After they dodge each of the foes on the eastward path, they must fall into a gap and land into another lake. There, the Kongs have to say goodbye to Ellie as they leave her and hop up into a high up barrel nearby. It shoots them to the next area, where Squitter can be found. The spider must be ridden under two dangerous Kopters. After that, the heroes must avoid a Booty Bird, being surrounded by another Kopter. Once they pass this short part, the monkeys and Squitter should continue east and watch out for the bombs of a Kuchuka. Farther on is a [[No Animal Sign]]. Squitter disappears when this sign is passed, allowing the Kongs to get onto the flagpole to the right and exit the level. | |||
== | ==Enemies== | ||
[[ | The following enemies appear in the following quantities: | ||
<gallery> | |||
Booty Bird DKC3.png|[[Booty Bird]] (5) | |||
Bounty Bass DKC3.png|[[Bounty Bass]] (7) | |||
Buzz DKC3 red.png|[[Buzz (enemy)|Buzz]] (red) (1) | |||
Koco DKC3 green.png|[[Koco]] (green) (2) | |||
Kopter DKC3.png|[[Kopter]] (7) | |||
Kuchuka DKC3 sprite.png|[[Kuchuka]] (8) | |||
Lurchin DKC3.png|[[Lurchin]] (10) | |||
</gallery> | |||
[[File:Pot Hole Panic | ==Items and objects== | ||
The following items and objects appear in the following quantities: | |||
<gallery> | |||
Banana Bunch DKC SNES.png|[[Banana Bunch]] (5) | |||
Bear Coin.png|[[Bear coin]] (3) | |||
DK Barrel DKC.png|[[DK Barrel]] (4) | |||
</gallery> | |||
===K-O-N-G Letters=== | |||
[[File:Pot Hole Panic SNES N.png|thumb|The location of the letter N]] | |||
*'''K:''' The letter K is found by defeating the first Booty Bird in the level with Squawks' attack. | |||
*'''O:''' The letter O is found right after the Squawks segment, floating at the end of a [[banana]] trail. | |||
*'''N:''' The letter N is beneath the first Bonus Barrel. | |||
*'''G:''' The letter G is found above a red Buzz in the Squitter area (or below it in the Game Boy Advance version). | |||
{{br}} | |||
== | ===DK Coin=== | ||
[[File:Pot Hole Panic GBA Koin.png|thumb|The Koin of Pot Hole Panic in the Game Boy Advance version]] | |||
At the end of the level, right before the Level Flag, Kiddy must use a [[Team-up]] throw to elevate himself and Dixie onto a high ledge with the [[Koin]]. The Kongs must do another Team-up throw to reach a ledge at the top-left, where they can pick up a [[Iron Barrel|Steel Barrel]]. The Kongs must then jump down to the right to land back on the ledge with the Koin. The Kongs must stand on Koin's shield and throw the Steel Barrel at the left wall. This causes the Steel Barrel to bounce off into the Koin and defeat him; the Kongs are rewarded with the [[DK Coin]]. | |||
{{br}} | |||
==== | ==Bonus Levels== | ||
{{multiframe|[[File:Pot Hole Panic GBA Bonus Area 1.png|200px]] [[File:Pot Hole Panic GBA Bonus Area 2.png|200px]]|size=420|The first and second Bonus Levels respectively}} | |||
Pot Hole Panic has two [[Bonus room|Bonus Level]]s, listed by type: | |||
*'''''Collect 20 Stars!''''': While the Kongs are riding Ellie, they must eventually jump below into the water. The group must swim to the left until they reach the letter N. From there, Dixie and Kiddy must jump off Ellie for a height boost into the [[Bonus Barrel]] above. At the start of the [[Bonus Level]], the Kongs are back to mounting Ellie. They must collect 20 [[star (Donkey Kong franchise)|star]]s within 20 seconds, which are hovering over a pool of water and can only be reached by Dixie and Kiddy jumping off of Ellie for a boost in height. After collecting all the stars, the [[Bonus Coin (Donkey Kong franchise)|Bonus Coin]] appears. | |||
*'''''Collect 15 Bananas!''''': After mounting Squitter and passing the letter G, the group come across an open area. A Kuchuka is throwing down bombs from a wide opening in the ceiling. Squitter must use his web platforms to go up the opening to find the Kuchuka on a left platform. The Kongs and Squitter must continue slightly higher to enter the Bonus Barrel on the ceiling. In the Bonus Level, the Kongs and Squitter must collect 15 [[green banana]]s while avoiding a Kuchuka as it throws bombs at them from the top-left platform. After collecting every green banana, the Bonus Coin appears in front of the exit, at the bottom right of the area. | |||
{{br}} | |||
==Gallery== | ==Gallery== | ||
<gallery> | <gallery> | ||
Pot Hole Panic DKC3 shot.png|The | Pot Hole Panic DKC3 shot.png|The start of the level | ||
Pot Hole Panic DKC3 shot 2.png|Kiddy rides on Squawks. | Pot Hole Panic DKC3 shot 2.png|Kiddy rides on Squawks. | ||
Pot Hole Panic DKC3 shot 3.png|The apes swimming underwater. | Pot Hole Panic DKC3 shot 3.png|The apes swimming underwater. | ||
Pot Hole Panic DKC3 shot 4.png|At the surface of the water. | Pot Hole Panic DKC3 shot 4.png|At the surface of the water. | ||
Pot Hole Panic SNES Ellie Crate.png|Ellie's animal crate. | |||
Pot Hole Panic DKC3 shot 5.png|Kiddy riding on Ellie. | Pot Hole Panic DKC3 shot 5.png|Kiddy riding on Ellie. | ||
Pot Hole Panic | Pot Hole Panic SNES Kuchuka.png|The location of the second Bonus Area. | ||
Pot Hole Panic SNES Kopter.png|A Kopter. | |||
Pot Hole Panic GBA underwater.png|The underwater area, as seen in the Game Boy Advance version | |||
Pot Hole Panic GBA K.png|The letter K, as seen in the Game Boy Advance version | |||
Pot Hole Panic GBA O.png|The letter O, as seen in the Game Boy Advance version | |||
Pot Hole Panic GBA G.png|The letter G, as seen in the Game Boy Advance version | |||
</gallery> | </gallery> | ||
==Names in other languages== | ==Names in other languages== | ||
{{foreign names | {{foreign names | ||
| | |Jpn=ともだちがいっぱい | ||
| | |JpnR=Tomodachi ga ippai | ||
| | |JpnM=Full of Friends | ||
|Spa=Pánico en la Gruta | |Spa=Pánico en la Gruta | ||
|SpaM=Panic in the Grotto | |SpaM=Panic in the Grotto | ||
| | |Fre=Cuvette Pas Cool | ||
| | |FreM=Uncool Basin | ||
|Ger=Höhlen-Humbug | |Ger=Höhlen-Humbug | ||
|GerM=Cave Hokum | |GerM=Cave Hokum | ||
|Ita=Panico nel Canyon | |||
|ItaM=Panic in the Canyon | |||
}} | }} | ||
==Trivia== | ==Trivia== | ||
*This level is very similar to [[Animal Antics (Donkey Kong Country 2 | *This level is very similar to [[Animal Antics (Donkey Kong Country 2)|Animal Antics]] from ''[[Donkey Kong Country 2: Diddy's Kong Quest]]'', as the Kongs will get to ride all of the game's ridable [[Animal Friends]] in it. | ||
{{DKC3}} | {{DKC3}} | ||
[[Category: | [[Category:Aquatic areas]] | ||
[[Category: | [[Category:Underground areas]] | ||
[[Category:Donkey Kong Country 3: Dixie Kong's Double Trouble! | [[Category:Donkey Kong Country 3: Dixie Kong's Double Trouble! levels]] | ||
Latest revision as of 15:32, January 7, 2025
| Level | |
|---|---|
| Pot Hole Panic | |
| |
| Level code | 6 - 4 |
| World | Razor Ridge |
| Game | Donkey Kong Country 3: Dixie Kong's Double Trouble! |
| Music track | Cavern Caprice |
| << Directory of levels >> | |
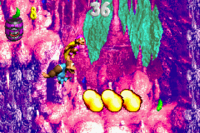
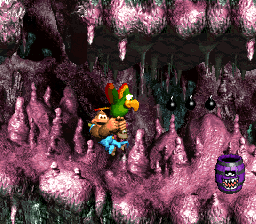
Pot Hole Panic is the twenty-ninth level in Donkey Kong Country 3: Dixie Kong's Double Trouble! It is also the fourth area of Razor Ridge. The level takes place in a purple cavern with four sections where Dixie and Kiddy can ride on each of the four Animal Friends. In the first section, the Kongs get to ride Squawks, who encounters Kopters and Booty Birds along the way. This is followed by a water portion, where the Kongs can optionally ride Enguarde by breaking his animal crate to the right of the letter O. After this, the Kongs can ride Ellie, who needs to avoid Kopters, as well as bombs thrown by Kuchukas, which first appear in this level. Lastly, the Kongs can ride Squitter, who can reach the letter G and the second Bonus Barrel.
Layout[edit]
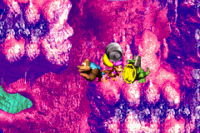
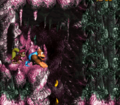
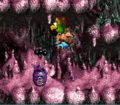
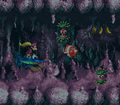
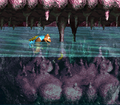
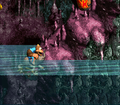
When the Kongs begin the level, they must fall into a thin gap and land on a crate with Squawks in it. They should grab onto the parrot and ride to the east. As they fly through the mostly straight path, they are greeted by Kuchukas, whose bombs must be avoided at all costs. After passing four Kopters gliding in and out of small alcoves, the heroes must float downwards, and then hover to the west. As they travel in this area, they need to defeat a few Booty Birds. Soon, the heroes find an underwater area. There, Squawks drops them off and flies away. So, the monkeys need to swim over a few Kocos to find Enguarde. The large fish must be ridden through the water, beating many different species of foes. After the three swim through the narrow paths around several Lurchins and Bounty Basses, they enter an open area with more Lurchins. They need to swim around the foes and swim in a U shaped path to find the outside of the lake, where they must hop off of Enguarde and jump onto a ledge. There, they can find the Star Barrel, as well as a crate.
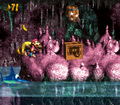
Halfway through the level, the group needs to break open the crate near them to find Ellie. The friend must be ridden through an area full of rowdy Kuchukas and Kopters. After they dodge each of the foes on the eastward path, they must fall into a gap and land into another lake. There, the Kongs have to say goodbye to Ellie as they leave her and hop up into a high up barrel nearby. It shoots them to the next area, where Squitter can be found. The spider must be ridden under two dangerous Kopters. After that, the heroes must avoid a Booty Bird, being surrounded by another Kopter. Once they pass this short part, the monkeys and Squitter should continue east and watch out for the bombs of a Kuchuka. Farther on is a No Animal Sign. Squitter disappears when this sign is passed, allowing the Kongs to get onto the flagpole to the right and exit the level.
Enemies[edit]
The following enemies appear in the following quantities:
Booty Bird (5)
Bounty Bass (7)
Buzz (red) (1)
Koco (green) (2)
Kopter (7)
Kuchuka (8)
Lurchin (10)
Items and objects[edit]
The following items and objects appear in the following quantities:
Banana Bunch (5)
Bear coin (3)
DK Barrel (4)
K-O-N-G Letters[edit]
- K: The letter K is found by defeating the first Booty Bird in the level with Squawks' attack.
- O: The letter O is found right after the Squawks segment, floating at the end of a banana trail.
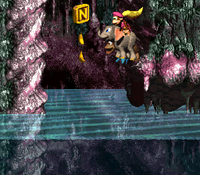
- N: The letter N is beneath the first Bonus Barrel.
- G: The letter G is found above a red Buzz in the Squitter area (or below it in the Game Boy Advance version).
DK Coin[edit]
At the end of the level, right before the Level Flag, Kiddy must use a Team-up throw to elevate himself and Dixie onto a high ledge with the Koin. The Kongs must do another Team-up throw to reach a ledge at the top-left, where they can pick up a Steel Barrel. The Kongs must then jump down to the right to land back on the ledge with the Koin. The Kongs must stand on Koin's shield and throw the Steel Barrel at the left wall. This causes the Steel Barrel to bounce off into the Koin and defeat him; the Kongs are rewarded with the DK Coin.
Bonus Levels[edit]
Pot Hole Panic has two Bonus Levels, listed by type:
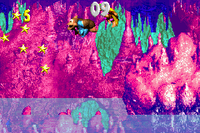
- Collect 20 Stars!: While the Kongs are riding Ellie, they must eventually jump below into the water. The group must swim to the left until they reach the letter N. From there, Dixie and Kiddy must jump off Ellie for a height boost into the Bonus Barrel above. At the start of the Bonus Level, the Kongs are back to mounting Ellie. They must collect 20 stars within 20 seconds, which are hovering over a pool of water and can only be reached by Dixie and Kiddy jumping off of Ellie for a boost in height. After collecting all the stars, the Bonus Coin appears.
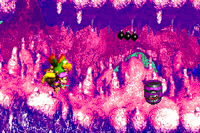
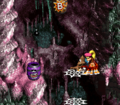
- Collect 15 Bananas!: After mounting Squitter and passing the letter G, the group come across an open area. A Kuchuka is throwing down bombs from a wide opening in the ceiling. Squitter must use his web platforms to go up the opening to find the Kuchuka on a left platform. The Kongs and Squitter must continue slightly higher to enter the Bonus Barrel on the ceiling. In the Bonus Level, the Kongs and Squitter must collect 15 green bananas while avoiding a Kuchuka as it throws bombs at them from the top-left platform. After collecting every green banana, the Bonus Coin appears in front of the exit, at the bottom right of the area.
Gallery[edit]
Names in other languages[edit]
| Language | Name | Meaning | Notes |
|---|---|---|---|
| Japanese | ともだちがいっぱい[?] Tomodachi ga ippai |
Full of Friends | |
| French | Cuvette Pas Cool[?] | Uncool Basin | |
| German | Höhlen-Humbug[?] | Cave Hokum | |
| Italian | Panico nel Canyon[?] | Panic in the Canyon | |
| Spanish | Pánico en la Gruta[?] | Panic in the Grotto |
Trivia[edit]
- This level is very similar to Animal Antics from Donkey Kong Country 2: Diddy's Kong Quest, as the Kongs will get to ride all of the game's ridable Animal Friends in it.
