Gallery:Mario vs. Donkey Kong: Difference between revisions
m (→Box art) |
|||
| (127 intermediate revisions by 30 users not shown) | |||
| Line 1: | Line 1: | ||
This is a gallery of images for the game ''[[Mario vs. Donkey Kong]]''. | {{italic title}} | ||
This is a gallery of images for the game ''[[Mario vs. Donkey Kong]]''. For a gallery of images released with the [[Mario vs. Donkey Kong (Nintendo Switch)|Nintendo Switch remake]], see [[Gallery:Mario vs. Donkey Kong (Nintendo Switch)|here]]. | |||
==Logos== | ==Logos== | ||
<gallery widths=" | <gallery widths="300"heights="150"> | ||
Mario vs DK logo.jpg|International logo | |||
MvsDK JP Logo.png|Japanese | MvsDK JP Logo.png|Japanese logo | ||
Gba mario-dk icon.gif|Pre-release English logo under the name ''Mario and Donkey Kong'' | |||
</gallery> | </gallery> | ||
==Artwork== | ==Artwork== | ||
<gallery> | <gallery> | ||
MvsDK Mario holding Key.jpg|[[Mario]] | |||
MvsDK Monchee. | MvsDK Monchee.jpg|Mario hanging from a [[Monchee]] | ||
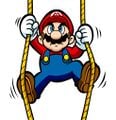
MvsDK-Mario | MvsDK Mario climbing.jpg|Mario climbing up two ropes | ||
Rivalryrenewed.jpg|Mario freeing a [[Mini Mario (toy)|Mini-Mario]] | |||
MvsDK Handstand artwork.jpg|A demonstration of Mario's [[Handstand]] | |||
MarioandMiniMariosMayhem.jpg|Mario being followed by a line of Mini-Marios | |||
Mariohammer.jpg|Mario using a [[Hammer]] | |||
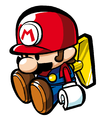
Mini Mario art.png|Mini Mario | |||
MiniMario MvsDK4.png|Mini Mario | |||
Mini Mario Sitting MvDK2.png|Mini Mario | |||
Mini Mario (winding) - Mario vs. Donkey Kong.png|Mini Mario winding another | |||
DK MvsDK.jpg|[[Donkey Kong]] | DK MvsDK.jpg|[[Donkey Kong]] | ||
Mvsdk.jpg | DonkeyKongMVSDKArtwork.png|Donkey Kong | ||
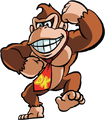
Mvsdk.jpg|Donkey Kong holding his bag of Mini-Marios | |||
MvsDK Toad.jpg|A [[Toad (species)|Toad]] upset | |||
</gallery> | </gallery> | ||
==Sprites and models== | ==Sprites and models== | ||
===Characters=== | |||
<gallery> | <gallery> | ||
Mario Mvs.DK.png|[[Mario]] | Mario Mvs.DK.png|[[Mario]] | ||
MarioVsDK Mario Enter.png|Mario | MarioVsDK Mario Enter.png|Mario | ||
| Line 26: | Line 35: | ||
MarioVsDK Burnt Land.gif|Mario falling, burning, and then landing. | MarioVsDK Burnt Land.gif|Mario falling, burning, and then landing. | ||
MarioVsDK DonkeyKong Sprite.png|[[Donkey Kong]] | MarioVsDK DonkeyKong Sprite.png|[[Donkey Kong]] | ||
MvsDK DonkeyKong.gif|Donkey Kong | |||
Donkey Kong head.png|The Donkey Kong head that may appear from a [[Present (Mario vs. Donkey Kong)|Present]] | |||
MarioVsDK MiniMario Sprite.png|[[Mini Mario (toy)|Mini-Mario]] | MarioVsDK MiniMario Sprite.png|[[Mini Mario (toy)|Mini-Mario]] | ||
MarioVsDK MiniMario Free.png|Mini-Mario | MarioVsDK MiniMario Free.png|Mini-Mario | ||
</gallery> | |||
===Enemies=== | |||
<gallery> | |||
MvsDK VenusFireTrap.png|[[Tane Pakkun]] | MvsDK VenusFireTrap.png|[[Tane Pakkun]] | ||
MvsDK Boo.png|[[Boo]] | MvsDK Boo.png|[[Boo]] | ||
MvsDK Bob-omb.png|[[Bob-omb]] | MvsDK Bob-omb.png|[[Bob-omb]] | ||
MvsDK MiniShyGuy.png|[[ | MvsDK MiniShyGuy.png|[[Shy Guy]] | ||
MvsDK BlackShyGuy.png|[[ | MvsDK BlackShyGuy.png|[[Wrench Shy Guy]] | ||
MvsDK | MvsDK ShyGuyGhost.png|[[Polterguy]] | ||
MvsDK | MvsDK SpearGuy.png|[[Spear Guy]] | ||
MvsDK Blowtorch Guy.png|[[ | MvsDK Blowtorch Guy.png|[[Fire Shy Guy]] | ||
MvsDK Thwomp.png|[[Thwomp]] | MvsDK Thwomp.png|[[Thwomp]] | ||
MvsDK Thwimp.png|[[Thwimp]] | MvsDK Thwimp.png|[[Thwimp]] | ||
MvsDK ThwompBlock.png|[[ | MvsDK ThwompBlock.png|[[Thwomp Platform]] | ||
MvsDK Podoboo.png|[[Lava Bubble]] | MvsDK Podoboo.png|[[Lava Bubble|Podoboo]] | ||
MvsDK OilDrum.png|[[Oil | MvsDK LavaGeyser.png|[[Lava Geyser]] | ||
FireMvsDK.png|[[ | MvsDK OilDrum.png|[[Oil]] | ||
MvsDK MiniNinji.png|[[ | Firebird MariovsDonkeyKong.png|[[Fire bird]] | ||
FireMvsDK.png|[[Fireball (Donkey Kong)|Fireball]] | |||
MvsDK MiniNinji.png|[[Ninji]] | |||
MvsDK Moncheesprite.png|[[Monchee]] | MvsDK Moncheesprite.png|[[Monchee]] | ||
MvsDK MoncheePanic.png|Monchee (falling) | |||
MvsDK Robokikki.png|[[Robo Kikki]] | |||
MvsDK Cannon.png|A [[Cannon]] firing a [[Cannonball]] | MvsDK Cannon.png|A [[Cannon]] firing a [[Cannonball]] | ||
MvsDK Bat.png|[[ | MvsDK Bat.png|[[Bat (Mario vs. Donkey Kong)|Bat]] | ||
MvsDK Nitpicker.png|[[ | MvsDK Nitpicker.png|[[Bird (Mario vs. Donkey Kong series)|Bird]] | ||
MvsDK Snapjaw.png|[[Snapjaw]] | MvsDK Snapjaw.png|[[Snapjaw]] | ||
Brickman. | MvsDK Snapjaw Alt.png|Snapjaw | ||
Brickman sprite.png|[[Brickman]] | |||
MvsDK RamRam.png|[[RamRam]] | MvsDK RamRam.png|[[RamRam]] | ||
MvsDK RamRamPanic.png|RamRam (flailing) | |||
MvsDK SirShovalot.png|[[Sir Shovalot]] | MvsDK SirShovalot.png|[[Sir Shovalot]] | ||
MvsDK FallingSpike.png|[[Falling | MvsDK FallingSpike.png|[[Falling spike]] | ||
MvsDK Candle.png|[[Candle]] | MvsDK Candle.png|[[Candle]] | ||
MvsDK TrashCan.png|[[Bucket Man]] | |||
MvsDK WireTrap.png|[[Wire Trap]] | |||
</gallery> | |||
===Objects=== | |||
<gallery> | |||
MvsDK Key.png|[[Key]] | MvsDK Key.png|[[Key]] | ||
MvsDK Spring.png|[[Spring]] | MvsDK Spring.png|[[Spring]] | ||
MvsDK ConveyorBelt.png|[[Conveyor Belt]] | MvsDK ConveyorBelt.png|[[Conveyor Belt]] | ||
MvsDK DonutLift.png|[[Donut | MvsDK DonutLift.png|[[Donut Block]] | ||
MarioVsDK Door.png|[[Key Door|Door]] | |||
MvsDK Elevator.png|[[Elevator]] | MvsDK Elevator.png|[[Elevator]] | ||
MvsDK TrashCanitem.png|[[Garbage Can]] | MvsDK SandBlockDKJungle.png|[[Sand block]]s ([[Donkey Kong Jungle (world)|Donkey Kong Jungle]]) | ||
MvsDK SandBlockFireMountain.png|Sand blocks ([[Fire Mountain (world)|Fire Mountain]]) | |||
MvsDK SandBlockMysticForest.png|Sand blocks ([[Mystic Forest]]) | |||
MvsDK SandBlockFireMountainPlus.png|Sand blocks ([[Fire Mountain Plus]]) | |||
MvsDK TrashCanitem.png|[[Trash Can|Garbage Can]] | |||
Barrel MvsDK.png|[[Barrel]] | Barrel MvsDK.png|[[Barrel]] | ||
MvsDK Hammer.png|[[Hammer]] | MvsDK Hammer.png|[[Hammer]] | ||
MvsDK Presents.png|[[Present]] | MvsDK Presents.png|[[Present (Mario vs. Donkey Kong)|Present]] | ||
MvsDK ToyChest.png|[[Toy | MvsDK ToyChest.png|[[Toy box (object)|Toy box]] | ||
MvsDK 1-UP.png|[[1-Up Mushroom]] | MvsDK 1-UP.png|[[1-Up Mushroom]] | ||
2 UP Mushroom.png|[[2 UP]] | |||
3 UP Mushroom.png|[[3 UP]] | |||
5 UP Mushroom.png|[[5 UP]] | |||
MvsDK Switch.png|[[Color Switch|Switch]]es | MvsDK Switch.png|[[Color Switch|Switch]]es | ||
MvsDK TOY.png|Letters | MvsDK TOY.png|Letters | ||
HelpBlockMVDKO.gif|[[Message Block|Help Box]] (English) | |||
MvsDK HelpBoxInternational.png|Help Box (international) | |||
</gallery> | </gallery> | ||
==Screenshots== | ==Screenshots== | ||
===Title screens=== | |||
<gallery heights="80"> | |||
MVDK Title Screen E.png|Title screen | |||
MVDK Title Screen J.png|Title screen (Japanese) | |||
MvsDK File selection.png|File selection screen | |||
MvsDK Language selection.png|Language selection screen (Europe only) | |||
</gallery> | |||
===Worlds=== | |||
====Mario Toy Company==== | |||
<gallery heights="80"> | |||
MVDKWorld1.png|[[Mario Toy Company]] level selection screen | |||
MVDK 1-1 1.png|First part of [[Level 1-1 (Mario vs. Donkey Kong)|Level 1-1]] | |||
MVDK 1-1 2.png|Second part of [[Level 1-1 (Mario vs. Donkey Kong)|Level 1-1]] | |||
MVDK 1-2 1.png|First part of [[Level 1-2 (Mario vs. Donkey Kong)|Level 1-2]] | |||
MVDK 1-2 2.png|Second part of [[Level 1-2 (Mario vs. Donkey Kong)|Level 1-2]] | |||
MVDK 1-3 1.png|First part of [[Level 1-3 (Mario vs. Donkey Kong)|Level 1-3]] | |||
MVDK 1-3 2.png|Second part of [[Level 1-3 (Mario vs. Donkey Kong)|Level 1-3]] | |||
MVDK 1-4 1.png|First part of [[Level 1-4 (Mario vs. Donkey Kong)|Level 1-4]] | |||
MvsDK 1-4.png|Second part of [[Level 1-4 (Mario vs. Donkey Kong)|Level 1-4]] | |||
MVDK 1-5 1.png|First part of [[Level 1-5 (Mario vs. Donkey Kong)|Level 1-5]] | |||
MVDK 1-5 2.png|Second part of [[Level 1-5 (Mario vs. Donkey Kong)|Level 1-5]] | |||
MVDK 1-6 1.png|First part of [[Level 1-6 (Mario vs. Donkey Kong)|Level 1-6]] | |||
MVDK 1-6 2.png|Second part of [[Level 1-6 (Mario vs. Donkey Kong)|Level 1-6]] | |||
MVDK 1-mm.png|[[Level 1-mm]] | |||
MVDK 1-DK.png|[[Level 1-DK]] | |||
MVDK World 1 End.png|End screen of Mario Toy Company | |||
MVDK World 1 End (No Text).png|End screen of Mario Toy Company (no text) | |||
MarioToyCompanylogo.png|The company's logo | |||
</gallery> | |||
====Donkey Kong Jungle==== | |||
<gallery heights="80"> | |||
MVDKWorld2.png|[[Donkey Kong Jungle (world)|Donkey Kong Jungle]] level selection screen | |||
MVDK 2-1 1.png|First part of [[Level 2-1 (Mario vs. Donkey Kong)|Level 2-1]] | |||
MVDK 2-1 2.png|Second part of [[Level 2-1 (Mario vs. Donkey Kong)|Level 2-1]] | |||
MVDK 2-2 1.png|First part of [[Level 2-2 (Mario vs. Donkey Kong)|Level 2-2]] | |||
MVDK 2-2 2.png|Second part of [[Level 2-2 (Mario vs. Donkey Kong)|Level 2-2]] | |||
MVDK 2-3 1.png|First part of [[Level 2-3 (Mario vs. Donkey Kong)|Level 2-3]] | |||
MVDK 2-3 2.png|Second part of [[Level 2-3 (Mario vs. Donkey Kong)|Level 2-3]] | |||
MVDK 2-4 1.png|First part of [[Level 2-4 (Mario vs. Donkey Kong)|Level 2-4]] | |||
MVDK 2-4 2.png|Second part of [[Level 2-4 (Mario vs. Donkey Kong)|Level 2-4]] | |||
MVDK 2-5 1.png|First part of [[Level 2-5 (Mario vs. Donkey Kong)|Level 2-5]] | |||
MVDK 2-5 2.png|Second part of [[Level 2-5 (Mario vs. Donkey Kong)|Level 2-5]] | |||
MVDK 2-6 1.png|First part of [[Level 2-6 (Mario vs. Donkey Kong)|Level 2-6]] | |||
MVDK 2-6 2.png|Second part of [[Level 2-6 (Mario vs. Donkey Kong)|Level 2-6]] | |||
MVDK 2-mm.png|[[Level 2-mm]] | |||
DonkeyKongJungleDKBattle.png|[[Level 2-DK]] | |||
MVDK World 2 End.png|End screen of Donkey Kong Jungle | |||
MVDK World 2 End (No Text).png|End screen of Donkey Kong Jungle (no text) | |||
</gallery> | |||
====Fire Mountain==== | |||
<gallery heights="80"> | |||
MVDKWorld 3.png|[[Fire Mountain (world)|Fire Mountain]] level selection screen | |||
MVDK 3-1 1.png|First part of [[Level 3-1 (Mario vs. Donkey Kong)|Level 3-1]] | |||
MVDK 3-1 2.png|Second part of [[Level 3-1 (Mario vs. Donkey Kong)|Level 3-1]] | |||
MVDK 3-2 1.png|First part of [[Level 3-2 (Mario vs. Donkey Kong)|Level 3-2]] | |||
MVDK 3-2 2.png|Second part of [[Level 3-2 (Mario vs. Donkey Kong)|Level 3-2]] | |||
MVDK 3-3 1.png|First part of [[Level 3-3 (Mario vs. Donkey Kong)|Level 3-3]] | |||
MVDK 3-3 2.png|Second part of [[Level 3-3 (Mario vs. Donkey Kong)|Level 3-3]] | |||
MVDK 3-4 1.png|First part of [[Level 3-4 (Mario vs. Donkey Kong)|Level 3-4]] | |||
MVDK 3-4 2.png|Second part of [[Level 3-4 (Mario vs. Donkey Kong)|Level 3-4]] | |||
MVDK 3-5 1.png|First part of [[Level 3-5 (Mario vs. Donkey Kong)|Level 3-5]] | |||
MVDK 3-5 2.png|Second part of [[Level 3-5 (Mario vs. Donkey Kong)|Level 3-5]] | |||
MVDK 3-6 1.png|First part of [[Level 3-6 (Mario vs. Donkey Kong)|Level 3-6]] | |||
MVDK 3-6 2.png|Second part of [[Level 3-6 (Mario vs. Donkey Kong)|Level 3-6]] | |||
FireMountainMMStage.png|[[Level 3-mm]] | |||
MVDK 3-DK.png|[[Level 3-DK]] | |||
MVDK World 3 End.png|End screen of Fire Mountain | |||
MVDK World 3 End (No Text).png|End screen of Fire Mountain (no text) | |||
</gallery> | |||
====Spooky House==== | |||
<gallery heights="80"> | |||
MVDKWorld4.png|[[Spooky House]] level selection screen | |||
MVDK 4-1 1.png|First part of [[Level 5-1 (Mario vs. Donkey Kong)|Level 4-1]] | |||
MVDK 4-1 2.png|Second part of [[Level 5-1 (Mario vs. Donkey Kong)|Level 4-1]] | |||
MVDK 4-2 1.png|First part of [[Level 5-2 (Mario vs. Donkey Kong)|Level 4-2]] | |||
MvsDK 4-2.png|Second part of [[Level 5-2 (Mario vs. Donkey Kong)|Level 4-2]] | |||
MVDK 4-3 1.png|First part of [[Level 5-3 (Mario vs. Donkey Kong)|Level 4-3]] | |||
MVDK 4-3 2.png|Second part of [[Level 5-3 (Mario vs. Donkey Kong)|Level 4-3]] | |||
MVDK 4-4 1.png|First part of [[Level 5-4 (Mario vs. Donkey Kong)|Level 4-4]] | |||
MVDK 4-4 2.png|Second part of [[Level 5-4 (Mario vs. Donkey Kong)|Level 4-4]] | |||
MVDK 4-5 1.png|First part of [[Level 5-5 (Mario vs. Donkey Kong)|Level 4-5]] | |||
MVDK 4 - 5.png|Second part of [[Level 5-5 (Mario vs. Donkey Kong)|Level 4-5]] | |||
MVDK 4-6 1.png|First part of [[Level 5-6 (Mario vs. Donkey Kong)|Level 4-6]] | |||
MVDK 4-6 2.png|Second part of [[Level 5-6 (Mario vs. Donkey Kong)|Level 4-6]] | |||
MVDK 4-mm.png|[[Level 5-mm|Level 4-mm]] | |||
SpookyHouseBossFight.png|[[Level 5-DK|Level 4-DK]] | |||
MVDK World 4 End.png|End screen of Spooky House | |||
MVDK World 4 End (No Text).png|End screen of Spooky House (no text) | |||
</gallery> | |||
====Mystic Forest==== | |||
<gallery heights="80"> | <gallery heights="80"> | ||
MVDK Mystic Forest Level Select.png|[[Mystic Forest]]'s level selection screen | |||
MVDK 5-1 Part 1.png|First part of [[Level 7-1|Level 5-1]] | |||
MVDK 5-1 Part 2.png|Second part of Level 5-1 | |||
MVDK 5-2 Part 1 (1).png|First part of [[Level 7-2|Level 5-2]] | |||
MVDK 5-2 Part 1 (2).png|First part of Level 5-2 | |||
MVDK 5-2 Part 2 (1).png|Second part of Level 5-2 | |||
MVDK 5-2 Part 2 (2).png|Second part of Level 5-2 | |||
MVDK 5-3 Part 1.png|First part of [[Level 7-3|Level 5-3]] | |||
MVDK 5-3 Part 2.png|Second part of Level 5-3 | |||
MVDK 5-4 Part 1 (1).png|First part of [[Level 7-4|Level 5-4]] | |||
MVDK 5-4 Part 1 (2).png|First part of Level 5-4 | |||
MVDK 5-4 Part 2 (1).png|Second part of Level 5-4 | |||
MVDK 5-4 Part 2 (2).png|Second part of Level 5-4 | |||
MVDK 5-5 Part 1 (1).png|First part of [[Level 7-5|Level 5-5]] | |||
MVDK 5-5 Part 1 (2).png|First part of Level 5-5 | |||
MVDK 5-5 Part 2 (1).png|Second part of Level 5-5 | |||
MVDK 5-5 Part 2 (2).png|Second part of Level 5-5 | |||
MVDK 5-6 Part 1 (1).png|First part of [[Level 7-6|Level 5-6]] | |||
MVDK 5-6 Part 1 (2).png|First part of Level 5-6 | |||
MVDK 5-6 Part 2 (1).png|Second part of Level 5-6 | |||
MVDK 5-6 Part 2 (2).png|Second part of Level 5-6 | |||
MVDK 5-MM (1).png|[[Level 7-mm|Level 5-mm]] | |||
MVDK 5-MM (2).png|Level 5-mm | |||
MVDK 5-DK.png|[[Level 7-DK|Level 5-DK]] | |||
MVDK 5-DK Victory.png|Victory picture after beating Level 5-DK | |||
MVDK World 5 End (No Text).png|Victory picture after beating Level 5-DK (no text) | |||
</gallery> | </gallery> | ||
=== | ====Twilight City==== | ||
<gallery heights="80"> | <gallery heights="80"> | ||
MVDK | MVDK World 6.png|[[Twilight City]] level selection screen | ||
MVDK_6_-_1.png|First part of [[Level 8-1|Level 6-1]] | |||
MVDK | MVDK 6-1 2.png|Second part of Level 6-1 | ||
MVDK | MVDK 6-2 1.png|First part of [[Level 8-2|Level 6-2]] | ||
MVDK | MVDK 6-2 2.png|Second part of Level 6-2 | ||
MVDK | MVDK 6-3 1.png|First part of [[Level 8-3|Level 6-3]] | ||
MVDK | MVDK 6-3 2.png|Second part of Level 6-3 | ||
MVDK 5 | MVDK 6-4 1.png|First part of [[Level 8-4|Level 6-4]] | ||
MVDK | MVDK 6-4 2.png|Second part of Level 6-4 | ||
MVDK | MVDK 6-5 1.png|First part of [[Level 8-5|Level 6-5]] | ||
MVDK 5- | MVDK 6-5 2.png|Second part of Level 6-5 | ||
MVDK 5-4 | MvsDK_6-6.png|First part of [[Level 8-6|Level 6-6]] | ||
MVDK 5-4 | MVDK 6-6 2.png|Second part of Level 6-6 | ||
MVDK 5-5 | MVDK 6-mm.png|[[Level 8-mm|Level 6-mm]] | ||
MVDK 5-5 | MVDK 6-DK.png|[[Level 8-DK|Level 6-DK]] | ||
MVDK 5-5 | MVDK World 6 End.png|End screen after Level 6-DK | ||
MVDK 5-5 | MVDK World 6 End (no text).png|End screen after Level 6-DK without text | ||
MVDK 5-6 | </gallery> | ||
MVDK 5-6 | |||
MVDK | ====Mario Toy Factory==== | ||
MVDK | <gallery heights="80"> | ||
MVDK 5 | MvsDK W1+.png|[[Mario Toy Factory]] level selection screen | ||
MVDK | MVDK 1-1+.png|[[Level 1-1+]] | ||
MVDK | MVDK 1-2+.png|[[Level 1-2+]] | ||
MVDK | MVDK 1-3+.png|[[Level 1-3+]] | ||
MVDK 1-4+.png|[[Level 1-4+]] | |||
MVDK 1-5+.png|[[Level 1-5+]] | |||
MVDK 1-6+.png|[[Level 1-6+]] | |||
MVDK 1-DK+.png|[[Level 1-DK+]] | |||
Mario Toy Factory End 1.png|End card without text | |||
Mario Toy Factory End 2.png|End card with text | |||
</gallery> | |||
====Donkey Kong Jungle Plus==== | |||
<gallery heights="80"> | |||
MvsDK_W2%2B.png|[[Donkey Kong Jungle Plus]] level selection screen | |||
2-1%2B_MvsDK.png|[[Level 2-1+]] | |||
2-2%2B_MvsDK.png|[[Level 2-2+]] | |||
2-3%2B_MvsDK.png|[[Level 2-3+]] | |||
Mario_vs._Donkey_Kong_2-4%2B.PNG|[[Level 2-4+]] | |||
MVDK Level 2-5+.PNG|[[Level 2-5+]] | |||
MVDK Level 2-6+.png|[[Level 2-6+]] | |||
MVDK Level 2-DK+.png|[[Level 2-DK+]] | |||
DKJunglePlus End 1.png|World end screen (no text) | |||
DKJunglePlus End 2.png|World end screen (with text) | |||
</gallery> | |||
====Fire Mountain Plus==== | |||
<gallery heights="80"> | |||
Fire Mountain Plus.png|[[Fire Mountain Plus]] level selection screen | |||
MVDK Level 3-1+.png|[[Level 3-1+]] | |||
MVDK Level 3-2+.png|[[Level 3-2+]] | |||
MVDK Level 3-3+.png|[[Level 3-3+]] | |||
MarioVsDonkeyKong-FireMountainPlus-3-4.png|[[Level 3-4+]] | |||
MVDK Level 3-5+.png|[[Level 3-5+]] | |||
MVDK Level 3-6+.png|[[Level 3-6+]] | |||
MVDK Level 3-DK+.png|[[Level 3-DK+]] | |||
3-DK+End1.png|End screen without text | |||
3-DK+End2.png|End screen with text | |||
</gallery> | |||
====Spooky House Plus==== | |||
<gallery heights="80"> | |||
Spooky House Plus.png|[[Spooky House Plus]] level selection screen | |||
MVDK Level 4-1+.png|[[Level 5-1+|Level 4-1+]] | |||
MVDK Level 4-2+.png|[[Level 5-2+|Level 4-2+]] | |||
MVDK Level 4-3+.png|[[Level 5-3+|Level 4-3+]] | |||
MVDK Level 4-4+.png|[[Level 5-4+|Level 4-4+]] | |||
MVDK Level 4-5+.png|[[Level 5-5+|Level 4-5+]] | |||
MVDK Level 4-6+.png|[[Level 5-6+|Level 4-6+]] | |||
MVDK Level 4-DK+.png|[[Level 5-DK+|Level 4-DK+]] | |||
MVDK_4%2B_End_1.png|End screen without text | |||
MVDK_4%2B_End_2.png|End screen with text | |||
</gallery> | |||
====Mystic Forest Plus==== | |||
<gallery heights="80"> | |||
Mario vs. Donkey Kong W-5+ Select.PNG|[[Mystic Forest Plus]] level section screen | |||
MVDK 5-1+ - A.PNG|Mario's starting position in [[Level 7-1+|Level 5-1+]] | |||
MVDK 5-1+ - B.PNG|5-1+ | |||
Mario vs. Donkey Kong 5-1+.PNG|5-1+ | |||
MVDK 5-2+ - A.PNG|Mario's starting position in [[Level 7-2+|Level 5-2+]] | |||
MVDK 5-2+ - B.PNG|5-2+ | |||
MVDK 5-3+ - A.PNG|Mario's starting position in [[Level 7-3+|Level 5-3+]] | |||
MVDK 5-3+ - B.PNG|5-3+ | |||
MVDK 5-4+ - A.PNG|Mario's starting position in [[Level 7-4+|Level 5-4+]] | |||
MVDK 5-4+ - B.PNG|5-4+ | |||
MVDK 5-5+ - A.PNG|Mario's starting position in [[Level 7-5+|Level 5-5+]] | |||
MVDK 5-5+ - B.PNG|5-5+ | |||
MVDK 5-6+ - A.PNG|Mario's starting position in [[Level 7-6+|Level 5-6+]] | |||
MVDK 5-6+ - B.PNG|5-6+ | |||
MVDK 5-DK+.PNG|[[Level 7-DK+|Level 5-DK+]] | |||
MVDK 5-DK+ End.png|Victory picture after beating 5-DK+, without text | |||
Mario vs. Donkey Kong 5-DK+ win.PNG|Victory picture after beating 5-DK+, with text | |||
</gallery> | |||
====Twilight City Plus==== | |||
<gallery heights="80"> | |||
Twilight City Plus.png|[[Twilight City Plus]] level section screen | |||
MVDK Level 6-1+.png|[[Level 8-1+|Level 6-1+]] | |||
MVDK Level 6-2+.png|[[Level 8-2+|Level 6-2+]] | |||
MVDK Level 6-3+.png|[[Level 8-3+|Level 6-3+]] | |||
MVDK Level 6-4+.png|[[Level 8-4+|Level 6-4+]] | |||
MVDK Level 6-5+.png|[[Level 8-5+|Level 6-5+]] | |||
MVDK Level 6-6+.png|[[Level 8-6+|Level 6-6+]] | |||
MVDK Level 6-DK+.png|[[Level 8-DK+|Level 6-DK+]] | |||
MVDK_Twilight_City_Plus_End_1.png|Victory picture after beating 6-DK+, without text | |||
MVDK_Twilight_City_Plus_End_2.png|Victory picture after beating 6-DK+, with text | |||
</gallery> | |||
====Expert==== | |||
<gallery heights="80"> | |||
MvDK Expert Levels.png|Expert level section screen | |||
MVDK Level x-1.png|[[Level EX-1|Level x-1]] | |||
MVDK Level x-2.png|[[Level EX-2|Level x-2]] | |||
MVDK Level x-3.png|[[Level EX-3|Level x-3]] | |||
MVDK Level x-4.png|[[Level EX-5|Level x-4]] | |||
MVDK Level x-5.png|[[Level EX-7|Level x-5]] | |||
MVDK Level x-6.png|[[Level EX-8|Level x-6]] | |||
MVDK Level x-7.png|[[Level EX-9|Level x-7]] | |||
MVDK Level x-8.png|[[Level EX-10|Level x-8]] | |||
MVDK Level x-9.png|[[Level EX-11|Level x-9]] | |||
MVDK Level x-10.png|[[Level EX-13|Level x-10]] | |||
MVDK Level x-11.png|[[Level EX-15|Level x-11]] | |||
MVDK Level x-12.png|[[Level EX-16|Level x-12]] | |||
</gallery> | </gallery> | ||
| Line 115: | Line 369: | ||
===Cutscenes=== | ===Cutscenes=== | ||
====Opening==== | |||
<gallery> | <gallery> | ||
Cutscene DonkeyWatchingTV.png | Cutscene DonkeyWatchingTV.png|[[Donkey Kong]] watching TV. | ||
Cutscene ShyGuyNews.png | Cutscene ShyGuyNews.png|A program of a [[Shy Guy]] hosting the News. | ||
Cutscene Bananas.png | Cutscene Bananas.png|An ad for Bananas. | ||
Cutscene MiniCommercial.png | Cutscene MiniCommercial.png|An ad for [[Mini Mario (toy)|Mini-Mario]]s. | ||
Cutscene DonkeyInLove.png | Cutscene DonkeyInLove.png|Donkey Kong immediately adores the new toy. | ||
Cutscene RunningDonkey.png | Cutscene RunningDonkey.png|Donkey Kong running off to the toy store. | ||
Cutscene SOLD OUT!.png | Cutscene SOLD OUT!.png|The Toy Store, with a notification stating the Mini-Marios are sold out. | ||
Cutscene ConfusedDonkey.png | Cutscene ConfusedDonkey.png|Donkey Kong noticing the Mini-Mario toys are sold out. | ||
MarioToyCo..png | MarioToyCo..png|Donkey Kong sees the Toy Company, deciding to raid its stock of Mini-Marios. | ||
Cutscene ToadWorkers.png|A group of [[Toad (species)|Toad]]s supervising the Mini-Marios. | |||
Cutscene ToadWorkers.png | Cutscene DonkeyAmbush.png|Donkey Kong enters the factory. | ||
Cutscene DonkeyAmbush.png | Cutscene DonkeyShadow.png|Donkey Kong attacks the factory. | ||
Cutscene DonkeyShadow.png | Cutscen DonkeySteals.png|Donkey Kong taking the stock of Mini-Marios. | ||
Cutscen DonkeySteals.png | Cutscene MarioShoutsAtDonkey.png|[[Mario]] noticing Donkey Kong with a bag full of Mini-Marios. | ||
Cutscene MarioShoutsAtDonkey.png | </gallery> | ||
====After [[Level 8-DK|Level 6-DK]]==== | |||
<gallery heights="80"> | |||
MVDK 6 End 1.png|Mario chasing Donkey Kong. | |||
MVDK 6 End 2.png|Donkey Kong stopping. | |||
MVDK 6 End 3.png|Donkey Kong looking into his sack. | |||
MVDK 6 End 4.png|Donkey Kong realizing the sack is empty. | |||
MVDK 6 End 5.png|Mario laughing at Donkey Kong. | |||
MVDK 6 End 6.png|Mario and the Mini-Marios laughing at Donkey Kong. | |||
Laughing at DK.png|Mario, the Mini-Marios, and three Toads laughing at Donkey Kong. | |||
MVDK 6 End 8.png|Donkey Kong getting angry. | |||
MVDK 6 End 9.png|Donkey Kong grabbing the Toads. | |||
MVDK 6 End 10.png|Donkey Kong looking at a tower. | |||
MVDK 6 End 11.png|Donkey Kong climbing the tower. | |||
MVDK 6 End 12.png|Mario giving chase. | |||
MVDK 6 End 13.png|Mario steps onto the elevator. | |||
MVDK 6 End 14.png|Mario moves up the tower. | |||
</gallery> | |||
====After [[Donkey Kong (level)]]==== | |||
<gallery heights="80"> | |||
MVDK DK End 1.png|Donkey Kong falls off the tower. | |||
MVDK DK End 2.png|A truck moves into view. | |||
MVDK DK End 3.png|Donkey Kong lands on the truck. | |||
MVDK DK End 4.png|The truck explodes. | |||
MVDK DK End 5.png|Mini-Marios and Donkey Kong land on the ground. | |||
MVDK DK End 6.png|Donkey Kong looks at the Mini-Marios. | |||
MVDK DK End 7.png|Mario checks on Donkey Kong. | |||
MVDK DK End 8.png|Donkey Kong gathers the Mini-Marios. | |||
MVDK DK End 9.png|Mario chases after Donkey Kong once more. | |||
MVDK DK End 10.png|Mario chases Donkey Kong into the Plus Worlds. | |||
</gallery> | |||
====After [[Level 8-DK+|Level 6-DK+]]==== | |||
<gallery heights="80"> | |||
MVDK 6+ End 1.png|Mario continues to chase after Donkey Kong. | |||
MVDK 6+ End 2.png|Donkey Kong stops. | |||
MVDK 6+ End 3.png|Donkey Kong looks in the bag. | |||
MVDK 6+ End 4.png|Donkey Kong tries to empty the bag as Mario laughs at him. | |||
MVDK 6+ End 5.png|Mini-Marios fall out of the bag. | |||
MVDK 6+ End 6.png|Donkey Kong scoops up the Mini-Marios. | |||
MVDK 6+ End 7.png|Mario chases after Donkey Kong again. | |||
</gallery> | |||
====After [[Donkey Kong Plus]]==== | |||
<gallery height="80"> | |||
MVDK DKP End 1.png|Donkey Kong cries after being defeated | |||
MVDK DKP End 2.png|Donkey Kong looks at Mario | |||
MVDK DKP End 3.png|Mario is angry | |||
MVDK DKP End 1.png|Donkey Kong starts crying again | |||
MVDK DKP End 4.png|Mario tries to comfort Donkey Kong. | |||
MVDK DKP End 2.png|Donkey Kong looks at Mario. | |||
MVDK DKP End 5.png|Mario presents a Mini-Mario. | |||
MVDK DKP End 6.png|The Mini-Mario speaks to Donkey Kong. | |||
MVDK DKP End 7.png|Donkey Kong holds the Mini-Mario. | |||
MVDK DKP End 8.png|Everyone is happy. | |||
</gallery> | |||
===Credits artwork=== | |||
<gallery> | |||
MINI-MARIO MVDK.png|[[Mini Mario (toy)|Mini-Mario]] | |||
SHY GUYS MVDK.PNG|[[Shy Guy]]s | |||
BARRELS MVDK.PNG|[[Barrel]]s | |||
TOADS MVDK.PNG|[[Toad (species)|Toad]]s | |||
MVDK Tane Pakkun.png|[[Tane Pakkun]] | |||
ALLIGATOR MVDK.PNG|[[Snapjaw]] | |||
ROBOKIKKI.PNG|[[Robo Kikki]] | |||
MVDK TOY BOX.png|[[Toy box (object)|Toy box]] | |||
MARIO TOYS MVDK.PNG|[[Mario]] and Mini-Marios | |||
KEY DOOR MVDK.PNG|[[Key Door]] | |||
KOMORI MVDK.PNG|[[Bat (Mario vs. Donkey Kong)|Bat]]s | |||
CANNON BALL MVDK.PNG|[[Cannon]] and [[cannonball]] | |||
BRICKMAN.PNG|[[Brickman]] | |||
PRESENTS MVDK.PNG|[[Present (Mario vs. Donkey Kong)|Present]]s | |||
FEATURING MARIO MVDK.PNG|Mario | |||
</gallery> | </gallery> | ||
==Box art== | ==Box art== | ||
<gallery> | <gallery> | ||
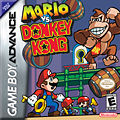
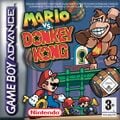
Mvd.jpg|North American box art | |||
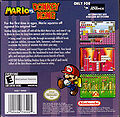
MvDKUS back cover.jpg|North American box art (back) | |||
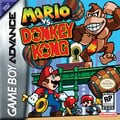
MvsDK Early Box NA.jpg|Early North American box art | |||
MvDKEU cover.jpg|European box art | MvDKEU cover.jpg|European box art | ||
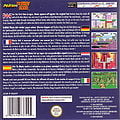
MvDKEU back cover.jpg|European box art (back) | |||
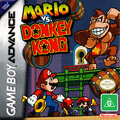
MvDK Box Art Australia.png|Australian box art | |||
MvsDK JP Cover.jpg|Japanese box art | MvsDK JP Cover.jpg|Japanese box art | ||
MvDKJPN back cover.jpg|Japanese | MvDKJPN back cover.jpg|Japanese box art (back) | ||
MvsDKWiiUicon.png|Wii U [[Virtual Console]] | |||
</gallery> | </gallery> | ||
==Miscellaneous== | |||
<gallery> | |||
Mario vs DK print ad.jpg|North American print ad | |||
MvDK Wallpaper JPN.jpg|Wallpaper from the Japanese website | |||
MvDK Shogakukan Stickers.jpg|Stickers from a Shogakukan guidebook | |||
MvDK NS promo pic w GBA version.jpg|Promotional photograph for the Nintendo Switch remake, showing it alongside the original version | |||
</gallery> | |||
{{Galleries}} | {{Galleries}} | ||
{{MVDK}} | |||
[[Category:Galleries]] | [[Category:Galleries]] | ||
[[Category:Mario vs. Donkey Kong|*]] | [[Category:Mario vs. Donkey Kong|*]] | ||
Latest revision as of 18:12, December 17, 2024
This is a gallery of images for the game Mario vs. Donkey Kong. For a gallery of images released with the Nintendo Switch remake, see here.
Logos[edit]
Artwork[edit]
Mario hanging from a Monchee
Mario freeing a Mini-Mario
A demonstration of Mario's Handstand
Mario using a Hammer
A Toad upset
Sprites and models[edit]
Characters[edit]
The Donkey Kong head that may appear from a Present
Enemies[edit]
A Cannon firing a Cannonball
Objects[edit]
Sand blocks (Fire Mountain)
Sand blocks (Mystic Forest)
Sand blocks (Fire Mountain Plus)
Help Box (English)
Screenshots[edit]
Title screens[edit]
Worlds[edit]
Mario Toy Company[edit]
Mario Toy Company level selection screen
First part of Level 1-1
Second part of Level 1-1
First part of Level 1-2
Second part of Level 1-2
First part of Level 1-3
Second part of Level 1-3
First part of Level 1-4
Second part of Level 1-4
First part of Level 1-5
Second part of Level 1-5
First part of Level 1-6
Second part of Level 1-6
Donkey Kong Jungle[edit]
Donkey Kong Jungle level selection screen
First part of Level 2-1
Second part of Level 2-1
First part of Level 2-2
Second part of Level 2-2
First part of Level 2-3
Second part of Level 2-3
First part of Level 2-4
Second part of Level 2-4
First part of Level 2-5
Second part of Level 2-5
First part of Level 2-6
Second part of Level 2-6
Fire Mountain[edit]
Fire Mountain level selection screen
First part of Level 3-1
Second part of Level 3-1
First part of Level 3-2
Second part of Level 3-2
First part of Level 3-3
Second part of Level 3-3
First part of Level 3-4
Second part of Level 3-4
First part of Level 3-5
Second part of Level 3-5
First part of Level 3-6
Second part of Level 3-6
Spooky House[edit]
Spooky House level selection screen
First part of Level 4-1
Second part of Level 4-1
First part of Level 4-2
Second part of Level 4-2
First part of Level 4-3
Second part of Level 4-3
First part of Level 4-4
Second part of Level 4-4
First part of Level 4-5
Second part of Level 4-5
First part of Level 4-6
Second part of Level 4-6
Mystic Forest[edit]
Mystic Forest's level selection screen
First part of Level 5-1
First part of Level 5-2
First part of Level 5-3
First part of Level 5-4
First part of Level 5-5
First part of Level 5-6
Twilight City[edit]
Twilight City level selection screen
First part of Level 6-1
First part of Level 6-2
First part of Level 6-3
First part of Level 6-4
First part of Level 6-5
First part of Level 6-6
Mario Toy Factory[edit]
Mario Toy Factory level selection screen
Donkey Kong Jungle Plus[edit]
Donkey Kong Jungle Plus level selection screen
Fire Mountain Plus[edit]
Fire Mountain Plus level selection screen
Spooky House Plus[edit]
Spooky House Plus level selection screen
Mystic Forest Plus[edit]
Mystic Forest Plus level section screen
Mario's starting position in Level 5-1+
Mario's starting position in Level 5-2+
Mario's starting position in Level 5-3+
Mario's starting position in Level 5-4+
Mario's starting position in Level 5-5+
Mario's starting position in Level 5-6+
Twilight City Plus[edit]
Twilight City Plus level section screen
Expert[edit]
Pre-release screenshots[edit]
Cutscenes[edit]
Opening[edit]
Donkey Kong watching TV.
A program of a Shy Guy hosting the News.
An ad for Mini-Marios.
A group of Toads supervising the Mini-Marios.
Mario noticing Donkey Kong with a bag full of Mini-Marios.
After Level 6-DK[edit]
After Donkey Kong (level)[edit]
After Level 6-DK+[edit]
After Donkey Kong Plus[edit]
Credits artwork[edit]
Mario and Mini-Marios
Cannon and cannonball
Box art[edit]
Wii U Virtual Console
Miscellaneous[edit]
| Mario vs. Donkey Kong (GBA) / Mario vs. Donkey Kong (Nintendo Switch) | ||
|---|---|---|
| Characters | Donkey Kong • Mario • Mini-Mario • Toadb | |
| Worlds | Regular worlds: Mario Toy Company • Donkey Kong Jungle • Fire Mountain • Merry Mini-Landb • Spooky House • Slippery Summitb • Mystic Forest • Twilight City • vs. Donkey Kong Plus worlds: Mario Toy Factory • Donkey Kong Jungle Plus • Fire Mountain Plus • Merry Mini-Land Plusb • Spooky House Plus • Slippery Summit Plusb • Mystic Forest Plus • Twilight City Plus • vs. Donkey Kong Plus | |
| Enemies and obstacles | Bat • Bird • Bob-omb • Bob-omb Block • Boo • Brickman • Bucket Man • Candle • Cannon • Falling spike • Fire bird • Fire Shy Guy • Fireball • Ice Blockb • Icicleb • Lava Geyser • Monchee • Ninji • Oil • Podoboo • Polterguy • RamRam • Robo Kikki • Shy Guy • Sir Shovalot • Snapjaw • Spear Guy • Spike • Spiked Barrel • Tane Pakkun • Thwimp • Thwomp • Thwomp Platform • Wire Trap • Wrench Shy Guy | |
| Abilities | Crouch • Handstand / Handstand Jump • Jump • Backflip • Wire Spin • Spring Jump | |
| Items and objects | 1-Up Mushroom • 2 UPa • 3 UPa • 5 UPa • Barrel • Bird Nest • Checkpoint Flagb • Conveyor Belt • Crumble Block • Direction Switch • Donut Block • Door • Elevator • Flower Fanb • Flying keyb • Garbage Can • Girder • Hammer • Help Box • Key • Ladder • Letter Block • Present • Spring • Rope • Color Switch • Toy box • Warp Boxb • Wire | |
| Other | Mini-Mario Factory Game! • Gallery (GBA · Switch) • Pre-release and unused content • Quotes • Staff (GBA · Switch) • Time Attackb | |
