Coin Rush: Difference between revisions
m (Reverted edits by 173.2.83.160 (talk) to last revision by Andymii) |
m (Text replacement - "(\| *)Jap([RMCN\d]* *=)" to "$1Jpn$2") |
||
| (82 intermediate revisions by 39 users not shown) | |||
| Line 1: | Line 1: | ||
{{FA}} | {{FA}} | ||
[[File:CoinRush.png|thumb|300px| | {{about|the mode in New Super Mario Bros. 2|state in the Toad Rally mode of [[Super Mario Run]]|[[Coin Rush (Super Mario Run)]]|the mode in [[Mario Kart Tour]]|[[Coin Rush (Mario Kart Tour)]]}} | ||
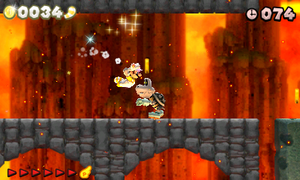
'''Coin Rush''' is a mode in ''[[New Super Mario Bros. 2]]''. It can be played only as one player and can be unlocked by clearing either the [[ | [[File:CoinRush.png|thumb|300px|White Raccoon Mario running through World 6-A in Coin Rush]] | ||
{{quote|Play three randomly selected courses back-to-back, collecting as many coins as you can. You can exchange Coin Rush records with other players via the StreetPass™ feature.|In-game manual|[[New Super Mario Bros. 2]]}} | |||
'''Coin Rush''' is a mode in ''[[New Super Mario Bros. 2]]''. It can be played only as one player and can be unlocked by clearing either the [[castle]] or the [[Warp Cannon]] levels of [[World 1 (New Super Mario Bros. 2)|World 1]]. In this mode, the player, as [[Mario]] or [[White Raccoon Mario]], must race through three random courses without losing a life and while collecting as many [[coin]]s as possible. The players still have access to all the coin-rewarding items from Solo Play mode, such as the [[Gold Block]]. | |||
Once players beat World 6-Bowser's Castle in the main game, they are given a [[Gold Flower]] in the [[ | Once players beat {{world link|6|bowser|World 6-Bowser's Castle}} in the main game, they are given a [[Gold Flower]] in the [[item storage]] (unless White Raccoon Mario mode is chosen, in which case the item storage is empty), which can be used in only one of the three [[level]]s. By default, there are only 100 seconds on the [[Time Limit|time limit]] allowed per course; some start with fewer than 100 seconds, such as [[World 1-1 (New Super Mario Bros. 2)|World 1-1]] (50 seconds) and the [[Third Course (Coin Challenge Pack A)|third course]] in [[Coin Challenge Pack A]] (20 seconds). The players can boost their time limit by collecting [[+ Clock]]s and making it past [[Checkpoint Flag]]s. | ||
As aforementioned, losing a single life ends the challenge, since the players cannot collect [[ | As aforementioned, losing a single life ends the challenge, since the players cannot collect [[extra life|extra lives]]. Because of this, collecting 100 coins does not affect the players' life count, and all [[1-Up Mushroom]]s are replaced by [[Gold Mushroom]]s, which give 50 coins (100 if collected by Gold Mario) each. Mario's remaining time is also converted into coins (one coin for every five remaining seconds). The third random course is always a [[tower]] or a castle. There are three course packs, and more packs can be downloaded via paid downloadable content at the [[Nintendo 3DS#Nintendo eShop|Nintendo eShop]].<ref>http://www.gamesradar.com/new-super-mario-bros-2-dlc-and-more-detailed-new-trailer/</ref> | ||
The maximum number of coins that can be collected during Coin Rush is 30,000. Once that number is reached, no other coins that are collected are added to the counter. Coin Rush also features StreetPass functionality (see [[#StreetPass|below]]), which allows Coin Rush players to challenge others' Coin Rush records. | The maximum number of coins that can be collected during Coin Rush is 30,000. Once that number is reached, no other coins that are collected are added to the counter. Coin Rush also features StreetPass functionality (see [[#StreetPass|below]]), which allows Coin Rush players to challenge others' Coin Rush records. | ||
==Coin values== | ==Coin values== | ||
===Items=== | ===Items=== | ||
{|border="1" class="wikitable" style="text-align:center;" | {|border="1"class="wikitable"style="text-align:center;" | ||
|- | |- | ||
! width="200" | !width="200"|Item | ||
! width="100" | !width="100"|Reward as Mario | ||
! width="100" | !width="100"|Reward as [[Gold Mario]] | ||
|- | |- | ||
|[[Coin]] | |[[Coin]] | ||
|colspan=2|1 | |colspan=2|1 | ||
|- | |- | ||
| | |Gold Mushroom | ||
|50 | |50 | ||
|100 | |100 | ||
|- | |- | ||
|First* [[Star Coin|Star]]/[[Moon Coin|Moon]] Coin | |First* [[Star Coin|Star]]/[[Moon Coin|Moon]] Coin | ||
|10 | |10 | ||
|20 | |20 | ||
|- | |- | ||
|Second* Star/Moon Coin | |Second* Star/Moon Coin | ||
|20 | |20 | ||
|40 | |40 | ||
|- | |- | ||
|Third* Star/Moon Coin | |Third* Star/Moon Coin | ||
|50 | |50 | ||
|100 | |100 | ||
|} | |} | ||
<small><nowiki>*</nowiki> - Order of Star Coins collected in a single level.</small> | <small><nowiki>*</nowiki> - Order of Star/Moon Coins collected in a single level.</small> | ||
===Enemies/bosses=== | ===Enemies/bosses=== | ||
{|border="1" class="wikitable" style="text-align:center;" | {|border="1"class="wikitable"style="text-align:center;" | ||
|- | |- | ||
! width="200" | !width="200"|Number of enemies defeated consecutively | ||
! width="100" | !width="100"|Reward as Gold Mario or from defeating gold enemy | ||
! width="100" | !width="100"|Reward from defeating gold enemy as Gold Mario | ||
|- | |- | ||
|First defeated enemy | |First defeated enemy | ||
|5 | |5 | ||
|10 | |10 | ||
|- | |- | ||
|Second defeated enemy | |Second defeated enemy | ||
|10 | |10 | ||
|20 | |20 | ||
|- | |- | ||
|Third defeated enemy | |Third defeated enemy | ||
|15 | |15 | ||
|30 | |30 | ||
|- | |- | ||
|Fourth defeated enemy | |Fourth defeated enemy | ||
|20 | |20 | ||
|40 | |40 | ||
|- | |- | ||
|Fifth (or more) defeated enemy | |Fifth (or more) defeated enemy | ||
|50 | |50 | ||
|100 | |100 | ||
|} | |} | ||
{|border="1"class="wikitable"style="text-align:center;" | |||
{|border="1" class="wikitable" style="text-align:center;" | |||
|- | |- | ||
! width="200" | Number of boss hits | !width="200"|Number of boss hits | ||
! width="100" | Reward as Mario | !width="100"|Reward as Mario | ||
! width="100" | Reward as Gold Mario | !width="100"|Reward as Gold Mario | ||
|- | |- | ||
|First/second hit on boss | |First/second hit on boss | ||
|0 | |0 | ||
|30 | |30 | ||
|- | |- | ||
|Final hit on boss | |Final hit on boss | ||
| colspan="2" |Coin total multiplied by 2 | |colspan="2"|Coin total multiplied by 2 | ||
|} | |} | ||
===[[ | ===[[Goal Pole]]=== | ||
{|border="1" class="wikitable" style="text-align:center;" | {|border="1"class="wikitable"style="text-align:center;" | ||
|- | |- | ||
! width="200" | !width="200"|Height | ||
! width="100" | !width="100"|Reward as Mario | ||
! width="100" | !width="100"|Reward as Gold Mario | ||
|- | |- | ||
|Top of | |Top of Goal Pole | ||
| colspan="2" |Coin total multiplied by 2 | |colspan="2"|Coin total multiplied by 2 | ||
|- | |- | ||
|Lower than top | |Lower than top | ||
|0 | |0 | ||
|10 | |10, 20, 30, 40, or 50* | ||
|} | |} | ||
<small><nowiki>*</nowiki> - The amount of coins earned from grabbing the | <small><nowiki>*</nowiki> - The amount of coins earned from grabbing the Goal Pole as Gold Mario depends on the height Mario grabbed it (i.e. The higher the point which the pole is grabbed, the more coins he receives).</small> | ||
Note: If Mario passes through a Goal Pole while under the effects of a [[Mega Mushroom]], he receives three Gold Mushrooms. However, Mario's coin total cannot be multiplied with this maneuver. | |||
Note: If Mario passes through a | |||
==Starting packs== | ==Starting packs== | ||
| Line 104: | Line 104: | ||
==Course selections list== | ==Course selections list== | ||
Although the courses are selected at random with each Coin Rush run, they | Although the courses are selected at random with each Coin Rush run, they are not completely random, as they will only appear based on which Coin Rush round the players are in. Additionally, courses from the main game are also picked in the order of one above-ground stage, one underground/underwater/Ghost House stage, and one tower/castle stage, respectively. Below is a list of which courses the players may get for each round. Note that each pack is staged in different difficulties, with the Mushroom Pack, the easiest pack, containing the courses from World 1, World 2, and World Mushroom, the Flower Pack, the middle pack, containing the courses from World 3, World 4, and World Flower, and the Star Pack, the hardest pack, containing the courses from World 5, World 6, and World Star. | ||
{|border="1"class="wikitable"style="text-align:left;" | |||
{|border="1" class="wikitable" style="text-align:left;" | |||
|- | |- | ||
! width="150" | Course Pack | !width="150"|Course Pack | ||
! width="150" | Course 1 | !width="150"|Course 1 | ||
! width="150" | Course 2 | !width="150"|Course 2 | ||
! width="150" | Course 3 | !width="150"|Course 3 | ||
|- | |- | ||
! | !Mushroom Pack | ||
| | | | ||
*[[World 1-1 (New_Super_Mario_Bros._2)|World 1-1]] | *[[World 1-1 (New_Super_Mario_Bros._2)|World 1-1]] | ||
| Line 123: | Line 122: | ||
*[[World 2-5 (New Super Mario Bros. 2)|World 2-5]] | *[[World 2-5 (New Super Mario Bros. 2)|World 2-5]] | ||
*[[World 2-A (New Super Mario Bros. 2)|World 2-A]] | *[[World 2-A (New Super Mario Bros. 2)|World 2-A]] | ||
*[[World 2-B|World 2-B]] | *[[World 2-B (New Super Mario Bros. 2)|World 2-B]] | ||
*{{world | *{{world link|mushroom|1|World Mushroom-1 (New Super Mario Bros. 2)}} | ||
*{{world | *{{world link|mushroom|A|World Mushroom-A}} | ||
*{{world | *{{world link|mushroom|B|World Mushroom-B}} | ||
| | | | ||
*[[World 1-2 (New Super Mario Bros. 2)|World 1-2]] | *[[World 1-2 (New Super Mario Bros. 2)|World 1-2]] | ||
| Line 132: | Line 131: | ||
*[[World 2-1 (New Super Mario Bros. 2)|World 2-1]] | *[[World 2-1 (New Super Mario Bros. 2)|World 2-1]] | ||
*[[World 2-3 (New Super Mario Bros. 2)|World 2-3]] | *[[World 2-3 (New Super Mario Bros. 2)|World 2-3]] | ||
*{{world | *{{world link|2|ghost|World 2-Ghost House}} | ||
*{{world | *{{world link|mushroom|2|World Mushroom-2 (New Super Mario Bros. 2)}} | ||
*{{world | *{{world link|mushroom|3|World Mushroom-3 (New Super Mario Bros. 2)}} | ||
*{{world | *{{world link|mushroom|ghost|World Mushroom-Ghost House}} | ||
| | | | ||
*{{world | *{{world link|1|towern2|World 1-Tower (New Super Mario Bros. 2)}} | ||
*{{world | *{{world link|1|castle|World 1-Castle (New Super Mario Bros. 2)}} | ||
*{{world | *{{world link|2|towern2|World 2-Tower (New Super Mario Bros. 2)}} | ||
*{{world | *{{world link|2|castle|World 2-Castle (New Super Mario Bros. 2)}} | ||
*{{world | *{{world link|mushroom|castle|World Mushroom-Castle}} | ||
|- | |- | ||
! | !Flower Pack | ||
| | | | ||
*[[World 3-1 (New Super Mario Bros. 2)|World 3-1]] | *[[World 3-1 (New Super Mario Bros. 2)|World 3-1]] | ||
| Line 154: | Line 153: | ||
*[[World 4-A (New Super Mario Bros. 2)|World 4-A]] | *[[World 4-A (New Super Mario Bros. 2)|World 4-A]] | ||
*[[World 4-B (New Super Mario Bros. 2)|World 4-B]] | *[[World 4-B (New Super Mario Bros. 2)|World 4-B]] | ||
*{{world | *{{world link|flower|1|World Flower-1 (New Super Mario Bros. 2)}} | ||
*{{world | *{{world link|flower|2|World Flower-2 (New Super Mario Bros. 2)}} | ||
*{{world | *{{world link|flower|3|World Flower-3 (New Super Mario Bros. 2)}} | ||
*{{world | *{{world link|flower|B|World Flower-B}} | ||
| | | | ||
*[[World 3-2 (New Super Mario Bros. 2)|World 3-2]] | *[[World 3-2 (New Super Mario Bros. 2)|World 3-2]] | ||
*[[World 3-5 (New Super Mario Bros. 2)|World 3-5]] | *[[World 3-5 (New Super Mario Bros. 2)|World 3-5]] | ||
*[[World 3-A (New Super Mario Bros. 2)|World 3-A]] | *[[World 3-A (New Super Mario Bros. 2)|World 3-A]] | ||
*{{world | *{{world link|3|ghost|World 3-Ghost House (New Super Mario Bros. 2)}} | ||
*[[World 4-5 (New Super Mario Bros. 2)|World 4-5]] | *[[World 4-5 (New Super Mario Bros. 2)|World 4-5]] | ||
*[[ | *[[World 4-C]] | ||
*{{world | *{{world link|4|ghost|World 4-Ghost House (New Super Mario Bros. 2)}} | ||
*{{world | *{{world link|flower|A|World Flower-A}} | ||
*{{world | *{{world link|flower|ghost|World Flower-Ghost House}} | ||
| | | | ||
*{{world | *{{world link|3|towern2|World 3-Tower (New Super Mario Bros. 2)}} | ||
*{{world | *{{world link|3|castle|World 3-Castle (New Super Mario Bros. 2)}} | ||
*{{world | *{{world link|4|towern2|World 4-Tower (New Super Mario Bros. 2)}} | ||
*{{world | *{{world link|4|castle|World 4-Castle (New Super Mario Bros. 2)}} | ||
*{{world | *{{world link|flower|castle|World Flower-Castle}} | ||
|- | |- | ||
! Star Pack | !Star Pack | ||
| | | | ||
*[[World 5-1 (New Super Mario Bros. 2)|World 5-1]] | *[[World 5-1 (New Super Mario Bros. 2)|World 5-1]] | ||
| Line 189: | Line 188: | ||
*[[World 6-A (New Super Mario Bros. 2)|World 6-A]] | *[[World 6-A (New Super Mario Bros. 2)|World 6-A]] | ||
*[[World 6-B (New Super Mario Bros. 2)|World 6-B]] | *[[World 6-B (New Super Mario Bros. 2)|World 6-B]] | ||
*{{world | *{{world link|star|1|World Star-1 (New Super Mario Bros. 2)}} | ||
*{{world | *{{world link|star|2|World Star-2 (New Super Mario Bros. 2)}} | ||
*{{world | *{{world link|star|5|World Star-5 (New Super Mario Bros. 2)}} | ||
*{{world | *{{world link|star|7|World Star-7 (New Super Mario Bros. 2)}} | ||
| | | | ||
*[[World 5-2 (New Super Mario Bros. 2)|World 5-2]] | *[[World 5-2 (New Super Mario Bros. 2)|World 5-2]] | ||
*{{world | *{{world link|5|ghost|World 5-Ghost House (New Super Mario Bros. 2)}} | ||
*[[World 6-3 (New Super Mario Bros. 2)|World 6-3]] | *[[World 6-3 (New Super Mario Bros. 2)|World 6-3]] | ||
*{{world | *{{world link|6|ghost|World 6-Ghost House (New Super Mario Bros. 2)}} | ||
*{{world | *{{world link|star|3|World Star-3 (New Super Mario Bros. 2)}} | ||
*{{world | *{{world link|star|4|World Star-4 (New Super Mario Bros. 2)}} | ||
*{{world | *{{world link|star|6|World Star-6 (New Super Mario Bros. 2)}} | ||
| | | | ||
*{{world | *{{world link|5|towern2|World 5-Tower (New Super Mario Bros. 2)}} | ||
*{{world | *{{world link|5|castle|World 5-Castle (New Super Mario Bros. 2)}} | ||
*{{world | *{{world link|6|towern2|World 6-Tower (New Super Mario Bros. 2)}} | ||
|} | |} | ||
'''Note''': {{world link|6|bowser|World 6-Bowser's Castle}} and {{world link|star|castle|World Star-Castle}} (both due to the length of the [[Bowser]]/[[Dry Bowser]] battles), as well as [[World 3-B (New Super Mario Bros. 2)|World 3-B]] (due to the required use of the [[Mini Mushroom]]), are never selected. This also applies to all the Rainbow courses, Cannon courses, and the Toad House "courses". | |||
==Downloadable content== | |||
Players were able to download additional course packs from the ''New Super Mario Bros. 2'' shop. The shop is not accessible at first, but when SpotPass is activated and the device is played for a while, a notification on the downloadable content pops up in the home menu. When players read that notification, the Shop button appears once they open the game and select Coin Rush. Each level pack includes three courses that are played in a fixed order and not found in the actual game. The packs cost ¥200 in Japan, £2.00 in the UK, $3.00 in Australia, and $2.50 in North America. Two to three course packs were released at a time, and they can be bought individually or in a set with a combined price of the costs of each pack. Four sets of DLC packs were released, with ten course packs released total; the Gold Classics Pack was not part of any set, being released in-between to celebrate three billion coins collected instead. The final set of course packs was released on December 20, 2012. | |||
Before December 20, 2012, the [[Coin Challenge Packs]] were the only Coin Rush packs to have leaderboards. | |||
With the discontinuation of digital purchases for Nintendo 3DS in March 2023, it is no longer possible to buy the downloadable course packs, though they can still be downloaded by those who purchased them when they were available. | |||
===October 2nd, 2012=== | ===October 2nd, 2012=== | ||
{|border="1" class="wikitable" style="text-align:left;" | {|border="1"class="wikitable"style="text-align:left;" | ||
|- | |- | ||
! width="150" | <center>Course Pack</center> <center>/ Difficulty</center> <center>/ Target</center> | !width="150"|<center>Course Pack</center> <center>/ Difficulty</center> <center>/ Target</center> | ||
! width="210" | Course 1 | !width="210"|Course 1 | ||
! width="210" | Course 2 | !width="210"|Course 2 | ||
! width="210" | Course 3 | !width="210"|Course 3 | ||
|- | |- | ||
!<center>[[File:CoinRush I1.png|70px]]</center><br>[[Gold Rush Pack]]<center> | !<center>[[File:CoinRush I1.png|70px]]</center><br>[[Gold Rush Pack]]<center>Very Easy</center><center>Target: 30,000 coins</center><br> | ||
|<center>[[File:NSMB2CoinRush1.png|150px]]</center><br><center>A sky level similar to [[World 5-3 (New Super Mario Bros. 2)|World 5-3]].</center> | |<center>[[File:NSMB2CoinRush1.png|150px|link=First Course (Gold Rush Pack)]]</center><br><center>A sky level similar to [[World 5-3 (New Super Mario Bros. 2)|World 5-3]].</center> | ||
|<center>[[File:NSMB2CoinRush2.png|150px]]</center><br><center>A level similar to [[World 5-A (New Super Mario Bros. 2)|World 5-A]] but in a beach area with jumping [[Cheep Cheep]]s.</center> | |<center>[[File:NSMB2CoinRush2.png|150px|link=Second Course (Gold Rush Pack)]]</center><br><center>A level similar to [[World 5-A (New Super Mario Bros. 2)|World 5-A]] but in a beach area with jumping [[Cheep Cheep]]s.</center> | ||
|<center>[[File:NSMB2CoinRush3.png|150px]]</center><br><center>A tower level with gray [[Brick Block]]s.</center> | |<center>[[File:NSMB2CoinRush3.png|150px|link=Third Course (Gold Rush Pack)]]</center><br><center>A tower level with gray [[Brick Block]]s.</center> | ||
|- | |- | ||
!<center>[[File:CoinRush I2.png|70px]]</center><br>[[ | !<center>[[File:CoinRush I2.png|70px]]</center><br>[[Coin Challenge Pack A]]<center>Normal</center><center>Target: 10,000 coins</center><br> | ||
|<center>[[File:NSMB2CoinRush4.png|150px]]</center><br><center>A level similar to | |<center>[[File:NSMB2CoinRush4.png|150px|link=First Course (Coin Challenge Pack A)]]</center><br><center>A level similar to {{world link|mushroom|1|World Mushroom-1 (New Super Mario Bros. 2)}} with Fire Flower Pipes.</center> | ||
|<center>[[File:NSMB2CoinRush5.png|150px]]</center><br><center>A mountain level with platforms that go up or down when the player steps on them.</center> | |<center>[[File:NSMB2CoinRush5.png|150px|link=Second Course (Coin Challenge Pack A)]]</center><br><center>A mountain level with platforms that go up or down when the player steps on them.</center> | ||
|<center>[[File:NSMB2CoinRush6.png|150px]]</center><br><center>A castle level in a volcano with [[Sledge Bro]]s.</center> | |<center>[[File:NSMB2CoinRush6.png|150px|link=Third Course (Coin Challenge Pack A)]]</center><br><center>A castle level in a volcano with [[Sledge Bro]]s.</center> | ||
|- | |- | ||
!<center>[[File:CoinRush I3.png|70px]]</center><br>[[Nerve-Wrack Pack]]<center> | !<center>[[File:CoinRush I3.png|70px]]</center><br>[[Nerve-Wrack Pack]]<center>Very Hard</center><center>Target: 15,000 coins</center><br> | ||
|<center>[[File:NSMB2CoinRush7.png|150px]]</center><br><center>A level high in the sky, over a forest, with the entire layout being | |<center>[[File:NSMB2CoinRush7.png|150px|link=First Course (Nerve-Wrack Pack)]]</center><br><center>A level high in the sky, over a forest, with the entire layout being composed of [[Coin]]s and Brick Blocks.</center> | ||
|<center>[[File:NSMB2CoinRush8.png|150px]]</center><br><center>A volcano level where the majority of the layout is | |<center>[[File:NSMB2CoinRush8.png|150px|link=Second Course (Nerve-Wrack Pack)]]</center><br><center>A volcano level where the majority of the layout is composed of jumping on [[Koopa Paratroopa|Paratroopa]]s.</center> | ||
|<center>[[File:NSMB2CoinRush9.png|150px]]</center><br><center>A cannon level where the majority of the layout is | |<center>[[File:NSMB2CoinRush9.png|150px|link=Third Course (Nerve-Wrack Pack)]]</center><br><center>A cannon level where the majority of the layout is composed of jumping on [[Bullet Bill]]s.</center> | ||
|} | |} | ||
Notice that this first set of packs was available in North America on October 4th, 2012, two days after the pack released in Europe, Oceania, and Japan. | |||
Notice that this first set of packs was available in North America on October 4th, 2012, two days after the pack released in Europe and Japan. | |||
===October 25th, 2012=== | ===October 25th, 2012=== | ||
{|border="1" class="wikitable" style="text-align:left;" | {|border="1"class="wikitable"style="text-align:left;" | ||
|- | |- | ||
! width="150" | <center>Course Pack</center> <center>/ Difficulty</center> <center>/ Target</center> | !width="150"|<center>Course Pack</center> <center>/ Difficulty</center> <center>/ Target</center> | ||
! width="210" | Course 1 | !width="210"|Course 1 | ||
! width="210" | Course 2 | !width="210"|Course 2 | ||
! width="210" | Course 3 | !width="210"|Course 3 | ||
|- | |- | ||
!<center>[[File:NSMB2coinrushicon.png|70px]]</center><br>[[Gold Mushroom Pack]]<center> | !<center>[[File:NSMB2coinrushicon.png|70px]]</center><br>[[Gold Mushroom Pack]]<center>Easy</center><center>Target: 30,000 coins</center><br> | ||
|<center>[[File:NSMB2CoinRush10.png|150px]]</center><br><center>A sky level with forest treetops.</center> | |<center>[[File:NSMB2CoinRush10.png|150px|link=First Course (Gold Mushroom Pack)]]</center><br><center>A sky level with forest treetops.</center> | ||
|<center>[[File:NSMB2CoinRush11.png|150px]]</center><br><center>A mountain level with an icy ground.</center> | |<center>[[File:NSMB2CoinRush11.png|150px|link=Second Course (Gold Mushroom Pack)]]</center><br><center>A mountain level with an icy ground.</center> | ||
|<center>[[File:NSMB2CoinRush12.png|150px]]</center><br><center>A cave level with mushroom platforms. </center> | |<center>[[File:NSMB2CoinRush12.png|150px|link=Third Course (Gold Mushroom Pack)]]</center><br><center>A cave level with mushroom platforms. </center> | ||
|- | |- | ||
!<center>[[File:NSMB2coinrushicon2.png|70px]]</center><br>[[ | !<center>[[File:NSMB2coinrushicon2.png|70px]]</center><br>[[Coin Challenge Pack B]]<center>Normal</center><center>Target: 10,000 coins</center><br> | ||
|<center>[[File:NSMB2CoinRush13.png|150px]]</center><br><center>A Ghost House with blue disappearing/reappearing blocks.</center> | |<center>[[File:NSMB2CoinRush13.png|150px|link=First Course (Coin Challenge Pack B)]]</center><br><center>A Ghost House with blue disappearing/reappearing blocks.</center> | ||
|<center>[[File:NSMB2CoinRush14.png|150px]]</center><br><center>A sky level with [[Bullet Bill]]s and [[Banzai Bill]]s.</center> | |<center>[[File:NSMB2CoinRush14.png|150px|link=Second Course (Coin Challenge Pack B)]]</center><br><center>A sky level with [[Bullet Bill]]s and [[Bomber Bill|Banzai Bill]]s.</center> | ||
|<center>[[File:NSMB2CoinRush15.png|150px]]</center><br><center>An outside volcano level with a castle foreground.</center> | |<center>[[File:NSMB2CoinRush15.png|150px|link=Third Course (Coin Challenge Pack B)]]</center><br><center>An outside volcano level with a castle foreground.</center> | ||
|} | |} | ||
===November 27th, 2012=== | ===November 27th, 2012=== | ||
From its release until January 31st, 2013, the Gold Classics Pack was free to download. | From its release until January 31st, 2013, the Gold Classics Pack was free to download. | ||
{|border="1" class="wikitable" style="text-align:left;" | {|border="1"class="wikitable"style="text-align:left;" | ||
|- | |- | ||
! width="150" | <center>Course Pack</center> <center>/ Difficulty</center> <center>/ Target</center> | !width="150"|<center>Course Pack</center> <center>/ Difficulty</center> <center>/ Target</center> | ||
! width="210" | Course 1 | !width="210"|Course 1 | ||
! width="210" | Course 2 | !width="210"|Course 2 | ||
! width="210" | Course 3 | !width="210"|Course 3 | ||
|- | |- | ||
!<center>[[File:NSMB2coinrushicon3.png|70px]]</center><br>[[Gold Classics Pack]]<center> | !<center>[[File:NSMB2coinrushicon3.png|70px]]</center><br>[[Gold Classics Pack]]<center>Very Easy</center><center>Target: 30,000 coins</center><br> | ||
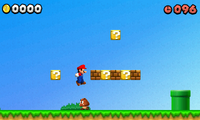
|<center>[[File:GoldClassicPack1.png|200px]]</center><br><center>A level based on World 1-1 and World 1-2 of ''[[Super Mario Bros]] | |<center>[[File:GoldClassicPack1.png|200px|link=First Course (Gold Classics Pack)]]</center><br><center>A level based on World 1-1 and World 1-2 of ''[[Super Mario Bros.]]''</center> | ||
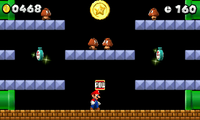
|<center>[[File:GoldClassicPack2.png|200px]]</center><br><center>A level based on World 1-1 and World 1-5 of ''[[Super Mario Bros. 3]].''</center> | |<center>[[File:GoldClassicPack2.png|200px|link=Second Course (Gold Classics Pack)]]</center><br><center>A level based on World 1-1 and World 1-5 of ''[[Super Mario Bros. 3]].''</center> | ||
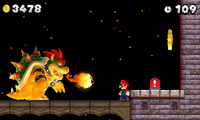
|<center>[[File:GoldClassicPack3.png|200px]]</center><br><center>A level based on the castle levels of ''[[Super Mario Bros.]]'' that also includes an altered version of ''[[New Super Mario Bros. 2]]''<nowiki>'</nowiki>s World 1-1.</center> | |<center>[[File:GoldClassicPack3.png|200px|link=Third Course (Gold Classics Pack)]]</center><br><center>A level based on the castle levels of ''[[Super Mario Bros.]]'' that also includes an altered version of ''[[New Super Mario Bros. 2]]''<nowiki>'</nowiki>s World 1-1.</center> | ||
|} | |} | ||
===December 5th, 2012=== | ===December 5th, 2012=== | ||
{|border="1" class="wikitable" style="text-align:left;" | {|border="1"class="wikitable"style="text-align:left;" | ||
|- | |- | ||
! width="150" | <center>Course Pack</center> <center>/ Difficulty</center> <center>/ Target</center> | !width="150"|<center>Course Pack</center> <center>/ Difficulty</center> <center>/ Target</center> | ||
! width="210" | Course 1 | !width="210"|Course 1 | ||
! width="210" | Course 2 | !width="210"|Course 2 | ||
! width="210" | Course 3 | !width="210"|Course 3 | ||
|- | |- | ||
![[File:NSMB2coinrushiconC.png|70px]]<br>[[ | ![[File:NSMB2coinrushiconC.png|70px]]<br>[[Coin Challenge Pack C]]<center>Normal</center><center>Target: 10,000 coins</center><br> | ||
|<center>[[File:Nsmb2 dlc-1.png|200px]]</center><br><center>A beach level with | |<center>[[File:Nsmb2 dlc-1.png|200px|link=First Course (Coin Challenge Pack C)]]</center><br><center>A beach level with many spikes and stars.</center> | ||
|<center>[[File:Nsmb2 dlc-2.png|200px]]</center><br><center>An underground desert level focusing on the Gold Flower.</center> | |<center>[[File:Nsmb2 dlc-2.png|200px|link=Second Course (Coin Challenge Pack C)]]</center><br><center>An underground desert level focusing on the Gold Flower.</center> | ||
|<center>[[File:Nsmb2 dlc-3.png|200px]]</center><br><center>A volcano level with | |<center>[[File:Nsmb2 dlc-3.png|200px|link=Third Course (Coin Challenge Pack C)]]</center><br><center>A volcano level with descending and ascending [[segmented platform]]s.</center> | ||
|- | |- | ||
![[File:NSMB2coinrushicon4.png|70px]]<br>[[Platform Panic Pack]]<center> | ![[File:NSMB2coinrushicon4.png|70px]]<br>[[Platform Panic Pack]]<center>Hard</center><center>Target: 15,000 coins</center><br> | ||
|<center>[[File:Nsmb2 dlc-4.png|200px]]</center><br><center>A [[Peepa]]-operated coaster.</center> | |<center>[[File:Nsmb2 dlc-4.png|200px|link=First Course (Platform Panic Pack)]]</center><br><center>A [[Peepa]]-operated [[ghost-coaster|coaster]].</center> | ||
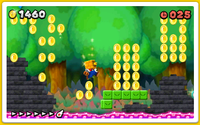
|<center>[[File:Nsmb2 dlc-5.png|200px]]</center><br><center>A jungle level with lots of [[Snake Block]]s.</center> | |<center>[[File:Nsmb2 dlc-5.png|200px|link=Second Course (Platform Panic Pack)]]</center><br><center>A jungle level with lots of [[Snake Block]]s.</center> | ||
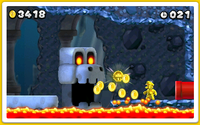
|<center>[[File:Nsmb2 dlc-6.png|200px]]</center><br><center>A castle level with | |<center>[[File:Nsmb2 dlc-6.png|200px|link=Third Course (Platform Panic Pack)]]</center><br><center>A castle level with segmented platforms and many Bullet Bills.</center> | ||
|} | |} | ||
===December 20th, 2012=== | ===December 20th, 2012=== | ||
This is the last batch of packs for ''New Super Mario Bros. 2''. Notice that this batch of these DLC packs was released in Japan and | This is the last batch of packs for ''New Super Mario Bros. 2''. Notice that this batch of these DLC packs was released in Japan and Oceania on December 21, 2012, a day after the release in North America and Europe. | ||
{|border="1" class="wikitable" style="text-align:left;" | {|border="1"class="wikitable"style="text-align:left;" | ||
|- | |- | ||
! width="150" | <center>Course Pack</center> <center>/ Difficulty</center> <center>/ Target</center> | !width="150"|<center>Course Pack</center> <center>/ Difficulty</center> <center>/ Target</center> | ||
! width="210" | Course 1 | !width="210"|Course 1 | ||
! width="210" | Course 2 | !width="210"|Course 2 | ||
! width="210" | Course 3 | !width="210"|Course 3 | ||
|- | |- | ||
![[File:NSMB2coinrushicon5.png|70px]]<br>[[Mystery Adventures Pack]]<center> | ![[File:NSMB2coinrushicon5.png|70px]]<br>[[Mystery Adventures Pack]]<center>Normal</center><center>Target: 20,000 coins</center><br> | ||
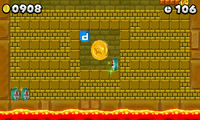
|<center>[[File: | |<center>[[File:NSMB2 Mystery Adventure Pack Level 1.png|200px|link=First Course (Mystery Adventures Pack)]]</center><br><center>A level in a pyramid with multiple themes.</center> | ||
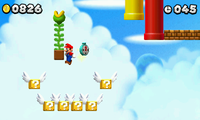
|<center>[[File: | |<center>[[File:NSMB2 Mystery Adventure Pack Level 2.png|200px|link=Second Course (Mystery Adventures Pack)]]</center><br><center>A sky level with a [[Flying Question Block]] platform.</center> | ||
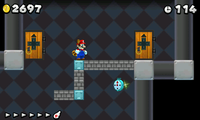
|<center>[[File: | |<center>[[File:NSMB2 Mystery Adventure Pack Level 3.png|200px|link=Third Course (Mystery Adventures Pack)]]</center><br><center>A pipe-themed level with many Brick Block platforms, pipes, and Bob-ombs.</center> | ||
|- | |- | ||
![[File:NSMB2coinrushicon6.png|70px]]<br>[[Impossible Pack]]<center>DANGER!</center><center>Target: 100 coins</center><br> | ![[File:NSMB2coinrushicon6.png|70px]]<br>[[Impossible Pack]]<center>DANGER!</center><center>Target: 100 coins</center><br> | ||
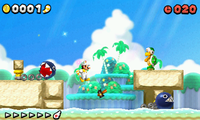
|<center>[[File: | |<center>[[File:NSMB2 Impossible Pack Level 1.png|200px|link=First Course (Impossible Pack)]]</center><br><center>A beach level filled with [[Cheep Chomp]]s, followed by a sky area with [[Lakitu]]s, [[Crowber]]s, and a [[Paddle Platform|paddle wheel]].</center> | ||
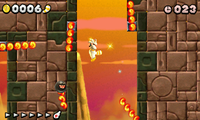
|<center>[[File: | |<center>[[File:NSMB2 Impossible Pack Level 2.png|200px|link=Second Course (Impossible Pack)]]</center><br><center>A mountain-themed level, where [[Flame Chomp]]s and a lot of [[Fire Bar]]s must be avoided.</center> | ||
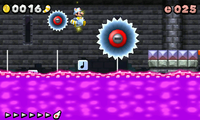
|<center>[[File: | |<center>[[File:NSMB2 Impossible Pack Level 3.png|200px|link=Third Course (Impossible Pack)]]</center><br><center>A castle with quickly-rising and lowering [[Poison (obstacle)|poison]] and jumping [[Grinder]]s.</center> | ||
|} | |} | ||
==StreetPass== | ==StreetPass== | ||
Coin Rush also features a StreetPass functionality. Upon the completion of a Coin Rush session, the player is allowed to save a record of their run. This record will then be exchanged with other ''New Super Mario Bros. 2'' players via StreetPass. Upon receiving another player's Coin Rush record, the receiving player may challenge the same three stages in the same order to earn more coins than the other player did. Players can only receive fifteen records at a time; if the player has fifteen records and receives more, then older records are deleted to make room. The number of coins needed to win is not revealed until the player finishes all three courses. Beating the received record earns the player a [[Crown Coin]]. Whether or not the record was beaten the first time, the other player's revealed record will add to the coin total the first time. | Coin Rush also features a StreetPass functionality. Upon the completion of a Coin Rush session, the player is allowed to save a record of their run. This record will then be exchanged with other ''New Super Mario Bros. 2'' players via StreetPass. Upon receiving another player's Coin Rush record, the receiving player may challenge the same three stages in the same order to earn more coins than the other player did. Players can only receive fifteen records at a time; if the player has fifteen records and receives more, then older records are deleted to make room. The number of coins needed to win is not revealed until the player finishes all three courses. Beating the received record earns the player a [[Win Coin|Crown Coin]]. Whether or not the record was beaten the first time, the other player's revealed record will add to the coin total the first time. | ||
In addition, each player may save only one of their own records at a time. This is the record that will be sent via StreetPass. Players may overwrite their previous record by either challenging their previous record on the same three stages, or by starting a brand new Coin Rush run. At the end, the player is given the choice to overwrite their previous record. However, if the record is from a DLC pack, the player that receives it but does not own the pack cannot challenge it until it is downloaded. | In addition, each player may save only one of their own records at a time. This is the record that will be sent via StreetPass. Players may overwrite their previous record by either challenging their previous record on the same three stages, or by starting a brand new Coin Rush run. At the end, the player is given the choice to overwrite their previous record. However, if the record is from a DLC pack, the player that receives it but does not own the pack cannot challenge it until it is downloaded. | ||
==Profiles== | |||
===''New Super Mario Bros. 2''=== | |||
*'''North American website bio:''' "''Show off your super skills in this mode, where you'll play three levels back to back trying to earn as many coins as possible... using only one life! Your Coin Rush record is then saved and can be shared with other players via the StreetPass™ feature. These players can try to beat your score, and you can challenge theirs.''" | |||
*'''European website bio:''' "''The aim of this mode is to make it through three courses with just one Mario, grabbing as many coins as you can. That's right, you get one chance: no backups, no 1-Ups, and no extra credits. If you make a mistake you'll start from the beginning of the first course again, so choose your moves – and your cash-stashing strategy – carefully! The three Coin Rush stages will be randomly selected from the levels that you have already cleared, so no spoilers there! You can now purchase additional Coin Rush course packs as add-on content – find out more about add-on-content here!''" | |||
==Names in other languages== | ==Names in other languages== | ||
{{ | {{foreign names | ||
| | |Jpn=コインラッシュ | ||
| | |JpnR=Koin Rasshu | ||
| | |JpnM=Coin Rush | ||
|Spa=Fiebre del oro | |Spa=Fiebre del oro | ||
|SpaM=Gold Fever | |SpaM=Gold Fever | ||
| | |Fre=Pièces en folie | ||
| | |FreM=Coin Madness | ||
|Ita=Febbre dell'oro | |Ita=Febbre dell'oro | ||
|ItaM=Gold Fever | |ItaM=Gold Fever | ||
| Line 344: | Line 347: | ||
|Kor=코인 러시 | |Kor=코인 러시 | ||
|KorR=Koin Reosi | |KorR=Koin Reosi | ||
|KorM=Coin Rush}} | |KorM=Coin Rush | ||
}} | |||
==References== | ==References== | ||
<references/> | <references/> | ||
{{NSMB2}} | {{NSMB2}} | ||
[[Category:New Super Mario Bros. 2]] | [[Category:New Super Mario Bros. 2]] | ||
[[Category:Downloadable content]] | [[Category:Downloadable content]] | ||
[[it:Febbre dell'oro]] | |||
Latest revision as of 11:31, January 7, 2025
- This article is about the mode in New Super Mario Bros. 2. For state in the Toad Rally mode of Super Mario Run, see Coin Rush (Super Mario Run). For the mode in Mario Kart Tour, see Coin Rush (Mario Kart Tour).
- “Play three randomly selected courses back-to-back, collecting as many coins as you can. You can exchange Coin Rush records with other players via the StreetPass™ feature.”
- —In-game manual, New Super Mario Bros. 2
Coin Rush is a mode in New Super Mario Bros. 2. It can be played only as one player and can be unlocked by clearing either the castle or the Warp Cannon levels of World 1. In this mode, the player, as Mario or White Raccoon Mario, must race through three random courses without losing a life and while collecting as many coins as possible. The players still have access to all the coin-rewarding items from Solo Play mode, such as the Gold Block.
Once players beat World 6-![]() Bowser's Castle in the main game, they are given a Gold Flower in the item storage (unless White Raccoon Mario mode is chosen, in which case the item storage is empty), which can be used in only one of the three levels. By default, there are only 100 seconds on the time limit allowed per course; some start with fewer than 100 seconds, such as World 1-1 (50 seconds) and the third course in Coin Challenge Pack A (20 seconds). The players can boost their time limit by collecting + Clocks and making it past Checkpoint Flags.
Bowser's Castle in the main game, they are given a Gold Flower in the item storage (unless White Raccoon Mario mode is chosen, in which case the item storage is empty), which can be used in only one of the three levels. By default, there are only 100 seconds on the time limit allowed per course; some start with fewer than 100 seconds, such as World 1-1 (50 seconds) and the third course in Coin Challenge Pack A (20 seconds). The players can boost their time limit by collecting + Clocks and making it past Checkpoint Flags.
As aforementioned, losing a single life ends the challenge, since the players cannot collect extra lives. Because of this, collecting 100 coins does not affect the players' life count, and all 1-Up Mushrooms are replaced by Gold Mushrooms, which give 50 coins (100 if collected by Gold Mario) each. Mario's remaining time is also converted into coins (one coin for every five remaining seconds). The third random course is always a tower or a castle. There are three course packs, and more packs can be downloaded via paid downloadable content at the Nintendo eShop.[1]
The maximum number of coins that can be collected during Coin Rush is 30,000. Once that number is reached, no other coins that are collected are added to the counter. Coin Rush also features StreetPass functionality (see below), which allows Coin Rush players to challenge others' Coin Rush records.
Coin values[edit]
Items[edit]
| Item | Reward as Mario | Reward as Gold Mario |
|---|---|---|
| Coin | 1 | |
| Gold Mushroom | 50 | 100 |
| First* Star/Moon Coin | 10 | 20 |
| Second* Star/Moon Coin | 20 | 40 |
| Third* Star/Moon Coin | 50 | 100 |
* - Order of Star/Moon Coins collected in a single level.
Enemies/bosses[edit]
| Number of enemies defeated consecutively | Reward as Gold Mario or from defeating gold enemy | Reward from defeating gold enemy as Gold Mario |
|---|---|---|
| First defeated enemy | 5 | 10 |
| Second defeated enemy | 10 | 20 |
| Third defeated enemy | 15 | 30 |
| Fourth defeated enemy | 20 | 40 |
| Fifth (or more) defeated enemy | 50 | 100 |
| Number of boss hits | Reward as Mario | Reward as Gold Mario |
|---|---|---|
| First/second hit on boss | 0 | 30 |
| Final hit on boss | Coin total multiplied by 2 | |
Goal Pole[edit]
| Height | Reward as Mario | Reward as Gold Mario |
|---|---|---|
| Top of Goal Pole | Coin total multiplied by 2 | |
| Lower than top | 0 | 10, 20, 30, 40, or 50* |
* - The amount of coins earned from grabbing the Goal Pole as Gold Mario depends on the height Mario grabbed it (i.e. The higher the point which the pole is grabbed, the more coins he receives). Note: If Mario passes through a Goal Pole while under the effects of a Mega Mushroom, he receives three Gold Mushrooms. However, Mario's coin total cannot be multiplied with this maneuver.
Starting packs[edit]
- Mushroom Pack: Included in-game; randomly selects courses from Worlds 1, 2, and Mushroom.
- Flower Pack: Included in-game; randomly selects from Worlds 3, 4, and Flower.
- Star Pack: Included in-game; randomly selects from Worlds 5, 6, and Star.
Course selections list[edit]
Although the courses are selected at random with each Coin Rush run, they are not completely random, as they will only appear based on which Coin Rush round the players are in. Additionally, courses from the main game are also picked in the order of one above-ground stage, one underground/underwater/Ghost House stage, and one tower/castle stage, respectively. Below is a list of which courses the players may get for each round. Note that each pack is staged in different difficulties, with the Mushroom Pack, the easiest pack, containing the courses from World 1, World 2, and World Mushroom, the Flower Pack, the middle pack, containing the courses from World 3, World 4, and World Flower, and the Star Pack, the hardest pack, containing the courses from World 5, World 6, and World Star.
| Course Pack | Course 1 | Course 2 | Course 3 |
|---|---|---|---|
| Mushroom Pack | |||
| Flower Pack | |||
| Star Pack |
Note: World 6-![]() Bowser's Castle and World
Bowser's Castle and World ![]() Star-
Star-![]() Castle (both due to the length of the Bowser/Dry Bowser battles), as well as World 3-B (due to the required use of the Mini Mushroom), are never selected. This also applies to all the Rainbow courses, Cannon courses, and the Toad House "courses".
Castle (both due to the length of the Bowser/Dry Bowser battles), as well as World 3-B (due to the required use of the Mini Mushroom), are never selected. This also applies to all the Rainbow courses, Cannon courses, and the Toad House "courses".
Downloadable content[edit]
Players were able to download additional course packs from the New Super Mario Bros. 2 shop. The shop is not accessible at first, but when SpotPass is activated and the device is played for a while, a notification on the downloadable content pops up in the home menu. When players read that notification, the Shop button appears once they open the game and select Coin Rush. Each level pack includes three courses that are played in a fixed order and not found in the actual game. The packs cost ¥200 in Japan, £2.00 in the UK, $3.00 in Australia, and $2.50 in North America. Two to three course packs were released at a time, and they can be bought individually or in a set with a combined price of the costs of each pack. Four sets of DLC packs were released, with ten course packs released total; the Gold Classics Pack was not part of any set, being released in-between to celebrate three billion coins collected instead. The final set of course packs was released on December 20, 2012.
Before December 20, 2012, the Coin Challenge Packs were the only Coin Rush packs to have leaderboards.
With the discontinuation of digital purchases for Nintendo 3DS in March 2023, it is no longer possible to buy the downloadable course packs, though they can still be downloaded by those who purchased them when they were available.
October 2nd, 2012[edit]
| Course 1 | Course 2 | Course 3 | |
|---|---|---|---|
 Gold Rush Pack |
 |
 |
 |
 Coin Challenge Pack A |
 |
 |
 |
 Nerve-Wrack Pack |
 |
 |
 |
Notice that this first set of packs was available in North America on October 4th, 2012, two days after the pack released in Europe, Oceania, and Japan.
October 25th, 2012[edit]
| Course 1 | Course 2 | Course 3 | |
|---|---|---|---|
Gold Mushroom Pack |
 |
 |
 |
Coin Challenge Pack B |
 |
 |
 |
November 27th, 2012[edit]
From its release until January 31st, 2013, the Gold Classics Pack was free to download.
| Course 1 | Course 2 | Course 3 | |
|---|---|---|---|
Gold Classics Pack |
 |
 |
 |
December 5th, 2012[edit]
| Course 1 | Course 2 | Course 3 | |
|---|---|---|---|
Coin Challenge Pack C |
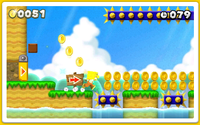 |
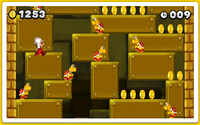 |
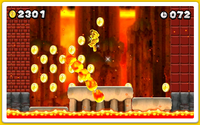 |
Platform Panic Pack |
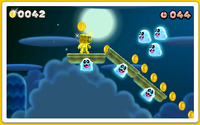 |
 |
 |
December 20th, 2012[edit]
This is the last batch of packs for New Super Mario Bros. 2. Notice that this batch of these DLC packs was released in Japan and Oceania on December 21, 2012, a day after the release in North America and Europe.
| Course 1 | Course 2 | Course 3 | |
|---|---|---|---|
Mystery Adventures Pack |
 |
 |
 |
Impossible Pack |
 |
 |
 |
StreetPass[edit]
Coin Rush also features a StreetPass functionality. Upon the completion of a Coin Rush session, the player is allowed to save a record of their run. This record will then be exchanged with other New Super Mario Bros. 2 players via StreetPass. Upon receiving another player's Coin Rush record, the receiving player may challenge the same three stages in the same order to earn more coins than the other player did. Players can only receive fifteen records at a time; if the player has fifteen records and receives more, then older records are deleted to make room. The number of coins needed to win is not revealed until the player finishes all three courses. Beating the received record earns the player a Crown Coin. Whether or not the record was beaten the first time, the other player's revealed record will add to the coin total the first time.
In addition, each player may save only one of their own records at a time. This is the record that will be sent via StreetPass. Players may overwrite their previous record by either challenging their previous record on the same three stages, or by starting a brand new Coin Rush run. At the end, the player is given the choice to overwrite their previous record. However, if the record is from a DLC pack, the player that receives it but does not own the pack cannot challenge it until it is downloaded.
Profiles[edit]
New Super Mario Bros. 2[edit]
- North American website bio: "Show off your super skills in this mode, where you'll play three levels back to back trying to earn as many coins as possible... using only one life! Your Coin Rush record is then saved and can be shared with other players via the StreetPass™ feature. These players can try to beat your score, and you can challenge theirs."
- European website bio: "The aim of this mode is to make it through three courses with just one Mario, grabbing as many coins as you can. That's right, you get one chance: no backups, no 1-Ups, and no extra credits. If you make a mistake you'll start from the beginning of the first course again, so choose your moves – and your cash-stashing strategy – carefully! The three Coin Rush stages will be randomly selected from the levels that you have already cleared, so no spoilers there! You can now purchase additional Coin Rush course packs as add-on content – find out more about add-on-content here!"
Names in other languages[edit]
| Language | Name | Meaning | Notes |
|---|---|---|---|
| Japanese | コインラッシュ[?] Koin Rasshu |
Coin Rush | |
| Chinese | 金幣衝衝衝[?] Jīnbì chōng chōng chōng |
Coin Rush Rush Rush | |
| Dutch | Muntenjacht[?] | Coin Hunt | |
| French | Pièces en folie[?] | Coin Madness | |
| German | Münzrausch[?] | Coin Rush | |
| Italian | Febbre dell'oro[?] | Gold Fever | |
| Korean | 코인 러시[?] Koin Reosi |
Coin Rush | |
| Portuguese | Caça às Moedas[?] | Coin Hunt | |
| Russian | Марафон[?] Marafon |
Marathon | |
| Spanish | Fiebre del oro[?] | Gold Fever |
