Boogie Mansion: Difference between revisions
Goolgenerade (talk | contribs) mNo edit summary |
No edit summary Tags: Mobile edit Advanced mobile edit |
||
| (31 intermediate revisions by 16 users not shown) | |||
| Line 1: | Line 1: | ||
{{level | {{level infobox | ||
|title=Boogie Mansion | |title=Boogie Mansion | ||
|image=[[ | |image=[[File:BoogieMansion.png|275px]] | ||
|code=5-S3 | |code=5-S3 | ||
|game=''[[Wario Land: Shake It!]]'' | |game=''[[Wario Land: Shake It!]]'' | ||
|track=Bad Manor (before freeing Merfle)<br>Boogie Mansion (after freeing Merfle) | |||
|before=[[Bad Manor|<<]] | |before=[[Bad Manor|<<]] | ||
|after=>> | |after=>> | ||
}} | }} | ||
'''Boogie Mansion''' is the third secret level of the [[Quiver Cliffs]] in ''[[Wario Land: Shake It!]]'', as well as the final secret level in the game and final | '''Boogie Mansion''' is the third secret level of the [[Quiver Cliffs]] in ''[[Wario Land: Shake It!]]'', as well as the final secret level in the game and, other than boss levels, the final level overall. It can be unlocked by finding the [[Secret Map]] in [[Bad Manor]]. | ||
==Layout== | |||
This level is very similar to its non-secret counterpart, [[Bad Manor]], but it is rather a comprehensive level involving many skills and elements. Moreover, all the [[treasure chest]]s here are actual living beings, namely [[Treasure Chomp]]s. The only way to defeat these and get the [[List of treasures in Wario Land: Shake It!|treasure]]s inside is to throw [[bomb]]s at them. | |||
This level is set in a dungeon full of various enemies. The sky is purple and gloomy, and walls are scattered with decaying vines. [[Shrinkbarrel]]s, [[push button]]s and [[Recapitator]]s from Bad Manor return. Wario jumps on a hanging rope, which stretches itself up and down, and enters the mansion from the top. Soon he encounters the first Treasure Chomp. Wario must use the bombs thrown by a [[Peek-a-boom]] above to get the treasure. He also needs to avoid attacks from Recapitators and a [[Spinbat]]. Next, Wario comes out and two [[Mummer]]s roam around and several hanging ropes with thorns stretch themselves automatically. The golden enemy, a Recapitator and the only golden Recapitator in the game, stands right at the top of the roof. Afterwards, Wario encounters the second Treasure Chomp, and he will have to become [[Tiny Wario|Mini Wario]] to approach the bomb. The section also features a [[trampoline]] and a ball that can be thrown at enemies and blocks. A [[Blast-O-Cannon]] at the end of the section leads to the next section. | |||
As he proceeds, Wario should use the [[Max Fastosity Dasherator]] below, rush on a row of push buttons, and topple over to reach the last Treasure Chomp. Some of the push buttons hide coin bags, while others give out [[Bandinero]]s. Eventually, Wario enters another Blast-O-Cannon which leads to the [[Merfle Barrel|caged]] [[Merfle]]. After freeing the Merfle, an alarm will go off and Wario needs to take a new route to get back. He will have to grab the hanging ropes to avoid pits of spikes, then he will have to use the Blast-O-Cannon to collect the hidden diamonds. After that, Wario enters a place with many shrinkbarrels. The area with the last few [[coin]]s can only be accessed by Mini Wario, and he can choose to rush back in either normal size or small size. | |||
==Missions== | ==Missions== | ||
{{image|section=yes|Each mission has an icon associated. They should be uploaded and added to this section.}} | |||
{{WLSI missions table | |||
|icon1=[[File:No image.png|18px]] | |||
|mission1=''Finish before the clock hits 1:30:00'' | |||
|icon2=[[File:No image.png|18px]] | |||
|mission2=''Beat the stage without taking damage'' | |||
|icon3=[[File:No image.png|18px]] | |||
|mission3=''Collect 83,000 [[coin]]s'' | |||
|icon4=[[File:No image.png|18px]] | |||
|mission4=''Pound down all [[push button]]s'' | |||
|icon5=[[File:No image.png|18px]] | |||
|mission5=''Beat the stage as [[Tiny Wario|Mini Wario]]'' | |||
|icon6=[[File:No image.png|18px]] | |||
|mission6=''Defeat the golden enemy'' | |||
|icon7=[[File:No image.png|18px]] | |||
|mission7=''Beat the stage without using the [[checkpoint block|checkpoint]]'' | |||
}} | |||
==Names in other | ==Enemies== | ||
{{ | *[[Bandinero]] (red) | ||
*[[Boomdinero]] (red) | |||
*[[Bumbleprod]] | |||
*[[Mummer]] | |||
*[[Nosedozer]] | |||
*[[Peek-a-boom]] | |||
*[[Pitchfork]] (blue) | |||
*[[Recapitator]] (normal and golden) | |||
*[[Spike Trap]] | |||
*[[Spinbat]] | |||
*[[Treasure Chomp]] | |||
==Treasures== | |||
{|class="wikitable"style="text-align:center" | |||
|- | |||
!width="5%"|Chest location | |||
!width="5%"|Treasure | |||
!width="15%"|NTSC-U description | |||
!width="15%"|PAL description | |||
|- | |||
|[[File:WLSI Boogie Mansion chest1.jpg|200px]] | |||
|[[File:WLSItreasure97.png|55px]]<br>Ghost Potion | |||
|colspan=2|''One sip and you'll turn into a ghost... Wait, isn't that just poison?'' | |||
|- | |||
|[[File:WLSI Boogie Mansion chest2.jpg|200px]] | |||
|[[File:WLSItreasure98.png|55px]]<br>Magic Lamp | |||
|''This lamp issues a thick smoke when rubbed. That's all it does. What were you expecting?'' | |||
|''This lamp issues a thick smoke when rubbed. That's all. What were you expecting?'' | |||
|- | |||
|[[File:WLSI Boogie Mansion chest3.jpg|200px]] | |||
|[[File:WLSItreasure99.png|55px]]<br>Therapeutic Music Box | |||
|''No one could remain stressed with this thing playing in the background. No one, I tell you!'' | |||
|''No one could remain stressed with this playing in the background. Except maybe for dogs.'' | |||
|} | |||
==Data== | |||
{{WLSI level data | |||
|time=2:30:00 | |||
|coins=89,550 | |||
}} | |||
==Names in other languages== | |||
{{foreign names| | |||
|Jap=スリラーハウス | |Jap=スリラーハウス | ||
|JapR=Surirā | |JapR=Surirā Hausu | ||
|JapM=Thriller House}} | |JapM=Thriller House | ||
|Ger=Gruselgruft | |||
|Ita=Magione dannata | |||
|ItaM=Cursed mansion | |||
|Fre=Manoir Hanté | |||
|FreM=Haunted Mansion | |||
}} | |||
{{WLSI}} | {{WLSI}} | ||
[[Category:Ghost Houses]] | [[Category:Ghost Houses]] | ||
[[Category: | [[Category:Mansions]] | ||
[[Category: | [[Category:Secret levels]] | ||
[[Category: | [[Category:Wario Land: Shake It! levels]] | ||
Latest revision as of 09:19, September 5, 2024
| Level | |
|---|---|
| Boogie Mansion | |

| |
| Level code | 5-S3 |
| Game | Wario Land: Shake It! |
| Music track | Bad Manor (before freeing Merfle) Boogie Mansion (after freeing Merfle) |
| << Directory of levels >> | |
Boogie Mansion is the third secret level of the Quiver Cliffs in Wario Land: Shake It!, as well as the final secret level in the game and, other than boss levels, the final level overall. It can be unlocked by finding the Secret Map in Bad Manor.
Layout[edit]
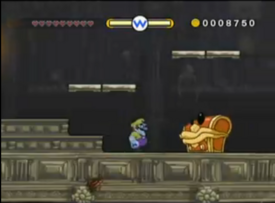
This level is very similar to its non-secret counterpart, Bad Manor, but it is rather a comprehensive level involving many skills and elements. Moreover, all the treasure chests here are actual living beings, namely Treasure Chomps. The only way to defeat these and get the treasures inside is to throw bombs at them.
This level is set in a dungeon full of various enemies. The sky is purple and gloomy, and walls are scattered with decaying vines. Shrinkbarrels, push buttons and Recapitators from Bad Manor return. Wario jumps on a hanging rope, which stretches itself up and down, and enters the mansion from the top. Soon he encounters the first Treasure Chomp. Wario must use the bombs thrown by a Peek-a-boom above to get the treasure. He also needs to avoid attacks from Recapitators and a Spinbat. Next, Wario comes out and two Mummers roam around and several hanging ropes with thorns stretch themselves automatically. The golden enemy, a Recapitator and the only golden Recapitator in the game, stands right at the top of the roof. Afterwards, Wario encounters the second Treasure Chomp, and he will have to become Mini Wario to approach the bomb. The section also features a trampoline and a ball that can be thrown at enemies and blocks. A Blast-O-Cannon at the end of the section leads to the next section.
As he proceeds, Wario should use the Max Fastosity Dasherator below, rush on a row of push buttons, and topple over to reach the last Treasure Chomp. Some of the push buttons hide coin bags, while others give out Bandineros. Eventually, Wario enters another Blast-O-Cannon which leads to the caged Merfle. After freeing the Merfle, an alarm will go off and Wario needs to take a new route to get back. He will have to grab the hanging ropes to avoid pits of spikes, then he will have to use the Blast-O-Cannon to collect the hidden diamonds. After that, Wario enters a place with many shrinkbarrels. The area with the last few coins can only be accessed by Mini Wario, and he can choose to rush back in either normal size or small size.
Missions[edit]
It has been requested that at least one image be uploaded for this section. Remove this notice only after the image(s) have been added. Specific(s): Each mission has an icon associated. They should be uploaded and added to this section.
| Icon | Mission
|
|---|---|
| Finish before the clock hits 1:30:00 | |
| Beat the stage without taking damage | |
| Collect 83,000 coins | |
| Pound down all push buttons | |
| Beat the stage as Mini Wario | |
| Defeat the golden enemy | |
| Beat the stage without using the checkpoint |
Enemies[edit]
- Bandinero (red)
- Boomdinero (red)
- Bumbleprod
- Mummer
- Nosedozer
- Peek-a-boom
- Pitchfork (blue)
- Recapitator (normal and golden)
- Spike Trap
- Spinbat
- Treasure Chomp
Treasures[edit]
Data[edit]
| Given time | Sum of coins |
|---|---|
| 2:30:00 | 89,550 |
Names in other languages[edit]
| Language | Name | Meaning | Notes |
|---|---|---|---|
| Japanese | スリラーハウス[?] Surirā Hausu |
Thriller House | |
| French | Manoir Hanté[?] | Haunted Mansion | |
| German | Gruselgruft[?] | - | |
| Italian | Magione dannata[?] | Cursed mansion |


