|
|
| (88 intermediate revisions by 25 users not shown) |
| Line 1: |
Line 1: |
| {{italic title}} | | {{italic title}} |
| {{split|Golf|Stroke & Match Golf|Golf (Game Boy)|Golf*|discussion=Talk:Golf#Split "VS. Golf" (or "Stroke & Match Golf") from Golf}}
| | {{about|the 1984 video game|other uses of the term "golf"|[[Golf (disambiguation)]]}} |
| {{about|the 1984 video game|the microgame with the same name|[[Golf (microgame)]]|the event in the 3DS version of [[Mario & Sonic at the Rio 2016 Olympic Games (Nintendo 3DS)|Mario & Sonic at the Rio 2016 Olympic Games]]|[[Golf (event)]]|an overview of all golf-related titles in the Mario series|[[Mario Golf (series)]]}} | |
| {{game infobox | | {{game infobox |
| |image=[[File:Golf Boxart.png|200px]]<br>NES box art<br> | | |image=[[File:Golf Boxart.png|200px]]<br>NES box art |
| [[File:Golf GB US.jpg|200px]]<br>Game Boy box art<br>
| |
| |developer=[[Nintendo Research & Development 2|Nintendo R&D2]]<br>[[Hudson Soft]] (PC-8801, PC-8001mkIISR, and Sharp X1 ports) | | |developer=[[Nintendo Research & Development 2|Nintendo R&D2]]<br>[[Hudson Soft]] (PC-8801, PC-8001mkIISR, and Sharp X1 ports) |
| |publisher=[[Nintendo]] | | |publisher=[[Nintendo]] |
| |release='''Famicom/NES:'''<br>{{release|Japan|May 1, 1984|USA|October 18, 1985|Europe|November 15, 1986}}'''VS. System:'''<br>{{release|Japan|August 1984|USA|October 1984 <small>(''VS. Golf'')</small>|USA|December 1984 <small>(''VS. Ladies Golf'')</small>}}'''PC-8801:'''<br>{{release|Japan|1985}}'''Sharp X1:'''<br>{{release|Japan|1985}}'''PC-8001mkIISR:'''<br>{{release|Japan|1985}}'''Famicom Disk System:'''<br>{{release|Japan|February 21, 1986}}'''Nintendo PlayChoice-10:'''<br>{{release|USA|August 1986}}'''Game Boy:'''<br>{{release|Japan|November 28, 1989|USA|March 1990|Europe|1990}}'''Virtual Boy:'''<br>{{release|Japan|August 11, 1995|USA|November 1995}}'''e-Reader:'''<br>{{release|USA|April 21, 2003}}'''Virtual Console (3DS):'''<br>{{release|Japan|June 29, 2011|USA|September 8, 2011|Europe|October 13, 2011|Australia|October 13, 2011|South Korea|July 20, 2016}}'''Virtual Console (Wii U):'''<br>{{release|USA|October 10, 2013|Europe|October 10, 2013|Australia|October 10, 2013|Japan|November 13, 2013}}'''Nintendo Switch:*'''<br>{{release|Japan|March 3, 2017|USA|March 3, 2017|Europe|March 3, 2017|Australia|March 3, 2017|HK|March 3, 2017}}<small>'''''*'''Only playable July 11.''</small><br>'''Nintendo Switch (''[[Arcade Archives]]''):'''<br>{{release|Japan|October 25, 2019|USA|October 25, 2019|Europe|October 25, 2019|Australia|October 25, 2019}} | | |release='''Famicom/NES:'''<br>{{flag list|Japan|May 1, 1984<ref>{{Cite|url=https://www.nintendo.com/jp/famicom/software/hvc-gf/index.html|title=ゴルフ|publisher=Nintendo Japan|language=ja|accessdate=August 13, 2024}}</ref>|USA|October 18, 1985|Europe|November 15, 1986}}'''PC-8801:'''<br>{{flag list|Japan|1985}}'''Sharp X1:'''<br>{{flag list|Japan|1985}}'''PC-8001mkIISR:'''<br>{{flag list|Japan|1985}}'''Famicom Disk System:'''<br>{{flag list|Japan|February 21, 1986}}'''Nintendo PlayChoice-10:'''<br>{{flag list|USA|August 1986}}'''e-Reader:'''<br>{{flag list|USA|April 21, 2003}}'''Virtual Console (Wii U):'''<br>{{flag list|USA|October 10, 2013|Europe|October 10, 2013|Australia|October 10, 2013|Japan|November 13, 2013}}'''Nintendo Switch:*'''<br>{{flag list|Japan|March 3, 2017|USA|March 3, 2017|Europe|March 3, 2017|Australia|March 3, 2017|HK|March 3, 2017}}<small>'''''*'''Playable only through July 11''</small><br> '''Nintendo Entertainment System - Nintendo Switch Online:'''<br>{{flag list|USA|July 3, 2024<ref>{{cite|author=Nintendo of America|language=en-us|date=July 3, 2024|url= youtube.com/watch?si=iXehdv_N4VuyCg9S&v=mam6BPIvLi4&feature=youtu.be|title=NES & Super NES - July 2024 Game Updates - Nintendo Switch Online|publisher=YouTube|accessdate=July 3, 2024}}</ref>|Japan|July 4, 2024<ref>{{cite|author=Nintendo 公式チャンネル|date=July 4, 2024|url=https://youtu.be/judoPb6qREg|title=ファミリーコンピュータ & スーパーファミコン & ゲームボーイ Nintendo Switch Online 追加タイトル <nowiki>[2024年7月4日]</nowiki>|publisher=YouTube|accessdate=July 4, 2024}}</ref>|Europe|July 4, 2024<ref>{{cite|author=@NintendoEurope|date=July 4, 2024|url=https://x.com/NintendoEurope/status/1808772744617545905|title="''Seven more classic #NES titles are now available for #NintendoSwitchOnline members! ☑️ Urban Champion ☑️ Golf ☑️ Donkey Kong Jr. Math ☑️ Mach Rider ☑️ The Mystery of Atlantis ☑️ Solar® Jetman ☑️ Cobra Triangle''"|publisher=X|accessdate=July 4, 2024}}</ref>|Australia|July 4, 2024<ref>{{cite|author=@NintendoAUNZ|date=July 4, 2024|url=https://x.com/NintendoAUNZ/status/1808697240703160469|title="''7 classic games are now available to play for #NintendoSwitchOnline members! #NES: ☑️ Urban Champion ☑️ Golf ☑️ Donkey Kong Jr. Math ☑️ Mach Rider ☑️ The Mystery of Atlantis ☑️ SOLAR JETMAN ☑️ COBRA TRIANGLE''"|publisher=X|accessdate=July 4, 2024}}</ref>}} |
| | |languages={{languages|en=y}} |
| |genre=[[Genre#Sports games|Sports]] | | |genre=[[Genre#Sports games|Sports]] |
| |modes=1–2 players | | |modes=1–2 players |
| |ratings={{ratings|esrb=E|pegi=3|cero=A|acb=G}} | | |ratings={{ratings|esrb=E|pegi=3|cero=A|acb=G|usk=0}} |
| |platforms=[[Nintendo Entertainment System|NES]], [[VS. System]], [[NEC PC-88]], Sharp X1, PC-8001mkIISR, [[Family Computer Disk System]], [[Nintendo PlayChoice-10]], [[Game Boy]], [[Virtual Boy]], [[e-Reader]], [[Virtual Console]] ([[Nintendo 3DS]], [[Wii U]]), [[Nintendo Switch]] | | |platforms=[[Family Computer]]/[[Nintendo Entertainment System]], {{wp|PC-8800 series|NEC PC-88}}, Sharp X1, PC-8001mkIISR, [[Family Computer Disk System]], [[Nintendo PlayChoice-10|PlayChoice-10]], [[e-Reader]], [[Virtual Console]] ([[Wii U]]), [[Nintendo Switch]], [[Nintendo Entertainment System - Nintendo Switch Online]] |
| |media={{media|nes=1|gb=1|ereader=1|3dsdl=1|wiiudl=1|switchdl=1}} | | |format={{format|fc=1|nes=1|fds=1|ereader=1|wiiudl=1|switchdl=1}} |
| |input={{input|nes=1|gb=1|gba=1|3ds=1|wiiu=1|wiiupro=1|wiiusideways=1|wiiuclassic=1|joy-con=1|switchpro=1}} | | |input={{input|fc=1|nes=1|gba=1|wiiu=1|wiiupro=1|wiiusideways=1|wiiuclassic=1|joy-con=1|joy-con-horizontal=1|switchpro=1|switchfc=1|switchnes=1|switchsnes=1}} |
| | |serials='''Famicom:'''<br>HVC-GF |
| |}} | | |}} |
| '''''Golf''''' is a game for the [[Nintendo Entertainment System|NES]] released in 1984. It is based on the {{wp|Golf|sport of the same name}}. The golfer has been identified as [[Mario]] in supplemental material, albeit not wearing his traditional shirt and overalls.<ref>''[[Mario Mania]]'', page 9.</ref> However, the game ''[[Captain Rainbow]]'' would instead identify the golfer as ''Ossan'', which happens to be a generic internal name Mario had during the development of ''[[Donkey Kong (game)|Donkey Kong]]''.<ref>http://iwataasks.nintendo.com/interviews/#/wii/mario25th/1/3</ref> Additionally, the [[Game Boy]] conversion of this game would feature Mario on the Western cover art but not the Japanese version, though the in-game sprite still appears to depict him. | | '''''Golf''''' is a game for the [[Family Computer]] and [[Nintendo Entertainment System]] released in 1984. It is based on the {{wp|Golf|sport of the same name}} and is the predecessor to the [[Mario Golf (series)|''Mario Golf'' series]]. The playable golfer, a heavyset man with a cap and mustache, has been identified as [[Mario]] in supplemental material, albeit not wearing his traditional shirt and overalls.<ref>{{cite|language=en-us|publisher=Nintendo of America|date=August 1991|title=''[[Mario Mania]]''|page=9}}</ref><ref>[[:File:SMCE page 85.jpg]]</ref> However, the game ''[[Captain Rainbow]]'' would instead identify the golfer as a separate character named "[[Ossan]]", which happens to be a generic internal name Mario had during the development of ''[[Donkey Kong (game)|Donkey Kong]]''.<ref>{{cite|url=iwataasks.nintendo.com/interviews/wii/mario25th/1/3|title=The Grand Culmination of Famicom Cartridges|publisher=Nintendo of America|language=en-us|accessdate=June 1, 2024}}</ref> On the North American box art for ''Golf'', the character is shown with red clothing, likely to make the Mario connection more clear, though this is actually the Player 2 color; a similar situation occurred in ''[[nwiki:Ice Climber|Ice Climber]]''. Installments of the ''Mario Golf'' series more clearly depict the main golfer as Mario. |
|
| |
|
| {{wp|Golf (1995 video game)|A polygonal, 3D variation of this game}}, developed by {{wp|T&E Soft}} and published by that company in Japan and [[Nintendo]] in America, was released for the [[Virtual Boy]] in 1995. In it, Mario is replaced by a generic golfer lacking a mustache. This version was titled '''''T&E Virtual Golf''''' in Japan, '''''Golf*''''' in America, and '''''Nintendo Golf''''' on the in-game loading screen. Aspects of its gameplay would be incorporated into ''[[Mario Golf (Nintendo 64)|Mario Golf]]'' for the [[Nintendo 64]].
| | [[Nintendo]] planned to release an 18-hole golfing game as a launch title for the Family Computer, but software companies declined the project and believed that it could not be done with such limited memory at the time. Then-[[HAL Laboratory]] employee [[Satoru Iwata]] was eager to prove this technical achievement and program the game himself, which required him to create a custom data compression routine.<ref name=shmup>{{cite|url=shmuplations.com/iwata|title=Satoru Iwata – 1999 Developer Interview originally featured in Used Games magazine|publisher=shmuplations|accessdate=June 1, 2024}}</ref> It is the second-released video game that Iwata programmed for Nintendo, after ''[[Pinball]]''.<ref name=shmup/> |
|
| |
|
| A copy of the original game was embedded in [[Nintendo Switch]] firmware. Activating it required the internal system clock to be set to July 11—[[Satoru Iwata]]'s {{wp|death anniversary}}—and performing his iconic "{{wp|List of Nintendo Direct presentations|directly to you}}" hand gesture with both Joy-Con controllers on the HOME Menu. If successful, a voice clip of Iwata from a [https://youtu.be/NWbYvzjAst8?t=16 Japanese 2012 presentation] would confirm the input, and an emulator of ''Golf'' with added motion control support would promptly boot up.<ref name=Flog>http://switchbrew.org/index.php?title=Flog</ref> ''Golf'' has significance as one of the first video games Iwata programmed himself for Nintendo while working at [[HAL Laboratory]].<ref>[http://shmuplations.com/iwata/ Satoru Iwata – 1999 Developer Interview originally featured in Used Games magazine, translated by shmuplations.com]</ref> This version of ''Golf'' was overwritten as of the 4.0.0 update, making it unplayable.<ref name=Flog/> Aside from the NES game's inclusion on the Switch, the international version of ''VS. Golf'' was later included on ''[[Arcade Archives]]''.<ref>Hamster Corporation. [http://www.hamster.co.jp/american_hamster/arcadearchives/switch/golf.htm ''Arcade Archives: Golf'']</ref>
| | ''Golf'' is a playable [[nookipedia:NES games|NES game]] in ''[[nookipedia:Doubutsu no Mori (game)|Doubutsu no Mori]]'' for the [[Nintendo 64]] and its [[Nintendo GameCube|GameCube]] port, ''[[nookipedia:Animal Crossing (GCN)|Animal Crossing]]''. Additionally, a copy of the original game was embedded in [[Nintendo Switch]] firmware. Activating it required the internal system clock to be set to July 11—Satoru Iwata's {{wp|death anniversary}}—and performing his iconic "{{wp|List of Nintendo Direct presentations|directly to you}}" hand gesture with both Joy-Con controllers on the HOME Menu. If the player was successful in doing so, a voice clip of Iwata from a [https://youtu.be/NWbYvzjAst8?t=16 Japanese 2012 presentation] would confirm the input, and ''Golf'' with added motion control support would promptly boot up. This version of ''Golf'' was overwritten as of the 4.0.0 update, making it unplayable. It was later added to [[Nintendo Entertainment System - Nintendo Switch Online]] in July 2024. |
|
| |
|
| ==Gameplay== | | ==Gameplay== |
| Line 25: |
Line 25: |
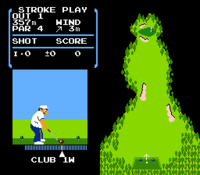
| The gameplay of ''Golf'' is relatively simple. The player is given a ball, and a map on the right side of the screen shows the hole that they must hit the ball into. The obstacles on the way are also displayed on the map. The player gets more points depending on how many times they hit the ball to get it into the hole. Many different types of clubs are also available to choose from by pressing Up/Down on the + Control Pad. Left/Right changes the direction the player will hit the ball in; on the fairway, this is limited to 16 directions and represented by an arrow, while on the putting green, the directions are unlimited and represented by a crosshair-like target. | | The gameplay of ''Golf'' is relatively simple. The player is given a ball, and a map on the right side of the screen shows the hole that they must hit the ball into. The obstacles on the way are also displayed on the map. The player gets more points depending on how many times they hit the ball to get it into the hole. Many different types of clubs are also available to choose from by pressing Up/Down on the + Control Pad. Left/Right changes the direction the player will hit the ball in; on the fairway, this is limited to 16 directions and represented by an arrow, while on the putting green, the directions are unlimited and represented by a crosshair-like target. |
|
| |
|
| Hitting the ball is done via a meter beneath the viewing field. Pressing the {{button|NES|A}} button once will make the golfer swing the club back, with the arrow on the meter moving left. Pressing it again causes them to swing forward, also moving the arrow back to the right - how far to the left it was determines the stroke's power, and if it reaches the far left, it will start moving right again on its own without a strength being yet determined. Pressing it a third time hits the ball, with the arrow's position relative to the meter's target area determining the impact point and thus how the ball will move; hitting the target on the center makes the ball go straight, hitting to the right of the target causes a left-curving hook ball, and hitting to the left of the target causes a right-curving slice ball. If the second step is skipped, the ball will merely be swiped a few yards ahead, and skipping the third step causes the club to miss entirely. The ball's direction in the air is also influenced by the direction and speed of the wind, which varies between rounds and is determined by an arrow and label found above the viewing area. | | Hitting the ball is done via a meter beneath the viewing field. Pressing the {{button|NES|A}} button once makes the golfer swing the club back, with the arrow on the meter moving left. Pressing it again causes them to swing forward, also moving the arrow back to the right—how far to the left it was determines the stroke's power, and if it reaches the far left, it will start moving right again on its own without a strength being yet determined. Pressing it a third time hits the ball, with the arrow's position relative to the meter's target area determining the impact point and thus how the ball will move; hitting the target on the center makes the ball go straight, hitting to the right of the target causes a left-curving hook ball, and hitting to the left of the target causes a right-curving slice ball. If the second step is skipped, the ball will merely be swiped a few yards ahead, and skipping the third step causes the club to miss entirely. The ball's direction in the air is also influenced by the direction and speed of the wind, which varies between rounds and is determined by an arrow and label found above the viewing area. On the putting green, meanwhile, the direction is influenced by the lay of the green, represented by arrows in different directions and densities. |
| {{br|left}}
| |
|
| |
|
| ===Description from the [[Nintendo eShop#Nintendo 3DS|Nintendo eShop]]===
| | Unlike in most golf games following it, there is no distinction between fairway and rough; as such, the only terrains are standard grass, putting green, and sand bunkers (which halve the drive), with trees representing out-of-bounds areas. |
| <blockquote>
| |
| ''Bogey, par, birdie, or Eagle.<br>
| |
| ''The score is up to you.<br>
| |
| ''Golf is 18 holes of realistic links action. Each hole has tricky hazards, so strategy is a must.<br>
| |
| ''Read the wind direction, check the distance, select a club, adjust your swing and keep your eye on the ball. Now drive it home.<br>
| |
| ''From twisting fairways and hungry sand traps to big water hazards and deceptive greens, Golf is packed with challenges.
| |
| ''This version of the game does not have multiplayer functionality.</blockquote>
| |
| {{br|left}} | | {{br|left}} |
|
| |
|
| ==Clubs== | | ==Clubs== |
| There are 14 different clubs in the game, being three {{wp|Wood (golf)|wood}}s (1W, 3W, 4W), eight {{wp|Iron (golf)|iron}}s (1I, 3I, 4I, 5I, 6I, 7I, 8I, 9I), a {{wp|pitching wedge}} (PW), a {{wp|sand wedge}} (SW), and a {{wp|putter}} (PT). Higher numbers mean lower length on the shaft and the resulting drive. Woods have a drive that causes the ball to roll a short distance after landing, and as such are most useful for covering ground. Irons have a drive that causes the ball to stop short almost immediately after landing, making them the most useful for precision with avoiding hazards. The pitching wedge gives a short-length, but very tall drive, and as such acts as a 10-level iron. The sand wedge gives a short-distance swat and is the most useful for escaping sand bunkers. The putter is unique, only rolling the ball a small amount forward along the ground to move it onto and across the putting green; its meter is shorter than the others and lacks an impact area, and is the only club available while on the green. | | There are 14 different clubs in the game: three {{wp|Wood (golf)|wood}}s (1W, 3W, 4W), eight {{wp|Iron (golf)|iron}}s (1I, 3I, 4I, 5I, 6I, 7I, 8I, 9I), a {{wp|pitching wedge}} (PW), a {{wp|sand wedge}} (SW), and a {{wp|putter}} (PT). Higher numbers mean lower length on the shaft and the resulting drive. Woods have a drive that causes the ball to roll a short distance after landing, and as such, they are most useful for covering ground. Irons have a drive that causes the ball to stop short almost immediately after landing, making them the most useful for precision with avoiding hazards. The pitching wedge gives a short-length but very tall drive, and as such, it acts as a 10-level iron. The sand wedge gives a short-distance swat and is the most useful for escaping sand bunkers. The putter is unique, only rolling the ball a small amount forward along the ground to move it onto and across the putting green; its meter is shorter than the others and lacks an impact area, and it is the only club available while the ball is on the green. |
| | | {|border=1 style="border-collapse:collapse;text-align:center;background:black;color:white;display:inline-block" |
| ==Levels==
| | |-style="background:#88D800;color:black" |
| ''Golf'' features 18 holes separated into nine labeled "OUT" and nine labeled "IN." Each hole features some green and some woods, and every hole except hole 11 features sand traps. Holes 2, 3, and 5 feature inland ponds; holes 7 and 16 feature rivers; and holes 6, 9, 13, 15, and 18 have water covering the majority of the map. The other holes do not have water. Once the player gets the ball close to the target (the actual "hole," marked by a flag) on each map, the section of the screen that previously showed a map of the entire course shows a zoomed-in map of the putting green.<ref>https://vgmaps.com/Atlas/NES/#Golf</ref><ref>https://www.youtube.com/watch?v=mjAqlIu5UvM</ref>
| | !colspan=2 style="font-size:larger"|Clubs and meters |
| | | !Fairway shot |
| ===Outward nine===
| | !Bunker shot |
| {|border=1 style="text-align:center; display:inline-block" | |
| |- | | |- |
| !colspan=2 style="background:#88D800"|<big>Hole 1</big>
| | |'''1W''' |
| | |[[File:Golf Meter 2.gif]] |
| | |240m* |
| | |120m |
| |- | | |- |
| |rowspan=3 width=50% style="background:black"|[[File:Golf NES Hole 1 map.png]] | | |'''3W''' |
| |style="background:black;color:white"|<big>'''390y'''</big> | | |[[File:Golf Meter 3.png]] |
| | |220m |
| | |110m |
| |- | | |- |
| |style="background:black;color:white"|<big>'''Par 4'''</big> | | |'''4W''' |
| | |[[File:Golf Meter 3.png]] |
| | |210m |
| | |105m |
| |- | | |- |
| !style="background:black"|[[File:Golf NES Hole 1 green.png]]
| | |'''1I''' |
| |} | | |[[File:Golf Meter 3.png]] |
| | | |195m |
| {|border=1 style="text-align:center; display:inline-block"
| | |97.5m |
| |- | | |- |
| !colspan=2 style="background:#88D800"|<big>Hole 2</big>
| | |'''3I''' |
| | |[[File:Golf Meter 3.png]] |
| | |175m |
| | |87.5m |
| |- | | |- |
| |rowspan=3 width=50% style="background:black"|[[File:Golf NES Hole 2 map.png]] | | |'''4I''' |
| |style="background:black;color:white"|<big>'''395y'''</big> | | |[[File:Golf Meter 4.png]] |
| | |165m |
| | |82.5m |
| |- | | |- |
| |style="background:black;color:white"|<big>'''Par 4'''</big> | | |'''5I''' |
| | |[[File:Golf Meter 4.png]] |
| | |155m |
| | |77.5m |
| |- | | |- |
| !style="background:black"|[[File:Golf NES Hole 2 green.png]]
| | |'''6I''' |
| |} | | |[[File:Golf Meter 4.png]] |
| | | |145m |
| {|border=1 style="text-align:center; display:inline-block"
| | |72.5m |
| |- | | |- |
| !colspan=2 style="background:#88D800"|<big>Hole 3</big>
| | |'''7I''' |
| | |[[File:Golf Meter 4.png]] |
| | |130m |
| | |65m |
| |- | | |- |
| |rowspan=3 width=50% style="background:black"|[[File:Golf NES Hole 3 map.png]] | | |'''8I''' |
| |style="background:black;color:white"|<big>'''215y'''</big> | | |[[File:Golf Meter 4.png]] |
| | |115m |
| | |57.5m |
| |- | | |- |
| |style="background:black;color:white"|<big>'''Par 3'''</big> | | |'''9I''' |
| | |[[File:Golf Meter 4.png]] |
| | |100m |
| | |50m |
| |- | | |- |
| !style="background:black"|[[File:Golf NES Hole 3 green.png]]
| | |'''PW''' |
| |} | | |[[File:Golf Meter 6.png]] |
| | | |80m |
| {|border=1 style="text-align:center; display:inline-block"
| | |40m |
| |-
| |
| !colspan=2 style="background:#88D800"|<big>Hole 4</big>
| |
| |- | | |- |
| |rowspan=3 width=50% style="background:black"|[[File:Golf NES Hole 4 map.png]] | | |'''SW''' |
| |style="background:black;color:white"|<big>'''388y'''</big> | | |[[File:Golf Meter 6.png]] |
| | |60m |
| | |30m |
| |- | | |- |
| |style="background:black;color:white"|<big>'''Par 4'''</big> | | |'''PT''' |
| |-
| | |[[File:Golf Meter PT.png]] |
| !style="background:black"|[[File:Golf NES Hole 4 green.png]]
| | |30m |
| | |15m |
| |} | | |} |
| | <nowiki>*</nowiki> - Boosted to 280m if a "super shot" is achieved through perfect timing |
|
| |
|
| {|border=1 style="text-align:center; display:inline-block" | | ==Holes== |
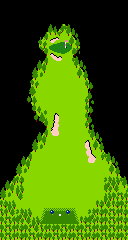
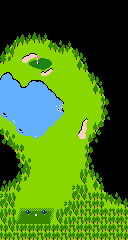
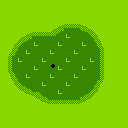
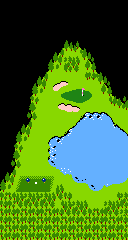
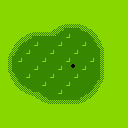
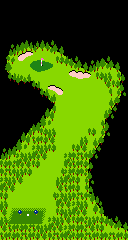
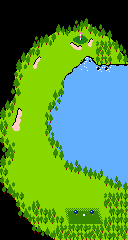
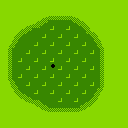
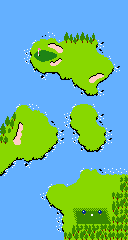
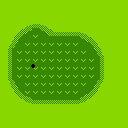
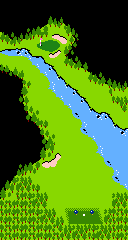
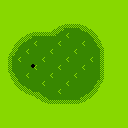
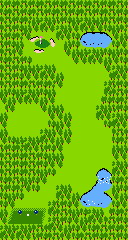
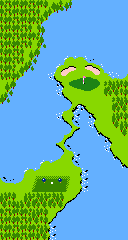
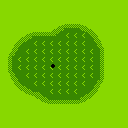
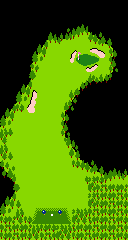
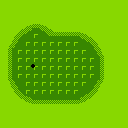
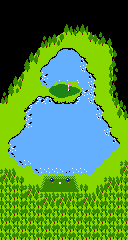
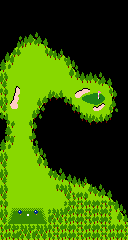
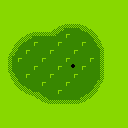
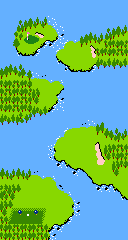
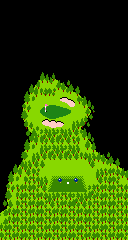
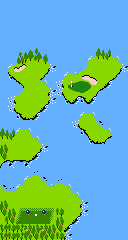
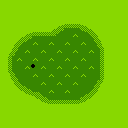
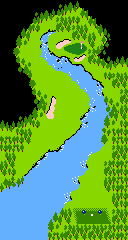
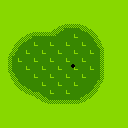
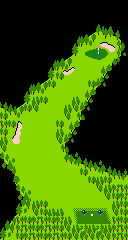
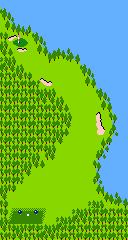
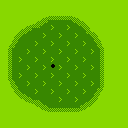
| | ''Golf'' features 18 holes separated into nine labeled "OUT" and nine labeled "IN." Each hole features some green and some woods, and every hole except hole 11 features sand traps. Holes 2, 3, and 5 feature inland ponds; holes 7 and 16 feature rivers; and holes 6, 9, 13, 15, and 18 have water covering the majority of the map. The other holes do not have water. Once the player gets the ball close to the target (the actual "hole," marked by a flag) on each map, the section of the screen that previously showed a map of the entire course shows a zoomed-in map of the putting green.<ref>{{cite|url=vgmaps.com/Atlas/NES/#Golf|title=NES Maps|publisher=The Video Game Atlas|accessdate=June 1, 2024}}</ref><ref>{{cite|url=www.youtube.com/watch?v=mjAqlIu5UvM|title= NES Game: Golf (1984 Nintendo)|author=Old Classic Retro Gaming|date=July 18, 2016|publisher=YouTube|accessdate=June 1, 2024}}</ref> |
| | ===Outward nine=== |
| | {|border=1 style="border-collapse:collapse;text-align:center;background:black;color:white;font-size:larger;display:inline-block" |
| | |-style="background:#88D800;color:black" |
| | !colspan=2|Hole 1 |
| |- | | |- |
| !colspan=2 style="background:#88D800"|<big>Hole 5</big>
| | |rowspan=3 width=50%|[[File:Golf NES Hole 1 map.png]] |
| | |'''390y''' |
| |- | | |- |
| |rowspan=3 width=50% style="background:black"|[[File:Golf NES Hole 5 map.png]] | | |'''Par 4''' |
| |style="background:black;color:white"|<big>'''491y'''</big>
| |
| |- | | |- |
| |style="background:black;color:white"|<big>'''Par 5'''</big>
| | !height=128px|[[File:Golf NES Hole 1 green.png]] |
| |-
| |
| !style="background:black"|[[File:Golf NES Hole 5 green.png]] | |
| |} | | |} |
| | | {|border=1 style="border-collapse:collapse;text-align:center;background:black;color:white;font-size:larger;display:inline-block" |
| {|border=1 style="text-align:center; display:inline-block" | | |-style="background:#88D800;color:black" |
| | !colspan=2|Hole 2 |
| |- | | |- |
| !colspan=2 style="background:#88D800"|<big>Hole 6</big>
| | |rowspan=3 width=50%|[[File:Golf NES Hole 2 map.png]] |
| | |'''395y''' |
| |- | | |- |
| |rowspan=3 width=50% style="background:black"|[[File:Golf NES Hole 6 map.png]] | | |'''Par 4''' |
| |style="background:black;color:white"|<big>'''398y'''</big>
| |
| |- | | |- |
| |style="background:black;color:white"|<big>'''Par 4'''</big>
| | !height=128px|[[File:Golf NES Hole 2 green.png]] |
| |-
| |
| !style="background:black"|[[File:Golf NES Hole 6 green.png]] | |
| |} | | |} |
| | | {|border=1 style="border-collapse:collapse;text-align:center;background:black;color:white;font-size:larger;display:inline-block" |
| {|border=1 style="text-align:center; display:inline-block" | | |-style="background:#88D800;color:black" |
| |- | | !colspan=2|Hole 3 |
| !colspan=2 style="background:#88D800"|<big>Hole 7</big>
| |
| |- | | |- |
| |rowspan=3 width=50% style="background:black"|[[File:Golf NES Hole 7 map.png]] | | |rowspan=3 width=50%|[[File:Golf NES Hole 3 map.png]] |
| |style="background:black;color:white"|<big>'''408y'''</big> | | |'''215y''' |
| |- | | |- |
| |style="background:black;color:white"|<big>'''Par 4'''</big> | | |'''Par 3''' |
| |- | | |- |
| !style="background:black"|[[File:Golf NES Hole 7 green.png]] | | !height=128px|[[File:Golf NES Hole 3 green.png]] |
| |} | | |} |
| | | {|border=1 style="border-collapse:collapse;text-align:center;background:black;color:white;font-size:larger;display:inline-block" |
| {|border=1 style="text-align:center; display:inline-block" | | |-style="background:#88D800;color:black" |
| | !colspan=2|Hole 4 |
| |- | | |- |
| !colspan=2 style="background:#88D800"|<big>Hole 8</big>
| | |rowspan=3 width=50%|[[File:Golf NES Hole 4 map.png]] |
| | |'''388y''' |
| |- | | |- |
| |rowspan=3 width=50% style="background:black"|[[File:Golf NES Hole 8 map.png]] | | |'''Par 4''' |
| |style="background:black;color:white"|<big>'''494y'''</big>
| |
| |- | | |- |
| |style="background:black;color:white"|<big>'''Par 5'''</big>
| | !height=128px|[[File:Golf NES Hole 4 green.png]] |
| |-
| |
| !style="background:black"|[[File:Golf NES Hole 8 green.png]] | |
| |} | | |} |
| | | {|border=1 style="border-collapse:collapse;text-align:center;background:black;color:white;font-size:larger;display:inline-block" |
| {|border=1 style="text-align:center; display:inline-block" | | |-style="background:#88D800;color:black" |
| |- | | !colspan=2|Hole 5 |
| !colspan=2 style="background:#88D800"|<big>Hole 9</big>
| |
| |- | | |- |
| |rowspan=3 width=50% style="background:black"|[[File:Golf NES Hole 9 map.png]] | | |rowspan=3 width=50%|[[File:Golf NES Hole 5 map.png]] |
| |style="background:black;color:white"|<big>'''247y'''</big> | | |'''491y''' |
| |- | | |- |
| |style="background:black;color:white"|<big>'''Par 3'''</big> | | |'''Par 5''' |
| |- | | |- |
| !style="background:black"|[[File:Golf NES Hole 9 green.png]] | | !height=128px|[[File:Golf NES Hole 5 green.png]] |
| |} | | |} |
| | | {|border=1 style="border-collapse:collapse;text-align:center;background:black;color:white;font-size:larger;display:inline-block" |
| ===Inward nine===
| | |-style="background:#88D800;color:black" |
| {|border=1 style="text-align:center; display:inline-block" | | !colspan=2|Hole 6 |
| |- | |
| !colspan=2 style="background:#88D800"|<big>Hole 10</big>
| |
| |- | | |- |
| |rowspan=3 width=50% style="background:black"|[[File:Golf NES Hole 10 map.png]] | | |rowspan=3 width=50%|[[File:Golf NES Hole 6 map.png]] |
| |style="background:black;color:white"|<big>'''395y'''</big> | | |'''398y''' |
| |- | | |- |
| |style="background:black;color:white"|<big>'''Par 4'''</big> | | |'''Par 4''' |
| |- | | |- |
| !style="background:black"|[[File:Golf NES Hole 10 green.png]] | | !height=128px|[[File:Golf NES Hole 6 green.png]] |
| |} | | |} |
| | | {|border=1 style="border-collapse:collapse;text-align:center;background:black;color:white;font-size:larger;display:inline-block" |
| {|border=1 style="text-align:center; display:inline-block" | | |-style="background:#88D800;color:black" |
| | !colspan=2|Hole 7 |
| |- | | |- |
| !colspan=2 style="background:#88D800"|<big>Hole 11</big>
| | |rowspan=3 width=50%|[[File:Golf NES Hole 7 map.png]] |
| | |'''408y''' |
| |- | | |- |
| |rowspan=3 width=50% style="background:black"|[[File:Golf NES Hole 11 map.png]] | | |'''Par 4''' |
| |style="background:black;color:white"|<big>'''220y'''</big>
| |
| |- | | |- |
| |style="background:black;color:white"|<big>'''Par 3'''</big>
| | !height=128px|[[File:Golf NES Hole 7 green.png]] |
| |-
| |
| !style="background:black"|[[File:Golf NES Hole 11 green.png]] | |
| |} | | |} |
| | | {|border=1 style="border-collapse:collapse;text-align:center;background:black;color:white;font-size:larger;display:inline-block" |
| {|border=1 style="text-align:center; display:inline-block" | | |-style="background:#88D800;color:black" |
| | !colspan=2|Hole 8 |
| |- | | |- |
| !colspan=2 style="background:#88D800"|<big>Hole 12</big>
| | |rowspan=3 width=50%|[[File:Golf NES Hole 8 map.png]] |
| | |'''494y''' |
| |- | | |- |
| |rowspan=3 width=50% style="background:black"|[[File:Golf NES Hole 12 map.png]] | | |'''Par 5''' |
| |style="background:black;color:white"|<big>'''410y'''</big>
| |
| |- | | |- |
| |style="background:black;color:white"|<big>'''Par 4'''</big>
| | !height=128px|[[File:Golf NES Hole 8 green.png]] |
| |-
| |
| !style="background:black"|[[File:Golf NES Hole 12 green.png]] | |
| |} | | |} |
| | | {|border=1 style="border-collapse:collapse;text-align:center;background:black;color:white;font-size:larger;display:inline-block" |
| {|border=1 style="text-align:center; display:inline-block" | | |-style="background:#88D800;color:black" |
| |- | | !colspan=2|Hole 9 |
| !colspan=2 style="background:#88D800"|<big>Hole 13</big>
| |
| |- | | |- |
| |rowspan=3 width=50% style="background:black"|[[File:Golf NES Hole 13 map.png]] | | |rowspan=3 width=50%|[[File:Golf NES Hole 9 map.png]] |
| |style="background:black;color:white"|<big>'''542y'''</big> | | |'''247y''' |
| |- | | |- |
| |style="background:black;color:white"|<big>'''Par 5'''</big> | | |'''Par 3''' |
| |- | | |- |
| !style="background:black"|[[File:Golf NES Hole 13 green.png]] | | !height=128px|[[File:Golf NES Hole 9 green.png]] |
| |} | | |} |
|
| |
|
| {|border=1 style="text-align:center; display:inline-block" | | ===Inward nine=== |
| | {|border=1 style="border-collapse:collapse;text-align:center;background:black;color:white;font-size:larger;display:inline-block" |
| | |-style="background:#88D800;color:black" |
| | !colspan=2|Hole 10 |
| |- | | |- |
| !colspan=2 style="background:#88D800"|<big>Hole 14</big>
| | |rowspan=3 width=50%|[[File:Golf NES Hole 10 map.png]] |
| | |'''395y''' |
| |- | | |- |
| |rowspan=3 width=50% style="background:black"|[[File:Golf NES Hole 14 map.png]] | | |'''Par 4''' |
| |style="background:black;color:white"|<big>'''174y'''</big>
| |
| |- | | |- |
| |style="background:black;color:white"|<big>'''Par 3'''</big>
| | !height=128px|[[File:Golf NES Hole 10 green.png]] |
| |-
| |
| !style="background:black"|[[File:Golf NES Hole 14 green.png]] | |
| |} | | |} |
| | | {|border=1 style="border-collapse:collapse;text-align:center;background:black;color:white;font-size:larger;display:inline-block" |
| {|border=1 style="text-align:center; display:inline-block" | | |-style="background:#88D800;color:black" |
| | !colspan=2|Hole 11 |
| |- | | |- |
| !colspan=2 style="background:#88D800"|<big>Hole 15</big>
| | |rowspan=3 width=50%|[[File:Golf NES Hole 11 map.png]] |
| | |'''220y''' |
| |- | | |- |
| |rowspan=3 width=50% style="background:black"|[[File:Golf NES Hole 15 map.png]] | | |'''Par 3''' |
| |style="background:black;color:white"|<big>'''343y'''</big>
| |
| |- | | |- |
| |style="background:black;color:white"|<big>'''Par 4'''</big>
| | !height=128px|[[File:Golf NES Hole 11 green.png]] |
| |-
| |
| !style="background:black"|[[File:Golf NES Hole 15 green.png]] | |
| |} | | |} |
| | | {|border=1 style="border-collapse:collapse;text-align:center;background:black;color:white;font-size:larger;display:inline-block" |
| {|border=1 style="text-align:center; display:inline-block" | | |-style="background:#88D800;color:black" |
| |- | | !colspan=2|Hole 12 |
| !colspan=2 style="background:#88D800"|<big>Hole 16</big>
| |
| |- | | |- |
| |rowspan=3 width=50% style="background:black"|[[File:Golf NES Hole 16 map.png]] | | |rowspan=3 width=50%|[[File:Golf NES Hole 12 map.png]] |
| |style="background:black;color:white"|<big>'''400y'''</big> | | |'''410y''' |
| |- | | |- |
| |style="background:black;color:white"|<big>'''Par 4'''</big> | | |'''Par 4''' |
| |- | | |- |
| !style="background:black"|[[File:Golf NES Hole 16 green.png]] | | !height=128px|[[File:Golf NES Hole 12 green.png]] |
| |} | | |} |
| | | {|border=1 style="border-collapse:collapse;text-align:center;background:black;color:white;font-size:larger;display:inline-block" |
| {|border=1 style="text-align:center; display:inline-block" | | |-style="background:#88D800;color:black" |
| |- | | !colspan=2|Hole 13 |
| !colspan=2 style="background:#88D800"|<big>Hole 17</big>
| |
| |- | | |- |
| |rowspan=3 width=50% style="background:black"|[[File:Golf NES Hole 17 map.png]] | | |rowspan=3 width=50%|[[File:Golf NES Hole 13 map.png]] |
| |style="background:black;color:white"|<big>'''466y'''</big> | | |'''542y''' |
| |- | | |- |
| |style="background:black;color:white"|<big>'''Par 4'''</big> | | |'''Par 5''' |
| |- | | |- |
| !style="background:black"|[[File:Golf NES Hole 17 green.png]] | | !height=128px|[[File:Golf NES Hole 13 green.png]] |
| |} | | |} |
| | | {|border=1 style="border-collapse:collapse;text-align:center;background:black;color:white;font-size:larger;display:inline-block" |
| {|border=1 style="text-align:center; display:inline-block" | | |-style="background:#88D800;color:black" |
| | !colspan=2|Hole 14 |
| |- | | |- |
| !colspan=2 style="background:#88D800"|<big>Hole 18</big>
| | |rowspan=3 width=50%|[[File:Golf NES Hole 14 map.png]] |
| | |'''174y''' |
| |- | | |- |
| |rowspan=3 width=50% style="background:black"|[[File:Golf NES Hole 18 map.png]] | | |'''Par 3''' |
| |style="background:black;color:white"|<big>'''513y'''</big>
| |
| |- | | |- |
| |style="background:black;color:white"|<big>'''Par 5'''</big>
| | !height=128px|[[File:Golf NES Hole 14 green.png]] |
| |-
| |
| !style="background:black"|[[File:Golf NES Hole 18 green.png]] | |
| |} | | |} |
| | | {|border=1 style="border-collapse:collapse;text-align:center;background:black;color:white;font-size:larger;display:inline-block" |
| ==VS. System==
| | |-style="background:#88D800;color:black" |
| The game was released for the [[VS. System]], for which the game is also known as '''''Stroke & Match Golf''''' or '''''VS. Golf'''''. Three versions of this game exist. All have a "stroke" version for casual play, and a "match" version for competitive play against another player or a computer opponent. The general gameplay remains the same as the NES original, with the same control scheme, physics, and clubs. All have more than 18 possible holes, though only 18 show up per round; certain holes are reserved as possible "first" and "second" holes, but the rest are entirely random.
| | !colspan=2|Hole 15 |
| | |
| The singular Japanese version features the same Mario lookalike as the NES game but has 26 holes in total. 17 of these holes are edited versions of holes from the original ''Golf'', with aspects such as the putting green, out-of-bounds trees, bunkers, and water hazards given more difficult positions. Due to its nature as an arcade game, a points system is in place, measured in hundreds; a bogey loses 100 points, a double bogey or above loses 200 points, and getting an equal score on a hole while sinking the ball second loses 50 points. Reaching zero points causes a game over, needing extra credits to continue. It has an attract mode showing gameplay.
| |
| | |
| Two international versions of the game exist, with one having the same male character as the NES version, but the other, also called '''''VS. Ladies Golf''''', instead featuring a female player. These each have 21 possible holes for each 18-hole playthrough. Most of the Men's version uses holes straight from the NES version with occasional minor changes. In the Ladies' version, a few holes are reused from the Japanese release with a few tweaks, but most are completely unique. The points system in these versions was altered to be more forgiving, with the points being measured in single and double digits depending on how many credits are inserted and losing a smaller amount proportional to the amount of strokes taken, though pars also lose a single point. Unlike the Japanese version, the golfer in these releases performs a fist-pump upon getting a birdie or lower. These releases have attract modes with instructions.
| |
| | |
| ===Holes===
| |
| The below orders for each release's holes are based on how they are stored in the respective game's ROM.<ref>[https://nerdlypleasures.blogspot.com/2019/10/nintendos-8-bit-obsession-with-golf.html Nintendo's 8-bit Obsession with Golf]. Written October 28, 2019, by Great Hierophant on Blogspot. Edited September 12, 2023 to include information on the Japanese release of ''VS. Golf'' following message by {{user|Doc von Schmeltwick}}</ref>
| |
| | |
| ====Japanese release====
| |
| {|border=1 style="text-align:center; display:inline-block" | |
| |- | | |- |
| !colspan=2 style="background:#6DDB00"|<big>Hole 1</big>
| | |rowspan=3 width=50%|[[File:Golf NES Hole 15 map.png]] |
| | |'''343y''' |
| |- | | |- |
| |rowspan=3 width=50% style="background:black"|[[File:VS Golf J Hole 1 map.png]] | | |'''Par 4''' |
| |style="background:black;color:white"|<big>'''197m'''</big>
| |
| |- | | |- |
| |style="background:black;color:white"|<big>'''Par 3'''</big>
| | !height=128px|[[File:Golf NES Hole 15 green.png]] |
| |-
| |
| !style="background:black"|[[File:VS Golf JM Hole 1-1 green.png]] | |
| |} | | |} |
| | | {|border=1 style="border-collapse:collapse;text-align:center;background:black;color:white;font-size:larger;display:inline-block" |
| {|border=1 style="text-align:center; display:inline-block" | | |-style="background:#88D800;color:black" |
| | !colspan=2|Hole 16 |
| |- | | |- |
| !colspan=2 style="background:#6DDB00"|<big>Hole 2</big>
| | |rowspan=3 width=50%|[[File:Golf NES Hole 16 map.png]] |
| | |'''400y''' |
| |- | | |- |
| |rowspan=3 width=50% style="background:black"|[[File:VS Golf J Hole 2 map.png]] | | |'''Par 4''' |
| |style="background:black;color:white"|<big>'''361m'''</big>
| |
| |- | | |- |
| |style="background:black;color:white"|<big>'''Par 4'''</big>
| | !height=128px|[[File:Golf NES Hole 16 green.png]] |
| |-
| |
| !style="background:black"|[[File:VS Golf J Hole 2 green.png]] | |
| |} | | |} |
| | | {|border=1 style="border-collapse:collapse;text-align:center;background:black;color:white;font-size:larger;display:inline-block" |
| {|border=1 style="text-align:center; display:inline-block" | | |-style="background:#88D800;color:black" |
| |- | | !colspan=2|Hole 17 |
| !colspan=2 style="background:#6DDB00"|<big>Hole 3</big>
| |
| |- | | |- |
| |rowspan=3 width=50% style="background:black"|[[File:VS Golf J Hole 3 map.png]] | | |rowspan=3 width=50%|[[File:Golf NES Hole 17 map.png]] |
| |style="background:black;color:white"|<big>'''357m'''</big> | | |'''466y''' |
| |- | | |- |
| |style="background:black;color:white"|<big>'''Par 4'''</big> | | |'''Par 4''' |
| |- | | |- |
| !style="background:black"|[[File:VS Golf J Hole 3 green.png]] | | !height=128px|[[File:Golf NES Hole 17 green.png]] |
| |} | | |} |
| | | {|border=1 style="border-collapse:collapse;text-align:center;background:black;color:white;font-size:larger;display:inline-block" |
| {|border=1 style="text-align:center; display:inline-block" | | |-style="background:#88D800;color:black" |
| |- | | !colspan=2|Hole 18 |
| !colspan=2 style="background:#6DDB00"|<big>Hole 4</big>
| |
| |- | | |- |
| |rowspan=3 width=50% style="background:black"|[[File:VS Golf J Hole 4 map.png]] | | |rowspan=3 width=50%|[[File:Golf NES Hole 18 map.png]] |
| |style="background:black;color:white"|<big>'''375m'''</big> | | |'''513y''' |
| |- | | |- |
| |style="background:black;color:white"|<big>'''Par 4'''</big> | | |'''Par 5''' |
| |- | | |- |
| !style="background:black"|[[File:VS Golf JF Hole 4-11 green.png]] | | !height=128px|[[File:Golf NES Hole 18 green.png]] |
| |} | | |} |
|
| |
| {|border=1 style="text-align:center; display:inline-block"
| |
| |-
| |
| !colspan=2 style="background:#6DDB00"|<big>Hole 5</big>
| |
| |-
| |
| |rowspan=3 width=50% style="background:black"|[[File:VS Golf J Hole 5 map.png]]
| |
| |style="background:black;color:white"|<big>'''159m'''</big>
| |
| |-
| |
| |style="background:black;color:white"|<big>'''Par 3'''</big>
| |
| |-
| |
| !style="background:black"|[[File:VS Golf JM Hole 5-17 green.png]]
| |
| |}
| |
|
| |
| {|border=1 style="text-align:center; display:inline-block"
| |
| |-
| |
| !colspan=2 style="background:#6DDB00"|<big>Hole 6</big>
| |
| |-
| |
| |rowspan=3 width=50% style="background:black"|[[File:VS Golf J Hole 6 map.png]]
| |
| |style="background:black;color:white"|<big>'''361m'''</big>
| |
| |-
| |
| |style="background:black;color:white"|<big>'''Par 4'''</big>
| |
| |-
| |
| !style="background:black"|[[File:VS Golf JM Hole 6-6 green.png]]
| |
| |}
| |
|
| |
| {|border=1 style="text-align:center; display:inline-block"
| |
| |-
| |
| !colspan=2 style="background:#6DDB00"|<big>Hole 7</big>
| |
| |-
| |
| |rowspan=3 width=50% style="background:black"|[[File:VS Golf J Hole 7 map.png]]
| |
| |style="background:black;color:white"|<big>'''373m'''</big>
| |
| |-
| |
| |style="background:black;color:white"|<big>'''Par 4'''</big>
| |
| |-
| |
| !style="background:black"|[[File:VS Golf J Hole 7 green.png]]
| |
| |}
| |
|
| |
| {|border=1 style="text-align:center; display:inline-block"
| |
| |-
| |
| !colspan=2 style="background:#6DDB00"|<big>Hole 8</big>
| |
| |-
| |
| |rowspan=3 width=50% style="background:black"|[[File:VS Golf J Hole 8 map.png]]
| |
| |style="background:black;color:white"|<big>'''449m'''</big>
| |
| |-
| |
| |style="background:black;color:white"|<big>'''Par 5'''</big>
| |
| |-
| |
| !style="background:black"|[[File:VS Golf J Hole 8 green.png]]
| |
| |}
| |
|
| |
| {|border=1 style="text-align:center; display:inline-block"
| |
| |-
| |
| !colspan=2 style="background:#6DDB00"|<big>Hole 9</big>
| |
| |-
| |
| |rowspan=3 width=50% style="background:black"|[[File:VS Golf J Hole 9 map.png]]
| |
| |style="background:black;color:white"|<big>'''517m'''</big>
| |
| |-
| |
| |style="background:black;color:white"|<big>'''Par 5'''</big>
| |
| |-
| |
| !style="background:black"|[[File:VS Golf JMF Hole 9-9-9 green.png]]
| |
| |}
| |
|
| |
| {|border=1 style="text-align:center; display:inline-block"
| |
| |-
| |
| !colspan=2 style="background:#6DDB00"|<big>Hole 10</big>
| |
| |-
| |
| |rowspan=3 width=50% style="background:black"|[[File:VS Golf J Hole 10 map.png]]
| |
| |style="background:black;color:white"|<big>'''421m'''</big>
| |
| |-
| |
| |style="background:black;color:white"|<big>'''Par 4'''</big>
| |
| |-
| |
| !style="background:black"|[[File:VS Golf J Hole 10 green.png]]
| |
| |}
| |
|
| |
| {|border=1 style="text-align:center; display:inline-block"
| |
| |-
| |
| !colspan=2 style="background:#6DDB00"|<big>Hole 11</big>
| |
| |-
| |
| |rowspan=3 width=50% style="background:black"|[[File:VS Golf J Hole 11 map.png]]
| |
| |style="background:black;color:white"|<big>'''469m'''</big>
| |
| |-
| |
| |style="background:black;color:white"|<big>'''Par 5'''</big>
| |
| |-
| |
| !style="background:black"|[[File:VS Golf JM Hole 11-4 green.png]]
| |
| |}
| |
|
| |
| {|border=1 style="text-align:center; display:inline-block"
| |
| |-
| |
| !colspan=2 style="background:#6DDB00"|<big>Hole 12</big>
| |
| |-
| |
| |rowspan=3 width=50% style="background:black"|[[File:VS Golf JM Hole 12-12 map.png]]
| |
| |style="background:black;color:white"|<big>'''431m'''</big>
| |
| |-
| |
| |style="background:black;color:white"|<big>'''Par 5'''</big>
| |
| |-
| |
| !style="background:black"|[[File:VS Golf JMF Hole 12-12-12 green.png]]
| |
| |}
| |
|
| |
| {|border=1 style="text-align:center; display:inline-block"
| |
| |-
| |
| !colspan=2 style="background:#6DDB00"|<big>Hole 13</big>
| |
| |-
| |
| |rowspan=3 width=50% style="background:black"|[[File:VS Golf J Hole 13 map.png]]
| |
| |style="background:black;color:white"|<big>'''215m'''</big>
| |
| |-
| |
| |style="background:black;color:white"|<big>'''Par 3'''</big>
| |
| |-
| |
| !style="background:black"|[[File:VS Golf J Hole 13 green.png]]
| |
| |}
| |
|
| |
| {|border=1 style="text-align:center; display:inline-block"
| |
| |-
| |
| !colspan=2 style="background:#6DDB00"|<big>Hole 14</big>
| |
| |-
| |
| |rowspan=3 width=50% style="background:black"|[[File:VS Golf J Hole 14 map.png]]
| |
| |style="background:black;color:white"|<big>'''389m'''</big>
| |
| |-
| |
| |style="background:black;color:white"|<big>'''Par 4'''</big>
| |
| |-
| |
| !style="background:black"|[[File:VS Golf J Hole 14 green.png]]
| |
| |}
| |
|
| |
| {|border=1 style="text-align:center; display:inline-block"
| |
| |-
| |
| !colspan=2 style="background:#6DDB00"|<big>Hole 15</big>
| |
| |-
| |
| |rowspan=3 width=50% style="background:black"|[[File:VS Golf J Hole 15 map.png]]
| |
| |style="background:black;color:white"|<big>'''505m'''</big>
| |
| |-
| |
| |style="background:black;color:white"|<big>'''Par 5'''</big>
| |
| |-
| |
| !style="background:black"|[[File:VS Golf JMF Hole 15-14-14 green.png]]
| |
| |}
| |
|
| |
| {|border=1 style="text-align:center; display:inline-block"
| |
| |-
| |
| !colspan=2 style="background:#6DDB00"|<big>Hole 16</big>
| |
| |-
| |
| |rowspan=3 width=50% style="background:black"|[[File:VS Golf J Hole 16 map.png]]
| |
| |style="background:black;color:white"|<big>'''376m'''</big>
| |
| |-
| |
| |style="background:black;color:white"|<big>'''Par 4'''</big>
| |
| |-
| |
| !style="background:black"|[[File:VS Golf JMF Hole 16-15-15 green.png]]
| |
| |}
| |
|
| |
| {|border=1 style="text-align:center; display:inline-block"
| |
| |-
| |
| !colspan=2 style="background:#6DDB00"|<big>Hole 17</big>
| |
| |-
| |
| |rowspan=3 width=50% style="background:black"|[[File:VS Golf JM Hole 17-16 map.png]]
| |
| |style="background:black;color:white"|<big>'''371m'''</big>
| |
| |-
| |
| |style="background:black;color:white"|<big>'''Par 4'''</big>
| |
| |-
| |
| !style="background:black"|[[File:VS Golf J Hole 17 green.png]]
| |
| |}
| |
|
| |
| {|border=1 style="text-align:center; display:inline-block"
| |
| |-
| |
| !colspan=2 style="background:#6DDB00"|<big>Hole 18</big>
| |
| |-
| |
| |rowspan=3 width=50% style="background:black"|[[File:VS Golf J Hole 18 map.png]]
| |
| |style="background:black;color:white"|<big>'''374m'''</big>
| |
| |-
| |
| |style="background:black;color:white"|<big>'''Par 4'''</big>
| |
| |-
| |
| !style="background:black"|[[File:VS Golf J Hole 18 green.png]]
| |
| |}
| |
|
| |
| {|border=1 style="text-align:center; display:inline-block"
| |
| |-
| |
| !colspan=2 style="background:#6DDB00"|<big>Hole 19</big>
| |
| |-
| |
| |rowspan=3 width=50% style="background:black"|[[File:VS Golf J Hole 19 map.png]]
| |
| |style="background:black;color:white"|<big>'''366m'''</big>
| |
| |-
| |
| |style="background:black;color:white"|<big>'''Par 4'''</big>
| |
| |-
| |
| !style="background:black"|[[File:VS Golf JMF Hole 19-7-7 green.png]]
| |
| |}
| |
|
| |
| {|border=1 style="text-align:center; display:inline-block"
| |
| |-
| |
| !colspan=2 style="background:#6DDB00"|<big>Hole 20</big>
| |
| |-
| |
| |rowspan=3 width=50% style="background:black"|[[File:VS Golf J Hole 20 map.png]]
| |
| |style="background:black;color:white"|<big>'''459m'''</big>
| |
| |-
| |
| |style="background:black;color:white"|<big>'''Par 5'''</big>
| |
| |-
| |
| !style="background:black"|[[File:VS Golf J Hole 20 green.png]]
| |
| |}
| |
|
| |
| {|border=1 style="text-align:center; display:inline-block"
| |
| |-
| |
| !colspan=2 style="background:#6DDB00"|<big>Hole 21</big>
| |
| |-
| |
| |rowspan=3 width=50% style="background:black"|[[File:VS Golf J Hole 21 map.png]]
| |
| |style="background:black;color:white"|<big>'''226m'''</big>
| |
| |-
| |
| |style="background:black;color:white"|<big>'''Par 3'''</big>
| |
| |-
| |
| !style="background:black"|[[File:VS Golf J Hole 21 green.png]]
| |
| |}
| |
|
| |
| {|border=1 style="text-align:center; display:inline-block"
| |
| |-
| |
| !colspan=2 style="background:#6DDB00"|<big>Hole 22</big>
| |
| |-
| |
| |rowspan=3 width=50% style="background:black"|[[File:VS Golf J Hole 22 map.png]]
| |
| |style="background:black;color:white"|<big>'''496m'''</big>
| |
| |-
| |
| |style="background:black;color:white"|<big>'''Par 5'''</big>
| |
| |-
| |
| !style="background:black"|[[File:VS Golf J Hole 22 green.png]]
| |
| |}
| |
|
| |
| {|border=1 style="text-align:center; display:inline-block"
| |
| |-
| |
| !colspan=2 style="background:#6DDB00"|<big>Hole 23</big>
| |
| |-
| |
| |rowspan=3 width=50% style="background:black"|[[File:VS Golf J Hole 23 map.png]]
| |
| |style="background:black;color:white"|<big>'''200m'''</big>
| |
| |-
| |
| |style="background:black;color:white"|<big>'''Par 3'''</big>
| |
| |-
| |
| !style="background:black"|[[File:VS Golf J Hole 23 green.png]]
| |
| |}
| |
|
| |
| {|border=1 style="text-align:center; display:inline-block"
| |
| |-
| |
| !colspan=2 style="background:#6DDB00"|<big>Hole 24</big>
| |
| |-
| |
| |rowspan=3 width=50% style="background:black"|[[File:VS Golf JM Hole 24-20 map.png]]
| |
| |style="background:black;color:white"|<big>'''384m'''</big>
| |
| |-
| |
| |style="background:black;color:white"|<big>'''Par 4'''</big>
| |
| |-
| |
| !style="background:black"|[[File:VS Golf JM Hole 24-20 green.png]]
| |
| |}
| |
|
| |
| {|border=1 style="text-align:center; display:inline-block"
| |
| |-
| |
| !colspan=2 style="background:#6DDB00"|<big>Hole 25</big>
| |
| |-
| |
| |rowspan=3 width=50% style="background:black"|[[File:VS Golf J Hole 25 map.png]]
| |
| |style="background:black;color:white"|<big>'''342m'''</big>
| |
| |-
| |
| |style="background:black;color:white"|<big>'''Par 4'''</big>
| |
| |-
| |
| !style="background:black"|[[File:VS Golf JM Hole 25-21 green.png]]
| |
| |}
| |
|
| |
| {|border=1 style="text-align:center; display:inline-block"
| |
| |-
| |
| !colspan=2 style="background:#6DDB00"|<big>Hole 26</big>
| |
| |-
| |
| |rowspan=3 width=50% style="background:black"|[[File:VS Golf J Hole 26 map.png]]
| |
| |style="background:black;color:white"|<big>'''314m'''</big>
| |
| |-
| |
| |style="background:black;color:white"|<big>'''Par 4'''</big>
| |
| |-
| |
| !style="background:black"|[[File:VS Golf J Hole 26 green.png]]
| |
| |}
| |
|
| |
| ====International release (Men's)====
| |
| {|border=1 style="text-align:center; display:inline-block"
| |
| |-
| |
| !colspan=2 style="background:#6DDB00"|<big>Hole 1</big>
| |
| |-
| |
| |rowspan=3 width=50% style="background:black"|[[File:VS Golf M Hole 1 map.png]]
| |
| |style="background:black;color:white"|<big>'''215y'''</big>
| |
| |-
| |
| |style="background:black;color:white"|<big>'''Par 3'''</big>
| |
| |-
| |
| !style="background:black"|[[File:VS Golf JM Hole 1-1 green.png]]
| |
| |}
| |
|
| |
| {|border=1 style="text-align:center; display:inline-block"
| |
| |-
| |
| !colspan=2 style="background:#6DDB00"|<big>Hole 2</big>
| |
| |-
| |
| |rowspan=3 width=50% style="background:black"|[[File:VS Golf M Hole 2 map.png]]
| |
| |style="background:black;color:white"|<big>'''395y'''</big>
| |
| |-
| |
| |style="background:black;color:white"|<big>'''Par 4'''</big>
| |
| |-
| |
| !style="background:black"|[[File:VS Golf MF Hole 2-2 green.png]]
| |
| |}
| |
|
| |
| {|border=1 style="text-align:center; display:inline-block"
| |
| |-
| |
| !colspan=2 style="background:#6DDB00"|<big>Hole 3</big>
| |
| |-
| |
| |rowspan=3 width=50% style="background:black"|[[File:VS Golf M Hole 3 map.png]]
| |
| |style="background:black;color:white"|<big>'''408y'''</big>
| |
| |-
| |
| |style="background:black;color:white"|<big>'''Par 4'''</big>
| |
| |-
| |
| !style="background:black"|[[File:VS Golf MF Hole 3-3 green.png]]
| |
| |}
| |
|
| |
| {|border=1 style="text-align:center; display:inline-block"
| |
| |-
| |
| !colspan=2 style="background:#6DDB00"|<big>Hole 4</big>
| |
| |-
| |
| |rowspan=3 width=50% style="background:black"|[[File:VS Golf M Hole 4 map.png]]
| |
| |style="background:black;color:white"|<big>'''512y'''</big>
| |
| |-
| |
| |style="background:black;color:white"|<big>'''Par 5'''</big>
| |
| |-
| |
| !style="background:black"|[[File:VS Golf JM Hole 11-4 green.png]]
| |
| |}
| |
|
| |
| {|border=1 style="text-align:center; display:inline-block"
| |
| |-
| |
| !colspan=2 style="background:#6DDB00"|<big>Hole 5</big>
| |
| |-
| |
| |rowspan=3 width=50% style="background:black"|[[File:VS Golf M Hole 5 map.png]]
| |
| |style="background:black;color:white"|<big>'''409y'''</big>
| |
| |-
| |
| |style="background:black;color:white"|<big>'''Par 4'''</big>
| |
| |-
| |
| !style="background:black"|[[File:VS Golf M Hole 5 green.png]]
| |
| |}
| |
|
| |
| {|border=1 style="text-align:center; display:inline-block"
| |
| |-
| |
| !colspan=2 style="background:#6DDB00"|<big>Hole 6</big>
| |
| |-
| |
| |rowspan=3 width=50% style="background:black"|[[File:VS Golf M Hole 6 map.png]]
| |
| |style="background:black;color:white"|<big>'''395y'''</big>
| |
| |-
| |
| |style="background:black;color:white"|<big>'''Par 4'''</big>
| |
| |-
| |
| !style="background:black"|[[File:VS Golf JM Hole 6-6 green.png]]
| |
| |}
| |
|
| |
| {|border=1 style="text-align:center; display:inline-block"
| |
| |-
| |
| !colspan=2 style="background:#6DDB00"|<big>Hole 7</big>
| |
| |-
| |
| |rowspan=3 width=50% style="background:black"|[[File:VS Golf M Hole 7 map.png]]
| |
| |style="background:black;color:white"|<big>'''400y'''</big>
| |
| |-
| |
| |style="background:black;color:white"|<big>'''Par 4'''</big>
| |
| |-
| |
| !style="background:black"|[[File:VS Golf JMF Hole 19-7-7 green.png]]
| |
| |}
| |
|
| |
| {|border=1 style="text-align:center; display:inline-block"
| |
| |-
| |
| !colspan=2 style="background:#6DDB00"|<big>Hole 8</big>
| |
| |-
| |
| |rowspan=3 width=50% style="background:black"|[[File:VS Golf M Hole 8 map.png]]
| |
| |style="background:black;color:white"|<big>'''343y'''</big>
| |
| |-
| |
| |style="background:black;color:white"|<big>'''Par 4'''</big>
| |
| |-
| |
| !style="background:black"|[[File:VS Golf MF Hole 8-8 green.png]]
| |
| |}
| |
|
| |
| {|border=1 style="text-align:center; display:inline-block"
| |
| |-
| |
| !colspan=2 style="background:#6DDB00"|<big>Hole 9</big>
| |
| |-
| |
| |rowspan=3 width=50% style="background:black"|[[File:VS Golf M Hole 9 map.png]]
| |
| |style="background:black;color:white"|<big>'''491y'''</big>
| |
| |-
| |
| |style="background:black;color:white"|<big>'''Par 5'''</big>
| |
| |-
| |
| !style="background:black"|[[File:VS Golf JMF Hole 9-9-9 green.png]]
| |
| |}
| |
|
| |
| {|border=1 style="text-align:center; display:inline-block"
| |
| |-
| |
| !colspan=2 style="background:#6DDB00"|<big>Hole 10</big>
| |
| |-
| |
| |rowspan=3 width=50% style="background:black"|[[File:VS Golf M Hole 10 map.png]]
| |
| |style="background:black;color:white"|<big>'''390y'''</big>
| |
| |-
| |
| |style="background:black;color:white"|<big>'''Par 4'''</big>
| |
| |-
| |
| !style="background:black"|[[File:VS Golf MF Hole 10-10 green.png]]
| |
| |}
| |
|
| |
| {|border=1 style="text-align:center; display:inline-block"
| |
| |-
| |
| !colspan=2 style="background:#6DDB00"|<big>Hole 11</big>
| |
| |-
| |
| |rowspan=3 width=50% style="background:black"|[[File:VS Golf M Hole 11 map.png]]
| |
| |style="background:black;color:white"|<big>'''410y'''</big>
| |
| |-
| |
| |style="background:black;color:white"|<big>'''Par 4'''</big>
| |
| |-
| |
| !style="background:black"|[[File:VS Golf M Hole 11 green.png]]
| |
| |}
| |
|
| |
| {|border=1 style="text-align:center; display:inline-block"
| |
| |-
| |
| !colspan=2 style="background:#6DDB00"|<big>Hole 12</big>
| |
| |-
| |
| |rowspan=3 width=50% style="background:black"|[[File:VS Golf JM Hole 12-12 map.png]]
| |
| |style="background:black;color:white"|<big>'''471y'''</big>
| |
| |-
| |
| |style="background:black;color:white"|<big>'''Par 5'''</big>
| |
| |-
| |
| !style="background:black"|[[File:VS Golf JMF Hole 12-12-12 green.png]]
| |
| |}
| |
|
| |
| {|border=1 style="text-align:center; display:inline-block"
| |
| |-
| |
| !colspan=2 style="background:#6DDB00"|<big>Hole 13</big>
| |
| |-
| |
| |rowspan=3 width=50% style="background:black"|[[File:VS Golf M Hole 13 map.png]]
| |
| |style="background:black;color:white"|<big>'''218y'''</big>
| |
| |-
| |
| |style="background:black;color:white"|<big>'''Par 3'''</big>
| |
| |-
| |
| !style="background:black"|[[File:VS Golf MF Hole 13-13 green.png]]
| |
| |}
| |
|
| |
| {|border=1 style="text-align:center; display:inline-block"
| |
| |-
| |
| !colspan=2 style="background:#6DDB00"|<big>Hole 14</big>
| |
| |-
| |
| |rowspan=3 width=50% style="background:black"|[[File:VS Golf M Hole 14 map.png]]
| |
| |style="background:black;color:white"|<big>'''552y'''</big>
| |
| |-
| |
| |style="background:black;color:white"|<big>'''Par 5'''</big>
| |
| |-
| |
| !style="background:black"|[[File:VS Golf JMF Hole 15-14-14 green.png]]
| |
| |}
| |
|
| |
| {|border=1 style="text-align:center; display:inline-block"
| |
| |-
| |
| !colspan=2 style="background:#6DDB00"|<big>Hole 15</big>
| |
| |-
| |
| |rowspan=3 width=50% style="background:black"|[[File:VS Golf M Hole 15 map.png]]
| |
| |style="background:black;color:white"|<big>'''398y'''</big>
| |
| |-
| |
| |style="background:black;color:white"|<big>'''Par 4'''</big>
| |
| |-
| |
| !style="background:black"|[[File:VS Golf JMF Hole 16-15-15 green.png]]
| |
| |}
| |
|
| |
| {|border=1 style="text-align:center; display:inline-block"
| |
| |-
| |
| !colspan=2 style="background:#6DDB00"|<big>Hole 16</big>
| |
| |-
| |
| |rowspan=3 width=50% style="background:black"|[[File:VS Golf JM Hole 17-16 map.png]]
| |
| |style="background:black;color:white"|<big>'''406y'''</big>
| |
| |-
| |
| |style="background:black;color:white"|<big>'''Par 4'''</big>
| |
| |-
| |
| !style="background:black"|[[File:VS Golf MF Hole 16-16 green.png]]
| |
| |}
| |
|
| |
| {|border=1 style="text-align:center; display:inline-block"
| |
| |-
| |
| !colspan=2 style="background:#6DDB00"|<big>Hole 17</big>
| |
| |-
| |
| |rowspan=3 width=50% style="background:black"|[[File:VS Golf M Hole 17 map.png]]
| |
| |style="background:black;color:white"|<big>'''174y'''</big>
| |
| |-
| |
| |style="background:black;color:white"|<big>'''Par 3'''</big>
| |
| |-
| |
| !style="background:black"|[[File:VS Golf JM Hole 5-17 green.png]]
| |
| |}
| |
|
| |
| {|border=1 style="text-align:center; display:inline-block"
| |
| |-
| |
| !colspan=2 style="background:#6DDB00"|<big>Hole 18</big>
| |
| |-
| |
| |rowspan=3 width=50% style="background:black"|[[File:VS Golf M Hole 18 map.png]]
| |
| |style="background:black;color:white"|<big>'''542y'''</big>
| |
| |-
| |
| |style="background:black;color:white"|<big>'''Par 5'''</big>
| |
| |-
| |
| !style="background:black"|[[File:VS Golf M Hole 18 green.png]]
| |
| |}
| |
|
| |
| {|border=1 style="text-align:center; display:inline-block"
| |
| |-
| |
| !colspan=2 style="background:#6DDB00"|<big>Hole 19</big>
| |
| |-
| |
| |rowspan=3 width=50% style="background:black"|[[File:VS Golf M Hole 19 map.png]]
| |
| |style="background:black;color:white"|<big>'''247y'''</big>
| |
| |-
| |
| |style="background:black;color:white"|<big>'''Par 3'''</big>
| |
| |-
| |
| !style="background:black"|[[File:VS Golf MF Hole 19-19 green.png]]
| |
| |}
| |
|
| |
| {|border=1 style="text-align:center; display:inline-block"
| |
| |-
| |
| !colspan=2 style="background:#6DDB00"|<big>Hole 20</big>
| |
| |-
| |
| |rowspan=3 width=50% style="background:black"|[[File:VS Golf JM Hole 24-20 map.png]]
| |
| |style="background:black;color:white"|<big>'''420y'''</big>
| |
| |-
| |
| |style="background:black;color:white"|<big>'''Par 4'''</big>
| |
| |-
| |
| !style="background:black"|[[File:VS Golf JM Hole 24-20 green.png]]
| |
| |}
| |
|
| |
| {|border=1 style="text-align:center; display:inline-block"
| |
| |-
| |
| !colspan=2 style="background:#6DDB00"|<big>Hole 21</big>
| |
| |-
| |
| |rowspan=3 width=50% style="background:black"|[[File:VS Golf M Hole 21 map.png]]
| |
| |style="background:black;color:white"|<big>'''374y'''</big>
| |
| |-
| |
| |style="background:black;color:white"|<big>'''Par 4'''</big>
| |
| |-
| |
| !style="background:black"|[[File:VS Golf JM Hole 25-21 green.png]]
| |
| |}
| |
|
| |
| ====International release (Ladies')====
| |
| {|border=1 style="text-align:center; display:inline-block"
| |
| |-
| |
| !colspan=2 style="background:#6DDB00"|<big>Hole 1</big>
| |
| |-
| |
| |rowspan=3 width=50% style="background:black"|[[File:VS Golf F Hole 1 map.png]]
| |
| |style="background:black;color:white"|<big>'''411y'''</big>
| |
| |-
| |
| |style="background:black;color:white"|<big>'''Par 4'''</big>
| |
| |-
| |
| !style="background:black"|[[File:VS Golf F Hole 1 green.png]]
| |
| |}
| |
|
| |
| {|border=1 style="text-align:center; display:inline-block"
| |
| |-
| |
| !colspan=2 style="background:#6DDB00"|<big>Hole 1</big>
| |
| |-
| |
| |rowspan=3 width=50% style="background:black"|[[File:VS Golf F Hole 2 map.png]]
| |
| |style="background:black;color:white"|<big>'''398y'''</big>
| |
| |-
| |
| |style="background:black;color:white"|<big>'''Par 4'''</big>
| |
| |-
| |
| !style="background:black"|[[File:VS Golf MF Hole 2-2 green.png]]
| |
| |}
| |
|
| |
| {|border=1 style="text-align:center; display:inline-block"
| |
| |-
| |
| !colspan=2 style="background:#6DDB00"|<big>Hole 3</big>
| |
| |-
| |
| |rowspan=3 width=50% style="background:black"|[[File:VS Golf F Hole 3 map.png]]
| |
| |style="background:black;color:white"|<big>'''418y'''</big>
| |
| |-
| |
| |style="background:black;color:white"|<big>'''Par 4'''</big>
| |
| |-
| |
| !style="background:black"|[[File:VS Golf MF Hole 3-3 green.png]]
| |
| |}
| |
|
| |
| {|border=1 style="text-align:center; display:inline-block"
| |
| |-
| |
| !colspan=2 style="background:#6DDB00"|<big>Hole 4</big>
| |
| |-
| |
| |rowspan=3 width=50% style="background:black"|[[File:VS Golf F Hole 4 map.png]]
| |
| |style="background:black;color:white"|<big>'''398y'''</big>
| |
| |-
| |
| |style="background:black;color:white"|<big>'''Par 4'''</big>
| |
| |-
| |
| !style="background:black"|[[File:VS Golf F Hole 4 green.png]]
| |
| |}
| |
|
| |
| {|border=1 style="text-align:center; display:inline-block"
| |
| |-
| |
| !colspan=2 style="background:#6DDB00"|<big>Hole 5</big>
| |
| |-
| |
| |rowspan=3 width=50% style="background:black"|[[File:VS Golf F Hole 5 map.png]]
| |
| |style="background:black;color:white"|<big>'''393y'''</big>
| |
| |-
| |
| |style="background:black;color:white"|<big>'''Par 4'''</big>
| |
| |-
| |
| !style="background:black"|[[File:VS Golf F Hole 5 green.png]]
| |
| |}
| |
|
| |
| {|border=1 style="text-align:center; display:inline-block"
| |
| |-
| |
| !colspan=2 style="background:#6DDB00"|<big>Hole 6</big>
| |
| |-
| |
| |rowspan=3 width=50% style="background:black"|[[File:VS Golf F Hole 6 map.png]]
| |
| |style="background:black;color:white"|<big>'''523y'''</big>
| |
| |-
| |
| |style="background:black;color:white"|<big>'''Par 5'''</big>
| |
| |-
| |
| !style="background:black"|[[File:VS Golf F Hole 6 green.png]]
| |
| |}
| |
|
| |
| {|border=1 style="text-align:center; display:inline-block"
| |
| |-
| |
| !colspan=2 style="background:#6DDB00"|<big>Hole 7</big>
| |
| |-
| |
| |rowspan=3 width=50% style="background:black"|[[File:VS Golf F Hole 7 map.png]]
| |
| |style="background:black;color:white"|<big>'''429y'''</big>
| |
| |-
| |
| |style="background:black;color:white"|<big>'''Par 4'''</big>
| |
| |-
| |
| !style="background:black"|[[File:VS Golf JMF Hole 19-7-7 green.png]]
| |
| |}
| |
|
| |
| {|border=1 style="text-align:center; display:inline-block"
| |
| |-
| |
| !colspan=2 style="background:#6DDB00"|<big>Hole 8</big>
| |
| |-
| |
| |rowspan=3 width=50% style="background:black"|[[File:VS Golf F Hole 8 map.png]]
| |
| |style="background:black;color:white"|<big>'''570y'''</big>
| |
| |-
| |
| |style="background:black;color:white"|<big>'''Par 5'''</big>
| |
| |-
| |
| !style="background:black"|[[File:VS Golf MF Hole 8-8 green.png]]
| |
| |}
| |
|
| |
| {|border=1 style="text-align:center; display:inline-block"
| |
| |-
| |
| !colspan=2 style="background:#6DDB00"|<big>Hole 9</big>
| |
| |-
| |
| |rowspan=3 width=50% style="background:black"|[[File:VS Golf F Hole 9 map.png]]
| |
| |style="background:black;color:white"|<big>'''435y'''</big>
| |
| |-
| |
| |style="background:black;color:white"|<big>'''Par 5'''</big>
| |
| |-
| |
| !style="background:black"|[[File:VS Golf JMF Hole 9-9-9 green.png]]
| |
| |}
| |
|
| |
| {|border=1 style="text-align:center; display:inline-block"
| |
| |-
| |
| !colspan=2 style="background:#6DDB00"|<big>Hole 10</big>
| |
| |-
| |
| |rowspan=3 width=50% style="background:black"|[[File:VS Golf F Hole 10 map.png]]
| |
| |style="background:black;color:white"|<big>'''463y'''</big>
| |
| |-
| |
| |style="background:black;color:white"|<big>'''Par 5'''</big>
| |
| |-
| |
| !style="background:black"|[[File:VS Golf MF Hole 10-10 green.png]]
| |
| |}
| |
|
| |
| {|border=1 style="text-align:center; display:inline-block"
| |
| |-
| |
| !colspan=2 style="background:#6DDB00"|<big>Hole 11</big>
| |
| |-
| |
| |rowspan=3 width=50% style="background:black"|[[File:VS Golf F Hole 11 map.png]]
| |
| |style="background:black;color:white"|<big>'''227y'''</big>
| |
| |-
| |
| |style="background:black;color:white"|<big>'''Par 3'''</big>
| |
| |-
| |
| !style="background:black"|[[File:VS Golf JF Hole 4-11 green.png]]
| |
| |}
| |
|
| |
| {|border=1 style="text-align:center; display:inline-block"
| |
| |-
| |
| !colspan=2 style="background:#6DDB00"|<big>Hole 12</big>
| |
| |-
| |
| |rowspan=3 width=50% style="background:black"|[[File:VS Golf F Hole 12 map.png]]
| |
| |style="background:black;color:white"|<big>'''422y'''</big>
| |
| |-
| |
| |style="background:black;color:white"|<big>'''Par 4'''</big>
| |
| |-
| |
| !style="background:black"|[[File:VS Golf JMF Hole 12-12-12 green.png]]
| |
| |}
| |
|
| |
| {|border=1 style="text-align:center; display:inline-block"
| |
| |-
| |
| !colspan=2 style="background:#6DDB00"|<big>Hole 13</big>
| |
| |-
| |
| |rowspan=3 width=50% style="background:black"|[[File:VS Golf F Hole 13 map.png]]
| |
| |style="background:black;color:white"|<big>'''466y'''</big>
| |
| |-
| |
| |style="background:black;color:white"|<big>'''Par 4'''</big>
| |
| |-
| |
| !style="background:black"|[[File:VS Golf MF Hole 13-13 green.png]]
| |
| |}
| |
|
| |
| {|border=1 style="text-align:center; display:inline-block"
| |
| |-
| |
| !colspan=2 style="background:#6DDB00"|<big>Hole 14</big>
| |
| |-
| |
| |rowspan=3 width=50% style="background:black"|[[File:VS Golf F Hole 14 map.png]]
| |
| |style="background:black;color:white"|<big>'''407y'''</big>
| |
| |-
| |
| |style="background:black;color:white"|<big>'''Par 4'''</big>
| |
| |-
| |
| !style="background:black"|[[File:VS Golf JMF Hole 15-14-14 green.png]]
| |
| |}
| |
|
| |
| {|border=1 style="text-align:center; display:inline-block"
| |
| |-
| |
| !colspan=2 style="background:#6DDB00"|<big>Hole 15</big>
| |
| |-
| |
| |rowspan=3 width=50% style="background:black"|[[File:VS Golf F Hole 15 map.png]]
| |
| |style="background:black;color:white"|<big>'''524y'''</big>
| |
| |-
| |
| |style="background:black;color:white"|<big>'''Par 5'''</big>
| |
| |-
| |
| !style="background:black"|[[File:VS Golf JMF Hole 16-15-15 green.png]]
| |
| |}
| |
|
| |
| {|border=1 style="text-align:center; display:inline-block"
| |
| |-
| |
| !colspan=2 style="background:#6DDB00"|<big>Hole 16</big>
| |
| |-
| |
| |rowspan=3 width=50% style="background:black"|[[File:VS Golf F Hole 16 map.png]]
| |
| |style="background:black;color:white"|<big>'''355y'''</big>
| |
| |-
| |
| |style="background:black;color:white"|<big>'''Par 4'''</big>
| |
| |-
| |
| !style="background:black"|[[File:VS Golf MF Hole 16-16 green.png]]
| |
| |}
| |
|
| |
| {|border=1 style="text-align:center; display:inline-block"
| |
| |-
| |
| !colspan=2 style="background:#6DDB00"|<big>Hole 17</big>
| |
| |-
| |
| |rowspan=3 width=50% style="background:black"|[[File:VS Golf F Hole 17 map.png]]
| |
| |style="background:black;color:white"|<big>'''198y'''</big>
| |
| |-
| |
| |style="background:black;color:white"|<big>'''Par 3'''</big>
| |
| |-
| |
| !style="background:black"|[[File:VS Golf F Hole 17 green.png]]
| |
| |}
| |
|
| |
| {|border=1 style="text-align:center; display:inline-block"
| |
| |-
| |
| !colspan=2 style="background:#6DDB00"|<big>Hole 18</big>
| |
| |-
| |
| |rowspan=3 width=50% style="background:black"|[[File:VS Golf F Hole 18 map.png]]
| |
| |style="background:black;color:white"|<big>'''324y'''</big>
| |
| |-
| |
| |style="background:black;color:white"|<big>'''Par 4'''</big>
| |
| |-
| |
| !style="background:black"|[[File:VS Golf F Hole 18 green.png]]
| |
| |}
| |
|
| |
| {|border=1 style="text-align:center; display:inline-block"
| |
| |-
| |
| !colspan=2 style="background:#6DDB00"|<big>Hole 19</big>
| |
| |-
| |
| |rowspan=3 width=50% style="background:black"|[[File:VS Golf F Hole 19 map.png]]
| |
| |style="background:black;color:white"|<big>'''185y'''</big>
| |
| |-
| |
| |style="background:black;color:white"|<big>'''Par 3'''</big>
| |
| |-
| |
| !style="background:black"|[[File:VS Golf MF Hole 19-19 green.png]]
| |
| |}
| |
|
| |
| {|border=1 style="text-align:center; display:inline-block"
| |
| |-
| |
| !colspan=2 style="background:#6DDB00"|<big>Hole 20</big>
| |
| |-
| |
| |rowspan=3 width=50% style="background:black"|[[File:VS Golf F Hole 20 map.png]]
| |
| |style="background:black;color:white"|<big>'''336'''</big>
| |
| |-
| |
| |style="background:black;color:white"|<big>'''Par 4'''</big>
| |
| |-
| |
| !style="background:black"|[[File:VS Golf F Hole 20 green.png]]
| |
| |}
| |
|
| |
| {|border=1 style="text-align:center; display:inline-block"
| |
| |-
| |
| !colspan=2 style="background:#6DDB00"|<big>Hole 21</big>
| |
| |-
| |
| |rowspan=3 width=50% style="background:black"|[[File:VS Golf F Hole 21 map.png]]
| |
| |style="background:black;color:white"|<big>'''196y'''</big>
| |
| |-
| |
| |style="background:black;color:white"|<big>'''Par 3'''</big>
| |
| |-
| |
| !style="background:black"|[[File:VS Golf F Hole 21 green.png]]
| |
| |}
| |
|
| |
| ==Game Boy==
| |
| The [[Game Boy]] game contains 36 different holes split into two courses: Japan and U.S.A.
| |
|
| |
| ==Virtual Boy==
| |
| The [[Virtual Boy]] game contains 18 holes, all of which take place at the '''Papillion Golf & Country Club'''. Due to the 3D capability, it includes slopes, and the area the ball will land is represented by a large square grid.
| |
|
| |
|
| ==Gallery== | | ==Gallery== |
| Line 1,108: |
Line 325: |
| ==References in later media== | | ==References in later media== |
| *''[[Super Mario-kun]]'' – In the [[Super Mario-kun Volume 2|second volume]] of the manga, Mario reminisces of his time in ''Golf''. | | *''[[Super Mario-kun]]'' – In the [[Super Mario-kun Volume 2|second volume]] of the manga, Mario reminisces of his time in ''Golf''. |
| *''{{wp|Wii Sports}}'' – Nine of the holes in ''Golf'' reappear as the 9-hole course in this game. | | *''[[WarioWare: Twisted!]]'' - A [[Golf (microgame)|microgame]] is based on this game. |
| *''{{wp|Wii Sports Resort}}'' – The same nine holes that appear in ''Wii Sports'' reappear as the back nine of this game's course in the same order. | | *''[[miiwiki:Wii Sports|Wii Sports]]'' – Nine of the holes in ''Golf'' reappear as the 9-hole course in this game. |
| *''{{wp|Clubhouse Games|Clubhouse Games: 51 Worldwide Classics}}'' – The first hole from ''Golf'' reappears in the Golf game in this game.<ref>GameXplain (April 29, 2020). [https://youtu.be/wLpBy7uZFOA?t=2074 Clubhouse Games - MASSIVE Overview of All 51 Games (Wii Play Tanks, Bowling, Golf, & More!)]. ''YouTube''. Retrieved May 6, 2020.</ref>
| | *''[[miiwiki:Wii Sports Resort|Wii Sports Resort]]'' – The same nine holes that appear in ''Wii Sports'' reappear as the back nine of this game's course in the same order. |
| *''[[NES Remix]]'' – Several challenges are based on this game. | | *''[[NES Remix]]'' – Several challenges are based on this game. |
| | *''{{wp|Clubhouse Games: 51 Worldwide Classics}}'' – The first hole from ''Golf'' reappears in the Golf game in this game.<ref>{{cite|author=GameXplain|date=April 29, 2020|url=youtu.be/wLpBy7uZFOA?t=2074|timestamp=34:34|title=Clubhouse Games - MASSIVE Overview of All 51 Games (Wii Play Tanks, Bowling, Golf, & More!)|publisher=YouTube|accessdate=June 1, 2024}}</ref> |
| | *''[[miiwiki:Nintendo Switch Sports|Nintendo Switch Sports]]'' – The same nine holes that appeared in ''Wii Sports'' and ''Wii Sports Resort'' reappear once again in this game, included in a post-release update that added golf. |
|
| |
|
| ==Staff== | | ==Staff== |
| {{main|List of Golf staff}}
| | ;Producer |
| | *Masayuki Uemura |
| | ;Director / Course Designer |
| | *[[Kenji Miki]] |
| | ;Programmer / Game Designer / Course Designer |
| | *[[Satoru Iwata]] |
| | ;Original Music |
| | *[[Koji Kondo]] |
|
| |
|
| ==Names in other languages== | | ==Names in other languages== |
| {{foreign names | | {{foreign names |
| |Jap=ゴルフ | | |Jpn=ゴルフ<ref>[[:File:Golf FC Logo.svg|Japanese logo]]</ref> |
| |JapR=Gorufu | | |JpnR=Gorufu |
| |JapM=Golf | | |JpnM=Golf |
| }} | | }} |
|
| |
|
| ==Trivia== | | ==References== |
| *[[Nintendo]] planned to release an 18-hole golfing game as a launch title for the [[Family Computer]], but software companies declined the project and believed that it could not be done with such limited memory at the time. Then-[[HAL Laboratory]] employee [[Satoru Iwata]] was eager to prove this technical achievement and program the game himself, which required him to create a custom data compression routine.<ref name=shmup/>
| | <references/> |
| *''Golf'' is the second released video game that Satoru Iwata programmed for Nintendo, after ''[[Pinball (game)|Pinball]]''.<ref name=shmup>[http://shmuplations.com/iwata/ Satoru Iwata – 1999 Developer Interview originally featured in Used Games magazine, translated by shmuplations.com]</ref>
| |
| *Like in ''{{wp|Ice Climber}}'', the red-colored character on the North American NES box art is actually the second player.
| |
| *''Golf'' is a playable [[nookipedia:NES games|NES game]] in ''[[nookipedia:Doubutsu no Mori (game)|Doubutsu no Mori]]'' for the [[Nintendo 64]] and its [[Nintendo GameCube|GameCube]] port, ''[[nookipedia:Animal Crossing (GCN)|Animal Crossing]]''.
| |
| {{br}}
| |
|
| |
|
| ==External links== | | ==External links== |
| | {{NIWA|Nookipedia=Item:Golf (Animal Crossing)}} |
| *[https://www.nintendo.com/jp/famicom/software/hvc-gf/index.html Official Japanese site] | | *[https://www.nintendo.com/jp/famicom/software/hvc-gf/index.html Official Japanese site] |
|
| |
| ==References==
| |
| {{NIWA|Nookipedia=Item:Golf (Animal Crossing)}}
| |
| <references/>
| |
|
| |
| {{Super Mario games}} | | {{Super Mario games}} |
| {{NES}} | | {{NES}} |
| {{GB}}
| |
| {{VB}}
| |
| {{Virtual Console}} | | {{Virtual Console}} |
| {{Switch}} | | {{Switch}} |
| [[de:Golf (Nintendo Entertainment System)]]
| | {{NSO}} |
| [[Category:Golf|*]] | | [[Category:Golf|*]] |
| [[Category:Games]] | | [[Category:Games]] |
| | [[Category:Family Computer games]] |
| | [[Category:Family Computer Disk System games]] |
| [[Category:Nintendo Entertainment System games]] | | [[Category:Nintendo Entertainment System games]] |
| [[Category:Game Boy games]] | | [[Category:Japanese home computer games]] |
| [[Category:Virtual Boy games]] | | [[Category:Nintendo Switch games]] |
| | [[Category:Launch titles]] |
| [[Category:1984 games]] | | [[Category:1984 games]] |
| [[Category:1985 games]] | | [[Category:1985 games]] |
| [[Category:1986 games]] | | [[Category:1986 games]] |
| [[Category:1989 games]]
| |
| [[Category:1995 games]]
| |
| [[Category:Sports games]] | | [[Category:Sports games]] |
| [[Category:Virtual Console games]] | | [[Category:Virtual Console games]] |
| | [[Category:Wii U Virtual Console games]] |
| | [[Category:Nintendo Switch Online games]] |
| | [[de:Golf (Nintendo Entertainment System)]] |
| | [[it:Golf]] |

button once makes the golfer swing the club back, with the arrow on the meter moving left. Pressing it again causes them to swing forward, also moving the arrow back to the right—how far to the left it was determines the stroke's power, and if it reaches the far left, it will start moving right again on its own without a strength being yet determined. Pressing it a third time hits the ball, with the arrow's position relative to the meter's target area determining the impact point and thus how the ball will move; hitting the target on the center makes the ball go straight, hitting to the right of the target causes a left-curving hook ball, and hitting to the left of the target causes a right-curving slice ball. If the second step is skipped, the ball will merely be swiped a few yards ahead, and skipping the third step causes the club to miss entirely. The ball's direction in the air is also influenced by the direction and speed of the wind, which varies between rounds and is determined by an arrow and label found above the viewing area. On the putting green, meanwhile, the direction is influenced by the lay of the green, represented by arrows in different directions and densities.
