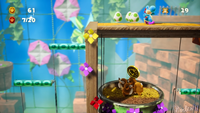
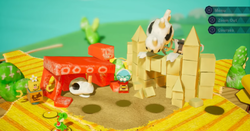
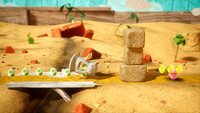
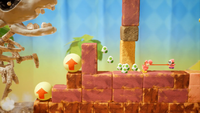
Yoshi's Crafted World: Difference between revisions
No edit summary |
No edit summary |
||
| (45 intermediate revisions by 24 users not shown) | |||
| Line 4: | Line 4: | ||
|developer=[[Good-Feel]] | |developer=[[Good-Feel]] | ||
|publisher=[[Nintendo]] | |publisher=[[Nintendo]] | ||
|release={{ | |release={{flag list|Japan|March 29, 2019|USA|March 29, 2019|Mexico|March 29, 2019<ref>https://www.nintendo.com/es_LA/games/detail/yoshis-crafted-world-switch/</ref>|Europe|March 29, 2019|Australia|March 29, 2019|South Korea|March 29, 2019|HK|March 29, 2019|ROC|March 29, 2019|China|July 9, 2021<ref>https://twitter.com/ZhugeEX/status/1409979239710011400?s=20</ref>}} | ||
|languages={{languages|en_us=y|en_gb=y|fr_fr=y|fr_ca=y|es_es=y|es_latam=y|de=y|it=y|nl=y|ru=y|jp=y|kr=y|zh_simp=y|zh_trad=y}} | |languages={{languages|en_us=y|en_gb=y|fr_fr=y|fr_ca=y|es_es=y|es_latam=y|de=y|it=y|nl=y|ru=y|jp=y|kr=y|zh_simp=y|zh_trad=y}} | ||
|genre=[[Genre#Platform|Platformer]] | |genre=[[Genre#Platform|Platformer]] | ||
|modes=Single-player<br>Multiplayer | |modes=Single-player<br>Multiplayer | ||
|ratings={{ratings|esrb=E|pegi=3|cero=A|acb=g|usk=6| | |ratings={{ratings|esrb=E|pegi=3|cero=A|acb=g|usk=6|classind=L|smeccv=A|rars=0+|grac=all|gsrr=p|fpb=pg|gcam=3|nmc=3|cadpa=8+}} | ||
|platforms=[[Nintendo Switch]] | |platforms=[[Nintendo Switch]] | ||
| | |format={{format|switch=1|switchdl=1}} | ||
|input={{input|joy-con= | |input={{input|joy-con=1|joy-con-horizontal=1|switchpro=1}} | ||
|serials={{flag list|Japan|HAC-AEA2A-JPN}} | |||
}} | }} | ||
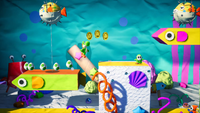
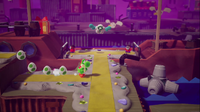
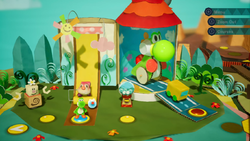
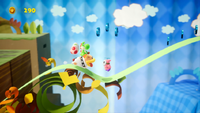
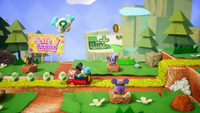
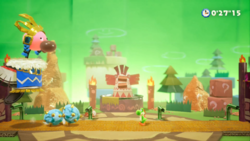
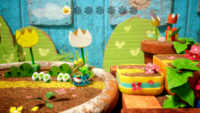
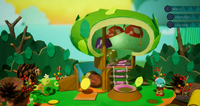
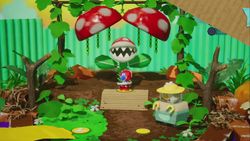
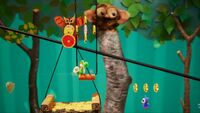
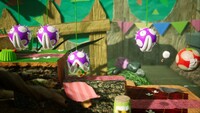
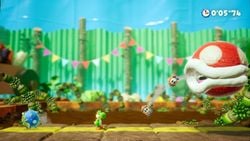
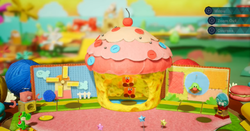
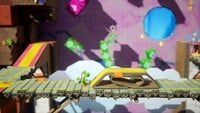
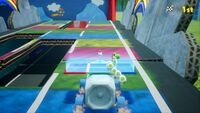
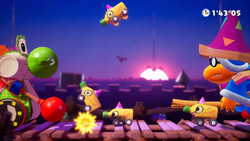
'''''Yoshi's Crafted World''''' is a title in the [[Yoshi (franchise)|''Yoshi'' franchise]] and the follow-up to the 2015 [[Wii U]] game ''[[Yoshi's Woolly World]]'', released for the [[Nintendo Switch]] on March 29, 2019. It was developed by [[Good-Feel]], the developer behind ''Yoshi's Woolly World'' and its [[Nintendo 3DS]] port ''[[Poochy & Yoshi's Woolly World]]''. The game places a great emphasis on its 3D environments; Yoshi is able to aim eggs into objects that appear in the foreground and background and can travel through a pseudo-3D environment along mostly yellow tape trails. | '''''Yoshi's Crafted World''''' is a title in the [[Yoshi (franchise)|''Yoshi'' franchise]] and the follow-up to the 2015 [[Wii U]] game ''[[Yoshi's Woolly World]]'', released for the [[Nintendo Switch]] on March 29, 2019. It was developed by [[Good-Feel]], the developer behind ''Yoshi's Woolly World'' and its [[Nintendo 3DS]] port ''[[Poochy & Yoshi's Woolly World]]''. The game places a great emphasis on its 3D environments; Yoshi is able to aim eggs into objects that appear in the foreground and background and can travel through a pseudo-3D environment along mostly yellow tape trails. | ||
| Line 28: | Line 29: | ||
'''Opening''' | '''Opening''' | ||
<blockquote> | <blockquote> | ||
{{color|Narrator: This is the lovely island of the | {{color|black|Narrator: This is the [[Yoshi's Island (location)|lovely island]] of the [[Yoshi (species)|Yoshi]]s.}}<br> | ||
{{color| | :{{color|black|At the topmost peak of the island sits a glistening, gem-set wonder known as the Sundream Stone.}}<br> | ||
{{color| | :{{color|black|Legends say the [[Sundream Stone]] possesses the power to make anyone's wildest dreams come true!}}<br> | ||
{{color| | :{{color|black|One fine day...}}<br> | ||
{{color| | :{{color|black|[[Baby Bowser]] and [[Kamek]] caught wind of the Sundream Stone and made their way to the island.}}<br> | ||
{{color|Kamek: "Eeeheehee! We'll be taking that!" | {{color|blue|Kamek: "Eeeheehee! We'll be taking that!"}}<br> | ||
{{color|Narrator: When the Yoshis came to, they found themselves in an unfamiliar forest... | {{color|black|Narrator: When the Yoshis came to, they found themselves in an unfamiliar forest...}}<br> | ||
{{color| | :{{color|black|Aw... The poor Yoshis seem to be lost...}}<br> | ||
{{color| | :{{color|black|Oh my! The [[Dream Gem]]s - they're all gone!}}<br> | ||
{{color| | :{{color|black|The Sundream Stone isn't looking too hot now...}}<br> | ||
{{color| | :{{color|black|What a tragedy! Someone better find those gems before Kamek and Baby Bowser get to them.}}<br> | ||
{{color| | :{{color|black|Wonder where this path leads...}}<br> | ||
{{color| | :{{color|black|Maybe it'll pave the way to the gems!}}<br> | ||
{{color| | :{{color|black|Looks like the Yoshis are sorting out who should go on this mission.}}<br> | ||
(after players choose a Yoshi to play as) | (after players choose a Yoshi to play as) | ||
{{color|Narrator: It's settled, then! | {{color|black|Narrator: It's settled, then!}}<br> | ||
{{color| | :{{color|black|The rest of the Yoshis will stay and protect the Sundream Stone. It'll be safe and sound!}}<br> | ||
{{color| | :{{color|black|The journey to find the gems begins!}} | ||
</blockquote> | </blockquote> | ||
'''Ending''' | '''Ending''' | ||
<blockquote> | <blockquote> | ||
{{color|Narrator: And so, the Sundream Stone was finally restored. | {{color|black|Narrator: And so, the Sundream Stone was finally restored.}}<br> | ||
{{color| | :{{color|black|Together, the Yoshis dreamed...that they could be returned to their island home!}}<br> | ||
{{color| | :{{color|black|All right, let's head back home!}} | ||
</blockquote> | </blockquote> | ||
==Gameplay== | ==Gameplay== | ||
Similar to the previous ''Yoshi'' games, Yoshi can run, jump, lick up enemies, [[Flutter Jump]], [[Ground Pound]], and throw [[Yoshi's Egg]]s/[[Poochy Pup]]s. Conversely, Yoshi | Similar to the previous ''Yoshi'' games, Yoshi can run, jump, lick up enemies, [[Flutter Jump]], [[Ground Pound]], and throw [[Yoshi's Egg]]s/[[Poochy Pup]]s. Conversely, Yoshi no longer needs to crouch in order to turn an enemy into an egg, as this action is now performed automatically upon grabbing an enemy with the tongue. The mechanics of Yoshi's egg throwing have likewise changed considerably. Instead of an autonomously moving cursor, Yoshi can freely aim the cursor anywhere on the screen, so that they can aim at objects in the foreground and background. When an object on a different plane is highlighted, the player can throw an egg at it, but eggs are otherwise restricted to a 2D plane. Some objects get knocked away while others stay in place after the impact. Yoshi can often travel between planes by following paths that connect them. While on one of these paths, Yoshi can only ground pound with the L or ZL buttons, due to the down command being assigned to moving towards the player. | ||
Like ''Yoshi's Woolly World'', Yoshi has a health meter that can be replenished by [[heart (item)|heart]]s, up to 20. These can be obtained by hitting certain [[Winged Cloud]]s, reaching [[Check Point (Yoshi's Crafted World)|Check Point]]s, or hitting [[Roulette Block]]s at the right time. Costumes can also be applied to Yoshi which allow him to take extra hits based on the costume's rarity (three for Common, four for Rare, and five for Super Rare/amiibo). These extra hits are replenished upon reaching a checkpoint, but if enough hits are taken, the costume is irreversibly destroyed for the rest of the level (though the costume can be reapplied from the World Map). | Like ''Yoshi's Woolly World'', Yoshi has a health meter that can be replenished by [[heart (item)|heart]]s, up to 20. These can be obtained by hitting certain [[Winged Cloud]]s, reaching [[Check Point (Yoshi's Crafted World)|Check Point]]s, or hitting [[Roulette Block]]s at the right time. Costumes can also be applied to Yoshi which allow him to take extra hits based on the costume's rarity (three for Common, four for Rare, and five for Super Rare/amiibo). These extra hits are replenished upon reaching a checkpoint, but if enough hits are taken, the costume is irreversibly destroyed for the rest of the level (though the costume can be reapplied from the World Map). | ||
| Line 83: | Line 84: | ||
This is the first ''Yoshi'' game without the game files option at the start. | This is the first ''Yoshi'' game without the game files option at the start. | ||
===Flip side=== | ===Flip side=== | ||
Each level (aside from boss fights and the levels in Hidden Hills) provide access to both the "front side" and the "flip side." The flip side gives a look at levels from the backside, often showing off how certain contraptions within the levels work, emphasizing the hand-crafted feel. The flip side can only be accessed upon beating the corresponding front side, and only after [[Poochy's Tape Trail]] has been completed. | Each level (aside from boss fights and the levels in Hidden Hills) provide access to both the "front side" and the "flip side." The flip side gives a look at levels from the backside, often showing off how certain contraptions within the levels work, emphasizing the hand-crafted feel. The flip side can only be accessed upon beating the corresponding front side, and only after [[Poochy's Tape Trail]] has been completed. | ||
| Line 107: | Line 107: | ||
Two players are able to play the entire game together, each one being a differently colored Yoshi. Each player can also choose their own costume and control options from the menu. | Two players are able to play the entire game together, each one being a differently colored Yoshi. Each player can also choose their own costume and control options from the menu. | ||
While playing, both players share the same screen, with a camera that dominantly follows Player 1. Each Yoshi has all of the abilities they can use in single-player, and they are able to eat and spit out each other. Additionally, one Yoshi can ride on the other, losing control of movement, but in turn having an unlimited supply of eggs to throw. | While playing, both players share the same screen, with a camera that dominantly follows Player 1. Each Yoshi has all of the abilities they can use in single-player, and they are able to eat and spit out each other. Additionally, one Yoshi can ride on the other, losing control of movement, but in turn having an unlimited supply of eggs to throw. The Yoshi on the bottom also gains an enhanced [[Ground Pound]] that sends out a shockwave, but cannot throw eggs until the Yoshi on top jumps off. | ||
Only one Yoshi needs to have 20 hearts at the end of a level to obtain the level's corresponding Smiley Flower. | Only one Yoshi needs to have 20 hearts at the end of a level to obtain the level's corresponding Smiley Flower. To make the task easier, Winged Clouds that drop hearts will produce 10 hearts instead of 5. | ||
====Mellow Mode==== | ====Mellow Mode==== | ||
Brought back from ''Yoshi's Woolly World'', Mellow Mode is an option in available at any time in the menu. When selected, Yoshi grows a pair of wings that allow them to Flutter Jump infinitely by holding down the jump button. Yoshi also | Brought back from ''Yoshi's Woolly World'', Mellow Mode is an option in available at any time in the menu. When selected, Yoshi grows a pair of wings that allow them to Flutter Jump infinitely by holding down the jump button. Yoshi will also only lose one heart upon taking damage, and lays two eggs after eating an enemy. | ||
==Worlds and courses== | ==Worlds and courses== | ||
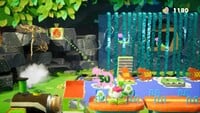
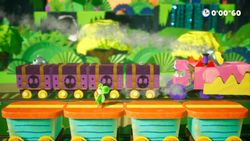
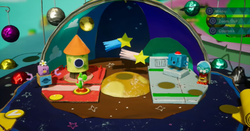
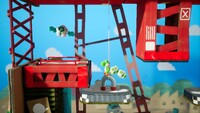
''Yoshi's Crafted World'' has 17 worlds in total, each one featuring a signature theme and constructed from different materials and techniques. Most worlds in the game feature two to four levels, and only six of them include a boss stage. This contrasts with previous ''Yoshi'' | ''Yoshi's Crafted World'' has 17 worlds in total, each one featuring a signature theme and constructed from different materials and techniques. Most worlds in the game feature two to four levels, and only six of them include a boss stage. This contrasts with previous ''Yoshi'' platformers, which typically include fewer worlds with a consistent, higher number of levels and one boss per world. | ||
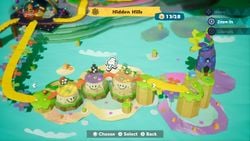
In order to progress to different worlds, Yoshis will often need to hand over Smiley | In order to progress to different worlds, Yoshis will often need to hand over [[Smiley Flower]]s to Blockafellers they meet along the way. The first and final sections of the game are linear, with each world leading to a single other. After [[Origami Gardens]], however, the path branches into two, giving the player more options regarding the order in which to complete the middle portion of the game. The paths converge again in [[Ninjarama]]. A bonus area, [[Hidden Hills]], becomes available after beating the final main story boss. | ||
A few courses in the game are scoring-based challenges in timed or auto-scrolling settings, with the player's final score translating into an amount of | A few courses in the game are scoring-based challenges in timed or auto-scrolling settings, with the player's final score translating into an amount of Smiley Flowers as a reward. These levels are marked below with an arrow (▷). | ||
<center> | |||
{| | {|class=wikitable width=70% style="text-align:center;" | ||
|-style="background: | |-style="background:#52883e;color:white" | ||
!width= | !width=45%|World | ||
!width= | !width=15%|Smiley Flowers to unlock | ||
!width=15%|Cost of costume | |||
!width= | |||
!width=15%|Leads to | !width=15%|Leads to | ||
!width=55% colspan=3|Courses | |||
|- | |||
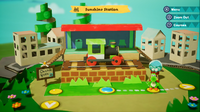
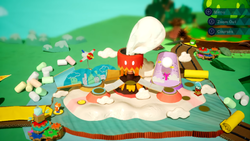
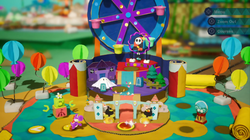
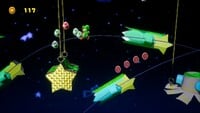
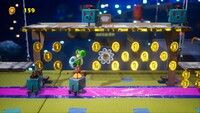
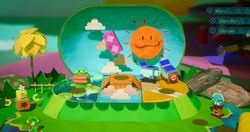
|rowspan=2 style="background-color:#ABDBE3"|[[File:SunshineStation.png|200px]]<br><br>'''{{color-link|black|Sunshine Station}}''' | |||
|rowspan=2|None | |||
|rowspan=2|100 | |||
|rowspan=2|[[Yarrctopus Docks]] | |||
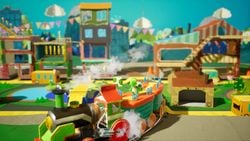
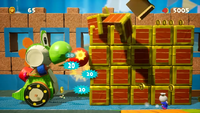
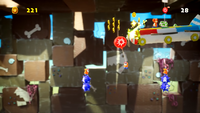
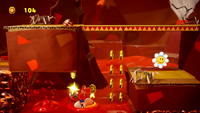
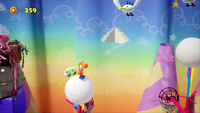
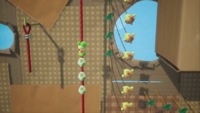
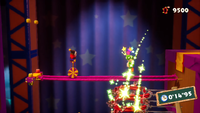
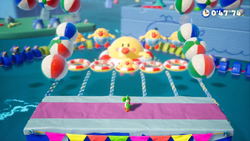
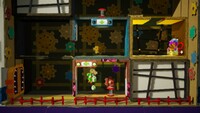
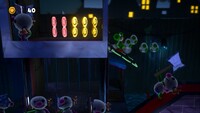
|[[File:YCW screen1.jpg|250px]] | |||
|colspan="2" rowspan=2| | |||
|- | |- | ||
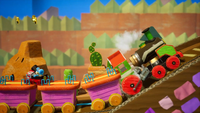
|[[Rail-Yard Run]] | |[[Rail-Yard Run]] | ||
|- | |- | ||
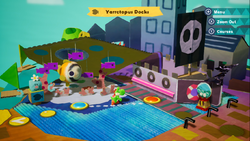
|style="background:# | |rowspan=2 style="background:#E3ABDB"|[[File:YarrctopusDocks.png|250px]]<br><br>'''{{color-link|black|Yarrctopus Docks}}''' | ||
|rowspan=2|1 | |||
|rowspan=2|100 | |||
|rowspan=2|[[Go-Go Land]] | |||
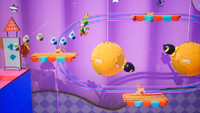
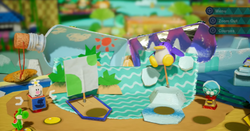
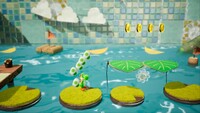
|[[File:ManyFishintheSea.png|200px]] | |||
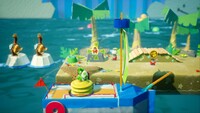
|[[File:PiratePier.png|200px]] | |||
|rowspan=2| | |||
|- | |||
|[[Many Fish in the Sea]] | |[[Many Fish in the Sea]] | ||
| | |[[Pirate Pier]] | ||
|- | |- | ||
|[[ | |rowspan=2 style="background:#D5FDBC"|[[File:GoGoLand YCW.png|250px]]<br><br>'''{{color-link|black|Go-Go Land}}''' | ||
| | |rowspan=2|5 | ||
|rowspan=2|100 | |||
|rowspan=2|[[Big Paper Peak]] | |||
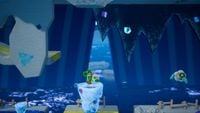
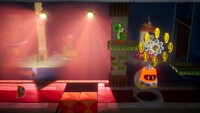
|[[File:PoochyTapeTrail.png|200px]] | |||
|[[File:GoGoYoshi.png|200px]] | |||
|rowspan=2| | |||
|- | |- | ||
|[[Poochy's Tape Trail]] | |[[Poochy's Tape Trail]] | ||
| | |[[Go-Go Yoshi (level)|Go-Go Yoshi]] ▷ | ||
| | |||
|- | |- | ||
|[[ | |rowspan=4 style="background:#A5D4B5"|[[File:YCW Big Paper Peak.png|250px]]<br><br>'''{{color-link|black|Big Paper Peak}}''' | ||
| | |rowspan=4|10 | ||
|rowspan=4|100 | |||
|rowspan=4|[[Origami Gardens]] | |||
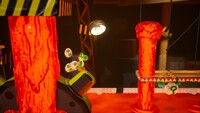
|[[File:MineCartCaveStage.png|200px]] | |||
|[[File:WhistlestopRailsStage.png|200px]] | |||
|[[File:MousersAndMagnetsStage.png|200px]] | |||
|- | |- | ||
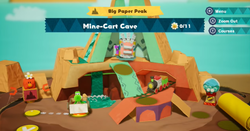
|[[Mine-Cart Cave]] | |[[Mine-Cart Cave]] | ||
| | |[[Whistlestop Rails]] | ||
| | |[[Mousers and Magnets]] | ||
|- | |- | ||
|[[ | |[[File:TheTinCanCondorStage.png|250px]] | ||
| | |colspan="2" rowspan=2| | ||
|- | |- | ||
|[[ | |'''BOSS:''' [[The Tin-Can Condor]]<br>({{icon|YCW-Flower}}×15) | ||
|- | |- | ||
|''' | |rowspan=2 style="background:#E0ABB5"|[[File:YCW Origami Gardens.png|250px]]<br><br>'''{{color-link|black|Origami Gardens}}''' | ||
| | |rowspan=2|None | ||
|rowspan=2|150 | |||
|[[Dino Desert]] | |||
|[[File:SpringSprungTrail.png|200px]] | |||
|[[File:MontyMoleBGoneStage.png|200px]] | |||
|rowspan=2| | |||
|- | |- | ||
|[[Pastel Pathway]] | |||
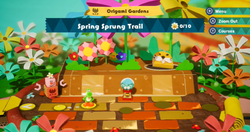
|[[Spring Sprung Trail]] | |[[Spring Sprung Trail]] | ||
| | |[[Monty-Mole-B-Gone]] ▷ | ||
|- | |- | ||
|[[ | |rowspan=2 style="background:#FBF5C8"|[[File:YCW Dino Desert.png|250px]]<br><br>'''{{color-link|black|Dino Desert}}''' | ||
|rowspan=2|10 | |||
|rowspan=2|150 | |||
|rowspan=2|[[Sky-High Heights]] | |||
|[[File:DinoSmash YCW.png|200px]] | |||
|[[File:SkelesaurusWrecks YCW.png|200px]] | |||
|rowspan=2| | |||
|- | |- | ||
|[[Dino Smash]] | |[[Dino Smash]] | ||
| | |[[Skelesaurus Wrecks]] | ||
|- | |- | ||
|[[ | |rowspan=2 style="background:#F3EFD5"|[[File:YCW SkyHighHeights.png|250px]]<br><br>'''{{color-link|black|Sky-High Heights}}''' | ||
| | |rowspan=2|10 | ||
|rowspan=2|150 | |||
|[[Acorn Forest]] | |||
|[[File:YCW AltitudeAdjustment.png|200px]] | |||
|[[File:YCW PoochyMagmaRun.png|200px]] | |||
|[[File:YCW WindwardWay.png|200px]] | |||
|- | |- | ||
|[[Ninjarama]] | |||
|[[Altitude Adjustment]] ▷ | |[[Altitude Adjustment]] ▷ | ||
|[[Poochy's Magma Run]] | |[[Poochy's Magma Run]] | ||
| | |[[Windward Way]] | ||
|- | |- | ||
|[[ | |rowspan=2 style="background:wheat"|[[File:YCW Acorn Forest.png|200px]]<br>[[File:YCWAcornForest.jpg|250px]]<br><br>'''{{color-link|black|Acorn Forest}}''' | ||
|rowspan=2|10 | |||
|rowspan=2|200 | |||
|rowspan=2|Nowhere | |||
|[[File:WeighingAcornsYCW.jpg|200px]] | |||
|[[File:JumpingtoVictoryYCW.jpg|200px]] | |||
|[[File:Spike the Piranha.jpg|250px]] | |||
|- | |- | ||
|[[Weighing Acorns]] | |[[Weighing Acorns]] | ||
|[[Jumping to Victory]] | |[[Jumping to Victory]] | ||
| | |'''BOSS:''' [[Spike the Piranha (level)|Spike the Piranha]]<br>({{icon|YCW-Flower}}×15) | ||
|- | |- | ||
|''' | |rowspan=2 style="background:#FFC9E8"|[[File:YCW Pastel Pathway.png|250px]]<br><br>'''{{color-link|black|Pastel Pathway}}''' | ||
| | |rowspan=2|15 | ||
|rowspan=2|150 | |||
|rowspan=2|[[Cardstock Carnival]] | |||
|[[File:StitchedTogether.png|200px]] | |||
|[[File:PoochySweetRun.png|200px]] | |||
|[[File:YoshiPullsSomeStrings.png|200px]] | |||
|- | |- | ||
|[[Stitched Together]] | |[[Stitched Together]] | ||
|[[Poochy's Sweet Run]] | |[[Poochy's Sweet Run]] | ||
| | |[[Yoshi Pulls Some Strings]] | ||
|- | |- | ||
|[[ | |rowspan=2 style="background:#D2A0EC"|[[File:CardstockCarnival YCW.png|250px]]<br><br>'''{{color-link|black|Cardstock Carnival}}''' | ||
|rowspan=2|10 | |||
|rowspan=2|150 | |||
|[[Chilly-Hot Isles]] | |||
|[[File:SpinwheelShuffle YCW.png|200px]] | |||
|[[File:HauntedMakerMansion YCW.png|200px]] | |||
|[[File:HoopJumpHop YCW.png|200px]] | |||
|- | |- | ||
|[[Ninjarama]] | |||
|[[Spinwheel Shuffle]] | |[[Spinwheel Shuffle]] | ||
|[[Haunted Maker Mansion]] | |[[Haunted Maker Mansion]] | ||
| | |[[Hoop-Jump Hop]] ▷ | ||
|- | |- | ||
|[[ | |rowspan=2 style="background:#A0E5EC"|[[File:YCW Chilly-Hot Isles.png|250px]]<br><br>'''{{color-link|black|Chilly-Hot Isles}}''' | ||
|rowspan=2|10 | |||
|rowspan=2|200 | |||
|rowspan=2|Nowhere | |||
|[[File:BombsAwayonPirateIsland.jpg|200px]] | |||
|[[File:SlipSlideIsleYCW.jpg|200px]] | |||
|[[File:BurtBouncyBattle YCW.png|250px]] | |||
|- | |- | ||
|[[Bombs Away on Pirate Island]] | |[[Bombs Away on Pirate Island]] | ||
|[[Slip-Slide Isle]] | |[[Slip-Slide Isle]] | ||
| | |'''BOSS:''' [[Burt's Bouncy Battle]]<br>({{icon|YCW-Flower}}×20) | ||
|- | |- | ||
|''' | |rowspan=2 style="background:#8FBFF1"|[[File:YCW Ninjarama.png|250px]]<br><br>'''{{color-link|black|Ninjarama}}''' | ||
| | |rowspan=2|10 | ||
|rowspan=2|200 | |||
|rowspan=2|[[Rumble Jungle]] | |||
|[[File:DeceptiveDoorsYCW.jpg|200px]] | |||
|[[File:BehindtheShojiYCW.jpg|200px]] | |||
|[[File:TheShogunsCastleYCW.jpg|200px]] | |||
|- | |- | ||
|[[Deceptive Doors]] | |[[Deceptive Doors]] | ||
|[[Behind the Shoji]] | |[[Behind the Shoji]] | ||
| | |[[The Shogun's Castle]] | ||
|- | |- | ||
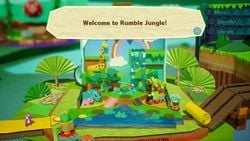
|[[ | |rowspan=4 style="background:#BFF18F"|[[File:RumbleJungleYCW.jpg|250px]]<br><br>'''{{color-link|black|Rumble Jungle}}''' | ||
|rowspan=4|15 | |||
|rowspan=4|200 | |||
|rowspan=4|[[Outer Orbit]] | |||
|[[File:ExploringtheAnimalKingdomYCW.jpg|200px]] | |||
|[[File:HoppinHigherYCW.jpg|200px]] | |||
|[[File:JungleTourChallengeYCW.jpg|200px]] | |||
|- | |- | ||
|[[Exploring the Animal Kingdom]] | |[[Exploring the Animal Kingdom]] | ||
| | |[[Hoppin' Higher]] | ||
| | |[[Jungle Tour Challenge]] ▷ | ||
|- | |- | ||
|[[ | |[[File:GatorTrainAttacks.jpg|250px]] | ||
| | |colspan="2" rowspan=2| | ||
|- | |- | ||
|[[ | |'''BOSS:''' [[Gator Train Attacks!]]<br>({{icon|YCW-Flower}}×20) | ||
|- | |- | ||
|''' | |rowspan=2 style="background:#C7C9D4"|[[File:YCW Outer Orbit.png|250px]]<br><br>'''{{color-link|black|Outer Orbit}}''' | ||
| | |rowspan=2|None | ||
|rowspan=2|250 | |||
|[[Cheery Valley]] | |||
|[[File:TheCountdownBeginsYCW.jpg|200px]] | |||
|[[File:RidetheStarsYCW.jpg|200px]] | |||
|[[File:SpaceHubHubbubYCW.jpg|200px]] | |||
|- | |- | ||
|[[Hidden Hills]]{{footnote|main|*}} | |||
|[[The Countdown Begins]] | |[[The Countdown Begins]] | ||
|[[Ride the Stars]] | |[[Ride the Stars]] | ||
|[[Space-Hub Hubbub]] | |||
|- | |- | ||
|[[ | |rowspan=2 style="background:#FFE6AF"|[[File:YCW Cheery Valley.png|250px]]<br><br>'''{{color-link|black|Cheery Valley}}''' | ||
|rowspan=2|15 | |||
|rowspan=2|250 | |||
|rowspan=2|[[Shadowville]] | |||
|[[File:RidetheRiverYCW.jpg|200px]] | |||
|[[File:OpenShutYCW.jpg|200px]] | |||
|[[File:SolarZoomYCW.jpg|200px]] | |||
|- | |- | ||
|[[Ride the River]] | |[[Ride the River]] | ||
|[[Open, Shut!]] | |[[Open, Shut!]] | ||
| | |[[Solar Zoom]] ▷ | ||
|- | |- | ||
|[[ | |rowspan=4 style="background:#5E5564"|[[File:Shadowville.jpg|200px]]<br>[[File:Shadowville2.png|250px]]<br><br>'''{{color-link|white|Shadowville}}''' | ||
|rowspan=4|15 | |||
|rowspan=4|250 | |||
|rowspan=4|Nowhere | |||
|[[File:BeAfraidofTheDarkYCW.jpg|200px]] | |||
|[[File:SkulkingAroundYCW.jpg|200px]] | |||
|[[File:MrGearyFactoryYCW.jpg|200px]] | |||
|- | |- | ||
|[[Be Afraid of the Dark]] | |[[Be Afraid of the Dark]] | ||
| | |[[Skulking Around]] | ||
| | |[[Mr. Geary's Factory]] | ||
|- | |- | ||
|[[ | |[[File:TheGreatKingBowserYCW.jpg|250px]] | ||
| | |colspan="2" rowspan=2| | ||
|- | |- | ||
|[[ | |'''BOSS:''' [[The Great King Bowser (level)|The Great King Bowser]]<br>({{icon|YCW-Flower}}×30) | ||
|- | |- | ||
|''' | |rowspan=4 style="background:#E3DFE9"|[[File:HiddenHillsYCW.jpg|250px]]<br><br>'''{{color-link|black|Hidden Hills}}'''{{footnote|main|*}} | ||
| | |rowspan=4|30 | ||
|rowspan=4|300 | |||
|rowspan=4|Nowhere | |||
|[[File:RoughRollingYCW.jpg|200px]] | |||
|[[File:UnderSiegeYCW.jpg|200px]] | |||
|[[File:FloppinAndPoppinYCW.jpg|200px]] | |||
|- | |- | ||
|[[Rough Rolling]] | |[[Rough Rolling]] | ||
|[[Under Siege]] | |[[Under Siege]] | ||
| | |[[Floppin' and Poppin']] | ||
|- | |- | ||
|[[ | |[[File:KamekKerfuffle.png|250px]] | ||
| | |colspan="2" rowspan=2| | ||
|- | |- | ||
|'''BOSS:''' [[Kamek Kerfuffle]] | |'''BOSS:''' [[Kamek Kerfuffle]]<br>({{icon|YCW-Flower}}×50) | ||
| | |||
|} | |} | ||
</center> | |||
{{footnote|note|*|After completing the main story.}} | {{footnote|note|*|After completing the main story.}} | ||
==Characters== | ==Characters== | ||
===Playable characters=== | ===Playable characters=== | ||
{|align=center width=99% cellspacing=0 border=1 cellpadding=4 style="border-collapse:collapse;background:white;border:forestgreen;text-align:center"width=80% | |||
|- | |||
!colspan=2 width=25% style="background:limegreen"|[[Yoshi|Yoshi]] | |||
YCW | !colspan=2 width=25% style="background:limegreen"|[[Yoshi (species)|Yoshi (Red)]] | ||
YCW Yellow Yoshi.png|[[Yoshi (species)| | !colspan=2 width=25% style="background:limegreen"|[[Yoshi (species)|Yoshi (Orange)]] | ||
!colspan=2 width=25% style="background:limegreen"|[[Yoshi (species)|Yoshi (Yellow)]] | |||
|- | |||
!colspan=2 style="background:#C3ff88"|[[File:YCW Green Yoshi.png|150x150px]] | |||
YCW | !colspan=2 style="background:#E1ffc3"|[[File:YCW Red Yoshi.png|150x150px]] | ||
!colspan=2 style="background:#C3ff88"|[[File:YCW Orange Yoshi.png|150x150px]] | |||
!colspan=2 style="background:#E1ffc3"|[[File:YCW Yellow Yoshi.png|150x150px]] | |||
|- | |||
!colspan=2 width=25% style="background:limegreen"|[[Yoshi (species)|Yoshi (Light-Blue)]] | |||
!colspan=2 width=25% style="background:limegreen"|[[Yoshi (species)|Yoshi (Blue)]] | |||
!colspan=2 width=25% style="background:limegreen"|[[Yoshi (species)|Yoshi (Purple)]] | |||
!colspan=2 width=25% style="background:limegreen"|[[Yoshi (species)|Yoshi (Pink)]] | |||
|- | |||
!colspan=2 style="background:#C3ff88"|[[File:YCW Light Blue Yoshi.png|150x150px]] | |||
!colspan=2 style="background:#E1ffc3"|[[File:YCW Blue Yoshi.png|150x150px]] | |||
!colspan=2 style="background:#C3ff88"|[[File:YCW Purple Yoshi.png|150x150px]] | |||
!colspan=2 style="background:#E1ffc3"|[[File:YCW Pink Yoshi.png|150x150px]] | |||
|} | |||
===Allies=== | ===Allies=== | ||
{|align=center width=99% cellspacing=0 border=2 cellpadding=3 style="border-collapse:collapse; background:white;border:forestgreen; text-align:center" | {|align=center width=99% cellspacing=0 border=2 cellpadding=3 style="border-collapse:collapse;background:white;border:forestgreen;text-align:center" | ||
|-style="background:limegreen; color:black" | |-style="background:limegreen;color:black" | ||
!width="10%"|Name | !width="10%"|Name | ||
!Image | !Image | ||
| Line 421: | Line 410: | ||
===Enemies=== | ===Enemies=== | ||
New enemies are marked with an asterisk (*). | New enemies are marked with an asterisk (*). | ||
{|align=center width=99% cellspacing=0 border=2 cellpadding=3 style="border-collapse:collapse; background:white;border:forestgreen; text-align:center" | {|align=center width=99% cellspacing=0 border=2 cellpadding=3 style="border-collapse:collapse;background:white;border:forestgreen;text-align:center" | ||
!style="background:limegreen; color:black;"colspan=6|'''Shy Guys''' | !style="background:limegreen;color:black;"colspan=6|'''Shy Guys''' | ||
|-style="background:limegreen; color:black" | |-style="background:limegreen;color:black" | ||
!width=6%|Name | !width=6%|Name | ||
!width=8%|Image | !width=8%|Image | ||
| Line 435: | Line 424: | ||
|style="text-align:left"|Basic enemies that walk from side to side and come in various colors, and can be defeated with any attack. They can be also seen in the background, sometimes holding collectibles. | |style="text-align:left"|Basic enemies that walk from side to side and come in various colors, and can be defeated with any attack. They can be also seen in the background, sometimes holding collectibles. | ||
|Every normal level except for [[Mousers and Magnets]], [[Jumping to Victory]], [[Slip-Slide Isle]], [[Open, Shut!]], and all levels in [[Hidden Hills]] | |Every normal level except for [[Mousers and Magnets]], [[Jumping to Victory]], [[Slip-Slide Isle]], [[Open, Shut!]], and all levels in [[Hidden Hills]] | ||
|{{color|Yes | |{{color|green|Yes}} | ||
|{{color|Yes | |{{color|green|Yes}} | ||
|-style="background:#E1ffc3" | |-style="background:#E1ffc3" | ||
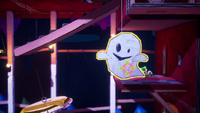
|[[Attack Ghost]]* | |[[Attack Ghost]]* | ||
|[[File:ReaperGuy.png|70px]] | |[[File:ReaperGuy.png|70px]] | ||
|style="text-align:left"|A cardboard | |style="text-align:left"|A cardboard [[Boo Guy]] with a scythe that chases Yoshi. It bears a resemblance to [[Greaper]]. | ||
|[[Haunted Maker Mansion]] | |[[Haunted Maker Mansion]] | ||
|{{color|No | |{{color|red|No}} | ||
|{{color|No | |{{color|red|No}} | ||
|-style="background:#C3ff88" | |-style="background:#C3ff88" | ||
|[[Bazooka Heyho]]* | |[[Bazooka Heyho]]* | ||
| Line 449: | Line 438: | ||
|style="text-align:left"|Armed Shy Guys that stand in one spot and fire at the direction they are looking at. They can be defeated with any attack. | |style="text-align:left"|Armed Shy Guys that stand in one spot and fire at the direction they are looking at. They can be defeated with any attack. | ||
|[[Altitude Adjustment]]<br>[[Outer Orbit]]<br>[[Mr. Geary's Factory]]<br>[[Floppin' and Poppin']] | |[[Altitude Adjustment]]<br>[[Outer Orbit]]<br>[[Mr. Geary's Factory]]<br>[[Floppin' and Poppin']] | ||
|{{color|Yes | |{{color|green|Yes}} | ||
|{{color|Yes | |{{color|green|Yes}} | ||
|-style="background:#E1ffc3" | |-style="background:#E1ffc3" | ||
|[[Donguri Heyho]]* | |[[Donguri Heyho]]* | ||
| Line 456: | Line 445: | ||
|style="text-align:left"|Shy Guys with an acorn-like hat on their heads. When they see Yoshi, they roll after him. They can be defeated with any attack. | |style="text-align:left"|Shy Guys with an acorn-like hat on their heads. When they see Yoshi, they roll after him. They can be defeated with any attack. | ||
|[[Weighing Acorns]]<br>[[Spike the Piranha]]<br>[[Kamek Kerfuffle]] | |[[Weighing Acorns]]<br>[[Spike the Piranha]]<br>[[Kamek Kerfuffle]] | ||
|{{color|Yes | |{{color|green|Yes}} | ||
|{{color|Yes | |{{color|green|Yes}} | ||
|-style="background:#C3ff88" | |-style="background:#C3ff88" | ||
|[[Fat Guy]] | |[[Fat Guy]] | ||
| Line 463: | Line 452: | ||
|style="text-align:left"|Large Shy Guys that pace back and forth. They start to run when jumped on and can hurt Yoshi if they touch him. When eaten and swallowed, they fill up Yoshi's egg stash. Some Fat Guys stay behind large rectangular cutouts, which they push to fall on Yoshi's path and then rise back upright. Yoshi can use these cutouts as platforms. | |style="text-align:left"|Large Shy Guys that pace back and forth. They start to run when jumped on and can hurt Yoshi if they touch him. When eaten and swallowed, they fill up Yoshi's egg stash. Some Fat Guys stay behind large rectangular cutouts, which they push to fall on Yoshi's path and then rise back upright. Yoshi can use these cutouts as platforms. | ||
|[[Poochy's Sweet Run]]<br>[[Altitude Adjustment]]<br>[[Poochy's Magma Run]] | |[[Poochy's Sweet Run]]<br>[[Altitude Adjustment]]<br>[[Poochy's Magma Run]] | ||
|{{color|Yes | |{{color|green|Yes}} | ||
|{{color|Yes | |{{color|green|Yes}} | ||
|-style="background:#E1ffc3" | |-style="background:#E1ffc3" | ||
|[[Fly Guy]] | |[[Fly Guy]] | ||
| Line 470: | Line 459: | ||
|style="text-align:left"|They fly back and forth on a straight line or swirl in formations around a platform at varying speeds, hurting Yoshi if they bump into him. They can be defeated in any manner. Sometimes, Fly Guys carry items which can be obtained by smacking them with an egg or by eating them. | |style="text-align:left"|They fly back and forth on a straight line or swirl in formations around a platform at varying speeds, hurting Yoshi if they bump into him. They can be defeated in any manner. Sometimes, Fly Guys carry items which can be obtained by smacking them with an egg or by eating them. | ||
|Most levels | |Most levels | ||
|{{color|Yes | |{{color|green|Yes}} | ||
|{{color|Yes | |{{color|green|Yes}} | ||
|-style="background:#C3ff88" | |-style="background:#C3ff88" | ||
|[[Fly Heyho]]* | |[[Fly Heyho]]* | ||
| Line 477: | Line 466: | ||
|style="text-align:left"|Enemies equipped with a glider, which allows them to float through the air. They make swoops above an area, turning around and descending a bit with each swoop. After they land, they act like normal Shy Guys. They can hurt Yoshi upon contact, but can be defeated with any attack. | |style="text-align:left"|Enemies equipped with a glider, which allows them to float through the air. They make swoops above an area, turning around and descending a bit with each swoop. After they land, they act like normal Shy Guys. They can hurt Yoshi upon contact, but can be defeated with any attack. | ||
|[[Ninjarama]] | |[[Ninjarama]] | ||
|{{color|Yes | |{{color|green|Yes}} | ||
|{{color|Yes | |{{color|green|Yes}} | ||
|-style="background:#E1ffc3" | |-style="background:#E1ffc3" | ||
|[[Juggling Heyho]]* | |[[Juggling Heyho]]* | ||
| Line 484: | Line 473: | ||
|style="text-align:left"|Shy Guys in red and black jester attire that juggle bombs in one spot. They can be defeated with any attack. | |style="text-align:left"|Shy Guys in red and black jester attire that juggle bombs in one spot. They can be defeated with any attack. | ||
|[[Hoop-Jump Hop]] | |[[Hoop-Jump Hop]] | ||
|{{color|Yes | |{{color|green|Yes}} | ||
|{{color|Yes | |{{color|green|Yes}} | ||
|-style="background:#C3ff88" | |-style="background:#C3ff88" | ||
|[[Ninja Guy]]* | |[[Ninja Guy]]* | ||
| Line 491: | Line 480: | ||
|style="text-align:left"|Enemies that stay in one place while hurling an indefinite amount of shurikens in the direction they face. They only throw shurikens as long as Yoshi is located in front of them. Ninja Guys can be defeated with any attack. | |style="text-align:left"|Enemies that stay in one place while hurling an indefinite amount of shurikens in the direction they face. They only throw shurikens as long as Yoshi is located in front of them. Ninja Guys can be defeated with any attack. | ||
|[[Deceptive Doors]]<br>[[Behind the Shoji]]<br>[[The Shogun's Castle]] | |[[Deceptive Doors]]<br>[[Behind the Shoji]]<br>[[The Shogun's Castle]] | ||
|{{color|Yes | |{{color|green|Yes}} | ||
|{{color|Yes | |{{color|green|Yes}} | ||
|-style="background:#E1ffc3" | |-style="background:#E1ffc3" | ||
|[[Petal Guy]] | |[[Petal Guy]] | ||
| Line 498: | Line 487: | ||
|style="text-align:left"|Shy Guys that disguise themselves as piles of flowers. They then pop up when Yoshi approaches. They can be defeated with any attack. | |style="text-align:left"|Shy Guys that disguise themselves as piles of flowers. They then pop up when Yoshi approaches. They can be defeated with any attack. | ||
|[[Spring Sprung Trail]] | |[[Spring Sprung Trail]] | ||
|{{color|Yes | |{{color|green|Yes}} | ||
|{{color|Yes | |{{color|green|Yes}} | ||
|-style="background:#C3ff88" | |-style="background:#C3ff88" | ||
|[[Rush Heyho]]* | |[[Rush Heyho]]* | ||
| Line 505: | Line 494: | ||
|style="text-align:left"|Enemies that rush in one direction while holding a sword forward. They can hurt Yoshi if they come into contact with him. However, any attack can be used to defeat them. A space-themed variant of it also appears in Outer Orbit. | |style="text-align:left"|Enemies that rush in one direction while holding a sword forward. They can hurt Yoshi if they come into contact with him. However, any attack can be used to defeat them. A space-themed variant of it also appears in Outer Orbit. | ||
|[[Deceptive Doors]]<br>[[Behind the Shoji]]<br>[[The Shogun's Castle]]<br>[[Space-Hub Hubbub]]<br>[[The Countdown Begins]] | |[[Deceptive Doors]]<br>[[Behind the Shoji]]<br>[[The Shogun's Castle]]<br>[[Space-Hub Hubbub]]<br>[[The Countdown Begins]] | ||
|{{color|Yes | |{{color|green|Yes}} | ||
|{{color|Yes | |{{color|green|Yes}} | ||
|-style="background:#E1ffc3" | |-style="background:#E1ffc3" | ||
|[[Shy Guy Tower]] | |[[Shy Guy Tower]] | ||
| Line 512: | Line 501: | ||
|style="text-align:left"|Tall stacks of Shy Guys. When Yoshi defeats one of the Shy Guys, the others fall until no more remain. | |style="text-align:left"|Tall stacks of Shy Guys. When Yoshi defeats one of the Shy Guys, the others fall until no more remain. | ||
|[[Dino Smash]]<br>[[Stitched Together]]<br>[[Windward Way]] | |[[Dino Smash]]<br>[[Stitched Together]]<br>[[Windward Way]] | ||
|{{color|Yes | |{{color|green|Yes}} | ||
|{{color|Yes | |{{color|green|Yes}} | ||
|-style="background:#C3ff88" | |-style="background:#C3ff88" | ||
|[[Skall Heyho]]* | |[[Skall Heyho]]* | ||
| Line 519: | Line 508: | ||
|style="text-align:left"|Shy Guys that run around in small dinosaur skulls, trying to ram into Yoshi. They turn around when they bump into something. | |style="text-align:left"|Shy Guys that run around in small dinosaur skulls, trying to ram into Yoshi. They turn around when they bump into something. | ||
|[[Dino Smash]] | |[[Dino Smash]] | ||
|{{color|No | |{{color|red|No}} | ||
|{{color|No | |{{color|red|No}} | ||
|-style="background:#E1ffc3" | |-style="background:#E1ffc3" | ||
|[[Spear Guy]] | |[[Spear Guy]] | ||
| Line 526: | Line 515: | ||
|style="text-align:left"|Shy Guys that hold spears and shields. They are immune to being hit from the front. They can be defeated by eating it or throwing an [[Yoshi's Egg|egg]] at its back. | |style="text-align:left"|Shy Guys that hold spears and shields. They are immune to being hit from the front. They can be defeated by eating it or throwing an [[Yoshi's Egg|egg]] at its back. | ||
|[[Mousers and Magnets]] | |[[Mousers and Magnets]] | ||
|{{color|Yes | |{{color|green|Yes}} | ||
|{{color|Yes | |{{color|green|Yes}} | ||
|-style="background:#C3ff88" | |-style="background:#C3ff88" | ||
|[[Unicycle Shy Guy]] | |[[Unicycle Shy Guy]] | ||
| Line 533: | Line 522: | ||
|style="text-align:left"|Shy Guys in red and black jester attire that ride unicycles. They can be defeated with any attack. | |style="text-align:left"|Shy Guys in red and black jester attire that ride unicycles. They can be defeated with any attack. | ||
|[[Hoop-Jump Hop]] | |[[Hoop-Jump Hop]] | ||
|{{color|Yes | |{{color|green|Yes}} | ||
|{{color|Yes | |{{color|green|Yes}} | ||
|-style="background:#E1ffc3" | |-style="background:#E1ffc3" | ||
|[[Vampire Heyho]]* | |[[Vampire Heyho]]* | ||
| Line 540: | Line 529: | ||
|style="text-align:left"|Shy Guys dressed with a black suit and a red cape which allows them to glide through the air. Once they reach the ground, they act like normal Shy Guys. Although dangerous to bump into, they can be defeated using any attack method. | |style="text-align:left"|Shy Guys dressed with a black suit and a red cape which allows them to glide through the air. Once they reach the ground, they act like normal Shy Guys. Although dangerous to bump into, they can be defeated using any attack method. | ||
|[[Haunted Maker Mansion]] | |[[Haunted Maker Mansion]] | ||
|{{color|Yes | |{{color|green|Yes}} | ||
|{{color|Yes | |{{color|green|Yes}} | ||
|-style="background:#C3ff88" | |-style="background:#C3ff88" | ||
|[[Woozy Guy]] | |[[Woozy Guy]] | ||
| Line 547: | Line 536: | ||
|style="text-align:left"|Shy Guys that move by doing continuous frontflips. They can be defeated with any move. | |style="text-align:left"|Shy Guys that move by doing continuous frontflips. They can be defeated with any move. | ||
|[[Whistlestop Rails]]<br>[[Stitched Together]]<br>[[Poochy's Sweet Run]]<br>[[Hoop-Jump Hop]]<br>[[The Countdown Begins]] | |[[Whistlestop Rails]]<br>[[Stitched Together]]<br>[[Poochy's Sweet Run]]<br>[[Hoop-Jump Hop]]<br>[[The Countdown Begins]] | ||
|{{color|Yes | |{{color|green|Yes}} | ||
|{{color|Yes | |{{color|green|Yes}} | ||
|-style="background:#E1ffc3" | |-style="background:#E1ffc3" | ||
|[[Zombie Guy]]* | |[[Zombie Guy]]* | ||
| Line 554: | Line 543: | ||
|style="text-align:left"|Undead variants of Shy Guys that shuffle slowly on the ground. While usually found in the open, they can also come out of burrows on the ground. They are harmful if touched, but Yoshi can defeat them with any attack. | |style="text-align:left"|Undead variants of Shy Guys that shuffle slowly on the ground. While usually found in the open, they can also come out of burrows on the ground. They are harmful if touched, but Yoshi can defeat them with any attack. | ||
|[[Haunted Maker Mansion]]<br>[[Be Afraid of the Dark]] | |[[Haunted Maker Mansion]]<br>[[Be Afraid of the Dark]] | ||
|{{color|Yes | |{{color|green|Yes}} | ||
|{{color|Yes | |{{color|green|Yes}} | ||
|-style="background:#C3ff88" | |-style="background:#C3ff88" | ||
|[[Zombie Debuho]]* | |[[Zombie Debuho]]* | ||
| Line 561: | Line 550: | ||
|style="text-align:left"|An undead variant of Fat Guys and a larger variant of Zombie Guys. Most of them are stationary, found sitting in couches throughout the mansions. Otherwise, they strut about outside. Like Fat Guys, they cannot be defeated with a jump, but can be defeated with a ground pound. Yoshi can also eat them to get a full stock of eggs. Often, if Yoshi eats a Zombie Debuho sitting on a couch, the couch moves, revealing a secret of some sort. | |style="text-align:left"|An undead variant of Fat Guys and a larger variant of Zombie Guys. Most of them are stationary, found sitting in couches throughout the mansions. Otherwise, they strut about outside. Like Fat Guys, they cannot be defeated with a jump, but can be defeated with a ground pound. Yoshi can also eat them to get a full stock of eggs. Often, if Yoshi eats a Zombie Debuho sitting on a couch, the couch moves, revealing a secret of some sort. | ||
|[[Haunted Maker Mansion]] | |[[Haunted Maker Mansion]] | ||
|{{color|Yes | |{{color|green|Yes}} | ||
|{{color|Yes | |{{color|green|Yes}} | ||
|- | |- | ||
!style="background:limegreen; color:black;"colspan=6|'''Other''' | !style="background:limegreen;color:black;"colspan=6|'''Other''' | ||
|- | |- | ||
|-style="background:limegreen; color:black" | |-style="background:limegreen;color:black" | ||
!width=10%|Name | !width=10%|Name | ||
!width=8%|Image | !width=8%|Image | ||
| Line 573: | Line 562: | ||
!width=6%|Defeatable? | !width=6%|Defeatable? | ||
!width=6%|Turns into egg? | !width=6%|Turns into egg? | ||
|- style="background:#C3ff88" | |-style="background:#C3ff88" | ||
|[[Bobber]]* | |[[Bobber]]* | ||
|[[File:YCW Bobber.png|70px]] | |[[File:YCW Bobber.png|70px]] | ||
|style="text-align:left"|Green enemies that sit in acorns, resembling [[Burt]]s. They swing from a string, trying to hurt Yoshi. | |style="text-align:left"|Green enemies that sit in acorns, resembling [[Burt]]s. They swing from a string, trying to hurt Yoshi. | ||
|[[Yoshi Pulls Some Strings]] | |[[Yoshi Pulls Some Strings]] | ||
|{{color|No | |{{color|red|No}} | ||
|{{color|No | |{{color|red|No}} | ||
|-style="background:#E1ffc3" | |-style="background:#E1ffc3" | ||
|[[Bon-Bom]]* | |[[Bon-Bom]]* | ||
| Line 585: | Line 574: | ||
|style="text-align:left"|Blue bombs with a [[Tap-Tap]]-like face. When they see Yoshi, they jump after him and explode a few seconds later. Yoshi can also eat Bon-Boms and spit them out to break rock walls and defeat enemies. | |style="text-align:left"|Blue bombs with a [[Tap-Tap]]-like face. When they see Yoshi, they jump after him and explode a few seconds later. Yoshi can also eat Bon-Boms and spit them out to break rock walls and defeat enemies. | ||
|[[Mine-Cart Cave]]<br>[[Dino Smash]] | |[[Mine-Cart Cave]]<br>[[Dino Smash]] | ||
|{{color|Yes | |{{color|green|Yes}} | ||
|{{color|No | |{{color|red|No}} | ||
|-style="background:#C3ff88" | |-style="background:#C3ff88" | ||
|[[Bushydo]]* | |[[Bushydo]]* | ||
| Line 592: | Line 581: | ||
|style="text-align:left"|Red samurai made out of red and blue milk bottles. They will try to attack Yoshi with their sword, which Yoshi can walk on. | |style="text-align:left"|Red samurai made out of red and blue milk bottles. They will try to attack Yoshi with their sword, which Yoshi can walk on. | ||
|[[The Shogun's Castle]] | |[[The Shogun's Castle]] | ||
|{{color|No | |{{color|red|No}} | ||
|{{color|No | |{{color|red|No}} | ||
|-style="background:#E1ffc3" | |-style="background:#E1ffc3" | ||
|[[Bullet Bill]] | |[[Bullet Bill]] | ||
| Line 599: | Line 588: | ||
|style="text-align:left"|Black bullets that are shot out of [[Bill Blaster]]s. They can be defeated by eating them. | |style="text-align:left"|Black bullets that are shot out of [[Bill Blaster]]s. They can be defeated by eating them. | ||
|[[Spinwheel Shuffle]] | |[[Spinwheel Shuffle]] | ||
|{{color|Yes | |{{color|green|Yes}} | ||
|{{color|Yes | |{{color|green|Yes}} | ||
|-style="background:#C3ff88" | |-style="background:#C3ff88" | ||
|[[Bumpty]] | |[[Bumpty]] | ||
| Line 606: | Line 595: | ||
|style="text-align:left"|Penguin enemies that try to slide into Yoshi. Although they cannot hurt Yoshi, they can potentially knock him into the water. While Yoshi can grab a Bumpty with his tongue, he cannot eat one. | |style="text-align:left"|Penguin enemies that try to slide into Yoshi. Although they cannot hurt Yoshi, they can potentially knock him into the water. While Yoshi can grab a Bumpty with his tongue, he cannot eat one. | ||
|[[Slip-Slide Isle]]<br>[[Burt's Bouncy Battle]] | |[[Slip-Slide Isle]]<br>[[Burt's Bouncy Battle]] | ||
|{{color|Yes | |{{color|green|Yes}} | ||
|{{color|No | |{{color|red|No}} | ||
|-style="background:#E1ffc3" | |-style="background:#E1ffc3" | ||
|[[Bungee Piranha]] | |[[Bungee Piranha]] | ||
| Line 613: | Line 602: | ||
|style="text-align:left"|Purple [[Piranha Plant]]s that stretch down from the ceiling. They can be defeated by throwing an [[Yoshi's Egg|egg]] at them. | |style="text-align:left"|Purple [[Piranha Plant]]s that stretch down from the ceiling. They can be defeated by throwing an [[Yoshi's Egg|egg]] at them. | ||
|[[Jumping to Victory]] | |[[Jumping to Victory]] | ||
|{{color|Yes | |{{color|green|Yes}} | ||
|{{color|No | |{{color|red|No}} | ||
|-style="background:#C3ff88" | |-style="background:#C3ff88" | ||
|[[Bunmawashi Doll]]* | |[[Bunmawashi Doll]]* | ||
| Line 620: | Line 609: | ||
|style="text-align:left"|Clown-like dolls that chase after Yoshi and attack him with an axe. They can be stopped by being exposed to light. | |style="text-align:left"|Clown-like dolls that chase after Yoshi and attack him with an axe. They can be stopped by being exposed to light. | ||
|[[Be Afraid of the Dark]] | |[[Be Afraid of the Dark]] | ||
|{{color|No | |{{color|red|No}} | ||
|{{color|No | |{{color|red|No}} | ||
|-style="background:#E1ffc3" | |-style="background:#E1ffc3" | ||
|[[Cheep Cheep]] | |[[Cheep Cheep]] | ||
| Line 627: | Line 616: | ||
|style="text-align:left"|Small red fish that jump out of the water in an attempt to hit Yoshi. They can be defeated by eating them. | |style="text-align:left"|Small red fish that jump out of the water in an attempt to hit Yoshi. They can be defeated by eating them. | ||
|[[Bombs Away on Pirate Island]]<br>[[Slip-Slide Isle]]<br>[[Ride the River]] | |[[Bombs Away on Pirate Island]]<br>[[Slip-Slide Isle]]<br>[[Ride the River]] | ||
|{{color|Yes | |{{color|green|Yes}} | ||
|{{color|Yes | |{{color|green|Yes}} | ||
|-style="background:#C3ff88" | |-style="background:#C3ff88" | ||
|[[Chompagobbler]]* | |[[Chompagobbler]]* | ||
| Line 634: | Line 623: | ||
|style="text-align:left"|Blue ghost enemies that patrol certain areas of the level [[Haunted Maker Mansion]]. When they see Yoshi, they chase after him at an extremely fast speed until he goes away. | |style="text-align:left"|Blue ghost enemies that patrol certain areas of the level [[Haunted Maker Mansion]]. When they see Yoshi, they chase after him at an extremely fast speed until he goes away. | ||
|[[Haunted Maker Mansion]] | |[[Haunted Maker Mansion]] | ||
|{{color|No | |{{color|red|No}} | ||
|{{color|No | |{{color|red|No}} | ||
|-style="background:#E1ffc3" | |-style="background:#E1ffc3" | ||
|[[Clawdaddy]] | |[[Clawdaddy]] | ||
| Line 641: | Line 630: | ||
|style="text-align:left"|Orange crab enemies that have a coat of wool protecting them. Yoshi must first lick away the wool on them then throw an egg or [[Ground Pound]] on them in order to defeat them. | |style="text-align:left"|Orange crab enemies that have a coat of wool protecting them. Yoshi must first lick away the wool on them then throw an egg or [[Ground Pound]] on them in order to defeat them. | ||
|[[Bombs Away on Pirate Island]] | |[[Bombs Away on Pirate Island]] | ||
|{{color|Yes | |{{color|green|Yes}} | ||
|{{color|No | |{{color|red|No}} | ||
|-style="background:#C3ff88" | |-style="background:#C3ff88" | ||
|[[Cybo]]* | |[[Cybo]]* | ||
| Line 648: | Line 637: | ||
|style="text-align:left"|They are normally helpful allies to Yoshi, but Cybos become hostile whenever an asteroid hits the space station in the level [[Space-Hub Hubbub]]. | |style="text-align:left"|They are normally helpful allies to Yoshi, but Cybos become hostile whenever an asteroid hits the space station in the level [[Space-Hub Hubbub]]. | ||
|[[Space-Hub Hubbub]] | |[[Space-Hub Hubbub]] | ||
|{{color|No | |{{color|red|No}} | ||
|{{color|No | |{{color|red|No}} | ||
|- style="background:#E1ffc3" | |-style="background:#E1ffc3" | ||
|[[Fang]] | |[[Fang]] | ||
|[[File:FangYCW.png|70px]] | |[[File:FangYCW.png|70px]] | ||
|style="text-align:left"|Small bats that fly in wavy patterns. They can be defeated by most attacks. | |style="text-align:left"|Small bats that fly in wavy patterns. They can be defeated by most attacks. | ||
|[[Whistlestop Rails]]<br>[[Be Afraid of the Dark]] | |[[Whistlestop Rails]]<br>[[Be Afraid of the Dark]] | ||
|{{color|Yes | |{{color|green|Yes}} | ||
|{{color|Yes | |{{color|green|Yes}} | ||
|-style="background:#C3ff88" | |-style="background:#C3ff88" | ||
|[[Fooly Flower]] | |[[Fooly Flower]] | ||
| Line 662: | Line 651: | ||
|style="text-align:left"|Enemies that mimic the appearance of a Smiley Flower, although they have a different facial expression. In some levels, Fooly Flowers rotate around a specific area during bonus challenges, hiding a Smiley Flower among them. | |style="text-align:left"|Enemies that mimic the appearance of a Smiley Flower, although they have a different facial expression. In some levels, Fooly Flowers rotate around a specific area during bonus challenges, hiding a Smiley Flower among them. | ||
|[[Whistlestop Rails]]<br>[[Poochy's Sweet Run]]<br>[[Windward Way]]<br>[[Exploring the Animal Kingdom]]<br>[[Be Afraid of the Dark]] | |[[Whistlestop Rails]]<br>[[Poochy's Sweet Run]]<br>[[Windward Way]]<br>[[Exploring the Animal Kingdom]]<br>[[Be Afraid of the Dark]] | ||
|{{color|No | |{{color|red|No}} | ||
|{{color|No | |{{color|red|No}} | ||
|-style="background:#E1ffc3" | |-style="background:#E1ffc3" | ||
|[[Flightless Goonie]] | |[[Flightless Goonie]] | ||
| Line 669: | Line 658: | ||
|style="text-align:left"|Flightless variants of [[Goonie]]s that run from left to right. They are usually encountered in groups. They can be defeated by any attack. | |style="text-align:left"|Flightless variants of [[Goonie]]s that run from left to right. They are usually encountered in groups. They can be defeated by any attack. | ||
|[[Windward Way]]<br>[[Open, Shut!]] | |[[Windward Way]]<br>[[Open, Shut!]] | ||
|{{color|Yes | |{{color|green|Yes}} | ||
|{{color|Yes | |{{color|green|Yes}} | ||
|-style="background:#C3ff88" | |-style="background:#C3ff88" | ||
|[[Flutter]] | |[[Flutter]] | ||
| Line 676: | Line 665: | ||
|style="text-align:left"|Flying enemies that get enraged and go after a Yoshi briefly if hit with any attack method. When enraged, they will fly up, allowing Yoshi to reach otherwise impossible-to-reach spots. They cannot be defeated. | |style="text-align:left"|Flying enemies that get enraged and go after a Yoshi briefly if hit with any attack method. When enraged, they will fly up, allowing Yoshi to reach otherwise impossible-to-reach spots. They cannot be defeated. | ||
|[[Weighing Acorns]] | |[[Weighing Acorns]] | ||
|{{color|No | |{{color|red|No}} | ||
|{{color|No | |{{color|red|No}} | ||
|-style="background:#E1ffc3" | |-style="background:#E1ffc3" | ||
|[[Gargantua Blargg]] | |[[Gargantua Blargg]] | ||
| Line 683: | Line 672: | ||
|style="text-align:left"|Huge, invincible, red monsters that live in the lava. They can be sent back into the lava with three egg hits, but only temporarily. | |style="text-align:left"|Huge, invincible, red monsters that live in the lava. They can be sent back into the lava with three egg hits, but only temporarily. | ||
|[[Poochy's Magma Run]] | |[[Poochy's Magma Run]] | ||
|{{color|No | |{{color|red|No}} | ||
|{{color|No | |{{color|red|No}} | ||
|-style="background:#C3ff88" | |-style="background:#C3ff88" | ||
|[[Goonie]] | |[[Goonie]] | ||
| Line 690: | Line 679: | ||
|style="text-align:left"|Flying bird enemies that travel in flocks. They flap their wings to rise, then glide to descend a bit. Yoshi can step on Goonies and use them as platforms, although this causes them to go downward under his weight. | |style="text-align:left"|Flying bird enemies that travel in flocks. They flap their wings to rise, then glide to descend a bit. Yoshi can step on Goonies and use them as platforms, although this causes them to go downward under his weight. | ||
|[[Windward Way]] | |[[Windward Way]] | ||
|{{color|Yes | |{{color|green|Yes}} | ||
|{{color|Yes | |{{color|green|Yes}} | ||
|-style="background:#E1ffc3" | |-style="background:#E1ffc3" | ||
|[[Gusty]] | |[[Gusty]] | ||
| Line 697: | Line 686: | ||
|style="text-align:left"|Enemies that fly from the left or right. They can be defeated by any move. | |style="text-align:left"|Enemies that fly from the left or right. They can be defeated by any move. | ||
|[[Stitched Together]]<br>[[Open, Shut!]]<br>[[Under Siege]] | |[[Stitched Together]]<br>[[Open, Shut!]]<br>[[Under Siege]] | ||
|{{color|Yes | |{{color|green|Yes}} | ||
|{{color|Yes | |{{color|green|Yes}} | ||
|-style="background:#C3ff88" | |-style="background:#C3ff88" | ||
|[[Koopa Troopa]] | |[[Koopa Troopa]] | ||
| Line 704: | Line 693: | ||
|style="text-align:left"|Enemies that walk back and forth. Yoshi can grab them in his mouth and spit out their shells. | |style="text-align:left"|Enemies that walk back and forth. Yoshi can grab them in his mouth and spit out their shells. | ||
|[[Many Fish in the Sea]] | |[[Many Fish in the Sea]] | ||
|{{color|Yes | |{{color|green|Yes}} | ||
|{{color|No | |{{color|red|No}} | ||
|-style="background:#E1ffc3" | |-style="background:#E1ffc3" | ||
|[[Li'l Marcher]]* | |[[Li'l Marcher]]* | ||
| Line 711: | Line 700: | ||
|style="text-align:left"|Enemies that run around whenever he activates an alarm. They can be pushed back with eggs, and can defeat themselves by colliding with another member of their species. | |style="text-align:left"|Enemies that run around whenever he activates an alarm. They can be pushed back with eggs, and can defeat themselves by colliding with another member of their species. | ||
|[[Skulking Around]]<br>[[Under Siege]] | |[[Skulking Around]]<br>[[Under Siege]] | ||
|{{color|Yes | |{{color|green|Yes}} | ||
|{{color|No | |{{color|red|No}} | ||
|-style="background:#C3ff88" | |-style="background:#C3ff88" | ||
|[[Little Mouser]] | |[[Little Mouser]] | ||
| Line 718: | Line 707: | ||
|style="text-align:left"|Small mice that play keep-away with coins and magnets. They can then be defeated by eating them. Yoshi does not take any damage if he collides with one. | |style="text-align:left"|Small mice that play keep-away with coins and magnets. They can then be defeated by eating them. Yoshi does not take any damage if he collides with one. | ||
|[[Mousers and Magnets]]<br>[[The Tin-Can Condor]] | |[[Mousers and Magnets]]<br>[[The Tin-Can Condor]] | ||
|{{color|Yes | |{{color|green|Yes}} | ||
|{{color|Yes | |{{color|green|Yes}} | ||
|-style="background:#E1ffc3" | |-style="background:#E1ffc3" | ||
|[[Lunge Fish]] | |[[Lunge Fish]] | ||
| Line 725: | Line 714: | ||
|style="text-align:left"|Gigantic green fish that jump out of the water in an attempt to eat Yoshi. They can be temporarily stunned by eggs. | |style="text-align:left"|Gigantic green fish that jump out of the water in an attempt to eat Yoshi. They can be temporarily stunned by eggs. | ||
|[[Ride the River]] | |[[Ride the River]] | ||
|{{color|No | |{{color|red|No}} | ||
|{{color|No | |{{color|red|No}} | ||
|-style="background:#C3ff88" | |-style="background:#C3ff88" | ||
|[[Makimaki]]* | |[[Makimaki]]* | ||
| Line 732: | Line 721: | ||
|style="text-align:left"|Pink round creatures with curled, squirrel-like tails. They roll pink paper while walking on it. They can be stunned by all of Yoshi's attack methods, but the only way to defeat them for good is to have Poochy run into them. | |style="text-align:left"|Pink round creatures with curled, squirrel-like tails. They roll pink paper while walking on it. They can be stunned by all of Yoshi's attack methods, but the only way to defeat them for good is to have Poochy run into them. | ||
|[[Poochy's Tape Trail]] | |[[Poochy's Tape Trail]] | ||
|{{color|Yes | |{{color|green|Yes}} | ||
|{{color|No | |{{color|red|No}} | ||
|-style="background:#E1ffc3" | |-style="background:#E1ffc3" | ||
|[[Mel (enemy)|Mel]]* | |[[Mel (enemy)|Mel]]* | ||
| Line 739: | Line 728: | ||
|style="text-align:left"|Caramel enemies that move around in tower formations. They can hurt Yoshi if they bump into him; however, they can be defeated one by one by eating and turning them into eggs. Dark Melcaras are a variant wrapped in foil. | |style="text-align:left"|Caramel enemies that move around in tower formations. They can hurt Yoshi if they bump into him; however, they can be defeated one by one by eating and turning them into eggs. Dark Melcaras are a variant wrapped in foil. | ||
|[[Poochy's Sweet Run]] | |[[Poochy's Sweet Run]] | ||
|{{color|Yes | |{{color|green|Yes}} | ||
|{{color|Yes | |{{color|green|Yes}} | ||
|-style="background:#C3ff88" | |-style="background:#C3ff88" | ||
|[[Monty Mole]] | |[[Monty Mole]] | ||
| Line 746: | Line 735: | ||
|style="text-align:left"|Mole enemies that pop out of manholes in the background. They can be defeated by hitting them with eggs. | |style="text-align:left"|Mole enemies that pop out of manholes in the background. They can be defeated by hitting them with eggs. | ||
|[[Spring Sprung Trail]]<br>[[Monty-Mole-B-Gone]] | |[[Spring Sprung Trail]]<br>[[Monty-Mole-B-Gone]] | ||
|{{color|Yes | |{{color|green|Yes}} | ||
|{{color|Yes | |{{color|green|Yes}} | ||
|- | |-style="background:#E1ffc3" | ||
|[[Nep-Enut]] | |[[Nep-Enut]] | ||
|[[File:Nep-enutYCW.png|70px]] | |[[File:Nep-enutYCW.png|70px]] | ||
|style="text-align:left"|An aquatic variation of Gargantua Blarggs. A single egg will temporarily send one back into the water. | |style="text-align:left"|An aquatic variation of Gargantua Blarggs. A single egg will temporarily send one back into the water. | ||
|[[Pirate Pier]] | |[[Pirate Pier]] | ||
|{{color|No | |{{color|red|No}} | ||
|{{color|No | |{{color|red|No}} | ||
|-style="background:#C3ff88" | |-style="background:#C3ff88" | ||
|[[Nipper Plant]] | |[[Nipper Plant]] | ||
|[[File:YCW NipperPlant.png|70px]] | |[[File:YCW NipperPlant.png|70px]] | ||
|style="text-align:left"|Petit Piranha Plants that can move on their stems. They can be defeated by throwing an egg at them. | |style="text-align:left"|Petit Piranha Plants that can move on their stems. They can be defeated by throwing an egg at them. | ||
|[[Jumping to Victory]] | |[[Jumping to Victory]] | ||
|{{color|Yes | |{{color|green|Yes}} | ||
|{{color|Yes | |{{color|green|Yes}} | ||
|- | |-style="background:#E1ffc3" | ||
|[[Nipper Spore]] | |[[Nipper Spore]] | ||
|[[File:YCW NipperSpore.png|70px]] | |[[File:YCW NipperSpore.png|70px]] | ||
|style="text-align:left"|Falling seeds that grow into Nipper Plants once they land. They can be eaten in mid-air. If Yoshi comes in contact with a Nipper Spore, he takes damage. | |style="text-align:left"|Falling seeds that grow into Nipper Plants once they land. They can be eaten in mid-air. If Yoshi comes in contact with a Nipper Spore, he takes damage. | ||
|[[Jumping to Victory]] | |[[Jumping to Victory]] | ||
|{{color|Yes | |{{color|green|Yes}} | ||
|{{color|No | |{{color|red|No}} | ||
|-style="background:#C3ff88" | |-style="background:#C3ff88" | ||
|[[Pinecone]]* | |[[Pinecone]]* | ||
| Line 774: | Line 763: | ||
|style="text-align:left"|Brown, rolling prickly creatures with angry eyes. They cannot be defeated in any way. | |style="text-align:left"|Brown, rolling prickly creatures with angry eyes. They cannot be defeated in any way. | ||
|[[Weighing Acorns]] | |[[Weighing Acorns]] | ||
|{{color|No | |{{color|red|No}} | ||
|{{color|No | |{{color|red|No}} | ||
|-style="background:#E1ffc3" | |-style="background:#E1ffc3" | ||
|[[Piranha Plant]] | |[[Piranha Plant]] | ||
| Line 781: | Line 770: | ||
|style="text-align:left"|Stationary carnivorous plants that chomp at the air aggressively, waiting to bite and injure Yoshi. They can be defeated by hitting them with an egg. | |style="text-align:left"|Stationary carnivorous plants that chomp at the air aggressively, waiting to bite and injure Yoshi. They can be defeated by hitting them with an egg. | ||
|[[Rail-Yard Run]]<br>[[Mine-Cart Cave]]<br>[[Spring-Sprung Trail]]<br>[[Skelesaurus Wrecks]]<br>[[Stitched Together]]<br>[[Behind the Shoji]]<br>[[Exploring the Animal Kingdom]]<br>[[Hoppin' Higher]]<br>[[Ride the River]] | |[[Rail-Yard Run]]<br>[[Mine-Cart Cave]]<br>[[Spring-Sprung Trail]]<br>[[Skelesaurus Wrecks]]<br>[[Stitched Together]]<br>[[Behind the Shoji]]<br>[[Exploring the Animal Kingdom]]<br>[[Hoppin' Higher]]<br>[[Ride the River]] | ||
|{{color|Yes | |{{color|green|Yes}} | ||
|{{color|No | |{{color|red|No}} | ||
|-style="background:#C3ff88" | |-style="background:#C3ff88" | ||
|[[Raven]] | |[[Raven]] | ||
| Line 788: | Line 777: | ||
|style="text-align:left"|Black bird enemies that circle around small moon-like platforms. They are immune to Yoshi's tongue, but can be defeated by jumping on them. | |style="text-align:left"|Black bird enemies that circle around small moon-like platforms. They are immune to Yoshi's tongue, but can be defeated by jumping on them. | ||
|[[Spinwheel Shuffle]] | |[[Spinwheel Shuffle]] | ||
|{{color|Yes | |{{color|green|Yes}} | ||
|{{color|No | |{{color|red|No}} | ||
|-style="background:#E1ffc3" | |-style="background:#E1ffc3" | ||
|[[Rhinono]]* | |[[Rhinono]]* | ||
| Line 795: | Line 784: | ||
|style="text-align:left"|Large, blue rhinos that chase Yoshi. While some of them are hostile, one Rhinono needs the Yoshi to help its Baby Rhinono by rebuilding the bridge. It then thanks the Yoshi by popping the large pink balloon that blocks the Yoshi's path. | |style="text-align:left"|Large, blue rhinos that chase Yoshi. While some of them are hostile, one Rhinono needs the Yoshi to help its Baby Rhinono by rebuilding the bridge. It then thanks the Yoshi by popping the large pink balloon that blocks the Yoshi's path. | ||
|[[Exploring the Animal Kingdom]] | |[[Exploring the Animal Kingdom]] | ||
|{{color|No | |{{color|red|No}} | ||
|{{color|No | |{{color|red|No}} | ||
|-style="background:#C3ff88" | |-style="background:#C3ff88" | ||
|[[Skelesaurus]]* | |[[Skelesaurus]]* | ||
| Line 802: | Line 791: | ||
|style="text-align:left"|A massive, living fossilized dinosaur that chases Yoshi, destroying everything in its path. It cannot be defeated, but Yoshi can temporarily slow it down by throwing eggs at its face. | |style="text-align:left"|A massive, living fossilized dinosaur that chases Yoshi, destroying everything in its path. It cannot be defeated, but Yoshi can temporarily slow it down by throwing eggs at its face. | ||
|[[Skelesaurus Wrecks]] | |[[Skelesaurus Wrecks]] | ||
|{{color|No | |{{color|red|No}} | ||
|{{color|No | |{{color|red|No}} | ||
|-style="background:#E1ffc3" | |-style="background:#E1ffc3" | ||
|[[Snakey]]* | |[[Snakey]]* | ||
| Line 809: | Line 798: | ||
|style="text-align:left"|A gigantic snake that constantly extends. Yoshi can hit it to temporarily contract its body. | |style="text-align:left"|A gigantic snake that constantly extends. Yoshi can hit it to temporarily contract its body. | ||
|[[Hoppin' Higher]] | |[[Hoppin' Higher]] | ||
|{{color|No | |{{color|red|No}} | ||
|{{color|No | |{{color|red|No}} | ||
|-style="background:#C3ff88" | |-style="background:#C3ff88" | ||
|[[Takko]]* | |[[Takko]]* | ||
| Line 816: | Line 805: | ||
|style="text-align:left"|A blue, squid-like extraterrestrial. They only appear in the [[moon]] portion of [[The Countdown Begins]]. When Yoshi jumps on them, they emit some smoke. They do not hurt Yoshi, and cannot be defeated. | |style="text-align:left"|A blue, squid-like extraterrestrial. They only appear in the [[moon]] portion of [[The Countdown Begins]]. When Yoshi jumps on them, they emit some smoke. They do not hurt Yoshi, and cannot be defeated. | ||
|[[The Countdown Begins]] | |[[The Countdown Begins]] | ||
|{{color|No | |{{color|red|No}} | ||
|{{color|No | |{{color|red|No}} | ||
|-style="background:#E1ffc3" | |-style="background:#E1ffc3" | ||
|[[Tap-Tap]] | |[[Tap-Tap]] | ||
| Line 823: | Line 812: | ||
|style="text-align:left"|Silver, spiky enemies that walk around. They are immune to most attacks, but can be pushed back by eggs or Yoshi's tongue. They can be defeated in two-player mode if a mounted Yoshi ground pounds nearby or if it gets run over by [[Poochy]]. | |style="text-align:left"|Silver, spiky enemies that walk around. They are immune to most attacks, but can be pushed back by eggs or Yoshi's tongue. They can be defeated in two-player mode if a mounted Yoshi ground pounds nearby or if it gets run over by [[Poochy]]. | ||
|[[Poochy's Magma Run]]<br>[[Skulking Around]] | |[[Poochy's Magma Run]]<br>[[Skulking Around]] | ||
|{{color|Yes | |{{color|Green|Yes}} | ||
|{{color|No | |{{color|red|No}} | ||
|-style="background:#C3ff88" | |-style="background:#C3ff88" | ||
|[[Ukiki]] | |[[Ukiki]] | ||
| Line 830: | Line 819: | ||
|style="text-align:left"|Brown monkeys that jump around. Some throw things, like missiles and eggs. While Yoshi can grab Ukikis with his tongue, he cannot eat them. They can be defeated by spitting them into the water. | |style="text-align:left"|Brown monkeys that jump around. Some throw things, like missiles and eggs. While Yoshi can grab Ukikis with his tongue, he cannot eat them. They can be defeated by spitting them into the water. | ||
|[[Jumping to Victory]]<br>[[Bombs Away on Pirate Island]] | |[[Jumping to Victory]]<br>[[Bombs Away on Pirate Island]] | ||
|{{color|Yes | |{{color|green|Yes}} | ||
|{{color|No | |{{color|red|No}} | ||
|-style="background:#E1ffc3" | |-style="background:#E1ffc3" | ||
|[[Wall Lakitu]] | |[[Wall Lakitu]] | ||
| Line 837: | Line 826: | ||
|style="text-align:left"|Enemies that hide behind structures in the background. If a Yoshi comes within their line of sight, they lock in and throw [[Spiny Egg]]s. They can be defeated by throwing eggs at them. | |style="text-align:left"|Enemies that hide behind structures in the background. If a Yoshi comes within their line of sight, they lock in and throw [[Spiny Egg]]s. They can be defeated by throwing eggs at them. | ||
|[[Be Afraid of the Dark]] | |[[Be Afraid of the Dark]] | ||
|{{color|Yes | |{{color|green|Yes}} | ||
|{{color|No | |{{color|red|No}} | ||
|} | |} | ||
===Bosses=== | ===Bosses=== | ||
Main story bosses must be defeated to retrieve the Dream Gems. The game also features three mini-bosses, indicated by an asterisk (*) in the list below, and a bonus boss fight with Kamek. | Main story bosses must be defeated to retrieve the Dream Gems. The game also features three mini-bosses, indicated by an asterisk (*) in the list below, and a bonus boss fight with Kamek. | ||
{|align=center width=99% cellspacing=0 border=2 cellpadding=3 style="border-collapse:collapse;background:white;border:forestgreen;text-align:center" | |||
{|align=center width=99% cellspacing=0 border=2 cellpadding=3 style="border-collapse:collapse; background:white;border:forestgreen; text-align:center" | |-style="background:limegreen;color:black" | ||
|-style="background:limegreen; color:black" | |||
!width="10%"|Name | !width="10%"|Name | ||
!Image | !Image | ||
| Line 859: | Line 847: | ||
|[[File:TheTinCanCondor.jpg|250px]] | |[[File:TheTinCanCondor.jpg|250px]] | ||
|[[The Tin-Can Condor]] | |[[The Tin-Can Condor]] | ||
|style="text-align:left"|A giant bird made from a tin can guarding the {{color| | |style="text-align:left"|A giant bird made from a tin can guarding the {{color|black|bg=royalblue|Blue Dream Gem}}. The player needs to use a magnet to pull it to the floor, then Ground Pound his head when his crown falls off. | ||
|- style="background:#C3ff88" | |-style="background:#C3ff88" | ||
|[[Burt the Ball]] | |[[Burt the Ball]] | ||
|[[File:YCW Burt The Ball.png|150px]] | |[[File:YCW Burt The Ball.png|150px]] | ||
|[[Burt's Bouncy Battle]] | |[[Burt's Bouncy Battle]] | ||
|style="text-align:left"|A big rubber Burt guarding the {{color| | |style="text-align:left"|A big rubber Burt guarding the {{color|black|bg=yellow|Yellow Dream Gem}}. The player has to spit Bumpties back at him to knock him into the water and Ground Pound his weak point. | ||
|-style="background:#E1ffc3" | |-style="background:#E1ffc3" | ||
|[[Spike the Piranha]] | |[[Spike the Piranha]] | ||
|[[File:Spike the Piranha splash.png|250px]] | |[[File:Spike the Piranha splash.png|250px]] | ||
|[[Spike the Piranha (level)|Spike the Piranha]] | |[[Spike the Piranha (level)|Spike the Piranha]] | ||
|style="text-align:left"|A giant Piranha Plant boss guarding the {{color| | |style="text-align:left"|A giant Piranha Plant boss guarding the {{color|black|bg=red|Red Dream Gem}}, similar to [[Naval Piranha]] and [[Big Bungee Piranha]] from other ''Yoshi'' games. The player needs to hit him on the head with a spiky ball to do damage. | ||
|-style="background:#C3ff88" | |-style="background:#C3ff88" | ||
|[[Shogun of Skewers]]* | |[[Shogun of Skewers]]* | ||
| Line 879: | Line 867: | ||
|[[File:YCW Dragon Train.png|150px]] | |[[File:YCW Dragon Train.png|150px]] | ||
|[[Gator Train Attacks!]] | |[[Gator Train Attacks!]] | ||
|style="text-align:left"|A giant train shaped like an alligator guarding the {{color| | |style="text-align:left"|A giant train shaped like an alligator guarding the {{color|black|bg=magenta|Magenta Dream Gem}}. It is defeated by hitting the inside of its mouth with an egg when it charges the player's own train. | ||
|-style="background:#C3ff88" | |-style="background:#C3ff88" | ||
|[[Mr. Geary]]* | |[[Mr. Geary]]* | ||
| Line 889: | Line 877: | ||
|[[File:YCWTheGreatKingBowser.jpg|250px]] | |[[File:YCWTheGreatKingBowser.jpg|250px]] | ||
|align="center" rowspan="2"|[[The Great King Bowser (level)|The Great King Bowser]] | |align="center" rowspan="2"|[[The Great King Bowser (level)|The Great King Bowser]] | ||
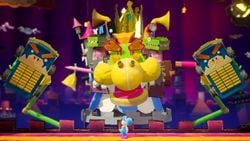
|rowspan="2" style="text-align:left"|Baby Bowser is the final boss of the main story, holding the {{color| | |rowspan="2"style="text-align:left"|Baby Bowser is the final boss of the main story, holding the {{color|black|bg=limegreen|Green Dream Gem}} and eventually the Sundream Stone itself. His first battle is against a giant robot controlled by him; the player must avoid its attacks, force Baby Bowser out by destroying its arms, then Ground Pound him. The robot will eventually be completely ruined, at which point Kamek, with the help of the Sundream Stone, turns Baby Bowser into Mega Baby Bowser. This version of him will attack Yoshi with fireballs, falling stars and meteors, as well as hammers and rockets that the player must use against him. | ||
|-style="background:#E1ffc3" | |-style="background:#E1ffc3" | ||
|[[ | |[[Mega Baby Bowser]] | ||
|[[File:YCW Mega Baby Bowser.png|250px]] | |[[File:YCW Mega Baby Bowser.png|250px]] | ||
|-style="background:#C3ff88" | |-style="background:#C3ff88" | ||
| Line 902: | Line 890: | ||
==Items and objects== | ==Items and objects== | ||
===Collectibles=== | ===Collectibles=== | ||
{|align=center width=99% cellspacing=0 border=2 cellpadding=3 style="border-collapse:collapse; background:white;border:forestgreen; text-align:center" | {|align=center width=99% cellspacing=0 border=2 cellpadding=3 style="border-collapse:collapse;background:white;border:forestgreen;text-align:center" | ||
|-style="background:limegreen; color:black" | |-style="background:limegreen;color:black" | ||
!width="10%"|Name | !width="10%"|Name | ||
!width="10%"|Image | !width="10%"|Image | ||
| Line 922: | Line 910: | ||
===General items and objects=== | ===General items and objects=== | ||
{|align=center width=99% cellspacing=0 border=2 cellpadding=3 style="border-collapse:collapse; background:white;border:forestgreen; text-align:center" | {|align=center width=99% cellspacing=0 border=2 cellpadding=3 style="border-collapse:collapse;background:white;border:forestgreen;text-align:center" | ||
|-style="background:limegreen; color:black" | |-style="background:limegreen;color:black" | ||
!width="10%"|Name | !width="10%"|Name | ||
!width="10%"|Image | !width="10%"|Image | ||
| Line 981: | Line 969: | ||
|-style="background:#E1ffc3" | |-style="background:#E1ffc3" | ||
|[[Roulette Block]] | |[[Roulette Block]] | ||
| | |[[File:YCW Roulette Block.png|40px]] | ||
|style="text-align:left"|Blocks that alternate between giving an amount of one, three, five, ten, or twenty coins, hearts, of types of eggs. Each one flips through a different number and set of items. | |style="text-align:left"|Blocks that alternate between giving an amount of one, three, five, ten, or twenty coins, hearts, of types of eggs. Each one flips through a different number and set of items. | ||
|-style="background:#C3ff88" | |-style="background:#C3ff88" | ||
|[[Spring Ball]] | |[[Spring Ball]] | ||
| | |[[File:YCW Spring Ball.png|40px]] | ||
|style="text-align:left"|Round objects with an upward arrow imprinted on them. Yoshi can use them to jump higher. | |style="text-align:left"|Round objects with an upward arrow imprinted on them. Yoshi can use them to jump higher. | ||
|-style="background:#E1ffc3" | |-style="background:#E1ffc3" | ||
| Line 1,033: | Line 1,021: | ||
In January 2019, Amazon Japan featured a preorder bundle containing the game, a tote bag themed to the game, and ten Yoshi plushes by Sanei Boeki.<ref>[https://www.amazon.co.jp/d/B07MM3XWJ6/]. ''Amazon.co.jp''. Retrieved July 17, 2022.</ref> | In January 2019, Amazon Japan featured a preorder bundle containing the game, a tote bag themed to the game, and ten Yoshi plushes by Sanei Boeki.<ref>[https://www.amazon.co.jp/d/B07MM3XWJ6/]. ''Amazon.co.jp''. Retrieved July 17, 2022.</ref> | ||
On March 20, 2019, in celebration of the ''Yoshi's Crafted World''{{'}}s launch at the time, Nintendo of UK announced a partnership with [https://kidzania.co.uk/ KidZania London] to host an {{wp|Egg hunt|Easter egg hunt}} event titled Yoshi's Easter Egg Hunt, which lasted from April 8 to April 21, 2019.<ref>Nintendo of UK (March 20, 2019). {{ | On March 20, 2019, in celebration of the ''Yoshi's Crafted World''{{'}}s launch at the time, Nintendo of UK announced a partnership with [https://kidzania.co.uk/ KidZania London] to host an {{wp|Egg hunt|Easter egg hunt}} event titled Yoshi's Easter Egg Hunt, which lasted from April 8 to April 21, 2019.<ref>Nintendo of UK (March 20, 2019). {{file link|Nintendo UK YCW Yoshi's Easter Egg Hunt 2019.jpg|A promotion for the Yoshi's Easter Egg Hunt event at KidZania London}}. Facebook.</ref> | ||
Sometime in 2019, a quiz was released on [[Play Nintendo]] called the ''[[Yoshi's Crafted World Trivia Quiz]]''. | Sometime in 2019, a quiz was released on [[Play Nintendo]] called the ''[[Yoshi's Crafted World Trivia Quiz]]''. | ||
| Line 1,040: | Line 1,028: | ||
==Development== | ==Development== | ||
Unusually for a [[Nintendo]] title, ''Yoshi's Crafted World'' was developed with {{wp|Unreal Engine 4}} in place of an in-house engine. According to producer Etsunobu Ebisu, the engine was chosen in order to more accurately represent the realistic materials featured in the game.<ref name="IGN">March 28, 2019. [https://www.ign.com/articles/2019/03/28/yoshis-crafted-world-developers-speak-on-unreal-engine-amiibo-and-more-a-ign-first Yoshi's Crafted World Developers Speak on Unreal Engine, amiibo, and More! – IGN First | Unusually for a [[Nintendo]] title, ''Yoshi's Crafted World'' was developed with {{wp|Unreal Engine 4}} in place of an in-house engine, making it the first ''[[Super Mario (franchise)|Super Mario]]'' and [[Nintendo]] game to be developed with this engine. According to producer Etsunobu Ebisu, the engine was chosen in order to more accurately represent the realistic materials featured in the game.<ref name="IGN">March 28, 2019. [https://www.ign.com/articles/2019/03/28/yoshis-crafted-world-developers-speak-on-unreal-engine-amiibo-and-more-a-ign-first Yoshi's Crafted World Developers Speak on Unreal Engine, amiibo, and More! – IGN First | ||
]. ''IGN.'' Retrieved July 15, 2023.</ref> As for the concept behind the art style, the developers claimed the game is supposed to take place in a kindergarten class within the ''Super Mario'' universe.<ref name="interview"/> | ]. ''IGN.'' Retrieved July 15, 2023.</ref> As for the concept behind the art style, the developers claimed the game is supposed to take place in a kindergarten class within the ''Super Mario'' universe.<ref name="interview"/> | ||
==Update== | |||
===Ver. 1.0.1=== | |||
This update was released on April 23, 2019.<ref>https://en-americas-support.nintendo.com/app/answers/detail/a_id/45096/~/how-to-update-yoshis-crafted-world#v101</ref> | |||
<i><blockquote> | |||
*We fixed the issue where the game would not start when the player uses the analogue stick upon game start up. | |||
*We fixed some other issues so the player can enjoy the game. | |||
</blockquote></i> | |||
==Critical reception== | ==Critical reception== | ||
''Yoshi's Crafted World'' has received generally positive reviews. Critics have praised the game's aesthetic and number of collectibles, but the difficulty and repetitive music have been criticized<ref name=GameXplain> GameXplain. (March 27, 2019). [https://www.youtube.com/watch?v=RfiLn4oDoyc ''Yoshi's Crafted World'' - REVIEW (Nintendo Switch)] ''YouTube''. Retrieved March 27, 2019 (PST).</ref>. | ''Yoshi's Crafted World'' has received generally positive reviews. Critics have praised the game's aesthetic and number of collectibles, but the difficulty and repetitive music have been criticized<ref name=GameXplain> GameXplain. (March 27, 2019). [https://www.youtube.com/watch?v=RfiLn4oDoyc ''Yoshi's Crafted World'' - REVIEW (Nintendo Switch)] ''YouTube''. Retrieved March 27, 2019 (PST).</ref>. | ||
{| class="wikitable reviews" | {|class="wikitable reviews" | ||
!colspan="4"style="font-size:120%; text-align:center; background-color:silver;"|Reviews | !colspan="4"style="font-size:120%;text-align:center;background-color:silver;"|Reviews | ||
|-style="background-color:#E6E6E6" | |-style="background-color:#E6E6E6" | ||
|Release | |Release | ||
| Line 1,068: | Line 1,064: | ||
|"''Yoshi's Crafted World is at its best when it's relaxing and pleasant. The 2D-to-3D level design keeps you curious while the go-at-your-own-pace approach keeps the pressure off and leaves you to appreciate the small, imaginative details. Its most interesting ideas never evolve past their first introductions and are frequently confined to one or two levels, but individually, those levels both reward your curiosity and your willingness to slow down and look at what's around you--and it's those simple pleasures that provide the most joy.''" | |"''Yoshi's Crafted World is at its best when it's relaxing and pleasant. The 2D-to-3D level design keeps you curious while the go-at-your-own-pace approach keeps the pressure off and leaves you to appreciate the small, imaginative details. Its most interesting ideas never evolve past their first introductions and are frequently confined to one or two levels, but individually, those levels both reward your curiosity and your willingness to slow down and look at what's around you--and it's those simple pleasures that provide the most joy.''" | ||
|- | |- | ||
!colspan="4"style="font-size:120%; text-align:center; background-color:silver;"|Aggregators | !colspan="4"style="font-size:120%;text-align:center;background-color:silver;"|Aggregators | ||
|-style="background-color:#E6E6E6" | |-style="background-color:#E6E6E6" | ||
|colspan=2|Compiler | |colspan=2|Compiler | ||
|colspan=2|{{ | |colspan=2|{{nw|Platform / Score}} | ||
|- | |- | ||
|colspan=2|Metacritic | |colspan=2|Metacritic | ||
| Line 1,119: | Line 1,115: | ||
*''[[Super Mario Galaxy]]'': Kamek's paper artwork is based on the Magikoopa's artwork from this game. | *''[[Super Mario Galaxy]]'': Kamek's paper artwork is based on the Magikoopa's artwork from this game. | ||
*''[[Mario Kart 8]]'' / ''[[Mario Kart 8 Deluxe]]'': Many of the craft materials are packaging from products, including the sponsors [[List of sponsors in Mario Kart 8 and Mario Kart 8 Deluxe#Fuzzy Battery|Fuzzy Battery]], [[List of sponsors in Mario Kart 8 and Mario Kart 8 Deluxe#Moo Moo Meadows Milk|Moo Moo Meadows Milk]] and [[List of sponsors in Mario Kart 8 and Mario Kart 8 Deluxe#Princess Orange|Princess Orange]] from these games, as well as [[List of sponsors in Mario Kart Wii#Fountain Cafe|Fountain Cafe]] and [[List of sponsors in Mario Kart Wii#Tropical Bakery|Tropical Bakery]], which use their updated logos from these games. Additionally, "Handle with care" stickers featuring [[? Block]]s from [[Sunshine Airport]] appear on various objects in the scenery. | *''[[Mario Kart 8]]'' / ''[[Mario Kart 8 Deluxe]]'': Many of the craft materials are packaging from products, including the sponsors [[List of sponsors in Mario Kart 8 and Mario Kart 8 Deluxe#Fuzzy Battery|Fuzzy Battery]], [[List of sponsors in Mario Kart 8 and Mario Kart 8 Deluxe#Moo Moo Meadows Milk|Moo Moo Meadows Milk]] and [[List of sponsors in Mario Kart 8 and Mario Kart 8 Deluxe#Princess Orange|Princess Orange]] from these games, as well as [[List of sponsors in Mario Kart Wii#Fountain Cafe|Fountain Cafe]] and [[List of sponsors in Mario Kart Wii#Tropical Bakery|Tropical Bakery]], which use their updated logos from these games. Additionally, "Handle with care" stickers featuring [[? Block]]s from [[Sunshine Airport]] appear on various objects in the scenery. | ||
*''[[Yoshi's New Island]]'': The song "Yards of Yarn" features this game's motif at around the 30-second mark. | |||
*''[[Yoshi's Woolly World]]'': Green Yarn Yoshi, Light-Blue Yarn Yoshi, and Pink Yarn Yoshi all appear as collectible amiibo costumes by scanning their respective [[amiibo]]. In certain levels such as [[Skulking Around]], stickers reading "15.07.16" can be seen stuck on the level environments, which is the Japanese release date of this game in the yy/mm/dd date format. The level [[Stitched Together]] reuses many assets and features from this game, such as [[Mobile]]s and [[Accordion wall]]s. Mellow Mode returns from this game. | *''[[Yoshi's Woolly World]]'': Green Yarn Yoshi, Light-Blue Yarn Yoshi, and Pink Yarn Yoshi all appear as collectible amiibo costumes by scanning their respective [[amiibo]]. In certain levels such as [[Skulking Around]], stickers reading "15.07.16" can be seen stuck on the level environments, which is the Japanese release date of this game in the yy/mm/dd date format. The level [[Stitched Together]] reuses many assets and features from this game, such as [[Mobile]]s and [[Accordion wall]]s. Mellow Mode returns from this game. | ||
*''[[Poochy & Yoshi's Woolly World]]'': Poochy Pups return from this game. | *''[[Poochy & Yoshi's Woolly World]]'': Poochy Pups return from this game. | ||
| Line 1,130: | Line 1,127: | ||
|JapR=Yosshī Kurafuto Wārudo | |JapR=Yosshī Kurafuto Wārudo | ||
|JapM=Yoshi Craft World | |JapM=Yoshi Craft World | ||
| | |ChiS=耀西的手工世界<ref>http://www.nintendo.com.hk/pressrelease/switch_20180914_2_sc.htm</ref> | ||
| | |ChiSR=Yàoxī de Shǒugōng Shìjiè | ||
| | |ChiSM=Yoshi's Handicraft World | ||
|Kor=요시 크래프트 월드<ref> | |ChiT= | ||
|ChiTR= | |||
|ChiTM= | |||
|Dut= | |||
|DutM= | |||
|FreA= | |||
|FreAM= | |||
|FreE= | |||
|FreEM= | |||
|Ger= | |||
|GerM= | |||
|Ita= | |||
|ItaM= | |||
|Kor=요시 크래프트 월드<ref>https://nintendo.co.kr/news/view.php?idx=164</ref> | |||
|KorR=Yosi Keuraepeuteu Woldeu | |KorR=Yosi Keuraepeuteu Woldeu | ||
|KorM=Yoshi Craft World | |KorM=Yoshi Craft World | ||
|PorA= | |||
|PorAM= | |||
|PorE= | |||
|PorEM= | |||
|Rus= | |||
|RusR= | |||
|RusM= | |||
|SpaA= | |||
|SpaAM= | |||
|SpaE= | |||
|SpaEM= | |||
}} | }} | ||
| Line 1,151: | Line 1,172: | ||
[[Category:Nintendo Switch games]] | [[Category:Nintendo Switch games]] | ||
[[Category:2019 games]] | [[Category:2019 games]] | ||
[[Category:2021 games]] | |||
[[Category:Games with demos]] | [[Category:Games with demos]] | ||
[[de:Yoshi's Crafted World]] | [[de:Yoshi's Crafted World]] | ||
[[it:Yoshi's Crafted World]] | [[it:Yoshi's Crafted World]] | ||
Revision as of 22:12, December 17, 2024
| Yoshi's Crafted World | |||||||||||||||||||||||||||||
|---|---|---|---|---|---|---|---|---|---|---|---|---|---|---|---|---|---|---|---|---|---|---|---|---|---|---|---|---|---|
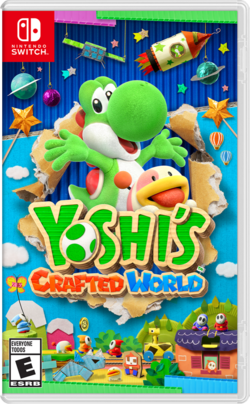 For alternate box art, see the game's gallery. | |||||||||||||||||||||||||||||
| Developer | Good-Feel | ||||||||||||||||||||||||||||
| Publisher | Nintendo | ||||||||||||||||||||||||||||
| Platform(s) | Nintendo Switch | ||||||||||||||||||||||||||||
| Release date | |||||||||||||||||||||||||||||
| Language(s) | English (United Kingdom) English (United States) French (France) French (Canada) German Spanish (Spain) Spanish (Latin America) Italian Dutch Russian Japanese Simplified Chinese Traditional Chinese Korean | ||||||||||||||||||||||||||||
| Genre | Platformer | ||||||||||||||||||||||||||||
| Rating(s) |
| ||||||||||||||||||||||||||||
| Mode(s) | Single-player Multiplayer | ||||||||||||||||||||||||||||
| Format | Nintendo Switch: | ||||||||||||||||||||||||||||
| Input | Nintendo Switch: | ||||||||||||||||||||||||||||
| Serial code(s) | |||||||||||||||||||||||||||||
Yoshi's Crafted World is a title in the Yoshi franchise and the follow-up to the 2015 Wii U game Yoshi's Woolly World, released for the Nintendo Switch on March 29, 2019. It was developed by Good-Feel, the developer behind Yoshi's Woolly World and its Nintendo 3DS port Poochy & Yoshi's Woolly World. The game places a great emphasis on its 3D environments; Yoshi is able to aim eggs into objects that appear in the foreground and background and can travel through a pseudo-3D environment along mostly yellow tape trails.
Unlike the previous game, the game adopts a hand-crafted art style, with every level being made to have a "theme of things crafted in kindergarten."[3] The Yoshis in particular are made out of a material called "flocky".[4] A variety of cardboard costumes are available to unlock within the game, including some based off Nintendo Labo. The game also features amiibo support, with certain amiibo granting the player exclusive themed costumes.
Story
General
At the start of the game, the Yoshis are seen resting on their island, gathered around the Sundream Stone, an artifact said to possess the power to make dreams come true. Suddenly, Kamek and Baby Bowser, who have heard the legend of the Sundream Stone, arrive at the island to take it for themselves. The Yoshis attempt to save the artifact from being stolen, which leads to its gems becoming detached and being flung across multiple worlds. The Yoshis then embark on a journey to search for the gems.
Multiple times over the course of the game, the Yoshis meet up with Kamek and Baby Bowser, who are also in search of the gems. After a short conversation, Kamek uses his magic to create a creature out of the surrounding landscape and pits it against the Yoshis. After defeating a boss, the Yoshis find one of the gems nearby and put it back into Sundream Stone.
After the Yoshis collect all the gems, Kamek steals them and grants Baby Bowser's wish, creating the "biggest, baddest, [and] most awesomest" robot. He then transforms Baby Bowser into a giant. After he is defeated, the Yoshis restore the Sundream Stone back to its original state and wish to return home. The stone then uses its power to create a large ship from the wreckage of The Great King Bowser that carries them back to their home island, which they continue to use as their base of operations.
Text
Opening
Narrator: This is the lovely island of the Yoshis.
- At the topmost peak of the island sits a glistening, gem-set wonder known as the Sundream Stone.
- Legends say the Sundream Stone possesses the power to make anyone's wildest dreams come true!
- One fine day...
- Baby Bowser and Kamek caught wind of the Sundream Stone and made their way to the island.
Kamek: "Eeeheehee! We'll be taking that!"
Narrator: When the Yoshis came to, they found themselves in an unfamiliar forest...
- Aw... The poor Yoshis seem to be lost...
- Oh my! The Dream Gems - they're all gone!
- The Sundream Stone isn't looking too hot now...
- What a tragedy! Someone better find those gems before Kamek and Baby Bowser get to them.
- Wonder where this path leads...
- Maybe it'll pave the way to the gems!
- Looks like the Yoshis are sorting out who should go on this mission.
(after players choose a Yoshi to play as)
Narrator: It's settled, then!
- The rest of the Yoshis will stay and protect the Sundream Stone. It'll be safe and sound!
- The journey to find the gems begins!
Ending
Narrator: And so, the Sundream Stone was finally restored.
- Together, the Yoshis dreamed...that they could be returned to their island home!
- All right, let's head back home!
Gameplay
Similar to the previous Yoshi games, Yoshi can run, jump, lick up enemies, Flutter Jump, Ground Pound, and throw Yoshi's Eggs/Poochy Pups. Conversely, Yoshi no longer needs to crouch in order to turn an enemy into an egg, as this action is now performed automatically upon grabbing an enemy with the tongue. The mechanics of Yoshi's egg throwing have likewise changed considerably. Instead of an autonomously moving cursor, Yoshi can freely aim the cursor anywhere on the screen, so that they can aim at objects in the foreground and background. When an object on a different plane is highlighted, the player can throw an egg at it, but eggs are otherwise restricted to a 2D plane. Some objects get knocked away while others stay in place after the impact. Yoshi can often travel between planes by following paths that connect them. While on one of these paths, Yoshi can only ground pound with the L or ZL buttons, due to the down command being assigned to moving towards the player.
Like Yoshi's Woolly World, Yoshi has a health meter that can be replenished by hearts, up to 20. These can be obtained by hitting certain Winged Clouds, reaching Check Points, or hitting Roulette Blocks at the right time. Costumes can also be applied to Yoshi which allow him to take extra hits based on the costume's rarity (three for Common, four for Rare, and five for Super Rare/amiibo). These extra hits are replenished upon reaching a checkpoint, but if enough hits are taken, the costume is irreversibly destroyed for the rest of the level (though the costume can be reapplied from the World Map).
Each level contains a unique level style and features, such as spotlights that summon enemies if they spot Yoshi and ropes that he can swing on. Generally, these features are only used in one level, though a few of them do make reappearances in Hidden Hills.
A number of levels in the game include alternative gameplay styles and challenges, often involving vehicles on auto-scrolling planes. In these, up to three Smiley Flowers can be collected based off how many points players get, with the exception of Solar Zoom, where it is instead based off how they place in the race.
This is the first Yoshi game without the game files option at the start.
Flip side
Each level (aside from boss fights and the levels in Hidden Hills) provide access to both the "front side" and the "flip side." The flip side gives a look at levels from the backside, often showing off how certain contraptions within the levels work, emphasizing the hand-crafted feel. The flip side can only be accessed upon beating the corresponding front side, and only after Poochy's Tape Trail has been completed.
In each flip side, the only collectibles remaining are hearts, which are the only items available in Winged Clouds. Some souvenirs can also be found on the flip side.
Instead, three Poochy Pups can be found scattered throughout the level. They can be found in a variety of situations: jumping between bushes, hanging onto rotating blocks, or even riding on solar cars. Once touched, licked, or hit with an egg, the Poochy Pup will follow closely behind Yoshi. They can be used as projectiles that can return to Yoshi, effectively giving an infinite supply of eggs.
For each pup brought to the end goal, a Smiley Flower will be obtained. Additionally, if all three pups are brought to the goal under a certain time limit, Poochy will appear holding a fourth Smiley Flower in his mouth.
Collectibles
Each level has a variety of collectibles to obtain, each requiring different conditions to find. In addition to the Smiley Flowers strewn about each level, obtaining all of the collectibles of another type will give the player another Smiley Flower. Players do not need to collect all the collectibles in one run; previously obtained Smiley Flowers and Red Coins will remain translucent upon replays. Some collectibles are found in presents in the background.
Smiley Flowers are used to unlock new subworlds by paying a "toll" to the Blockafeller resting in front of it. Once all of them are collected, they can be paid to the big Blockafeller in Hidden Hills to unlock the Sundream Stone costume. Getting all the Smiley Flowers in a subworld will adorn the diorama with festive pinwheel flowers.
Blockafellers appear in each subworld to provide the Yoshis with missions to find souvenirs in the form of crafts, themed decorations that appear in the foreground or background. One at a time, Yoshi will be requested to find a certain number of the souvenir in a certain level. Once Yoshi finds and throws eggs at each of them, he can leave the level immediately, or continue to play through. Either way, after returning to the world map, the Blockafeller will give Yoshi a Smiley Flower as a reward and, if the are still uncollected souvenirs in the subworld, request another type of souvenir.
Similarly, a small Blockafeller named Sprout can be found hiding in every level, on the ground, once Baby Bowser is defeated. Although he does not give Smiley Flowers for being found, finding him in every level will award a costume based off himself.
Modes
There are two modes, Classic and Mellow.
Co-op
Two players are able to play the entire game together, each one being a differently colored Yoshi. Each player can also choose their own costume and control options from the menu.
While playing, both players share the same screen, with a camera that dominantly follows Player 1. Each Yoshi has all of the abilities they can use in single-player, and they are able to eat and spit out each other. Additionally, one Yoshi can ride on the other, losing control of movement, but in turn having an unlimited supply of eggs to throw. The Yoshi on the bottom also gains an enhanced Ground Pound that sends out a shockwave, but cannot throw eggs until the Yoshi on top jumps off.
Only one Yoshi needs to have 20 hearts at the end of a level to obtain the level's corresponding Smiley Flower. To make the task easier, Winged Clouds that drop hearts will produce 10 hearts instead of 5.
Mellow Mode
Brought back from Yoshi's Woolly World, Mellow Mode is an option in available at any time in the menu. When selected, Yoshi grows a pair of wings that allow them to Flutter Jump infinitely by holding down the jump button. Yoshi will also only lose one heart upon taking damage, and lays two eggs after eating an enemy.
Worlds and courses
Yoshi's Crafted World has 17 worlds in total, each one featuring a signature theme and constructed from different materials and techniques. Most worlds in the game feature two to four levels, and only six of them include a boss stage. This contrasts with previous Yoshi platformers, which typically include fewer worlds with a consistent, higher number of levels and one boss per world.
In order to progress to different worlds, Yoshis will often need to hand over Smiley Flowers to Blockafellers they meet along the way. The first and final sections of the game are linear, with each world leading to a single other. After Origami Gardens, however, the path branches into two, giving the player more options regarding the order in which to complete the middle portion of the game. The paths converge again in Ninjarama. A bonus area, Hidden Hills, becomes available after beating the final main story boss.
A few courses in the game are scoring-based challenges in timed or auto-scrolling settings, with the player's final score translating into an amount of Smiley Flowers as a reward. These levels are marked below with an arrow (▷).
* - After completing the main story.
Characters
Playable characters
| Yoshi | Yoshi (Red) | Yoshi (Orange) | Yoshi (Yellow) | ||||
|---|---|---|---|---|---|---|---|
|
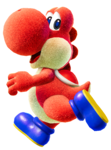
|
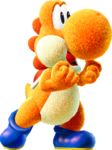
|
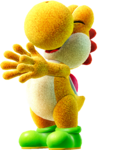
| ||||
| Yoshi (Light-Blue) | Yoshi (Blue) | Yoshi (Purple) | Yoshi (Pink) | ||||
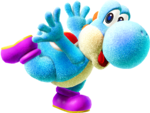
|

|

|
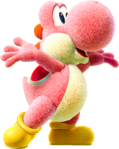
|
Allies
| Name | Image | Description |
|---|---|---|
| Poochy | 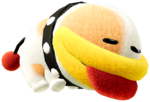
|
A canine ally who can be ridden and driven into obstacles and enemies to destroy them. He can also swim in lava. He follows Yoshi around in certain courses. He also gives Yoshi a Smiley Flower if all of the Poochy Pups are found within a specific time limit in a level. |
| Poochy Pups | 
|
Three miniature Poochies, each displaying a distinct coloration. They form an objective when levels are played from the backside; they must be spotted in the background of each stage and hit with a Yoshi's Egg to reveal them. After coming out of their spots, they follow Yoshi until the end of the level. |
| Sundream Stone | 
|
A sentient stone tablet that has five gems which are detached by Kamek and Baby Bowser. |
| Blockafellers | 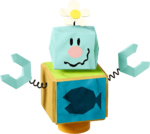
|
Robots constructed of blocks with a large nose and a flower who sit outside several worlds and send the player on side-quests. Each Blockafeller has a different appearance. |
Minor characters
Enemies
New enemies are marked with an asterisk (*).
| Shy Guys | |||||
|---|---|---|---|---|---|
| Name | Image | Description | Levels | Defeatable? | Turns into egg? |
| Shy Guy | 
|
Basic enemies that walk from side to side and come in various colors, and can be defeated with any attack. They can be also seen in the background, sometimes holding collectibles. | Every normal level except for Mousers and Magnets, Jumping to Victory, Slip-Slide Isle, Open, Shut!, and all levels in Hidden Hills | Yes | Yes |
| Attack Ghost* | A cardboard Boo Guy with a scythe that chases Yoshi. It bears a resemblance to Greaper. | Haunted Maker Mansion | No | No | |
| Bazooka Heyho* | 
|
Armed Shy Guys that stand in one spot and fire at the direction they are looking at. They can be defeated with any attack. | Altitude Adjustment Outer Orbit Mr. Geary's Factory Floppin' and Poppin' |
Yes | Yes |
| Donguri Heyho* | 
|
Shy Guys with an acorn-like hat on their heads. When they see Yoshi, they roll after him. They can be defeated with any attack. | Weighing Acorns Spike the Piranha Kamek Kerfuffle |
Yes | Yes |
| Fat Guy | 
|
Large Shy Guys that pace back and forth. They start to run when jumped on and can hurt Yoshi if they touch him. When eaten and swallowed, they fill up Yoshi's egg stash. Some Fat Guys stay behind large rectangular cutouts, which they push to fall on Yoshi's path and then rise back upright. Yoshi can use these cutouts as platforms. | Poochy's Sweet Run Altitude Adjustment Poochy's Magma Run |
Yes | Yes |
| Fly Guy | 
|
They fly back and forth on a straight line or swirl in formations around a platform at varying speeds, hurting Yoshi if they bump into him. They can be defeated in any manner. Sometimes, Fly Guys carry items which can be obtained by smacking them with an egg or by eating them. | Most levels | Yes | Yes |
| Fly Heyho* | 
|
Enemies equipped with a glider, which allows them to float through the air. They make swoops above an area, turning around and descending a bit with each swoop. After they land, they act like normal Shy Guys. They can hurt Yoshi upon contact, but can be defeated with any attack. | Ninjarama | Yes | Yes |
| Juggling Heyho* | 
|
Shy Guys in red and black jester attire that juggle bombs in one spot. They can be defeated with any attack. | Hoop-Jump Hop | Yes | Yes |
| Ninja Guy* | 
|
Enemies that stay in one place while hurling an indefinite amount of shurikens in the direction they face. They only throw shurikens as long as Yoshi is located in front of them. Ninja Guys can be defeated with any attack. | Deceptive Doors Behind the Shoji The Shogun's Castle |
Yes | Yes |
| Petal Guy | 
|
Shy Guys that disguise themselves as piles of flowers. They then pop up when Yoshi approaches. They can be defeated with any attack. | Spring Sprung Trail | Yes | Yes |
| Rush Heyho* |  
|
Enemies that rush in one direction while holding a sword forward. They can hurt Yoshi if they come into contact with him. However, any attack can be used to defeat them. A space-themed variant of it also appears in Outer Orbit. | Deceptive Doors Behind the Shoji The Shogun's Castle Space-Hub Hubbub The Countdown Begins |
Yes | Yes |
| Shy Guy Tower | 
|
Tall stacks of Shy Guys. When Yoshi defeats one of the Shy Guys, the others fall until no more remain. | Dino Smash Stitched Together Windward Way |
Yes | Yes |
| Skall Heyho* | 
|
Shy Guys that run around in small dinosaur skulls, trying to ram into Yoshi. They turn around when they bump into something. | Dino Smash | No | No |
| Spear Guy | Shy Guys that hold spears and shields. They are immune to being hit from the front. They can be defeated by eating it or throwing an egg at its back. | Mousers and Magnets | Yes | Yes | |
| Unicycle Shy Guy | 
|
Shy Guys in red and black jester attire that ride unicycles. They can be defeated with any attack. | Hoop-Jump Hop | Yes | Yes |
| Vampire Heyho* | 
|
Shy Guys dressed with a black suit and a red cape which allows them to glide through the air. Once they reach the ground, they act like normal Shy Guys. Although dangerous to bump into, they can be defeated using any attack method. | Haunted Maker Mansion | Yes | Yes |
| Woozy Guy | 
|
Shy Guys that move by doing continuous frontflips. They can be defeated with any move. | Whistlestop Rails Stitched Together Poochy's Sweet Run Hoop-Jump Hop The Countdown Begins |
Yes | Yes |
| Zombie Guy* | 
|
Undead variants of Shy Guys that shuffle slowly on the ground. While usually found in the open, they can also come out of burrows on the ground. They are harmful if touched, but Yoshi can defeat them with any attack. | Haunted Maker Mansion Be Afraid of the Dark |
Yes | Yes |
| Zombie Debuho* | 
|
An undead variant of Fat Guys and a larger variant of Zombie Guys. Most of them are stationary, found sitting in couches throughout the mansions. Otherwise, they strut about outside. Like Fat Guys, they cannot be defeated with a jump, but can be defeated with a ground pound. Yoshi can also eat them to get a full stock of eggs. Often, if Yoshi eats a Zombie Debuho sitting on a couch, the couch moves, revealing a secret of some sort. | Haunted Maker Mansion | Yes | Yes |
| Other | |||||
| Name | Image | Description | Levels | Defeatable? | Turns into egg? |
| Bobber* | 
|
Green enemies that sit in acorns, resembling Burts. They swing from a string, trying to hurt Yoshi. | Yoshi Pulls Some Strings | No | No |
| Bon-Bom* | 
|
Blue bombs with a Tap-Tap-like face. When they see Yoshi, they jump after him and explode a few seconds later. Yoshi can also eat Bon-Boms and spit them out to break rock walls and defeat enemies. | Mine-Cart Cave Dino Smash |
Yes | No |
| Bushydo* | 
|
Red samurai made out of red and blue milk bottles. They will try to attack Yoshi with their sword, which Yoshi can walk on. | The Shogun's Castle | No | No |
| Bullet Bill | Black bullets that are shot out of Bill Blasters. They can be defeated by eating them. | Spinwheel Shuffle | Yes | Yes | |
| Bumpty | 
|
Penguin enemies that try to slide into Yoshi. Although they cannot hurt Yoshi, they can potentially knock him into the water. While Yoshi can grab a Bumpty with his tongue, he cannot eat one. | Slip-Slide Isle Burt's Bouncy Battle |
Yes | No |
| Bungee Piranha | 
|
Purple Piranha Plants that stretch down from the ceiling. They can be defeated by throwing an egg at them. | Jumping to Victory | Yes | No |
| Bunmawashi Doll* | 
|
Clown-like dolls that chase after Yoshi and attack him with an axe. They can be stopped by being exposed to light. | Be Afraid of the Dark | No | No |
| Cheep Cheep | 
|
Small red fish that jump out of the water in an attempt to hit Yoshi. They can be defeated by eating them. | Bombs Away on Pirate Island Slip-Slide Isle Ride the River |
Yes | Yes |
| Chompagobbler* | 
|
Blue ghost enemies that patrol certain areas of the level Haunted Maker Mansion. When they see Yoshi, they chase after him at an extremely fast speed until he goes away. | Haunted Maker Mansion | No | No |
| Clawdaddy | Orange crab enemies that have a coat of wool protecting them. Yoshi must first lick away the wool on them then throw an egg or Ground Pound on them in order to defeat them. | Bombs Away on Pirate Island | Yes | No | |
| Cybo* | They are normally helpful allies to Yoshi, but Cybos become hostile whenever an asteroid hits the space station in the level Space-Hub Hubbub. | Space-Hub Hubbub | No | No | |
| Fang | Small bats that fly in wavy patterns. They can be defeated by most attacks. | Whistlestop Rails Be Afraid of the Dark |
Yes | Yes | |
| Fooly Flower | 
|
Enemies that mimic the appearance of a Smiley Flower, although they have a different facial expression. In some levels, Fooly Flowers rotate around a specific area during bonus challenges, hiding a Smiley Flower among them. | Whistlestop Rails Poochy's Sweet Run Windward Way Exploring the Animal Kingdom Be Afraid of the Dark |
No | No |
| Flightless Goonie | Flightless variants of Goonies that run from left to right. They are usually encountered in groups. They can be defeated by any attack. | Windward Way Open, Shut! |
Yes | Yes | |
| Flutter | Flying enemies that get enraged and go after a Yoshi briefly if hit with any attack method. When enraged, they will fly up, allowing Yoshi to reach otherwise impossible-to-reach spots. They cannot be defeated. | Weighing Acorns | No | No | |
| Gargantua Blargg | 
|
Huge, invincible, red monsters that live in the lava. They can be sent back into the lava with three egg hits, but only temporarily. | Poochy's Magma Run | No | No |
| Goonie | Flying bird enemies that travel in flocks. They flap their wings to rise, then glide to descend a bit. Yoshi can step on Goonies and use them as platforms, although this causes them to go downward under his weight. | Windward Way | Yes | Yes | |
| Gusty | 
|
Enemies that fly from the left or right. They can be defeated by any move. | Stitched Together Open, Shut! Under Siege |
Yes | Yes |
| Koopa Troopa | 
|
Enemies that walk back and forth. Yoshi can grab them in his mouth and spit out their shells. | Many Fish in the Sea | Yes | No |
| Li'l Marcher* | 
|
Enemies that run around whenever he activates an alarm. They can be pushed back with eggs, and can defeat themselves by colliding with another member of their species. | Skulking Around Under Siege |
Yes | No |
| Little Mouser | Small mice that play keep-away with coins and magnets. They can then be defeated by eating them. Yoshi does not take any damage if he collides with one. | Mousers and Magnets The Tin-Can Condor |
Yes | Yes | |
| Lunge Fish | Gigantic green fish that jump out of the water in an attempt to eat Yoshi. They can be temporarily stunned by eggs. | Ride the River | No | No | |
| Makimaki* | 
|
Pink round creatures with curled, squirrel-like tails. They roll pink paper while walking on it. They can be stunned by all of Yoshi's attack methods, but the only way to defeat them for good is to have Poochy run into them. | Poochy's Tape Trail | Yes | No |
| Mel* |  
|
Caramel enemies that move around in tower formations. They can hurt Yoshi if they bump into him; however, they can be defeated one by one by eating and turning them into eggs. Dark Melcaras are a variant wrapped in foil. | Poochy's Sweet Run | Yes | Yes |
| Monty Mole | 
|
Mole enemies that pop out of manholes in the background. They can be defeated by hitting them with eggs. | Spring Sprung Trail Monty-Mole-B-Gone |
Yes | Yes |
| Nep-Enut | 
|
An aquatic variation of Gargantua Blarggs. A single egg will temporarily send one back into the water. | Pirate Pier | No | No |
| Nipper Plant | 
|
Petit Piranha Plants that can move on their stems. They can be defeated by throwing an egg at them. | Jumping to Victory | Yes | Yes |
| Nipper Spore | 
|
Falling seeds that grow into Nipper Plants once they land. They can be eaten in mid-air. If Yoshi comes in contact with a Nipper Spore, he takes damage. | Jumping to Victory | Yes | No |
| Pinecone* | 
|
Brown, rolling prickly creatures with angry eyes. They cannot be defeated in any way. | Weighing Acorns | No | No |
| Piranha Plant | 
|
Stationary carnivorous plants that chomp at the air aggressively, waiting to bite and injure Yoshi. They can be defeated by hitting them with an egg. | Rail-Yard Run Mine-Cart Cave Spring-Sprung Trail Skelesaurus Wrecks Stitched Together Behind the Shoji Exploring the Animal Kingdom Hoppin' Higher Ride the River |
Yes | No |
| Raven | 
|
Black bird enemies that circle around small moon-like platforms. They are immune to Yoshi's tongue, but can be defeated by jumping on them. | Spinwheel Shuffle | Yes | No |
| Rhinono* | Large, blue rhinos that chase Yoshi. While some of them are hostile, one Rhinono needs the Yoshi to help its Baby Rhinono by rebuilding the bridge. It then thanks the Yoshi by popping the large pink balloon that blocks the Yoshi's path. | Exploring the Animal Kingdom | No | No | |
| Skelesaurus* | 
|
A massive, living fossilized dinosaur that chases Yoshi, destroying everything in its path. It cannot be defeated, but Yoshi can temporarily slow it down by throwing eggs at its face. | Skelesaurus Wrecks | No | No |
| Snakey* | 
|
A gigantic snake that constantly extends. Yoshi can hit it to temporarily contract its body. | Hoppin' Higher | No | No |
| Takko* | 
|
A blue, squid-like extraterrestrial. They only appear in the moon portion of The Countdown Begins. When Yoshi jumps on them, they emit some smoke. They do not hurt Yoshi, and cannot be defeated. | The Countdown Begins | No | No |
| Tap-Tap | 
|
Silver, spiky enemies that walk around. They are immune to most attacks, but can be pushed back by eggs or Yoshi's tongue. They can be defeated in two-player mode if a mounted Yoshi ground pounds nearby or if it gets run over by Poochy. | Poochy's Magma Run Skulking Around |
Yes | No |
| Ukiki | 
|
Brown monkeys that jump around. Some throw things, like missiles and eggs. While Yoshi can grab Ukikis with his tongue, he cannot eat them. They can be defeated by spitting them into the water. | Jumping to Victory Bombs Away on Pirate Island |
Yes | No |
| Wall Lakitu | Enemies that hide behind structures in the background. If a Yoshi comes within their line of sight, they lock in and throw Spiny Eggs. They can be defeated by throwing eggs at them. | Be Afraid of the Dark | Yes | No | |
Bosses
Main story bosses must be defeated to retrieve the Dream Gems. The game also features three mini-bosses, indicated by an asterisk (*) in the list below, and a bonus boss fight with Kamek.
| Name | Image | Level | Description |
|---|---|---|---|
| Yarrctopus* | 
|
Pirate Pier | A pirate octopus. The player needs to throw an egg at him to deal damage. |
| Tin-Can Condor | 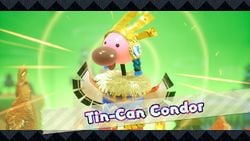
|
The Tin-Can Condor | A giant bird made from a tin can guarding the Blue Dream Gem. The player needs to use a magnet to pull it to the floor, then Ground Pound his head when his crown falls off. |
| Burt the Ball | 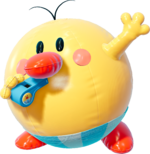
|
Burt's Bouncy Battle | A big rubber Burt guarding the Yellow Dream Gem. The player has to spit Bumpties back at him to knock him into the water and Ground Pound his weak point. |
| Spike the Piranha | 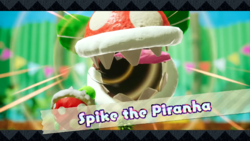
|
Spike the Piranha | A giant Piranha Plant boss guarding the Red Dream Gem, similar to Naval Piranha and Big Bungee Piranha from other Yoshi games. The player needs to hit him on the head with a spiky ball to do damage. |
| Shogun of Skewers* | 
|
The Shogun's Castle | A samurai made from a can. Although defenseless, Yoshi must solve his puzzles and then Ground Pound his head. |
| Gator Train | 
|
Gator Train Attacks! | A giant train shaped like an alligator guarding the Magenta Dream Gem. It is defeated by hitting the inside of its mouth with an egg when it charges the player's own train. |
| Mr. Geary* | 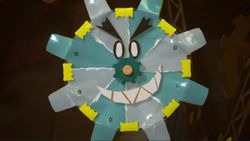
|
Mr. Geary's Factory | A gear that rolls and tries to crush Yoshi under its teeth, which the player must defeat by knocking the tape off it with eggs. |
| The Great King Bowser | 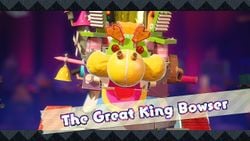
|
The Great King Bowser | Baby Bowser is the final boss of the main story, holding the Green Dream Gem and eventually the Sundream Stone itself. His first battle is against a giant robot controlled by him; the player must avoid its attacks, force Baby Bowser out by destroying its arms, then Ground Pound him. The robot will eventually be completely ruined, at which point Kamek, with the help of the Sundream Stone, turns Baby Bowser into Mega Baby Bowser. This version of him will attack Yoshi with fireballs, falling stars and meteors, as well as hammers and rockets that the player must use against him. |
| Mega Baby Bowser | 
| ||
| Kamek | Kamek Kerfuffle | Baby Bowser's assistant, who acts as a secret boss. First, he transforms into a harder version of the Tin-Can Condor and the Gator Train. He can be knocked out using the same method used to defeat these bosses. The player must then Ground Pound on him to deal damage. During the final phase, Yoshi must use the Go-Go Yoshi to deflect his attacks to defeat him. |
Items and objects
Collectibles
| Name | Image | Description |
|---|---|---|
| Heart | Small items that recover Yoshi's health, which is necessary to 100% complete a level. They are produced by Winged Clouds, but also appear from enemies who are caught on-screen when Yoshi passes a checkpoint. They hop around and disappear shortly after spawning. | |
| Red Coin | Special coins that are commonly found among regular gold coins. There are twenty scattered throughout each stage, sometimes carried by enemies. | |
| Smiley Flower | 
|
Each level has a certain amount of hidden Smiley Flowers for the player to find. They can be collected by simply touching them, but Yoshi can also toss an egg at them. They can also be obtained by completing objectives such as searching for souvenirs and Poochy Pups. |
General items and objects
| Name | Image | Description |
|---|---|---|
| Coin | The most common items in the game. They can be collected normally when found floating in the air. However, there are other means of obtaining coins, such as hitting certain Winged Clouds or stealing them from Shy Guys and Fly Guys. Yoshi's Eggs will also drop coins when they hit an enemy after rebounding off a wall or a platform. | |
| 10 Coin | 
|
Large coins with Yoshi's face on them worth 10 normal coins each. Though they are rarer than regular gold coins, they are still somewhat common. |
| Apple | If Yoshi hits a Time Cloud, apples might appear nearby. If Yoshi eats all of them before time runs out, a Smiley Flower appears. | |
| Blue Coin | Collectibles that appear when a blue Time Cloud is hit, and must all be collected within a time limit to make a Smiley Flower appear. | |
| Check Point | The checkpoint mark of a level. It resembles an upright plant with an upside-down bell with eyes for a flower. Upon passing it, part of Yoshi's lost energy is restored and any enemies present around the area turn into hearts. | |
| Egg Block | Blocks that produce Yoshi's Eggs when hit from the bottom. They stop giving out any more when there are six present on-screen. | |
| Egg Plant | Plants that emit Yoshi's Eggs. | |
| Balloon | If Yoshi hits a Time Cloud, balloons might appear nearby, in the background. Yoshi must throw eggs at them to pop them. If he pops all of the balloons before time runs out, a Smiley Flower appears. | |
| Heyho Coin Bag | Coin bags carried by certain Shy Guys and Pirate Guys. If hit, they will burst open and add ten coins to the player's tally. | |
| Item Balloon | Balloons which carry helpful or harmful items or enemies, such as crates, hearts, and Shy Guys. | |
| Key | Items that can open locked doors. | |
| Message Block | Smiling blocks which provide tips and hints. | |
| Party Ball | Round capsules hanging from the top of the screen, resembling Piranha Plants. Red ones contain objects, but blue ones do not. | |
| Roulette Block | Blocks that alternate between giving an amount of one, three, five, ten, or twenty coins, hearts, of types of eggs. Each one flips through a different number and set of items. | |
| Spring Ball | Round objects with an upward arrow imprinted on them. Yoshi can use them to jump higher. | |
| Time booster | Time boosters appear throughout the level Hoop-Jump Hop. When Yoshi collects one, his time is reset to thirty seconds. | |
| Time Cloud | Winged Clouds that, when hit, flip the perspective 180 degrees, allowing Yoshi to see elements previously located behind the camera. This activates a timed challenge of aiming and throwing eggs at enemies to receive a prize. A blue variant exists as well, tasking Yoshi with either collecting some blue coins, pounding all posts, popping balloons with eggs, or eat all on-screen apples within the time limit. | |
| Winged Cloud | Stationary objects that hover above the ground. They turn into an item or a formation of coins when hit with a Yoshi's Egg. | |
| Yoshi's Egg | Throwable projectiles obtained through an Egg Block, Egg Plant or by eating enemies. Eggs can be used to harm enemies, collect or activate items and objects both in the foreground and in the background. |
Crafts
- Main article: List of crafts in Yoshi's Crafted World
In the game's worlds Blockafellers may request the player to collect crafts from the level, which can be obtained by hitting them with an egg. Smiley Flowers are rewarded for collecting requested crafts, and there are a total of 121 crafts requested in the game. These appear in both the Front and Flip Side of the level, and certain worlds may have souvenirs which have to be collected from three different levels.
Costumes
- Main article: List of costumes in Yoshi's Crafted World
Costumes can be obtained and worn in the game. They can protect Yoshi from a set amount of hits before breaking, depending on the costume's rarity. Most costumes in the game can be obtained from capsule machines which appear in each world, though certain costumes can be obtained through amiibo use, and three more can be obtained by completing certain late-game objectives. A total of 185 costumes in the game, with 173 being obtainable without amiibo use.
Promotion
Trailers
- The game was first revealed during E3 2017 where it was tentatively titled Yoshi and given an expected release date of 2018.[5] Nintendo Treehouse demonstrated roughly half an hour of gameplay for the new game.[6]
- On September 18, 2018, during a Nintendo Direct presentation, the game's official title was revealed as Yoshi's Crafted World.[7]
- On November 1, 2018, additional gameplay of Yoshi's Crafted World was featured during a Nintendo Treehouse: Live presentation.[8]
- On January 8, 2019, a story trailer for the game was released on the Nintendo YouTube channel.[9]
- On February 15, 2019, a demo trailer was released to promote a demo for the game being published on the Nintendo eShop.[10]
- On March 22, 2019, co-op gameplay of the game from Nintendo Minute was released on the Nintendo YouTube channel.[11].
- On March 25, 2019, a trailer demonstrating the game's basic mechanics was released on the Nintendo UK YouTube channel.[12]
- On March 29, 2019, the Nintendo UK YouTube channel released a launch trailer to promote the release of the game.[13] This was followed by a launch trailer from NintendoAU on April 2, 2019.[14]
- On April 1, 2019, the game was featured in the Spring Game Guide during a Nintendo Power Podcast.[15]
- On April 15, 2019, an accolades trailer for the game was released on the Nintendo YouTube channel.[16]
Other
In January 2019, Amazon Japan featured a preorder bundle containing the game, a tote bag themed to the game, and ten Yoshi plushes by Sanei Boeki.[17]
On March 20, 2019, in celebration of the Yoshi's Crafted World's launch at the time, Nintendo of UK announced a partnership with KidZania London to host an Easter egg hunt event titled Yoshi's Easter Egg Hunt, which lasted from April 8 to April 21, 2019.[18]
Sometime in 2019, a quiz was released on Play Nintendo called the Yoshi's Crafted World Trivia Quiz.
Several T-shirts promoting the game were made available as merchandise on the Nintendo Store section of Amazon.com.[19][20][21][22]
Development
Unusually for a Nintendo title, Yoshi's Crafted World was developed with Unreal Engine 4 in place of an in-house engine, making it the first Super Mario and Nintendo game to be developed with this engine. According to producer Etsunobu Ebisu, the engine was chosen in order to more accurately represent the realistic materials featured in the game.[23] As for the concept behind the art style, the developers claimed the game is supposed to take place in a kindergarten class within the Super Mario universe.[3]
Update
Ver. 1.0.1
This update was released on April 23, 2019.[24]
- We fixed the issue where the game would not start when the player uses the analogue stick upon game start up.
- We fixed some other issues so the player can enjoy the game.
Critical reception
Yoshi's Crafted World has received generally positive reviews. Critics have praised the game's aesthetic and number of collectibles, but the difficulty and repetitive music have been criticized[25].
| Reviews | |||
|---|---|---|---|
| Release | Reviewer, Publication | Score | Comment |
| Nintendo Switch | Tom Marks, IGN |
7.8/10 | "Yoshi's Crafted World is an engaging and charming platformer that is absolutely worth playing, but it misses a clear opportunity to be more than that by not taking full advantage of its most clever ideas. It has enough creative collectibles to make completionists want to hunt down every last one, but I'm disappointed Crafted World didn’t challenge me more in the way its last few levels proved it could have. Of course, I still thoroughly enjoyed every adorable hour I spent with it." |
| Nintendo Switch | Chris Carter, Destructoid |
7.5/10 | "Most of my journey through the wonderful cardboard universe of Yoshi's Crafted World, littered with myriad ridiculous noises from Yoshi, was spent with a smile on my face. It's not the type of project that's going to set the world on fire like Tropical Freeze, but it still has more heart than most studios could ever hope to give in their lifetime." |
| Nintendo Switch | Kallie Plagge, GameSpot |
8/10 | "Yoshi's Crafted World is at its best when it's relaxing and pleasant. The 2D-to-3D level design keeps you curious while the go-at-your-own-pace approach keeps the pressure off and leaves you to appreciate the small, imaginative details. Its most interesting ideas never evolve past their first introductions and are frequently confined to one or two levels, but individually, those levels both reward your curiosity and your willingness to slow down and look at what's around you--and it's those simple pleasures that provide the most joy." |
| Aggregators | |||
| Compiler | Platform / Score | ||
| Metacritic | 79 | ||
| GameRankings | 79.92% | ||
Gallery
- For this subject's image gallery, see Gallery:Yoshi's Crafted World.
Yoshi and Red Yoshi
Media
- For this subject's sound test, see Yoshi's Crafted World sound test.
| File info |
| File info |
| File info |
| File info |
Staff
- Main article: List of Yoshi's Crafted World staff
Yoshi's Crafted World was developed by Good-Feel in collaboration with some staff for Nintendo, most of them are a follow-up from Yoshi's Woolly World. The game was directed by Masahiro Yamamoto, game design was led by Yosuke Suda, programming by Yasuhiro Masuoka, art by Ayano Otsuka, the whole game soundtrack was composed by Kazufumi Umeda, and was produced by Etsunobu Ebisu and Takashi Tezuka.
Quotes
- Main article: List of Yoshi's Crafted World quotes
References to other games
- Mario Kart 64: Milk cartons can be seen in the background of certain levels that brandish the logo of Moo Moo Farm, a track from the game.
- Mario & Luigi: Superstar Saga: Certain level elements are made from Starbeans Iced Coffee boxes, referencing the Starbeans Cafe from this game.[26]
- Super Mario Galaxy: Kamek's paper artwork is based on the Magikoopa's artwork from this game.
- Mario Kart 8 / Mario Kart 8 Deluxe: Many of the craft materials are packaging from products, including the sponsors Fuzzy Battery, Moo Moo Meadows Milk and Princess Orange from these games, as well as Fountain Cafe and Tropical Bakery, which use their updated logos from these games. Additionally, "Handle with care" stickers featuring ? Blocks from Sunshine Airport appear on various objects in the scenery.
- Yoshi's New Island: The song "Yards of Yarn" features this game's motif at around the 30-second mark.
- Yoshi's Woolly World: Green Yarn Yoshi, Light-Blue Yarn Yoshi, and Pink Yarn Yoshi all appear as collectible amiibo costumes by scanning their respective amiibo. In certain levels such as Skulking Around, stickers reading "15.07.16" can be seen stuck on the level environments, which is the Japanese release date of this game in the yy/mm/dd date format. The level Stitched Together reuses many assets and features from this game, such as Mobiles and Accordion walls. Mellow Mode returns from this game.
- Poochy & Yoshi's Woolly World: Poochy Pups return from this game.
References in other games
- Super Smash Bros. Ultimate: Yoshi's in-game design is featured as one of his alternate colors in this game, and also appears as a spirit.
Names in other languages
| Language | Name | Meaning | Notes |
|---|---|---|---|
| Chinese (simplified) | 耀西的手工世界[27] Yàoxī de Shǒugōng Shìjiè |
Yoshi's Handicraft World | |
| Korean | 요시 크래프트 월드[28] Yosi Keuraepeuteu Woldeu |
Yoshi Craft World |
References
- ^ https://www.nintendo.com/es_LA/games/detail/yoshis-crafted-world-switch/
- ^ https://twitter.com/ZhugeEX/status/1409979239710011400?s=20
- ^ a b April 27, 2019. Yoshi's Crafted World devs on the art style, kindergarten inspiration, flip side gimmick, more (page 2). Nintendo Everything. Retrieved May 12, 2019.
- ^ April 27, 2019. Yoshi's Crafted World devs on the art style, kindergarten inspiration, flip side gimmick, more (page 3). Nintendo Everything. Retrieved May 13, 2019.
- ^ Nintendo Spotlight: E3 2017. YouTube. Retrieved June 5, 2022.
- ^ Yoshi (Working Title) - Demonstration - Nintendo E3 2017. YouTube. Retrieved July 17, 2022.
- ^ Yoshi’s Crafted World - Nintendo Switch | Nintendo Direct 9.13.2018. YouTube. Retrieved July 17, 2022.
- ^ Yoshi’s Crafted World - Gameplay - Nintendo Treehouse: Live. YouTube. Retrieved July 17, 2022.
- ^ Yoshi’s Crafted World - Story Trailer - Nintendo Switch. YouTube. Retrieved July 17, 2022.
- ^ Yoshi’s Crafted World - Demo Trailer - Nintendo Switch. YouTube. Retrieved July 17, 2022.
- ^ Yoshi’s Crafted World Co-op Gameplay - Nintendo Minute. YouTube. Retrieved July 17, 2022.
- ^ Yoshi's Crafted World - Newcomer trailer (Nintendo Switch). YouTube. Retrieved July 17, 2022.
- ^ Yoshi's Crafted World - Launch trailer (Nintendo Switch). YouTube. Retrieved July 17, 2022.
- ^ Yoshi's Crafted World - Launch Trailer (Nintendo Switch). YouTube. Retrieved July 17, 2022.
- ^ Spring Game Guide 2019: Yoshi’s Crafted World, Cuphead & More! | Nintendo Power Podcast. YouTube. Retrieved July 17, 2022.
- ^ Yoshi’s Crafted World - Accolades Trailer - Nintendo Switch. YouTube. Retrieved July 17, 2022.
- ^ [1]. Amazon.co.jp. Retrieved July 17, 2022.
- ^ Nintendo of UK (March 20, 2019). A promotion for the Yoshi's Easter Egg Hunt event at KidZania London. Facebook.
- ^ Yoshi's Crafted World Poochy Burst Game Logo Premium T-Shirt. Amazon.com. Retrieved July 17, 2022.
- ^ Yoshi's Crafted World More Eggs Riding Pals Graphic T-Shirt. Amazon.com. Retrieved July 17, 2022.
- ^ Yoshi's Crafted World Group Shot Poster Graphic T-Shirt. Amazon.com. Retrieved July 17, 2022.
- ^ [https://www.amazon.com/Yoshis-Crafted-Piggyback-Poster-T-Shirt/dp/B07QNZTBBW/ Yoshi's Crafted World Team Yoshi Piggyback Poster T-Shirt. Amazon.com. Retrieved July 17, 2022.
- ^ March 28, 2019. [https://www.ign.com/articles/2019/03/28/yoshis-crafted-world-developers-speak-on-unreal-engine-amiibo-and-more-a-ign-first Yoshi's Crafted World Developers Speak on Unreal Engine, amiibo, and More! – IGN First ]. IGN. Retrieved July 15, 2023.
- ^ https://en-americas-support.nintendo.com/app/answers/detail/a_id/45096/~/how-to-update-yoshis-crafted-world#v101
- ^ GameXplain. (March 27, 2019). Yoshi's Crafted World - REVIEW (Nintendo Switch) YouTube. Retrieved March 27, 2019 (PST).
- ^ https://www.youtube.com/watch?v=Dh3hDqq5HCA
- ^ http://www.nintendo.com.hk/pressrelease/switch_20180914_2_sc.htm
- ^ https://nintendo.co.kr/news/view.php?idx=164
