Mario + Rabbids Kingdom Battle: Difference between revisions
Tags: Mobile edit Advanced mobile edit |
LorenzoDotti (talk | contribs) (added some information regarding the creation of the icicle golem) |
||
| (77 intermediate revisions by 27 users not shown) | |||
| Line 5: | Line 5: | ||
|developer={{wp|List of Ubisoft subsidiaries#Ubisoft Paris|Ubisoft Paris}}<br>{{wp|List of Ubisoft subsidiaries#Ubisoft Paris|Ubisoft Milan|Ubisoft Milan}} | |developer={{wp|List of Ubisoft subsidiaries#Ubisoft Paris|Ubisoft Paris}}<br>{{wp|List of Ubisoft subsidiaries#Ubisoft Paris|Ubisoft Milan|Ubisoft Milan}} | ||
|publisher=[[Ubisoft]] (NA, EU, OC)<br>[[Nintendo]] (JP, SK, HK, TW) | |publisher=[[Ubisoft]] (NA, EU, OC)<br>[[Nintendo]] (JP, SK, HK, TW) | ||
|release={{ | |release={{flag list|USA|August 29, 2017<ref name="YouTube">Ubisoft US (June 12, 2017). [https://www.youtube.com/watch?v=3bvUwoBXOyc Mario + Rabbids Kingdom Battle: E3 2017 Announcement Trailer]. ''YouTube''. Retrieved June 12, 2017.</ref>|Mexico|August 29, 2017<ref>https://www.nintendo.com/es_LA/games/detail/mario-plus-rabbids-kingdom-battle-switch/</ref>|Europe|August 29, 2017|Australia|August 29, 2017<ref>[http://www.nintendo.com.au/the-nintendo-switch-journey-comes-to-e3-to-reveal-new-worlds-for-marios-odyssey The Nintendo Switch journey comes to E3 to reveal new worlds for Mario's Odyssey]. ''Nintendo.com.au''. Retrieved June 16, 2017.</ref>|Mexico|November 16, 2017 (Gold Edition)<ref>https://www.nintendo.com/es_LA/games/detail/mario-plus-rabbids-kingdom-battle-gold-edition-switch/</ref>|USA|November 17, 2017 (Gold Edition)|Japan|January 18, 2018<ref>[https://topics.nintendo.co.jp/c/article/0d0578ff-4b3d-11e7-8f53-063b7ac45a6d.html]</ref>|South Korea|January 18, 2018<ref>[http://www.nintendo.co.kr/PR/press_list.php?cPage1=1&cPage2=1&idx=274&press_div=P Official Nintendo website (Korea)]. Retrieved September 19, 2017.</ref>|HK|January 18, 2018<ref>http://www.nintendo.com.hk/software/switch/</ref>|ROC|January 18, 2018<ref>[http://www.nintendo.tw/pressrelease/switch_20170920.html Official Nintendo website (Taiwan)]. Retrieved September 19, 2017.</ref>|China|February 15, 2022<ref>[https://www.nintendoswitch.com.cn/software/70010000039538 Official Nintendo website (China)]. Retrieved February 13, 2022.</ref>}} | ||
|languages={{languages|en_us=y|fr_fr=y|es_es=y|de=y|it=y|nl=y|ru=y|jp=y|kr=y|zh_simp=y|zh_trad=y}} | |languages={{languages|en_us=y|fr_fr=y|es_es=y|de=y|it=y|nl=y|ru=y|jp=y|kr=y|zh_simp=y|zh_trad=y}} | ||
|genre=[[Genre#Turn-based tactics|Turn-based tactics]] | |genre=[[Genre#Turn-based tactics|Turn-based tactics]] | ||
|ratings={{ratings|cero=A|esrb=E10+|pegi=7|acb=G|grac=All|cadpa=8+|usk=6| | |ratings={{ratings|cero=A|esrb=E10+|pegi=7|acb=G|grac=All|cadpa=8+|usk=6|classind=L|smeccv=B|rars=6+|gsrr=P|fpb=PG|gcam=7}} | ||
|platforms=[[Nintendo Switch]] | |platforms=[[Nintendo Switch]] | ||
| | |format={{format|switch=1|switchdl=1}} | ||
|input={{input|joy-con=1|switchpro=1|switchgcn=1}} | |input={{input|joy-con=1|switchpro=1|switchgcn=1}} | ||
|serials={{flag list|USA|HAC-BAANA-USA}} | |||
}} | }} | ||
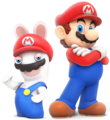
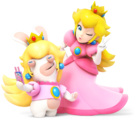
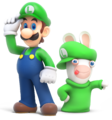
'''''Mario + Rabbids Kingdom Battle''''' is a [[Genre#Turn-based tactics|turn-based tactical]] title for the [[Nintendo Switch]] and a cross-over between the ''[[Super Mario (franchise)|Super Mario]]'' franchise and [[Ubisoft]]{{'}}s ''[[raywiki:Rabbids (series)|Rabbids]]'' series, being the first in the [[Mario + Rabbids (series)|''Mario + Rabbids'' series]] of games. It is the first tactics game in the ''Super Mario'' franchise, and it also incorporates some [[Genre#Role-playing|role-playing]] elements. The game sees [[Mario]] and his friends trying to restore order in the [[Mushroom Kingdom]] after [[Rabbid]]s invade and fuse it with their own world using a powerful merging device. In overworld sections, the player takes control of [[Beep-0]], a robotic assistant who guides characters in tow and can perform various actions to solve puzzles and find secrets. Throughout their journey, the heroes frequently engage in turn-based battles with enemy Rabbids during which they must complete objectives such as defeating a number of enemies or escorting a supporting character to a certain spot. Each character's abilities in battle can be customized and upgraded via a skill tree. | |||
'''''Mario + Rabbids Kingdom Battle''''' is a [[Genre#Turn-based tactics|turn-based tactical]] title for the [[Nintendo Switch]] and a cross-over between the ''[[Super Mario (franchise)|Super Mario]]'' franchise and [[Ubisoft]]{{'}}s | |||
The game presents a single-player story mode, which involves the above, and a local co-operative mode with separate stages in which multiple human players can face off against enemy Rabbids. A Versus mode was added through an update, enabling players to battle each other locally. The game also offers paid add-on content with new weapons, challenges, and a [[Donkey Kong Adventure|story expansion]] focusing on [[Donkey Kong]]. | The game presents a single-player story mode, which involves the above, and a local co-operative mode with separate stages in which multiple human players can face off against enemy Rabbids. A Versus mode was added through an update, enabling players to battle each other locally. The game also offers paid add-on content with new weapons, challenges, and a [[Donkey Kong Adventure|story expansion]] focusing on [[Donkey Kong]]. | ||
| Line 21: | Line 21: | ||
A sequel, ''[[Mario + Rabbids Sparks of Hope]]'', was released on October 20, 2022 in most territories. | A sequel, ''[[Mario + Rabbids Sparks of Hope]]'', was released on October 20, 2022 in most territories. | ||
==Story== | ==Story== | ||
{{multiple image | {{multiple image | ||
| Line 36: | Line 35: | ||
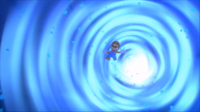
Meanwhile, [[Mario]], [[Luigi]], [[Yoshi]], [[Toad]], and [[Princess Peach]] are inaugurating a new statue of Peach while an audience of [[Toad (species)|Toad]]s (including [[Toadette]]) watches. Suddenly, a vortex is formed and sucks Mario and the others in. | Meanwhile, [[Mario]], [[Luigi]], [[Yoshi]], [[Toad]], and [[Princess Peach]] are inaugurating a new statue of Peach while an audience of [[Toad (species)|Toad]]s (including [[Toadette]]) watches. Suddenly, a vortex is formed and sucks Mario and the others in. | ||
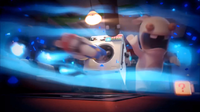
In midair over the [[Ancient Gardens]], Beep-0 gains rabbit ears and the outline of two rabbit's teeth on the front. The Rabbid with the SupaMerge fuses with the headset, causing it to be stuck to him. Mario later saves Beep-0 from being crushed by the Time Washing Machine. Upon landing, they soon encounter Rabbid Peach and [[Rabbid Luigi]], who join Mario's team and help them fight off various [[Ziggy|Garden Ziggies]], thanks to weapons attached to a message sent by a mysterious ''F.B.'' | In midair over the [[Ancient Gardens]], Beep-0 gains rabbit ears and the outline of two rabbit's teeth on the front. The Rabbid with the SupaMerge fuses with the headset, causing it to be stuck to him. Mario later saves Beep-0 from being crushed by the Time Washing Machine. Upon landing, they soon encounter Rabbid Peach and [[Rabbid Luigi]], who join Mario's team and help them fight off various [[Ziggy|Garden Ziggies]], thanks to weapons attached to a message sent by a mysterious ''F.B.'' As they travel, they get a glimpse of the vortex, later referred to as the [[Megabug]]. | ||
Soon after, Mario's group find Luigi and the Rabbid with the SupaMerge headset. Luigi and the SupaMerge Rabbid are both scared by a [[Piranha Plant]] with which a Rabbid is playing. Due to the fear, the SupaMerge Rabbid ends up fusing the other Rabbid with the Piranha Plant, creating the [[Pirabbid Plant]]. Mario's team successfully defeats the Plant and restore both the Piranha Plant and the Rabbid that was fused with it to their original selves. Seeing this, Luigi joins their team. Meanwhile, Beep-0 notices that the Megabug has grown in size. | Soon after, Mario's group find Luigi and the Rabbid with the SupaMerge headset. Luigi and the SupaMerge Rabbid are both scared by a [[Piranha Plant]] with which a Rabbid is playing. Due to the fear, the SupaMerge Rabbid ends up fusing the other Rabbid with the Piranha Plant, creating the [[Pirabbid Plant]]. Mario's team successfully defeats the Plant and restore both the Piranha Plant and the Rabbid that was fused with it to their original selves. Seeing this, Luigi joins their team. Meanwhile, Beep-0 notices that the Megabug has grown in size. | ||
| Line 42: | Line 41: | ||
[[Bowser Jr.]] has observed what happened with the Pirabbid Plant and, when Mario's team find the SupaMerge Rabbid and scare him, takes the chance to befriend him, naming him [[Spawny]]. With the intent of using Spawny's powers to take over the Mushroom Kingdom while [[Bowser|his father]] is on vacation, Junior flies away with Spawny on his [[Junior Clown Car]], while Mario's team must face a giant, ape-like Rabbid resembling [[Donkey Kong]], named [[Rabbid Kong]]. They defeat Rabbid Kong, causing him to fall off of the platform they are standing on. | [[Bowser Jr.]] has observed what happened with the Pirabbid Plant and, when Mario's team find the SupaMerge Rabbid and scare him, takes the chance to befriend him, naming him [[Spawny]]. With the intent of using Spawny's powers to take over the Mushroom Kingdom while [[Bowser|his father]] is on vacation, Junior flies away with Spawny on his [[Junior Clown Car]], while Mario's team must face a giant, ape-like Rabbid resembling [[Donkey Kong]], named [[Rabbid Kong]]. They defeat Rabbid Kong, causing him to fall off of the platform they are standing on. | ||
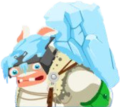
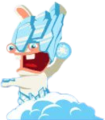
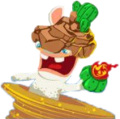
Mario's team then venture to [[Sherbet Desert]], where thanks to a message from F.B. they discover that the Megabug is growing with every enemy Rabbid defeated. They also find Rabbid Mario frozen in an ice cube. They take him with them, and place the cube in a door in the hopes of freeing him. Said door opens, and they soon encounter Bowser Jr. with Spawny again. Bowser Jr. has Spawny look at Mario's team, which agitates the Rabbid, activating the SupaMerge's powers. Just before it activates, Bowser Jr. turns Spawny away, causing him to create [[Blizzy]] and [[Sandy]], who proceed to attack Mario's team. Mario's team defeat both of them and save Rabbid Mario, who joins them. At the end of the desert, Mario's team face off against the [[Icicle Golem]] | Mario's team then venture to [[Sherbet Desert]], where thanks to a message from F.B. they discover that the Megabug is growing with every enemy Rabbid defeated. They also find Rabbid Mario frozen in an ice cube. They take him with them, and place the cube in a door in the hopes of freeing him. Said door opens, and they soon encounter Bowser Jr. with Spawny again. Bowser Jr. has Spawny look at Mario's team, which agitates the Rabbid, activating the SupaMerge's powers. Just before it activates, Bowser Jr. turns Spawny away, causing him to create [[Blizzy]] and [[Sandy]], who proceed to attack Mario's team. Mario's team defeat both of them and save Rabbid Mario, who joins them. At the end of the desert, Mario's team face off against the [[Icicle Golem]] which Spawny accidentally created by falling inside a giant freezer. the Icicle Golem proceeds to freeze Mario and friends. However, Princess Peach appears and saves them, joining Mario's team in their fight against the monster. They eventually prevail. | ||
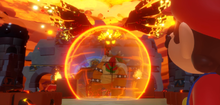
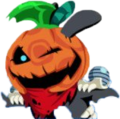
Mario's team then go to [[Spooky Trails]]. They are directed to find two Relics of Goodness, a gramophone and a Boo-shaped balloon, under the instruction of a mysterious third party who wants them to wake up a being named "Tom Phan" who they claim has the power to defeat Bowser Jr. After finding the relics, they discover through a message from the mysterious helper that they need a full moon. While finding a way to bring the full moon back, they come across [[Calavera]], who is holding [[Rabbid Yoshi]] hostage. Mario's team defeat Calavera and are subsequently joined by Rabbid Yoshi. They then find a clock tower and manipulate the clock to get the full moon back. The helper gives them an invitation to cross the now opened Moon Gate. They later find out that it is actually Bowser Jr. himself, who confronts them in a theater. Bowser Jr. scares Spawny, causing him to fuse a Rabbid with the Relics of Goodness to create the [[Phantom ( | Mario's team then go to [[Spooky Trails]]. They are directed to find two Relics of Goodness, a gramophone and a Boo-shaped balloon, under the instruction of a mysterious third party who wants them to wake up a being named "Tom Phan" who they claim has the power to defeat Bowser Jr. After finding the relics, they discover through a message from the mysterious helper that they need a full moon. While finding a way to bring the full moon back, they come across [[Calavera]], who is holding [[Rabbid Yoshi]] hostage. Mario's team defeat Calavera and are subsequently joined by Rabbid Yoshi. They then find a clock tower and manipulate the clock to get the full moon back. The helper gives them an invitation to cross the now opened Moon Gate. They later find out that it is actually Bowser Jr. himself, who confronts them in a theater. Bowser Jr. puts his bandana over his mouth and scares Spawny, causing him to fuse a Rabbid with the Relics of Goodness to create the [[Phantom (character)|Phantom]]. The Phantom sings [[The Phantom of the Bwahpera|a song]] and battles Mario's group, but is defeated. | ||
[[File:MarioRabbids story03.png|thumb|left|upright=1.1|Bowser fusing with the Megabug.]] | [[File:MarioRabbids story03.png|thumb|left|upright=1.1|Bowser fusing with the Megabug.]] | ||
| Line 53: | Line 52: | ||
==Gameplay== | ==Gameplay== | ||
{{rewrite-expand|section=yes|Explain the basics of the turn-based combat and overworld exploration}} | {{rewrite-expand|section=yes|Explain the basics of the turn-based combat and overworld exploration}} | ||
The game is estimated to be composed of | The game is estimated to be composed of 30% exploration elements and 70% turn-based combat.<ref>[https://www.youtube.com/watch?v=WKFOuFaZz4Q&t=303s Mario + Rabbids Kingdom Battle Interview with Davide Soliani. Retrieved April 9, 2024]</ref> There is also multiplayer, local co-op mode. The combat is weapon-based, with the weapons primarily resembling guns (notably the Blaster, Boomshot, Rumblebang, and Precision class-weapons), though they also resemble warhammers (Melee-class), rocket launchers (Rocket-class), rubber ducks (Grenaduck-class), yo-yos (Bworb-class), and deployable shuttles (Sentry-class). | ||
The exploration aspect of the game is controlled by [[Beep-0]], a new character which serves as a helpful character which gives out tips and help. There are seven enemy archetypes, and one mid-boss and boss per world and four world environments. Some of the open world exploring involves puzzles. | The exploration aspect of the game is controlled by [[Beep-0]], a new character which serves as a helpful character which gives out tips and help. There are seven enemy archetypes, and one mid-boss and boss per world and four world environments. Some of the open world exploring involves puzzles. | ||
| Line 59: | Line 58: | ||
===Controls=== | ===Controls=== | ||
The following descriptions are found in the ''Mario + Rabbids Kingdom Battle'' [https://rabbids.ubisoft.com/portal/en-gb/games/mario-rabbids-kingdom-battle-manual.aspx online manual]. | The following descriptions are found in the ''Mario + Rabbids Kingdom Battle'' [https://rabbids.ubisoft.com/portal/en-gb/games/mario-rabbids-kingdom-battle-manual.aspx online manual]. | ||
{|class="wikitable" | {|class="wikitable" | ||
!Button | !Button | ||
| Line 122: | Line 120: | ||
Each character uses two weapons: a primary weapon that can be used every turn and a secondary weapon that requires cooling down in-between turns, as well as two Techniques. One of the techniques is either a line-of-sight technique that allows the user to fire at targets while they move for the ''Super Mario'' characters or a shield with different properties for the Rabbids. The other technique gives a unique effect exclusive to each of the eight characters. | Each character uses two weapons: a primary weapon that can be used every turn and a secondary weapon that requires cooling down in-between turns, as well as two Techniques. One of the techniques is either a line-of-sight technique that allows the user to fire at targets while they move for the ''Super Mario'' characters or a shield with different properties for the Rabbids. The other technique gives a unique effect exclusive to each of the eight characters. | ||
====Main Game==== | ====Main Game==== | ||
{|class="wikitable" style="text-align:center; margin:auto" | {|class="wikitable"style="text-align:center;margin:auto" | ||
!style="background:DEEPSKYBLUE" colspan="3"|{{color-link|Mario | !style="background:DEEPSKYBLUE"colspan="3"|{{color-link|white|Mario}} | ||
!style="background:HOTPINK" colspan="3"|{{color-link|Peach | !style="background:HOTPINK"colspan="3"|{{color-link|white|Peach}} | ||
!style="background:LIMEGREEN" colspan="3"|{{color-link|Luigi | !style="background:LIMEGREEN"colspan="3"|{{color-link|white|Luigi}} | ||
!style="background:ORANGE" colspan="3"|{{color-link|Yoshi | !style="background:ORANGE"colspan="3"|{{color-link|white|Yoshi}} | ||
|- | |- | ||
|style="background:LIGHTSKYBLUE" colspan="3"|[[File:MRKB Mario Stats.png|200px]] | |style="background:LIGHTSKYBLUE"colspan="3"|[[File:MRKB Mario Stats.png|200px]] | ||
|style="background:PINK" colspan="3"|[[File:MRKB Peach Stats.png|200px]] | |style="background:PINK"colspan="3"|[[File:MRKB Peach Stats.png|200px]] | ||
|style="background:LIGHTGREEN" colspan="3"|[[File:MRKB Luigi Stats.png|200px]] | |style="background:LIGHTGREEN"colspan="3"|[[File:MRKB Luigi Stats.png|200px]] | ||
|style="background:NAVAJOWHITE" colspan="3"|[[File:MRKB Yoshi Stats.png|200px]] | |style="background:NAVAJOWHITE"colspan="3"|[[File:MRKB Yoshi Stats.png|200px]] | ||
|- | |- | ||
|style="background:LIGHTSKYBLUE" colspan="3"|''Mario's offensive talents make him a natural choice to lead the charge in battle. He is a mid-to-close range fighter with excellent mobility.'' | |style="background:LIGHTSKYBLUE"colspan="3"|''Mario's offensive talents make him a natural choice to lead the charge in battle. He is a mid-to-close range fighter with excellent mobility.'' | ||
|style="background:PINK" colspan="3"|''In her new role as a 'defender in a dress' vs. 'damsel in distress', Princess Peach strikes a nice balance between offense, defense and mobility.'' | |style="background:PINK"colspan="3"|''In her new role as a 'defender in a dress' vs. 'damsel in distress', Princess Peach strikes a nice balance between offense, defense and mobility.'' | ||
|style="background:LIGHTGREEN" colspan="3"|''A master of long-range attacks (due to his fear of the front lines) Luigi has bravely led many 'fighting retreats' thanks to his advanced mobility.'' | |style="background:LIGHTGREEN"colspan="3"|''A master of long-range attacks (due to his fear of the front lines) Luigi has bravely led many 'fighting retreats' thanks to his advanced mobility.'' | ||
|style="background:NAVAJOWHITE" colspan="3"|''Yoshi is a long-range specialist who belongs behind the front lines where he can deliver a power-packed punch from afar. Loves fruit.'' | |style="background:NAVAJOWHITE"colspan="3"|''Yoshi is a long-range specialist who belongs behind the front lines where he can deliver a power-packed punch from afar. Loves fruit.'' | ||
|- | |- | ||
|style="background:LIGHTSKYBLUE" colspan="3"|'''Team Fighter''' | |style="background:LIGHTSKYBLUE"colspan="3"|'''Team Fighter''' | ||
|style="background:PINK" colspan="3"|'''Paladin''' | |style="background:PINK"colspan="3"|'''Paladin''' | ||
|style="background:LIGHTGREEN" colspan="3"|'''Scout''' | |style="background:LIGHTGREEN"colspan="3"|'''Scout''' | ||
|style="background:NAVAJOWHITE" colspan="3"|'''Eggsploder''' | |style="background:NAVAJOWHITE"colspan="3"|'''Eggsploder''' | ||
|- | |- | ||
|style="background:LIGHTSKYBLUE"|<small>Offense ★★★★★</small> | |style="background:LIGHTSKYBLUE"|<small>Offense ★★★★★</small> | ||
| Line 158: | Line 155: | ||
|style="background:NAVAJOWHITE"|<small>Mobility ★★★☆☆</small> | |style="background:NAVAJOWHITE"|<small>Mobility ★★★☆☆</small> | ||
|- | |- | ||
|style="background:LIGHTSKYBLUE" colspan="3"|'''Health Points'''<br>220 | |style="background:LIGHTSKYBLUE"colspan="3"|'''Starting Health Points'''<br>220 | ||
|style="background:PINK" colspan="3"|'''Health Points'''<br>340 | |style="background:PINK"colspan="3"|'''Starting Health Points'''<br>340 | ||
|style="background:LIGHTGREEN" colspan="3"|'''Health Points'''<br>130 | |style="background:LIGHTGREEN"colspan="3"|'''Starting Health Points'''<br>130 | ||
|style="background:NAVAJOWHITE" colspan="3"|'''Health Points'''<br>420 | |style="background:NAVAJOWHITE"colspan="3"|'''Starting Health Points'''<br>420 | ||
|- | |||
|style="background:LIGHTSKYBLUE"colspan="3"|'''Maximum Health Points'''<br>590 | |||
|style="background:PINK"colspan="3"|'''Maximum Health Points'''<br>755 | |||
|style="background:LIGHTGREEN"colspan="3"|'''Maximum Health Points'''<br>335 | |||
|style="background:NAVAJOWHITE"colspan="3"|'''Maximum Health Points'''<br>635 | |||
|- | |- | ||
|style="background:LIGHTSKYBLUE" colspan="3"|'''Area of Movement'''<br>6 Cells | |style="background:LIGHTSKYBLUE"colspan="3"|'''Starting Area of Movement'''<br>6 Cells | ||
|style="background:PINK" colspan="3"|'''Area of Movement'''<br>6 Cells | |style="background:PINK"colspan="3"|'''Starting Area of Movement'''<br>6 Cells | ||
|style="background:LIGHTGREEN" colspan="3"|'''Area of Movement'''<br>6 Cells | |style="background:LIGHTGREEN"colspan="3"|'''Starting Area of Movement'''<br>6 Cells | ||
|style="background:NAVAJOWHITE" colspan="3"|'''Area of Movement'''<br>6 Cells | |style="background:NAVAJOWHITE"colspan="3"|'''Starting Area of Movement'''<br>6 Cells | ||
|- | |||
|style="background:LIGHTSKYBLUE"colspan="3"|'''Maximum Area of Movement'''<br>7 Cells | |||
|style="background:PINK"colspan="3"|'''Maximum Area of Movement'''<br>7 Cells | |||
|style="background:LIGHTGREEN"colspan="3"|'''Maximum Area of Movement'''<br>9 Cells | |||
|style="background:NAVAJOWHITE"colspan="3"|'''Maximum Area of Movement'''<br>8 Cells | |||
|- | |||
|style="background:LIGHTSKYBLUE"colspan="3"|'''Starting Pipe Exit Range'''<br>3 Cells | |||
|style="background:PINK"colspan="3"|'''Starting Pipe Exit Range'''<br>3 Cells | |||
|style="background:LIGHTGREEN"colspan="3"|'''Starting Pipe Exit Range'''<br>3 Cells | |||
|style="background:NAVAJOWHITE"colspan="3"|'''Starting Pipe Exit Range'''<br>3 Cells | |||
|- | |- | ||
|style="background:LIGHTSKYBLUE" colspan="3"|'''Pipe Exit Range'''<br> | |style="background:LIGHTSKYBLUE"colspan="3"|'''Maximum Pipe Exit Range'''<br>4 Cells | ||
|style="background:PINK" colspan="3"|'''Pipe Exit Range'''<br> | |style="background:PINK"colspan="3"|'''Maximum Pipe Exit Range'''<br>4 Cells | ||
|style="background:LIGHTGREEN" colspan="3"|'''Pipe Exit Range'''<br> | |style="background:LIGHTGREEN"colspan="3"|'''Maximum Pipe Exit Range'''<br>6 Cells | ||
|style="background:NAVAJOWHITE" colspan="3"|'''Pipe Exit Range'''<br> | |style="background:NAVAJOWHITE"colspan="3"|'''Maximum Pipe Exit Range'''<br>5 Cells | ||
|- | |- | ||
|style="background:LIGHTSKYBLUE" colspan="3"|'''Dash'''<br>20 Damage | |style="background:LIGHTSKYBLUE"colspan="3"|'''Dash'''<br>20 Damage | ||
|style="background:PINK" colspan="3"|'''Dash'''<br>20 Damage | |style="background:PINK"colspan="3"|'''Dash'''<br>20 Damage | ||
|style="background:LIGHTGREEN" colspan="3"|'''Dash'''<br>20 Damage | |style="background:LIGHTGREEN"colspan="3"|'''Dash'''<br>20 Damage | ||
|style="background:NAVAJOWHITE" colspan="3"|'''Dash'''<br>20 Damage | |style="background:NAVAJOWHITE"colspan="3"|'''Dash'''<br>20 Damage | ||
|- | |- | ||
|style="background:LIGHTSKYBLUE;vertical-align: top" colspan="3"| | |style="background:LIGHTSKYBLUE;vertical-align:top"colspan="3"| | ||
{| class="mw-collapsible mw-collapsed" cellspacing=0 cellpadding=4 style=width:100% | {|class="mw-collapsible mw-collapsed"cellspacing=0 cellpadding=4 style=width:100% | ||
|'''Stomp Jump'''<br>6 Cells | |'''Stomp Jump'''<br>6 Cells | ||
|- | |- | ||
|<small><hr>An attack at an enemy's head following a '''TEAM JUMP'''. Afterwards Mario lands on a nearby cell.<hr>'''''Technique Range'''''<br>''6 Cells''<br>'''''Stomp Range'''''<br>''3 Cells''<br>'''''Damage'''''<br>''30''</small> | |<small><hr>An attack at an enemy's head following a '''TEAM JUMP'''. Afterwards Mario lands on a nearby cell.<hr>'''''Technique Range'''''<br>''6 Cells''<br>'''''Stomp Range'''''<br>''3 Cells''<br>'''''Damage'''''<br>''30''</small> | ||
|} | |} | ||
|style="background:PINK;vertical-align: top" colspan="3"| | |style="background:PINK;vertical-align:top"colspan="3"| | ||
{| class="mw-collapsible mw-collapsed" cellspacing=0 cellpadding=4 style=width:100% | {|class="mw-collapsible mw-collapsed"cellspacing=0 cellpadding=4 style=width:100% | ||
|'''Healing Jump'''<br>6 Cells | |'''Healing Jump'''<br>6 Cells | ||
|- | |- | ||
|<small><hr>A '''TEAM JUMP''' that allows Peach to heal nearby teammates after landing.<hr>'''''Technique Range'''''<br>''6 Cells''<br>'''''Healing Range'''''<br>''2 Cells''<br>'''''HP Bonus'''''<br>''5%''</small> | |<small><hr>A '''TEAM JUMP''' that allows Peach to heal nearby teammates after landing.<hr>'''''Technique Range'''''<br>''6 Cells''<br>'''''Healing Range'''''<br>''2 Cells''<br>'''''HP Bonus'''''<br>''5%''</small> | ||
|} | |} | ||
|style="background:LIGHTGREEN;vertical-align: top" colspan="3"| | |style="background:LIGHTGREEN;vertical-align:top"colspan="3"| | ||
{| class="mw-collapsible mw-collapsed" cellspacing=0 cellpadding=4 style=width:100% | {|class="mw-collapsible mw-collapsed"cellspacing=0 cellpadding=4 style=width:100% | ||
|'''Double Jump'''<br>6 Cells | |'''Double Jump'''<br>6 Cells | ||
|- | |- | ||
|<small><hr>Allows Luigi to perform a '''TEAM JUMP''' with two successive Heroes.<hr>'''''Technique Range'''''<br>''6'' | |<small><hr>Allows Luigi to perform a '''TEAM JUMP''' with two successive Heroes.<hr>'''''Technique Range'''''<br>''6'' | ||
|} | |} | ||
|style="background:NAVAJOWHITE;vertical-align: top" colspan="3"| | |style="background:NAVAJOWHITE;vertical-align:top"colspan="3"| | ||
{| class="mw-collapsible mw-collapsed" cellspacing=0 cellpadding=4 style=width:100% | {|class="mw-collapsible mw-collapsed"cellspacing=0 cellpadding=4 style=width:100% | ||
|'''Ground Pound'''<br>6 Cells | |'''Ground Pound'''<br>6 Cells | ||
|- | |- | ||
| Line 203: | Line 215: | ||
|} | |} | ||
|- | |- | ||
|style="background:LIGHTSKYBLUE;vertical-align: top" colspan="3"| | |style="background:LIGHTSKYBLUE;vertical-align:top"colspan="3"| | ||
{| class="mw-collapsible mw-collapsed" cellspacing=0 cellpadding=4 style=width:100% | {|class="mw-collapsible mw-collapsed" cellspacing=0 cellpadding=4 style=width:100% | ||
|'''Primary Weapon'''<br>Blaster | |'''Primary Weapon'''<br>Blaster | ||
|- | |- | ||
|<small><hr>A short to mid-range weapon that fires one round at a time at a single target.<hr>''<u>Lightning Shark</u>''<br>'''''Hit Damage'''''<br>''25-35''<br>'''''Medium Range'''''<br>''10 Cells''<br>'''''Cover Damage'''''<br>''LOW''</small> | |<small><hr>A short to mid-range weapon that fires one round at a time at a single target.<hr>''<u>Lightning Shark</u>''<br>'''''Hit Damage'''''<br>''25-35''<br>'''''Medium Range'''''<br>''10 Cells''<br>'''''Cover Damage'''''<br>''LOW''</small> | ||
|} | |} | ||
{| class="mw-collapsible mw-collapsed" cellspacing=0 cellpadding=4 style=width:100% | {|class="mw-collapsible mw-collapsed"cellspacing=0 cellpadding=4 style=width:100% | ||
|'''Secondary Weapon'''<br>Melee | |'''Secondary Weapon'''<br>Melee | ||
|- | |- | ||
|<small><hr>Close-range weapon that can hit multiple targets at once.<hr>''<u>Button Masher</u>''<br>'''''Hit Damage'''''<br>''55-65''<br>'''''Close Range'''''<br>''1 Cell''<br>'''''Cover Damage'''''<br>''NONE''<br>'''''Cooldown'''''<br>''1 Turn''<br>'''''Area of Damage'''''<br>''2 Cells''</small> | |<small><hr>Close-range weapon that can hit multiple targets at once.<hr>''<u>Button Masher</u>''<br>'''''Hit Damage'''''<br>''55-65''<br>'''''Close Range'''''<br>''1 Cell''<br>'''''Cover Damage'''''<br>''NONE''<br>'''''Cooldown'''''<br>''1 Turn''<br>'''''Area of Damage'''''<br>''2 Cells''</small> | ||
|} | |} | ||
|style="background:PINK;vertical-align: top" colspan="3"| | |style="background:PINK;vertical-align:top"colspan="3"| | ||
{| class="mw-collapsible mw-collapsed" cellspacing=0 cellpadding=4 style=width:100% | {|class="mw-collapsible mw-collapsed"cellspacing=0 cellpadding=4 style=width:100% | ||
|'''Primary Weapon'''<br>Boomshot | |'''Primary Weapon'''<br>Boomshot | ||
|- | |- | ||
|<small><hr>Short-range weapon capable of hitting multiple targets at once without cooldown.<hr>''<u>Blue Flame</u>''<br>'''''Hit Damage'''''<br>''90-100''<br>'''''Short Range'''''<br>''7 Cells''<br>'''''Cover Damage'''''<br>''LOW''</small> | |<small><hr>Short-range weapon capable of hitting multiple targets at once without cooldown.<hr>''<u>Blue Flame</u>''<br>'''''Hit Damage'''''<br>''90-100''<br>'''''Short Range'''''<br>''7 Cells''<br>'''''Cover Damage'''''<br>''LOW''</small> | ||
|} | |} | ||
{| class="mw-collapsible mw-collapsed" cellspacing=0 cellpadding=4 style=width:100% | {|class="mw-collapsible mw-collapsed"cellspacing=0 cellpadding=4 style=width:100% | ||
|'''Secondary Weapon'''<br>Grenaduck | |'''Secondary Weapon'''<br>Grenaduck | ||
|- | |- | ||
|<small><hr>Tossed overhead at a target for an area attack affecting all enemies within range.<hr>''<u>The Duckess</u>''<br>'''''Hit Damage'''''<br>''65-75''<br>'''''Medium Range'''''<br>''10 Cells''<br>'''''Cover Damage'''''<br>''LOW''<br>'''''Cooldown'''''<br>''1 Turn''<br>'''''Area of Damage'''''<br>''2 Cells''</small> | |<small><hr>Tossed overhead at a target for an area attack affecting all enemies within range.<hr>''<u>The Duckess</u>''<br>'''''Hit Damage'''''<br>''65-75''<br>'''''Medium Range'''''<br>''10 Cells''<br>'''''Cover Damage'''''<br>''LOW''<br>'''''Cooldown'''''<br>''1 Turn''<br>'''''Area of Damage'''''<br>''2 Cells''</small> | ||
|} | |} | ||
|style="background:LIGHTGREEN;vertical-align: top" colspan="3"| | |style="background:LIGHTGREEN;vertical-align:top"colspan="3"| | ||
{| class="mw-collapsible mw-collapsed" cellspacing=0 cellpadding=4 style=width:100% | {|class="mw-collapsible mw-collapsed"cellspacing=0 cellpadding=4 style=width:100% | ||
|'''Primary Weapon'''<br>Precision | |'''Primary Weapon'''<br>Precision | ||
|- | |- | ||
|<small><hr>A long range weapon that fires one round at a single target.<hr>''<u>Suction Destruction</u>''<br>'''''Hit Damage'''''<br>''35-45''<br>'''''Long Range'''''<br>''15 Cells''<br>'''''Cover Damage'''''<br>''LOW''</small> | |<small><hr>A long range weapon that fires one round at a single target.<hr>''<u>Suction Destruction</u>''<br>'''''Hit Damage'''''<br>''35-45''<br>'''''Long Range'''''<br>''15 Cells''<br>'''''Cover Damage'''''<br>''LOW''</small> | ||
|} | |} | ||
{| class="mw-collapsible mw-collapsed" cellspacing=0 cellpadding=4 style=width:100% | {|class="mw-collapsible mw-collapsed"cellspacing=0 cellpadding=4 style=width:100% | ||
|'''Secondary Weapon'''<br>Sentry | |'''Secondary Weapon'''<br>Sentry | ||
|- | |- | ||
|<small><hr>Never stops chasing its target, it will detonate when it gets close. Can be destroyed.<hr>''<u>Top Gear</u>''<br>'''''Hit Damage'''''<br>''45-55''<br>'''''Long Range'''''<br>''15 Cells''<br>'''''Cover Damage'''''<br>''LOW''<br>'''''Cooldown'''''<br>''1 Turn''<br>'''''Area of Damage'''''<br>''1 Cell''<br>'''''Sentry Health Points'''''<br>''150''<br>'''''Sentry Move Range'''''<br>''6 Cells''</small> | |<small><hr>Never stops chasing its target, it will detonate when it gets close. Can be destroyed.<hr>''<u>Top Gear</u>''<br>'''''Hit Damage'''''<br>''45-55''<br>'''''Long Range'''''<br>''15 Cells''<br>'''''Cover Damage'''''<br>''LOW''<br>'''''Cooldown'''''<br>''1 Turn''<br>'''''Area of Damage'''''<br>''1 Cell''<br>'''''Sentry Health Points'''''<br>''150''<br>'''''Sentry Move Range'''''<br>''6 Cells''</small> | ||
|} | |} | ||
|style="background:NAVAJOWHITE;vertical-align: top" colspan="3"| | |style="background:NAVAJOWHITE;vertical-align:top"colspan="3"| | ||
{| class="mw-collapsible mw-collapsed" cellspacing=0 cellpadding=4 style=width:100% | {|class="mw-collapsible mw-collapsed"cellspacing=0 cellpadding=4 style=width:100% | ||
|'''Primary Weapon'''<br>Rumblebang | |'''Primary Weapon'''<br>Rumblebang | ||
|- | |- | ||
|<small><hr>Mid-range weapon that fires multiple rounds at once at a single target.<hr>''<u>Egg Creamer</u>''<br>'''''Hit Damage'''''<br>''125-255''<br>'''''Medium Range'''''<br>''10 Cells''<br>'''''Cover Damage'''''<br>''LOW''</small> | |<small><hr>Mid-range weapon that fires multiple rounds at once at a single target.<hr>''<u>Egg Creamer</u>''<br>'''''Hit Damage'''''<br>''125-255''<br>'''''Medium Range'''''<br>''10 Cells''<br>'''''Cover Damage'''''<br>''LOW''</small> | ||
|} | |} | ||
{| class="mw-collapsible mw-collapsed" cellspacing=0 cellpadding=4 style=width:100% | {|class="mw-collapsible mw-collapsed"cellspacing=0 cellpadding=4 style=width:100% | ||
|'''Secondary Weapon'''<br>Rocket | |'''Secondary Weapon'''<br>Rocket | ||
|- | |- | ||
| Line 248: | Line 260: | ||
|} | |} | ||
|- | |- | ||
|style="background:LIGHTSKYBLUE;vertical-align: top" colspan="3"| | |style="background:LIGHTSKYBLUE;vertical-align:top"colspan="3"| | ||
{| class="mw-collapsible mw-collapsed" cellspacing=0 cellpadding=4 style=width:100% | {|class="mw-collapsible mw-collapsed"cellspacing=0 cellpadding=4 style=width:100% | ||
|'''Primary Technique'''<br>Hero Sight | |'''Primary Technique'''<br>Hero Sight | ||
|- | |- | ||
|<small><hr>This bonus attack is a mid-range reaction shot dealt to the first enemy to move within Mario's line of sight.<hr>'''''Cooldown'''''<br>''3 Turns''<br>'''''Reaction Shots'''''<br>''1''<br>'''''Reaction Shot DMG'''''<br>''80%''</small> | |<small><hr>This bonus attack is a mid-range reaction shot dealt to the first enemy to move within Mario's line of sight.<hr>'''''Cooldown'''''<br>''3 Turns''<br>'''''Reaction Shots'''''<br>''1''<br>'''''Reaction Shot DMG'''''<br>''80%''</small> | ||
|} | |} | ||
{| class="mw-collapsible mw-collapsed" cellspacing=0 cellpadding=4 style=width:100% | {|class="mw-collapsible mw-collapsed"cellspacing=0 cellpadding=4 style=width:100% | ||
|'''Secondary Technique'''<br>M-Power | |'''Secondary Technique'''<br>M-Power | ||
|- | |- | ||
|<small><hr>Increases Mario's weapon damage along with the damage caused by any Heroes in range.<hr>'''''Cooldown'''''<br>''3 Turns''<br>'''''Technique Range'''''<br>''4 Cells''<br>'''''DMG Increase'''''<br>''20%''</small> | |<small><hr>Increases Mario's weapon damage along with the damage caused by any Heroes in range.<hr>'''''Cooldown'''''<br>''3 Turns''<br>'''''Technique Range'''''<br>''4 Cells''<br>'''''DMG Increase'''''<br>''20%''</small> | ||
|} | |} | ||
|style="background:PINK;vertical-align: top" colspan="3"| | |style="background:PINK;vertical-align:top"colspan="3"| | ||
{| class="mw-collapsible mw-collapsed" cellspacing=0 cellpadding=4 style=width:100% | {|class="mw-collapsible mw-collapsed"cellspacing=0 cellpadding=4 style=width:100% | ||
|'''Primary Technique'''<br>Royal Gaze | |'''Primary Technique'''<br>Royal Gaze | ||
|- | |- | ||
|<small><hr>This bonus attack is a short reaction shot dealt to the first enemy to move within Peach's line of sight.<hr>'''''Cooldown'''''<br>''3 Turns''<br>'''''Reaction Shots'''''<br>''1''<br>'''''Reaction Shot DMG'''''<br>''80%''</small> | |<small><hr>This bonus attack is a short reaction shot dealt to the first enemy to move within Peach's line of sight.<hr>'''''Cooldown'''''<br>''3 Turns''<br>'''''Reaction Shots'''''<br>''1''<br>'''''Reaction Shot DMG'''''<br>''80%''</small> | ||
|} | |} | ||
{| class="mw-collapsible mw-collapsed" cellspacing=0 cellpadding=4 style=width:100% | {|class="mw-collapsible mw-collapsed"cellspacing=0 cellpadding=4 style=width:100% | ||
|'''Secondary Technique'''<br>Protection | |'''Secondary Technique'''<br>Protection | ||
|- | |- | ||
|<small><hr>Damage taken by Heroes within range is partially absorbed by Peach.<hr>'''''Cooldown'''''<br>''2 Turns''<br>'''''Technique Range'''''<br>''4 Cells''<br>'''''DMG Reduction'''''<br>''30%''</small> | |<small><hr>Damage taken by Heroes within range is partially absorbed by Peach.<hr>'''''Cooldown'''''<br>''2 Turns''<br>'''''Technique Range'''''<br>''4 Cells''<br>'''''DMG Reduction'''''<br>''30%''</small> | ||
|} | |} | ||
|style="background:LIGHTGREEN;vertical-align: top" colspan="3"| | |style="background:LIGHTGREEN;vertical-align:top"colspan="3"| | ||
{| class="mw-collapsible mw-collapsed" cellspacing=0 cellpadding=4 style=width:100% | {|class="mw-collapsible mw-collapsed"cellspacing=0 cellpadding=4 style=width:100% | ||
|'''Primary Technique'''<br>Steely Stare | |'''Primary Technique'''<br>Steely Stare | ||
|- | |- | ||
|<small><hr>This bonus attack is a long range reaction shot dealt to the first enemy to move within Luigi's line of sight.<hr>'''''Cooldown'''''<br>''2 Turns''<br>'''''Reaction Shots'''''<br>''1''<br>'''''Reaction Shot DMG'''''<br>''50%''</small> | |<small><hr>This bonus attack is a long range reaction shot dealt to the first enemy to move within Luigi's line of sight.<hr>'''''Cooldown'''''<br>''2 Turns''<br>'''''Reaction Shots'''''<br>''1''<br>'''''Reaction Shot DMG'''''<br>''50%''</small> | ||
|} | |} | ||
{| class="mw-collapsible mw-collapsed" cellspacing=0 cellpadding=4 style=width:100% | {|class="mw-collapsible mw-collapsed"cellspacing=0 cellpadding=4 style=width:100% | ||
|'''Secondary Technique'''<br>Itchy Feet | |'''Secondary Technique'''<br>Itchy Feet | ||
|- | |- | ||
|<small><hr>Area of Movement is increased for all Heroes in range.<hr>'''''Cooldown'''''<br>''2 Turns''<br>'''''Technique Range'''''<br>''4 Cells''<br>'''''Extra Cells'''''<br>''1 Cell''</small> | |<small><hr>Area of Movement is increased for all Heroes in range.<hr>'''''Cooldown'''''<br>''2 Turns''<br>'''''Technique Range'''''<br>''4 Cells''<br>'''''Extra Cells'''''<br>''1 Cell''</small> | ||
|} | |} | ||
|style="background:NAVAJOWHITE;vertical-align: top" colspan="3"| | |style="background:NAVAJOWHITE;vertical-align:top"colspan="3"| | ||
{| class="mw-collapsible mw-collapsed" cellspacing=0 cellpadding=4 style=width:100% | {|class="mw-collapsible mw-collapsed"cellspacing=0 cellpadding=4 style=width:100% | ||
|'''Primary Technique'''<br>Egg Beater | |'''Primary Technique'''<br>Egg Beater | ||
|- | |- | ||
|<small><hr>Bonus attack - a mid-range reaction shot dealt to enemies within Yoshi's line of sight.<hr>'''''Cooldown'''''<br>''3 Turns''<br>'''''Reaction Shots'''''<br>''1''<br>'''''Reaction Shot DMG'''''<br>''100%''</small> | |<small><hr>Bonus attack - a mid-range reaction shot dealt to enemies within Yoshi's line of sight.<hr>'''''Cooldown'''''<br>''3 Turns''<br>'''''Reaction Shots'''''<br>''1''<br>'''''Reaction Shot DMG'''''<br>''100%''</small> | ||
|} | |} | ||
{| class="mw-collapsible mw-collapsed" cellspacing=0 cellpadding=4 style=width:100% | {|class="mw-collapsible mw-collapsed"cellspacing=0 cellpadding=4 style=width:100% | ||
|'''Secondary Technique'''<br>Super Chance | |'''Secondary Technique'''<br>Super Chance | ||
|- | |- | ||
| Line 293: | Line 305: | ||
|} | |} | ||
|- | |- | ||
!style="background:DEEPSKYBLUE" colspan="3"|{{color-link|Rabbid Mario | !style="background:DEEPSKYBLUE"colspan="3"|{{color-link|white|Rabbid Mario}} | ||
!style="background:HOTPINK" colspan="3"|{{color-link|Rabbid Peach | !style="background:HOTPINK"colspan="3"|{{color-link|white|Rabbid Peach}} | ||
!style="background:LIMEGREEN" colspan="3"|{{color-link|Rabbid Luigi | !style="background:LIMEGREEN"colspan="3"|{{color-link|white|Rabbid Luigi}} | ||
!style="background:ORANGE" colspan="3"|{{color-link|Rabbid Yoshi | !style="background:ORANGE"colspan="3"|{{color-link|white|Rabbid Yoshi}} | ||
|- | |- | ||
|style="background:LIGHTSKYBLUE" colspan="3"|[[File:MRKB Rabbid Mario Stats.png|200px]] | |style="background:LIGHTSKYBLUE"colspan="3"|[[File:MRKB Rabbid Mario Stats.png|200px]] | ||
|style="background:PINK" colspan="3"|[[File:MRKB Rabbid Peach Stats.png|200px]] | |style="background:PINK"colspan="3"|[[File:MRKB Rabbid Peach Stats.png|200px]] | ||
|style="background:LIGHTGREEN" colspan="3"|[[File:MRKB Rabbid Luigi Stats.png|190px]] | |style="background:LIGHTGREEN"colspan="3"|[[File:MRKB Rabbid Luigi Stats.png|190px]] | ||
|style="background:NAVAJOWHITE" colspan="3"|[[File:MRKB Rabbid Yoshi Stats.png|200px]] | |style="background:NAVAJOWHITE"colspan="3"|[[File:MRKB Rabbid Yoshi Stats.png|200px]] | ||
|- | |- | ||
|style="background:LIGHTSKYBLUE" colspan="3"|''A big league brawler with exceptional luck, a dependable defense, solid moves and massive case of imposter syndrome.'' | |style="background:LIGHTSKYBLUE"colspan="3"|''A big league brawler with exceptional luck, a dependable defense, solid moves and massive case of imposter syndrome.'' | ||
|style="background:PINK" colspan="3"|''A proficient healer and damage-denier, when this defense-oriented prima donna takes the battlefield she keeps one eye on the enemy, and one on Mario.'' | |style="background:PINK"colspan="3"|''A proficient healer and damage-denier, when this defense-oriented prima donna takes the battlefield she keeps one eye on the enemy, and one on Mario.'' | ||
|style="background:LIGHTGREEN" colspan="3"|''Rabbid Luigi is a defensive specialist who can leverage the unpredictable elemental forces that surround us all to great strategic effect.'' | |style="background:LIGHTGREEN"colspan="3"|''Rabbid Luigi is a defensive specialist who can leverage the unpredictable elemental forces that surround us all to great strategic effect.'' | ||
|style="background:NAVAJOWHITE" colspan="3"|''Rabbid Yoshi is best utilized lashing out with heavy weapons at long range. His arsenal includes melee skills, solid defense and a cool victory dance.'' | |style="background:NAVAJOWHITE"colspan="3"|''Rabbid Yoshi is best utilized lashing out with heavy weapons at long range. His arsenal includes melee skills, solid defense and a cool victory dance.'' | ||
|- | |- | ||
|style="background:LIGHTSKYBLUE" colspan="3"|'''Brawler''' | |style="background:LIGHTSKYBLUE"colspan="3"|'''Brawler''' | ||
|style="background:PINK" colspan="3"|'''Healer''' | |style="background:PINK"colspan="3"|'''Healer''' | ||
|style="background:LIGHTGREEN" colspan="3"|'''Wizard''' | |style="background:LIGHTGREEN"colspan="3"|'''Wizard''' | ||
|style="background:NAVAJOWHITE" colspan="3"|'''Boomboomer''' | |style="background:NAVAJOWHITE"colspan="3"|'''Boomboomer''' | ||
|- | |- | ||
|style="background:LIGHTSKYBLUE"| <small>Offense ★★★★☆</small> | |style="background:LIGHTSKYBLUE"| <small>Offense ★★★★☆</small> | ||
| Line 326: | Line 338: | ||
|style="background:NAVAJOWHITE"|<small>Mobility ★★★☆☆</small> | |style="background:NAVAJOWHITE"|<small>Mobility ★★★☆☆</small> | ||
|- | |- | ||
|style="background:LIGHTSKYBLUE" colspan="3"|'''Health Points'''<br>265 | |style="background:LIGHTSKYBLUE"colspan="3"|'''Starting Health Points'''<br>265 | ||
|style="background:PINK" colspan="3"|'''Health Points'''<br>220 | |style="background:PINK"colspan="3"|'''Starting Health Points'''<br>220 | ||
|style="background:LIGHTGREEN" colspan="3"|'''Health Points'''<br>200 | |style="background:LIGHTGREEN"colspan="3"|'''Starting Health Points'''<br>200 | ||
|style="background:NAVAJOWHITE" colspan="3"|'''Health Points'''<br>290 | |style="background:NAVAJOWHITE"colspan="3"|'''Starting Health Points'''<br>290 | ||
|- | |||
|style="background:LIGHTSKYBLUE"colspan="3"|'''Maximum Health Points'''<br>590 | |||
|style="background:PINK"colspan="3"|'''Maximum Health Points'''<br>530 | |||
|style="background:LIGHTGREEN"colspan="3"|'''Maximum Health Points'''<br>500 | |||
|style="background:NAVAJOWHITE"colspan="3"|'''Maximum Health Points'''<br>550 | |||
|- | |||
|style="background:LIGHTSKYBLUE"colspan="3"|'''Starting Area of Movement'''<br>6 Cells | |||
|style="background:PINK"colspan="3"|'''Starting Area of Movement'''<br>6 Cells | |||
|style="background:LIGHTGREEN"colspan="3"|'''Starting Area of Movement'''<br>6 Cells | |||
|style="background:NAVAJOWHITE"colspan="3"|'''Starting Area of Movement'''<br>6 Cells | |||
|- | |||
|style="background:LIGHTSKYBLUE"colspan="3"|'''Maximum Area of Movement'''<br>9 Cells | |||
|style="background:PINK"colspan="3"|'''Maximum Area of Movement'''<br>8 Cells | |||
|style="background:LIGHTGREEN"colspan="3"|'''Maximum Area of Movement'''<br>8 Cells | |||
|style="background:NAVAJOWHITE"colspan="3"|'''Maximum Area of Movement'''<br>9 Cells | |||
|- | |- | ||
|style="background:LIGHTSKYBLUE" colspan="3"|''' | |style="background:LIGHTSKYBLUE"colspan="3"|'''Starting Pipe Exit Range'''<br>3 Cells | ||
|style="background:PINK" colspan="3"|''' | |style="background:PINK"colspan="3"|'''Starting Pipe Exit Range'''<br>3 Cells | ||
|style="background:LIGHTGREEN" colspan="3"|''' | |style="background:LIGHTGREEN"colspan="3"|'''Starting Pipe Exit Range'''<br>3 Cells | ||
|style="background:NAVAJOWHITE" colspan="3"|''' | |style="background:NAVAJOWHITE"colspan="3"|'''Starting Pipe Exit Range'''<br>3 Cells | ||
|- | |- | ||
|style="background:LIGHTSKYBLUE" colspan="3"|'''Pipe Exit Range'''<br> | |style="background:LIGHTSKYBLUE"colspan="3"|'''Maximum Pipe Exit Range'''<br>6 Cells | ||
|style="background:PINK" colspan="3"|'''Pipe Exit Range'''<br> | |style="background:PINK"colspan="3"|'''Maximum Pipe Exit Range'''<br>5 Cells | ||
|style="background:LIGHTGREEN" colspan="3"|'''Pipe Exit Range'''<br> | |style="background:LIGHTGREEN"colspan="3"|'''Maximum Pipe Exit Range'''<br>5 Cells | ||
|style="background:NAVAJOWHITE" colspan="3"|'''Pipe Exit Range'''<br> | |style="background:NAVAJOWHITE"colspan="3"|'''Maximum Pipe Exit Range'''<br>6 Cells | ||
|- | |- | ||
|style="background:LIGHTSKYBLUE;vertical-align: top" colspan="3"| | |style="background:LIGHTSKYBLUE;vertical-align:top"colspan="3"| | ||
{| class="mw-collapsible mw-collapsed" cellspacing=0 cellpadding=4 style=width:100% | {|class="mw-collapsible mw-collapsed"cellspacing=0 cellpadding=4 style=width:100% | ||
|'''Boom Dash'''<br>20 Damage | |'''Boom Dash'''<br>20 Damage | ||
|- | |- | ||
|<hr><small>An explosive area attack Rabbid Mario performs with a '''DASH'''.<hr>'''''Damage'''''<br>''20''<br>'''''Technique Range'''''<br>''2 Cells''</small> | |<hr><small>An explosive area attack Rabbid Mario performs with a '''DASH'''.<hr>'''''Damage'''''<br>''20''<br>'''''Technique Range'''''<br>''2 Cells''</small> | ||
|} | |} | ||
|style="background:PINK;vertical-align: top" colspan="3"| | |style="background:PINK;vertical-align:top"colspan="3"| | ||
{| class="mw-collapsible mw-collapsed" cellspacing=0 cellpadding=4 style=width:100% | {|class="mw-collapsible mw-collapsed"cellspacing=0 cellpadding=4 style=width:100% | ||
|'''Stylish Dash'''<br>20 Damage | |'''Stylish Dash'''<br>20 Damage | ||
|- | |- | ||
|<hr><small>Allows Rabbid Peach to '''DASH''' more than one enemy while on the move.<hr>'''''Damage'''''<br>''20''</small> | |<hr><small>Allows Rabbid Peach to '''DASH''' more than one enemy while on the move.<hr>'''''Damage'''''<br>''20''</small> | ||
|} | |} | ||
|style="background:LIGHTGREEN;vertical-align: top" colspan="3"| | |style="background:LIGHTGREEN;vertical-align:top"colspan="3"| | ||
{| class="mw-collapsible mw-collapsed" cellspacing=0 cellpadding=4 style=width:100% | {|class="mw-collapsible mw-collapsed"cellspacing=0 cellpadding=4 style=width:100% | ||
|'''Vamp Dash'''<br>30 Damage | |'''Vamp Dash'''<br>30 Damage | ||
|- | |- | ||
|<hr><small>Allows Rabbid Luigi to drain enemy Health Points with a '''DASH'''.<hr>'''''Damage'''''<br>''30''<br>'''''Life Drain'''''<br>''30%'' | |<hr><small>Allows Rabbid Luigi to drain enemy Health Points with a '''DASH'''.<hr>'''''Damage'''''<br>''30''<br>'''''Life Drain'''''<br>''30%'' | ||
|} | |} | ||
|style="background:NAVAJOWHITE;vertical-align: top" colspan="3"| | |style="background:NAVAJOWHITE;vertical-align:top"colspan="3"| | ||
{| class="mw-collapsible mw-collapsed" cellspacing=0 cellpadding=4 style=width:100% | {|class="mw-collapsible mw-collapsed"cellspacing=0 cellpadding=4 style=width:100% | ||
|'''Ultra Dash'''<br>20 Damage | |'''Ultra Dash'''<br>20 Damage | ||
|- | |- | ||
| Line 371: | Line 398: | ||
|style="background:NAVAJOWHITE" colspan="3"|'''Team Jump'''<br>6 Cells | |style="background:NAVAJOWHITE" colspan="3"|'''Team Jump'''<br>6 Cells | ||
|- | |- | ||
|style="background:LIGHTSKYBLUE;vertical-align: top" colspan="3"| | |style="background:LIGHTSKYBLUE;vertical-align:top"colspan="3"| | ||
{| class="mw-collapsible mw-collapsed" cellspacing=0 cellpadding=4 style=width:100% | {|class="mw-collapsible mw-collapsed"cellspacing=0 cellpadding=4 style=width:100% | ||
|'''Primary Weapon'''<br>Boomshot | |'''Primary Weapon'''<br>Boomshot | ||
|- | |- | ||
|<small><hr>Short-range weapon capable of hitting multiple targets at once without cooldown.<hr>''<u>Red Lightning</u>''<br>'''''Hit Damage'''''<br>''90-100''<br>'''''Short Range'''''<br>''7 Cells''<br>'''''Cover Damage'''''<br>''LOW''</small> | |<small><hr>Short-range weapon capable of hitting multiple targets at once without cooldown.<hr>''<u>Red Lightning</u>''<br>'''''Hit Damage'''''<br>''90-100''<br>'''''Short Range'''''<br>''7 Cells''<br>'''''Cover Damage'''''<br>''LOW''</small> | ||
|} | |} | ||
{| class="mw-collapsible mw-collapsed" cellspacing=0 cellpadding=4 style=width:100% | {|class="mw-collapsible mw-collapsed"cellspacing=0 cellpadding=4 style=width:100% | ||
|'''Secondary Weapon'''<br>Melee | |'''Secondary Weapon'''<br>Melee | ||
|- | |- | ||
|<small><hr>Close-range weapon that can hit multiple targets at once.<hr>''<u>Big Blue Bopper</u>''<br>'''''Hit Damage'''''<br>''105-115''<br>'''''Close Range'''''<br>''1 Cell''<br>'''''Cover Damage'''''<br>''NONE''<br>'''''Cooldown'''''<br>''1 Turn''<br>'''''Area of Damage'''''<br>''2 Cells''</small> | |<small><hr>Close-range weapon that can hit multiple targets at once.<hr>''<u>Big Blue Bopper</u>''<br>'''''Hit Damage'''''<br>''105-115''<br>'''''Close Range'''''<br>''1 Cell''<br>'''''Cover Damage'''''<br>''NONE''<br>'''''Cooldown'''''<br>''1 Turn''<br>'''''Area of Damage'''''<br>''2 Cells''</small> | ||
|} | |} | ||
|style="background:PINK;vertical-align: top" colspan="3"| | |style="background:PINK;vertical-align:top"colspan="3"| | ||
{| class="mw-collapsible mw-collapsed" cellspacing=0 cellpadding=4 style=width:100% | {|class="mw-collapsible mw-collapsed"cellspacing=0 cellpadding=4 style=width:100% | ||
|'''Primary Weapon'''<br>Blaster | |'''Primary Weapon'''<br>Blaster | ||
|- | |- | ||
|<small><hr>A short to mid-range weapon that fires one round at a time at a single target.<hr>''<u>Fuchsia Fury</u>''<br>'''''Hit Damage'''''<br>''25-35''<br>'''''Medium Range'''''<br>''10 Cells''<br>'''''Cover Damage'''''<br>''LOW''</small> | |<small><hr>A short to mid-range weapon that fires one round at a time at a single target.<hr>''<u>Fuchsia Fury</u>''<br>'''''Hit Damage'''''<br>''25-35''<br>'''''Medium Range'''''<br>''10 Cells''<br>'''''Cover Damage'''''<br>''LOW''</small> | ||
|} | |} | ||
{| class="mw-collapsible mw-collapsed" cellspacing=0 cellpadding=4 style=width:100% | {|class="mw-collapsible mw-collapsed"cellspacing=0 cellpadding=4 style=width:100% | ||
|'''Secondary Weapon'''<br>Sentry | |'''Secondary Weapon'''<br>Sentry | ||
|- | |- | ||
|<small><hr>Never stops chasing its target, it will detonate when it gets close. Can be destroyed.<hr>''<u>Excavator</u>''<br>'''''Hit Damage'''''<br>''45-55''<br>'''''Long Range'''''<br>''15 Cells''<br>'''''Cover Damage'''''<br>''LOW''<br>'''''Cooldown'''''<br>''1 Turn''<br>'''''Area of Damage'''''<br>''1 Cell''<br>'''''Sentry Health Points'''''<br>''150''<br>'''''Sentry Move Range'''''<br>''6 Cells''</small> | |<small><hr>Never stops chasing its target, it will detonate when it gets close. Can be destroyed.<hr>''<u>Excavator</u>''<br>'''''Hit Damage'''''<br>''45-55''<br>'''''Long Range'''''<br>''15 Cells''<br>'''''Cover Damage'''''<br>''LOW''<br>'''''Cooldown'''''<br>''1 Turn''<br>'''''Area of Damage'''''<br>''1 Cell''<br>'''''Sentry Health Points'''''<br>''150''<br>'''''Sentry Move Range'''''<br>''6 Cells''</small> | ||
|} | |} | ||
|style="background:LIGHTGREEN;vertical-align: top" colspan="3"| | |style="background:LIGHTGREEN;vertical-align:top"colspan="3"| | ||
{| class="mw-collapsible mw-collapsed" cellspacing=0 cellpadding=4 style=width:100% | {|class="mw-collapsible mw-collapsed"cellspacing=0 cellpadding=4 style=width:100% | ||
|'''Primary Weapon'''<br>Bworb | |'''Primary Weapon'''<br>Bworb | ||
|- | |- | ||
|<small><hr>Fires one round at a single target with lots of side effects.<hr>''<u>Dwarf Star</u>''<br>'''''Hit Damage'''''<br>''20-30''<br>'''''Medium Range'''''<br>''10 Cells''<br>'''''Cover Damage'''''<br>''LOW''</small> | |<small><hr>Fires one round at a single target with lots of side effects.<hr>''<u>Dwarf Star</u>''<br>'''''Hit Damage'''''<br>''20-30''<br>'''''Medium Range'''''<br>''10 Cells''<br>'''''Cover Damage'''''<br>''LOW''</small> | ||
|} | |} | ||
{| class="mw-collapsible mw-collapsed" cellspacing=0 cellpadding=4 style=width:100% | {|class="mw-collapsible mw-collapsed"cellspacing=0 cellpadding=4 style=width:100% | ||
|'''Secondary Weapon'''<br>Rocket | |'''Secondary Weapon'''<br>Rocket | ||
|- | |- | ||
|<small><hr>Area attack affecting all enemies within range.<hr>''<u>Pipe Dream</u>''<br>'''''Hit Damage'''''<br>''20-30''<br>'''''Long Range'''''<br>''15 Cells''<br>'''''Cover Damage'''''<br>''LOW''<br>'''''Cooldown'''''<br>''1 Turn''<br>'''''Area of Damage'''''<br>''2 Cells''</small> | |<small><hr>Area attack affecting all enemies within range.<hr>''<u>Pipe Dream</u>''<br>'''''Hit Damage'''''<br>''20-30''<br>'''''Long Range'''''<br>''15 Cells''<br>'''''Cover Damage'''''<br>''LOW''<br>'''''Cooldown'''''<br>''1 Turn''<br>'''''Area of Damage'''''<br>''2 Cells''</small> | ||
|} | |} | ||
|style="background:NAVAJOWHITE;vertical-align: top" colspan="3"| | |style="background:NAVAJOWHITE;vertical-align:top"colspan="3"| | ||
{| class="mw-collapsible mw-collapsed" cellspacing=0 cellpadding=4 style=width:100% | {|class="mw-collapsible mw-collapsed"cellspacing=0 cellpadding=4 style=width:100% | ||
|'''Primary Weapon'''<br>Rumblebang | |'''Primary Weapon'''<br>Rumblebang | ||
|- | |- | ||
|<small><hr>Mid-range weapon that fires multiple rounds at once at a single target.<hr>''<u>Egg Fry</u>''<br>'''''Hit Damage'''''<br>''70-180''<br>'''''Medium Range'''''<br>''11 Cells''<br>'''''Cover Damage'''''<br>''LOW''</small> | |<small><hr>Mid-range weapon that fires multiple rounds at once at a single target.<hr>''<u>Egg Fry</u>''<br>'''''Hit Damage'''''<br>''70-180''<br>'''''Medium Range'''''<br>''11 Cells''<br>'''''Cover Damage'''''<br>''LOW''</small> | ||
|} | |} | ||
{| class="mw-collapsible mw-collapsed" cellspacing=0 cellpadding=4 style=width:100% | {|class="mw-collapsible mw-collapsed"cellspacing=0 cellpadding=4 style=width:100% | ||
|'''Secondary Weapon'''<br>Grenaduck | |'''Secondary Weapon'''<br>Grenaduck | ||
|- | |- | ||
| Line 416: | Line 443: | ||
|} | |} | ||
|- | |- | ||
|style="background:LIGHTSKYBLUE;vertical-align: top" colspan="3"| | |style="background:LIGHTSKYBLUE;vertical-align:top"colspan="3"| | ||
{| class="mw-collapsible mw-collapsed" cellspacing=0 cellpadding=4 style=width:100% | {|class="mw-collapsible mw-collapsed"cellspacing=0 cellpadding=4 style=width:100% | ||
|'''Primary Technique'''<br>Bodyguard | |'''Primary Technique'''<br>Bodyguard | ||
|- | |- | ||
|<small><hr>Limits damage dealt from movement-based attacks like Dash.<hr>'''''Cooldown'''''<br>''2 Turns''<br>'''''Weapon DMG Reduction'''''<br>''0%''<br>'''''Movement DMG Reduction'''''<br>''80%''</small> | |<small><hr>Limits damage dealt from movement-based attacks like Dash.<hr>'''''Cooldown'''''<br>''2 Turns''<br>'''''Weapon DMG Reduction'''''<br>''0%''<br>'''''Movement DMG Reduction'''''<br>''80%''</small> | ||
|} | |} | ||
{| class="mw-collapsible mw-collapsed" cellspacing=0 cellpadding=4 style=width:100% | {|class="mw-collapsible mw-collapsed"cellspacing=0 cellpadding=4 style=width:100% | ||
|'''Secondary Technique'''<br>Magnet Dance | |'''Secondary Technique'''<br>Magnet Dance | ||
|- | |- | ||
|<small><hr>Enemies within range are drawn to Rabbid Mario.<hr>'''''Cooldown'''''<br>''3 Turns''<br>'''''Technique Range'''''<br>''6 Cells''</small> | |<small><hr>Enemies within range are drawn to Rabbid Mario.<hr>'''''Cooldown'''''<br>''3 Turns''<br>'''''Technique Range'''''<br>''6 Cells''</small> | ||
|} | |} | ||
|style="background:PINK;vertical-align: top" colspan="3"| | |style="background:PINK;vertical-align:top"colspan="3"| | ||
{| class="mw-collapsible mw-collapsed" cellspacing=0 cellpadding=4 style=width:100% | {|class="mw-collapsible mw-collapsed"cellspacing=0 cellpadding=4 style=width:100% | ||
|'''Primary Technique'''<br>Shield | |'''Primary Technique'''<br>Shield | ||
|- | |- | ||
|<small><hr>Limits damage taken by Rabbid Peach from enemy weapons.<hr>'''''Cooldown'''''<br>''2 Turns''<br>'''''Weapon DMG Reduction'''''<br>''40%''<br>'''''Movement DMG Reduction'''''<br>''20%''</small> | |<small><hr>Limits damage taken by Rabbid Peach from enemy weapons.<hr>'''''Cooldown'''''<br>''2 Turns''<br>'''''Weapon DMG Reduction'''''<br>''40%''<br>'''''Movement DMG Reduction'''''<br>''20%''</small> | ||
|} | |} | ||
{| class="mw-collapsible mw-collapsed" cellspacing=0 cellpadding=4 style=width:100% | {|class="mw-collapsible mw-collapsed"cellspacing=0 cellpadding=4 style=width:100% | ||
|'''Secondary Technique'''<br>Heal | |'''Secondary Technique'''<br>Heal | ||
|- | |- | ||
|<small><hr>Restores health points to all Heroes in range.<hr>'''''Cooldown'''''<br>''3 Turns''<br>'''''Technique Range'''''<br>''4 Cells''<br>'''''HP Bonus'''''<br>''20%''</small> | |<small><hr>Restores health points to all Heroes in range.<hr>'''''Cooldown'''''<br>''3 Turns''<br>'''''Technique Range'''''<br>''4 Cells''<br>'''''HP Bonus'''''<br>''20%''</small> | ||
|} | |} | ||
|style="background:LIGHTGREEN;vertical-align: top" colspan="3"| | |style="background:LIGHTGREEN;vertical-align:top"colspan="3"| | ||
{| class="mw-collapsible mw-collapsed" cellspacing=0 cellpadding=4 style=width:100% | {|class="mw-collapsible mw-collapsed"cellspacing=0 cellpadding=4 style=width:100% | ||
|'''Primary Technique'''<br>Super Barrier | |'''Primary Technique'''<br>Super Barrier | ||
|- | |- | ||
|<small><hr>Grants Rabbid Luigi immunity to Super Effects and reduces regular damage.<hr>'''''Cooldown'''''<br>''2 Turns''<br>'''''Weapon DMG Reduction'''''<br>''20%''<br>'''''Movement DMG Reduction'''''<br>''20%''</small> | |<small><hr>Grants Rabbid Luigi immunity to Super Effects and reduces regular damage.<hr>'''''Cooldown'''''<br>''2 Turns''<br>'''''Weapon DMG Reduction'''''<br>''20%''<br>'''''Movement DMG Reduction'''''<br>''20%''</small> | ||
|} | |} | ||
{| class="mw-collapsible mw-collapsed" cellspacing=0 cellpadding=4 style=width:100% | {|class="mw-collapsible mw-collapsed"cellspacing=0 cellpadding=4 style=width:100% | ||
|'''Secondary Technique'''<br>Weaken | |'''Secondary Technique'''<br>Weaken | ||
|- | |- | ||
|<small><hr>Weakens enemy weapons near Rabbid Luigi.<hr>'''''Cooldown'''''<br>''2 Turns''<br>'''''Technique Range'''''<br>''6 Cells''<br>'''''DMG Reduction'''''<br>''20%''</small> | |<small><hr>Weakens enemy weapons near Rabbid Luigi.<hr>'''''Cooldown'''''<br>''2 Turns''<br>'''''Technique Range'''''<br>''6 Cells''<br>'''''DMG Reduction'''''<br>''20%''</small> | ||
|} | |} | ||
|style="background:NAVAJOWHITE;vertical-align: top" colspan="3"| | |style="background:NAVAJOWHITE;vertical-align:top"colspan="3"| | ||
{| class="mw-collapsible mw-collapsed" cellspacing=0 cellpadding=4 style=width:100% | {|class="mw-collapsible mw-collapsed"cellspacing=0 cellpadding=4 style=width:100% | ||
|'''Primary Technique'''<br>Outer Shell | |'''Primary Technique'''<br>Outer Shell | ||
|- | |- | ||
|<small><hr>Damage taken by Rabbid Yoshi from an enemy's first successful attack is reduced to less than half.<hr>'''''Cooldown'''''<br>''2 Turns''<br>'''''Weapon DMG Reduction'''''<br>''80%''<br>'''''Movement DMG Reduction'''''<br>''80%''<br>'''''Attacks Absorbed'''''<br>''1''</small> | |<small><hr>Damage taken by Rabbid Yoshi from an enemy's first successful attack is reduced to less than half.<hr>'''''Cooldown'''''<br>''2 Turns''<br>'''''Weapon DMG Reduction'''''<br>''80%''<br>'''''Movement DMG Reduction'''''<br>''80%''<br>'''''Attacks Absorbed'''''<br>''1''</small> | ||
|} | |} | ||
{| class="mw-collapsible mw-collapsed" cellspacing=0 cellpadding=4 style=width:100% | {|class="mw-collapsible mw-collapsed"cellspacing=0 cellpadding=4 style=width:100% | ||
|'''Secondary Technique'''<br>Scaredy Rabbid | |'''Secondary Technique'''<br>Scaredy Rabbid | ||
|- | |- | ||
| Line 463: | Line 490: | ||
====Donkey Kong Adventure DLC==== | ====Donkey Kong Adventure DLC==== | ||
In the Donkey Kong Adventure mode, only Donkey Kong, Rabbid Peach, and Rabbid Cranky are playable. | In the [[Donkey Kong Adventure]] mode, only Donkey Kong, Rabbid Peach, and Rabbid Cranky are playable. | ||
{|class="wikitable" style="text-align:center; margin:auto" | {|class="wikitable" style="text-align:center; margin:auto" | ||
!style="background:CRIMSON" colspan="3"|{{color-link|Donkey Kong | !style="background:CRIMSON" colspan="3"|{{color-link|white|Donkey Kong}} | ||
!style="background:HOTPINK" colspan="3"|{{color-link|Rabbid Peach | !style="background:HOTPINK" colspan="3"|{{color-link|white|Rabbid Peach}} | ||
!style="background:CRIMSON" colspan="3"|{{color-link|Rabbid Cranky | !style="background:CRIMSON" colspan="3"|{{color-link|white|Rabbid Cranky}} | ||
|- | |- | ||
|style="background:LIGHTSALMON" colspan="3"|[[File:MRKB Donkey Kong Stats.png|200px]] | |style="background:LIGHTSALMON" colspan="3"|[[File:MRKB Donkey Kong Stats.png|200px]] | ||
| Line 490: | Line 516: | ||
|style="background:LIGHTSALMON" colspan="3"|'''Pipe Exit Range'''<br>3 Cells | |style="background:LIGHTSALMON" colspan="3"|'''Pipe Exit Range'''<br>3 Cells | ||
|- | |- | ||
|style="background:LIGHTSALMON;vertical-align: top" colspan="3"| | |style="background:LIGHTSALMON;vertical-align:top"colspan="3"| | ||
{| class="mw-collapsible mw-collapsed" cellspacing=0 cellpadding=4 style=width:100% | {|class="mw-collapsible mw-collapsed"cellspacing=0 cellpadding=4 style=width:100% | ||
|'''Grab & Launch'''<br>20 Damage | |'''Grab & Launch'''<br>20 Damage | ||
|- | |- | ||
|<hr><small>Allows Donkey Kong to pick up allies, enemies, Cover Blocks or Sentries, move to another cell and launch them. Cleanses an ally overcome by a Super Effect.<hr>'''''Damage'''''<br>''20''</small> | |<hr><small>Allows Donkey Kong to pick up allies, enemies, Cover Blocks or Sentries, move to another cell and launch them. Cleanses an ally overcome by a Super Effect.<hr>'''''Damage'''''<br>''20''</small> | ||
|} | |} | ||
|style="background:PINK;vertical-align: top" colspan="3"| | |style="background:PINK;vertical-align:top"colspan="3"| | ||
{| class="mw-collapsible mw-collapsed" cellspacing=0 cellpadding=4 style=width:100% | {|class="mw-collapsible mw-collapsed"cellspacing=0 cellpadding=4 style=width:100% | ||
|'''Stylish Dash'''<br>30 Damage | |'''Stylish Dash'''<br>30 Damage | ||
|- | |- | ||
|<hr><small>Allows Rabbid Peach to '''DASH''' more than one enemy while on the move.<hr>'''''Damage'''''<br>''30''</small> | |<hr><small>Allows Rabbid Peach to '''DASH''' more than one enemy while on the move.<hr>'''''Damage'''''<br>''30''</small> | ||
|} | |} | ||
|style="background:LIGHTSALMON;vertical-align: top" colspan="3"| | |style="background:LIGHTSALMON;vertical-align:top"colspan="3"| | ||
{| class="mw-collapsible mw-collapsed" cellspacing=0 cellpadding=4 style=width:100% | {|class="mw-collapsible mw-collapsed"cellspacing=0 cellpadding=4 style=width:100% | ||
|'''Dash'''<br>20 Damage | |'''Dash'''<br>20 Damage | ||
|- | |- | ||
| Line 509: | Line 535: | ||
|} | |} | ||
|- | |- | ||
|style="background:LIGHTSALMON;vertical-align: top" colspan="3"| | |style="background:LIGHTSALMON;vertical-align:top"colspan="3"| | ||
{| class="mw-collapsible mw-collapsed" cellspacing=0 cellpadding=4 style=width:100% | {|class="mw-collapsible mw-collapsed"cellspacing=0 cellpadding=4 style=width:100% | ||
|'''Throw Range'''<br>6 Cells | |'''Throw Range'''<br>6 Cells | ||
|- | |- | ||
| Line 516: | Line 542: | ||
|} | |} | ||
|style="background:PINK" colspan="3"|'''Team Jump'''<br>6 Cells | |style="background:PINK" colspan="3"|'''Team Jump'''<br>6 Cells | ||
|style="background:LIGHTSALMON;vertical-align: top" colspan="3"| | |style="background:LIGHTSALMON;vertical-align:top"colspan="3"| | ||
{| class="mw-collapsible mw-collapsed" cellspacing=0 cellpadding=4 style=width:100% | {|class="mw-collapsible mw-collapsed"cellspacing=0 cellpadding=4 style=width:100% | ||
|'''Grump Jump'''<br>6 Cells | |'''Grump Jump'''<br>6 Cells | ||
|- | |- | ||
| Line 523: | Line 549: | ||
|} | |} | ||
|- | |- | ||
|style="background:LIGHTSALMON;vertical-align: top" colspan="3"| | |style="background:LIGHTSALMON;vertical-align:top"colspan="3"| | ||
{| class="mw-collapsible mw-collapsed" cellspacing=0 cellpadding=4 style=width:100% | {|class="mw-collapsible mw-collapsed"cellspacing=0 cellpadding=4 style=width:100% | ||
|'''Primary Weapon'''<br>Bwananarang | |'''Primary Weapon'''<br>Bwananarang | ||
|- | |- | ||
|<small><hr>Mid-range weapon capable of hitting multiple targets in a row without cooldown.<hr>''<u>Potassium Pulverizer</u>''<br>'''''Hit Damage'''''<br>''20-30''<br>'''''Bounce Damage'''''<br>''39''<br>'''''Bounce Chance'''''<br>''30%''<br>'''''Medium Range'''''<br>''7 Cells''<br>'''''Cover Damage'''''<br>''LOW''<br>'''''Ricochets'''''<br>''3''</small> | |<small><hr>Mid-range weapon capable of hitting multiple targets in a row without cooldown.<hr>''<u>Potassium Pulverizer</u>''<br>'''''Hit Damage'''''<br>''20-30''<br>'''''Bounce Damage'''''<br>''39''<br>'''''Bounce Chance'''''<br>''30%''<br>'''''Medium Range'''''<br>''7 Cells''<br>'''''Cover Damage'''''<br>''LOW''<br>'''''Ricochets'''''<br>''3''</small> | ||
|} | |} | ||
{| class="mw-collapsible mw-collapsed" cellspacing=0 cellpadding=4 style=width:100% | {|class="mw-collapsible mw-collapsed"cellspacing=0 cellpadding=4 style=width:100% | ||
|'''Secondary Weapon'''<br>DK Ground Pound | |'''Secondary Weapon'''<br>DK Ground Pound | ||
|- | |- | ||
|<small><hr>Targeted attack affecting all enemies within a cylindrical area, regardless of cover.<hr>''<u>The Classic</u>''<br>'''''Hit Damage'''''<br>''45-55''<br>'''''Bounce Damage'''''<br>''72''<br>'''''Bounce Chance'''''<br>''30%''<br>'''''Short Range'''''<br>''2 Cells''<br>'''''Cover Damage'''''<br>''LOW''<br>'''''Cooldown'''''<br>''1 Turn''<br>'''''Area of Damage'''''<br>''2 Cells''</small> | |<small><hr>Targeted attack affecting all enemies within a cylindrical area, regardless of cover.<hr>''<u>The Classic</u>''<br>'''''Hit Damage'''''<br>''45-55''<br>'''''Bounce Damage'''''<br>''72''<br>'''''Bounce Chance'''''<br>''30%''<br>'''''Short Range'''''<br>''2 Cells''<br>'''''Cover Damage'''''<br>''LOW''<br>'''''Cooldown'''''<br>''1 Turn''<br>'''''Area of Damage'''''<br>''2 Cells''</small> | ||
|} | |} | ||
|style="background:PINK;vertical-align: top" colspan="3"| | |style="background:PINK;vertical-align:top"colspan="3"| | ||
{| class="mw-collapsible mw-collapsed" cellspacing=0 cellpadding=4 style=width:100% | {|class="mw-collapsible mw-collapsed"cellspacing=0 cellpadding=4 style=width:100% | ||
|'''Primary Weapon'''<br>Blaster | |'''Primary Weapon'''<br>Blaster | ||
|- | |- | ||
|<small><hr>A short to mid-range weapon that fires one round at a time at a single target.<hr>''<u>Megalodon</u>''<br>'''''Hit Damage'''''<br>''20-30''<br>'''''Honey Damage'''''<br>''39''<br>'''''Honey Chance'''''<br>''30%''<br>'''''Medium Range'''''<br>''10 Cells''<br>'''''Cover Damage'''''<br>''LOW''</small> | |<small><hr>A short to mid-range weapon that fires one round at a time at a single target.<hr>''<u>Megalodon</u>''<br>'''''Hit Damage'''''<br>''20-30''<br>'''''Honey Damage'''''<br>''39''<br>'''''Honey Chance'''''<br>''30%''<br>'''''Medium Range'''''<br>''10 Cells''<br>'''''Cover Damage'''''<br>''LOW''</small> | ||
|} | |} | ||
{| class="mw-collapsible mw-collapsed" cellspacing=0 cellpadding=4 style=width:100% | {|class="mw-collapsible mw-collapsed"cellspacing=0 cellpadding=4 style=width:100% | ||
|'''Secondary Weapon'''<br>Sentry | |'''Secondary Weapon'''<br>Sentry | ||
|- | |- | ||
|<small><hr>Never stops chasing its target, it will detonate when it gets close. Can be destroyed.<hr>''<u>Panoramic Pillager</u>''<br>'''''Hit Damage'''''<br>''30-40''<br>'''''Honey Damage'''''<br>''52''<br>'''''Honey Chance'''''<br>''30%''<br>'''''Long Range'''''<br>''15 Cells''<br>'''''Cover Damage'''''<br>''LOW''<br>'''''Cooldown'''''<br>''1 Turn''<br>'''''Area of Damage'''''<br>''1 Cell''<br>'''''Sentry Health Points'''''<br>''60''<br>'''''Sentry Move Range'''''<br>''6 Cells''</small> | |<small><hr>Never stops chasing its target, it will detonate when it gets close. Can be destroyed.<hr>''<u>Panoramic Pillager</u>''<br>'''''Hit Damage'''''<br>''30-40''<br>'''''Honey Damage'''''<br>''52''<br>'''''Honey Chance'''''<br>''30%''<br>'''''Long Range'''''<br>''15 Cells''<br>'''''Cover Damage'''''<br>''LOW''<br>'''''Cooldown'''''<br>''1 Turn''<br>'''''Area of Damage'''''<br>''1 Cell''<br>'''''Sentry Health Points'''''<br>''60''<br>'''''Sentry Move Range'''''<br>''6 Cells''</small> | ||
|} | |} | ||
|style="background:LIGHTSALMON;vertical-align: top" colspan="3"| | |style="background:LIGHTSALMON;vertical-align:top"colspan="3"| | ||
{| class="mw-collapsible mw-collapsed" cellspacing=0 cellpadding=4 style=width:100% | {|class="mw-collapsible mw-collapsed"cellspacing=0 cellpadding=4 style=width:100% | ||
|'''Primary Weapon'''<br>Boombow | |'''Primary Weapon'''<br>Boombow | ||
|- | |- | ||
|<small><hr>Delivers a scattershot attack affecting enemies out in the open.<hr>''<u>Wood Shop Walloper</u>''<br>'''''Hit Damage'''''<br>''40-50''<br>'''''Vamp Damage'''''<br>''65''<br>'''''Vamp Chance'''''<br>''30%''<br>'''''Medium Range'''''<br>''10 Cells''<br>'''''Cover Damage'''''<br>''LOW''</small> | |<small><hr>Delivers a scattershot attack affecting enemies out in the open.<hr>''<u>Wood Shop Walloper</u>''<br>'''''Hit Damage'''''<br>''40-50''<br>'''''Vamp Damage'''''<br>''65''<br>'''''Vamp Chance'''''<br>''30%''<br>'''''Medium Range'''''<br>''10 Cells''<br>'''''Cover Damage'''''<br>''LOW''</small> | ||
|} | |} | ||
{| class="mw-collapsible mw-collapsed" cellspacing=0 cellpadding=4 style=width:100% | {|class="mw-collapsible mw-collapsed"cellspacing=0 cellpadding=4 style=width:100% | ||
|'''Secondary Weapon'''<br>Barrel Bolt | |'''Secondary Weapon'''<br>Barrel Bolt | ||
|- | |- | ||
| Line 557: | Line 583: | ||
|} | |} | ||
|- | |- | ||
|style="background:LIGHTSALMON;vertical-align: top" colspan="3"| | |style="background:LIGHTSALMON;vertical-align:top"colspan="3"| | ||
{| class="mw-collapsible mw-collapsed" cellspacing=0 cellpadding=4 style=width:100% | {|class="mw-collapsible mw-collapsed"cellspacing=0 cellpadding=4 style=width:100% | ||
|'''Primary Technique'''<br>Hairy Eye | |'''Primary Technique'''<br>Hairy Eye | ||
|- | |- | ||
|<small><hr>This bonus attack is a mid-range reaction shot dealt to the first enemy to move within Donkey Kong's line of sight.<hr>'''''Cooldown'''''<br>''3 Turns''<br>'''''Reaction Shots'''''<br>''1''<br>'''''Reaction Shot DMG'''''<br>''100%''</small> | |<small><hr>This bonus attack is a mid-range reaction shot dealt to the first enemy to move within Donkey Kong's line of sight.<hr>'''''Cooldown'''''<br>''3 Turns''<br>'''''Reaction Shots'''''<br>''1''<br>'''''Reaction Shot DMG'''''<br>''100%''</small> | ||
|} | |} | ||
{| class="mw-collapsible mw-collapsed" cellspacing=0 cellpadding=4 style=width:100% | {|class="mw-collapsible mw-collapsed"cellspacing=0 cellpadding=4 style=width:100% | ||
|'''Secondary Technique'''<br>Magnet Groove | |'''Secondary Technique'''<br>Magnet Groove | ||
|- | |- | ||
| Line 569: | Line 595: | ||
takes them for a ride to beat town!<hr>'''''Cooldown'''''<br>''4 Turns''<br>'''''Technique Range'''''<br>''6 Cells''</small> | takes them for a ride to beat town!<hr>'''''Cooldown'''''<br>''4 Turns''<br>'''''Technique Range'''''<br>''6 Cells''</small> | ||
|} | |} | ||
|style="background:PINK;vertical-align: top" colspan="3"| | |style="background:PINK;vertical-align:top"colspan="3"| | ||
{| class="mw-collapsible mw-collapsed" cellspacing=0 cellpadding=4 style=width:100% | {|class="mw-collapsible mw-collapsed"cellspacing=0 cellpadding=4 style=width:100% | ||
|'''Primary Technique'''<br>Shield | |'''Primary Technique'''<br>Shield | ||
|- | |- | ||
|<small><hr>Limits damage taken by Rabbid Peach from any enemy attack.<hr>'''''Cooldown'''''<br>''2 Turns''<br>'''''DMG Reduction'''''<br>''30%''</small> | |<small><hr>Limits damage taken by Rabbid Peach from any enemy attack.<hr>'''''Cooldown'''''<br>''2 Turns''<br>'''''DMG Reduction'''''<br>''30%''</small> | ||
|} | |} | ||
{| class="mw-collapsible mw-collapsed" cellspacing=0 cellpadding=4 style=width:100% | {|class="mw-collapsible mw-collapsed"cellspacing=0 cellpadding=4 style=width:100% | ||
|'''Secondary Technique'''<br>Heal | |'''Secondary Technique'''<br>Heal | ||
|- | |- | ||
|<small><hr>Restores health points to all Heroes in range.<hr>'''''Cooldown'''''<br>''3 Turns''<br>'''''Technique Range'''''<br>''6 Cells''<br>'''''HP Bonus'''''<br>''30%''</small> | |<small><hr>Restores health points to all Heroes in range.<hr>'''''Cooldown'''''<br>''3 Turns''<br>'''''Technique Range'''''<br>''6 Cells''<br>'''''HP Bonus'''''<br>''30%''</small> | ||
|} | |} | ||
|style="background:LIGHTSALMON;vertical-align: top" colspan="3"| | |style="background:LIGHTSALMON;vertical-align:top"colspan="3"| | ||
{| class="mw-collapsible mw-collapsed" cellspacing=0 cellpadding=4 style=width:100% | {|class="mw-collapsible mw-collapsed"cellspacing=0 cellpadding=4 style=width:100% | ||
|'''Primary Technique'''<br>Stink Eye | |'''Primary Technique'''<br>Stink Eye | ||
|- | |- | ||
|<small><hr>This bonus attack is a mid-range reaction shot dealt to the first enemy to move within Rabbid Cranky's disapproving gaze.<hr>'''''Cooldown'''''<br>''3 Turns''<br>'''''Reaction Shots'''''<br>''1''<br>'''''Reaction Shot DMG'''''<br>''70%''</small> | |<small><hr>This bonus attack is a mid-range reaction shot dealt to the first enemy to move within Rabbid Cranky's disapproving gaze.<hr>'''''Cooldown'''''<br>''3 Turns''<br>'''''Reaction Shots'''''<br>''1''<br>'''''Reaction Shot DMG'''''<br>''70%''</small> | ||
|} | |} | ||
{| class="mw-collapsible mw-collapsed" cellspacing=0 cellpadding=4 style=width:100% | {|class="mw-collapsible mw-collapsed"cellspacing=0 cellpadding=4 style=width:100% | ||
|'''Secondary Technique'''<br>Long Story | |'''Secondary Technique'''<br>Long Story | ||
|- | |- | ||
| Line 608: | Line 634: | ||
==Enemies== | ==Enemies== | ||
{{main|Mario + Rabbids Kingdom Battle bestiary}} | {{main|Mario + Rabbids Kingdom Battle bestiary}} | ||
Enemies marked with an asterisk (*) are Midbosses, enemies marked with two are Bosses, and [[MegaDragonBowser]], marked with three, is the Final Boss. | |||
===Ancient Gardens=== | ===Ancient Gardens=== | ||
<gallery> | <gallery> | ||
| Line 614: | Line 640: | ||
MRKB Garden Hopper Portrait.png|[[Hopper|Garden Hopper]] | MRKB Garden Hopper Portrait.png|[[Hopper|Garden Hopper]] | ||
MRKB Garden Smasher Portrait.png|[[Smasher|Garden Smasher]] | MRKB Garden Smasher Portrait.png|[[Smasher|Garden Smasher]] | ||
MRKB Pirabbid Plant Portrait.png|[[Pirabbid Plant]] | MRKB Pirabbid Plant Portrait.png|[[Pirabbid Plant]]* | ||
MRKB Rabbid Kong Portrait.png|[[Rabbid Kong]] | MRKB Rabbid Kong Portrait.png|[[Rabbid Kong]]** | ||
</gallery> | </gallery> | ||
| Line 624: | Line 650: | ||
MRKB Sherbet Smasher Portrait.png|Sherbet Smasher | MRKB Sherbet Smasher Portrait.png|Sherbet Smasher | ||
MRKB Sherbet Supporter Portrait.png|[[Supporter|Sherbet Supporter]] | MRKB Sherbet Supporter Portrait.png|[[Supporter|Sherbet Supporter]] | ||
MRKB Blizzy Portrait.png|[[Blizzy]] | MRKB Blizzy Portrait.png|[[Blizzy]]* | ||
MRKB Sandy Portrait.png|[[Sandy]] | MRKB Sandy Portrait.png|[[Sandy]]* | ||
MRKB Sherbet Buckler Portrait.png|[[Buckler|Sherbet Buckler]] | MRKB Sherbet Buckler Portrait.png|[[Buckler|Sherbet Buckler]] | ||
MRKB Icicle Golem Portrait.png|[[Icicle Golem]] | MRKB Icicle Golem Portrait.png|[[Icicle Golem]]** | ||
</gallery> | </gallery> | ||
| Line 637: | Line 663: | ||
MRKB Spooky Hopper Portrait.png|Spooky Hopper | MRKB Spooky Hopper Portrait.png|Spooky Hopper | ||
MRKB Spooky Smasher Portrait.png|Spooky Smasher | MRKB Spooky Smasher Portrait.png|Spooky Smasher | ||
MRKB Calavera Portrait.png|[[Calavera]] | MRKB Calavera Portrait.png|[[Calavera]]* | ||
MRKB Spooky Valkyrie Portrait.png|[[Valkyrie|Spooky Valkyrie]] | MRKB Spooky Valkyrie Portrait.png|[[Valkyrie|Spooky Valkyrie]] | ||
MRKB Spooky Buckler Portrait.png|Spooky Buckler | MRKB Spooky Buckler Portrait.png|Spooky Buckler | ||
MRKB Phantom Portrait.png|[[Phantom (boss)|Phantom]] | MRKB Phantom Portrait.png|[[Phantom (boss)|Phantom]]** | ||
</gallery> | </gallery> | ||
| Line 652: | Line 678: | ||
MRKB Lava Peek-A-Boo Portrait.png|Lava Peek-a-Boo | MRKB Lava Peek-A-Boo Portrait.png|Lava Peek-a-Boo | ||
MRKB Lava Supporter Portrait.png|Lava Supporter | MRKB Lava Supporter Portrait.png|Lava Supporter | ||
MRKB Mecha Jr. Portrait.png|[[Mecha Jr.]] | MRKB Mecha Jr. Portrait.png|[[Mecha Jr.]]* | ||
MRKB Bwario Portrait.png|[[Bwario]] | MRKB Bwario Portrait.png|[[Bwario]] | ||
MRKB Bwaluigi Portrait.png|[[Bwaluigi]] | MRKB Bwaluigi Portrait.png|[[Bwaluigi]] | ||
MRKB Lava Queen Portrait.png|[[Lava Queen]] | MRKB Lava Queen Portrait.png|[[Lava Queen]] | ||
MRKB MegaDragonBowser Portrait.png|[[MegaDragonBowser]] | MRKB MegaDragonBowser Portrait.png|[[MegaDragonBowser]]*** | ||
</gallery> | </gallery> | ||
| Line 663: | Line 689: | ||
*[[Boo]]s | *[[Boo]]s | ||
*[[Blooper]]s | *[[Blooper]]s | ||
*[[Banzai Bill]] | *[[Bomber Bill|Banzai Bill]] | ||
*[[Bowser]] | *[[Bowser]] | ||
*[[Bowser Jr.]] | *[[Bowser Jr.]] | ||
| Line 682: | Line 708: | ||
*[[Red Ring]]s | *[[Red Ring]]s | ||
*Rabbid Warp Pipes | *Rabbid Warp Pipes | ||
===Weapons=== | ===Weapons=== | ||
{{main|List of weapons in Mario + Rabbids Kingdom Battle}} | {{main|List of weapons in Mario + Rabbids Kingdom Battle}} | ||
| Line 688: | Line 713: | ||
==Worlds== | ==Worlds== | ||
{| class="wikitable" | {|class="wikitable" | ||
|- | |- | ||
! [[Ancient Gardens]] | ![[Ancient Gardens]] | ||
! [[Sherbet Desert]] | ![[Sherbet Desert]] | ||
! [[Spooky Trails]] | ![[Spooky Trails]] | ||
! [[Lava Pit (Mario + Rabbids Kingdom Battle)|Lava Pit]] | ![[Lava Pit (Mario + Rabbids Kingdom Battle)|Lava Pit]] | ||
|- | |- | ||
|[[Unlikely Heroes]] | |[[Unlikely Heroes]] | ||
| Line 751: | Line 776: | ||
==Add-on content== | ==Add-on content== | ||
[[File:Mario-Rabbids-Season-Pass.jpg|thumb|upright=1.66|Image detailing the add-on content.]] | [[File:Mario-Rabbids-Season-Pass.jpg|thumb|upright=1.66|Image detailing the add-on content.]] | ||
===Pixel Pack=== | ===Pixel Pack=== | ||
A "pixel pack" of eight primary weapons is available via download code for those who preordered ''Mario + Rabbids Kingdom Battle''. Otherwise, it can be downloaded as paid add-on content via [[Nintendo eShop]]. The weapons included are as follows: | A "pixel pack" of eight primary weapons is available via download code for those who preordered ''Mario + Rabbids Kingdom Battle''. Otherwise, it can be downloaded as paid add-on content via [[Nintendo eShop]]. The weapons included are as follows: | ||
| Line 764: | Line 788: | ||
===Season Pass=== | ===Season Pass=== | ||
A season pass of paid add-on content is released in ''Mario + Rabbids Kingdom Battle''. The content was released in three packs, which contain the following: | A season pass of paid add-on content is released in ''Mario + Rabbids Kingdom Battle''. This content, alongside the base game, is included in ''Mario + Rabbids Kingdom Battle Gold Edition''. The content was released in three packs, which contain the following: | ||
====Steampunk Pack==== | |||
The Steampunk Pack was made available at launch. It adds a set of eight "steampunk"-themed secondary weapons with unique statistics. They are as follows: | |||
*[[Cranial Abogator]] for Mario | |||
*[[Effectual Atomizer]] for Rabbid Luigi | |||
*[[Calamitous Coupe]] for Rabbid Peach | |||
*[[Jeopardous Jalopy]] for Luigi | |||
*[[Baleful Bad-Ender]] for Rabbid Mario | |||
*[[Defalcating Dandy]] for Peach | |||
*[[Exalted Entropic Eggs]] for Rabbid Yoshi | |||
*[[Direly Dulcet Doomsayer]] for Yoshi | |||
====Ultra Challenge Pack==== | |||
**[[ | The Ultra Challenge Pack was released on October 17, 2017 and is available as a standalone purchase via the Nintendo eShop. It adds eight solo and five co-op challenge levels. They are as follows: | ||
**[[ | *Solo: | ||
**[[ | **[[Hurry-Up Offense]] | ||
**[[ | **[[The Toad Less Traveled]] | ||
**[[ | **[[Super Effect Free-for-All]] | ||
**[[ | **[[Phalanx Fracas]] | ||
**[[ | **[[A Sticky Situation]] | ||
**[[ | **[[Go Ahead and Take Ten]] | ||
**[[Last Bounce of Courage]] | |||
**[[Bowser Jr.'s Big Payback]] | |||
*Co-op: | |||
**[[High Ground Hijinx]] | |||
**[[Chomping at the Bit]] | |||
**[[Toadnado Alley]] | |||
**[[The Bwahshank Redemption]] | |||
**[[Forecast calls for... Danger!]] | |||
====Donkey Kong Adventure==== | |||
[[File:M+R KB Donkey Kong Adventure logo.jpg|thumb]] | |||
{{main|Donkey Kong Adventure}} | |||
The Donkey Kong Adventure expansion pack was released on June 26, 2018 and is available as a standalone purchase via the Nintendo eShop. As its name suggests, it features [[Donkey Kong]]. This expansion sees [[Rabbid Peach]] and [[Beep-0]] becoming separated from the others and landing on [[Donkey Kong Island]], where [[Rabbid Kong]], who seeks revenge for his defeat in the main game, has formed an army. A [[Megabug]] has also appeared on the island, contaminating [[banana]]s and increasing Rabbid Kong's power. Rabbid Peach and Beep-0 work with [[Donkey Kong]] and [[Rabbid Cranky]] to get Rabbid Kong's army and the Megabug off the island, as well as decontaminate the bananas. | |||
===Versus=== | |||
[[File:RabbidsKingdomBattle SelectionvsMode.jpg|thumb|left|upright=1.4|The character selection]] | |||
[[File:RabbidsKingdomBattle Vsmode.jpg|thumb|upright=1.4|Pipe Up! gameplay]] | |||
Added through a free update released on December 8th, 2017, Versus allows two players to pit their team of characters against each other. Players pick a team of three characters and assign them weapons. Each player is limited to three actions per turn, which are split between the three characters (for example, all three characters can perform one action or one character can perform three actions). The characters players can choose from not based on those used in the main campaign, however each character has [[List of Versus Mode sets in Mario + Rabbids Kingdom Battle|three distinct sets]] based off of their ingame abilities. | |||
[[ | |||
Included are four maps: | |||
*[[Pipe Up!]] | |||
*[[Trampoline Alley]] | |||
*[[Nowhere to Hide]] | |||
*[[Make Haste Slowly]] | |||
{{br}} | {{br}} | ||
==Nintendo Switch Online game trial== | ==Nintendo Switch Online game trial== | ||
| Line 808: | Line 851: | ||
===Early ideas=== | ===Early ideas=== | ||
Davide Soliani mentioned a few scrapped ideas during an Ask Me Anything session set on {{wp|Reddit}}'s Nintendo subreddit<ref>Davide Soliani (October 06, 2017). [https://www.reddit.com/r/nintendo/comments/74oinv/hi_i_am_davide_soliani_creative_director_of/ Hi, I am Davide Soliani, Creative Director of Mario+Rabbids: Kingdom Battle! AMA!]". ''Reddit''. Retrieved October 07, 2017. ([http://web.archive.org/web/20201122223709/https://www.reddit.com/r/nintendo/comments/74oinv/hi_i_am_davide_soliani_creative_director_of/ Archived] November 22, 2020, 22:37:09 UTC via Internet Archive: Wayback Machine.)</ref>. | Davide Soliani mentioned a few scrapped ideas during an Ask Me Anything session set on {{wp|Reddit}}'s Nintendo subreddit<ref>Davide Soliani (October 06, 2017). [https://www.reddit.com/r/nintendo/comments/74oinv/hi_i_am_davide_soliani_creative_director_of/ Hi, I am Davide Soliani, Creative Director of Mario+Rabbids: Kingdom Battle! AMA!]". ''Reddit''. Retrieved October 07, 2017. ([http://web.archive.org/web/20201122223709/https://www.reddit.com/r/nintendo/comments/74oinv/hi_i_am_davide_soliani_creative_director_of/ Archived] November 22, 2020, 22:37:09 UTC via Internet Archive: Wayback Machine.)</ref>. | ||
*A Rabbid [[Whomp]] character. | *A Rabbid [[Whomp]] character. | ||
*A mechanic called "Fumble", described as "Some weapons were supposed to be truly powerful, but with a high risk of exploding". | *A mechanic called "Fumble", described as "Some weapons were supposed to be truly powerful, but with a high risk of exploding". | ||
| Line 815: | Line 857: | ||
==Glitches== | ==Glitches== | ||
{{main|List of Mario + Rabbids Kingdom Battle glitches}} | |||
===Random flickering object placement glitch=== | ===Random flickering object placement glitch=== | ||
Sometimes in [[Spooky Trails]] and [[Lava Pit (Mario + Rabbids Kingdom Battle)|Lava Pit]], random background objects will randomly flicker around to places they do not belong. Normally, this is a simple | Sometimes in [[Spooky Trails]] and [[Lava Pit (Mario + Rabbids Kingdom Battle)|Lava Pit]], random background objects will randomly flicker around to places they do not belong. Normally, this is a simple glitch the game will fix quickly, but in other cases, the glitch will persist and start affecting things around the player, potentially causing coins on moving platforms to become stuck in the ground and similar effects. Occasionally, a piece will start to blink over [[Beep-0]], eventually leading to an exception that crashes the game. | ||
==Staff== | ==Staff== | ||
| Line 835: | Line 868: | ||
The game has been credited by {{wp|List of Ubisoft subsidiaries#Ubisoft Paris|Ubisoft Milan|Ubisoft Milan}} staff as a "game changer" for the studio as, following the game's critical and commercial success, the studio started receiving ten times more job applications than it had at any point of its history.<ref>Matthew Handrahan (September 29, 2017). [http://www.gamesindustry.biz/articles/2017-09-29-ubisoft-milan-i-see-a-really-brilliant-future-in-front-of-us Ubisoft Milan: "I see a really brilliant future in front of us"]. ''Gameindutrybiz''. Retrieved September 29, 2017.</ref> | The game has been credited by {{wp|List of Ubisoft subsidiaries#Ubisoft Paris|Ubisoft Milan|Ubisoft Milan}} staff as a "game changer" for the studio as, following the game's critical and commercial success, the studio started receiving ten times more job applications than it had at any point of its history.<ref>Matthew Handrahan (September 29, 2017). [http://www.gamesindustry.biz/articles/2017-09-29-ubisoft-milan-i-see-a-really-brilliant-future-in-front-of-us Ubisoft Milan: "I see a really brilliant future in front of us"]. ''Gameindutrybiz''. Retrieved September 29, 2017.</ref> | ||
{|class="wikitable reviews" | |||
{| class="wikitable reviews" | !colspan="4"style="font-size:120%;text-align:center;background-color:silver;"|Reviews | ||
!colspan="4" style="font-size:120%; text-align:center; background-color:silver;"|Reviews | |||
|-style="background-color:#E6E6E6" | |-style="background-color:#E6E6E6" | ||
|Release | |Release | ||
| Line 869: | Line 901: | ||
|''Mario + Rabbids Kingdom Battle's guts are impressive, but its main event feels like a [good] expansion for a fleshed-out strategy RPG that has more to offer than a great combat system. By the time it opens up halfway in and you really start to delve into the skill tree, it begs to be played. But until then both exploration and some battles feel like going through the motions in a "kinda sorta" tutorial way.'' | |''Mario + Rabbids Kingdom Battle's guts are impressive, but its main event feels like a [good] expansion for a fleshed-out strategy RPG that has more to offer than a great combat system. By the time it opens up halfway in and you really start to delve into the skill tree, it begs to be played. But until then both exploration and some battles feel like going through the motions in a "kinda sorta" tutorial way.'' | ||
|- | |- | ||
!colspan="4" style="font-size:120%; text-align:center; background-color:silver;"|Aggregators | !colspan="4"style="font-size:120%;text-align:center;background-color:silver;"|Aggregators | ||
|-style="background-color:#E6E6E6" | |-style="background-color:#E6E6E6" | ||
|colspan=2|Compiler | |colspan=2|Compiler | ||
|colspan=2|{{ | |colspan=2|{{nw|Platform / Score}} | ||
|- | |- | ||
|colspan=2|Metacritic | |colspan=2|Metacritic | ||
| Line 880: | Line 912: | ||
|colspan=2|[https://www.gamerankings.com/switch/211325-mario-rabbids-kingdom-battle/index.html 84.63%] | |colspan=2|[https://www.gamerankings.com/switch/211325-mario-rabbids-kingdom-battle/index.html 84.63%] | ||
|} | |} | ||
===Sales=== | ===Sales=== | ||
As of September 21 2017, ''Mario + Rabbids Kingdom Battle'' is the best-selling third party game on the Nintendo Switch, and was noted to have outsold at least one first-party game, although no specific numbers were disclosed.<ref>Tom Philips (September 21, 2017). "[http://www.eurogamer.net/articles/2017-09-21-mario-rabbids-kingdom-battle-is-switchs-best-selling-non-nintendo-game Mario + Rabbids: Kingdom Battle is Switch's best-selling non-Nintendo game]". ''Eurogamer''. Retrieved September 21, 2017</ref> According to {{wp|NPD Group}} data, ''Mario + Rabbids Kingdom Battle'' was the 7th best-selling individual game for September 2017.<ref>Business Wire (October 19, 2017) [http://www.businesswire.com/news/home/20171019005513/en/ Nintendo News: Nintendo Systems Claim Two-Thirds of September Video Game Hardware Sales]. Retrieved October 20, 2017</ref> In France, the game sold over 150,000 copies in 2017.<ref>''Le Numérique'' (January 11, 2018). [https://www.lesnumeriques.com/loisirs/switch-retrogaming-super-mario-zelda-l-incroyable-come-back-nintendo-a3491.html Switch, Super Mario, Zelda, retrogaming... L'incroyable retour de Nintendo Entretien avec Philippe Lavoué, directeur général]. Retrieved January 11, 2018</ref> | As of September 21 2017, ''Mario + Rabbids Kingdom Battle'' is the best-selling third party game on the Nintendo Switch, and was noted to have outsold at least one first-party game, although no specific numbers were disclosed.<ref>Tom Philips (September 21, 2017). "[http://www.eurogamer.net/articles/2017-09-21-mario-rabbids-kingdom-battle-is-switchs-best-selling-non-nintendo-game Mario + Rabbids: Kingdom Battle is Switch's best-selling non-Nintendo game]". ''Eurogamer''. Retrieved September 21, 2017</ref> According to {{wp|NPD Group}} data, ''Mario + Rabbids Kingdom Battle'' was the 7th best-selling individual game for September 2017.<ref>Business Wire (October 19, 2017) [http://www.businesswire.com/news/home/20171019005513/en/ Nintendo News: Nintendo Systems Claim Two-Thirds of September Video Game Hardware Sales]. Retrieved October 20, 2017</ref> In France, the game sold over 150,000 copies in 2017.<ref>''Le Numérique'' (January 11, 2018). [https://www.lesnumeriques.com/loisirs/switch-retrogaming-super-mario-zelda-l-incroyable-come-back-nintendo-a3491.html Switch, Super Mario, Zelda, retrogaming... L'incroyable retour de Nintendo Entretien avec Philippe Lavoué, directeur général]. Retrieved January 11, 2018</ref> | ||
| Line 888: | Line 919: | ||
*"Best Strategy Game" '''(Won)'''. Other nominees were ''{{wp|XCOM 2: War of the Chosen}}'', ''{{wp|Tooth and Tail}}'', ''{{wp|Total War: Warhammer II}}'', and ''{{wp|Halo Wars 2}}''.<ref name="The Game Awards">[http://thegameawards.com/awards/ Awards - The Game Awards 2017]. ''The Game Awards''. Retrieved December 9, 2017.</ref> | *"Best Strategy Game" '''(Won)'''. Other nominees were ''{{wp|XCOM 2: War of the Chosen}}'', ''{{wp|Tooth and Tail}}'', ''{{wp|Total War: Warhammer II}}'', and ''{{wp|Halo Wars 2}}''.<ref name="The Game Awards">[http://thegameawards.com/awards/ Awards - The Game Awards 2017]. ''The Game Awards''. Retrieved December 9, 2017.</ref> | ||
*"Best Family Game" '''(Nominated)'''. Lost to ''[[Super Mario Odyssey]]''.<ref name="The Game Awards" /> | *"Best Family Game" '''(Nominated)'''. Lost to ''[[Super Mario Odyssey]]''.<ref name="The Game Awards" /> | ||
==Community Competition== | |||
{{main|Community Competition}} | |||
[[File:MRKB Community Competition S1 roadmap.jpg|thumb|300px|Initial roadmap of the Community Competition]] | |||
From 2018 through 2019, Ubisoft sponsored an event in which participants had to complete certain in-game battles under new conditions for a chance to enter a [[#Versus|Versus]] tournament at one of Ubisoft's studios. The competition spanned three seasons, each ending with a studio tournament, followed by a number of final rounds at {{wp|Gamescom|Gamescom 2019}} which saw the best players from these studio tournaments competing for the championship. Ubisoft announced the latest developments of the Community Competition via their website and social media channels. The official "Mario + Rabbids" {{wp|Discord}} channel hosted periodic Q&A sessions where users could discuss the competition with Ubisoft staff. | |||
{{br}} | |||
==References to other games== | ==References to other games== | ||
*''[[Donkey Kong (game)|Donkey Kong]]'': The [[Phantom (boss)|Phantom]] mentions this game in [[Phantom of the Bwahpera|his song]], which references the fact that it is Mario's first appearance. In the Donkey Kong Adventure DLC, this game's title theme can be heard in the mid-boss theme and the pre-battle theme. Also, a stone structure resembling the [[25m]] stage can been seen, where a [[Rabbid]] is found jumping over barrels that another Rabbid is throwing while imitating Donkey Kong's movements and the 25m theme plays in the background. [[Beep-0]] remarks that the Rabbid would be lucky to get to 125 meters unless he finds a [[Hammer]]. | *''[[Donkey Kong (game)|Donkey Kong]]'': The [[Phantom (boss)|Phantom]] mentions this game in [[The Phantom of the Bwahpera|his song]], which references the fact that it is Mario's first appearance. In the Donkey Kong Adventure DLC, this game's title theme can be heard in the mid-boss theme and the pre-battle theme. Also, a stone structure resembling the [[25m]] stage can been seen, where a [[Rabbid]] is found jumping over barrels that another Rabbid is throwing while imitating Donkey Kong's movements and the 25m theme plays in the background. [[Beep-0]] remarks that the Rabbid would be lucky to get to 125 meters unless he finds a [[Hammer]]. | ||
*''[[Mario Bros. (game)|Mario Bros.]]'': On the title screen for the game's battle mode, there is an arcade machine with artwork that heavily parodies ''Mario Bros.'' with [[Rabbid Mario]] and [[Rabbid Luigi]] replacing their respective counterparts, [[ | *''[[Mario Bros. (game)|Mario Bros.]]'': On the title screen for the game's battle mode, there is an arcade machine with artwork that heavily parodies ''Mario Bros.'' with [[Rabbid Mario]] and [[Rabbid Luigi]] replacing their respective counterparts, [[small bird]]s replacing the [[Shellcreeper]]s, [[Bee]]s (as seen in-game) replacing the [[Fighter Fly|Fighter Flies]], and mice replacing the [[Sidestepper]]s. | ||
*''[[Super Mario Bros.]]'': The wallpaper in the laboratory in the introductory cutscene is a scene from this game. When clearing all battles in a level, a cover of the fanfare that plays after [[Mario]]/[[Luigi]] grabs the [[Goal Pole]] is played. A cover of the Game Over theme plays when the player loses a battle. The Phantom says "your princess is in another castle" in his song, which is derived from a quote from this game. [[Rabbid Mario]]'s The Splatformer weapon has a design based on a scene from this game. Also, the description for said weapon mentions the [[Minus World]]. | *''[[Super Mario Bros.]]'': The wallpaper in the laboratory in the introductory cutscene is a scene from this game. When clearing all battles in a level, a cover of the fanfare that plays after [[Mario]]/[[Luigi]] grabs the [[Goal Pole]] is played. A cover of the Game Over theme plays when the player loses a battle. The Phantom says "your princess is in another castle" in his song, which is derived from a quote from this game. [[Rabbid Mario]]'s The Splatformer weapon has a design based on a scene from this game. Also, the description for said weapon mentions the [[Minus World]]. | ||
*''[[Super Mario Bros. 3]]'': When the Rabbids' Time Washing Machine malfunctions in the introductory cutscene, sprites of [[Super Mushroom]]s, [[? Block]]s, and Mario taken from this game can be seen on the number displays. | *''[[Super Mario Bros. 3]]'': When the Rabbids' Time Washing Machine malfunctions in the introductory cutscene, sprites of [[Super Mushroom]]s, [[? Block]]s, and Mario taken from this game can be seen on the number displays. | ||
| Line 907: | Line 944: | ||
*''[[Super Mario Galaxy 2]]'': A weapon modeled after [[Gobblegut]] appears. | *''[[Super Mario Galaxy 2]]'': A weapon modeled after [[Gobblegut]] appears. | ||
*[[Mario Party (series)|''Mario Party'' series]]: The jingle that is heard after activating a switch was previously used in ''[[Mario Party 9]]'' and ''[[Mario Party 10]]'' for landing on a [[Bowser Jr. Space]]. Some of Luigi's animations from ''Mario Party 10'' are reused. A poster featuring artwork from ''[[Mario Party: Star Rush]]'' appears in the introductory cutscene. | *[[Mario Party (series)|''Mario Party'' series]]: The jingle that is heard after activating a switch was previously used in ''[[Mario Party 9]]'' and ''[[Mario Party 10]]'' for landing on a [[Bowser Jr. Space]]. Some of Luigi's animations from ''Mario Party 10'' are reused. A poster featuring artwork from ''[[Mario Party: Star Rush]]'' appears in the introductory cutscene. | ||
==References in later games== | ==References in later games== | ||
*''[[Super Smash Bros. Ultimate]]'': Rabbid Peach, Rabbid Mario, and Rabbid Kong (using his [[Mega Rabbid Kong]] artwork) appear in this game as [[Spirit (Super Smash Bros. Ultimate)|Spirits]]. | *''[[Super Smash Bros. Ultimate]]'': Rabbid Peach, Rabbid Mario, and Rabbid Kong (using his [[Mega Rabbid Kong]] artwork) appear in this game as [[Spirit (Super Smash Bros. Ultimate)|Spirits]]. | ||
*''[[Mario + Rabbids Sparks of Hope]]'': Weapon skins based on Megabug are available as part of the Megabug Collection pre-order bonus. This game's arrangement of "Inside the Castle Walls" returns and plays during the prologue, albeit synthesized instead of live recorded. The likeliness of the Block Tower from Ancient Gardens is used for the bonus rooms, along with reusing the same music. MegaDragonBowser makes a cameo in the "The Story So Far" Memory profile, and is referenced at the start of the battle against Darkmess Bowser, when Beep-0 states how they beat him in front of Bowser Jr.. Numerous background objects from the game appear as props in the Repository of Rayman and the Phantom Show, including the clock tower from Spooky Trails and a submarine outfitted with a drill from Lava Pit. At the start of the battle with Swingin' Phantom, Beep-0 directly quotes his dialogue from the beginning of the fight against the Phantom in this game. | |||
==Gallery== | ==Gallery== | ||
| Line 932: | Line 969: | ||
|title2=Two Worlds Collide | |title2=Two Worlds Collide | ||
|file3=OGS The Phantom of the Bwahpera, Act 1.oga | |file3=OGS The Phantom of the Bwahpera, Act 1.oga | ||
|title3=[[Phantom of the Bwahpera]] Act 1 | |title3=[[The Phantom of the Bwahpera]] Act 1 | ||
|file4=M+RKB Game Over Theme.oga | |||
|title4={{conjectural|Game Over}} | |||
}} | }} | ||
| Line 940: | Line 979: | ||
|JapR=Mario + Rabittsu Kingudamu Batoru | |JapR=Mario + Rabittsu Kingudamu Batoru | ||
|JapM=Mario + Rabbids Kingdom Battle | |JapM=Mario + Rabbids Kingdom Battle | ||
| | |Fre=Mario + The Lapins Crétins Kingdom Battle | ||
| | |FreM=Mario + Rabbids Kingdom Battle | ||
|Rus=Mario + Rabbids: Битва За Королевство | |Rus=Mario + Rabbids: Битва За Королевство | ||
|RusR=Mario + Rabbids: Bitva Za Korolevstvo | |RusR=Mario + Rabbids: Bitva Za Korolevstvo | ||
| Line 957: | Line 996: | ||
==Trivia== | ==Trivia== | ||
*''Mario + Rabbids Kingdom Battle'' was not the first attempt by Ubisoft to crossover Mario with the Rabbids: in 2010, Ubisoft Paris had pitched a [[List of unreleased media#Mario | *''Mario + Rabbids Kingdom Battle'' was not the first attempt by Ubisoft to crossover Mario with the Rabbids: in 2010, Ubisoft Paris had pitched a [[List of unreleased media#Super Mario/Rabbids crossover adventure game|Mario/Rabbids crossover adventure game]] for the [[Wii]], which ended up being rejected by Nintendo.<ref>Liam Robertson (June 12, 2017). [https://www.youtube.com/watch?v=21oZewbY0j4 Mario + Rabbids: The Lost Adventure Game Concept]. ''YouTube''. Retrieved February 14, 2018</ref> | ||
*In the opening sequence, [[Genius Girl]] opens a magazine, which shows herself in a posture referencing Pagan Min, the main antagonist of Ubisoft's ''{{wp|Far Cry 4}}'', which is taken from that game's box art. | *In the opening sequence, [[Genius Girl]] opens a magazine, which shows herself in a posture referencing Pagan Min, the main antagonist of Ubisoft's ''{{wp|Far Cry 4}}'', which is taken from that game's box art. | ||
*This is the first ''Super Mario'' game that has been mainly developed by an Italian company. | *This is the first ''Super Mario'' game that has been mainly developed by an Italian company. | ||
*The song that was used for the game's E3 trailers is "[https://www.youtube.com/watch?v=Q0q9a5QS6WQ It's All for Rock N' Roll]" by {{wp|Airbourne (band)|Airbourne}}. | *The song that was used for the game's E3 trailers is "[https://www.youtube.com/watch?v=Q0q9a5QS6WQ It's All for Rock N' Roll]" by {{wp|Airbourne (band)|Airbourne}}. | ||
*Many enemy portraits in [[Tacticam]] are inaccurate to their in-game models. | |||
==References== | ==References== | ||
| Line 966: | Line 1,006: | ||
==External links== | ==External links== | ||
{{TCRF}} | |||
*[https://rabbids.ubisoft.com/portal/en-us/games/mario-rabbids-kingdom-battle.aspx Official site] | *[https://rabbids.ubisoft.com/portal/en-us/games/mario-rabbids-kingdom-battle.aspx Official site] | ||
*[https://www.nintendo.com/games/detail/mario-plus-rabbids-kingdom-battle-switch Nintendo of America site] | *[https://www.nintendo.com/games/detail/mario-plus-rabbids-kingdom-battle-switch Nintendo of America site] | ||
| Line 974: | Line 1,015: | ||
*[https://www.nintendo.co.kr/software/switch/ac2ga/pc/index.html Official Korean site] | *[https://www.nintendo.co.kr/software/switch/ac2ga/pc/index.html Official Korean site] | ||
*[https://www.ubisoft.com.cn/mrkb/ Official mainland Chinese site] | *[https://www.ubisoft.com.cn/mrkb/ Official mainland Chinese site] | ||
*[ | *[[raywiki:Mario + Rabbids Kingdom Battle|Article on RayWiki]] | ||
{{M+RKB}} | {{M+RKB}} | ||
{{Super Mario games}} | {{Super Mario games}} | ||
{{Switch}} | {{Switch}} | ||
[[Category:Mario + Rabbids Kingdom Battle|*]] | [[Category:Mario + Rabbids Kingdom Battle|*]] | ||
[[Category:Games]] | [[Category:Games]] | ||
| Line 985: | Line 1,025: | ||
[[Category:2017 games]] | [[Category:2017 games]] | ||
[[Category:2018 games]] | [[Category:2018 games]] | ||
[[Category:2022 games]] | |||
[[Category:Crossover games]] | [[Category:Crossover games]] | ||
[[Category:Role-playing games]] | [[Category:Role-playing games]] | ||
[[Category:Amiibo-compatible games]] | [[Category:Amiibo-compatible games]] | ||
[[de:Mario + Rabbids Kingdom Battle]] | [[de:Mario + Rabbids Kingdom Battle]] | ||
[[it:Mario + Rabbids Kingdom Battle]] | [[it:Mario + Rabbids Kingdom Battle]] | ||
Revision as of 20:11, November 27, 2024
| Mario + Rabbids Kingdom Battle | |||||||||||||||||||||||||||
|---|---|---|---|---|---|---|---|---|---|---|---|---|---|---|---|---|---|---|---|---|---|---|---|---|---|---|---|
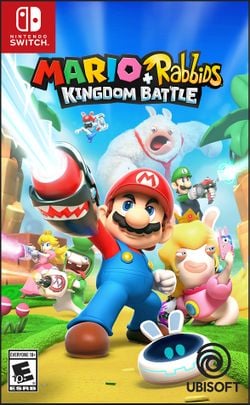 For alternate box art, see the game's gallery. | |||||||||||||||||||||||||||
| Developer | Ubisoft Paris Ubisoft Milan | ||||||||||||||||||||||||||
| Publisher | Ubisoft (NA, EU, OC) Nintendo (JP, SK, HK, TW) | ||||||||||||||||||||||||||
| Platform(s) | Nintendo Switch | ||||||||||||||||||||||||||
| Release date | |||||||||||||||||||||||||||
| Language(s) | English (United States) French (France) German Spanish (Spain) Italian Dutch Russian Japanese Simplified Chinese Traditional Chinese Korean | ||||||||||||||||||||||||||
| Genre | Turn-based tactics | ||||||||||||||||||||||||||
| Rating(s) |
| ||||||||||||||||||||||||||
| Format | Nintendo Switch: | ||||||||||||||||||||||||||
| Input | Nintendo Switch:
| ||||||||||||||||||||||||||
| Serial code(s) | |||||||||||||||||||||||||||
Mario + Rabbids Kingdom Battle is a turn-based tactical title for the Nintendo Switch and a cross-over between the Super Mario franchise and Ubisoft's Rabbids series, being the first in the Mario + Rabbids series of games. It is the first tactics game in the Super Mario franchise, and it also incorporates some role-playing elements. The game sees Mario and his friends trying to restore order in the Mushroom Kingdom after Rabbids invade and fuse it with their own world using a powerful merging device. In overworld sections, the player takes control of Beep-0, a robotic assistant who guides characters in tow and can perform various actions to solve puzzles and find secrets. Throughout their journey, the heroes frequently engage in turn-based battles with enemy Rabbids during which they must complete objectives such as defeating a number of enemies or escorting a supporting character to a certain spot. Each character's abilities in battle can be customized and upgraded via a skill tree.
The game presents a single-player story mode, which involves the above, and a local co-operative mode with separate stages in which multiple human players can face off against enemy Rabbids. A Versus mode was added through an update, enabling players to battle each other locally. The game also offers paid add-on content with new weapons, challenges, and a story expansion focusing on Donkey Kong.
Ubisoft published the game for most territories (the Americas, EMEA, Oceania, Southeast Asia) in August 2017, whilst Nintendo themselves published the game for Japan, South Korea, Hong Kong, and Taiwan in January 2018, although Ubisoft would later re-publish the game digitally for Hong Kong in June 2018. Ubisoft's Chinese partner, Bihan Internet Technology, would eventually publish the game for mainland China in February 2022.
A sequel, Mario + Rabbids Sparks of Hope, was released on October 20, 2022 in most territories.
Story
The Rabbids end up with their Time Washing Machine in the laboratory of a Super Mario fan who is perfecting, along with her robot assistant Beep-0, a visor able to fuse two objects into one, called the SupaMerge. One Rabbid finds said visor and uses it to create Rabbid Peach, Rabbid Mario, and other Rabbids fused with objects. It also causes the Time Washing Machine to malfunction, sending Beep-0 and the Rabbids to the Mushroom Kingdom.
Meanwhile, Mario, Luigi, Yoshi, Toad, and Princess Peach are inaugurating a new statue of Peach while an audience of Toads (including Toadette) watches. Suddenly, a vortex is formed and sucks Mario and the others in.
In midair over the Ancient Gardens, Beep-0 gains rabbit ears and the outline of two rabbit's teeth on the front. The Rabbid with the SupaMerge fuses with the headset, causing it to be stuck to him. Mario later saves Beep-0 from being crushed by the Time Washing Machine. Upon landing, they soon encounter Rabbid Peach and Rabbid Luigi, who join Mario's team and help them fight off various Garden Ziggies, thanks to weapons attached to a message sent by a mysterious F.B. As they travel, they get a glimpse of the vortex, later referred to as the Megabug.
Soon after, Mario's group find Luigi and the Rabbid with the SupaMerge headset. Luigi and the SupaMerge Rabbid are both scared by a Piranha Plant with which a Rabbid is playing. Due to the fear, the SupaMerge Rabbid ends up fusing the other Rabbid with the Piranha Plant, creating the Pirabbid Plant. Mario's team successfully defeats the Plant and restore both the Piranha Plant and the Rabbid that was fused with it to their original selves. Seeing this, Luigi joins their team. Meanwhile, Beep-0 notices that the Megabug has grown in size.
Bowser Jr. has observed what happened with the Pirabbid Plant and, when Mario's team find the SupaMerge Rabbid and scare him, takes the chance to befriend him, naming him Spawny. With the intent of using Spawny's powers to take over the Mushroom Kingdom while his father is on vacation, Junior flies away with Spawny on his Junior Clown Car, while Mario's team must face a giant, ape-like Rabbid resembling Donkey Kong, named Rabbid Kong. They defeat Rabbid Kong, causing him to fall off of the platform they are standing on.
Mario's team then venture to Sherbet Desert, where thanks to a message from F.B. they discover that the Megabug is growing with every enemy Rabbid defeated. They also find Rabbid Mario frozen in an ice cube. They take him with them, and place the cube in a door in the hopes of freeing him. Said door opens, and they soon encounter Bowser Jr. with Spawny again. Bowser Jr. has Spawny look at Mario's team, which agitates the Rabbid, activating the SupaMerge's powers. Just before it activates, Bowser Jr. turns Spawny away, causing him to create Blizzy and Sandy, who proceed to attack Mario's team. Mario's team defeat both of them and save Rabbid Mario, who joins them. At the end of the desert, Mario's team face off against the Icicle Golem which Spawny accidentally created by falling inside a giant freezer. the Icicle Golem proceeds to freeze Mario and friends. However, Princess Peach appears and saves them, joining Mario's team in their fight against the monster. They eventually prevail.
Mario's team then go to Spooky Trails. They are directed to find two Relics of Goodness, a gramophone and a Boo-shaped balloon, under the instruction of a mysterious third party who wants them to wake up a being named "Tom Phan" who they claim has the power to defeat Bowser Jr. After finding the relics, they discover through a message from the mysterious helper that they need a full moon. While finding a way to bring the full moon back, they come across Calavera, who is holding Rabbid Yoshi hostage. Mario's team defeat Calavera and are subsequently joined by Rabbid Yoshi. They then find a clock tower and manipulate the clock to get the full moon back. The helper gives them an invitation to cross the now opened Moon Gate. They later find out that it is actually Bowser Jr. himself, who confronts them in a theater. Bowser Jr. puts his bandana over his mouth and scares Spawny, causing him to fuse a Rabbid with the Relics of Goodness to create the Phantom. The Phantom sings a song and battles Mario's group, but is defeated.
Later, they go to the Lava Pit, a volcano which has been transformed into a factory by Bowser Jr.. Here, they battle Junior in his Mecha Jr. After this battle, Spawny seemingly falls to his doom as Bowser Jr. escapes. However, Spawny is saved by Yoshi, who subsequently joins Mario's team. It is only after this battle that Spawny seems regretful for all the trouble he has caused. After returning Spawny to safety, Mario's team attempt to leave via a crystal mine. However, Spawny is attracted to the Megabug which has grown strong enough to obtain a physical, phoenix-like form. The Megabug absorbs Spawny before heading in the direction of Bowser's Castle. Bowser Jr. returns to tell off Mario's team for allowing Spawny to get kidnapped and the Megabug to escape, noting that at least his father is still away. However, he gets a text message from his father, who has decided to return home early. Realizing that his father is in danger, Bowser Jr. flies off to Bowser's Castle while Mario's team chases after. On the way, they encounter two villainous Rabbids resembling Wario and Waluigi, named Bwario and Bwaluigi respectively. They, as well as another villainous Rabbid called the Lava Queen, battle and are defeated by Mario's group. Upon their arrival at Bowser's Castle, Bowser Jr. requests them to help Bowser return to his normal self, as he is barely conscious and near the Megabug. The latter fuses with Bowser, creating MegaDragonBowser. In this form, Bowser is defeated, freeing the Megabug that tries to attack Mario's team. Said team attacks the Megabug, destroying it and seemingly closing the rift while also freeing Spawny. Bowser Jr. takes Spawny back to the team and thanks them for what they have done, while also promising to be somewhat better. Fearing being chastised by his father, he tries to convince them to speak to Bowser on his behalf, but Mario's team return to Peach's Castle to tell that the threat is no more, while also inaugurating a new statue of Rabbid Peach. A delighted Rabbid Peach then takes a selfie with the group. After this, Beep-0 sends a letter to his past self with weapons through the Time Washing Machine, revealing that F.B. is actually Future Beep-0.
Gameplay
It has been requested that this section be rewritten and expanded to include more information. Reason: Explain the basics of the turn-based combat and overworld exploration
The game is estimated to be composed of 30% exploration elements and 70% turn-based combat.[10] There is also multiplayer, local co-op mode. The combat is weapon-based, with the weapons primarily resembling guns (notably the Blaster, Boomshot, Rumblebang, and Precision class-weapons), though they also resemble warhammers (Melee-class), rocket launchers (Rocket-class), rubber ducks (Grenaduck-class), yo-yos (Bworb-class), and deployable shuttles (Sentry-class).
The exploration aspect of the game is controlled by Beep-0, a new character which serves as a helpful character which gives out tips and help. There are seven enemy archetypes, and one mid-boss and boss per world and four world environments. Some of the open world exploring involves puzzles.
Controls
The following descriptions are found in the Mario + Rabbids Kingdom Battle online manual.
Heroes
Main Heroes
The player may use a total of three characters on a team, with Mario and at least one Rabbid always required. These restrictions were made for balancing, as the development team felt some combinations of characters were too powerful.[11]
Each character uses two weapons: a primary weapon that can be used every turn and a secondary weapon that requires cooling down in-between turns, as well as two Techniques. One of the techniques is either a line-of-sight technique that allows the user to fire at targets while they move for the Super Mario characters or a shield with different properties for the Rabbids. The other technique gives a unique effect exclusive to each of the eight characters.
Main Game
| Template:Color-link | Template:Color-link | Template:Color-link | Template:Color-link | ||||||||||||||||||||||||
|---|---|---|---|---|---|---|---|---|---|---|---|---|---|---|---|---|---|---|---|---|---|---|---|---|---|---|---|
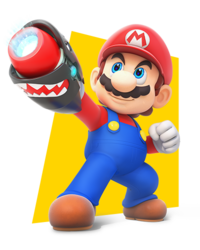
|
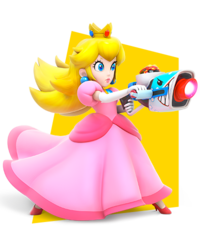
|
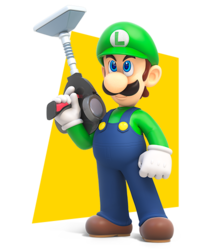
|
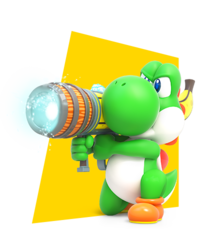
| ||||||||||||||||||||||||
| Mario's offensive talents make him a natural choice to lead the charge in battle. He is a mid-to-close range fighter with excellent mobility. | In her new role as a 'defender in a dress' vs. 'damsel in distress', Princess Peach strikes a nice balance between offense, defense and mobility. | A master of long-range attacks (due to his fear of the front lines) Luigi has bravely led many 'fighting retreats' thanks to his advanced mobility. | Yoshi is a long-range specialist who belongs behind the front lines where he can deliver a power-packed punch from afar. Loves fruit. | ||||||||||||||||||||||||
| Team Fighter | Paladin | Scout | Eggsploder | ||||||||||||||||||||||||
| Offense ★★★★★ | Defense ★★☆☆☆ | Mobility ★★★☆☆ | Offense ★★★☆☆ | Defense ★★★☆☆ | Mobility ★★★★☆ | Offense ★★★★☆ | Defense ★☆☆☆☆ | Mobility ★★★★★ | Offense ★★★★★ | Defense ★★☆☆☆ | Mobility ★★★☆☆ | ||||||||||||||||
| Starting Health Points 220 |
Starting Health Points 340 |
Starting Health Points 130 |
Starting Health Points 420 | ||||||||||||||||||||||||
| Maximum Health Points 590 |
Maximum Health Points 755 |
Maximum Health Points 335 |
Maximum Health Points 635 | ||||||||||||||||||||||||
| Starting Area of Movement 6 Cells |
Starting Area of Movement 6 Cells |
Starting Area of Movement 6 Cells |
Starting Area of Movement 6 Cells | ||||||||||||||||||||||||
| Maximum Area of Movement 7 Cells |
Maximum Area of Movement 7 Cells |
Maximum Area of Movement 9 Cells |
Maximum Area of Movement 8 Cells | ||||||||||||||||||||||||
| Starting Pipe Exit Range 3 Cells |
Starting Pipe Exit Range 3 Cells |
Starting Pipe Exit Range 3 Cells |
Starting Pipe Exit Range 3 Cells | ||||||||||||||||||||||||
| Maximum Pipe Exit Range 4 Cells |
Maximum Pipe Exit Range 4 Cells |
Maximum Pipe Exit Range 6 Cells |
Maximum Pipe Exit Range 5 Cells | ||||||||||||||||||||||||
| Dash 20 Damage |
Dash 20 Damage |
Dash 20 Damage |
Dash 20 Damage | ||||||||||||||||||||||||
|
|
|
| ||||||||||||||||||||||||
|
|
|
| ||||||||||||||||||||||||
|
|
|
| ||||||||||||||||||||||||
| Template:Color-link | Template:Color-link | Template:Color-link | Template:Color-link | ||||||||||||||||||||||||
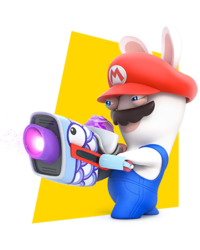
|
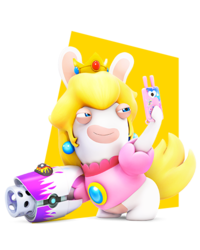
|
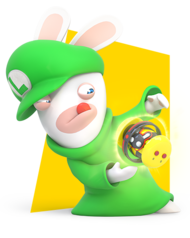
|
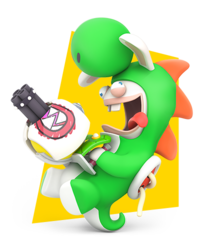
| ||||||||||||||||||||||||
| A big league brawler with exceptional luck, a dependable defense, solid moves and massive case of imposter syndrome. | A proficient healer and damage-denier, when this defense-oriented prima donna takes the battlefield she keeps one eye on the enemy, and one on Mario. | Rabbid Luigi is a defensive specialist who can leverage the unpredictable elemental forces that surround us all to great strategic effect. | Rabbid Yoshi is best utilized lashing out with heavy weapons at long range. His arsenal includes melee skills, solid defense and a cool victory dance. | ||||||||||||||||||||||||
| Brawler | Healer | Wizard | Boomboomer | ||||||||||||||||||||||||
| Offense ★★★★☆ | Defense ★★☆☆☆ | Mobility ★★★★☆ | Offense ★★☆☆☆ | Defense ★★★★★ | Mobility ★★★☆☆ | Offense ★★★☆☆ | Defense ★★★★☆ | Mobility ★★★☆☆ | Offense ★★★★☆ | Defense ★★★★☆ | Mobility ★★★☆☆ | ||||||||||||||||
| Starting Health Points 265 |
Starting Health Points 220 |
Starting Health Points 200 |
Starting Health Points 290 | ||||||||||||||||||||||||
| Maximum Health Points 590 |
Maximum Health Points 530 |
Maximum Health Points 500 |
Maximum Health Points 550 | ||||||||||||||||||||||||
| Starting Area of Movement 6 Cells |
Starting Area of Movement 6 Cells |
Starting Area of Movement 6 Cells |
Starting Area of Movement 6 Cells | ||||||||||||||||||||||||
| Maximum Area of Movement 9 Cells |
Maximum Area of Movement 8 Cells |
Maximum Area of Movement 8 Cells |
Maximum Area of Movement 9 Cells | ||||||||||||||||||||||||
| Starting Pipe Exit Range 3 Cells |
Starting Pipe Exit Range 3 Cells |
Starting Pipe Exit Range 3 Cells |
Starting Pipe Exit Range 3 Cells | ||||||||||||||||||||||||
| Maximum Pipe Exit Range 6 Cells |
Maximum Pipe Exit Range 5 Cells |
Maximum Pipe Exit Range 5 Cells |
Maximum Pipe Exit Range 6 Cells | ||||||||||||||||||||||||
|
|
|
| ||||||||||||||||||||||||
| Team Jump 6 Cells |
Team Jump 6 Cells |
Team Jump 6 Cells |
Team Jump 6 Cells | ||||||||||||||||||||||||
|
|
|
| ||||||||||||||||||||||||
|
|
|
| ||||||||||||||||||||||||
Donkey Kong Adventure DLC
In the Donkey Kong Adventure mode, only Donkey Kong, Rabbid Peach, and Rabbid Cranky are playable.
| Template:Color-link | Template:Color-link | Template:Color-link | ||||||||||||||||||
|---|---|---|---|---|---|---|---|---|---|---|---|---|---|---|---|---|---|---|---|---|
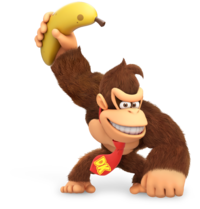
|
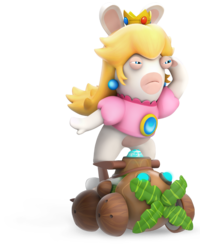
|

| ||||||||||||||||||
| He's the Ziggy crushin', high jumpin', cover point luggin', king of the ground-pondin' apes who never backs down when his friends (or his banana supply) are endangered. | A proficient healer and damage-denier, when this defense-oriented prima donna takes the battlefield she keeps one eye on the enemy, and one on Mario. | The irascible Rabbid Cranky may not be as fast as he used to be, but he doesn't need to be when he has a Boombow and short-ranged Barrel Bolts as explosive as his temper. | ||||||||||||||||||
| Health Points 280 |
Health Points 220 |
Health Points 200 | ||||||||||||||||||
| Area of Movement 6 Cells |
Area of Movement 6 Cells |
Area of Movement 6 Cells | ||||||||||||||||||
| Pipe Exit Range 3 Cells |
Pipe Exit Range 3 Cells |
Pipe Exit Range 3 Cells | ||||||||||||||||||
|
|
| ||||||||||||||||||
|
Team Jump 6 Cells |
| ||||||||||||||||||
|
|
| ||||||||||||||||||
|
|
| ||||||||||||||||||
Skill Trees
- To read the full list of skills and upgrades that can be purchased in the Skill Trees, see List of Skill Trees in Mario + Rabbids Kingdom Battle.
After gaining Power Orbs throughout the game it is possible to spend them to purchase various skill and upgrades for each character. The skills and upgrades are classified in four categories: Movement, Attack, Technique and Other. The upgrades and skills of each category can only be bought after a specific mandatory skill in said category has been bought, and the skills and upgrades in the Other category can only be bought after the three mandatory skills of the other categories have been bought, creating a tree-like structure of requirements and categorization known as Skill Tree.
Secondary Heroes
These characters are playable in escort levels. They cannot attack enemies.
Enemies
- Main article: Mario + Rabbids Kingdom Battle bestiary
Enemies marked with an asterisk (*) are Midbosses, enemies marked with two are Bosses, and MegaDragonBowser, marked with three, is the Final Boss.
Ancient Gardens
Sherbet Desert
Spooky Trails
Phantom**
Lava Pit
Other characters
- Beep-0
- Boos
- Bloopers
- Banzai Bill
- Bowser
- Bowser Jr.
- Chain Chomps
- Goombas
- Madame Bwahstrella
- Piranha Plant
- Rabbids
- Rabbid Challengers
- Sunflower
Items and objects
- Blue Coins
- Brick Blocks
- Coins
- Mega Blocks
- Red Coins
- Red Rings
- Rabbid Warp Pipes
Weapons
- Main article: List of weapons in Mario + Rabbids Kingdom Battle
There are various weapons in the game, organized in thirteen categories: Blaster, Melee, Precision, Sentry, Rumblebang, Rocket, Boomshot, Grenaduck, Bworb, Boombow, Bwananarang, DK Ground Pound, and Barrel Bolt. Each character can equip both a primary and secondary weapon, both of which pertain to specific classes. The last four weapon classes are exclusive to the Donkey Kong Adventure DLC, and function similarly to Melee, Boomshot, and Grenaduck weapons; however, only the Bwananarang is a completely unique weapon.
Worlds
amiibo compatibility
Mario + Rabbids Kingdom Battle is compatible with amiibo. The ability to scan amiibo in-game is unlocked after World 1-5, Brother, Where Art Thou?, is completed. The compatible amiibo are the characters Mario, Luigi, Peach, and Yoshi, and they each unlock a weapon for these characters and their Rabbid deriratives (i.e. Mario amiibo unlock weapons for Mario and Rabbid Mario, etc.).
Add-on content
Pixel Pack
A "pixel pack" of eight primary weapons is available via download code for those who preordered Mario + Rabbids Kingdom Battle. Otherwise, it can be downloaded as paid add-on content via Nintendo eShop. The weapons included are as follows:
- The Fragmenter for Mario
- ASCII Eradicator for Rabbid Luigi
- Retro Deflator for Rabbid Peach
- Boom Broom for Luigi
- Cartridge Commander for Rabbid Mario
- Bait N' Switch Bruiser for Peach
- Raster Blaster for Rabbid Yoshi
- Hostile Voxel for Yoshi
Season Pass
A season pass of paid add-on content is released in Mario + Rabbids Kingdom Battle. This content, alongside the base game, is included in Mario + Rabbids Kingdom Battle Gold Edition. The content was released in three packs, which contain the following:
Steampunk Pack
The Steampunk Pack was made available at launch. It adds a set of eight "steampunk"-themed secondary weapons with unique statistics. They are as follows:
- Cranial Abogator for Mario
- Effectual Atomizer for Rabbid Luigi
- Calamitous Coupe for Rabbid Peach
- Jeopardous Jalopy for Luigi
- Baleful Bad-Ender for Rabbid Mario
- Defalcating Dandy for Peach
- Exalted Entropic Eggs for Rabbid Yoshi
- Direly Dulcet Doomsayer for Yoshi
Ultra Challenge Pack
The Ultra Challenge Pack was released on October 17, 2017 and is available as a standalone purchase via the Nintendo eShop. It adds eight solo and five co-op challenge levels. They are as follows:
- Solo:
- Co-op:
Donkey Kong Adventure
- Main article: Donkey Kong Adventure
The Donkey Kong Adventure expansion pack was released on June 26, 2018 and is available as a standalone purchase via the Nintendo eShop. As its name suggests, it features Donkey Kong. This expansion sees Rabbid Peach and Beep-0 becoming separated from the others and landing on Donkey Kong Island, where Rabbid Kong, who seeks revenge for his defeat in the main game, has formed an army. A Megabug has also appeared on the island, contaminating bananas and increasing Rabbid Kong's power. Rabbid Peach and Beep-0 work with Donkey Kong and Rabbid Cranky to get Rabbid Kong's army and the Megabug off the island, as well as decontaminate the bananas.
Versus
Added through a free update released on December 8th, 2017, Versus allows two players to pit their team of characters against each other. Players pick a team of three characters and assign them weapons. Each player is limited to three actions per turn, which are split between the three characters (for example, all three characters can perform one action or one character can perform three actions). The characters players can choose from not based on those used in the main campaign, however each character has three distinct sets based off of their ingame abilities.
Included are four maps:
Nintendo Switch Online game trial
For a period of time in July 2022, subscribers to the Nintendo Switch Online service could download and play the entire game for free. The save data resulted from playing this trial can be used with a purchased copy of the game.[12] The trial was playable from July 6, 2022, 10:00 a.m. PT to July 12, 2022, 11:59 p.m. PT in North America[12] and from July 4, 2022 to July 10, 2022 in Europe and Oceania.[13]
Development
After the Japanese release of Just Dance in 2011, Nintendo and Ubisoft began experimenting a concept featuring a "new genre" with Mario and the Rabbids[14], in part due to the over 20 year relationship between the companies. According to producer Xavier Manzanare, Ubisoft's Rabbids developers were not going to make another Rabbids party game due to poor sales of later entries and "internal fatigue", but felt that the Rabbids characters could bring something unique to other genres of games.[15] Creative Director Davide Soliani and the development team (being "tactical fans") proposed creating a turn-based game, but wanted to "stay true to the Super Mario universe" and developed it with "tactical combat phases with adventure phases" while creating the enemies and tone.[16] Three weeks after an internal pitch meeting, the development team created a playable prototype, featuring Mario and Luigi recreated from scratch in order to "bring the essence of those two characters", and presented it to Nintendo and Shigeru Miyamoto in Kyoto, Japan. Miyamoto was reportedly impressed[17], telling the development team he wanted a type of Super Mario game that was never done before and challenged them to make a Super Mario game with no jumping.[18]
Although pre-release impressions often compared Mario + Rabbids Kingdom Battle to the long-running X-COM series of turn-based tactics games (and indeed, X-COM's creator Julian Gollop had been invited to work on the game[19]), Davide Soliani cited Mario Kart as a key inspiration for the design of the game, stating the goal was to make a turn-based tactics game that was not only quick and accessible, but also spectator friendly.[18] Handling the crossover aspect was a challenge: Soliani stated that early on, the team was conscious about "having a balance" between the Super Mario and Rabbids universes, but were encouraged by Nintendo to "not worry about it"[18] and Miyamoto, who said "Show me your colors. Show me your Rabbids' humor even more. Show me how crazy you can be".[15] The developers were also apprehensive about the idea of featuring guns as the primary weapon in a Super Mario game, but Nintendo approved it the first time it was presented.[20] Soliani characterized Nintendo as open-minded, stating "Every time you are proposing something crazy to Nintendo, they are quite open-minded. But you need a good justification and a good logic to create something in the Mario universe.[20]
The game was officially announced at E3 2017 during Ubisoft's press conference, although images of it were leaked prior. The "leak" caused grief to the development team due to the largely negative reaction, although their fears were assuaged after the game's E3 unveiling was met with a positive response. Upon release, the game garnered positive reception (detailed below).
Pre-release and unused content
Early ideas
Davide Soliani mentioned a few scrapped ideas during an Ask Me Anything session set on Reddit's Nintendo subreddit[21].
- A Rabbid Whomp character.
- A mechanic called "Fumble", described as "Some weapons were supposed to be truly powerful, but with a high risk of exploding".
- A parody of the Sailor Moon transformation sequence featuring Rabbid Peach. The animation had previously been posted on Soliani's Twitter account.[22]
- The Phantom's song was originally meant to have three different styles of music for its three phases, with one phase being an opera song, one being a rap song, and one being a metal song respectively. [23]
Glitches
- Main article: List of Mario + Rabbids Kingdom Battle glitches
Random flickering object placement glitch
Sometimes in Spooky Trails and Lava Pit, random background objects will randomly flicker around to places they do not belong. Normally, this is a simple glitch the game will fix quickly, but in other cases, the glitch will persist and start affecting things around the player, potentially causing coins on moving platforms to become stuck in the ground and similar effects. Occasionally, a piece will start to blink over Beep-0, eventually leading to an exception that crashes the game.
Staff
- Main article: List of Mario + Rabbids Kingdom Battle staff
Critical reception
Mario + Rabbids Kingdom Battle has received generally positive reviews from professional critics. It received a score of 8 out of 10 from Russ Frushtick of Polygon. He said that the game "offer[s] up a legitimately challenging squad tactics experience without alienating the family-friendly Super Mario audience", but also stated that "it doesn't quite have the full layer of spit and polish of a [Nintendo developed] title".[24] Dan Stapleton of IGN gave the game a 7.7 out of 10 (a "Good" rating). He praised the game's difficulty, animation, and "enemy variety", but criticized the rewards for completing puzzles and "the progression system".[25] The game currently averages 85% on Metacritic based on 91 reviews.[26]
The game has been credited by Ubisoft Milan staff as a "game changer" for the studio as, following the game's critical and commercial success, the studio started receiving ten times more job applications than it had at any point of its history.[27]
| Reviews | |||
|---|---|---|---|
| Release | Reviewer, Publication | Score | Comment |
| Nintendo Switch | Jeff Gerstmann, Giant Bomb |
3/5 | The out-of-combat drudgery and late-game enemy design are probably the only negative things about Mario + Rabbids, but they end up casting a large shadow over the experience as a whole. That's not to say that the game should have just been some friendly cakewalk from start to finish--the game's got difficulty options that ensure that anyone should be able to get through the fights with enough persistence--but the way the game changes things up near the end makes the combat feel like a chore on any setting. It's an unfortunate shift that mars the final product quite a bit. This is still a wild ride with a handful of amazing moments, but the gameplay part of it needs more variety than it has, so the whole thing ends up coming back down to earth and feeling a little disappointing by the end. |
| Nintendo Switch | Edmond Tran, GameSpot |
9/10 | Mario + Rabbids: Kingdom Battle exudes off-beat optimism that never dissolves. It's a consistent delight, no matter how challenging the road becomes, because Kingdom Battle's unique turn-based tactics system is in every way a pleasure to engage with. Coupled with the annoyingly infectious allure of Rabbids, and the always delightful, colorful world of the Mushroom Kingdom, Mario + Rabbids: Kingdom Battle is an implausibly engrossing formula that is positively challenging and endlessly charming. |
| Nintendo Switch | Russ Frushtick, Polygon |
8/10 | Mario + Rabbids manages to walk a narrow road, offering up a legitimately challenging squad tactics experience without alienating the family-friendly Mario audience. While it doesn't quite have the full layer of spit and polish of an in-house title, Ubisoft’s game comes damn close to capturing that Nintendo magic. |
| Nintendo Switch | Dan Stapleton, IGN |
7.7/10 | Based on its colorful world, beautiful animation, and source material you might expect Mario + Rabbids: Kingdom Battle to be "My first turn-based tactics game." But you're in for a surprise: even for XCOM vets some of its battles are challenging puzzles. Some of its tougher levels do devolve into a trial-and-error slog, but a good mix of enemies, objectives, and character abilities keep things interesting. |
| Nintendo Switch | Chris Carter, Destructoid |
7.5/10 | Mario + Rabbids Kingdom Battle's guts are impressive, but its main event feels like a [good] expansion for a fleshed-out strategy RPG that has more to offer than a great combat system. By the time it opens up halfway in and you really start to delve into the skill tree, it begs to be played. But until then both exploration and some battles feel like going through the motions in a "kinda sorta" tutorial way. |
| Aggregators | |||
| Compiler | Platform / Score | ||
| Metacritic | 85 | ||
| GameRankings | 84.63% | ||
Sales
As of September 21 2017, Mario + Rabbids Kingdom Battle is the best-selling third party game on the Nintendo Switch, and was noted to have outsold at least one first-party game, although no specific numbers were disclosed.[28] According to NPD Group data, Mario + Rabbids Kingdom Battle was the 7th best-selling individual game for September 2017.[29] In France, the game sold over 150,000 copies in 2017.[30]
Awards and acknowledgements
Mario + Rabbids Kingdom Battle was nominated for two awards at The Game Awards 2017, winning one, in the following categories:
- "Best Strategy Game" (Won). Other nominees were XCOM 2: War of the Chosen, Tooth and Tail, Total War: Warhammer II, and Halo Wars 2.[31]
- "Best Family Game" (Nominated). Lost to Super Mario Odyssey.[31]
Community Competition
- Main article: Community Competition
From 2018 through 2019, Ubisoft sponsored an event in which participants had to complete certain in-game battles under new conditions for a chance to enter a Versus tournament at one of Ubisoft's studios. The competition spanned three seasons, each ending with a studio tournament, followed by a number of final rounds at Gamescom 2019 which saw the best players from these studio tournaments competing for the championship. Ubisoft announced the latest developments of the Community Competition via their website and social media channels. The official "Mario + Rabbids" Discord channel hosted periodic Q&A sessions where users could discuss the competition with Ubisoft staff.
References to other games
- Donkey Kong: The Phantom mentions this game in his song, which references the fact that it is Mario's first appearance. In the Donkey Kong Adventure DLC, this game's title theme can be heard in the mid-boss theme and the pre-battle theme. Also, a stone structure resembling the 25m stage can been seen, where a Rabbid is found jumping over barrels that another Rabbid is throwing while imitating Donkey Kong's movements and the 25m theme plays in the background. Beep-0 remarks that the Rabbid would be lucky to get to 125 meters unless he finds a Hammer.
- Mario Bros.: On the title screen for the game's battle mode, there is an arcade machine with artwork that heavily parodies Mario Bros. with Rabbid Mario and Rabbid Luigi replacing their respective counterparts, small birds replacing the Shellcreepers, Bees (as seen in-game) replacing the Fighter Flies, and mice replacing the Sidesteppers.
- Super Mario Bros.: The wallpaper in the laboratory in the introductory cutscene is a scene from this game. When clearing all battles in a level, a cover of the fanfare that plays after Mario/Luigi grabs the Goal Pole is played. A cover of the Game Over theme plays when the player loses a battle. The Phantom says "your princess is in another castle" in his song, which is derived from a quote from this game. Rabbid Mario's The Splatformer weapon has a design based on a scene from this game. Also, the description for said weapon mentions the Minus World.
- Super Mario Bros. 3: When the Rabbids' Time Washing Machine malfunctions in the introductory cutscene, sprites of Super Mushrooms, ? Blocks, and Mario taken from this game can be seen on the number displays.
- Super Mario Land: In bonus levels, the Blue Coins make the same sounds as the coins in this game when collected.
- Donkey Kong Country series: DK Barrels can be seen floating in the ocean as part of the background of World 1-7. The sound effect that plays when a banana bunch is collected in the original Donkey Kong Country can be heard as several bananas fall in front of Rabbid Kong at the beginning of his battle. Also, the bonus room theme from the first game, also known as "Bonus Room Blitz", is remixed in the Donkey Kong Adventure DLC. This arrangement plays in bonus rooms. Weapons modeled after Rambi, Enguarde, Expresso, Winky, and Squawks appear in the same DLC, and the description for the Winky-based weapon mentions Monkey Mines.
- Mario Kart series: During the Phantom's song, he mentions this series and describes a scenario in which Mario is in first place and doing well until he gets hit by a Spiny Shell.
- Yoshi's Island series: Beep-0 asks Yoshi if it is true that the latter has his own island.
- Super Mario 64: The music that plays in the hub world is a rearrangement of the Peach's Castle theme from this game. Also, several of Mario's voice clips from this game are reused.
- Donkey Kong 64: Rabbid Kong's battle theme is a rearrangement of Jungle Japes's music from this game. Jungle Japes is also rearranged as one of the battle themes in the Donkey Kong Adventure DLC. A cover of Donkey Kong Island is also played in the overworld of the Donkey Kong Adventure world.
- Luigi's Mansion: Luigi's primary weapons are all shaped like vacuum cleaners as a reference to the Poltergust 3000. Also, several of Luigi's voice clips from this game are reused.
- New Super Mario Bros.: A poster featuring artwork from this game appears in the introductory cutscene.
- Super Mario Galaxy: A tube of honey with a Bee Mushroom design on it appears in World 1-1 and near Peach's castle. A weapon called the "Matter Splatter" shares its name and color scheme with a galaxy from this game. The voice clip of Peach calling for Mario from this game is reused.
- Super Smash Bros. Brawl: One of Mario's voice clips is recycled in one of the cutscenes.
- New Super Mario Bros. Wii: Several of Mario and Luigi's voice clips from this game are recycled.
- Super Mario Galaxy 2: A weapon modeled after Gobblegut appears.
- Mario Party series: The jingle that is heard after activating a switch was previously used in Mario Party 9 and Mario Party 10 for landing on a Bowser Jr. Space. Some of Luigi's animations from Mario Party 10 are reused. A poster featuring artwork from Mario Party: Star Rush appears in the introductory cutscene.
References in later games
- Super Smash Bros. Ultimate: Rabbid Peach, Rabbid Mario, and Rabbid Kong (using his Mega Rabbid Kong artwork) appear in this game as Spirits.
- Mario + Rabbids Sparks of Hope: Weapon skins based on Megabug are available as part of the Megabug Collection pre-order bonus. This game's arrangement of "Inside the Castle Walls" returns and plays during the prologue, albeit synthesized instead of live recorded. The likeliness of the Block Tower from Ancient Gardens is used for the bonus rooms, along with reusing the same music. MegaDragonBowser makes a cameo in the "The Story So Far" Memory profile, and is referenced at the start of the battle against Darkmess Bowser, when Beep-0 states how they beat him in front of Bowser Jr.. Numerous background objects from the game appear as props in the Repository of Rayman and the Phantom Show, including the clock tower from Spooky Trails and a submarine outfitted with a drill from Lava Pit. At the start of the battle with Swingin' Phantom, Beep-0 directly quotes his dialogue from the beginning of the fight against the Phantom in this game.
Gallery
- For this subject's image gallery, see Gallery:Mario + Rabbids Kingdom Battle.
Mario and Rabbid Mario
Peach and Rabbid Peach
Luigi and Rabbid Luigi
Yoshi and Rabbid Yoshi
Media
- Main article: Mario + Rabbids Kingdom Battle Original Game Soundtrack
| File info |
| File info |
| File info |
| File info |
Names in other languages
| Language | Name | Meaning | Notes |
|---|---|---|---|
| Chinese (simplified) | 马力欧+疯狂兔子:王国之战[32] Mǎlìōu + Fēngkuángtùzi: Wánggúo Zhīzhàn |
Mario + Rabbids: Battle of the Kingdom | |
| Chinese (traditional) | 瑪利歐+瘋狂兔子 王國之戰[33] Mǎlìōu + Fēngkuángtùzi: Wánggúo Zhīzhàn |
Mario + Rabbids: Battle of the Kingdom | |
| French | Mario + The Lapins Crétins Kingdom Battle[?] | Mario + Rabbids Kingdom Battle | |
| Korean | 마리오 + 래비드 킹덤 배틀[?] Mario + Raebideu Kingdeom Baeteul |
Mario + Rabbid Kingdom Battle | |
| Russian | Mario + Rabbids: Битва За Королевство[?] Mario + Rabbids: Bitva Za Korolevstvo |
Mario + Rabbids: Battle For The Kingdom |
Trivia
- Mario + Rabbids Kingdom Battle was not the first attempt by Ubisoft to crossover Mario with the Rabbids: in 2010, Ubisoft Paris had pitched a Mario/Rabbids crossover adventure game for the Wii, which ended up being rejected by Nintendo.[34]
- In the opening sequence, Genius Girl opens a magazine, which shows herself in a posture referencing Pagan Min, the main antagonist of Ubisoft's Far Cry 4, which is taken from that game's box art.
- This is the first Super Mario game that has been mainly developed by an Italian company.
- The song that was used for the game's E3 trailers is "It's All for Rock N' Roll" by Airbourne.
- Many enemy portraits in Tacticam are inaccurate to their in-game models.
References
- ^ Ubisoft US (June 12, 2017). Mario + Rabbids Kingdom Battle: E3 2017 Announcement Trailer. YouTube. Retrieved June 12, 2017.
- ^ https://www.nintendo.com/es_LA/games/detail/mario-plus-rabbids-kingdom-battle-switch/
- ^ The Nintendo Switch journey comes to E3 to reveal new worlds for Mario's Odyssey. Nintendo.com.au. Retrieved June 16, 2017.
- ^ https://www.nintendo.com/es_LA/games/detail/mario-plus-rabbids-kingdom-battle-gold-edition-switch/
- ^ [1]
- ^ Official Nintendo website (Korea). Retrieved September 19, 2017.
- ^ http://www.nintendo.com.hk/software/switch/
- ^ Official Nintendo website (Taiwan). Retrieved September 19, 2017.
- ^ Official Nintendo website (China). Retrieved February 13, 2022.
- ^ Mario + Rabbids Kingdom Battle Interview with Davide Soliani. Retrieved April 9, 2024
- ^ Davide Soliani on twitter. Retrieved October 2, 2017
- ^ a b July 5, 2022. Try the latest Game Trial, Mario + Rabbids Kingdom Battle! nintendo.com. Retrieved July 19, 2022. (Archived July 19, 2022, 16:21:51 UTC via Wayback Machine.)
- ^ NintendoEurope (June 29, 2022). #NintendoSwitchOnline members can get a taste of the Mario + Rabbids experience with the upcoming Mario + Rabbids Kingdom Battle Game Trial! Download the game now so you're ready to start on 04/07:. Twitter. Retrieved July 19, 2022. (Archived July 19, 2022, 16:32:00 UTC via Wayback Machine.)
- ^ Eurogamer. (June 15, 2017). The big interview: Shigeru Miyamoto and Ubisoft's Yves Guillemot. eurogamer.net. Retrieved August 30, 2017.
- ^ a b Ben Reeves (August 1, 2017)Mario + Rabbids Kingdom Battle: On Rayman’s Absence And Mario Kart’s Influence. Game Informer. Retrieved September 19, 2017
- ^ Nintendo Everything. (June 12, 2017). Ubisoft on Mario + Rabbids Kingdom Battle – origins. nintendoeverything.com. Retrieved August 30, 2017.
- ^ Nintendo UK. (June 21, 2017) Interview: Taking Mario + Rabbids Kingdom Battle from prototype to teary E3 reveal. nintendo.co.uk. Retrieved August 30, 2017.
- ^ a b c Stefanie Fogel(August 29, 2017) Blending two game worlds in Mario+Rabbids Kingdom Battle. Gamasutra. Retrieved September 19, 2017
- ^ Julian Benson (September 22, 2017). X-Com creator Julian Gollop was asked to work on Mario + Rabbids Kingdom Battle. PCGamer.com. Retrieved October 21, 2017
- ^ a b Here's How Ubisoft Convinced Nintendo To Let Mario Use Guns. Kotaku. Retrieved September 19, 2017
- ^ Davide Soliani (October 06, 2017). Hi, I am Davide Soliani, Creative Director of Mario+Rabbids: Kingdom Battle! AMA!". Reddit. Retrieved October 07, 2017. (Archived November 22, 2020, 22:37:09 UTC via Internet Archive: Wayback Machine.)
- ^ DavideSoliani (September 18, 2017). When you have to create 1000 animations per character just for the Combat Phase, animators started to go crazy. This was 2 years ago...😂 Twitter. Retrieved October 7, 2017. (Archived November 22, 2020, 22:39:33 UTC via Internet Archive: Wayback Machine.)
- ^ Grant Kirkhope (January 29, 2018). Let's Interview: Banjo-Kazooie and Mario + Rabbids Composer Grant Kirkhope. Gaming Reinvented. Retrieved January 31, 2018. (Archived November 9, 2020, 04:06:38 UTC via Internet Archive: Wayback Machine.)
- ^ https://www.polygon.com/2017/8/28/16213294/mario-rabbids-kingdom-battle-review-nintendo-switch-ubisoft
- ^ http://au.ign.com/articles/2017/08/28/mario-rabbids-kingdom-battle-review
- ^ http://www.metacritic.com/game/switch/mario-+-rabbids-kingdom-battle
- ^ Matthew Handrahan (September 29, 2017). Ubisoft Milan: "I see a really brilliant future in front of us". Gameindutrybiz. Retrieved September 29, 2017.
- ^ Tom Philips (September 21, 2017). "Mario + Rabbids: Kingdom Battle is Switch's best-selling non-Nintendo game". Eurogamer. Retrieved September 21, 2017
- ^ Business Wire (October 19, 2017) Nintendo News: Nintendo Systems Claim Two-Thirds of September Video Game Hardware Sales. Retrieved October 20, 2017
- ^ Le Numérique (January 11, 2018). Switch, Super Mario, Zelda, retrogaming... L'incroyable retour de Nintendo Entretien avec Philippe Lavoué, directeur général. Retrieved January 11, 2018
- ^ a b Awards - The Game Awards 2017. The Game Awards. Retrieved December 9, 2017.
- ^ http://www.ubisoft.com.cn/games?game=82:rkb
- ^ https://rabbids.ubisoft.com/portal/zh-tw/news/detail.aspx?c=tcm:268-300289-16&ct=tcm:268-76770-32
- ^ Liam Robertson (June 12, 2017). Mario + Rabbids: The Lost Adventure Game Concept. YouTube. Retrieved February 14, 2018
External links
- Official site
- Nintendo of America site
- Nintendo of America site (Gold Edition)
- Nintendo UK site
- Official Japanese site
- Japan eShop page
- Official Korean site
- Official mainland Chinese site
- Article on RayWiki
