Golf (Game Boy): Difference between revisions
| (12 intermediate revisions by 9 users not shown) | |||
| Line 4: | Line 4: | ||
|developer=[[Nintendo Research & Development 2|Nintendo R&D2]] | |developer=[[Nintendo Research & Development 2|Nintendo R&D2]] | ||
|publisher=[[Nintendo]] | |publisher=[[Nintendo]] | ||
|release='''Game Boy:'''<br>{{ | |release='''Game Boy:'''<br>{{flag list|Japan|November 28, 1989|USA|March 1990|Europe|1990}}'''Virtual Console (3DS):'''<br>{{flag list|Japan|June 29, 2011|USA|September 8, 2011|Europe|October 13, 2011|Australia|October 13, 2011|South Korea|July 20, 2016}} | ||
|languages={{languages|en_us=y}} | |||
|genre=[[Genre#Sports games|Sports]] | |genre=[[Genre#Sports games|Sports]] | ||
|modes=1–2 players | |modes=1–2 players | ||
|ratings={{ratings|esrb=E|pegi=3|cero=A|acb=G}} | |ratings={{ratings|esrb=E|pegi=3|cero=A|acb=G}} | ||
|platforms=[[Game Boy]], [[Virtual Console]] ([[Nintendo 3DS]]) | |platforms=[[Game Boy]], [[Virtual Console]] ([[Nintendo 3DS]]) | ||
| | |format={{format|gb=1|3dsdl=1}} | ||
|input={{input|gb=1|3ds=1}} | |input={{input|gb=1|3ds=1}} | ||
|serials=DMG-GOA | |||
|}} | |}} | ||
'''''Golf''''' is a [[Game Boy]] game released near the beginning of the system's lifespan in 1989. It is an expansion of the [[Nintendo Entertainment System]] [[Golf|game of the same name]], inserting aspects from the Japan-only | '''''Golf''''' is a [[Game Boy]] game released near the beginning of the system's lifespan in 1989. It is an expansion of the [[Nintendo Entertainment System]] [[Golf|game of the same name]], inserting aspects from the Japan-only successors ''[[Golf: Japan Course]]'' and ''[[Golf: U.S. Course]]''. As with the previous games, the player character is [[Mario]] or a lookalike, with player one having light skin and a dark cap, while player two has dark skin and a light cap. Mario is absent from the Japanese cover art, which instead features a group of generic characters; in the Western cover art, however, Mario appears reenacting {{file link|Golf Key Artwork.png|the Japanese and European artwork}} for the original ''Golf''. On the [[Game Boy Color]] and [[Game Boy Advance]], backgrounds and heads-up-display graphics are colored green, while character and object sprites are colored a reddish orange. | ||
The game was rereleased on the [[Nintendo 3DS]]'s [[Virtual Console]] in Japan on June 2011; in North America on September 2011; in Europe and Australia on October 2011; and in South Korea on July 2016. | The game was rereleased on the [[Nintendo 3DS]]'s [[Virtual Console]] in Japan on June 2011; in North America on September 2011; in Europe and Australia on October 2011; and in South Korea on July 2016. | ||
==Gameplay== | ==Gameplay== | ||
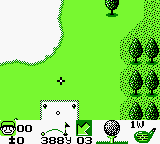
Most of the base gameplay is reused from the original NES game. However, it retrofits aspects from later NES golf games, such as trees acting as solid obstacles that must be gone over or around, differentiation between fairway and rough zones, and putting greens having multiple ways to push the ball. All of the original game's clubs return, and the game contains 36 different holes split between two courses: Japan and U.S.A. In the Japan Course, forested areas act as out-of-bounds zones, while in the U.S.A. course, they are treated as standard rough spots. Unlike previous games, it lacks the golfer-based viewing field, with him instead being shown on a more zoomed-in version of the bird's-eye-view map. The view can be switched between the zoomed-in map, the full map, and a view of the green via the {{button|GB|A}} button. Unlike the original, the player can hit the ball in any angle regardless of view. Additionally, by hitting the {{button|GB|L}} button when the club hits the ball, the player can make it spin backwards, which can be useful for preventing it from rolling too far. The hole's exact position on the green varies between four possible positions on each; which position is seen is determined by how many strokes the player has made before arriving, with it cycling for every stroke made. The exception is the first hole, which is random. | Most of the base gameplay is reused from the original NES game. However, it retrofits aspects from later NES golf games, such as trees acting as solid obstacles that must be gone over or around, differentiation between fairway and rough zones, and putting greens having multiple ways to push the ball. All of the original game's clubs return, and the game contains 36 different holes split between two courses: Japan and U.S.A. In the Japan Course, forested areas act as out-of-bounds zones, while in the U.S.A. course, they are treated as standard rough spots. Unlike previous games, it lacks the golfer-based viewing field, with him instead being shown on a more zoomed-in version of the bird's-eye-view map. The view can be switched between the zoomed-in map, the full map, and a view of the green via the {{button|GB|A}} button. Unlike the original, the player can hit the ball in any angle regardless of view. Additionally, by hitting the {{button|GB|L}} button when the club hits the ball, the player can make it spin backwards, which can be useful for preventing it from rolling too far. The hole's exact position on the green varies between four possible positions on each; which position is seen is determined by how many strokes the player has made before arriving, with it cycling for every stroke made. The exception is the first hole, which is random. | ||
| Line 21: | Line 22: | ||
In single-player mode, each course has a scoreboard with five records to beat; the player's final placement determines what reward (if any) the golfer receives, with there being a different trophy for third and second place and a car for first place. In two-player, the golfers try to get a higher score than the other, with a winner being chosen after the total scores are far enough apart or all the holes in a course have been completed. If the score is tied at the end of all holes, a "sudden death" mode starts, looping back to the first hole and playing through again until a player gets a better score on any of the holes, ending the competition in their favor. | In single-player mode, each course has a scoreboard with five records to beat; the player's final placement determines what reward (if any) the golfer receives, with there being a different trophy for third and second place and a car for first place. In two-player, the golfers try to get a higher score than the other, with a winner being chosen after the total scores are far enough apart or all the holes in a course have been completed. If the score is tied at the end of all holes, a "sudden death" mode starts, looping back to the first hole and playing through again until a player gets a better score on any of the holes, ending the competition in their favor. | ||
{{br|left}} | {{br|left}} | ||
<gallery widths=160 heights=144> | <gallery widths=160 heights=144> | ||
Golf GBC Screenshot swing demonstration 1.png|The player aims the ball. Mario is not present, and the UI contains various information. | Golf GBC Screenshot swing demonstration 1.png|The player aims the ball. Mario is not present, and the UI contains various information. | ||
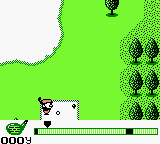
| Line 28: | Line 28: | ||
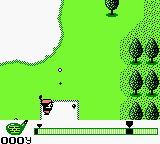
Golf GBC Screenshot swing demonstration 4.png|The player takes the swing, the arrow stopped near the target. | Golf GBC Screenshot swing demonstration 4.png|The player takes the swing, the arrow stopped near the target. | ||
</gallery> | </gallery> | ||
===Description from the [[Nintendo eShop#Nintendo 3DS|Nintendo eShop]]=== | ===Description from the [[Nintendo eShop#Nintendo 3DS|Nintendo eShop]]=== | ||
<blockquote> | <blockquote> | ||
| Line 40: | Line 39: | ||
==Clubs and lays== | ==Clubs and lays== | ||
The game features the same 14 clubs as the original ''Golf'': three Woods, eight Irons, a Pitching Wedge, a Sand Wedge, and a Putter; higher numbers mean a shorter distance, but greater height. Unlike the original game, there are a large number of terrains; counting variance in depth, there are 11 that can be swung from. The contact area for each swing varies depending on the club and the ball's lay, and how deep the ball ends up in a Rough or Bunker depends on the swing used to get there; a tall swing will result in it being buried deep, and putting along the surface causes it to be near the top. When on the tee, using the 1W club gives a special meter with an extra target zone on the left side; hitting both of these results in a "Super Shot" that goes much further than normal. | The game features the same 14 clubs as the original ''Golf'': three Woods, eight Irons, a Pitching Wedge, a Sand Wedge, and a Putter; higher numbers mean a shorter distance, but greater height. Unlike the original game, there are a large number of terrains; counting variance in depth, there are 11 that can be swung from. The contact area for each swing varies depending on the club and the ball's lay, and how deep the ball ends up in a Rough or Bunker depends on the swing used to get there; a tall swing will result in it being buried deep, and putting along the surface causes it to be near the top. When on the tee, using the 1W club gives a special meter with an extra target zone on the left side; hitting both of these results in a "Super Shot" that goes much further than normal. | ||
{|border=1 style="text-align:center;display:inline-block" | |||
{|border=1 style="text-align:center; display:inline-block" | |||
!colspan=12 style="background:#78F830"|Swing meters between clubs and lays | !colspan=12 style="background:#78F830"|Swing meters between clubs and lays | ||
|- | |- | ||
| Line 244: | Line 242: | ||
====Outward nine==== | ====Outward nine==== | ||
{{br}} | {{br}} | ||
{|border=1 style="text-align:center; display:inline-block" | {|border=1 style="text-align:center;display:inline-block" | ||
|- | |- | ||
!colspan=2 style="background:#78F830"|<big>Hole 1</big> | !colspan=2 style="background:#78F830"|<big>Hole 1</big> | ||
| Line 253: | Line 251: | ||
|style="background:white;color:black"|<big>'''Par 4'''</big> | |style="background:white;color:black"|<big>'''Par 4'''</big> | ||
|} | |} | ||
{|border=1 style="text-align:center;display:inline-block" | |||
{|border=1 style="text-align:center; display:inline-block" | |||
|- | |- | ||
!colspan=2 style="background:#78F830"|<big>Hole 2</big> | !colspan=2 style="background:#78F830"|<big>Hole 2</big> | ||
| Line 263: | Line 260: | ||
|style="background:white;color:black"|<big>'''Par 4'''</big> | |style="background:white;color:black"|<big>'''Par 4'''</big> | ||
|} | |} | ||
{|border=1 style="text-align:center;display:inline-block" | |||
{|border=1 style="text-align:center; display:inline-block" | |||
|- | |- | ||
!colspan=2 style="background:#78F830"|<big>Hole 3</big> | !colspan=2 style="background:#78F830"|<big>Hole 3</big> | ||
| Line 273: | Line 269: | ||
|style="background:white;color:black"|<big>'''Par 3'''</big> | |style="background:white;color:black"|<big>'''Par 3'''</big> | ||
|} | |} | ||
{|border=1 style="text-align:center;display:inline-block" | |||
{|border=1 style="text-align:center; display:inline-block" | |||
|- | |- | ||
!colspan=2 style="background:#78F830"|<big>Hole 4</big> | !colspan=2 style="background:#78F830"|<big>Hole 4</big> | ||
| Line 283: | Line 278: | ||
|style="background:white;color:black"|<big>'''Par 5'''</big> | |style="background:white;color:black"|<big>'''Par 5'''</big> | ||
|} | |} | ||
{|border=1 style="text-align:center;display:inline-block" | |||
{|border=1 style="text-align:center; display:inline-block" | |||
|- | |- | ||
!colspan=2 style="background:#78F830"|<big>Hole 5</big> | !colspan=2 style="background:#78F830"|<big>Hole 5</big> | ||
| Line 293: | Line 287: | ||
|style="background:white;color:black"|<big>'''Par 4'''</big> | |style="background:white;color:black"|<big>'''Par 4'''</big> | ||
|} | |} | ||
{|border=1 style="text-align:center;display:inline-block" | |||
{|border=1 style="text-align:center; display:inline-block" | |||
|- | |- | ||
!colspan=2 style="background:#78F830"|<big>Hole 6</big> | !colspan=2 style="background:#78F830"|<big>Hole 6</big> | ||
| Line 303: | Line 296: | ||
|style="background:white;color:black"|<big>'''Par 3'''</big> | |style="background:white;color:black"|<big>'''Par 3'''</big> | ||
|} | |} | ||
{|border=1 style="text-align:center;display:inline-block" | |||
{|border=1 style="text-align:center; display:inline-block" | |||
|- | |- | ||
!colspan=2 style="background:#78F830"|<big>Hole 7</big> | !colspan=2 style="background:#78F830"|<big>Hole 7</big> | ||
| Line 313: | Line 305: | ||
|style="background:white;color:black"|<big>'''Par 4'''</big> | |style="background:white;color:black"|<big>'''Par 4'''</big> | ||
|} | |} | ||
{|border=1 style="text-align:center;display:inline-block" | |||
{|border=1 style="text-align:center; display:inline-block" | |||
|- | |- | ||
!colspan=2 style="background:#78F830"|<big>Hole 8</big> | !colspan=2 style="background:#78F830"|<big>Hole 8</big> | ||
| Line 323: | Line 314: | ||
|style="background:white;color:black"|<big>'''Par 4'''</big> | |style="background:white;color:black"|<big>'''Par 4'''</big> | ||
|} | |} | ||
{|border=1 style="text-align:center;display:inline-block" | |||
{|border=1 style="text-align:center; display:inline-block" | |||
|- | |- | ||
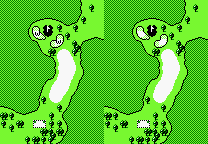
!colspan=2 style="background:#78F830"|<big>Hole 9</big> | !colspan=2 style="background:#78F830"|<big>Hole 9</big> | ||
| Line 335: | Line 325: | ||
====Inward nine==== | ====Inward nine==== | ||
{|border=1 style="text-align:center; display:inline-block" | {|border=1 style="text-align:center;display:inline-block" | ||
|- | |- | ||
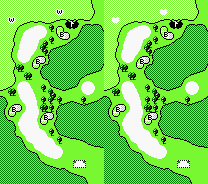
!colspan=2 style="background:#78F830"|<big>Hole 10</big> | !colspan=2 style="background:#78F830"|<big>Hole 10</big> | ||
| Line 344: | Line 334: | ||
|style="background:white;color:black"|<big>'''Par 4'''</big> | |style="background:white;color:black"|<big>'''Par 4'''</big> | ||
|} | |} | ||
{|border=1 style="text-align:center;display:inline-block" | |||
{|border=1 style="text-align:center; display:inline-block" | |||
|- | |- | ||
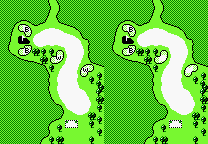
!colspan=2 style="background:#78F830"|<big>Hole 11</big> | !colspan=2 style="background:#78F830"|<big>Hole 11</big> | ||
| Line 354: | Line 343: | ||
|style="background:white;color:black"|<big>'''Par 3'''</big> | |style="background:white;color:black"|<big>'''Par 3'''</big> | ||
|} | |} | ||
{|border=1 style="text-align:center;display:inline-block" | |||
{|border=1 style="text-align:center; display:inline-block" | |||
|- | |- | ||
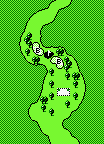
!colspan=2 style="background:#78F830"|<big>Hole 12</big> | !colspan=2 style="background:#78F830"|<big>Hole 12</big> | ||
| Line 364: | Line 352: | ||
|style="background:white;color:black"|<big>'''Par 4'''</big> | |style="background:white;color:black"|<big>'''Par 4'''</big> | ||
|} | |} | ||
{|border=1 style="text-align:center;display:inline-block" | |||
{|border=1 style="text-align:center; display:inline-block" | |||
|- | |- | ||
!colspan=2 style="background:#78F830"|<big>Hole 13</big> | !colspan=2 style="background:#78F830"|<big>Hole 13</big> | ||
| Line 374: | Line 361: | ||
|style="background:white;color:black"|<big>'''Par 5'''</big> | |style="background:white;color:black"|<big>'''Par 5'''</big> | ||
|} | |} | ||
{|border=1 style="text-align:center;display:inline-block" | |||
{|border=1 style="text-align:center; display:inline-block" | |||
|- | |- | ||
!colspan=2 style="background:#78F830"|<big>Hole 14</big> | !colspan=2 style="background:#78F830"|<big>Hole 14</big> | ||
| Line 384: | Line 370: | ||
|style="background:white;color:black"|<big>'''Par 4'''</big> | |style="background:white;color:black"|<big>'''Par 4'''</big> | ||
|} | |} | ||
{|border=1 style="text-align:center;display:inline-block" | |||
{|border=1 style="text-align:center; display:inline-block" | |||
|- | |- | ||
!colspan=2 style="background:#78F830"|<big>Hole 15</big> | !colspan=2 style="background:#78F830"|<big>Hole 15</big> | ||
| Line 394: | Line 379: | ||
|style="background:white;color:black"|<big>'''Par 4'''</big> | |style="background:white;color:black"|<big>'''Par 4'''</big> | ||
|} | |} | ||
{|border=1 style="text-align:center;display:inline-block" | |||
{|border=1 style="text-align:center; display:inline-block" | |||
|- | |- | ||
!colspan=2 style="background:#78F830"|<big>Hole 16</big> | !colspan=2 style="background:#78F830"|<big>Hole 16</big> | ||
| Line 404: | Line 388: | ||
|style="background:white;color:black"|<big>'''Par 4'''</big> | |style="background:white;color:black"|<big>'''Par 4'''</big> | ||
|} | |} | ||
{|border=1 style="text-align:center;display:inline-block" | |||
{|border=1 style="text-align:center; display:inline-block" | |||
|- | |- | ||
!colspan=2 style="background:#78F830"|<big>Hole 17</big> | !colspan=2 style="background:#78F830"|<big>Hole 17</big> | ||
| Line 414: | Line 397: | ||
|style="background:white;color:black"|<big>'''Par 5'''</big> | |style="background:white;color:black"|<big>'''Par 5'''</big> | ||
|} | |} | ||
{|border=1 style="text-align:center;display:inline-block" | |||
{|border=1 style="text-align:center; display:inline-block" | |||
|- | |- | ||
!colspan=2 style="background:#78F830"|<big>Hole 18</big> | !colspan=2 style="background:#78F830"|<big>Hole 18</big> | ||
| Line 427: | Line 409: | ||
===U.S.A. Course=== | ===U.S.A. Course=== | ||
====Outward nine==== | ====Outward nine==== | ||
{|border=1 style="text-align:center; display:inline-block" | {|border=1 style="text-align:center;display:inline-block" | ||
|- | |- | ||
!colspan=2 style="background:#78F830"|<big>Hole 1</big> | !colspan=2 style="background:#78F830"|<big>Hole 1</big> | ||
| Line 437: | Line 419: | ||
|} | |} | ||
{|border=1 style="text-align:center; display:inline-block" | {|border=1 style="text-align:center;display:inline-block" | ||
|- | |- | ||
!colspan=2 style="background:#78F830"|<big>Hole 2</big> | !colspan=2 style="background:#78F830"|<big>Hole 2</big> | ||
| Line 446: | Line 428: | ||
|style="background:white;color:black"|<big>'''Par 3'''</big> | |style="background:white;color:black"|<big>'''Par 3'''</big> | ||
|} | |} | ||
{|border=1 style="text-align:center;display:inline-block" | |||
{|border=1 style="text-align:center; display:inline-block" | |||
|- | |- | ||
!colspan=2 style="background:#78F830"|<big>Hole 3</big> | !colspan=2 style="background:#78F830"|<big>Hole 3</big> | ||
| Line 456: | Line 437: | ||
|style="background:white;color:black"|<big>'''Par 5'''</big> | |style="background:white;color:black"|<big>'''Par 5'''</big> | ||
|} | |} | ||
{|border=1 style="text-align:center;display:inline-block" | |||
{|border=1 style="text-align:center; display:inline-block" | |||
|- | |- | ||
!colspan=2 style="background:#78F830"|<big>Hole 4</big> | !colspan=2 style="background:#78F830"|<big>Hole 4</big> | ||
| Line 466: | Line 446: | ||
|style="background:white;color:black"|<big>'''Par 4'''</big> | |style="background:white;color:black"|<big>'''Par 4'''</big> | ||
|} | |} | ||
{|border=1 style="text-align:center;display:inline-block" | |||
{|border=1 style="text-align:center; display:inline-block" | |||
|- | |- | ||
!colspan=2 style="background:#78F830"|<big>Hole 5</big> | !colspan=2 style="background:#78F830"|<big>Hole 5</big> | ||
| Line 476: | Line 455: | ||
|style="background:white;color:black"|<big>'''Par 4'''</big> | |style="background:white;color:black"|<big>'''Par 4'''</big> | ||
|} | |} | ||
{|border=1 style="text-align:center;display:inline-block" | |||
{|border=1 style="text-align:center; display:inline-block" | |||
|- | |- | ||
!colspan=2 style="background:#78F830"|<big>Hole 6</big> | !colspan=2 style="background:#78F830"|<big>Hole 6</big> | ||
| Line 486: | Line 464: | ||
|style="background:white;color:black"|<big>'''Par 5'''</big> | |style="background:white;color:black"|<big>'''Par 5'''</big> | ||
|} | |} | ||
{|border=1 style="text-align:center;display:inline-block" | |||
{|border=1 style="text-align:center; display:inline-block" | |||
|- | |- | ||
!colspan=2 style="background:#78F830"|<big>Hole 7</big> | !colspan=2 style="background:#78F830"|<big>Hole 7</big> | ||
| Line 496: | Line 473: | ||
|style="background:white;color:black"|<big>'''Par 4'''</big> | |style="background:white;color:black"|<big>'''Par 4'''</big> | ||
|} | |} | ||
{|border=1 style="text-align:center;display:inline-block" | |||
{|border=1 style="text-align:center; display:inline-block" | |||
|- | |- | ||
!colspan=2 style="background:#78F830"|<big>Hole 8</big> | !colspan=2 style="background:#78F830"|<big>Hole 8</big> | ||
| Line 506: | Line 482: | ||
|style="background:white;color:black"|<big>'''Par 4'''</big> | |style="background:white;color:black"|<big>'''Par 4'''</big> | ||
|} | |} | ||
{|border=1 style="text-align:center;display:inline-block" | |||
{|border=1 style="text-align:center; display:inline-block" | |||
|- | |- | ||
!colspan=2 style="background:#78F830"|<big>Hole 9</big> | !colspan=2 style="background:#78F830"|<big>Hole 9</big> | ||
| Line 518: | Line 493: | ||
====Inward nine==== | ====Inward nine==== | ||
{|border=1 style="text-align:center; display:inline-block" | {|border=1 style="text-align:center;display:inline-block" | ||
|- | |- | ||
!colspan=2 style="background:#78F830"|<big>Hole 10</big> | !colspan=2 style="background:#78F830"|<big>Hole 10</big> | ||
| Line 527: | Line 502: | ||
|style="background:white;color:black"|<big>'''Par 4'''</big> | |style="background:white;color:black"|<big>'''Par 4'''</big> | ||
|} | |} | ||
{|border=1 style="text-align:center;display:inline-block" | |||
{|border=1 style="text-align:center; display:inline-block" | |||
|- | |- | ||
!colspan=2 style="background:#78F830"|<big>Hole 11</big> | !colspan=2 style="background:#78F830"|<big>Hole 11</big> | ||
| Line 537: | Line 511: | ||
|style="background:white;color:black"|<big>'''Par 5'''</big> | |style="background:white;color:black"|<big>'''Par 5'''</big> | ||
|} | |} | ||
{|border=1 style="text-align:center;display:inline-block" | |||
{|border=1 style="text-align:center; display:inline-block" | |||
|- | |- | ||
!colspan=2 style="background:#78F830"|<big>Hole 12</big> | !colspan=2 style="background:#78F830"|<big>Hole 12</big> | ||
| Line 547: | Line 520: | ||
|style="background:white;color:black"|<big>'''Par 4'''</big> | |style="background:white;color:black"|<big>'''Par 4'''</big> | ||
|} | |} | ||
{|border=1 style="text-align:center;display:inline-block" | |||
{|border=1 style="text-align:center; display:inline-block" | |||
|- | |- | ||
!colspan=2 style="background:#78F830"|<big>Hole 13</big> | !colspan=2 style="background:#78F830"|<big>Hole 13</big> | ||
| Line 557: | Line 529: | ||
|style="background:white;color:black"|<big>'''Par 3'''</big> | |style="background:white;color:black"|<big>'''Par 3'''</big> | ||
|} | |} | ||
{|border=1 style="text-align:center;display:inline-block" | |||
{|border=1 style="text-align:center; display:inline-block" | |||
|- | |- | ||
!colspan=2 style="background:#78F830"|<big>Hole 14</big> | !colspan=2 style="background:#78F830"|<big>Hole 14</big> | ||
| Line 567: | Line 538: | ||
|style="background:white;color:black"|<big>'''Par 4'''</big> | |style="background:white;color:black"|<big>'''Par 4'''</big> | ||
|} | |} | ||
{|border=1 style="text-align:center;display:inline-block" | |||
{|border=1 style="text-align:center; display:inline-block" | |||
|- | |- | ||
!colspan=2 style="background:#78F830"|<big>Hole 15</big> | !colspan=2 style="background:#78F830"|<big>Hole 15</big> | ||
| Line 577: | Line 547: | ||
|style="background:white;color:black"|<big>'''Par 4'''</big> | |style="background:white;color:black"|<big>'''Par 4'''</big> | ||
|} | |} | ||
{|border=1 style="text-align:center;display:inline-block" | |||
{|border=1 style="text-align:center; display:inline-block" | |||
|- | |- | ||
!colspan=2 style="background:#78F830"|<big>Hole 16</big> | !colspan=2 style="background:#78F830"|<big>Hole 16</big> | ||
| Line 587: | Line 556: | ||
|style="background:white;color:black"|<big>'''Par 3'''</big> | |style="background:white;color:black"|<big>'''Par 3'''</big> | ||
|} | |} | ||
{|border=1 style="text-align:center;display:inline-block" | |||
{|border=1 style="text-align:center; display:inline-block" | |||
|- | |- | ||
!colspan=2 style="background:#78F830"|<big>Hole 17</big> | !colspan=2 style="background:#78F830"|<big>Hole 17</big> | ||
| Line 597: | Line 565: | ||
|style="background:white;color:black"|<big>'''Par 5'''</big> | |style="background:white;color:black"|<big>'''Par 5'''</big> | ||
|} | |} | ||
{|border=1 style="text-align:center;display:inline-block" | |||
{|border=1 style="text-align:center; display:inline-block" | |||
|- | |- | ||
!colspan=2 style="background:#78F830"|<big>Hole 18</big> | !colspan=2 style="background:#78F830"|<big>Hole 18</big> | ||
| Line 610: | Line 577: | ||
==Pre-release and unused content== | ==Pre-release and unused content== | ||
Many sprites are loaded into the game's sprite bank at different points in the game, but are not actually used. | Many sprites are loaded into the game's sprite bank at different points in the game, but are not actually used. | ||
;Coffee shop | ;Coffee shop | ||
[[File:Golf GB Unused Coffee shop.png]][[File:Golf GB Unused P1 coffee.png]]<br> | [[File:Golf GB Unused Coffee shop.png]][[File:Golf GB Unused P1 coffee.png]]<br> | ||
Tiles for an unused scene involving a coffee shop. It presumably would have functioned as a loading screen, as with ''[[Golf: Japan Course]]'', though it does not appear in the final. While the tiles for the sign and building are jumbled in the data like most tiles, the ones depicting player 1 cheering are found fully assembled in the otherwise blank space underneath. | Tiles for an unused scene involving a coffee shop. It presumably would have functioned as a loading screen, as with ''[[Golf: Japan Course]]'', though it does not appear in the final. While the tiles for the sign and building are jumbled in the data like most tiles, the ones depicting player 1 cheering are found fully assembled in the otherwise blank space underneath. | ||
;Single player scenes | ;Single player scenes | ||
[[File:Golf GB Unused Caddy screen.png]][[File:Golf GB Unused Caddy away.png]]<br> | [[File:Golf GB Unused Caddy screen.png]][[File:Golf GB Unused Caddy away.png]]<br> | ||
| Line 621: | Line 586: | ||
[[File:Golf GB Unused Exhaust.png]]<br> | [[File:Golf GB Unused Exhaust.png]]<br> | ||
A puff of smoke or dust. It is found with the car tiles, so it is most likely intended to be exhaust. | A puff of smoke or dust. It is found with the car tiles, so it is most likely intended to be exhaust. | ||
;2-player scenes | ;2-player scenes | ||
[[File:Golf GB Unused P2 walk 1.png]][[File:Golf GB Unused P2 walk 2.png]]<br> | [[File:Golf GB Unused P2 walk 1.png]][[File:Golf GB Unused P2 walk 2.png]]<br> | ||
| Line 637: | Line 601: | ||
[[File:Golf GB Unused P1 stand front.png]][[File:Golf GB Unused P2 stand front.png]]<br> | [[File:Golf GB Unused P1 stand front.png]][[File:Golf GB Unused P2 stand front.png]]<br> | ||
Unused alternate front-facing tiles. They resemble ones used in the foot-stamping animation, but seem to be associated with the upward-looking ones above. Once again, player 2 appears to have a white face. | Unused alternate front-facing tiles. They resemble ones used in the foot-stamping animation, but seem to be associated with the upward-looking ones above. Once again, player 2 appears to have a white face. | ||
;Gameplay | ;Gameplay | ||
[[File:Golf GB Unused Arrow white up.png]][[File:Golf GB Unused Arrow white left.png]][[File:Golf GB Unused Arrow black up.png]][[File:Golf GB Unused Arrow black left.png]]<br> | [[File:Golf GB Unused Arrow white up.png]][[File:Golf GB Unused Arrow white left.png]][[File:Golf GB Unused Arrow black up.png]][[File:Golf GB Unused Arrow black left.png]]<br> | ||
| Line 650: | Line 613: | ||
[[File:Golf GB Unused Putting green surface.png]]<br> | [[File:Golf GB Unused Putting green surface.png]]<br> | ||
A tile for an unknown surface found in the putting green area tiles. | A tile for an unknown surface found in the putting green area tiles. | ||
==Staff== | |||
;Programmer | |||
*Toru Narihiro | |||
;Original Music | |||
*[[Ryoji Yoshitomi]] | |||
;Sound | |||
*[[Hirokazu Tanaka]] | |||
==Gallery== | ==Gallery== | ||
| Line 666: | Line 637: | ||
|JapM=Golf | |JapM=Golf | ||
}} | }} | ||
{{Super Mario games}} | {{Super Mario games}} | ||
{{GB}} | {{GB}} | ||
{{Virtual Console}} | {{Virtual Console}} | ||
[[de:Golf (Game Boy)]] | [[de:Golf (Game Boy)]] | ||
[[Category:Golf|*]] | [[Category:Golf (Game Boy)|*]] | ||
[[Category:Games]] | [[Category:Games]] | ||
[[Category:Game Boy games]] | [[Category:Game Boy games]] | ||
[[Category:1989 games]] | [[Category:1989 games]] | ||
[[Category:1990 games]] | |||
[[Category:Sports games]] | [[Category:Sports games]] | ||
[[Category:Virtual Console games]] | [[Category:Virtual Console games]] | ||
Revision as of 21:14, November 16, 2024
| Golf | |||||||||
|---|---|---|---|---|---|---|---|---|---|
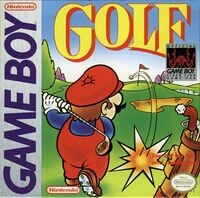 Box art for the US release For alternate box art, see the game's gallery. | |||||||||
| Developer | Nintendo R&D2 | ||||||||
| Publisher | Nintendo | ||||||||
| Platform(s) | Game Boy, Virtual Console (Nintendo 3DS) | ||||||||
| Release date | Game Boy: Virtual Console (3DS): | ||||||||
| Language(s) | English (United States) | ||||||||
| Genre | Sports | ||||||||
| Rating(s) |
| ||||||||
| Mode(s) | 1–2 players | ||||||||
| Format | Game Boy:
Nintendo 3DS: | ||||||||
| Input | Game Boy:
Nintendo 3DS:
| ||||||||
| Serial code(s) | DMG-GOA | ||||||||
Golf is a Game Boy game released near the beginning of the system's lifespan in 1989. It is an expansion of the Nintendo Entertainment System game of the same name, inserting aspects from the Japan-only successors Golf: Japan Course and Golf: U.S. Course. As with the previous games, the player character is Mario or a lookalike, with player one having light skin and a dark cap, while player two has dark skin and a light cap. Mario is absent from the Japanese cover art, which instead features a group of generic characters; in the Western cover art, however, Mario appears reenacting the Japanese and European artwork for the original Golf. On the Game Boy Color and Game Boy Advance, backgrounds and heads-up-display graphics are colored green, while character and object sprites are colored a reddish orange.
The game was rereleased on the Nintendo 3DS's Virtual Console in Japan on June 2011; in North America on September 2011; in Europe and Australia on October 2011; and in South Korea on July 2016.
Gameplay
Most of the base gameplay is reused from the original NES game. However, it retrofits aspects from later NES golf games, such as trees acting as solid obstacles that must be gone over or around, differentiation between fairway and rough zones, and putting greens having multiple ways to push the ball. All of the original game's clubs return, and the game contains 36 different holes split between two courses: Japan and U.S.A. In the Japan Course, forested areas act as out-of-bounds zones, while in the U.S.A. course, they are treated as standard rough spots. Unlike previous games, it lacks the golfer-based viewing field, with him instead being shown on a more zoomed-in version of the bird's-eye-view map. The view can be switched between the zoomed-in map, the full map, and a view of the green via the button. Unlike the original, the player can hit the ball in any angle regardless of view. Additionally, by hitting the button when the club hits the ball, the player can make it spin backwards, which can be useful for preventing it from rolling too far. The hole's exact position on the green varies between four possible positions on each; which position is seen is determined by how many strokes the player has made before arriving, with it cycling for every stroke made. The exception is the first hole, which is random.
In single-player mode, each course has a scoreboard with five records to beat; the player's final placement determines what reward (if any) the golfer receives, with there being a different trophy for third and second place and a car for first place. In two-player, the golfers try to get a higher score than the other, with a winner being chosen after the total scores are far enough apart or all the holes in a course have been completed. If the score is tied at the end of all holes, a "sudden death" mode starts, looping back to the first hole and playing through again until a player gets a better score on any of the holes, ending the competition in their favor.
Description from the Nintendo eShop
Bogey, par, birdie, or Eagle.
The score is up to you.
Golf is 18 holes of realistic links action. Each hole has tricky hazards, so strategy is a must.
Read the wind direction, check the distance, select a club, adjust your swing and keep your eye on the ball. Now drive it home.
From twisting fairways and hungry sand traps to big water hazards and deceptive greens, Golf is packed with challenges.This version of the game does not have multiplayer functionality.
Clubs and lays
The game features the same 14 clubs as the original Golf: three Woods, eight Irons, a Pitching Wedge, a Sand Wedge, and a Putter; higher numbers mean a shorter distance, but greater height. Unlike the original game, there are a large number of terrains; counting variance in depth, there are 11 that can be swung from. The contact area for each swing varies depending on the club and the ball's lay, and how deep the ball ends up in a Rough or Bunker depends on the swing used to get there; a tall swing will result in it being buried deep, and putting along the surface causes it to be near the top. When on the tee, using the 1W club gives a special meter with an extra target zone on the left side; hitting both of these results in a "Super Shot" that goes much further than normal.
Holes
Japan Course
Outward nine
| Hole 1 | |
|---|---|
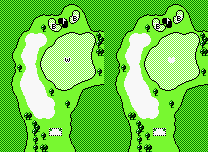
|
391y |
| Par 4 | |
| Hole 2 | |
|---|---|
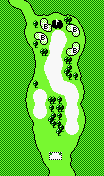
|
468y |
| Par 4 | |
| Hole 3 | |
|---|---|
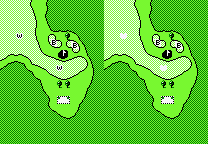
|
162y |
| Par 3 | |
| Hole 4 | |
|---|---|
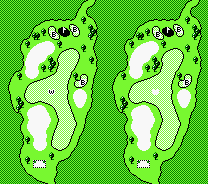
|
479y |
| Par 5 | |
| Hole 5 | |
|---|---|
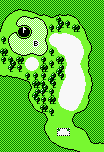
|
380y |
| Par 4 | |
| Hole 6 | |
|---|---|
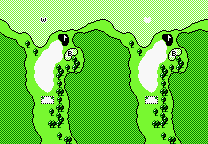
|
226y |
| Par 3 | |
| Hole 7 | |
|---|---|
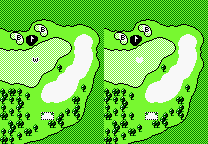
|
274y |
| Par 4 | |
| Hole 8 | |
|---|---|
|
335y |
| Par 4 | |
| Hole 9 | |
|---|---|
|
495y |
| Par 5 | |
Inward nine
| Hole 10 | |
|---|---|
|
342y |
| Par 4 | |
| Hole 11 | |
|---|---|
|
142y |
| Par 3 | |
| Hole 12 | |
|---|---|
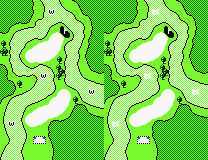
|
393y |
| Par 4 | |
| Hole 13 | |
|---|---|
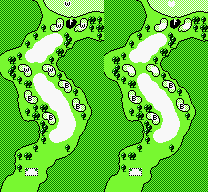
|
545y |
| Par 5 | |
| Hole 14 | |
|---|---|
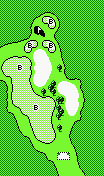
|
443y |
| Par 4 | |
| Hole 15 | |
|---|---|
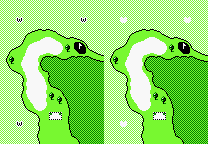
|
258y |
| Par 4 | |
| Hole 16 | |
|---|---|
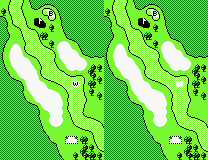
|
429y |
| Par 4 | |
| Hole 17 | |
|---|---|
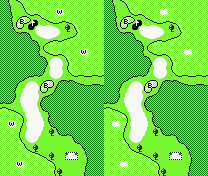
|
484y |
| Par 5 | |
| Hole 18 | |
|---|---|
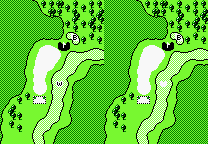
|
207y |
| Par 3 | |
U.S.A. Course
Outward nine
| Hole 1 | |
|---|---|
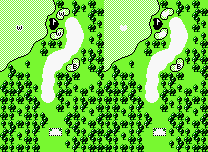
|
384y |
| Par 4 | |
| Hole 2 | |
|---|---|
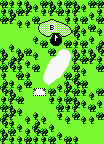
|
194y |
| Par 3 | |
| Hole 3 | |
|---|---|
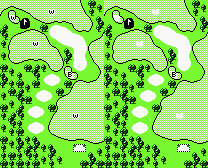
|
481y |
| Par 5 | |
| Hole 4 | |
|---|---|
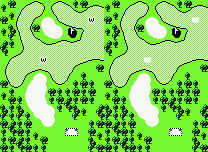
|
352y |
| Par 4 | |
| Hole 5 | |
|---|---|
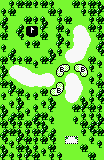
|
408y |
| Par 4 | |
| Hole 6 | |
|---|---|
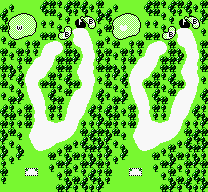
|
556y |
| Par 5 | |
| Hole 7 | |
|---|---|
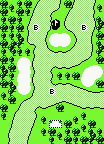
|
354y |
| Par 4 | |
| Hole 8 | |
|---|---|
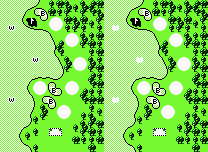
|
398y |
| Par 4 | |
| Hole 9 | |
|---|---|
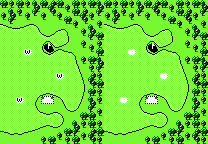
|
186y |
| Par 3 | |
Inward nine
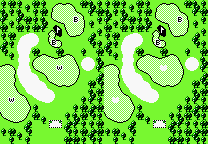
| Hole 10 | |
|---|---|
|
331y |
| Par 4 | |
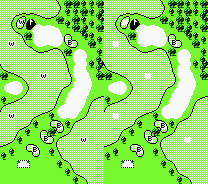
| Hole 11 | |
|---|---|
|
498y |
| Par 5 | |
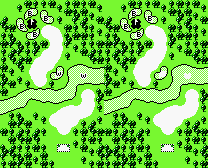
| Hole 12 | |
|---|---|
|
454y |
| Par 4 | |
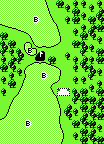
| Hole 13 | |
|---|---|
|
147y |
| Par 3 | |
| Hole 14 | |
|---|---|
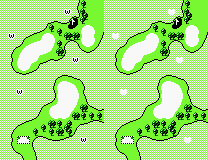
|
451y |
| Par 4 | |
| Hole 15 | |
|---|---|
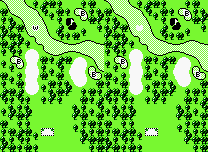
|
394y |
| Par 4 | |
| Hole 16 | |
|---|---|
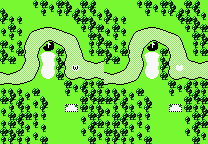
|
232y |
| Par 3 | |
| Hole 17 | |
|---|---|
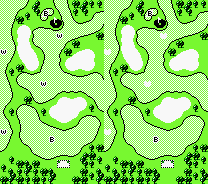
|
500y |
| Par 5 | |
| Hole 18 | |
|---|---|
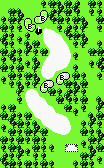
|
429y |
| Par 4 | |
Pre-release and unused content
Many sprites are loaded into the game's sprite bank at different points in the game, but are not actually used.
- Coffee shop

![]()
Tiles for an unused scene involving a coffee shop. It presumably would have functioned as a loading screen, as with Golf: Japan Course, though it does not appear in the final. While the tiles for the sign and building are jumbled in the data like most tiles, the ones depicting player 1 cheering are found fully assembled in the otherwise blank space underneath.
- Single player scenes
![]()
![]()
Tiles exist for the caddy looking at and away from the screen. The body tiles seemingly associated with the "away" head are used in unrelated animations, however.
![]()
A puff of smoke or dust. It is found with the car tiles, so it is most likely intended to be exhaust.
- 2-player scenes
![]()
![]()
Tiles for a walking animation for player 2, who is never shown walking in the final game.
![]()
![]()
Unused alternative standing/walking sprites while looking to the side. They appear unfinished, as player 2 seems to have a white face as well.
![]()
![]()
Unused tiles for squinting/sad faces, loaded alongside the foot-stamping animations.
![]()
![]()
Unused tiles for looking upward, most likely intended as an alternate happy reaction.
![]()
![]()
Unused alternate front-facing tiles. They resemble ones used in the foot-stamping animation, but seem to be associated with the upward-looking ones above. Once again, player 2 appears to have a white face.
- Gameplay
![]()
![]()
![]()
![]()
Arrows found among player 1's gameplay tiles. They likely would blink or have their colors determined by the player, like the map pointers.
![]()
An alternative to the animated directional pointers found on the map screen.
![]()
A scenery tile for an x-mark on the map screen.
![]()
A tile for an unknown surface found in the putting green area tiles.
Staff
- Programmer
- Toru Narihiro
- Original Music
- Sound
Gallery
- For this subject's image gallery, see Gallery:Golf (Game Boy).
Names in other languages
| Language | Name | Meaning | Notes |
|---|
| Game Boy games | |
|---|---|
| Super Mario franchise | Alleyway (1989) • Baseball (1989) • Super Mario Land (1989) • Golf (1989) • Dr. Mario (1990) • Super Mario Land 2: 6 Golden Coins (1992) • Donkey Kong (1994) • Mario's Picross (1995) • Picross 2 (1996) |
| Donkey Kong franchise | Donkey Kong (1994) • Donkey Kong Land (1995) • Donkey Kong Land 2 (1996) • Donkey Kong Land III (1997) |
| Yoshi franchise | Yoshi (1991) • Yoshi's Cookie (1992) • Tetris Attack (1996) |
| Wario franchise | Wario Land: Super Mario Land 3 (1994) • Wario Blast: Featuring Bomberman! (1994) • Wario Land II (1998) |
| Miscellaneous | Tetris (1989) • The Legend of Zelda: Link's Awakening (1993) • Game & Watch Gallery (1997) • Game & Watch Gallery 2 (1997) |
