User:Mid188/Sandbox: Difference between revisions
From the Super Mario Wiki, the Mario encyclopedia
Jump to navigationJump to search
mNo edit summary |
(Added images) |
||
| Line 9: | Line 9: | ||
|4x[[File:Red Mushroom.png]]<br>4 [[Mushroom#Super_Mario_RPG:_Legend_of_the_Seven_Stars|Mushrooms]] | |4x[[File:Red Mushroom.png]]<br>4 [[Mushroom#Super_Mario_RPG:_Legend_of_the_Seven_Stars|Mushrooms]] | ||
|After trying to leave the area, [[History_of_Mario#Super_Mario_RPG:_Legend_of_the_Seven_Stars|Mario]] bumps into [[Toad#Super_Mario_RPG:_Legend_of_the_Seven_Stars|Toad]] which takes of 1 HP, so Toad gives Mario a [[Mushroom#Super_Mario_RPG:_Legend_of_the_Seven_Stars|Mushroom]]. After the optional tutorial on how to use items, a [[Goomba#Super_Mario_RPG:_Legend_of_the_Seven_Stars|Goomba]] appears. After the optional battle, Toad gives Mario three more Mushrooms. | |After trying to leave the area, [[History_of_Mario#Super_Mario_RPG:_Legend_of_the_Seven_Stars|Mario]] bumps into [[Toad#Super_Mario_RPG:_Legend_of_the_Seven_Stars|Toad]] which takes of 1 HP, so Toad gives Mario a [[Mushroom#Super_Mario_RPG:_Legend_of_the_Seven_Stars|Mushroom]]. After the optional tutorial on how to use items, a [[Goomba#Super_Mario_RPG:_Legend_of_the_Seven_Stars|Goomba]] appears. After the optional battle, Toad gives Mario three more Mushrooms. | ||
| | |[[File:Mario's Pad (4 Mushrooms).png]] | ||
| | |[[File:Mario's Pad (4 Mushrooms) (Switch).png|300px]] | ||
|- | |- | ||
|[[File:RPG Bag.png]]<br>[[Dry Bones Flag]] | |[[File:RPG Bag.png]]<br>[[Dry Bones Flag]] | ||
|After sleeping in the [[Three Musty Fears|Three Musty Fears']] bed in [[Monstro Town]], find it under Mario's bed. | |After sleeping in the [[Three Musty Fears|Three Musty Fears']] bed in [[Monstro Town]], find it under Mario's bed. | ||
| | |[[File:Mario's Pad (Dry Bones Flag).png]] | ||
| | |[[File:Mario's Pad (Dry Bones Flag) (Switch).png|300px]] | ||
|} | |} | ||
| Line 27: | Line 27: | ||
|[[Stay Voucher]] | |[[Stay Voucher]] | ||
|After loading a save file after defeating [[Smithy]], given by Toad. | |After loading a save file after defeating [[Smithy]], given by Toad. | ||
| | |[[File:Mario's Pad (Stay Voucher).png|300px]] | ||
|} | |} | ||
| Line 40: | Line 40: | ||
|[[File:RedSyrup SMRPG.png]]<br>[[Honey Syrup]] | |[[File:RedSyrup SMRPG.png]]<br>[[Honey Syrup]] | ||
|Given by [[Toad#Super_Mario_RPG:_Legend_of_the_Seven_Stars|Toad]] after saving him from [[Goomba#Super_Mario_RPG:_Legend_of_the_Seven_Stars|Goomba]] in the first scene. | |Given by [[Toad#Super_Mario_RPG:_Legend_of_the_Seven_Stars|Toad]] after saving him from [[Goomba#Super_Mario_RPG:_Legend_of_the_Seven_Stars|Goomba]] in the first scene. | ||
| | |[[File:Mushroom Way (Honey Syrup).png]] | ||
| | |[[File:Mushroom Way (Honey Syrup) (Switch).png|300px]] | ||
|- | |- | ||
|[[File:RPG Bag.png]]<br>[[Flower Tab]] | |[[File:RPG Bag.png]]<br>[[Flower Tab]] | ||
|Given by Toad after saving him from [[Koopa_Paratroopa#Super_Mario_RPG:_Legend_of_the_Seven_Stars|Paratroopa]] in the second scene. | |Given by Toad after saving him from [[Koopa_Paratroopa#Super_Mario_RPG:_Legend_of_the_Seven_Stars|Paratroopa]] in the second scene. | ||
| | |[[File:Mushroom Way (Flower Tab).png]] | ||
| | |[[File:Mushroom Way (Flower Tab) (Switch).png|300px]] | ||
|- | |- | ||
|[[File:SMRPG Hammer box.png]]<br>[[Hammer#Super_Mario_RPG:_Legend_of_the_Seven_Stars|Hammer]] | |[[File:SMRPG Hammer box.png]]<br>[[Hammer#Super_Mario_RPG:_Legend_of_the_Seven_Stars|Hammer]] | ||
|Given by Toad after saving him from [[Hammer_Bro#Super_Mario_RPG:_Legend_of_the_Seven_Stars|Hammer Bro]] in the third scene. | |Given by Toad after saving him from [[Hammer_Bro#Super_Mario_RPG:_Legend_of_the_Seven_Stars|Hammer Bro]] in the third scene. | ||
| | |[[File:Mushroom Way (Hammer).png]] | ||
|[[File:SMRPG NS Hammer.jpg|300px]] | |[[File:SMRPG NS Hammer.jpg|300px]] | ||
|} | |} | ||
| Line 63: | Line 63: | ||
|Flower Tab | |Flower Tab | ||
|Found on the ground left of the left elevated ground in the second scene. | |Found on the ground left of the left elevated ground in the second scene. | ||
| | |[[File:Mushroom Way (Flower Tab 2).png|300px]] | ||
|- | |- | ||
|[[Pick Me Up]] | |[[Pick Me Up]] | ||
|Found on the ground on the upper elevated ground in the second scene. | |Found on the ground on the upper elevated ground in the second scene. | ||
| | |[[File:Mushroom Way (Pick Me Up).png|300px]] | ||
|} | |} | ||
| Line 80: | Line 80: | ||
|[[File:Red Mushroom.png]]<br>[[Mushroom#Super_Mario_RPG:_Legend_of_the_Seven_Stars|Mushroom]] | |[[File:Red Mushroom.png]]<br>[[Mushroom#Super_Mario_RPG:_Legend_of_the_Seven_Stars|Mushroom]] | ||
|Given by [[Granny]] after finding [[Peach's ???]] in [[Princess_Peach's_room#Super_Mario_RPG:_Legend_of_the_Seven_Stars|Princess Peach's room]]. | |Given by [[Granny]] after finding [[Peach's ???]] in [[Princess_Peach's_room#Super_Mario_RPG:_Legend_of_the_Seven_Stars|Princess Peach's room]]. | ||
| | |[[File:Mushroom Kingdom (Mushroom).png]] | ||
| | |[[File:Mushroom Kingdom (Mushroom) (Switch).png|300px]] | ||
|- | |- | ||
|[[File:Red Star Drink.png]]<br>[[Pick Me Up]] | |[[File:Red Star Drink.png]]<br>[[Pick Me Up]] | ||
|Given by the shopkeeper in the Item Shop after [[Mallow]] joins the party. | |Given by the shopkeeper in the Item Shop after [[Mallow]] joins the party. | ||
| | |[[File:Mushroom Kingdom (Pick Me Up).png]] | ||
| | |[[File:Mushroom Kingdom (Pick Me Up) (Switch).png|300px]] | ||
|- | |- | ||
|[[File:SMRPGCoin.png]][[File:SMRPGCoin.png]][[File:SMRPGCoin.png]][[File:SMRPGCoin.png]][[File:SMRPGCoin.png]][[File:SMRPGCoin.png]][[File:SMRPGCoin.png]][[File:SMRPGCoin.png]][[File:SMRPGCoin.png]][[File:SMRPGCoin.png]]<br>10 [[Coin#Super_Mario_RPG:_Legend_of_the_Seven_Stars|Coins]] | |[[File:SMRPGCoin.png]][[File:SMRPGCoin.png]][[File:SMRPGCoin.png]][[File:SMRPGCoin.png]][[File:SMRPGCoin.png]][[File:SMRPGCoin.png]][[File:SMRPGCoin.png]][[File:SMRPGCoin.png]][[File:SMRPGCoin.png]][[File:SMRPGCoin.png]]<br>10 [[Coin#Super_Mario_RPG:_Legend_of_the_Seven_Stars|Coins]] | ||
|During [[Claymorton|Claymorton's]] invasion, given by a [[Toad_(species)#Super_Mario_RPG:_Legend_of_the_Seven_Stars|Toad]] guard near the item shop after saving him from [[Shymore]]. | |During [[Claymorton|Claymorton's]] invasion, given by a [[Toad_(species)#Super_Mario_RPG:_Legend_of_the_Seven_Stars|Toad]] guard near the item shop after saving him from [[Shymore]]. | ||
| | |[[File:Mushroom Kingdom (10 Coins).png]] | ||
| | |[[File:Mushroom Kingdom (10 Coins) (Switch).png|300px]] | ||
|- | |- | ||
|[[File:RPG Bag.png]]<br>[[Flower Tab]] | |[[File:RPG Bag.png]]<br>[[Flower Tab]] | ||
|During Claymorton's invasion, given by a Toad near the house opposite of item shop after giving him the [[Wallet]]. If not given during the invasion, it can be given after the invasion, in which Toad stands next to the left house of the lower two ones. | |During Claymorton's invasion, given by a Toad near the house opposite of item shop after giving him the [[Wallet]]. If not given during the invasion, it can be given after the invasion, in which Toad stands next to the left house of the lower two ones. | ||
| | |[[File:Mushroom Kingdom (Flower Tab 1).png]] | ||
| | |[[File:Mushroom Kingdom (Flower Tab 1) (Switch).png|300px]] | ||
|- | |- | ||
|[[File:RPG Bag.png]]<br>Flower Tab | |[[File:RPG Bag.png]]<br>Flower Tab | ||
|During Claymorton's invasion, given by a dad Toad in the two-story house on the left after all 3 Shymores found in the house are defeated. Can be given on either floor, depending on which set of Shymores was defeated first. | |During Claymorton's invasion, given by a dad Toad in the two-story house on the left after all 3 Shymores found in the house are defeated. Can be given on either floor, depending on which set of Shymores was defeated first. | ||
| | |[[File:Mushroom Kingdom (Flower Tab 2).png]] | ||
| | |[[File:Mushroom Kingdom (Flower Tab 2) (Switch).png|300px]] | ||
|- | |- | ||
|[[File:RPG Pin.png]]<br>[[Wake-Up Pin]] | |[[File:RPG Pin.png]]<br>[[Wake-Up Pin]] | ||
|During Claymorton's invasion, given by a Toad hiding in the guest room of the castle. | |During Claymorton's invasion, given by a Toad hiding in the guest room of the castle. | ||
| | |[[File:Mushroom Kingdom (Wake Up Pin).png]] | ||
| | |[[File:Mushroom Kingdom (Wake-Up Pin) (Switch).png|300px]] | ||
|- | |- | ||
|[[File:RPG Bag.png]]<br>Flower Tab | |[[File:RPG Bag.png]]<br>Flower Tab | ||
|During Claymorton's invasion, given by the Toad after escorting him from the entrance of the castle to the Princess Peach's room. | |During Claymorton's invasion, given by the Toad after escorting him from the entrance of the castle to the Princess Peach's room. | ||
| | |[[File:Mushroom Kingdom (Flower Tab 3).png]] | ||
| | |[[File:Mushroom Kingdom (Flower Tab 3) (Switch).png|300px]] | ||
|- | |- | ||
|[[File:RPG Bag.png]]<br>[[Cricket Pie]] | |[[File:RPG Bag.png]]<br>[[Cricket Pie]] | ||
|After Claymorton's invasion, given by the shopkeeper in exchange for [[Special Frog Coin]]. | |After Claymorton's invasion, given by the shopkeeper in exchange for [[Special Frog Coin]]. | ||
| | |[[File:Mushroom Kingdom (Cricket Pie).png]] | ||
| | |[[File:Mushroom Kingdom (Cricket Pie) (Switch).png|300px]] | ||
|- | |- | ||
|[[File:RPG Bag.png]] [[File:Frog Coin.png]]<br>Flower Tab or [[Frog Coin]] | |[[File:RPG Bag.png]] [[File:Frog Coin.png]]<br>Flower Tab or [[Frog Coin]] | ||
|After returning with Princess Peach, talk to the Toad who was given the Wallet to receive additional reward. | |After returning with Princess Peach, talk to the Toad who was given the Wallet to receive additional reward. | ||
| | |[[File:Mushroom Kingdom (Flower Tab, Frog Coin).png]] | ||
| | |[[File:Mushroom Kingdom (Flower Tab, Frog Coin) (Switch).png|300px]] | ||
|} | |} | ||
| Line 133: | Line 133: | ||
|[[Signal Ring]] | |[[Signal Ring]] | ||
|Given by an elderly Toad woman in the basement of the Item Shop after getting first [[Hidden Treasure]]. | |Given by an elderly Toad woman in the basement of the Item Shop after getting first [[Hidden Treasure]]. | ||
| | |[[File:Mushroom Kingdom (Signal Ring).png|300px]] | ||
|} | |} | ||
| Line 146: | Line 146: | ||
|[[File:SMRPGCoin.png]][[File:SMRPGCoin.png]][[File:SMRPGCoin.png]]<br>3 [[Coin#Super_Mario_RPG:_Legend_of_the_Seven_Stars|Coins]] | |[[File:SMRPGCoin.png]][[File:SMRPGCoin.png]][[File:SMRPGCoin.png]]<br>3 [[Coin#Super_Mario_RPG:_Legend_of_the_Seven_Stars|Coins]] | ||
|In the second scene, 4 Coins spawn while using the tiles. Only the last three are collectable since [[Croco]] takes the first one. | |In the second scene, 4 Coins spawn while using the tiles. Only the last three are collectable since [[Croco]] takes the first one. | ||
| | |[[File:Bandit's Way (Coin 1).png]]<br>[[File:Bandit's Way (Coin 2).png]]<br>[[File:Bandit's Way (Coin 3).png]] | ||
| | |[[File:Bandit's Way (Coin 1) (Switch).png|300px]]<br>[[File:Bandit's Way (Coin 2) (Switch).png|300px]]<br>[[File:Bandit's Way (Coin 3) (Switch).png|300px]] | ||
|- | |- | ||
|[[File:Frog Coin.png]] [[File:RPG Bag.png]]<br>[[Special Frog Coin]] (Rare Frog Coin in the original) and [[Wallet]] | |[[File:Frog Coin.png]] [[File:RPG Bag.png]]<br>[[Special Frog Coin]] (Rare Frog Coin in the original) and [[Wallet]] | ||
|In the fifth scene, picked up after defeating Croco. | |In the fifth scene, picked up after defeating Croco. | ||
| | |[[File:Bandit's Way (Rare Frog Coin, Wallet).png]] | ||
| | |[[File:Bandit's Way (Special Frog Coin and Wallet).png|300px]] | ||
|} | |} | ||
| Line 163: | Line 163: | ||
!Image (Switch) | !Image (Switch) | ||
|- | |- | ||
|4x[[File:Frog Coin.png]]<br>4 [[Frog Coin]]s | |4x[[File:Frog Coin.png]]<br>4 [[Frog Coin]]s | ||
|Found in the waterfall portion of the area. | |Found in the waterfall portion of the area. | ||
| | |[[File:Midas River (Frog Coin Waterfall 1).png]]<br>[[File:Midas River (Frog Coin Waterfall 2).png]]<br>[[File:Midas River (Frog Coin Waterfall 3).png]]<br>[[File:Midas River (Frog Coin Waterfall 4).png]] | ||
| | |[[File:Midas River (Frog Coin Waterfall 1) (Switch).png|300px]]<br>[[File:Midas River (Frog Coin Waterfall 2) (Switch).png|300px]]<br>[[File:Midas River (Frog Coin Waterfall 3) (Switch).png|300px]]<br>[[File:Midas River (Frog Coin Waterfall 4) (Switch).png|300px]] | ||
|- | |- | ||
|[[File:RPG Flower.png]]<br>[[Flower (Super Mario RPG)|Flower]] | |[[File:RPG Flower.png]]<br>[[Flower (Super Mario RPG)|Flower]] | ||
|Automatically given after going into the first cave after chosing to go left from the top of the waterfall. | |Automatically given after going into the first cave after chosing to go left from the top of the waterfall. | ||
| | |[[File:Midas River (Flower 1).png]] | ||
| | |[[File:Midas River (Flower 1) (Switch).png|300px]] | ||
|- | |- | ||
|[[File:Frog Coin.png]]<br>Frog Coin | |[[File:Frog Coin.png]]<br>Frog Coin | ||
|Automatically given after going into the second cave after chosing to go left from the top of the waterfall. | |Automatically given after going into the second cave after chosing to go left from the top of the waterfall. | ||
| | |[[File:Midas River (Frog Coin Cave).png]] | ||
| | |[[File:Midas River (Frog Coin Cave) (Switch).png|300px]] | ||
|- | |- | ||
|[[File:RPG Flower.png]]<br>Flower | |[[File:RPG Flower.png]]<br>Flower | ||
|Automatically given after going into the second cave after chosing to go right from the top of the waterfall. | |Automatically given after going into the second cave after chosing to go right from the top of the waterfall. | ||
| | |[[File:Midas River (Flower 2).png]] | ||
| | |[[File:Midas River (Flower 2) (Switch).png|300px]] | ||
|- | |- | ||
|[[File:RPG Bag.png]]<br>[[Koopa_Shell#Super_Mario_RPG:_Legend_of_the_Seven_Stars|Koopa Shell]] (NokNok Shell in the original)<br>[[File:Frog Coin.png]]<br>Frog Coin<br>5x[[File:Frog Coin.png]]<br>5 Frog Coins | |[[File:RPG Bag.png]]<br>[[Koopa_Shell#Super_Mario_RPG:_Legend_of_the_Seven_Stars|Koopa Shell]] (NokNok Shell in the original)<br>[[File:Frog Coin.png]]<br>Frog Coin<br>5x[[File:Frog Coin.png]]<br>5 Frog Coins | ||
|'''Koopa Shell''': Automatically given by the [[Toad_(species)#Super_Mario_RPG:_Legend_of_the_Seven_Stars|Toad]] at the end of the river after completing the waterfall and river events for the first time.<br>'''Frog Coins''': One is given after Mario collects 60 or more coins during the events for the first time. Afterwards every 70-99 Coins award 1 Frog Coin and 100 Coins award 5 Frog Coins. | |'''Koopa Shell''': Automatically given by the [[Toad_(species)#Super_Mario_RPG:_Legend_of_the_Seven_Stars|Toad]] at the end of the river after completing the waterfall and river events for the first time.<br>'''Frog Coins''': One is given after Mario collects 60 or more coins during the events for the first time. Afterwards every 70-99 Coins award 1 Frog Coin and 100 Coins award 5 Frog Coins. | ||
| | |[[File:Midas River (NokNok Shell, Frog Coins).png]] | ||
| | |[[File:Midas River (Koopa Shell and Frog Coins).png|300px]] | ||
|- | |- | ||
|[[File:SMRPGCoin.png]]<br>[[Coin#Super_Mario_RPG:_Legend_of_the_Seven_Stars|Coins]] | |[[File:SMRPGCoin.png]]<br>[[Coin#Super_Mario_RPG:_Legend_of_the_Seven_Stars|Coins]] | ||
|After using the secret entrance from [[Moleville]], all collected Coins during this run are given to Mario after he reads the paper at the end of the river event. | |After using the secret entrance from [[Moleville]], all collected Coins during this run are given to Mario after he reads the paper at the end of the river event. | ||
|{ | |[[File:Midas River (Coins).png]] | ||
| | |[[File:Midas River (Coins) (Switch).png|300px]] | ||
|} | |||
==Switch Exclusive== | |||
{|style="text-align:center;width:100%;margin:0 auto;border:#90EE90;border-collapse:collapse;"border="1"cellpadding="4"cellspacing="1" | |||
|-style="background:#008000;font-size:14pt;color:white" | |||
!Item | |||
!Description | |||
!Image | |||
|- | |||
|2 Frog Coins | |||
|There are two additional Frog Coins to be found on the right side of the waterfall. | |||
|[[File:Midas River (Frog Coin Waterfall 5).png|300px]]<br>[[File:Midas River (Frog Coin Waterfall 6).png|300px]] | |||
|} | |} | ||
| Line 204: | Line 216: | ||
|[[File:RPG Bag.png]]<br>[[Froggie Stick]]<br>10x[[File:Frog Coin.png]]<br>10 [[Frog Coin]]s | |[[File:RPG Bag.png]]<br>[[Froggie Stick]]<br>10x[[File:Frog Coin.png]]<br>10 [[Frog Coin]]s | ||
|Given by the [[Frog Sage]] after giving him the [[Cricket Pie]] (Froggie Stick)/[[Cricket Jam]] (10 Frog Coins). | |Given by the [[Frog Sage]] after giving him the [[Cricket Pie]] (Froggie Stick)/[[Cricket Jam]] (10 Frog Coins). | ||
| | |[[File:Tadpole Pond (Froggie Stick and 10 Frog Coins).png]] | ||
| | |[[File:Tadpole Pond (Froggie Stick and 10 Frog Coins) (Switch).png|300px]] | ||
|- | |- | ||
|[[File:RPG Bag.png]] [[File:RPG Bag.png]] [[File:RPG Bag.png]]<br>[[Alto Card]], [[Tenor Card]], [[Soprano Card]] | |[[File:RPG Bag.png]] [[File:RPG Bag.png]] [[File:RPG Bag.png]]<br>[[Alto Card]], [[Tenor Card]], [[Soprano Card]] | ||
|Given by [[Toadofsky]] after helping him with compositions. Available after talking with the Frog Sage for the first time (Alto), after saving [[Dyna and Mite]] in [[Moleville]] (Tenor) and after interacting with [[Starslap]] upstairs of the [[Monstermama]]'s house in [[Monstro Town]] (Soprano). | |Given by [[Toadofsky]] after helping him with compositions. Available after talking with the Frog Sage for the first time (Alto), after saving [[Dyna and Mite]] in [[Moleville]] (Tenor) and after interacting with [[Starslap]] upstairs of the [[Monstermama]]'s house in [[Monstro Town]] (Soprano). | ||
| | |[[File:Tadpole Pond (Alto, Tenor and Soprano Cards).png]] | ||
| | |[[File:Tadpole Pond (Alto, Tenor and Soprano Cards) (Switch).png|300px]] | ||
|} | |} | ||
| Line 223: | Line 235: | ||
|[[File:SMRPG Mushroom box.png]]<br>[[Mushroom#Super_Mario_RPG:_Legend_of_the_Seven_Stars|Mushroom]] | |[[File:SMRPG Mushroom box.png]]<br>[[Mushroom#Super_Mario_RPG:_Legend_of_the_Seven_Stars|Mushroom]] | ||
|In the first scene, found on the second island after using the second [[tile]]. | |In the first scene, found on the second island after using the second [[tile]]. | ||
| | |[[File:Rose Way (Mushroom).png]] | ||
| | |[[File:Rose Way (Mushroom) (Switch).png|300px]] | ||
|- | |- | ||
|[[File:RPG Flower.png]]<br>[[Flower (Super Mario RPG)|Flower]] | |[[File:RPG Flower.png]]<br>[[Flower (Super Mario RPG)|Flower]] | ||
|In the first scene, found on the third island after using the third tile. | |In the first scene, found on the third island after using the third tile. | ||
| | |[[File:Rose Way (Flower).png]] | ||
| | |[[File:Rose Way (Flower) (Switch).png|300px]] | ||
|- | |- | ||
|[[File:SMRPG 10 Gold Coin.png]]<br>[[10-Coin#Super_Mario_RPG:_Legend_of_the_Seven_Stars|10-Coin]] | |[[File:SMRPG 10 Gold Coin.png]]<br>[[10-Coin#Super_Mario_RPG:_Legend_of_the_Seven_Stars|10-Coin]] | ||
|In the first scene, between first and second islands after using fourth tile. | |In the first scene, between first and second islands after using fourth tile. | ||
| | |[[File:Rose Way (10-Coin 1).png]] | ||
| | |[[File:Rose Way (10-Coin 1) (Switch).png|300px]] | ||
|- | |- | ||
|[[File:SMRPG 10 Gold Coin.png]]<br>10-Coin | |[[File:SMRPG 10 Gold Coin.png]]<br>10-Coin | ||
|In the first scene after going through the second, above the second island after using first tile. | |In the first scene after going through the second, above the second island after using first tile. | ||
| | |[[File:Rose Way (10-Coin 2).png]] | ||
| | |[[File:Rose Way (10-Coin 2) (Switch).png|300px]] | ||
|- | |- | ||
|[[File:SMRPG 10 Gold Coin.png]] [[File:SMRPG 10 Gold Coin.png]]<br>2 10-Coins | |[[File:SMRPG 10 Gold Coin.png]] [[File:SMRPG 10 Gold Coin.png]]<br>2 10-Coins | ||
|In the first scene after going through the second, between first and second island after using the third tile. | |In the first scene after going through the second, between first and second island after using the third tile. | ||
| | |[[File:Rose Way (10-Coins 3-4).png]] | ||
| | |[[File:Rose Way (10-Coins 3-4) (Switch).png|300px]] | ||
|- | |- | ||
|[[File:SMRPG 10 Gold Coin.png]]<br>10-Coin | |[[File:SMRPG 10 Gold Coin.png]]<br>10-Coin | ||
|In the first scene after going through the second, above the second island after using the second tile. | |In the first scene after going through the second, above the second island after using the second tile. | ||
| | |[[File:Rose Way (10-Coin 5).png]] | ||
| | |[[File:Rose Way (10-Coin 5) (Switch).png|300px]] | ||
|} | |} | ||
| Line 262: | Line 274: | ||
|[[File:RPG Bag.png]]<br>[[Flower Tab]] | |[[File:RPG Bag.png]]<br>[[Flower Tab]] | ||
|Given by [[Toad#Super_Mario_RPG:_Legend_of_the_Seven_Stars|Toad]] after sleeping in the Rose Town inn for the first time after the cutscene where [[Geno]] doll awakens. | |Given by [[Toad#Super_Mario_RPG:_Legend_of_the_Seven_Stars|Toad]] after sleeping in the Rose Town inn for the first time after the cutscene where [[Geno]] doll awakens. | ||
| | |[[File:Rose Town (Flower Tab).png]] | ||
| | |[[File:Rose Town (Flower Tab) (Switch).png|300px]] | ||
|- | |- | ||
|[[File:Frog Coin.png]]<br>[[Frog Coin]] | |[[File:Frog Coin.png]]<br>[[Frog Coin]] | ||
|Given by a Treasure Hunter [[Toad_(species)#Super_Mario_RPG:_Legend_of_the_Seven_Stars|Toad]]. Only given if [[History_of_Mario#Super_Mario_RPG:_Legend_of_the_Seven_Stars|Mario]] found the secret [[Treasure_chest#Super_Mario_RPG:_Legend_of_the_Seven_Stars|Treasure Chest]] room in [[Forest Maze]] beforehand. | |Given by a Treasure Hunter [[Toad_(species)#Super_Mario_RPG:_Legend_of_the_Seven_Stars|Toad]]. Only given if [[History_of_Mario#Super_Mario_RPG:_Legend_of_the_Seven_Stars|Mario]] found the secret [[Treasure_chest#Super_Mario_RPG:_Legend_of_the_Seven_Stars|Treasure Chest]] room in [[Forest Maze]] beforehand. | ||
| | |[[File:Rose Town (Frog Coin).png]] | ||
| | |[[File:Rose Town (Frog Coin) (Switch).png|300px]] | ||
|- | |- | ||
|[[File:RPG Bag.png]]<br>[[Finger Shot]] | |[[File:RPG Bag.png]]<br>[[Finger Shot]] | ||
|Given by [[Gaz]] in the inn after defeating [[Bowyer]] in Forest Maze. | |Given by [[Gaz]] in the inn after defeating [[Bowyer]] in Forest Maze. | ||
| | |[[File:Rose Town (Finger Shot).png]] | ||
| | |[[File:Rose Town (Finger Shot) (Switch).png|300px]] | ||
|- | |- | ||
|[[File:RPG Bag.png]]<br>[[Greaper Flag]] | |[[File:RPG Bag.png]]<br>[[Greaper Flag]] | ||
|After sleeping in the [[Three Musty Fears|Three Musty Fears']] bed in [[Monstro Town]], find it behind introductory sign. | |After sleeping in the [[Three Musty Fears|Three Musty Fears']] bed in [[Monstro Town]], find it behind introductory sign. | ||
| | |[[File:Rose Town (Greaper Flag).png]] | ||
| | |[[File:Rose Town (Greaper Flag) (Switch).png|300px]] | ||
|} | |} | ||
| Line 291: | Line 303: | ||
|[[File:Red Mushroom.png]]<br>[[Mushroom#Super_Mario_RPG:_Legend_of_the_Seven_Stars|Mushroom]] | |[[File:Red Mushroom.png]]<br>[[Mushroom#Super_Mario_RPG:_Legend_of_the_Seven_Stars|Mushroom]] | ||
|In the first scene, right of the exit. | |In the first scene, right of the exit. | ||
| | |[[File:Forest Maze (Mushroom 1).png]] | ||
| | |[[File:Forest Maze (Mushroom 1) (Switch).png|300px]] | ||
|- | |- | ||
|[[File:Red Mushroom.png]]<br>Mushroom | |[[File:Red Mushroom.png]]<br>Mushroom | ||
|In the second scene, left of the entrance. | |In the second scene, left of the entrance. | ||
| | |[[File:Forest Maze (Mushroom 2).png]] | ||
| | |[[File:Forest Maze (Mushroom 2) (Switch).png|300px]] | ||
|- | |- | ||
|[[File:Red Mushroom.png]]<br>Mushroom | |[[File:Red Mushroom.png]]<br>Mushroom | ||
|In the third scene (first cave scene), in the first mushroom patch. | |In the third scene (first cave scene), in the first mushroom patch. | ||
| | |[[File:Forest Maze (Mushroom 3).png]] | ||
| | |[[File:Forest Maze (Mushroom 3) (Switch).png|300px]] | ||
|- | |- | ||
|[[File:Red Mushroom.png]]<br>Mushroom | |[[File:Red Mushroom.png]]<br>Mushroom | ||
|In the third scene (first cave scene), in the second mushroom patch. | |In the third scene (first cave scene), in the second mushroom patch. | ||
| | |[[File:Forest Maze (Mushroom 4).png]] | ||
| | |[[File:Forest Maze (Mushroom 4) (Switch).png|300px]] | ||
|- | |- | ||
|[[File:Red Mushroom.png]]<br>Mushroom | |[[File:Red Mushroom.png]]<br>Mushroom | ||
|In the third scene (first cave scene), in the third mushroom patch. | |In the third scene (first cave scene), in the third mushroom patch. | ||
| | |[[File:Forest Maze (Mushroom 5).png]] | ||
| | |[[File:Forest Maze (Mushroom 5) (Switch).png|300px]] | ||
|- | |- | ||
|[[File:Red Mushroom.png]]<br>Mushroom | |[[File:Red Mushroom.png]]<br>Mushroom | ||
|In the third scene (first cave scene), in the fourth mushroom patch. | |In the third scene (first cave scene), in the fourth mushroom patch. | ||
| | |[[File:Forest Maze (Mushroom 6).png]] | ||
| | |[[File:Forest Maze (Mushroom 6) (Switch).png|300px]] | ||
|- | |- | ||
|[[File:Red Mushroom.png]]<br>Mushroom | |[[File:Red Mushroom.png]]<br>Mushroom | ||
|In the eight scene (third cave scene), in the second mushroom patch. | |In the eight scene (third cave scene), in the second mushroom patch. | ||
| | |[[File:Forest Maze (Mushroom 7).png]] | ||
| | |[[File:Forest Maze (Mushroom 7) (Switch).png|300px]] | ||
|- | |- | ||
|[[File:Red Mushroom.png]]<br>Mushroom | |[[File:Red Mushroom.png]]<br>Mushroom | ||
|In the eight scene (third cave scene), in the third mushroom patch. | |In the eight scene (third cave scene), in the third mushroom patch. | ||
| | |[[File:Forest Maze (Mushroom 8).png]] | ||
| | |[[File:Forest Maze (Mushroom 8) (Switch).png|300px]] | ||
|- | |- | ||
|[[File:Red Mushroom.png]]<br>Mushroom | |[[File:Red Mushroom.png]]<br>Mushroom | ||
|In the ninth scene (fourth cave scene), in the first mushroom patch. | |In the ninth scene (fourth cave scene), in the first mushroom patch. | ||
| | |[[File:Forest Maze (Mushroom 9).png]] | ||
| | |[[File:Forest Maze (Mushroom 9) (Switch).png|300px]] | ||
|- | |- | ||
|[[File:Red Mushroom.png]]<br>Mushroom | |[[File:Red Mushroom.png]]<br>Mushroom | ||
|In the ninth scene (fourth cave scene), in the second mushroom patch. | |In the ninth scene (fourth cave scene), in the second mushroom patch. | ||
| | |[[File:Forest Maze (Mushroom 10).png]] | ||
| | |[[File:Forest Maze (Mushroom 10) (Switch).png|300px]] | ||
|- | |- | ||
|[[File:Red Mushroom.png]]<br>Mushroom | |[[File:Red Mushroom.png]]<br>Mushroom | ||
|In the ninth scene (fourth cave scene), in the third mushroom patch. | |In the ninth scene (fourth cave scene), in the third mushroom patch. | ||
| | |[[File:Forest Maze (Mushroom 11).png]] | ||
| | |[[File:Forest Maze (Mushroom 11) (Switch).png|300px]] | ||
|- | |- | ||
|[[File:Red Mushroom.png]]<br>Mushroom | |[[File:Red Mushroom.png]]<br>Mushroom | ||
|In the tenth scene, found left of the exit. | |In the tenth scene, found left of the exit. | ||
| | |[[File:Forest Maze (Mushroom 12).png]] | ||
| | |[[File:Forest Maze (Mushroom 12) (Switch).png|300px]] | ||
|} | |} | ||
| Line 360: | Line 372: | ||
|[[File:SMRPGCoin.png]][[File:SMRPGCoin.png]][[File:SMRPGCoin.png]][[File:SMRPGCoin.png]][[File:SMRPGCoin.png]]<br>5 [[Coin#Super_Mario_RPG:_Legend_of_the_Seven_Stars|Coins]] | |[[File:SMRPGCoin.png]][[File:SMRPGCoin.png]][[File:SMRPGCoin.png]][[File:SMRPGCoin.png]][[File:SMRPGCoin.png]]<br>5 [[Coin#Super_Mario_RPG:_Legend_of_the_Seven_Stars|Coins]] | ||
|In the room accessed from the second pipe of the third room. | |In the room accessed from the second pipe of the third room. | ||
| | |[[File:Pipe Vault (5 Coins).png]] | ||
| | |[[File:Pipe Vault (5 Coins) (Switch).png|300px]] | ||
|- | |- | ||
|[[File:Frog Coin.png]]<br>[[Frog Coin]] | |[[File:Frog Coin.png]]<br>[[Frog Coin]] | ||
|In the room accessed from the second pipe of the third room, under the wall. Mario must slide in order to get the coin. | |In the room accessed from the second pipe of the third room, under the wall. Mario must slide in order to get the coin. | ||
| | |[[File:Pipe Vault (Frog Coin).png]] | ||
| | |[[File:Pipe Vault (Frog Coin) (Switch).png|300px]] | ||
|- | |- | ||
|[[File:RPG Bag.png]] [[File:Frog Coin.png]] [[File:RPG Bag.png]] <br>[[Flower Tab]], Frog Coins, [[Flower Jar]] | |[[File:RPG Bag.png]] [[File:Frog Coin.png]] [[File:RPG Bag.png]] <br>[[Flower Tab]], Frog Coins, [[Flower Jar]] | ||
|In the room accessed from the fifth pipe of the third room, rewards from the [[Goomba-thumping]] minigame. Rewards include:<br>Flower Tab for the first time<br>Flower Jar for the second time<br>Frog Coins for all other times. There are also two Frog Coins between Flower Tab and Flower Jar in the remake. | |In the room accessed from the fifth pipe of the third room, rewards from the [[Goomba-thumping]] minigame. Rewards include:<br>Flower Tab for the first time<br>Flower Jar for the second time<br>Frog Coins for all other times. There are also two Frog Coins between Flower Tab and Flower Jar in the remake. | ||
| | |[[File:Pipe Vault (Flower Tab, Frog Coin, Flower Jar).png]] | ||
| | |[[File:Pipe Vault (Flower Tab, Frog Coin, Flower Jar) (Switch).png|300px]] | ||
|} | |} | ||
| Line 384: | Line 396: | ||
|[[File:RPG Cookie.png]][[File:RPG Cookie.png]][[File:RPG Cookie.png]]<br>3 [[Yoshi_Cookie#Super_Mario_RPG:_Legend_of_the_Seven_Stars|Yoshi Cookies]] | |[[File:RPG Cookie.png]][[File:RPG Cookie.png]][[File:RPG Cookie.png]]<br>3 [[Yoshi_Cookie#Super_Mario_RPG:_Legend_of_the_Seven_Stars|Yoshi Cookies]] | ||
|Given by [[History_of_Yoshi#Super_Mario_RPG:_Legend_of_the_Seven_Stars|Yoshi]] after defeating [[Boshi]] in the [[Mushroom Derby]] for the first time. Afterwards, if Mario is out of the cookies, they can be replenished by talking to a red Yoshi near the egg nest. | |Given by [[History_of_Yoshi#Super_Mario_RPG:_Legend_of_the_Seven_Stars|Yoshi]] after defeating [[Boshi]] in the [[Mushroom Derby]] for the first time. Afterwards, if Mario is out of the cookies, they can be replenished by talking to a red Yoshi near the egg nest. | ||
| | |[[File:Yo'ster Isle (3 Yoshi Cookies).png]] | ||
| | |[[File:Yo'ster Isle (3 Yoshi Cookies) (Switch).png|300px]] | ||
|- | |- | ||
|[[File:RPG Cookie.png]]<br>Yoshi Cookies | |[[File:RPG Cookie.png]]<br>Yoshi Cookies | ||
|Given by red Yoshi after winning Mushroom Derby. Amount of cookies depends on how many were wagered and the ratio said by Boshi. | |Given by red Yoshi after winning Mushroom Derby. Amount of cookies depends on how many were wagered and the ratio said by Boshi. | ||
| | |[[File:Yo'ster Isle (Yoshi Cookies).png]] | ||
| | |[[File:Yo'ster Isle (Yoshi Cookies) (Switch).png|300px]] | ||
|- | |- | ||
|[[File:Frog Coin.png]]<br>[[Frog Coin]]<br>[[File:Red Essence.png]]<br>[[Red Essence]]<br>[[File:Red Essence.png]] [[File:Yoshi-ade.png]] [[File:Green P Drink.png]] [[File:Yellow D Drink.png]]<br>Red Essence or [[Yoshi-Ade]] or [[Energizer]] or [[Bracer]] | |[[File:Frog Coin.png]]<br>[[Frog Coin]]<br>[[File:Red Essence.png]]<br>[[Red Essence]]<br>[[File:Red Essence.png]] [[File:Yoshi-ade.png]] [[File:Green P Drink.png]] [[File:Yellow D Drink.png]]<br>Red Essence or [[Yoshi-Ade]] or [[Energizer]] or [[Bracer]] | ||
|After [[Baby Fat]] hatches from its egg and is given 21 Yoshi Cookies, it leaves its nest. Afterwards, giving it certain amounts of Yoshi Cookies means getting certain rewards in return. These rewards include:<br>'''[[Frog Coin]]''': After giving it 30 Cookies in total, afterwards after every 50 Cookies.<br>'''[[Red Essence]]''': After giving it 20 Cookies simultaneously.<br>'''Red Essence, [[Yoshi-Ade]], [[Energizer]] and [[Bracer]]''': One of the four is randomly picked after giving it 10 Cookies simultaneously. | |After [[Baby Fat]] hatches from its egg and is given 21 Yoshi Cookies, it leaves its nest. Afterwards, giving it certain amounts of Yoshi Cookies means getting certain rewards in return. These rewards include:<br>'''[[Frog Coin]]''': After giving it 30 Cookies in total, afterwards after every 50 Cookies.<br>'''[[Red Essence]]''': After giving it 20 Cookies simultaneously.<br>'''Red Essence, [[Yoshi-Ade]], [[Energizer]] and [[Bracer]]''': One of the four is randomly picked after giving it 10 Cookies simultaneously. | ||
| | |[[File:Yo'ster Isle (Bracer, Energizer, Yoshi-Aide, Red Essence, Frog Coin).png]] | ||
| | |[[File:Yo'ster Isle (Bracer, Energizer, Yoshi-Aide, Red Essence, Frog Coin) (Switch).png|300px]] | ||
|- | |- | ||
|[[File:RPG Bag.png]]<br>[[Boo Flag]] (Big Boo Flag in the original) | |[[File:RPG Bag.png]]<br>[[Boo Flag]] (Big Boo Flag in the original) | ||
|After sleeping in the [[Three Musty Fears|Three Musty Fears']] bed in [[Monstro Town]], find it between the O and A in GOAL. | |After sleeping in the [[Three Musty Fears|Three Musty Fears']] bed in [[Monstro Town]], find it between the O and A in GOAL. | ||
| | |[[File:Yo'ster Isle (Big Boo Flag).png]] | ||
| | |[[File:Yo'ster Isle (Boo Flag).png|300px]] | ||
|} | |} | ||
| Line 413: | Line 425: | ||
|3x[[File:RPG Bag.png]]<br>3 [[Flower Tab]]s | |3x[[File:RPG Bag.png]]<br>3 [[Flower Tab]]s | ||
|After [[Croco]] destroys the wall with [[Microbomb]], he and three [[Crook]]s with him scatter through out the mines. After finding and defeating a Crook, [[History_of_Mario#Super_Mario_RPG:_Legend_of_the_Seven_Stars|Mario]] is given a Flower Tab in return. This can be repeated two times. | |After [[Croco]] destroys the wall with [[Microbomb]], he and three [[Crook]]s with him scatter through out the mines. After finding and defeating a Crook, [[History_of_Mario#Super_Mario_RPG:_Legend_of_the_Seven_Stars|Mario]] is given a Flower Tab in return. This can be repeated two times. | ||
| | |[[File:Moleville (Flower Tab 1).png]]<br>[[File:Moleville (Flower Tab 2).png]]<br>[[File:Moleville (Flower Tab 3).png]] | ||
| | |[[File:Moleville (Flower Tab 1) (Switch).png|300px]]<br>[[File:Moleville (Flower Tab 2) (Switch).png|300px]]<br>[[File:Moleville (Flower Tab 3) (Switch).png|300px]] | ||
|- | |- | ||
|[[File:BBomb.png]] [[File:SMRPGCoin.png]]<br>Microbomb (Bambino Bomb in the original) and stolen [[Coin#Super_Mario_RPG:_Legend_of_the_Seven_Stars|Coins]] | |[[File:BBomb.png]] [[File:SMRPGCoin.png]]<br>Microbomb (Bambino Bomb in the original) and stolen [[Coin#Super_Mario_RPG:_Legend_of_the_Seven_Stars|Coins]] | ||
|Picked up after defeating Croco. | |Picked up after defeating Croco. | ||
| | |[[File:Moleville (Bambino Bomb and Coins).png]] | ||
| | |[[File:Moleville (Microbomb and Coins).png|300px]] | ||
|- | |- | ||
|[[File:Frog Coin.png]]<br>[[Frog Coin]] | |[[File:Frog Coin.png]]<br>[[Frog Coin]] | ||
|After blowing up the wall with Microbomb, Mario must take the lower path. In the next scene, after trying to leave through the lower path, a minecart with [[Shy_Guy#Super_Mario_RPG:_Legend_of_the_Seven_Stars|Shy Guy]] rams Mario back into the previous scene and drops a Frog Coin in a process. | |After blowing up the wall with Microbomb, Mario must take the lower path. In the next scene, after trying to leave through the lower path, a minecart with [[Shy_Guy#Super_Mario_RPG:_Legend_of_the_Seven_Stars|Shy Guy]] rams Mario back into the previous scene and drops a Frog Coin in a process. | ||
| | |[[File:Moleville (Frog Coin 1).png]] | ||
| | |[[File:Moleville (Frog Coin 1) (Switch).png|300px]] | ||
|- | |- | ||
|1-32x[[File:SMRPGCoin.png]]<br>1 to 32 Coins (SNES)<br>1 to 204 Coins (SWITCH) | |1-32x[[File:SMRPGCoin.png]]<br>1 to 32 Coins (SNES)<br>1 to 204 Coins (SWITCH) | ||
|After the first time, the coins are added in the house of Dyna and Mite's parents, afterwards they're added outside, where Bowser was seen.<br>'''SNES''': There are 34 Coins found in the second and fourth scenes of the [[Moleville Mountain]] minigame, but only 32 can be collected. Coins are added to inventory after the minigame ends.<br>'''SWITCH''': There are total of 204 Coins found during the minigame. Mario cannot take all of them. Coins are added to inventory after the minigame ends. | |After the first time, the coins are added in the house of Dyna and Mite's parents, afterwards they're added outside, where Bowser was seen.<br>'''SNES''': There are 34 Coins found in the second and fourth scenes of the [[Moleville Mountain]] minigame, but only 32 can be collected. Coins are added to inventory after the minigame ends.<br>'''SWITCH''': There are total of 204 Coins found during the minigame. Mario cannot take all of them. Coins are added to inventory after the minigame ends. | ||
| | |[[File:Moleville (32 Coins).png]] | ||
| | |[[File:Moleville (Coins).png|300px]] | ||
|- | |- | ||
|[[File:SMRPG 10 Gold Coin.png]][[File:SMRPG 10 Gold Coin.png]][[File:SMRPG 10 Gold Coin.png]][[File:SMRPG 10 Gold Coin.png]][[File:SMRPG 10 Gold Coin.png]]<br>5 10-Coins | |[[File:SMRPG 10 Gold Coin.png]][[File:SMRPG 10 Gold Coin.png]][[File:SMRPG 10 Gold Coin.png]][[File:SMRPG 10 Gold Coin.png]][[File:SMRPG 10 Gold Coin.png]]<br>5 10-Coins | ||
|After wagering 30 Coins and breaking the record in the Moleville Mountain minigame. | |After wagering 30 Coins and breaking the record in the Moleville Mountain minigame. | ||
| | |[[File:Moleville (5 10-Coins).png]] | ||
| | |[[File:Moleville (5 10-Coins) (Switch).png|300px]] | ||
|- | |- | ||
|[[File:Green Bomb.png]] [[File:Red Bomb.png]] [[File:Blue Bomb.png]]<br>[[Fright Bomb]] or [[Fire Bomb]] or [[Ice Bomb]] | |[[File:Green Bomb.png]] [[File:Red Bomb.png]] [[File:Blue Bomb.png]]<br>[[Fright Bomb]] or [[Fire Bomb]] or [[Ice Bomb]] | ||
|After saving [[Dyna and Mite]], in the rightmost house, given by a [[Mole (Super Mario RPG)|Mole]] woman after accumulating 100 points (by giving her spare Mushrooms and Syrups). | |After saving [[Dyna and Mite]], in the rightmost house, given by a [[Mole (Super Mario RPG)|Mole]] woman after accumulating 100 points (by giving her spare Mushrooms and Syrups). | ||
| | |[[File:Moleville (Fright-Fire-Ice Bombs).png]] | ||
| | |[[File:Moleville (Fright-Fire-Ice Bombs) (Switch).png|300px]] | ||
|- | |- | ||
|[[File:RPG Bag.png]]<br>[[Fireworks#Super_Mario_RPG:_Legend_of_the_Seven_Stars|Fireworks]] | |[[File:RPG Bag.png]]<br>[[Fireworks#Super_Mario_RPG:_Legend_of_the_Seven_Stars|Fireworks]] | ||
|After saving Dyna and Mite, in the house above the Item Shop, given by Mole man in exchange for 500 Coins. Changes type of fireworks that appear in the credits based on how many times it was bought from him. | |After saving Dyna and Mite, in the house above the Item Shop, given by Mole man in exchange for 500 Coins. Changes type of fireworks that appear in the credits based on how many times it was bought from him. | ||
| | |[[File:Moleville (Fireworks).png]] | ||
| | |[[File:Moleville (Fireworks) (Switch).png|300px]] | ||
|- | |- | ||
|[[File:RPG Bag.png]]<br>[[Shiny Stone]] | |[[File:RPG Bag.png]]<br>[[Shiny Stone]] | ||
|After saving Dyna and Mite, given by a Mole girl partially hidden by crates in exchange for the Fireworks. | |After saving Dyna and Mite, given by a Mole girl partially hidden by crates in exchange for the Fireworks. | ||
| | |[[File:Moleville (Shiny Stone).png]] | ||
| | |[[File:Moleville (Shiny Stone) (Switch).png|300px]] | ||
|- | |- | ||
|[[File:RPG Cookie.png]]<br>[[Carbo Cookie]] | |[[File:RPG Cookie.png]]<br>[[Carbo Cookie]] | ||
|After saving Dyna and Mite, given by a Mole girl in the back of the Item Shop in exchange for the Shiny Stone. | |After saving Dyna and Mite, given by a Mole girl in the back of the Item Shop in exchange for the Shiny Stone. | ||
| | |[[File:Moleville (Carbo Cookie).png]] | ||
| | |[[File:Moleville (Carbo Cookie) (Switch).png|300px]] | ||
|- | |- | ||
|[[File:Frog Coin.png]]<br>[[Frog Coin]] | |[[File:Frog Coin.png]]<br>[[Frog Coin]] | ||
|After saving Dyna and Mite, there is a Mole girl standing on the top of the bucket. By giving her the Carbo Cookie, she either leaves the bucket, allowing access to the secret entrance to [[Midas River]] or she gives Mario a Frog Coin. | |After saving Dyna and Mite, there is a Mole girl standing on the top of the bucket. By giving her the Carbo Cookie, she either leaves the bucket, allowing access to the secret entrance to [[Midas River]] or she gives Mario a Frog Coin. | ||
| | |[[File:Moleville (Frog Coin 2).png]] | ||
| | |[[File:Moleville (Frog Coin 2) (Switch).png|300px]] | ||
|- | |- | ||
|[[File:Lucky Jewel.png]] [[File:Mysteryegg.png]] [[File:RPG Bag.png]]<br>[[Lucky Jewel]], [[Mystery Egg (Super Mario RPG)|Mystery Egg]], [[Frying_Pan#Super_Mario_RPG:_Legend_of_the_Seven_Stars|Frying Pan]]<br>[[Feather (accessory)|Feather]] | |[[File:Lucky Jewel.png]] [[File:Mysteryegg.png]] [[File:RPG Bag.png]]<br>[[Lucky Jewel]], [[Mystery Egg (Super Mario RPG)|Mystery Egg]], [[Frying_Pan#Super_Mario_RPG:_Legend_of_the_Seven_Stars|Frying Pan]]<br>[[Feather (accessory)|Feather]] | ||
|Given by a [[Moleville Toad]] in the Item Shop. There are three (four in the remake) items to be given and each have different requirements:<br>'''[[Lucky Jewel]]''': Costs 100 Coins, available right after saving Dyna and Mite.<br>'''[[Mystery Egg (Super Mario RPG)|Mystery Egg]]''': Costs 200 Coins, available only after [[Speardovich]] have been defeated.<br>'''[[Feather (accessory)|Feather]]''': Switch version only, costs 250 Coins, available only after [[Valentina]] have been defeated.<br>'''[[Frying_Pan#Super_Mario_RPG:_Legend_of_the_Seven_Stars|Frying Pan]]''': Costs 300 Coins, available only after [[Axem Rangers]] have been defeated. | |Given by a [[Moleville Toad]] in the Item Shop. There are three (four in the remake) items to be given and each have different requirements:<br>'''[[Lucky Jewel]]''': Costs 100 Coins, available right after saving Dyna and Mite.<br>'''[[Mystery Egg (Super Mario RPG)|Mystery Egg]]''': Costs 200 Coins, available only after [[Speardovich]] have been defeated.<br>'''[[Feather (accessory)|Feather]]''': Switch version only, costs 250 Coins, available only after [[Valentina]] have been defeated.<br>'''[[Frying_Pan#Super_Mario_RPG:_Legend_of_the_Seven_Stars|Frying Pan]]''': Costs 300 Coins, available only after [[Axem Rangers]] have been defeated. | ||
| | |[[File:Moleville (Lucky Jewel, Mystery Egg, Frying Pan).png]] | ||
| | |[[File:Moleville (Lucky Jewel, Mystery Egg, Feather, Frying Pan).png|300px]] | ||
|} | |} | ||
| Line 476: | Line 488: | ||
|[[Wonder Chomp]] | |[[Wonder Chomp]] | ||
|Given by [[Punchinello]] in his room in the mines after defeating him in a rematch. | |Given by [[Punchinello]] in his room in the mines after defeating him in a rematch. | ||
| | |[[File:Moleville (Wonder Chomp).png|300px]] | ||
|} | |} | ||
| Line 489: | Line 501: | ||
|[[File:Frog Coin.png]]<br>[[Frog Coin]] | |[[File:Frog Coin.png]]<br>[[Frog Coin]] | ||
|In the first scene, in the second bush. | |In the first scene, in the second bush. | ||
| | |[[File:Booster Pass (Frog Coin).png]] | ||
| | |[[File:Booster Pass (Frog Coin) (Switch).png|300px]] | ||
|- | |- | ||
|[[File:RPG Flower.png]]<br>[[Flower (Super Mario RPG)|Flower]] | |[[File:RPG Flower.png]]<br>[[Flower (Super Mario RPG)|Flower]] | ||
|In the second scene, at the end of the lower part. | |In the second scene, at the end of the lower part. | ||
| | |[[File:Booster Pass (Flower).png]] | ||
| | |[[File:Booster Pass (Flower) (Switch).png|300px]] | ||
|- | |- | ||
|[[File:SMRPG 10 Gold Coin.png]][[File:SMRPG 10 Gold Coin.png]][[File:SMRPG 10 Gold Coin.png]][[File:SMRPG 10 Gold Coin.png]]<br>4 [[10-Coin#Super_Mario_RPG:_Legend_of_the_Seven_Stars|10-Coins]] | |[[File:SMRPG 10 Gold Coin.png]][[File:SMRPG 10 Gold Coin.png]][[File:SMRPG 10 Gold Coin.png]][[File:SMRPG 10 Gold Coin.png]]<br>4 [[10-Coin#Super_Mario_RPG:_Legend_of_the_Seven_Stars|10-Coins]] | ||
|In the second scene, there is a button hidden behind a creek, which after being pressed, fills up the holes in the upper part, granting [[History_of_Mario#Super_Mario_RPG:_Legend_of_the_Seven_Stars|Mario]] 4 10-Coins in the process. | |In the second scene, there is a button hidden behind a creek, which after being pressed, fills up the holes in the upper part, granting [[History_of_Mario#Super_Mario_RPG:_Legend_of_the_Seven_Stars|Mario]] 4 10-Coins in the process. | ||
| | |[[File:Booster Pass (4 10-Coins).png]] | ||
| | |[[File:Booster Pass (4 10-Coins) (Switch).png|300px]] | ||
|} | |} | ||
| Line 512: | Line 524: | ||
|[[Monster Trophy]] | |[[Monster Trophy]] | ||
|Given by Monster List Agent in the second scene after completing the [[Super Mario RPG (Nintendo Switch) bestiary|Monster List]] and filling all [[Thought Peek]] entries. | |Given by Monster List Agent in the second scene after completing the [[Super Mario RPG (Nintendo Switch) bestiary|Monster List]] and filling all [[Thought Peek]] entries. | ||
| | |[[File:Booster Pass (Monster Trophy).png|300px]] | ||
|} | |} | ||
| Line 525: | Line 537: | ||
|[[File:RPG Bag.png]]<br>[[Flower Tab]] | |[[File:RPG Bag.png]]<br>[[Flower Tab]] | ||
|In the scene where [[Booster]] first shows up on the train, in the crevice on the right side of the room. | |In the scene where [[Booster]] first shows up on the train, in the crevice on the right side of the room. | ||
| | |[[File:Booster Tower (Flower Tab).png]] | ||
| | |[[File:Booster Tower (Flower Tab) (Switch).png|300px]] | ||
|- | |- | ||
|[[File:RPG Key.png]]<br>[[Elder Key]] | |[[File:RPG Key.png]]<br>[[Elder Key]] | ||
|Drops from the ceiling after succesfully completing the portrait puzzle. | |Drops from the ceiling after succesfully completing the portrait puzzle. | ||
| | |[[File:Booster Tower (Elder Key).png]] | ||
| | |[[File:Booster Tower (Elder Key) (Switch).png|300px]] | ||
|- | |- | ||
|[[File:SMRPG Chomp friendly.png]]<br>[[Chain_Chomp#Super_Mario_RPG:_Legend_of_the_Seven_Stars|Chain Chomp]] (Chomp in the original game) | |[[File:SMRPG Chomp friendly.png]]<br>[[Chain_Chomp#Super_Mario_RPG:_Legend_of_the_Seven_Stars|Chain Chomp]] (Chomp in the original game) | ||
|Found in the room accessed by the Elder Key. | |Found in the room accessed by the Elder Key. | ||
| | |[[File:Booster Tower (Chomp).png]] | ||
| | |[[File:Booster Tower (Chain Chomp).png|300px]] | ||
|- | |- | ||
|[[File:Frog Coin.png]]<br>[[Frog Coin]] | |[[File:Frog Coin.png]]<br>[[Frog Coin]] | ||
|In the room where [[History_of_Mario#Super_Mario_RPG:_Legend_of_the_Seven_Stars|Mario]] lands after being launched from a seesaw by a [[Thwomp#Super_Mario_RPG:_Legend_of_the_Seven_Stars|Thwomp]], found in the crevice near the stairs. | |In the room where [[History_of_Mario#Super_Mario_RPG:_Legend_of_the_Seven_Stars|Mario]] lands after being launched from a seesaw by a [[Thwomp#Super_Mario_RPG:_Legend_of_the_Seven_Stars|Thwomp]], found in the crevice near the stairs. | ||
| | |[[File:Booster Tower (Frog Coin).png]] | ||
| | |[[File:Booster Tower (Frog Coin) (Switch).png|300px]] | ||
|- | |- | ||
|4x[[File:Frog Coin.png]] [[File:SMRPGCoin.png]][[File:SMRPGCoin.png]][[File:SMRPGCoin.png]][[File:SMRPGCoin.png]][[File:SMRPGCoin.png]][[File:SMRPGCoin.png]][[File:SMRPGCoin.png]][[File:SMRPGCoin.png]][[File:SMRPGCoin.png]]<br>4 Frog Coins, 9 [[Coin#Super_Mario_RPG:_Legend_of_the_Seven_Stars|Coins]] | |4x[[File:Frog Coin.png]] [[File:SMRPGCoin.png]][[File:SMRPGCoin.png]][[File:SMRPGCoin.png]][[File:SMRPGCoin.png]][[File:SMRPGCoin.png]][[File:SMRPGCoin.png]][[File:SMRPGCoin.png]][[File:SMRPGCoin.png]][[File:SMRPGCoin.png]]<br>4 Frog Coins, 9 [[Coin#Super_Mario_RPG:_Legend_of_the_Seven_Stars|Coins]] | ||
|In the room with invisible [[Lava Blubble]]s. | |In the room with invisible [[Lava Blubble]]s. | ||
| | |[[File:Booster Tower (4 Frog Coins and 9 Coins).png]] | ||
| | |[[File:Booster Tower (4 Frog Coins and 9 Coins) (Switch).png|300px]] | ||
|- | |- | ||
|[[File:RPG Key.png]]<br>[[Room Key]] | |[[File:RPG Key.png]]<br>[[Room Key]] | ||
|In the room with invisible Lava Blubbles, near the top right corner. | |In the room with invisible Lava Blubbles, near the top right corner. | ||
| | |[[File:Booster Tower (Room Key).png]] | ||
| | |[[File:Booster Tower (Room Key) (Switch).png|300px]] | ||
|- | |- | ||
|[[File:RPG Pin.png]]<br>[[Booster's Charm]] (Amulet in the original game) | |[[File:RPG Pin.png]]<br>[[Booster's Charm]] (Amulet in the original game) | ||
|Given by Booster after succesfully completing the curtain minigame. | |Given by Booster after succesfully completing the curtain minigame. | ||
| | |[[File:Booster Tower (Amulet).png]] | ||
| | |[[File:Booster Tower (Booster Charm).png|300px]] | ||
|- | |- | ||
|[[File:RPG Bag.png]] [[File:RPG Bag.png]] [[File:RPG Bag.png]] [[File:Red Mushroom.png]] [[File:Green Mushroom.png]] [[File:Yellow Mushroom.png]] [[File:Green Something Drink.png]]<br>[[Moldy Mush]], [[Rotten Mush]], [[Dried Mushroom|Wilt Shroom]], [[Mushroom#Super_Mario_RPG:_Legend_of_the_Seven_Stars|Mushroom]], [[Super_Mushroom#Super_Mario_RPG:_Legend_of_the_Seven_Stars|Mid Mushroom]], [[Ultra_Mushroom#Super_Mario_RPG:_Legend_of_the_Seven_Stars|Max Mushroom]], [[Croaka Cola]] (Kerokero Cola in the original)<br>[[File:RPG Bag.png]]<br>[[Bright Card]] | |[[File:RPG Bag.png]] [[File:RPG Bag.png]] [[File:RPG Bag.png]] [[File:Red Mushroom.png]] [[File:Green Mushroom.png]] [[File:Yellow Mushroom.png]] [[File:Green Something Drink.png]]<br>[[Moldy Mush]], [[Rotten Mush]], [[Dried Mushroom|Wilt Shroom]], [[Mushroom#Super_Mario_RPG:_Legend_of_the_Seven_Stars|Mushroom]], [[Super_Mushroom#Super_Mario_RPG:_Legend_of_the_Seven_Stars|Mid Mushroom]], [[Ultra_Mushroom#Super_Mario_RPG:_Legend_of_the_Seven_Stars|Max Mushroom]], [[Croaka Cola]] (Kerokero Cola in the original)<br>[[File:RPG Bag.png]]<br>[[Bright Card]] | ||
|In the room before the room with the [[Save_Block#Super_Mario_RPG:_Legend_of_the_Seven_Stars|Save Block]], available only after completing [[Booster Hill]]. Given by Knife Guy after winning a round of his juggling game. He gives out HP-filling items at random. After winning the game 12 times in the row, he gives Mario a Bright Card. | |In the room before the room with the [[Save_Block#Super_Mario_RPG:_Legend_of_the_Seven_Stars|Save Block]], available only after completing [[Booster Hill]]. Given by Knife Guy after winning a round of his juggling game. He gives out HP-filling items at random. After winning the game 12 times in the row, he gives Mario a Bright Card. | ||
| | |[[File:Booster Tower (Moldy Mush, Rotten Mush, Wilt Shroom, Mushroom, Mid Mushroom, Max Mushroom, Croaka Cola, Bright Card).png]] | ||
| | |[[File:Booster Tower (Moldy Mush, Rotten Mush, Wilt Shroom, Mushroom, Mid Mushroom, Max Mushroom, Croaka Cola, Bright Card) (Switch).png|300px]] | ||
|} | |} | ||
| Line 573: | Line 585: | ||
|Stella 023 | |Stella 023 | ||
|Given by Booster in the last scene after his rematch. | |Given by Booster in the last scene after his rematch. | ||
| | |[[File:Booster Tower (Stella 023).png|300px]] | ||
|} | |} | ||
| Line 586: | Line 598: | ||
|[[File:RPG Flower.png]]<br>[[Flower (Super Mario RPG)|Flowers]] | |[[File:RPG Flower.png]]<br>[[Flower (Super Mario RPG)|Flowers]] | ||
|During the first visit, if [[History_of_Mario#Super_Mario_RPG:_Legend_of_the_Seven_Stars|Mario]] reaches [[History_of_Princess_Peach#Super_Mario_RPG:_Legend_of_the_Seven_Stars|Princess Peach]] during the chase, she gives him a Flower. | |During the first visit, if [[History_of_Mario#Super_Mario_RPG:_Legend_of_the_Seven_Stars|Mario]] reaches [[History_of_Princess_Peach#Super_Mario_RPG:_Legend_of_the_Seven_Stars|Princess Peach]] during the chase, she gives him a Flower. | ||
| | |[[File:Booster Hill (Peach Flowers).png]] | ||
| | |[[File:Booster Hill (Peach Flowers) (Switch).png|300px]] | ||
|- | |- | ||
|[[File:RPG Flower.png]]<br>[[Flower (Super Mario RPG)|Flowers]] | |[[File:RPG Flower.png]]<br>[[Flower (Super Mario RPG)|Flowers]] | ||
|If Mario visits Booster Hill after the chase but before having [[Beetle Box]] in his possesion, he can find numerous Flowers before [[Toad#Super_Mario_RPG:_Legend_of_the_Seven_Stars|Toad]] tells him there are no more left. Amount of Flowers depends on how many he collected from Peach during the first visit. | |If Mario visits Booster Hill after the chase but before having [[Beetle Box]] in his possesion, he can find numerous Flowers before [[Toad#Super_Mario_RPG:_Legend_of_the_Seven_Stars|Toad]] tells him there are no more left. Amount of Flowers depends on how many he collected from Peach during the first visit. | ||
| | |[[File:Booster Hill (Hill Flowers).png]] | ||
| | |[[File:Booster Hill (Hill Flowers) (Switch).png|300px]] | ||
|} | |} | ||
| Line 605: | Line 617: | ||
|[[File:RPG Bag.png]] [[File:RPG Bag.png]] [[File:Frog Coin.png]]<br>[[Flower Tab]], [[Flower Jar]], [[Frog Coin]]s | |[[File:RPG Bag.png]] [[File:RPG Bag.png]] [[File:Frog Coin.png]]<br>[[Flower Tab]], [[Flower Jar]], [[Frog Coin]]s | ||
|Given by a receptionist based on how many times [[History_of_Mario#Super_Mario_RPG:_Legend_of_the_Seven_Stars|Mario]] stayed at the hotel: Flower Tab for staying 1 time, Flower Jar for staying 3 times, 1 Frog Coin for staying 5, 10 and 15 times and 20 Frog Coins for staying 200 times. | |Given by a receptionist based on how many times [[History_of_Mario#Super_Mario_RPG:_Legend_of_the_Seven_Stars|Mario]] stayed at the hotel: Flower Tab for staying 1 time, Flower Jar for staying 3 times, 1 Frog Coin for staying 5, 10 and 15 times and 20 Frog Coins for staying 200 times. | ||
| | |[[File:Marrymore (Flower Tab, Flower Jar, Frog Coins).png]] | ||
| | |[[File:Marrymore (Flower Tab, Flower Jar, Frog Coins) (Switch).png|300px]] | ||
|- | |- | ||
|[[File:Red Star Drink.png]] [[File:Green Something Drink.png]]<br>[[Pick Me Up]], [[Croaka Cola]] (Kerokero Cola in the original) | |[[File:Red Star Drink.png]] [[File:Green Something Drink.png]]<br>[[Pick Me Up]], [[Croaka Cola]] (Kerokero Cola in the original) | ||
|Can be bought from a bellhop for 10 and 150 [[Coin#Super_Mario_RPG:_Legend_of_the_Seven_Stars|Coins]] respectively after using room service in the suite. | |Can be bought from a bellhop for 10 and 150 [[Coin#Super_Mario_RPG:_Legend_of_the_Seven_Stars|Coins]] respectively after using room service in the suite. | ||
| | |[[File:Marrymore (Pick Me Up, Kerokero Cola).png]] | ||
| | |[[File:Marrymore (Pick Me Up, Croaka Cola).png|300px]] | ||
|- | |- | ||
|[[File:Green Mushroom.png]] [[File:Yellow Mushroom.png]] [[File:Red Star Drink.png]]<br>[[Super_Mushroom#Super_Mario_RPG:_Legend_of_the_Seven_Stars|Mid Mushroom]], [[Ultra_Mushroom#Super_Mario_RPG:_Legend_of_the_Seven_Stars|Max Mushroom]], Pick Me Up | |[[File:Green Mushroom.png]] [[File:Yellow Mushroom.png]] [[File:Red Star Drink.png]]<br>[[Super_Mushroom#Super_Mario_RPG:_Legend_of_the_Seven_Stars|Mid Mushroom]], [[Ultra_Mushroom#Super_Mario_RPG:_Legend_of_the_Seven_Stars|Max Mushroom]], Pick Me Up | ||
|After tipping the bellhop and then saying you had a good stay while leaving the hotel, there is a chance that he gives Mario one of three items as a gift. | |After tipping the bellhop and then saying you had a good stay while leaving the hotel, there is a chance that he gives Mario one of three items as a gift. | ||
| | |[[File:Marrymore (Mid Mushroom, Max Mushroom, Pick Me Up).png]] | ||
| | |[[File:Marrymore (Mid Mushroom, Max Mushroom, Pick Me Up) (Switch).png|300px]] | ||
|- | |- | ||
|[[File:Red Mushroom.png]] [[File:Green Mushroom.png]] [[File:RPG Bag.png]] 30x[[File:SMRPGCoin.png]]<br>[[Mushroom#Super_Mario_RPG:_Legend_of_the_Seven_Stars|Mushroom]], Mid Mushroom, [[Flower Box]], 30 [[Coin#Super_Mario_RPG:_Legend_of_the_Seven_Stars|Coins]] | |[[File:Red Mushroom.png]] [[File:Green Mushroom.png]] [[File:RPG Bag.png]] 30x[[File:SMRPGCoin.png]]<br>[[Mushroom#Super_Mario_RPG:_Legend_of_the_Seven_Stars|Mushroom]], Mid Mushroom, [[Flower Box]], 30 [[Coin#Super_Mario_RPG:_Legend_of_the_Seven_Stars|Coins]] | ||
|After Mario overstays in the suite and is then forced to work out his debt as a bellhop, he has a chance to be given a reward for his efforts by a suite guest. | |After Mario overstays in the suite and is then forced to work out his debt as a bellhop, he has a chance to be given a reward for his efforts by a suite guest. | ||
| | |[[File:Marrymore (Mushroom, Mid Mushroom, Flower Box, 30 Coins).png]] | ||
| | |[[File:Marrymore (Mushroom, Mid Mushroom, Flower Box, 30 Coins) (Switch).png|300px]] | ||
|- | |- | ||
|100x[[File:SMRPGCoin.png]] 5/10x[[File:Frog Coin.png]]<br>100 Coins, 5 or 10 [[Frog Coin]]s<br>[[File:RPG Bag.png]]<br>[[Bright Card]] | |100x[[File:SMRPGCoin.png]] 5/10x[[File:Frog Coin.png]]<br>100 Coins, 5 or 10 [[Frog Coin]]s<br>[[File:RPG Bag.png]]<br>[[Bright Card]] | ||
|In the reception of the hotel is a old [[Toad_(species)#Super_Mario_RPG:_Legend_of_the_Seven_Stars|Toad]] near the table. Mario can trade his Bright Card for either 100 Coins, 5 or 10 Frog Coins. If he decides to buy the card back, it costs 15 Frog Coins. | |In the reception of the hotel is a old [[Toad_(species)#Super_Mario_RPG:_Legend_of_the_Seven_Stars|Toad]] near the table. Mario can trade his Bright Card for either 100 Coins, 5 or 10 Frog Coins. If he decides to buy the card back, it costs 15 Frog Coins. | ||
| | |[[File:Marrymore (100 Coins, Frog Coins, Bright Card).png]] | ||
| | |[[File:Marrymore (100 Coins, Frog Coins, Bright Card) (Switch).png|300px]] | ||
|} | |} | ||
| Line 638: | Line 650: | ||
|[[Enduring Brooch]] | |[[Enduring Brooch]] | ||
|Given by [[Chef Torte]] and [[Apprentice (Torte)|Apprentice]] in the wedding hall after the rematch against them and the [[Cake (boss)|Bundt/Raspberry]]. | |Given by [[Chef Torte]] and [[Apprentice (Torte)|Apprentice]] in the wedding hall after the rematch against them and the [[Cake (boss)|Bundt/Raspberry]]. | ||
| | |[[File:Marrymore (Enduring Brooch).png|300px]] | ||
|} | |} | ||
| Line 651: | Line 663: | ||
|[[File:RPG Flower.png]]<br>[[Flower (Super Mario RPG)|Flower]] | |[[File:RPG Flower.png]]<br>[[Flower (Super Mario RPG)|Flower]] | ||
|In the first room with [[Alley Rat]]s going up and down the stairs, found behind the crates at the top of the stairs. | |In the first room with [[Alley Rat]]s going up and down the stairs, found behind the crates at the top of the stairs. | ||
| | |[[File:Sunken Ship (Flower 1).png]] | ||
| | |[[File:Sunken Ship (Flower 1) (Switch).png|300px]] | ||
|- | |- | ||
|[[File:SMRPG Mushroom box.png]]<br>[[Mushroom#Super_Mario_RPG:_Legend_of_the_Seven_Stars|Mushroom]] | |[[File:SMRPG Mushroom box.png]]<br>[[Mushroom#Super_Mario_RPG:_Legend_of_the_Seven_Stars|Mushroom]] | ||
|Falls of the ceiling after solving the puzzle behind the first of the six doors. | |Falls of the ceiling after solving the puzzle behind the first of the six doors. | ||
| | |[[File:Sunken Ship (Mushroom 1).png]] | ||
| | |[[File:Sunken Ship (Mushroom 1) (Switch).png|300px]] | ||
|- | |- | ||
|[[File:RPG Flower.png]]<br>Flower | |[[File:RPG Flower.png]]<br>Flower | ||
|Falls of the ceiling after solving the puzzle behind the second of the six doors. | |Falls of the ceiling after solving the puzzle behind the second of the six doors. | ||
| | |[[File:Sunken Ship (Flower 2).png]] | ||
| | |[[File:Sunken Ship (Flower 2) (Switch).png|300px]] | ||
|- | |- | ||
|[[File:Royal Syrup.PNG]]<br>[[Royal Syrup]] | |[[File:Royal Syrup.PNG]]<br>[[Royal Syrup]] | ||
|Falls of the ceiling after solving the puzzle behind the third of the six doors. | |Falls of the ceiling after solving the puzzle behind the third of the six doors. | ||
| | |[[File:Sunken Ship (Royal Syrup).png]] | ||
| | |[[File:Sunken Ship (Royal Syrup) (Switch).png|300px]] | ||
|- | |- | ||
|16x[[File:SMRPG 10 Gold Coin.png]]<br>16 [[10-Coin#Super_Mario_RPG:_Legend_of_the_Seven_Stars|10-Coins]] | |16x[[File:SMRPG 10 Gold Coin.png]]<br>16 [[10-Coin#Super_Mario_RPG:_Legend_of_the_Seven_Stars|10-Coins]] | ||
|Added to the inventory after colleting the last coin during the puzzle behind the fourth of the six doors | |Added to the inventory after colleting the last coin during the puzzle behind the fourth of the six doors | ||
| | |[[File:Sunken Ship (16 10-Coins).png]] | ||
| | |[[File:Sunken Ship (16 10-Coins) (Switch).png|300px]] | ||
|- | |- | ||
|[[File:Red Mushroom.png]]<br>Mushroom | |[[File:Red Mushroom.png]]<br>Mushroom | ||
|Falls of the ceiling after solving the puzzle behind the fifth of the six doors. | |Falls of the ceiling after solving the puzzle behind the fifth of the six doors. | ||
| | |[[File:Sunken Ship (Mushroom 2).png]] | ||
| | |[[File:Sunken Ship (Mushroom 2) (Switch).png|300px]] | ||
|- | |- | ||
|[[File:SMRPG Mushroom box.png]]<br>Mushroom | |[[File:SMRPG Mushroom box.png]]<br>Mushroom | ||
|Falls of the ceiling after solving the puzzle behind the sixth of the six doors. | |Falls of the ceiling after solving the puzzle behind the sixth of the six doors. | ||
| | |[[File:Sunken Ship (Mushroom 3).png]] | ||
| | |[[File:Sunken Ship (Mushroom 3) (Switch).png|300px]] | ||
|- | |- | ||
|[[File:Frog Coin.png]][[File:Frog Coin.png]][[File:Frog Coin.png]][[File:Frog Coin.png]]<br>4 [[Frog Coin]]s | |[[File:Frog Coin.png]][[File:Frog Coin.png]][[File:Frog Coin.png]][[File:Frog Coin.png]]<br>4 [[Frog Coin]]s | ||
|Under the water in the first partially flooded room, accessible by a whirpool in the next room. | |Under the water in the first partially flooded room, accessible by a whirpool in the next room. | ||
| | |[[File:Sunken Ship (4 Frog Coins).png]] | ||
| | |[[File:Sunken Ship (4 Frog Coins) (Switch).png|300px]] | ||
|- | |- | ||
|[[File:Frog Coin.png]]<br>Frog Coin | |[[File:Frog Coin.png]]<br>Frog Coin | ||
|In the last partially flooded room, above the barrels in the left corner. | |In the last partially flooded room, above the barrels in the left corner. | ||
| | |[[File:Sunken Ship (Frog Coin).png]] | ||
| | |[[File:Sunken Ship (Frog Coin) (Switch).png|300px]] | ||
|} | |} | ||
| Line 704: | Line 716: | ||
|[[Extra-Shiny Stone]] | |[[Extra-Shiny Stone]] | ||
|Given by [[Johnny]] in his cabin after defeating him in the rematch. | |Given by [[Johnny]] in his cabin after defeating him in the rematch. | ||
| | |[[File:Sunken Ship (Extra-Shiny Stone).png|300px]] | ||
|} | |} | ||
| Line 717: | Line 729: | ||
|[[File:RPG Key.png]]<br>Shed Key | |[[File:RPG Key.png]]<br>Shed Key | ||
|Found on the ground after defeating [[Speardovich]]. | |Found on the ground after defeating [[Speardovich]]. | ||
| | |[[File:Seaside Town (Shed Key).png]] | ||
| | |[[File:Seaside Town (Shed Key) (Switch).png|300px]] | ||
|- | |- | ||
|[[File:RPG Bag.png]] [[File:RPG Bag.png]] [[File:RPG Bag.png]] [[File:SMRPGCoin.png]]<br>[[Flower Box]], [[Flower Jar]], [[Flower Tab]], [[Coin#Super_Mario_RPG:_Legend_of_the_Seven_Stars|Coin]] | |[[File:RPG Bag.png]] [[File:RPG Bag.png]] [[File:RPG Bag.png]] [[File:SMRPGCoin.png]]<br>[[Flower Box]], [[Flower Jar]], [[Flower Tab]], [[Coin#Super_Mario_RPG:_Legend_of_the_Seven_Stars|Coin]] | ||
|Given by the [[Toad_(species)#Super_Mario_RPG:_Legend_of_the_Seven_Stars|Toad]] elder. Reward depends on how many times Mario let him be tickled: Flower Box for not being tickled at all, Flower Jar for being tickled once, Flower Tab for being tickled twice and 1 Coin for being tickled thirce or more. | |Given by the [[Toad_(species)#Super_Mario_RPG:_Legend_of_the_Seven_Stars|Toad]] elder. Reward depends on how many times Mario let him be tickled: Flower Box for not being tickled at all, Flower Jar for being tickled once, Flower Tab for being tickled twice and 1 Coin for being tickled thirce or more. | ||
| | |[[File:Seaside Town (Flower Box, Flower Tab, Flower Jar, Coin).png]] | ||
| | |[[File:Seaside Town (Flower Box, Flower Tab, Flower Jar, Coin) (Switch).png|300px]] | ||
|- | |- | ||
|[[File:Lucky Jewel.png]] [[File:Green Liquid.png]] [[File:RPG Bag.png]]<br>[[Rock Candy (item)|Rock Candy]], [[Maple Syrup]], Flower Tab | |[[File:Lucky Jewel.png]] [[File:Green Liquid.png]] [[File:RPG Bag.png]]<br>[[Rock Candy (item)|Rock Candy]], [[Maple Syrup]], Flower Tab | ||
|Given by a Toad in his Mushroom Boy shop. Rewards are chosen at random but dialogue indicates the reward:<br>If Toad says that Mario gave him a Rippin Mushroom, he gives a Rock Candy in return.<br>If Toad says that Mario gave him a Berry Mushroom, he gives a Maple Syrup in return.<br>If Toad says that Mario gave him a Flower Mushroom, he gives a Flower Tab in return. | |Given by a Toad in his Mushroom Boy shop. Rewards are chosen at random but dialogue indicates the reward:<br>If Toad says that Mario gave him a Rippin Mushroom, he gives a Rock Candy in return.<br>If Toad says that Mario gave him a Berry Mushroom, he gives a Maple Syrup in return.<br>If Toad says that Mario gave him a Flower Mushroom, he gives a Flower Tab in return. | ||
| | |[[File:Seaside Town (Rock Candy, Maple Syrup, Flower Tab).png]] | ||
| | |[[File:Seaside Town (Rock Candy, Maple Syrup, Flower Tab) (Switch).png|300px]] | ||
|- | |- | ||
|[[File:RPG Bag.png]]<br>[[Beetle Box]]<br>1x/50x[[File:SMRPGCoin.png]] [[File:Frog Coin.png]]<br>1/50 Coins, [[Frog Coin]] | |[[File:RPG Bag.png]]<br>[[Beetle Box]]<br>1x/50x[[File:SMRPGCoin.png]] [[File:Frog Coin.png]]<br>1/50 Coins, [[Frog Coin]] | ||
|In the [[Beetles Are Us]] shop. Mario can buy a Beetle Box for 150 Coins (first time)/50 Coins (later times). After collecting [[Beetle (Super Mario RPG)|Beetles]] in [[Booster Hill]], he can be given a reward from a [[Snifster]], depending on type of beetle caught: Female Beetle for 1 Coin, male Beetle for 50 Coins and Golden Beetle for 1 Frog Coin. | |In the [[Beetles Are Us]] shop. Mario can buy a Beetle Box for 150 Coins (first time)/50 Coins (later times). After collecting [[Beetle (Super Mario RPG)|Beetles]] in [[Booster Hill]], he can be given a reward from a [[Snifster]], depending on type of beetle caught: Female Beetle for 1 Coin, male Beetle for 50 Coins and Golden Beetle for 1 Frog Coin. | ||
| | |[[File:Seaside Town (Beetle Box, Coins and Frog Coins).png]] | ||
| | |[[File:Seaside Town (Beetle Box, Coins and Frog Coins) (Switch).png|300px]] | ||
|} | |} | ||
| Line 746: | Line 758: | ||
|5x-32x[[File:SMRPGCoin.png]] 1x-4x[[File:Frog Coin.png]]<br>5-32 [[Coin#Super_Mario_RPG:_Legend_of_the_Seven_Stars|Coins]], 1-4 [[Frog Coin]]s | |5x-32x[[File:SMRPGCoin.png]] 1x-4x[[File:Frog Coin.png]]<br>5-32 [[Coin#Super_Mario_RPG:_Legend_of_the_Seven_Stars|Coins]], 1-4 [[Frog Coin]]s | ||
|Given by a [[Shaman]] after completing [[Sky Bridge]] minigame. Rewards differ based on which course is taken (normal, special, expert) and which pass in done (1st, 2nd, 3rd). | |Given by a [[Shaman]] after completing [[Sky Bridge]] minigame. Rewards differ based on which course is taken (normal, special, expert) and which pass in done (1st, 2nd, 3rd). | ||
| | |[[File:Land's End (Coins, Frog Coins).png]] | ||
| | |[[File:Land's End (Coins, Frog Coins) (Switch).png|300px]] | ||
|- | |- | ||
|[[File:Red Bomb.png]] [[File:Yellow Mushroom.png]] [[File:Royal Syrup.PNG]] 4x[[File:RPG Flower.png]] 8x[[File:Frog Coin.png]]<br>[[Fire Bomb]], [[Ultra_Mushroom#Super_Mario_RPG:_Legend_of_the_Seven_Stars|Max Mushroom]], [[Royal Syrup]], 4 [[Flower (Super Mario RPG)|Flowers]], 8 Frog Coins | |[[File:Red Bomb.png]] [[File:Yellow Mushroom.png]] [[File:Royal Syrup.PNG]] 4x[[File:RPG Flower.png]] 8x[[File:Frog Coin.png]]<br>[[Fire Bomb]], [[Ultra_Mushroom#Super_Mario_RPG:_Legend_of_the_Seven_Stars|Max Mushroom]], [[Royal Syrup]], 4 [[Flower (Super Mario RPG)|Flowers]], 8 Frog Coins | ||
|After getting [[Temple Key]] from [[Monstro Town]], the key is used on the statue in the secret treasure room of [[Belome Temple]]. | |After getting [[Temple Key]] from [[Monstro Town]], the key is used on the statue in the secret treasure room of [[Belome Temple]]. | ||
| | |[[File:Land's End (Fire Bomb, Max Mushroom, Royal Syrup, 4 Flowers, 8 Frog Coins).png]] | ||
|[[File:SMRPG Switch Frog Coins.jpg|300px]] | |[[File:SMRPG Switch Frog Coins.jpg|300px]] | ||
|- | |- | ||
|[[File:RPG Pin.png]]<br>[[Troopa Medal]] (Troopa Pin in the original) | |[[File:RPG Pin.png]]<br>[[Troopa Medal]] (Troopa Pin in the original) | ||
|After completing [[Sergeant Flutter|Sergeant Flutter's]] minigame on the cliff, given by him after completing it under 12 seconds (11 in the remake) for the first time. | |After completing [[Sergeant Flutter|Sergeant Flutter's]] minigame on the cliff, given by him after completing it under 12 seconds (11 in the remake) for the first time. | ||
| | |[[File:Land's End (Troopa Pin).png]] | ||
| | |[[File:Land's End (Troopa Medal).png|300px]] | ||
|- | |- | ||
|1x/5x[[File:Frog Coin.png]]<br>1/5 Frog Coins | |1x/5x[[File:Frog Coin.png]]<br>1/5 Frog Coins | ||
|After completing Sergeant Flutter's minigame on the cliff, given by him after completing it under 12 seconds (11 in the remake) (1 Frog Coin) or 11 seconds (10 in the remake) (5 Frog Coins). | |After completing Sergeant Flutter's minigame on the cliff, given by him after completing it under 12 seconds (11 in the remake) (1 Frog Coin) or 11 seconds (10 in the remake) (5 Frog Coins). | ||
| | |[[File:Land's End (Frog Coins).png]] | ||
| | |[[File:Land's End (Frog Coins) (Switch).png|300px]] | ||
|} | |} | ||
| Line 774: | Line 786: | ||
|[[File:RPG Bag.png]]<br>[[Flower Tab]] | |[[File:RPG Bag.png]]<br>[[Flower Tab]] | ||
|In the Sky Bridge area, on the ground part in the upper left corner. | |In the Sky Bridge area, on the ground part in the upper left corner. | ||
| | |[[File:Land's End (Flower Tab).png|300px]] | ||
|- | |- | ||
|Sage Stick | |Sage Stick | ||
|Left behind by [[Belome]] in his room of Belome Temple after a rematch against him. | |Left behind by [[Belome]] in his room of Belome Temple after a rematch against him. | ||
| | |[[File:Land's End (Sage Stick).png|300px]] | ||
|} | |} | ||
| Line 791: | Line 803: | ||
|[[File:RPG Bag.png]] [[File:RPG Bag.png]]<br>[[Attack Scarf]], [[Super Suit]] | |[[File:RPG Bag.png]] [[File:RPG Bag.png]]<br>[[Attack Scarf]], [[Super Suit]] | ||
|Given by [[Chow]] in the second house after doing 30 and 100 Super jumps in the row respectivelly. | |Given by [[Chow]] in the second house after doing 30 and 100 Super jumps in the row respectivelly. | ||
| | |[[File:Monstro Town (Attack Scarf, Super Suit).png]] | ||
| | |[[File:Monstro Town (Attack Scarf, Super Suit) (Switch).png|300px]] | ||
|- | |- | ||
|[[File:RPG Key.png]]<br>[[Temple Key]] | |[[File:RPG Key.png]]<br>[[Temple Key]] | ||
|After talking to [[Thwomp#Super_Mario_RPG:_Legend_of_the_Seven_Stars|Thwomp]] in the second house 7 times, the outside key that was unreachable before falls to the ground. | |After talking to [[Thwomp#Super_Mario_RPG:_Legend_of_the_Seven_Stars|Thwomp]] in the second house 7 times, the outside key that was unreachable before falls to the ground. | ||
| | |[[File:Monstro Town (Temple Key).png]] | ||
| | |[[File:Monstro Town (Temple Key) (Switch).png|300px]] | ||
|- | |- | ||
|[[File:RPG Pin.png]]<br>[[Ghost Medal]] | |[[File:RPG Pin.png]]<br>[[Ghost Medal]] | ||
|Given by [[Three Musty Fears]] after sleeping in their bed after collecting [[Boo Flag]], [[Dry Bones Flag]] and [[Greaper Flag]]. | |Given by [[Three Musty Fears]] after sleeping in their bed after collecting [[Boo Flag]], [[Dry Bones Flag]] and [[Greaper Flag]]. | ||
| | |[[File:Monstro Town (Ghost Medal).png]] | ||
| | |[[File:Monstro Town (Ghost Medal) (Switch).png|300px]] | ||
|- | |- | ||
|[[File:RPG Bag.png]]<br>[[Jinx Belt]]<br>[[Teamwork Band]] | |[[File:RPG Bag.png]]<br>[[Jinx Belt]]<br>[[Teamwork Band]] | ||
|'''[[Jinx Belt]]''': Given by [[Jinx]] after beating him for the third time.<br>'''[[Teamwork Band]]''': Switch version only, given by him after beating him in the post game rematch. | |'''[[Jinx Belt]]''': Given by [[Jinx]] after beating him for the third time.<br>'''[[Teamwork Band]]''': Switch version only, given by him after beating him in the post game rematch. | ||
| | |[[File:Monstro Town (Jinx Belt).png]] | ||
| | |[[File:Monstro Town (Jinx Belt, Teamwork Band).png|300px]] | ||
|- | |- | ||
|[[File:RPG Pin.png]]<br>[[Quartz Charm]] | |[[File:RPG Pin.png]]<br>[[Quartz Charm]] | ||
|Given by [[Culex]] after beating him. | |Given by [[Culex]] after beating him. | ||
| | |[[File:Monstro Town (Quartz Charm).png]] | ||
| | |[[File:Monstro Town (Quartz Charm) (Switch).png|300px]] | ||
|} | |} | ||
| Line 824: | Line 836: | ||
|[[Crystal Shard]] | |[[Crystal Shard]] | ||
|Given by Culex after beating him in his 3D form. | |Given by Culex after beating him in his 3D form. | ||
| | |[[File:Monstro Town (Crystal Shard).png|300px]] | ||
|} | |} | ||
| Line 837: | Line 849: | ||
|[[File:RPG Bag.png]]<br>[[Seed (Super Mario RPG)|Seed]] | |[[File:RPG Bag.png]]<br>[[Seed (Super Mario RPG)|Seed]] | ||
|Taken after reading the note after defeating [[Smilax|Megasmilax]]. | |Taken after reading the note after defeating [[Smilax|Megasmilax]]. | ||
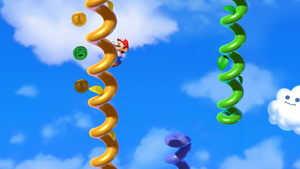
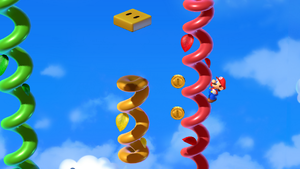
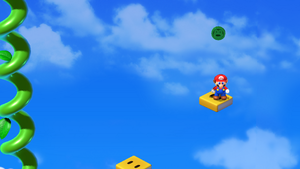
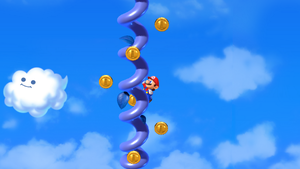
| | |[[File:Bean Valley (Seed).png]] | ||
| | |[[File:Bean Valley (Seed) (Switch).png|300px]] | ||
|- | |- | ||
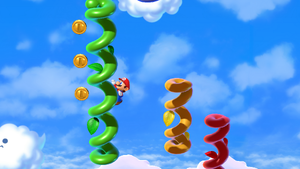
|[[File:SMRPG 10 Gold Coin.png]][[File:SMRPG 10 Gold Coin.png]][[File:SMRPG 10 Gold Coin.png]]<br>3 [[10-Coin#Super_Mario_RPG:_Legend_of_the_Seven_Stars|10-Coins]] | |[[File:SMRPG 10 Gold Coin.png]][[File:SMRPG 10 Gold Coin.png]][[File:SMRPG 10 Gold Coin.png]]<br>3 [[10-Coin#Super_Mario_RPG:_Legend_of_the_Seven_Stars|10-Coins]] | ||
|In the first beanstalk area, next to the yellow beanstalk. | |In the first beanstalk area, next to the yellow beanstalk. | ||
| | |[[File:Bean Valley (3 10-Coins).png]] | ||
| | |[[File:Bean Valley (3 10-Coins) (Switch).png|300px]] | ||
|- | |- | ||
|[[File:Frog Coin.png]]<br>[[Frog Coin]] | |[[File:Frog Coin.png]]<br>[[Frog Coin]] | ||
|In the first beanstalk area, next to the blue beanstalk. | |In the first beanstalk area, next to the blue beanstalk. | ||
| | |[[File:Bean Valley (Frog Coin).png]] | ||
| | |[[File:Bean Valley (Frog Coin 1) (Switch).png|300px]] | ||
|} | |} | ||
| Line 860: | Line 872: | ||
|[[File:SMRPG 10 Gold Coin.png]][[File:SMRPG 10 Gold Coin.png]][[File:SMRPG 10 Gold Coin.png]] [[File:Frog Coin.png]]<br>3 10-Coins, Frog Coin | |[[File:SMRPG 10 Gold Coin.png]][[File:SMRPG 10 Gold Coin.png]][[File:SMRPG 10 Gold Coin.png]] [[File:Frog Coin.png]]<br>3 10-Coins, Frog Coin | ||
|In the second beanstalk area, next to top yellow and green beanstalks. | |In the second beanstalk area, next to top yellow and green beanstalks. | ||
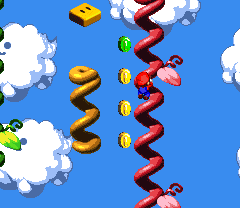
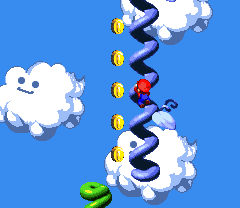
| | |[[File:Bean Valley (3 10-Coins and Frog Coin 1).png]] | ||
|- | |- | ||
|[[File:SMRPG 10 Gold Coin.png]][[File:SMRPG 10 Gold Coin.png]][[File:SMRPG 10 Gold Coin.png]] [[File:Frog Coin.png]]<br>3 10-Coins, Frog Coin | |[[File:SMRPG 10 Gold Coin.png]][[File:SMRPG 10 Gold Coin.png]][[File:SMRPG 10 Gold Coin.png]] [[File:Frog Coin.png]]<br>3 10-Coins, Frog Coin | ||
|In the third beanstalk area (leaving the second via yellow beanstalk), between yellow and red beanstalks. | |In the third beanstalk area (leaving the second via yellow beanstalk), between yellow and red beanstalks. | ||
| | |[[File:Bean Valley (3 10-Coins and Frog Coin 2).png]] | ||
|- | |- | ||
|[[File:SMRPG 10 Gold Coin.png]][[File:SMRPG 10 Gold Coin.png]][[File:SMRPG 10 Gold Coin.png]][[File:SMRPG 10 Gold Coin.png]][[File:SMRPG 10 Gold Coin.png]]<br>5 10-Coins | |[[File:SMRPG 10 Gold Coin.png]][[File:SMRPG 10 Gold Coin.png]][[File:SMRPG 10 Gold Coin.png]][[File:SMRPG 10 Gold Coin.png]][[File:SMRPG 10 Gold Coin.png]]<br>5 10-Coins | ||
|In the fourth beanstalk area (leaving the second via green beanstalk), next to the blue beanstalk. | |In the fourth beanstalk area (leaving the second via green beanstalk), next to the blue beanstalk. | ||
| | |[[File:Bean Valley (5 10-Coins).png]] | ||
|} | |} | ||
| Line 880: | Line 892: | ||
|Frog Coin | |Frog Coin | ||
|In the second beanstalk area, between the red and upper yellow beanstalks. | |In the second beanstalk area, between the red and upper yellow beanstalks. | ||
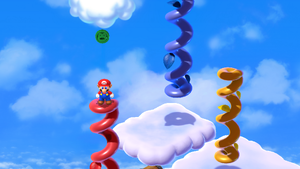
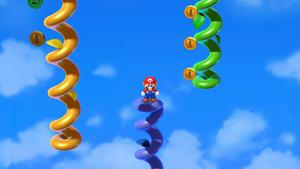
| | |[[File:Bean Valley (Frog Coin 2).png|300px]] | ||
|- | |- | ||
|3 10-Coins | |3 10-Coins | ||
|In the second beanstalk area, next to the green beanstalk. | |In the second beanstalk area, next to the green beanstalk. | ||
| | |[[File:Bean Valley (3 10-Coins 2).png|300px]] | ||
|- | |- | ||
|Frog Coin and 2 10-Coins | |Frog Coin and 2 10-Coins | ||
|In the second beanstalk area, next to the upper yellow beanstalk. | |In the second beanstalk area, next to the upper yellow beanstalk. | ||
| | |[[File:Bean Valley (2 10-Coins, Frog Coin).png|300px]] | ||
|- | |- | ||
|2 10-Coins | |2 10-Coins | ||
|In the third beanstalk area (leaving the second via yellow beanstalk), between red and yellow beanstalks. | |In the third beanstalk area (leaving the second via yellow beanstalk), between red and yellow beanstalks. | ||
| | |[[File:Bean Valley (2 10-Coins).png|300px]] | ||
|- | |- | ||
|Frog Coin | |Frog Coin | ||
|In the third beanstalk area, above the tile right of the red beanstalk. | |In the third beanstalk area, above the tile right of the red beanstalk. | ||
| | |[[File:Bean Valley (Frog Coin 3).png|300px]] | ||
|- | |- | ||
|3 10-Coins | |3 10-Coins | ||
|In the fourth beanstalk area (leaving the second via green beanstalk), next to the green beanstalk. | |In the fourth beanstalk area (leaving the second via green beanstalk), next to the green beanstalk. | ||
| | |[[File:Bean Valley (3 10-Coins 3).png|300px]] | ||
|- | |- | ||
|6 10-Coins | |6 10-Coins | ||
|In the fourth beanstalk area, | |In the fourth beanstalk area, around the blue beanstalk. | ||
| | |[[File:Bean Valley (6 10-Coins).png|300px]] | ||
|} | |} | ||
=Grate Guy's Casino= | =Grate Guy's Casino= | ||
| Line 918: | Line 929: | ||
|[[File:Frog Coin.png]]<br>[[Frog Coin]] (SNES)<br>[[Cleansing Juice]], [[Party Cleanse]], [[Royal Syrup]], [[Maple Syrup]], [[Finless Cola]] (SWITCH) | |[[File:Frog Coin.png]]<br>[[Frog Coin]] (SNES)<br>[[Cleansing Juice]], [[Party Cleanse]], [[Royal Syrup]], [[Maple Syrup]], [[Finless Cola]] (SWITCH) | ||
|'''SNES''': Given by winning a round of blackjack.<br>'''SWITCH''': Given by winning a round of the Memory Game. | |'''SNES''': Given by winning a round of blackjack.<br>'''SWITCH''': Given by winning a round of the Memory Game. | ||
| | |[[File:Grate Guy's Casino (Frog Coin).png]] | ||
| | |[[File:Grate Guy's Casino (Cleansing Juice, Party Cleanse, Royal Syrup, Maple Syrup, Finless Cola).png|300px]] | ||
|- | |- | ||
|[[File:RPG Bag.png]] [[File:RPG Bag.png]] [[File:RPG Bag.png]] [[File:Red Mushroom.png]] [[File:Royal Syrup.PNG]] [[File:Green Something Drink.png]] [[File:Lucky Jewel.png]] [[File:Red Essence.png]]<br>[[Moldy Mush]], [[Rotten Mush]], [[Dried Mushroom|Wilt Shroom]], [[Mushroom#Super_Mario_RPG:_Legend_of_the_Seven_Stars|Mushroom]], Royal Syrup, [[Croaka Cola]], [[Rock Candy (item)|Rock Candy]], [[Red Essence]]<br>[[File:Lucky Jewel.png]]<br>[[Star Egg]] | |[[File:RPG Bag.png]] [[File:RPG Bag.png]] [[File:RPG Bag.png]] [[File:Red Mushroom.png]] [[File:Royal Syrup.PNG]] [[File:Green Something Drink.png]] [[File:Lucky Jewel.png]] [[File:Red Essence.png]]<br>[[Moldy Mush]], [[Rotten Mush]], [[Dried Mushroom|Wilt Shroom]], [[Mushroom#Super_Mario_RPG:_Legend_of_the_Seven_Stars|Mushroom]], Royal Syrup, [[Croaka Cola]], [[Rock Candy (item)|Rock Candy]], [[Red Essence]]<br>[[File:Lucky Jewel.png]]<br>[[Star Egg]] | ||
|Given by Grate Guy after winning a round of [[Look the other way]] game. He gives out items at random. After winning the game 100 times, he gives Mario a Star Egg. | |Given by Grate Guy after winning a round of [[Look the other way]] game. He gives out items at random. After winning the game 100 times, he gives Mario a Star Egg. | ||
| | |[[File:Grate Guy's Casino (Moldy Mush, Rotten Mush, Wilt Shroom, Mushroom, Royal Syrup, Kerokero Cola, Rock Candy, Red Essence, Star Egg).png]] | ||
| | |[[File:Grate Guy's Casino (Moldy Mush, Rotten Mush, Wilt Shroom, Mushroom, Royal Syrup, Croaka Cola, Rock Candy, Red Essence, Star Egg).png|300px]] | ||
|} | |} | ||
| Line 937: | Line 948: | ||
|[[File:Red Essence.png]][[File:Red Essence.png]]<br>2 [[Red Essence]]s | |[[File:Red Essence.png]][[File:Red Essence.png]]<br>2 [[Red Essence]]s | ||
|After using the Dream Cushion option in the inn, [[History_of_Mario#Super_Mario_RPG:_Legend_of_the_Seven_Stars|Mario]] has a chance to have a dream where [[Toad#Super_Mario_RPG:_Legend_of_the_Seven_Stars|Toad]] reveals he's actually a monster. After waking up, Toad shows up and Mario runs away in fear. After explaining himself, Toad gives him 2 Red Essences. | |After using the Dream Cushion option in the inn, [[History_of_Mario#Super_Mario_RPG:_Legend_of_the_Seven_Stars|Mario]] has a chance to have a dream where [[Toad#Super_Mario_RPG:_Legend_of_the_Seven_Stars|Toad]] reveals he's actually a monster. After waking up, Toad shows up and Mario runs away in fear. After explaining himself, Toad gives him 2 Red Essences. | ||
| | |[[File:Nimbus Land (2 Red Essences).png]] | ||
| | |[[File:Nimbus Land (2 Red Essences) (Switch).png|300px]] | ||
|- | |- | ||
|[[File:Dodo Feather.png]]<br>[[Feather (accessory)|Feather]] | |[[File:Dodo Feather.png]]<br>[[Feather (accessory)|Feather]] | ||
|Picked up after succesfully completing the statue minigame with [[Dodo]]. | |Picked up after succesfully completing the statue minigame with [[Dodo]]. | ||
| | |[[File:Nimbus Land (Feather).png]] | ||
| | |[[File:Nimbus Land (Feather) (Switch).png|300px]] | ||
|- | |- | ||
|[[File:RPG Bag.png]]<br>[[Flower Jar]] | |[[File:RPG Bag.png]]<br>[[Flower Jar]] | ||
|In the room with 3 doors, Mario should take the left one. After reaching the very end, he can get a Flower Jar by talking to the man in the blue clothing. | |In the room with 3 doors, Mario should take the left one. After reaching the very end, he can get a Flower Jar by talking to the man in the blue clothing. | ||
| | |[[File:Nimbus Land (Flower Jar 1).png]] | ||
| | |[[File:Nimbus Land (Flower Jar 1) (Switch).png|300px]] | ||
|- | |- | ||
|[[File:RPG Key.png]]<br>[[Castle Key 1]] | |[[File:RPG Key.png]]<br>[[Castle Key 1]] | ||
|In the room with 3 doors, Mario should take the left one. After reaching the very end, he can get a key to the middle one from the guy in the left corner. | |In the room with 3 doors, Mario should take the left one. After reaching the very end, he can get a key to the middle one from the guy in the left corner. | ||
| | |[[File:Nimbus Land (Castle Key 1).png]] | ||
| | |[[File:Nimbus Land (Castle Key 1) (Switch).png|300px]] | ||
|- | |- | ||
|[[File:RPG Key.png]]<br>[[Castle Key 2]] | |[[File:RPG Key.png]]<br>[[Castle Key 2]] | ||
|Given by [[Birdo#Super_Mario_RPG:_Legend_of_the_Seven_Stars|Birdo]] after defeating her. | |Given by [[Birdo#Super_Mario_RPG:_Legend_of_the_Seven_Stars|Birdo]] after defeating her. | ||
| | |[[File:Nimbus Land (Castle Key 2).png]] | ||
| | |[[File:Nimbus Land (Castle Key 2) (Switch).png|300px]] | ||
|- | |- | ||
|[[File:RPG Bag.png]]<br>Flower Jar | |[[File:RPG Bag.png]]<br>Flower Jar | ||
|After defeating [[Valentina]], given by a man in the "king's bedroom". | |After defeating [[Valentina]], given by a man in the "king's bedroom". | ||
| | |[[File:Nimbus Land (Flower Jar 2).png]] | ||
| | |[[File:Nimbus Land (Flower Jar 2) (Switch).png|300px]] | ||
|- | |- | ||
|[[File:RPG Bag.png]]<br>[[Fertilizer]] | |[[File:RPG Bag.png]]<br>[[Fertilizer]] | ||
|After defeating Valentina, given by a [[Beezo]] found hiding on the invisible platform in the main outside area. | |After defeating Valentina, given by a [[Beezo]] found hiding on the invisible platform in the main outside area. | ||
| | |[[File:Nimbus Land (Fertilizer).png]] | ||
| | |[[File:Nimbus Land (Fertilizer) (Switch).png|300px]] | ||
|- | |- | ||
|[[File:RPG Ring.png]]<br>[[Signal Ring]] ([[Echo Signal Ring]] in the remake) | |[[File:RPG Ring.png]]<br>[[Signal Ring]] ([[Echo Signal Ring]] in the remake) | ||
|After defeating Valentina, dropped by [[Croco]] in the rightmost house in the main outside area. | |After defeating Valentina, dropped by [[Croco]] in the rightmost house in the main outside area. | ||
| | |[[File:Nimbus Land (Signal Ring).png]] | ||
| | |[[File:Nimbus Land (Echo Signal Ring).png|300px]] | ||
|} | |} | ||
| Line 986: | Line 997: | ||
|[[File:Frog Coin.png]]<br>[[Frog Coin]] | |[[File:Frog Coin.png]]<br>[[Frog Coin]] | ||
|In the eighth scene for the entrance. | |In the eighth scene for the entrance. | ||
| | |[[File:Barrel Volcano (Frog Coin 1).png]] | ||
| | |[[File:Barrel Volcano (Frog Coin 1) (Switch).png|300px]] | ||
|- | |- | ||
|[[File:Frog Coin.png]]<br>Frog Coin | |[[File:Frog Coin.png]]<br>Frog Coin | ||
|In the ninth scene from the entrance. | |In the ninth scene from the entrance. | ||
| | |[[File:Barrel Volcano (Frog Coin 2).png]] | ||
| | |[[File:Barrel Volcano (Frog Coin 2) (Switch).png|300px]] | ||
|- | |- | ||
|[[File:Frog Coin.png]] [[File:Frog Coin.png]]<br>2 Frog Coins | |[[File:Frog Coin.png]] [[File:Frog Coin.png]]<br>2 Frog Coins | ||
|In the tenth scene from the entrance. | |In the tenth scene from the entrance. | ||
| | |[[File:Barrel Volcano (Frog Coin 3-4).png]] | ||
| | |[[File:Barrel Volcano (Frog Coins 3-4) (Switch).png|300px]] | ||
|} | |} | ||
| Line 1,010: | Line 1,021: | ||
|[[File:SMRPG 10 Gold Coin.png]][[File:SMRPG 10 Gold Coin.png]][[File:SMRPG 10 Gold Coin.png]][[File:SMRPG 10 Gold Coin.png]]<br>4 [[10-Coin#Super_Mario_RPG:_Legend_of_the_Seven_Stars|10-Coins]] | |[[File:SMRPG 10 Gold Coin.png]][[File:SMRPG 10 Gold Coin.png]][[File:SMRPG 10 Gold Coin.png]][[File:SMRPG 10 Gold Coin.png]]<br>4 [[10-Coin#Super_Mario_RPG:_Legend_of_the_Seven_Stars|10-Coins]] | ||
|Found in the action course with invisible path. | |Found in the action course with invisible path. | ||
| | |[[File:Bowser's Keep (Invisible Path 10-Coins 1-2).png]]<br>[[File:Bowser's Keep (Invisible Path 10-Coin 3).png]]<br>[[File:Bowser's Keep (Invisible Path 10-Coin 4).png]] | ||
| | |[[File:Bowser's Keep (Invisible Path 10-Coins 1-2) (Switch).png|300px]]<br>[[File:Bowser's Keep (Invisible Path 10-Coin 3) (Switch).png|300px]]<br>[[File:Bowser's Keep (Invisible Path 10-Coin 4) (Switch).png|300px]] | ||
|- | |- | ||
|[[File:SMRPG 10 Gold Coin.png]][[File:SMRPG 10 Gold Coin.png]][[File:SMRPG 10 Gold Coin.png]][[File:SMRPG 10 Gold Coin.png]][[File:SMRPG 10 Gold Coin.png]][[File:SMRPG 10 Gold Coin.png]][[File:SMRPG 10 Gold Coin.png]][[File:SMRPG 10 Gold Coin.png]]<br>8 10-Coins | |[[File:SMRPG 10 Gold Coin.png]][[File:SMRPG 10 Gold Coin.png]][[File:SMRPG 10 Gold Coin.png]][[File:SMRPG 10 Gold Coin.png]][[File:SMRPG 10 Gold Coin.png]][[File:SMRPG 10 Gold Coin.png]][[File:SMRPG 10 Gold Coin.png]][[File:SMRPG 10 Gold Coin.png]]<br>8 10-Coins | ||
|Found in the action course with iron ball. | |Found in the action course with iron ball. | ||
| | |[[File:Bowser's Keep (Iron Ball 10-Coins 1).png]]<br>[[File:Bowser's Keep (Iron Ball 10-Coins 2).png]] | ||
| | |[[File:Bowser's Keep (Iron Ball 10-Coins 1) (Switch).png|300px]]<br>[[File:Bowser's Keep (Iron Ball 10-Coins 2) (Switch).png|300px]] | ||
|} | |} | ||
| Line 1,029: | Line 1,040: | ||
|[[File:Lucky Jewel.png]]<br>[[Rock Candy (item)|Rock Candy]] | |[[File:Lucky Jewel.png]]<br>[[Rock Candy (item)|Rock Candy]] | ||
|Given by [[Toad#Super_Mario_RPG:_Legend_of_the_Seven_Stars|Toad]] after trying to leave the room where [[Clerk]] was located. | |Given by [[Toad#Super_Mario_RPG:_Legend_of_the_Seven_Stars|Toad]] after trying to leave the room where [[Clerk]] was located. | ||
| | |[[File:Weapon World (Rock Candy).png]] | ||
| | |[[File:Weapon World (Rock Candy) (Switch).png|300px]] | ||
|} | |} | ||
Revision as of 01:40, October 3, 2024
Mario's Pad
| Item | Description | Image (SNES) | Image (Switch) |
|---|---|---|---|
| 4x 4 Mushrooms |
After trying to leave the area, Mario bumps into Toad which takes of 1 HP, so Toad gives Mario a Mushroom. After the optional tutorial on how to use items, a Goomba appears. After the optional battle, Toad gives Mario three more Mushrooms. | 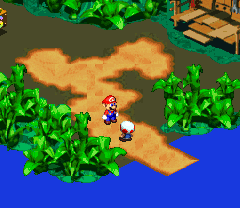
|
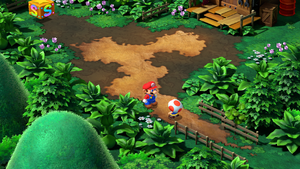
|
Dry Bones Flag |
After sleeping in the Three Musty Fears' bed in Monstro Town, find it under Mario's bed. | 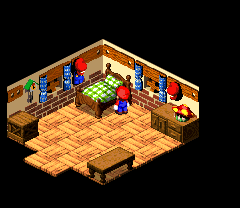
|
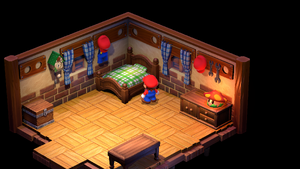
|
Switch Exclusive
| Item | Description | Image |
|---|---|---|
| Stay Voucher | After loading a save file after defeating Smithy, given by Toad. | 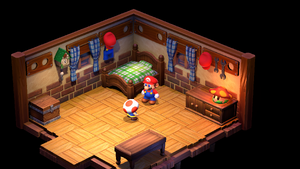
|
Mushroom Way
| Item | Description | Image (SNES) | Image (Switch) |
|---|---|---|---|
Honey Syrup |
Given by Toad after saving him from Goomba in the first scene. | 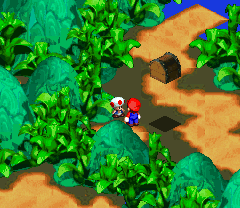
|
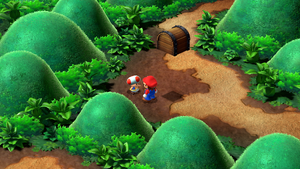
|
Flower Tab |
Given by Toad after saving him from Paratroopa in the second scene. | 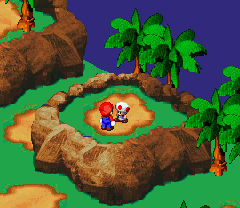
|
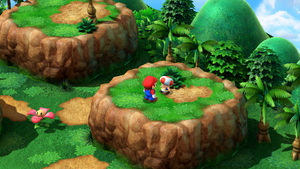
|
Hammer |
Given by Toad after saving him from Hammer Bro in the third scene. | 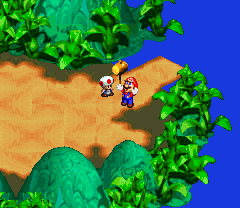
|
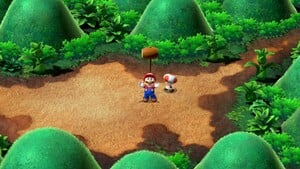
|
Switch Exclusive
| Item | Description | Image |
|---|---|---|
| Flower Tab | Found on the ground left of the left elevated ground in the second scene. | 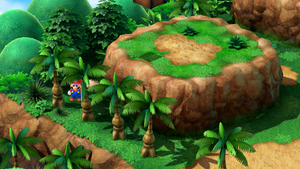
|
| Pick Me Up | Found on the ground on the upper elevated ground in the second scene. | 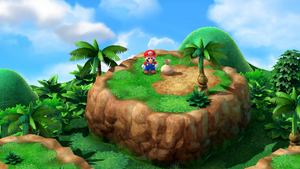
|
Mushroom Kingdom
| Item | Description | Image (SNES) | Image (Switch) |
|---|---|---|---|
Mushroom |
Given by Granny after finding Peach's ??? in Princess Peach's room. | 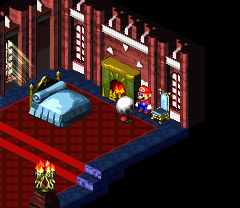
|
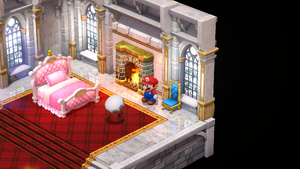
|
Pick Me Up |
Given by the shopkeeper in the Item Shop after Mallow joins the party. | 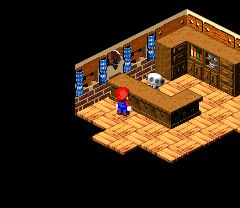
|
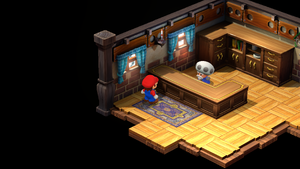
|
10 Coins |
During Claymorton's invasion, given by a Toad guard near the item shop after saving him from Shymore. | 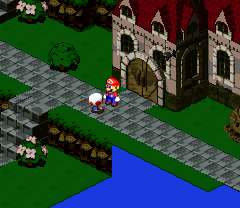
|
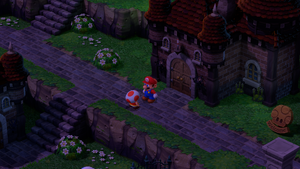
|
Flower Tab |
During Claymorton's invasion, given by a Toad near the house opposite of item shop after giving him the Wallet. If not given during the invasion, it can be given after the invasion, in which Toad stands next to the left house of the lower two ones. | 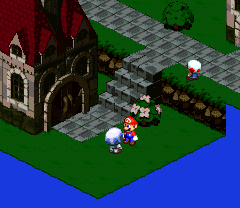
|
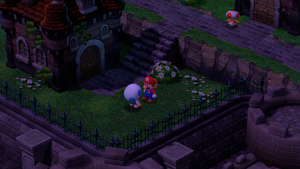
|
Flower Tab |
During Claymorton's invasion, given by a dad Toad in the two-story house on the left after all 3 Shymores found in the house are defeated. Can be given on either floor, depending on which set of Shymores was defeated first. | 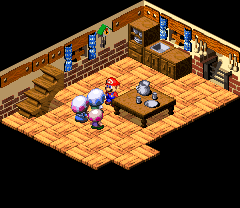
|
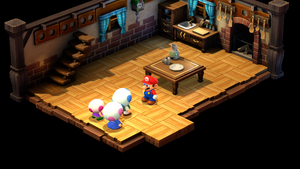
|
Wake-Up Pin |
During Claymorton's invasion, given by a Toad hiding in the guest room of the castle. | 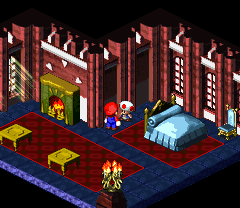
|
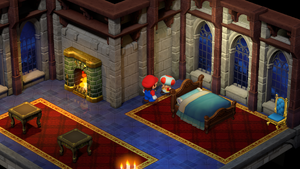
|
Flower Tab |
During Claymorton's invasion, given by the Toad after escorting him from the entrance of the castle to the Princess Peach's room. | 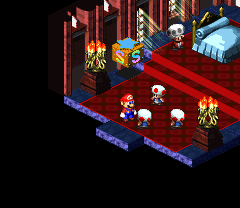
|
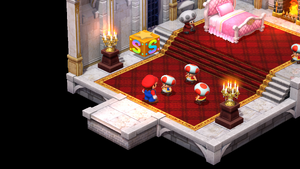
|
Cricket Pie |
After Claymorton's invasion, given by the shopkeeper in exchange for Special Frog Coin. | 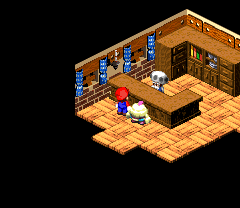
|
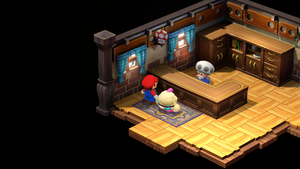
|
Flower Tab or Frog Coin |
After returning with Princess Peach, talk to the Toad who was given the Wallet to receive additional reward. | 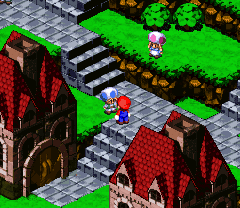
|
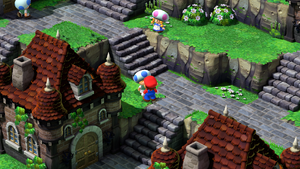
|
Switch Exclusive
| Item | Description | Image |
|---|---|---|
| Signal Ring | Given by an elderly Toad woman in the basement of the Item Shop after getting first Hidden Treasure. | 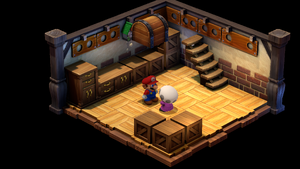
|
Bandit's Way
| Item | Description | Image (SNES) | Image (Switch) |
|---|---|---|---|
3 Coins |
In the second scene, 4 Coins spawn while using the tiles. Only the last three are collectable since Croco takes the first one. | 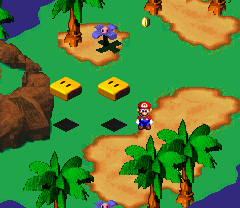 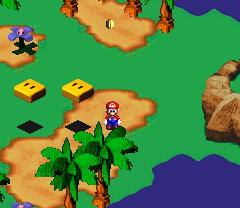 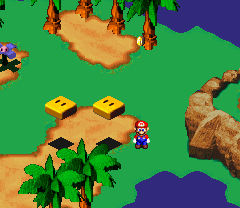
|
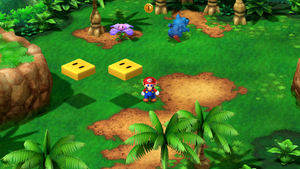 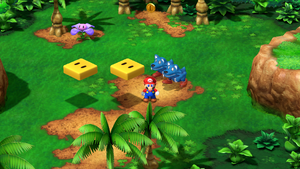 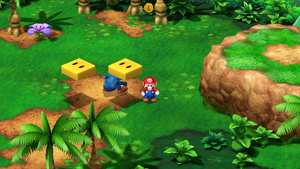
|
Special Frog Coin (Rare Frog Coin in the original) and Wallet |
In the fifth scene, picked up after defeating Croco. | 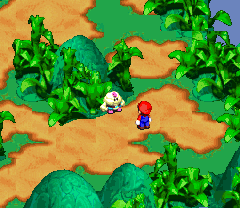
|
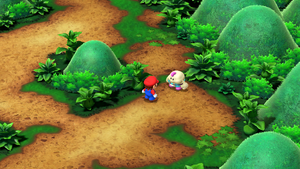
|
Midas River
| Item | Description | Image (SNES) | Image (Switch) |
|---|---|---|---|
| 4x 4 Frog Coins |
Found in the waterfall portion of the area. |    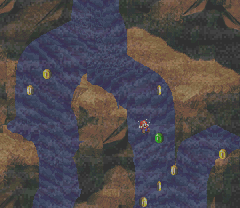
|
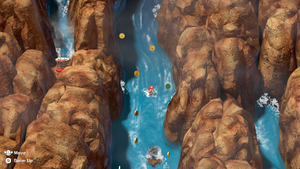 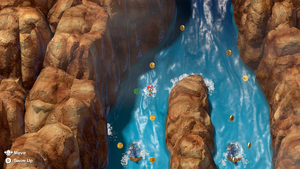 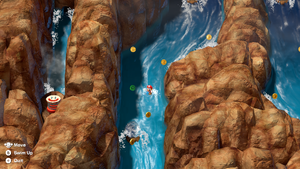 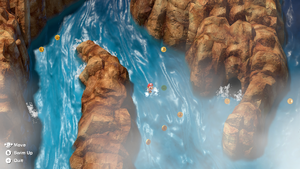
|
Flower |
Automatically given after going into the first cave after chosing to go left from the top of the waterfall. | 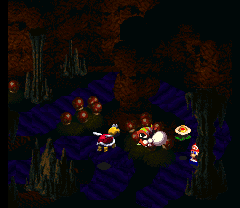
|
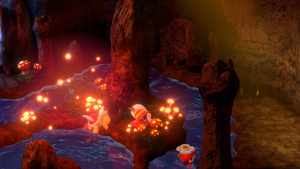
|
Frog Coin |
Automatically given after going into the second cave after chosing to go left from the top of the waterfall. | 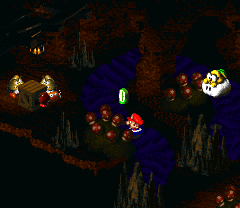
|
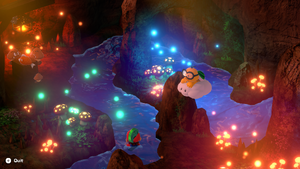
|
Flower |
Automatically given after going into the second cave after chosing to go right from the top of the waterfall. | 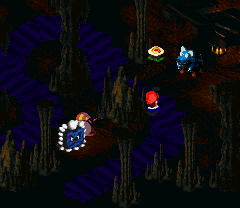
|
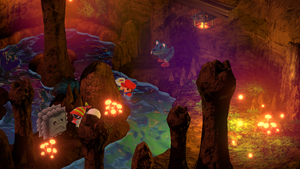
|
Koopa Shell (NokNok Shell in the original) Frog Coin 5x 5 Frog Coins |
Koopa Shell: Automatically given by the Toad at the end of the river after completing the waterfall and river events for the first time. Frog Coins: One is given after Mario collects 60 or more coins during the events for the first time. Afterwards every 70-99 Coins award 1 Frog Coin and 100 Coins award 5 Frog Coins. |
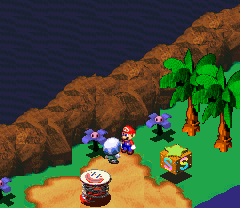
|
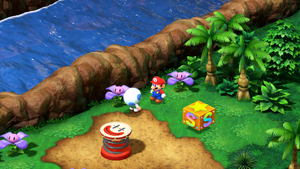
|
Coins |
After using the secret entrance from Moleville, all collected Coins during this run are given to Mario after he reads the paper at the end of the river event. | 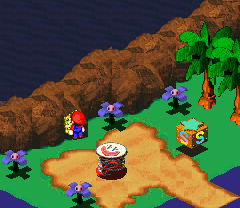
|
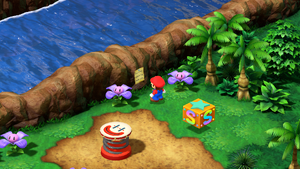
|
Switch Exclusive
| Item | Description | Image |
|---|---|---|
| 2 Frog Coins | There are two additional Frog Coins to be found on the right side of the waterfall. | 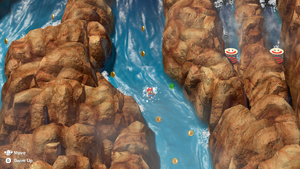 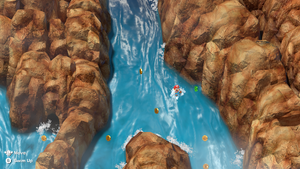
|
Tadpole Pond
| Item | Description | Image (SNES) | Image (Switch) |
|---|---|---|---|
Froggie Stick 10x 10 Frog Coins |
Given by the Frog Sage after giving him the Cricket Pie (Froggie Stick)/Cricket Jam (10 Frog Coins). | 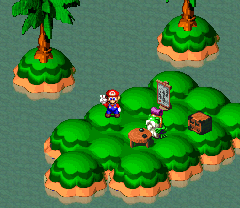
|
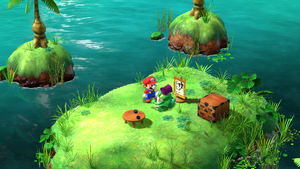
|
Alto Card, Tenor Card, Soprano Card |
Given by Toadofsky after helping him with compositions. Available after talking with the Frog Sage for the first time (Alto), after saving Dyna and Mite in Moleville (Tenor) and after interacting with Starslap upstairs of the Monstermama's house in Monstro Town (Soprano). | 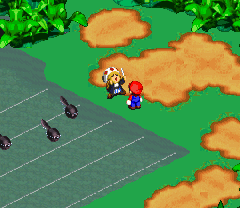
|
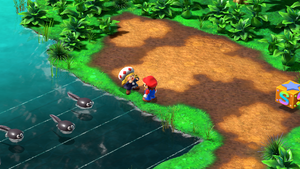
|
Rose Way
| Item | Description | Image (SNES) | Image (Switch) |
|---|---|---|---|
Mushroom |
In the first scene, found on the second island after using the second tile. | 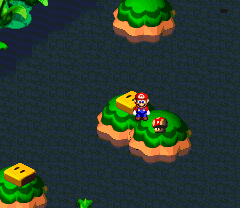
|
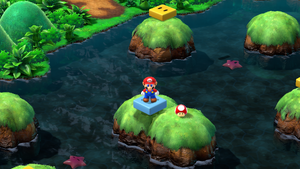
|
Flower |
In the first scene, found on the third island after using the third tile. | 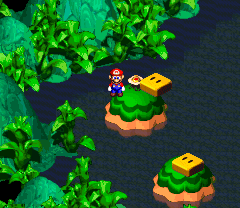
|
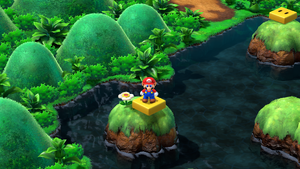
|
10-Coin |
In the first scene, between first and second islands after using fourth tile. | 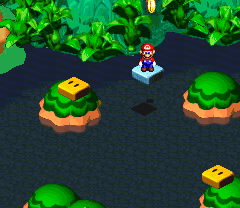
|
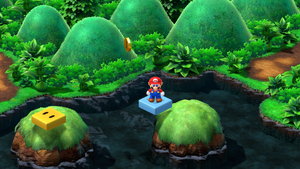
|
10-Coin |
In the first scene after going through the second, above the second island after using first tile. | 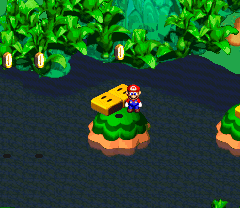
|
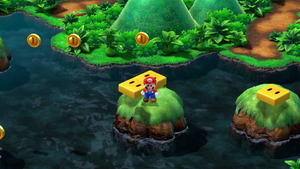
|
2 10-Coins |
In the first scene after going through the second, between first and second island after using the third tile. | 
|
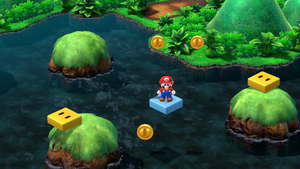
|
10-Coin |
In the first scene after going through the second, above the second island after using the second tile. | 
|
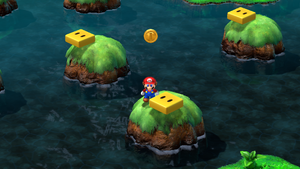
|
Rose Town
| Item | Description | Image (SNES) | Image (Switch) |
|---|---|---|---|
Flower Tab |
Given by Toad after sleeping in the Rose Town inn for the first time after the cutscene where Geno doll awakens. | 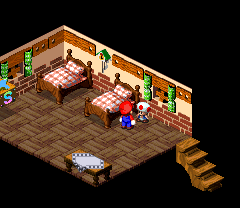
|
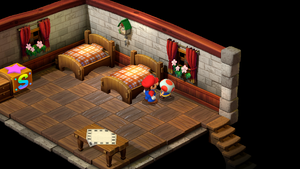
|
Frog Coin |
Given by a Treasure Hunter Toad. Only given if Mario found the secret Treasure Chest room in Forest Maze beforehand. | 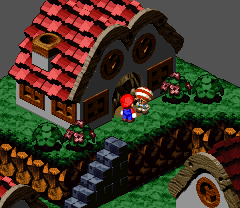
|
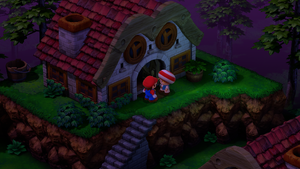
|
Finger Shot |
Given by Gaz in the inn after defeating Bowyer in Forest Maze. | 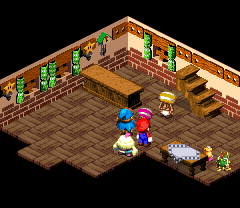
|
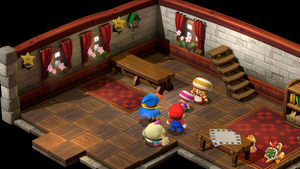
|
Greaper Flag |
After sleeping in the Three Musty Fears' bed in Monstro Town, find it behind introductory sign. | 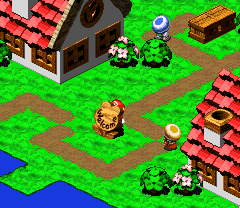
|
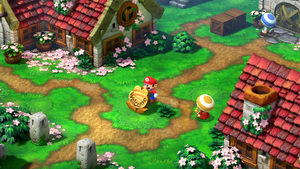
|
Forest Maze
| Item | Description | Image (SNES) | Image (Switch) |
|---|---|---|---|
Mushroom |
In the first scene, right of the exit. | 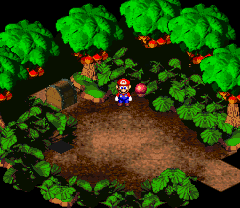
|
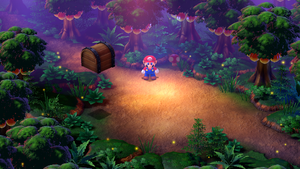
|
Mushroom |
In the second scene, left of the entrance. | 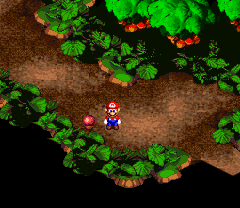
|
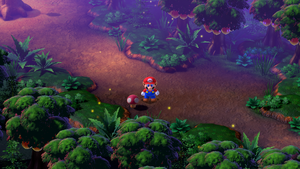
|
Mushroom |
In the third scene (first cave scene), in the first mushroom patch. | 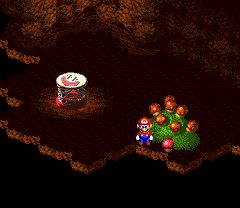
|
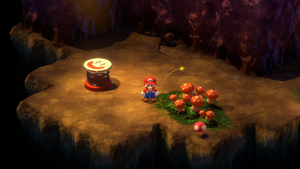
|
Mushroom |
In the third scene (first cave scene), in the second mushroom patch. | 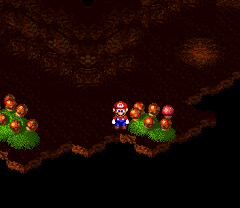
|
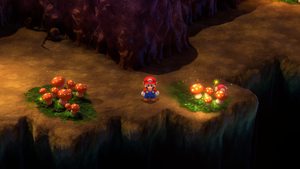
|
Mushroom |
In the third scene (first cave scene), in the third mushroom patch. | 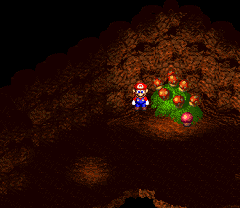
|
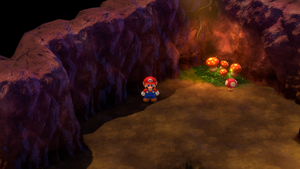
|
Mushroom |
In the third scene (first cave scene), in the fourth mushroom patch. | 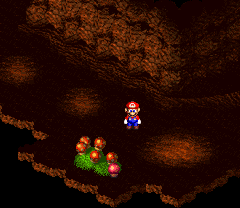
|
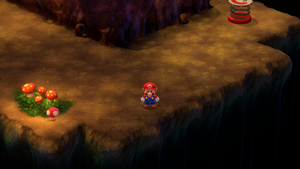
|
Mushroom |
In the eight scene (third cave scene), in the second mushroom patch. | 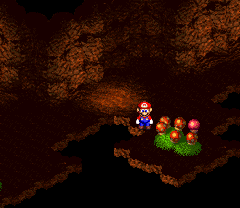
|
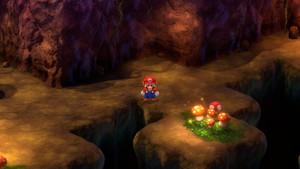
|
Mushroom |
In the eight scene (third cave scene), in the third mushroom patch. | 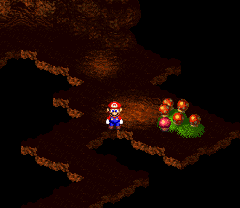
|
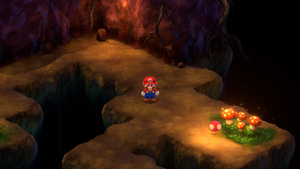
|
Mushroom |
In the ninth scene (fourth cave scene), in the first mushroom patch. | 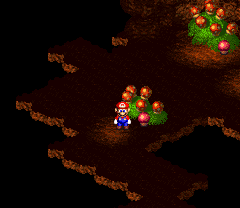
|
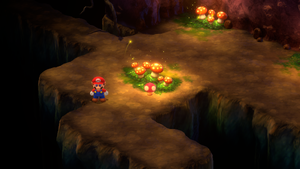
|
Mushroom |
In the ninth scene (fourth cave scene), in the second mushroom patch. | 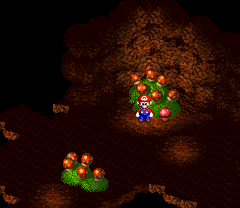
|
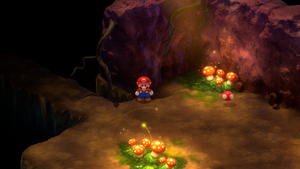
|
Mushroom |
In the ninth scene (fourth cave scene), in the third mushroom patch. | 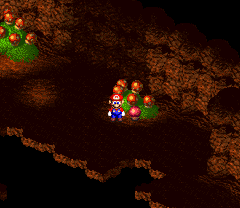
|
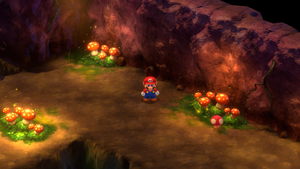
|
Mushroom |
In the tenth scene, found left of the exit. | 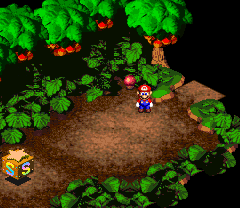
|
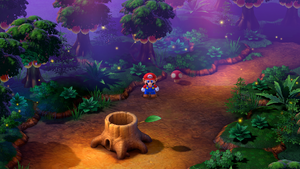
|
Pipe Vault
| Item | Description | Image (SNES) | Image (Switch) |
|---|---|---|---|
5 Coins |
In the room accessed from the second pipe of the third room. | 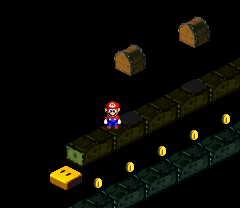
|
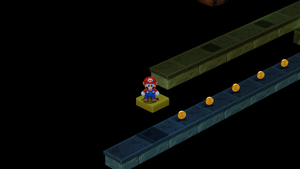
|
Frog Coin |
In the room accessed from the second pipe of the third room, under the wall. Mario must slide in order to get the coin. | 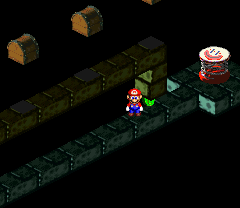
|
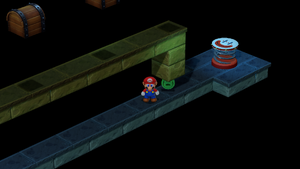
|
Flower Tab, Frog Coins, Flower Jar |
In the room accessed from the fifth pipe of the third room, rewards from the Goomba-thumping minigame. Rewards include: Flower Tab for the first time Flower Jar for the second time Frog Coins for all other times. There are also two Frog Coins between Flower Tab and Flower Jar in the remake. |
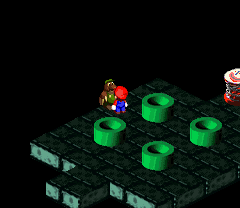
|
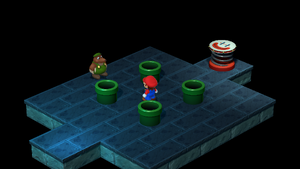
|
Yo'ster Isle
| Item | Description | Image (SNES) | Image (Switch) |
|---|---|---|---|
3 Yoshi Cookies |
Given by Yoshi after defeating Boshi in the Mushroom Derby for the first time. Afterwards, if Mario is out of the cookies, they can be replenished by talking to a red Yoshi near the egg nest. | 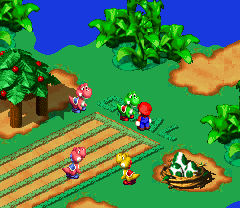
|
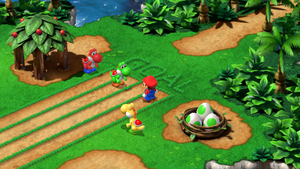
|
Yoshi Cookies |
Given by red Yoshi after winning Mushroom Derby. Amount of cookies depends on how many were wagered and the ratio said by Boshi. | 
|
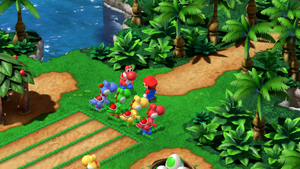
|
Frog Coin Red Essence Red Essence or Yoshi-Ade or Energizer or Bracer |
After Baby Fat hatches from its egg and is given 21 Yoshi Cookies, it leaves its nest. Afterwards, giving it certain amounts of Yoshi Cookies means getting certain rewards in return. These rewards include: Frog Coin: After giving it 30 Cookies in total, afterwards after every 50 Cookies. Red Essence: After giving it 20 Cookies simultaneously. Red Essence, Yoshi-Ade, Energizer and Bracer: One of the four is randomly picked after giving it 10 Cookies simultaneously. |
|
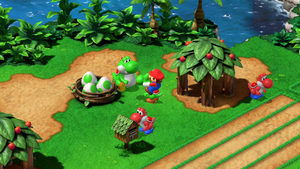
|
Boo Flag (Big Boo Flag in the original) |
After sleeping in the Three Musty Fears' bed in Monstro Town, find it between the O and A in GOAL. | 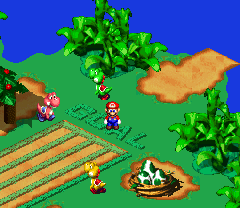
|
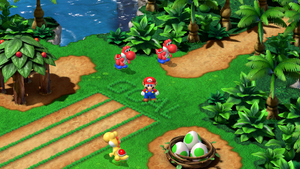
|
Moleville
| Item | Description | Image (SNES) | Image (Switch) |
|---|---|---|---|
| 3x 3 Flower Tabs |
After Croco destroys the wall with Microbomb, he and three Crooks with him scatter through out the mines. After finding and defeating a Crook, Mario is given a Flower Tab in return. This can be repeated two times. | 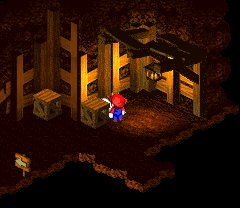 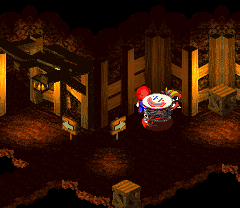 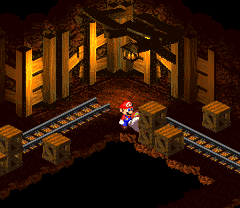
|
  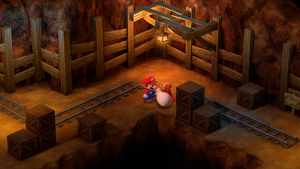
|
Microbomb (Bambino Bomb in the original) and stolen Coins |
Picked up after defeating Croco. | 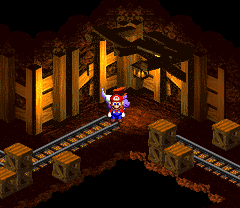
|
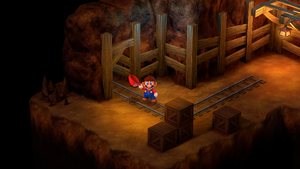
|
Frog Coin |
After blowing up the wall with Microbomb, Mario must take the lower path. In the next scene, after trying to leave through the lower path, a minecart with Shy Guy rams Mario back into the previous scene and drops a Frog Coin in a process. | 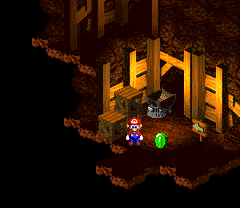
|
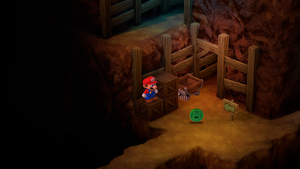
|
| 1-32x 1 to 32 Coins (SNES) 1 to 204 Coins (SWITCH) |
After the first time, the coins are added in the house of Dyna and Mite's parents, afterwards they're added outside, where Bowser was seen. SNES: There are 34 Coins found in the second and fourth scenes of the Moleville Mountain minigame, but only 32 can be collected. Coins are added to inventory after the minigame ends. SWITCH: There are total of 204 Coins found during the minigame. Mario cannot take all of them. Coins are added to inventory after the minigame ends. |
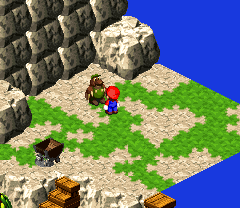
|
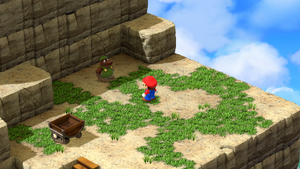
|
5 10-Coins |
After wagering 30 Coins and breaking the record in the Moleville Mountain minigame. | 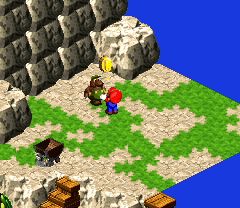
|
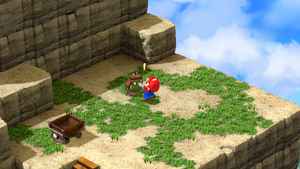
|
Fright Bomb or Fire Bomb or Ice Bomb |
After saving Dyna and Mite, in the rightmost house, given by a Mole woman after accumulating 100 points (by giving her spare Mushrooms and Syrups). | 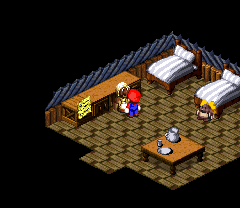
|
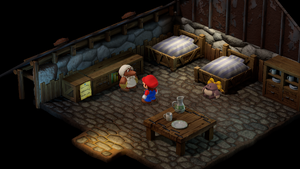
|
Fireworks |
After saving Dyna and Mite, in the house above the Item Shop, given by Mole man in exchange for 500 Coins. Changes type of fireworks that appear in the credits based on how many times it was bought from him. | 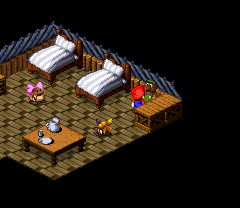
|
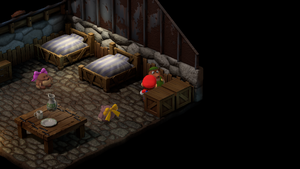
|
Shiny Stone |
After saving Dyna and Mite, given by a Mole girl partially hidden by crates in exchange for the Fireworks. | 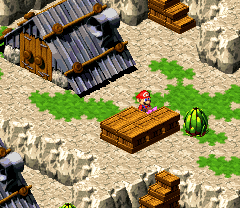
|
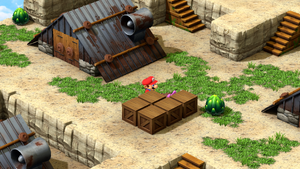
|
Carbo Cookie |
After saving Dyna and Mite, given by a Mole girl in the back of the Item Shop in exchange for the Shiny Stone. | 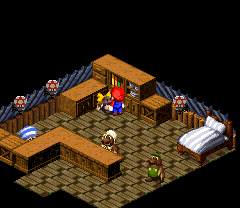
|
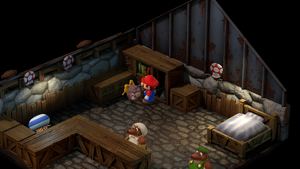
|
Frog Coin |
After saving Dyna and Mite, there is a Mole girl standing on the top of the bucket. By giving her the Carbo Cookie, she either leaves the bucket, allowing access to the secret entrance to Midas River or she gives Mario a Frog Coin. | 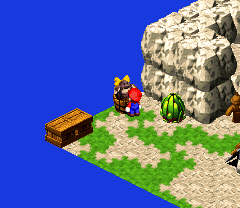
|
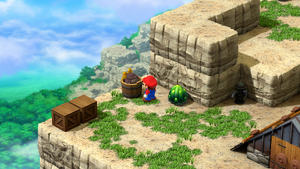
|
Lucky Jewel, Mystery Egg, Frying Pan Feather |
Given by a Moleville Toad in the Item Shop. There are three (four in the remake) items to be given and each have different requirements: Lucky Jewel: Costs 100 Coins, available right after saving Dyna and Mite. Mystery Egg: Costs 200 Coins, available only after Speardovich have been defeated. Feather: Switch version only, costs 250 Coins, available only after Valentina have been defeated. Frying Pan: Costs 300 Coins, available only after Axem Rangers have been defeated. |
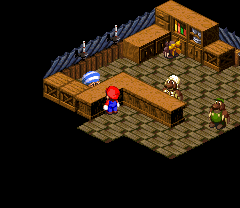
|
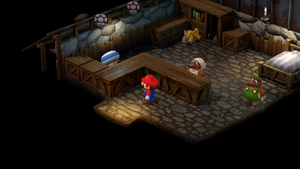
|
Switch Exclusive
| Item | Description | Image |
|---|---|---|
| Wonder Chomp | Given by Punchinello in his room in the mines after defeating him in a rematch. | 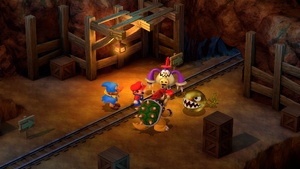
|
Booster Pass
| Item | Description | Image (SNES) | Image (Switch) |
|---|---|---|---|
Frog Coin |
In the first scene, in the second bush. | 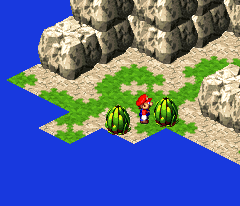
|
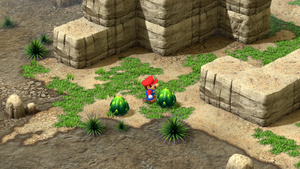
|
Flower |
In the second scene, at the end of the lower part. | 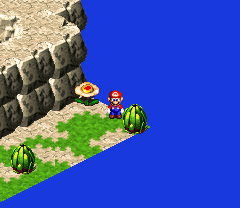
|
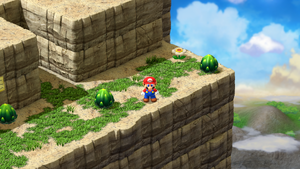
|
4 10-Coins |
In the second scene, there is a button hidden behind a creek, which after being pressed, fills up the holes in the upper part, granting Mario 4 10-Coins in the process. | 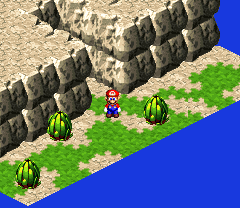
|
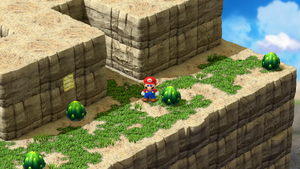
|
Switch Exclusive
| Item | Description | Image |
|---|---|---|
| Monster Trophy | Given by Monster List Agent in the second scene after completing the Monster List and filling all Thought Peek entries. | 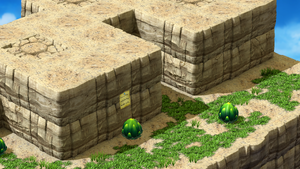
|
Booster Tower
| Item | Description | Image (SNES) | Image (Switch) |
|---|---|---|---|
Flower Tab |
In the scene where Booster first shows up on the train, in the crevice on the right side of the room. | 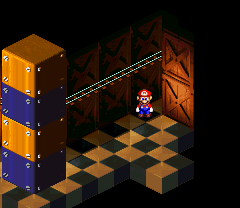
|
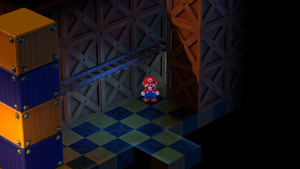
|
Elder Key |
Drops from the ceiling after succesfully completing the portrait puzzle. | 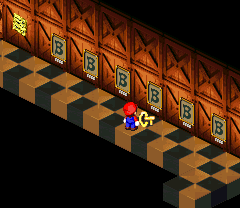
|
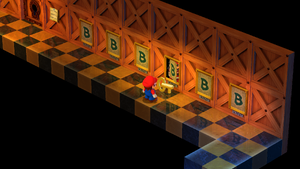
|
Chain Chomp (Chomp in the original game) |
Found in the room accessed by the Elder Key. | 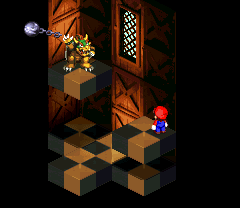
|
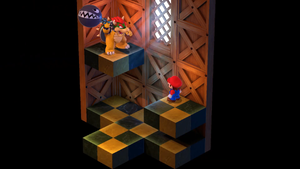
|
Frog Coin |
In the room where Mario lands after being launched from a seesaw by a Thwomp, found in the crevice near the stairs. | 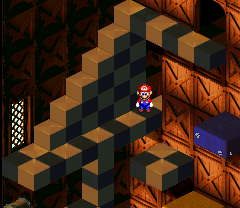
|
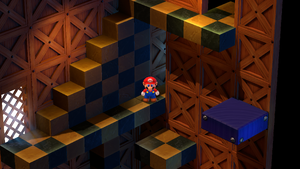
|
| 4x 4 Frog Coins, 9 Coins |
In the room with invisible Lava Blubbles. | 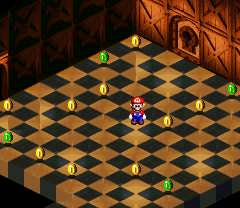
|
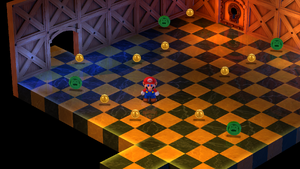
|
Room Key |
In the room with invisible Lava Blubbles, near the top right corner. | 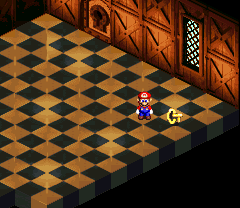
|
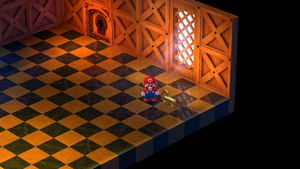
|
Booster's Charm (Amulet in the original game) |
Given by Booster after succesfully completing the curtain minigame. | 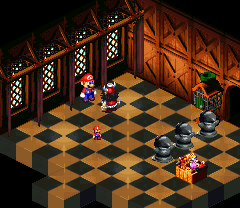
|
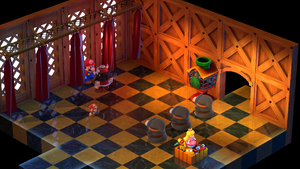
|
Moldy Mush, Rotten Mush, Wilt Shroom, Mushroom, Mid Mushroom, Max Mushroom, Croaka Cola (Kerokero Cola in the original) Bright Card |
In the room before the room with the Save Block, available only after completing Booster Hill. Given by Knife Guy after winning a round of his juggling game. He gives out HP-filling items at random. After winning the game 12 times in the row, he gives Mario a Bright Card. | 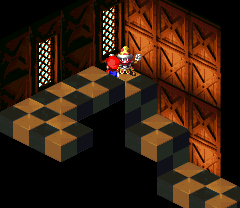
|
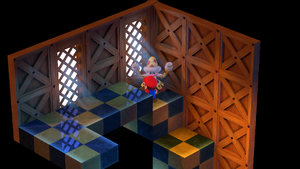
|
Switch Exclusive
| Item | Description | Image |
|---|---|---|
| Stella 023 | Given by Booster in the last scene after his rematch. | 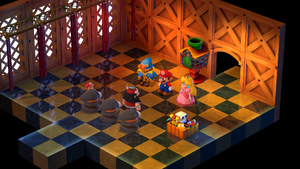
|
Booster Hill
| Item | Description | Image (SNES) | Image (Switch) |
|---|---|---|---|
Flowers |
During the first visit, if Mario reaches Princess Peach during the chase, she gives him a Flower. | 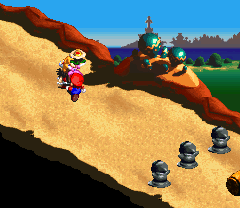
|
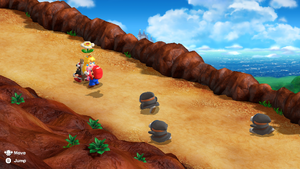
|
Flowers |
If Mario visits Booster Hill after the chase but before having Beetle Box in his possesion, he can find numerous Flowers before Toad tells him there are no more left. Amount of Flowers depends on how many he collected from Peach during the first visit. | 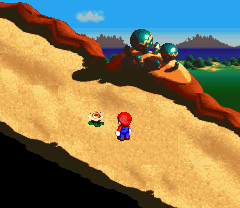
|
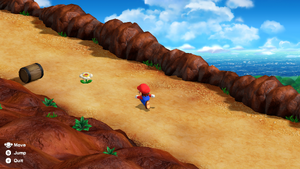
|
Marrymore
| Item | Description | Image (SNES) | Image (Switch) |
|---|---|---|---|
Flower Tab, Flower Jar, Frog Coins |
Given by a receptionist based on how many times Mario stayed at the hotel: Flower Tab for staying 1 time, Flower Jar for staying 3 times, 1 Frog Coin for staying 5, 10 and 15 times and 20 Frog Coins for staying 200 times. | 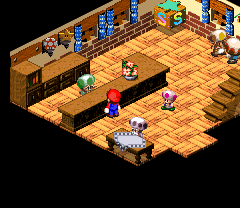
|
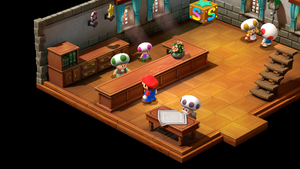
|
Pick Me Up, Croaka Cola (Kerokero Cola in the original) |
Can be bought from a bellhop for 10 and 150 Coins respectively after using room service in the suite. | 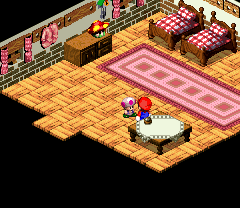
|
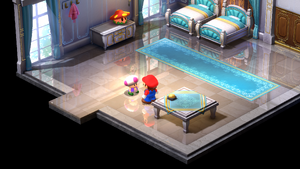
|
Mid Mushroom, Max Mushroom, Pick Me Up |
After tipping the bellhop and then saying you had a good stay while leaving the hotel, there is a chance that he gives Mario one of three items as a gift. | 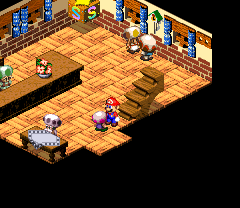
|
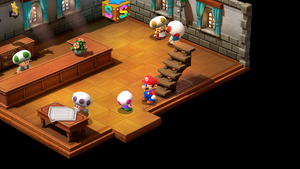
|
Mushroom, Mid Mushroom, Flower Box, 30 Coins |
After Mario overstays in the suite and is then forced to work out his debt as a bellhop, he has a chance to be given a reward for his efforts by a suite guest. | 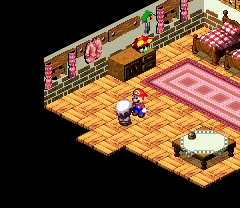
|
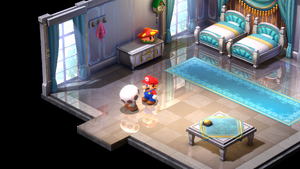
|
| 100x 100 Coins, 5 or 10 Frog Coins Bright Card |
In the reception of the hotel is a old Toad near the table. Mario can trade his Bright Card for either 100 Coins, 5 or 10 Frog Coins. If he decides to buy the card back, it costs 15 Frog Coins. | 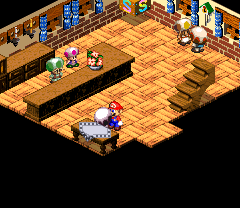
|
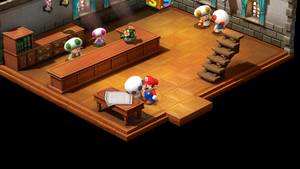
|
Switch Exclusive
| Item | Description | Image |
|---|---|---|
| Enduring Brooch | Given by Chef Torte and Apprentice in the wedding hall after the rematch against them and the Bundt/Raspberry. | 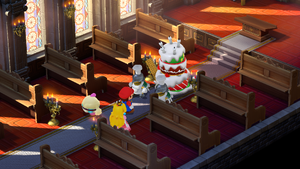
|
Sunken Ship
| Item | Description | Image (SNES) | Image (Switch) |
|---|---|---|---|
Flower |
In the first room with Alley Rats going up and down the stairs, found behind the crates at the top of the stairs. | 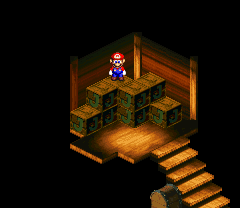
|
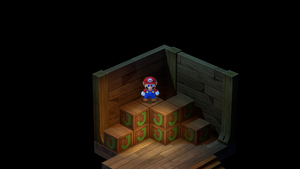
|
Mushroom |
Falls of the ceiling after solving the puzzle behind the first of the six doors. | 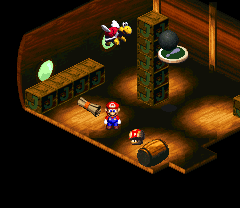
|
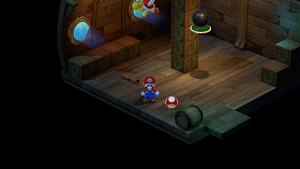
|
Flower |
Falls of the ceiling after solving the puzzle behind the second of the six doors. | 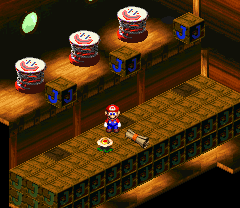
|
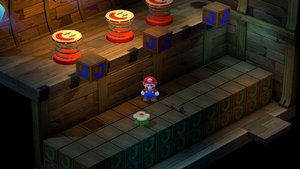
|
Royal Syrup |
Falls of the ceiling after solving the puzzle behind the third of the six doors. | 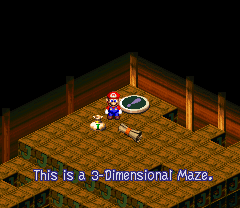
|
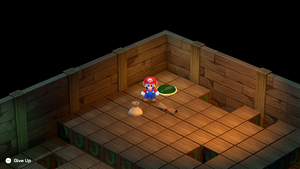
|
| 16x 16 10-Coins |
Added to the inventory after colleting the last coin during the puzzle behind the fourth of the six doors | 
|
|
Mushroom |
Falls of the ceiling after solving the puzzle behind the fifth of the six doors. | 
|
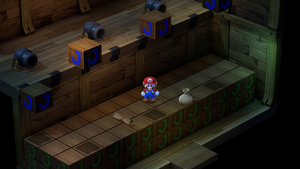
|
Mushroom |
Falls of the ceiling after solving the puzzle behind the sixth of the six doors. | 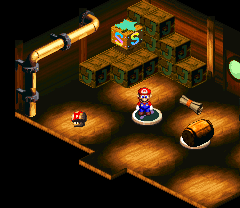
|
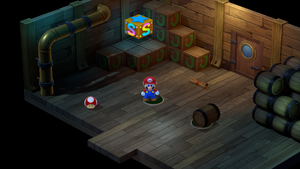
|
4 Frog Coins |
Under the water in the first partially flooded room, accessible by a whirpool in the next room. | 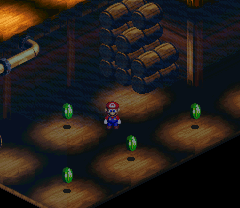
|
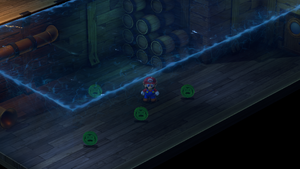
|
Frog Coin |
In the last partially flooded room, above the barrels in the left corner. | 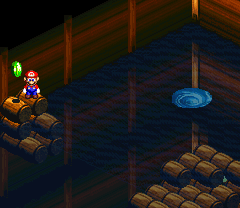
|
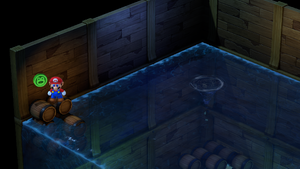
|
Switch Exclusive
| Item | Description | Image |
|---|---|---|
| Extra-Shiny Stone | Given by Johnny in his cabin after defeating him in the rematch. | 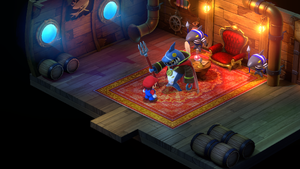
|
Seaside Town
| Item | Description | Image (SNES) | Image (Switch) |
|---|---|---|---|
Shed Key |
Found on the ground after defeating Speardovich. | 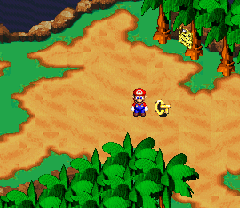
|
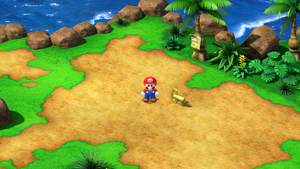
|
Flower Box, Flower Jar, Flower Tab, Coin |
Given by the Toad elder. Reward depends on how many times Mario let him be tickled: Flower Box for not being tickled at all, Flower Jar for being tickled once, Flower Tab for being tickled twice and 1 Coin for being tickled thirce or more. | 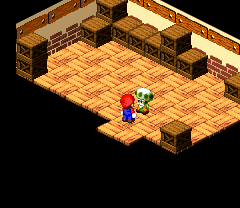
|
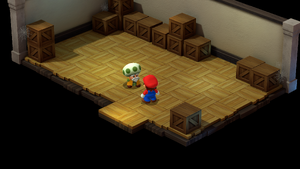
|
Rock Candy, Maple Syrup, Flower Tab |
Given by a Toad in his Mushroom Boy shop. Rewards are chosen at random but dialogue indicates the reward: If Toad says that Mario gave him a Rippin Mushroom, he gives a Rock Candy in return. If Toad says that Mario gave him a Berry Mushroom, he gives a Maple Syrup in return. If Toad says that Mario gave him a Flower Mushroom, he gives a Flower Tab in return. |
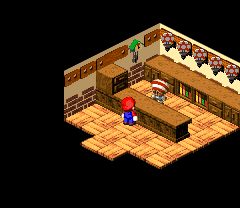
|
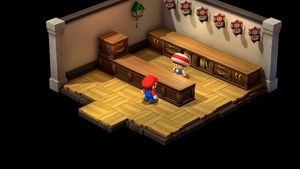
|
Beetle Box 1x/50x 1/50 Coins, Frog Coin |
In the Beetles Are Us shop. Mario can buy a Beetle Box for 150 Coins (first time)/50 Coins (later times). After collecting Beetles in Booster Hill, he can be given a reward from a Snifster, depending on type of beetle caught: Female Beetle for 1 Coin, male Beetle for 50 Coins and Golden Beetle for 1 Frog Coin. | 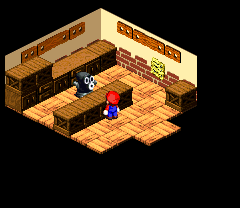
|
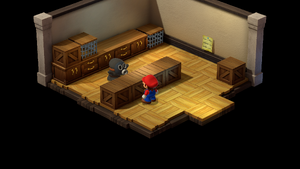
|
Land's End
| Item | Description | Image (SNES) | Image (Switch) |
|---|---|---|---|
| 5x-32x 5-32 Coins, 1-4 Frog Coins |
Given by a Shaman after completing Sky Bridge minigame. Rewards differ based on which course is taken (normal, special, expert) and which pass in done (1st, 2nd, 3rd). | 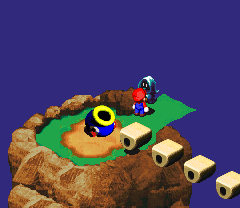
|
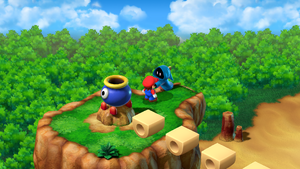
|
Fire Bomb, Max Mushroom, Royal Syrup, 4 Flowers, 8 Frog Coins |
After getting Temple Key from Monstro Town, the key is used on the statue in the secret treasure room of Belome Temple. | 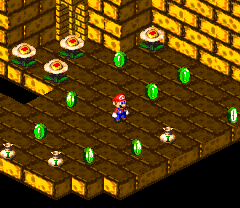
|
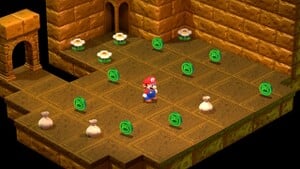
|
Troopa Medal (Troopa Pin in the original) |
After completing Sergeant Flutter's minigame on the cliff, given by him after completing it under 12 seconds (11 in the remake) for the first time. | 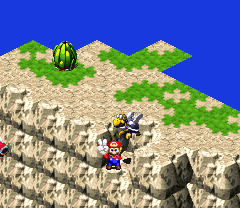
|
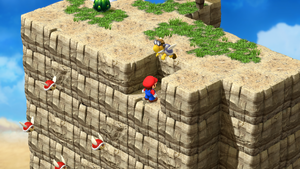
|
| 1x/5x 1/5 Frog Coins |
After completing Sergeant Flutter's minigame on the cliff, given by him after completing it under 12 seconds (11 in the remake) (1 Frog Coin) or 11 seconds (10 in the remake) (5 Frog Coins). | 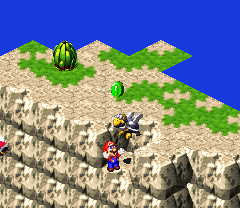
|
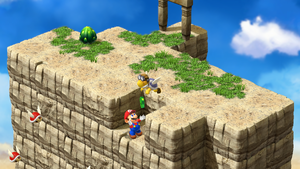
|
Switch Exclusive
| Item | Description | Image |
|---|---|---|
Flower Tab |
In the Sky Bridge area, on the ground part in the upper left corner. | 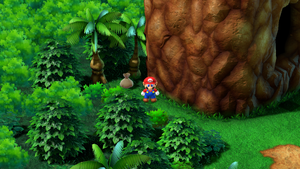
|
| Sage Stick | Left behind by Belome in his room of Belome Temple after a rematch against him. | 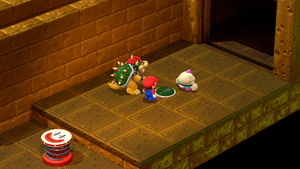
|
Monstro Town
| Item | Description | Image (SNES) | Image (Switch) |
|---|---|---|---|
Attack Scarf, Super Suit |
Given by Chow in the second house after doing 30 and 100 Super jumps in the row respectivelly. | 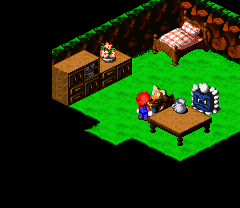
|
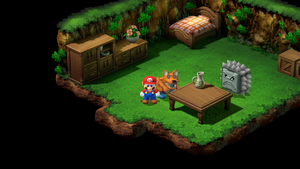
|
Temple Key |
After talking to Thwomp in the second house 7 times, the outside key that was unreachable before falls to the ground. | 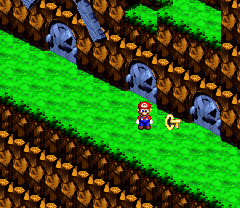
|
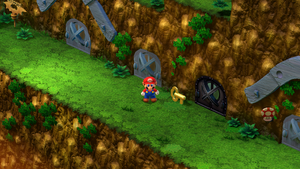
|
Ghost Medal |
Given by Three Musty Fears after sleeping in their bed after collecting Boo Flag, Dry Bones Flag and Greaper Flag. | 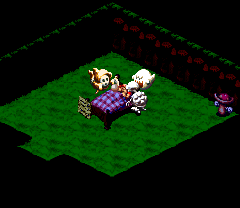
|
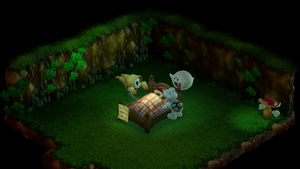
|
Jinx Belt Teamwork Band |
Jinx Belt: Given by Jinx after beating him for the third time. Teamwork Band: Switch version only, given by him after beating him in the post game rematch. |
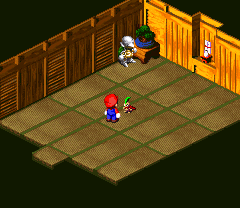
|
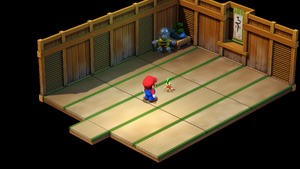
|
Quartz Charm |
Given by Culex after beating him. | 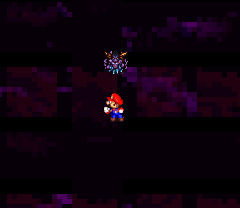
|
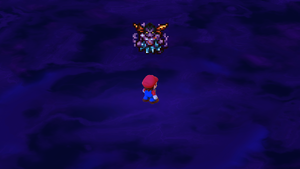
|
Switch Exclusive
| Item | Description | Image |
|---|---|---|
| Crystal Shard | Given by Culex after beating him in his 3D form. | 
|
Bean Valley
| Item | Description | Image (SNES) | Image (Switch) |
|---|---|---|---|
Seed |
Taken after reading the note after defeating Megasmilax. | 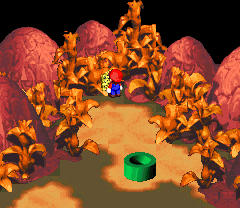
|
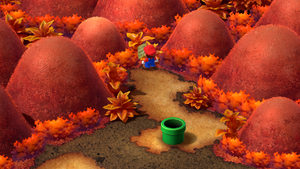
|
3 10-Coins |
In the first beanstalk area, next to the yellow beanstalk. | 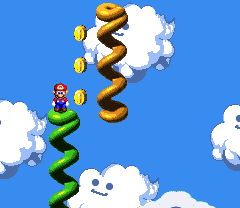
|
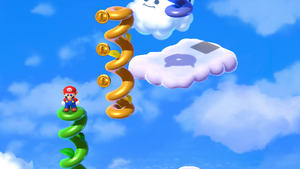
|
Frog Coin |
In the first beanstalk area, next to the blue beanstalk. | 
|
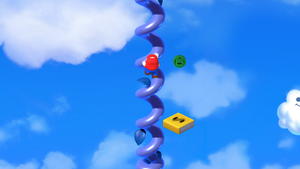
|
SNES Exclusive
Switch Exclusive
Grate Guy's Casino
| Item | Description | Image (SNES) | Image (Switch) |
|---|---|---|---|
Frog Coin (SNES) Cleansing Juice, Party Cleanse, Royal Syrup, Maple Syrup, Finless Cola (SWITCH) |
SNES: Given by winning a round of blackjack. SWITCH: Given by winning a round of the Memory Game. |
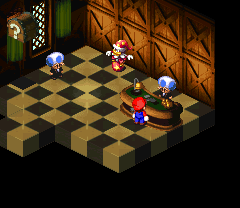
|
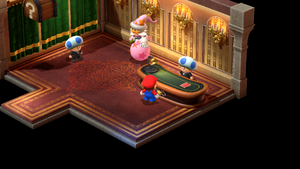
|
Moldy Mush, Rotten Mush, Wilt Shroom, Mushroom, Royal Syrup, Croaka Cola, Rock Candy, Red Essence Star Egg |
Given by Grate Guy after winning a round of Look the other way game. He gives out items at random. After winning the game 100 times, he gives Mario a Star Egg. | 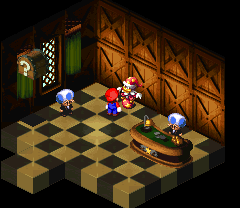
|
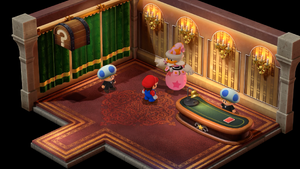
|
Nimbus Land
| Item | Description | Image (SNES) | Image (Switch) |
|---|---|---|---|
2 Red Essences |
After using the Dream Cushion option in the inn, Mario has a chance to have a dream where Toad reveals he's actually a monster. After waking up, Toad shows up and Mario runs away in fear. After explaining himself, Toad gives him 2 Red Essences. | 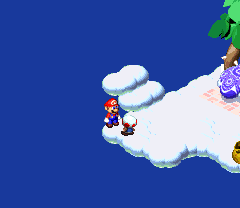
|
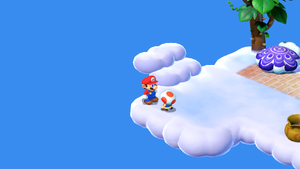
|
Feather |
Picked up after succesfully completing the statue minigame with Dodo. | 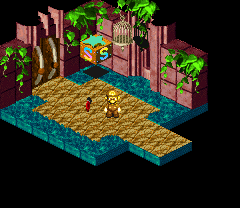
|
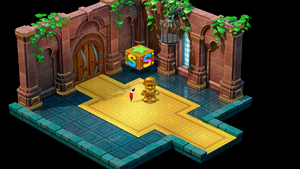
|
Flower Jar |
In the room with 3 doors, Mario should take the left one. After reaching the very end, he can get a Flower Jar by talking to the man in the blue clothing. | 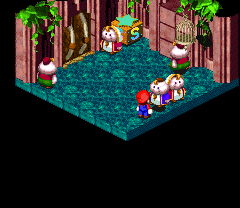
|
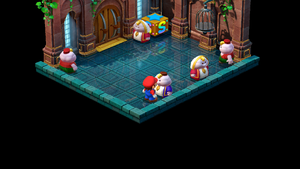
|
Castle Key 1 |
In the room with 3 doors, Mario should take the left one. After reaching the very end, he can get a key to the middle one from the guy in the left corner. | 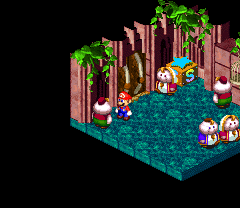
|
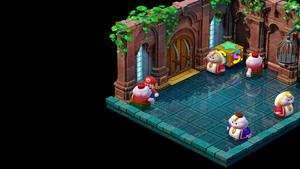
|
Castle Key 2 |
Given by Birdo after defeating her. | 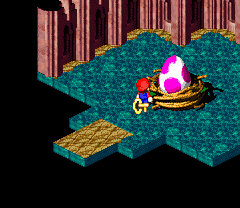
|
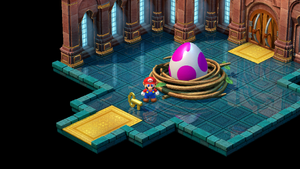
|
Flower Jar |
After defeating Valentina, given by a man in the "king's bedroom". | 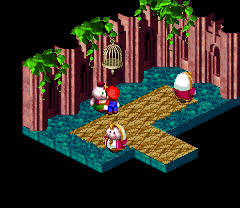
|
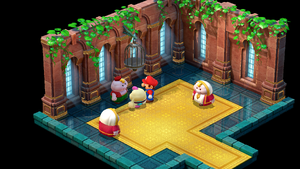
|
Fertilizer |
After defeating Valentina, given by a Beezo found hiding on the invisible platform in the main outside area. | 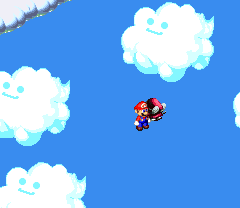
|
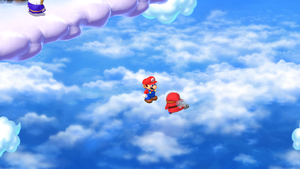
|
Signal Ring (Echo Signal Ring in the remake) |
After defeating Valentina, dropped by Croco in the rightmost house in the main outside area. | 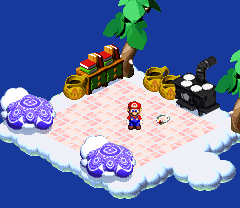
|
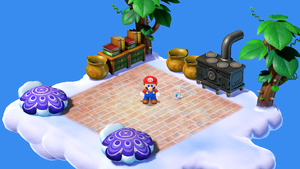
|
Barrel Volcano
| Item | Description | Image (SNES) | Image (Switch) |
|---|---|---|---|
Frog Coin |
In the eighth scene for the entrance. | 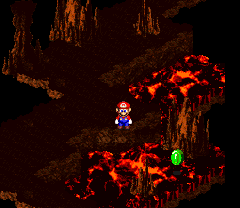
|
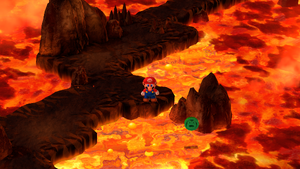
|
Frog Coin |
In the ninth scene from the entrance. | 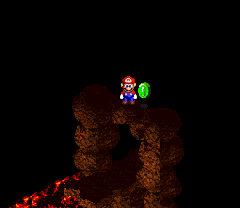
|
|
2 Frog Coins |
In the tenth scene from the entrance. | 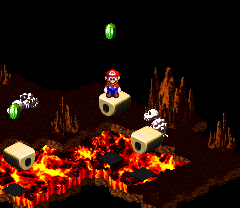
|
|
Bowser's Keep
| Item | Description | Image (SNES) | Image (Switch) |
|---|---|---|---|
4 10-Coins |
Found in the action course with invisible path. | 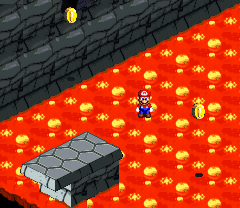 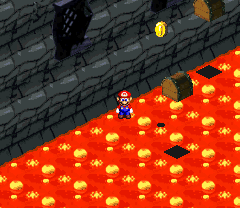 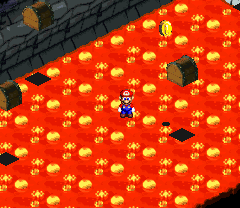
|
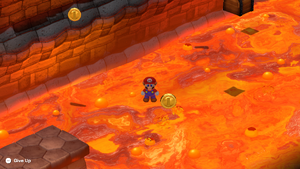 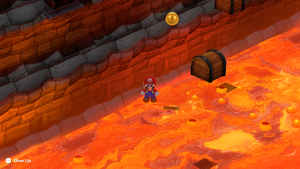 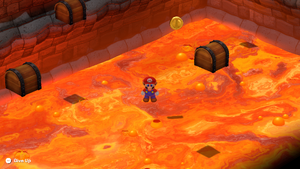
|
8 10-Coins |
Found in the action course with iron ball. | 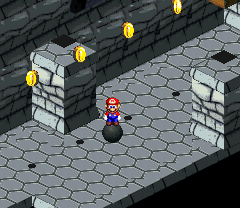 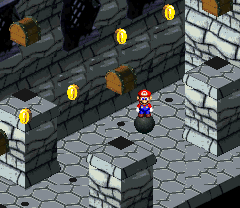
|
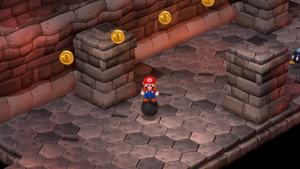 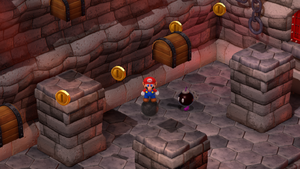
|
Weapon World
| Item | Description | Image (SNES) | Image (Switch) |
|---|---|---|---|
Rock Candy |
Given by Toad after trying to leave the room where Clerk was located. | 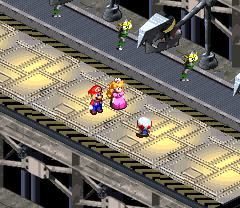
|
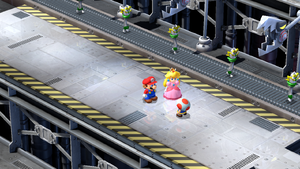
|
