Kannon's Klaim (Donkey Kong Country 2): Difference between revisions
Master R.O.B (talk | contribs) mNo edit summary |
No edit summary |
||
| (65 intermediate revisions by 33 users not shown) | |||
| Line 1: | Line 1: | ||
{{ | {{italic title|id=yes}} | ||
| | {{level infobox | ||
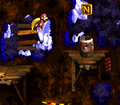
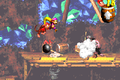
|image=[[File: | |image=[[File:Kannon's Klaim DKC2 screenshot.png]] | ||
|code=2 - 2 | |code=2 - 2 | ||
|game=''[[Donkey Kong Country 2: Diddy's Kong Quest | |world=[[Crocodile Cauldron]] | ||
| | |game=''[[Donkey Kong Country 2: Diddy's Kong Quest]]'' | ||
|track=Kannon's Klaim<!--"Mining Melancholy" is an unofficial title, "Kannon's Klaim" is from the official GBA sound test--> | |||
|before=[[Hot-Head Hop|<<]] | |before=[[Hot-Head Hop|<<]] | ||
|after=[[Lava Lagoon|>>]] | |after=[[Lava Lagoon (Donkey Kong Country 2)|>>]] | ||
}} | }} | ||
'''Kannon's Klaim''' is the seventh level of ''[[Donkey Kong Country 2: Diddy's Kong Quest]]'' and | '''Kannon's Klaim''' is the seventh level of ''[[Donkey Kong Country 2: Diddy's Kong Quest]]'' and the second level of [[Crocodile Cauldron]]. It is the first level set in a mine shaft. Like the rigging levels from [[Gangplank Galleon (world)|Gangplank Galleon]], the level involves [[Diddy Kong]] and [[Dixie Kong]] traveling a vertical path to reach the top of the level. To progress through the level, the [[Kong]]s must jump from wooden platforms and blast from [[Blast Barrel]]s and some [[Arrow Barrel]]s. [[Kannon]]s make their first level appearance as the main and titular enemy: their attack is to either blast cannonballs or [[barrel]]s at the Kongs. [[Mini-Necky]]s also make their first in-game level appearance in Kannon's Klaim. | ||
In the [[Game Boy Advance]] version's Sound Test, the background music for mine shaft levels is also named Kannon's Klaim. | |||
==Layout== | |||
[[File:Kannons Klaim DKC2 GBA.png|thumb|left|Kannon's Klaim in the Game Boy Advance version]] | |||
The Kongs begin the platform on a wooden platform with two Neeks walking along it. There is a Blast Barrel above here that can blast the heroes up to a [[DK Barrel]] and then back down onto the platform. If the heroes head to the end of the platform, they can find some bananas hidden above an abyss that form that shape of an arrow pointing east where a [[Bonus Barrel]] is located. A Blast Barrel is also near here that can blast them onto a higher platform with a [[barrel]]-shooting Kannon on it. A [[Banana Bunch]] is to the left of the platform in the air, while a hook is above the platform for the heroes to grab onto. They can find a Blast Barrel above the Kannon, and it can be used to blast them to another barrel, which can then send them onto a solid platform with two Neeks and a Kruncha on it. To the right of these foes, they can find a pair of explosive [[TNT Barrel]]s. After the primates pass the Kruncha, they can find a few Blast Barrels ahead of them that they must use to blast over a wide abyss. The [[KONG Letters|letter K]] and some bananas are above the barrels, which are followed by a small platform with two Klomps on it. | |||
A Blast Barrel is above them that can shoot the Kongs onto a platform with a Kannon on it. They can use the barrels shot by this foe to reach a nearby DK Barrel placed high in the air. Several Blast Barrels are to the right of the Kannon, and the heroes must use them to rise through the level. As they shoot upwards with the barrels, they reach a Flitter that is surrounded by a Zinger. They can use the Flitter to bounce to a hidden set of barrels that can shoot them in a circle to many bananas and a [[Banana Coin]]. If the primates shift to the left when the blast out of the Blast Barrel to the left the previously-mentioned Flitter, they can land in another barrel on the main path of the level. They can use this barrel and the barrels ahead of it to reach a platform higher in the level. As they approach this platform, they come up to a Flitter that they must bounce on to cross a gap between two of the barrels. Once the platform is reached, the heroes can find a TNT Barrel and another platform that supports a barrel-shooting Kannon. The letter O is high above this platform, which is followed by two more platforms. The first of the platforms holds a Klomp, while the next one carries a Kannon that shoots [[Cannonball|kannonball]]s at the Kongs. If the heroes shoot upwards with the Blast Barrel above this foe, they can reach a platform with a DK Barrel on it and a [[Star Barrel]] over it. | |||
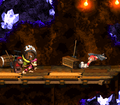
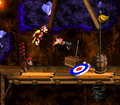
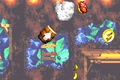
[[File:Kannons Klaim DKC2 shot.png|thumb|Dixie Kong shoots out of a Blast Barrel]] | |||
A Zinger is to the left of here, and it guards a Blast Barrel that can shoot the heroes towards more Blast Barrels. As they travel to the west above an abyss with these Blast Barrels, they must also watch out for a few Zingers. Soon, the primates reach a barrel that can blast them higher up to a platform that holds a TNT Barrel. As they head across this platform, a Mini-Necky dives at them. After they pass the enemy, they reach a Zinger that guards two Blast Barrels. The first of the barrels is aimed to the north towards a higher platform, while the second, which floats under a Banana Coin, is positioned towards the first barrel. They can use the first barrel to blast onto the higher platform, where they can find two Mini-Neckys, a DK Barrel, and, to the left of the platform, a Bonus Barrel. A platform is to the right of here that sits under a Blast Barrel, which can blast the heroes past a Zinger and to some more Blast Barrels. These barrels shoot them in a curvy path into many bananas and then into one last barrel that can shoot them a small distance into the air. | |||
A platform and a Zinger is to the left of this barrel, and the platform holds a TNT Barrel. Another platform is ahead of here that supports a Kannon that shoots kannonballs to attack. The duo can find a Blast Barrel behind it that can blast them upwards to more barrels. As they climb upwards through the shaft with these barrels, they must watch for a few Zingers that hover over the barrels. Soon, the primates are blasted onto a solid platform with a Mini-Necky near it. A platform is placed to the right of this foe that holds a [[Diddy Barrel]] with the letter N above it. The Diddy Barrel can blast Diddy Kong, but not Dixie Kong, to a few Blast Barrels that can fire them in a circle to many bananas and a Banana Coin in a hidden area. To the left of the aforementioned Diddy Barrel, the heroes can find a trio of Blast Barrels lined up under a Zinger that hovers over them. If they manage to dodge this enemy and reach the last of the three barrels, they are blasted upwards onto a platform with another Blast Barrel above it. A gap is to the right of here, and on the other side of it, the heroes can find a hidden platform with a barrel-shooting Kannon and a Bonus Barrel on it. If the primates enter the nearby Blast Barrel, they are shot up to a platform with a [[Treasure Chest]] that contains the letter G on it. As they head across the platform, Mini-Neckys attack them. There are two more platforms ahead of here, and once the heroes reach the second of the platforms, they can find an [[End of Level Target]] with a [[golden feather]] (found exclusively in the Game Boy Advance version of the game) above it. If they hit the target, they complete the level successfully. Additionally, they can bounce off of a nearby Mini-Necky and then hit the target to win a prize from it. The prizes include either a Banana Bunch, a Banana Coin, or a Red Balloon. | |||
A Zinger is to the left of | |||
==Enemies== | |||
The following enemies appear in the following quantities: | |||
The | |||
<gallery> | |||
Flitter DKC2.png|[[Flitter]] (8){{footnote|main|a}} | |||
Kannon DKC2 enemy.png|[[Kannon]] (6) | |||
Klomp DKC2.png|[[Klomp]] (3) | |||
Kruncha DKC2 blue.png|[[Kruncha]] (blue) (1) | |||
Mini Necky DKC2.png|[[Mini-Necky]] (9) | |||
Neek DKC2.png|[[Neek]] (4) | |||
Zinger DKC2 yellow.png|[[Zinger]] (yellow) (10) | |||
</gallery> | |||
{{footnote|note|a|Of the 8 Flitters, only two of them are in the main level, while the other six are in a Bonus Level.}} | |||
==Items and objects== | |||
The following items and objects appear in the following quantities: | |||
=== | <gallery> | ||
[[File: | Banana Coin.png|[[Banana Coin]] (3) | ||
*K: After the | DK Barrel.png|[[DK Barrel]] (5) | ||
*O: | Treasure Chest DKC2.png|[[Treasure Chest]] (5) | ||
</gallery> | |||
* | |||
===KONG Letters=== | |||
[[File:Kannons Klaim DKC2 shot 2.png|thumb|Diddy Kong jumps to the letter O]] | |||
*'''K:''' After the first Kruncha in the level, Diddy and Dixie must blast from two Arrow Barrels. From the second Arrow Barrel to the left, the Kongs must blast to the right to reach the letter K. | |||
*After | *'''O:''' After the first Flitter, the Kongs must blast from two Blast Barrels to land on a wooden platform with a TNT Barrel. To the right, the Kongs must jump on a slightly higher platform, which has a Kannon firing barrels. The letter O is hovering to the top-left of the platform, and can only be reached if the Kongs use a team up throw or bounce from a barrel. | ||
=== | *'''N:''' Some time after the Star Barrel, the Kongs must blast from a group of three Arrow Barrels while avoiding the Zinger hovering between the second and third Arrow Barrels. After this, Diddy and Dixie are blasted up to a platform where a Mini-Necky swoops at them. The letter N is hovering above a Diddy Barrel, which only Diddy can enter. The Kongs are blasted between a few more Blast Barrels, which some bananas and a single Banana Coin appear between. After this, the Kongs are blasted back to the main path. | ||
* | *'''G:''' After the letter N, the Kongs must blast from three more Arrow Barrels to land on a wooden platform. Another Arrow Barrel is above the wooden platform, and it blasts the Kongs onto a higher wooden platform which with a Treasure Chest. It contains the letter G, and the Kongs can break it open by hitting it into a nearby Mini-Necky. | ||
{{br}} | |||
===Key items=== | |||
[[File:KannonKlaim-SNES-Coin.png|thumb|The location of the Video Game Hero Coin]] | |||
*'''[[DK Coin|Cranky's Video Game Hero Coin]]:''' At the very start of the first Bonus Level, Dixie must continue right and use her Helicopter Spin to cross a wide gap and land on a platform with the Video Game Hero Coin. A [[Diddy & Dixie Barrels|Dixie Barrel]] is hovering above the Video Game Hero Coin, and it blasts Dixie upward and back onto the main path. Not counting the [[Lost World (Donkey Kong Country 2)|Lost World]] levels, Kannon's Klaim is the only level that has its Video Game Hero Coin hidden within a [[Bonus Level]], though the reward is still a [[Kremkoin]]. | |||
*'''[[Golden feather]] (Game Boy Advance version):''' At the very end of the level, the golden feather is hovering over the End of Level Target. They can reach it by either jumping onto a Mini-Necky or by performing a [[team up]] throw. | |||
*'''[[Photograph]] (Game Boy Advance version):''' After the letter N, the Kongs must blast from three Arrow Barrels, the third of which blasts them onto a small platform on the left. A nearby Kannon is blasting barrels from the right side, and the Kongs must bounce on the barrels to reach the Kannon, who has a photograph over its head. By defeating the Kannon, Diddy and Dixie obtain a photograph of a Kannon in the third page of the [[Scrapbook (Donkey Kong Country series)|scrapbook]]. | |||
==='' | {{br}} | ||
==Bonus Levels== | |||
* | [[File:Kannon's Klaim Bonus Area 1.png|thumb|The first Bonus Level]] | ||
Kannon's Klaim has three Bonus Levels, listed by type: | |||
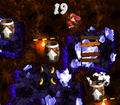
* | *'''Find the Token!''': At the very start, the Kongs encounter two Neeks. Instead of jumping into the Arrow Barrel above, Dixie must use her Helicopter Spin to cross a gap to the right, following the direction of bananas arranged in the shape of a right arrow. This leads to a Bonus Barrel at the bottom right. In the Bonus Level, the Kongs have 30 seconds to obtain the [[Kremkoin]]. A [[DK Barrel]] is at the start of the Bonus Level, as both [[Diddy Kong]] and [[Dixie Kong]] are needed to blast from the respective [[Diddy & Dixie Barrels]]. From the first pair of these barrels, either Kong must enter their barrel to blast up onto a few small platforms, taking them to the next pair of Diddy & Dixie Barrels. Following this is four small platforms, and entering the Dixie Barrel blasts the Kongs onto a small platform, where a Diddy Barrel. The Diddy Barrel blasts the Kongs onto another small platform with a Dixie Barrel, which finally blasts the Kongs to a long platform, where they can collect the Kremkoin to the very right. | ||
*'''Find the Token!''': Shortly after the Star Barrel is a platform with a TNT Barrel and a Mini-Necky. They must jump to the right into an Arrow Barrel, which blasts them up to another platform. From the left edge of the platform the Kongs must use a Team-up throw to enter into a Bonus Barrel. Alternatively, the Kongs can enter the Bonus Barrel by continuing in the level until they land on a small platform with the TNT Barrel. From there, they must jump down to the left to land into the Bonus Level. Diddy and Dixie have 25 seconds to collect the Kremkoin at the top. To do so, the Kongs must blast from ten Arrow Barrels. The last Arrow Barrel points northeast to the Kremkoin, which is hovering over a small platform, where the Kongs exit the Bonus Level. | |||
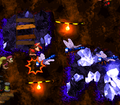
*'''Find the Token!''': After the letter N, the Kongs must blast from three Arrow Barrels to be sent up onto a higher platform. To the right, a Kannon is on another platform, firing barrels at Diddy and Dixie. The Kongs must bounce from the barrels to reach the Kannon. The Bonus Barrel is sitting on the platform, to the right of the Kannon. In the Bonus Level, the Kongs have 10 seconds to collect the Kremkoin. They must bounce from six Flitters to get across a large gap and reach the Kremkoin, which is hovering over a platform to the top-right. | |||
{{br}} | |||
==== | ==Warp Barrel== | ||
[[File:Kannon's Klaim GBA Warp Barrel.png|thumb|left|The location of the Warp Barrel]] | |||
When the Kongs encounter the first Kruncha, they must roll jump into a gap to their left and jump to the right to land into an invisible [[Warp Barrel]] beneath the wooden platform. The Kongs must go through the warp room, which has a group of bananas shaping an exclamation mark. By exiting from the right, Diddy and Dixie are sent back into the main level, onto a Mini-Necky right before the End of Level Target. | |||
{{br|left}} | |||
==Gallery== | ==Gallery== | ||
<gallery> | |||
KannonsKlaimSNES2.png|Dixie Kong grabs some bananas in the air | |||
KannonsKlaimSNES3.png|Dixie hangs on a hook near a Kannon | |||
Kannon's Klaim DKC2 Star Barrel.png|Diddy beneath the Star Barrel | |||
</gallery> | KannonsKlaimSNES1.png|The Kongs in an Arrow Barrel, just after the Star Barrel | ||
==Names in | Kannon's Klaim DKC2 Mini-Necky.png|Dixie holding a TNT Barrel at a Mini-Necky | ||
{{ | KannonKlaim-SNES-N.png|The letter N | ||
Kannon's Klaim Bonus Area 2.png|The second Bonus Level | |||
Kannon's Klaim Bonus Area 3.png|The third Bonus Level | |||
Kannon's Klaim DKC2 end.png|The Kongs at the End of Level Target | |||
Kannon's Klaim GBA screenshot.png|The Kongs jump over a kannonball shot by a Kannon, shortly before the Star Barrel in the Game Boy Advance version | |||
Kannon's Klaim GBA Bonus Level 2.png|The second Bonus Level in the Game Boy Advance version | |||
</gallery> | |||
==Names in other languages== | |||
{{foreign names | |||
|Jap=タルタルこうざん | |||
|JapR=Tarutaru Kōzan | |||
|JapM=Barrel-Barrel Mine | |||
|Fre=Complainte de Kannon | |||
|FreM=Kannon's Complaint | |||
|Ger=Böllergrube | |||
|GerM=Firecracker Pit | |||
|Ita=Cannoni di Lancio | |||
|ItaM=Launch Cannons | |||
|Spa=Terreno de Kannon | |Spa=Terreno de Kannon | ||
|SpaM=Kannon's Land | |SpaM=Kannon's Land | ||
}} | |||
{{DKC2}} | {{DKC2}} | ||
[[Category:Mines]] | |||
[[Category:Crocodile Isle]] | [[Category:Crocodile Isle]] | ||
[[Category | [[Category:Donkey Kong Country 2: Diddy's Kong Quest levels]] | ||
Latest revision as of 20:57, June 22, 2024
| Level | |
|---|---|
| Kannon's Klaim | |

| |
| Level code | 2 - 2 |
| World | Crocodile Cauldron |
| Game | Donkey Kong Country 2: Diddy's Kong Quest |
| Music track | Kannon's Klaim |
| << Directory of levels >> | |
Kannon's Klaim is the seventh level of Donkey Kong Country 2: Diddy's Kong Quest and the second level of Crocodile Cauldron. It is the first level set in a mine shaft. Like the rigging levels from Gangplank Galleon, the level involves Diddy Kong and Dixie Kong traveling a vertical path to reach the top of the level. To progress through the level, the Kongs must jump from wooden platforms and blast from Blast Barrels and some Arrow Barrels. Kannons make their first level appearance as the main and titular enemy: their attack is to either blast cannonballs or barrels at the Kongs. Mini-Neckys also make their first in-game level appearance in Kannon's Klaim.
In the Game Boy Advance version's Sound Test, the background music for mine shaft levels is also named Kannon's Klaim.
Layout[edit]

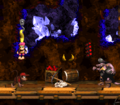
The Kongs begin the platform on a wooden platform with two Neeks walking along it. There is a Blast Barrel above here that can blast the heroes up to a DK Barrel and then back down onto the platform. If the heroes head to the end of the platform, they can find some bananas hidden above an abyss that form that shape of an arrow pointing east where a Bonus Barrel is located. A Blast Barrel is also near here that can blast them onto a higher platform with a barrel-shooting Kannon on it. A Banana Bunch is to the left of the platform in the air, while a hook is above the platform for the heroes to grab onto. They can find a Blast Barrel above the Kannon, and it can be used to blast them to another barrel, which can then send them onto a solid platform with two Neeks and a Kruncha on it. To the right of these foes, they can find a pair of explosive TNT Barrels. After the primates pass the Kruncha, they can find a few Blast Barrels ahead of them that they must use to blast over a wide abyss. The letter K and some bananas are above the barrels, which are followed by a small platform with two Klomps on it.
A Blast Barrel is above them that can shoot the Kongs onto a platform with a Kannon on it. They can use the barrels shot by this foe to reach a nearby DK Barrel placed high in the air. Several Blast Barrels are to the right of the Kannon, and the heroes must use them to rise through the level. As they shoot upwards with the barrels, they reach a Flitter that is surrounded by a Zinger. They can use the Flitter to bounce to a hidden set of barrels that can shoot them in a circle to many bananas and a Banana Coin. If the primates shift to the left when the blast out of the Blast Barrel to the left the previously-mentioned Flitter, they can land in another barrel on the main path of the level. They can use this barrel and the barrels ahead of it to reach a platform higher in the level. As they approach this platform, they come up to a Flitter that they must bounce on to cross a gap between two of the barrels. Once the platform is reached, the heroes can find a TNT Barrel and another platform that supports a barrel-shooting Kannon. The letter O is high above this platform, which is followed by two more platforms. The first of the platforms holds a Klomp, while the next one carries a Kannon that shoots kannonballs at the Kongs. If the heroes shoot upwards with the Blast Barrel above this foe, they can reach a platform with a DK Barrel on it and a Star Barrel over it.

A Zinger is to the left of here, and it guards a Blast Barrel that can shoot the heroes towards more Blast Barrels. As they travel to the west above an abyss with these Blast Barrels, they must also watch out for a few Zingers. Soon, the primates reach a barrel that can blast them higher up to a platform that holds a TNT Barrel. As they head across this platform, a Mini-Necky dives at them. After they pass the enemy, they reach a Zinger that guards two Blast Barrels. The first of the barrels is aimed to the north towards a higher platform, while the second, which floats under a Banana Coin, is positioned towards the first barrel. They can use the first barrel to blast onto the higher platform, where they can find two Mini-Neckys, a DK Barrel, and, to the left of the platform, a Bonus Barrel. A platform is to the right of here that sits under a Blast Barrel, which can blast the heroes past a Zinger and to some more Blast Barrels. These barrels shoot them in a curvy path into many bananas and then into one last barrel that can shoot them a small distance into the air.
A platform and a Zinger is to the left of this barrel, and the platform holds a TNT Barrel. Another platform is ahead of here that supports a Kannon that shoots kannonballs to attack. The duo can find a Blast Barrel behind it that can blast them upwards to more barrels. As they climb upwards through the shaft with these barrels, they must watch for a few Zingers that hover over the barrels. Soon, the primates are blasted onto a solid platform with a Mini-Necky near it. A platform is placed to the right of this foe that holds a Diddy Barrel with the letter N above it. The Diddy Barrel can blast Diddy Kong, but not Dixie Kong, to a few Blast Barrels that can fire them in a circle to many bananas and a Banana Coin in a hidden area. To the left of the aforementioned Diddy Barrel, the heroes can find a trio of Blast Barrels lined up under a Zinger that hovers over them. If they manage to dodge this enemy and reach the last of the three barrels, they are blasted upwards onto a platform with another Blast Barrel above it. A gap is to the right of here, and on the other side of it, the heroes can find a hidden platform with a barrel-shooting Kannon and a Bonus Barrel on it. If the primates enter the nearby Blast Barrel, they are shot up to a platform with a Treasure Chest that contains the letter G on it. As they head across the platform, Mini-Neckys attack them. There are two more platforms ahead of here, and once the heroes reach the second of the platforms, they can find an End of Level Target with a golden feather (found exclusively in the Game Boy Advance version of the game) above it. If they hit the target, they complete the level successfully. Additionally, they can bounce off of a nearby Mini-Necky and then hit the target to win a prize from it. The prizes include either a Banana Bunch, a Banana Coin, or a Red Balloon.
Enemies[edit]
The following enemies appear in the following quantities:


a - Of the 8 Flitters, only two of them are in the main level, while the other six are in a Bonus Level.
Items and objects[edit]
The following items and objects appear in the following quantities:

Banana Coin (3)

DK Barrel (5)

Treasure Chest (5)


KONG Letters[edit]

- K: After the first Kruncha in the level, Diddy and Dixie must blast from two Arrow Barrels. From the second Arrow Barrel to the left, the Kongs must blast to the right to reach the letter K.
- O: After the first Flitter, the Kongs must blast from two Blast Barrels to land on a wooden platform with a TNT Barrel. To the right, the Kongs must jump on a slightly higher platform, which has a Kannon firing barrels. The letter O is hovering to the top-left of the platform, and can only be reached if the Kongs use a team up throw or bounce from a barrel.
- N: Some time after the Star Barrel, the Kongs must blast from a group of three Arrow Barrels while avoiding the Zinger hovering between the second and third Arrow Barrels. After this, Diddy and Dixie are blasted up to a platform where a Mini-Necky swoops at them. The letter N is hovering above a Diddy Barrel, which only Diddy can enter. The Kongs are blasted between a few more Blast Barrels, which some bananas and a single Banana Coin appear between. After this, the Kongs are blasted back to the main path.
- G: After the letter N, the Kongs must blast from three more Arrow Barrels to land on a wooden platform. Another Arrow Barrel is above the wooden platform, and it blasts the Kongs onto a higher wooden platform which with a Treasure Chest. It contains the letter G, and the Kongs can break it open by hitting it into a nearby Mini-Necky.
Key items[edit]

- Cranky's Video Game Hero Coin: At the very start of the first Bonus Level, Dixie must continue right and use her Helicopter Spin to cross a wide gap and land on a platform with the Video Game Hero Coin. A Dixie Barrel is hovering above the Video Game Hero Coin, and it blasts Dixie upward and back onto the main path. Not counting the Lost World levels, Kannon's Klaim is the only level that has its Video Game Hero Coin hidden within a Bonus Level, though the reward is still a Kremkoin.
- Golden feather (Game Boy Advance version): At the very end of the level, the golden feather is hovering over the End of Level Target. They can reach it by either jumping onto a Mini-Necky or by performing a team up throw.
- Photograph (Game Boy Advance version): After the letter N, the Kongs must blast from three Arrow Barrels, the third of which blasts them onto a small platform on the left. A nearby Kannon is blasting barrels from the right side, and the Kongs must bounce on the barrels to reach the Kannon, who has a photograph over its head. By defeating the Kannon, Diddy and Dixie obtain a photograph of a Kannon in the third page of the scrapbook.
Bonus Levels[edit]

Kannon's Klaim has three Bonus Levels, listed by type:
- Find the Token!: At the very start, the Kongs encounter two Neeks. Instead of jumping into the Arrow Barrel above, Dixie must use her Helicopter Spin to cross a gap to the right, following the direction of bananas arranged in the shape of a right arrow. This leads to a Bonus Barrel at the bottom right. In the Bonus Level, the Kongs have 30 seconds to obtain the Kremkoin. A DK Barrel is at the start of the Bonus Level, as both Diddy Kong and Dixie Kong are needed to blast from the respective Diddy & Dixie Barrels. From the first pair of these barrels, either Kong must enter their barrel to blast up onto a few small platforms, taking them to the next pair of Diddy & Dixie Barrels. Following this is four small platforms, and entering the Dixie Barrel blasts the Kongs onto a small platform, where a Diddy Barrel. The Diddy Barrel blasts the Kongs onto another small platform with a Dixie Barrel, which finally blasts the Kongs to a long platform, where they can collect the Kremkoin to the very right.
- Find the Token!: Shortly after the Star Barrel is a platform with a TNT Barrel and a Mini-Necky. They must jump to the right into an Arrow Barrel, which blasts them up to another platform. From the left edge of the platform the Kongs must use a Team-up throw to enter into a Bonus Barrel. Alternatively, the Kongs can enter the Bonus Barrel by continuing in the level until they land on a small platform with the TNT Barrel. From there, they must jump down to the left to land into the Bonus Level. Diddy and Dixie have 25 seconds to collect the Kremkoin at the top. To do so, the Kongs must blast from ten Arrow Barrels. The last Arrow Barrel points northeast to the Kremkoin, which is hovering over a small platform, where the Kongs exit the Bonus Level.
- Find the Token!: After the letter N, the Kongs must blast from three Arrow Barrels to be sent up onto a higher platform. To the right, a Kannon is on another platform, firing barrels at Diddy and Dixie. The Kongs must bounce from the barrels to reach the Kannon. The Bonus Barrel is sitting on the platform, to the right of the Kannon. In the Bonus Level, the Kongs have 10 seconds to collect the Kremkoin. They must bounce from six Flitters to get across a large gap and reach the Kremkoin, which is hovering over a platform to the top-right.
Warp Barrel[edit]

When the Kongs encounter the first Kruncha, they must roll jump into a gap to their left and jump to the right to land into an invisible Warp Barrel beneath the wooden platform. The Kongs must go through the warp room, which has a group of bananas shaping an exclamation mark. By exiting from the right, Diddy and Dixie are sent back into the main level, onto a Mini-Necky right before the End of Level Target.
Gallery[edit]

Dixie Kong grabs some bananas in the air
Dixie hangs on a hook near a Kannon
Diddy beneath the Star Barrel
The Kongs in an Arrow Barrel, just after the Star Barrel
Dixie holding a TNT Barrel at a Mini-Necky
The letter N
The second Bonus Level
The third Bonus Level
The Kongs at the End of Level Target
The Kongs jump over a kannonball shot by a Kannon, shortly before the Star Barrel in the Game Boy Advance version
The second Bonus Level in the Game Boy Advance version


Names in other languages[edit]
| Language | Name | Meaning | Notes |
|---|---|---|---|
| Japanese | タルタルこうざん[?] Tarutaru Kōzan |
Barrel-Barrel Mine | |
| French | Complainte de Kannon[?] | Kannon's Complaint | |
| German | Böllergrube[?] | Firecracker Pit | |
| Italian | Cannoni di Lancio[?] | Launch Cannons | |
| Spanish | Terreno de Kannon[?] | Kannon's Land |