The 'Shroom:Issue 205/Strategy Wing
Director's Notes
Written by: Hooded Pitohui (talk)
Hello, all you readers of The 'Shroom! April arrives, and, well, so do busy times for me. I'll be occupied with plenty both online and offline, and among the things I'll be involved in online is Awards prep. Yes indeed, it's that time of year once again. Awards meetings are underway, and we're squabbling about Mario so you don't have to! Ah, jokes aside, it's nice to be planning the big shindig again, and I suggest you check the process out (at least read Anniversary Announcements in Pipe Plaza!).
As for Strategy Wing, well, it's been busy around our offices, too! Our spacefaring swordsman, Meta Knight (talk), joins us once again with another edition of Galactic Expedition. If you enjoy a good detailed breakdown of a boss battle and a combat guide, be sure to give it a read. I hear a pretty famous face from the Metroid series (not Ridley) is making an appearance this month, so you might want to see it to see a mainstay of the series, as well!
Joining our team for the very first time, Sparks (talk) kicks off a three-part guide to the Blue Bomber's first adventure! In An Overly Detailed and Funny Walkthrough of Mega Man, you'll get a guide to getting through Mega Man's inaugural battle against Dr. Wily and his commandeered Robot Masters from start to finish! This month covers three of the game's six Robot Masters, so grab an E-tank (or maybe not - they don't exist in this game) and jump right in!
That's not all in the way of big news, either! After a year and a half of scouring every square inch of File Island, riding whales, chasing bandits, running a shop, reclaiming history, repairing factories, curling, recruiting Digimon, and doing some questionably-heroic things, we finish our ascent of Mt. Infinity and face down the source of File Island's calamity in File City Files this month. You won't be getting spoilers from me! I'll let Shoey (talk) take it away when you get down there!
Beyond that, we have our usual slate of sections ready to go for you! Waluigi Time (talk) takes the fight to Bowser once again in a mysterious old fortress in Shine Get, we probe the powers of a strange Pikmin type that seems to defy thermodynamics in The Anatomy of a Pikmin, and we explore Searchlight Sneak from Super Mario 3D World. Poisonous moths and dancers holding daggers all await, too, so let me send you off with a reminder that you're always welcome to join our team and tell us something about your favorite games so you can get to reading it all!
Section of the Month
It seems that discussing the role of spectacle in Mario games - or at least in Bob-ombs Below - was something our readers enjoyed! Thank you all for voting Four Steps for a 3D World section of the month last month. That detailed examination of Winged Pikmin falling off between Pikmin 3 and Pikmin 4 from Shoey (talk) was evidently appreciated too! Their usefulness may have declined, but at least they'll always be cute...
There was an upswell in votes this month; thank you so much for showing your support for our writers with your votes! Be sure to vote in the poll at the bottom of the page to keep that up, and nominate a writer for Poochy's Picks if you've want to highlight something you particularly liked about their section!
| STRATEGY WING SECTION OF THE MONTH | ||||
|---|---|---|---|---|
| Place | Section | Votes | % | Writer |
| 1st | Four Steps for a 3D World | 8 | 30.77% | Hooded Pitohui (talk) |
| 2nd | The Anatomy of a Pikmin | 5 | 19.23% | Shoey (talk) |
| 3rd | Pitohui's Pokémon Academy | 4 | 15.38% | Hooded Pitohui (talk) |
| 3rd | Shine Get | 4 | 15.38% | Waluigi Time (talk) |
An Octet Gazette
Written by: Museful Traveler (talk)
On a journey demanding of all the vigor one can muster, one must now and again find not only respite, but entertainment. A mirthless life can hardly at all be considered better than that which beasts live. For that reason, and that I cannot resist from time to time the indulgences of the flesh, I would occasionally on my travels be compelled to seek the dancers of this land. In my homeland, dancers clad themselves in shadow, kept to performing in buildings of disrepute and forced to conceal themselves for the benefit of the reputations of those who sought them out.
In Solistia, to my shock, I have discovered that dancers perform not in the darkness, but upon stages across the land. From the alehouses to the great stages of metropolises, brilliant shining stars dance so lightly it is as though the very winds carry them. Their methods are more varied than I have seen before, and yet, still I see similarities. Here, as back home, dancers serve to inspire and invigorate beyond anything else...
Welcome back to An Octet Gazette, readers of The 'Shroom! There's no need for a lengthy preamble this time, but there is something we need to cover today before we get around to comparing the Dancer job between the two Octopath games. You might remember from last month that, among other topics, I mentioned "shield points" while telling you we would get there eventually. Well, we're there, so let's talk about breaking enemies!
Break 'em Down!
If you've picked up anything about the Octopath games outside of this section, you may have heard the phrase "Break & Boost" used to describe the battle system of the games. It's a clever, memorable way of putting the system into words, and it does an apt job at describing how the system works. It's not very complicated! It really does revolve around boosting your attacks with BP and breaking foes by targeting their weaknesses. We're going to focus on just the "break" part today, though.
In the Octopath games, every enemy type has a certain number of "shield points" and a selection of weaknesses. These shield points can be seen beneath an enemy in-battle, alongside their weaknesses, which begin concealed but are revealed as you strike them (or through a few other miscellaneous other means like the move "Analyze" we talked about last month). Every time you strike a foe with an attack that it is weak to, its shield points decrease by one. And yes, to be clear, for moves that hit multiple times, assuming the move's type doesn't change, each hit will lower a shield point. It's a simple system.
When an enemy's shield points are reduced to zero, they enter a state of being "broken". A broken enemy will be unable to take any further actions on the turn they are broken and on the following turn. They will also take increased damage from your attacks so long as they remain broken. After spending one full turn of being broken, enemies will return to normal, restoring their shield points and regaining the ability to attack. In fact, on a turn that an enemy recovers from being broken, it will always move first on that turn, and, if it's an enemy that gets multiple actions, it will take all of those actions in rapid succession at the beginning of the turn. This, of course, prevents enemies from becoming punching bags that never get a chance to hit back, and it adds a bit of extra strategy, forcing you to consider when the moment is right to break a foe.
You might be wondering, at this point, what weaknesses a foe can have. Well, they're the same as the six types of weapons and six types of magic! Enemies can be weak to: fire, ice, lightning, dark, light, wind, axes, staves, bows, swords, daggers, and polearms. For most common enemies, once you work out their weaknesses, you can be sure that they'll always have the same weaknesses whenever you encounter them (and, in fact, if you've revealed their weaknesses in one battle, they'll be visible whenever you encounter that foe again). Bosses, though, tend to shuffle and lock out their weaknesses, either changing what they're weak to or making it so that hitting them with a particular type of attack no longer reduces their shield points, so don't get caught unaware!
That's the "break" half of "Break & Boost" covered in full! We'll save the "boost" half for next month, so let's get into the performance of the Dancer job!
The Charms of a Dancer
Just like last month, we'll look at weapons first, then break down the skills in each game, and wrap up with the Support Skills in each game.
In both games, the only weapon available to Dancers are daggers! This poor weapon selection results in Dancers having a difficult time hitting an enemy's weaknesses. If they fight an enemy that isn't weak to daggers, they have no (solo) options for reducing an enemy's shield points at a rate faster than one per turn (there is one somewhat unreliable way to maybe get more, but we'll talk about that in a later edition). Add this to Dancers generally specializing in speed and evasion over offense and defense, and you can see why starting your game with the Dancer traveler is considered rather rough (though the second game takes some steps to make it easier).
That said, Dancers don't shine solo, but instead burn brightest once they have a party to travel with, so let's look at the skills that come with the Dancer job and see what's on offer!
Looking at the above list, it should be abundantly clear that Dancers specialize in status buffs. There are four moves there - half of that skillset - that exist solely to grant buffs to a party member. All those "[Animal] Dance/Strut" moves are straightforward. For a low SP cost, you can make a party member stronger in some way, with the effects lasting even longer if you spend BP to boost the move. If you're willing to spend three BP and a lot more SP beforehand, you can even use Sealticge's Seduction to extend the reach of those buffs to everyone in your party. This is what the Dancer is built around, and why the Dancer job works out better once the traveler who has it joins up with the party. They can buff themself, but they're not going to get as much use out of those buffs as the others!
Aside from those buffing moves, the Dancers in the first game have access to dark magic, and are the only of the starting jobs to have access to it, actually. Now, the Dancer job does provide a slight boost to elemental attack, but, really, Moonlight Waltz and Night Ode will get more mileage on a character who has taken the Dancer job on as a secondary job or on a Dancer who has taken a job like the Scholar. They're simple offensive spells and present the usual "lower cost, higher damage, but one target" versus "higher cost, lower damage, but hits all targets" choice.
The last move in the Dancer's skillset is one that's... both simple and tricky. Bewildering Grace is a classic "random effect" move. Use it, and you never know what you're going to get. Maybe you'll get a bonus of a 100x EXP or JP modifier! Or maybe your entire party's health will be reduced to 1 HP! All you can do is hope that it goes well! You can spend BP to get more random effects from a single use, and supposedly boosting it also makes the more extreme outcomes (positive or negative) more likely to occur? I'll be honest; I'm not going through and and sampling this move's effects hundreds of times to try and get a distribution, so, for more details on how it works and what possible outcomes it can produce, I'll link to the Fandom Octopath Wiki and hopefully they tell you how the move works accurately!
In the first game, the Dancer job is all about buffs. Let's take a look at the second game now, though, because, while it does retain an emphasis on buffs, it reworks things a bit to make life a little easier on solo Dancers.
First off, the Dancer's various dances have been reduced to two! Mole Dance and Panther Dance are gone, opening up some space for the Dancer to be made more flexible and a little more effective when solo. Though Panther Dance isn't quite as gone as it may seem at first glance. While the Dancer job has no speed-raising skill this time around, Stimulate fulfills its purpose in a more targeted, more reliable fashion. The hope with a speed boost was that your party could move earlier in the turn order, though it could be hard to gauge exactly how effective it would be. Stimulate gives you more direct control, letting a specific target consistently jump one place forward in the turn order.
Mole Dance really is gone, though, replaced by a new offensive skill that serves two roles. Ruinous Kick, first off, is a fairly powerful move for a Dancer to unleash in general, and can do solid damage when boosted and used against a broken foe. Its unique property of always lowering an enemy's shield points when it hits, regardless of their weaknesses, helps to offset the Dancer having access only to daggers and one type of magic.
The other major difference you may have noticed is that the Dancer's magic has been changed! A few jobs received this treatment in Octopath II, with the associated element for Merchants, Dancers, and Thieves shuffled around. The Dancer job has lost its darkness magic, swapping the single-foe darkness move for a single-hit wind move, and, interestingly, swapping the full-field darkness move for a full-field dagger move. This actually leaves wind magic in the odd position of being the only element without a job-linked move that hits all enemies on the field at once without some kind of augmentation (there is a move that fills this role, but we'll talk about it down the road). It's a strange arrangement, especially because the Dancer would have the same coverage spread of one element and one weapon (Ruinous Kick aside) if they did have a full-field wind move, but, hey, take this as your introduction to some skills being associated with a weapon type, rather than an elemental magic type!
Those are all the changes to the Dancer job, actually! Sealticge's Seduction's in-game description has been clarified a bit, and I believe some of the outcomes and odds for Bewildering Grace were reworked, but, other than that, the rest is the same as in the first game. In the end, you have a job that still can focus on buffs and supporting the rest of the party, but that also has a few more options for standing on its own.
With that said, let's start wrapping up this performance by taking a glance at the Support Skills of the Dancer job!
| Name | Effect |
|---|---|
| The Show Goes On | When the character with this skill grants buffs, those buffs will last one turn longer than normal. |
| Eye for an Eye | Gain a 50% chance to hit an enemy with a counterattack after being hit with a physical attack |
| Second Wind | Some SP will be recovered at the end of each turn. |
| Encore | The first time in a battle the character with this skill is knocked out, they will automatically revive with 25% of their HP. |
We've got one Support Skill seemingly crafted for the Dancer here, with The Show Goes On taking the various buffs from Lion Dance, Panther Dance, etc. and extending them by a turn. Eye for an Eye may not scream "Dancer" in particular and may not seem particularly aligned to its role, but it does fit the character who starts with the Dancer job in this game. Second Wind and Encore, meanwhile, are generally useful skills. They're probably more helpful on travelers who took Dancer as a secondary job, but they're at least somewhat useful on a starting Dancer. After all, while they'll typically use it in small amounts at a time, Dancers do burn through a rather limited SP reserve, so gradual SP restoration can help spare you a turn of having to toss a Dancer an Inspiriting Plum. Encore, meanwhile, can help spare you a turn using an Olive of Life on your squishy Dancer when that emphasis on evasion inevitably results in them taking a hit and crumpling like a paper fan.
| Name | Effect |
|---|---|
| The Show Goes On | When the character with this skill grants buffs, those buffs will last one turn longer than normal. |
| Ever Evasive | Characters with this skill have a higher chance of avoiding enemy attacks. |
| Hard Worker | Gain more JP than usual from battles |
| Invigorate and Inspire | When buffing an ally, slightly fill their latent power gauge |
The second verse is not the same as the first, in this case! For their second showing, Dancers have a selection of Support Skills more specifically-crafted to their role. The Show Goes on returns unchanged, but it's complemented this time by Invigorate and Inspire, allowing Dancers to give their allies an extra benefit when granting their buffs. We'll talk about what "latent powers" are well down the road, but just know for now that this is a pleasant bonus.
The gradual SP restoration from the first game has been replaced with an extra dose of evasion, with this change being... middling. It does feel specifically suited to the Dancer, since they emphasize evasion, but that gradual SP restoration did serve them well as they burned through SP to offer buffs, and evasion just truly isn't that reliable of a stat.
Finally, the seemingly character-focused Eye for an Eye has been replaced with another seemingly character-focused skill, with Hard Worker being an apt description of the second game's starting Dancer. This is one of those Support Skills that's useful in the early portions of the game, and broadly-so, at that, but that gradually gets outclassed by other Support Skills as you unlock an abundance of them.
Of course, beyond that, there's one more difference between the Dancer job in the first game and in the second, and it's one we've vaguely touched upon! In the first game, Primrose Azelhart is the character with Dancer as her primary job, with Agnea Bristarni having it first in the second. As usual though, we'll talk more about them and traits specific to the two of them down the road. For now, we take a bow and end the show!
Come back next month, and we'll compare the two games' approaches to the Merchant job!
An Overly Detailed and Funny Walkthrough of Mega Man
Introduction
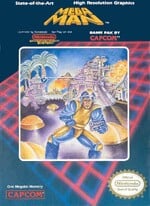
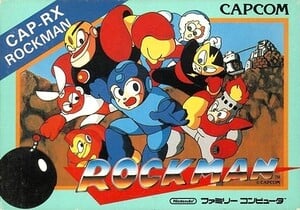
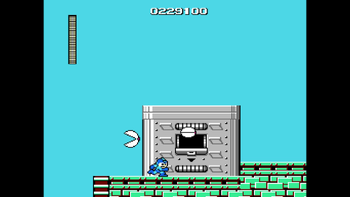
Mega Man is a series of platforming run-'n'-gun games developed by Capcom. While there is the mainline series of games, there are spin-offs as well, like Mega Man X and Mega Man Battle Network'. This is going to be a very funny and over-the-top walkthrough of the first ever Mega Man game!
For those who've never heard of Mega Man, the games have you controlling a blue robot named Mega Man (duh!) who must defeat Robot Masters (usually eight) and then stop the nefarious plans of Dr. Wily. Mega Man can move left and right, jump, and fire projectiles from his Mega Buster to attack enemies. Every time a Robot Master is defeated, Mega Man acquires their weapon and can use it for the rest of the game. The weapons vary depending on the Robot Master, and they all consume weapon energy when used, so you can't constantly use them all the time! The later games add in new features for Mega Man, like E Tanks that can restore the life energy of Mega Man, and Rush, a faithful robot dog companion who helps Mega Man out on his adventures.
Now, let's start the game!
This game has no introduction, probably because it's the first game in the series, so I'll provide the plot for you: Dr. Light, a robotics scientist, has created eight robots to help him out, Rock, a housekeeping robot who would eventually become Mega Man; Roll, Mega Man's "sister" who also housekeeps; and the six Robot Masters: Cut Man, Guts Man, Elec Man, Ice Man, Fire Man and Bomb Man. Dr. Wily, another robotics scientist who is the villain of the series, takes the six Robot Masters and modifies them to serve Wily instead of Light. Rock volunteers to be made into a combat robot to stop Wily's plans, and thus Mega Man was born. Now it's time for him to save the day!
Did you get all that? Good. Now let's start the game for real!
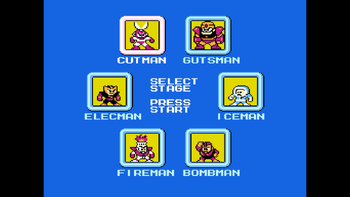
Here is the stage select screen for the game, showing all six Robot Masters. You can choose any stage you want, in any order you want! Each Robot Master has a weakness to another's ability, so strategy is encouraged to find the easiest possible path to take them down. Here's a list of their weaknesses:
- Cut Man is weak to Guts Man's weapon.
- Guts Man is weak to Bomb Man's weapon.
- Elec Man is weak to Cut Man's weapon.
- Ice Man is weak to Elec Man's weapon.
- Fire Man is weak to Ice Man's weapon.
- Bomb Man is weak to Fire Man's weapon.
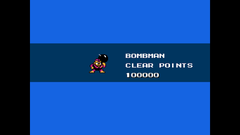
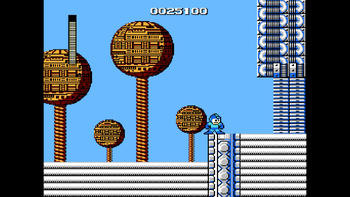
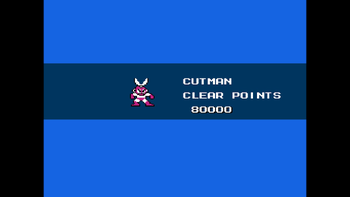
I will showcase the path I like to do, and it starts with Bomb Man! When you select a Robot Master, the game will show how many points you get when you defeat them. The points don't matter, and only this game had them.
Bomb Man
Bomb Man Beginnings
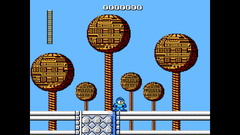
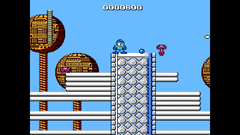
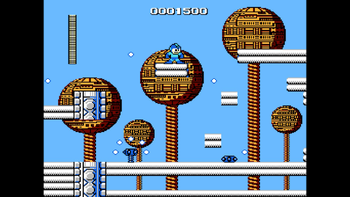
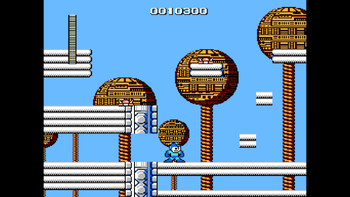
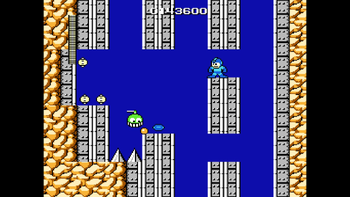
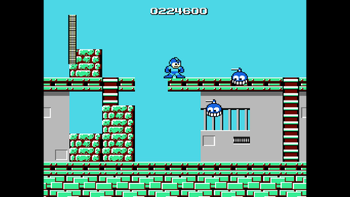
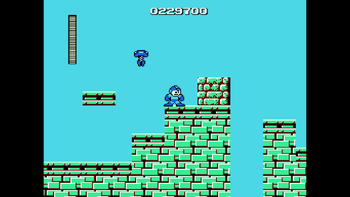
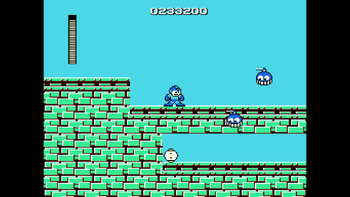
We are in the stage! After making a teensy-tiny amount of progress, we are suddenly attacked by little pink jumping enemies. These enemies can either jump a small or large distance, so be on your toes when dealing with these things. A well-timed Mega Buster shot will deal with them, or you can just spam. That works too.
I should mention this now. Enemies can drop power-ups for you sometimes when they're defeated. They usually drop these small orbs that add extra points when you clear the stage. They're pretty useless in my opinion. Thank goodness the sequels removed them. Health and weapon power-ups can also be dropped that restore energy, so a trick you can do is farm from weak enemies to regain your stats. Some luck is involved, but it'll be worth it in the end!
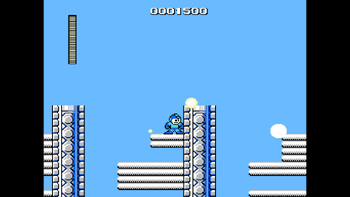
As we proceed onward, we find ourselves having to jump over gaps with these big blue bombs that explode into four smaller bombs. It might look tough to get past, but there's a trick I know about! Hide in the right corner to avoid the bombs, and then make a run for it! Even if you do get hit, the bombs do weak damage.
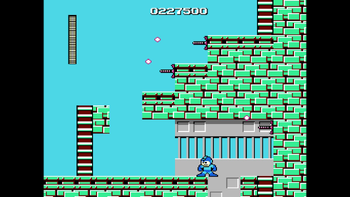
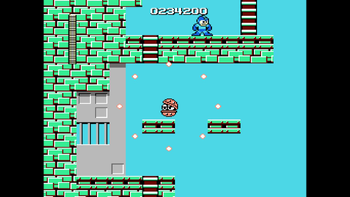
Now, there are these "screws" (I don't know the names of ALL the Mega Man enemies!) that poke out from the surface they're on and then fire bullets in five directions. These ones are on the ground, so we can just use the high platforms to avoid them. Oh yeah! A ladder at the far right of this segments leads us upward.
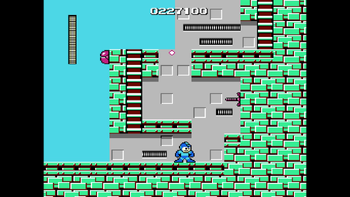
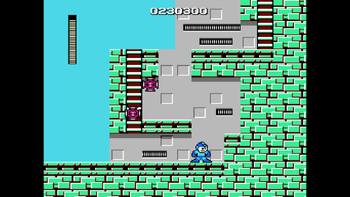
We then find ourselves in a room where four turrets are attached to a wall. These turret enemies fires four shots that always travel in the same directions. They are also invincible when inactive, and so we must strike when they're shooting. You can also make a mad dash for it if you can dodge them all. It's tricky, but possible! There's also a health power-up in case you've taken lots of damage already. Now to climb higher!
Attack of the Bullet Bills and Sniper Joes
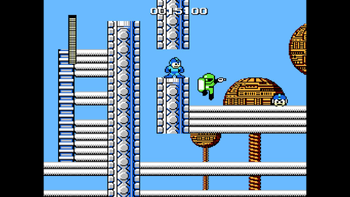
We climb up, and not far after, this green guy with a shield (known as a Sniper Joe) jumps in our way. This is an annoying enemy to deal with, as you can only attack him if he jumps or when he shoots. You also just can't fire at him relentlessly because he won't do anything if you do. You'll have to wait. Patience, my friends!
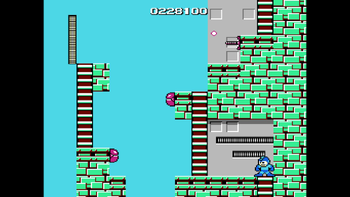
After getting past the Sniper Joe, there are more gaps we must jump across. There are these Bullet Bill-like enemies that fly in from the right in a curve pattern that will explode when they're attacked, hurting us if we're close to them. Avoid close proximity when fighting these enemies, and if you can't attack them, simply dodge them. There are also more wall turrets in the way, so we have to jump over the gaps, avoid the Bullet Bills, and destroy the turrets. Multitasking! When I was making my way through this segment, I discovered a glitch I benefited from. The Bullet Bills stopped spawning, and so I only had to worry about the gaps and turrets! To be fair, there are a lot of bugs in this game, but it's the first one, so you can forgive Capcom, right?
We now find ourselves at an area where there are small enemies that roam the ground, and will speed up if you're on the same ground level as them. The worst part is that they can't be defeated normally; Mega Buster shots only temporarily pause them. Maybe later I'll get a weapon to take them down!
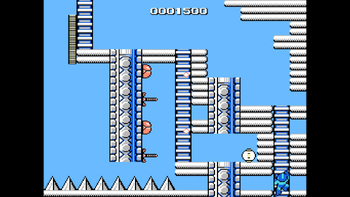
This next room is rather scary. We must avoid Bullet Bills and reach to the ladder, which is directly above spikes. In these games, spikes instantly KO Mega Man if he touches them. I don't know why, but maybe he hates spikes with a passion?
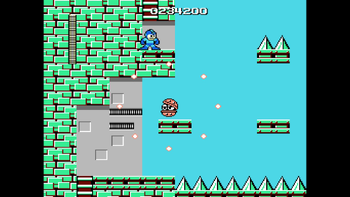
So after climbing this ladder, we find ourselves in an area much worse than the previous one! This one has a sea of spikes with small platforms we must use to jump across. There are also these "spaceship" enemies that, like the turrets, are invincible when not attacking. They move and stop and, when they do stop, they fire eight fast bullets around them before moving again. Oh man! Thankfully this segment is short, as solid ground is found not long afterwards.
Ooh a 1-Up! A Sniper Joe is guarding it though. Because we are on higher ground, we can only attack him when he jumps. Once again, patience, my friends! After defeating him, you can claim that 1-Up!
After some more progress, another Sniper Joe blocks our way. He's guarding the entrance to the boss room! After defeating him, we can enter.
Bomb Man's Territory
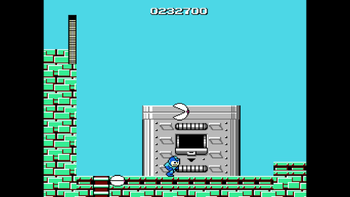
In the first Mega Man game, there are more obstacles before reaching to the boss. In this instance, we must climb down a ladder to avoid eye blocks that occasionally move from side to side. You can climb down the ladder or you can take the shortcut and just drop down. There's another room of them below though, so you might take damage.
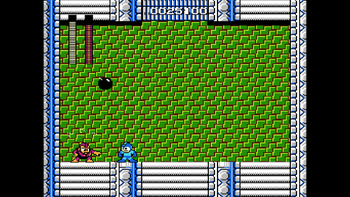
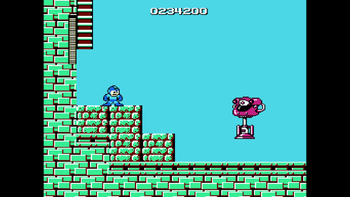
At the bottom of this section is Bomb Man himself! He likes to jump around. A lot. Like he's Pinkie Pie. Oh, and he also throws bombs at you that cause explosions when they hit the ground. He's weak to Fire Man's weapon, but I don't have it, so I have to fight him regular style. He takes more damage than usual from the Mega Buster, so this'll be a quick fight! My advice for this battle is to watch when he jumps and avoid him. When he throws bombs, that's the time to strike! Just watch out for the bombs though.
After Bomb Man is defeated, there's this big orb thing (I don't know what it is!), and collecting it will end the level. That's one Robot Master down. Five to go! We also now have his ability. Bomb Man's weapon allows Mega Man to throw bombs that take a few seconds to explode. I honestly don't see it as very useful, but it's not the worst weapon in the game.
Guts Man is weak to Bomb Man's weapon, so he's the next one to battle!
Guts Man
Taking a Detour to Unstable Platforms and Angry Construction Workers
We land in a construction site, and immediately we have enemies in our way. These are classic enemies in the series – they are Mettaurs!
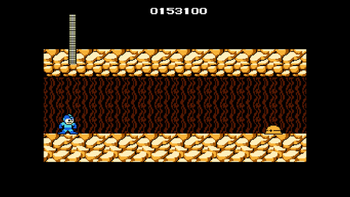
These ones are stationary and will fire three slow projectiles when they are approached. They can only be attacked while they shoot. They're not that bad, to be honest.
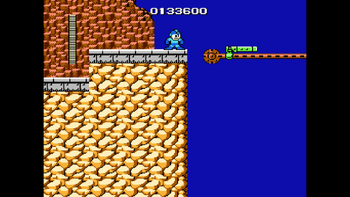
After getting past some Mettaurs, we find one of the most annoying sections in the game! We must use moving platforms to traverse a large gap. That sounds simple, but these platforms can drop us if we're not careful. By drop, I mean Mega Man falls faster than an anvil on a planet with high gravity. These platforms travel on tracks, so if we look carefully, we should be able to tell when they'll drop us.
After getting past that tough section, we find more solid ground where these flying green smiling enemies can dive bomb us when they are near. Thankfully they only take one shot to get rid of, so if you time your jumps and attacks, you should defeat them easily… just don't let them bully you. A big health power-up is found along the way, so you can heal yourself if you've taken lots of damage.
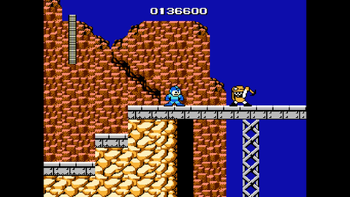
After falling from a cliff, we find more enemies to fight. These ones resemble Mettaurs, but they have arms and legs, and constantly throw picks at us! They jump in from offscreen with their shields up, and then go on the offensive. What I do to get rid of them is slowly move towards them while shooting, that way I can dodge their attacks and defeat them. The area with them has some gaps too, so watch out! The end of this area has a path leading downward.
Digging Straight Down
Up next is a series of rooms with paths leading even deeper. The first room has the flying green smiling enemies again, but did you know they can fly upwards to attack you? They don't just dive bomb!
The next room below has some power-ups, but also more of those green smiling flying enemies (I really have to think of a shorter name for them…). What's down below?
I fall down on the far right side and, OH MY GOODNESS, there are spikes here that I couldn't avoid. Thankfully there's a checkpoint at the "top" of this section. Knowing my mistake, I avoid the spikes when I reach there again. If only I can reach that 1-Up… we'll have to go down once again, I guess.
We reach the bottom and find a giant blue one-eyed jumping machine that leaps toward us. This is arguably the most dangerous enemy in the game, and it's very bad news if it touches you. It jumps between low and high at random, so there's no way to predict its movements. It it jumps high, you can run under it, but it's risky. I just fired away at it before it could reach me. It has lots of HP, too! Thankfully I destroyed it before it could reach me. The boss door is found right afterwards.
Construction Clash
On the way to Guts Man there are some Mettaurs. Easy peasie!
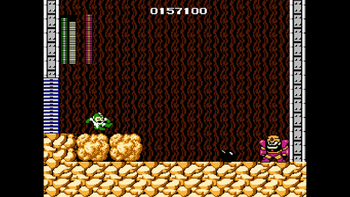
Now it's time to battle Guts Man! He just jumps (lowly) and occasionally throws rocks at us. All of his jumps will shake the screen, stunning Mega Man if he is on the ground. It's difficult to avoid this, so what I do is stand far away and just stand there, because if you mistime your jump, you will be stunned when you land, making you more vulnerable. Sometimes he can be unfair and become too close for comfort. He also takes more damage than usual from the Mega Buster, but because of the higher ground on the left some of the shots will miss, so I used the bombs from Bomb Man to defeat him. They do MASSIVE damage and 3 will defeat him! Two down, four to go!
Guts Man's ability is the Super Arm, which allows Mega Man to pick up large blocks in the way and throw them. It's useless without the blocks, but it's vital to progress, as you'll see later on. Now to challenge Cut Man!
Cut Man
Onward and Upward!
Right off the bat when entering, I notice big blocks that my Super Arm ability lets me grab and throw. I won't though – I want to save it for the boss!
Looks who's back! It those green smiling flying enemies from Guts Man's stage! But now they're blue! They act the same, however, and still aren't a problem unless you're swarmed with them.
After making progress, to the right there will be those turret enemies from Bomb Man's stage. The path leads upwards, so that's where we'll go!
The next room has three turrets with a slightly different layout. Just get through them and climb on up!
The next room has… more turrets. And we still have to go upwards, so we will.
The next is… oh, who am I kidding? It's more turrets! One of them is in a gap, so that's something I suppose.
After reaching to the top, there's this strange structure in the background with a hole on it. When we run past it, scissor-like enemies jump out at us! The best thing to do is to run past them; there's an endless amount and it's futile to try to fight them. Afterwards are blue versions of those jumping pink enemies from Bomb Man's stage.
More Climbing
At the end of this area are more of those eye blocks from the end of Bomb Man's stage. These ones can move up and down, in addition to left and right. Now we have to climb up and deal with more rooms of eye block repetition. I didn't add in screenshots because the whole thing is incredibly boring. Just know that there are lots of eye blocks as you climb up multiple rooms.
After reaching another peak, there's another structure with scissors. Just run past this one like the previous one!
Up next are more of those smiling blue enemies. After getting past them you have access to a health power-up, and then you have to go downwards!
Time to Descend!
The first room of the downward descent has spaceship enemies from Bomb Man's stage that endlessly spawn. Don't fall on the right side; a nasty surprise awaits you if you do!
The next room has spikes now! You wouldn't want to land on those would you? Oh and there are more spaceships. Use the ladder to the left to reach the bottom!
At the bottom is a pink version of the one-eyed machine from Guts Man's stage. There are also blocks you can pick up here, so if you've defeated Guts Man, you can use these blocks to fell the mech! I did. It was awesome. To the right is the boss door!
A Battle of Rock Paper Scissors
The area leading to the boss has orange "screw" enemies from Bomb Man's stage. These ones are on the ground and the ceiling, so you can walk under the ceiling ones if you're careful. Time to fight Cut Man!
I say Cut Man is the easiest boss in the game. He takes 3 damage from the Mega Buster and gets pushed back every time he is attacked! He attacks by jumping high and throwing his scissors like a boomerang. There are two rocks you can use to throw at him, with each one taking out half of Cut Man's HP! Halfway there!
Cut Man's weapon allows Mega Man to throw scissors like a boomerang, similar to how Cut Man does. One of the better weapons in the game in my opinion. Up next is Elec Man! I'll tell you about his stage and more next month, so come back in May!
File City Files
Hello again, and welcome back to File City Files, the city of five seasons' (look it up) number-one encyclopedia for Digimon World strategies. Last month, we began exploring Mt. Infinity, a twisted and confusing mountain made out of broken data and even more broken Digimon. This month, we continue our exploration of the mountain in hopes of finding the source of File Island's calamity and putting a stop to it once and for all!
A Mighty Warrior in a Digital Wasteland
Picking up where we left off, with Devimon out of the way, we can continue our mountain expedition. From here, things get a little odder. The enemies get a little more spread out. They don't pursue you as much. Some even stand stationary, completely ignoring you if you don't touch them, almost as if whatever is controlling them is running out of resources. The first room after Devimon has a Rockmon that you're almost guaranteed to fight because the little corridor he guards is too tight for slick reverse moves! There's also an unguarded PC in this room that contains an Autopilot. The exit to this room is guarded by another Rockmon, but this one is much easier to avoid. Or, if you want, you can just fight it; I mean, it's just a stupid Rockmon. The next room contains multiple Digimon, but, as if their programming is bugging, none of them move; instead, they sit stationary, watching you. In the back of the room there's a PC containing a Double Floppy, a pretty useful recovery item which recovers 1500 HP and 1500 MP. Because the enemies don't move in this room, you can simply ignore them all and make your way into the next warp.
This warp takes you to a maze-like room. The enemy placement is poor. A Rockmon sits in the front, guarding the way you came in (he's really easy to avoid). A Piddomon guards a dead end to the left, while a PC containing a Sup Recovery (which heals all HP) sits on the upper path, completely unguarded. The warp is guarded by a single Piddomon who is very easy to simply avoid! But on the other hand, it's actually somewhat worth it to fight these single Piddomon because they have a 10% chance to drop the Sage Fruit. The Sage Fruit is a rare item that provides a 20-point permanent boost to your Brains stat. This is actually the same with the Rockmon and Vermilmon, who can drop a Power Ice and Power Power Fruit, which boost Defense by 20 and Offense by 20, respectively. Of course, because this is Digimon World, they only have a 1% chance of dropping those items, so it's probably not worth it to fight them, but, hey, just thought I'd provide you all the information!
Eventually you'll come to a room with a large straight pathway with an upper alcove you can enter. If you keep going straight, you'll reach the warp to the next zone with no trouble, but if you take the upper path, you'll come face to face with an unknown Digimon of immense power.
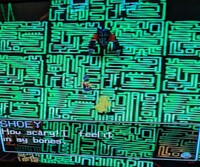
This power is so immense that, upon approaching him, the power radiates through our body, unnerving us. Unlike everything we've faced up until now, we can feel that this Digimon contains a power we've never experienced before. At first, this Digimon says nothing, instead choosing to silently size us up. We ask him why he isn't attacking us, but again he says nothing. Again, we question why he doesn't fight us, and we're left with a choice. Should we leave him be or fight him? While it may be smarter to leave him be, we realize we can't let a Digimon of such immense strength fall into the hands of those who are causing this calamity, so with great reluctance we decide to fight him!
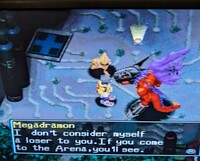
This Digimon is Megadramon, Ultimate-level Digimon and one of the toughest bosses in the game. Megadramon lives up to his name, having 7,500 HP and knowing three powerful moves. Those moves are: Megaton Punch (320 power), Giga Freeze (224 power), and, finally, the most powerful standard move in the game, DG Dimension (722 power). Megadramon is an insanely difficult fight, easily one of the hardest in the game. If you're not prepared with dozens of healing items, he will rock you without any trouble. Megadramon has very high Speed, allowing him to constantly spam DG Dimension, which can quickly drain your health. I wouldn't recommend fighting Megadramon with anything other than a high level Ultimate with High HP, Offense, and Speed, and even then, I would recommend bringing a ton of recovery items! But eventually, after a grueling fight, Megadramon goes down. But even in defeat Megadramon says nothing to us and flies away silently, leading us to question if we've even won.
Megadramon drops an Offense Chip and behind him are two computers, one with an HP Chip and the other with an MP Chip. Again, you don't actually have to fight Megadramon to progress in Mt. Infinity, but for both completion's sake and because you get three stat-boosting items, I'd say it's worth it as long as you have a strong enough Digimon. But maybe, just maybe, if you've got lifespan to spare, it would make sense to save before you fight him just so that, if you do lose, you don't have to do everything in Mt. Infinity all over again.
Purpose in the City: A powerful warrior in his own right, Megadramon joins the arena, participating in level S tournaments. Mostly, though, he sits outside the arena, talking shit and cutting promos about how powerful he is.
The Brainwashed Series Mascot
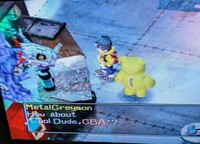
With or without beating Megadramon, we're able to advance to the next room. This room is different than the others, though! The data is a little more complete, taking the form of a long hallway. Going down this hallway, we're confronted by the Digimon equivalent of Charizard, MetalGreymon. MetalGreymon calmly tells us that we're here at last. We respond by asking him if he's the boss of these parts. He informs us that he's not the boss; he's just MetalGreymon.
We're already like 100% sick of this conversation, so we tell him to get out of our way. MetalGreymon refuses, telling us he won't move one foot back. Since he's not the boss and figuring that this is one of the last things before the big boss, we don't want to fight him because that would waste precious time and calories. Unfortunately for us, MetalGreymon makes and executive decision and charges us! Realizing we have no choice, we prepare GBA for battle!
MetalGreymon has even more HP then Megadramon has! MetalGreymon has a staggering 8,600 HP, the second-highest of any boss in the game! But its moves are comparatively weaker. MetalGreymon knows Meltdown (488 power), Buster Dive (500 Power), and Infinity Burn (400). As you can see, his moves are fairly powerful, but there's on big catch. Buster Dive is a deceptively bad move, one of the worst in the game in fact. Not only does the animation time on it take forever, but because of how it works, with the Digimon that uses it just charging at you, it's very easy to dodge it because your Digimon can just move out of the way. Honestly, Buster Dive is the worst of the powerful moves because it's just so unreliable! Thanks to this, this fight can be difficult, but it's not really that hard in most cases. You could easily beat MetalGreymon with a high-level Champion or low-level Ultimate. He really only has his high HP going for him. His attacks, while overall fairly powerful, are kind of anti-climatic for the penultimate boss of the game! Upon being defeated, MetalGreymon snaps out of the spell he was under, asking where he is. While we're happy to see that he's regained his senses, MetalGreymon ominously tells us that if we beat "them" then maybe we'll see him again. But until that happens, he's out of here! Oh, also he drops a Defense Chip!
Purpose in the City: MetalGreymon joins the arena, participating in high-level Ultimate tournaments. More importantly, he opens a stand inside the arena where he comes up with different nicknames for your Digimon, the Digital World's hero! This isn't useful, but I think it's pretty fun and charming!
The Final Battle in the Mountain
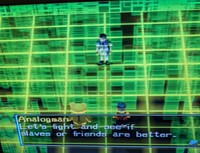
With MetalGreymon defeated, we continue down the hallway and end up in what appears to be a control room. Continuing forward a little bit, we come face to face with him. With a facade of politeness, he informs us that he's Analogman, not Analogmon.
He tells us that he knows all about us. He's been monitoring our progress, analyzing everything we've been doing to stop him. But… Then he also mentions that he didn't realize we were a kid. So, like, honestly, how much could he really know about us, you know? He then expresses shock that some snot-nosed little brat is messing up his plans to rule the Net World. First off, asshole, it's called the Digital World! God, learn the lore! And second off, this couldn't be that good of a plan if it has been stopped with little problem by some 10-year old who has been here for like a month and half! We're all like, bro, you're an adult, get out of here and get a life, get a girlfriend, go touch some grass and quit being such a nerd! But Analogman is all like "yeah, I don't care what a bunch of stupid computer programs think". Which, honestly, reasonable! But then he says Digimon should obey humans like slaves, which is, uh, less reasonable.
We're like "dude, that's pretty fucked up. Digimon aren't just computer programs. They have hearts and minds and they're my friends". Analogman is then all like "alright, let's throw down and see who is better, friends or slaves." Which, like? That's a weird statement! I don't know what that's supposed to mean in context! Analogman then pulls out his Macintosh Powerbook 5300cs with a whopping 8MB of RAM and loads up his most powerful slave -- the dreaded, the cruel, the mighty Machinedramon!
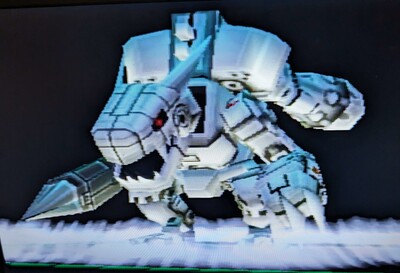
The only Mega Digimon in the game (there are others, but they're all classified as Ultimate), Machinedramon has max HP (9,400), max Offense (999) and insanely high defense (650 – by the way, thank god for grindosaur.com, which provided this information). But, uh, here's the kind of weird thing. Despite being the only Mega with max HP and potentially max stats, his moves aren't exactly setting the world on fire… He has Megaton Punch (320 power), Thunder Justice (586 power), and All Range Beam (573 power). The latter two are pretty powerful moves, but, like, goddamn, Megaton Punch is just a waste for him! Yet according to my best friend grindosaur.com, Megaton Punch is the move he uses the second most. It's just… why would you have your final boss have a pretty mediocre move? It's just kind of a waste. So, naturally, I bodied Machinedramon! Like, I think it only hit me like three times, lol.
To be fair, though, I saved like all of my stat boosts for this Monzaemon, knowing that I was going to clear most of the game with it. Now, I didn't know I was going to beat the game with it, but, still, this is a very powerful Monzaemon and I was graced by the digital gods with Thunder Justice, one of Monzaemon's best moves. With that and my own high offensive stat, I was doing like 1,100 HP per hit! Plus, thanks to all the times I used to fish glitch to make all the money, I was basically never going to lose this fight because I had so many recovery items!
Upon being defeated, Machinedramon literally just disappears, which, while funny because he just pops out of existence like a cartoon, actually makes a lot of sense. Unlike everything else we've fought, Machinedramon isn't a naturally-occurring Digimon. Instead, he was a construct created by Analogman hacking the Digital World. Because of that, it's easy to assume that, quite simply, when defeated, his data corrupted, causing him it to scatter through the Digital World! We then rub it in Analogman's stupid smug face that he was wrong, claiming that friendship is superior to slavery. We then tell him that the Digimon will forgive him if he just asks for forgiveness and leaves the island alone!
But Analogman is a sore loser, and, after first grumbling about how he should have never trusted a Digimon with this job, he again pulls out his Macintosh Powerbook 5300cs with a built in 8-bit color display and manically declares that he's going to blow up this stupid little island while he escapes to another world! At this point we're panicking because we don't know anything about computers, so how are we supposed to defuse a digital bomb??? Analogman then appears on his big screen, taunting us about how we're going to die, because I guess Analogman has fully accepted that murdering a child is the right call!
Suddenly a voice calls out, telling us that it's alright. Analogman then begins to panic, saying that something has gone wrong and that the bomb isn't transferring. From here, we suddenly realize we can hear everyone's voices, and cutting through those voices is Jijimon, who tells us that he's sending energy to us. An explosion goes off on Analogman's screen as Analogman screams about how everything has gone wrong.
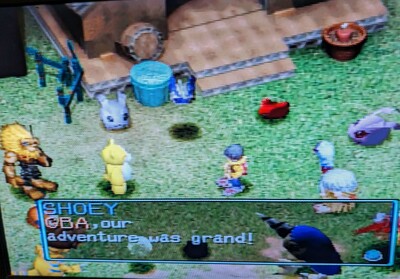
As we question what exactly just happened, through a wormhole comes Airdramon! He's all better, guys! Airdramon tells us to get on his back so that we can get the hell out of here! We make it out just in the nick of time as Mt. Infinity collapses or something. Analogman is dead, and we've ended the calamity and restored peace to File Island! Having escaped the destruction of Mt. Infinity, we find ourselves surrounded by all of our friends, the people who helped us restore File City to its glory, the people who helped us save this island. A tearful Jijimon tells us that it's time. We tell him we'd like to stay but that our mother worries about us. Jijimon thanks us for saving his island, wishing he had some way to thank us. AIrdramon, who we really just met if you think about it, confidently predicts that we'll meet again. We thank everyone for having us, telling them we've had a great time.
With that, Jijimon sends us home and the credits begin to role as photos of different areas of the game display. After 18 issues, we've done it. Peace has been restored and the human threat to File City is finally destroyed. File Island can finally begin the process of rebuilding. The calamity is over.
OR IS IT?
Loading up your save file, you get a new cutscene. In this cutscene, we're desperately trying to convince our friends that we entered the Digital World and had a grand adventure. Obviously, none of them believe us, 'cause, you know, why would they? Suddenly, our Digivice begins to glow, and out pops Mamemon, one of our weirdest friends.
Mamemon tells us that Analogman has returned and that we have to come stop him! As our friends watch in awe, we return to Digital World. We then head to Jijimon, who says that, while he can't confirm Analogman is actually back, he can confirm that he feels his evil presence!
So that's right boys and girls, our adventure isn't over yet! Join me next time in File City Files as we investigate the mysterious presence of Analogman's evil!
Four Steps for a 3D World
Written by: Hooded Pitohui (talk)
Hello, all you readers of The 'Shroom, and welcome back to Four Steps for a 3D World, a section in which we look at levels from a selection of 3D Super Mario titles through the lens of a design philosophy Koichi Hayashida discussed in an interview.
In brief, 3D Mario game levels in certain titles are designed around an introduction that lets a player learn a mechanic in a safe environment, further development that builds on what the player is learning and introduces more complicated aspects of a mechanic, a twist that adds some kind of significant wrinkle or challenge to force players to consider the mechanic from a new angle, and a conclusion which gives players one final satisfying chance to show they've mastered the mechanic. We look at 3D Mario levels and see if they conform to this model while trying to get some insight on how a good level is constructed.
Last month, we played with Bob-ombs, and this month, we'll continue playing with explosive munitions (professional plumber on a closed course - do not attempt) by moving on to a level filled with Bullet Bills! Specifically, we're going to Searchlight Sneak in Super Mario 3D World, a level filled with Cat Bullet Bills that fire and begin their pursuit when the player steps into the searchlights scanning the level. Let's get into it!
Well, I would say that level shows the influence of these four steps pretty clearly! I could entertain an argument that the boundaries aren't quite where I found them to be, but certainly not one claiming these four steps aren't at all apparent in the level's design. There's a clear progression here, and it makes for a pretty enjoyable and memorable level. I did find the Conclusion segment weak, personally. It didn't feel like it incorporated the level's gimmick very well, and may have been stronger with one last (easily-avoided, even) searchlight. Perhaps the designers thought it would be too much to add another challenge after the ascent up the wall? Well, I can only speculate on the intent of the designers.
Now, with that level covered, I have a question for you all out there who have been reading along! To date, I've stuck to covering levels from Super Mario Galaxy 2, Super Mario 3D Land, and Super Mario 3D World (and one level made in Super Mario Maker 2) because those are the 3D Mario titles on which Hayashida was the director. I mentioned last year I'd consider maybe rarely covering levels from the other 3D games, but I want your thoughts. Would you be interested in seeing this section (or perhaps a separate section - one of you could even be the one to write it!) cover levels from the other 3D titles, or even the 2D titles? They tended towards a very different design philosophy, so I would be hesitant to apply these four steps to them, but we might be able to tease out some other insights using the lessons learned in this section. Or would you prefer that I stick to these three Hayashida-directed games! Reach out via my talk page or on the forum if you have a preference, and feel free to suggest any levels you'd like to see covered!
Anyway, with four searchlights across the first two paths in this level, three Bill Blasters at the first searchlight, two opportunities to use Bullet Bills to break things that lead to a Green Star, and one question posed, this has been Four Steps for a 3D World!
Galactic Expedition
Written by: Meta Knight (talk)
A necessity for all space travelers, this is another Galactic Expedition to guide you throughout the final frontier. We're continuing the trend we started by embarking back to Planet ZDR as featured in Metroid Dread. Last time I made it clear that this feature will focus more on taking down monstrous beats, and this will be no different. Corpius was the first victim of this irregularly-scheduled program, so next up we'll be uncovering the details to wipe out a baddie whose legacy to the franchise cannot be understated: Kraid! Oh, and before anyone asks, no it did not take me 5 months to beat Kraid, I already recorded footage for all of the bosses months ago (yes, even that one).
Kraid
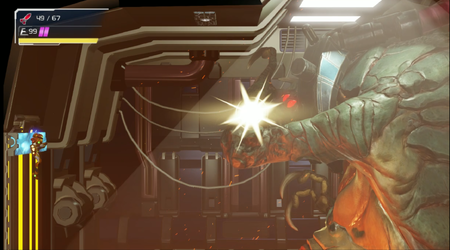
Kraid is one of the original bosses going back all the way to the original Metroid on the NES. Here though, he has been captured and is itching to break free and destroy you. This was actually pretty exciting at the time Metroid Dread released, since Kraid's prior appearance was in Metroid: Zero Mission a whole 17 years ago! In terms of in-game continuity and lore, the most likely explanation is that this Kraid is a separate entity of the same species. Either way, at this stage in the game you will likely have hard a large roar sound in Cataris at some point. There's a few sequence breaks that could have occurred, so although your exact inventory might vary from others, you most likely have just obtained the Varia Suit. This iconic attire has traditionally protected Samus from intense heat, and that's no different here.
Phase One
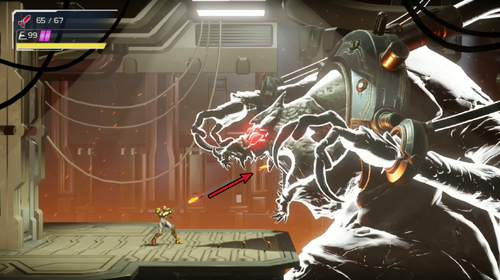
Kraid for the most part is a stationary boss; meaning that he's not someone to run at you. After all, he is chained to the wall. He'll still try to punch you, but he cannot hit you this way during Phase One. That being said, Kraid's main weakness is the inside of his mouth. Shooting his mouth when it's closed will cause him to open it, but landing a Missile or Charge Beam shot on the inside of his mouth as quick as possible is the surefire way to get through this part. The way this fight plays out at the start is similar to his previous encounters such as Super Metroid and Metroid: Zero Mission. He does have some fresh attacks that you need to look out for though, so keep your eyes open!
| Quick Claw | ||
|---|---|---|
|
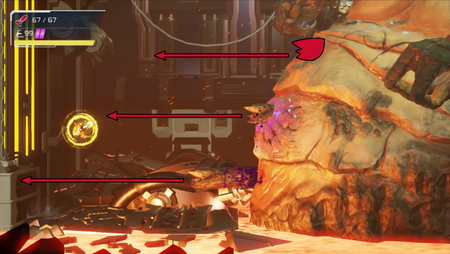
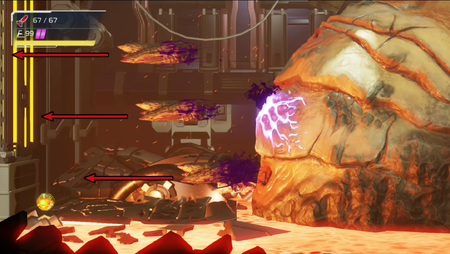
Kraid will wave his fingers to have his slimy claws break off and swirl toward you. The first one comes from his left hand straight toward you, and a second one is thrown at you from above. The quickest way to deal with this attack is to just shoot the broken nails with a Missile to cause them to shatter. Kraid will usually toss a pair of claws more than once before moving on to another tactic, so you'll need to react quickly to handle them. | ||
| Indigestion Rebuttal | ||
|---|---|---|
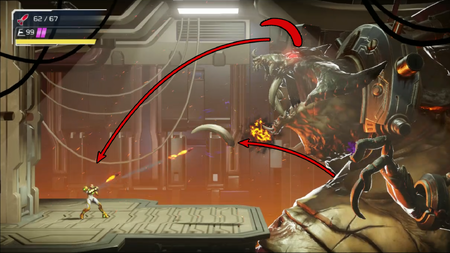
|
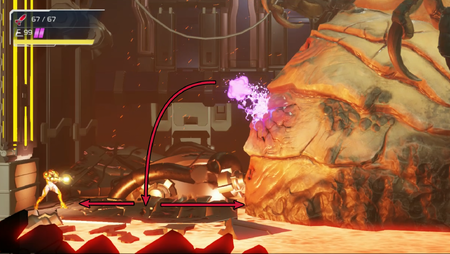
Apparently they don't feed Kraid very well, because for this attack he will just spit a bunch of projectiles at you. There are two different kinds to dodge here. It will start with several solid ball-shaped objects. These are random nature in terms of where they end up, but you can destroy them with some quick firing. They also have a consistent arc, so it's fairly easy to see where they will land. However, periodically Kraid will also have yellow plasma-like viscous material spat out. These will actively home-in on you, and cannot be destroyed. The entire procedure is a test of your maneuvering, because it becomes somewhat bullet-hell in nature. | ||
Once Kraid has digested enough firepower, he will partially escape from his chains and host a throwdown leading into the next phase.
Phase Two
A little bit of a twist compared to previous encounters, Kraid starts off Phase Two by forcing you unto a lower level. The cinematic you just watched will highlight his belly area, which consistently pulsates throughout this sequence. This is another weak spot. It won't outright cause damage to Kraid himself, but it can speed things up in your favor. Somehow, you'll need to get back up in order to shoot his face again....
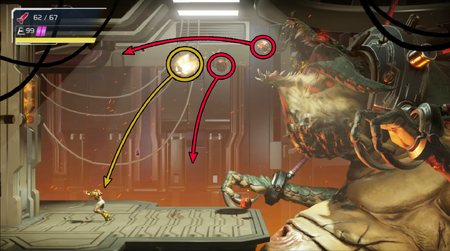
| Roll Outie | ||
|---|---|---|
|
Similar to when he was spitting these rock-like projectiles from his mouth, this time they pop out of his belly (gross). The dark purple liquid forming around is the indication that this object will be the one to release. You can destroy it by rapidly firing away with good aim. This is generally a good idea because if you get rid of it quickly it'll land a few extra hits in the target area. If it manages to hit the ground, it will just bounce toward you, at which point you can jump out of the way. | ||
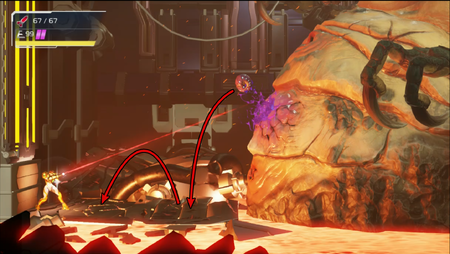
| Gastro Acid | ||
|---|---|---|
|
This attack is almost identical to Roll Outie, but has a couple of key differences. The most obvious of which is the fact that the fluid bubbling up inside Kraid's stomach is a much brighter purple, almost pink in color (sorry color-blind players). This will enable you to prepare a dodge, and it has to be a dodge, because a gelatinous material is pumped out right into the center of the ground. Once it lands, it also spreads on the ground in each direction. The only way do avoid is to wait for the bile to appear, and jump toward the middle after it's about to land. You might be able to wall jump on the left to help get some extra height if you're concerned about timing. | ||
Eventually, Kraid will give you a crucial opportunity. Depending on how this fight plays out, you'll need to take advantage of a simple fact: whenever Kraid shoots spikes from his lower half, he gives you a pathway straight to the top. Basically, he'll shoot, you dodge, then latch onto the Spider Magnet. This could happen in a few different ways, so to be thorough, I'll cover each of them.
| Pin Missile | ||
|---|---|---|
|
Kraid will load up his spikes from the bottom-up. You'll be able to see the first one pop out and wiggle a little (gross, again). He doesn't have any knee-jerk reaction, so this is not a sign that you've done a bunch of damage into his wounds, but rather this is just a regular attack like the other projectiles. In any case, the spikes will be shot one at a time, once again starting from the bottom. Interestingly enough, they do not break when hitting the wall. You'll need to work quickly, but you can time it in such a way that you use each spike as a platform to ascend higher, and eventually grab the Spider Magnet at the top! | ||
| Spikes | ||
|---|---|---|
|
For this formation, usually it happens after you've shot Kraid enough in the chest. He will noticeably react in pain, and place his hand over his abdomen. What this means is that Kraid will fire a spike from each belly hole all at the same time. An easy strategy is to just camp-out in Morph Ball and wait in the corner. Once his spikes hit the wall, they will break, and the Spider Magnet will drop down to where you are. Jump on and catch a lift! | ||
Hopefully by this point, you've gone ahead back to face-level with Kraid. There's only one thing left to do, go back to where you started and keep firing away into his mouth like just like before! Kraid can still use his Quick Claw attack though, so be sure to keep an eye out and shoot those as well so you don't accidentally take damage. If you're up here long enough, Kraid will attempt to do something about it!
| Focus Punch | ||
|---|---|---|
|
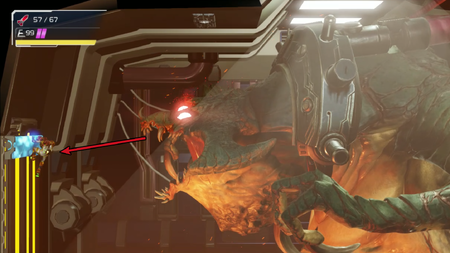
Kraid will desperately try clawing at you while bringing his jaw ever so closely to you. His eyes will then flash, and this is your incredibly short warning to 'get out of the way! It might be possible to time it such that you can jump over his hand and grab onto the Spider Magnet again, so if you can do that then great! Otherwise, jump down and repeat the prior tactics. | ||
| Slash | ||
|---|---|---|
|
The most rewarding attack to deal with, Kraid moves his claw in a backhanded manner, bringing his left arm across his body away from the screen. He'll hold it there for a brief moment, but this is when your quick time event happens! Parry it successfully, and you'll be able to unload your arsenal even faster than before, and get a flashy cutscene to boot! | ||
It may take a few tries, but with enough dedication, and enough ammunition forcefully fed into Kraid's gullet, you will emerge victorious. Head over into the next room to get your new upgrade!
Kraid can be quite challenging if you're not prepared, especially on Dread Mode (one hit kills you mode). In fact, in Dread Mode he is most likely the reason people would quit. Personally I really enjoyed seeing him make a comeback, with a really great battle. Without a doubt, this is the best he's ever been. If he gives you trouble, hopefully this guide has helped you out! Thank you so much for reading, and I'll see you all in the next Galactic Expedition!
Shine Get
Written by: Waluigi Time (talk)
Hello there, 'Shroom readers! Welcome back to Shine Get, the number one 'Shroom section about Luigi cheese in Super Mario 63. After cleaning out the castle basement, today we're going to fight Bowser again! I speculated last time that Bowser's just going to be colorblind and keep referring to Luigi as Mario in his dialogue, so let's see if I got that one right.
Secret Course: Bowser's Second Trap (The Ancient Fortress)
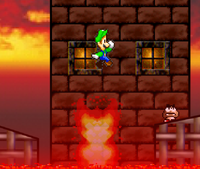
Just left of the door to the castle moat, there's a Star Door that briefly turns Luigi into Mario when he unlocks it. Gotta appreciate the jank. The door leads to a vertical water-filled hallway with another door at the bottom, taking us to the next Bowser level! Don't let the fancy title fool you, this is very much just an adaptation of Bowser in the Fire Sea. The level description mentions that the fortress looks hundreds of years old and that it definitely wasn't Bowser who constructed, but then if it wasn't him, then who, and why? Unfortunately, despite the game asking the question, it never gives us the answer! Oh well.
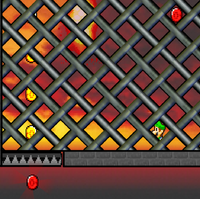
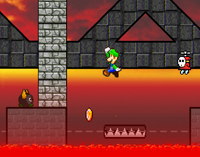
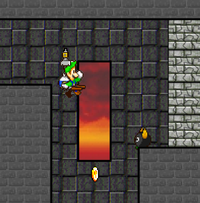
The level starts off with a semi-leisurely ride across a moving platform, though there's a few obstacles like breakable blocks in the way, a fire shooter to avoid, and of course lava to break your fall in an extremely painful way. Then it's just some standard platforming until getting to an elevator with some Koopa Paratroopas to avoid during the ride. After getting to the top, there's a heart which I took full advantage of because I already ran afoul of a few enemies and set Luigi on fire a few times, you know, the usual stuff. Just after this there's a ferris wheel with the first Red Coin. This one's a little tricky because it's positioned in the same direction that the ferris wheel is moving, so if you aren't careful, you'll get roasted after you collect it! That ended up happening to me but I just used the fire launch to get back to safety and use the heart again. Past the ferris wheel is some platforms that collapse after you step on them, and then it's a quick ride over to the second level.
There's some seesaws up here, and a cage-like area at the end. The next two Red Coins are here, but they're not placed very nice. One is in the path of some fire geysers that turn on and off in a pattern. It's easy enough to avoid them and grab the coin, but if you're not paying attention, you might miss it. The second is underneath an elevator, so you have to step on to activate it, step back off, and fall underneath it before it respawns. Just be careful because this will put you directly over a fire geyser! Spinning to slow down your descent works well. (I got burned by this again. Luigi's going to hate me.) This causes some lost progress, but it's not too bad. I ended up dying trying to cheese it a little, and it probably would've taken less time if I just did it the normal way. Oh well. Back where we were, the elevator leads up to the next screen.
It looks like a split path up here, but that's not really the case. Going to the right and following a coin trail into the pit just takes you back down in case you need to come back. Anyway, this is basically more of the beginning with the moving platforms and brick walls that you have to break open so you don't fall in the lava. The fourth Red Coin is in between the second and third walls, once again in the path of a fire geyser. Then it's back to jumping across sinking platforms while dodging enemies. At the end of this section there's a sinking staircase, and quickly getting to the top nabs me my 38th Star Coin, unlocking the Level Designer's Castle Tileset! As it sinks, it'll also reveal the fifth Red Coin, and once it's fully submerged, a Sling Star is revealed to launch us to the next screen. Here's a tip, if you miss the Star Coin you can jump back down and the staircase will be back.
More platforming over lava, what else did you expect? The sixth Red Coin is found pretty early on between two platforms, so you'll need to be careful this time to both avoid the fire geyser and not fall in the lava. I used a spin jump and was able to make it across safely. Soon I reach the Turbo Nozzle, which is required to make the next set of jumps coming up. I tried to Luigi cheese these, but it looks like you definitely need F.L.U.D.D. for it. After using Turbo to dash across a sinking platform, I reach an interior area of the fortress with the Rocket Nozzle to climb the gaps. Make sure to go down into the first drop because the seventh Red Coin is down there, along with a 1-Up. Make sure you're ready to quickly use the Rocket Nozzle, otherwise you'll take a lava bath! Then there's a breakable wall and another drop, where you have to rocket up and to the right to avoid the lava. It's pretty neat. Now I'm out of the fortress, but instead of continuing on, I rocket up and to the left to get on top of it, where the final Red Coin is. The Shine Sprite spawns just to the right, so I grab that, but unfortunately it kicks me out of the level. I'll be right back once I do all that again!
Unfortunately, it doesn't save the F.L.U.D.D. nozzles unlike regular levels, otherwise that would've been a piece of cake. It wasn't too bad though, I only died once from carelessly rushing ahead! Anyway, that was basically the end of the level. There's just a bridge and then a weird funnel thing that leads to the Bowser fight.
And I called it! Even though I'm playing as Luigi, Bowser still says Mario. He gloats that "Mario" appearing here couldn't stop his master plan and reveals that he already got what he needed from the fortress, showing off the Orb of Power. (Unfortunately, I don't know what the Japanese characters on it mean. If I had to guess it's either something edgy or just random characters with no meaning.) Now he moves on to the next stage of his master plan, destroying Mario! Or Luigi, as the case may be! The fight is pretty similar to last time, but now he releases shockwaves when he lands. Once again, pretty easy. Luigi uses Mario's voice clips when he throws Bowser though, so that's kind of funny. After chucking him into bombs three times, he's done and drops a key, and then suddenly...
Mario?!
Yeah, Luigi turns back into Mario in the cutscene. Bowser says that even though Mario beat him, his master plan still can't be stopped, and goes into a villain monologue complete with dramatic visuals revealing his plans to use the orb's magical powers to summon the Meteor of Ultamite[sic] Destruction, dropping it on Peach's Castle and incinerating the entire Mushroom Kingdom, except for his own castle which is protected by a force field. Then, the remaining members of the Koopa Troop will rule the world (even though there won't be much left of it, but he doesn't really acknowledge that!). Remember back when this section began and I said Bowser doesn't pull punches in this game? Oh yeah, he also breaks the fourth wall by calling Mario a "worthless pile of pixelized sludge". Then he teleports away as the arena collapses, and Mario manages to escape just in time by teleporting away with the key back to the castle grounds. There's some not very important dialogue with Eddie and a few other Toads, and suddenly Bowser's voice announces that he will be summoning the meteor in two days, claiming that Peach sided with him and offering the Toads a chance to join him and be saved. I don't know why he wants the Toads to join him, but okay! The Toads start panicking and eventually figure out a plan to get Mario into Bowser's Castle by Sling Star. Unfortunately, the Super Sling Star is still locked away by Bowser's spell, so it's time to grab more Shine Sprites! (I wouldn't be surprised if I have enough already, actually.)
Oh hey, Luigi's back now. Well, uh... I definitely don't think we'll be getting to that in two days! These issues come out monthly, after all. Eh, it'll probably be fine. Time doesn't pass when I have the game closed. Time doesn't really pass when I have the game open, either! So I think I'll just deal with Bowser in due time and focus on grabbing every Shine Sprite I can for now. I'll see you next time when I do just that!
The Anatomy of a Pikmin
Hello, and welcome back to The Anatomy of a Pikmin, a section that's running dangerously close to running out of Pikmin! Last month, we finished off the new types of Pikmin introduced in Pikmin 3, and since Hey Pikmin didn't introduce any new types of Pikmin, we're onto the newest Pikmin game, Pikmin 4. This month, we look at the new parasite in town, the icy cold Ice Pikmin!
As stated in the opening, Ice Pikmin, much like Rock Pikmin and Bulbmin, are actually parasitic Pikmin. But, like, how does this work? Like a Bulbmin, attaches itself to a living creature. That makes sense; that's a concept in nature. Rock Pikmin attach themselves to rocks, which is a little weird, but okay, sure, I guess. How do Ice Pikmin work? What stops the ice from melting? I don't understand it, but, then again, I'm not a scientist; I'm just a factory operator.
First appearing in Last-Frost Cavern in the first area (Sun-Speckled Terrace), you'll first find ten Ice Pikmin fighting a Snowy Blowhog. After you defeat that Snowy Blowhog, you can whistle the Ice Pikmin to attention and they become yours! Ice Pikmin, for much of the game, are a lot like Purple and White Pikmin in Pikmin 2, because you can't get the Ice Pikmin Onion until the 4th area, the Hero's Hideaway. That means that, for much of the game, you'll be scrounging up your Ice Pikmin from Candypop Buds and wild Pikmin found in caves.
For stats, Ice Pikmin have mostly standard stats with the exception of their attack. Ice Pikmin have below-average attack on par with Wing Pikmin and White Pikmin. But unlike those two Pikmin, the lack of attack power doesn't hinder Ice Pikmin at all. In fact, in combat, Ice Pikmin have one of the most useful abilities in the game – if not the most useful ability. Ice Pikmin can freeze just about every enemy in the game, including some bosses! The way it works is, while Ice Pikmin are attacking an enemy, a blue ring appears around the enemy's health meter. When that fills up, the enemy will be frozen. While frozen an enemy can't attack and you can just beat the shit out of them with your Pikmin. One of the best things to do is to stack Ice Pikmin along with Oatchi's charge attack. The charge stuns the enemy and, by the time they come to, they'll be either frozen or most of the way frozen! If you manage to freeze an airborne enemy, they'll simply drop, shattering on contact with the ground.
The only real downside to this power is that frozen enemies simply shatter instead of leaving a corpse, occasionally dropping nectar or Ultra-Spicy Spray when they do. This can be kind of annoying since, unlike in previous games, overworld enemies never respawn, meaning you have only limited (comparatively) opportunities to build your army. But even with this consideration, Ice Pikmin in combat are pretty OP. While they don't do very much damage, their freezing ability is so good it makes up for it, especially when combined with Oatchi and other Pikmin types such as the more combat-efficient Purple or Red Pikmin.
Ice Pikmin have a number of other minor things attached to them. For example, Ice Pikmin can walk into and be thrown on water. They can even attack things they are thrown onto from the water. But unlike Blue Pikmin, they can't carry things over water. Instead, they simply float over the water. They also have an increased weakness to flames, dying in four seconds compared to every other Pikmin type's six seconds. It makes sense. They are made out of Ice after all!
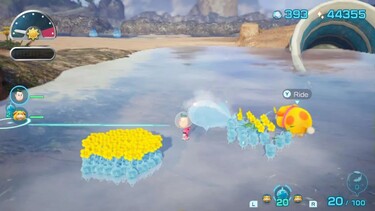
The main gimmick of Ice Pikmin outside of freezing enemies, though, is that they can freeze large bodies of water! Every large body of water now has an Ice Pikmin counter on it. If you let a enough Ice Pikmin sit idle on the water, the body of water it will freeze. Then, as long as you leave enough Ice Pikmin idle on the body of water, it will remain frozen, allowing you to cross over the body of water with Pikmin that usually would be unable to cross water. It's weird, though, because, to be honest, despite being advertised as being Ice Pikmin type's main gimmick, it's really not used very much! Most of the bodies of water just take so many Ice Pikmin to freeze them that it's not worth it.
Consider that there are some bodies of water that require 70-80 Ice Pikmin! Then you factor in that your Pikmin can ride Oatchi with you and you can teach him to swim, and it becomes even less useful. That's not to mention that Blue Pikmin still exist and, once you get them, you no longer need to worry about traversing over water. It's weird because this was clearly supposed to be positioned as the "main" gimmick of Ice Pikmin, but it's just so under-utilized that it comes off as unnecessary.
Ice Pikmin are a very good Pikmin type, and it's almost entirely because of their role in combat. While it's clear that Nintendo wanted Ice Pikmin to help with level traversal, the fact that Oatchi exists kind of screwed that all up, rendering their main gimmick sort of pointless. But because Ice Pikmin can freeze enemies, basically acting as a sort of Ultra-Bitter Spray, Ice Pikmin, despite having a low attack stat, are perfect for combat. You can combine them with Oatchi's abilities and the attacking power of other Pikmin to quickly destroy enemies.
That's all for this edition of "The Anatomy of a Pikmin! Join me next month as I look at the final Pikmin type, the mysterious ghost-like Glow Pikmin.
Pitohui's Pokémon Academy
Written by: Hooded Pitohui (talk)
Hello, hello, students! Are you enjoying the deepening spring and its... warmer weather... and... brighter days...? Good, good, then. Myself, I could gladly return to autumn, but, well, I do suppose there are some upsides to this time of year. For instance, Bug-types begin to stir once again! While it may not be time for the Volbeat to dance above our heads, go out on a spring evening, and you'll certainly find some Venonat hopping about! In fact, I went searching for the adorable fuzzballs just the other week, and, as luck would have it, encountered a Venomoth. After such a serendipitous happening, I thought that we might make Venomoth the subject of today's lecture! Yes, yes, I know Bug-types and Poison-types are not the most popular, but do give Venomoth a chance, no? You may begin to see its charms by the end of our lesson!
While we get underway, allow me to remind those of you who are just joining us to take a look at our course policies in the first box below. If you need to review the most commonly-used terms in this class, open up the second box.
First, a Smogon University course, this course is not. No, this academy's lessons are designed to get trainers of any stripe thinking about how they can raise their Pokémon, and, as a result, aren't designed to keep up with the widely-accepted metagame for the series. In some cases, the way I've raised my Pokémon may even flies in the face of conventional wisdom. If you're looking for top-tier strategies, do check out Smogon, but if you merely want to get a little deeper into raising Pokémon while still doing things your own way, feel free to use this section as a reference.
Since we all know the importance of citing our sources, I also need to credit the design of some of the tables used in these lectures to Crocodile Dippy, author of the Pocket Handbook which can be found in early editions of Strategy Wing.Base Stats: Base stats are the values associated with a particular Pokémon species, and are the same across every individual Pokémon of a given species. You have no influence on them. You can think of them as traits tied to a species. A chimp isn't ever going to be able to get as good as digging as a mole will be, and, likewise, an Abra is never going to have the defensive prowess a Shuckle has.
Individual Values (IVs): Individual values, as their name implies, are associated with individual Pokémon. They range from 0 to 31 in each stat, with 31 being considered a "perfect" IV and higher numbers corresponding to different stats. Magikarp A and Magikarp B will have the same base stats, but they may very well have different IVs. To stick with the animal analogy, one mole may be born with larger claws than another mole, and that first mole is probably going to have an easier time digging through dirt than the latter. Individual values are set in stone, strictly speaking, but you can use Hyper Training (from Generation VII onwards) to functionally get a perfect IV in a stat.
Effort Values (EVs): Effort values are the one thing you can easily change. A Pokémon can earn, primarily through battling, but also through means like the use of certain items or mechanics like Super Training, up to a total of 510 effort values, with up to 252 in any given stat. To finish off the animal analogy, no matter what kind of claws a mole is born with, moles who have more experience digging are probably going to be better at digging than moles which have never dug.
Nature: A Pokémon's nature is, more or a less, a stat modifier with a name meant to make it sound like a Pokémon has some personality. Natures will raise one stat by ten percent and lower another stat by ten percent. Some natures raise and lower the same stat, canceling out the effect and leaving stats unchanged. Natures can be functionally changed with the use of special mint items from Generation VIII onwards.
STAB: STAB stands for Same-Type Attack Bonus, and refers to the boosted power of moves that match the type of the move's user. To illustrate this, consider the case of a Lombre, a dual-type Pokémon which is both a Water-type and a Grass-type. Any Water-type moves Lombre uses will have their power boosted by 1.5x, and any Grass-type moves Lombre uses will, likewise, have their power boosted by 1.5x. (There are circumstances where this does not apply, and, while the 1.5x multiplier is typical, some games use other multipliers.)
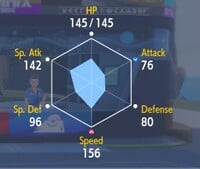
As usual, we'll begin by examining Venomoth's base stats. Unfortunately, they're... a bit lacking. While Venomoth's speed and special attack are decent, its other stats are outright poor. Well, nevertheless, we shall make do! As we've done before with Luvdisc, let's turn to Venomoth's moveset to help us bolster its capabilities in battle.
Looking through the moves Venomoth can learn, we find it has access to Quiver Dance, an excellent move which is common on Bug-types and which raises their speed, special attack, and special defense all at once. This will allow us to capitalize and double down on Venomoth's two best stats, turning Venomoth into a Pokémon which, if it can set up a Quiver Dance or two, should be able to outspeed plenty of foes and hit them hard.
Now knowing the approach we want to take, we can work out Venomoth's IVs and EVs and its Nature. First, since we're going all-in on special attack, we can write off attack entirely, limiting us to a Nature that lowers attack. We also want to prioritize special attack and speed over defenses, so we can limit ourselves to choosing just between Timid and Modest (the former raising speed and the latter raising special attack). All the power in the world won't help Venomoth if it doesn't have a chance to set up and a chance to strike, so let's prioritize Speed and go with a Timid Nature.
With that settled, we ensure we have 31 IVs in speed and special attack, aim for 31 IVs in the defensive stats, and invest a full 252 EVs in speed and special attack. The remaining 6 EVs, we'll toss into special defense, adding just a little extra to it since Quiver Dance will also raise it, thus giving Venomoth just a little more hope of hanging on after taking taking an attack from a specially-oriented opponent.
Moving along to abilities, we have three to choose from and can eliminate one right away. Wonder Skin is not a particularly useful ability, only reducing the accuracy of status moves used against the Pokémon with Wonder Skin to 50%. A lot of the more dangerous moves of this kind, such as Sleep Powder, already have poor accuracy, and most of the cases where it would be useful are situational and relatively rare. Shield Dust is more useful, blocking the additional effects of moves and thus blunting offensive moves that also cause stat drops or that inflict status effects, but it'd be a better choice for us if we were raising Venomoth to be more defensively-oriented.
Our best choice is actually Tinted Lens, which lets us get away without worrying as much about pesky bad type matchups, maximizing Venomoth's ability to hit hard. Tinted Lens boosts a move's power if it would otherwise be "not very effective". For example, if Venomoth faces off against a Steel-type and tries to use a STAB Bug-type move, normally the damage would be halved, but Tinted Lens boosts its power back up so that it hits like a neutral attack. Quite helpful, I would say, since we want Venomoth to be able to take out threats quickly!
We have everything settled in terms of stats, so our final step is to work out Venomoth's moveset! We already know that we need to include Quiver Dance, and, to make the most of the power boost that it gives us, we should aim to have two special STAB moves. Luckily, it's not hard to find two powerful moves which match our criteria. First, we find Bug Buzz, one of the most reliable Bug-type moves out there, with a respectable 90 base power, no hit to accuracy, and a chance of lowering the opponent's special defense. There's only a 10% chance of this happening, but, if it does happen, it makes Venomoth's attacks hit that much harder. Thanks to Tinted Lens, this is also a decent option for dealing with Steel-types.
Why do Steel-types otherwise present a problem? Well, they're immune to Poison-types, and the other STAB move we're going to add is the ever-reliable Sludge Bomb, a Poison-type move. Again, we have 90 base power with no drop in accuracy, and, further, the move will poison an opponent (which hasn't already been afflicted by a status condition) 30% of the time.
That poisoning chance, in fact, informs our last move. For a final move, Venomoth has a good range of supporting status moves we could consider. The powder moves (Sleep Powder, Poison Powder, etc.) aren't bad, and, in fact, because Venomoth already has a decent speed stat, you could try using Sleep Powder to give Venomoth room to set up. Personally, I don't like to gamble with that 75% accuracy, though. Poison Powder I would eliminate right away, because we already have an chance to poison with Sludge Bomb. Myself, I think I'll stick to that chance and also rule out Stun Spore. Since it can stack with poisoning, Confuse Ray is a reasonable option here, and one you may wish to experiment with. It could be genuinely useful, although, for me, considering Venomoth already needs a turn to set-up and it's going to take a hit on that turn, I'm not sure gambling on confusion keeping Venomoth safe on subsequent turns is worthwhile. It could put pressure on your opponent to switch out, though, and if you go for it, it could give Venomoth just the extra turn it needs to KO a persistent opponent.
Disable may be useful, but is somewhat situational because most opponents Venomoth faces off against will have more than one move they can use to KO it. Toxic Spikes and Toxic would be more worthwhile if, again, we didn't have the Sludge Bomb poisoning chance already.
What that leaves us with is really a choice between Confuse Ray, Sleep Powder, and the move I chose, Baton Pass. With its speed boosted by Quiver Dance, if Venomoth gets into a tight spot where it is likely to get KO'd anyway, it might be worth using Baton Pass to pass along its stat increases to another Pokémon. That other Pokémon will have to be able to take a hit, and Venomoth will have a hard time making it back onto the field, but with a couple of Quiver Dance boosts, that other Pokémon can emerge as a major special-oriented threat.
| Bug Buzz | 
|
The user vibrates to generate a damaging sound wave. This may also lower the target's Sp. Def stat. |
| Sludge Bomb | 
|
The user strikes everything around it by swamping the area with a giant sludge wave. This may also poison those it hits. |
| Quiver Dance | 
|
The user lightly performs a beautiful, mystic dance. This boosts the user's Sp. Atk, Sp. Def, and Speed stats. |
| Baton Pass | 
|
The user switches places with a party Pokémon in waiting and passes along any stat changes. |
Slot in Baton Pass, and, well, would you look at that? It seems we're finished! Well, well, a brisk session, wasn't it? Now, I'll let you shuffle out of here, but, for any of you who might be interested in experimenting with alternative moves like Confuse Ray, well... I will be going on another outing to observe the Venonat next week. Do come chat with me before you leave if you'd be interested in an evening excursion! They're quite attracted to bright lights. I guarantee we can find them in massive swarms!
...ah, no interest, then? Nobody...? Ah, well... Go on your ways, then, and remember to prepare for our next session!
| The 'Shroom: Issue 205 | |
|---|---|
| Staff sections | Staff Notes • The 'Shroom Spotlight • Poochy's Picks • Credits |
| Features | Fake News • Fun Stuff • Palette Swap • Pipe Plaza • Critic Corner • Strategy Wing |


