The 'Shroom:Issue 209/Strategy Wing
Director's Notes
Written by: Hooded Pitohui (talk)
Hellooooo, all you readers of The 'Shroom. I have finally escaped the X-Naut Fortress, as you can see. Unfortunately, I wasn't able to smuggle out a cute little Yux for myself. I made it out just in time, though, seeing as Awards happened just a week ago! It was a wonderful, invigorating time, truly, and I can't thank those of you who made it possible enough. I hope everyone who attended had a great time, and, if you couldn't make it live, be sure to go check out the presentations!
Speaking of Awards, I'd also like to shout out those of you who voted for the Strategy Wing team - and for the writers and sections within it. We have a really cool team of writers here who put heart into covering their favorite games, no matter how obscure, janky, or old, and it means a lot to see you express your appreciation for their work. We have a blast getting to share our favorite bunch of games with you, and we'll keep at it as long as you're there to keep reading!
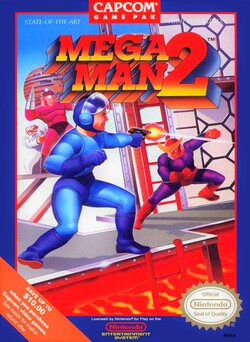
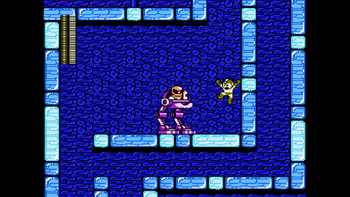
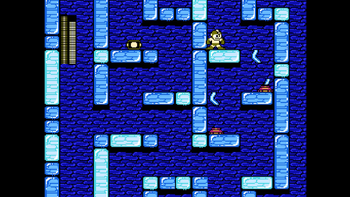
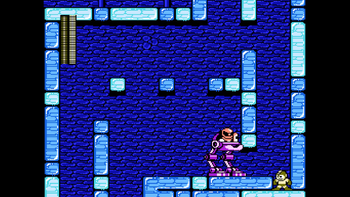
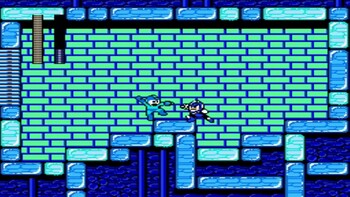
Now, before I get too mired in words, I have some exciting news about Strategy Wing itself. First off, fresh off his step into The Thousand-Year Door, Sparks (talk) is joining us with a new guide to Mega Man, this time tackling Mega Man 2 in An Overly Detailed and Funny Walkthrough of Mega Man 2. If you enjoyed the first walkthrough of Mega Man's battle against Dr. Wily's Robot Masters, you'll have a blast with this one, featuring new wit from Sparks, new weapons, new bosses, and some new additional commentary and tables courtesy of MightyMario (talk)! With Sparks back, our Poll Committee Chairperson, and the Blue Bomber joining forces, it'll rock(man)!
Also returning to us this month is Strategy Wing's long-time king of obscure games, the ever-humorous Shoey (talk)! Conqueror of Japan, savior of File City, bard with all the tales of the brave Sir Cucumber, he's back this time with a sequel to An Ogre Battle section, aptly titled Another Ogre Battle Section! We're moving from the SNES to the Nintendo 64, moving into Ogre Battle 64: Person of Lordly Caliber, and this time around, rather than looking at units, we'll be joining him on a playthrough. First, though, we need to learn the basics, so get on down to boot camp, pronto!t
I'll let you get to reading, but remember, if you ever feel inspired to share some of your favorite games (obscure, new, old, jank, smooth, whatever!), we're always ready to welcome you to the Strategy Wing team. Reach out if you have ideas you want help turning into a section, or get to writing the first edition and send it in as an application! I hope to see you up here with Shoey, Sparks, Waluigi Time, and MightyMario real soon!
Section of the Month
Making like a dashing, romantic badge thief, Strategy Wing regular Sparks (talk) stole the victory last month with his close look at TTYD's most-overlooked partner! I don't know about you, but I've certainly been inclined to give Ms. Mowz a second chance after that! In fact, I used her a fair bit in my run through the Pit of 100 Trials in the Switch remake. With a secret Shine wrested from Kamek, Waluigi Time (talk) takes second place with a nice, bite-sized Shine Get.
Thank you all for the support you show our writers both in these monthly polls and in our annual Awards. We have a wonderful, tight crew of regulars in Strategy Wing, and I really appreciate all of you showing them that they're appreciated. Keep it up, please, and feel free to give any of them a shout in a Poochy's Pick if you really want to make their day!
| STRATEGY WING SECTION OF THE MONTH | ||||
|---|---|---|---|---|
| Place | Section | Votes | % | Writer |
| 1st | Respect for Ms. Mowz | 6 | 40.00% | Sparks (talk) |
| 2nd | Shine Get | 4 | 26.67% | Waluigi Time (talk) |
| 2nd | Pitohui's Pokemon Academy | 4 | 26.67 | Hooded Pitohui (talk) |
Another Ogre Battle Section
Hello Strategy Wing readers! I, Shoey, the resident writer about games you've never heard of, am back with another strategy guide on another game which I love but which most of you have never heard of! Now, some of you may remember that, way back in 2021-2022, I wrote a section called An Ogre Battle Section, where I took a look at various usable units mainly appearing in the SNES classic Ogre Battle: March of the Black Queen. The section was not popular, receiving reviews such as:
"Oh my god, who cares?" - Turb
"Why is this so long? It doesn't need to be so long." - GBA
"Why do I keep hiring him? He's driving readers away." - Hooded Pitohui, Strategy Wing Director
Well, unfortunately for them, despite the fact that it has been proven time and time again that there's no market for Ogre Battle strategy guides and despite being resoundingly rejected by the 'Shroom reader base, I'm not one to shy away from a bad idea, so I'm back with Another Ogre Battle Section! But this one is going to be a little bit different! Instead of looking at only individual units and their best usage, we're going to be doing a full strategy guide on one of my favorite N64 games, Ogre Battle 64: Person of Lordly Caliber!
So Ogre Battle 64, kind of like Digimon World, is a weird, weird game. It really has a playstyle that almost no other games have. It's a strange combination of tactical RPG and real-time strategy. Levels, or "scenes," as the game calls them, take place on large open battlefields where you place your units. Your goal is to march your units through the battlefield, liberating (hopefully) all the towns along the way while smashing through the enemy units. You continue with this until you reach the boss's stronghold, where you have to defeat the boss to fully liberate the area. But there's so much more to this game! So, this month, we're going to cover just a couple of the basics. We're not going to get too in depth, but, rather, we're just going to cover a couple of the unique things in Ogre Battle 64, starting with a more in-depth description of how levels play out.
Managing An Army
So, like I said, each level takes place on a pretty open battlefield, usually consisting of a couple different types of terrains. There are plains, roads, forests, and mountains. The cool thing is that the different types of units/classes prefer marching in different terrains. For example, a unit consisting of nothing but human characters marches the best on plains and roads. If they march in the mountains, by contrast, not only will they march at a snail's pace, but they'll also get tired more easily (more on that in a second). On the other hand, a unit consisting of mostly flying creatures, like, let's say, Hawkmen, will have no problem marching through mountains. In fact, they might even choose to cross the mountains if it'll make the march quicker; whereas, a unit of human characters would march around the mountains unless specifically ordered to march through them! So even just placing units and ordering them to take particular marching routes has a lot going on with it, because you have to consider who is best to march where, and whether they'll take the route you want them to take or another route.
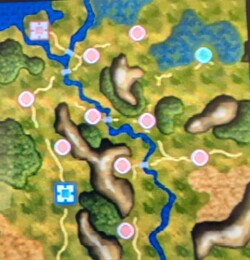
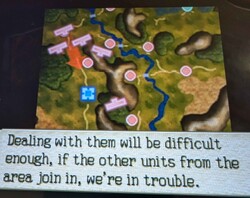
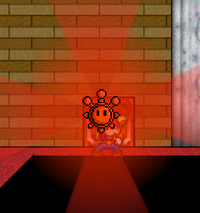
Each level starts with a little briefing from our chief tactician, Hugo. In this briefing, Hugo explains what the objective is, where the enemy base is, any side objectives, and even where the enemy units are moving from. This is a great and cool little feature, and it's super useful, too. Take this for an example:
With this map, I know to send my strongest units towards the main column of enemies, and I can detach weaker units to mop up the smaller column. This gives you a great chance to strategize before you even start the mission.
Morale, Alignment, and You
When you start a mission, the first thing I suggest is pausing and clicking on each city individually to check out their morale. As I said, Ogre Battle 64 has a morale/morality system (the game calls it alignment, but it really links morale to your morality). Now, March of the Black Queen also had a morality system, but in that game the individual towns didn't have morale; you could take any city with anybody and it would count as a liberation. That's not the case in Ogre Battle 64. In Ogre Battle 64, cities can be either captured or liberated. Whether a town is liberated or captured depends on that town's morale. The city's morale is going to determine who you need to send to liberate it, because that's going to make the difference between capturing and liberating a town. Liberating a town raises your alignment and capturing a town lowers your alignment.
That's the morale side, so let's talk about your morality, AKA your alignment. Your unit's alignment is between 1-100, and there are a number of factors that go into it. Now, you don't actually get to see the exact number each unit has; instead, it's represented by one of seven different alignment classes you can have. These are:
- Very Chaotic (0-14)
- Chaotic (15-28)
- Neutral Leaning Chaotic (29-42)
- Neutral (43-57)
- Neutral Leaning Lawful (58-71)
- Lawful (72-85)
- Very Lawful (86-100)
Now, I won't lie! I got that information off of the Ogre Battle Wiki and it took me a long time to verify the information, because, despite owning the official Ogre Battle 64 Prima guide, the guide was worthless! You'd think since I spent money on this that it would have, like, a list of alignment rankings, right? Well, no! Wrong! Fuck you! It just vaguely talked about different alignments, so that was cool. Thank god the internet is here to inform us on these things for free.
So, your unit alignment is based on an average of the alignment of each character within a unit (a unit can be made up of 3-5 characters depending on size, but we'll get into that more in-depth next month). First off, each character inside of a unit has its own individual alignment. It's entirely possible to have a unit consisting of, say, two characters that are neutral, one that's chaotic, and one that's lawful. In theory, this system would allow one character to skew your unit's alignment score, but, realistically speaking, the cream rises and water finds its level. Usually, as long as you aren't constantly changing the composition of units, no matter what you start with, you're probably going to end up with the people in a unit all having around the same alignment.
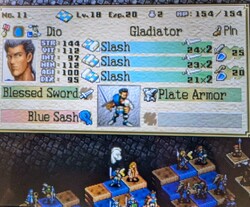
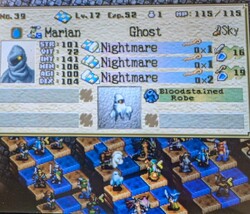
Alignment can be raised or lowered in two main ways. The first way is fighting, duh! Defeating a unit of higher alignment than yours will raise alignment, while defeating a unit of lower alignment will lower yours. The second way is using items. Using an item such as the Scroll of Discipline will raise alignment and an item like the Urn of Chaos will lower it. A chaotic alignment unit can be pretty tough to get. Your best bet is to make a unit with character classes that are already chaotic, such as Ghosts, because they'll naturally drag down whatever group leader you assign to the unit, making them more chaotic.
Alignment is relevant to a lot of things in this game. The main character's alignment will determine what ending you get. Individual alignment can affect what classes a character can become, but that's something that I think we'll talk about in a later issue.
Taking Towns and Tribute
Circling back to alignment affecting whether you capture or liberate a town, the way you liberate towns is by placing a unit on top of them. There are three types of towns, these being red (enemy), blue (allied to you), and green (neutral). To capture a town, simply command a unit to march to it and take it. Sometimes they're guarded by enemy units, but some aren't guarded by anything.
Now, you don't have to liberate towns at all! You can avoid the majority of them and still progress through the game. But you want to take as many towns as possible! Not only does it affect your Chaos Meter (which we'll get to in a second), but towns that you've captured/liberated pay you tribute!
Tribute is important because your soldiers aren't just fighting for truth, justice, and the American way. No, they need cash money and the best way to get said cash money is to be paid tribute by towns for your protection. It might sound messed up, but armies ain't cheap. There's a reason the Hundred Years' War only had like eight years tops of actual fighting! Now, if this was March of the Black Queen, then idling on levels waiting for time to slip by would cause your reputation to go down, but that's not true in this game! You can sit on a level as long as you want, just rolling in the dough! But it'll be pretty boring!
But back to towns! Just as important as money, towns give you a place to rest! If you have a unit docked in a town, they'll regain health as time passes. Not only that, but they also regain precious stamina. You see, Ogre Battle 64 introduced a stamina system. In March of the Black Queen, your troops could march forever, but not so in Ogre Battle 64! In Ogre Battle 64, you now have to camp out eventually or your units will collapse from exhaustion. When that happens, they're liable to get caught unaware by enemies who can attack them while they're sleeping! Exhausted units will start off these battles at a massive disadvantage, whether from positioning or just on account of being asleep.
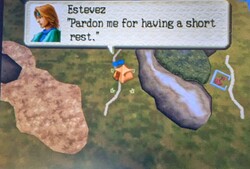
The cool thing is, this stamina mechanic also applies to enemy units. If you cut them off from towns, they'll eventually get too exhausted and have to camp out, and then you can surprise attack them! But yeah, it's really not that hard to determine what units should take what towns. For anything with morale under 40, use chaotic units. For anything between 41-60, use neutral units. For everything else, use lawful units. Do that, and you shouldn't even have a problem! Just remember to check all towns before you liberate them. As you can see by this image, towns on the same map can have vastly different morale levels:
Oh, one last thing on towns! There are also green neutral towns, and you can't liberate those! Any time you take them, it will count as a capture, because they want no part of your damn war, man!
The Chaos Meter
Now the last thing I want to talk about is one of the most important things in the game, which is odd, because it's pretty cryptic. Let's talk about the Chaos Meter. The replacement to the reputation meter from March of the Black Queen, the Chaos Meter is like the alignment system, only it applies to your entire army. Basically, it's what determines whether or not your army is viewed as good people or not. The mechanic is actually really simple! Capture a town and your Chaos Meter goes up. Liberate a town and your meter goes down, with capturing towns doing more damage to your meter than liberating improves it. After all, it's easier to lose a good reputation than it is to gain one! Also, if you let a town get recaptured, that will raise your Chaos Meter. It boils down to "be a good, righteous person and people will consider you good and righteous"!
Capturing and liberating towns is the main way to raise or lower your Chaos Meter, but there are also storyline decisions you can make that will affect the meter. Don't really fret it if you screw up a lot early into the game; the meter isn't as important as it was in March of the Black Queen and, since lowering your meter is mostly a matter of just making sure you liberate instead of capture, it's pretty easy to lower your Chaos Meter just by, you know, not being a monster!
That's just a quick overview of some of the basics. I'd have liked to discuss combat a little bit, but this thing is already pretty long and I'm sure all of our heads are melted by the alignment system. With that said, I'm going to call it good there! Join me next month when we definitely discuss battles and possibly start playing the game!
Shine Get
Written by: Waluigi Time (talk)
Hello there, 'Shroom readers! Welcome back to Shine Get, the only 'Shroom section where the apocalypse is now four months behind schedule. Last time I stole a red Shine Sprite back from Kamek, and like the green one from before, it unlocks another door in the castle! There's still more to do in the first room of the upper floor, but I'm going to put that off a little longer.
This opens up several new levels to explore, and Toads to talk to! One of them claims he's Mewtwo, gets mad that we think he's just pretending to be Mewtwo, unleashes a "Shadow Ball", runs out of power, and teleports away. You can't make this stuff up in this game. Another one is running back and forth, saying that he's exercising so he can run to Bowser's Castle when the meteor comes in case we fail. Thanks for the show of confidence, buddy. And of course, because this is the late 2000s, there's one who rickrolls you. At least he's apologetic about it!
Anyway, I'm going to be heading to this area's mini course, Tick Tock Clock!
Mission 1: The Top of the Clock
So this is another platforming mission that revolves around just going up. You know what that means? It means I get to phone in the writing again because describing platforming in extreme detail would probably be even more boring for you to read than it is for me to write. Stuff moves and rotates, you get the idea. Luigi is once again wonderful to have! I start by going to the left (there's apparently nothing to the right, I don't know why this is here) and go up some elevator platforms to start the section. The clock's pendulums make things a little more interesting, at least. Near the top of the first room, there's a branching path to the left across pendulums or to the right with a Sling Star. The left path is a trap, and by that I mean it's the wrong mission. Nothing stopping you from doing that, of course, but I'm going to take the Sling Star and move up.
The next room has another Sling Star to keep going, and I can already see Red Coins to the right. So that's already the other two Shines in sight! Moving on, there's a ride across an elevator platform with a massive pendulum swinging back and forth, and if you're not careful, it'll knock you off or crush you! I wasn't careful and I got knocked off the first time and crushed the second time. Luigi will be fine. After that elevator ride, there's finally a Hover Nozzle box and another fork in the road. I'll take the right path first and climb up some rotating blocks, absolutely destroying this platforming with the Luigi + Hover combo. I know I keep gushing about Luigi in this game, but he's really good, okay? Anyway, at the top there's a Star Coin, so now I can grab that and safely take the left path across some conveyor belts. Past those, there's another Sling Star to the next room.
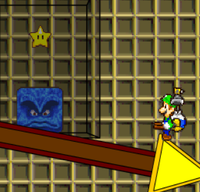
More platforming! There's a Star Coin above the first pendulum in this area, which is an easy grab. It's not too long before there's an apparent dead end with no more platforms to the right, but there's some pendulums to climb up. Past the pendulums is a Rocket Nozzle, and up above are the clock's hands. The idea is that you're supposed to rocket on to the clock hands, be careful not to fall off, and ride them up to the Shine Sprite at the top. However, if you rocket jump to the base of the clock hands, you can rocket directly to the Shine Sprite from there. Also, in the background of this area, there's a Thwomp with a Power Star as a reference to the Stomp on the Thwomp mission from the original Super Mario 64, which is kind of neat. There's no way to get to this Thwomp, but it doesn't matter, because we're not collecting Power Stars anyway!
Mission 2: The Flippin' Red Coins
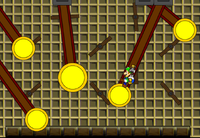
Well, we already know where these are! Thankfully, since I'm doing the missions in order, I have the Rocket Nozzle and can make quick work of the platforming to get to the second area. This one is extremely easy, probably even easier than whatever I said the other easiest Red Coin mission so far was. The game tries to make it a challenge by putting them all on rotating platforms, but actually finding them is, well... a picture says a thousand words, and I managed to include all eight Red Coins in the picture to the left just by zooming out a bit. Need I say more? Hover F.L.U.D.D. makes this a cakewalk, and the Shine Sprite spawns on the floor just below all the rotating platforms. Easy peasy!
Mission 3: The Pit of the Pendulums
One more time, from the top! Or from the bottom, rather. The Rocket Nozzle makes a quick trip to the top of the first room, and you could completely cheese this mission with it, as a matter of fact. Don't do that, though! There's a Star Coin in the pendulums that you'll miss if you skip the platforming section. Anyway, it's really easy with Hover F.L.U.D.D. at your disposal. Even if you're doing it out of order, it's not too hard, just be patient and careful with your jumps. All the way to the left is the Shine Sprite, but you can drop down below it into an alcove with the Turbo Nozzle box. I don't know why you would want Turbo in this level, but, there it is?
So that's Tick Tock Clock finished! Up to 52 Shine Sprites and 53 Star Coins now, and getting pretty close to the end of the game! Next month (because the apocalypse will still be behind schedule) I'll be cleaning up some of the secret courses that have been left behind. See you then!
Pitohui's Pokémon Academy
Written by: Hooded Pitohui (talk)
Hello once again, students. I trust you're appreciating this delayed class session, what with all that partying I hear you did last week, hm? Well, truth be told, I, too, am doing my share of recovering from Awards. I have been rather preoccupied, so, to our mutual benefit, I shall keep this month's session condensed to as short a time as possible. I'm sure we all could use a vacation right about now, so, in that spirit, we'll look at a Pokémon I raised on a past trip to the Alola region - the noble but-oft-overlooked Huntail!
First, a Smogon University course, this course is not. No, this academy's lessons are designed to get trainers of any stripe thinking about how they can raise their Pokémon, and, as a result, aren't designed to keep up with the widely-accepted metagame for the series. In some cases, the way I've raised my Pokémon may even flies in the face of conventional wisdom. If you're looking for top-tier strategies, do check out Smogon, but if you merely want to get a little deeper into raising Pokémon while still doing things your own way, feel free to use this section as a reference.
Since we all know the importance of citing our sources, I also need to credit the design of some of the tables used in these lectures to Crocodile Dippy, author of the Pocket Handbook which can be found in early editions of Strategy Wing.Base Stats: Base stats are the values associated with a particular Pokémon species, and are the same across every individual Pokémon of a given species. You have no influence on them. You can think of them as traits tied to a species. A chimp isn't ever going to be able to get as good as digging as a mole will be, and, likewise, an Abra is never going to have the defensive prowess a Shuckle has.
Individual Values (IVs): Individual values, as their name implies, are associated with individual Pokémon. They range from 0 to 31 in each stat, with 31 being considered a "perfect" IV and higher numbers corresponding to different stats. Magikarp A and Magikarp B will have the same base stats, but they may very well have different IVs. To stick with the animal analogy, one mole may be born with larger claws than another mole, and that first mole is probably going to have an easier time digging through dirt than the latter. Individual values are set in stone, strictly speaking, but you can use Hyper Training (from Generation VII onwards) to functionally get a perfect IV in a stat.
Effort Values (EVs): Effort values are the one thing you can easily change. A Pokémon can earn, primarily through battling, but also through means like the use of certain items or mechanics like Super Training, up to a total of 510 effort values, with up to 252 in any given stat. To finish off the animal analogy, no matter what kind of claws a mole is born with, moles who have more experience digging are probably going to be better at digging than moles which have never dug.
Nature: A Pokémon's nature is, more or a less, a stat modifier with a name meant to make it sound like a Pokémon has some personality. Natures will raise one stat by ten percent and lower another stat by ten percent. Some natures raise and lower the same stat, canceling out the effect and leaving stats unchanged. Natures can be functionally changed with the use of special mint items from Generation VIII onwards.
STAB: STAB stands for Same-Type Attack Bonus, and refers to the boosted power of moves that match the type of the move's user. To illustrate this, consider the case of a Lombre, a dual-type Pokémon which is both a Water-type and a Grass-type. Any Water-type moves Lombre uses will have their power boosted by 1.5x, and any Grass-type moves Lombre uses will, likewise, have their power boosted by 1.5x. (There are circumstances where this does not apply, and, while the 1.5x multiplier is typical, some games use other multipliers.)
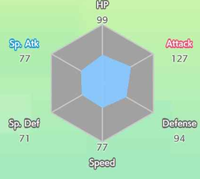
As always, we first turn our eyes to Huntail's base stats. What should be apparent to you is that Huntail has quite strong physical stats, a respectable special attack, and middling-to-poor stats across the board otherwise. This is an... unusual distribution, and, frankly, one that is challenging to work with. You might invest in Huntail's considerable defense, but find that approach undermined by its poor HP. You might think to maximize its attacking stats, but find that strategy hampered by middling speed. This is a situation where base stats fail to provide us with a clear roadmap, so let's look at Huntail's moveset for some guidance, shall we?
Huntail doesn't learn Trick Room, so, while the possibility of running Huntail in a Trick Room team needn't be discarded, let's set that thought aside. Huntail does learn Rain Dance and has access to the ability Swift Swim, a promising combination that could offset its low speed and make give Huntail a chance to actually put its offensive stats to use. We could go that route, but even with Swift Swim, a number of Pokémon outspeed Huntail before boosting their speed - and plenty more can outspeed Huntail with a boost or two. It would be better if Huntail could boost its speed through a status move, in addition to or in place of the Swift Swim boost, and it would be even better if it could boost its offenses at the same time. Luckily, Huntail has a move in its arsenal that just does that, learning Shell Smash, previously seen in our lecture on Minior and able to boost the user's attack, special attack, and speed by two stages in exchange for a defense and special defense drop.
While Shell Smash doesn't synergize as well with Huntail as it did with Minior, it at least provides us with a direction for raising Huntail. With Shell Smash as the crux of our strategy, we want to maximize Huntail's speed and offenses, and we'll focus on physical attack over special attack since it's the higher of the two. Now, I raised Huntail a good many years ago, and I settled for an nearly-perfect IV in speed. I recommend trying for a 31 IV. Likewise, I chose an Adamant nature because I had no plans to use special moves and thought it beneficial to further boost Huntail's attack, but I would actually recommend a nature that raises its speed. You won't be particularly disadvantaged by choosing a Jolly nature and taking the special attack loss, especially if you use the moveset we'll discuss in today's lesson, but Huntail's special attack is high enough you can get use out of it even without EV investment, so you might also consider a Naughty nature and take the special defense drop since Shell Smash will make Huntail frail regardless.

|
Name: | Huntail | Base HP: | 55 | |
| Category: | Deep Sea | Base Attack: | 104 | ||
| Type: | Water | Base Defense: | 105 | ||
| Abilities: | Swift Swim | Base Special Attack: | 94 | ||
| Water Veil | Base Special Defense: | 75 | |||
| Base Speed: | 52 | ||||
With our goal set to maximize attack and speed through IVs and EV investment, all that's left in the planning stage is choosing an ability. As mentioned, Huntail has Swift Swim, which can boost its speed in the rain. This... isn't bad, and, if you're using Huntail in a rain-focused team anyway, you might consider it, since that speed boost on top of Shell Smash makes Huntail faster than the vast majority of its opponents. If you aren't using Huntail in the rain, though, the better pick is Water Veil, which will keep opponents from denting Huntail's physical attack by preventing Huntail from being burned.
That and an investment of the leftover EVs into HP takes care of Huntail's stats, so let's see how those stats shake out and move on to a discussion of its moveset.
It goes without saying that we'll spend one of our four moveslots on Shell Smash. For a second move, we'll want a powerful, reliable physical STAB move, and our options are Dive, Aqua Tail, and Waterfall. Now, Dive is a two-turn move, so it's disadvantageous, easily letting an opponent switch in a Pokémon able to weather the attack (or worse, inflict damage to Huntail with an item like the Rocky Helmet or an ability like Iron Barbs). We'll eliminate it and focus on the other two. Aqua Tail has slightly higher base power, but lower accuracy. This is typically where I'd advise you that this is a choice of risk versus reward, and either option is reasonable, but in this case, the scales are firmly tilted in favor of Waterfall. You see, Waterfall has a secondary effect, having a small chance to cause the opponent to flinch. With luck, even if Huntail doesn't KO an opponent in one turn, it can make it flinch and finish it off the following turn without taking a hit itself. That's far better than missing with Aqua Tail and getting KO'd on account of those defense drops from Shell Smash, so Waterfall it is!
| Waterfall | 
|
The user charges at the target and may make it flinch. |
| Shell Smash | The user breaks its shell, which lowers its Defense and Sp. Def stats but sharply boosts its Attack, Sp. Atk, and Speed stats. | |
| Sucker Punch | 
|
This move enables the user to attack first. This move fails if the target is not readying an attack. |
| Facade | 
|
This move's power is doubled if the user is poisoned, burned, or paralyzed. |
Now, with Shell Smash and possibly Swift Swim, we've made Huntail rather speedy, but all the speed in the world won't make a difference if a foe tries to take advantage of Huntail's frail constitution by using a priority move like Extreme Speed. To counter that possibility, we'll add Sucker Punch to Huntail's arsenal. If you suspect an opponent might use a priority move, or that they might outspeed Huntail in general, use Sucker Punch to hit them with a powerful, nasty surprise.
Sucker Punch does provide Huntail with an option for Pokémon resistant to Water-type moves, but it'd be nice to have one more physical move that Huntail could use in those situations, preferably one without risk of failing. Unfortunately, though, Huntail's movepool is thin. The only moves with a decent base power that fit our criteria are Crunch, Facade, and Giga Impact. Rock Tomb and Ice Fang are also options, but they have middling base power and imperfect accuracy, so I would caution against them. Of the three moves we're choosing from, Giga Impact is ill-suited to Huntail, with its recharge period leaving the frail Huntail wide open. Crunch is a solid choice, or, rather, it would be if we didn't already have Dark represented by Sucker Punch. By default, I've gone with Facade, which will at least help if someone tried to paralyze Huntail (and if someone tries to burn a Swift Swim Huntail), but, truth be told, this might be where you consider incorporating one special move into Huntail's moveset.
We, however, will go with a fully-physical moveset, because it's about time to depart for the month. Before we reconvene next month, play around, and see if you can't come up with a better moveset or even better stat spread for Huntail. It makes a good challenge, trying to work out a method to raise a Pokémon with base stats that don't immediately suggestion an endpoint to work towards, so engage with it to keep yourselves sharp! That will be all for this month. Class is dismissed!
An Overly Detailed and Funny Walkthrough of Mega Man 2
Written by: Sparks (talk) and MegaMario (talk)
Played by Sparks through the Mega Man Legacy Collection for the Nintendo Switch.
Introduction
With the first Mega Man game completed it's time for me to start playing the sequel, Mega Man 2! This one's known to be the best game in the series and one of the greatest games of all time!
Like my previous walkthrough, this one will have lots of images and plenty of humor to keep you entertained. It's not just me providing a walkthrough of this game however, as MightyMario is joining me for the rest of the games in the series! He will offer tips and tricks of his own that I might not have known about.
(Hi! I'm MightyMario, but I'll be known as MegaMario for this walkthrough. I have played almost all of the classic Mega Man games, so I'll try my best to give a few facts and tips about Mega Man 2 from my experience playing it. Please enjoy!)
Now, let's start the game!
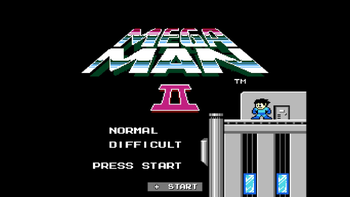
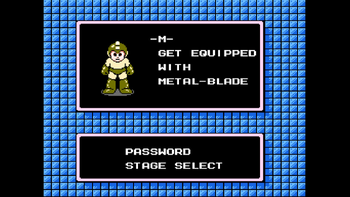
Unlike the first game, Mega Man 2 has two difficulty options to choose from - Normal and Difficult. I recommend Normal mode for beginners, because you'll do double damage to all enemies and bosses. I'm not a beginner though, so I'll play this game on Difficult mode.
Mega Man 2 also introduces a "password" system that allows players to continue from a set point in the game. Each Robot Master defeated will add to the password, so this means there are many different passwords with different results. Keep in mind that this game was made in the 1980s; save systems didn't exist yet.
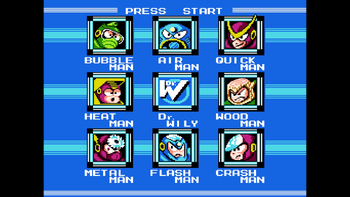
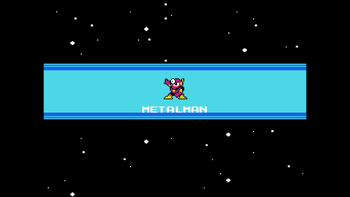
Here we have the 8 - that's right, not 6, but 8 - Robot Masters, which is the norm for all Mega Man games (except the first one). The top row has Bubble Man, Air Man and Quick Man. The middle row has Heat Man and Wood Man. Finally, the bottom row has Metal Man, Flash Man and Crash Man. Here's a general idea on what everyone is weak to:
- Bubble Man is weak to Metal Man's weapon, the Metal Blade (M).
- Air Man is weak to Wood Man's weapon, the Leaf Shield (W).
- Quick Man is weak to Flash Man's weapon, the Time Stopper (F), and to the Crash Bomber.
- Heat Man is weak to Bubble Man's weapon, the Bubble Lead (B).
- Wood Man is weak to Heat Man's weapon, the Atomic Fire (H).
- Metal Man is weak to Quick Man's weapon, the Quick Boomerang (Q). (He's also weak to his own weapon! How ironic is that?)
- Flash Man is weak to Crash Man's weapon, the Crash Bomber (C), and to the Metal Blade.
- Crash Man is weak to Air Man's weapon, the Air Shooter.
(There are also three special items that Mega Man obtains: Items 1 (a hovering platform), 2 (a jet platform), and 3 (a crawling platform). They are rewarded after defeating Heat Man, Air Man, and Flash Man respectively.)
Keep in mind that other special weapons deal additional damage to Robot Masters, but these ones are the most effective.
Let's do this!
Metal Man
It's A Factory!
| Enemy | Description |
|---|---|
| Blocky | A towering block robot that topples when Mega Man shoots at it, but rebuilds itself quickly after. |
| Mole | Small drill robots that burrow from ceilings and floors. |
| Pierobot | An enemy unique to Metal Man's stage; they roll along sharp gears that fall and try to run over Mega Man. If he shoots the Pierobot, the gears slow down. |
| Press | Indestructible crushers with spikes, move carefully to avoid them. |
| Springer | A small enemy that slides along the ground, and true to its name, springs up and down when it hits Mega Man. |
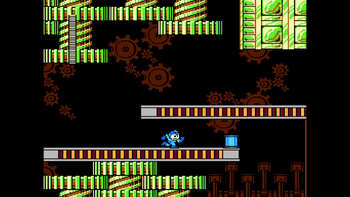
Metal Man's stage takes place in a factory, where lots of conveyor belts and other mechanical objects are. You've also probably noticed that there is no longer a score system in the game at all. Maybe it's because you can't really get a high score in games like these? Or maybe points don't even matter at all. In any case, here we go!
Right off the bat we find our first E Tank, another staple in the series. These handy items will fully replenish Mega Man's energy gauge, so the best time to use these is during tough boss battles. You can only hold on to four at a time, though. You can access these items in the menu, which now has two screens of abilities instead of one.
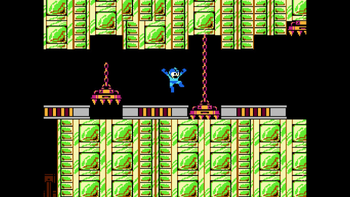
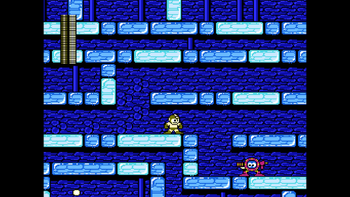
Look out! After progressing just a little bit to the right we run into these spiky crushing things (I don't know what they're called). When Mega Man approaches them, they fall down and hit the ground with a "CLANG!" Touching these will deal heavy damage, so steer clear of these things. Mega Man's bullets also simply bounce off of them, so they cannot be destroyed. I don't think any special weapon will get rid of them either. The path ahead is a mixture of these things and conveyor belts, so I have to be very careful to not get hit. I keep jumping in place so the conveyor belts won't move me to these traps. There is some solid ground in this part as well.
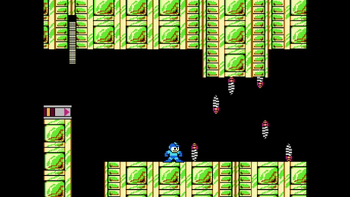
After getting past that we have another issue; these annoying drill enemies that attack from the ground and ceiling. They can attack you unexpectedly so try to go as slow as possible (ASAP) through here. You can keep getting rid of these things for power-ups if you're low, so they can help with grinding. Speaking of power-ups, they've been redesigned as well! This section goes on for a while… Eventually, there's an end where the conveyor belts are.
There is a hole we must fall down to move on! There's a 1-UP here on a high-up conveyor belt but I can't reach it.
Is This Also A Circus?
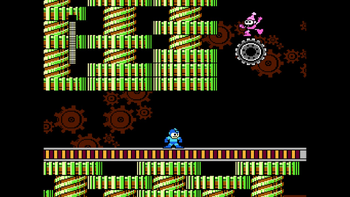
After falling to more conveyor belts we reach a new area where there are these floating grey gears in the air. When approached, a pink clown-like enemy will fall on the gear before both of them plummet to the ground and roll at you. It takes a couple shots to destroy the gear, but the clown is weak and will be destroyed in one hit. If the gear is destroyed first, the clown will simply fall out of the screen. If the clown is defeated first, then the gear will roll slower. This next area has several of these new enemies. Nothing I can't handle! This area also has slight platforming with aerial conveyor belts. Try not to get knocked off!
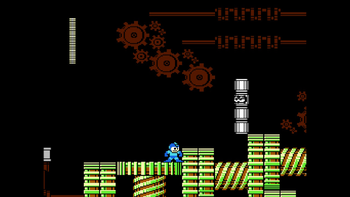
Reaching to solid ground once again, we encounter a stacked-block enemy that slowly "slithers" forward. You must attack the eyes of it to damage it! When damaged though, it will send off its three other blocks as an attack, all going various distances. It will then reform with three new blocks but the next hit will get rid of it entirely. In Normal mode, one shot will knock out this enemy, so you won't have to worry about their attack. This section consists of "stairs" leading upward, with three of these enemies present throughout. A strategy I find useful is waiting for them to reach a stopping point before attacking them. Hide behind the block they're at to avoid them, and then attack again once they're reformed.
After reaching the top of the stairs, we now must jump across a large gap. Try to be as close as you can to the ledge and jump with all your might to the other side. There's also an E Tank we can't obtain. Sad.
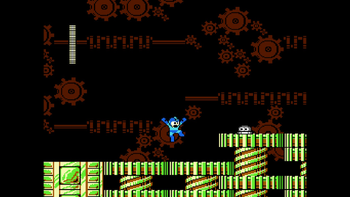
YES I've made it! We're almost there to the boss when suddenly, these grey ground enemies speed towards me. They act like those ground enemies in the first game, but bullets no longer stun them; they just bounce off of them. If you touch them, you'll take damage and they will stop and spring up like a bobble-head. Some special weapons can defeat them though! The boss door is right past them!
(MegaMario: Bubble Lead, Quick Boomerang, Crash Bomber, and a fully charged Atomic Fire can take down Springers.)
Time To Deactivate Metal Man!
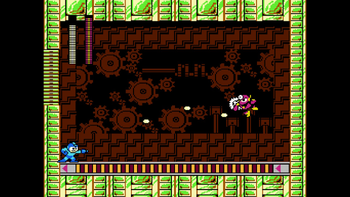
Time to fight our first boss! Metal Man attacks by throwing Metal Blades at you. Whenever you shoot, Metal Man will jump up and throw Metal Blades at you. The amount he throws is determined by how high he jumps. Try to time your shots because he can't follow up with another attack if he's in the air. The ground is a conveyor belt that changes direction after certain amounts of time, signaled by a bright flash. If Metal Man is approached, he will jump to the other side of the room. My strategy is to just stay at the left side and attack him when the conveyor belt moves left. With good jumps and well-timed shots I took him down!
After defeating Metal Man, we obtain the Metal Blade, which is no doubt the best weapon in the game and possibly of the entire franchise. It allows you to throw large metal blades in any of the eight directions with so much weapon energy! The attacks can even Pierce multiple enemies! It's honestly broken. Of course I'll just spam this for the entire game! This is why I fought against Metal Man first by the way. This weapon makes Mega Man brown, and the icon is an M.
Up next I'll go after Flash Man!
Flash Man
What A Gorgeous Mine!
| Enemy | Description |
|---|---|
| Blocky | A towering block robot that topples when Mega Man shoots at it, but rebuilds itself quickly after. |
| Returning Sniper Joe | An enemy that stands in place and fires bullets when Mega Man is near. |
| Scworm | Enemies that dispense small noodle-like pieces that hurt Mega Man. |
| Shotman | A shooting robot that will alter its aim after firing six shots. |
| Sniper Armor | Mechs piloted by Sniper Joes that jump and shoot bullets. |
Flash Man is located in what I'm assuming is a super bright mine? Well I'll explore it with Metal Blade equipped!
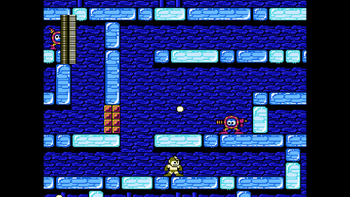
While exploring this place, we encounter several of these turret enemies that fire shots that go pretty far in a curved horizontal trajectory. After 6 shots they will aim diagonally upwards. After 6 more shots they go back to firing horizontally. They're annoying enemies that can surprise you if they're in your path. Thankfully with Metal Blade I won't have to get right up in their face to fight them. I'm safe!
This area is kinda like a maze, because there are many paths that could lead to a dead end. These unique walls act as the dead ends. They can only be destroyed with Crash Man's weapon, which I don't have yet.
Many of these turret enemies I can attack through the ground, which really helps me out! We eventually run into a hole where we begin our lengthy descent!
After falling through 1 screen, we encounter a large mech piloted by a Sniper Joe! The mech leaps far at set intervals and will fire five rapid fire bullets if Mega Man is on the ground after it lands. Fear not! The mech can be destroyed! After it is, the Sniper Joe will fall to the ground and must be fought as well. Their behavior is different from the first game; they now fire three slow shots rather than super recast random shots. They will block all damage when their shields are up, so get 'em when their guard is down!
Falling some more I get hit by a sudden turret enemy. Really? After dispatching it I fall some more! There are several paths you could take here by the way. I'm going with the middle route.
The path leads to the right and I have to go off against these stationary ground enemies that fire… what are these things? I thought they were noodles when I was younger. These enemies are also great for grinding, but they can be rather annoying as well. Metal Blade will dispose of them with ease!
Look! It's another stacked block enemy! I can avoid it though because the path I took doesn't lead to it.
After falling some more we encounter another Sniper Joe mech. I just realized that Metal Blade has no effect on the mech, so I will have to take it down regular-style. When the Sniper Joe is out, I can then spam Metal Blade to take it down. Oh yeah! I then take the right path.
This path leads to floating blocks above more Sniper Joe mechs. With careful jumps I make my way to solid ground where I find another E Tank! There's also a wall that blocks my progress, so I'll have to go the bottom path to reach the boss door (while avoiding another mech).
Gone In A Flash
No screenshot because I forgot to take one…
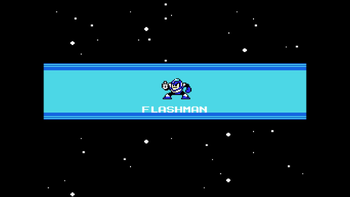
Time to fight Flash Man! The ground is uneven in this room so it's difficult to navigate. Flash Man will run and jump towards your location constantly. Occasionally, he will freeze time and fire a stream of bullets. The best strategy to do this? Just spam. Just spam the Metal Blade as soon as the fight starts and he will go down quickly. Can you beat him before he reaches you?
Flash Man's weapon is Time Stopper, a weapon that stops time temporarily. While time is stopped, enemies and hazards cannot move, and Mega Man cannot shoot. Also the weapon cannot be swapped out once it's used so that's a problem. This is, in my opinion, the worst weapon in the game. It helps in one stage though, but that's pretty much it. Wow, we went from getting the best weapon in the game to getting the worst one! While Time Stopper is equipped, Mega Man is purple, and the weapon's icon is F.
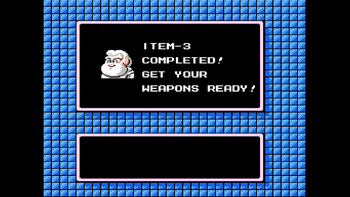
That's not all though! Also from defeating Flash Man we get a call from Dr. Light. He tells us that Item 3 is complete! This item will create a bouncing platform that slowly scales up walls if it touches them. Mega Man can use the platform when it's on the wall. The platform will then go down the wall once Mega Man jumps off of it. When Item 3 is equipped, Mega Man is red, and the weapon's icon is 3.
Up next I'll fight Bubble Man!
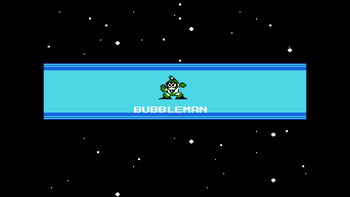
Bubble Man
My Eyes!
| Enemy | Description |
|---|---|
| Anko | Large, stationery anglerfish robots that spawn Shrinks from their mouths. Their antenna is their weak point. |
| Claw | Crab robots that fall from above to get in Mega Man's way. |
| Kerog | Frog robots that shoot smaller frogs from their mouths. |
| M-445 | Enemies that float down during the spiked section of the stage. |
| Shrink | Shrimp robots that spawn from Anko's mouth and crowd around Mega Man. |
| Tanishi | Hermit crab enemies that wheel around on platforms. Knocking their shell off causes them to speed up. One in particular will catch you off guard in this stage if you aren't careful. |
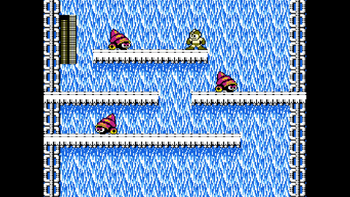
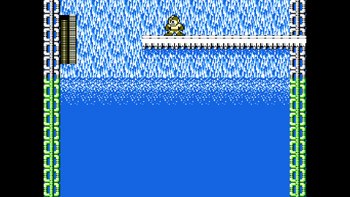
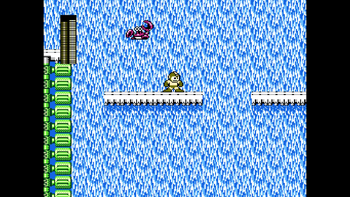
As soon as the stage starts, my eyes are assaulted with a very bright moving waterfall background. It's not recommended that you play this stage in a dark room! You could hurt your eyes and it could cause epilepsy. I'll have to move fast, but I also have to be careful because I don't wanna fall. This is a platformer after all!
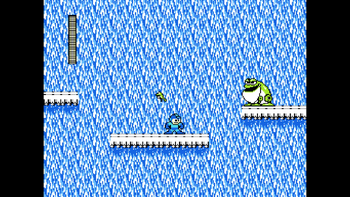
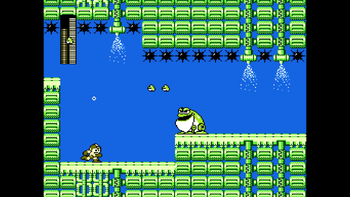
The first enemy I run into is a large frog enemy that attacks by sending out smaller versions of them at me. It sends out three at a time, and these small frogs will constantly leap at Mega Man until they're disposed of. When all three are gone, the big frog will summon more, thus it's better to knock out the big guy as soon as possible (ASAP). There isn't only one though, but three of them, all encountered not far after each other! Bring it on! Nothing Metal Blade can't handle.
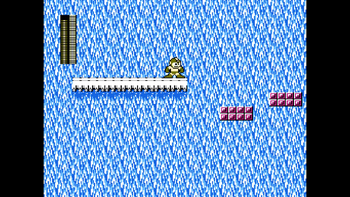
After getting past the frogs I now have to jump across purple blocks to reach the next section of the stage. Be quick though, because once Mega Man sets foot on a block, it'll fall right away! Thankfully I did this section first try (no deaths yet!) and now I must descend, although not as much as I did in Flash Man's stage.
After descending by one screen I find myself surrounded by three hermit crab-like enemies. When they are attacked, they will lose their shells and gain a speed boost! They'll be so low to the ground that special weapons are needed to take them out, unless you're on a lower platform, then you can attack them with the Mega Buster. In Normal mode, one hit will get rid of them completely, so you won't have to worry about this then.
It's time to enter the water! Now the background is much better and more calm. The next screen has three more hermit crabs in a similar area, so it's not noteworthy enough to take a screenshot of.
That's Better!
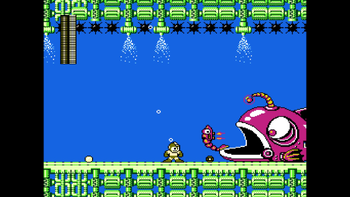
This entire next section takes place underwater, so Mega Man will jump higher and be more floaty than usual. I am then attacked by robotic shrimp that are summoned by a large angler fish. These shrimp get destroyed in one hit by Metal Blade, so you know what that means! More Metal Blade spam! The angler fish can only be defeated by attacking its light, so well-timed attacks are needed. Something interesting about the angler fish is that it won't respawn if a life is lost. I'm pretty sure a game over will cause it to return though. The ceiling is covered in spikes too by the way, which are one-hit KOs for poor Mega Man if contact is made with them. Don't jump too high!
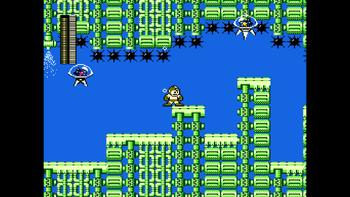
Continuing onwards, these small enemies that greatly resemble CWU-01P from the first Mega Man descend and will try to swim towards Mega Man's location, although indirectly. Time for some more Metal Blade action! The spikes here are also closer to the ground, so more caution is required.
After jumping through some spikes, I encounter another angler fish with more shrimp! I dispose of it easily, like the previous one.
There will then be two more frogs, this time underwater! The small frogs are also affected by the water physics in this game and will jump higher and farther, although more slowly.
We're at the home stretch! Exiting the water (and seeing that bright waterfall background again) I now have to jump across platforms to reach the boss door. There's a problem however - random crabs that fall from the sky! They can really ruin your jumps and even cause you to fall completely, nobody wants that! Carefully time your jumps to avoid getting knocked into a pit. Now I've reached Bubble Man.
Popping Bubble Man
Bubble Man is fought underwater, where he attacks by lobbing bouncing bubbles and swimming high up before slowly landing on the ground. He can fire lots of bullets while swimming, so be wary of that. He's not that difficult honestly. He's just another victim of Metal Blade spam. Just make sure you don't jump too high because there are spikes on the ceiling.
Bubble Man's weapon is Bubble Lead, which allows Mega Man to fire bubbles that travel across the ground. When they reach a pit, they will fall straight down. That could be useful! When equipped, Mega Man is grey and the weapon's icon is B.
One more Robot Master before I'm halfway done with them all! The next one is Wood Man!
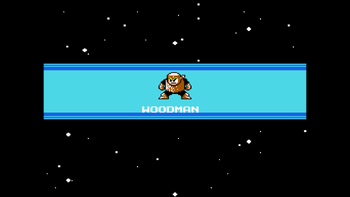
Wood Man
Bats And Bunnies And Dogs, Oh My!
| Enemy | Description |
|---|---|
| Batton | Bat enemies that follow Mega Man, making their first appearance in the series here. |
| Copipi | Small birds that hatch from Pipi's eggs. If you have a Leaf Shield, expect a lot of rewards! |
| Friender | The first and only mid bosses in Mega Man 2, these big wolf enemies shoot streams of fire. |
| Kukku | Speedy enemies that run toward Mega Man, jumping off of edges. |
| Monking | Monkey robots that hang on platforms and jump up if Mega Man approaches. |
| Pipi | Birds that drop eggs that hatch into Copipis. |
| Robbit | Purple rabbits that shoot carrots and hop around. |
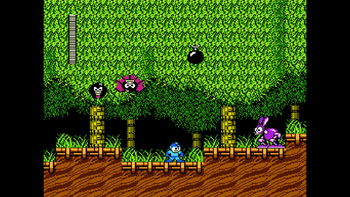
Wood Man is found in the woods (duh). Not far into the level I come across these bats that fly down from the trees to attack Mega Man. While these bats are "sleeping" they cannot be attacked. They're slow and pose no threat. Then there are these bunny rabbits that leap before tossing three carrots right at ya! Once again Metal Blade makes this super easy. Do you understand why the weapon is broken now? Anyways, at the end of this first area there's a ladder we must climb down. It leads us into a room where three more bats inhabit. One well-aimed Metal Blade will get rid of all of them!
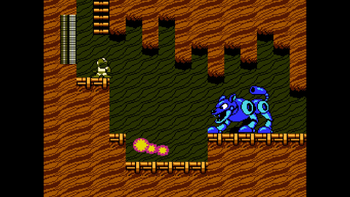
The next room has a big blue dog enemy that appears the same way Mega Man does. It attacks by constantly breathing fire that curves upwards. Not to worry! Several Metal Blades will take care of it.
The next room has another one, although in a harder to reach spot. My advice to get this one is to move and jump over its flames. While in the air, constantly attack it with Metal Blade. Once you've hit the ground, run to the left and repeat until the second dog is defeated.
The next room has yet another one. I have a good strategy though: just jump on the leftern stairs and keep throwing Metal Blades (one at a time, as it's a precise jump) until you get rid of it. This will ensure you don't risk getting attacked in the process!
(MegaMario: Despite their name, Frienders are not friendly in the slightest.)
Time To Climb!
Now we've reached a room that just has a ladder. Climb up it, and then there's a room that has more bats. Get rid of them! Then there's another ladder to climb even higher!
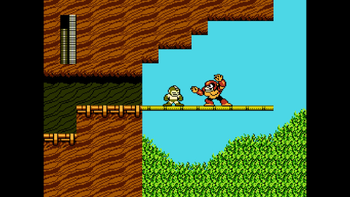
We've now reached the canopy! This next section has some platforming involved, as well as some enemies, like these monkeys for example! They will grab onto platforms from below before jumping to attack you. Metal Blade can get rid of them before they jump up. Handy!
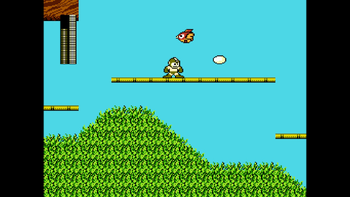
There are also these annoying bird enemies that drop eggs. When the eggs hit the ground, they will hatch and release lots of baby bird that fly at you all at once. This is difficult to avoid, so try to prevent that from happening! Thankfully Metal Blade can dispatch the birds with ease. After getting past these enemies a ladder will lead downwards.
The following three rooms all have a bunny rabbit in them. The first room is flat, the second is a staircase and the third has three elevation levels.
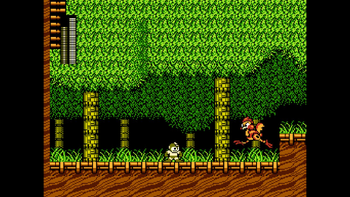
The final section before the boss room has these roadrunner enemies that run fast and jump at set times. They're difficult to take down, so the best method to get by is to move a little bit and then stop. Make sure they jump over you, and then continue. Be careful, and keep doing this until you reach Wood Man.
Cutting Down Wood Man!
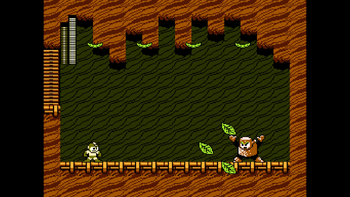
Wood Man is definitely one of the tougher Robot Masters in the game. He starts by putting up a leaf shield and sending four leaves into the sky before throwing his leaf shield. At the same time he throws it, the four leaves will descend and Wood Man will leap towards Mega Man. He will then restart his attack pattern. You can get cornered in this fight and things can go downhill quickly. What did I do? I spam Metal Blade once again, although Wood Man only takes 2 damage from it unlike the previous two Robot Masters, which took four damage from it. Nevertheless, I spammed this weapon and won the battle. The best weapon to use against Wood Man is Heat Man's weapon, but because I didn't defeat him yet I can't use it.
Wood Man's weapon is Leaf Shield, which enables Mega Man to create a shield of leaves around himself before tossing it. I believe the shield will last longer if Mega Man does not move and the button is held. When the weapon is equipped, Mega Man is green and the weapon's icon is W.
With four Robot Masters taken care of, we're halfway there! Tune in next time to see the walkthrough for Air Man, Crash Man, Heat Man and Quick Man in that order!
(MegaMario: Until next time!)
An Octet Gazette
Written by: Museful Traveler (talk)
Commerce, theater, travel, chronicling, all of these endeavors and more I have witnessed, even partaken in, on this journey. These pursuits of the civilized, they impress, of that, there is no doubt. There can too, however, be no doubt that a want for sustenance would disrupt these pursuits. Without security of food, man cannot prosper. It is a simple proposition, but one oft forgotten by those in possession of excess. In my travels, I have flirted with this want, not so much so to join the ranks of the emaciated I have seen in the backstreets, but enough to know the pangs of hunger. Only for the coin in my purse and the skill hunters of this land, so similar to those in my own, but more precise in their shots and of even greater skill with an axe, that I have been spared from worse...
Welcome back to An Octet Gazette, readers of The 'Shroom! In this post-Awards month, I'm hunting for time to work, so let's jump right into a look at the Hunter job class!
A Flurry of Arrows
As always, let's begin with a quick look at the weapons at the disposal of hunters.
Hunters are a less-straightforward class than, say, Warriors or Scholars, though they aren't too complicated. Like Warriors, they're a physically-oriented class, though not to the same extent. They have solid physical stats, but don't reach the same heights as Warriors, in exchange actually getting a magic attack, getting some additional support options, and, in the first game especially, getting an emphasis on striking multiple enemies. Let's take a closer look at those herd-hitting moves.
That right, there are five - count 'em, five - bow attacks out of an eight total skills! Now, of those five bow attacks, Mercy Strike is the odd one out, being the only move here limited to hitting a single foe. It also has a unique property, acting much like False Swipe in Pokémon and keeping the target alive if a move would have otherwise knocked them out. This might seem odd without context, but we're not going to get too deep into the context today. We'll talk more about that when we discuss the travelers who start with the Hunter job. For now, just know that the Pokémon comparison isn't too far off, and that the initial huntress travelers have a monster-capturing mechanic that... sort of... justifies Mercy Strike. We'll get there! True Strike is pretty simple, being the more straightforward "hit a single enemy with a lot of force" bow attack. It's Mercy Strike without the gimmick, basically.
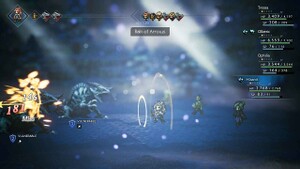
More pertinently, we can see the three other bow-based moves all offer a different spin on "strike all foes with a bow". You have Rain of Arrows offering a cheap-but-unreliable option which could easily concentrate your fire on one or two foes rather than spreading the shots around. You have Arrowstorm as a much more expensive option that guarantees targeting off the whole field and hits multiple times, really whittling down those Shield Points. Take note, though, the individual hits from these moves miss pretty often, so don't bank on knocking down an entire field of enemies with a torrent of arrows! If you do need to count on the hit, you can splurge on Draefendi's rage to go for a KO blow on the whole field. Really, though, a big chunk of the Hunter's skillset in the first game boils down to giving you different options for shooting arrows at the whole field! It's pretty clear which weapon the designers were emphasizing for the Hunter job here, and what offensive role they expected the job class to play. In fairness, they weren't entirely wrong, either. I did get a lot of mileage out of Rain of Arrows on a Hunter-subclassing Tressa...
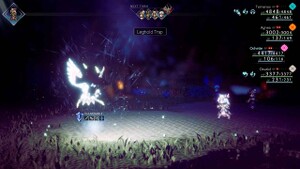
Outside of the quiver full of bow skills, we have Thunderbird as the standard single-target elemental attack. There's not much to say on that front. We have two support moves, as well. Take Aim isn't bad, giving the whole party better odds of scoring critical hits. I didn't use it that often because there are set-ups that outclass it, but it's not a bad choice if you're building up to a big strike and don't have anything else for a Hunter to do. Leghold Trap, on the other hand, is incredibly useful throughout the entire game. With Octopath's battle system, being able to manipulate the order of attacks within a turn is a powerful ability. Your use of Leghold Trap can make or break boss battles. I cannot emphasize how useful it is in letting you set up Breaks at just the right moment for you to take advantage of a stockpile of BP and buffs.
Axing the Bow Emphasis
What we see in the first game is a bow heavy-class. There are a few support skills, their average usefulness pulled way up by Leghold Trap, and you have Thunderbird for one magic option, but the Hunter class there primarily emphasizes wide strikes on the other side of the field. Octopath Traveler II changes this up a fair bit, actually letting Hunters make use of their axes in their skillset and condensing the multi-target, multi-strike attacks. Are these changes an improvement? Let's look at them in detail!
You'll notice immediately that the number of bow skills has been reduced from five to three, which is a big shift, but not where we're going to start. Instead, we'll start with what hasn't changed. Take Aim, Mercy Strike, and Thunderbird are back unchanged, and Leghold Trap mostly returns unchanged... save for its SP cost going up. Honestly, given how useful Leghold Trap is, the cost increase makes sense. It never made a difference for me, either, so it's not as though this move makes Leghold Trap too costly to use, or something. This isn't gameplay-related in any way, but shout out to the way Ochette says "Thunder-birdy" when she uses Thunderbird. Octopath voice lines are a treasure.
Let's get into those new bow attacks now, though. Rain of Arrows and True Strike have been superseded by Precise Shot, a move that combines elements of both of them. Where Rain of Arrows allowed you to get multiple hits on multiple foes, at the mercy of the RNG, Precise Shot lets you score multiple hits with a little more... well, precision. If you want to spread your shots around, you can. If you want to pile them all onto one enemy, you can. You don't get as many hits as with Rain of Arrows, but having control over the targets makes it worth the reduction (plus, oftentimes, with Rain of Arrows' miss rate, you weren't getting all 5-8 of those hits anyway). Precise Shot doesn't get the high power of True Strike, but, honestly, it makes sense that True Strike was eliminated with Precise Shot in the mix. There's just not much of a need for it when you could simply aim a succession of arrows at one foe, or use any number of other set-ups if you wanted to do a singular powerful bow strike.
The elimination of True Strike has opened up a slot for an axe-based attack, with Cleaving Blow directly taking True Strike's place as the powerful single-hit skill. It has a pretty nice bonus in the form of a buff dependent on the type of enemy it's used against, which meshes well thematically with the Hunter's beastmaster-type niche. I used Cleaving Blow often, myself. The buffs weren't much use, but they were welcome bonuses, extra garnish on a straightforwardly useful move.
As for Arrowstorm, well, it was eliminated by folding it and Draefendi's Rage into one move, basically. Draefendi's Rage was an expensive guaranteed hit on all foes, while Arrowstorm was an expensive multi-hit on all foes move, so they mashed them together and gave us Draefendi's Bow, an expensive guaranteed multi-hit on all foes. This was a good call, really. While they did have their slight differences, the moves had a considerable degree of overlap, and the extra reliability of hits feels like an upgrade over Arrowstorm while the multiple hits feels like an upgrade over Draefendi's Rage. Good on Draefendi for chilling out between games! This also allowed for Abating Orb, one last support move, to squeak into the Hunter skillset. It's an okay move, kind of situational, I found. I used it a few times, but it never reached the rank of a move I used regularly. It's an alright way of filling that slot, but the Hunter skillset could have taken advantage of this condensing with a better move.
In summation, Octopath II looked at the Hunter job class and went "what if we tried... less bow?", and it was right to do so! Now, let's take a brief peek at the job's support skills!
Support Skills
| Name | Effect |
|---|---|
| Heighten Senses | When this skill is equipped, the party has a higher chance of surprising enemies when entering battle, getting an extra turn |
| Eagle Eye | The critical hit rate of the equipping character is boosted by 50 points |
| Second Serving | Have a 50% chance of using a standard physical attack twice |
| Patience | Have a 25% chance to get an extra action at the end of a turn |
There isn't too much to say on the first game's Supper Skills. You have one field effect which makes thematic sense for the class, one stat-boosting skill which matches one of the job's emphasized stats, and two skills that give the Hunter extra moves. Considering the job is well-suited to whittling down shields with all of its multi-hit moves, these make sense. They even work well with Mercy Strike and the beast capturing mechanic, or, at least Patience does. Truth be told, though, I found it most useful to equip the last two skills on non-Hunters. As for the relevance of Patience to beast capturing, well... We'll have much more to discussion about that mechanic in a future issue. For now, let's move on to the second game.
| Name | Effect |
|---|---|
| Heighten Senses | When this skill is equipped, the party has a higher chance of surprising enemies when entering battle, getting an extra turn |
| Eagle Eye | The critical hit rate of the equipping character is boosted by 50 points |
| More Rare Monsters | Have a higher chance of encountering rare monsters |
| Salt the Wound | Have a 50% chance of acting again after breaking a foe (cannot be chained) |
The first two Support Skills have been retained from the first game, and Patience and Second Serving have more or less been combined into Salt the Wound! Once again, abilities with some overlap have been merged and reworked. Salt the Wound brings the 50% chance of getting another move from Second Serving, but the flexibility of Patience, allowing you to do anything with your extra turn rather. In exchange, it now has a specific activation requirement, but, honestly, this is more of a boon than a curse. It allows you to reliably control it, and, wew, let me tell you, there were plenty of times I had a character with Salt the Wound break a foe, then use their extra action to finish some big set-up I was working on so that I could go ham on unleashing damage from the whole party on the following turn. It's quite useful. With the gap that condensing created, More Rare Monsters was added as a new field effect, synergizing with the beast capturing mechanic by drawing out rare monsters. That whole mechanic is a little better handled in the second game, but, again, we'll get there someday. For now, know this ability helps you out with rebattling certain bosses, who begin to appear as rare random encounters in the the areas they were initially battled after you defeat them.
There you have it! We've gone over everything we need to go over about the Hunter job class! We'll have more to discuss when we get around to talking about character-specific stuff and look at the two default huntresses, H'aanit and Ochette, but that's all for now. What we ultimately see in this class is a secondary physical class, with a few more tricks than Warriors that offer more flexibility and an emphasis of whittling down Shield Points. I think they struggled a little bit to fill out this class in the first game, with all those multi-target bow moves overlapping a fair bit, but they refined and condensed those nicely in the second game, another testament to Octopath Traveler II buffing out the rough edges of its predecessors.
That's all for this month! We're closing in on the end of the eight base job classes, so join me next month as we hit either the Apothecary job or the Cleric job!
| The 'Shroom: Issue 209 | |
|---|---|
| Staff sections | Staff Notes • The 'Shroom Spotlight • Poochy's Picks • Credits |
| Features | Fake News • Fun Stuff • Palette Swap • Pipe Plaza • Critic Corner • Strategy Wing |
