The 'Shroom:Issue 208/Strategy Wing
Director's Notes
Written by: Hooded Pitohui (talk)
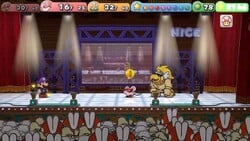
Hello there, all you readers of The 'Shroom, and welcome to a special summer edition of Strategy Wing! Would you just look at that wonderful X-Naut Fortress banner up there? BBQ Turtle (talk) generously provided it to us for the occasion. Now, ah, I'm going to need you to select a move before I can continue. Preferably, you'll pick the "defend" option so you don't have to wallop me?
>Defend
Thank you kindly for that! You see, it's RPG month here in Strategy Wing, and, well, you know... Turn-based RPGs and all, am I right? As you've likely seen by now (by RPG law, I am bound to pointlessly repeat exposition), The 'Shroom is celebrating Paper Mario: The Thousand-Year Door this month, and, here in Strategy Wing, we've gotten in the spirit of celebrating this beloved RPG by putting together three sections focused on three different RPGs! In addition to our usual RPG-focused sections (someday, yes, someday I will get one of you to play Octopath Traveler II, and I'll finally have won), our Dr. Wily-defeating friend Sparks (talk) has contributed a special TTYD-themed section! Give Respect For Ms. Mowz a read, and find out a little more about the mysterious and flirtatious badge thief!
On the topic of badges, while it's a standalone special and not actually within the team this month, I must give a nod to Ninelevendo's excellent badge tier list. If you're a first-time player of TTYD or even if you're just looking up to switch up your usual selection of badges, it's exactly what you need to sort through all the options available to you. Ah... there the turn counter goes... Could you help me out again?
>Inquire
"Pitohui," I hear you asking through the limited dialogue available to you in the occasional choice prompt, "if this is RPG month, where is Four Steps for a 3D World?" Well, first, I'd like to assure you that it'll be back next month! Secondly, I'd like to point out that we have the non-RPG Shine Get for you to get your Mario fix from. Thirdly, since you're looking for something to satisfy your extra cravings for a Mario adventure, let me direct you to our special staff project, a 'Shroom-y choose-your-own-adventure story! I won't spoil you on anything, but I will thank Flygon64 (talk) for working closely with me to make a few special contributions to a certain segment of the project!
It's quite an expansive story, so please do enjoy playing it and exploring as much of it as you can! Now, in the spirit of Strategy Wing, let me give you a special hint to help you get started. To get a few in-game hints, you'll want to go to- to- to- Aww...
>Tap foot impatiently
Thanks again. Unfortunately, it seems I'm out of FP, so I can only use my default attacks now... I guess that hint will have to wait until I stop by an inn. Well, while I go and rest up, let me remind you that you're always welcome to send in an application to join the Strategy Wing team. We welcome you to tell us all about your favorite RPGs, but games from any genre will do, too!
Section of the Month
My hearty congratulations goes out to both Sparks (talk) and Shoey (talk)! Strategy Wing's newest contributor and one of the team's long-time supporters, these two took a joint first place with joint finales! After a long, long journey, we finally restored File City to its full glory in File City Files, and after dealing with the deadly Robot Masters, we invaded the base of that evil Dr. Wily and handed him a defeat in An Overly Detailed and Funny Walkthrough of Mega Man. Congratulations on completing your sections, both of you, and on a well-earned win! All of you out there, please do keep voting to show your support for our writers!
| STRATEGY WING SECTION OF THE MONTH | ||||
|---|---|---|---|---|
| Place | Section | Votes | % | Writer |
| 1st | An Overly Detailed and Funny Walkthrough of Mega Man | 5 | 27.78% | Sparks (talk) |
| 1st | File City Files | 5 | 27.78% | Shoey (talk) |
| 2nd | Four Steps for a 3D World | 4 | 17.39% | Hooded Pitohui (talk) |
| 3rd | Shine Get | 2 | 11.11% | Waluigi Time (talk) |
Shine Get
Written by: Waluigi Time (talk)
Hello there, 'Shroom readers! Welcome back to Shine Get, which is going to be very short this month because I'm running out of time! We're going to be making some story progress though, so hopefully it'll still be interesting. Also, the apocalypse is now three months behind schedule!
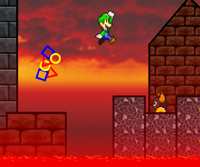
Right next to the Lethal Lava Land painting, there's a star door, and that's where I'm headed today. There's a pretty cool looking room behind it (pictured here) containing a Sling Star that goes to today's "secret" level.
Secret Course: Kamek's Castle
This level actually starts with a cutscene! Kamek is up on his tower ranting at a Koopa Paratroopa about how much he's helped Bowser with his master plan, and apparently, now he's been fired! He also hates Bowser's plan to destroy the planet and thinks that he has been possessed by the Orb of Power, and then vows to defeat him. He even swears! (But this is a 2009 game, so of course it's censored by random symbols.) As he remembers all of Bowser's mistreatment of him, there's also a flashback to Yoshi's Island, showing Baby Bowser beating Kamek up just before the final boss fight. This is the only time Yoshi appears in the entire game! After this, Luigi finally arrives and gets spotted by the Koopa Paratroopa. Kamek sees him (but calls him Mario...) and declares that, although they're both enemies of Bowser now, they're not allies and he's still going to try and kill him. Why? I don't know!
So now we're finally in the level proper. It's actually an autoscroller! It's another lava level filled with enemies, and the entire time Kamek is swooping across the screen and firing magic blasts, which either spawn enemies or just explode, depending on the color. There's not a whole lot to say about this portion, really. Some of the platforms sink into the lava, others don't. Between the enemies, platforms, and Kamek's magic, it can actually be kind of tricky to keep up with. Thankfully, there's lots of coins! At the end of this sequence, there's an elevator platform leading to an arena area. There's a breakable block on both sides, make sure to break these as soon as you can!
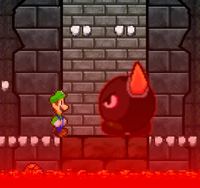
After spending an apparently arbitrary amount of time in the arena, Kamek decides that he's wasted enough time here and summons... Big Bully. Yeah, kind of anticlimactic, considering we've already fought him before, along with Chief Chilly who is basically the same thing! But this time, it's glowing red, so you know it means business! Joking aside, the fight is actually a little different from the previous ones. First of all, there's no F.L.U.D.D. in this level! The Hover Nozzle normally shreds the Bully bosses, so that alone makes this somewhat more difficult. Also, you have to deal with Goombas, Bullet Bills, and Skeleton Goonies showing up at the same time. Finally, Big Bully grows after each hit, which doesn't affect much, as far as I can tell. Despite these changes, Big Bully is kind of dumb. You can easily chain multiple hits in a row, and sometimes you can even get Big Bully to walking into the lava holes on its own! My advice is to just do this fast. If you take too long, the enemies can start to trip you up, but Big Bully by itself is once again pretty easy.
So yeah, still a pretty easy fight despite some changes and the extra hype. Once Big Bully has been defeated, a red Shine Sprite appears! Much like the green Shine Sprite that I got from the last Kamek-related fight, this is a special Shine Sprite that will unlock a new area in the castle. Also like that green Shine Sprite, it turns yellow once it's collected, which is kind of sad. Still, the jank is probably expected at this point.
And that's Kamek's Castle! Normally I would've tacked on another secret level or something, but I'm writing this the night before release and I'm tired and we're all tired. So, next time, we'll either put that red Shine Sprite to good use or maybe check out some secret levels, I'm not really sure! I'll decide later. One thing's for sure, the apocalypse will definitely not have happened by then!
Pitohui's Pokémon Academy
Written by: Hooded Pitohui (talk)
Ah, good day, students! Although, I suppose in this darkened castle, it might be difficult to distinguish between day and night... I hope you encountered no difficulties in making your way to this month's class session. To tell you the truth, I would have preferred to hold class somewhere with fewer, ah, bones littering the ground, but, well, the dean said we had to hold class in Hooktail Castle this month in order to continue receiving funding from The 'Shroom. All the same, we'll try to make this an exciting session, if that sounds acceptable? To that end, being that a fearsome dragon once inhabited this very castle, I thought we might focus on an iconic draconian Pokémon. Do your best to disregard the atmosphere, and let's turn our attention to the mighty Salamence!
Before we proceed, those of you who are just joining us should look at our course policies in the first box below. If you need to review the most commonly-used terms in this class, open up the second box.
First, a Smogon University course, this course is not. No, this academy's lessons are designed to get trainers of any stripe thinking about how they can raise their Pokémon, and, as a result, aren't designed to keep up with the widely-accepted metagame for the series. In some cases, the way I've raised my Pokémon may even flies in the face of conventional wisdom. If you're looking for top-tier strategies, do check out Smogon, but if you merely want to get a little deeper into raising Pokémon while still doing things your own way, feel free to use this section as a reference.
Since we all know the importance of citing our sources, I also need to credit the design of some of the tables used in these lectures to Crocodile Dippy, author of the Pocket Handbook which can be found in early editions of Strategy Wing.Base Stats: Base stats are the values associated with a particular Pokémon species, and are the same across every individual Pokémon of a given species. You have no influence on them. You can think of them as traits tied to a species. A chimp isn't ever going to be able to get as good as digging as a mole will be, and, likewise, an Abra is never going to have the defensive prowess a Shuckle has.
Individual Values (IVs): Individual values, as their name implies, are associated with individual Pokémon. They range from 0 to 31 in each stat, with 31 being considered a "perfect" IV and higher numbers corresponding to different stats. Magikarp A and Magikarp B will have the same base stats, but they may very well have different IVs. To stick with the animal analogy, one mole may be born with larger claws than another mole, and that first mole is probably going to have an easier time digging through dirt than the latter. Individual values are set in stone, strictly speaking, but you can use Hyper Training (from Generation VII onwards) to functionally get a perfect IV in a stat.
Effort Values (EVs): Effort values are the one thing you can easily change. A Pokémon can earn, primarily through battling, but also through means like the use of certain items or mechanics like Super Training, up to a total of 510 effort values, with up to 252 in any given stat. To finish off the animal analogy, no matter what kind of claws a mole is born with, moles who have more experience digging are probably going to be better at digging than moles which have never dug.
Nature: A Pokémon's nature is, more or a less, a stat modifier with a name meant to make it sound like a Pokémon has some personality. Natures will raise one stat by ten percent and lower another stat by ten percent. Some natures raise and lower the same stat, canceling out the effect and leaving stats unchanged. Natures can be functionally changed with the use of special mint items from Generation VIII onwards.
STAB: STAB stands for Same-Type Attack Bonus, and refers to the boosted power of moves that match the type of the move's user. To illustrate this, consider the case of a Lombre, a dual-type Pokémon which is both a Water-type and a Grass-type. Any Water-type moves Lombre uses will have their power boosted by 1.5x, and any Grass-type moves Lombre uses will, likewise, have their power boosted by 1.5x. (There are circumstances where this does not apply, and, while the 1.5x multiplier is typical, some games use other multipliers.)
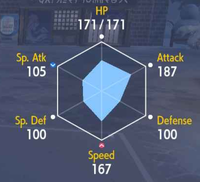
We'll begin, as always, by examining Salamence's base states. Now, as a so-called "pseudo-legendary", a Pokémon which is relatively easy to obtain but which has remarkably high stats, Salamence is quite a powerhouse. Its lowest stats, coming in at 80, would be considered just shy of respectable for many other Pokémon, and all of its offensive stats (speed included) are great. Before we get further, I should mention that today's class will not be discussing or factoring in Salamence's Mega Evolution.
Evidently, we want to focus on Salamence's offensive capabilities, so our first choice is narrowing down whether we want to focus on physical attack or special attack. With physical attack being higher, the choice is easy!

|
Name: | Salamence | Base HP: | 95 | |
| Species: | Dragon | Base Attack: | 135 | ||
| Type: | Dragon | Flying | Base Defense: | 80 | |
| Abilities: | Intimidate | Base Special Attack: | 110 | ||
| Moxie | Base Special Defense: | 80 | |||
| Base Speed: | 100 | ||||
Now, it would be great if we could max out attack, special attack, and speed, but since we're limited to maxing out two stats, we need to make a cut somewhere. Our cut will be special attack, conveniently giving us a dump stat we don't have to worry too much about when breeding for IVs, too. I will say, there are some movesets that equip Salamence with a special move and it may not always be in your interest to write special attack off, but we need not discuss those cases today. The important thing is that we aim for 31 IVs in our two important stats (attack and speed) so that Salamence can hit hard and in all three defensive stats so that it withstands as many attacks as possible. EVs should, likewise, be used to maximize attack and speed, with the leftovers going into HP to bolster Salamence's best defensive stat.
As for a Nature, since all the offensive power in the world won't mean a thing if Salamence never gets a chance to act, we want to boost speed. Of all the speed-raising Natures, I would recommend a Jolly Nature since we're disregarding special attack and a reduction in it won't matter.
We've discussed stats rather efficiently today, but we still need to examine Salamence's abilities before we can get into selecting a moveset. Happily, consider we've invested so much in physical attack, both of Salamence's abilities relate to the attack stat. Intimidate lowers the attack stat of the opponent when Salamence enters battle, while Moxie raises Salamence's attack state when it knocks out an opponent. These are both great abilities, handy in many situations. As to which you should select, I would say it depends on your purpose. In standard single battles, Moxie is arguably more useful, allowing Salamence to dish out damage and get a boost in the same turn, avoiding the risk of Salamence taking a major hit while it raises its stats. In double battles and situations where you do plan to Mega Evolve, Intimidate is more useful, dropping your opponent's attack and either lessening the damage they can deal or forcing them to switch out. Ultimately, though, they're both passable choices. Myself? I took the path of least resistance this month and went with Intimidate.
With that all out of the way, let's begin putting together Salamence's moveset. As usual, we want to get a reliable, decently-powerful STAB move to begin, and, luckily, we have the perfect move in the form of Dragon Claw. Now, there is an alternative for which you could swap Dragon Claw out. Outrage has 100% accuracy and a considerably higher 120 base power, with the only drawbacks being that you're locked into repeatedly using Outrage for 2-3 turns and that Salamence becomes confused when those 2-3 turns are up. These aren't actually huge drawbacks, especially if you're switching out regularly, though Outrage might be more viable for a Salamence with Moxie, since that Salamence won't have to spend extra turns restoring its stat boosts after re-entering battle.
Now, normally, given that Salamence is a dual-type Pokémon, I would say it's worth finding a Flying-type STAB move next. However, Salamence has access to two great status moves, access to which, I think, is a worthy trade for not having a second STAB move. First, Salamence has access to the long-lauded Dragon Dance, a move which boosts both its speed and attack by one stage. If Salamence is able to get a few Dragon Dance uses in (something that Intimidate may help with), it can quickly become a destructive force quite well and capable of tearing through its opponents.
| Dragon Claw | 
|
The user slashes the target with huge, sharp claws to inflict damage. |
| Iron Head | 
|
The user slams the target with its steel-hard head. This may also make the target flinch. |
| Roost | The user lands and rests its body. This move restores the user's HP by up to half its max HP. | |
| Dragon Dance | The user vigorously performs a mystic, powerful dance that raises its Attack and Speed stats. |
There is that pesky if, however. Salamence does have to weather a few hits to use Dragon Dance a couple times, and, while it might get one free turn if its opponent is switched out, it's likely Salamence will get struck. That's where Roost comes in handy. You can almost never go wrong with an HP-restoring move, and Roost is one of the best. Getting half of Salamence's health back only at the expense of losing its Flying-typing for a turn? That's an excellent deal! It even temporarily eliminates Salamence's weakness to Rock-type moves and reduces its 4x Ice-type weakness to a mere 2x weakness.
With those three moves set in place, we do have room for a Flying-type STAB move, and there are arguments for it, to be certain. Flying-type moves aren't widely resisted and they keep Fighting-types in check. For fun, though, I say we go for a coverage move, instead. Salamence has four weaknesses, those being Rock, Ice (x4), Fairy, and Dragon. Those first three are all weak to Steel-type moves, and it just so happens that Salamence has access to a reliable, decently-powerful Steel-type move in the form of Iron Head. It may not be the most sound strategy, but it could be fun to surprise your opponents with Iron Head if they think they'll check Salamence with one of its weaknesses.
With that, we bring our class session to a close. I'm certain, given the atmosphere, that nobody will mind wrapping up early today? Wonderful, wonderful then! Be on your way, and I shall follow shortly behind you! Do take care not to get snatched by any dragons as you disperse!
Respect For Ms. Mowz
There are seven partners in Paper Mario: The Thousand-Year Door, all with their own personalities and abilities. Goombella, Vivian and Yoshi Kid are popular choices with the fans especially. In my opinion, there is one partner who doesn't get as much recognition as the others - Ms. Mowz!
Who is Ms. Mowz?
Ms. Mowz is a female Little Mouser thief who appears in Paper Mario: The Thousand-Year Door and its Nintendo Switch remake. She is also the manager of the Lovely Howz of Badges, where she works with her assistant to sell badges. Being a thief, Ms. Mowz looks for rare and elusive badges and then proceeds to sell her finds at her shop. Ms. Mowz also possesses amazing acrobatic abilities and maneuvers.
Appearance and Personality
Ms. Mowz, being a Little Mouser, shares the same body structure as others of her kind. She is white in color and wears a red mask that covers her white eyes. She also has red high heels and her tail curls into a heart shape.
Ms. Mowz removes her disguise while she is inside the Lovely Howz of Badges. Here, she has markings on her face that make it look like a black mask covers her eyes (like other typical Little Mousers) and her shoes lack heels. Her tail remains the same however.
Ms. Mowz is shown to flirt with Mario constantly, implying that she's in love with him. She gives him sweet nicknames such as "Sweetie" and "Hunk of cheese" and even kisses him on multiple occasions. I don't think I've seen her get legitimately angry. I mean, she does look mad when attacking, but that's about all there is to it!
History
Ms. Mowz can be found in the Lovely Howz of Badges when it first opens during the prologue. She is out of her disguise, however, so the player may not know her true identity unless they've played the game before.
Ms. Mowz' first real appearance is during chapter one, where Mario and his friends find her inside Hooktail Castle. She flirts with Mario (even kissing him!) and leaves the castle, having found the badge she was after. Before she leaves however, Ms. Mowz offers a hint to Mario and co. about an item that is Hooktail's weakness. She tells them it's hidden somewhere in the castle, and that they may or may not have found it already.
She is then seen again in chapter two, inside the Great Tree. Mario and his friends see that she has knocked an X-Naut unconscious. Ms. Mowz once again finds the badges she was looking for and flirts with Mario again (kissing him again too). Before leaving the Great Tree, she tells Mario that the Crystal Star is hidden at the bottom of the tree, and gives her support.
Ms. Mowz returns in chapter three, where she can be found and talked to inside the Glitz Pit. If spoken to, she simply says hello and that they meet again. Later on in the chapter, Ms. Mowz is found in the storage room, where she once again flirts and kisses Mario. She has also found what she needed and denies making any noise in the room, despite what Glitz Pit security said. Before exiting, she tells Mario and co. that the Glitz Pit holds many secrets, and warns them to be very careful lest they "end up like those poor souls upstairs" (referring to King K. and Bandy Andy).
Until she is acquired as a partner, Ms. Mowz will return to running the Lovely Howz of Badges, as well as setting out to look for badges once more.
How to Acquire Her as a Partner
After chapter four is completed, a new trouble will become available at the Trouble Center, known as "Elusive badge!" The requestor is "???", and they ask to meet them on top of Zess T.'s house in Rogueport. The owner of the Trouble Center says that because the poster is anonymous, the trouble could be dangerous. It is then revealed that Ms. Mowz herself posted the trouble, and she asks for Mario to find an elusive badge hidden in Hooktail Castle, in Hooktail's room. Ms. Mowz is unable to find the badge herself, and thus asks for Mario's assistance. She gives a clue to help find the Badge - "Use the wind". This means that Mario must use Flurrie's Gale Force ability to reveal a treasure chest containing the badge (the badge in question is Attack FX B). After taking it back to Ms. Mowz, she reveals that she was the one who hid the badge and allows Mario to keep it. She then decides to join Mario on his adventure and becomes a permanent partner for the rest of the game! This makes Ms. Mowz the only optional partner in the game. Afterwards, Ms. Mowz's assistant runs the Lovely Howz of Badges on his own.
Ms. Mowz's Abilities
| Rank | Amount |
|---|---|
| Base: | 15 |
| Super: | 20 |
| Ultra: | 25 |
Sniffing
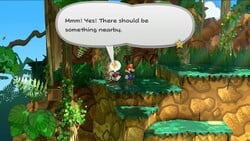
While exploring, Ms. Mowz's partner ability is to sniff the surrounding area for any items, such as coins, items, badges, Star Pieces and Shine Sprites. If she senses anything, she will jump and tell Mario that something is nearby. If Mario is right next to something when her ability is used, Ms. Mowz will do a flip and tell Mario they are right next to something. Ms. Mowz's ability is super helpful because she can let you know about Star Pieces hidden in the floor and invisible blocks. Over the course of my playthrough of the remake, I found myself using her in every new room I encountered just to make sure I didn't miss anything. It definitely saves lots of time to not whack every inch of the ground while looking for Star Pieces, am I right?
Love Slap
Now to get into Ms. Mowz's battle abilities! Her main attack is Love Slap, an attack that pierces the defense of targets struck. To deal the most damage possible, tilt left and right repeatedly to fill up the gauge. Please do not use the palm of your hand to fill the gauge. Use only your thumb to avoid damage.
Beware! This attack will not affect spiky/fiery enemies as Ms. Mowz will receive contact damage instead. Due to a coding error in the original game, this attack will not raise Star Power (unless you perform the stylish move, but that's still very little Star Power) and can cause audience members to leave. How rude! Thankfully this was fixed in the Nintendo Switch remake, and I can confirm that, having used Ms. Mowz pretty often in battle. This attack is super helpful against enemies with high defense, such as Bombshell Bill Blasters and Chain Chomps.
Range: This attack will strike the frontmost grounded enemy, similar to Mario's hammer attacks.
Stylish move: When Ms. Mowz walks back to the left after attacking, press while halfway to returning to her stage position for her to perform a stylish jump, boosting Star Power earned.
| Statistic | Number |
|---|---|
| FP Cost: | 0 |
| Base Rank damage: | 2 |
| Super Rank damage: | 3 |
| Ultra Rank damage: | 4 |
Kiss Thief
Ms. Mowz also starts off with Kiss Thief, a move that has the potential to steal coins, items and Badges from enemies. To successfully steal something from an opponent, press when the gauge passes "OK!" It starts off slow, but speeds up after a second, so be ready! Who knew kissing could lower someone's guard down so much they can be pickpocketed?
Even if an enemy has no item or Badge, there is a small chance that you can still steal one from them! The chances are: 82% for coins, 16% for items and 2% for badges. Enemies can have Life Shrooms, so if you see one, why not steal from them? They're very valuable! Honestly I only used this move whenever an enemy held a very great item, which is to say, very rarely.
Range: Frontmost grounded enemy, making it have the same range as Love Slap.
Stylish move: When Ms. Mowz walks up to the selected enemy, press for her to perform a flip, boosting Star Power earned.
FP Cost: 2
The attack does no damage.
Tease
Once upgraded to Super Rank, Ms. Mowz learns Tease, which deals no damage, but can inflict dizzy on all enemies, sometimes causing them to miss their attacks completely. Ms. Mowz creates three copies of herself to tease the enemies, all jumping around them before her copies disappear and Ms. Mowz returns to her stage position. Press and hold to fill the gauge as much as you can. If it reaches the limit, it will decrease, so try to keep it as close to the end as possible without overfilling the gauge. The chance of dizzying the enemies is determined by how much of the gauge is filled up. Affected enemies will become dizzy for 3 turns. I will admit that I haven't really used this move, but it can help against enemies that deal high damage.
Range: All enemies.
Stylish move: Press after Ms. Mowz performs the move for her to perform a cool backflip, increasing the amount of Star Power earned.
FP Cost: 3
This attack deals no damage.
Smooch
Ms. Mowz's final ability, only learned once she has reached Ultra Rank, is Smooch. Like in her previous encounters with Mario, Ms. Mowz gives him a big kiss, restoring his HP. Alternately press and
to fill up a gauge; the more it is filled up, the more HP restored for Mario. This move restores Mario's HP to a maximum of 10 HP, but at the cost of 10 FP. I actually never used this move outside of training, but if players have way too much FP and need an emergency healing for Mario, then this is the right move to do! With a cost of 10 FP, this is the most expensive move in the game.
Range: Mario only
Stylish move: After Ms. Mowz kisses Mario, press to make Ms. Mowz perform a flip, increasing Star Power earned.
FP Cost: 10 FP
Maximum HP restored: 10 HP
Conclusion
Ms. Mowz is a fantastic partner that most overlook, mainly because she can be missed entirely. I loved having her as my main partner because of her secret-sniffing ability and I always looked forward to what she had to say in specific situations. When going off against bosses however, I had Goombella and performed the ol' Power Lift + Rally Wink strategy, but elsewhere I had Ms. Mowz to keep me company. She also made my 100% completion journey much more fun and easier! I encourage you all to at least give her a chance; you'll find out just how helpful she can be!
An Octet Gazette
Written by: Museful Traveler (talk)
In unfamiliar lands, one can never possess an overabundance of caution. Outside of the shining metropolis, bandits lie in wait in the countryside, primed to strike when a wanderer should pass them by. I do not intend to become the target of brigands. For my protection, I have hired a sellsword. She is sturdy of body, and sharp of mind. I do not doubt my safety with her at my back. She, not so different from the warriors of home with the exception of her propensity for feints, regales me with tales of tournaments in which she has claimed victory. I suppose it must be the case that in whatever lands strong warriors may gather, tournaments shall arise, and the wealthy shall gather to gamble...``
Welcome back to An Octet Gazette, readers of The 'Shroom! As you know, it's our The Thousand-Year Door special this month, so, to honor it, I'm here to talk about a, uh, completely different RPG. Hey, though, the stories of both starting warriors in the Octopath games have a tournament between powerful fighters, and TTYD has the tournament in the Glitz Pit, so it's still thematic!
Clashing With A Warrior
As always, let's begin with a quick look at what weapons warriors can wield.
Warriors get swords and polearms. On the whole, the Warrior job class is a physically-oriented class, with boosts to physical attack, physical defense, and HP. This job class gives you sturdy tanks that can take powerful whacks and keep on standing and dish out some massive damage. With just a little bit of set-up (and the right support skills), five-digit damage is far from unthinkable. The major trade-off for having two weapons and all that physical strength? Warriors don't have any magic type at their disposal.
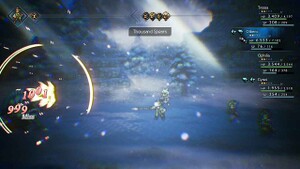
The "angle", so to speak, of the Warrior job class is fairly apparent in its skillset in the first game. The job gets two damaging skills corresponding to its two weapons, one which strikes a single foe but has some extra benefit, and one which strikes multiple foes (or, at least, has a chance to strike multiple foes, in the case of Thousand Spears). There really isn't much to say with that arrangement of skills without getting in-depth to the point of discussing different synergies across a team of character or specific battles. You have options to hit hard (or extra hard, in the case of Brand's Thunder), and you get to choose whether you want to focus those options on one foe or spread them around. The Warrior job is fairly straightforward!
There are three non-damaging moves here, but Abide and Stout Wall aren't much less straightforward than the attacking options. Either further boost the strength of the hardest-hitting job class or further boost the defense of a pretty-resilient job class. It's simple! Incite is about the only "tricky" (and I use that very relatively here) move in the Warrior skillset. Its use cases aren't that esoteric, though. You need to protect your squishier party members? You can use Incite to draw certain attacks to your sturdy warrior. Ultimately, even it falls into that simple angle of "hit hard physically, stand up to hard physical hits".
New Swordplay Tricks
What we've seen is that the Warrior job class is a fairly straightforward class. In fact, it may be the simplest of all the classes we've looked at so far. Does that hold true in Octopath Traveler II? The answer is a resounding "mostly!". For the most part, the job's angle hasn't changed. You still have the same three non-offensive skills, and you still have a multi-target sword option and a single-target sword option. Both of those sword skills have a few new wrinkles, though, and the single-hit/multi-hit dichotomy has been broken with the job's polearm skills.
Looking at those sword skills first, Aggressive Slash works a little different than Level Slash. Rather than striking all foes one time, it allows the user to strike multiple times while targeting foes randomly. It's a subtle change. Usually it works out such that it still hits most foes on the field, so it's not too different, but it's a roll of the dice. You might end up hitting one foe multiple times. Of course, if you're only facing a single foe, well, that gives it a pretty big advantage over Level Slash, especially if that foe is weak to swords. It sure can help in whittling down those shield points, and all for the same SP cost Level Slash had!
Cross Strike, meanwhile, has been replaced by Enervating Slash, which is... basically Cross Strike with the twist of becoming more powerful if you're willing to sacrifice some positive status effects. Honestly, I consider this a bit of a downgrade, and, for reasons we'll discuss when we look at the actual titular travelers themselves, it... gets outclassed, really. To add insult to injury, It also has an inaccurate in-game description that makes claims it removes positive status effects from the enemy you target. Yeaaah, while I see the same intent to mix things up that Aggressive Slash was built around, I don't feel this one works that well.
On the polearm side of things, Piercing Thrust isn't actually all that different from its predecessor, still being a single-target spear attack with an extra boon. The only difference here is that the boon has been changed. What we don't see, however, is a multi-target polearm attack. This is the one place where the Warrior job fully swapped out something from the first game, and while there were times I missed a multi-target spear option (not too much, though, because there were some alternatives that, again, we'll discuss when we talk about the actual travelers), this actually worked out well. Vengeful Blade was a skill I called upon frequently. It still meshes with the Warrior's role of being able to tank physical hits (and it even pairs well with Incite), but it also adds something a little more strategic and passive to the job's repertoire. It's easily the biggest change to the Warrior job between games, if only by virtue of the other changes being low bars to clear, but it's one that works well.
Clearly, there were some efforts made to mix up the Warrior job class, but it's such a straightforward class that there wasn't much to tweak with it in terms of skills. Does that hold true of Support Skills, too? Let's see!
Support Skills
| Name | Effect |
|---|---|
| Cover | Shield allies with low HP from single-target attacks that are directed at them, taking damage in their place |
| Summon Strength | The physical attack stat of the equipping character is boosted by 50 points. |
| Endure | Receive a boost to physical attack and defense when poisoned, sleeping, confused, blinded, silenced, terrorized, or unconsciousness |
| Surpassing Power | Allows the equipping character to break the four-digit damage cap and deal up to 99,999 damage per strike |
Unsurprisingly, all of the Warrior job's support skills are built around high physical offense and high physical defense! Summon Strength and Surpassing Power (one of the most useful Support Skills in the game) fall into the former category, both allowing an equipping warrior to dish out more damage. Since warriors can better weather physical blows than the other classes, Cover gives them an option to take hits on behalf of other party members, putting their sturdiness to use. Considering that you want your warriors to stay standing strong through an onslaught, it's easy to see the purpose of Endure in further bolstering their defensive abilities, too!
Overall, you see the same straightforward emphasis on making the most of the job's physical attack and defenses as was apparent in the job's skillset!
| Name | Effect |
|---|---|
| Bolstering Break | Get a boost to physical attack when breaking an opponent |
| Summon Strength | The physical attack stat of the equipping character is boosted by 50 points |
| Latent Power Plus | Gain additional Latent Power when taking damage or breaking foes |
| Deal More Damage | Allows the equipping character to break the four-digit damage cap and deal up to 99,999 damage per strike |
Then, in the sequel, you see much the same thing you saw with the job's skillset, too. These are mostly the same, with two of these Support Skills being unchanged, but they did try to find some means of mixing these up. The emphasis on physical defense has been dropped, with all of these Support Skills more oriented towards boosting a party member's offensive capabilities. Bolstering Break is straightforward, but even Latent Power Plus is an offensively-oriented Support Skill! After all, getting that Latent Power gauge up to full broadly gives the travelers access to some powerful offensive options.
In the end, we have a job class with a well-defined, easily-understandable role that, perhaps due to the property of "if it ain't broke, don't fix it", didn't change that much between games. There were a few tweaks to the class, though, and, despite Enervating Slash having a somewhat questionable level of utility, those tweaks worked out well. They did manage to make the job class just a little more interesting and (especially with Vengeful Blade) strategic. That's all for this month. I haven't actually picked a job class for next month yet, but we're winding down the eight base jobs, so we'll look at one of the last few next month!


