The 'Shroom:Issue 214/Strategy Wing
Director's Notes
Written by: Hooded Pitohui (talk)
Hello all of you readers of The 'Shroom! Welcome to Strategy Wing's first edition of 2025! So, how about that Nintendo Switch 2, huh? It's the sensible approach from a business perspective, though I will admit that I felt a twinge of disappointment it didn't have any noticeable gimmick. We've had two decades of gimmicks, with the DS kicking things off with its touch screen in 2004! What is there to say about it at this stage, though? All we know officially is that it exists and what it looks like. I'll be reserving judgement until we get more information in April and see what games are coming its way.
Nintendo isn't the only one that has new announcements for you, though! Here in Strategy Wing, we've got a new section from a returning writer. Give Roserade (talk) a warm welcome back as they dissect the roles assigned to players in the Killing Game, a popular community game format! Their new section, Killing the Killing Game Roles, offers a detailed breakdown of what works well and what has the potential to go awry with various roles created for the game format over the years and will hopefully provide some insight on how to construct a role and what pitfalls to watch out for as a KG host. Even if you don't know the game format well, some of its lessons could translate to similar collaborative storytelling games like a favorite TTRPG, so there are plenty of reasons to read!
Aside from that, we have the usual slate of sections you've come to expect, breaking down Mario courses, raising Pokémon, and conquering Just Shapes & Beats. Go on and enjoy what the team has put together for you, and, hey, if there's a favorite game you'd like to write about, well-known or obscure, video or tabletop, consider joining the Strategy Wing team. Follow The Groovy Guide or former section Shine Get and offer up a walkthrough of your favorites, if you'd like. Don't feel like you have to cover a whole game, though. If you just want to do one level, that's perfectly fine! If not a walkthrough, why not an analysis or breakdown like Killing the Killing Game Roles or Four Steps for a 3D World? Tips for building a certain character like Pokémon Academy? A history showing how an aspect of a videogame has changed over time like The Anatomy of a Pikmin? Suggesting rulesets for challenge runs of a game? There are plenty of options, and we welcome small and focused sections just as we do more expansive ones, so don't be shy about submitting an application!
Section of the Month
A hearty thank you and congratulations goes out to Waluigi Time (talk), who capped off his long-running Shine Get with one final concise and breezy description of a nostalgic platformer for us as he revealed the secrets of the Shine Sprites. Thank you for showing your support for his finale and for showing support for all of our writers and sections, like Sparks (talk) who debuted his Just Shapes & Beats walkthrough last month and my look at Mamoswine in Pokémon Academy. Keep on voting, and we'll be here to keep on writing!
| STRATEGY WING SECTION OF THE MONTH | ||||
|---|---|---|---|---|
| Place | Section | Votes | % | Writer |
| 1st | Shine Get | 7 | 50.00% | Waluigi Time (talk) |
| 2nd | Pitohui's Pokémon Academy | 3 | 21.43% | Hooded Pitohui (talk) |
| 3rd | Just Shapes & Beats: The Groovy Guide | 2 | 14.29% | Sparks (talk) |
| 3rd | Four Steps for a 3D World | 2 | 14.29% | Hooded Pitohui (talk) |
Four Steps for a 3D World
Written by: Hooded Pitohui (talk)
Hello, all you readers of The 'Shroom, and welcome back to Four Steps for a 3D World, a section in which we look at levels from a selection of 3D Super Mario titles through the lens of a design philosophy Koichi Hayashida discussed in an interview.
In brief, 3D Mario game levels in certain titles are designed around an introduction that lets a player learn a mechanic in a safe environment, further development that builds on what the player is learning and introduces more complicated aspects of a mechanic, a twist that adds some kind of significant wrinkle or challenge to force players to consider the mechanic from a new angle, and a conclusion which gives players one final satisfying chance to show they've mastered the mechanic. We look at 3D Mario levels and see if they conform to this model while trying to get some insight on how a good level is constructed.
This month, thanks to a suggestion from Waluigi Time (talk), we're finally tackling Super Mario Sunshine in this section. More specifically, we'll be focusing on one of its so-called "secret levels". For those unfamiliar, these are short platforming challenges which are accessed through one of Sunshine's main stages but are isolated from them. Rather than jumping around on tropical beaches, for these courses, Mario is whisked away to an assortment of blocks and floating platforms arranged into something of an obstacle course, and until the mission's Shine Sprite is collected, Mario must complete these courses without F.L.U.D.D.. Once the Shine Sprite has been collected, Mario can re-enter these secret levels with F.L.U.D.D. and will find a switch that challenges him to collect eight Red Coins in a certain amount of time.
We won't be taking on the Red Coin challenge today. Instead, we're going to look at this level as the obstacle course it's designed to be. For our first Sunshine secret level, I've chosen the course behind the Cliff Spring Cave in Bianco Hills' mission "The Secret of the Dirty Lake". To make the experience more authentic to an initial playthrough of the level, I decided not to use F.L.U.D.D. as I played (though I did stop and spray the clouds a bit for fun).
Now, Sunshine came before Hayashida was directing games (though he was a programmer on the game) and long before any interviews which discussed our four-step design philosophy. As such, I expected we wouldn't see our usual four steps, and, spoiler alert, I was right. We also don't exactly have true antepiece-setpiece pairs, though we do have a similar set-up where a stage mechanic will be introduced in an easier form and then repeated in a more challenging form.
My general impression of Super Mario Sunshine secret levels before today was that they're odd mishmashes of ideas. They're kitchen sink courses, I thought, with random platforming elements strewn around like a poorly-designed Mario Maker level. Only a few really had a core idea that they stuck to all the way, like the one in Gelato Beach's first level or Ricco Tower's course. After taking a look at one through the lens of this section... I still think that. Don't get me wrong. I think they're fun to play, and there are a few I really enjoy (Noki Bay takes the cake), but I don't know that they're... well-designed. They feel like the bare minimum for Mario platforming, competent and able to offer a few lesson-challenge pairs, but unfocused and unpolished. Would they really be remembered if not for the unique aspect of being forced to go it solo, that incredible a capella, and the glitchiness that plagues some of them? I'm doubtful.
With four blue panels at the start of the level, three lessons, two rotating cubes, and one weird end of level palm tree, this has been Four Steps for a 3D World. Come back next month for some Red Coins!
Just Shapes & Beats: The Groovy Guide
Played by Sparks on the Nintendo Switch
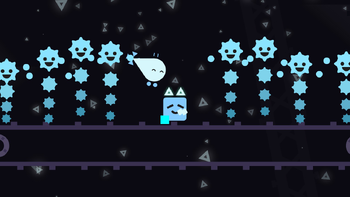
Happy New Year everybody, and welcome back to my very visually-appealing Just Shapes & Beats walkthrough! In the last issue, we had just defeated a random Triangle boss and gained access to the volcano, where we will purify and reclaim one of three "tree" triangles and restore peace and harmony to the world.
Volcano
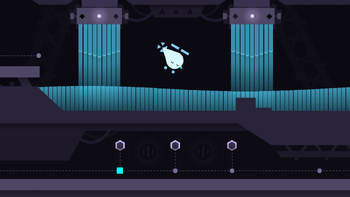
The interior of this volcano is very dark... shocking, right? I thought the lava inside would provide illumination but I guess not. We reach the first song of this world, "Dubwoofer Substep"
Dubwoofer Substep, by Omnitica
This stage has for checkpoints, making for five sections total.
In the first part, droplets of water fall in time to the music. They start out slow, but become a little faster later on. You can actually stay at the far left side to completely avoid everything! Near the end of this section, water will emerge from the bottom of the screen, and spikes fill the top of the screen.
The second section gets rid of the water droplets, but now the spikes break apart and fall in the water, causing splashes of water that thankfully don't deal any damage. The spikes themselves hurt though, so watch out!
When the third part starts, the spikes go away and a voice says "Because of the extreme amount of bass, listener's discretion is advised." Then, those large lasers will strike the water to the now-intense beat. These strikes will send waves across both sides of the screen, so be sure to stay away from the water. Smaller lasers will also appear around the screen, but they are small and won't cause much trouble.
In the fourth section, those small water droplets from the first part fall from the top before more large lasers strike the water. Between the strikes, smaller lasers will fill the left and right sides of the screen, so try to stay in the center. There will be times where two big lasers strike at the same time, causing the sent-out waves to combine into one huge wave in the center. This happens two times, and my advice is to get to the top of the screen right next to one of the lasers to avoid the wave. Near the end of this execution is a series lasers that "get" the players to move closer to the water before stage spikes return to the top of the screen.
The last part is basically the second section but with lasers involved now.
We've done it! The small triangle we obtain from this song lights up the mushrooms inside the volcano, giving us light to see our surroundings! To make progress, we must jump across rocks to reach our next level, Cheat Codes.
Cheat Codes, by Nitro Fun
This stage has three checkpoints, so there are four parts to it.
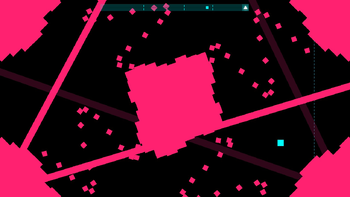
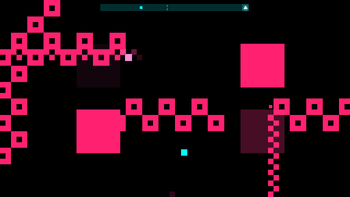
The song starts off with a square made up of smaller squares directly in the center of the screen. It shoots out small squares from its sides, but not from all of them. The direction the squares are fired at is indicated by the pink glowing side. The big square then disappears and two more appear on the left and right, firing out more squares to the music. These two then disappear and three more appear in the center, stacked. These ones only fire horizontally.
In the second section, the squares rush to the bottom of the screen, creating a "sea of squares" that fires small squares from five sections, one at a time. Not long into this part, spinning squares fly in from the right side of the screen, so try to stay towards the left. After more time, bombs appear and explode at the right side, shooting out tiny projectiles in many directions. The best thing to do is stay high and to the left!
The third section has everything disappear, as well as three squares appearing diagonally before disappearing. As the music builds up, more spinning squares fly in from the sides, disappearing when they reach the center of the screen. After enough squares, a big square appears in the center, shooting out squares from all four sides at once! Four more squares appear at the diagonals, and the main square in the center turns while shooting out more squares from all four of its sides. Additionally, lasers shoot to the music too! Sounds like a lot, right? Try to stay on the corners of the main square to dodge the projectiles.
The final part has a lot going on in a short time span, but I'll try my best. At the start, the square shoots out several lasers from it while the diagonal squares slowly scale the edges of the screen. The walls then become squares as a smaller square turns and shoots out smaller squares from the center. Afterwards, the large square returns, spinning quickly while shooting, so a well-timed dash is needed. Finally, the walls become squares again while a smaller square rotates and shoots from the center. Watching a video will give you a better idea of what happens.
Completion of this song gets us a raft to sail the corrupted water here. A nearby mushroom falls into the water, becoming corrupted itself. Yikes. We then reach an area where a happy flower watches from a cliff, but we have no way forward. Thankfully another song is here - "Clash".
Clash, by Trip40
This song has two checkpoints, so there are three parts.
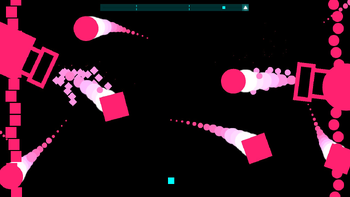
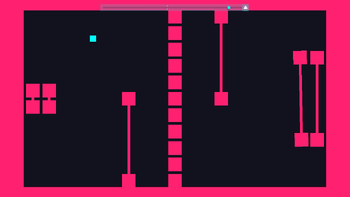
The first part of this song has squares and circles appearing before quickly disappearing to the beats. Squares appear on the left while circles are at the right. Eventually, a big square and circle appear at their respective sides, flying around. Try to stay in the center.
The second section has the sides becoming walls of squares and circles while more big shapes fly around. The walls will shoot out squares or circles to cover up one half of the screen. It's kinda like "Cheat Codes" except there's no warning and it's more chaotic. As the song goes on, more flying shapes appear. At the end of the section, the walls vanish and even more shapes fly around. It's pretty crazy, but staying at the very top or bottom of the screen will protect you, trust me!
The third and final part has the flying shapes disappearing before cannons emerge from the sides: a square cannon at the left, and a circle cannon on the right. They shoot their respective shapes to the music and angle their attacks after each shot. They will eventually move to different places after each shot too. Always be alert and try to find breathing room!
The triangle we obtain creates a two-level platform for us! When we jump aboard, the happy flower loses balance and falls into the corrupted water, becoming corrupted itself. It launches our new platform high up, and the water quickly rises with it.
Going up!
In this sequence, we must avoid attacks as we reach the top of the volcano. Stalactites fall from the top, the corrupted flower jumps from below, and sometimes it leaps in an arc, covering up more space. We must move across six spaces to survive. At three intervals, the corrupted flower creates waves, forcing us to move to the second level. There will eventually be falling spike falls that bypass the platform entirely, which must also be dodged. Don't worry! You don't have to get through all of this in one go; if you break apart, you will continue off at where you left off. Losing does not matter.
After getting through that, we finally reach the top! Unfortunately for us, the corrupted flower is still hot on our trail. We escape it by jumping upwards at the right time, and we're next to the corrupted tree triangle. The only way to purify it is by clearing the song it has - "Lycanthropy". Just when we are about to enter, the flower jumps into the stage with us, meaning that we will have to fight it.
Lycanthropy, by Cardi
At the start of the song, water emerges from the bottom of the screen and permanently stays there. The walls and ceiling suddenly gain spikes just before the corrupted flower pops up from the water, creating large waves horizontally. It then starts dancing around from atop the water's surface, creating small projectiles as it does so. The flower will eventually dive into the air and emerge as a head that bounces around the screen. Three more heads will then emerge to the music, one at a time, and bounce around as well. The walls will lose their spikes but the ceiling spikes will break apart and fall into the water, similar to "Dubwoofer Substep".
After some time, the heads will dive into the water and the ceiling spikes go away, but a large expressive corrupted flower emerges from the center of the water. It causes a trail of spike balls to arc over the flower before it jumps up and down twice, sending more spike ball trails and waves to its sides with each jump before disappearing. The ceiling spikes return before corrupted flowers leap from the water and explode like bombs, sending out projectiles all around them. The ceiling spikes disappear once again and the main corrupted flower descends from the sky and has more spike balls and lasers before standing atop the water once more.
In the final stretch, the flower dances in place while more exploding flowers jump from the water. Eventually, the main flower dances across the water while the ceiling spikes come back while more exploding flowers arrive. For one final attack, the flower jumps into the water to create more waves before the song ends.
By "defeating" the boss, we have purified the first tree triangle, even restoring the volcano, the sea and even the flowers affected! We land back on our trusty boat, where we chase down our drifting square friend into a pipe. Meanwhile, the big boss is rockin' out on his guitar at the top of his tower…
Industry
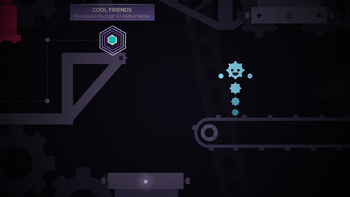
We have entered the Industry world, where smashers smash and gears spin to the metallic beat going on here. Of course, there are conveyor belts too, but they do their own thing… Anyway, our boat brings us onto solid ground, where we'll have to look for our lost square friend on foot. We jump from a spinning gear and avoid smashers to get to our first stage - "Cool Friends".
Cool Friends, by Silva Hound (Murtagh and Veschell Remix)
This song has two checkpoints, so there are three parts total.
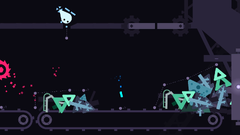
When the song starts, lasers strike at various places around the screen. Then, projectiles rise up from the bottom, followed by a conveyor belt. The stage then autoscrolls to the right while saws give pursuit from the left. The path ahead has pistons that strike outwards in either "+" or "X" formations and saws that move up and down. The best way to get through this part is to stay at the top of the screen. This will allow for an easier time when dodging everything.
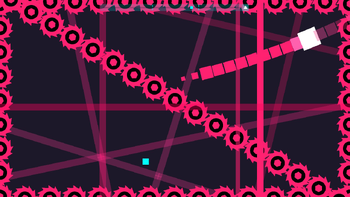
The second part removes all the current obstacles, stops the autoscrolling and covers the screen's edges in saws. We now must dodge lots of lasers, both small and large, as well as random square trails that fly in from the left. Midway through this section, a line of saws appears in the center and rotates counterclockwise, adding more craziness.
Everything disappears when the final part starts. Now, giant saws fall from the sky and roll across the bottom of the screen, sending lots of blocky projectiles into the air behind them. After four saws, the ground and ceiling become saws and a line of saws strikes and rotates from the right before attacking from the left, then right again. Lastly, the saws appear at the left, spinning super fast. The only way to avoid this is to stay on the far right side - they disappear before they can hit you!
The small triangle we obtain reverses the conveyor belt. Our sad square friend then falls from a pipe before tumbling into another. We jump onto the conveyor belt to chase after it, but we fall through a gap. We land in an area with more smashers, as well as three new songs to do: "Unlocked", "Spectra" and "The Lunar Whale". A tired helicopter is also present; it has nowhere to land due to the amount of water beneath it. We must shut off the water supply! Let's start with "Spectra".
Spectra, by Chipzel
This song has three checkpoints, making for a total of four parts.
The first section has several hexagons appearing before disappearing. Afterwards, triangles appear and expand in three directions, making large hexagon patterns that cover the screen. Smaller hexagons appear within these big ones before the large grows grow even bigger.
The second part involves autoscrolling while the hexagons quickly turn to the beat. We must dash across the hexagons and keep up. Some hexagons have obstacles inside, like lines and spikes. This isn't that hard, honestly.
The third section is similar to the previous one, but now rapidly-expanding hexagons can appear inside the large ones, so we must be alert and dash to safety when necessary.
In the last part, the screen stops autoscrolling, and now the center hexagon grows by a lot. Everything then quickly rotates, forcing us to stay in the center. Four lines of hexagons, one after the other, appear and slowly rotate in the center, so we have something to avoid until the song ends.
Clearing a song will reduce the water supply, so we must clear all of them to completely stop it. Up next is "Unlocked".
Unlocked, by Plesco
This song has one checkpoint, making for two sections total.
The first part of the song involves "checkerboard" square trails that fly in from all sides. Not long into this section, bigger but slower trails will appear, followed by big squares that appear in set positions on the screen. Before the second part starts, projectiles fly in from the right.
The second section has a square in the center of the screen that sends out checkerboard square trails from all four sides of it before it grows and sends out walls of squares that appear and disappear to the beat, "moving" away from the main square. After the walls reach a specific distance, checkerboard square trails fall and rise unexpectedly, making for a cheap attack if you aren't paying attention. This occurs four times before the song ends. Dash through the walls but be sure to stay at an edge of the screen to avoid the sudden attacks.
One more to go! That is "The Lunar Whale".
The Lunar Whale, by Danimal Cannon and Zef
This song has one checkpoint, making for a total of two parts. Honestly, this might be the worst level in the game. You'll find out why!
The first section has these grids of squares that appear at various places on the screen before expanding out, rotating before retracting and disappearing. There are a total of eight of these, one right after the other. Bombs accompany them, as well as projectiles midway through. That was easy, right? Now for the stupid part.
The second section starts off with the edges covered. Then, these walls appear and expand out of thin air before rushing off in the opposite direction without warning. Most of them appear from the right, but some are also from the left, so really be on guard and prepare to dash. A lot. If that wasn't bad enough, a wall gets put in the center midway through! You really have to see how stupid this is to believe it.
With these three small triangles obtained, the water is removed entirely, allowing for the helicopter to land! We now must reach it by using the gears. Unfortunately for us, one of them malfunctions and sends us flying off the screen. Thankfully, the helicopter notices and flies after us.
Helicopter to the rescue!
We crash into a wall and land on a conveyor belt. One that has saws at the end of it! We must rapidly rush away from the danger and navigate through the trash that comes our way. Luckily, a spring will launch us up to helicopter's grip, where it hugs us. Awww!
We now control the helicopter, and we must fly and navigate through the hazardous pink terrain, dodging dangers and such. We also witness flowers getting punched unconscious by a smasher before being grabbed by a claw. After more progress, we discover the second Tree Triangle being used as a corruption source to corrupt the flowers. We reach a landing point, but after we do, we see the sad square emerge from a pipe. It then gets grabbed by a claw, and the helicopter fights against it and saves the da- nope, the claw is too strong for our helicopter buddy. It drops the sad square on the conveyor belt, where the corrupted tree triangle corrupts it. Now we must save our friend in a boss battle.
Close to me, by Sabrepulse
When the song starts, the sad square tries to fight against the corruption, but it also cries tears of pinkness that fall down. Four sets of lasers stretch out from the square, one at a time. They all then grow, one at a time. After more dodging, the square becomes fully corrupted and gets claw hands. The lasers then disappear and the real thing starts.
The corrupted square lifts up the ground really high up, and saws appear at the top of each side. The boss then drops the ground and ground-pounds, sending a shockwave along the bottom as the saws fall. To dodge this attack, get as high up as you can, but make sure you don't touch the saws. When the ground is dropped, move out of the saws to avoid the saws. The square then fires lasers that rotate, so move along with them until they disappear.
Now, this boss does a sequence of attacks, all of which end with the lasers I mentioned earlier. There are three attacks it can do: the claw attack I also mentioned, a gear attack, and a saw attack. During the gear attack, the square rolls to the right before becoming a giant gear that rolls to the left. We must dash through this gear to dodge it. For the saw attack, the boss sends out four saws, one for each side of the boss, to the edges of the screen, where they will roll and send out slow projectiles. The boss can perform any one of these attacks.
After some attacks, the square falls to the ground, uncorrupted. It then crawls to the left, where it reaches out its hand while lasers fill the top of the screen and saws slowly creep up on the poor thing. A saw touches the boss, corrupting it again and resuming the battle. It performs the three attacks a few more times.
Afterwards, the square strikes all around it with its many tools before it grabs the edges of the screen to bring them closer to the boss before they get covered in saws. Everything then rotates while the boss shoots out slow projectiles. The rotations will then occur in the opposite direction, before the hazards disappear. The boss then performs a few more attacks before the song ends.
With the small triangle we obtained from this battle, we purify the second tree triangle! It then cures the sad square, reverting it back to normal while everyone celebrates. The square also picks up smaller triangles and uses them for cat ears, removing its tear under one of its eyes. However, we aren't finished yet! Corrupted flowers safe still a threat, and a few of them retreat to the tower, where the boss rocks out once more at the very top of.
Tune in next time to see the climactic conclusion to this adventure!
Killing the Killing Game Roles
Killing Games, first invented by the esteemed Fun With Despair (talk), are at this point a forum game staple of the Mario Boards. Mixing in elements of murder mystery games, social deduction/deception games like Mafia, and freeform roleplay experiences like Dungeons & Dragons, Killing Game has become a fan-favorite in our community, with sign-ups immediately swarmed and anticipation of the next one always around the corner.
It would be an understatement to call Killing Game a complex game. For its players, certainly – but for its hosts, it is a commitment that is hardly comparable in the forum game sphere. The host is responsible for crafting plots, characters, maps, and coherent murder mysteries all at once, and this mountain of game design can feel challenging to scale. One such element, and oftentimes the most important to consider, are player roles. Everyone in a Killing Game receives a role with its own unique set of abilities, strengths, and weaknesses. In its purest sense, the objective of player roles is to give every player their own individualized way to approach the game, while also balancing their abilities against the abilities of every other player. Sometimes, this works. Sometimes, this doesn’t. This is where I hope to help out.
Welcome to Killing the Killing Game Roles, with full name inspiration from TPG’s Killing the Killing Game special. This is a section where I’ll grab one of several miscellaneous player roles that have been seen on the Mario Boards and dissect them from a game design perspective, aiming to answer the following questions: how does a good Killing Game player role come about? How do elements like inventiveness, versatility, and player responsiveness work to generate a functional, fun powerset for the inheriting player? Though I will not tout myself as an “expert” in designing player roles, in my time both hosting and playing Killing Game, I feel like I’ve learned a thing or two. Through this section, I get to potentially help out any up-and-coming Killing Game hosts, and also gush about a game format I adore! Wahoo!
For this section, I’ll be focusing on roles only seen in the Mario Boards universe of Killing Games; offsite games, although no doubt with their own interesting roles, will not be analyzed here. For now, anyway – I might expand the scope later on. I’ll also be generally avoiding roles from Awards Randomizer Killing Game, since those were randomly rolled out of a pool of attributes – though I might talk about one or two if I find them interesting enough for this section. Finally, for reasons of personal disassociation with it, I will not be discussing roles from the first Awards Killing Game. I’m sure there’s something interesting to be learned there, but frankly, it’s better for everyone if AKG1’s memory were left behind.
That’s all the pretense! Let’s grab a role and get analyzing!
AKG4 - Ultimate Neocowboy
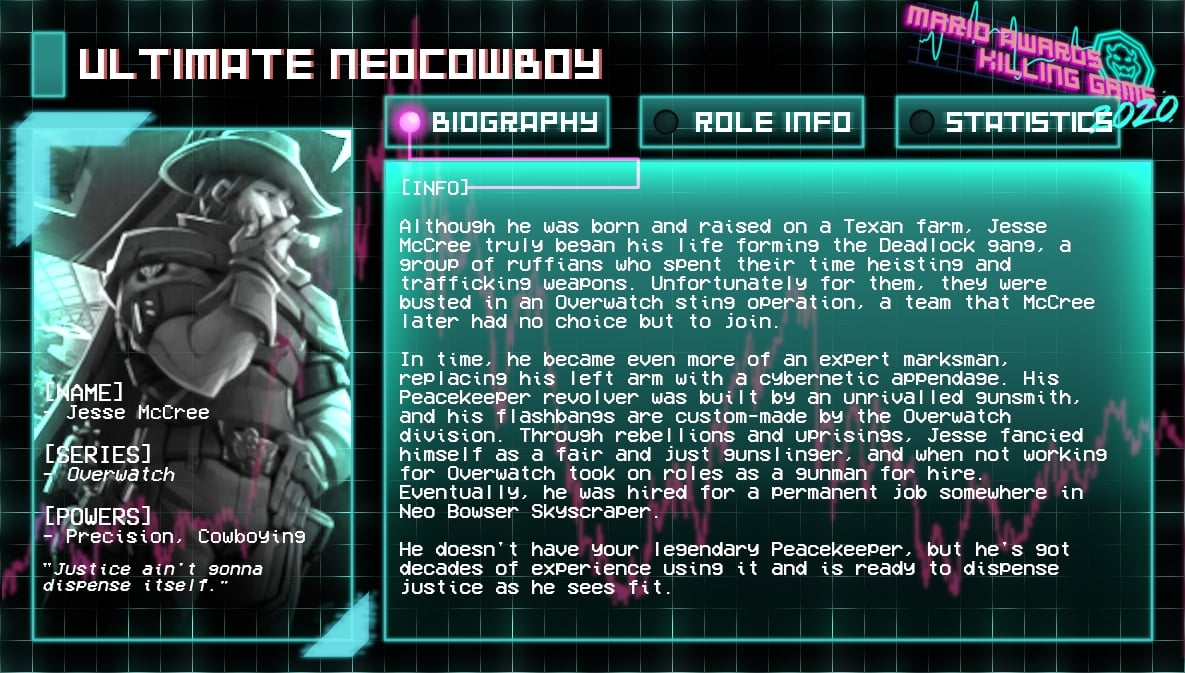
Card 1 - Biography
- [NAME] Jesse McCree
- [SERIES] Overwatch
- [POWERS] Precision, Cowboying
- Justice ain't gonna dispense itself.
Although he was born and raised on a Texan farm, Jesse McCree truly began his life forming the Deadlock gang, a group of ruffians who spent their time heisting and trafficking weapons. Unfortunately for them, they were busted in an Overwatch sting operation, a team that McCree later had no choice but to join.
In time, he became even more of an expert marksman, replacing his left arm with a cybernetic appendage. His Peacekeeper revolver was built by an unrivalled gunsmith, and his flashbangs are custom-made by the Overwatch division. Through rebellions and uprising, Jesse fancied himself as a fair and just gunslinger, and when not working for Overwatch took on roles as a gunman for hire. Eventually, he was hired for a permanent job somewhere in Neo Bowser Skyscraper.
He doesn't have your legendary Peacekeeper, but he's got decades of experience using it and is ready to dispense justice as he sees fit.
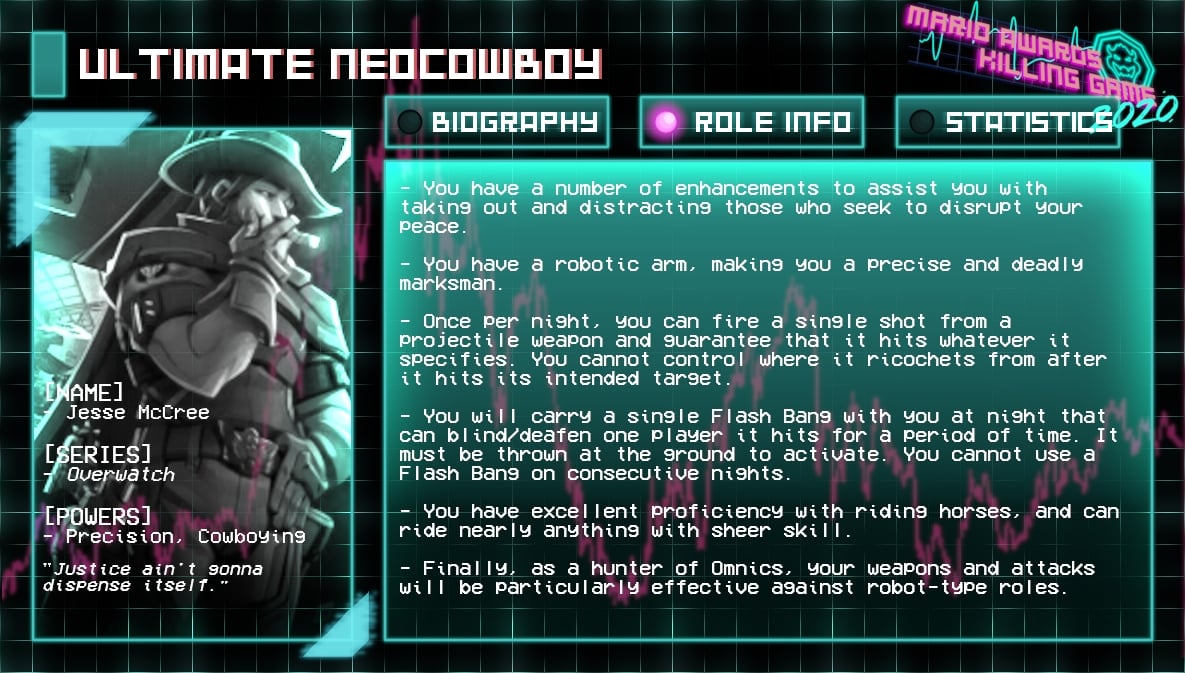
Card 2 - Role Info
- You have a number of enhancements to assist you with taking out and distracting those who seek to disrupt your peace.
- You have a robotic arm, making you a precise and deadly marksman.
- Once per night, you can fire a single shot from a projectile weapon and guarantee that it hits whatever it specifies. You cannot control where it ricochets from after it hits its intended target.
- You will carry a single Flash Bang with you at night that can blind/deafen one player it hits for a period of time. It must be thrown at the ground to activate. You cannot use a Flash Bang on consecutive nights.
- You have excellent proficiency with riding horses, and can ride nearly anything with sheer skill.
- Finally, as a hunter of Omnics, your weapons and attacks will be particularly effective against robot-type roles.
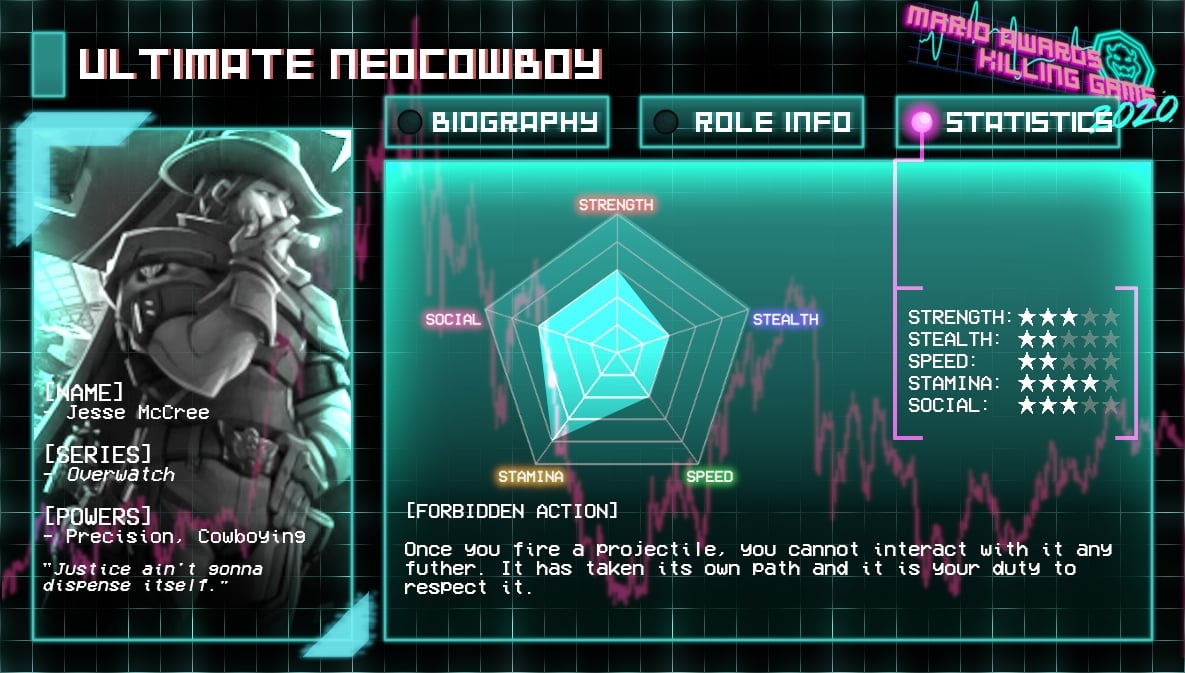
Card 3 - Statistics
- STRENGTH: 3/5
- STEALTH: 2/5
- SPEED: 2/5
- STAMINA: 4/5
- SOCIAL: 3/5
[FORBIDDEN ACTION]
Once you fire a projectile, you cannot interact with it any further. It has taken its own path and it is your duty to respect it.
That’s right, we’ll be starting out with a role I’ve carried before. I figured starting with one I was personally familiar with would help get the ball rolling in the writer's room. I utilized this role in Awards Killing Game 4: Deimos Matrix Corp, when I played as gunslinger Jake Marshall. I didn’t last too long in that game, though I made a real Ace Attorney case out of Day 3, if I do say so myself. Most of my kill attempt didn’t really involve my role at all, though, if you remove the convoluted seven layers of misdirect I went for. But enough about me specifically, what does this role offer its player?
General Overview
The Ultimate Neocowboy is based on the character now known as Cassidy from Overwatch, with a little Neo flair to match the aesthetics of AKG4. I would describe the Ultimate Neocowboy as a “general versatility” role. Though several roles in Killing Game have versatility in what abilities they provide, a number of them have this versatility channeled through a specific source. A spellcaster role, for instance, might have a number of spells they can cast, but they must have their spellbook with them to accomplish this. In contrast, the Ultimate Neocowboy does not require a specific object or action to utilize their versatile powerset; instead, their variety of skills are innately usable at any time. To counteract their relative availability, the abilities are not necessarily “stronger tier”. They have functionality, but they are not incredibly powerful like some other role powers can be.
This neutral “jack of all trades” versatility can also be seen in the Ultimate Neocowboy’s stat spread, which is not weighted in any direction too fiercely. The application of stats in actual Killing Game gameplay is its own conversation, but all that is to say, the Ultimate Neocowboy is a role without a fierce edge in one direction or another.
Ability Application
Now, let’s move step-by-step through the Neocowboy’s abilities and see what application they have in the game world itself. When discussing application, an element that becomes very important is clarity of the ability. How legible is the ability to the player receiving it, and how many applications can they conceive of from there?
The first point to stop at is the robotic arm. From a player perspective, I might be uncertain of what this means for my physical condition at night. Does this mean this arm cannot be harmed by regular means, and will I be fatally injured if I lose my arm? A simple line of clarification would make this part clearer, though I’d take part point to be more “flavor text” for the following ability than its own role power.
The meat and potatoes of the Ultimate Neocowboy is the trained marksman component, which crucially applies to any projectile weapon. This allows for much more versatility in how this ability can be used. If it was only a gun that had perfect aim, this role’s scope would be much more limited. With this framework, however, bow and arrows, crossbows, cannons, slingshots, all of these are realizable proficiencies. Theoretically, you might even be able to build your own projectile weapon; grab some rubber bands and some sticks, and you too can make a kitchen knife launcher. Additionally, there are a variety of contexts where a perfect aim can be beneficial. Your first thought might be to simply shoot someone for a kill attempt, which is certainly viable – but consider firing at a distance to trigger a trap, or getting a blow on an evil NPC character during an important fight, or just showing off if you really want to. A lot of flexibility here.
Next, we have the Flash Bangs. The Flash Bangs are only applicable to situations in which they may hit the ground – not that you’ll find yourself in many situations where the ground isn’t available to you. Still, you couldn’t activate one on a wall or a ceiling, for instance. However, an important application note is that the Flash Bangs are automatically refreshing, as opposed to requiring materials to make. A different version of this role would easily say “you can create Flash Bangs from metal parts you collect”, but instead player convenience is prioritized.
The following two abilities feel less inherently critical to the Neocowboy’s gameplan, and less defined in their aims. The ability to “ride nearly anything with sheer skill” is rather ill-articulated, I would say. Although the flexibility might seem good in theory, its application makes things uncertain. What counts as riding something? Does the object need to be horse-like, or just anything at all? What falls under the nearly anything clause? Can you ride a wave, like surfboarding? The application of this flexibility is pretty dependent on the game environment – which we’ll be looking at in just a minute.
Lastly, we have the strength against robot-type roles. There were a few roles in AKG4 that were labeled as robotic, but utilizing this part of the Ultimate Neocowboy efficiently requires learning who actually has one of those robotic roles, which is easier said than done. Also, the nature of stronger weapons and attacks isn’t necessarily clear either. I would take this to mean that, for instance, your Flash Bangs last longer on robots than nonrobots, but seeing that in practice might be challenging to grab. The idea of having the strength to punch a robot in the back of the head and knock them out is pretty fun, I’ll grant that.
Environmental Functionality
Environmental functionality refers here to the way that the role interacts with a theoretical map, and what a host should consider when trying to build synergy between a role and a map.
For instance, an environmental factor that is pretty obvious from the start: there needs to be projectile weaponry on the map somewhere for the Ultimate Neocowboy to use. Thankfully, Killing Games are never too short on projectile weapons, especially later games that have readily provided smaller handguns or similar weaponry from the start of the game. A host building this role might need to ask themselves what accessibility they want the Ultimate Neocowboy to have to these weapons. Are they keen on giving them an elephant rifle from day one, or should they need to work themselves up to larger weapons? The answer to this question depends on many factors – the strength of other player roles, the length of the game, etc.
The other major environmental consideration is things to ride. If the host is aiming for that part of the role to actually be utilized, there should be things to ride on the map. With this, you’d probably want your map size to be larger or more spacious to accommodate this. Having your Ultimate Neocowboy riding a motorcycle might seem awesome, but it probably becomes less awesome in a crammed castle corridor. Honestly, if the game this role was featured in was almost entirely inside and in narrow spaces, I would likely cut this aspect from the role altogether, unless I really encouraged my player to get creative with it.
Drawbacks & Balances
This section analyzes how this role maintains a balance of strengths and drawbacks, especially as we consider the ever-present Forbidden Action.
The main limiting factor of the Ultimate Neocowboy is an inability to pick up any projectile shot by them. Many roles in Killing Games have a Forbidden Action that result in an inability to obscure ability use. This is one such role, though this inability to obscure is less blatant than other roles that require you to clearly announce yourself what you did. A bullet can come from wherever, after all, and if your game has a lot of people running around with guns, this element becomes less detrimental to the role. This Forbidden Action also requires the player to be more clever with what weapon they’re utilizing; if everyone in the game has seen them use the gun with golden bullets, and then they use the gun with golden bullets in their kill, there’s no way to obscure what weapon was utilized. Overall, I’d say this Forbidden Action adds a smart check to the Neocowboy’s perfect aim, and its flavor fits the surrounding role text.
This is not the only limiting factor of the role, though. You only get one shot with perfect aim a night – a natural way to ensure that the player is considerate about when and how to use their role ability. Also, a singular Flash Bang is only accessible every other night, though this limitation feels less critical to me if your game has a large number of other role abilities at play. Especially with how Flash Bangs are, in my opinion, more readily defensive tools than offensive tools, I don’t think it hurts the role to have one available every night. Despite this, it’s not a huge knock against the role to only have them available every other night either. The Ultimate Neocowboy player is likely to be focusing on how to utilize that perfect shot, so Flash Bangs are not as critical to their game plan.
Player Responsibility
This portion identifies how much commitment a player needs to the overall game or their role to see strong returns from their role. This becomes much more prevalent in roles that are lore-related, associated with a faction, or require focused action to unlock their fullest potential. Here, I’d say the Ultimate Neocowboy is pretty accessible. Its set of abilities are easy to parse, understand, and utilize. Just about any player would have a clear sense of what their goals are, and the role itself does not require strong commitment to unlock its full potential. Really, you mostly have one, maybe two smaller powers to account for a night, easy breezy. Perhaps if the player is really interested in eradicating robots, this role requires more focus, but that is a choice the player themselves would have to intentionally shoulder; it isn't inherent to the role itself.
Host Responsibility
This portion looks at what the host is placing on their shoulders by introducing this role into the game. Do they need to keep careful notes of player action, available resources, or unlock criteria? This is another instance in which the Ultimate Neocowboy is pretty accessible to its host. The most a host would have to watch out for is that the perfect shot only happens once – which is remarkably easy – and that the Flash Bang was not used the previous night. If you’re really adverse to keeping track of any ability usage during the night, maybe the Flash Bang will become an annoyance, but if you feel that adverse to the idea, hosting Killing Game likely isn’t best for you. All in all, this is the kind of role a host can drop into the game and trust the player to take into their own hands, without needing to have any kind of focused feedback loop with the player.
Overall Thoughts
The Ultimate Neocowboy is a middle-of-the-road role in many respects. It does not have a particularly overpowering edge to its abilities, while having plenty of availability in what it can accomplish. Though this means that its strengths are not monumental, it also means that both player and host alike would be able to engage with it fully. I would recommend roles like this exist in any game. It allows for newer players to have a simple entrypoint to role powers; a newer host would be easily able to maintain it; and oftentimes a Killing Game needs more “mundane” roles like this to offset the more out-there or niche role concepts that regularly come about. General versatility roles are good for the health of the game, and the Ultimate Neocowboy demonstrates a streamlined way to pull one together around a central concept – the perfect aim.
That’s all for this month. Tune in next month for more Killing Game goodness!
Pitohui's Pokémon Academy
Written by: Hooded Pitohui (talk)
Welcome back from your holiday break, class. I'll take for granted that everyone took care, yes? Excellent. Now, as you may know, on the 29th of January this year, we will enter, according to the Chinese zodiac, the year of the snake. You may be familiar with a variety of serpentine Pokémon, such as Silicobra, Ekans, Seviper, Snivy, Onix, or Dunsparce. Despite sharing many similar characteristics and a body plan, there are many unique traits which serve to distinguish these Pokémon and their evolutions from one another. In honor of this year, I thought we might select one of these Pokémon lines for a case study, familiarizing ourselves with its unique features. Do your best to temper any intimidation you might feel, as today, we are going to raise an Arbok.
Before we get into the lesson, for those of you just joining us, you can find our course policies and aims in the first box below and a refresher on frequently-used terms in the second box. By all means, skip them if you're already familiar with what we do here!
First, a Smogon University course, this course is not. No, this academy's lessons are designed to get trainers of any stripe thinking about how they can raise their Pokémon, and, as a result, aren't designed to keep up with the widely-accepted metagame for the series. In some cases, the way I've raised my Pokémon may even flies in the face of conventional wisdom. If you're looking for top-tier strategies, do check out Smogon, but if you merely want to get a little deeper into raising Pokémon while still doing things your own way, feel free to use this section as a reference.
Since we all know the importance of citing our sources, I also need to credit the design of some of the tables used in these lectures to Crocodile Dippy, author of the Pocket Handbook which can be found in early editions of Strategy Wing. Additionally, I'd like to give nod to the Bulbagarden Archives, the source of many images in this section.Base Stats: Base stats are the values associated with a particular Pokémon species, and are the same across every individual Pokémon of a given species. You have no influence on them. You can think of them as traits tied to a species. A chimp isn't ever going to be able to get as good as digging as a mole will be, and, likewise, an Abra is never going to have the defensive prowess a Shuckle has.
Individual Values (IVs): Individual values, as their name implies, are associated with individual Pokémon. They range from 0 to 31 in each stat, with 31 being considered a "perfect" IV and higher numbers corresponding to different stats. Magikarp A and Magikarp B will have the same base stats, but they may very well have different IVs. To stick with the animal analogy, one mole may be born with larger claws than another mole, and that first mole is probably going to have an easier time digging through dirt than the latter. Individual values are set in stone, strictly speaking, but you can use Hyper Training (from Generation VII onwards) to functionally get a perfect IV in a stat.
Effort Values (EVs): Effort values are the one thing you can easily change. A Pokémon can earn, primarily through battling, but also through means like the use of certain items or mechanics like Super Training, up to a total of 510 effort values, with up to 252 in any given stat. To finish off the animal analogy, no matter what kind of claws a mole is born with, moles who have more experience digging are probably going to be better at digging than moles which have never dug.
Nature: A Pokémon's nature is, more or a less, a stat modifier with a name meant to make it sound like a Pokémon has some personality. Natures will raise one stat by ten percent and lower another stat by ten percent. Some natures raise and lower the same stat, canceling out the effect and leaving stats unchanged. Natures can be functionally changed with the use of special mint items from Generation VIII onwards.
STAB: STAB stands for Same-Type Attack Bonus, and refers to the boosted power of moves that match the type of the move's user. To illustrate this, consider the case of a Lombre, a dual-type Pokémon which is both a Water-type and a Grass-type. Any Water-type moves Lombre uses will have their power boosted by 1.5x, and any Grass-type moves Lombre uses will, likewise, have their power boosted by 1.5x. (There are circumstances where this does not apply, and, while the 1.5x multiplier is typical, some games use other multipliers.)
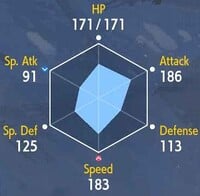
Moving right into base stats, we can see that Arbok's best stats are its attack and speed, with special defense just shy of being on par with speed and everything else middling. There's no question of what to do here. We may as well invest maximally in Arbok's two highest stats and plan on equipping it to strike with great power quickly. We'll put slightly more emphasis on speed over attack because all the attacking force in the world will do Arbok no good if its opponent knocks it out before it has a chance to act. With that in mind, and for reasons I will elaborate on when we construct a moveset, we'll pick a Jolly nature to raise speed.

|
Name: | Arbok | Base HP: | 60 | |
| Category: | Cobra | Base Attack: | 95 | ||
| Type: | Poison | Base Defense: | 69 | ||
| Abilities: | Intimidate | Base Special Attack: | 65 | ||
| Shed Skin | Base Special Defense: | 79 | |||
| Unnerve | Base Speed: | 80 | |||
With stats settled, we can move next into abilities, of which Arbok has three options. None of these abilities are poor choices in isolation, but there is a clear winner among them, and that is Intimidate. Lowering an opponent's attack upon entering the battle is quite useful, potentially disrupting an opponent's strategy (at the very least, it will draw it out longer and give you more time to counter) and helping to somewhat offset Arbok's poor physical defense. You'll find it quite handy should you encounter an opponent who you know will be setting up an attack boost, as you can simply switch in Arbok to cause them trouble.
If you don't go with Intimidate, you may consider Shed Skin. While not the most reliable ability out there, dispelling status conditions is a valuable service, and it can come in handy for freeing Arbok up if it gets burned or paralyzed. After all, with its stat spread, having its speed or physical attack reduced is dire for Arbok! You may also be able to get some experimental uses out of Shed Skin, if you're inclined to get creative.
Unnerve isn't the worst ability, but Arbok benefits much more from its other abilities, so I suggest avoiding it.
With an ability selected, we now turn to constructing a moveset, and we will get underway in the same manner as always. We must find a suitable STAB move, which means we are looking at physical Poison-type moves. Discarding anything with a base power below 70, we can choose from either Poison Jab or Gunk Shot. This is a classic case of a power versus accuracy tradeoff. If you value reliability, as I do, select Poison Jab. If you are comfortable with the occasional missed attack and would prefer Arbok has more KO potential, then select Gunk Shot.
Next, we need a coverage move. I insist upon it in this case, because without a coverage move, Arbok could be left helpless against Steel-types. There are a few options here you might consider. The ever-consistent Earthquake is not a terrible option for Arbok, allowing it to hit Steel-types supereffectively and hitting both Psychic-types and Ground-types neutrally. You won't be doing yourself any disfavors by choosing it. As for other options, Leech Life may seem tempting as a recovery option which hits Psychic-types supereffectively, but consider that Steel-types resist it. No, what I recommend here is a Dark-type move. Crunch, Knock Off, Lash Out, Throat Chop, and Sucker Punch are all viable options here, though I'd put Throat Chop at the bottom of the list for being less powerful than Crunch and more niche in its effects than any of the others. I'd rate Lash Out as a little less reliable than the others, as well, though if its effect triggers, it is quite powerful, so unlike Throat Chop, I would not take it out of consideration altogether.
All of that taken into consideration, I recommend choosing between Crunch, Knock Off, and Sucker Punch, or perhaps even swapping between the three depending on your needs. Nobody said a Pokémon's moveset was permanent, after all! Factor in the rest of the team you plan to use and what you commonly encounter in battle. Note, though, that Sucker Punch is acquired through breeding, so you will need a Mirror Herb if you plan to swap another move out for it. Myself, I've chosen Crunch in a bid for higher attack power over utility, as I've packed some utility into my next two move selections.
| Poison Jab | 
|
The target is stabbed with a tentacle, an arm, or the like steeped in poison. This may also poison the target. |
| Crunch | 
|
The user crunches up the target with sharp fangs. This may also lower the target's Defense stat. |
| Dragon Tail | 
|
The target is knocked away, and a different Pokémon is dragged out. In the wild, this ends a battle against a single Pokémon. |
| Glare | The user intimidates the target with the pattern on its belly to cause paralysis. |
From this point onward, rather than focusing on power, you might say we are preparing Arbok to cause trouble for its opponents, which is a part of the reason we opted for a Jolly nature over an attack-boosting nature. Our emphasis here is not entirely attacking power! In fact, rather, you could make double that assertion, as we are devoting two moves to the purpose of causing trouble. You'll recall that one of the boons of Intimidate is its ability to disrupt opponents who plan to raise their attack. Let's take that notion a step further and disrupt opponents that rely upon raising any of their stats. There are two arrows in our metaphorical quiver from which we may choose - Dragon Tail and Haze. Dragon Tail's benefits are that it deals damage and forces the opposing Pokémon to switch out, making it extra disruptive and capitalizing on Arbok's attack, but it is a lowered priority move, so Arbok will almost invariably move after its opponent and our speed investment is slightly devalued. On the other hand, Haze will take advantage of Arbok's speed and can reset the stat changes of all Pokémon on the field.
Here, you should make your decision by factoring in both format and your comfort when it comes to predicting your opponent's moves. If you're planning on using Arbok in double battles, Haze carries more weight, as it can dispel the stat boosts of both opponents at once and restore the stats of both of your Pokémon at once, though you need to take care not to dispel your own positive stat changes! In a single battle format, I would lean Dragon Tail over Haze if you feel you can reasonably predict when your opponent will use a stat-boosting move. If you can predict it, you can immediately disrupt their strategy on multiple levels. Though if you err in your prediction, you risk Arbok taking a hit before it forces a switchout. With Haze, you only get one layer of disruption, but you have a chance of moving first and dispelling any stat boosts to help Arbok weather any incoming attack. I'm fairly confident, so I will go with Dragon Tail.
Finally, for a fourth move, I have selected Glare. Should Arbok's glare be able to catch an opponent that is switching in, paralysis will slow them and occasionally prevent them from moving. Those are both great boons for Arbok, which will have the opportunity to wallop them, and they can cause great trouble for speed-focused strategies in general.
You will notice, at this point, that I've left off the highly-recommended Coil, and, that's purposeful. I wanted an Arbok that could create problems for an opponent as much as an Arbok which could hit hard, and there are only four move slots to work with! As I emphasized elsewhere in this section, however, movesets are not set in stone, so experiment and refine your selection of moves! You do not need to do what I do one-to-one, and even if you do, there's no prohibition on changing it later.
In fact, that is your homework for this month. Go on and design two movesets for Arbok, try them both, compare the outcomes, and see which suits you better! I shall look forward with great eagerness to hearing you report your results at our next session.
An Octet Gazette
Written by: Museful Traveler (talk)
Welcome back to An Octet Gazette, readers of The 'Shroom! We're continuing on with the secret jobs of the two games. Unlike last month, the two jobs we're covering today aren't clear-cut counterparts to each other, so we'll be looking at them in isolation rather than trying to draw any lines of comparison.
Masters of Magic
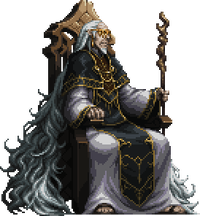
This month, we're looking at the Sorcerer job, which gets to wield two weapons (quite the step down from last month), those being staves and bows.
It's clear what role the Sorcerer job is meant to serve. Where the Warmaster wielded every weapon type, the Sorcerer wields every elemental magic, and just as the Warmaster hit hard physically, the Sorcerer has high elemental attack. Almost all of the skills the job possesses are oriented around maximizing elemental damage.
Becoming a sorcerer does not come easily, however. To obtain the job, the god Dreisang must be defeated in the Shrine of the Archmagus in the East Duskbarrow Trail. Once obtained, the job offers the following skills, with most locked behind the usual JP cost:
Like last month, I'm not going to stretch this out by going into detail on every single one of these skills. You can see get the gist from the table. The Sorcerer has every element in one job and hits with any given element three times in one attack, outdoing the Scholar's two times per one attack. It comes with a higher SP cost, of course, though that is somewhat offset by the job giving a bonus to SP.
There are a couple of other skills here, though. Elemental Break actually uses a weapon, but it's honestly mostly there in service of further boosting the damage output of the elemental skills. Of course, since it's a debuff on an enemy, other magic-users in the party benefit from it, as well. Dreisang's Spell is the Divine Skill of the lot here, and it's... not that useful, honestly. Not only is it costly in terms of SP, but as a Divine Skill, it takes three BP to use, BP that you'll then need to build or raise back up if you want to get the highest damage possible from those critical hits. It does fit with the job's goal of hitting as hard as possible with magic, but it's too costly in terms of time and resources to be useful.
That all but covers the Sorcerer job. As I said, it's another one with a straightforward concept. Now, you may remember two skills from the Scholar job in Octopath Traveler II which we discussed in the first edition of this section. Advanced Magic boosted the Scholar's three elemental attacks to their second-tier forms, condensing the Scholar's list of spells from the first game. Alephan's Wisdom boosted them to their third-tier forms, causing them to hit three times and even giving them new names like Ignis Ardere... Tonitrus Canrere, and... Glacies Claudere... Yes, in the sequel, the Sorcerer's repertoire was folded into this new system built upon Alephan's Wisdom, though it was carved up a bit, and not every Sorcerer elemental skill made the transition. We'll touch on that a bit more when we get to another job. For now, it serves you well enough to know that the role of the Sorcerer was subsumed in the sequel.
As such, we have an entirely different type of job to look at in the second game, so let's get to the lab and see what awaits!
Sufficiently Advanced Technology
The Inventor job in the second game is unique even among its peers, requiring no JP and no SP, but its skills must be unlocked in a peculiar fashion and it has unique mechanics in battles. To begin with the familiar, though, here are the weapons that the Inventor job can wield:
So how is this job obtained? Well, it's quite simple. All you must do is speak with the inventor Arkar in his house just a short ways outside of New Delsta. He provides the job and beseeches the party to take a look at his planned inventions. Inspecting the empty displays in his home will reveal the name of each invention and the materials required to craft it. This is important, because, despite having no JP costs, the job, like all others, begins with only its first two skills unlocked. To unlock the others, the party must craft the corresponding invention.
Arkar himself can be found early in the game, but the materials required for his inventions are spread all across the map, with a number found in late-game areas. Some of the materials found in late-game areas can be acquired earlier, but acquiring them is a matter of dueling powerful NPCs or succeeding in thefts with remarkably poor odds. A few materials, you may have to seek out, though most of them can be uncovered with simple thorough exploration as you go through the stories.
The job is a balanced, supportive one, with modest boosts to every stat except HP and SP and a mixture of offensive options, buffing options, and even healing. No skill for this job requires SP, though the Divine Skill still requires BP, and there is a cost of a sort. Once a given Inventor skill is used in a battle, a turn counter appears next to that skill in the battle menu. The skill cannot be used again until this counter reaches zero, and this counter will not begin to tick down until the skill is selected again, which uses up an action to begin re-crafting the invention. So, the flow is that you use a skill, you select it again to begin crafting it, you wait until its turn counter hits zero, and then you can use the skill again. All but the Changeable Catapult (one turn) and Springy Boots (two turns) require three turns to craft.
It's a simple system in practice and is best experienced, so, with that established, let's take a look at the skills in detail.
Let's divide these up into categories for discussion, shall we?
There are three offensive options here, two buffing options, two healing options, and then the All-Purpose Tool. Of the three offensive options, it's not difficult to see the all-roundedness of the Inventor job in Changeable Catapult and Elemental Bomb Bottle, which grant access to every type of weapon and every element, albeit in different ways. Changeable Catapult gives you the choice of weapon, but you can only use one at a time. Elemental Bomb Bottle instead runs off a selected enemy's revealed weaknesses, and will hit them once for every revealed elemental weakness. That is to say, if an enemy if weak to Ice and Dark magic, it'll be hit twice, once for Ice and once for Dark. If it's weak to those two and Wind, you can add a third strike which will be, you guessed it, wind. This can be great for breaking enemies. Hastening Hammer, the final offensive option, trades flexibility for a boost to the job's gimmick, reducing the wait for another invention a little bit. It's worth noting that Hastening Hammer affects the invention you must recently began re-crafting.
Critical Scope and Springy Boots are the two buffing options, and, for the most part, they do exactly what their descriptions say. Just remember with Springy Boots that enemies recovering from being broken will still move before anyone else! Springy Boots is quite useful, and Critical Scope... I used it very occasionally.
Our two healing options are Tin Horn, which fills the Latent Power gauges of the whole party, and Arkar's Coil, which can revive allies and will restore both their HP and SP by a set percentage-based amount (the percentage can be increased by Boosting). Arkar's coil further offers BP. These two are great skills which are extremely useful in a pinch.
Finally, you have the All-Purpose Tool, which is... alright. You won't use it often, because it mostly sees use in longer battles, but it certainly does speed up the process of repairing the other inventions. Getting to bypass spending turns on setting them all to be crafted again is a boon, as is having their turn counters ticking down in parallel.
The Inventor job is perhaps my favorite secret job in Octopath II for what it represents. You can see that the developers, having condensed the jobs of the first game down a bit and reshuffled them and having made some room for new jobs, decided to get experimental and make something mechanically unique. While the Sorcerer job is sufficient in its role, I set it against the Inventor job to demonstrate the different design sensibilities behind the secret jobs in the two games. In the first game, you get a simple concept like "more powerful magic user", while in the second game, you get a job unlike any of the others.
Support Skills
| Name | Effect |
|---|---|
| Intimidation | Gain a 25% chance to reduce the physical and elemental attack of foes at the start of a battle |
| Stronger Strikes | Do more damage when using a weapon or element a foe is weak to |
| Elemental Aid | Elemental attacks do more damage, but require twice the SP |
| Augmented Elements | Elemental attacks do more damage |
There is a clear theme here. Aside from Intimidation, which I imagine is there to shore up the (presumably weak) defenses of a high-damage output traveler, all of these Support Skills serve to make the Sorcerer's elemental attacks more powerful. Ah, this truly is the "more powerful magic" job, isn't it?
| Name | Effect |
|---|---|
| A Step Ahead | The traveler with this equipped will move first at the start of battle |
| Upgraded Accessories | The effects of equipped accessories are boosted by 50% |
| BP in Adversity | When low on health, receive two BP |
| Fruits of Labor | Gain a point of defense and elemental defense for every job skill learned by the equipping traveler |
On the other hand, the well-rounded Inventor job is all over the place. A Step Ahead is neat to me, because it's somewhat like a one-time free use of Springy Boots, and I like the connection between the skill and Support Skill there. BP in Adversity is a straightforward one, but I also wonder if it's meant to synergize with Arkar's Coil. Low on health? Take the two free BP and Boost Arkar's Coil for some great healing. I can also see it pairing well with the All-Purpose Tool. If you're low on health in a long battle, it's likely you've exhausted the other Inventor Skills, so getting two extra BP so you're nearly there to being able to use the All-Purpose Tool again could be a big help.
Upgraded Accessories is a bit of an oddball, and I don't imagine it being that useful, but I suppose it befits a mechanically-unique job to have some unique Support Skills. Fruits of Labor is certainly a unique one, and it's neat that it encourages unlocking as many skills across as many jobs as possible on one traveler. I'm not certain if it counts the default skills for each job or not, but if you unlock every skill for every job, that's either 72 or 96 additional points in two stats, which isn't a bad increase. I suspect there are more efficient ways to obtain a comparable increase that don't take up a Support Skill slot, but even so, the idea is fun.
Now you've seen a job focused on doing one thing extremely well and another that does a little bit of everything, and I hope looking at both of them revealed something about the differences in how the secret jobs in the two games are constructed. Next month, we'll look at another two secret jobs! See you then!
| The 'Shroom: Issue 214 | |
|---|---|
| Staff sections | Staff Notes • The 'Shroom Spotlight • Poochy's Picks • Directorial Address • Credits |
| Features | Fake News • Fun Stuff • Palette Swap • Pipe Plaza • Critic Corner • Strategy Wing |


