User:List of hidden blocks in Paper Mario: Color Splash
- This page is about the visible ? Blocks from Paper Mario: Color Splash. For the hidden ones from same game, see List of hidden blocks in Paper Mario: Color Splash.
This is a list of ? Blocks from Paper Mario: Color Splash. There are 238 visible ? Blocks in the game. They mostly contain Battle Cards or Coins, with occasional paint related-items (globs of paint in Sunglow Ridge or 1-Up Mushrooms in Green Energy Plant). Some of them are also disguised as Brick Blocks.
Port Prisma, Dark Bloo Inn, Cobalt Base and all Roshambo Temples are the only locations without any visible ? Block.
Also, Mario can only collect the content of the block on the airship in The Crimson Tower once, because after the the self-destruct button is hammered and airship explodes, this block can no longer be accessed.
| Red Big Paint Star | Ruddy Road • Cherry Lake • Indigo Underground • Bloo Bay Beach • Daffodil Peak • The Crimson Tower |
| Yellow Big Paint Star | Sunglow Ridge • Château Chanterelle • Mondo Woods • Marmalade Valley • Kiwano Temple • The Golden Coliseum |
| Blue Big Paint Star | Plum Park • Violet Passage • Sacred Forest • Fort Cobalt |
| Purple Big Paint Star | Vortex Island • Lighthouse Island • Fortune Island |
| Orange Big Paint Star | Mustard Café • Tangerino Grill • Toad Trainworks • Sunset Express |
| Green Big Paint Star | Redpepper Volcano • Redpepper Crater • Green Energy Plant • Mossrock Theater • The Emerald Circus |
| Black Bowser's Castle | Black Bowser's Castle |
? Block locations
Red Big Paint Star | |||
| Template:Color-link |  Hammer (colorless) |
In the first scene, right after the first bridge. | 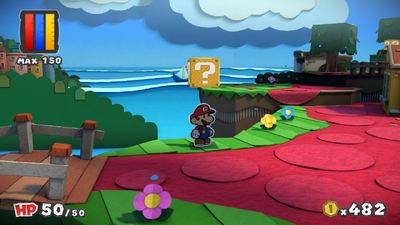
|
| Ruddy Road |     Coin (all 4) |
Same scene, to the right of the house. | 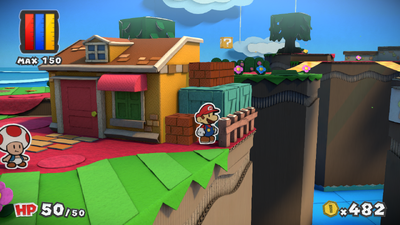
|
| Ruddy Road |  Coin |
In the secret scene behind the house. | 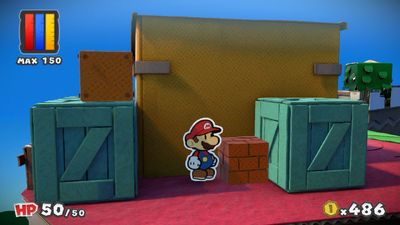
|
| Ruddy Road |  Worn-Out Jump x3 (colorless) |
In the first scene, before the second bridge. | 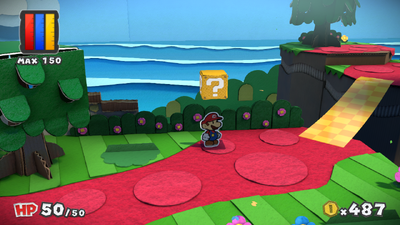
|
| Ruddy Road |  Worn-Out Hammer x3 (colorless) |
Same scene, in the west of the part after the third bridge. | 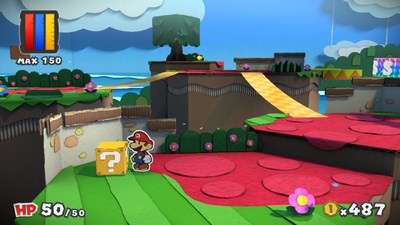
|
| Ruddy Road |  Worn-Out Jump x3 (colorless) |
In the third scene (northeast of the first scene), near the entrance. | 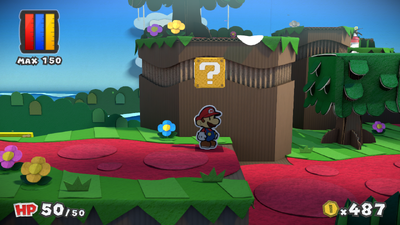
|
| Ruddy Road |  Jump (colorless) |
In the second scene (southeast of the first scene), before the upper bridge, found in the east of the scene. | 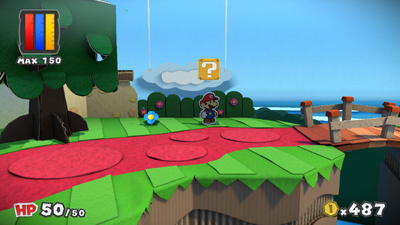
|
| Template:Color-link |   Coin (both) |
In the first scene, right of the gate. | 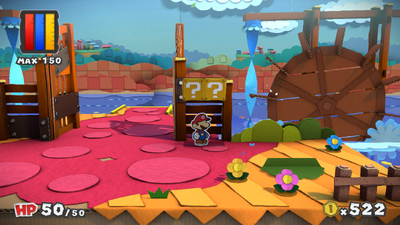
|
| Cherry Lake |  Worn-Out Jump x3 (colorless) |
In the second scene, right of the second tree. | 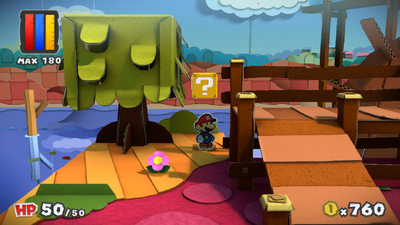
|
| Cherry Lake |  Hopslipper (colorless) |
Same scene, on the walkway between two water wheels. | 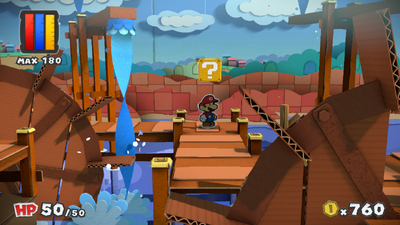
|
| Cherry Lake |  Worn-Out Jump x3 |
In the third scene, between the first tree and the water wheel. | 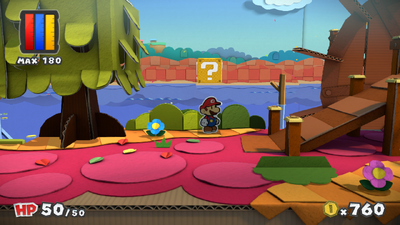
|
| Cherry Lake |  KO Hammer (colorless) |
Same scene, on the first walkway behind the water wheel. | 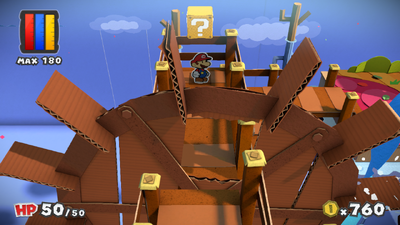
|
| Cherry Lake |  Jump (colorless) |
Same scene, at the start of the second walkway. | 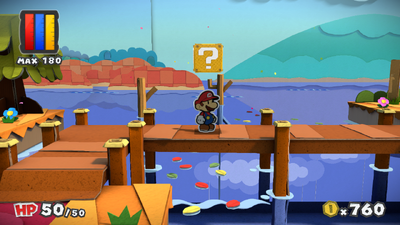
|
| Cherry Lake |  KO Hammer |
Same scene, near the southeastern exit. Need to be painted first to access the content inside. | 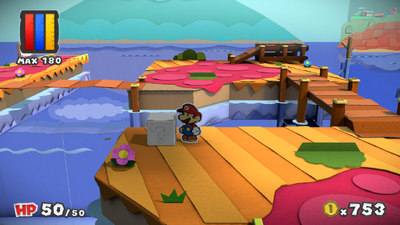
|
| Cherry Lake |  Worn-Out Hammer x3 (colorless) |
In the fourth scene, in front of the first water wheel. | 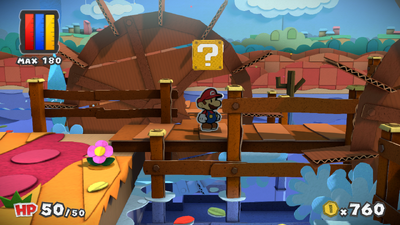
|
| Cherry Lake |  Worn-Out Hammer x3 (colorless) |
In the fifth scene, in the east of the upper part. | 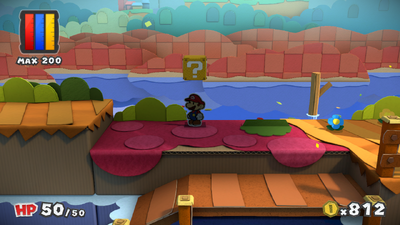
|
| Cherry Lake |  Mushroom |
Same scene, in the west of the upper part. | 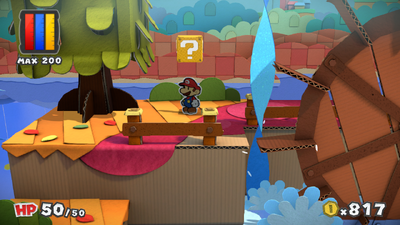
|
| Template:Color-link |  Spike Helmet |
In the first scene, right after the first rising block. | 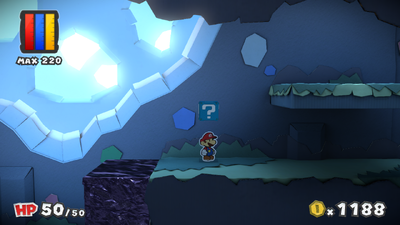
|
| Indigo Underground |  Jump (colorless) |
In the second scene, in front of the entrance. | 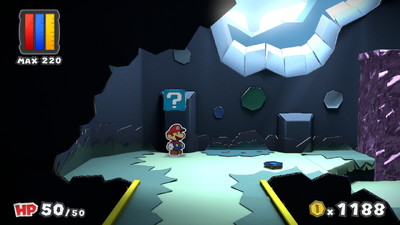
|
| Indigo Underground |  Hammer (colorless) |
Same scene, in the lower part of the scene, right of the rising block. | 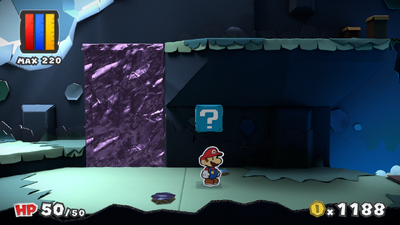
|
| Indigo Underground |  Line Jump (colorless) |
Same scene, in the lower part of the scene, between two waterfalls. | 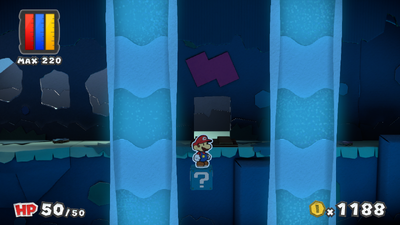
|
| Indigo Underground |   Fire Flower (colorless), Heart |
In the third scene, in the lower part of the scene, right after the slope. | 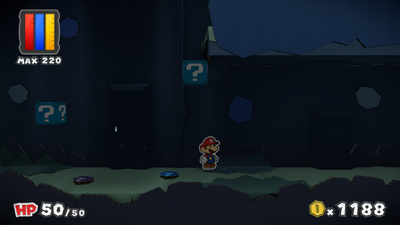
|
| Template:Color-link |  Line Jump (colorless) |
In the first scene, in the north. | 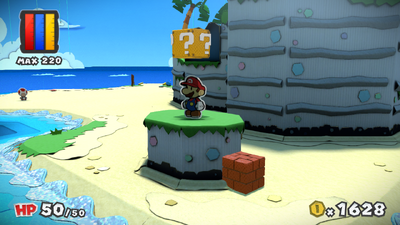
|
| Bloo Bay Beach |  Worn-Out Jump x3 (colorless) |
Same scene, in the south of the rocky cliff accessed by the cave found in the north of the scene. | 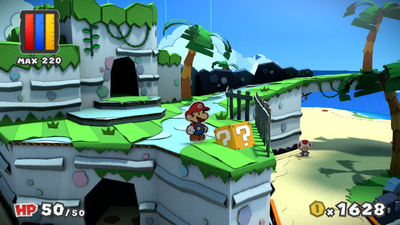
|
| Bloo Bay Beach |  Hopslipper (colorless) |
In the second scene, right of the entrance. | 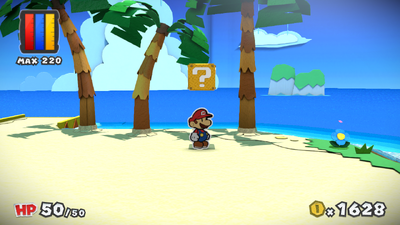
|
| Bloo Bay Beach |  KO Hammer (colorless) |
Same scene, in the very west of the scene. | 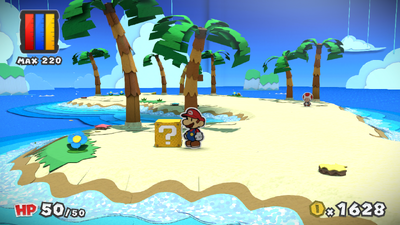
|
| Bloo Bay Beach |  Line Jump (colorless) |
Same scene, in the southwest of the scene. | 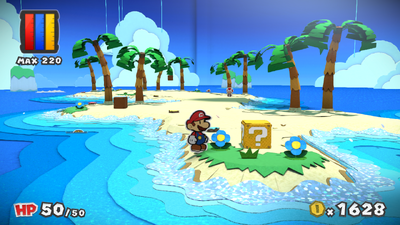
|
| Bloo Bay Beach |  Eekhammer |
In the fourth scene, in the very east of the scene, above the stairs created by painting a semi-invisible first stair. | 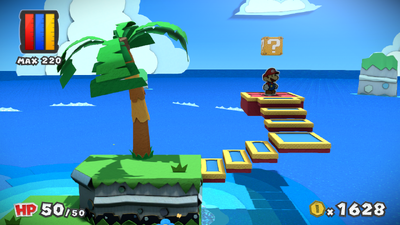
|
| Template:Color-link |  Hammer (colorless) |
In the third scene, in the middle of the lowest part. | 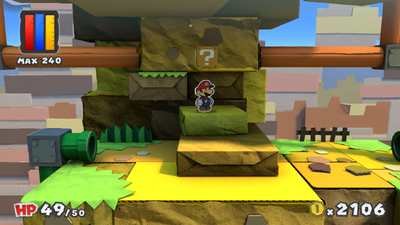
|
| Daffodil Peak |   KO Hammer (colorless), Hopslipper (colorless) |
Same scene, in the lower middle part. | 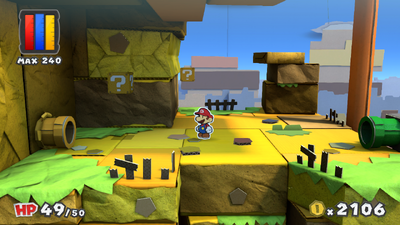
|
| Daffodil Peak |  Eekhammer (colorless) |
Same scene, in the back of the upper middle part. | 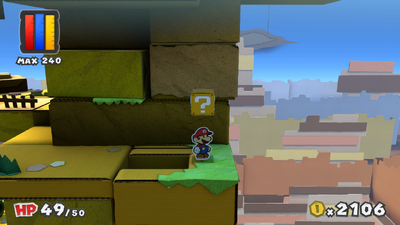
|
| Daffodil Peak |  Hammer (colorless) |
Same scene, in the uppermost part. | 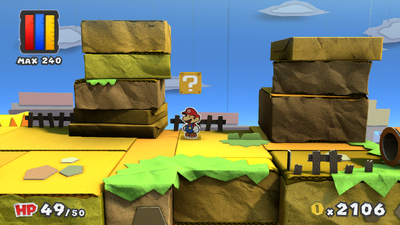
|
| Daffodil Peak |  Hammer (colorless) |
In the fourth scene, between two lower Warp Pipes. | 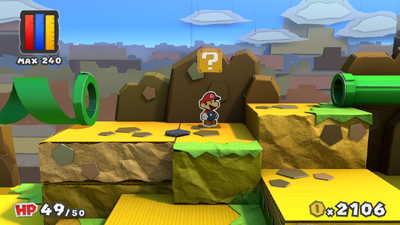
|
| Daffodil Peak |  Blazehammer (colorless) |
Same scene, in the southwest of the upper right part. | 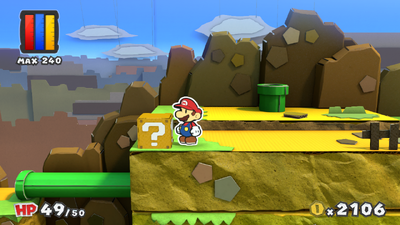
|
| Daffodil Peak |  Eekhammer (colorless) |
Same scene, in the south of the part with yellow pipe. | 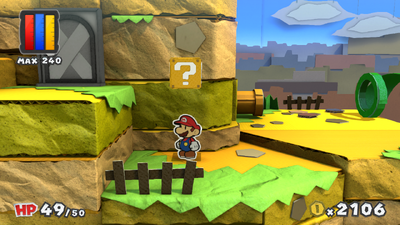
|
| Daffodil Peak |  Line Jump (colorless) |
In the fifth scene, in the part accessible with yellow pipe. | 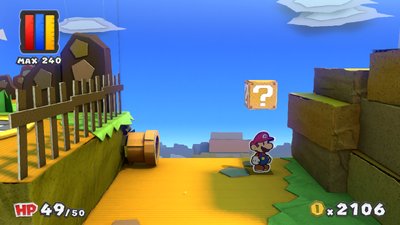
|
| Daffodil Peak |  Eekhammer (colorless) |
Same scene, in the lower part in the northwest of the the scene. | 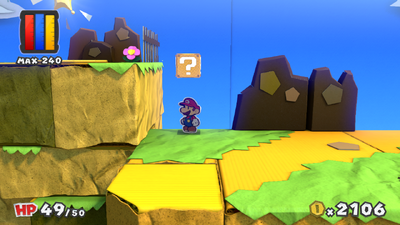
|
| Template:Color-link |  Blazehammer (colorless) |
In the airship scene, on the bowsprit. Only missable block due to airship being no longer accessible later on. | 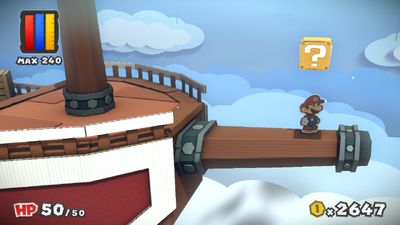
|
| The Crimson Tower |  Line Jump (colorless) |
In the third scene, near the entrance. | 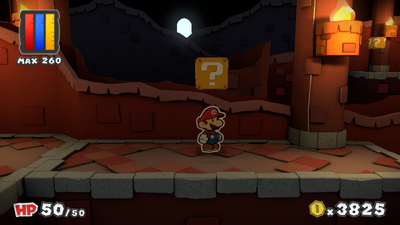
|
| The Crimson Tower |  Jump x2 (colorless) |
Same scene, in the west of the background part of the scene. | 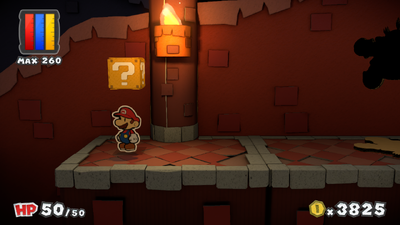
|
| The Crimson Tower |  KO Hammer (colorless) |
In the fourth scene, above the second set of stairs. | 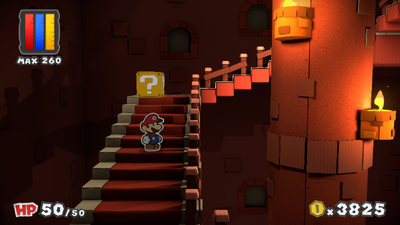
|
| The Crimson Tower |  Hopslipper (colorless) |
Same scene, above the fourth set of stairs. | 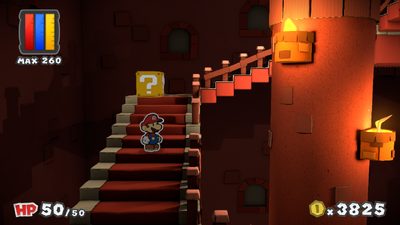
|
| The Crimson Tower |  Hammer x2 (colorless) |
Same scene. above the sixth set of stairs. | 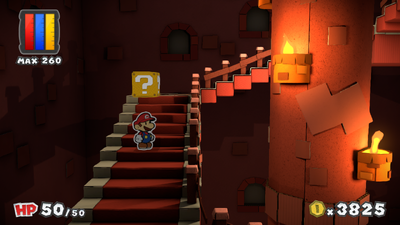
|
| The Crimson Tower |   KO Hammer (colorless), Big Hammer (colorless) |
In the fifth scene, in the middle part of the scene. | 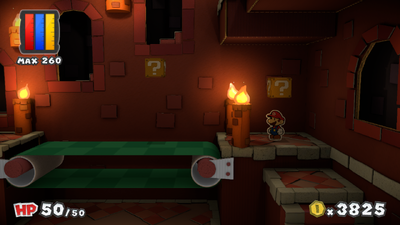
|
Yellow Big Paint Star | |||
| Template:Color-link |  Iron Jump (colorless) |
In the first scene, in the east of the upper left part. | 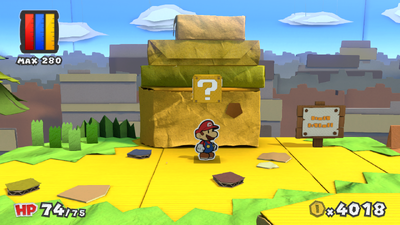
|
| Sunglow Ridge |  Iron Jump (colorless) |
In the second scene, left of the entrance. | 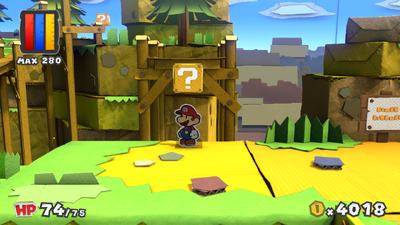
|
| Sunglow Ridge |  Hammer x2 (colorless) |
Same scene, in the southwest. | 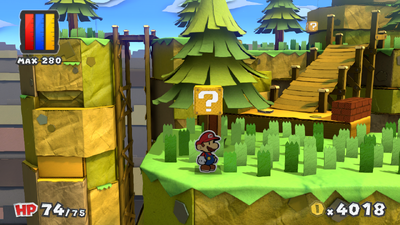
|
| Sunglow Ridge | Glob of Green Paint (all 3) | Same scene, right of the wooden slope. | 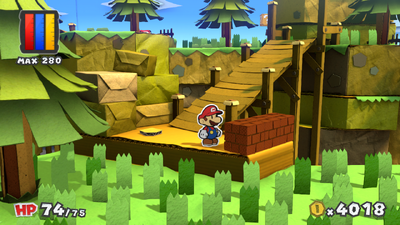
|
| Sunglow Ridge |  Jump x2 (colorless) |
Same scene, in the north. | 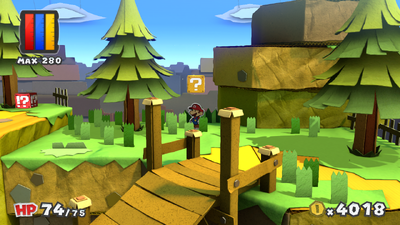
|
| Sunglow Ridge |  KO Hammer |
In the third scene, above the platform that need to be painted on first. | 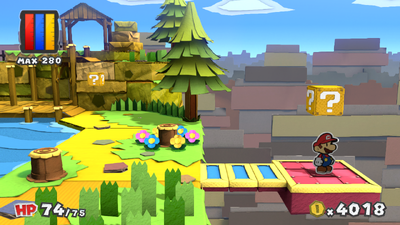
|
| Sunglow Ridge |  Iron Jump (colorless) |
Same scene, in the northeast. | 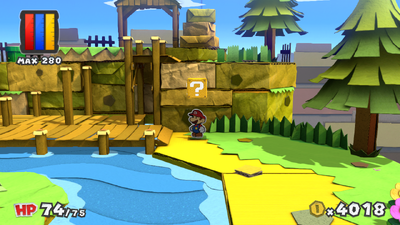
|
| Sunglow Ridge |  Eekhammer (colorless) |
Same scene, in the northwest. | 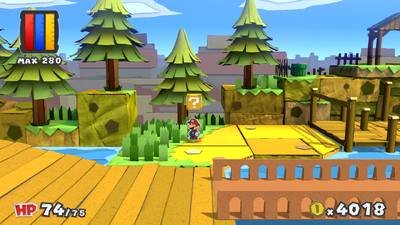
|
| Sunglow Ridge |  Frog Suit |
Same scene, in the west, on the wooden slope leading to the mill. | 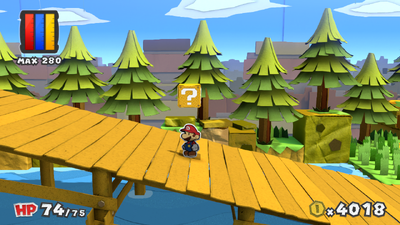
|
| Sunglow Ridge |  Line Jump (colorless) |
In the fourth scene, after the upper bridge. | 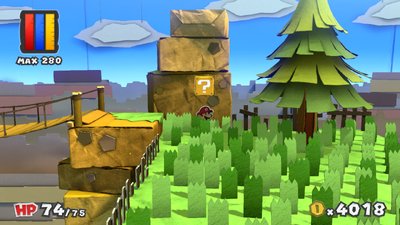
|
| Sunglow Ridge |   Coin (both) |
Same scene, in the southeast. These blocks also serve as platforms with Cutout ability. | 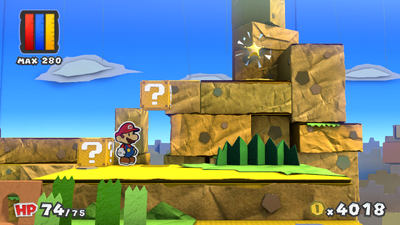
|
| Template:Color-link | Thing Replica Card | Behind the right door of the barn. | 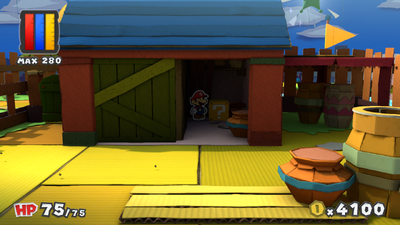
|
| Template:Color-link |  Hopslipper (colorless) |
In the first scene, near the entrance. | 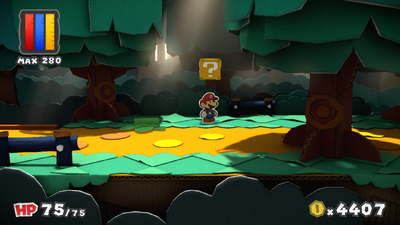
|
| Mondo Woods |  Big Hammer (colorless) |
Same scene, in the northeast corner. | 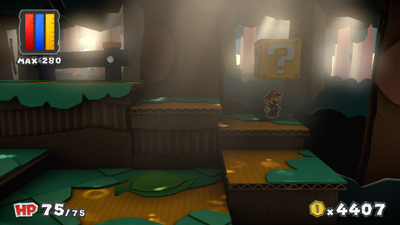
|
| Mondo Woods |  Big Jump (colorless) |
Same scene, above the Hidden Block in the north. | 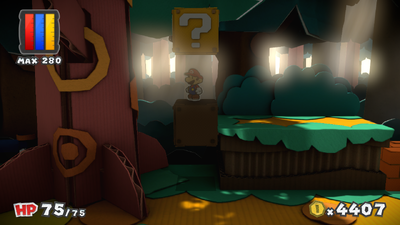
|
| Mondo Woods |    Big Jump (colorless), Coin (brick blocks) |
In the second scene, left of the northern exit. | 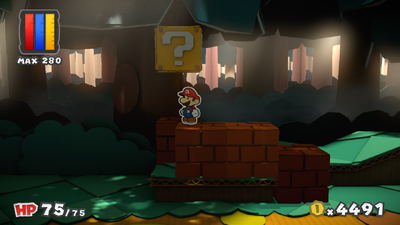
|
| Mondo Woods |   Coin, Big Hammer (colorless) |
In the fifth scene (east of the second scene), between the upper left and upper right parts. | 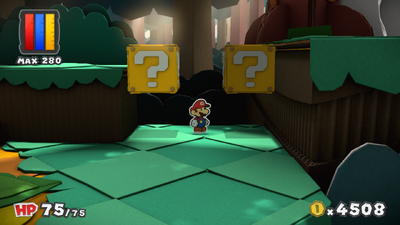
|
| Mondo Woods |  Big Jump (colorless) |
In the third scene, above the platform in the southeast that needs to be painted on first. | 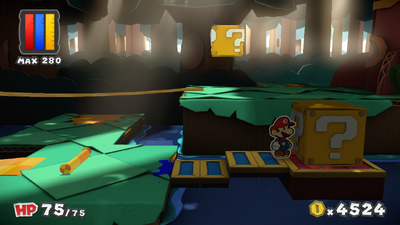
|
| Mondo Woods |  Big Eekhammer (colorless) |
Same scene, near the exit. | 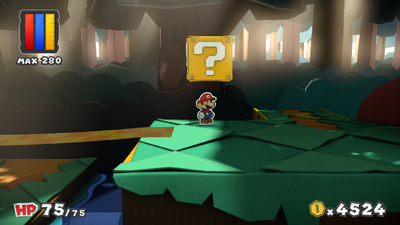
|
| Template:Color-link |    Ice Flower (colorless), Spin Jump (colorless), Fire Flower (colorless) |
In the second scene (first cave scene), behind the three rightmost white sheets. | 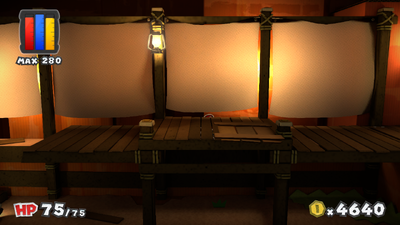
|
| Marmalade Valley |  POW Block |
Same scene, in front of the leftmost white sheet. | 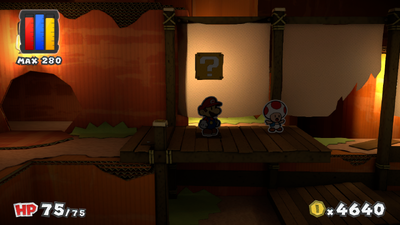
|
| Marmalade Valley |  Hopslipper x2 (colorless) |
In the first scene, right of the exit of the previous scene. | 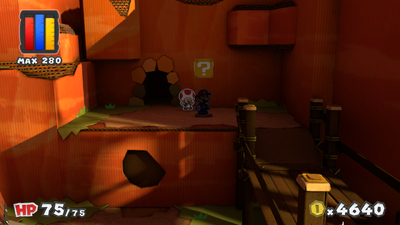
|
| Marmalade Valley |  Hurlhammer (colorless) |
Same scene, above the platform with white sheet under it. | 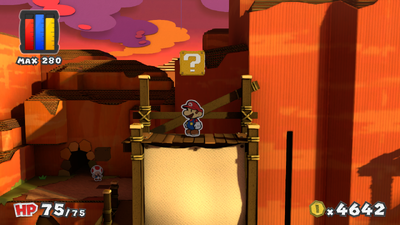
|
| Marmalade Valley |  Jump x2 (colorless) |
In the third scene, in the middle of the track with moving platform. | 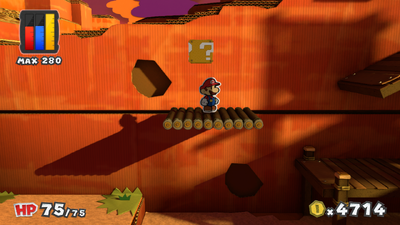
|
| Marmalade Valley |  Blazehammer (colorless) |
In the fourth scene, near the entrance. | 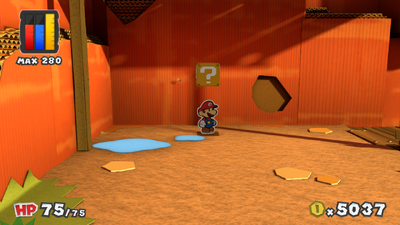
|
| Marmalade Valley |  Hopslipper x2 (colorless) |
Same scene, near the exit. | 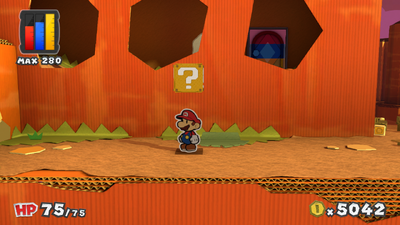
|
| Template:Color-link |  POW Block |
In the first scene, at the end of the platform made out of Brick Blocks, found left of the entrance to the temple. | 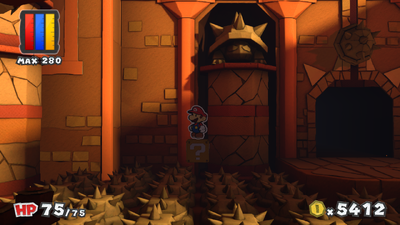
|
| Kiwano Temple |  POW Block |
In the second scene, in the southwest. | 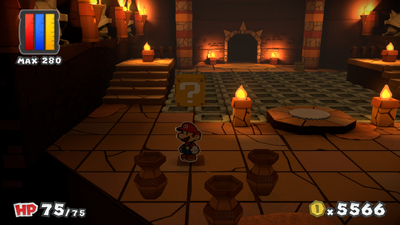
|
| Kiwano Temple |  POW Block |
In the third scene, on the lone platform reachable only with the first cardboard tube. | 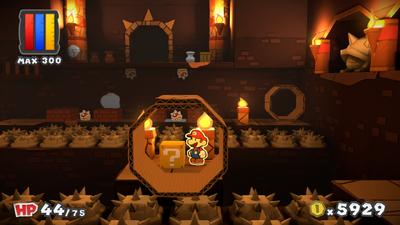
|
| Template:Color-link |   Jump x2 (colorless), POW Block |
In the fifth scene (spectator seats), at the start of the third level. | 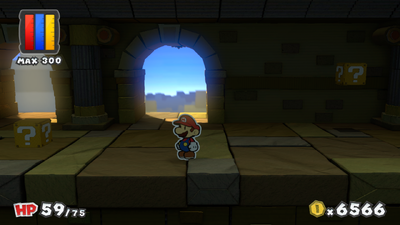
|
| The Golden Coliseum |  Hammer x2 (colorless) |
Same scene, in the part reachable by the third opening in the outer walls of the third level. | 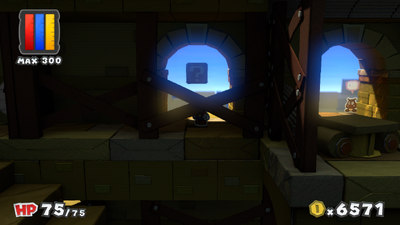
|
| The Golden Coliseum |   Blazehammer (colorless), Hopslipper x2 (colorless) |
Same scene, in the east of the second level of the spectator seats. | 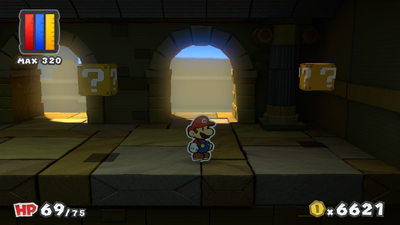
|
| The Golden Coliseum |   Eekhammer (colorless), Hopslipper (colorless) |
Same scene, in the part reachable by the fourth opening in the outer walls of the second level. | 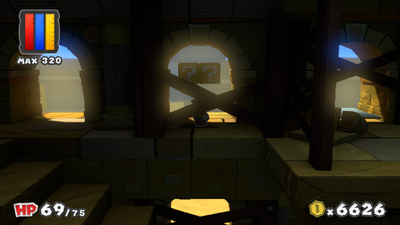
|
| The Golden Coliseum |  Big Hammer (colorless) |
Same scene, in the west of the second level of the spectator seats. | 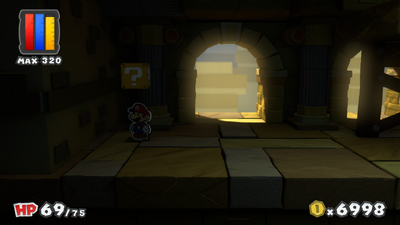
|
| The Golden Coliseum |   Hammer x2 (colorless), Fire Flower (colorless) |
Same scene, in the part reachable by the last three openings in the outer walls of the first level. | 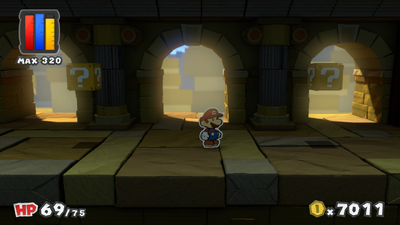
|
| The Golden Coliseum |  Ice Flower (colorless) |
Same scene, in the east of the first level of the spectator seats. It can be reached by using the last opening to the outer walls, which causes Mario to drop down. Afterwards, he has to reach a hole to fall into the left part of the backstage. Here, he uses a door to reach a part of the main lobby normally unaccessible. Lastly, he has to use the stairs to reach the desired destination. | 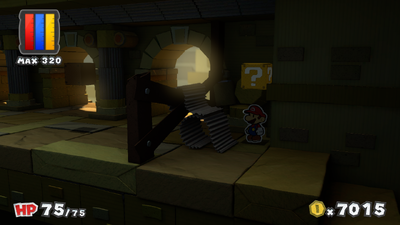
|
Blue Big Paint Star | |||
| Template:Color-link |  Hurlhammer (colorless) |
In the first scene, in the northeast. | 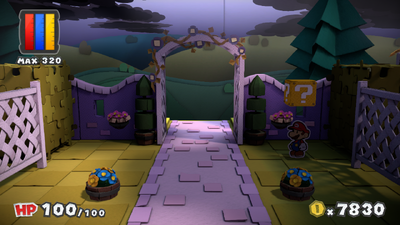
|
| Plum Park |   Jump x2 (colorless), Hammer x2 (colorless) |
In the second scene, first on the walkway, second in the northeast. | 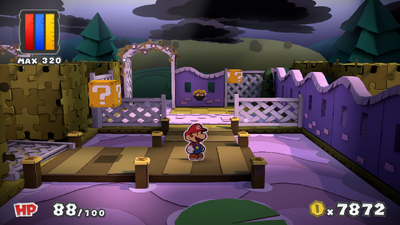
|
| Plum Park |    Hopslipper x2 (colorless), Eekhammer x2 (colorless), Iron Jump x2 (colorless) |
In the third scene, in the east of the scene. | 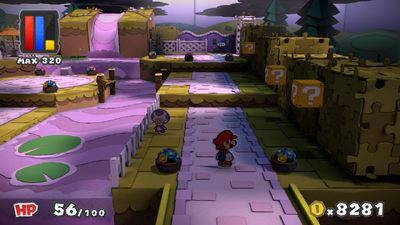
|
| Plum Park |  Hurlhammer (colorless) |
In the fourth scene, right of the northwestern exit. | 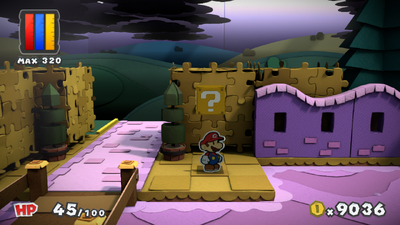
|
| Plum Park |  Big Jump (colorless) |
Same scene, in the north, under the wooden structure. | 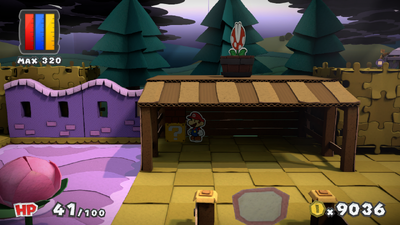
|
| Plum Park |  Line Jump (colorless) |
In the fifth scene, in the southeast. | 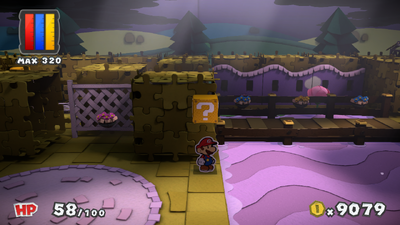
|
| Plum Park |  Hurlhammer (colorless) |
Same scene, in the south. | 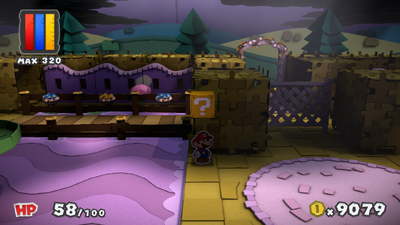
|
| Plum Park |  Jump x2 (colorless) |
Same scene, in the northwest. | 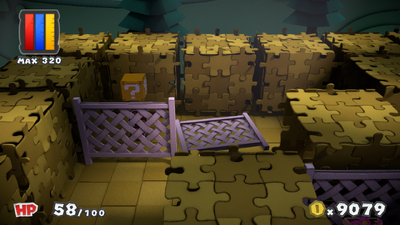
|
| Plum Park |  Big Iron Jump (colorless) |
In the fourth scene, near the northeastern exit. | 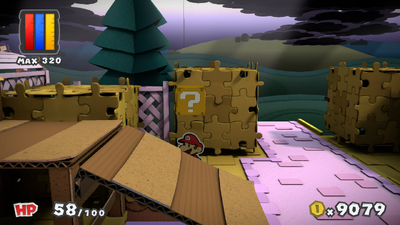
|
| Template:Color-link |  Blazehammer |
Above the platform which needs to be painted on, found in the northwest of the area. | 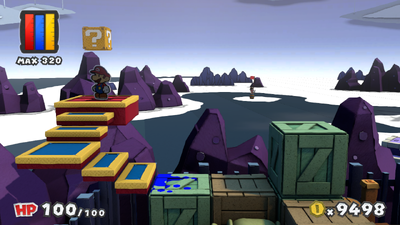
|
| Violet Passage |  Hopslipper x2 (colorless) |
In the middle of the wooden dock (end of the first part during the attack). | 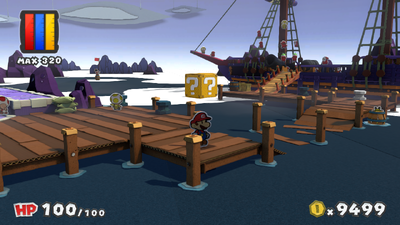
|
| Template:Color-link |  Eekhammer x2 (colorless) |
In the second scene, right of the entrance pipe. | 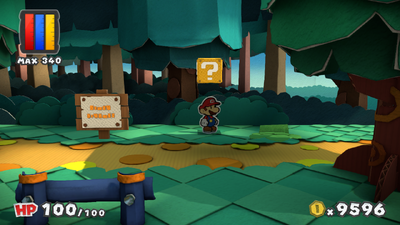
|
| Sacred Forest |  Worn-Out Hammer x3 (colorless) |
Same scene, at the start of the part with shrunk terrain. | 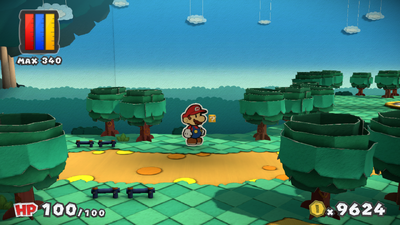
|
| Sacred Forest |  Worn-Out Jump x3 (colorless) |
In the third scene, near the entrance, behind the flat cardboard tree. | 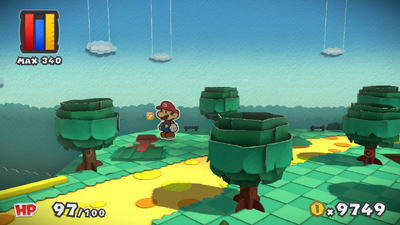
|
| Sacred Forest |  Worn-Out Jump x5 (colorless) |
Same scene, after the bridge, on the ground behind the flat cardboard tree. | 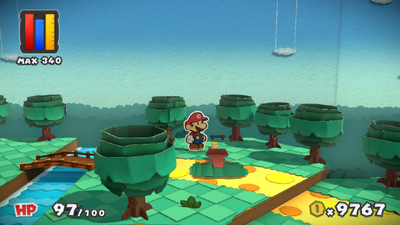
|
| Sacred Forest |  Worn-Out Hammer x3 (colorless) |
Same scene, between the eastern exit and Old Sacred Tree. | 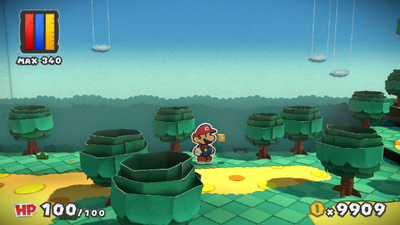
|
| Sacred Forest |  POW Block |
In the fourth scene, near the entrance. | 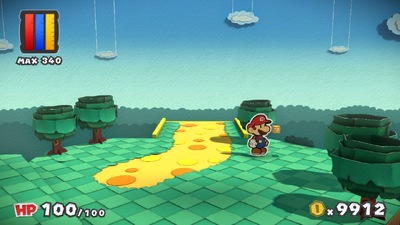
|
| Sacred Forest |  Worn-Out Hammer x3 (colorless) |
In the fifth scene, behind the ground that can be rolled up. | 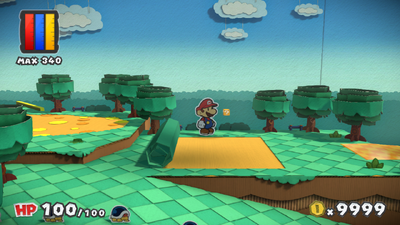
|
| Sacred Forest |  Worn-Out Jump x3 (colorless) |
Same scene, behind the bridge. | 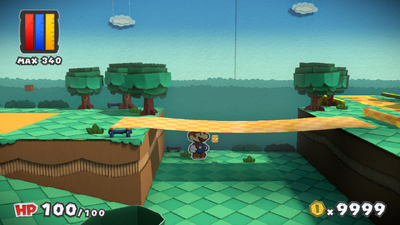
|
| Template:Color-link |  Tail |
In the first scene, in the lower part, in front of the fence. | 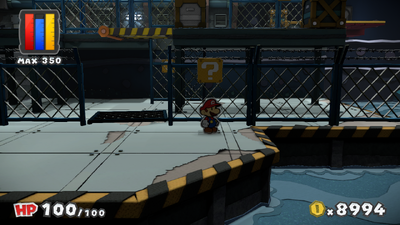
|
| Fort Cobalt |  Hammer x2 (colorless) |
Same scene, in the north of the lower part. | 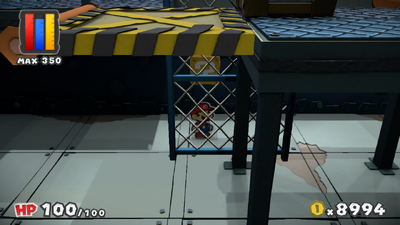
|
| Fort Cobalt |  Iron Jump x2 (colorless) |
Same scene, above the second flip-able platform in the upper part. | 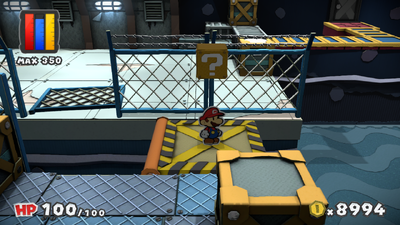
|
| Fort Cobalt |  Big Hammer (colorless) |
In the scene after failing to choose the right fence at last set of fences, in the northeast. | 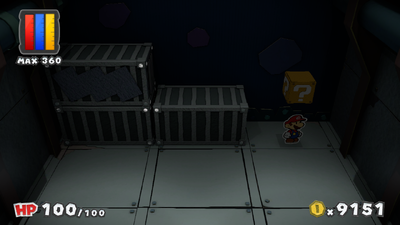
|
| Fort Cobalt |  Iron Jump x2 (colorless) |
In the third scene, above the left flip-able platform. | 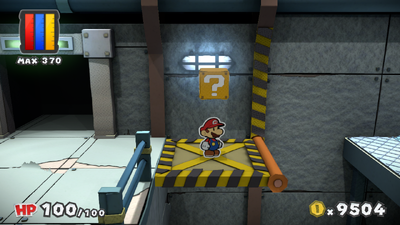
|
Purple Big Paint Star | |||
| Template:Color-link |  Big Line Jump (colorless) |
In the first scene, after the end of the wooden dock. | 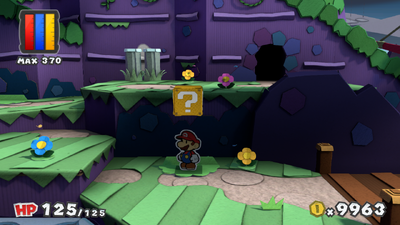
|
| Vortex Island |  POW Block |
In the fourth scene (first Parallel world scene), in the same place where Save Block in third scene is found. | 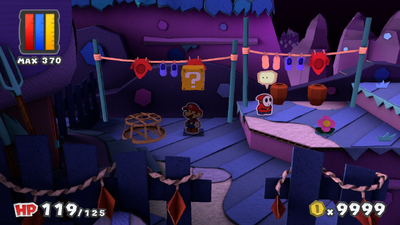
|
| Vortex Island |  Hurlhammer (colorless) |
Same scene, in the middle part (where water is normally in the real world). | 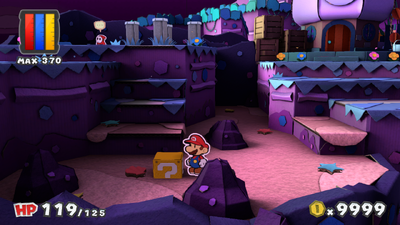
|
| Vortex Island |  Jump x2 (colorless) |
In the fifth scene (second Parallel world scene), in the middle. | 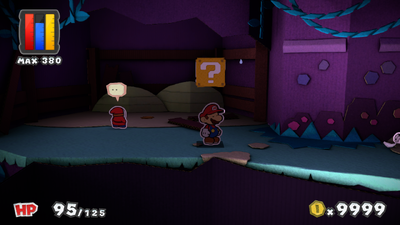
|
| Vortex Island |  Big Line Jump (colorless) |
Same scene, in the east. | 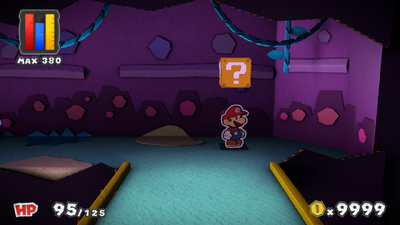
|
| Vortex Island |   Hopslipper x2 (colorless), Hurlhammer (colorless) |
In the sixth scene (third Parallel world scene), near the wooden dock. | 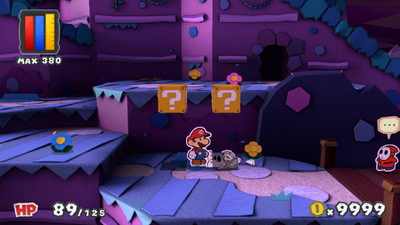
|
| Template:Color-link |  Big Hopslipper (colorless) |
In the first scene, above the right sandbags near the right of the lighthouse. | 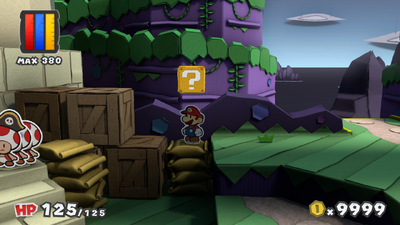
|
| Lighthouse Island |  Hopslipper x2 (colorless) |
Same scene, right of the northwestern exit. | 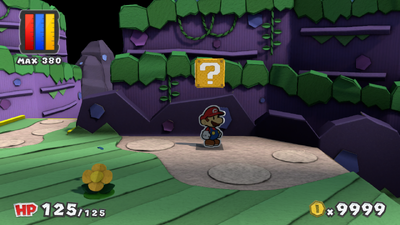
|
| Lighthouse Island |  Hopslipper x2 (colorless) |
In the second scene, in the upper right part. | 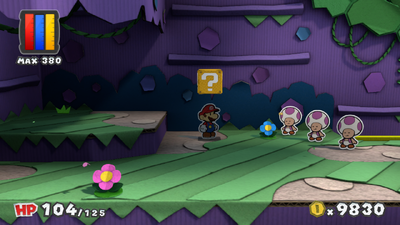
|
| Lighthouse Island |  Hopslipper (colorless) |
In the third scene, in the upper part. | 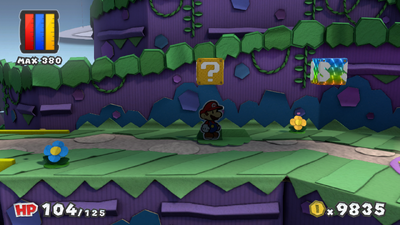
|
| Lighthouse Island |  Eekhammer x2 (colorless) |
In the fourth scene (first Parallel world scene), right of the same place last block in real world is found. | 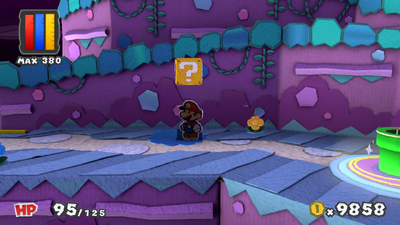
|
| Lighthouse Island |  Coin |
In the second scene, after breaking down the wall in the fifth scene (second Parallel world scene), found behind the same wall in the real world. Needs to be painted first for the content inside to be accessed. | 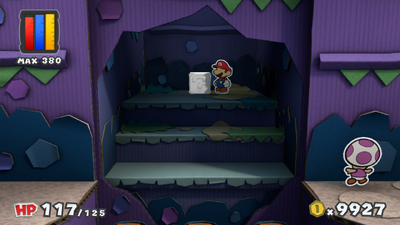
|
| Lighthouse Island |   Eekhammer x2 (colorless), Big Eekhammer (colorless) |
In the sixth scene (third Parallel world scene), right of the northwestern entrance. | 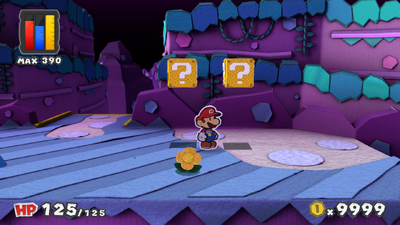
|
| Template:Color-link |  Big Hopslipper (colorless) |
In the first real world scene, at the end of the wooden dock. | 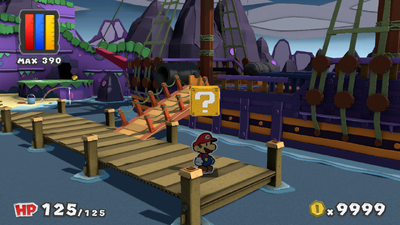
|
| Fortune Island |  Big Fire Flower (colorless) |
Same scene, left of the pipe which leads to the parallel world. | 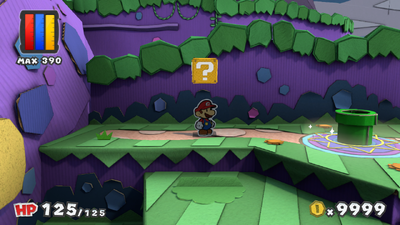
|
| Fortune Island |   Big Ice Flower (colorless), Ice Flower (colorless) |
In the first Parallel world scene, to the left and right of the place where the last block is found in the real world. | 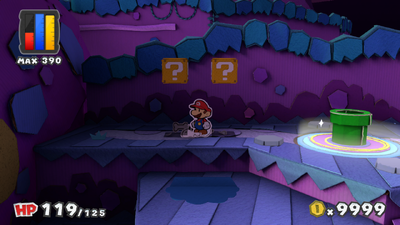
|
| Fortune Island |  Ice Flower (colorless) |
In the second Parallel world scene, found right of the right entrance. | 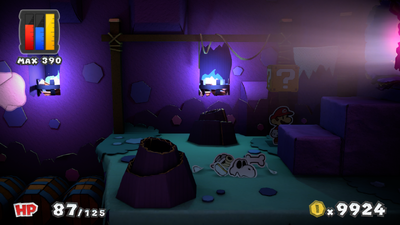
|
| Fortune Island |  Big KO Hammer (colorless) |
In the second real world scene, in the middle of upper left part. | 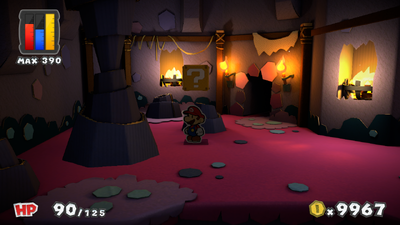
|
| Fortune Island |  Jump x3 (colorless) |
In the first real world scene, in the part accessible only from the previous scene by pushing the cork out. | 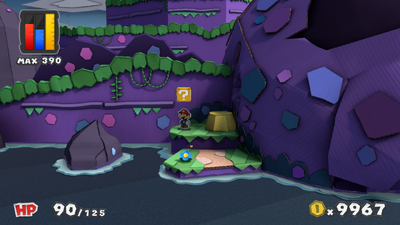
|
| Fortune Island |  Hurlhammer x2 (colorless) |
In the second Parallel world scene, in the west of the upper part. Accessed by using the cork in the first Parallel world scene as a platform. | 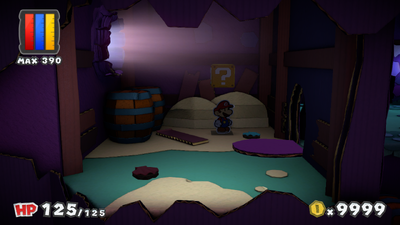
|
| Fortune Island |  Jump x3 (colorless) |
In third Parallel world scene, near the exit. Appears only after the right pattern of torches is chosen, which also opens the exit. | 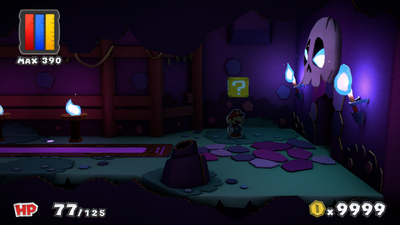
|
Orange Big Paint Star | |||
| Template:Color-link |  Big KO Hammer (colorless) |
In the second scene (first underground scene), in the northwest. | 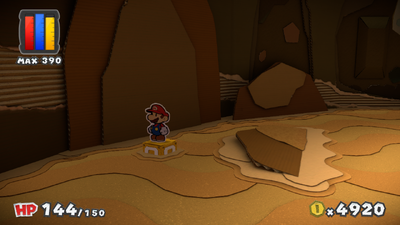
|
| Mustard Café |  Big Eekhammer (colorless) |
Same scene, in the southwest. | 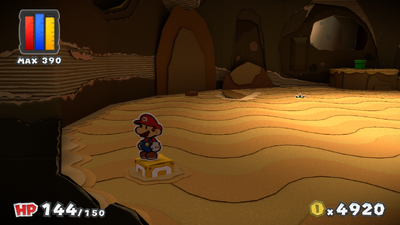
|
| Mustard Café |   Iron Jump x2 (colorless), Hammer x2 (colorless) |
Same scene, in the east. | 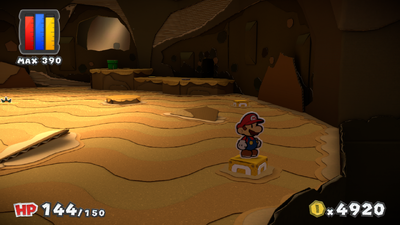
|
| Mustard Café |  Big Iron Jump (colorless) |
In the third scene, near the entrance. | 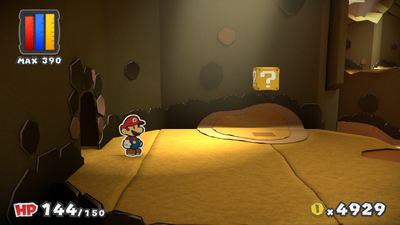
|
| Mustard Café |  Spin Jump (colorless) |
Same scene, above the second spinning pipe. | 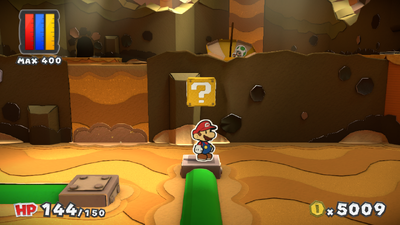
|
| Mustard Café |  Big Line Jump (colorless) |
In the fifth scene, in the west of the lower part. | 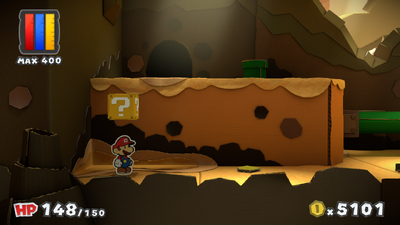
|
| Mustard Café | Thing Replica Card | In the sixth scene, in the northwest of the B3 part, revealed by pulling the left rope. | 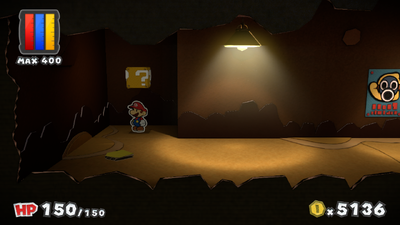
|
| Mustard Café |   Coin (both) |
In the first scene, in the Café proper. | 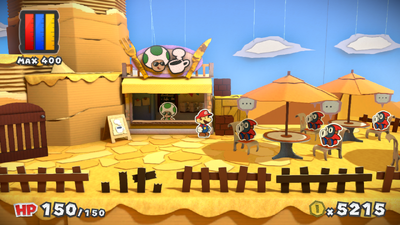
|
| Template:Color-link |   Fire Flower (colorless) (both) |
In the first scene, on the balcony accessed by a stairs which need to be painted first to appear. | 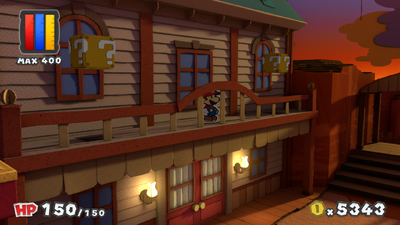
|
| Template:Color-link |    Iron Jump x2 (colorless), Hopslipper x2 (colorless), Eekhammer x2 (colorless) |
In the fourth scene (the cabin), on the upper floor. | 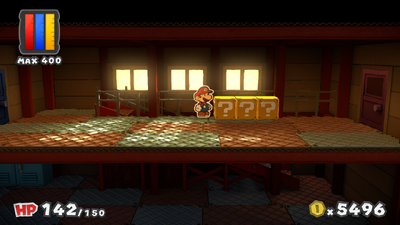
|
| Toad Trainworks |  Big KO Hammer (colorless) |
In the third scene, on the highest platform south of the train cars. | 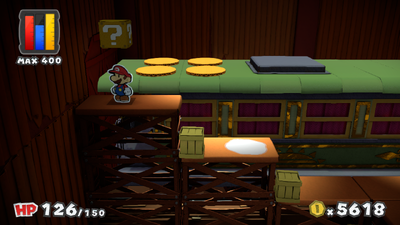
|
| Template:Color-link |  Big Spin Jump (colorless) |
In the first scene, between the second and third sets of crates/barrels. | 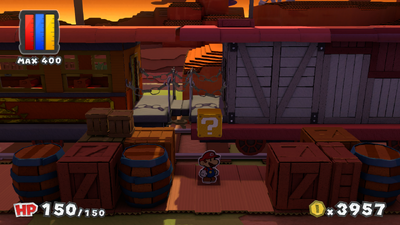
|
| Sunset Express |    Big Hurlhammer (colorless), Coin (both brick blocks) |
Same scene, in the east. | 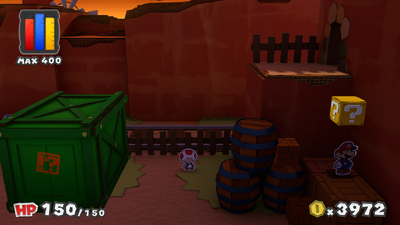
|
| Sunset Express |   Coin (both) |
In the second scene, in the southwest. | 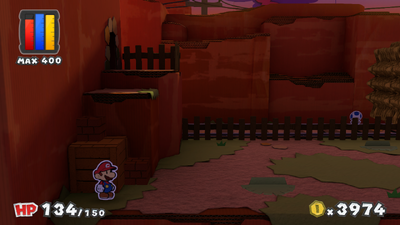
|
| Sunset Express |  Big Line Jump (colorless) |
In the first scene, after the train leaves the station, left of the Spinning-Door. | 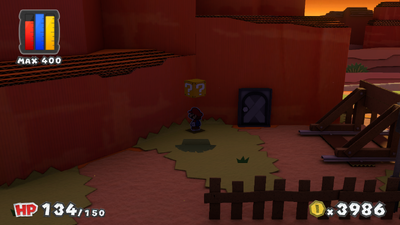
|
Green Big Paint Star | |||
| Template:Color-link |  Ice Flower (colorless) |
In the second scene, near the entrance. | 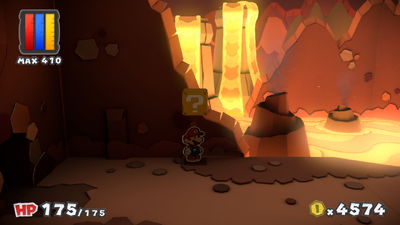
|
| Redpepper Volcano |  Big Eekhammer x2 (colorless) |
Same scene, after the second bridge. | 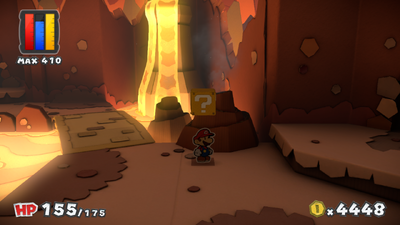
|
| Redpepper Volcano |  Big KO Hammer (colorless) |
In the third scene, above the third platform. | 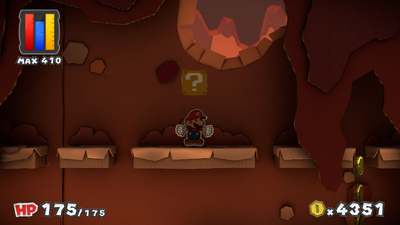
|
| Redpepper Volcano |  Hopslipper x3 (colorless) |
Same scene, above the fifth platform. | 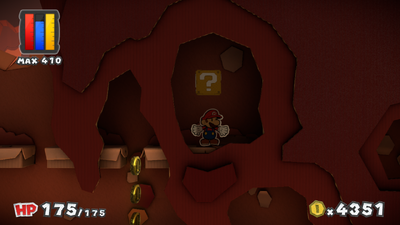
|
| Redpepper Volcano |  Big Ice Flower (colorless) |
Same scene, above the last two grounds near the exit. | 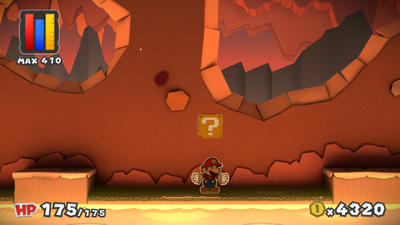
|
| Redpepper Volcano |  Big Ice Flower (colorless) |
In the fourth scene, at the end of the southwest part. | 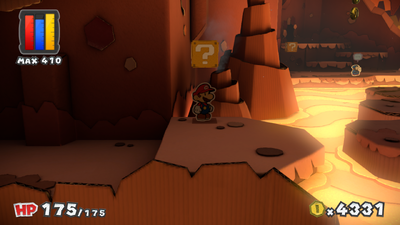
|
| Redpepper Volcano |  Big Jump x2 (colorless) |
Same scene, in the west of the north part. | 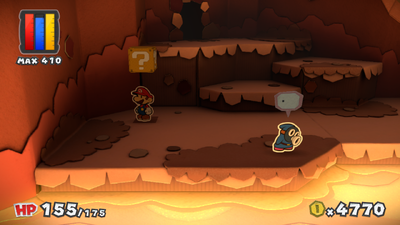
|
| Template:Color-link |  Hammer x3 (colorless) |
In the first scene, near the entrance. | 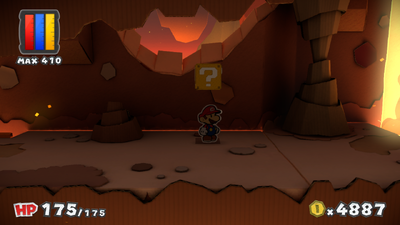
|
| Redpepper Crater |  Iron Jump x3 (colorless) |
Same scene, before the second rising block. | 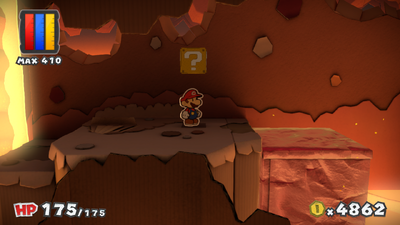
|
| Redpepper Crater |  Big Ice Flower (colorless) |
Same scene, before the last rising block of the scene. | 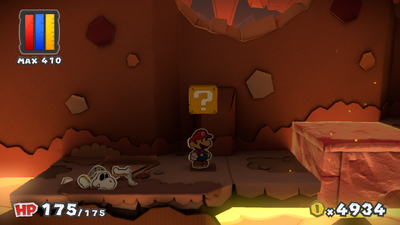
|
| Redpepper Crater |  Big Hammer x2 (colorless) |
In the second scene, near the entrance. | 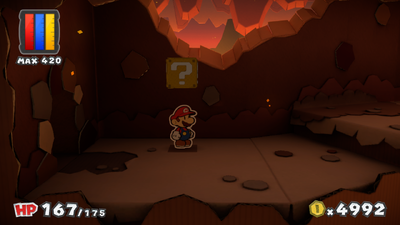
|
| Redpepper Crater |  Big Hurlhammer (colorless) |
Same scene, on the island accessed by a moving block, which is at first stuck with the Bowser Tape. | 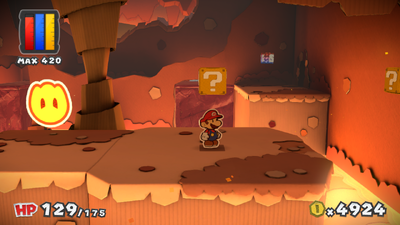
|
| Redpepper Crater |  Big Ice Flower |
Same scene, above the platform which needs to be painted on first, found right of the previous block. | 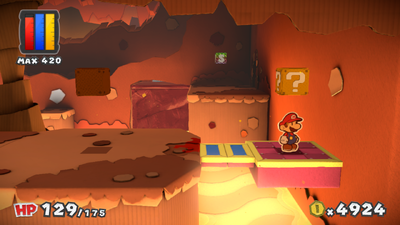
|
| Template:Color-link | Coin (first block, 2D)  Jump x3 (colorless) (first block, 3D)  1-Up Mushroom (second block, 2D)  Big Hammer (colorless) (second block, 3D) |
In the third scene (first sub-level scene), near the start. | 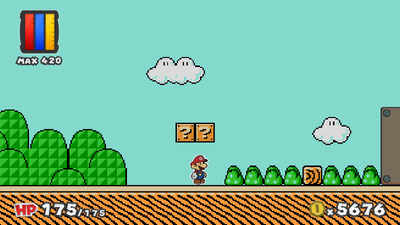
|
| Green Energy Plant | Coin (first block, 2D)  Huge Jump (colorless) (first block, 3D) Coin (second block, both 2D and 3D)  1-Up Mushroom (third block, only 2D) |
Same scene, in the east part accesible with Flip technique. | 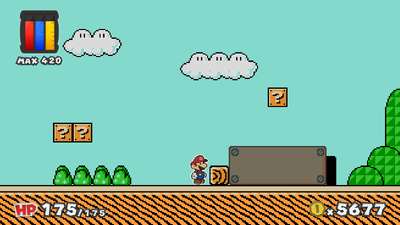
|
| Green Energy Plant |  Big Mushroom |
Same scene, found near the first two blocks after using the Flip technique. | File:Green Energy Plant Block 6.png |
| Green Energy Plant | Coin(first block)  Heart (second block) Coin (third block) Coin (fourth block) Coin (fifth block)  Huge Eekhammer (colorless) (sixth block) Coin (seventh block)  1-Up Mushroom (eighth block, 2D) Coin (eighth block, 3D) |
In the fourth scene, after using the Flip technique, found in front of the right exit. | File:Green Energy Plant Block 7-14.png |
| Green Energy Plant |  Coin, Huge Hammer (colorless), Coin, Coin |
Same scene, after using the Flip technique, found in front of the left exit. | 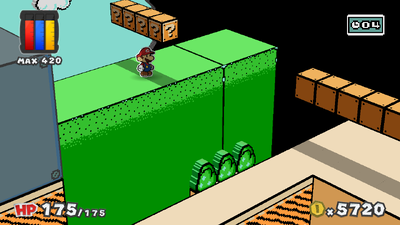
|
| Green Energy Plant |  1-Up Mushroom (2D)  Huge Iron Jump (colorless) (3D) |
In the fifth scene (after taking the right exit from previous scene), before the background becomes black. | 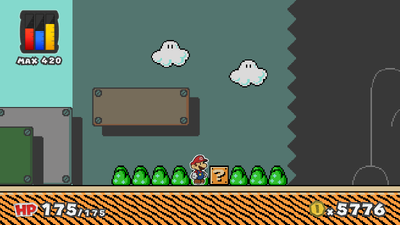
|
| Green Energy Plant |  1-Up Mushroom (2D)  Heart (3D) |
Same scene, after using the Flip technique to get behind the black background. This block is found on the right side after the black background. | 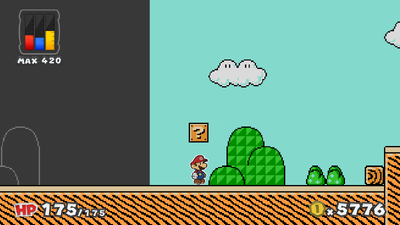
|
| Green Energy Plant |  1-Up Mushroom |
In the sixth scene (underground scene reachable from previous scene), above the platform. | 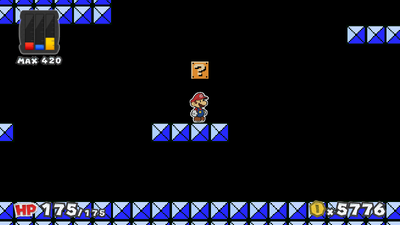
|
| Green Energy Plant |  1-Up Mushroom (2D)  Huge Hurlhammer (colorless) (3D) |
In the seventh scene (outside scene accesible only from previous scene), right of the entrance pipe. | 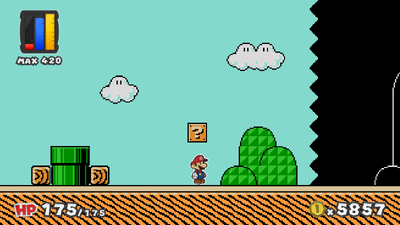
|
| Green Energy Plant |   Huge Line Jump (colorless), Heart |
In the eighth scene (after using the left exit in the fourth scene), after using the Flip technique in front of the bushes, found at the end of the revealed part. | 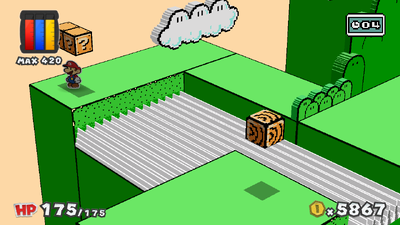
|
| Green Energy Plant |  1-Up Mushroom (2D)  Huge Hopslipper (colorless) (3D) |
Same scene, after the spike pit. | 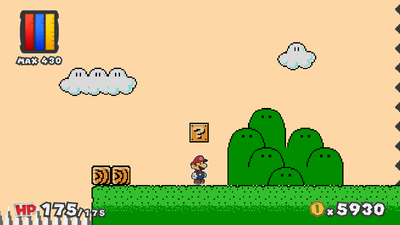
|
| Green Energy Plant |  1-Up Mushroom (2D)  Huge KO Hammer (colorless) (3D) |
In the ninth scene (after using the red pipe in the fourth scene), near the end between the second red pipe and last green pipe. | 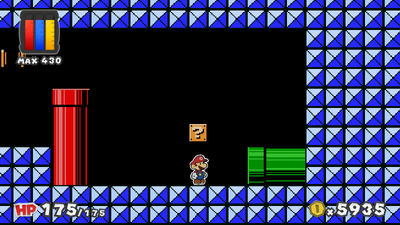
|
| Green Energy Plant |  1-Up Mushroom (2D)  Heart (3D) |
In the tenth scene (after using the second red pipe in the previous scene), above the fifth platform. | 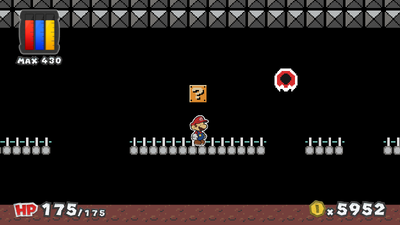
|
| Template:Color-link |  Big KO Hammer (colorless) |
In the first scene, between first two trees. | 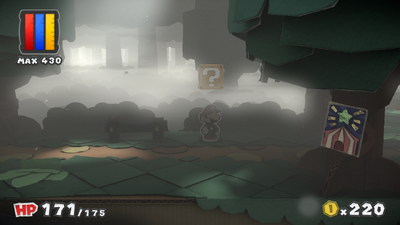
|
| Mossrock Theater |  Fire Flower (colorless) |
In the second scene, found left of the entrance. | 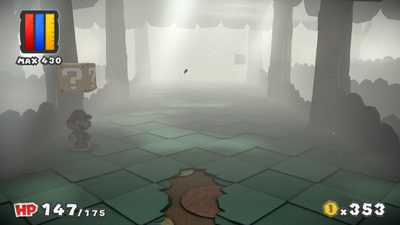
|
| Mossrock Theater |  POW Block |
Same scene, found further forward to the right. | 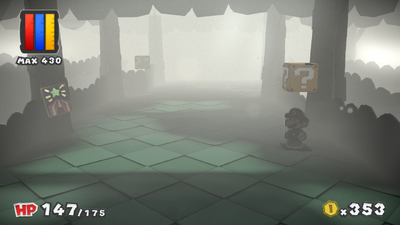
|
| Mossrock Theater |  Blazehammer (colorless) |
Same scene, found further forward to the left. | 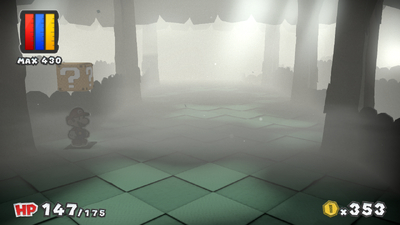
|
| Mossrock Theater |  Big Line Jump (colorless) |
Same scene, found at the very north, near the exit. | 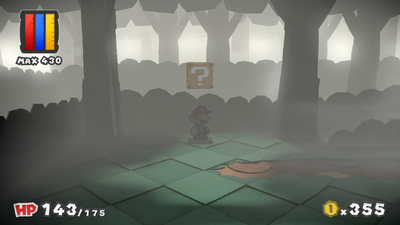
|
| Mossrock Theater |  Ice Flower (colorless) |
In the third scene, near the exit. | 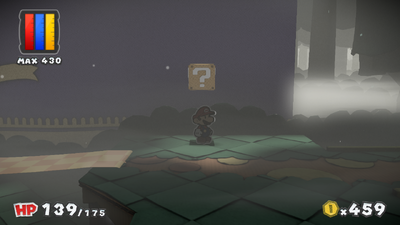
|
| Mossrock Theater |  Hammer x3 (colorless) |
In the fourth scene, to the left after going forward a bit. | 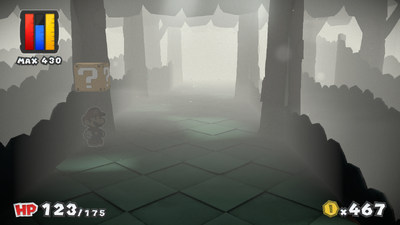
|
| Mossrock Theater |  Hurlhammer x3 (colorless) |
Same scene, found near the exit to the scene with 2 Mini Paint Stars. | 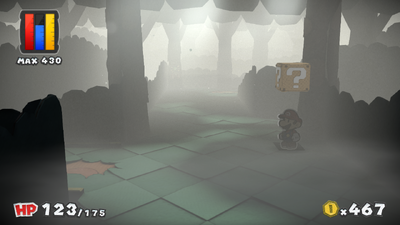
|
| Mossrock Theater |  Huge Iron Jump |
In the scene with two Mini Paint Stars, on the platform/stairs which needs to be painted on first, found at the very west of the scene. | 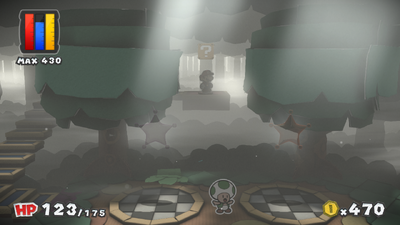
|
| Mossrock Theater |  Big Fire Flower (colorless) |
In the fifth scene, found before the first bridge. | 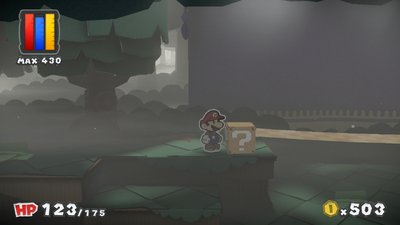
|
| Template:Color-link |  Big Hammer x2 (colorless) |
In the first scene, found between the opening in the fence and Yoshi cage. | 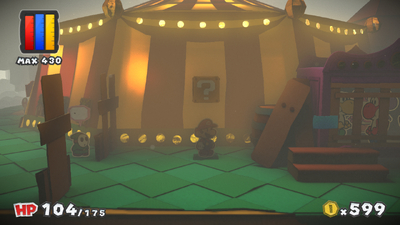
|
| The Emerald Circus |  1-Up Mushroom |
Same scene, in the right of the exit to the backstage of the circus. | 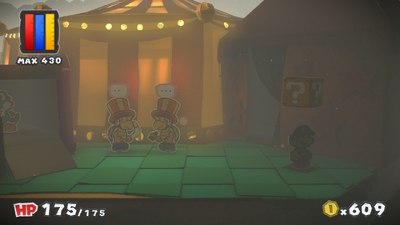
|
white | |||
| Template:Color-link |    Huge Hammer, Huge Hurlhammer, Huge Hammer |
In the third scene (after factory is destroyed), in the southwest. | 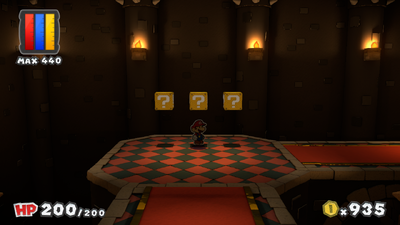
|
| white |   1-Up Mushroom, Huge Hurlhammer |
Same scene, in the northeast. | 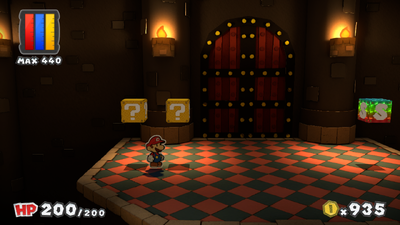
|
? Block count
This chart shows the number of ? Blocks for each location, with the total amount at the bottom. Locations are listed in the order the player can collect contents from them.
| Location | Count |
|---|---|
| Ruddy Road | 10 |
| Cherry Lake | 11 |
| Indigo Underground | 6 |
| Bloo Bay Beach | 6 |
| Daffodil Peak | 10 |
| The Crimson Tower | 8 |
| Sunglow Ridge | 14 |
| Château Chanterelle | 1 |
| Mondo Woods | 10 |
| Marmalade Valley | 10 |
| Kiwano Temple | 3 |
| The Golden Coliseum | 11 |
| Plum Park | 12 |
| Violet Passage | 2 |
| Sacred Forest | 8 |
| Fort Cobalt | 5 |
| Vortex Island | 7 |
| Lighthouse Island | 8 |
| Fortune Island | 9 |
| Mustard Café | 10 |
| Tangerino Grill | 2 |
| Toad Trainworks | 4 |
| Sunset Express | 7 |
| Redpepper Volcano | 7 |
| Redpepper Crater | 6 |
| Green Energy Plant | 27 |
| Mossrock Theater | 10 |
| The Emerald Circus | 2 |
| Black Bowser's Castle | 5 |
| Total | 238 |
See also
In Paper Mario: Color Splash, Mario can discover Hidden Blocks throughout the areas he visits. Like regular ? Blocks, these invisible blocks contain Battle Cards or Coins. Unlike first three entries, where Mario had help in finding these, he must locate them alone by either Jumping or Hammering suspicious areas (it shares this fact with previous entry). Like in Super Paper Mario and Paper Mario: Sticker Star, the ? Blocks (which includes hidden blocks) respawn upon leaving the area, so subsequent visits allow the contents of the blocks to be collected again. Some invisible blocks are used as stepping stones to reach new places or other items. There are 43 hidden blocks in the game. This page lists the location of each hidden block, the contents, and how to get to them.
Hidden Blocks
| Location | Item | Description | Image | Image (block/s revealed) |
|---|---|---|---|---|
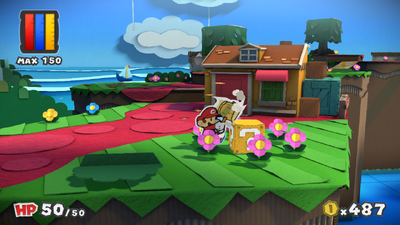
| Ruddy Road |  Jump (colorless) |
In the first scene, on the ground in the circle of flowers in front of the house. | 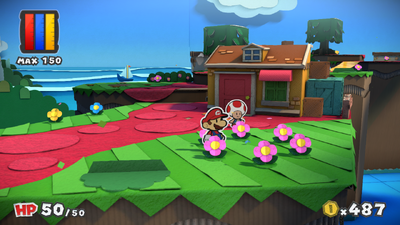
|
|
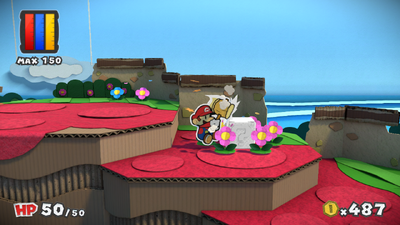
| Ruddy Road |  Hopslipper |
In the second scene, on the ground in the circle of flowers in the east part of the scene. Block needs to be painted first before content of it can be accessed. | 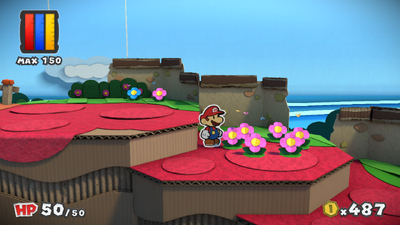
|
|
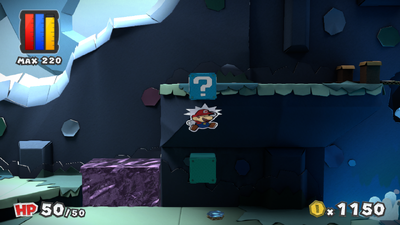
| Indigo Underground |  Blazehammer (colorless) |
In the second scene, above the ? Block on the lower part of the scene, right of the rising block. | 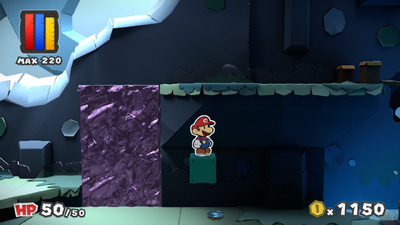
|
|
| Indigo Underground |   Coin (both) |
Same scene, to the left and right of the ? Block on the lower part of the scene, between two waterfalls. | File:PMCS Hidden Block 4A-5A.png | 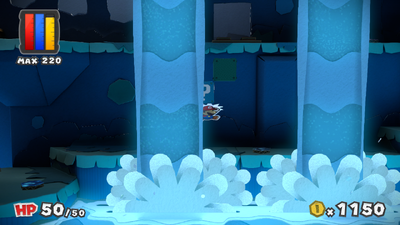 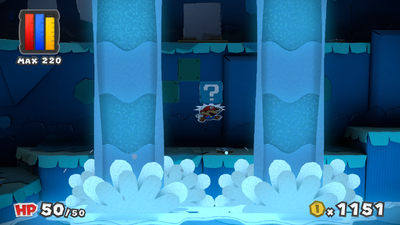
|
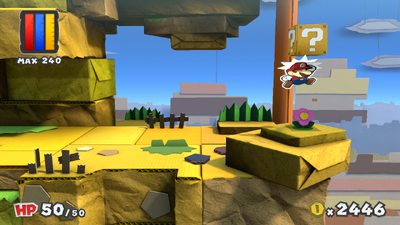
| Daffodil Peak |  Blazehammer (colorless) |
In the third scene, above the flower in the upper middle part. | 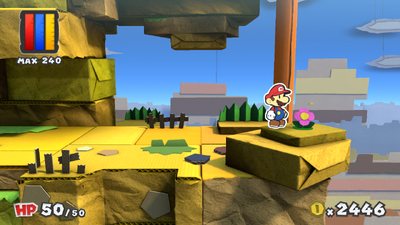
|
|
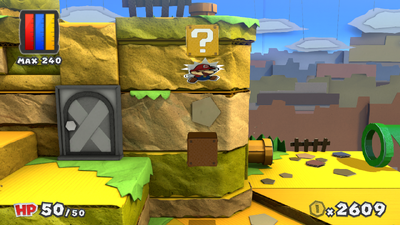
| Daffodil Peak |  Blazehammer (colorless) |
In the fourth scene, above the ? Block in the part with yellow Warp Pipe. | 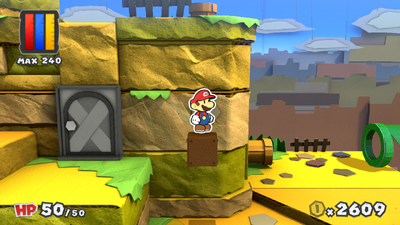
|
|
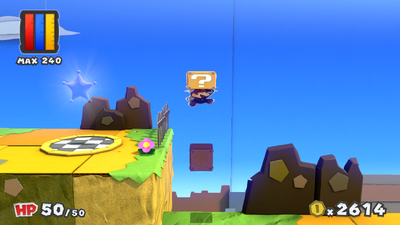
| Daffodil Peak |  Blazehammer (colorless) |
In the fifth scene, above the ? Block in the lower part in the northwest of the scene. | 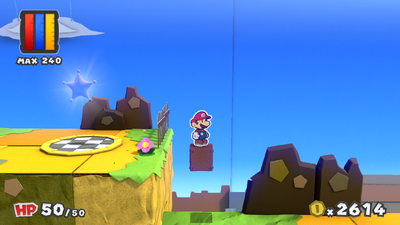
|
|
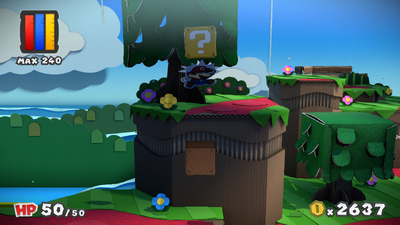
| Ruddy Road |  Eekhammer |
In the third scene, above the ? Block found near the entrance. Can be accessed only after all members of Purple Rescue Squad have been found. | 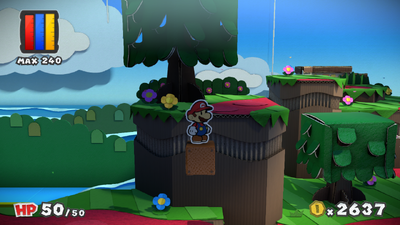
|
|
| Sunglow Ridge |  Blazehammer (colorless), Spin Jump (colorless) |
In the second scene, to the left and right of the ? Block found left of the entrance. | File:PMCS Hidden Block 10A-11A.png | 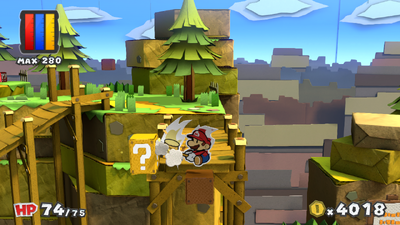 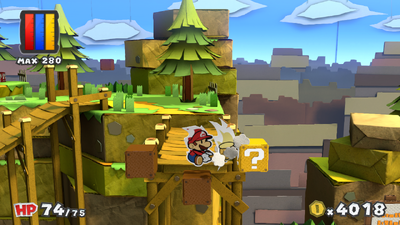
|
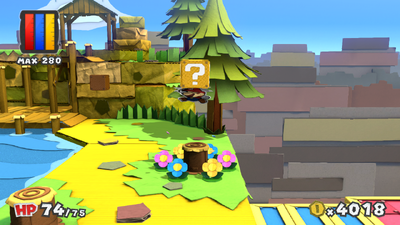
| Sunglow Ridge |  Spin Jump (colorless) |
In the third scene, above the stump surrounded by the circle of flowers. | 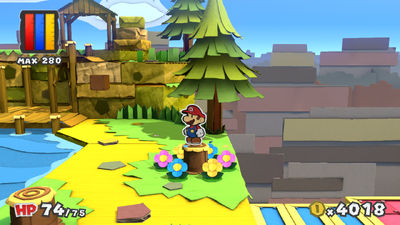
|
|
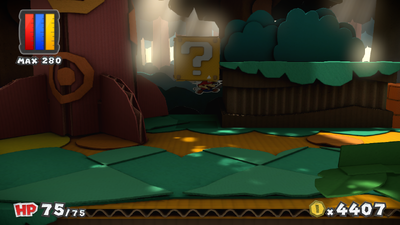
| Mondo Woods |  Big Hopslipper (colorless) |
In the first scene, to the left of the upper left part. | 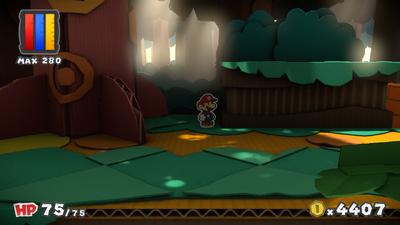
|
|
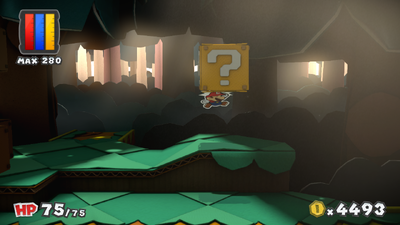
| Mondo Woods |  Coin |
In the second scene, to the right of the northern exit. | 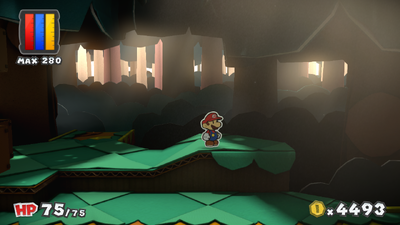
|
|
| Kiwano Temple |      Coin (all 5) |
In the first scene, in the northeast of the scene. These blocks act as a platform to reach the Colorless spot on the wall. | File:PMCS Hidden Block 15A-19A.png | 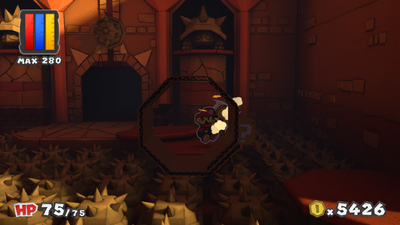 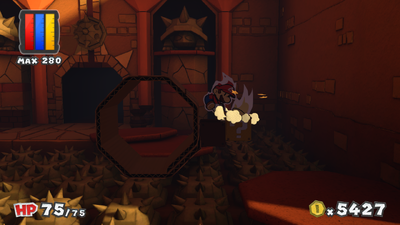 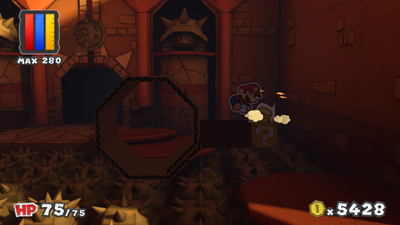 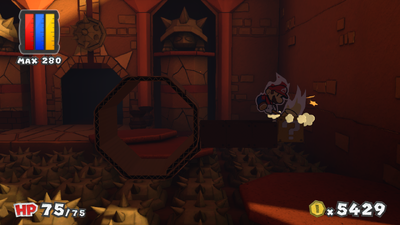 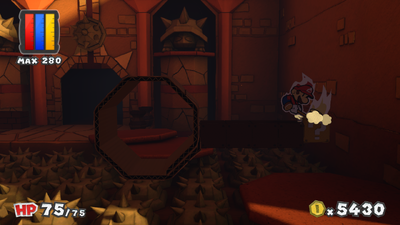
|
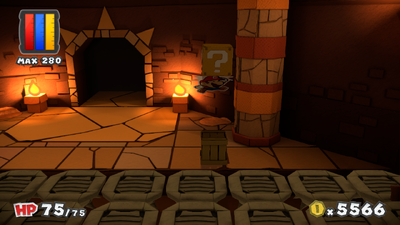
| Kiwano Temple |  Spin Jump (colorless) |
In the second scene, above the right crate in the north of the scene. | 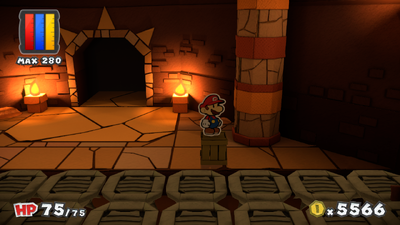
|
|
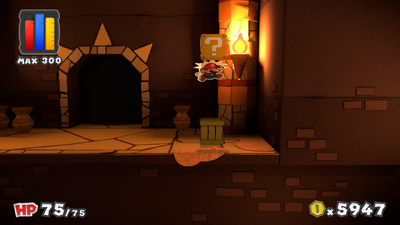
| Kiwano Temple |  Hammer x2 (colorless) |
In the third scene, above the crate near the exit. | 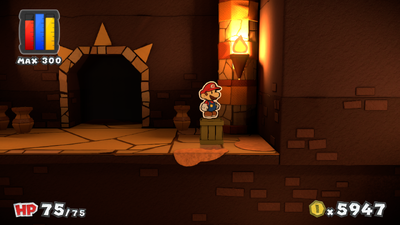
|
|
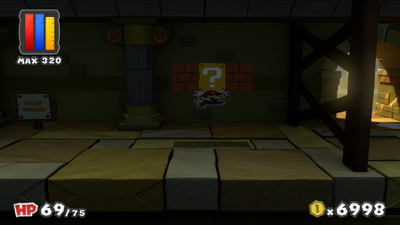
| The Golden Coliseum |  Big Line Jump (colorless) |
In the fifth scene (spectator seats), in the east of the west part of the first level. | 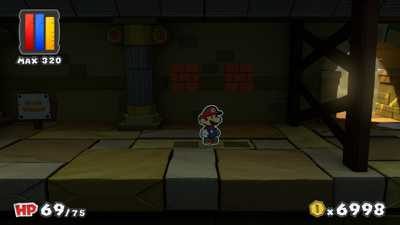
|
|
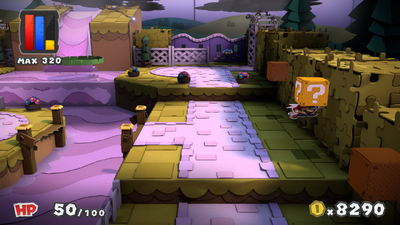
| Plum Park |  Big KO Hammer (colorless) |
In the third scene, between the second and third ? Blocks found in the east of the scene. | 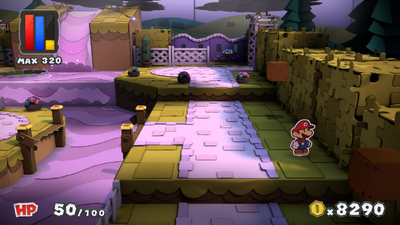
|
|
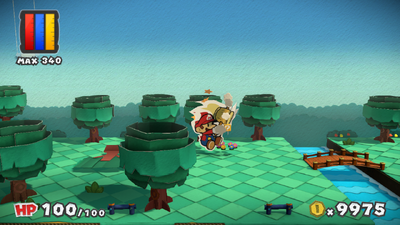
| Sacred Forest |  POW Block |
In the third scene, found above the circle of flowers. | 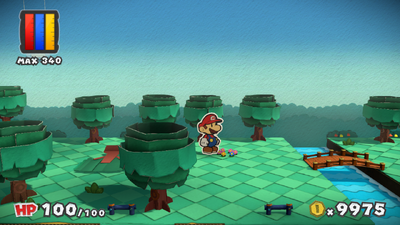
|
|
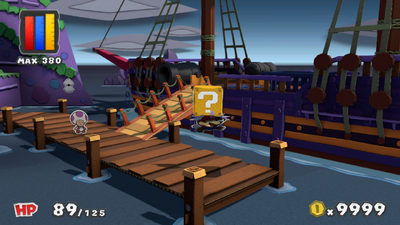
| Vortex Island |  Jump x3 (colorless) |
In the first scene, at the southern end of the wooden dock. | 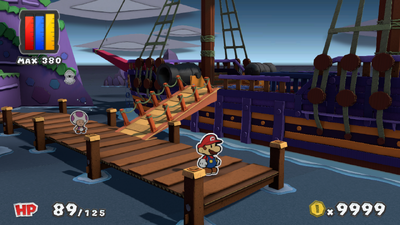
|
|
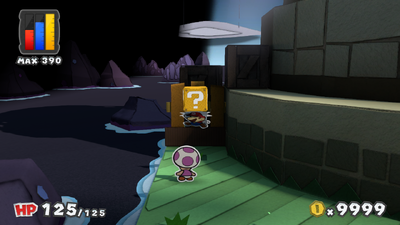
| Lighthouse Island |  Hammer x3 (colorless) |
In the first scene, above the flower found left of the lighthouse. | 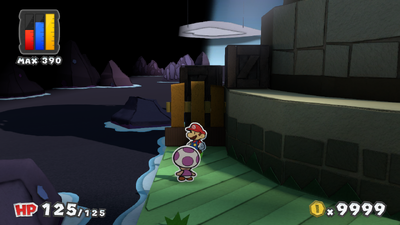
|
|
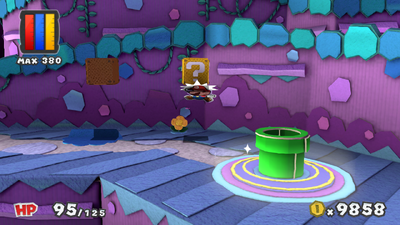
| Lighthouse Island |  Jump x3 (colorless) |
In the fourth scene (first Parallel world scene), found in the same place Save Block is found in the third scene. | 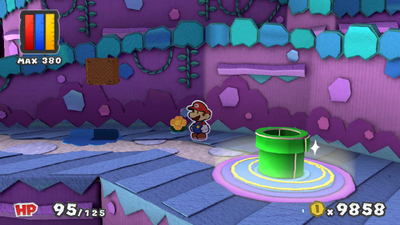
|
|
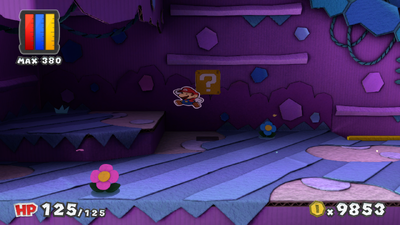
| Lighthouse Island |  Hammer x3 (colorless) |
In the fifth scene (second Parallel world scene), found in the same place ? Block is found in the second scene. | 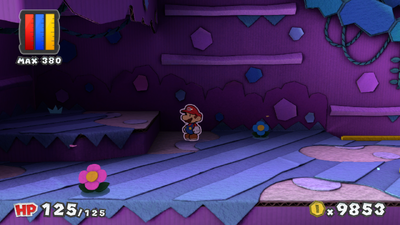
|
|
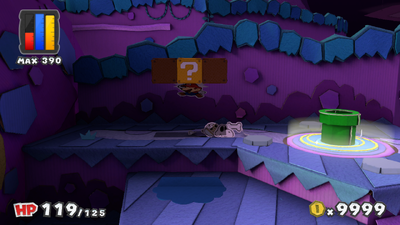
| Fortune Island |  Iron Jump x2 (colorless) |
In the first Parallel world scene, found between the two ? Blocks left of the pipe. | 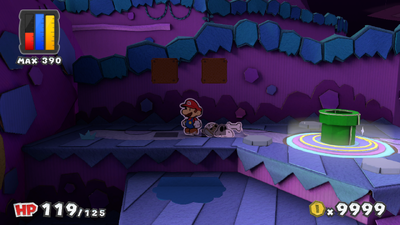
|
|
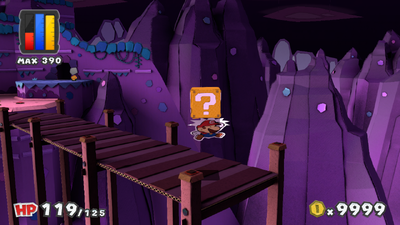
| Fortune Island |  Big Eekhammer (colorless) |
Same scene, at the end of the wooden dock. | 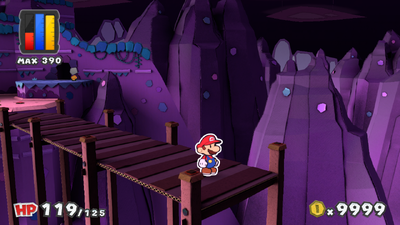
|
|
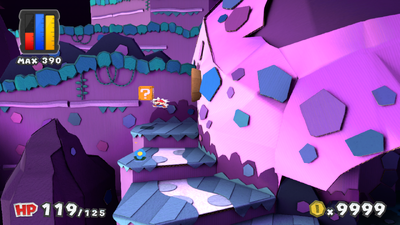
| Fortune Island |  Hammer x3 (colorless) |
Same scene, found in the northwest, left of the left cork stuck in the skull. | 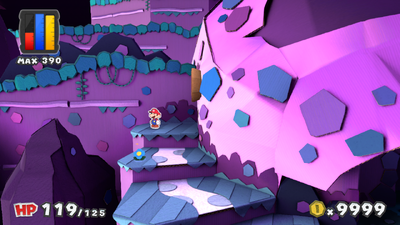
|
|
| Fortune Island |  Big Spin Jump (colorless) |
In the second real world scene, in the upper right part. | 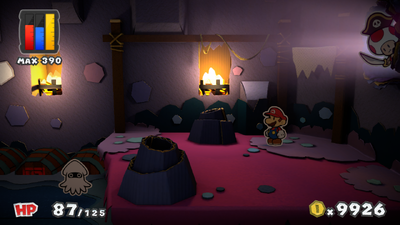
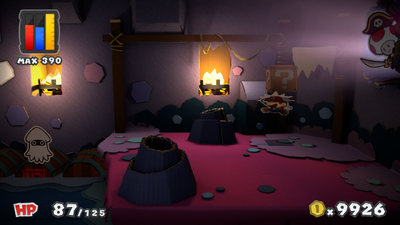
|
|
| Mustard Café |       Coin, Coin, Coin, Iron Jump x2 (colorless), Big Mushroom, Eekhammer x3 (colorless) |
In the third scene, under the Colorless spot found on the wall before the sandfall. Without these six blocks, the spot cannot be reached. | File:PMCS Hidden Block 33A-38A.png | 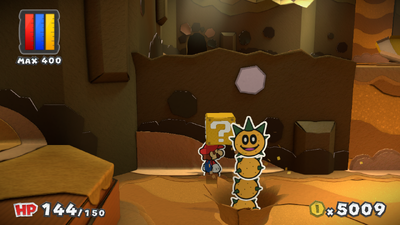 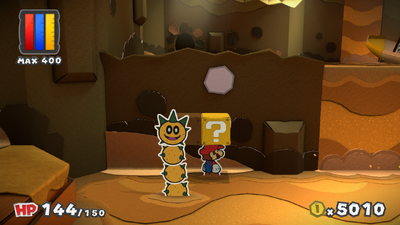 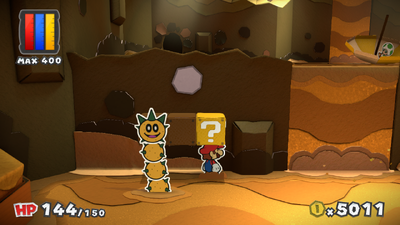 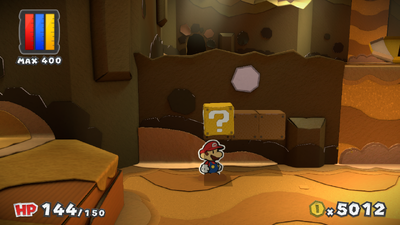 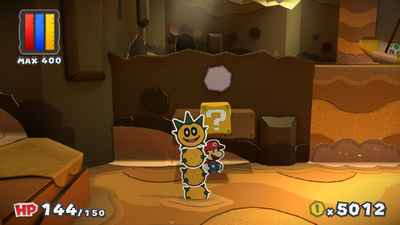 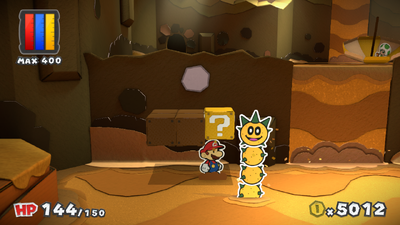
|
| Mustard Café |   Coin (both) |
In the fourth scene, in the northeast of the upper pipes is a platform that appears after being painted on. These two blocks are to the right of said platform and act as platform to reach Colorless spot on the wall. | File:PMCS Hidden Block 39A-40A.png | File:PMCS Hidden Block 49B.png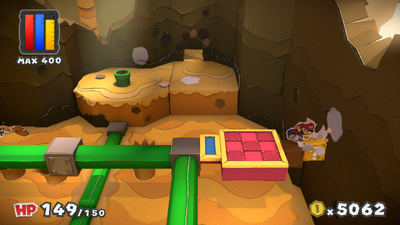
|
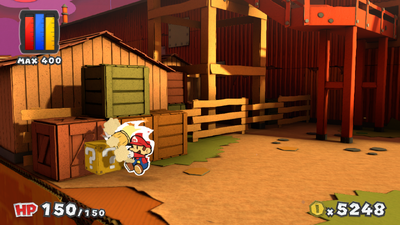
| Toad Trainworks |  Coin |
In the first scene, in the southwest, in front of the crates. | 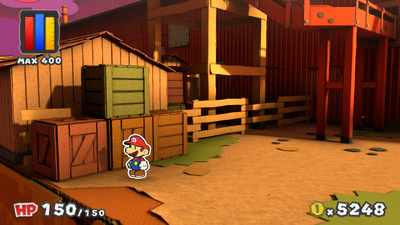
|
|
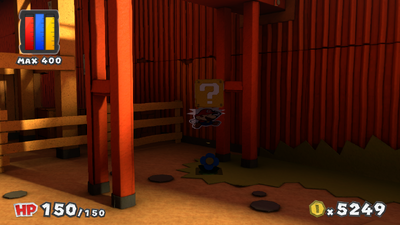
| Toad Trainworks |  Big Line Jump (colorless) |
Same scene, above the flower found under the coal chute. | 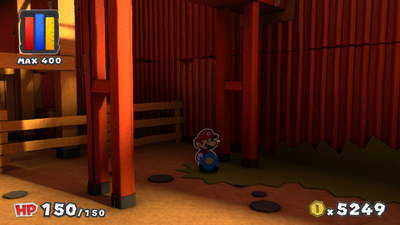
|
|
| Toad Trainworks |  Big Hurlhammer (colorless) |
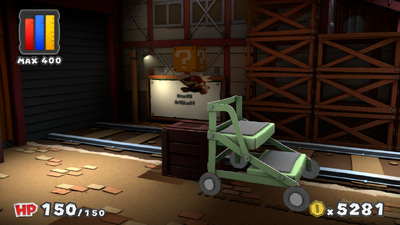
In the second scene, above the crate that can be reached with the help of stairs/ladder with wheels. | 
|
|
Hidden Block count
This chart shows the number of Hidden Blocks for each location, with the total amount at the bottom. Locations are listed in the order the player can visit them.
| Location | Count |
|---|---|
| Ruddy Road | 3 |
| Indigo Underground | 3 |
| Daffodil Peak | 3 |
| Sunglow Ridge | 3 |
| Mondo Woods | 2 |
| Kiwano Temple | 7 |
| The Golden Coliseum | 1 |
| Plum Park | 1 |
| Sacred Forest | 1 |
| Vortex Island | 1 |
| Lighthouse Island | 3 |
| Fortune Island | 4 |
| Mustard Café | 8 |
| Toad Trainworks | 3 |
| Total | 43 |