Toxic Tower (Donkey Kong Country 2)
| Level | |
|---|---|
| Toxic Tower | |
| |
| Level code | 6 - 6 |
| World | K. Rool's Keep |
| Game | Donkey Kong Country 2: Diddy's Kong Quest |
| Music track | Krook's March |
| << Directory of levels >> | |
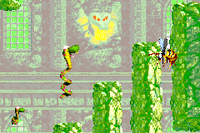
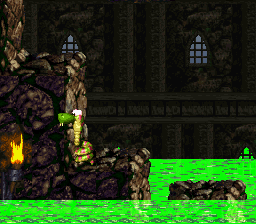
Toxic Tower is the thirty-third level of Donkey Kong Country 2: Diddy's Kong Quest and the sixth and final level of K. Rool's Keep. It features rising toxic waste (similar to the rising water in Slime Climb) that Diddy and Dixie Kong must avoid by quickly climbing up the level, as an Animal Friend. The Kongs are required to transform into one of three Animal Friends via their Animal Barrel to progress, with each Animal Friend having the ability to surpass certain obstacles or reach higher areas that the Kongs are unable to by themselves. The Rattly Barrel is found at the beginning of the stage, and Rattly's jumping abilities are required to reach higher platforms as he bounces away from the toxic waste. Some Zingers have to be jumped on to reach higher platforms or cross gaps. The Squawks Barrel appears right before the Star Barrel, and Squawks can go up through the narrow pathways and avoid Zingers along the way. The Squitter Barrel is located shortly before the level end, and as Squitter, he must pass the last brief segment before the level exit, or even access a Bonus Area.
Layout
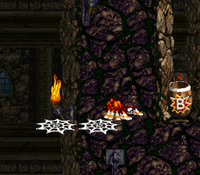
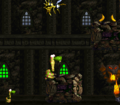
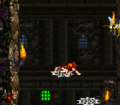
At the beginning of the level, the Kongs find themselves on a flat piece of ground with a DK Barrel above them. Some ledges are ahead with a pair of Klampons marching down them. As the heroes climb the ledges, a toxic, green liquid begins to rise, and it does not stop rising until the end of the level. At the top of the ledges, the Kongs can find an Animal Barrel containing Rattly; if they enter this barrel, they are transformed into the Animal Friend, who must use his jumping abilities to progress on a nearby ledge. Three platforms float to the left of this ledge that the rattlesnake can travel along to pass over the green liquid. A few Kaboings bounce down the platforms, which are followed by a large ledge that Rattly must climb to find another platform above him. A pit followes this platform, but he can cross it by bouncing off of a pair of Zingers that float in it. Once he crosses the pit, he lands on a solid ledge with another Zinger ahead of it. An additional ledge is located across this ledge on the leftmost side of the room, and it holds three Banana Bunches. Rattly can optionally jump to this ledge or continue over a pit with the previously-mentioned Zinger to access an area full of small platforms and the letter K.
Once Rattly reaches the highest platform in the rightmost part of this area, he can find some Zingers to his left that he must bounce on to cross a pit and reach a solid ledge positioned under several thin platforms. After reaching the platforms, he must travel along them to discover a Zinger above a small gap that he can jump through to find a hidden area with the level's Video Game Hero Coin. If Rattly continues past the Zinger, he can find some more thin platforms above him that he can jump to in order to progress. As he heads along the platforms, a nearby Kannon shoots barrels at him. The Kannon blocks a small alcove at the end of the area that holds a DK Barrel. If Rattly jumps to the ledge above the barrel, he can find a small platform above him. Three Zingers fly from left to right over a pit to the right of this platform, and Rattly must bounce on them to safely cross the pit and land on a solid ledge to the right of them.
If he jumps onto another piece of ground above here, he can find a Zinger guarding a small passage above him. On the other side of the passage, he can find a group of six bananas to his right and another passage being guarded by a Zinger to his left. After jumping through the passage and heading east, the rattlesnake can discover a ledge above him that he can jump to in order to find a raised piece of ground with some Zingers around it. There are two sets of these Zingers; one set is to the left of the raised ground, and the other is to the right of it. A Banana Coin sits in the left corner of this area near the raised piece of ground. In order to progress, Rattly must bounce on the Zingers above the raised ground. If he bounces along the Zingers to the right of the platform, he comes up to the letter O, but if he bounces on the Zingers to the left, he finds nothing. After jumping off of the Zingers to reach a higher platform, Rattly approaches a Blast Barrel that can blast him into an Animal Barrel that contains Squawks. When he lands in the barrel, he is transformed into the parrot, who can head north to find the level's Star Barrel.
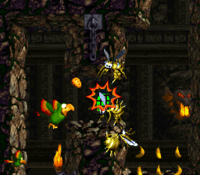
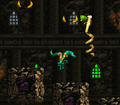
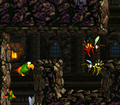
An alcove holding four bananas is located to the left of the barrel, as well as a curvy pathway that is infested with Zingers. As Squawks travels past the many Zingers, he comes past a few alcoves that contain some bananas. After the second of these banana-filled alcoves is passed, the parrot comes up to a Zinger with a DK Barrel immediately after it. Another Zinger ahead of here blocks Squawks's path, but he can defeat it with his nut projectiles. Once the bird travels up this path, can finds a passage to the left that is full of alcoves with Kaboings in them. An additional alcove is in the top of the passage with some bananas in it. After Squawks makes his way through this area, he finds a path to the north that contains a Zinger. If he continues from here, he reaches a yellow Zinger in an alcove and a red Zinger that moves from left to right. He cannot defeat the red Zinger, so he must instead maneuver around it as it moves back and forth. After passing the foe, he approaches a wide area full of yellow and red Zingers that move in a circle around the area. Two alcoves are on the sides of the room, and the alcove to the right contains the letter N. If Squawks heads north from the circle of Zingers, he heads up a narrow passage with a alcove containing some bananas.
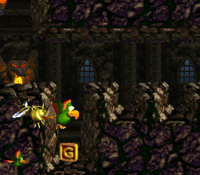
At the top of the path, the parrot can discover a long, wide room with two gaps that are guarded by Zingers at the top of it. After Squawks makes his way on the other side of the gaps, he can find another room with a gap at the top of it, followed by another with two gaps at the top of it. Each gap is guarded by a red or yellow Zinger. After passing through one of the gaps in the third room, Squawks approaches a narrow passage that is guarded by another red Zinger. Once he passes the foe, he comes through a winding passage. On his way through, a Zinger stands in his way, which he can defeat with his nut-shooting power. After passing this foe, he comes over a small alcove with some bananas in it and a continuing part of the pathway that is soon blocked off by an additional two Zingers. Once he passes the wasps, he flies over a second alcove full of bananas. To the north of the alcove, he can find a small passage that is blocked off by three Zingers that he can shoot nuts at to defeat. On the other side of the Zingers, he can find another alcove full of bananas and a pathway taking him up to an area full of Zingers that move in and out of several smaller alcoves. The last of the alcoves, which is bigger than all the others, contains the letter G.
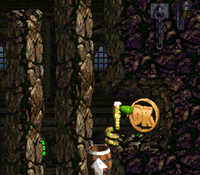
If Squawks heads north from here, he comes up an Animal Barrel containing Squitter. The barrel blocks his path into the next room, so he cannot access the room without first entering the Animal Barrel, which turns him into Squitter upon being entered. In order to avoid the rising liquid, Squitter must build his web platforms to climb the tall room. As he climbs, he comes up to a pair of Zingers, one of which that guards a banana and the way into a Bonus Level, and another that holds a photograph in the Game Boy Advance version of the game. Once Squitter accesses the top-left part of the room, he can discover a ledge that supports a Blast Barrel, which is able to blast him to another Blast Barrel. This barrel then shoots him into a No Animal Sign, which turns him back into Diddy and Dixie Kong and makes a Life Balloon appear when passed. If the two friends travel ahead of here, they can find a climbable chain hanging over an alcove that contains some bananas. A solid piece of ground with an End of Level Target sitting on it is located on the right side of the chain. Its prizes are either a banana, Banana Bunch, or a Banana Coin
Enemies
The following enemies appear in the following quantities:
Items and objects
The following items and objects appear in the following quantities:
Banana Bunch (9)
Banana Coin (5)
DK Barrel (3)
KONG Letters
- K: As Rattly, he must pass the first few Zingers. By bouncing up a few platforms and keeping to the right, Rattly can find the letter K floating just left of the wall.
- O: After passing a Kannon, Rattly must continue bouncing up the stage, passing a line of three Zingers and two individual ones along the way. After passing them, he ends up in an isolated room with ten Zingers sorted in an oval arrangement. The letter O is located on the right, above the third Zinger, who is hovering at the wall.
- N: As Squawks, after passing some Kaboings, he must continue up a narrow pathway and pass a few Zingers. After flying around the red Zinger, Squawks must continue flying upward. He appears in a symmetrical room with a Zinger flying in the center. By flying directly right, Squawks can collect the letter N in a small opening of the wall.
- G: A while after collecting the letter N, Squawks encounters a row of four Zingers. By defeating the leftmost Zinger, he can hover down an opening to obtain the letter G.
Key items
- Cranky's Video Game Hero Coin: After bouncing from three Zingers in succession, Rattly comes across a series of narrow pillars, where he must perform a supercharge jump. After jumping from the pillars, Rattly finds a Zinger blocking an opening, which can be accessed by defeating the Zinger. Down the opening, the Video Game Hero Coin is in a small alcove to the right.
- Golden feather (Game Boy Advance version only): After bouncing from the first two Zingers, Rattly lands back on the ground. From there, Rattly must perform a Supercharge jump to reach the golden feather (its located is hinted to by a single banana). Alternatively, Rattly can bounce on the third Zinger and jump from the second platform on the right.
- Photograph (Game Boy Advance version only): As Squitter, he must shoot a web projectile and defeat a Zinger above the one blocking the wall to the Bonus Area. This photograph shows an image of Squitter on the fifteenth page of the scrapbook.
Bonus Area
Toxic Tower has only one Bonus Level, listed by its type:
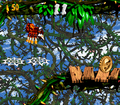
- Find the Token!: Shortly after the Kongs transform into Squitter, he must create web platforms, keeping to the right, until finding a Zinger. Squitter must defeat the Zinger and walk through the wall behind it. The Bonus Barrel is located on the other side. The Bonus Area is themed after a bramble location, and Squitter is enclosed between a series of two brambles. The brambles and the wide path between them are in a zigzag pattern. Squitter has thirty seconds to reach the top using his web platforms. His path is directed by a couple diagonal trails of bananas. The Kremkoin is on a wooden platform at the very top.
Gallery
Super Nintendo Entertainment System
Game Boy Advance
Names in other languages
| Language | Name | Meaning | Notes |
|---|---|---|---|
| Japanese | どくどくタワー[?] Dokudoku Tawā |
Poisonous Tower | |
| French | Tour Toxique[?] | Toxic Tower | |
| German | Gift-Gemäuer[?] | Toxic Ruins | |
| Italian | Torre Tossica[?] | Toxic Tower | |
| Spanish | Torre Tóxica[?] | Toxic Tower |
Trivia
- Unlike in other castle levels where the windows in the background are black, the windows in this level show a visible sky. The toxic waste's surface also spans past the background wall, rendering it visible through the windows as well.
