Barrel Shield Bust-Up: Difference between revisions
m (Text replacement - "(\| *)Jap([RMCN\d]* *=)" to "$1Jpn$2") |
|||
| (59 intermediate revisions by 25 users not shown) | |||
| Line 1: | Line 1: | ||
{{ | {{DKC level infobox | ||
| | |image=[[File:Barrel Shield Bust-Up DKC3.png]] | ||
|code=2 - 1 (SNES)<br>2 - 4 (GBA) | |code=2 - 1 (SNES)<br>2 - 4 (GBA) | ||
|game=''[[Donkey Kong Country 3: Dixie Kong's Double Trouble]] | |world=[[Kremwood Forest]] | ||
| | |game=''[[Donkey Kong Country 3: Dixie Kong's Double Trouble!]] | ||
|before=[[ | |track=Treetop Tumble | ||
|before=[[Belcha's Barn|<<]] | |||
|after=[[Riverside Race|>>]] | |after=[[Riverside Race|>>]] | ||
| | |before3=[[Squeals on Wheels|<<]] | ||
| | |after3=[[Bobbing Barrel Brawl|>>]] | ||
}} | }} | ||
'''Barrel Shield Bust-Up''' is the sixth [[level]] of | '''Barrel Shield Bust-Up''' is the sixth [[level]] of ''[[Donkey Kong Country 3: Dixie Kong's Double Trouble!]]'' It is also the first level of the [[Kremwood Forest]]. In the [[Game Boy Advance]] remake, the level switched places with [[Springin' Spiders]], making it the fourth level of Kremwood Forest and the tenth level overall. It takes place directly inside two giant hollow trees. The main goal of [[Dixie Kong|Dixie]] and [[Kiddy Kong|Kiddy]] is to reach the top of the giant tree. The [[Kong]]s can go up the tree by climbing up [[rope]]s and jumping on platforms. Within the hollow trees are groups of [[Minkey]]s who throw acorns at the Kongs. A [[Barrel Shield]] often moves up and down between the Minkeys. The horizontal sections usually involve alternating between the two trees. Many [[Sneek]]s and few [[Buzz (enemy)|Buzzes]] can also be found here, along with a single [[Nid]] that provides access to the letter G. Some areas are hidden around the trees leading to the [[Koin]] and two [[Bonus Barrel]]s respectively. | ||
==Layout== | |||
[[File:Barrel Shield Bust-Up DKC3 GBA.png|thumb|left|Barrel Shield Bust-Up in the Game Boy Advance version]] | |||
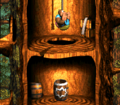
The Kongs begin the level inside of a tree with an opening on the right of it that leads outside onto some branches that support a Sneek. A [[DK Barrel]] is placed next to the opening that leads into the second tree in the level, which contains a Buzz, who flies in front of a [[Banana Bunch]], and a few platform that hold bananas. The Kongs can climb the platforms to reach a rope that they can travel up to reach some bananas and the [[KONG Letters|letter K]]. As they climb higher on the rope, they come up to a couple of Minkeys that they must avoid. A Barrel Shield blocks the acorns from the second of the Minkeys. If they continue from here, they reach the end of the rope and an opening to the left that they can go through to exit the tree. Outside of the tree, they can find some branches that they can climb to reach some Sneeks and the way into a higher part of the first tree in the level. Here, they can find a vertical rope that they can climb up to reach a trio of Minkeys and the letter O, which is surrounded by bananas. As they pass the three Minkeys, a stationary Barrel Shield can protect them. Once they pass the letter O, they reach a group of four Minkeys that throw their acorns after one another, instead of at the same time. After they are passed, the primates reach some more Minkeys that throw acorns all at the same time in a straight path. They can use a pair of Barrel Shields to dodge their projectiles. The top of the rope is located after these enemies, and the Kongs can find some platforms here that they must climb to reach an opening that leads out of the tree and onto some branches with a pair of Buzzes orbiting a Banana Bunch above them. | |||
The way into the second tree is to the right of here. In the tree's interior, they can find a hole in the ground that they can fall through to reach a hidden [[bear coin]] and an invisible [[Blast Barrel|Auto-Fire Barrel]], which can blast them back up through the hole. Above the hole, the apes can find a vertical rope that they must climb. Several Minkeys that throw nuts after one another impend in their progress as they climb. Once the Kongs reach the top of the rope, they can find some platforms that can be climbed to reach a [[TNT Barrel]], which they can use to break open some of the left side of the tree. If they walk into the opening they make, they can find an area with a [[Bonus Barrel]] in it. The Kongs must continue up a rope near the TNT Barrel to progress to five Minkeys that throw acorns after one another. Once the primates climb past these foes, they reach the top of the rope, where they can find a passage that leads out between the level's two trees. Here, there is a Sneek and some branches that can be climbed to reach the level's [[Star Barrel]]. | |||
At this point in the level, the Kongs can find a passage to the right of them that leads into the second tree. In this part of the tree, they can find a Sneek and some platforms that they must climb to reach a DK Barrel and a rope. As they climb the rope, they come past five Minkeys that throw acorns at them. They can dodge all of their nuts by hiding behind a moving Barrel Shield as they progress. Once they pass the foes, they reach some platforms that help them reach an opening that leads outside of the tree, where some branches can be found to help the Kongs reach the way back into the first tree. As they approach the opening to this tree, a pair of Sneeks get in their way. Once they access the tree, they can find a vertical rope with a group of Minkeys lined up to the left of it. They must use a moving Barrel Shield to climb past the foes unharmed. Another group of Minkeys is ahead, and they throw their acorns after one another. If they manage to pass these enemies, they discover another line of Minkeys on the side of the tree that all throw acorns at the same time. As a few time before, they must rely on a moving Barrel Shield to dodge all of the nuts. Soon after passing these Minkeys, the apes reach the top of the rope, where they can find the letter N and a passage leading outside of the tree, where some branches and a DK Barrel can be found. If the Kongs throw one another upwards, they can find some hidden branches, one of which that holds a TNT Barrel, which can bust open part of the tree to the left. | |||
At | |||
If they walk through the created opening in this tree, they can find a [[Iron Barrel|Steel Barrel]] and a [[Koin]] in a small area of the first tree. Another opening is to the right of the previously-mentioned DK Barrel that leads into the second tree encountered in the level. In this part of the tree, they can find a rope that they must climb to progress. Some Minkeys that throw nuts after one another impend in their progress as they begin to climb. Once this group of foes is passed, the Kongs can find several bananas and a trio of platforms, one of which that holds Nid, who can lift the primates up to the letter G and some bananas. A passage leading outside of the tree and onto some branches is to the left of here, and the branches lead the Kongs to another passage that they can travel through to reach the interior of the first tree. Here, they can find a vertical rope that they must climb to reach some Minkeys that throw acorns at them. They all throw the nuts at the same time, so the only way to dodge all of their nuts is by using a Barrel Shield that slides up and down the rope. | |||
There are five more Minkeys ahead of here, who throw their nuts in the same way as the previous Minkeys. As before, a moving Barrel Shield must be used to dodge all of their nuts. More Minkeys follow these enemies, and, similar to the two previous Minkey groups, they all throw their acorns at the same time. Therefore, a Barrel Shield that moves along the rope must be used to dodge their weapons. Once the apes pass these enemies, they reach the end of the rope, which is located next to a TNT Barrel. They can use this barrel to break a hole in the wall to the left, which they can then travel through to reach some branches at the edge of the area. After they climb the branches, they can find another passage that leads into the first tree. Here, they can discover a high platform and a DK Barrel, along with a hole in the wall that Dixie can hover through to reach holes in the following tree. If she hovers through all of the holes, she can reach a hidden Bonus Barrel. To the right of the aforementioned TNT Barrel, the primates can find another way out of the first tree; once they move through it, they can find some branches that lead them towards the opening to the top of the second tree. In this part of the tree, they can find the [[Level Flag]]. If they raise the flag, they complete the level successfully. | |||
==Enemies== | |||
The following enemies appear in the following quantities: | |||
<gallery> | |||
Buzz DKC3 green.png|[[Buzz (enemy)|Buzz]] (green) (2) | |||
Minkey DKC3.png|[[Minkey]] (51) | |||
Nid DKC3 purple.png|[[Nid]] (purple) (1) | |||
Sneek DKC3.png|[[Sneek]] (6) | |||
</gallery> | |||
==Items and objects== | |||
The following items and objects appear in the following quantities: | |||
<gallery> | |||
Bear Coin.png|[[Bear coin]] (2) | |||
DK Barrel.png|[[DK Barrel]] (4) | |||
TNT Barrel.png|[[TNT Barrel]] (3) | |||
</gallery> | |||
===K-O-N-G Letters=== | |||
*'''K:''' Hovering to the left of the first rope in the level. | |||
*'''O:''' After passing the first group of Minkeys on the second rope in the level, the Kongs can climb up to the letter O. | |||
*'''N:''' The letter N is located above a vertical rope located just before the second DK Barrel after the Star Barrel. | |||
*'''G:''' Once the Kongs climb the vertical rope located shortly after the second DK Barrel, they can find a Nid, who can bounce them up to the letter G and some bananas. | |||
===DK Coin=== | ===DK Coin=== | ||
[[File:Barrel Shield Bust-Up Koin.png|thumb|The location of the Koin]] | |||
Right after the letter N, the Kongs must exit the tree to access an area between the two trees. Here, Kiddy must perform a [[team up]] throw to throw Dixie up to a hidden area with branches holding a TNT Barrel. They must use the barrel to blast open a part of the tree to the left. If they go through the opening, the Kongs can find a section in the first tree with a [[Iron Barrel|Steel Barrel]] and a [[Koin]]. The Kongs must throw the Steel Barrel at the left wall while standing over the Koin for the Steel Barrel to bounce on the lower platform with Koin. As the Koin holds its shield above, the Steel Barrel hits Koin, which defeats him and rewards the [[DK Coin]] to the Kongs. | |||
{{br}} | |||
==Bonus Levels== | |||
{{multiframe|[[File:Barrel Shield Bust-Up Bonus Area 1.png|200px]] [[File:Barrel Shield Bust-Up Bonus Level 2.png|200px]]|size=420|The first and second Bonus Levels respectively}} | |||
Barrel Shield Bust-Up has two Bonus Levels, as follows: | |||
*'''''Find the Coin!''''': Shortly before the Star Barrel, the Kongs must pick up a TNT Barrel and throw it against a wall to the left to open access to an area with a [[Bonus Barrel]]. In the [[Bonus Level]], the Kongs have 15 seconds to climb up a rope in a tree and avoid six Minkeys; there are no [[Barrel Shield]]s for them to protect themselves with. When the Kongs reach the top of the rope, they can go outside of the tree and drop below to find the [[Bonus Coin (Donkey Kong franchise)|Bonus Coin]]. | |||
*'''''Grab 15 Bananas!''''': After the letter G, the Kongs must climb the neighboring tree to find a TNT Barrel. They must use it to blast away a wall on the left. Once this is done, they can go outside of the tree, jump up some branches, and re-enter the tree through another passage. A DK Barrel is above the platform followed after the entrance. A hole is on the other side of the tree's interior, which Dixie must [[Helicopter Spin]] through to exit the tree. She must continue hovering diagonally and go through another hole leading into the next tree, and then another hole to enter a Bonus Barrel to the right of the interior. In the Bonus Level, the Kongs have a limited time to collect 15 [[green banana]]s that randomly appear around a rope. Three Minkeys throw acorns around the rope, and Dixie and Kiddy must avoid being hit by them. Once every green banana has been collected, the Bonus Coin appears at the bottom of the area. | |||
{{br}} | |||
=== [[Warp Barrel]] | ==Warp Barrel== | ||
[[File:Barrel Shield Bust-Up GBA Warp Barrel.png|thumb|left|The location of the Warp Barrel, as seen in the Game Boy Advance version]] | |||
Shortly after passing the letter O, the Kongs can find a hole in the ground that they must drop into to find an Auto-Fire Barrel that blasts them upwards. If they shift to the left of this barrel, they land in a hidden [[Warp Barrel]] that sends them to the Level Flag when entered. | |||
{{br|left}} | |||
== | ==Gallery== | ||
===Super Nintendo Entertainment System=== | |||
<gallery> | |||
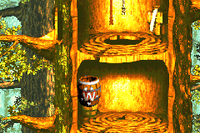
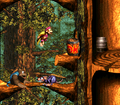
Barrel Shield Bust-Up DKC3 DK Barrel.png|The Kongs jump to a DK Barrel | |||
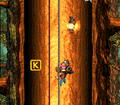
Barrel Shield Bust-Up K.png|The letter K | |||
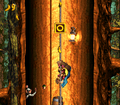
Barrel Shield Bust-Up O.png|The letter O | |||
Barrel Shield Bust-Up DKC3 shot.png|The Kongs shoot out of an Auto-Fire Barrel | |||
Barrel Shield Bust-Up DKC3 shot 2.png|The Kongs dodge the attacks of several Minkeys. | |||
Barrel Shield Bust-Up DKC3 shot 3.png|The apes travel along some branches that lead to a Koin. | |||
Barrel Shield Bust-Up DKC3 shot 4.png|Kiddy and Dixie in a hollow tree | |||
Barrel Shield Bust-Up DKC3 Buzzes.png|The Kongs stand under two Buzzes | |||
Barrel Shield Bust-Up N.png|The letter N | |||
Barrel Shield Bust-Up G.png|The letter G | |||
</gallery> | |||
===Game Boy Advance=== | |||
<gallery> | |||
Barrel Shield Bust-Up DKC3 GBA 2.png|The Kongs exit from a hollow tree | |||
Barrel Shield Bust-Up GBA first Bonus Barrel.png|The Kongs reach the first Bonus Barrel | |||
BarrelShieldBustup-GBA-N.png|The letter N | |||
Barrel Shield Bust-Up GBA second Bonus Barrel.png|Dixie travels to the second Bonus Barrel | |||
</gallery> | |||
==Names in | ==Names in other languages== | ||
{{ | {{foreign names | ||
| | |Jpn=タルのシールド | ||
| | |JpnR=Taru no shīrudo | ||
| | |JpnM=Barrel Shield | ||
|Spa=Escudos de Barriles | |Spa=Escudos de Barriles | ||
|SpaM=Barrel Shields | |SpaM=Barrel Shields | ||
|Fre=Tonneaux Tonnerre | |||
|FreM=Thunder Barrel | |||
|Ger=Feine Fässer-Fiesta | |||
|GerM=Nice Barrel Party | |||
|Ita=Nascondino con Barili | |||
|ItaM=Hide and Seek with Barrels | |||
}} | }} | ||
==Trivia== | |||
*Barrel Shield Bust-Up has a glitch in the Game Boy Advance version. When Dixie tosses Kiddy into the Koin, Kiddy will bounce off and be ride-able. This normally should not be possible. As a result, when Kiddy gets off of Dixie, she always appears to be bending down. This can be fixed by pressing "Select" to switch the player Kong. | |||
{{DKC3}} | {{DKC3}} | ||
[[Category: | [[Category:Forests]] | ||
[[Category:Donkey Kong Country 3: Dixie Kong's Double Trouble! levels]] | |||
[[de:Feine Fässer-Fiesta]] | |||
[[Category | |||
Latest revision as of 12:38, January 7, 2025
| Level | |
|---|---|
| Barrel Shield Bust-Up | |
| |
| Level code | 2 - 1 (SNES) 2 - 4 (GBA) |
| World | Kremwood Forest |
| Game | Donkey Kong Country 3: Dixie Kong's Double Trouble! |
| Music track | Treetop Tumble |
| << Directory of levels (SNES) >> | |
| << Directory of levels (GBA) >> | |
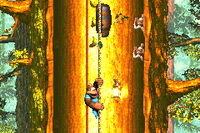
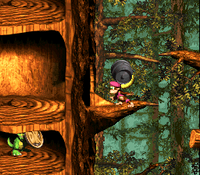
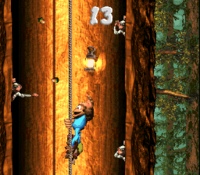
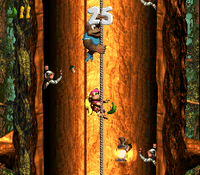
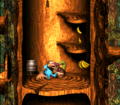
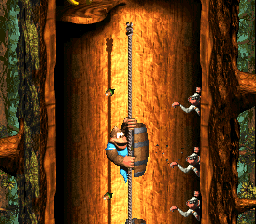
Barrel Shield Bust-Up is the sixth level of Donkey Kong Country 3: Dixie Kong's Double Trouble! It is also the first level of the Kremwood Forest. In the Game Boy Advance remake, the level switched places with Springin' Spiders, making it the fourth level of Kremwood Forest and the tenth level overall. It takes place directly inside two giant hollow trees. The main goal of Dixie and Kiddy is to reach the top of the giant tree. The Kongs can go up the tree by climbing up ropes and jumping on platforms. Within the hollow trees are groups of Minkeys who throw acorns at the Kongs. A Barrel Shield often moves up and down between the Minkeys. The horizontal sections usually involve alternating between the two trees. Many Sneeks and few Buzzes can also be found here, along with a single Nid that provides access to the letter G. Some areas are hidden around the trees leading to the Koin and two Bonus Barrels respectively.
Layout[edit]
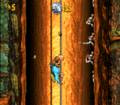
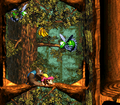
The Kongs begin the level inside of a tree with an opening on the right of it that leads outside onto some branches that support a Sneek. A DK Barrel is placed next to the opening that leads into the second tree in the level, which contains a Buzz, who flies in front of a Banana Bunch, and a few platform that hold bananas. The Kongs can climb the platforms to reach a rope that they can travel up to reach some bananas and the letter K. As they climb higher on the rope, they come up to a couple of Minkeys that they must avoid. A Barrel Shield blocks the acorns from the second of the Minkeys. If they continue from here, they reach the end of the rope and an opening to the left that they can go through to exit the tree. Outside of the tree, they can find some branches that they can climb to reach some Sneeks and the way into a higher part of the first tree in the level. Here, they can find a vertical rope that they can climb up to reach a trio of Minkeys and the letter O, which is surrounded by bananas. As they pass the three Minkeys, a stationary Barrel Shield can protect them. Once they pass the letter O, they reach a group of four Minkeys that throw their acorns after one another, instead of at the same time. After they are passed, the primates reach some more Minkeys that throw acorns all at the same time in a straight path. They can use a pair of Barrel Shields to dodge their projectiles. The top of the rope is located after these enemies, and the Kongs can find some platforms here that they must climb to reach an opening that leads out of the tree and onto some branches with a pair of Buzzes orbiting a Banana Bunch above them.
The way into the second tree is to the right of here. In the tree's interior, they can find a hole in the ground that they can fall through to reach a hidden bear coin and an invisible Auto-Fire Barrel, which can blast them back up through the hole. Above the hole, the apes can find a vertical rope that they must climb. Several Minkeys that throw nuts after one another impend in their progress as they climb. Once the Kongs reach the top of the rope, they can find some platforms that can be climbed to reach a TNT Barrel, which they can use to break open some of the left side of the tree. If they walk into the opening they make, they can find an area with a Bonus Barrel in it. The Kongs must continue up a rope near the TNT Barrel to progress to five Minkeys that throw acorns after one another. Once the primates climb past these foes, they reach the top of the rope, where they can find a passage that leads out between the level's two trees. Here, there is a Sneek and some branches that can be climbed to reach the level's Star Barrel.
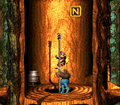
At this point in the level, the Kongs can find a passage to the right of them that leads into the second tree. In this part of the tree, they can find a Sneek and some platforms that they must climb to reach a DK Barrel and a rope. As they climb the rope, they come past five Minkeys that throw acorns at them. They can dodge all of their nuts by hiding behind a moving Barrel Shield as they progress. Once they pass the foes, they reach some platforms that help them reach an opening that leads outside of the tree, where some branches can be found to help the Kongs reach the way back into the first tree. As they approach the opening to this tree, a pair of Sneeks get in their way. Once they access the tree, they can find a vertical rope with a group of Minkeys lined up to the left of it. They must use a moving Barrel Shield to climb past the foes unharmed. Another group of Minkeys is ahead, and they throw their acorns after one another. If they manage to pass these enemies, they discover another line of Minkeys on the side of the tree that all throw acorns at the same time. As a few time before, they must rely on a moving Barrel Shield to dodge all of the nuts. Soon after passing these Minkeys, the apes reach the top of the rope, where they can find the letter N and a passage leading outside of the tree, where some branches and a DK Barrel can be found. If the Kongs throw one another upwards, they can find some hidden branches, one of which that holds a TNT Barrel, which can bust open part of the tree to the left.
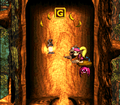
If they walk through the created opening in this tree, they can find a Steel Barrel and a Koin in a small area of the first tree. Another opening is to the right of the previously-mentioned DK Barrel that leads into the second tree encountered in the level. In this part of the tree, they can find a rope that they must climb to progress. Some Minkeys that throw nuts after one another impend in their progress as they begin to climb. Once this group of foes is passed, the Kongs can find several bananas and a trio of platforms, one of which that holds Nid, who can lift the primates up to the letter G and some bananas. A passage leading outside of the tree and onto some branches is to the left of here, and the branches lead the Kongs to another passage that they can travel through to reach the interior of the first tree. Here, they can find a vertical rope that they must climb to reach some Minkeys that throw acorns at them. They all throw the nuts at the same time, so the only way to dodge all of their nuts is by using a Barrel Shield that slides up and down the rope.
There are five more Minkeys ahead of here, who throw their nuts in the same way as the previous Minkeys. As before, a moving Barrel Shield must be used to dodge all of their nuts. More Minkeys follow these enemies, and, similar to the two previous Minkey groups, they all throw their acorns at the same time. Therefore, a Barrel Shield that moves along the rope must be used to dodge their weapons. Once the apes pass these enemies, they reach the end of the rope, which is located next to a TNT Barrel. They can use this barrel to break a hole in the wall to the left, which they can then travel through to reach some branches at the edge of the area. After they climb the branches, they can find another passage that leads into the first tree. Here, they can discover a high platform and a DK Barrel, along with a hole in the wall that Dixie can hover through to reach holes in the following tree. If she hovers through all of the holes, she can reach a hidden Bonus Barrel. To the right of the aforementioned TNT Barrel, the primates can find another way out of the first tree; once they move through it, they can find some branches that lead them towards the opening to the top of the second tree. In this part of the tree, they can find the Level Flag. If they raise the flag, they complete the level successfully.
Enemies[edit]
The following enemies appear in the following quantities:
Items and objects[edit]
The following items and objects appear in the following quantities:
Bear coin (2)
DK Barrel (4)
TNT Barrel (3)
K-O-N-G Letters[edit]
- K: Hovering to the left of the first rope in the level.
- O: After passing the first group of Minkeys on the second rope in the level, the Kongs can climb up to the letter O.
- N: The letter N is located above a vertical rope located just before the second DK Barrel after the Star Barrel.
- G: Once the Kongs climb the vertical rope located shortly after the second DK Barrel, they can find a Nid, who can bounce them up to the letter G and some bananas.
DK Coin[edit]
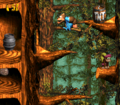
Right after the letter N, the Kongs must exit the tree to access an area between the two trees. Here, Kiddy must perform a team up throw to throw Dixie up to a hidden area with branches holding a TNT Barrel. They must use the barrel to blast open a part of the tree to the left. If they go through the opening, the Kongs can find a section in the first tree with a Steel Barrel and a Koin. The Kongs must throw the Steel Barrel at the left wall while standing over the Koin for the Steel Barrel to bounce on the lower platform with Koin. As the Koin holds its shield above, the Steel Barrel hits Koin, which defeats him and rewards the DK Coin to the Kongs.
Bonus Levels[edit]
Barrel Shield Bust-Up has two Bonus Levels, as follows:
- Find the Coin!: Shortly before the Star Barrel, the Kongs must pick up a TNT Barrel and throw it against a wall to the left to open access to an area with a Bonus Barrel. In the Bonus Level, the Kongs have 15 seconds to climb up a rope in a tree and avoid six Minkeys; there are no Barrel Shields for them to protect themselves with. When the Kongs reach the top of the rope, they can go outside of the tree and drop below to find the Bonus Coin.
- Grab 15 Bananas!: After the letter G, the Kongs must climb the neighboring tree to find a TNT Barrel. They must use it to blast away a wall on the left. Once this is done, they can go outside of the tree, jump up some branches, and re-enter the tree through another passage. A DK Barrel is above the platform followed after the entrance. A hole is on the other side of the tree's interior, which Dixie must Helicopter Spin through to exit the tree. She must continue hovering diagonally and go through another hole leading into the next tree, and then another hole to enter a Bonus Barrel to the right of the interior. In the Bonus Level, the Kongs have a limited time to collect 15 green bananas that randomly appear around a rope. Three Minkeys throw acorns around the rope, and Dixie and Kiddy must avoid being hit by them. Once every green banana has been collected, the Bonus Coin appears at the bottom of the area.
Warp Barrel[edit]
Shortly after passing the letter O, the Kongs can find a hole in the ground that they must drop into to find an Auto-Fire Barrel that blasts them upwards. If they shift to the left of this barrel, they land in a hidden Warp Barrel that sends them to the Level Flag when entered.
Gallery[edit]
Super Nintendo Entertainment System[edit]
Game Boy Advance[edit]
Names in other languages[edit]
| Language | Name | Meaning | Notes |
|---|---|---|---|
| Japanese | タルのシールド[?] Taru no shīrudo |
Barrel Shield | |
| French | Tonneaux Tonnerre[?] | Thunder Barrel | |
| German | Feine Fässer-Fiesta[?] | Nice Barrel Party | |
| Italian | Nascondino con Barili[?] | Hide and Seek with Barrels | |
| Spanish | Escudos de Barriles[?] | Barrel Shields |
Trivia[edit]
- Barrel Shield Bust-Up has a glitch in the Game Boy Advance version. When Dixie tosses Kiddy into the Koin, Kiddy will bounce off and be ride-able. This normally should not be possible. As a result, when Kiddy gets off of Dixie, she always appears to be bending down. This can be fixed by pressing "Select" to switch the player Kong.
