Fire-Ball Frenzy: Difference between revisions
Fawfulfury65 (talk | contribs) mNo edit summary |
m (Text replacement - "(\| *)Jap([RMCN\d]* *=)" to "$1Jpn$2") |
||
| (56 intermediate revisions by 24 users not shown) | |||
| Line 1: | Line 1: | ||
{{level | {{level infobox | ||
|image=[[File:Fire-Ball Frenzy DKC3 screenshot.png]] | |||
|image=[[ | |||
|code=4 - 1 | |code=4 - 1 | ||
|game=''[[Donkey Kong Country 3: Dixie Kong's Double Trouble]] | |world=[[Mekanos]] | ||
| | |game=''[[Donkey Kong Country 3: Dixie Kong's Double Trouble!]] | ||
|before=[[ | |track=Nuts and Bolts | ||
|before=[[Arich's Ambush|<<]] | |||
|after=[[Demolition Drain-Pipe|>>]] | |after=[[Demolition Drain-Pipe|>>]] | ||
}} | }} | ||
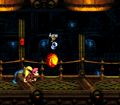
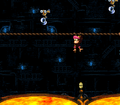
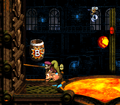
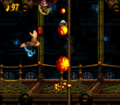
'''Fire-Ball Frenzy''' is the sixteenth [[level]] in ''[[Donkey Kong Country 3: Dixie Kong's Double Trouble]]'', and the first | '''Fire-Ball Frenzy''' is the sixteenth [[level]] in ''[[Donkey Kong Country 3: Dixie Kong's Double Trouble!]]'' and the first level of [[Mekanos]]. It is the first factory level of the game. [[Karbine]]s appear throughout the level, shooting fireballs in [[Dixie Kong]] and [[Kiddy Kong]]'s path. The [[Kong]]s have to go across some [[bubbling cauldron]]s, often by moving across a horizontal [[rope]]. [[Squitter]] is used in the first [[Bonus room|Bonus Level]], although there is a [[No Animal Sign]] in the main level to prevent him from progressing further. | ||
==Layout== | |||
[[File:Fire-Ball Frenzy GBA three Karbines.png|thumb|left|Fire-Ball Frenzy in the Game Boy Advance version]] | |||
From the start of the level, there will be a [[DK Barrel]], followed by some bananas. The Kongs will then go east and encounter three Karbines, each shooting one fireball at a time. They must pass two side by side Karbines, which also shoot a bit faster. They will go northeast, then jump off of a Knik-Knak to grab [[KONG Letters|the letter K]] and avoid falling into bubbling cauldrons. There will then be two Bristles, followed by more Karbines. The Kongs will be transported up to a rope, yet the Karbines will follow them. They must run west past another Bristle and three Karbines to find a DK Barrel. They must then jump over a Buzz and avoid yet another Karbine. They will then find the letter O, and then climb across two bubbling cauldrons, avoiding three Karbines. The last Karbine will chase the Kongs up seven ropes and platforms until they reach a patch of bananas. They must avoid another Bristle to find the midway point | |||
[[ | The first item after the [[Star Barrel]] is a DK Barrel. Going east, the Kongs can find an invisible [[bear coin]], but to do so, they must avoid a Karbine while going down five platforms and a pit of lava. Going east, they must avoid two Buzzes and two Karbines then go up a moving platform avoiding more Karbines. They must then avoid two Karbines shooting three fireballs to find the letter N. After that, the apes will go up a platform and find another DK Barrel. [[Koin]] is near here. They must go west avoiding eight fast shooting Karbines. These Karbines will again chase them on a high-up rope. Past here they will find another Bristle and the letter G. There will be four more Karbines before the level ends. | ||
{{br|left}} | |||
== | ==Enemies== | ||
The following enemies appear in the following quantities: | |||
<gallery> | |||
Buzz DKC3 green.png|[[Buzz (enemy)|Buzz]] (green) (11) | |||
Buzz DKC3 red.png|Buzz (red) (3) | |||
Bristles DKC3.png|[[Bristles]] (5) | |||
Karbine DKC3.png|[[Karbine]] (39) | |||
Knik Knak DKC3 red.png|[[Knik-Knak]] (red) (1) | |||
Rekoil DKC3.png|[[Re-Koil]] (2) | |||
</gallery> | |||
The | ==Items and objects== | ||
The following items and objects appear in the following quantities: | |||
<gallery> | |||
Bear Coin.png|[[Bear coin]] (3) | |||
DK Barrel.png|[[DK Barrel]] (3) | |||
</gallery> | |||
===K-O-N-G Letters=== | |||
[[File:FireballFrenzy-SNES-K.png|thumb|The letter K]] | |||
*'''K:''' Hovering above a lone Knik-Knak. | |||
*'''O:''' Shortly after the first Buzz. | |||
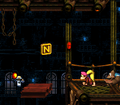
*'''N:''' After the Karbine that shoots three times in a row. | |||
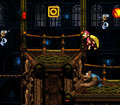
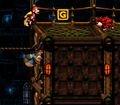
*'''G:''' Right after a rope climbing section. | |||
{{br}} | |||
== | ===DK Coin=== | ||
[[File:Fire-Ball Frenzy Koin.png|thumb|The Koin of Fire-Ball Frenzy]] | |||
Just after the letter N, the Kongs encounter a [[Koin]] on a platform to the right, with a [[Iron Barrel|Steel Barrel]] and a Karbine. The Kongs must pick up the Steel Barrel, while avoiding the Karbine, then throw it to the wall on the right. The Steel Barrel rolls into Koin from behind, thus defeating him and giving the [[DK Coin]] to the Kongs. | |||
{{br}} | |||
== | ==Bonus Levels== | ||
* | {{multiframe|[[File:Fire-Ball Frenzy Bonus Level 1.png|200px]] [[File:Fire-Ball Frenzy Bonus Level 2.png|200px]]|size=420|The first and second Bonus Levels respectively}} | ||
Fire-Ball Frenzy has two [[Bonus room|Bonus Levels]], listed by type: | |||
*'''''Bash the Baddies!''''': After the Star Barrel, Dixie and Kiddy are chased down some platforms by a Karbine. From the fifth short platform, the Kongs must jump left to land on a platform below with another Karbine. With Dixie's [[Helicopter Spin]], she must twirl across another lava pit to land on a lower platform. She must hover over another pit of lava, which another Karbine is hovering over. The [[Bonus Barrel]] is on the floor at the southwest corner. In the [[Bonus Level]], the Kongs transform into [[Squitter the Spider]]. Squitter has twenty seconds to defeat ten green Buzzes with his web projectiles while avoiding the Karbines shooting fireballs at him. After defeating every Buzz, Squitter can collect the [[Bonus Coin (Donkey Kong franchise)|Bonus Coin]]. | |||
*'''''Grab 15 Bananas!''''': Right before the letter N, there is a Karbine shooting three fireballs in a row. A lone banana floats at the top-left of the Karbine, and with their [[Team-up]] move, Kiddy must throw Dixie up on a small platform, which then moves up and takes the Kongs to a short path leading to the Bonus Barrel in an alcove. In the Bonus Level, the Kongs have 40 seconds to collect 15 green bananas while avoiding the fireballs blasted by two Karbines at a consecutive rate. Once they obtain every green banana, the Bonus Coin appears for Dixie and Kiddy to collect. | |||
==Gallery== | |||
<gallery> | |||
Fire-Ball Frenzy Karbine.png|The Kongs encounter a Karbine | |||
Fire-Ball Frenzy horizontal rope.png|Dixie moving across a horizontal rope beneath two Karbines | |||
Fire-Ball Frenzy Bonus Barrel 1.png|The Kongs at the first Bonus Barrel | |||
FireBall Frenzy DKC3.png|Kiddy throwing Dixie up to a platform, which is just before the second Bonus Barrel | |||
Fire-Ball Frenzy O.png|The letter O | |||
Fire-Ball Frenzy N.png|The letter N | |||
Fire-Ball Frenzy G.png|The letter G | |||
Fire-Ball Frenzy GBA three Karbines.png|Kiddy walking beneath three Karbines in the Game Boy Advance version | |||
Fire-Ball Frenzy GBA Star Barrel.png|The Kongs beneath the Star Barrel in the Game Boy Advance version | |||
FireballFrenzy-GBA.png|The Kongs move across a horizontal as Karbines blast fireballs at them in the Game Boy Advance version | |||
Fire-Ball Frenzy GBA lava.png|The Kongs climb a rope across a pit of lava in the Game Boy Advance version | |||
FireballFrenzy-GBA-Bonus.png|Bash the Baddies! in the Game Boy Advance version | |||
</gallery> | |||
==Names in other languages== | |||
{{foreign names | |||
|Jpn=ファイヤーボール カービン | |||
|JpnR=Faiyābōru Kābin | |||
|JpnM=Fireball Karbine | |||
|Spa=Frenesí de Bolas de Fuego | |||
|SpaM=Fireball Frenzy | |||
|Fre=Folle Fournaise | |||
|FreM=Mad Furnace | |||
|Ger=Feuerball-Knall | |||
|GerM=Fireball Blast | |||
|Ita=Frenesia di Fuochi | |||
|ItaM=Frenzy of Fire | |||
}} | |||
==Trivia== | ==Trivia== | ||
* | *The large moving platform with two Karbines above it is actually two small platforms layered over each other. | ||
{{DKC3}} | {{DKC3}} | ||
[[Category:Factories]] | [[Category:Factories]] | ||
[[Category | [[Category:Donkey Kong Country 3: Dixie Kong's Double Trouble! levels]] | ||
Latest revision as of 12:05, January 7, 2025
| Level | |
|---|---|
| Fire-Ball Frenzy | |
| |
| Level code | 4 - 1 |
| World | Mekanos |
| Game | Donkey Kong Country 3: Dixie Kong's Double Trouble! |
| Music track | Nuts and Bolts |
| << Directory of levels >> | |
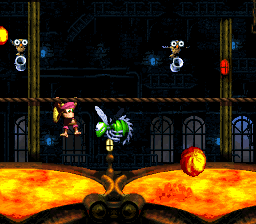
Fire-Ball Frenzy is the sixteenth level in Donkey Kong Country 3: Dixie Kong's Double Trouble! and the first level of Mekanos. It is the first factory level of the game. Karbines appear throughout the level, shooting fireballs in Dixie Kong and Kiddy Kong's path. The Kongs have to go across some bubbling cauldrons, often by moving across a horizontal rope. Squitter is used in the first Bonus Level, although there is a No Animal Sign in the main level to prevent him from progressing further.
Layout[edit]
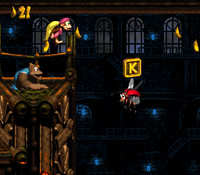
From the start of the level, there will be a DK Barrel, followed by some bananas. The Kongs will then go east and encounter three Karbines, each shooting one fireball at a time. They must pass two side by side Karbines, which also shoot a bit faster. They will go northeast, then jump off of a Knik-Knak to grab the letter K and avoid falling into bubbling cauldrons. There will then be two Bristles, followed by more Karbines. The Kongs will be transported up to a rope, yet the Karbines will follow them. They must run west past another Bristle and three Karbines to find a DK Barrel. They must then jump over a Buzz and avoid yet another Karbine. They will then find the letter O, and then climb across two bubbling cauldrons, avoiding three Karbines. The last Karbine will chase the Kongs up seven ropes and platforms until they reach a patch of bananas. They must avoid another Bristle to find the midway point
The first item after the Star Barrel is a DK Barrel. Going east, the Kongs can find an invisible bear coin, but to do so, they must avoid a Karbine while going down five platforms and a pit of lava. Going east, they must avoid two Buzzes and two Karbines then go up a moving platform avoiding more Karbines. They must then avoid two Karbines shooting three fireballs to find the letter N. After that, the apes will go up a platform and find another DK Barrel. Koin is near here. They must go west avoiding eight fast shooting Karbines. These Karbines will again chase them on a high-up rope. Past here they will find another Bristle and the letter G. There will be four more Karbines before the level ends.
Enemies[edit]
The following enemies appear in the following quantities:
Items and objects[edit]
The following items and objects appear in the following quantities:
K-O-N-G Letters[edit]
- K: Hovering above a lone Knik-Knak.
- O: Shortly after the first Buzz.
- N: After the Karbine that shoots three times in a row.
- G: Right after a rope climbing section.
DK Coin[edit]
Just after the letter N, the Kongs encounter a Koin on a platform to the right, with a Steel Barrel and a Karbine. The Kongs must pick up the Steel Barrel, while avoiding the Karbine, then throw it to the wall on the right. The Steel Barrel rolls into Koin from behind, thus defeating him and giving the DK Coin to the Kongs.
Bonus Levels[edit]
Fire-Ball Frenzy has two Bonus Levels, listed by type:
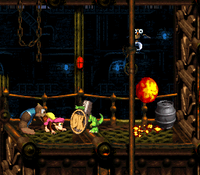
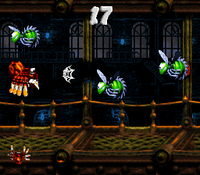
- Bash the Baddies!: After the Star Barrel, Dixie and Kiddy are chased down some platforms by a Karbine. From the fifth short platform, the Kongs must jump left to land on a platform below with another Karbine. With Dixie's Helicopter Spin, she must twirl across another lava pit to land on a lower platform. She must hover over another pit of lava, which another Karbine is hovering over. The Bonus Barrel is on the floor at the southwest corner. In the Bonus Level, the Kongs transform into Squitter the Spider. Squitter has twenty seconds to defeat ten green Buzzes with his web projectiles while avoiding the Karbines shooting fireballs at him. After defeating every Buzz, Squitter can collect the Bonus Coin.
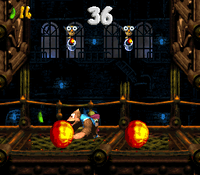
- Grab 15 Bananas!: Right before the letter N, there is a Karbine shooting three fireballs in a row. A lone banana floats at the top-left of the Karbine, and with their Team-up move, Kiddy must throw Dixie up on a small platform, which then moves up and takes the Kongs to a short path leading to the Bonus Barrel in an alcove. In the Bonus Level, the Kongs have 40 seconds to collect 15 green bananas while avoiding the fireballs blasted by two Karbines at a consecutive rate. Once they obtain every green banana, the Bonus Coin appears for Dixie and Kiddy to collect.
Gallery[edit]
Names in other languages[edit]
| Language | Name | Meaning | Notes |
|---|---|---|---|
| Japanese | ファイヤーボール カービン[?] Faiyābōru Kābin |
Fireball Karbine | |
| French | Folle Fournaise[?] | Mad Furnace | |
| German | Feuerball-Knall[?] | Fireball Blast | |
| Italian | Frenesia di Fuochi[?] | Frenzy of Fire | |
| Spanish | Frenesí de Bolas de Fuego[?] | Fireball Frenzy |
Trivia[edit]
- The large moving platform with two Karbines above it is actually two small platforms layered over each other.


