Wario Land: Shake It!: Difference between revisions
No edit summary Tags: Mobile edit Advanced mobile edit |
m (Text replacement - "(\| *)Jap([RMCN\d]* *=)" to "$1Jpn$2") |
||
| (One intermediate revision by the same user not shown) | |||
| Line 79: | Line 79: | ||
!width=55% colspan=4|Levels | !width=55% colspan=4|Levels | ||
|- | |- | ||
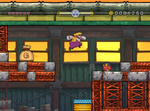
|rowspan="2"style="background:#F6B537"|[[File:Sweet Stuff.png|250px]]<br>'''{{color | |rowspan="2"style="background:#F6B537"|[[File:Sweet Stuff.png|250px]]<br>'''{{color link|black|The Sweet Stuff}}''' | ||
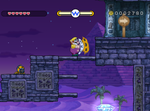
|[[File:Aboard the Sweet Stuff.png|150px]] | |[[File:Aboard the Sweet Stuff.png|150px]] | ||
|[[File:Pirateshop.png|150px]] | |[[File:Pirateshop.png|150px]] | ||
| Line 87: | Line 87: | ||
|[[Pirate Shop]] | |[[Pirate Shop]] | ||
|- | |- | ||
|rowspan="4"style="background:#E5D6AB"|[[File:RatlRuins.png|250px]]<br>'''{{color | |rowspan="4"style="background:#E5D6AB"|[[File:RatlRuins.png|250px]]<br>'''{{color link|black|Ratl Ruins}}''' | ||
|[[File:Stonecarving City.png|150px]] | |[[File:Stonecarving City.png|150px]] | ||
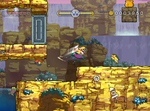
|[[File:WhoopsyDesert.png|150px]] | |[[File:WhoopsyDesert.png|150px]] | ||
| Line 107: | Line 107: | ||
|1-B: [[Rollanratl Battle]] | |1-B: [[Rollanratl Battle]] | ||
|- | |- | ||
|rowspan="4"style="background:#FFD118"|[[File:WigglyWilds.png|250px]]<br>'''{{color | |rowspan="4"style="background:#FFD118"|[[File:WigglyWilds.png|250px]]<br>'''{{color link|black|Wiggly Wilds}}''' | ||
|[[File:Just Plains.png|150px]] | |[[File:Just Plains.png|150px]] | ||
|[[File:Wavy Waters.png|150px]] | |[[File:Wavy Waters.png|150px]] | ||
| Line 127: | Line 127: | ||
|2-B: [[Hot Roderick Race]] | |2-B: [[Hot Roderick Race]] | ||
|- | |- | ||
|rowspan="4"style="background:#95A5AB"|[[File:RockingRange.png|250px]]<br>'''{{color | |rowspan="4"style="background:#95A5AB"|[[File:RockingRange.png|250px]]<br>'''{{color link|black|Rocking Range}}''' | ||
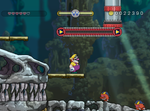
|[[File:WreckTrain.png|150px]] | |[[File:WreckTrain.png|150px]] | ||
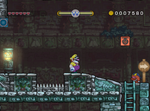
|[[File:Stonetooth Cave.png|150px]] | |[[File:Stonetooth Cave.png|150px]] | ||
| Line 147: | Line 147: | ||
|3-B: [[Chortlebot Challenge]] | |3-B: [[Chortlebot Challenge]] | ||
|- | |- | ||
|rowspan="4"style="background:#4DBE7F"|[[File:JiggleJungle.png|250px]]<br>'''{{color | |rowspan="4"style="background:#4DBE7F"|[[File:JiggleJungle.png|250px]]<br>'''{{color link|black|Jiggle Jungle}}''' | ||
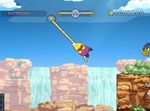
|[[File:Ropey Jungle.png|150px]] | |[[File:Ropey Jungle.png|150px]] | ||
|[[File:Windbreak Bay.png|150px]] | |[[File:Windbreak Bay.png|150px]] | ||
| Line 168: | Line 168: | ||
|4-B: [[Bloomsday Blowout]]<br><small>''4-B: Scumflower Skirmish''</small> | |4-B: [[Bloomsday Blowout]]<br><small>''4-B: Scumflower Skirmish''</small> | ||
|- | |- | ||
|rowspan="4"style="background:#CF836C"|[[File:QuiverCliffs.png|250px]]<br>'''{{color | |rowspan="4"style="background:#CF836C"|[[File:QuiverCliffs.png|250px]]<br>'''{{color link|black|Quiver Cliffs}}''' | ||
|[[File:Mount Bighill.jpg|150px]] | |[[File:Mount Bighill.jpg|150px]] | ||
|[[File:Creep Blue Sea.png|150px]] | |[[File:Creep Blue Sea.png|150px]] | ||
| Line 189: | Line 189: | ||
|5-B: [[Large Fry Cook-Off]] | |5-B: [[Large Fry Cook-Off]] | ||
|- | |- | ||
|rowspan="2"style="background:#A977FF"|[[File:ShakedownSchooner.png|250px]]<br>'''{{color | |rowspan="2"style="background:#A977FF"|[[File:ShakedownSchooner.png|250px]]<br>'''{{color link|black|Shakedown Schooner}}''' | ||
|[[File:Shake King Fight3.png|150px]] | |[[File:Shake King Fight3.png|150px]] | ||
|colspan="3"rowspan="2"| | |colspan="3"rowspan="2"| | ||
| Line 573: | Line 573: | ||
==Names in other languages== | ==Names in other languages== | ||
{{foreign names | {{foreign names | ||
| | |Jpn=ワリオランドシェイク | ||
| | |JpnR=Wario Rando Sheiku | ||
| | |JpnM=Wario Land Shake | ||
|ChiT=壞莉歐樂園SHAKE<ref>{{cite|deadlink=y|archive=web.archive.org/web/20130122210132/http://www.nintendo.tw/wii/wii_software.htm|title=Wii遊戲軟體|publisher=Nintendo of Taiwan|language=zh-hant|accessdate=July 5, 2024}}</ref> | |ChiT=壞莉歐樂園SHAKE<ref>{{cite|deadlink=y|archive=web.archive.org/web/20130122210132/http://www.nintendo.tw/wii/wii_software.htm|title=Wii遊戲軟體|publisher=Nintendo of Taiwan|language=zh-hant|accessdate=July 5, 2024}}</ref> | ||
|ChiTR=Huàilìōu Lèyuán Shake | |ChiTR=Huàilìōu Lèyuán Shake | ||
Latest revision as of 17:04, January 7, 2025
| Wario Land: Shake It! | |||||||||||||
|---|---|---|---|---|---|---|---|---|---|---|---|---|---|
 For alternate box art, see the game's gallery. | |||||||||||||
| Developer | Good-Feel | ||||||||||||
| Publisher | Nintendo | ||||||||||||
| Platform(s) | Wii, Wii U | ||||||||||||
| Release date | Original release: Wii U (digital download): | ||||||||||||
| Language(s) | English (United Kingdom) English (United States) French (France) German Spanish (Spain) Italian Japanese Korean | ||||||||||||
| Genre | 2D Platformer | ||||||||||||
| Rating(s) |
| ||||||||||||
| Mode(s) | Single-player | ||||||||||||
| Format | Wii: Wii U: | ||||||||||||
| Input | Wii: | ||||||||||||
| Serial code(s) | |||||||||||||
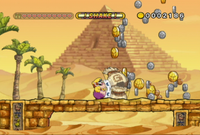
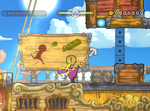
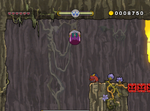
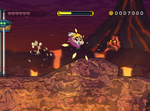
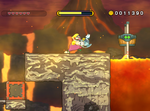
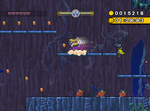
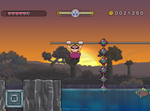
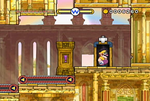
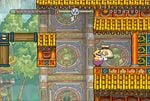
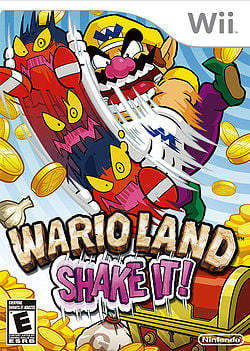
Wario Land: Shake It! (known as Wario Land: The Shake Dimension in Europe and Australia) is a platformer game developed by Good-Feel for the Wii. It is the sixth installment in the Wario Land series, the eighth platformer starring Wario overall, the first game in the Wario Land series to be released since Wario Land 4 in 2001, and the only Wario Land game released on a home console. The game also features the return of Captain Syrup, who hosts the Pirate Shop. The game is drawn in the style of anime, as the animations for the cutscenes and gameplay were done by Japanese animation studio Production I.G.
The game was rereleased for the Wii U's Nintendo eShop service in Europe on April 7, 2016, Australia on April 8, 2016, Japan on August 24, 2016, and North America on November 17, 2016; however, it was later removed from the Wii U eShop service after their discontinuation on March 27, 2023, making it no longer possible for players to purchase the game, although players who did so before this date can still play it as long as any version is on their Wii U device.
Story[edit]
Prologue[edit]
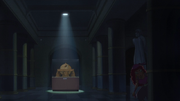
One night, the pirate Captain Syrup sneaks into a museum looking for treasure to steal, when an item known as the Kodaigi catches her interest. Upon inspecting it, she sees there is another world within the globe called the Shake Dimension. As Captain Syrup watches, dark clouds cover the Shake Dimension as the peace is shattered by the marauding pirate known as the Shake King. The Shake King steals a legendary treasure known as the Bottomless Coin Sack, which can create infinite gold coins by shaking it, and shares its contents with his minions. He also kidnaps and imprisons all but one of the peaceful Merfle tribe, along with their beloved ruler, Merelda. While the Shake King gloats, the one Merfle who managed to escape imprisonment vows to find someone from the outside world who can help his people and escapes. After seeing the events unfold, Captain Syrup decides that defeating the Shake King, rescuing Queen Merelda and her Merfle followers, and taking the Bottomless Coin Sack as a reward for her "heroism" may all prove too difficult for her to accomplish alone, so she steals the Kodaigi from the museum, planning to give it to someone she hopes would help her with these three tasks.
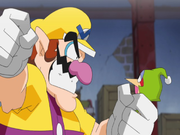
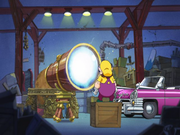
At home in his garage, Wario is seen fast asleep in his car. He is then awakened from his slumber by the delivery of a very large gift, which, once unwrapped, reveals the Kodaigi and a note from Captain Syrup explaining that there is treasure within the globe. Misinterpreting the note, Wario gets a hammer to smash the globe open. Then suddenly, smoke bursts from the top, causing Wario to miss and smack his head. The smoke forms a large telescope, which Merfle uses to reach Wario's world. Merfle then greets Wario, causing him to hit his head on the telescope when trying to look up. In a fit of anger, Wario grabs Merfle and was going to punch him in the face until Merfle begins pleading for Wario's help. Merfle explains to Wario about how the Shake King appeared, captured, and imprisoned his people and stole the legendary treasure. At first, Wario showed very little interest in the story or the Merfle's plight, even picking his nose as it is being told, but then his interest is piqued at the mention of treasure. He then grabs the Merfle for more information and Merfle explains the properties of the Bottomless Coin Sack to Wario. Having been tempted, Wario then demands to know how to get into the Shake Dimension, and Merfle answers that the telescope acts as a portal into it, but warns him that if he does not rescue the other Merfles he would be stranded in the Shake Dimension. Tempted by the promise of wealth, Wario decides that this quest will be worth his time, which gladdens Merfle. Merfle then travels through the telescope back into the Shake Dimension, and Wario prepares to follow him.
Ending[edit]
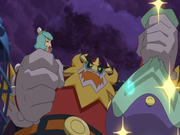
After surviving all of the Shake King's traps and minions, Wario is able to battle the Shake King himself. It is a hard and long battle, since the Shake King also has some of Wario's moves; however, Wario is able to beat him, resulting in the Shake Dimension being saved at last from the Shake King's evil grip.
When Queen Merelda thanks Wario for saving her kingdom, Wario tosses her aside and takes the Bottomless Coin Sack. When returning to his world for the final time, he shakes the bag to collect all the coins he always wanted. However, the celebration does not last long. Catching Wario off guard, Captain Syrup takes the Bottomless Coin Sack and all the coins Wario shook out from it and makes a quick getaway. Wario is completely humiliated that he was double-crossed from the start, angrily chasing Merfle around his garage.
Gameplay[edit]
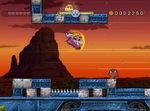
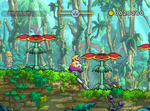
Like all other Wario Land games, Wario Land: Shake It! is a 2D platformer. Players must hold the Wii Remote sideways to play this game. ![]() is used for Jumping, while the
is used for Jumping, while the ![]() is used to perform a Dash Attack.
is used to perform a Dash Attack. ![]() is used for ducking, and entering a Warp Pipe. When using
is used for ducking, and entering a Warp Pipe. When using ![]() in midair, Wario performs a Ground Pound. However, there are also some changes according to the environment. When pressing
in midair, Wario performs a Ground Pound. However, there are also some changes according to the environment. When pressing ![]() on a hillside, Wario will slide down on his belly. Throwing an enemy or object is done by pressing
on a hillside, Wario will slide down on his belly. Throwing an enemy or object is done by pressing ![]() , but the player must hold the button and tilt the Wii Remote in the desired direction, and then release
, but the player must hold the button and tilt the Wii Remote in the desired direction, and then release ![]() to make Wario throw in that direction.
to make Wario throw in that direction.
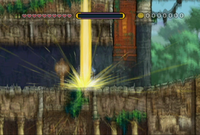
There are also new features in gameplay, mostly implementing the motion-sensing abilities of the Wii Remote. Executing an Earthshake Punch uses the motion sensitivity. By shaking the Wii Remote when the Shake Meter at the top of the screen is full, Wario performs a powerful punch on the ground, causing an earthquake. It is needed to move objects in some levels, opening new paths, and it also stuns enemies. However, when used, the Shake Meter gets empty. The player cannot use another Earthshake Punch when the Shake Meter is empty, so they must wait until the Shake Meter is full, which only takes a few seconds. Another frequently implemented action in the game is shaking an enemy or a Coin Bag. When Wario picks up an enemy or a Coin Bag, the player can shake the Wii Remote to let Wario shake it. Shaking a Bandinero may reveal a clove of Garlic, while a Coin Bag will lose all the Coins it contains.
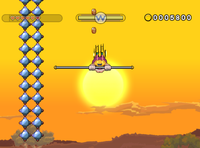
When in contact with a bar, Wario can hang from the bar and then perform a Bar Spin by shaking the Wii Remote. Upon pressing the ![]() , Wario spins high into the air, and can also reach grab another bar if he comes into contact with one. Wario can also use Unibuckets to travel on cords - yet another action that uses motion sensitivity. When the player presses
, Wario spins high into the air, and can also reach grab another bar if he comes into contact with one. Wario can also use Unibuckets to travel on cords - yet another action that uses motion sensitivity. When the player presses ![]() , Wario jumps into the Unibucket, and pressing
, Wario jumps into the Unibucket, and pressing ![]() will let Wario to pop out of the vehicle. Tilting the Wii Remote sideways moves it, with the angle of the remote affecting the speed at which the Unibucket moves. Pressing
will let Wario to pop out of the vehicle. Tilting the Wii Remote sideways moves it, with the angle of the remote affecting the speed at which the Unibucket moves. Pressing ![]() lets it jump. If a Unibucket lands on any surface that is not a Unibucket cord, it breaks instantly.
lets it jump. If a Unibucket lands on any surface that is not a Unibucket cord, it breaks instantly.
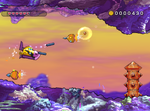
A flying counterpart to the Unibucket is the Rocket Bucket. By pressing ![]() , Wario will jump in. When in this vehicle, two rockets and a dome appear. Pressing
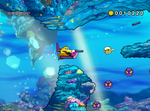
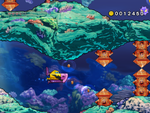
, Wario will jump in. When in this vehicle, two rockets and a dome appear. Pressing ![]() accelerates it, and tilting the Wii Remote is used for steering. Colliding with spikes will break it. However, it can land on any piece of non-spiky ground. The game also introduces and underwater device; Wario's Subwarine. In underwater levels (of which there are 3), Wario must use this vehicle to proceed through the level. Tilting the Wii Remote will steer the Subwarine, and
accelerates it, and tilting the Wii Remote is used for steering. Colliding with spikes will break it. However, it can land on any piece of non-spiky ground. The game also introduces and underwater device; Wario's Subwarine. In underwater levels (of which there are 3), Wario must use this vehicle to proceed through the level. Tilting the Wii Remote will steer the Subwarine, and ![]() will move it back and forth. Pressing the
will move it back and forth. Pressing the ![]() makes the Subwarine shoot a torpedo in a straight line.
makes the Subwarine shoot a torpedo in a straight line.
Wario will find metal boxes throughout almost every level, with a screen and a red entrance atop it. These machines are named Max Fastosity Dasherators; they let Wario run very fast when entered. Wario can still jump while dashing. Pressing the opposite direction of the direction Wario is running causes him to skid to a halt and quickly turn to that direction. Moving is automatic and Wario can also run over water. Another thing that Wario can do is break blocks and defeat enemies in this state. Wario will cease dashing if he collides with any solid object or wall.
Blast-O-Cannons are cannons where Wario can jump in, by pressing ![]() . The player can then tilt the Wii Remote to choose a direction. Pressing
. The player can then tilt the Wii Remote to choose a direction. Pressing ![]() will let the cannon prepare to shoot, and releasing
will let the cannon prepare to shoot, and releasing ![]() will let the cannon shoot. When touching another Blast-O-Cannon after being blasted from another one, Wario will automatically enter it. Wario cannot enter a Blast-O-Cannon on a wall in a normal way. He should use another Blast-O-Cannon to enter a Blast-O-Cannon on a wall. Some Blast-O-Cannons move automatically.
will let the cannon shoot. When touching another Blast-O-Cannon after being blasted from another one, Wario will automatically enter it. Wario cannot enter a Blast-O-Cannon on a wall in a normal way. He should use another Blast-O-Cannon to enter a Blast-O-Cannon on a wall. Some Blast-O-Cannons move automatically.
The main goal of a level is to guide Wario to the cage where a Merfle has been caught. Such cages are called Merfle Barrels. Near to it is a checkpoint block. If Wario picks up the cage, an intruder alert is triggered. Then the player must shake the Wii Remote to break open the cage to free the Merfle. A timer then appears, and a different, faster song plays. With the Merfle holding an arrow that shows the direction to go, Wario must go back the beginning of the level before the timer reaches zero. Blue shake blocks also will appear, while red shake blocks disappear, which changes some paths and opens new places, often allowing different treasures to be found. If the countdown reaches fifteen seconds, another tune will be played, and the Merfle is panicking. If the timer runs out, the Shake King's shadow appears, takes Wario, shakes him, so Wario loses all his collected money, and the King then throws him back to the start. If the player used a checkpoint block, the Shake King will throw him to the checkpoint instead.
The old transformations that were in previous Wario Land games were reduced to three. These were Flaming Wario, Snowman Wario, and Frozen Wario. They were not changed in this game. Wario can turn into Flaming Wario by touching a flame, and Wario runs with his bottom on fire until he becomes engulfed in fire that can burn Bonfire Blocks. Wario can turn into Snowman Wario if he touches a falling pile of snow. He turns into a snowball when standing on a slope, and can break Snowman Blocks. Turning into Frozen Wario is still a hazard. There is a new transformation called Mini Wario (which has the same goal as Tiny Wario, but is much different in appearance). This transformation can be used by entering a shrinkbarrel and will allow Wario to fit through small openings.
Also, Wario will come across Bomb Blocks, which have a certain number on them. Touching one in any way causes it to count down to zero and explode. Certainty Switches are block switches that turn Uncertain Blocks touchable and untouchable, depending on the color of the switch and the corresponding blocks.
Areas and levels[edit]
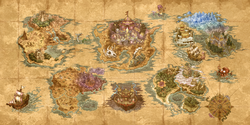
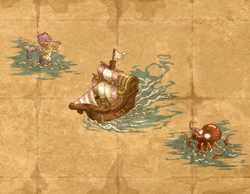
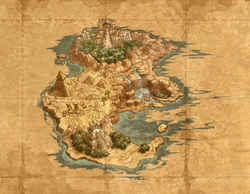
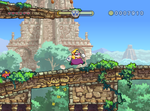
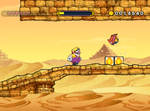
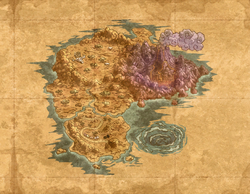
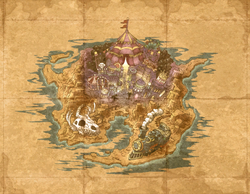
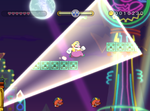
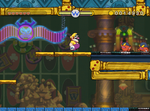
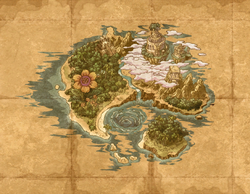
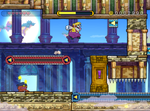
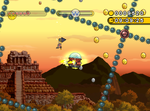
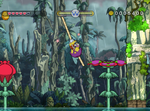
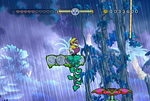
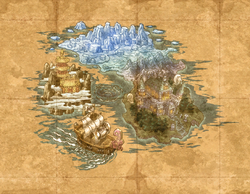
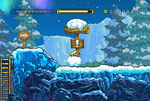
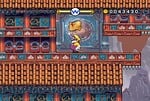
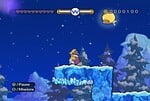
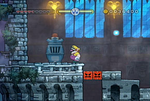
There are five continents with five levels each; four normal levels and one boss level. Additionally, secret levels can be unlocked by finding a Secret Map in certain levels. After beating a boss, Wario must return to Captain Syrup to buy a map of the next continent. Depending on the amount of money the player has, they can go in any order they choose. The following chart shows the American English names of the levels, with the British English names in italics.
Enemies and obstacles[edit]
Enemies[edit]
| Image | Name | Description | First level | Last level |
|---|---|---|---|---|

|
Bandinero | The most common enemy. They walk back and forth on platforms, but are sometimes found stationary, jumping on the spot, or sleeping. It is completely harmless to Wario and can be defeated with any attack. | Aboard the Sweet Stuff (red) Stonecarving City (yellow) Aboard the Sweet Stuff (white) Aboard the Sweet Stuff (gold) |
Large Fry Cook-Off (red) Large Fry Cook-Off (yellow) Bamboozle Village (white) Bamboozle Village (gold) |

|
Floating Bandinero | An inflated Bandinero that floats in the air in a straight line. If bumped into or jumped onto, it becomes a regular blue Bandinero. Most are harmless, but some regularly produce electricity that harms Wario. Floating Bandineros can be defeated by any attack, but they are immune to physical attacks while electrified. | Aboard the Sweet Stuff (blue) Savannah Valley (gold) |
Bad Manor (blue) Freezing Fields (gold) |
|
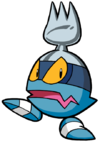
Pitchfork | A variant of Bandinero with a fork on its head. They usually stick to ceilings and drop when Wario walks underneath them, but some are grounded and attempt to headbutt him. When thrown at walls, the fork will stick to it, so their bodies can be used as platforms. | Foulwater Falls (blue) Savannah Valley (purple) Mt. Lava Lava (gold) |
Boogie Mansion (blue) Derailed Express (purple) Its-all Mine (gold) |
|
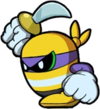
Buccanero | An enemy that wields a sword and attempts to attack Wario on sight. Buccaneros can be defeated with any attack. | Aboard the Sweet Stuff | Large Fry Cook-Off |

|
Boomdinero | Bandineros wearing suits of armor. Their helmets can fire spiky balls in a similar manner to the Shortfuse, but they explode after a few seconds. Their heavy armor protects them from most attacks, but they can be stunned with an Earthshake Punch. Shaking them will remove their armor, and revert them back into standard Bandineros. | Sneak Peak (silver) Sneak Peak (red) |
Bamboozle Village (silver) Boogie Mansion (red) |

|
Mummer | Mummy enemies that pace back and forth on a platform. They are initially immune to Wario's attacks thanks to their bandages. However, if Wario performs an Earthshake Punch nearby, the bandages will temporarily fall down and make it vulnerable to any attack. | Disturbing Tomb (normal) Disturbing Tomb (gold) |
Boogie Mansion (normal) Disturbing Tomb (gold) |

|
Flipsting | A shelled scorpion with a long tail tipped with a stinger. If Wario gets too close, it thrusts the stinger towards him. The stinger aims both forward and upward, meaning they can neither be attacked from the front nor top. An Earthshake Punch will topple the enemy, making it safe to hold. A red variant clings to ceilings. | Disturbing Tomb (yellow) Disturbing Tomb (red) |
Bloomsday Blowout (yellow) Disturbing Tomb (red) |

|
Bumbleprod | Semi-common enemies adorned with spikes, making contact dangerous. Once flipped over with an Earthshake Punch, they can be defeated with a Ground Pound, but they cannot be picked up. | Disturbing Tomb (normal) Gurgle Gulch (gold) |
Boogie Mansion (normal) Gurgle Gulch (gold) |

|
Turkeyjerk | Bird enemies that dive-bomb Wario when approached. They are vulnerable to all attacks, but they can avoid the Earthshake Punch by flying. Some are stationary while some patrol an area. | Disturbing Tomb (green) Soggybog River (brown) |
Riverbloat Rapids (green) Prism Prison (brown) |

|
Shortfuse | A small, barrel-like enemy that shoots spiky balls in Wario's direction. Although the projectiles are harmful, the enemy itself is safe to touch from any side and can be defeated with any attack. | Disturbing Tomb (normal) Glittertown (gold) |
Large Fry Cook-Off (normal) Glittertown (gold) |
|
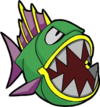
Scarracuda | A fish enemy that is encountered at the surface of the water. Red Scarracudas only patrol the area of water from side to side, while green ones also jump out to bite Wario. There are also black Scarracudas which live inside lava, but otherwise act the same as their green relatives. Green and black Scarracudas can be defeated by Dash Attacking them while they are in the air. | Foulwater Falls (green) Gurgle Gulch (red) Mt. Lava Lava (black) |
Soggybog River (green) Bad Manor (red) Mt. Lava Lava (black) |
|
Crackpot | Rare, octopus-like enemies that hide in jars and shoot spiky balls. Shaking them makes them fire their balls ahead of Wario, which works as a makeshift weapon. | Gurgle Gulch (red) Gurgle Gulch (purple) |
Sneak Peak (red) Gurgle Gulch (purple) |

|
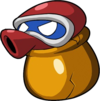
Nosedozer | Semi-common enemies that are similar to Bandineros, but the drill on their face can harm Wario. Jumping on them flips them onto their backs, making the drill point upwards, causing damage if jumped on again. | Gurgle Gulch | Large Fry Cook-Off |
|
Plunger | Scuba-diving enemies exclusively found in Subwarine levels. They have a variety of movement patterns to impede Wario's progress, some of which hide from the ground and emerge when Wario approaches to ambush him. They can be shot down with a single torpedo. | Wavy Waters (orange) Wavy Waters (purple) Wavy Waters (green) Windbreak Bay (blue) |
Creep Blue Sea (orange) Creep Blue Sea (purple) Creep Blue Sea (green) Creep Blue Sea (blue) |

|
Jellopus | Jellyfish enemies that exclusively appear in the Subwarine levels. Groups will typically fill a given area to barricade the path, but can be defeated with torpedoes. The purple variety attack by shooting electric bolts. | Wavy Waters (blue) Wavy Waters (yellow) Wavy Waters (purple) |
Creep Blue Sea (blue) Creep Blue Sea (yellow) Creep Blue Sea (purple) |
| Grunchin | Explosive sea urchin enemies that primarily appear in Subwarine levels as an obstacle. Despite this, they occasionally appear in platforming levels. They are the only enemies to appear in both underwater levels and platforming levels. | Wavy Waters (red) Wavy Waters (purple) |
Creep Blue Sea (red) Creep Blue Sea (purple) | |

|
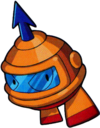
Tub-sub | Barrel-like submarines that fire torpedoes at the Subwarine. They are more durable than other enemies, requiring three hits, but drop more gold upon defeat. | Wavy Waters (brown) Wavy Waters (gray) |
Creep Blue Sea (brown) Creep Blue Sea (gray) |
|
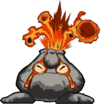
Volcannon | Living volcanoes that periodically spew fire from their top. They are immune to the Earthshake Punch, but can be defeated with Dash Attacks and Ground Pounds. | Mt. Lava Lava | Sneak Peak |
| Spinbat | Bats that hang from ceilings and drop when Wario passes by, getting stuck in the ground upon landing, making them vulnerable. They can be defeated by any attack. If left alone, they fly back to their roost. | Savannah Valley | Boogie Mansion | |

|
Flimflam | Living flames that turn Wario into Flaming Wario, allowing him to break Bonfire Blocks. There also exists an ice variant, turning him into Frozen Wario. | Stonetooth Cave (orange) Slipshod Slopes (blue) |
Bad Manor (orange) Freezing Fields (blue) |
|
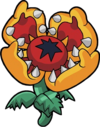
Venus Guytrap | Large sundew enemies that will try to eat Wario, much like the Venus flytrap-based enemy, the Piranha Plant. Their broad petals act as platforms, but if Wario stands on them for too long, they bite down and cause damage until the player shakes the Wii Remote to escape. | Ropey Jungle (yellow) Ropey Jungle (purple) |
Riverbloat Rapids (yellow) Bloomsday Blowout (purple) |

|
Peek-a-boom | Ninja enemies that throw bombs to attack. They also use smokescreens to disappear, reappearing elsewhere. The bombs they throw can be picked up and thrown back at them. | Prism Prison | Boogie Mansion |
|
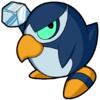
Pengoon | Penguins that hide in burrows and emerge to spit out chunks of ice. Pink ones spit out three at a time. | Slipshod Slopes (blue) Slipshod Slopes (pink) |
Freezing Fields (blue) Freezing Fields (pink) |

|
Treasure Chomp | Mimic chests that replace the normal chests in Boogie Mansion. Attempting to open one as though it were a standard chest will cause Wario to be eaten by it, taking damage. Only feeding it a bomb will defeat it and release its treasure. | Boogie Mansion | |
|
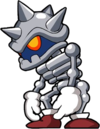
Recapitator | Armored skeletons that throw their heads like boomerangs, like the previous Wario Land games' zombie. They can be dismantled with a Dash Attack, but they will eventually rebuild themselves, just as Dry Bones do. Their spiky heads protect them from jumps, but leave the body exposed when thrown. | Boogie Mansion (normal) Boogie Mansion (gold) |
Large Fry Cook-Off (normal) Boogie Mansion (gold) |
Obstacles[edit]
| Image | Name | Description | First level | Last level |
|---|---|---|---|---|

|
Spike Trap | Spikes that hurt Wario on contact. | Aboard the Sweet Stuff (grounded) Boogie Mansion (pole) |
Boogie Mansion (grounded) Boogie Mansion (pole) |

|
Quicksand | Sand that sinks Wario. | Disturbing Tomb | |

|
Water | Large bodies of harmless liquid whose surface can be swum on. | Foulwater Falls | Slipshod Slopes |

|
Mine | Explosives that hurt Wario upon contact. Some are found in underwater levels. | Gurgle Gulch | Creep Blue Sea |

|
Lava | Molten rock that hurts Wario on contact. | Mt. Lava Lava | Sneak Peak |

|
Boulder | Rocks that roll down a slope. | Mt. Lava Lava (small) Mt. Lava Lava (medium) Sneak Peak (big) |
Sneak Peak (small) Sneak Peak (medium) Sneak Peak (big) |

|
Burner | Constant streams of fire. | Wreck Train | Derailed Express |
|
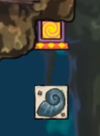
Fossil | Stony ammonite shells produced from spawners onto Conveyor Belts. | Stonetooth Cave | |

|
Skewer | Large spiked pillars that damage the Subwarine if it touches them. | Windbreak Bay | Creep Blue Sea |

|
Current | Strong underwater forces that push the player. Some appear in platforming levels like Soggybog River and Riverbloat Rapids. | Windbreak Bay | Creep Blue Sea |

|
Spike pole | Rotating poles of spikes that activate when Wario rides the Rocket Bucket. | Airytale Castle | Prism Prison |

|
Icicle | Frozen rain drops that fall when Wario performs an Earthshake Punch. | Slipshod Slopes | Freezing Fields |
Bosses[edit]
| Image | Name | Description | Area | Level |
|---|---|---|---|---|

|
Rollanratl | A giant, living statue. During the first phase Rollanratl drops its head to the ground, which causes earthquakes to knock Wario over if he does not jump in time. Wario will be squished if Rollanratl's head falls on top of him, but he will not take damage. During the second phase, shakes the ceiling, causing pillars to fall to the ground, with the red ones exploding on impact and the blue pillars lodging into the ground as platforms for a brief moment. Wario must Dash Attack into the weak spots on the sides of its head two times each in these phases. The third and final phase has Rollanratl not only produce spikes on the side of its head, but also summon two Pouncer-like heads that begin rotating (although they will later fire laser beams to the ground), so Wario must jump on top of one, ride it up to the top of its rotation cycle, and Ground Pound the top of Rollanratl's main head twice. Each hit cause Rollanratl to prevent Wario from attacking again by using harmless shockwaves to push him back. It takes six hits to defeat Rollanratl. | Ratl Ruins | Rollanratl Battle |

|
Hot Roderick | A racer that Wario can only fight while using a yellow Unibucket-like vehicle with a booster and a fist contraption. Hot Roderick starts off by throwing wrenches back at Wario, which must be knocked back at him. When Hot Roderick's HP is down to half, he raises his car up and throws tires. Wario can still hit his motor, but he must steer the direction of the vehicle to knock back the tires to the engine. Once the engine goes down again for a little while, Hot Roderick's car will first come down, allowing Wario to hit him. Hot Roderick may also occasionally come down, slowing down for a moment and then rushing forwards at Wario, who must avoid this attack by making his vehicle jump. Once Hot Roderick's remaining health is almost depleted, the car will break apart and the scrap parts will fly at Wario, and he must knock them back, but damage is dealt to the driver. When his car breaks apart, Hot Roderick runs across the ground with the steering wheel still in his grip; however, one punch is enough to defeat him. | Wiggly Wilds | Hot Roderick Race |
|
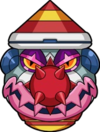
Chortlebot | A giant, robotic clown head. Chortlebot's main weapon, his spiky nose, is not only launched towards Wario, but can also split in two, revealing two long bars of fire that he must avoid. Lastly, he can send beams from below which can only be avoided by ducking. Wario must swing on the bars on the sides of the arena to gain enough height to jump on Chortlebot. It takes three hits to stun him, allowing Wario to bounce on the weak point on Chortlebot's head to damage him. Seven deals of damage defeats Chortlebot. | Rocking Range | Chortlebot Challenge |
|
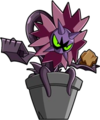
Bloomsday Scumflower |
A giant, living flower. Not only will Bloomsday attempt to blow Wario to the edge of the log where a Venus Guytrap waits to attack him, but it can also spit out Bumbleprods, Flipstings or Bandineros; Wario must use Flipstings and Bandineros to temporarily stun Bloomsday by throwing them at its face so he can Dash Attack the pot, pushing it closer to edge of the log. Bloomsday responds to attacks by summoning a wave of thorny vines from the ground. It will keep repeating these moves until it has been attacked at least two or three times, at which point it will change strategies. It will stomp the ground, causing a large, thorny vine to sprout in front of it, guarding its face. The second stomp removes the vine, allowing Wario to throw another enemy. After a few more hits, Bloomsday will stomp to create two large, metallic vines on either side of the platform and trap Wario between them, stunning him if he does not jump right before it hits. Bloomsday will then spit out a Boomdinero and two Bumbleprods that land on the field. Wario must grab the Boomdinero, remove its armor (to revert it back into a standard Bandinero), and wait for an opening. Bloomsday will try to suck and blow Wario into the Brumbleprods and thorns, so he must let go of the Bandinero. Once Wario manages to resist the attack and dodge the hazards, Bloomsday will stomp again to remove the thorny vines, and Wario can throw the Bandinero and attack Bloomsday. After Wario does this twice, Bloomsday gets pushed off the log and is defeated. | Jiggle Jungle | Bloomsday Blowout |

|
Large Fry | A massive fish dressed as a chef who rides on a balti dish. Large Fry starts off by glowing blue and attcking with a Ground Pound, leading two sacks of enemies dropping down; Wario must avoid the attack in time, because otherwise, he will be stunned. Inside each sack is a mixture of red and yellow Bandineros, Buccaneros, Shortfuses, Nosedozers, or Recapitators. Large Fry can also glow green and dash from one side of the screen to the other, an attack that Wario must avoid by ducking. Occasionally, Large Fry may spit out giant missiles from his mouth, which home in on him. Once Wario throws an enemy into Large Fry's mouth, he will spew a bomb, which he can then throw back in. Only bombs hurt Large Fry, and the bomb explodes inside him, dropping him to the floor and rendering him vulnerable to Wario's attack. | Quiver Cliffs | Large Fry Cook-Off |

|
Shake King | A pirate responsible for dominating the Shake Dimension, kidnapping Queen Merelda and her Merfles, and stealing the Bottomless Coin Sack. The Shake King is the final boss of the game. He starts off by attempting the following attacks in order: using his charge attack (very similar to Wario's Dash Attack) once, dropping fireballs, performing his own Earthshake Punch, and throwing a giant Bandinero. During the second phase, he will attempt the following attacks in order: throwing a giant Bumbleprod, using his charge attack twice, using a new attack by jumping into the air unleashing a powerful Ground Pound for each jump from side to side, and using his Earthshake Punch. During the third and final phase, he uses powerful magic which he never has never used in the previous phases and will attempt the following attacks in order: creating the first wave of thunderbolts, using his charge attack three times, firing balls of electrical energy and large lightning bolts, dropping more fireballs, using his Earthshake Punch, and firing energy balls that bounce off the ground and the edges of the screen. Wario must jump on or Ground Pound the Shake King when he uses his charge attack (very similar to Wario's Dash Attack) to make him crash into a wall. Then, he must damage him with a Dash Attack on his behind repeatedly until he falls out of the wall, stunned. Following that, Wario should deal a large amount of damage by throwing him into the ceiling or any wall. Optionally, he can shake the Shake King before throwing him to cause damage, as this produces large amounts of coins. If Wario throws him into a nearby wall, he can also decide to deal a small amount of damage with a Dash Attack. If the Shake King is charging any attack (other than the charge), Wario can use an Earthshake Punch to cancel the attack. In addition, using an Earthshake Punch when the Shake King does will counter it, granting Wario a chance to attack. | Shakedown Schooner | VS the Shake King |
Missions[edit]
- Main article: List of Wario Land: Shake It! missions
There are three or more missions in every level. Secret levels usually have more missions than normal levels. Some missions appear very often, such as finishing a stage before the clock reaches a certain time, finishing a stage without taking damage, or collecting a certain amount of coins. If all of the missions in the stage are completed, the player will earn the stage's music in "Media Room" (specifically the music heard before freeing the Merfle in normal stages, the music heard after freeing the Merfle in secret stages, and the music heard during the battle in boss stages).
Treasures[edit]
- Main article: List of treasures in Wario Land: Shake It!
Every stage in the game, apart from boss stages, contains 3 treasures. They are always contained within treasure chests. Each treasure chest looks identical, with the only variation existing in underwater levels; where they are much smaller, and are blue rather than red. To obtain a treasure, Wario must simply attack the treasure chest and it will open. In order to 100% complete the game, the player must collect all 99 treasures as well as completing every stage's Missions. If the player collects every treasure, Wario's garage will be decorated with gold.
The only time when a different method is required to obtain treasures is in the Boogie Mansion stage, where all three treasure chests are mimics, looking like normal chests until Wario comes into contact with them. If this happens, the chest's eyes appear and it opens up, swallowing Wario in a similar way that Venus Guy-Traps can. To obtain the treasures from these living chests, Wario must throw a bomb into them, causing them to eat it and explode open.
Development[edit]
The creation of Wario Land: Shake It! began when Nintendo producer Takahiro Harada was inspired to do a new Wario Land sequel after playing Ganbare Goemon: Tōkai Dōchū Ōedo Tengu ri Kaeshi no Maki, a Konami platformer released on the Nintendo DS. Having enjoyed the Goemon game greatly, he contacted its producer, Etsunobu Ebisu,[5] who had subsequently left Konami to make his own video game development company, Good-Feel.[6] While Ebisu initially envisioned a Wild Western-style shooter for the game, Harada convinced him that sticking to what they know with a platformer would be better. Picturing Wario as a reckless yet manly brute who relies on his strength to smash though obstacles and knock things down, they eventually came up with the idea of using the Wii's motion controls for shaking things around, with other uses of tilting and aiming to compensate for the lack of buttons on the Wii Remote.[7]
After some discussion, Harada and Ebisu decided to make Wario Land: Shake It! "the ultimate 2D game" by having everything hand-drawn, from the characters to the backgrounds. Knowing the massive amount of work this would entail, they considered simply using 3D polygons, but decided to take advantage of the fact that technology had finally advanced enough to support such a lofty undertaking (for example, according to program director Koichi Yagi, "the scenery alone would have filled up the Nintendo GameCube"). A single action taken by a character amounted to about 30 animation frames, resulting in 6000 enemy patterns, with 2000 more for Wario alone, in order to animate the roughly 200 actions he can perform. The backgrounds were non-repeating and hand-drawn, and just as any change to a character's design required all the frames to be adjusted, "even a small change [to the background] meant everything had to be changed", according to design director Tadanori Tsukawaki. The end result was worth the "hard labor", however, as even in the early builds that only had basic line drawings, Tsukawaki could tell that the game "has impact". Knowing that they would benefit from the involvement of more experienced anime companies, Good-Feel brought in Production I.G to help with character animation and the opening and ending cutscenes, while Kusanagi assisted with the background art.[8]
Critical reception[edit]
| Reviews | |||
|---|---|---|---|
| Release | Reviewer, Publication | Score | Comment |
| Nintendo Wii | Ellie Gibson, Eurogamer |
7/10 | Does Nintendo still care about hardcore gamers? This title could be used as evidence for the defence; it's a 2D platformer, with hard bits and boss battles and rewards for extra effort. But, as the prosecution might point out, even here there are indications of an attempt to appeal to a wider market. The result is a game which is good, but not great, and certainly not up to the standard of Nintendo's best 2D platformers. They don't make 'em like they used to, that's for sure. Still - at least they make 'em. |
| Nintendo Wii | Jonathan Holmes, Destructoid |
7.5/10 | I can wholeheartedly recommend the full-price purchase of Wario Land: Shake It to only three groups of people: kids between 5-10 years old, die-hard fans of hand-drawn animation, and people who love "easy but smart" 2D platformers. The game is top-notch in terms of its look, its controls, and its level design. Then why is it that I kept wanting to stop playing it in favor of another go at Tornado Man's Time Attack challenge in Mega Man 9? It's because by comparison, Mega Man 9 is like a brush with death, an edge-of-your-seat thrill ride on a brand new roller coaster, whereas Wario Land : Shake It is more like a leisurely, risk-free hop in the tea cups. If the game had Wario start out with half the amount of special moves, wasn't so resistant to letting you die, and had some of that trademark Wario weirdness, then I'd be more apt to recommend it to everybody. It's a shame, because I really want Wario Land: Shake It to succeed, if not just to send the message to developers that home-console, hand-drawn 2D action/platformers didn't have to die along with the Sega Saturn. Guess I'll just have to hope for Muramasa to turn out good enough make that point. |
| Nintendo Wii | Andrew Webster, GameSpot |
7.5/10 | Wario Land: Shake Dimension is a fun action romp (dare we say with an occasional puzzle?) with a decided nod to the past glory of the genre. However, its short, easy-to-finish story mode and occasionally lackluster control system hamper what is an otherwise solid platformer. |
| Aggregators | |||
| Compiler | Platform / Score | ||
| Metacritic | 78 | ||
| GameRankings | 77.80% | ||
Promotion[edit]
There was a promotional sweepstakes which began on August 13, 2008. To enter, contestants sent a postcard containing their full name, mailing address, phone number, and email address to the Nintendo Power sweepstakes address. The grand prize was given to one person and consisted of a Wii and a copy of Wario Land: Shake It! The second prize was given to ten people and consisted of just the game. The sweepstakes ended on November 1, 2008.[9]
In collaboration with Six Flags, ten of their theme park locations were "taken over" in September.[10] As a part of this event, demos of the game were available at the parks' Wii Experience areas. On September 27, 2008, competitions were held concurrently at Six Flags Magic Mountain and Six Flags St. Louis. Competitors were tasked to play through a level of the game as quickly as possible. The player with the best overall time from both parks won a trip to New York and the Nintendo World store. In addition, a person from each park with the best time won a "Bottomless Coin Sack" which contained a Wii and a copy of the game, a Nintendo DS system, a gift certificate for Six Flags merchandise, and "fun premium items".
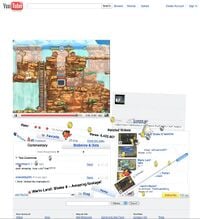
On September 19, 2008, a video showcasing footage of the game was uploaded to YouTube.[11] During the video, whenever a large shaking motion occurred in the footage, the webpage shook as well. As the video progressed, more of the webpage's elements were dislodged and fell down. Once an element fell out of place, it could be dragged around using the cursor.
Staff[edit]
- Main article: List of Wario Land: Shake It! staff
Madoka Yamauchi is credited as the director as well as one of the game's planners. The assistant director, Nobuo Matsumiya, had previously worked on several Super Mario franchise games such as Super Mario Bros. Deluxe and Yoshi's Island DS. The backgrounds were illustrated by KUSANAGI, Inc. while the characters' animations and opening and ending sequences were created by Production I.G.
Pre-release and unused content[edit]
A cut track was found in pre-release versions of the game for a level known as "Plumber's Cave," the main melody being based on the Underground Theme from the mainstream Super Mario titles. It was featured on the game site as a soundtrack sample before release. For one reason or another, it was completely removed from the game. The accompanying "hurry up" theme was left in the game and used in Foulwater Falls.[12]
Gallery[edit]
- For this subject's image gallery, see Gallery:Wario Land: Shake It!
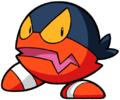
Red Bandinero
References to other games[edit]
- Wario Land 4: The Wario Car returns.
References in later games[edit]
- Super Smash Bros. series: Wario's victory jingle is an excerpt of Stonecarving City's music. The original music for Stonecarving City, under the name "Ruins (Wario Land: Shake It!)", is present in Super Smash Bros. for Wii U and Super Smash Bros. Ultimate.
- Kirby's Epic Yarn: Several sound effects are reused.
- Mario Party 10: The treasure chests on Wario's board in amiibo Party look similar to the ones from this game and a Coin Bag also appears. The board's music is a rearrangement of Stonecarving City's music.
- Yoshi's Woolly World: Several sound effects are reused. These include the selecting, pipe entering, and boss damaging sound effects.
Names in other languages[edit]
| Language | Name | Meaning | Notes |
|---|---|---|---|
| Japanese | ワリオランドシェイク[?] Wario Rando Sheiku |
Wario Land Shake | |
| Chinese (traditional) | 壞莉歐樂園SHAKE[13] Huàilìōu Lèyuán Shake |
Wario Wonderland Shake | |
| German | Wario Land: The Shake Dimension[?] | - | |
| Korean | 와리오랜드 셰이킹[?] Wario Raendeu Syeiking |
Wario Land Shaking |
Trivia[edit]
- Wario Land: Shake It! was referenced on the 2009 Valentine's Day episode of Saturday Night Live in a sketch titled "Wii Guys." The sketch parodied the game's signature element of gameplay—shaking enemies and Money Bags by shaking the Wii Remote. The skit incorrectly states that the game has a 2-player mode.
References[edit]
- ^ latam.Wii.com - El Sitio de la Experiencia Wii Global en Español. Nintendo (Latin American Spanish). Archived January 29, 2009, 17:42:29 UTC from the original via Wayback Machine. Retrieved July 5, 2024.
- ^ https://www.nintendo.com/en-za/Games/Wii/Wario-Land-The-Shake-Dimension-283861.html
- ^ Jake (July 21, 2016). 10 Wii games coming to Japanese Wii U eShop over coming weeks, with My Nintendo discount. NintendoEverything (English). Retrieved July 5, 2024.
- ^ Wario Land: Shake It for Wii U. Nintendo of America (American English). Archived November 23, 2016, 12:49:17 UTC from the original via Wayback Machine. Retrieved July 5, 2024.
- ^ 東海道中 大江戸天狗り返しの巻. ウィキペディア日本語版 (Japanese). Retrieved July 5, 2024.
- ^ "At that time, I had just quit working for that company and had founded Good-Feel." – Etsunobu Ebisu. Staff interview on the official Wario Land: Shake It! website, page 1. Nintendo (English). Archived January 21, 2009 from the original via Wayback Machine. Retrieved July 5, 2014.
- ^ "Then we began developing plans for tilting the Wii Remote and shaking it up and down or side to side." – Madoka Yamauchi. Staff interview on the official Wario Land: Shake It! website, page 1. Nintendo (English). Archived January 21, 2009, 03:17:42 UTC from the original via Wayback Machine. Retrieved July 5, 2014.
- ^ "Production I.G helped with character animation and the opening and ending sequences, and Kusanagi helped with the backgrounds." – Etsunobu Ebisu. Staff interview on the official Wario Land: Shake It! website, page 1. Nintendo (English). Archived February 10, 2009, 01:16:43 UTC from the original via Wayback Machine. Retrieved July 5, 2014.
- ^ Holiday 2007. Nintendo Power Volume 223. Future US (American English). Page 80.
- ^ September 16, 2008. Nintendo's Famous Anti-Hero, Wario, Invades Six Flags This Summer. Nintendo of America (American English). Archived September 20, 2008, 13:50:33 UTC from the original via Wayback Machine. Retrieved July 5, 2024.
- ^ videogameclipcollect (September 19, 2018). Wario Land: Shake It! YouTube page (2008). YouTube (English). Retrieved July 5, 2024.
- ^ Prerelease:Wario Land: Shake It!. The Cutting Room Floor (English). Retrieved July 5, 2024.
- ^ Wii遊戲軟體. Nintendo of Taiwan (Traditional Chinese). Archived January 22, 2013, 21:01:32 UTC from the original via Wayback Machine. Retrieved July 5, 2024.
External links[edit]
- Official Japanese Wario Land Shake website
- Pre-Launch American Wario Land: Shake It! website
- Official American Wario Land: Shake It! website
- Official Australian Wario Land: The Shake Dimension webpage
- Official European Wario Land: The Shake Dimension website
- Japanese instruction booklet
