Gallery:WarioWare: Get It Together!: Difference between revisions
(Add more about characters) Tag: Mobile edit |
|||
| (26 intermediate revisions by 3 users not shown) | |||
| Line 18: | Line 18: | ||
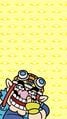
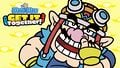
WWGIT Key artwork alt.jpg|Key artwork (portrait) | WWGIT Key artwork alt.jpg|Key artwork (portrait) | ||
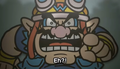
WWGIT Wario.jpg|[[Wario]] | WWGIT Wario.jpg|[[Wario]] | ||
WWGIT Wario.png|Wario | |||
WWGIT Wario Alt.png|Wario | WWGIT Wario Alt.png|Wario | ||
WWGIT Wario Joycons.png|Wario | WWGIT Wario Joycons.png|Wario | ||
| Line 26: | Line 27: | ||
WWGIT Wario Artwork 5.png|Wario | WWGIT Wario Artwork 5.png|Wario | ||
WWGIT Wario Artwork 6.png|Wario | WWGIT Wario Artwork 6.png|Wario | ||
Wario Bash WWGIT.png|Wario | |||
WWGIT Wario Artwork 8.png|Wario | WWGIT Wario Artwork 8.png|Wario | ||
WWGIT Young Cricket.jpg|[[Young Cricket]] | WWGIT Young Cricket.jpg|[[Young Cricket]] | ||
WWGIT Young Cricket.png|Young Cricket | |||
WWGIT Young Cricket Artwork 2.png|Young Cricket | WWGIT Young Cricket Artwork 2.png|Young Cricket | ||
WWGIT Young Cricket Artwork 3.png|Young Cricket | WWGIT Young Cricket Artwork 3.png|Young Cricket | ||
WWGIT 18 Volt.jpg|[[18-Volt]] | WWGIT 18 Volt.jpg|18-Volt | ||
WWGIT 18-Volt.png|[[18-Volt]] | |||
WWGIT 18 Volt Artwork 2.png|18-Volt | WWGIT 18 Volt Artwork 2.png|18-Volt | ||
WWGIT 18 Volt Artwork 3.png|18-Volt | WWGIT 18 Volt Artwork 3.png|18-Volt | ||
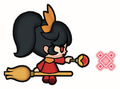
WWGIT Mona. | WWGIT Mona.png|[[Mona]] | ||
WWGIT Mona.jpg|Mona | |||
WWGIT Mona Artwork 2.png|Mona | WWGIT Mona Artwork 2.png|Mona | ||
WWGIT Mona Artwork 3.png|Mona | WWGIT Mona Artwork 3.png|Mona | ||
WWGIT Dribble and Spitz.png|[[Dribble & Spitz]] | WWGIT Dribble and Spitz.png|[[Dribble & Spitz]] | ||
WWGIT Dribble.jpg|Dribble | WWGIT Dribble.jpg|Dribble | ||
WWGIT Dribble.png|Dribble | |||
WWGIT Dribble Artwork.png|Dribble | WWGIT Dribble Artwork.png|Dribble | ||
WWGIT Dribble Artwork 3.png|Dribble | WWGIT Dribble Artwork 3.png|Dribble | ||
WWGIT Spitz.jpg|Spitz | WWGIT Spitz.jpg|Spitz | ||
WWGIT Spitz.png|Spitz | |||
WWGIT Spitz Artwork.png|Spitz | WWGIT Spitz Artwork.png|Spitz | ||
WWGIT Spitz Artwork 3.png|Spitz | WWGIT Spitz Artwork 3.png|Spitz | ||
WWGIT Dr Crygor.jpg|[[Dr. Crygor]] | WWGIT Dr Crygor.jpg|[[Dr. Crygor]] | ||
WWGIT Dr. Crygor.png|Dr. Crygor | |||
WWGIT Dr Crygor Artwork 2.png|Dr. Crygor | WWGIT Dr Crygor Artwork 2.png|Dr. Crygor | ||
WWGIT Dr Crygor Artwork 3.png|Dr. Crygor | WWGIT Dr Crygor Artwork 3.png|Dr. Crygor | ||
WWGIT 9 Volt.jpg|[[9-Volt]] | WWGIT 9 Volt.jpg|9-Volt | ||
WWGIT 9 Volt 2.png|9-Volt | WWGIT 9-Volt.png|[[9-Volt]] | ||
WWGIT 9-Volt 2.png|9-Volt | |||
WWGIT 9 Volt Artwork 2.png|9-Volt | WWGIT 9 Volt Artwork 2.png|9-Volt | ||
WWGIT 9 Volt Artwork 3.png|9-Volt | WWGIT 9 Volt Artwork 3.png|9-Volt | ||
WWGIT Mike.jpg|[[Mike]] | WWGIT Mike.jpg|[[Mike]] | ||
WWGIT Mike.png|Mike | |||
WWGIT Mike Artwork 2.png|Mike | WWGIT Mike Artwork 2.png|Mike | ||
WWGIT Kat and Ana.png|[[Kat & Ana]] | WWGIT Kat and Ana.png|[[Kat & Ana]] | ||
WWGIT Kat.jpg| | WWGIT Kat.jpg|Kat | ||
WWGIT Kat.png|Kat | |||
WWGIT Kat 2.png|Kat | WWGIT Kat 2.png|Kat | ||
WWGIT Kat Artwork 3.png|Kat | WWGIT Kat Artwork 3.png|Kat | ||
WWGIT Ana.jpg| | WWGIT Ana.jpg|Ana | ||
WWGIT Ana.png|Ana | |||
WWGIT Ana 2.png|Ana | WWGIT Ana 2.png|Ana | ||
WWGIT Ana Artwork 3.png|Ana | WWGIT Ana Artwork 3.png|Ana | ||
WWGIT Jimmy T.jpg|[[Jimmy T]] | WWGIT Jimmy T.jpg|[[Jimmy T]] | ||
WWGIT Jimmy T Artwork.png|Jimmy T | |||
WWGIT Jimmy T Artwork 2.png|Jimmy T | WWGIT Jimmy T Artwork 2.png|Jimmy T | ||
WWGIT Jimmy T Artwork 3.png|Jimmy T | WWGIT Jimmy T Artwork 3.png|Jimmy T | ||
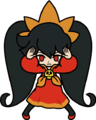
WWGIT Ashley.jpg|[[Ashley]] | WWGIT Ashley.jpg|[[Ashley]] | ||
WWGIT Ashley.png|Ashley | |||
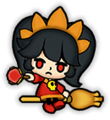
WWGIT Ashley Artwork 4.png|Ashley | WWGIT Ashley Artwork 4.png|Ashley | ||
WWGIT Ashley Artwork 2.png|Ashley | WWGIT Ashley Artwork 2.png|Ashley | ||
| Line 71: | Line 84: | ||
WWGIT Orbulon Artwork 3.png|Orbulon | WWGIT Orbulon Artwork 3.png|Orbulon | ||
WWGIT 5 Volt.jpg|[[5-Volt]] | WWGIT 5 Volt.jpg|[[5-Volt]] | ||
WWGIT 5-Volt.png|5-Volt | |||
WWGIT 5 Volt Artwork 2.png|5-Volt | WWGIT 5 Volt Artwork 2.png|5-Volt | ||
WWGIT 5 Volt Artwork 3.png|5-Volt | WWGIT 5 Volt Artwork 3.png|5-Volt | ||
WWGIT Red Artwork.png|[[Red (WarioWare series)|Red]] | WWGIT Red Artwork.png|[[Red (WarioWare series)|Red]] | ||
WWGIT Master Mantis Artwork.png|[[Master Mantis]] | WWGIT Master Mantis Artwork.png|[[Master Mantis]] | ||
Lulu WWGiT.png|[[Lulu]] | |||
WWGIT Penny Artwork.png|[[Penny]] | WWGIT Penny Artwork.png|[[Penny]] | ||
WWGIT Penny Artwork 2.png|Penny | WWGIT Penny Artwork 2.png|Penny | ||
WWGIT Pyoro.png|[[Pyoro]] | WWGIT Pyoro.png|[[Pyoro]] | ||
WWGIT 13 Amp Artwork.png|[[13-Amp]] | WWGIT 13 Amp Artwork.png|[[13-Amp]] | ||
WWGIT Doris1.png|[[Doris 1]] | |||
WWGIT Fronk Artwork.png|[[Fronk]] | WWGIT Fronk Artwork.png|[[Fronk]] | ||
WWGIT Group Artwork 1.png|Group artwork | WWGIT Group Artwork 1.png|Group artwork | ||
| Line 385: | Line 399: | ||
Icon Genre Culture^q.png|Culture | Icon Genre Culture^q.png|Culture | ||
Icon Genre WarioDX^q.png|Anything Goes | Icon Genre WarioDX^q.png|Anything Goes | ||
</gallery> | |||
===Suitability icons=== | |||
<gallery> | |||
WWGIT Good Fit.png|Good Fit | |||
WWGIT Above-Average Fit.png|Above-Average Fit | |||
WWGIT Average Fit.png|Average Fit | |||
WWGIT Below-Average Fit.png|Below-Average Fit | |||
WWGIT Bad Fit.png|Bad Fit | |||
</gallery> | </gallery> | ||
| Line 526: | Line 549: | ||
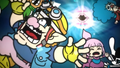
WarioWare GIT Disappointed Employees (1).png|The group wondering why the game console is not working | WarioWare GIT Disappointed Employees (1).png|The group wondering why the game console is not working | ||
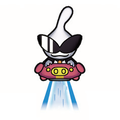
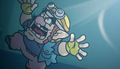
WarioWare GIT Disappointed Employees (2).png|Wario throwing the game console into the air | WarioWare GIT Disappointed Employees (2).png|Wario throwing the game console into the air | ||
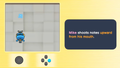
Mouth on Screen.png|[[The Supreme Developer|A mouth]] appearing on the game's screen | Mouth on Screen.png|[[The Supreme Developer|A mouth]] appearing on the game console's screen | ||
Mouth Vacuum.png|The mouth beginning to suck the group | Mouth Vacuum.png|The mouth beginning to suck the group | ||
WarioWare GIT Sucked Employees.png|The group being pulled into the console | WarioWare GIT Sucked Employees.png|The group being pulled into the game console | ||
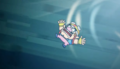
Wario Gets Sucked.png|Wario being pulled into the console | Wario Gets Sucked.png|Wario being pulled into the game console | ||
Mini Wario.png|Wario becoming small | Mini Wario.png|Wario becoming small | ||
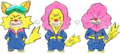
Mini Characters (1).png|[[Young Cricket]], [[18-Volt]], [[Mona]], [[Dribble & Spitz|Dribble, Spitz]], [[Dr. Crygor]], [[9-Volt]], [[Mike]], [[Kat & Ana]] becoming small | Mini Characters (1).png|[[Young Cricket]], [[18-Volt]], [[Mona]], [[Dribble & Spitz|Dribble, Spitz]], [[Dr. Crygor]], [[9-Volt]], [[Mike]], [[Kat & Ana]] becoming small | ||
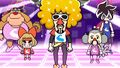
Mini Characters (2).png|[[Jimmy T]], [[Ashley]], [[Orbulon]], [[5-Volt]], [[Red (WarioWare series)|Red]], [[Master Mantis]], and [[Lulu]] becoming small | Mini Characters (2).png|[[Jimmy T]], [[Ashley]], [[Orbulon]], [[5-Volt]], [[Red (WarioWare series)|Red]], [[Master Mantis]], and [[Lulu]] becoming small | ||
Everyone Sucked.png|The group being pulled into the console completely | Everyone Sucked.png|The group being pulled into the game console completely | ||
</gallery> | </gallery> | ||
| Line 543: | Line 566: | ||
====That's Life==== | ====That's Life==== | ||
<gallery> | <gallery> | ||
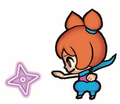
MonaScooterWWGIT.png|Mona on her [[Mona's scooter|scooter]] | |||
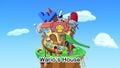
WWGIT Mona's House.jpg|[[Mona's House]] | WWGIT Mona's House.jpg|[[Mona's House]] | ||
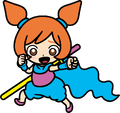
WWGIT Mona Boomerang.jpg|Mona holding her boomerang | WWGIT Mona Boomerang.jpg|Mona holding her boomerang | ||
| Line 563: | Line 587: | ||
</gallery> | </gallery> | ||
====[[Nintendo | ====[[Nintendo]] Classics==== | ||
<gallery> | <gallery> | ||
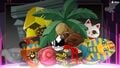
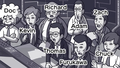
WWGIT 9-Volt Cutscene.jpg|13-Amp, 9-Volt, Fronk, and 18-Volt | WWGIT 9-Volt Cutscene.jpg|13-Amp, 9-Volt, Fronk, and 18-Volt | ||
| Line 614: | Line 638: | ||
====Interlude==== | ====Interlude==== | ||
<gallery> | <gallery> | ||
WarioWare GIT Returned Employees.jpg|The WarioWare, Inc. | WarioWare GIT Returned Employees.jpg|The [[WarioWare, Inc.|group]] successfully returning to the real world | ||
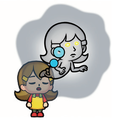
WarioWare GIT Thinking Employees.jpg|The | Wondering Mona.png|[[Mona]] wondering | ||
WarioWare GIT Thinking Employees.jpg|The group wondering where the [[game bug]]s came from | |||
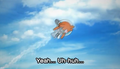
Wario's GIT! Interlude (1).png|[[Wario]] immediately remembering something | |||
WarioWare GIT Wario's Reckless Typing.jpg|Wario's reckless typing | WarioWare GIT Wario's Reckless Typing.jpg|Wario's reckless typing | ||
GAME BUGS!.png|The game bugs accidentally created by Wario | |||
WarioWare GIT Wario Checking The Game Console.jpg|Wario checking the game console | WarioWare GIT Wario Checking The Game Console.jpg|Wario checking the game console | ||
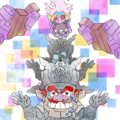
Mega Bug in GIT!.jpg|The game bugs fusing into the [[Mega Bug]] | |||
WWGIT Mega Bug Jumpscare.jpg|The Mega Bug scaring Wario | WWGIT Mega Bug Jumpscare.jpg|The Mega Bug scaring Wario | ||
WarioWare GIT Wario Throwing The Game Console.jpg|Wario throwing the game console | WarioWare GIT Wario Throwing The Game Console.jpg|Wario throwing the game console | ||
WarioWare GIT Angry Employees.png|The | Wario's GIT! Interlude (2).png|Wario realising what he did before noticing the group's angers | ||
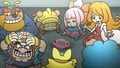
WWGIT Chase.jpg|The | WarioWare GIT Angry Employees.png|The group angry at Wario for his shenanigan | ||
WarioWare GIT Shocked Employees.png|The missing | WWGIT Chase.jpg|The group chasing Wario for his shenanigan | ||
Wario's GIT! Interlude (3).png|The group cornering Wario and calling him bad | |||
Wario's GIT! Interlude (4).png|Wario suddenly noticing something else | |||
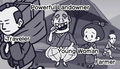
3 someones MISSING!.png|Wario telling the group about [[Red (WarioWare series)|three]] [[Master Mantis|peo]][[Lulu|ple]] missing | |||
WarioWare GIT Shocked Employees.png|The group realising that Wario is right | |||
Let's rescue them!.png|[[Young Cricket]] suggesting to the group that they rescue their missing friends | |||
Wario's GIT! Interlude (5).png|Wario suddenly becoming heartless | |||
Wario's GIT! Interlude (6).png|The group shouting at Wario | |||
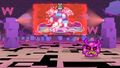
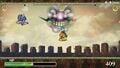
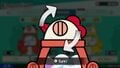
WWGIT Real Final Boss.jpg|[[Pyoro|A shadowy figure]] on the game console's screen | WWGIT Real Final Boss.jpg|[[Pyoro|A shadowy figure]] on the game console's screen | ||
</gallery> | </gallery> | ||
| Line 637: | Line 672: | ||
<gallery> | <gallery> | ||
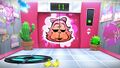
Penny's Lab WWGIT.png|[[Penny's Lab]] | Penny's Lab WWGIT.png|[[Penny's Lab]] | ||
WWGIT Doris 1 and Penny.jpg|Penny | WWGIT Doris 1 and Penny.jpg|[[Penny]] & [[Doris 1]] inventing something | ||
WWGIT Jet Tank One.jpg|Penny | Penny & Doris 1 FINISHED!.png|Penny & Doris 1 finishing their invention | ||
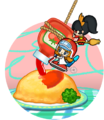
WWGIT Doris 1 and Alien Bunnies.jpg|Doris 1 | WWGIT Jet Tank One.jpg|Penny presenting the [[Jet Tank One]] | ||
WWGIT Doris 1 and Alien Bunnies.jpg|Doris 1 relaxing with some [[Alien Bunny|Alien Bunnies]] | |||
Jet Tank One Practice.png|Penny practicing the Jet Tank One | |||
Penny's Ringtone.png|Penny's phone suddenly ringing | |||
A phone call from grandpa.png|Penny receiving a phone call from [[Dr. Crygor]] | |||
Penny in the sky.png|Penny talking with Dr. Crygor and flying in the sky at the same time | |||
WarioWare, Inc. (Penny).png|Penny going to the [[WarioWare, Inc.]] building | |||
Posing Penny.png|Penny posing | |||
Mini Penny.png|Penny becoming small to enter the game world | |||
WWGIT Golden Watering Can.jpg|Penny filling the [[Golden Watering Can]] | WWGIT Golden Watering Can.jpg|Penny filling the [[Golden Watering Can]] | ||
</gallery> | </gallery> | ||
| Line 686: | Line 729: | ||
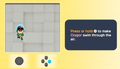
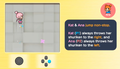
WWGIT! Penny's Tutorial.png|Penny | WWGIT! Penny's Tutorial.png|Penny | ||
WWGIT! Pyoro's Tutorial.png|Pyoro | WWGIT! Pyoro's Tutorial.png|Pyoro | ||
</gallery> | |||
====Gameplay==== | |||
<gallery> | |||
WWGIT! Wario's Tutorial GP.png|Wario | |||
WWGIT! Young Cricket's Tutorial GP.png|Young Cricket | |||
WWGIT! 18-Volt's Tutorial GP.png|18-Volt | |||
WWGIT! Mona's Tutorial GP.png|Mona | |||
WWGIT! Dribble & Spitz's Tutorial GP.png|Dribble & Spitz | |||
WWGIT! Dr. Crygor's Tutorial GP.png|Dr. Crygor | |||
WWGIT! 9-Volt's Tutorial GP.png|9-Volt | |||
WWGIT! Mike's Tutorial GP.jpg|Mike | |||
WWGIT! Kat & Ana's Tutorial GP.png|Kat & Ana | |||
WWGIT! Jimmy T's Tutorial GP.png|Jimmy T | |||
WWGIT! Ashley's Tutorial GP.png|Ashley | |||
WWGIT! Orbulon's Tutorial GP.png|Orbulon | |||
WWGIT! 5-Volt's Tutorial GP.jpg|5-Volt | |||
WWGIT! Red's Tutorial GP.png|Red | |||
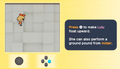
WWGIT! Master Mantis' Tutorial GP.png|Master Mantis | |||
WWGIT! Lulu's Tutorial GP.png|Lulu | |||
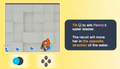
WWGIT! Penny's Tutorial GP.png|Penny | |||
WWGIT! Pyoro's Tutorial GP.jpg|Pyoro | |||
</gallery> | </gallery> | ||
| Line 1,088: | Line 1,153: | ||
===Miscellaneous=== | ===Miscellaneous=== | ||
<gallery> | <gallery> | ||
WWGIT Cluckade.jpg|A Cluckade machine | WWGIT Cluckade.jpg|A Cluckade machine | ||
</gallery> | </gallery> | ||
Latest revision as of 12:27, February 3, 2025
This is a gallery of images from the game WarioWare: Get It Together!
Logos[edit]

International logo

Japanese logo
Japanese logo (Alternate)
Traditional Chinese logo

Traditional Chinese logo (Alternate)
Simplified Chinese logo

Korean logo
Artwork[edit]

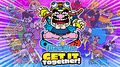
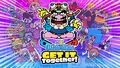
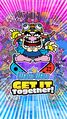
Key artwork
Key artwork (landscape)
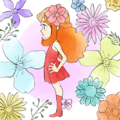
Key artwork (portrait)
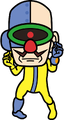
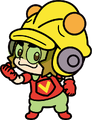
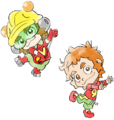
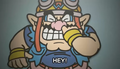
Wario
Wario
Wario
Wario
Wario
Wario

Wario
Wario

Wario
Wario
Wario

Young Cricket

Young Cricket
Young Cricket
18-Volt

18-Volt
18-Volt
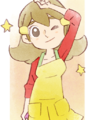
Mona

Mona

Mona
Dribble
Dribble
Dribble
Dribble

Spitz

Spitz
Spitz
Spitz
Dr. Crygor
Dr. Crygor
Dr. Crygor
9-Volt
9-Volt

9-Volt
9-Volt
Mike
Mike
Kat
Kat

Kat
Kat
Ana
Ana

Ana
Ana

Jimmy T

Jimmy T

Jimmy T

Ashley
Ashley
Ashley
Ashley

Orbulon
Orbulon

5-Volt

5-Volt
5-Volt

Penny
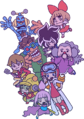
Group artwork
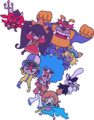
Group artwork

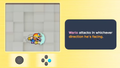
Wario and Dr. Crygor in Stop the Stopper
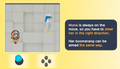
Mona and Ashley in Slathered in Ketchup


Character gallery[edit]
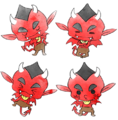
Wario[edit]
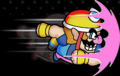
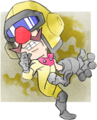
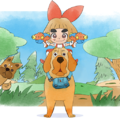
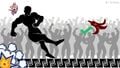
Wario treasure hunting
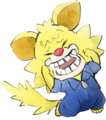
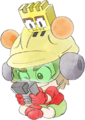
Both forms of the Wario Bug
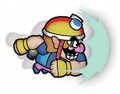
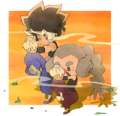
Wario overseeing construction of WarioWare, Inc.


Young Cricket[edit]
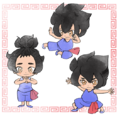
Young Cricket as a child
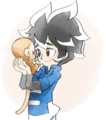
Young Cricket holding a monkey
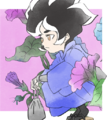
Young Cricket
Young Cricket and Master Mantis


18-Volt[edit]

18-Volt holding a cat
18-Volt and 13-Amp
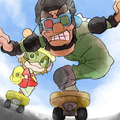
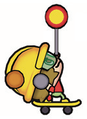
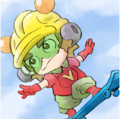
18-Volt skateboarding with 9-Volt
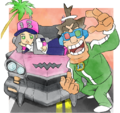
18-Volt and 13-Amp with the Wario Car


Mona[edit]
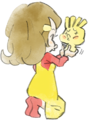
Mona with a flower in her hair

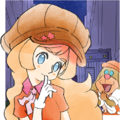
Mona wearing her outfit from WarioWare: Touched!
Mona and Joe


Dribble[edit]


Spitz[edit]
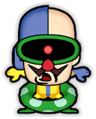
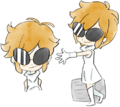
Spitz without his goggles
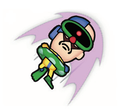
Spitz pulling his hood up
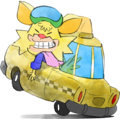
Spitz in his taxi
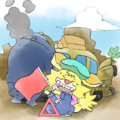
Dribble & Spitz repairing their taxi
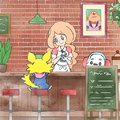
Mona serving Spitz at a café


Dr. Crygor[edit]

Dr. Crygor in his jumpsuit and lab coat from Game & Wario
Dr. Crygor with his WarioWare Gold appearance
Dr. Crygor
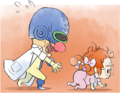
Dr. Crygor chasing an infant Penny
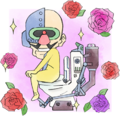
Dr. Crygor on a toilet


9-Volt[edit]
9-Volt and Fronk
9-Volt
9-Volt skateboarding
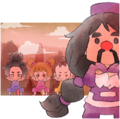
5-Volt carrying a sleepy 9-Volt
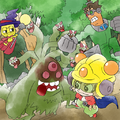
9-Volt, 18-Volt, and Fronk fighting a monster


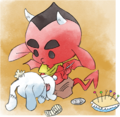
Mike[edit]

A sleeping Dr. Crygor dissecting Mike
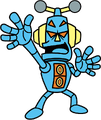
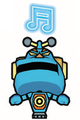
Mike recharging
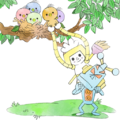
Mike and Doris 1 returning birds to their nest
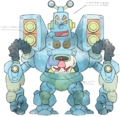
Mike converted into a mech suit piloted by Dr. Crygor


Kat[edit]

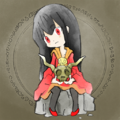
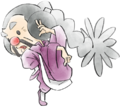
Kat in a kimono
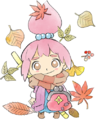
Kat during autumn
Kat & Ana sleeping


Ana[edit]
Ana
Ana in a kimono
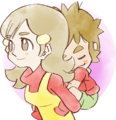
Kat & Ana taking a selfie
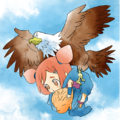
An eagle carrying Ana and a hedgehog
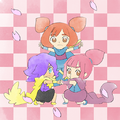
Kat & Ana with Leo


Jimmy T[edit]

Jimmy T

Jimmy T looking at a picture of his family
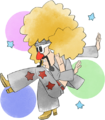
Jimmy T in a yellow afro and a gray suit
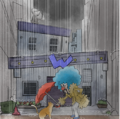
Jimmy T giving his umbrella to a cat in the rain in front of WarioWare, Inc.
Jimmy T at a café with three cats


Ashley[edit]
Ashley with her hair down
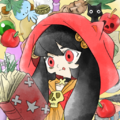
Ashley reading her spell-book
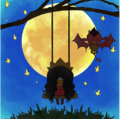
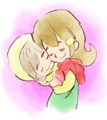
Ashley & Red looking at the moon

Ashley & Red


Orbulon[edit]
Orbulon in his human disguise
Orbulon piloting his Oinker with Alien Bunnies
Orbulon hiding amongst humans
Orbulon with Alien Bunnies inside a UFO catcher


5-Volt[edit]
5-Volt holding a Fronk

5-Volt in a kimono

5-Volt playing 9-Volt's Epic Augmented Reality Game
5-Volt
5-Volt holding an infant 9-Volt


Red[edit]
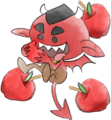
Red eating an apple
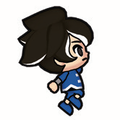
Red
Red sewing Ashley's doll
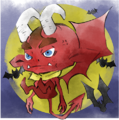
Red surrounded by bats
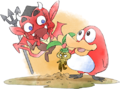
Red and Pyoro watering a plant


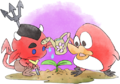
Master Mantis[edit]
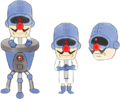
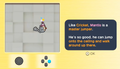
Master Mantis
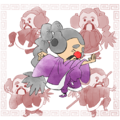
Master Mantis
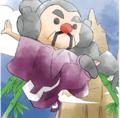
Master Mantis
A young Master Mantis training Young Cricket and other students
Young Cricket and Master Mantis with dumplings


Lulu[edit]
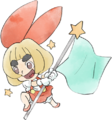
Lulu with a flag
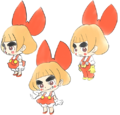
Lulu

Lulu in her pajamas sleeping with Ruffington
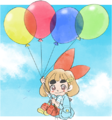
Lulu riding on balloons
Lulu wielding two of the Hydrocannon LX while riding a dog with Ruffington looking on


Penny[edit]

Penny in her pink lab coat
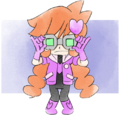
Penny with goggles
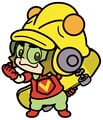
Penny piloting a machine

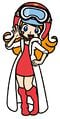
Penny dressing up as Sal Out

Penny holding a giant wrench


Pyoro[edit]
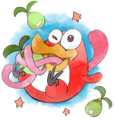
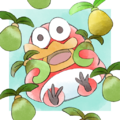
Pyoro eating a bean
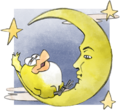
Pyoro with his Pyoro 2 appearance sleeping on the moon
Pyoro surrounded by beans

Pyoro annoying Wario
Pyoro scaring Red with a Mandrake


Artwork from Nintendo-operated social media accounts[edit]
Twitter[edit]


Instagram[edit]


Sprites and models[edit]
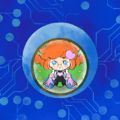
Character icons[edit]
Character select sprites[edit]

Wario

Young Cricket

18-Volt

Mona

Dribble & Spitz

Dr. Crygor

9-Volt

Mike

Kat & Ana

Jimmy T

Ashley

Orbulon

5-Volt

Red

Master Mantis

Lulu

Penny

Pyoro


Story icons[edit]


Level icons[edit]

Intro Games

That's Life

Fantasy

High Tech

Nintendo Classics

Nature

Sports

Food

Culture

Anything Goes


Suitability icons[edit]

Good Fit

Above-Average Fit

Average Fit

Below-Average Fit

Bad Fit


Microgame sprites[edit]

Female goalie (Basically Water Polo)

Male goalie (Basically Water Polo)


Microgame models[edit]


Variety Pack[edit]

Daily Grind logo

Daily Grind menu background

Friendless Battle logo
Friendless Battle menu background

High Five logo
High Five menu background


Prezzies[edit]

Strand of Hair

Dandelion Seed

Spiderweb

Apple Core

Soda-Can Tab
Empty Can

Plastic Bag

Shower Cap

Ribbon

Cashew

Hard Candy

Cracker
Boiled Egg

Scallion

Rubber Plug

Light Bulb

Mystery Screw

Mystery Key

Toilet Paper

Toothbrush
Milk

Garlic

Banana

Grapes

Smoothie

Meat Dumpling

Ice Cream

Donut

Floppy Disk

Octopus Sausage

Pudding

Rose

Magnet
Paper Wrestler

Faucet Handle

Cake Roll
Hamburger

Pizza

Ramen

Japanese Curry

Rubber Ducky
Sock

Disguise Glasses

Bicycle Pump

White Plate
Eye-Exam Stick

Mustache Catalog

Piggy Bank

Cactus

Sunglasses

Matryoshka Doll

Hunk of Meat

Bowling Pin

Soccer Ball

Rugby Ball

Birthday Cake

Manhole Cover

Afternoon Tea

Mushroom

Sushi
Marbled Meat

High-Tech Shoes

Headphones
Boxing Glove
Bat
Dumbbell

Electric Fan

Rafflesia
Mobile Phone
Digital Camera
Electric Guitar

Dual-Sport Bicycle

Laptop

Deer Scare

Wedding Dress

Alpenhorn

Haniwa Figure

Super-Fancy Toilet
Tuna

Mandrake Root
Body-Builder Statue
Minitruck

Expensive Vase
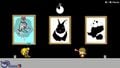
Painting

Gold Card

Golden Egg
Red Gem

Cabin Cruiser
Helicopter
Large-Scale Crane

Gaudy Crown
Golden Toilet

Company Building

Golf Course

Desert Island
Luxury Cruise Ship

Jumbo Jet
Tigronic Model
Spaceship
Giant Meteorite


Screenshots[edit]
Cutscenes[edit]
Prologue[edit]
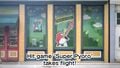
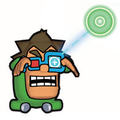
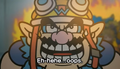
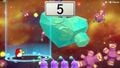
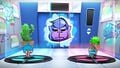
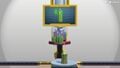
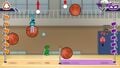
The Super Pyoro display
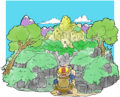
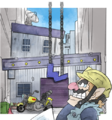
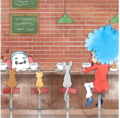
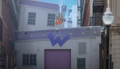
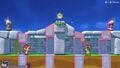
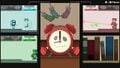
The WarioWare, Inc. building
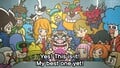
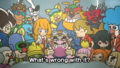
Wario telling his group that the new game is finished
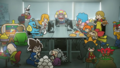
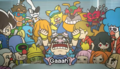
The group gathering around Wario to see the game console
Wario testing the game console out
The group wondering why the game console is not working
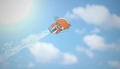
Wario throwing the game console into the air
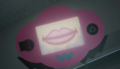
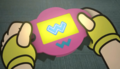
A mouth appearing on the game console's screen
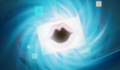
The mouth beginning to suck the group
The group being pulled into the game console
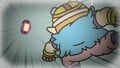
Wario being pulled into the game console
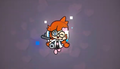
Wario becoming small
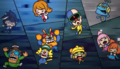
Young Cricket, 18-Volt, Mona, Dribble, Spitz, Dr. Crygor, 9-Volt, Mike, Kat & Ana becoming small
The group being pulled into the game console completely


.png)
.png)


.png)
.png)

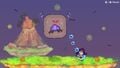
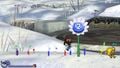
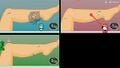
Intro Games[edit]

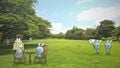
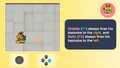
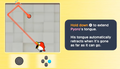
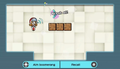
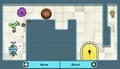
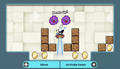
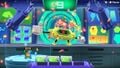
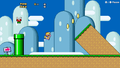
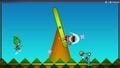
The ground control

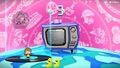
That's Life[edit]

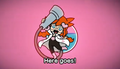
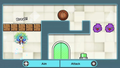
Mona on her scooter
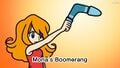
Mona holding her boomerang
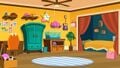
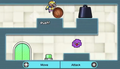
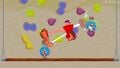
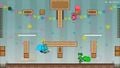
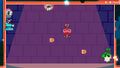
Mona's room

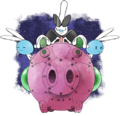
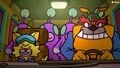
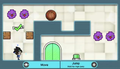
Mona commanding her pets


Fantasy[edit]
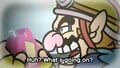
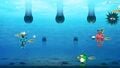
Dribble & Spitz in their taxi with aliens

High Tech[edit]
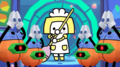
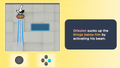
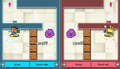
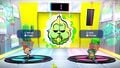
Doris 1 impressing the Flatterbots

Mike impressing the Flatterbots
Dr. Crygor disappointing the Flatterbots


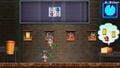
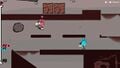
Nintendo Classics[edit]
13-Amp, 9-Volt, Fronk, and 18-Volt
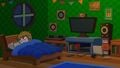
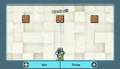
9-Volt's room
9-Volt holding the Epic Augmented Reality Game
9-Volt showing Fronk the Epic Augmented Reality Game

Fronk

5-Volt watching 9-Volt and Fronk


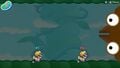
Nature[edit]
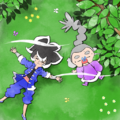
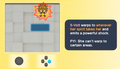
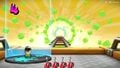
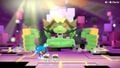
Leo about to use Lion's Roar

Kat & Ana facing Leo


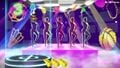
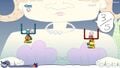
Sports[edit]
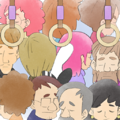
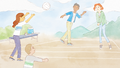
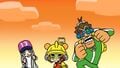
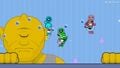
Joe, Lulu, Jimmy T, Young Cricket, and Master Mantis at Feelin' Groovy Fitness


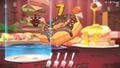
Food[edit]
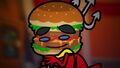
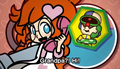
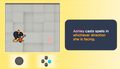
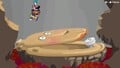
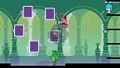
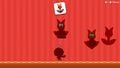
Ashley imagining Red as a burger

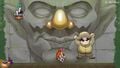
Mandrakes attacking Ashley's Mansion


Culture[edit]
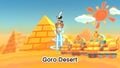
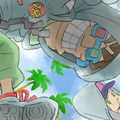
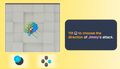
Orbulon at Goro Desert

Orbulon at Takechiko City
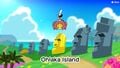
Orbulon at Ohlaka Island
Orbulon abducting Ruffington and Ms. Munchly
Orbulon in front of Wario's House
Orbulon with his collection of artifacts


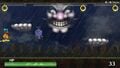
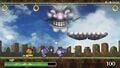
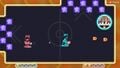
Anything Goes[edit]
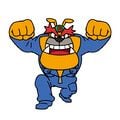
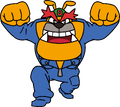
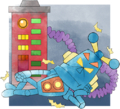
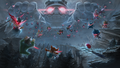
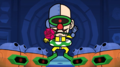
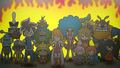
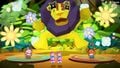
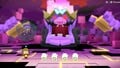
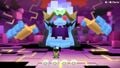
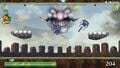
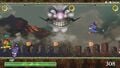
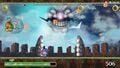
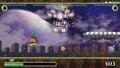
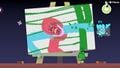
The Mega Bug


Interlude[edit]
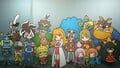
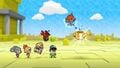
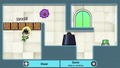
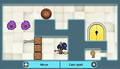
The group successfully returning to the real world
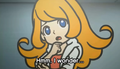
Mona wondering
The group wondering where the game bugs came from
Wario immediately remembering something
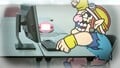
Wario's reckless typing
The game bugs accidentally created by Wario
Wario checking the game console
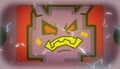
The game bugs fusing into the Mega Bug

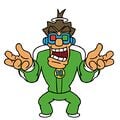
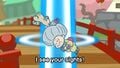
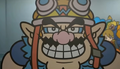
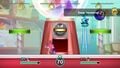
The Mega Bug scaring Wario
Wario throwing the game console
Wario realising what he did before noticing the group's angers
The group angry at Wario for his shenanigan
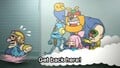
The group chasing Wario for his shenanigan
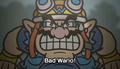
The group cornering Wario and calling him bad
Wario suddenly noticing something else
The group realising that Wario is right
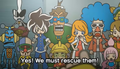
Young Cricket suggesting to the group that they rescue their missing friends
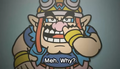
Wario suddenly becoming heartless
The group shouting at Wario
A shadowy figure on the game console's screen


.png)


.png)


.png)
.png)


.png)
.png)

Variety Towers[edit]
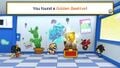
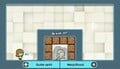
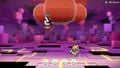
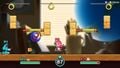
The Golden Beehive
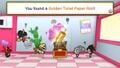
The Golden Toilet Paper Roll
A shadowy figure passing by
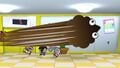
The Golden Holey Mug


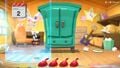
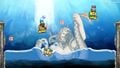
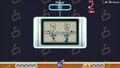
Penny's Mix[edit]
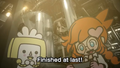
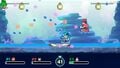
Penny & Doris 1 finishing their invention
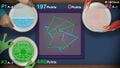
Penny presenting the Jet Tank One
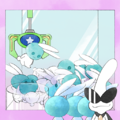
Doris 1 relaxing with some Alien Bunnies
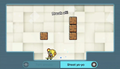
Penny practicing the Jet Tank One

Penny's phone suddenly ringing
Penny receiving a phone call from Dr. Crygor
Penny talking with Dr. Crygor and flying in the sky at the same time
Penny going to the WarioWare, Inc. building
Penny posing
Penny becoming small to enter the game world
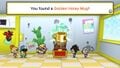
Penny filling the Golden Watering Can


.png)


Characters[edit]
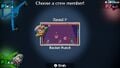
Introductions[edit]


Tutorials[edit]
Wario
Young Cricket
18-Volt
Mona
Dribble & Spitz
Dr. Crygor

9-Volt
Mike
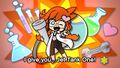
Kat & Ana
Jimmy T
Ashley
Orbulon
5-Volt
Red
Master Mantis
Lulu
Penny
Pyoro


Gameplay[edit]
Wario
Young Cricket
18-Volt
Mona
Dribble & Spitz
Dr. Crygor
9-Volt
Mike
Kat & Ana
Jimmy T
Ashley
Orbulon
5-Volt
Red
Master Mantis
Lulu
Penny
Pyoro


Character stages[edit]

Intro Games
That's Life
Fantasy
High Tech

Nintendo Classics
Remix
Nature
Sports
Food
Culture
Remix 2.0
Anything Goes
Anything Goes
Anything Goes
Anything Goes
All Mixed Up
Super Hard
Thrill Ride
Penny's Mix
Showdown

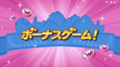
Nintendo Classics Bonus Stage screen (English)
Culture Bonus Stage screen (Japanese)


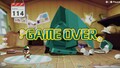
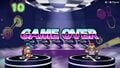
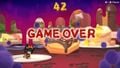
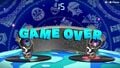
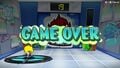
Game Over[edit]
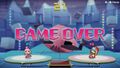
Intro Games
That's Life
Fantasy

High Tech
Nintendo Classics
Remix
Nature
Sports
Food
Culture

Remix 2.0

Anything Goes
All Mixed Up
Super Hard
Thrill Ride
Penny's Mix

Showdown
Play-o-pedia

Wario Cup

Puck 'er Up


Microgames[edit]
Intro Games[edit]
Spiky Wario (Boss)


That's Life[edit]
Delivery Center (Boss)


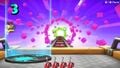
Fantasy[edit]
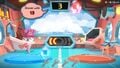
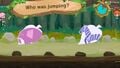
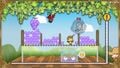
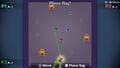
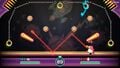
The multiplayer variant of Mermaid Tears
Poseidon (Boss)


High Tech[edit]
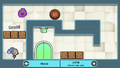
Ride the Line (Boss)


Nintendo Classics[edit]
Pikmin 2 (2-players)
Splatoon 2 (Level 1)
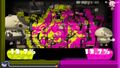
Splatoon 2 (Level 3)
Captain Toad: Treasure Tracker (2-player)
Super Mario World (Boss)


Nature[edit]
Monochrome Creatures
Safari Tour (Boss)


Sports[edit]
Shadow Sports
Rock Climber (Boss)


Food[edit]
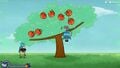
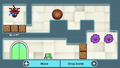
The multiplayer variant of Apple Drop
Great Juice (Boss)


Culture[edit]
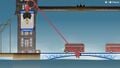
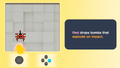
Drawbridge Dilemma (Boss)
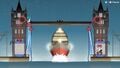
The multiplayer variant of Drawbridge Dilemma


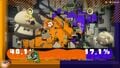
Anything Goes[edit]
The ending to Bug Out
Potty Pursuit (Boss)


Variety Pack[edit]
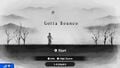
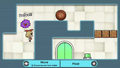
Gotta Bounce's title screen

Gotta Bounce
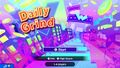
Daily Grind's title screen

Daily Grind

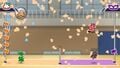
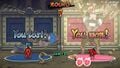
Friendless Battle's title screen
Friendless Battle
Friendless Battle
Friendless Battle
Friendless Battle
Friendless Battle
Friendless Battle
Friendless Battle
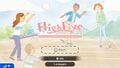
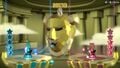
High Five's title screen
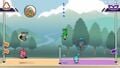
High Five
High Five
High Five
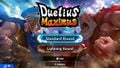
Duelius Maximus' title screen
Duelius Maximus
Duelius Maximus
Duelius Maximus
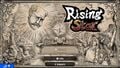
Rising Star's title screen
Rising Star

Balloon Bang's title screen

Balloon Bang
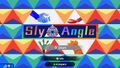
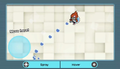
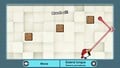
Sly Angle's title screen
Sly Angle
Sly Angle
Sly Angle
Sly Angle (Alarming Clock)
Sly Angle (Ball Blast)
Sly Angle (Burst Your Balloon)
Sly Angle (Card Pick Trick)
Sly Angle (Contemporary Art)
Sly Angle (Eye-Clops)
Sly Angle (Here, Fishy Fishy!)
Sly Angle (Rocket Punch)
Sly Angle (Sneaky Silhouette)

Sly Angle (Toilet Rollin')
Sly Angle (Tweeze Please)
Sly Angle (Up and Out)

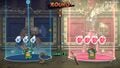
Puck 'er Up's title screen
Puck 'er Up
Puck 'er Up
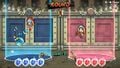
Frenemy Frenzy's title screen
Frenemy Frenzy (Desktop)
Frenemy Frenzy (Fish Tank)
Frenemy Frenzy (Sweet Shop)
Frenemy Frenzy (Pinball Machine)


Credits[edit]
The ground control crew
Sleepytown Village villagers
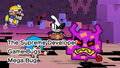
The Mega Bug
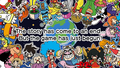
"The story has come to an end... But the game has just begun!"


.png)
.png)
.png)
.png)
.png)


Miscellaneous[edit]
A Cluckade machine

Box art[edit]
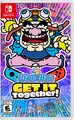
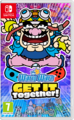
North American box art
Mexican box art
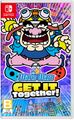
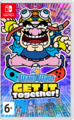
European box art
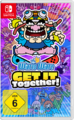
German box art
Russian box art
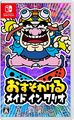
Japanese box art
Hong Kong box art
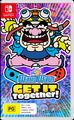
Australian box art


Miscellaneous[edit]
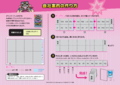
Pamphlet printable from the official Japanese website
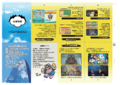
Pamphlet printable from the official Japanese website
Pamphlet printable from the official Japanese website
Pamphlet printable from the official Japanese website
YouTube video thumbnail (Play Nintendo channel)

YouTube video thumbnail (Play Nintendo channel)


Play Nintendo[edit]


My Nintendo[edit]
Desktop wallpaper (Japan)
Smartphone wallpaper (Japan)
Desktop wallpaper 1 (North America)
Smartphone wallpaper 1 (North America)
Desktop wallpaper 2 (North America)
Smartphone wallpaper 2 (North America)
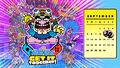
September 2021 desktop calendar (North America)
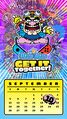
September 2021 smartphone calendar (North America)


Merchandise[edit]
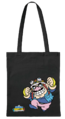
A cotton bag
A notebook (front)
A notebook (back)
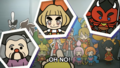
A sticker sheet
A poster


| WarioWare: Get It Together! | ||
|---|---|---|
| Characters | Playable | Wario • Young Cricket • 18-Volt • Mona • Dribble (P1) • Spitz (P2) • Dr. Crygor • 9-Volt • Mike • Kat (P1) • Ana (P2) • Jimmy T • Ashley • Orbulon • 5-Volt • Red • Master Mantis • Lulu • Penny • Pyoro |
| Supporting | 13-Amp • Alien Bunny • Club Goers • Doris 1 • Fronk • Game bug • Joe • Leo • Mega Bug • Mona's Pets • Ms. Munchly • Ruffington • The Supreme Developer • Wario Bug | |
| Microgame sets | Intro Games (Wario) • That's Life (Mona) • Fantasy (Dribble & Spitz) • High Tech (Dr. Crygor) • Nintendo Classics (9-Volt) • Nature (Kat & Ana) • Sports (Jimmy T) • Food (Ashley) • Culture (Orbulon) • Anything Goes (Wario Bug) | |
| Variety Pack minigames | Gotta Bounce • Daily Grind • Friendless Battle • High Five • Duelius Maximus • Rising Star • Balloon Bang • Sly Angle • Puck 'er Up • Frenemy Frenzy | |
| Locations | 9-Volt's House • Ashley's Mansion • Diamond City • Dr. Crygor's Top Secret Factory • Feelin' Groovy Fitness • Goro Desert • Mona's House • Ohlaka Island • Penny's Lab • Sleepytown Village • Takechiko City • Wario's House • WarioWare, Inc. | |
| Objects | Bomb • Dribble's taxi • Epic Augmented Reality Game • Flatterbot • Golden Watering Can • Jet Tank One • Mandrake • Mona's Boomerang • Mona's scooter • Oinker • Super Pyoro | |
| Other | Challenges • Cluckade • Gallery • Microgames • Missions • Penny's Song • Prezzies • Quotes • Showdown • Staff • Variety Towers | |