User:Nintendo101/garden: Difference between revisions
From the Super Mario Wiki, the Mario encyclopedia
Jump to navigationJump to search
Nintendo101 (talk | contribs) (It has become cumbersome to draft large scale changes for articles alongside my general user info.) Tag: Disambiguation links |
Nintendo101 (talk | contribs) m (→Items) |
||
| (823 intermediate revisions by 5 users not shown) | |||
| Line 1: | Line 1: | ||
=== | ==Locations== | ||
===Setting=== | |||
*Takes place in the [[Flower Kingdom]], positioned southeast of the [[Mushroom Kingdom]] | |||
*Ruled by a caterpillar named [[Prince Florian]] and whose main inhabitants are [[Poplin]]s | |||
*Consists of seven [[world]]s (called "Areas" in this game), including a series of small islands called [[Petal Isles]] that interconnect the different areas | |||
*Most areas are themed, similar to ''[[Super Mario Bros. 3]]'' and other 2D games, but it includes new ones that have never been the feature of a world before: series of vertical waterfalls and a wholly underground-themed one | |||
===Courses=== | |||
== | ====Overview==== | ||
*Different types of courses: | |||
**Normal courses | |||
**Small courses | |||
***Badge Challenges | |||
***Wiggler Race | |||
***KO Arena | |||
***Break Time! | |||
====Table==== | |||
==Characters== | |||
===Playable characters=== | |||
{| | ===Non-playable characters=== | ||
==Enemies and obstacles== | |||
|- | ===Enemies=== | ||
As of July 2024, not all enemies have publicized English names. They are listed here with Romanizations of their Japanese ones. | |||
| | {|class="wikitable sortable" style="width:100%;text-align:center" | ||
! | |-style="color:white;background:#FF2400" | ||
!colspan= | !rowspan=2 width=10%|Name | ||
| | !rowspan=2 class=unsortable|Description | ||
| | !colspan=2 class=unsortable|Courses | ||
!rowspan=2|New | |||
|-style="color:white;background:#FF2400" | |||
!width=8%|First | |||
!width=8%|Last | |||
|- | |- | ||
|data-sort-value=Gooa style="background:white"|[[File:SMBW Screenshot Goomba.png|100x100px]]<br>[[Goomba]] | |||
|align=left|Squat mushroom creatures that walk along the ground and are weak to all attacks. Direct contact damages Mario unless he [[stomp]]s them on the head. Touching sleeping Goombas does not harm him, but this startles them awake. In some courses, Goombas lack the space to move and instead sit on the ground, disgruntled.<ref name=kai14>{{cite|author=Kai, editor|date=9 Feb. 2024|url=topics.nintendo.co.jp/article/3c24e9ec-6583-401a-a5ab-818180c2c0a8|title=マリオたちの行く手を阻む。フラワー王国の個性豊かな敵キャラクターをご紹介。~その2~【ワンダーの世界へ Vol.14】|publisher=Nintendo Official Site|language=ja|accessdate=9 Feb. 2024}}</ref> During the [[Wonder Effect]] in [[Sproings in the Twilight Forest]], their bodies greatly extend to varying heights. In some other Wonder Effects, Mario is [[Goomba Mario|transformed into one]]. Goombas are the most common enemies. | |||
|data-sort-value=101|[[Welcome to the Flower Kingdom!]] | |||
|data-sort-value=809|[[The Final Test Wonder Gauntlet]] | |||
|— | |||
|- | |- | ||
| | |data-sort-value=Hef style="background:white"|[[File:SMBW Hefty Goomba.png|100x100px]]<br>[[Hefty Goomba]] | ||
| | |align=left|Larger Goombas. Stomping Hefty Goombas split them into two normal-sized ones. In some courses, they drift down on dandelion seeds. | ||
| | |data-sort-value=304|[[The Sharp Trial: Launch to Victory]] | ||
|data-sort-value=714|[[The Final Battle! Bowser's Rage Stage]] | |||
|— | |||
|- | |- | ||
| | |data-sort-value=BigG style="background:white"|[[File:SMBW Big Goomba.png|100x100px]]<br>[[Big Goomba]] | ||
| | |align=left|The largest Goombas. Stomping them splits them into two Hefty Goombas. | ||
|data-sort-value=304|[[The Sharp Trial: Launch to Victory]] | |||
|data-sort-value=714|[[The Final Battle! Bowser's Rage Stage]] | |||
|— | |||
|- | |- | ||
| | |data-sort-value=BonG style="background:white"|[[File:SMBW Bone Goomba.png|100x100px]]<br>[[Bone Goomba]] | ||
| | |align=left|Boneheaded Goombas that are impervious to [[fireball]]s. Unlike other skeletal enemies, Bone Goombas are not undead. They are revealed to be living blue Goombas when stomped, which knocks away the skull covering their head. | ||
|data-sort-value=112|[[Pipe-Rock Plateau Palace]] | |||
|data-sort-value=410|[[Sunbaked Desert Palace]] | |||
|— | |||
|- | |- | ||
| | |data-sort-value=Goor style="background:white"|[[File:SMBW screenshot Goombrat.png|100x100px]]<br>[[Goombrat]] | ||
|{{ | |align=left|Goomba-like {{wp|persimmon}} enemies. Goombrats sometimes float down on dandelion seeds. Collisions with Bloomps bounce them away and, if equipped, destroy their seeds. Unlike Goombas, Goombrats turn around when they reach the edge of platforms. | ||
|data-sort-value=105|[[Here Come the Hoppos]] | |||
|data-sort-value=502|[[Taily's Toxic Pond]] | |||
|— | |||
|- | |- | ||
| | |data-sort-value=KodK style="background:white"|[[File:SMBW Big Goombrat Walking.jpg|100x100px]]<br>[[Kodeka Kakibō]] | ||
|align=left|Big Goombrats. Like Hefty Goombas, stomping them causes them to split into two normal-sized Goombrats. They similarly float on dandelion seeds. | |||
|colspan=2 data-sort-value=405|[[Bloomps of the Desert Skies]] | |||
|— | |||
|- | |- | ||
| | |data-sort-value=TromB style="background:white"|[[File:SMBW Artwork Trompette (Brown).png|100x100px]]<br>[[Trompette]] (Brown) | ||
|align=left|Mushroom enemies of varying heights. Struck Trompettes fall back and knock out any enemies behind them or collect coins for Mario. The brown ones walk off the edge of platforms like Goombas. | |||
|data-sort-value=104|[[Bulrush Coming Through!]] | |||
|data-sort-value=805|[[Fungi Mines Special Dangerous Donut Ride]] | |||
|{{icon|new}} | |||
|- | |- | ||
|data-sort-value=TromP style="background:white"|[[File:SMBW Artwork Trompette (Purple).png|100x100px]]<br>Trompette (Purple) | |||
|align=left|Purple-colored Trompettes turn around when they reach the edge of platforms. | |||
|data-sort-value=104|[[Bulrush Coming Through!]] | |||
|data-sort-value=307|[[POOF! Badge Challenge Crouching High Jump I]] | |||
|{{icon|new}} | |||
|- | |- | ||
| | |data-sort-value=Pir style="background:white"|[[File:SMBW screenshot Piped Piranha Plant.png|100x100px]]<br>[[Piranha Plant]] | ||
| | |align=left|Carnivorous plants that sit in [[Warp Pipe|pipes]]. They pop out of them with snapping jaws in consistent intervals, tilting their heads towards Mario. Piranha Plants do not emerge if he stands next to or on their pipes. Some Piranha Plants occur outside of pipes, and some are even rooted to the ceiling, where they perpetually snap. | ||
| | |data-sort-value=102|[[Piranha Plants on Parade]] | ||
|data-sort-value=810|[[The Final-Final Test Badge Marathon]] | |||
|— | |||
|- | |- | ||
| | |data-sort-value=BigP style="background:white"|[[File:SMBW Big Piranha Plant.png|100x100px]]<br>[[Big Piranha Plant]] | ||
| | |align=left|The giant Piranha Plants occur inside [[Warp Pipe|giant pipes]], in which they behave like the normal-sized ones. In some areas, they are rooted to the ground and snap from side to side. Big Piranha Plants take three hits from [[fireball]]s to defeat. | ||
|data-sort-value=102|[[Piranha Plants on Parade]] | |||
|data-sort-value=808|[[The Semifinal Test Piranha Plant Reprise]] | |||
|— | |||
|- | |- | ||
| | |data-sort-value=TrotP style="background:white"|[[File:SMBW Singing Piranha Plants Artwork.png|100x100px]]<br>[[Trottin' Piranha Plant]] | ||
| | |align=left|Walking Piranha Plants that exit their pipes to pursue Mario. Some even enter other pipes or walk along ceilings. Trottin' Piranha Plants sing in unison during certain Wonder Effects. | ||
|data-sort-value=102|[[Piranha Plants on Parade]] | |||
|data-sort-value=808|[[The Semifinal Test Piranha Plant Reprise]] | |||
|{{icon|new}} | |||
|- | |- | ||
| | |data-sort-value=BigT style="background:white"|[[File:SMBW Big Trottin' Piranha Plant.png|100x100px]]<br>[[Big Trottin' Piranha Plant]]<br>{{derived}} | ||
| | |align=left|Big Trottin' Piranha Plants take three strikes from fireballs to be defeated, like stationary Big Piranha Plants. They otherwise behave like normal-sized Trottin' Piranha Plants, but emerge from and retreat into giant pipes. | ||
|data-sort-value=102|[[Piranha Plants on Parade]] | |||
|data-sort-value=808|[[The Semifinal Test Piranha Plant Reprise]] | |||
|{{icon|new}} | |||
|- | |- | ||
| | |data-sort-value=Mel style="background:white"|[[File:Melon Piranha.png|100x100px]]<br>[[Melon Piranha Plant]] | ||
| | |align=left|Piranha Plants that look like [[watermelon]]s. They spit seeds that damage Mario, but they can be jumped on without taking damage. This allows Mario to cross large gaps, or ascend tall platforms. Yoshis can eat and spit the seeds back at them and other enemies. Melon Piranha Plants are otherwise defeated when stomped. | ||
|data-sort-value=207|[[Countdown to Drop Down]] | |||
|data-sort-value=810|[[The Final-Final Test Badge Marathon]] | |||
|{{icon|new}} | |||
|- | |- | ||
| | |data-sort-value=FirP style="background:white"|[[File:SMBW Screenshot Fire Piranha.png|100x100px]]<br>[[Fire Piranha Plant]] | ||
| | |align=left|Piranha Plants that spit fireballs. They emerge from pipes and aim their heads towards Mario's position before firing. Some Fire Piranha Plants spit multiple fireballs at once. | ||
|data-sort-value=501|[[Upshroom Downshroom]] | |||
|data-sort-value=808|[[The Semifinal Test Piranha Plant Reprise]] | |||
|— | |||
|- | |- | ||
| | |data-sort-value=BigF style="background:white"|[[File:Fire piranha big full.png|100x100px]]<br>[[Big Fire Piranha]] | ||
|align=left|The giant Fire Piranha Plants are rooted to the earth and require three strikes from fireballs to defeat. They spit multiple fireballs at once. | |||
|colspan=2 data-sort-value=501|[[Upshroom Downshroom]] | |||
|— | |||
|- | |- | ||
|data-sort-value=BonP style="background:white"|[[File:SMBW Bone Piranha.png|100x100px]]<br>[[Bone Piranha Plant]] | |||
|align=left|Skeletal Piranhas. They behave like the living plants, but they are immune to fire. Bone Piranha Plants are heightened during the Wonder Effect in Fluff-Puff Peaks Palace. | |||
|colspan=2 data-sort-value=210|[[Fluff-Puff Peaks Palace]] | |||
|— | |||
|- | |- | ||
| | |data-sort-value=TrotB style="background:white"|[[File:SMBW Trottin' Bone Piranha.png|100x100px]]<br>[[Trottin' Bone Piranha Plant]]<br>{{derived}} | ||
|align=left|Trottin' Bone Piranha Plants. Like the stationary ones, they are resistant to fireballs and heighten during their course's Wonder Effect. | |||
| | |colspan=2 data-sort-value=210|[[Fluff-Puff Peaks Palace]] | ||
|{{icon|new}} | |||
|- | |- | ||
| | |data-sort-value=Not style="background:white"|[[File:SMBW Screenshot Note Piranha Plant.png|100x100px]]<br>[[Note Piranha Plant]]<br>{{conjectural}} | ||
| | |align=left|Blazing Piranha Plants spit by [[Bowser]]. Their movement is in synch with the music of the battle and encourages rhythmic dodges from Mario. Note Piranha Plants are only defeated by strikes from [[Elephant Mario]] or tossed [[bubble]]s. | ||
|colspan=2 data-sort-value=714|[[The Final Battle! Bowser's Rage Stage]] | |||
|{{icon|new}} | |||
|- | |- | ||
| | |data-sort-value=BigN style="background:white"|[[File:Giant Note Piranha.png|100x100px]]<br>[[Big Note Piranha Plant]]<br>{{conjectural}} | ||
| | |align=left|Big Note Piranha Plants are too large to be avoided through normal [[jump]]s and are invincible. During later phases of the battle, Big Note Piranha Plants fall the sky and break into the normal-sized ones when they collide with the floor. | ||
|colspan=2 data-sort-value=714|[[The Final Battle! Bowser's Rage Stage]] | |||
|{{icon|new}} | |||
|- | |- | ||
| | |data-sort-value=WonP style="background:white"|[[File:WonderPackunSMBW.png|100x100px]]<br>[[Wonder Packun]] | ||
| | |align=left|Piranha Plants with long stalks that appeared after Bowser collected the [[Wonder Flower]] at the start of the game. They guard locked levels and can be eliminated by collecting enough [[Wonder Seed]]s, reverting to normal Piranha Plants. | ||
|data-sort-value=121|[[Badge House in Pipe-Rock Plateau]] | |||
|data-sort-value=809|[[The Final Test Wonder Gauntlet]] | |||
|{{icon|new}} | |||
|- | |- | ||
| | |data-sort-value=Clo style="background:white"|[[File:CloudPiranhaSMBW.png|100x100px]]<br>[[Cloud Piranha]] | ||
|{{ | |align=left|Black, cloudy Piranha Plants made of smoke that protect Castle Bowser and continuously swirl around him. They are vanquished by a [[Royal Seed]]. | ||
|colspan=2 data-sort-value=700|[[Petal Isles]] | |||
|{{icon|new}} | |||
|- | |- | ||
| | |data-sort-value=Mun style="background:white"|[[File:MuncherSMBW.png|100x100px]]<br>[[Muncher]] | ||
|align=left|Black plants often found in large groups. | |||
|data-sort-value=708|[[Muncher Fields]] | |||
|data-sort-value=810|[[The Final-Final Test Badge Marathon]] | |||
|— | |||
|- | |- | ||
|data-sort-value=Nip style="background:white"|[[File:SMBW Nipper.png|100x100px]]<br>[[Nipper Plant]] | |||
|align=left|Little white plants that damage the player in contact. They can walk on walls and ceilings. | |||
|data-sort-value=708|[[Muncher Fields]] | |||
|data-sort-value=718|[[KO Arena Petal Meddle]] | |||
|— | |||
|- | |- | ||
| | |data-sort-value=KooTR style="background:white"|[[File:SMBW screenshot Troopa red.png|100x100px]]<br>[[Koopa Troopa]] (Red) | ||
| | |align=left|Common turtle enemies that walk along the ground. When Koopa Troopas walk into each other, they knock their shells together before turning around as a way of saying "hello" to each other.<ref name=kai14/> Stomping Koopa Troopas knocks them [[Unshelled Koopa Troopa|out of their shells]], which can be picked up and tossed along the ground as a projectile. Koopa Troopas with different colored shells have unique behaviors. The red-shelled ones turn around when the reach the edge of platforms. | ||
| | |data-sort-value=103|[[Scram, Skedaddlers!]] | ||
|data-sort-value=809|[[The Final Test Wonder Gauntlet]] | |||
|— | |||
|- | |- | ||
| | |data-sort-value=KooTG style="background:white"|[[File:SMBW screenshot Troopa green.png|100x100px]]<br>Koopa Troopa (Green) | ||
| | |align=left|Green-shelled Koopa Troopas walk off edges at the end of platforms, but otherwise behave the same as the red-shelled ones. | ||
|data-sort-value=205|[[Up 'n' Down with Puffy Lifts]] | |||
|data-sort-value=602|[[Raarghs in the Ruins]] | |||
|— | |||
|- | |- | ||
| | |data-sort-value=Rol style="background:white"|[[File:SMBW screenshot Troopa pink.png|100x100px]]<br>[[Rolla Koopa]] | ||
| | |align=left|Pink-shelled Koopa Troopas on roller skates. Rolla Koopas quickly skate along the ground and leap across gaps. They often occur in groups that skate together in the same direction. | ||
|data-sort-value=106|[[Rolla Koopa Derby]] | |||
|data-sort-value=809|[[The Final Test Wonder Gauntlet]] | |||
|{{icon|new}} | |||
|- | |- | ||
| | |data-sort-value=KooPR style="background:white"|[[File:SMBW screenshot Paratroopa red.png|100x100px]]<br>[[Koopa Paratroopa]] (Red) | ||
| | |align=left|Winged Koopa Troopas. Stomping Koopa Paratroopas makes them lose their wings and become normal Koopa Troopas. The red-shelled ones fly through the air. | ||
|data-sort-value=110|[[Sproings in the Twilight Forest]] | |||
|data-sort-value=809|[[The Final Test Wonder Gauntlet]] | |||
|— | |||
|- | |- | ||
| | |data-sort-value=KooPG style="background:white"|[[File:SMBW screenshot Paratroopa green.png|100x100px]]<br>Koopa Paratroopa (Green) | ||
| | |align=left|Green Koopa Paratroopas bounce along the ground. | ||
|data-sort-value=205|[[Up 'n' Down with Puffy Lifts]] | |||
|data-sort-value=401|[[Armads on the Roll]] | |||
|— | |||
|- | |- | ||
| | |data-sort-value=Dry style="background:white"|[[File:SMBW Screenshot Dry Bones.png|100x100px]]<br>[[Dry Bones]] | ||
| | |align=left|Undead Koopa Troopas that walk along the ground. Stomping Dry Bones causes them to collapse into a pile of bones for a brief period of time, but this does not defeat them. They are unphased by fireballs. | ||
|data-sort-value=112|[[Pipe-Rock Plateau Palace]] | |||
|data-sort-value=608|[[Deep Magma Bog Palace]] | |||
|— | |||
|- | |- | ||
| | |data-sort-value=Shov style="background:white"|[[File:ShovaForeground.png|100x100px]]<br>[[Shova]] | ||
|align=left|Burly [[Koopa (species)|Koopas]] in helmets and large gloves. Shovas push objects in the environment and contact with one head on simply pushes back Mario. Touching it anywhere else is damaging to him. The objects being pushed by Shovas can be pushed back against, often solving a puzzle in the level when it is shoved into a divot. For most attacks, Shovas take three hits to defeat. | |||
|data-sort-value=107|[[Swamp Pipe Crawl]] | |||
|data-sort-value=408|[[Secrets of Shova Mansion]] | |||
|{{icon|new}} | |||
|- | |- | ||
| | |data-sort-value=Ham style="background:white"|[[File:SMBW Screenshot Hammer Bro.png|100x100px]]<br>[[Hammer Bro]] | ||
|align=left|Helmeted Koopas that toss [[hammer]]s. Hammer Bros often occur in pairs and leap between rows of platforms. Like the ''[[Super Mario Maker]]'' titles, Yoshis can eat Hammer Bros. | |||
|data-sort-value=112|[[Pipe-Rock Plateau Palace]] | |||
|data-sort-value=809|[[The Final Test Wonder Gauntlet]] | |||
|— | |||
|- | |- | ||
|data-sort-value=Snor style="background:white"|[[File:Sea Turtle Enemy.png|100x100px]]<br>[[Snortoise]] | |||
|align=left|Finned Koopas similar to {{wp|softshell turtle}}s. Snortoises swim swiftly underwater and turn around when they reach a wall. On land, they slowly crawl. Like Koopa Troopas and Swirlypods, stomping a Snortoise makes it receed into its shell and makes to available to be grabbed. | |||
|data-sort-value=702|[[Robbird Cove]] | |||
|data-sort-value=704|[[Downpour Uproar]] | |||
|{{icon|new}} | |||
|- | |- | ||
| | |data-sort-value=Lak style="background:white"|[[File:SMBW Screenshot Lakitu.png|100x100px]]<br>[[Lakitu]] | ||
| | |align=left|[[Lakitu's Cloud|Cloud]]-riding Koopas. They closely follow Mario and toss Spiny Eggs at him from the top of the screen. If a Lakitu is stomped, its cloud becomes available to ride. In some courses, three Lakitus appear together in a large cloud and toss yellow Spike Balls. | ||
| | |data-sort-value=207|[[Countdown to Drop Down]] | ||
|data-sort-value=613|[[Expert Badge Challenge Invisibility II]] | |||
|— | |||
|- | |- | ||
| | |data-sort-value=Lakt style="background:white"|[[File:Triple Lakitu enemy.png|100x100px]]<br>[[Lakitu trio]]<br>{{conjectural}} | ||
| | |align=left|During certain Wonder Effects, a trio of Lakitus that share the same cloud appear in the background. They throw coins, power-ups, and [[Wonder Token]]s. | ||
|data-sort-value=208|[[Cruising with Linking Lifts]] | |||
|data-sort-value=803|[[Shining Falls Special Triple Threat Deluge]] | |||
|{{icon|new}} | |||
|- | |- | ||
| | |data-sort-value=SpinE style="background:white"|[[File:SMBW screenshot Spiny Egg.png|100x100px]]<br>[[Spiny Egg]] | ||
| | |align=left|The retracted form of Spinies tossed by Lakitus. When they make contact with the ground, they become Spinies. Spiny Eggs damage Mario on contact. | ||
|colspan=2 data-sort-value=207|[[Countdown to Drop Down]] | |||
|— | |||
|- | |- | ||
| | |data-sort-value=Spin style="background:white"|[[File:SMBW screenshot Spiny.png|100x100px]]<br>[[Spiny]] | ||
| | |align=left|Spiked, stout Koopas. The spikes protect them from being jumped on and damage Mario on contact, but they are weak to indirect attacks like fireballs. Spinies walk off the edge of platforms like green-shelled Koopa Troopas. | ||
|data-sort-value=207|[[Countdown to Drop Down]] | |||
|data-sort-value=601|[[Where the Rrrumbas Rule]] | |||
|— | |||
|- | |- | ||
| | |data-sort-value=Kam style="background:white"|[[File:Kamek SMBW Direct.png|100x100px]]<br>[[Kamek]] | ||
| | |align=left|Bowser's adviser – a broom-riding [[Magikoopa]]. Kamek summons [[Battleship]]s on the overworld map to inhibit Mario's progress. He otherwise appears in certain cutscenes with Bowser and [[Bowser Jr.]] | ||
|data-sort-value=209|[[Fluff-Puff Peaks Flying Battleship]] | |||
|data-sort-value=607|[[Deep Magma Bog Flying Battleship]] | |||
|— | |||
|- | |- | ||
| | |data-sort-value=Buz style="background:white"|[[File:SMBW Screenshot Buzzy Beetle.png|100x100px]]<br>[[Buzzy Beetle]] | ||
| | |align=left|Koopas with shells that protect them from fire damage. They can be found walking in lava. | ||
|data-sort-value=602|[[Raarghs in the Ruins]] | |||
|data-sort-value=606|[[Dragon Boneyard]] | |||
|— | |||
|- | |- | ||
| | |data-sort-value=Spik style="background:white"|[[File:Spike SMBW.png|100x100px]]<br>[[Spike]] | ||
|align=left|Big-mouthed Koopas that spit [[Spike Ball]]s. Spikes remain still and are usually elevated above the ground. The Spike Balls they spit-up are indestructible and roll along the ground. During a particular Wonder Effect, the Spikes roll the Spike Balls in rhythm to the music. | |||
|data-sort-value=108|[[Angry Spikes and Sinkin' Pipes]] | |||
|data-sort-value=809|[[The Final Test Wonder Gauntlet]] | |||
|— | |||
|- | |- | ||
| | |data-sort-value=FirS style="background:white"|[[File:SMBW screenshot Fire Spike.png|100x100px]]<br>[[Fire Spike]]<br>{{derived}} | ||
|align=left| Red Spikes that spit balls of flame. Unlike normal Spikes, the balls tossed by Fire Spikes fly horizontally through the air. | |||
|data-sort-value=605|[[Wavy Ride through the Magma Tube]] | |||
|data-sort-value=616|[[KO Arena Magma Flare-Up]] | |||
|{{icon|new}} | |||
|- | |- | ||
|data-sort-value=Ske style="background:white"|[[File:SMBW Skedaddler.png|100x100px]]<br>[[Skedaddler]] | |||
|align=left|Shelled squirrel-like creatures that frantically runaway from Mario when he is near. They fire large projectile seeds back at him as they skedaddle. These can be held by Yoshis and fired back. Skedaddlers do not run away if the player character has the [[Badge (Super Mario Bros. Wonder)#Expert Badges|Invisibility Expert Badge]] equipped. | |||
|data-sort-value=103|[[Scram, Skedaddlers!]] | |||
|data-sort-value=120|[[Wiggler Race Mountaineering!]] | |||
|{{icon|new}} | |||
|- | |- | ||
| | |data-sort-value=Bulr style="background:white"|[[File:BulrushArtworkWonder2.png|100x100px]]<br>[[Bulrush]] | ||
| | |align=left|Herding [[dinosaur]]s in tracksuits. Bulrushes idly remain still until Mario is near, at which point they snort and charge at him. They destroy [[Hard Block|hard blocks]] in their path and leap at the end of upward slopes. Charging Bulrushes do not turn around if Mario leaps over them, and they are briefly stunned when they collide with indestructible terrain. Bulrushes can be safely stood on like platforms. Bulrushes otherwise appear on the savanna portion of the [[Pipe-Rock Plateau]], grazing. | ||
|{{ | |data-sort-value=104|[[Bulrush Coming Through!]] | ||
|data-sort-value=714|[[The Final Battle! Bowser's Rage Stage]] | |||
|{{icon|new}} | |||
|- | |- | ||
|{{ | |data-sort-value=WonB style="background:white"|[[File:SMBW screenshot Bulrush.png|100x100px]]<br>[[Wonder Bulrush Herd]]<ref name=kikai49>{{cite|author=kikai, Kimiyosu Hongo, Chimtaro, Hiromi Karakita (HQ), and Yamato Ishibashi|date=2023|title=『スーパーマリオブラザーズ ワンダー 完全攻略本』|language=ja|location=Tokyo|publisher=ambit|isbn=4-198657-69-6|page=49}}</ref><br>{{derived}} | ||
|{{ | |align=left|Large, stampeding herds of Bulrushes materialize during certain Wonder Effects. | ||
|data-sort-value=104|[[Bulrush Coming Through!]] | |||
|data-sort-value=714|[[The Final Battle! Bowser's Rage Stage]] | |||
|{{icon|new}} | |||
|- | |- | ||
| | |data-sort-value=Hop style="background:white"|[[File:SMBW Hoppo.png|100x100px]]<br>[[Hoppo]] | ||
| | |align=left|Round-bodied hippopotamuses found on Pipe-Rock Plateau. Hoppos idly walk across the ground and unlike most enemies, they do not damage Mario on contact. Touching them instead causes them to roll along the ground. In most areas, they ultimately roll between gaps in the terrain and become wedged. They can be bounced on like [[trampoline]]s to reach higher areas. In a Wonder Effect, they occur floating in space and function like [[Bumper (Super Mario series)|bumper]]s. | ||
|data-sort-value=105|[[Here Come the Hoppos]] | |||
|data-sort-value=809|[[The Final Test Wonder Gauntlet]] | |||
|{{icon|new}} | |||
|- | |- | ||
|{{ | |data-sort-value=WonH style="background:white"|[[File:SMBW screenshot Hoppo roll big.png|100x100px]]<br>[[Wonder Hoppo]]<br>{{derived}} | ||
|{{ | |align=left|A giant Hoppo that appears during certain Wonder Effects. In Here Come the Hoppos, it is necessary to reach the Wonder Flower. | ||
|data-sort-value=105|[[Here Come the Hoppos]] | |||
|data-sort-value=809|[[The Final Test Wonder Gauntlet]] | |||
|{{icon|new}} | |||
|- | |- | ||
| | |data-sort-value=Swir style="background:white"|[[File:SMBW screenshot Climby Snail.png|100x100px]]<br>[[Swirlypod]] | ||
| | |align=left|Snail enemies that adhere to surfaces, found crawling along floors, walls, and ceilings. Like Koopa Troopas, a stomp knocks them out of their shell and makes it a useable projectile. The unshelled Swirlypods are left dazed and vulnerable. When they stir, they try to reenter their shells if they are still on the ground. | ||
|data-sort-value=104|[[Bulrush Coming Through!]] | |||
|data-sort-value=502|[[Taily's Toxic Pond]] | |||
|{{icon|new}} | |||
|- | |- | ||
| | |data-sort-value=KodM style="background:white"|[[File:SMBWScreenshotUnknownSnailEnemy.png|100x100px]]<br>[[Kodeka Maimai]] | ||
|{{ | |align=left|Big Swirlypods. They function like the smaller ones, but their shells are so big that they can only be picked up by [[Elephant Mario]]. | ||
|data-sort-value=107|[[Swamp Pipe Crawl]] | |||
|data-sort-value=302|[[The Anglefish Trial: Ready, Aim, Fly!]] | |||
|{{icon|new}} | |||
|- | |- | ||
| | |data-sort-value=Spr style="background:white"|[[File:ExtendoSproing.png|100x100px]]<br>[[Sproing]] | ||
|align=left|Goomba-like enemies that protract their springy bodies when approached by Mario. Sproings are typically shrouded in darkness, but their bodies are briefly illuminated under certain conditions. In these moments, it is revealed that they look like acorns. | |||
|data-sort-value=110|[[Sproings in the Twilight Forest]] | |||
|data-sort-value=809|[[The Final Test Wonder Gauntlet]] | |||
|{{icon|new}} | |||
|- | |- | ||
| | |data-sort-value=Smo style="background:white"|[[File:SMBW screenshot Cloud Menace small.png|100x100px]]<br>[[Smogrin]] | ||
|align=left|Grimacing storm clouds with trailing bodies. They hover back-and-forth or up-and-down. Stomping on the trailing clouds clears, but Mario must stomp on their heads to truly defeat them. Smogrins aspire to become {{wp|cumulonimbus cloud}}s.<ref name=kai14/> | |||
|data-sort-value=104|[[Bulrush Coming Through!]] | |||
|data-sort-value=710|[[Missile Meg Mayhem]] | |||
|{{icon|new}} | |||
|- | |- | ||
|data-sort-value=KodM style="background:white"|[[File:Big Mokumokumo.png|100x100px]]<br>[[Kodeka Mokumokumo]] | |||
|align=left|Larger Smogrins. They behave like the normal-sized ones, but they are not trailed by small clouds. | |||
|data-sort-value=217|[[KO Arena Fluff-Puff Kerfuff]] | |||
|data-sort-value=614|[[Expert Badge Challenge Spring Feet II]] | |||
|{{icon|new}} | |||
|- | |- | ||
| | |data-sort-value=Dek style="background:white"|[[File:SMBW screenshot Cloud Menace big.png|100x100px]]<br>[[Deka Mokumokumo]]<ref>{{cite|author=kikai, Kimiyosu Hongo, Chimtaro, Hiromi Karakita (HQ), and Yamato Ishibashi|date=2023|title=『スーパーマリオブラザーズ ワンダー 完全攻略本』|language=ja|location=Tokyo|publisher=ambit|isbn=4-198657-69-6|page=42}}</ref> | ||
|align=left|The largest Smogrins. With the exception of their size, they are indistinguishable from Kodeka Mokumokumo and behave the same way. | |||
|{{ | |data-sort-value=217|[[KO Arena Fluff-Puff Kerfuff]] | ||
|data-sort-value=614|[[Expert Badge Challenge Spring Feet II]] | |||
|{{icon|new}} | |||
|- | |- | ||
| | |data-sort-value=Rev style="background:white"|[[File:SMBWScreenshotUnknownWheelChainLeashDryBones-likeEnemy.png|100x100px]]<br>[[Revver]] | ||
|{{ | |align=left|Skeletal dog-like enemies on wheels. Their chain leash is grabbable, and pulling back on it sends Revvers rolling forward like {{wp|pullback motor|pullback motor toys}}. They are defeated when they collide with a wall or obstacle. Stomping on one otherwise stuns it for a brief period of time. | ||
|data-sort-value=403|[[Rolling-Ball Hall]] | |||
|data-sort-value=604|[[Hot-Hot Hot!]] | |||
|{{icon|new}} | |||
|- | |- | ||
| | |data-sort-value=Sma style="background:white"|[[File:UnknownFlounderEnemySMBW.png|100x100px]]<br>[[Smackerel]] | ||
|{{ | |align=left|{{wp|Flatfish}} that hide under sand on the seafloor. Smackerels rapidly swim upward with snapping jaws when Mario is detected above. They destroy blocks and defeat enemies in their path. Smackerels can only be stomped as the descend, when their white flank are facing the screen. Attempting to touch them otherwise damages Mario. | ||
|colspan=2 data-sort-value=701|[[Leaping Smackerel]] | |||
|{{icon|new}} | |||
|- | |- | ||
|{{ | |data-sort-value=WonS style="background:white"|[[File:Giga Smackerel.png|100x100px]]<br>[[Wonder Smackerel]]<br>{{derived}} | ||
|{{ | |align=left|A large Smackerel that appears during the Wonder Effect in Leaping Smackerel and chomps through earth, destroying it. | ||
|colspan=2 data-sort-value=701|[[Leaping Smackerel]] | |||
|{{icon|new}} | |||
|- | |- | ||
| | |data-sort-value=Che style="background:white"|[[File:SMBW screenshot Cheep Cheep.png|100x100px]]<br>[[Cheep Cheep]] | ||
| | |align=left|Pudgy red fish. They swim horizontally through water. They are defeated when stomped. | ||
|data-sort-value=701|[[Leaping Smackerel]] | |||
|data-sort-value=617|[[Search Party Item Park]] | |||
|— | |||
|- | |- | ||
| | |data-sort-value=Slu style="background:white"|[[File:SMBW screenshot Hidey Nudibranch.png|100x100px]]<br>[[Sluglug]] | ||
| | |align=left|Spiked {{wp|nudibranch}} enemies that emerge from underwater pipes. Sluglugs must be struck five times to be fully defeated, but each hit forces them to incrementally recede into their pipes. Their head's distance from the pipe determines the amount of hits necessary. | ||
|data-sort-value=701|[[Leaping Smackerel]] | |||
|data-sort-value=719|[[Wiggler Race Swimming!]] | |||
|{{icon|new}} | |||
|- | |- | ||
|colspan=2|{{ | |data-sort-value=Rob style="background:white"|[[File:SMBWScreenshotUnknownDivingBirdEnemy.png|100x100px]]<br>[[Robbird]] | ||
|align=left|Flying {{wp|kingfisher}} enemies that dive into water. They flyoff as they exit, taking any [[coin]]s they touch with them. | |||
|colspan=2 data-sort-value=702|[[Robbird Cove]] | |||
|{{icon|new}} | |||
|- | |- | ||
| | |data-sort-value=Urc style="background:white"|[[File:SMBW Artwork Urchin.png|100x100px]]<br>[[Urchin]] | ||
|align=left|Sea creatures covered in spines. While underwater, Urchins float in the water, without moving. On land, they roll along the ground like balls. Direct contact with Urchins damages Mario, but indirect means of attack defeats them. | |||
|data-sort-value=702|[[Robbird Cove]] | |||
|data-sort-value=704|[[Downpour Uproar]] | |||
|— | |||
|- | |- | ||
| | |data-sort-value=Ble style="background:white"|[[File:SMBW Bubble Bird Enemy.png|100x100px]]<br>[[Blewbird]] | ||
|align=left|Shelled bird enemies that fire their beaks like {{wp|blowgun}}s. The beaks extend into platforms upon hitting opposing walls. When a Blewbird is defeated, another emerges from the ground to take its place. During Wonder Effects, Blewbirds blow [[bubble]]s that can be used as bouncy platforms. | |||
|data-sort-value=703|[[Blewbird Roost]] | |||
|data-sort-value=809|[[The Final Test Wonder Gauntlet]] | |||
|{{icon|new}} | |||
|- | |- | ||
|data-sort-value=Out style="background:white"|[[File:SMBWscreenshotOutmaway.png|100x100px]]<br>[[Outmaway]] | |||
|align=left|Masked snow creatures. Outmaways are often on top of elevated platforms, where they kick giant [[Ice Block]]s that emerge from the ground before them. They otherwise occur walking along the ground like Goombrats. Outmaways are weak to most attacks, but attempting they kick away tossed Koopa Shells back at Mario. | |||
|data-sort-value=201|[[Outmaway Valley]] | |||
|data-sort-value=507|[[A Final Uncharted Area: Poison Ruins]] | |||
|{{icon|new}} | |||
|- | |- | ||
| | |data-sort-value=PokG style="background:white"|[[File:SMBWScreenshotUnknownBoxingWiggler-likeEnemy.png|100x100px]]<br>[[Pokipede]] (Green) | ||
| | |align=left|[[Wiggler]]-like centipedes that swiftly move along [[track]]s. Pokipedes punch as they move, clearing falling [[snow block]]s. Stomping on their unguarded tail or tossing three fireballs at them defeats them. Touching any other part of a Pokipede damages Mario unless he is in his Drill or Elephant forms. | ||
|{{ | |data-sort-value=202|[[Pokipede Pass]] | ||
|data-sort-value=720|[[Wiggler Race Spelunking!]] | |||
|{{icon|new}} | |||
|- | |- | ||
| | |data-sort-value=PokR style="background:white"|[[File:Red pokipede.png|100x100px]]<br>Pokipede (Red) | ||
|{{ | |align=left|The red-clad Pokipedes move much more rapidly than the green ones. | ||
|data-sort-value=202|[[Pokipede Pass]] | |||
|data-sort-value=720|[[Wiggler Race Spelunking!]] | |||
|{{icon|new}} | |||
|- | |- | ||
| | |data-sort-value=Who style="background:white"|[[File:SMBWScreenshotUnknownOwlEnemy.png|100x100px]]<br>[[Whohoo]] | ||
| | |align=left|Owl enemies that swoop down from upside-down nests on ceilings. Whohoos destroy snow blocks as they fly and sometimes carry coins with them. If undefeated, they grow tired and return to their nests. | ||
|colspan=2 data-sort-value=202|[[Pokipede Pass]] | |||
|{{icon|new}} | |||
|- | |- | ||
| | |data-sort-value=Cona style="background:white"|[[File:Melicondor.png|100x100px]]<br>[[Condart]] | ||
| | |align=left|Hovering dart-like birds. When Mario crosses their line of sight, Condarts forcefully propel themselves at him, destroying [[Brick Block]]s in their path and lodging themselves into opposing terrain. While lodged, they are briefly immobile and vulnerable to attack. They either slam themselves into floors or walls, depending on the direction they face. Condarts apparently lose their memories on impact.<ref name=kai14/> | ||
|data-sort-value=203|[[Condarts Away!]] | |||
|data-sort-value=402|[[The Desert Mystery]] | |||
|{{icon|new}} | |||
|- | |- | ||
| | |data-sort-value=Zip style="background:white"|[[File:SMBW Screenshot Zip-Zap.png|100x100px]]<br>[[Zip-Zap]] | ||
|{{ | |align=left|Living bolts concealed in storm clouds. Zip-Zaps occur in groups. They leap vertically from the clouds in set intervals and shock Mario on contact. They are defeated only by bubbles. | ||
|colspan=2 data-sort-value=208|[[Cruising with Linking Lifts]] | |||
|{{icon|new}} | |||
|- | |- | ||
| | |data-sort-value=Conr style="background:white"|[[File:HakandoruDry.jpg|100x100px]]<br>[[Condrop]] | ||
|align=left|Helmeted birds that fly in straight horizontal lines. Condrops carry enemies or items as they travel. When Mario is detected below, they screech and drop them. Some Condrops have coins trailing after them. | |||
|data-sort-value=208|[[Cruising with Linking Lifts]] | |||
|data-sort-value=809|[[The Final Test Wonder Gauntlet]] | |||
|{{icon|new}} | |||
|- | |- | ||
| | |data-sort-value=Bob style="background:white"|[[File:SMBW Bob-omb.png|100x100px]]<br>[[Bob-omb]] | ||
|align=left|Walking bombs. Stomps or tossed fireballs lights their fuse and renders them immobile. They can be picked up and tossed to destroy objects and enemies, but they damage Mario if they go off in his hands. | |||
|colspan=2 data-sort-value=209|[[Fluff-Puff Peaks Flying Battleship]] | |||
|— | |||
|- | |- | ||
|data-sort-value=Bab style="background:white"|[[File:Firework-Bobomb.png|100x100px]]<br>[[Baboom]] | |||
|align=left|Firework Bob-ombs composed of three segments. When struck, Babooms ignite. They discharge each body segment, one by one, into the sky. They explode at the height of their arch, destroying [[crate]]s and defeating enemies in their blast radius. The fireworks do not damage Mario, and he can carry Babooms to direct them at desired targets. | |||
|data-sort-value=209|[[Fluff-Puff Peaks Flying Battleship]] | |||
|data-sort-value=616|[[KO Arena Magma Flare-Up]] | |||
|{{icon|new}} | |||
|- | |- | ||
| | |data-sort-value=Bull style="background:white"|[[File:BulletBillMK8.png|100x100px]]<br>[[Bullet Bill]] | ||
| | |align=left|Missiles fired from [[Bill Blaster]]s. They fly horizontally. Bullet Bills are defeated by all means of attack. | ||
| | |data-sort-value=209|[[Fluff-Puff Peaks Flying Battleship]] | ||
|data-sort-value=808|[[The Semifinal Test Piranha Plant Reprise]] | |||
|— | |||
|- | |- | ||
| | |data-sort-value=See style="background:white"|[[File:SMBW Screenshot Seeker Bullet Bill.png|100x100px]]<br>[[Seeker Bullet Bill]] | ||
| | |align=left|Bullet Bills fhat directly target Mario when he is near. Most Seeker Bullet Bills are fastened to terrain by their suction cup-like exhaust ports, bobbing back-and-forth in rhythm to the music as they wait for targets. They rapidly swing their arms and turn their heads to Mario's position before launching, flashing red. Once launched, Seeker Bullet Bills do not change their course of direction. When they collide with opposing terrain, they fasten themselves to it, positioned to launch back at Mario if he is within their sights. They are damaged like normal Bullet Bills, but they can also be lured into [[Poison (obstacle)|poison]]. There are rotating hexagonal objects in the ceiling that launch Seeker Bullet Bills like Bill Blasters. | ||
|colspan=2 data-sort-value=712|[[Evade the Seeker Bullet Bills!]] | |||
|{{icon|new}} | |||
|- | |- | ||
|{{ | |data-sort-value=BigS style="background:white"|[[File:Bigseeker.jpg|100x100px]]<br>[[Big Seeker Bullet Bill]]<br>{{derived}} | ||
|{{ | |align=left|Big Seeker Bullet Bills. They have a bigger attack radius than the normal-sized ones, but otherwise behave the same way. | ||
|colspan=2 data-sort-value=712|[[Evade the Seeker Bullet Bills!]] | |||
|{{icon|new}} | |||
|- | |- | ||
| | |data-sort-value=Ren style="background:white"|[[File:BullsEyeBillSMBW.png|100x100px]]<br>[[Renketsu Search Killer]] | ||
|{{ | |align=left|Serpentine [[Bull's-Eye Bill]]s. While launched, Renketsu Search Killers directly target Mario and will change their course of direction mid-air to pursue him. | ||
|colspan=2 data-sort-value=713|[[KnuckleFest Bowser's Blazing Beats]] | |||
|{{icon|new}} | |||
|- | |- | ||
| | |data-sort-value=Mis style="background:white"|[[File:SMBW Screenshot Missile Meg.png|100x100px]]<br>[[Missile Meg]] | ||
|align=left|Long-bodied Bullet Bills launched from off-screen blasters. Missile Megs fly through the air horizontally. Their backs can be stood on like platforms, but contact immediately knocks them out and causes them to slowly descend. Mario loses a life if he does not get off by the time it descends past he boundary of the bottom screen. | |||
|data-sort-value=710|[[Missile Meg Mayhem]] | |||
|data-sort-value=810|[[The Final-Final Test Badge Marathon]] | |||
|{{icon|new}} | |||
|- | |- | ||
|data-sort-value=WonM style="background:white"|[[File:SMBW screenshot Blasted Bill.png|100x100px]]<br>[[Wonder Missile Meg]]<ref name=kikai49/><br>{{derived}} | |||
|align=left|During certain Wonder Effects, Missile Megs fly horizontally and do not lose altitude when stood on. Their exhaust is also rainbow-colored. | |||
|colspan=2 data-sort-value=710|[[Missile Meg Mayhem]] | |||
|{{icon|new}} | |||
|- | |- | ||
| | |data-sort-value=Hop style="background:white"|[[File:SMBW Hoppycat.png|100x100px]]<br>[[Hoppycat]] | ||
| | |align=left|Spiked creatures that copy Mario's jumping movements, often ascending platforms with him or popping out of pits. They otherwise compress their bodies and shiver in place, tracking Mario with their eyes. Hoppycats can be used to break blocks. The spikes on their back damage Mario on contact. Though not easily visible, the bottom of Hoppycats are lined with teeth. | ||
|{{ | |data-sort-value=301|[[The Hoppycat Trial: Hop, Hop, and Awaaay]] | ||
|data-sort-value=720|[[Wiggler Race Spelunking!]] | |||
|{{icon|new}} | |||
|- | |- | ||
|{{ | |data-sort-value=WonH style="background:white"|[[File:Red Hoppycat screenshot.png|100x100px]]<br>[[Wonder Hoppycat]]<br>{{derived}} | ||
|{{ | |align=left|A Hoppycat that jumps extremely high. Its body has turned orange due to rigorous training.<ref name=kai14/> | ||
|colspan=2 data-sort-value=303|[[The Midway Trial: Hop to It]] | |||
|{{icon|new}} | |||
|- | |- | ||
| | |data-sort-value=Kyo style="background:white"|[[File:WonderEffectHoppycat.jpg|100x100px]]<br>[[Kyodai na Hoppin]] | ||
| | |align=left|Large Hoppycats that appear during certain Wonder Effects. They jump straight through earth, destroying it. | ||
|data-sort-value=301|[[The Hoppycat Trial: Hop, Hop, and Awaaay]] | |||
|data-sort-value=809|[[The Final Test Wonder Gauntlet]] | |||
|{{icon|new}} | |||
|- | |- | ||
| | |data-sort-value=Ang style="background:white"|[[File:AnglefishIdle.jpg|100x100px]]<br>[[Anglefish]] | ||
| | |align=left|Tirangular fish that leap from water in high arches when Mario is near. The arch of their jumps is dependent on Mario's position and conveyed by the light-blue glow of their flanks. | ||
|data-sort-value=302|[[The Anglefish Trial: Ready, Aim, Fly!]] | |||
|data-sort-value=809|[[The Final Test Wonder Gauntlet]] | |||
|{{icon|new}} | |||
|- | |- | ||
|{{ | |data-sort-value=WonA style="background:white"|[[File:SMBW Screenshot Anglefish.png|100x100px]]<br>[[Wonder Anglefish]]<ref name=kikai49/><br>{{derived}} | ||
|{{ | |align=left|In certain Wonder Effects, Anglefish shine green and fly through the air. | ||
|data-sort-value=302|[[The Anglefish Trial: Ready, Aim, Fly!]] | |||
|data-sort-value=809|[[The Final Test Wonder Gauntlet]] | |||
|{{icon|new}} | |||
|- | |- | ||
| | |data-sort-value=GamG style="background:white"|[[File:SMBW Screenshot Gamboo (Green).png|100x100px]]<br>[[Gamboo]] (Green) | ||
| | |align=left|Walking bamboo enemies. Gamboos emerge from the ground and stack together to form towers. Individuals that can be picked up and tossed once stomped. During some Wonder Effects, Gamboos dance to the music. The green ones walk off the edge of platforms. | ||
|data-sort-value=303|[[The Midway Trial: Hop to It]] | |||
|data-sort-value=808|[[The Semifinal Test Piranha Plant Reprise]] | |||
|{{icon|new}} | |||
|- | |- | ||
| | |data-sort-value=GamP style="background:white"|[[File:TakeboPurple.png|100x100px]]<br>Gamboo (Purple) | ||
|align=left|Purple-colored Gamboos turn around when the reach the edge of platforms. | |||
|data-sort-value=303|[[The Midway Trial: Hop to It]] | |||
|data-sort-value=809|[[The Final Test Wonder Gauntlet]] | |||
|{{icon|new}} | |||
|- | |- | ||
|data-sort-value=MetG style="background:white"|[[File:SMBW Screenshot Metal Gamboo (Gold).png|100x100px]]<br>[[Metal Gamboo]] (Gold)<br>{{derived}} | |||
|align=left|The metallic Gamboos are impervious to fire. When near an electric surge, they conduct the electricity for a brief period of time. Touching Metal Gamboos in this state damages Mario. The gold-rimmed ones walk off the edge of platforms. | |||
|data-sort-value=710|[[Missile Meg Mayhem]] | |||
|data-sort-value=713|[[KnuckleFest Bowser's Blazing Beats]] | |||
|{{icon|new}} | |||
|- | |- | ||
| | |data-sort-value=MetS style="background:white"|[[File:SMBW Screenshot Silver Metal Gamboo.png|100x100px]]<br>Metal Gamboo (Silver)<br>{{derived}} | ||
| | |align=left|The silver-rimmed Gamboos turn around when the reach the edge of platforms. | ||
|{{ | |data-sort-value=710|[[Missile Meg Mayhem]] | ||
|data-sort-value=713|[[KnuckleFest Bowser's Blazing Beats]] | |||
|{{icon|new}} | |||
|- | |- | ||
|{{ | |data-sort-value=SugG style="background:white"|[[File:SMBW Screenshot Sugarstar (Green).png|100x100px]]<br>[[Sugarstar]] (Green) | ||
|{{ | |align=left|Shimmering enemies similar to {{wp|konpeitō}}. Sugarstars appear in groups and move through the air in unison. Different groups move in different patterns and their paths can be tracked by the trailing streaks they leave in the sky. When struck Sugarstars are temporarily reduced to undamaging black cores, but they regenerate their crystalline exterior in a few seconds. | ||
|data-sort-value=305|[[The Sugarstar Trial: Across the Night Sky]] | |||
|data-sort-value=810|[[The Final-Final Test Badge Marathon]] | |||
|{{icon|new}} | |||
|- | |- | ||
| | |data-sort-value=SugP style="background:white"|[[File:SMBW Screenshot Sugarstar (Purple).png|100x100px]]<br>Sugarstar (Purple) | ||
|align=left|The purple-colored Sugarstars are speedier than the green ones. | |||
< | |data-sort-value=305|[[The Sugarstar Trial: Across the Night Sky]] | ||
|data-sort-value=810|[[The Final-Final Test Badge Marathon]] | |||
= | |{{icon|new}} | ||
|- | |- | ||
|style="background: | |data-sort-value=KonY style="background:white"|[[File:Konk Direct.png|100x100px]]<br>[[Konk]] (Yellow) | ||
| | |align=left|Metal Thwomp-like enemies. Yellow-rimmed Konks slide along ceilings and slam down when Mario is detected below. They slowly rise back to the ceiling and can be used like rising [[Lift]]s, but Mario will be crushed if he is still on top of them when the recollide with the ceiling. Konks are indestructible. | ||
| | |data-sort-value=705|[[Jewel-Block Cave]] | ||
|data-sort-value=505|[[An Uncharted Area: Wubba Ruins]] | |||
|{{icon|new}} | |||
|- | |- | ||
|style="background: | |data-sort-value=KonB style="background:white"|[[File:Blue Konk.png|100x100px]]<br>Konk (Blue) | ||
| | |align=left|The blue-rimmed Konks slide across the floor and thrust themselves skyward to strike Mario. | ||
| | |data-sort-value=705|[[Jewel-Block Cave]] | ||
|data-sort-value=505|[[An Uncharted Area: Wubba Ruins]] | |||
|{{icon|new}} | |||
|- | |- | ||
|style="background: | |data-sort-value=WonK style="background:white"|[[File:Giant Konk SMBW.jpg|100x100px]]<br>[[Wonder Konk]]<br>{{derived}} | ||
| | |align=left|A giant yellow Konk that appears from above during the Wonder Effect in Jewel-Block Cave. It crushes anything directly below it, including terrain. | ||
| | |colspan=2 data-sort-value=705|[[Jewel-Block Cave]] | ||
|{{icon|new}} | |||
|- | |- | ||
|style="background: | |data-sort-value=Arm style="background:white"|[[File:ArmadSMBW.png|100x100px]]<br>[[Armad]] | ||
| | |align=left|Armadillo creatures that live in the [[Sunbaked Desert]]. They curl into a ball when Mario draws near and rapidly roll towards him. They also curl up when they reach a slope to roll downhill. Stomping Armads causes them to curl as well, but they are motionless and undamaging in this context. They can be picked up and tossed. Some Armads are trailed by coins as they roll. | ||
| | |data-sort-value=401|[[Armads on the Roll]] | ||
|data-sort-value=804|[[Sunbaked Desert Special Pole Block Allure]] | |||
|{{icon|new}} | |||
|- | |- | ||
|style="background: | |data-sort-value=Pok style="background:white"|[[File:SMBW Pokey.png|100x100px]]<br>[[Pokey]] | ||
| | |align=left|Segmented [[cactus]] enemies that shimmy back-and-forth across the ground. Pokeys are of varying heights, with some so tall that they are difficult to work around. Stomping one as Small or Super Mario damages him, but they are vulnerable to indirect attacks like fireballs or Elephant Mario's trunk. Doing so knocks away individual segments, shortening them and making them easier to circumnavigate. Pokeys are defeated immediately when their heads are struck. During the Wonder Effect of Armads on the Roll, the speed of Pokeys rapidly increases. | ||
|colspan=2 data-sort-value=401|[[Armads on the Roll]] | |||
| | |— | ||
| | |||
|- | |- | ||
| | |data-sort-value=Mum style="background:white"|[[File:Mumsie.png|100x100px]]<br>[[Mumsy]] | ||
|align=left|The | |align=left|Mummy enemies enwrapped in loose cloth. The end of the cloth can be grabbed and pulled back to defeat them. Mumsies are of varying heights, with the tallest ones requiring the longest pulls to fully unfurl their bodies. They are otherwise difficult to defeat, with stomps, ground pounds, and fireballs ineffective. When Mumsies reach the ends of platforms, they turn around. | ||
|data-sort-value=402|[[The Desert Mystery]] | |||
|data-sort-value=804|[[Sunbaked Desert Special Pole Block Allure]] | |||
|{{icon|new}} | |||
|- | |- | ||
| | |data-sort-value=Nin style="background:white"|[[File:SMBW Ninji.png|96px]]<br>[[Ninji]] | ||
|align=left| | |align=left|Impish ninja enemies. They dance in rhythm in their debut level's Wonder Effect. | ||
|- | |data-sort-value=404|[[Ninji Jump Party]] | ||
|data-sort-value=415|[[Break Time! Raise the Stage]] | |||
|— | |||
| | |||
| | |||
|- | |- | ||
| | |data-sort-value=BloG style="background:white"|[[File:SMBWBLOOMP.png|100x100px]]<br>[[Bloomp]] (Green) | ||
|align=left| | |align=left|{{wp|Balloonfish}} enemies that fly through the sky. Bloomps are inflated by Blaster-like turrets before release. Mario can bounce on their back to reach distant areas, but each bounce makes the ridden Bloomp deflate a little until eventually disappearing. Striking them from below defeats them. | ||
| | |data-sort-value=405|[[Bloomps of the Desert Skies]] | ||
|data-sort-value=810|[[The Final-Final Test Badge Marathon]] | |||
|{{icon|new}} | |||
|- | |- | ||
| | |data-sort-value=BloP style="background:white"|[[File:SMBW Screenshot Bloomp (Purple).jpg|100x100px]]<br>Bloomp (Purple) | ||
|align=left| | |align=left|The purple Bloomps fly faster than the green ones. Other colored varieties appear during certain Wonder effects. | ||
| | |data-sort-value=405|[[Bloomps of the Desert Skies]] | ||
| | |data-sort-value=810|[[The Final-Final Test Badge Marathon]] | ||
|{{icon|new}} | |||
|- | |- | ||
| | |data-sort-value=WonB style="background:white"|[[File:Giga Bloomp.png|100x100px]]<br>[[Wonder Bloomp]]<br>{{derived}} | ||
|align=left|Big | |align=left|Big Bloomps filled with confetti. Mario bounces on Wonder Būsuke during certain Wonder Effects, but they do not deflate. | ||
| | |data-sort-value=409|[[Flight of the Bloomps]] | ||
| | |data-sort-value=804|[[Sunbaked Desert Special Pole Block Allure]] | ||
|{{icon|new}} | |||
|- | |- | ||
| | |data-sort-value=Snoo style="background:white"|[[File:Snootle.png|100x100px]]<br>[[Snootle]] | ||
|align=left| | |align=left|Round tumbling creatures that bounce around the immediate area. Some Snootles bounce Goombas around. | ||
| | |colspan=2 data-sort-value=406|[[Valley Fulla Snootles]] | ||
| | |{{icon|new}} | ||
|- | |- | ||
| | |data-sort-value=BigS style="background:white"|[[File:SMBW Big Snootle.png|100x100px]]<br>[[Big Snootle]]<br>{{derived}} | ||
|align=left| | |align=left|A big Snootle that withholds a [[10-flower coin]]. It otherwise behaves like normal-sized Snootles. | ||
| | |colspan=2 data-sort-value=406|[[Valley Fulla Snootles]] | ||
| | |{{icon|new}} | ||
|- | |- | ||
| | |data-sort-value=Ser style="background:white"|[[File:SnakePotWonder.png|100x100px]][[File:TsubochanWonder.png|100x100px]]<br>[[Serpont]] | ||
|align=left| | |align=left|Little snakes with [[Jar|pots]] on their heads. Serponts slowly slither while their heads are covered. Striking them breaks their pots, exposing their heads and enabling them to move quickly. | ||
| | |data-sort-value=407|[[Color-Switch Dungeon]] | ||
| | |data-sort-value=420|[[KO Arena Sunbaked Skirmish]] | ||
|{{icon|new}} | |||
|- | |- | ||
| | |data-sort-value=Lil style="background:white"|[[File:Lil' Sparky SMBW.png|100x100px]]<br>[[Lil Sparky]] | ||
|align=left| | |align=left|Energized balls of fire that tightly roll around platforms. They illuminate the space around them and shock Mario on contact. | ||
| | |data-sort-value=407|[[Color-Switch Dungeon]] | ||
| | |data-sort-value=810|[[The Final-Final Test Badge Marathon]] | ||
|— | |||
|- | |- | ||
| | |data-sort-value=Hot style="background:white"|[[File:Hothead SMBW.png|100x100px]]<br>[[Hothead]] | ||
|align=left| | |align=left|Big Sparkies. Hotheads move more slowly than Lil Sparkies, but they also have a larger [[:MarioWiki:Glossary#H|hitbox]] and illuminate a larger amount of space. | ||
| | |data-sort-value=407|[[Color-Switch Dungeon]] | ||
| | |data-sort-value=810|[[The Final-Final Test Badge Marathon]] | ||
|— | |||
|- | |- | ||
| | |data-sort-value=RifM style="background:white"|[[File:DarkMarioScreenshot.png|100x100px]]<br>[[Rift Mario]] | ||
|align=left| | |align=left|A shadowy doppelgänger that mimics Mario's movement during certain Wonder Effects. In multiplayer, Rift Mario chases the player with the crown. It can be temporarily stunned by fireballs and nearby activated POW Blocks. It disappears when the Wonder Seed is touched, but it can be permanently defeated beforehand if struck by fireballs fifty times. | ||
| | |data-sort-value=407|[[Color-Switch Dungeon]] | ||
| | |data-sort-value=504|[[Beware of the Rifts]] | ||
|{{icon|new}} | |||
|- | |- | ||
| | |data-sort-value=RifK style="background:white"|[[File:Dark Nokonoko.png|100x100px]]<br>[[Rift Koopa]]<br>{{derived}} | ||
|align=left| | |align=left|Dark entities that look like Koopa Troopas. They appear during the Wonder Effect in Beware of the Rifts and damage Mario on contact. Like Rift Mario, they disappear when the Wonder Seed is grabbed. | ||
| | |colspan=2 data-sort-value=504|[[Beware of the Rifts]] | ||
| | |{{icon|new}} | ||
|- | |- | ||
| | |data-sort-value=Thw style="background:white"|[[File:ThwompSMBW.png|100x100px]]<br>[[Thwomp]] | ||
|align=left| | |align=left|Grimacing stones. Thwomps suspend themselves above ground and slam into the earth below when they detect Mario underneath. Crushing him makes him lose a live. Directly touching Thwomps, even grounded ones, is damaging. They are invincible to all attacks. | ||
| | |data-sort-value=410|[[Sunbaked Desert Palace]] | ||
| | |data-sort-value=807|[[Petal Isles Special Way of the Goomba]] | ||
|— | |||
|- | |- | ||
| | |data-sort-value=Shoo style="background:white"|[[File:Baby Thwomp (long).png|100x100px]]<br>[[Shoomp]] | ||
|align=left| | |align=left|Enemies that look like baby Thwomps of varying widths. They occur on terrain that rocks back and forth, causing their spiked bodies to slide left-and-right. Contact with their sides damages Mario, and being between them and a wall makes him lose a life. Their backs are harmless and can be stood on like platforms. The terrain apparently is invocative of a rocking cradle for Shoomps.<ref name=kai13>{{cite|author=Kai, editor|date=26 Jan. 2024|url=www.nintendo.com/jp/topics/article/f6d2505a-dd79-410d-b350-b2b2036213f0|title=マリオたちの行く手を阻む。フラワー王国の個性豊かな敵キャラクターをご紹介。~その1~【ワンダーの世界へ Vol.13】|publisher=Nintendo Official Site|language=ja|accessdate=11 Jul. 2024}}</ref> | ||
| | |colspan=2 data-sort-value=506|[[Another Uncharted Area: Swaying Ruins]] | ||
| | |{{icon|new}} | ||
|- | |- | ||
| | |data-sort-value=Mec style="background:white"|[[File:MechakoopaSMBW.png|100x100px]]<br>[[Mechakoopa]] | ||
|align=left| | |align=left|Mechanical Koopas with keys on their backs. | ||
| | |colspan=2 data-sort-value=709|[[Petal Isles Flying Battleship]] | ||
| | |— | ||
|- | |- | ||
| | |data-sort-value=Fly style="background:white"|[[File:Flying Mechakoopa.png|100x100px]]<br>[[Flying Mechakoopa]] | ||
|align=left| | |align=left|Airborne Mechakoopas. They ascend from the bottom screen until they match Mario's position, then directly pursue him. Flying Mechakoopas conduct nearby electricity and make them briefly damaging to touch. Stomping them makes them collapse on the ground and usable as a projectile, like their grounded counterparts. | ||
| | |data-sort-value=607|[[Deep Magma Bog Flying Battleship]] | ||
| | |data-sort-value=711|[[High-Voltage Gauntlet]] | ||
|{{icon|new}} | |||
|- | |- | ||
| | |data-sort-value=Tai style="background:white"|[[File:Taily.png|100x100px]]<br>[[Taily]] | ||
|align=left| | |align=left|{{wp|Pitcher plant}} enemies that stand on the ceiling with tail-like vines hanging down. Tailys periodically release spiked fruits that damage Mario on contact. Mario can be defeat them when pulling their vines, or by striking them with in his [[Drill Mario|Drill form]]. In one particular course, yellow, red, and blue Tailys appear. | ||
| | |data-sort-value=502|[[Taily's Toxic Pond]] | ||
| | |data-sort-value=511|[[KO Arena Fungi Funk]] | ||
|{{icon|new}} | |||
|- | |- | ||
| | |data-sort-value=Boo style="background:white"|[[File:Boo SMBW.png|100x100px]]<br>[[Boo]] | ||
|align=left| | |align=left|Ghostly enemies that only follow players that are facing away from them, and stop when looked at. | ||
| | |data-sort-value=503|[[Light-Switch Mansion]] | ||
| | |data-sort-value=511|[[KO Arena Fungi Funk]] | ||
|— | |||
|- | |- | ||
| | |data-sort-value=Kin style="background:white"|[[File:SMBW King Boo.png|100x100px]]<br>[[King Boo]] | ||
|align=left| | |align=left|The king of Boos. In this game, King Boo is nearly the whole height of the slowly as the camera follows him, similar to a [[Boohemoth]] from ''[[New Super Mario Bros. 2]]''. | ||
| | |data-sort-value=503|[[Light-Switch Mansion]] | ||
| | |data-sort-value=714|[[The Final Battle! Bowser's Rage Stage]] | ||
|— | |||
|- | |- | ||
| | |data-sort-value=Nok style="background:white"|[[File:SMBW Screenshot Door Enemy.png|100x100px]]<br>[[Noknok]] | ||
|align=left| | |align=left|Monsters disguised as normal [[Warp Door|door]]s. They expose themselves when Mario tries to open them, an action accompanied by a fearful scream. Noknoks give chase once expose. | ||
| | |data-sort-value=503|[[Light-Switch Mansion]] | ||
| | |data-sort-value=714|[[The Final Battle! Bowser's Rage Stage]] | ||
|{{icon|new}} | |||
|- | |- | ||
| | |data-sort-value=Wub style="background:white"|[[File:SMBW Screenshot Wubba.png|100x100px]]<br>[[Wubba]] | ||
|align=left| | |align=left|Underground slimes. Wubbas slide back and forth and swim through larger bodies of goo. Some occur clinging to ceilings and walls. Few have coins in their bodies. Mario [[Wubba Mario|transforms into a Wubba]] during certain Wonder Effects. | ||
| | |data-sort-value=505|[[An Uncharted Area: Wubba Ruins]] | ||
| | |data-sort-value=511|[[KO Arena Fungi Funk]] | ||
|{{icon|new}} | |||
|- | |- | ||
| | |data-sort-value=Gna style="background:white"|[[File:WingChomps.png|100x100px]]<br>[[Gnawsher]] | ||
|align=left| | |align=left|Winged [[Chain Chomp|Chomp]]-like enemies with golden eyes and teeth that chomp through blocks. | ||
| | |data-sort-value=706|[[Gnawsher Lair]] | ||
| | |data-sort-value=809|[[The Final Test Wonder Gauntlet]] | ||
|{{icon|new}} | |||
|- | |- | ||
| | |data-sort-value=WonG style="background:white"|[[File:WonderGnawsherHorde.png|100x100px]]<br>[[Wonder Gnawsher]]<ref name=kikai49/><br>{{derived}} | ||
|align=left| | |align=left|TBW | ||
| | |data-sort-value=706|[[Gnawsher Lair]] | ||
| | |data-sort-value=809|[[The Final Test Wonder Gauntlet]] | ||
|{{icon|new}} | |||
|- | |- | ||
| | |data-sort-value=Sea style="background:white"|[[File:RedGnawsher.png|100x100px]]<br>[[Search Gashigashi]] | ||
|align=left| | |align=left|These red Gnawshers pursue Mario when in close proximity. | ||
| | |data-sort-value=706|[[Gnawsher Lair]] | ||
| | |data-sort-value=616|[[KO Arena Magma Flare-Up]] | ||
|{{icon|new}} | |||
|- | |- | ||
| | |data-sort-value=Maw style="background:white"|[[File:MawmawIdle.jpg|100x100px]]<br>[[Maw-Maw]] | ||
|align=left| | |align=left|{{wp|Giant salamander}} enemies that chase and eat anything and everything in their path, even other enemies. After chasing for a period of time, they become exhausted and stop. | ||
| | |data-sort-value=707|[[Maw-Maw Mouthful]] | ||
| | |data-sort-value=809|[[The Final Test Wonder Gauntlet]] | ||
|{{icon|new}} | |||
|- | |- | ||
| | |data-sort-value=Rrr style="background:white"|[[File:Rrrumba.png|100x100px]]<br>[[Rrrumba]] | ||
|align=left| | |align=left|Little {{wp|Armadillidiidae|pillbug}}-like creatures in breakable [[boulder]]-like shells. They roll at Mario when he is near, and also rolls down slopes. | ||
| | |colspan=2 data-sort-value=601|[[Where the Rrrumbas Rule]] | ||
| | |{{icon|new}} | ||
|- | |- | ||
| | |data-sort-value=Raa style="background:white"|[[File:SMBW Artwork Raargh.png|100x100px]]<br>[[Raargh]] | ||
|align=left| | |align=left|Maned [[Blargg]]s that emerge from walls and ceilings. They roar and fling themselves in a straight line when Mario is in their line of sight. Raarghs fall apart when they collide with the opposing terrain, but new ones emerge to take their place after a few seconds. Raarghs are large and often the same width as the corridors in which they are encountered, making them difficult to avoid. | ||
| | |colspan=2 data-sort-value=602|[[Raarghs in the Ruins]] | ||
| | |{{icon|new}} | ||
|- | |- | ||
| | |data-sort-value=LavBu style="background:white"|[[File:SMBW Screenshot Lava Bubble.png|100x100px]]<br>[[Lava Bubble]] | ||
|align=left| | |align=left|Incandescent drops of [[lava]] that leap vertically from greater magma pools. Direct contact damages Mario. | ||
| | |colspan=2 data-sort-value=603|[[Pull, Turn, Burn]] | ||
| | |— | ||
|- | |- | ||
| | |data-sort-value=LavBl style="background:white"|[[File:Track-riding Lava Bubble.png|100x100px]]<br>[[Lava Blobble]] | ||
|align=left| | |align=left|Large Lava Bubble-like enemies that ride on tracks. | ||
| | |colspan=2 data-sort-value=607|[[Deep Magma Bog Flying Battleship]] | ||
| | |{{icon|new}} | ||
|- | |- | ||
| | |data-sort-value=Ker style="background:white"|[[File:SMBWScreenshotUnknownCorn KernelEnemy.png|100x100px]][[File:SMBW Screenshot Popcorn Enemy.png|100x100px]]<br>[[Kerpop]] | ||
|align=left| | |align=left|Corn kernel enemies that slowly walk along the ground. When Kerpops make contact with heated sources like [[Hot-Hot Rock]]s they turn into bouncy pieces of popcorn that make them more difficult to avoid. Kerpops apparently give off a savory aroma in this state. | ||
| | |data-sort-value=604|[[Hot-Hot Hot!]] | ||
| | |data-sort-value=616|[[KO Arena Magma Flare-Up]] | ||
|{{icon|new}} | |||
|- | |- | ||
| | |data-sort-value=Li'l style="background:white"|[[File:Fryguy-like Enemy.png|100x100px]]<br>[[Li'l Scorcher]] | ||
|align=left| | |align=left|Enflamed enemies that spit slow-moving fireballs at Mario. Li'l Scorchers occur on floors and ceilings. Despite resembling flames, they can be safely stomped on to defeat them. They are also defeated when doused with water or struck by bubbles. | ||
|colspan=2 data-sort-value=608|[[Deep Magma Bog Palace]] | |||
|{{icon|new}} | |||
| | |||
| | |||
|} | |} | ||
=== | ===Obstacles=== | ||
{| | {|class="wikitable"style="width:100%;text-align:center" | ||
|-style=" | |-style="color:white;background:red" | ||
!width=10%|Name | !rowspan=2 width=10%|Name | ||
! | !rowspan=2|Description | ||
!colspan=2|Levels | |||
! | |-style="color:white;background:red" | ||
|- | !width=8%|First | ||
!width=8%|Last | |||
|- | |- | ||
| | |style="background:white"|[[File:Robo-Bowser Head.png|100x100px]]<br>[[Bowser cannon|Battleship figurehead]]<br>{{conjectural}} | ||
|align=left| | |align=left|During certain Wonder Effects, the figurehead of the [[Airship|battleship]]'s bow disconnects and fires lasers from the background of the course. The blasts are strong enough to destroy terrain and [[Iron Block]]s. | ||
|[[Fluff-Puff Peaks Flying Battleship]] | |||
|[[Deep Magma Bog Flying Battleship]] | |||
|- | |- | ||
| | |style="background:white"|[[File:SMBW Bill Blaster.png|100x100px]]<br>[[Bill Blaster]] | ||
|align=left| | |align=left|TBW | ||
|[[Fluff-Puff Peaks Flying Battleship]] | |||
|[[The Semifinal Test Piranha Plant Reprise]] | |||
|- | |- | ||
| | |style="background:white"|[[File:SMBW Thundercloud.jpg|100x100px]]<br>[[Electricity Cloud|Biribiri Kumo]]<ref name=kikai56>{{cite|author=kikai, Kimiyosu Hongo, Chimtaro, Hiromi Karakita (HQ), and Yamato Ishibashi|date=2023|title=『スーパーマリオブラザーズ ワンダー 完全攻略本』|language=ja|location=Tokyo|publisher=ambit|isbn=4-198657-69-6|page=56}}</ref> | ||
| | |align=left|TBW | ||
|align= | |colspan=2|[[Downpour Uproar]] | ||
| | |||
|- | |- | ||
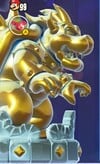
| | |style="background:white"|[[File:SMBW Gold Bowser Statue.jpg|100x100px]]<br>[[Bowser Statue|Bowser statue]] | ||
|align=left| | |align=left|TBW | ||
|[[Secrets of Shova Mansion]] | |||
|[[The Final Battle! Bowser's Rage Stage]] | |||
|- | |- | ||
| | |style="background:white"|[[File:SMBW Screenshot Bull's-Eye Blaster.png|100x100px]]<br>[[Bull's-Eye Blaster]] | ||
|align=left| | |align=left|TBW | ||
| | |colspan=2|[[KnuckleFest Bowser's Blazing Beats]] | ||
|- | |- | ||
| | |style="background:white"|[[File:SMBW Petal Isles Flying Battleship first 10-flower coin.png|100x100px]]<br>[[Burner]] | ||
|align=left| | |align=left|TBW | ||
|colspan=2|[[Petal Isles Flying Battleship]] | |||
| | |||
|- | |- | ||
| | |style="background:white"|[[File:Bloomp Blaster.png|100x100px]]<br>[[Būsuke Hōdai]]<ref>{{cite|author=kikai, Kimiyosu Hongo, Chimtaro, Hiromi Karakita (HQ), and Yamato Ishibashi|date=2023|title=『スーパーマリオブラザーズ ワンダー 完全攻略本』|language=ja|location=Tokyo|publisher=ambit|isbn=4-198657-69-6|page=45}}</ref> | ||
|align=left| | |align=left|TBW | ||
|[[Bloomps of the Desert Skies]] | |||
|[[The Final-Final Test Badge Marathon]] | |||
|- | |- | ||
| | |style="background:white"|[[File:SMBW Cannon.png|100x100px]]<br>[[Cannon]] | ||
|align=left| | |align=left|TBW | ||
|[[Fluff-Puff Peaks Flying Battleship]] | |||
|[[Petal Isles Flying Battleship]] | |||
|- | |- | ||
| | |style="background:white"|[[File:SMBW Lightning Block 2.jpg|100x100px]]<br>[[Electricity Block]] | ||
|align=left| | |align=left|TBW | ||
|[[High-Voltage Gauntlet]] | |||
|[[The Final-Final Test Badge Marathon]] | |||
|- | |- | ||
| | |style="background:white"|[[File:Fire Bar SMBW.jpg|100x100px]]<br>[[Fire Bar]] | ||
|align=left| | |align=left|TBW | ||
|[[Sunbaked Desert Palace]] | |||
|[[The Final-Final Test Badge Marathon]] | |||
|- | |- | ||
| | |style="background:white"|[[File:Flaming Fist.png|100x100px]]<br>[[Fire Knuckle]]<ref name=kikai56/> | ||
|align=left| | |align=left|TBW | ||
|[[KnuckleFest Bowser's Blazing Beats]] | |||
|[[The Final Battle! Bowser's Rage Stage]] | |||
|- | |- | ||
| | |style="background:white"|[[File:Fiery Pinwheel-thing.png|100x100px]]<br>[[Fire Wheel]]<ref name=kikai56/> | ||
|align=left| | |align=left|TBW | ||
| | |colspan=2|[[Pull, Turn, Burn]] | ||
|- | |- | ||
| | |style="background:white"|[[File:FireballSMBW.png|100x100px]]<br>[[Fireball (obstacle)|Fireball]] | ||
|align=left| | |align=left|TBW | ||
|[[Fluff-Puff Peaks Palace]] | |||
|[[Deep Magma Bog Palace]] | |||
|- | |- | ||
| | |style="background:white"|[[File:SMBW Screenshot Ice.jpg|100x100px]]<br>[[Ice|Frozen surface]] | ||
|align=left| | |align=left|Icy terrain that reduces Mario's traction. Frozen surfaces make it difficult to make precise jumps and avoid oncoming hazards. | ||
|[[Outmaway Valley]] | |||
|[[Fluff-Puff Peaks Palace]] | |||
|- | |- | ||
| | |style="background:white"|[[File:SMBW screenshot Giant Spiked Ball.png|100x100px]]<br>[[Giant Spiked Ball]] | ||
|align=left| | |align=left|TBW | ||
|[[Rolling-Ball Hall]] | |||
|[[The Final Battle! Bowser's Rage Stage]] | |||
|- | |- | ||
| | |style="background:white"|[[File:Bowser Burner.png|100x100px]]<br>[[Handle-controlled burner]]<br>{{conjectural}} | ||
|align=left| | |align=left|TBW | ||
| | |colspan=2|[[Deep Magma Bog Flying Battleship]] | ||
|- | |- | ||
| | |style="background:white"|[[File:SMBW Wonder Bowser Jr. second fight.jpg|100x100px]]<br>[[Honey]] | ||
|align=left| | |align=left|TBW | ||
| | |colspan=2|[[Fluff-Puff Peaks Palace]] | ||
|- | |- | ||
| | |style="background:white"|[[File:SMBWScreenshotHot-HotRockEmitingMagma.png|100x100px]]<br>[[Hot-Hot Rock]] | ||
|align=left| | |align=left|TBW | ||
|[[Hot-Hot Hot!]] | |||
|[[The Final-Final Test Badge Marathon]] | |||
|- | |- | ||
| | |style="background:white"|[[File:SMBWLavaTide.png|100x100px]][[File:PoisonTideGreenSMBW.png|100x100px]]<br>[[Lava]] | ||
|align=left| | |align=left|TBW | ||
|[[Where the Rrrumbas Rule]] | |||
|[[Deep Magma Bog Special Solar Roller]] | |||
|- | |- | ||
| | |style="background:white"|[[File:SMBW Lava Geyser.jpg|100x100px]][[File:SMBW Poison Geyser.jpg|100px]]<br>[[Lava Geyser]] | ||
|align=left| | |align=left|TBW | ||
|colspan=2|[[Pull, Turn, Burn]] | |||
| | |||
|- | |- | ||
| | |style="background:white"|[[File:DownpourUproar Wonder.jpg|100x100px]]<br>[[Lightning (obstacle)|Lightning]] | ||
|align=left| | |align=left|TBW | ||
|[[Downpour Uproar]] | |||
|[[The Final Test Wonder Gauntlet]] | |||
|- | |- | ||
| | |style="background:white"|[[File:SMBW Bowser machine.png|100x100px]]<br>[[Mecha Maker]] | ||
|align=left| | |align=left|The heart of the battleships that creates [[Mechakoopa]]s. The red buttons on their tops causes them to malfunction and the battleship to self-destruct. | ||
|[[Fluff-Puff Peaks Flying Battleship]] | |||
|[[Deep Magma Bog Flying Battleship]] | |||
|- | |- | ||
| | |style="background:white"|[[File:SMBW Petal Isles Flying Battleship second 10-flower coin.png|100x100px]]<br>[[Burner|Moving torch]] | ||
|align=left| | |align=left|TBW | ||
| | |colspan=2|[[Petal Isles Flying Battleship]] | ||
|- | |- | ||
| | |style="background:white"|[[File:SMBW Smasher.png|100x100px]]<br>[[Piston]] | ||
|align=left| | |align=left|TBW | ||
| | |colspan=2|[[Fluff-Puff Peaks Flying Battleship]] | ||
|- | |- | ||
| | |style="background:white"|[[File:PoisonTideSMBW.png|100x100px]]<br>[[Poison (obstacle)|Poison swamp]] | ||
|align=left| | |align=left|TBW | ||
|[[Swamp Pipe Crawl]] | |||
|[[The Final Test Wonder Gauntlet]] | |||
|- | |- | ||
| | |style="background:white"|[[File:SMBW Rift.jpg|100x100px]]<br>[[Rift]] | ||
|align=left| | |align=left|TBW | ||
|[[Beware of the Rifts]] | |||
|[[The Final Test Wonder Gauntlet]] | |||
|- | |- | ||
| | |style="background:white"|[[File:SMBW Sand.png|100x100px]]<br>Sand | ||
|align=left| | |align=left|TBW | ||
|[[Armads on the Roll]] | |||
|[[Sunbaked Desert Palace]] | |||
|- | |- | ||
| | |style="background:white"|[[File:SwayingRuins Wonder.jpg|100x100px]]<br>Slime<br>{{conjectural}} | ||
|align=left| | |align=left|TBW | ||
|colspan=2|[[Another Uncharted Area: Swaying Ruins]] | |||
| | |||
|- | |- | ||
| | |style="background:white"|[[File:Rolling-Ball Hall Thumbnail.png|100x100px]]<br>[[Spike Ball]] | ||
|align=left| | |align=left|TBW | ||
|[[Up 'n' Down with Puffy Lifts]] | |||
|[[Petal Isles Special Way of the Goomba]] | |||
|- | |- | ||
| | |style="background:white"|[[File:SpikeTrapSMBW.png|100x100px]]<br>[[Spike Trap]] | ||
|align=left| | |align=left|TBW | ||
|[[Bulrush Coming Through!]] | |||
|[[The Final-Final Test Badge Marathon]] | |||
|- | |- | ||
| | |style="background:white"|[[File:Spike Statue's Boulder.png|100x100px]]<br>[[Volcanic debris]] | ||
|align=left| | |align=left|TBW | ||
|colspan=2|[[Wavy Ride through the Magma Tube]] | |||
| | |||
|} | |} | ||
=== | ===Bosses=== | ||
{| | {|class="wikitable"style="width:100%;text-align:center" | ||
|-style=" | |-style="color:white;background:red" | ||
!width=10%|Name | !rowspan=2 width=10%|Name | ||
! | !rowspan=2|Description | ||
!colspan=2|Levels | |||
! | |-style="color:white;background:red" | ||
!width=8%|First | |||
!width=8%|Last | |||
|- | |||
|- | |- | ||
| | |style="background:white"|[[File:SMBW Artwork Bowser Jr.png|100x100px]][[File:SMBW Artwork Wonder Bowser Jr.png|100x100px]]<br>[[Bowser Jr.]] / [[Wonder Bowser Jr.]] | ||
|align=left|Bowser's son appears as a boss and gains a new form referred to as Wonder Bowser Jr. He returns alongside his [[Junior Clown Car]]. | |||
| | |[[Pipe-Rock Plateau Palace]] | ||
|align= | |[[Deep Magma Bog Palace]] | ||
|- | |- | ||
| | |style="background:white"|[[File:SMBW CastleBowser Render.png|100x100px]]<br>[[Castle Bowser]] | ||
| | |align=left|[[Bowser]] returns as the main villain in this game. Touching a Wonder Flower turned him into Castle Bowser by combining him with his [[Koopa Clown Car]] and [[Prince Florian]]'s castle. | ||
| | |colspan=2|[[The Final Battle! Bowser's Rage Stage]] | ||
|} | |} | ||
=== | ==Items and objects== | ||
===Items=== | |||
{| | These are collectibles, pickups, and health-restoring objects. | ||
|-style=" | {|class="wikitable" style="width:100%;text-align:center" | ||
!width= | |-style="color:white;background:red" | ||
!width=12%|Name | |||
!Description | !Description | ||
|- | |- | ||
| | |style="background:white"|[[File:SMBW Wonder Seed Artwork.png|100x100px]]<br>[[Wonder Seed]]s | ||
|align=left|TBD | |||
|align= | |||
|- | |- | ||
| | |style="background:white"|[[File:Royal Seed model SMBW.png|100x100px]]<br>[[Royal Seed]]s | ||
|align=left|TBD | |||
|align= | |||
|- | |- | ||
| | |style="background:white"|[[File:SMBW WonderFlowerCoin.png|100x100px]]<br>[[Wonder Token]]s | ||
|align=left|TBD | |||
|align= | |||
|- | |- | ||
| | |style="background:white"|[[File:SMBW coin.png|100x100px]]<br>[[Coin]]s | ||
|align=left|TBD | |||
|align= | |||
|- | |- | ||
| | |style="background:white"|[[File:Super Mario Wonder Invisible Coin.png|100x100px]]<br>[[Hidden Coin]]s | ||
|align=left|TBD | |||
|align= | |||
| | |||
|- | |- | ||
| | |style="background:white"|[[File:SMBW Blue Coin.png|100x100px]]<br>[[Blue Coin]]s | ||
|align=left|TBD | |||
|align= | |||
| | |||
|- | |- | ||
| | |style="background:white"|[[File:SMBW Artwork Flower Coin.png|100x100px]]<br>[[Flower coin]]s | ||
|align=left|TBD | |||
|align= | |||
|- | |- | ||
| | |style="background:white"|[[File:FlowerCoinsSMBW.png|100x100px]]<br>[[small flower coin]]s<ref name=kikai51/><br>{{derived}} | ||
|align=left|TBD | |||
| | |||
|- | |- | ||
| | |style="background:white"|[[File:SMBW 10-Flower Coin.png|100x100px]]<br>[[10-flower coin]]s | ||
|align=left|TBD | |||
|align= | |||
| | |||
|- | |- | ||
| | |style="background:white"|[[File:1-Up Mushroom SMBW.jpg|100x100px]]<br>[[1-Up Mushroom]]s | ||
|align=left|TBD | |||
|align= | |||
| | |||
|- | |- | ||
| | |style="background:white"|[[File:SMBW Blue Key.png|100x100px]][[File:SMBW Red Key.png|100x100px]]<br>[[Key]]s | ||
|align=left|TBD | |||
| | |||
|- | |- | ||
| | |style="background:white"|[[File:RedShellMK8.png|100x100px]]<br>Shells | ||
| | |align=left|(inc. '''[[Koopa Shell]]s''', '''[[Swirlypod Shell]]s'''{{derived}}<ref>{{cite|author=kikai, Kimiyosu Hongo, Chimtaro, Hiromi Karakita (HQ), and Yamato Ishibashi|date=2023|title=『スーパーマリオブラザーズ ワンダー 完全攻略本』|language=ja|location=Tokyo|publisher=ambit|isbn=4-198657-69-6|page=46}} Name is asserted to be "unofficial" within source.</ref>, '''[[Buzzy Shell]]s''', curled '''[[Armad]]s''') | ||
| | |||
|- | |- | ||
| | |style="background:white"|[[File:SMBW The Anglefish Trial Ready, Aim, Fly! third 10-flower coin.jpg|100x100px]]<br>[[Big shell]]s<ref>{{cite|quote=When in Elephant form, you can carry big shells.|author=loading-screen tip|title=''Super Mario Bros. Wonder'' by [[Nintendo EPD]]|format=North American Localization|publisher=Nintendo of America|date=20 Oct. 2023|accessdate=27 Nov. 2024}}</ref> | ||
| | |align=left|TBD | ||
| | |||
| | |||
|- | |- | ||
| | |style="background:white"|[[File:SMBW POW Artwork.png|100x100px]]<br>[[POW Block]] | ||
|align=left|TBD | |||
|align= | |||
| | |||
|- | |- | ||
| | |style="background:white"|[[File:UnknownPotSMBW.png|100x100px]]<br>[[Jar]]s | ||
|align=left|TBD | |||
|align= | |||
|- | |- | ||
| | |style="background:white"|[[File:MarioStandeeSMBW.png|100x100px]]<br>[[Standee]]s | ||
|align=left|TBD | |||
|align= | |||
|} | |} | ||
===Power-ups=== | ===Power-ups=== | ||
{|width=100% cellspacing=0 border=1 cellpadding=3 style="border-collapse:collapse;background:#f5f5f5" | {|width=100% cellspacing=0 border=1 cellpadding=3 style="border-collapse:collapse;background:#f5f5f5" | ||
|-style="background: | |-style="background:red;color:white;" | ||
!width=12% rowspan= | !width=12% rowspan=4|Power-up | ||
!width=24% colspan=3|Form | !width=24% colspan=3|Form | ||
!rowspan= | !rowspan=4|Description | ||
|- | |- | ||
!width=12% style="background: | !width=12% style="background:red" rowspan=3|{{icon|SMBW-Mario}} | ||
!width=6% style="background: | !width=6% style="background:red"|{{icon|SMBW-Luigi}} | ||
!width=6% style="background: | !width=6% style="background:red"|{{icon|SMBW-Peach}} | ||
|- | |- | ||
!style="background: | !style="background:red"|{{icon|SMBW-Daisy}} | ||
!style="background: | !style="background:red"|{{icon|SMBW-ToadY}} | ||
|- | |- | ||
!style="background:red"|{{icon|SMBW-ToadB}} | |||
| | !style="background:red"|{{icon|SMBW-Toadette}} | ||
|- | |- | ||
|align=center style="background: | |align=center style="background:white" rowspan=3|N/A | ||
|align=center style="background: | |align=center style="background:white" rowspan=3|[[File:SMBW Screenshot Small Mario.png|100x100px]]<br>[[Small Mario]] | ||
|align=center style="background:white"|[[File:Small Luigi - SMBW render.png|50x50px]]<br><small>[[Small Mario|Small Luigi]]</small> | |||
|align=center style="background:white"|[[File:Small Peach - SMBW render.png|50x50px]]<br><small>[[Small Mario|Small Peach]]</small> | |||
|rowspan=3|TBW | |||
|- | |- | ||
|align=center style="background: | |align=center style="background:white"|[[File:No image.png|50x50px]]<br><small>[[Small Mario|Small<br>Daisy]]</small> | ||
|align=center style="background:white"|[[File:Small Toad (Yellow) - SMBW render.png|50x50px]]<br><small>[[Small Mario|Small Yellow Toad]]</small> | |||
|align=center style="background: | |||
|- | |- | ||
|align=center style="background: | |align=center style="background:white"|[[File:Small Toad (blue) - SMBW render.png|50x50px]]<br><small>[[Small Mario|Small Blue Toad]]</small> | ||
|align=center style="background: | |align=center style="background:white"|[[File:Small Toadette - SMBW render.png|50x50px]]<br><small>[[Small Mario|Small<br>Toadette]]</small> | ||
|- | |- | ||
|align=center style="background: | |align=center style="background:white" rowspan=3|[[File:SMP Dash Mushroom.png|100x100px]]<br>[[Super Mushroom]] | ||
|align=center style="background: | |align=center style="background:white" rowspan=3|[[File:SMBW Mario Jump.png|110x110px]]<br>[[Super Mario (form)|Super Mario]] | ||
|align=center style="background: | |align=center style="background:white"|[[File:Standee Posing Luigi.png|50x50px]]<br><small>[[Super Mario (form)|Super Luigi]]</small> | ||
|align=center style="background: | |align=center style="background:white"|[[File:Standee Jumping Peach.png|50x50px]]<br><small>[[Super Mario (form)|Super Peach]]</small> | ||
|rowspan= | |rowspan=3|TBW | ||
|- | |- | ||
|align=center style="background: | |align=center style="background:white"|[[File:Standee Posing Daisy.png|50x50px]]<br><small>[[Super Mario (form)|Super<br>Daisy]]</small> | ||
|align=center style="background: | |align=center style="background:white"|[[File:Standee Posing Yellow Toad.png|50x50px]]<br><small>[[Super Mario (form)|Super Yellow Toad]]</small> | ||
|- | |- | ||
|align=center style="background: | |align=center style="background:white"|[[File:Standee Posing Blue Toad.png|50x50px]]<br><small>[[Super Mario (form)|Super Blue Toad]]</small> | ||
|align=center style="background:white"|[[File:Standee Posing Toadette.png|50x50px]]<br><small>[[Super Mario (form)|Super<br>Toadette]]</small> | |||
|align=center style="background: | |||
|- | |- | ||
|align=center style="background: | |align=center style="background:white" rowspan=3|[[File:FireFlowerMK8.png|100x100px]]<br>[[Fire Flower]] | ||
|align=center style="background: | |align=center style="background:white" rowspan=3|[[File:Fire Mario Artwork (alt) - Super Mario 3D World.png|110x110px]]<br>[[Fire Mario]] | ||
|align=center style="background:white"|[[File:Standee Fire Luigi.png|50x50px]]<br><small>[[Fire Mario|Fire Luigi]]</small> | |||
|align=center style="background:white"|[[File:Standee Fire Peach.png|50x50px]]<br><small>[[Fire Mario|Fire Peach]]</small> | |||
|rowspan=3|TBW | |||
|- | |- | ||
|align=center style="background: | |align=center style="background:white"|[[File:Standee Fire Daisy.png|50x50px]]<br><small>[[Fire Mario|Fire<br>Daisy]]</small> | ||
|align=center style="background:white"|[[File:Standee Fire Yellow Toad1.png|50x50px]]<br><small>[[Fire Mario|Fire Yellow Toad]]</small> | |||
|align=center style="background: | |||
|- | |- | ||
|align=center style="background: | |align=center style="background:white"|[[File:Standee Fire Blue Toad.png|50x50px]]<br><small>[[Fire Mario|Fire Blue Toad]]</small> | ||
|align=center style="background: | |align=center style="background:white"|[[File:Standee Fire Toadette.png|50x50px]]<br><small>[[Fire Mario|Fire Toadette]]</small> | ||
|- | |- | ||
|align=center style="background: | |align=center style="background:white" rowspan=3|[[File:MPS Star.png|100x100px]]<br>[[Super Star]] | ||
|align=center style="background: | |align=center style="background:white" rowspan=3|[[File:NSMBWii Invincible Mario Artwork.png|110x110px]]<br>[[Invincible Mario]] | ||
|align=center style="background: | |align=center style="background:white"|[[File:No image.png|50x50px]]<br><small>[[Invincible Mario|Invincible Luigi]]</small> | ||
|align=center style="background: | |align=center style="background:white"|[[File:No image.png|50x50px]]<br><small>[[Invincible Mario|Invincible Peach]]</small> | ||
|rowspan= | |rowspan=3|TBW | ||
|- | |- | ||
|align=center style="background: | |align=center style="background:white"|[[File:No image.png|50x50px]]<br><small>[[Invincible Mario|Invincible<br>Daisy]]</small> | ||
|align=center style="background: | |align=center style="background:white"|[[File:No image.png|50x50px]]<br><small>[[Invincible Mario|Invincible Yellow Toad]]</small> | ||
|- | |- | ||
|align=center style="background: | |align=center style="background:white"|[[File:No image.png|50x50px]]<br><small>[[Invincible Mario|Invincible Blue Toad]]</small> | ||
|align=center style="background:white"|[[File:No image.png|50x50px]]<br><small>[[Invincible Mario|Invincible Toadette]]</small> | |||
|align=center style="background: | |||
|- | |- | ||
|align=center style="background: | |align=center style="background:white" rowspan=3|[[File:SMBW Elephant Fruit.png|100x100px]]<br>[[Elephant Fruit]] | ||
|align=center style="background: | |align=center style="background:white" rowspan=3|[[File:SMBW Artwork Elephant Mario.png|110x110px]]<br>[[Elephant Mario]] | ||
|align=center style="background:white"|[[File:Standee Elephant Luigi.png|50x50px]]<br><small>[[Elephant Mario|Elephant<br>Luigi]]</small> | |||
|align=center style="background:white"|[[File:Standee Elephant Peach.png|50x50px]]<br><small>[[Elephant Mario|Elephant Peach]]</small> | |||
|rowspan=3|TBW | |||
|- | |- | ||
|align=center style="background: | |align=center style="background:white"|[[File:Standee Elephant Daisy.png|50x50px]]<br><small>[[Elephant Mario|Elephant<br>Daisy]]</small> | ||
|align=center style="background:white"|[[File:Standee Elephant Yellow Toad.png|50x50px]]<br><small>[[Elephant Mario|Elephant Yellow Toad]]</small> | |||
|align=center style="background: | |||
|- | |- | ||
|align=center style="background: | |align=center style="background:white"|[[File:Standee Elephant Blue Toad.png|50x50px]]<br><small>[[Elephant Mario|Elephant Blue Toad]]</small> | ||
|align=center style="background: | |align=center style="background:white"|[[File:Standee Elephant Toadette.png|50x50px]]<br><small>[[Elephant Mario|Elephant Toadette]]</small> | ||
|- | |- | ||
|align=center style="background: | |align=center style="background:white" rowspan=3|[[File:SMBW Bubble Flower.png|100x100px]]<br>[[Bubble Flower]] | ||
|align=center style="background: | |align=center style="background:white" rowspan=3|[[File:SMBW Artwork Bubble Mario.png|110x110px]]<br>[[Bubble Mario]] | ||
|align=center style="background: | |align=center style="background:white"|[[File:Standee Bubble Luigi.png|50x50px]]<br><small>[[Bubble Mario|Bubble Luigi]]</small> | ||
|align=center style="background: | |align=center style="background:white"|[[File:Standee Bubble Peach.png|50x50px]]<br><small>[[Bubble Mario|Bubble Peach]]</small> | ||
|rowspan= | |rowspan=3|TBW | ||
|- | |- | ||
|align=center style="background: | |align=center style="background:white"|[[File:Standee Bubble Daisy.png|50x50px]]<br><small>[[Bubble Mario|Bubble<br>Daisy]]</small> | ||
|align=center style="background: | |align=center style="background:white"|[[File:Standee Bubble Yellow Toad.png|50x50px]]<br><small>[[Bubble Mario|Bubble Yellow Toad]]</small> | ||
|- | |- | ||
|align=center style="background: | |align=center style="background:white"|[[File:Standee Bubble Blue Toad.png|50x50px]]<br><small>[[Bubble Mario|Bubble Blue Toad]]</small> | ||
|align=center style="background:white"|[[File:Standee Bubble Toadette.png|50x50px]]<br><small>[[Bubble Mario|Bubble Toadette]]</small> | |||
|align=center style="background: | |||
|- | |- | ||
|align=center style="background: | |align=center style="background:white" rowspan=3|[[File:SMBW Drill Mushroom.png|100x100px]]<br>[[Drill Mushroom]] | ||
|align=center style="background: | |align=center style="background:white" rowspan=3|[[File:SMBW Artwork Drill Mario.png|110x110px]]<br>[[Drill Mario]] | ||
|align=center style="background:white"|[[File:Standee Drill Luigi.png|50x50px]]<br><small>[[Drill Mario|Drill Luigi]]</small> | |||
|align=center style="background:white"|[[File:Standee Drill Peach.png|50x50px]]<br><small>[[Drill Mario|Drill Peach]]</small> | |||
|rowspan=3|TBW | |||
|- | |- | ||
|align=center style="background: | |align=center style="background:white"|[[File:Standee Drill Daisy.png|50x50px]]<br><small>[[Drill Mario|Drill<br>Daisy]]</small> | ||
|align=center style="background:white"|[[File:Standee Drill Yellow Toad.png|50x50px]]<br><small>[[Drill Mario|Drill Yellow Toad]]</small> | |||
|align=center style="background: | |||
|- | |- | ||
|align=center style="background: | |align=center style="background:white"|[[File:Standee Drill Blue Toad.png|50x50px]]<br><small>[[Drill Mario|Drill Blue Toad]]</small> | ||
|align=center style="background: | |align=center style="background:white"|[[File:Standee Drill Toadette.png|50x50px]]<br><small>[[Drill Mario|Drill Toadette]]</small> | ||
|} | |} | ||
=== | ===Wonder Flower=== | ||
{{multiframe | |||
|[[File:SMBW Wubba Mario.png|70x70px]][[File:SMBW Wubba Yoshi.png|70x70px]][[File:SMBW Wubba Nabbit.png|70x70px]] | |||
|-style=" | |From left to right, screenshots of Mario, [[Yoshi]], and [[Nabbit]] in their [[Wubba Mario|Wubba form]]s. | ||
|size=210 | |||
|align=right | |||
}} | |||
[[File:SMBW Wonder Flower.png|left|110px]] | |||
This is where you write details about forms triggered by the Wonder Flower. Uniquely, unlike traditional power-ups, Wonder Flowers also transforms the Yoshis and Nabbit. | |||
{|class="wikitable" style="width:100%;text-align:center" | |||
|-style="color:white;background:red" | |||
!width=12%|Name | !width=12%|Name | ||
!Description | !Description | ||
|- | |- | ||
|style="background:white"|[[File:SMBW Hoppycat Mario.png|100x100px]]<br>[[Hoppycat Mario]] | |||
|align=left|TBW | |||
|- | |- | ||
| | |style="background:white"|[[File:SMBWGoombas.png|100x100px]]<br>[[Goomba Mario]] | ||
| | |align=left|TBW | ||
|- | |- | ||
| | |style="background:white"|[[File:SMBW Screenshot Balloon Mario.png|100x100px]]<br>[[Balloon Mario]] | ||
| | |align=left|TBW | ||
|- | |- | ||
| | |style="background:white"|[[File:SMBW Screenshot Spike Ball Mario.png|100x100px]]<br>[[Spike-Ball Mario]] | ||
| | |align=left|TBW | ||
|- | |- | ||
| | |style="background:white"|[[File:SMBW Wubba Mario Artwork.png|100x100px]]<br>[[Wubba Mario]] | ||
| | |align=left|TBW | ||
|- | |- | ||
| | |style="background:white"|[[File:SMBW Screenshot Stretchy Mario.png|100x100px]]<br>[[Biyon Mario|Sproing Mario]] | ||
|TBW | |align=left|TBW | ||
|- | |- | ||
| | |style="background:white"|[[File:SMBW Screenshot Puffy Lift Mario.png|100x100px]]<br>[[Puffy Lift Mario|Puffy-Lift Mario]] | ||
| | |align=left|TBW | ||
|- | |- | ||
| | |style="background:white"|[[File:SMBW Screenshot Metal Mario.png|100x100px]]<br>[[Metal Mario]] | ||
| | |align=left|TBW | ||
|} | |||
===Badges=== | |||
===Objects=== | |||
Objects are interactable elements of the environment that cannot be picked up or collected by [[Mario]]. For objects that primarily function as obstructions or hazards, see [[#Obstacles|above]]. | |||
{|class="wikitable"style="width:100%;text-align:center" | |||
|-style="color:white;background:red" | |||
!width=12%|Name | |||
!Description | |||
|- | |- | ||
!colspan=3 style="background:#FF7733"|Blocks and containers | |||
|- | |- | ||
| | |style="background:white"|[[File:Exclamationblock sighting SMBW.png|100x100px]]<br>[[! Block]] | ||
| | |align=left|TBW | ||
|- | |- | ||
| | |style="background:white"|[[File:SMBW question block.png|100x100px]]<br>[[? Block]] | ||
| | |align=left|TBW (inc. '''[[Empty Block]]''', '''[[Coin Block]]''', '''[[Hidden Block|invisible block]]''',<ref>{{cite|quote=There are sometimes invisible blocks hidden near walls. Hop around in places you think a block might be!|author=Tip|title=''Super Mario Bros. Wonder'' by [[Nintendo EPD]]|format=North American Localization|publisher=[[Nintendo|Nintendo of America]]|date=20 Oct. 2023|accessdate=27 Nov. 2024}}</ref> and '''[[Shoot ? Block]]'''{{derived}}<ref name=kikai51/>) | ||
|- | |- | ||
| | |style="background:white"|[[File:No image.png|100x100px]]<br>[[? Capsule]]<ref name=kikai51>{{cite|author=kikai, Kimiyosu Hongo, Chimtaro, Hiromi Karakita (HQ), and Yamato Ishibashi|date=2023|title=『スーパーマリオブラザーズ ワンダー 完全攻略本』|language=ja|location=Tokyo|publisher=ambit|isbn=4-198657-69-6|page=51}}</ref><br>{{derived}} | ||
| | |align=left|TBW | ||
|- | |- | ||
| | |style="background:white"|[[File:SMBW Atchi Muite Block.png|100x100px]]<br>[[Atchi Muite Block]]<ref name=kikai53>{{cite|author=kikai, Kimiyosu Hongo, Chimtaro, Hiromi Karakita (HQ), and Yamato Ishibashi|date=2023|title=『スーパーマリオブラザーズ ワンダー 完全攻略本』|language=ja|location=Tokyo|publisher=ambit|isbn=4-198657-69-6|page=53}}</ref> | ||
| | |align=left|TBW | ||
|- | |- | ||
|style="background:white"|[[File:SMBW Artwork Brick Block.png|100x100px]]<br>[[Brick Block]] | |||
|align=left|TBW | |||
|- | |- | ||
| | |style="background:white"|[[File:SMBW Screenshot Bubble.png|100x100px]]<br>[[Bubble]] | ||
| | |align=left|TBW | ||
|- | |- | ||
| | |style="background:white"|[[File:HardBlock5SMBW.png|100x100px]]<br>Bump block<br>{{conjectural}} | ||
| | |align=left|TBW | ||
|- | |- | ||
| | |style="background:white"|[[File:Cactus Block.jpg|100x100px]]<br>[[Cactus box]]<ref name=kikai53/><br>{{derived}} | ||
|align=left|TBW | |||
|- | |- | ||
|style="background:white"|[[File:CloudBlock2SMBW.png|100x100px]]<br>[[Cloud Block]] | |||
|align=left|TBW | |||
|- | |- | ||
| | |style="background:white"|[[File:SMBW Screenshot Crate.jpg|100x100px]]<br>[[Crate]] | ||
| | |align=left|TBW | ||
|- | |- | ||
| | |style="background:white"|[[File:No image.png|100x100px]]<br>[[Donut Block]] | ||
|TBW | |align=left|TBW | ||
|- | |- | ||
| | |style="background:white"|[[File:UnknownDottedLineBlockSMBW.png|100x100px]]<br>[[Dotted-Line Block]] | ||
|TBW | |align=left|TBW (inc. '''[[Rizumu Block]]'''<ref>Japanese in-game name for [[Fluff-Puff Peaks Special Climb to the Beat]].</ref>) | ||
|- | |- | ||
| | |style="background:white"|[[File:HardBlock2SMBW.png|100x100px]]<br>[[Hard Block|Hard block]] | ||
| | |align=left|TBW (inc. '''[[Coral]]''', '''[[Stone Block]]''', and '''[[Wood Block]]''') | ||
|- | |- | ||
| | |style="background:white"|[[File:InvisibleCharacterBlockRedYoshiSMBW.png|100x100px]]<br>[[Hidden Character Block]] | ||
| | |align=left|TBW | ||
|- | |- | ||
| | |style="background:white"|[[File:IceBlockSMBW.png|100x100px]]<br>[[Ice Block]] | ||
| | |align=left|TBW | ||
|- | |- | ||
|style="background:white"|[[File:ItemBalloonElephantFruitSMBW.png|100x100px]]<br>[[Item Balloon (Super Mario Bros. Wonder)|Item Balloon]] | |||
|align=left|TBW | |||
|- | |- | ||
| | |style="background:white"|[[File:Evil cube SMBW.jpg|100x100px]]<br>[[Iron Block]] | ||
| | |align=left|TBW | ||
|- | |- | ||
| | |style="background:white"|[[File:JewelBlockSMBW.png|100x100px]]<br>[[Jewel block]] | ||
| | |align=left|TBW | ||
|- | |- | ||
| | |style="background:white"|[[File:Lifting Shabon SMBW.jpg|100x100px]]<br>[[Lifting Shabon]] | ||
| | |align=left|TBW | ||
|- | |- | ||
| | |style="background:white"|[[File:SMBW question block long.png|100x100px]]<br>[[? Block|Long ? Block]] | ||
| | |align=left|TBW | ||
|- | |- | ||
| | |style="background:white"|[[File:SMBW Fungi Mines Special Dangerous Donut Ride first 10-flower coin.jpg|100x100px]]<br>[[Long Donut Block]] | ||
| | |align=left|TBW | ||
|- | |- | ||
| | |style="background:white"|[[File:SMBW Long Rotating Block.jpg|100x100px]]<br>[[Long Rotating Block]]<br>{{conjectural}} | ||
| | |align=left|TBW | ||
|- | |- | ||
| | |style="background:white"|[[File:SMBW gimmick sound long.png|100x100px]]<br>[[Marimba Block]] | ||
| | |align=left|TBW | ||
|- | |- | ||
| | |style="background:white"|[[File:UnknownBreakableYellowBlockSMBW.png|100x100px]]<br>[[Peanut box]] | ||
|TBW | |align=left|TBW | ||
|- | |- | ||
|style="background:white"|[[File:UnknownBreakablePumpkinSMBW.png|100x100px]]<br>[[Pumpkin box]]<ref name=kikai53/><br>{{derived}} | |||
|align=left|TBW | |||
|- | |- | ||
| | |style="background:white"|[[File:Race Block SMBW.jpg|100x100px]]<br>[[Race Block]]<ref name=direct>{{cite|author=Nintendo of America|date=31 Aug. 2023|url=youtu.be/G0m_uNaSres|title=Super Mario Bros. Wonder Direct 8.31.2023|publisher=YouTube|accessdate=31 Aug. 2023}}</ref> | ||
| | |align=left|TBW | ||
|- | |- | ||
| | |style="background:white"|[[File:1RedPOWBlockSMBW.png|100x100px]]<br>[[Red POW Block]] | ||
| | |align=left|TBW | ||
|- | |- | ||
| | |style="background:white"|[[File:Rock Block SMBW.jpg|100x100px]]<br>[[Rock Block]] | ||
| | |align=left|TBW | ||
|- | |- | ||
| | |style="background:white"|[[File:SMBW Rotating Block.jpg|100x100px]]<br>[[Rotating Block]] | ||
| | |align=left|TBW | ||
|- | |- | ||
| | |style="background:white"|[[File:Roulette Block SMBW.jpg|100x100px]]<br>[[Roulette Block]] | ||
|TBW | |align=left|TBW | ||
|- | |- | ||
| | |style="background:white"|[[File:ArrowBlockSMBW.png|100x100px]]<br>[[Shoot Block]]<ref name=kikai52>{{cite|author=kikai, Kimiyosu Hongo, Chimtaro, Hiromi Karakita (HQ), and Yamato Ishibashi|date=2023|title=『スーパーマリオブラザーズ ワンダー 完全攻略本』|language=ja|location=Tokyo|publisher=ambit|isbn=4-198657-69-6|page=52}}</ref> | ||
| | |align=left|TBW | ||
|- | |- | ||
| | |style="background:white"|[[File:SnowBlockSMBW.png|100x100px]]<br>[[Snow Block (Super Mario Bros. Wonder)|Snow Block]]<ref name=kai14/><br>{{derived}} | ||
|TBW | |align=left|TBW | ||
|- | |- | ||
| | |style="background:white"|[[File:Treasure Chest SMBW.jpg|100x100px]]<br>[[Treasure chest]] | ||
| | |align=left|TBW | ||
|- | |- | ||
| | |style="background:white"|[[File:No image.png|100x100px]]<br>[[Wonder POW Block]]<ref name=kikai52/> | ||
| | |align=left|TBW | ||
|- | |- | ||
!colspan=3 style="background:#FF7733"|Trigger objects | |||
|- | |- | ||
| | |style="background:white"|[[File:SMBW The Midway Trial Hop to It second 10-flower coin.jpg|100x100px]]<br>[[! Switch]] | ||
| | |align=left|TBW | ||
|- | |- | ||
| | |style="background:white"|[[File:SMBW Deep Magma Bog Flying Battleship second 10-flower coin.jpg|100x100px]]<br>[[? Switch]] | ||
| | |align=left|TBW | ||
|- | |- | ||
| | |style="background:white"|[[File:SMBW Drillbeacon screenshot.png|100x100px]]<br>[[Beacon (Super Mario Bros. Wonder)|Beacon]]<ref name=treehouse>{{cite|author=[[Nintendo|Nintendo of America]]|title=Nintendo Treehouse: Live - Super Mario Bros. Wonder|date=1 Sept. 2023|url=youtu.be/nq8-ONShIZQ?si=DAmJgECyDyO5BtwE|publisher=YouTube}}</ref> | ||
| | |align=left|TBW | ||
|- | |- | ||
| | |style="background:white"|[[File:Door knocker SMBW.jpg|100x100px]]<br>[[Handle (Super Mario Bros. Wonder)|Handle]] | ||
| | |align=left|TBW | ||
|- | |- | ||
| | |style="background:white"|[[File:Green Timer Block.jpg|100x100px]]<br>[[Light-Switch]] | ||
|align=left| | |align=left|(inc. '''[[spotlight (object)|spotlight]]''') | ||
|- | |- | ||
| | |style="background:white"|[[File:SMBW On OnOffSwitch.jpg|100x100px]][[File:SMBW Off OnOffSwitch.jpg|100x100px]]<br>[[ON/OFF Switch]] | ||
|TBW | |align=left|TBW | ||
|- | |- | ||
| | |style="background:white"|[[File:SMBW Bulrush Express.jpg|100x100px]]<br>[[P Switch]] | ||
| | |align=left|TBW | ||
|- | |- | ||
|style="background:white"|[[File:SMBW Pop Up, Hoppo.jpg|100x100px]]<br>[[Springboard object]]<br>{{conjectural}} | |||
|align=left|TBW | |||
|- | |- | ||
| | |style="background:white"|[[File:Purple Timer Block.jpg|100x100px]]<br>[[Timer-Switch]] | ||
| | |align=left|TBW | ||
|- | |- | ||
| | |style="background:white"|[[File:UnknownPillarSMBW.png|100x100px]]<br>[[Topple Rock]]<ref>{{cite|author=Shea, Brian|date=19 Oct. 2023|title=Super Mario Bros. Wonder Flower Coins And Wonder Seeds Guide|publisher=Game Informer|archive=web.archive.org/web/20231021132240/https://www.gameinformer.com/guide/2023/10/19/super-mario-bros-wonder-flower-coins-and-wonder-seeds-guide}}</ref> | ||
| | |align=left|TBW | ||
|- | |- | ||
| | |style="background:white"|[[File:SMBW Flower.png|100x100px]]<br>[[Wilted flower]]<ref>{{cite|quote=You should try and share water with wilted flowers. They'll definitely appreciate the help.|author=Tip|title=''Super Mario Bros. Wonder'' by [[Nintendo EPD]]|format=North American Localization|publisher=[[Nintendo|Nintendo of America]]|date=20 Oct. 2023|accessdate=27 Nov. 2024}}</ref> | ||
| | |align=left|TBW | ||
|- | |- | ||
| | |style="background:white"|[[File:UnknownFlowerBlueSMBW.png|100x100px]]<br>[[Wow Bud]] | ||
| | |align=left|TBW | ||
|- | |- | ||
!colspan=3 style="background:#FF7733"|Transportation objects | |||
|- | |- | ||
| | |style="background:white"|[[File:Propeller 3 SMBW.jpg|100x100px]]<br>[[Golden Propeller Flower]]<br>{{conjectural}} | ||
| | |align=left|TBW | ||
|- | |- | ||
| | |style="background:white"|[[File:SMBW Yellow Toad Artwork.png|100x100px]]<br>[[Propeller Flower]] | ||
| | |align=left|TBW | ||
|- | |- | ||
| | |style="background:white"|[[File:Vine SMBW.jpg|100x100px]]<br>[[Vine]] | ||
| | |align=left|TBW | ||
|- | |- | ||
!colspan=3 style="background:#FF7733"|Doorways | |||
|- | |- | ||
| | |style="background:white"|[[File:Door SMBW.jpg|100x100px]]<br>[[Warp Door|Door]] | ||
| | |align=left|TBW | ||
|- | |- | ||
| | |style="background:white"|[[File:SMBW Blue Key Door.png|100x100px]][[File:SMBW Red Key Door.png|100x100px]]<br>[[Key Door]] | ||
| | |align=left|TBW | ||
|- | |- | ||
!colspan=3 style="background:#FF7733"|Pipes | |||
|- | |- | ||
| | |style="background:white"|[[File:SMBW Big Pipe.jpg|100x100px]]<br>[[Warp Pipe|Giant pipe]] | ||
| | |align=left|TBW | ||
|- | |- | ||
| | |style="background:white"|[[File:SMBW Living Pipe Alt.png|100x100px]]<br>[[Inchworm Pipe]] | ||
|TBW | |align=left|TBW | ||
|- | |- | ||
| | |style="background:white"|[[File:SMBW Screenshot Jet Pipe.png|100x100px]]<br>[[Jet Pipe]] | ||
| | |align=left|TBW | ||
|- | |- | ||
|style="background:white"|[[File:SMBW Daisy Sledge Bro enemy.jpg|100x100px]]<br>[[Oseru Dokan]]<ref name=kai13/> | |||
|align=left|TBW | |||
|- | |- | ||
| | |style="background:white"|[[File:SMBW Pipe.png|100x100px]]<br>[[Warp Pipe|Pipe]] | ||
|TBW | |align=left|TBW | ||
|- | |- | ||
| | |style="background:white"|[[File:SMBW Angry Spikes and Sinkin' Pipes third 10-flower coin.jpg|100x100px]]<br>[[Sinkin' Pipe]]<ref>In-game name for [[Angry Spikes and Sinkin' Pipes]].</ref> | ||
|align=left|TBW | |||
|- | |- | ||
| | |style="background:white"|[[File:SMBW Screenshot Spout Pipe.png|100x100px]]<br>[[Water spout]] | ||
| | |align=left|TBW | ||
|- | |- | ||
!colspan=3 style="background:#FF7733"|Platforms | |||
|- | |- | ||
| | |style="background:white"|[[File:SMBW Bone Platform.jpg|100x100px]]<br>[[Bone Lift (Super Mario Bros. Wonder)|Bone Lift]]<ref>{{cite|author=KADOKAWA Game Linkage, editors|date=2023|title=『スーパーマリオブラザーズ ワンダー かんぺき攻略本』|language=ja|location=Tokyo|publisher=Kadokawa|page=[https://www.famitsu.com/images/000/329/537/y_658a8c656448a.jpg 62]|isbn=4-047337-02-1}} Name is asserted to be "unofficial" within source.</ref> | ||
|TBW | |align=left|TBW | ||
|- | |- | ||
| | |style="background:white"|[[File:BridgeSMBW.png|100x100px]]<br>[[Bridge]] | ||
| | |align=left|TBW | ||
|- | |- | ||
| | |style="background:white"|[[File:Blue Block SMBW.jpg|100x100px]]<br>[[Bumper (Super Mario series)|Bumper]] | ||
| | |align=left|TBW | ||
|- | |- | ||
| | |style="background:white"|[[File:Disappearing Platform SMBW.jpg|100x100px]]<br>Carpeted platform<br>{{conjectural}} | ||
|align=left|TBW | |||
|align= | |||
|- | |- | ||
|style="background:white"|[[File:Chandelier SMBW.jpg|100x100px]]<br>Chandelier platform<br>{{conjectural}} | |||
|align=left|TBW | |||
| | |||
|- | |- | ||
| | |style="background:white"|[[File:CloudBlockSMBW.png|100x100px]]<br>[[Cloud Lift]] | ||
|align=left|TBW | |||
|- | |- | ||
| | |style="background:white"|[[File:No image.png|100x100px]]<br>[[Conveyor Belt]] | ||
|align=left| | |align=left|TBW | ||
|- | |- | ||
| | |style="background:white"|[[File:SemisolidAngryCloudSMBW.png|100x100px]]<br>[[Downpour Cloud]] | ||
|align=left|TBW | |||
|- | |- | ||
| | |style="background:white"|[[File:CountdownPlatformSMBW.png|100x100px]]<br>[[Dropdown Countdown Lift]] | ||
|align=left| | |align=left|TBW | ||
|- | |- | ||
| | |style="background:white"|[[File:Fountain SMBW.jpg|100x100px]]<br>[[Fountain]] | ||
|align=left| | |align=left|TBW | ||
|- | |- | ||
| | |style="background:white"|[[File:SMBW Badge Challenge Parachute Cap I first 10-flower coin.jpg|100x100px]]<br>[[Lift|Flatbed Ferry]] | ||
|align=left| | |align=left|TBW | ||
|- | |- | ||
| | |style="background:white"|[[File:Fossil Wheel.jpg|100x100px]]<br>[[Fossilized dragon]]<ref>{{cite|quote=Imagine what it would be like for those fossilized dragons to soar freely through the air...|author=Tip|title=''Super Mario Bros. Wonder'' by [[Nintendo EPD]]|format=North American Localization|publisher=[[Nintendo|Nintendo of America]]|date=20 Oct. 2023|accessdate=27 Nov. 2024}}</ref> | ||
|align=left| | |align=left|TBW | ||
|- | |- | ||
| | |style="background:white"|[[File:SMBW Goo.jpg|100x100px]]<br>[[Goo]] | ||
|align=left| | |align=left|TBW | ||
|- | |- | ||
| | |style="background:white"|[[File:SavannaTreeSMBW.png|100x100px]]<br>[[Hip Tree]]<ref name=kadokawa>{{cite|author=KADOKAWA Game Linkage, editors|date=2023|title=『スーパーマリオブラザーズ ワンダー かんぺき攻略本』|language=ja|location=Tokyo|publisher=Kadokawa|page=[https://www.famitsu.com/images/000/329/537/y_658a8c656448a.jpg 62]|isbn=4-047337-02-1}}</ref><ref name=kikai55>{{cite|author=kikai, Kimiyosu Hongo, Chimtaro, Hiromi Karakita (HQ), and Yamato Ishibashi|date=2023|title=『スーパーマリオブラザーズ ワンダー 完全攻略本』|language=ja|location=Tokyo|publisher=ambit|isbn=4-198657-69-6|page=55}}</ref> | ||
|align=left|TBW | |||
|- | |- | ||
| | |style="background:white"|[[File:Unknown Hoppycat Lift.png|100x100px]]<br>Hollow log platform<br>{{conjectural}} | ||
|align=left| | |align=left|TBW | ||
|- | |- | ||
| | |style="background:white"|[[File:LakitusCloudSMBW.png|100x100px]]<br>[[Lakitu's Cloud]] | ||
|align=left| | |align=left|TBW | ||
|- | |- | ||
| | |style="background:white"|[[File:LiftSMBW.png|100x100px]]<br>[[Lift]] | ||
|align=left| | |align=left|TBW | ||
|- | |- | ||
| | |style="background:white"|[[File:Linking Lift.png|100x100px]]<br>[[Linking Lift]] | ||
|align=left|(inc. '''[[Linking Block]]'''<ref name=kikai53/>{{derived}}) | |||
|- | |- | ||
| | |style="background:white"|[[File:Rollakoopaderby wonder.jpg|100x100px]]<br>[[Mienai Ashiba]]<ref>{{cite|author=KADOKAWA Game Linkage, editors|date=2023|title=『スーパーマリオブラザーズ ワンダー かんぺき攻略本』|language=ja|location=Tokyo|publisher=Kadokawa|page=[https://www.famitsu.com/images/000/329/537/y_658a8c656448a.jpg 63]|isbn=4-047337-02-1}} Name is asserted to be "unofficial" within source.</ref> | ||
|align=left| | |align=left|TBW | ||
|- | |- | ||
| | |style="background:white"|[[File:MushroomPlatformSMBW.png|100x100px]]<br>[[Mushroom Platform]] | ||
|align=left| | |align=left|TBW | ||
|- | |- | ||
| | |style="background:white"|[[File:Mushroom Trampoline SMBW.jpg|100x100px]]<br>[[Mushroom Trampoline]] | ||
|align=left| | |align=left|TBW | ||
|- | |- | ||
| | |style="background:white"|[[File:ON-OFF platform SMBW.png|100x100px]]<br>ON/OFF floor<br>{{conjectural}} | ||
|align=left| | |align=left|TBW | ||
|- | |- | ||
| | |style="background:white"|[[File:OnOffZipTrackRedSMBW.png|100x100px]][[File:OnOffZipTrackBlueSMBW.png|100x100px]]<br>ON/OFF Zip Track<br>{{conjectural}} | ||
|align=left| | |align=left|TBW | ||
|- | |- | ||
| | |style="background:white"|[[File:SMBW Deep Magma Bog Flying Battleship first 10-flower coin.jpg|100x100px]]<br>[[Pole]] | ||
|align=left| | |align=left|(inc. '''[[Pole Block]]''') | ||
|- | |- | ||
| | |style="background:white"|[[File:Bubblegum Platform SMBW.jpg|100x100px]]<br>[[Puffy Lift]] | ||
|align=left| | |align=left|TBW | ||
|- | |- | ||
| | |style="background:white"|[[File:(Unknown name)Harmonica platform.png|100x100px]]<br>[[Pump Lift]]<ref name=kadokawa/><ref name=kikai55/> | ||
|align=left| | |align=left|TBW | ||
|- | |- | ||
| | |style="background:white"|[[File:Rolly Block.jpg|100x100px]][[Pushable wall]]<br>{{conjectural}} | ||
|align=left| | |align=left|TBW | ||
|- | |- | ||
| | |style="background:white"|[[File:Bounce pad.png|100x100px]]<br>Rhythm floor<br>{{conjectural}} | ||
|align=left| | |align=left|TBW | ||
|- | |- | ||
| | |style="background:white"|[[File:SMBW KnuckleFest Bowser's Blazing Beats third 10-flower coin.jpg|100x100px]]<br>Rhythm platform<br>{{conjectural}} | ||
|align=left| | |align=left|TBW | ||
|- | |- | ||
| | |style="background:white"|[[File:SMBW Valley Fulla Snootles second 10-flower coin.jpg|100x100px]]<br>[[Sankaku Trampoline]]<ref name=kikai55/> | ||
|align=left| | |align=left|TBW | ||
|- | |- | ||
| | |style="background:white"|[[File:SemisolidPlatformGrassSMBW.png|100x100px]]<br>[[Semisolid Platform]] | ||
|align=left| | |align=left|TBW | ||
|- | |- | ||
| | |style="background:white"|[[File:Wonder Ship.jpg|100x100px]]<br>[[Ship (Wonder Effect)]]<br>{{conjectural}} | ||
|align=left| | |align=left|TBW | ||
|- | |- | ||
| | |style="background:white"|[[File:Walking Platform.jpg|100x100px]]<br>[[Totchī]]<ref name=kikai55/> | ||
|align=left| | |align=left|TBW | ||
|- | |- | ||
| | |style="background:white"|[[File:SMBW Conveyor Belt.png|100x100px]]<br>[[Zip Track]] | ||
|align=left| | |align=left|TBW | ||
|- | |- | ||
!colspan=3 style="background:#FF7733"|Goals | |||
|- | |- | ||
| | |style="background:white"|[[File:SMBW Checkpoint.png|100x100px]]<br>[[Checkpoint Flag]] | ||
|align=left| | |align=left|TBW | ||
|- | |- | ||
| | |style="background:white"|[[File:Unknown name goal post.png|100x100px]]<br>[[Goal (Wiggler Race)]]<ref name=kai12>{{cite|author=Kai, editor|date=12 Jan. 2024|url=www.nintendo.com/jp/topics/article/81448599-29e6-4579-b553-6c95c7201f65|title=全て合わせて120以上。マリオたちが冒険するフラワー王国のいろんなコースをご紹介。【ワンダーの世界へ Vol.12】|publisher=Nintendo Official Site|language=ja|accessdate=19 Jan. 2025}}</ref> | ||
|align=left| | |align=left|TBW | ||
|- | |- | ||
| | |style="background:white"|[[File:GoalPoleSMBW.png|100x100px]]<br>[[Goal Pole]] | ||
|align=left| | |align=left|TBW | ||
|- | |- | ||
| | |style="background:white"|[[File:Secret SMBW.jpg|100x100px]]<br>[[Goal Pole (secret)]] | ||
|align=left| | |align=left|TBW | ||
|- | |- | ||
!colspan=3 style="background:#FF7733"|Other objects | |||
|- | |- | ||
| | |style="background:white"|[[File:ArrowSignSMBW.png|100x100px]]<br>[[Arrow Sign]] | ||
|align=left| | |align=left|TBW | ||
|- | |- | ||
| | |style="background:white"|[[File:SMBW Screenshot Cloud Cover.png|100x100px]]<br>[[cloud (cover)|Cloud Cover]] | ||
|align=left| | |align=left|TBW | ||
|- | |- | ||
| | |style="background:white"|[[File:CoinBlasterSMBW.png|100x100px]]<br>[[Coin blaster]]<br>{{conjectural}} | ||
|align=left|TBW | |||
|- | |- | ||
| | |style="background:white"|[[File:CurrentSMBW.png|100x100px]]<br>[[Current]] | ||
|align=left| | |align=left|TBW | ||
|- | |- | ||
| | |style="background:white"|[[File:OnOffWallRedSMBW.png|100x100px]][[File:OnOffWallBlueSMBW.png|100x100px]]<br>ON/OFF wall<br>{{conjectural}} | ||
|align=left| | |align=left|TBW | ||
|- | |- | ||
| | |style="background:white"|[[File:Tasty Tree SMBW.jpg|100x100px]]<br>Shrub<br>{{conjectural}} | ||
|align=left|TBW | |||
|- | |- | ||
| | |style="background:white"|[[File:SpecialWorldMarioWonder.png|100x100px]]<br>[[Sign]] | ||
|align=left| | |align=left|TBW | ||
|- | |- | ||
| | |style="background:white"|[[File:SMBW Screenshot Water.png|100x100px]]<br>[[Water]] | ||
|align=left| | |align=left|TBW | ||
|} | |} | ||
== | ==References== | ||
<references/> | |||
Latest revision as of 01:48, January 19, 2025
Locations
Setting
- Takes place in the Flower Kingdom, positioned southeast of the Mushroom Kingdom
- Ruled by a caterpillar named Prince Florian and whose main inhabitants are Poplins
- Consists of seven worlds (called "Areas" in this game), including a series of small islands called Petal Isles that interconnect the different areas
- Most areas are themed, similar to Super Mario Bros. 3 and other 2D games, but it includes new ones that have never been the feature of a world before: series of vertical waterfalls and a wholly underground-themed one
Courses
Overview
- Different types of courses:
- Normal courses
- Small courses
- Badge Challenges
- Wiggler Race
- KO Arena
- Break Time!
Table
Characters
Playable characters
Non-playable characters
Enemies and obstacles
Enemies
As of July 2024, not all enemies have publicized English names. They are listed here with Romanizations of their Japanese ones.
| Name | Description | Courses | New | |
|---|---|---|---|---|
| First | Last | |||
 Goomba |
Squat mushroom creatures that walk along the ground and are weak to all attacks. Direct contact damages Mario unless he stomps them on the head. Touching sleeping Goombas does not harm him, but this startles them awake. In some courses, Goombas lack the space to move and instead sit on the ground, disgruntled.[1] During the Wonder Effect in Sproings in the Twilight Forest, their bodies greatly extend to varying heights. In some other Wonder Effects, Mario is transformed into one. Goombas are the most common enemies. | Welcome to the Flower Kingdom! | The Final Test Wonder Gauntlet | — |
 Hefty Goomba |
Larger Goombas. Stomping Hefty Goombas split them into two normal-sized ones. In some courses, they drift down on dandelion seeds. | The Sharp Trial: Launch to Victory | The Final Battle! Bowser's Rage Stage | — |
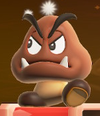 Big Goomba |
The largest Goombas. Stomping them splits them into two Hefty Goombas. | The Sharp Trial: Launch to Victory | The Final Battle! Bowser's Rage Stage | — |
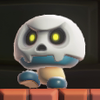 Bone Goomba |
Boneheaded Goombas that are impervious to fireballs. Unlike other skeletal enemies, Bone Goombas are not undead. They are revealed to be living blue Goombas when stomped, which knocks away the skull covering their head. | Pipe-Rock Plateau Palace | Sunbaked Desert Palace | — |
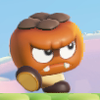 Goombrat |
Goomba-like persimmon enemies. Goombrats sometimes float down on dandelion seeds. Collisions with Bloomps bounce them away and, if equipped, destroy their seeds. Unlike Goombas, Goombrats turn around when they reach the edge of platforms. | Here Come the Hoppos | Taily's Toxic Pond | — |
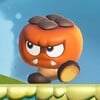 Kodeka Kakibō |
Big Goombrats. Like Hefty Goombas, stomping them causes them to split into two normal-sized Goombrats. They similarly float on dandelion seeds. | Bloomps of the Desert Skies | — | |
Trompette (Brown) |
Mushroom enemies of varying heights. Struck Trompettes fall back and knock out any enemies behind them or collect coins for Mario. The brown ones walk off the edge of platforms like Goombas. | Bulrush Coming Through! | Fungi Mines Special Dangerous Donut Ride | |
Trompette (Purple) |
Purple-colored Trompettes turn around when they reach the edge of platforms. | Bulrush Coming Through! | POOF! Badge Challenge Crouching High Jump I | |
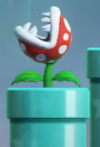 Piranha Plant |
Carnivorous plants that sit in pipes. They pop out of them with snapping jaws in consistent intervals, tilting their heads towards Mario. Piranha Plants do not emerge if he stands next to or on their pipes. Some Piranha Plants occur outside of pipes, and some are even rooted to the ceiling, where they perpetually snap. | Piranha Plants on Parade | The Final-Final Test Badge Marathon | — |
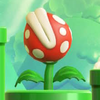 Big Piranha Plant |
The giant Piranha Plants occur inside giant pipes, in which they behave like the normal-sized ones. In some areas, they are rooted to the ground and snap from side to side. Big Piranha Plants take three hits from fireballs to defeat. | Piranha Plants on Parade | The Semifinal Test Piranha Plant Reprise | — |
 Trottin' Piranha Plant |
Walking Piranha Plants that exit their pipes to pursue Mario. Some even enter other pipes or walk along ceilings. Trottin' Piranha Plants sing in unison during certain Wonder Effects. | Piranha Plants on Parade | The Semifinal Test Piranha Plant Reprise | |
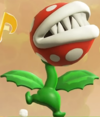 Big Trottin' Piranha Plant [derived] |
Big Trottin' Piranha Plants take three strikes from fireballs to be defeated, like stationary Big Piranha Plants. They otherwise behave like normal-sized Trottin' Piranha Plants, but emerge from and retreat into giant pipes. | Piranha Plants on Parade | The Semifinal Test Piranha Plant Reprise | |
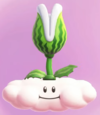 Melon Piranha Plant |
Piranha Plants that look like watermelons. They spit seeds that damage Mario, but they can be jumped on without taking damage. This allows Mario to cross large gaps, or ascend tall platforms. Yoshis can eat and spit the seeds back at them and other enemies. Melon Piranha Plants are otherwise defeated when stomped. | Countdown to Drop Down | The Final-Final Test Badge Marathon | |
 Fire Piranha Plant |
Piranha Plants that spit fireballs. They emerge from pipes and aim their heads towards Mario's position before firing. Some Fire Piranha Plants spit multiple fireballs at once. | Upshroom Downshroom | The Semifinal Test Piranha Plant Reprise | — |
 Big Fire Piranha |
The giant Fire Piranha Plants are rooted to the earth and require three strikes from fireballs to defeat. They spit multiple fireballs at once. | Upshroom Downshroom | — | |
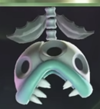 Bone Piranha Plant |
Skeletal Piranhas. They behave like the living plants, but they are immune to fire. Bone Piranha Plants are heightened during the Wonder Effect in Fluff-Puff Peaks Palace. | Fluff-Puff Peaks Palace | — | |
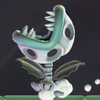 Trottin' Bone Piranha Plant [derived] |
Trottin' Bone Piranha Plants. Like the stationary ones, they are resistant to fireballs and heighten during their course's Wonder Effect. | Fluff-Puff Peaks Palace | ||
 Note Piranha Plant [conjectural] |
Blazing Piranha Plants spit by Bowser. Their movement is in synch with the music of the battle and encourages rhythmic dodges from Mario. Note Piranha Plants are only defeated by strikes from Elephant Mario or tossed bubbles. | The Final Battle! Bowser's Rage Stage | ||
 Big Note Piranha Plant [conjectural] |
Big Note Piranha Plants are too large to be avoided through normal jumps and are invincible. During later phases of the battle, Big Note Piranha Plants fall the sky and break into the normal-sized ones when they collide with the floor. | The Final Battle! Bowser's Rage Stage | ||
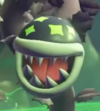 Wonder Packun |
Piranha Plants with long stalks that appeared after Bowser collected the Wonder Flower at the start of the game. They guard locked levels and can be eliminated by collecting enough Wonder Seeds, reverting to normal Piranha Plants. | Badge House in Pipe-Rock Plateau | The Final Test Wonder Gauntlet | |
 Cloud Piranha |
Black, cloudy Piranha Plants made of smoke that protect Castle Bowser and continuously swirl around him. They are vanquished by a Royal Seed. | Petal Isles | ||
 Muncher |
Black plants often found in large groups. | Muncher Fields | The Final-Final Test Badge Marathon | — |
 Nipper Plant |
Little white plants that damage the player in contact. They can walk on walls and ceilings. | Muncher Fields | KO Arena Petal Meddle | — |
 Koopa Troopa (Red) |
Common turtle enemies that walk along the ground. When Koopa Troopas walk into each other, they knock their shells together before turning around as a way of saying "hello" to each other.[1] Stomping Koopa Troopas knocks them out of their shells, which can be picked up and tossed along the ground as a projectile. Koopa Troopas with different colored shells have unique behaviors. The red-shelled ones turn around when the reach the edge of platforms. | Scram, Skedaddlers! | The Final Test Wonder Gauntlet | — |
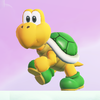 Koopa Troopa (Green) |
Green-shelled Koopa Troopas walk off edges at the end of platforms, but otherwise behave the same as the red-shelled ones. | Up 'n' Down with Puffy Lifts | Raarghs in the Ruins | — |
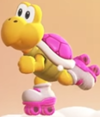 Rolla Koopa |
Pink-shelled Koopa Troopas on roller skates. Rolla Koopas quickly skate along the ground and leap across gaps. They often occur in groups that skate together in the same direction. | Rolla Koopa Derby | The Final Test Wonder Gauntlet | |
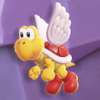 Koopa Paratroopa (Red) |
Winged Koopa Troopas. Stomping Koopa Paratroopas makes them lose their wings and become normal Koopa Troopas. The red-shelled ones fly through the air. | Sproings in the Twilight Forest | The Final Test Wonder Gauntlet | — |
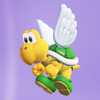 Koopa Paratroopa (Green) |
Green Koopa Paratroopas bounce along the ground. | Up 'n' Down with Puffy Lifts | Armads on the Roll | — |
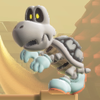 Dry Bones |
Undead Koopa Troopas that walk along the ground. Stomping Dry Bones causes them to collapse into a pile of bones for a brief period of time, but this does not defeat them. They are unphased by fireballs. | Pipe-Rock Plateau Palace | Deep Magma Bog Palace | — |
 Shova |
Burly Koopas in helmets and large gloves. Shovas push objects in the environment and contact with one head on simply pushes back Mario. Touching it anywhere else is damaging to him. The objects being pushed by Shovas can be pushed back against, often solving a puzzle in the level when it is shoved into a divot. For most attacks, Shovas take three hits to defeat. | Swamp Pipe Crawl | Secrets of Shova Mansion | |
 Hammer Bro |
Helmeted Koopas that toss hammers. Hammer Bros often occur in pairs and leap between rows of platforms. Like the Super Mario Maker titles, Yoshis can eat Hammer Bros. | Pipe-Rock Plateau Palace | The Final Test Wonder Gauntlet | — |
 Snortoise |
Finned Koopas similar to softshell turtles. Snortoises swim swiftly underwater and turn around when they reach a wall. On land, they slowly crawl. Like Koopa Troopas and Swirlypods, stomping a Snortoise makes it receed into its shell and makes to available to be grabbed. | Robbird Cove | Downpour Uproar | |
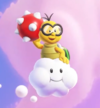 Lakitu |
Cloud-riding Koopas. They closely follow Mario and toss Spiny Eggs at him from the top of the screen. If a Lakitu is stomped, its cloud becomes available to ride. In some courses, three Lakitus appear together in a large cloud and toss yellow Spike Balls. | Countdown to Drop Down | Expert Badge Challenge Invisibility II | — |
 Lakitu trio [conjectural] |
During certain Wonder Effects, a trio of Lakitus that share the same cloud appear in the background. They throw coins, power-ups, and Wonder Tokens. | Cruising with Linking Lifts | Shining Falls Special Triple Threat Deluge | |
 Spiny Egg |
The retracted form of Spinies tossed by Lakitus. When they make contact with the ground, they become Spinies. Spiny Eggs damage Mario on contact. | Countdown to Drop Down | — | |
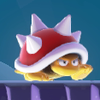 Spiny |
Spiked, stout Koopas. The spikes protect them from being jumped on and damage Mario on contact, but they are weak to indirect attacks like fireballs. Spinies walk off the edge of platforms like green-shelled Koopa Troopas. | Countdown to Drop Down | Where the Rrrumbas Rule | — |
 Kamek |
Bowser's adviser – a broom-riding Magikoopa. Kamek summons Battleships on the overworld map to inhibit Mario's progress. He otherwise appears in certain cutscenes with Bowser and Bowser Jr. | Fluff-Puff Peaks Flying Battleship | Deep Magma Bog Flying Battleship | — |
 Buzzy Beetle |
Koopas with shells that protect them from fire damage. They can be found walking in lava. | Raarghs in the Ruins | Dragon Boneyard | — |
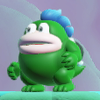 Spike |
Big-mouthed Koopas that spit Spike Balls. Spikes remain still and are usually elevated above the ground. The Spike Balls they spit-up are indestructible and roll along the ground. During a particular Wonder Effect, the Spikes roll the Spike Balls in rhythm to the music. | Angry Spikes and Sinkin' Pipes | The Final Test Wonder Gauntlet | — |
![Squared screenshot of a Fire Spike[derived] from Super Mario Bros. Wonder.](https://mario.wiki.gallery/images/thumb/2/25/SMBW_screenshot_Fire_Spike.png/100px-SMBW_screenshot_Fire_Spike.png) Fire Spike [derived] |
Red Spikes that spit balls of flame. Unlike normal Spikes, the balls tossed by Fire Spikes fly horizontally through the air. | Wavy Ride through the Magma Tube | KO Arena Magma Flare-Up | |
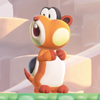 Skedaddler |
Shelled squirrel-like creatures that frantically runaway from Mario when he is near. They fire large projectile seeds back at him as they skedaddle. These can be held by Yoshis and fired back. Skedaddlers do not run away if the player character has the Invisibility Expert Badge equipped. | Scram, Skedaddlers! | Wiggler Race Mountaineering! | |
 Bulrush |
Herding dinosaurs in tracksuits. Bulrushes idly remain still until Mario is near, at which point they snort and charge at him. They destroy hard blocks in their path and leap at the end of upward slopes. Charging Bulrushes do not turn around if Mario leaps over them, and they are briefly stunned when they collide with indestructible terrain. Bulrushes can be safely stood on like platforms. Bulrushes otherwise appear on the savanna portion of the Pipe-Rock Plateau, grazing. | Bulrush Coming Through! | The Final Battle! Bowser's Rage Stage | |
 Wonder Bulrush Herd[2] [derived] |
Large, stampeding herds of Bulrushes materialize during certain Wonder Effects. | Bulrush Coming Through! | The Final Battle! Bowser's Rage Stage | |
 Hoppo |
Round-bodied hippopotamuses found on Pipe-Rock Plateau. Hoppos idly walk across the ground and unlike most enemies, they do not damage Mario on contact. Touching them instead causes them to roll along the ground. In most areas, they ultimately roll between gaps in the terrain and become wedged. They can be bounced on like trampolines to reach higher areas. In a Wonder Effect, they occur floating in space and function like bumpers. | Here Come the Hoppos | The Final Test Wonder Gauntlet | |
 Wonder Hoppo [derived] |
A giant Hoppo that appears during certain Wonder Effects. In Here Come the Hoppos, it is necessary to reach the Wonder Flower. | Here Come the Hoppos | The Final Test Wonder Gauntlet | |
 Swirlypod |
Snail enemies that adhere to surfaces, found crawling along floors, walls, and ceilings. Like Koopa Troopas, a stomp knocks them out of their shell and makes it a useable projectile. The unshelled Swirlypods are left dazed and vulnerable. When they stir, they try to reenter their shells if they are still on the ground. | Bulrush Coming Through! | Taily's Toxic Pond | |
 Kodeka Maimai |
Big Swirlypods. They function like the smaller ones, but their shells are so big that they can only be picked up by Elephant Mario. | Swamp Pipe Crawl | The Anglefish Trial: Ready, Aim, Fly! | |
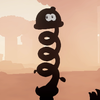 Sproing |
Goomba-like enemies that protract their springy bodies when approached by Mario. Sproings are typically shrouded in darkness, but their bodies are briefly illuminated under certain conditions. In these moments, it is revealed that they look like acorns. | Sproings in the Twilight Forest | The Final Test Wonder Gauntlet | |
 Smogrin |
Grimacing storm clouds with trailing bodies. They hover back-and-forth or up-and-down. Stomping on the trailing clouds clears, but Mario must stomp on their heads to truly defeat them. Smogrins aspire to become cumulonimbus clouds.[1] | Bulrush Coming Through! | Missile Meg Mayhem | |
 Kodeka Mokumokumo |
Larger Smogrins. They behave like the normal-sized ones, but they are not trailed by small clouds. | KO Arena Fluff-Puff Kerfuff | Expert Badge Challenge Spring Feet II | |
 Deka Mokumokumo[3] |
The largest Smogrins. With the exception of their size, they are indistinguishable from Kodeka Mokumokumo and behave the same way. | KO Arena Fluff-Puff Kerfuff | Expert Badge Challenge Spring Feet II | |
 Revver |
Skeletal dog-like enemies on wheels. Their chain leash is grabbable, and pulling back on it sends Revvers rolling forward like pullback motor toys. They are defeated when they collide with a wall or obstacle. Stomping on one otherwise stuns it for a brief period of time. | Rolling-Ball Hall | Hot-Hot Hot! | |
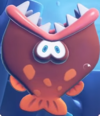 Smackerel |
Flatfish that hide under sand on the seafloor. Smackerels rapidly swim upward with snapping jaws when Mario is detected above. They destroy blocks and defeat enemies in their path. Smackerels can only be stomped as the descend, when their white flank are facing the screen. Attempting to touch them otherwise damages Mario. | Leaping Smackerel | ||
![The Wonder Smackerel[derived] in Super Mario Bros. Wonder.](https://mario.wiki.gallery/images/thumb/9/94/Giga_Smackerel.png/100px-Giga_Smackerel.png) Wonder Smackerel [derived] |
A large Smackerel that appears during the Wonder Effect in Leaping Smackerel and chomps through earth, destroying it. | Leaping Smackerel | ||
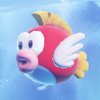 Cheep Cheep |
Pudgy red fish. They swim horizontally through water. They are defeated when stomped. | Leaping Smackerel | Search Party Item Park | — |
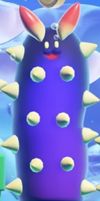 Sluglug |
Spiked nudibranch enemies that emerge from underwater pipes. Sluglugs must be struck five times to be fully defeated, but each hit forces them to incrementally recede into their pipes. Their head's distance from the pipe determines the amount of hits necessary. | Leaping Smackerel | Wiggler Race Swimming! | |
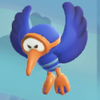 Robbird |
Flying kingfisher enemies that dive into water. They flyoff as they exit, taking any coins they touch with them. | Robbird Cove | ||
 Urchin |
Sea creatures covered in spines. While underwater, Urchins float in the water, without moving. On land, they roll along the ground like balls. Direct contact with Urchins damages Mario, but indirect means of attack defeats them. | Robbird Cove | Downpour Uproar | — |
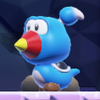 Blewbird |
Shelled bird enemies that fire their beaks like blowguns. The beaks extend into platforms upon hitting opposing walls. When a Blewbird is defeated, another emerges from the ground to take its place. During Wonder Effects, Blewbirds blow bubbles that can be used as bouncy platforms. | Blewbird Roost | The Final Test Wonder Gauntlet | |
 Outmaway |
Masked snow creatures. Outmaways are often on top of elevated platforms, where they kick giant Ice Blocks that emerge from the ground before them. They otherwise occur walking along the ground like Goombrats. Outmaways are weak to most attacks, but attempting they kick away tossed Koopa Shells back at Mario. | Outmaway Valley | A Final Uncharted Area: Poison Ruins | |
 Pokipede (Green) |
Wiggler-like centipedes that swiftly move along tracks. Pokipedes punch as they move, clearing falling snow blocks. Stomping on their unguarded tail or tossing three fireballs at them defeats them. Touching any other part of a Pokipede damages Mario unless he is in his Drill or Elephant forms. | Pokipede Pass | Wiggler Race Spelunking! | |
 Pokipede (Red) |
The red-clad Pokipedes move much more rapidly than the green ones. | Pokipede Pass | Wiggler Race Spelunking! | |
 Whohoo |
Owl enemies that swoop down from upside-down nests on ceilings. Whohoos destroy snow blocks as they fly and sometimes carry coins with them. If undefeated, they grow tired and return to their nests. | Pokipede Pass | ||
Condart |
Hovering dart-like birds. When Mario crosses their line of sight, Condarts forcefully propel themselves at him, destroying Brick Blocks in their path and lodging themselves into opposing terrain. While lodged, they are briefly immobile and vulnerable to attack. They either slam themselves into floors or walls, depending on the direction they face. Condarts apparently lose their memories on impact.[1] | Condarts Away! | The Desert Mystery | |
 Zip-Zap |
Living bolts concealed in storm clouds. Zip-Zaps occur in groups. They leap vertically from the clouds in set intervals and shock Mario on contact. They are defeated only by bubbles. | Cruising with Linking Lifts | ||
 Condrop |
Helmeted birds that fly in straight horizontal lines. Condrops carry enemies or items as they travel. When Mario is detected below, they screech and drop them. Some Condrops have coins trailing after them. | Cruising with Linking Lifts | The Final Test Wonder Gauntlet | |
 Bob-omb |
Walking bombs. Stomps or tossed fireballs lights their fuse and renders them immobile. They can be picked up and tossed to destroy objects and enemies, but they damage Mario if they go off in his hands. | Fluff-Puff Peaks Flying Battleship | — | |
 Baboom |
Firework Bob-ombs composed of three segments. When struck, Babooms ignite. They discharge each body segment, one by one, into the sky. They explode at the height of their arch, destroying crates and defeating enemies in their blast radius. The fireworks do not damage Mario, and he can carry Babooms to direct them at desired targets. | Fluff-Puff Peaks Flying Battleship | KO Arena Magma Flare-Up | |
 Bullet Bill |
Missiles fired from Bill Blasters. They fly horizontally. Bullet Bills are defeated by all means of attack. | Fluff-Puff Peaks Flying Battleship | The Semifinal Test Piranha Plant Reprise | — |
 Seeker Bullet Bill |
Bullet Bills fhat directly target Mario when he is near. Most Seeker Bullet Bills are fastened to terrain by their suction cup-like exhaust ports, bobbing back-and-forth in rhythm to the music as they wait for targets. They rapidly swing their arms and turn their heads to Mario's position before launching, flashing red. Once launched, Seeker Bullet Bills do not change their course of direction. When they collide with opposing terrain, they fasten themselves to it, positioned to launch back at Mario if he is within their sights. They are damaged like normal Bullet Bills, but they can also be lured into poison. There are rotating hexagonal objects in the ceiling that launch Seeker Bullet Bills like Bill Blasters. | Evade the Seeker Bullet Bills! | ||
 Big Seeker Bullet Bill [derived] |
Big Seeker Bullet Bills. They have a bigger attack radius than the normal-sized ones, but otherwise behave the same way. | Evade the Seeker Bullet Bills! | ||
 Renketsu Search Killer |
Serpentine Bull's-Eye Bills. While launched, Renketsu Search Killers directly target Mario and will change their course of direction mid-air to pursue him. | KnuckleFest Bowser's Blazing Beats | ||
 Missile Meg |
Long-bodied Bullet Bills launched from off-screen blasters. Missile Megs fly through the air horizontally. Their backs can be stood on like platforms, but contact immediately knocks them out and causes them to slowly descend. Mario loses a life if he does not get off by the time it descends past he boundary of the bottom screen. | Missile Meg Mayhem | The Final-Final Test Badge Marathon | |
 Wonder Missile Meg[2] [derived] |
During certain Wonder Effects, Missile Megs fly horizontally and do not lose altitude when stood on. Their exhaust is also rainbow-colored. | Missile Meg Mayhem | ||
 Hoppycat |
Spiked creatures that copy Mario's jumping movements, often ascending platforms with him or popping out of pits. They otherwise compress their bodies and shiver in place, tracking Mario with their eyes. Hoppycats can be used to break blocks. The spikes on their back damage Mario on contact. Though not easily visible, the bottom of Hoppycats are lined with teeth. | The Hoppycat Trial: Hop, Hop, and Awaaay | Wiggler Race Spelunking! | |
![Squared screenshot of the Wonder Hoppycat[derived] from Super Mario Bros. Wonder.](https://mario.wiki.gallery/images/thumb/e/e3/Red_Hoppycat_screenshot.png/100px-Red_Hoppycat_screenshot.png) Wonder Hoppycat [derived] |
A Hoppycat that jumps extremely high. Its body has turned orange due to rigorous training.[1] | The Midway Trial: Hop to It | ||
 Kyodai na Hoppin |
Large Hoppycats that appear during certain Wonder Effects. They jump straight through earth, destroying it. | The Hoppycat Trial: Hop, Hop, and Awaaay | The Final Test Wonder Gauntlet | |
 Anglefish |
Tirangular fish that leap from water in high arches when Mario is near. The arch of their jumps is dependent on Mario's position and conveyed by the light-blue glow of their flanks. | The Anglefish Trial: Ready, Aim, Fly! | The Final Test Wonder Gauntlet | |
 Wonder Anglefish[2] [derived] |
In certain Wonder Effects, Anglefish shine green and fly through the air. | The Anglefish Trial: Ready, Aim, Fly! | The Final Test Wonder Gauntlet | |
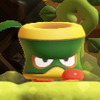 Gamboo (Green) |
Walking bamboo enemies. Gamboos emerge from the ground and stack together to form towers. Individuals that can be picked up and tossed once stomped. During some Wonder Effects, Gamboos dance to the music. The green ones walk off the edge of platforms. | The Midway Trial: Hop to It | The Semifinal Test Piranha Plant Reprise | |
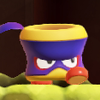 Gamboo (Purple) |
Purple-colored Gamboos turn around when the reach the edge of platforms. | The Midway Trial: Hop to It | The Final Test Wonder Gauntlet | |
![Squared screenshot of a gold Metal Gamboo[derived] from Super Mario Bros. Wonder.](https://mario.wiki.gallery/images/thumb/4/4a/SMBW_Screenshot_Metal_Gamboo_%28Gold%29.png/100px-SMBW_Screenshot_Metal_Gamboo_%28Gold%29.png) Metal Gamboo (Gold) [derived] |
The metallic Gamboos are impervious to fire. When near an electric surge, they conduct the electricity for a brief period of time. Touching Metal Gamboos in this state damages Mario. The gold-rimmed ones walk off the edge of platforms. | Missile Meg Mayhem | KnuckleFest Bowser's Blazing Beats | |
![A silver Metal Gamboo[derived] from Super Mario Bros. Wonder.](https://mario.wiki.gallery/images/thumb/5/57/SMBW_Screenshot_Silver_Metal_Gamboo.png/100px-SMBW_Screenshot_Silver_Metal_Gamboo.png) Metal Gamboo (Silver) [derived] |
The silver-rimmed Gamboos turn around when the reach the edge of platforms. | Missile Meg Mayhem | KnuckleFest Bowser's Blazing Beats | |
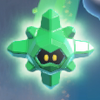 Sugarstar (Green) |
Shimmering enemies similar to konpeitō. Sugarstars appear in groups and move through the air in unison. Different groups move in different patterns and their paths can be tracked by the trailing streaks they leave in the sky. When struck Sugarstars are temporarily reduced to undamaging black cores, but they regenerate their crystalline exterior in a few seconds. | The Sugarstar Trial: Across the Night Sky | The Final-Final Test Badge Marathon | |
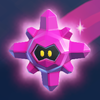 Sugarstar (Purple) |
The purple-colored Sugarstars are speedier than the green ones. | The Sugarstar Trial: Across the Night Sky | The Final-Final Test Badge Marathon | |
 Konk (Yellow) |
Metal Thwomp-like enemies. Yellow-rimmed Konks slide along ceilings and slam down when Mario is detected below. They slowly rise back to the ceiling and can be used like rising Lifts, but Mario will be crushed if he is still on top of them when the recollide with the ceiling. Konks are indestructible. | Jewel-Block Cave | An Uncharted Area: Wubba Ruins | |
 Konk (Blue) |
The blue-rimmed Konks slide across the floor and thrust themselves skyward to strike Mario. | Jewel-Block Cave | An Uncharted Area: Wubba Ruins | |
Wonder Konk [derived] |
A giant yellow Konk that appears from above during the Wonder Effect in Jewel-Block Cave. It crushes anything directly below it, including terrain. | Jewel-Block Cave | ||
 Armad |
Armadillo creatures that live in the Sunbaked Desert. They curl into a ball when Mario draws near and rapidly roll towards him. They also curl up when they reach a slope to roll downhill. Stomping Armads causes them to curl as well, but they are motionless and undamaging in this context. They can be picked up and tossed. Some Armads are trailed by coins as they roll. | Armads on the Roll | Sunbaked Desert Special Pole Block Allure | |
 Pokey |
Segmented cactus enemies that shimmy back-and-forth across the ground. Pokeys are of varying heights, with some so tall that they are difficult to work around. Stomping one as Small or Super Mario damages him, but they are vulnerable to indirect attacks like fireballs or Elephant Mario's trunk. Doing so knocks away individual segments, shortening them and making them easier to circumnavigate. Pokeys are defeated immediately when their heads are struck. During the Wonder Effect of Armads on the Roll, the speed of Pokeys rapidly increases. | Armads on the Roll | — | |
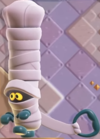 Mumsy |
Mummy enemies enwrapped in loose cloth. The end of the cloth can be grabbed and pulled back to defeat them. Mumsies are of varying heights, with the tallest ones requiring the longest pulls to fully unfurl their bodies. They are otherwise difficult to defeat, with stomps, ground pounds, and fireballs ineffective. When Mumsies reach the ends of platforms, they turn around. | The Desert Mystery | Sunbaked Desert Special Pole Block Allure | |
 Ninji |
Impish ninja enemies. They dance in rhythm in their debut level's Wonder Effect. | Ninji Jump Party | Break Time! Raise the Stage | — |
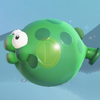 Bloomp (Green) |
Balloonfish enemies that fly through the sky. Bloomps are inflated by Blaster-like turrets before release. Mario can bounce on their back to reach distant areas, but each bounce makes the ridden Bloomp deflate a little until eventually disappearing. Striking them from below defeats them. | Bloomps of the Desert Skies | The Final-Final Test Badge Marathon | |
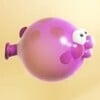 Bloomp (Purple) |
The purple Bloomps fly faster than the green ones. Other colored varieties appear during certain Wonder effects. | Bloomps of the Desert Skies | The Final-Final Test Badge Marathon | |
 Wonder Bloomp [derived] |
Big Bloomps filled with confetti. Mario bounces on Wonder Būsuke during certain Wonder Effects, but they do not deflate. | Flight of the Bloomps | Sunbaked Desert Special Pole Block Allure | |
 Snootle |
Round tumbling creatures that bounce around the immediate area. Some Snootles bounce Goombas around. | Valley Fulla Snootles | ||
 Big Snootle [derived] |
A big Snootle that withholds a 10-flower coin. It otherwise behaves like normal-sized Snootles. | Valley Fulla Snootles | ||
  Serpont |
Little snakes with pots on their heads. Serponts slowly slither while their heads are covered. Striking them breaks their pots, exposing their heads and enabling them to move quickly. | Color-Switch Dungeon | KO Arena Sunbaked Skirmish | |
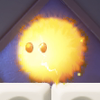 Lil Sparky |
Energized balls of fire that tightly roll around platforms. They illuminate the space around them and shock Mario on contact. | Color-Switch Dungeon | The Final-Final Test Badge Marathon | — |
 Hothead |
Big Sparkies. Hotheads move more slowly than Lil Sparkies, but they also have a larger hitbox and illuminate a larger amount of space. | Color-Switch Dungeon | The Final-Final Test Badge Marathon | — |
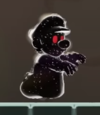 Rift Mario |
A shadowy doppelgänger that mimics Mario's movement during certain Wonder Effects. In multiplayer, Rift Mario chases the player with the crown. It can be temporarily stunned by fireballs and nearby activated POW Blocks. It disappears when the Wonder Seed is touched, but it can be permanently defeated beforehand if struck by fireballs fifty times. | Color-Switch Dungeon | Beware of the Rifts | |
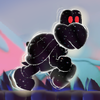 Rift Koopa [derived] |
Dark entities that look like Koopa Troopas. They appear during the Wonder Effect in Beware of the Rifts and damage Mario on contact. Like Rift Mario, they disappear when the Wonder Seed is grabbed. | Beware of the Rifts | ||
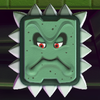 Thwomp |
Grimacing stones. Thwomps suspend themselves above ground and slam into the earth below when they detect Mario underneath. Crushing him makes him lose a live. Directly touching Thwomps, even grounded ones, is damaging. They are invincible to all attacks. | Sunbaked Desert Palace | Petal Isles Special Way of the Goomba | — |
 Shoomp |
Enemies that look like baby Thwomps of varying widths. They occur on terrain that rocks back and forth, causing their spiked bodies to slide left-and-right. Contact with their sides damages Mario, and being between them and a wall makes him lose a life. Their backs are harmless and can be stood on like platforms. The terrain apparently is invocative of a rocking cradle for Shoomps.[4] | Another Uncharted Area: Swaying Ruins | ||
 Mechakoopa |
Mechanical Koopas with keys on their backs. | Petal Isles Flying Battleship | — | |
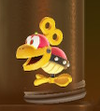 Flying Mechakoopa |
Airborne Mechakoopas. They ascend from the bottom screen until they match Mario's position, then directly pursue him. Flying Mechakoopas conduct nearby electricity and make them briefly damaging to touch. Stomping them makes them collapse on the ground and usable as a projectile, like their grounded counterparts. | Deep Magma Bog Flying Battleship | High-Voltage Gauntlet | |
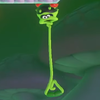 Taily |
Pitcher plant enemies that stand on the ceiling with tail-like vines hanging down. Tailys periodically release spiked fruits that damage Mario on contact. Mario can be defeat them when pulling their vines, or by striking them with in his Drill form. In one particular course, yellow, red, and blue Tailys appear. | Taily's Toxic Pond | KO Arena Fungi Funk | |
 Boo |
Ghostly enemies that only follow players that are facing away from them, and stop when looked at. | Light-Switch Mansion | KO Arena Fungi Funk | — |
 King Boo |
The king of Boos. In this game, King Boo is nearly the whole height of the slowly as the camera follows him, similar to a Boohemoth from New Super Mario Bros. 2. | Light-Switch Mansion | The Final Battle! Bowser's Rage Stage | — |
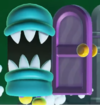 Noknok |
Monsters disguised as normal doors. They expose themselves when Mario tries to open them, an action accompanied by a fearful scream. Noknoks give chase once expose. | Light-Switch Mansion | The Final Battle! Bowser's Rage Stage | |
 Wubba |
Underground slimes. Wubbas slide back and forth and swim through larger bodies of goo. Some occur clinging to ceilings and walls. Few have coins in their bodies. Mario transforms into a Wubba during certain Wonder Effects. | An Uncharted Area: Wubba Ruins | KO Arena Fungi Funk | |
 Gnawsher |
Winged Chomp-like enemies with golden eyes and teeth that chomp through blocks. | Gnawsher Lair | The Final Test Wonder Gauntlet | |
 Wonder Gnawsher[2] [derived] |
TBW | Gnawsher Lair | The Final Test Wonder Gauntlet | |
 Search Gashigashi |
These red Gnawshers pursue Mario when in close proximity. | Gnawsher Lair | KO Arena Magma Flare-Up | |
 Maw-Maw |
Giant salamander enemies that chase and eat anything and everything in their path, even other enemies. After chasing for a period of time, they become exhausted and stop. | Maw-Maw Mouthful | The Final Test Wonder Gauntlet | |
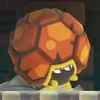 Rrrumba |
Little pillbug-like creatures in breakable boulder-like shells. They roll at Mario when he is near, and also rolls down slopes. | Where the Rrrumbas Rule | ||
 Raargh |
Maned Blarggs that emerge from walls and ceilings. They roar and fling themselves in a straight line when Mario is in their line of sight. Raarghs fall apart when they collide with the opposing terrain, but new ones emerge to take their place after a few seconds. Raarghs are large and often the same width as the corridors in which they are encountered, making them difficult to avoid. | Raarghs in the Ruins | ||
 Lava Bubble |
Incandescent drops of lava that leap vertically from greater magma pools. Direct contact damages Mario. | Pull, Turn, Burn | — | |
 Lava Blobble |
Large Lava Bubble-like enemies that ride on tracks. | Deep Magma Bog Flying Battleship | ||
  Kerpop |
Corn kernel enemies that slowly walk along the ground. When Kerpops make contact with heated sources like Hot-Hot Rocks they turn into bouncy pieces of popcorn that make them more difficult to avoid. Kerpops apparently give off a savory aroma in this state. | Hot-Hot Hot! | KO Arena Magma Flare-Up | |
 Li'l Scorcher |
Enflamed enemies that spit slow-moving fireballs at Mario. Li'l Scorchers occur on floors and ceilings. Despite resembling flames, they can be safely stomped on to defeat them. They are also defeated when doused with water or struck by bubbles. | Deep Magma Bog Palace | ||
Obstacles
Bosses
| Name | Description | Levels | |
|---|---|---|---|
| First | Last | ||
  Bowser Jr. / Wonder Bowser Jr. |
Bowser's son appears as a boss and gains a new form referred to as Wonder Bowser Jr. He returns alongside his Junior Clown Car. | Pipe-Rock Plateau Palace | Deep Magma Bog Palace |
 Castle Bowser |
Bowser returns as the main villain in this game. Touching a Wonder Flower turned him into Castle Bowser by combining him with his Koopa Clown Car and Prince Florian's castle. | The Final Battle! Bowser's Rage Stage | |
Items and objects
Items
These are collectibles, pickups, and health-restoring objects.
| Name | Description |
|---|---|
 Wonder Seeds |
TBD |
 Royal Seeds |
TBD |
 Wonder Tokens |
TBD |
 Coins |
TBD |
 Hidden Coins |
TBD |
 Blue Coins |
TBD |
 Flower coins |
TBD |
small flower coins[7] [derived] |
TBD |
 10-flower coins |
TBD |
 1-Up Mushrooms |
TBD |
  Keys |
TBD |
 Shells |
(inc. Koopa Shells, Swirlypod Shells[derived][8], Buzzy Shells, curled Armads) |
 Big shells[9] |
TBD |
 POW Block |
TBD |
 Jars |
TBD |
 Standees |
TBD |
Power-ups
Wonder Flower
This is where you write details about forms triggered by the Wonder Flower. Uniquely, unlike traditional power-ups, Wonder Flowers also transforms the Yoshis and Nabbit.
| Name | Description |
|---|---|
 Hoppycat Mario |
TBW |
 Goomba Mario |
TBW |
 Balloon Mario |
TBW |
 Spike-Ball Mario |
TBW |
 Wubba Mario |
TBW |
Sproing Mario |
TBW |
 Puffy-Lift Mario |
TBW |
 Metal Mario |
TBW |
Badges
Objects
Objects are interactable elements of the environment that cannot be picked up or collected by Mario. For objects that primarily function as obstructions or hazards, see above.
References
- ^ a b c d e f Kai, editor (9 Feb. 2024). マリオたちの行く手を阻む。フラワー王国の個性豊かな敵キャラクターをご紹介。~その2~【ワンダーの世界へ Vol.14】. Nintendo Official Site (Japanese). Retrieved 9 Feb. 2024.
- ^ a b c d kikai, Kimiyosu Hongo, Chimtaro, Hiromi Karakita (HQ), and Yamato Ishibashi (2023). 『スーパーマリオブラザーズ ワンダー 完全攻略本』. Tokyo: ambit (Japanese). ISBN 4-198657-69-6. Page 49.
- ^ kikai, Kimiyosu Hongo, Chimtaro, Hiromi Karakita (HQ), and Yamato Ishibashi (2023). 『スーパーマリオブラザーズ ワンダー 完全攻略本』. Tokyo: ambit (Japanese). ISBN 4-198657-69-6. Page 42.
- ^ a b Kai, editor (26 Jan. 2024). マリオたちの行く手を阻む。フラワー王国の個性豊かな敵キャラクターをご紹介。~その1~【ワンダーの世界へ Vol.13】. Nintendo Official Site (Japanese). Retrieved 11 Jul. 2024.
- ^ a b c kikai, Kimiyosu Hongo, Chimtaro, Hiromi Karakita (HQ), and Yamato Ishibashi (2023). 『スーパーマリオブラザーズ ワンダー 完全攻略本』. Tokyo: ambit (Japanese). ISBN 4-198657-69-6. Page 56.
- ^ kikai, Kimiyosu Hongo, Chimtaro, Hiromi Karakita (HQ), and Yamato Ishibashi (2023). 『スーパーマリオブラザーズ ワンダー 完全攻略本』. Tokyo: ambit (Japanese). ISBN 4-198657-69-6. Page 45.
- ^ a b c kikai, Kimiyosu Hongo, Chimtaro, Hiromi Karakita (HQ), and Yamato Ishibashi (2023). 『スーパーマリオブラザーズ ワンダー 完全攻略本』. Tokyo: ambit (Japanese). ISBN 4-198657-69-6. Page 51.
- ^ kikai, Kimiyosu Hongo, Chimtaro, Hiromi Karakita (HQ), and Yamato Ishibashi (2023). 『スーパーマリオブラザーズ ワンダー 完全攻略本』. Tokyo: ambit (Japanese). ISBN 4-198657-69-6. Page 46. Name is asserted to be "unofficial" within source.
- ^ "When in Elephant form, you can carry big shells." – loading-screen tip (20 Oct. 2023). Super Mario Bros. Wonder by Nintendo EPD (North American Localization). Nintendo of America. Retrieved 27 Nov. 2024.
- ^ "There are sometimes invisible blocks hidden near walls. Hop around in places you think a block might be!" – Tip (20 Oct. 2023). Super Mario Bros. Wonder by Nintendo EPD (North American Localization). Nintendo of America. Retrieved 27 Nov. 2024.
- ^ a b c d kikai, Kimiyosu Hongo, Chimtaro, Hiromi Karakita (HQ), and Yamato Ishibashi (2023). 『スーパーマリオブラザーズ ワンダー 完全攻略本』. Tokyo: ambit (Japanese). ISBN 4-198657-69-6. Page 53.
- ^ Japanese in-game name for Fluff-Puff Peaks Special Climb to the Beat.
- ^ Nintendo of America (31 Aug. 2023). Super Mario Bros. Wonder Direct 8.31.2023. YouTube. Retrieved 31 Aug. 2023.
- ^ a b kikai, Kimiyosu Hongo, Chimtaro, Hiromi Karakita (HQ), and Yamato Ishibashi (2023). 『スーパーマリオブラザーズ ワンダー 完全攻略本』. Tokyo: ambit (Japanese). ISBN 4-198657-69-6. Page 52.
- ^ Nintendo of America (1 Sept. 2023). Nintendo Treehouse: Live - Super Mario Bros. Wonder. YouTube.
- ^ Shea, Brian (19 Oct. 2023). Super Mario Bros. Wonder Flower Coins And Wonder Seeds Guide. Game Informer. (Archived October 21, 2023, 13:22:40 UTC via Wayback Machine.)
- ^ "You should try and share water with wilted flowers. They'll definitely appreciate the help." – Tip (20 Oct. 2023). Super Mario Bros. Wonder by Nintendo EPD (North American Localization). Nintendo of America. Retrieved 27 Nov. 2024.
- ^ In-game name for Angry Spikes and Sinkin' Pipes.
- ^ KADOKAWA Game Linkage, editors (2023). 『スーパーマリオブラザーズ ワンダー かんぺき攻略本』. Tokyo: Kadokawa (Japanese). ISBN 4-047337-02-1. Page 62. Name is asserted to be "unofficial" within source.
- ^ "Imagine what it would be like for those fossilized dragons to soar freely through the air..." – Tip (20 Oct. 2023). Super Mario Bros. Wonder by Nintendo EPD (North American Localization). Nintendo of America. Retrieved 27 Nov. 2024.
- ^ a b KADOKAWA Game Linkage, editors (2023). 『スーパーマリオブラザーズ ワンダー かんぺき攻略本』. Tokyo: Kadokawa (Japanese). ISBN 4-047337-02-1. Page 62.
- ^ a b c d kikai, Kimiyosu Hongo, Chimtaro, Hiromi Karakita (HQ), and Yamato Ishibashi (2023). 『スーパーマリオブラザーズ ワンダー 完全攻略本』. Tokyo: ambit (Japanese). ISBN 4-198657-69-6. Page 55.
- ^ KADOKAWA Game Linkage, editors (2023). 『スーパーマリオブラザーズ ワンダー かんぺき攻略本』. Tokyo: Kadokawa (Japanese). ISBN 4-047337-02-1. Page 63. Name is asserted to be "unofficial" within source.
- ^ Kai, editor (12 Jan. 2024). 全て合わせて120以上。マリオたちが冒険するフラワー王国のいろんなコースをご紹介。【ワンダーの世界へ Vol.12】. Nintendo Official Site (Japanese). Retrieved 19 Jan. 2025.


