Squeals on Wheels: Difference between revisions
No edit summary |
m (Text replacement - "(\| *)Jap([RMCN\d]* *=)" to "$1Jpn$2") |
||
| (6 intermediate revisions by 4 users not shown) | |||
| Line 1: | Line 1: | ||
{{DKC level infobox | {{DKC level infobox | ||
|image | |image=[[File:Squeals Wheels DKC3.png]] | ||
|code=2 - 3 | |code=2 - 3 | ||
|world=[[Kremwood Forest]] | |world=[[Kremwood Forest]] | ||
| Line 11: | Line 11: | ||
}} | }} | ||
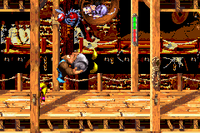
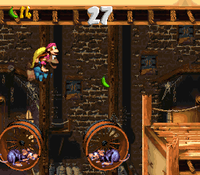
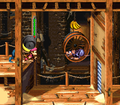
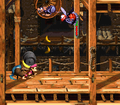
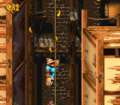
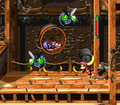
'''Squeals on Wheels''' is the eighth [[level]] of ''[[Donkey Kong Country 3: Dixie Kong's Double Trouble!]]'' It is also the third area of [[Kremwood Forest]]. The name of the level may be derived from {{wp|Meals on Wheels}}. Squeals on Wheels is the last level in the game to take place within a mill. The level features [[Sneek]]s moving on large wheels, and [[Dixie Kong|Dixie]] and [[Kiddy Kong|Kiddy]] are required to defeat one or two Sneeks for a nearby door to open. If a Sneek is not defeated, the nearby meter is red, but if the Sneek is defeated, the meter turns green. Unlike other levels, the level exit is located near the start, but is blocked off by a door that does not open unless the [[Kong]]s defeat every Sneek in the level, so they must travel to the top of the mill and defeat every Sneek along the way. Other enemies in the level include both green and red [[Buzz (enemy)|Buzz]]es, [[Re-Koil]]s and a [[Booty Bird]]. [[Parry the Parallel Bird]] makes its first level appearance in Squeals on Wheels, where its [[Animal Crate]] is found during the last part of the level. Parry assists the Kongs by collecting items in the air. If the Kongs take Parry past its [[No Animal Sign]], they are rewarded with a [[Blue Balloon]]. | '''Squeals on Wheels''' is the eighth [[level]] of ''[[Donkey Kong Country 3: Dixie Kong's Double Trouble!]]'' It is also the third area of [[Kremwood Forest]]. The name of the level may be derived from {{wp|Meals on Wheels}}. Squeals on Wheels is the last level in the game to take place within a mill. The level features [[Sneek]]s moving on large wheels, and [[Dixie Kong|Dixie]] and [[Kiddy Kong|Kiddy]] are required to defeat one or two Sneeks for a nearby door to open. If a Sneek is not defeated, the nearby meter is red, but if the Sneek is defeated, the meter turns green. Unlike other levels, the level exit is located near the start, but is blocked off by a door that does not open unless the [[Kong]]s defeat every Sneek in the level, so they must travel to the top of the mill and defeat every Sneek along the way. Other enemies in the level include both green and red [[Buzz (enemy)|Buzz]]es, [[Re-Koil]]s and a [[Booty Bird]]. [[Parry the Parallel Bird]] makes its first level appearance in Squeals on Wheels, where its [[Animal Crate]] is found during the last part of the level. Parry assists the Kongs by collecting items in the air. If the Kongs take Parry past its [[No Animal Sign]], they are rewarded with a [[Blue Balloon]]. | ||
==Layout== | ==Layout== | ||
[[File:Squeals Wheels DKC3 GBA.png|thumb|left|Squeals on Wheels in the Game Boy Advance version]] | |||
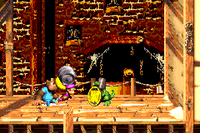
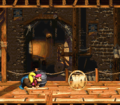
The Kongs begin the level on a flat pathway leading to a few [[banana]]s that hang along the ceiling and a [[Steel Keg]] that can be used to defeat a Sneek running on a small wheel. A Banana Bunch hovers above the mechanism. Once the Sneek is defeated, a meter on a nearby pole fills up, causing a nearby door to open and allow the primates to journey farther. The apes find a [[DK Barrel]] ahead of them after they reach the other side of the door. A Sneek and a rope are located near the barrel, and another door is placed to the right of them. The door cannot be opened until every Sneek in the level is defeated. If the heroes head to the top of the banana-covered rope, they reach a Banana Bunch and a solid area of ground with a Re-Koil on it. A wheel is suspended in the air nearby, and a Sneek runs along it, who can be defeated with a nearby Steel Keg. After they defeat it, a small section of a bar hanging on a pole turns green, indicating that the Kongs are closer to opening the next door, which is located farther ahead. Once the primates climb over a raised piece of ground with the [[KONG Letters|letter K]] on it, they find another Steel Keg that can be used to defeat a Sneek on a wheel that is guarded by a red Buzz. A ledge is near here with a Re-Koil on top of it. Using an elevator to the right of the bouncing enemy, the Kongs are able to reach a higher area of the mill, where they can find another Sneek on the wheel being protected by two red Buzzes. The foe can be defeated with the Steel Keg placed under it. As with the previous Sneeks, some of a nearby meter fills up when this Sneek is defeated. The heroes can find a few ledges nearby with a Re-Koil on the edge of one of them. | The Kongs begin the level on a flat pathway leading to a few [[banana]]s that hang along the ceiling and a [[Steel Keg]] that can be used to defeat a Sneek running on a small wheel. A Banana Bunch hovers above the mechanism. Once the Sneek is defeated, a meter on a nearby pole fills up, causing a nearby door to open and allow the primates to journey farther. The apes find a [[DK Barrel]] ahead of them after they reach the other side of the door. A Sneek and a rope are located near the barrel, and another door is placed to the right of them. The door cannot be opened until every Sneek in the level is defeated. If the heroes head to the top of the banana-covered rope, they reach a Banana Bunch and a solid area of ground with a Re-Koil on it. A wheel is suspended in the air nearby, and a Sneek runs along it, who can be defeated with a nearby Steel Keg. After they defeat it, a small section of a bar hanging on a pole turns green, indicating that the Kongs are closer to opening the next door, which is located farther ahead. Once the primates climb over a raised piece of ground with the [[KONG Letters|letter K]] on it, they find another Steel Keg that can be used to defeat a Sneek on a wheel that is guarded by a red Buzz. A ledge is near here with a Re-Koil on top of it. Using an elevator to the right of the bouncing enemy, the Kongs are able to reach a higher area of the mill, where they can find another Sneek on the wheel being protected by two red Buzzes. The foe can be defeated with the Steel Keg placed under it. As with the previous Sneeks, some of a nearby meter fills up when this Sneek is defeated. The heroes can find a few ledges nearby with a Re-Koil on the edge of one of them. | ||
A platform with a Steel Keg on it is raised over the pathway ahead of the ledges. The Kongs can use the barrel to defeat another Sneek on a wheel, which is surrounded by a red Buzz. After the rat is defeated and the meter is filled, they can use the wheel to land on a high area of ground farther into the level, where a locked [[Trapdoor (Donkey Kong Country 3)|trapdoor]] and a Re-Koil are located. Once the apes pass a nearby Sneek, they can reach another raised piece of ground with a Steel Keg on it and the letter O above it. A rope hangs to the right of the letter O, while an additional room is located to the left of it. In this room, the Kongs can find elevator that is able to lift them to another Sneek-holding wheel. After they defeat the foe and fill some of the meter as a result, they can head back to the previously-mentioned rope to reach a higher part of the mill. Here, they can find a locked trapdoor with a Sneek on a wheel above it. The Sneek can be defeated with a nearby Steel Keg that stands next to a closed door. Once the primates beat this enemy, the closed door opens and the meter empties, if they have defeated the previous Sneeks on wheels as well. The level's [[Star Barrel]] and another Steel Keg are immediately after the door. | |||
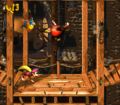
A platform with a Steel Keg on it is raised over the pathway ahead of the ledges. The Kongs can use the barrel to defeat another Sneek on a wheel, which is surrounded by a red Buzz. After the rat is defeated and the meter is filled, they can use the wheel to land on a high area of ground farther into the level, where a locked trapdoor and a Re-Koil are located. Once the apes pass a nearby Sneek, they can reach another raised piece of ground with a Steel Keg on it and the letter O above it. A rope hangs to the right of the letter O, while an additional room is located to the left of it. In this room, the Kongs can find elevator that is able to lift them to another Sneek-holding wheel. After they defeat the foe and fill some of the meter as a result, they can head back to the previously-mentioned rope to reach a higher part of the mill. Here, they can find a locked trapdoor with a Sneek on a wheel above it. The Sneek can be defeated with a nearby Steel Keg that stands next to a closed door. Once the primates beat this enemy, the closed door opens and the meter empties, if they have defeated the previous Sneeks on wheels as well. The level's [[Star Barrel]] and another Steel Keg are immediately after the door. | |||
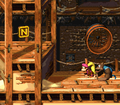
The Steel Keg can be used to defeat two Sneeks ahead, who both run on wheels, which can be jumped on to reach a hidden area containing a [[Bonus Barrel]]. Ahead of the two wheels, the heroes can find a Re-Koil, another DK Barrel, and a lone Sneek that walks down a slanted platform. The Kongs can find an additional Steel Keg and an elevator ahead of here. The elevator can lift them to a Sneek on a wheel that is guarded by two red Buzzes. After they beat the enemy, the meter fills slightly. If the apes choose to progress from here, they ride to the top of the area with the elevator, where there is a solid piece of ground with a Steel Keg on it. The item can be used to defeat a Sneek on a wheel, which is orbited by a pair of green Buzzes. The letter N stands on a raised piece of ground nearby, which is followed by another Steel Keg and an additional raised area of the ground with two red Buzzes flying over it. The Kongs can carry the barrel past the Buzzes to be able to defeat another Sneek that runs on a wheel with it, who is placed nearby. After they defeat it, filling up some of the meter, they can head down a ledge with a trapdoor following it. After they drop down an additional ledge, they reach another Steel Keg that can be used to fight a Sneek on a wheel that is surrounded by a pair of red Buzzes. | The Steel Keg can be used to defeat two Sneeks ahead, who both run on wheels, which can be jumped on to reach a hidden area containing a [[Bonus Barrel]]. Ahead of the two wheels, the heroes can find a Re-Koil, another DK Barrel, and a lone Sneek that walks down a slanted platform. The Kongs can find an additional Steel Keg and an elevator ahead of here. The elevator can lift them to a Sneek on a wheel that is guarded by two red Buzzes. After they beat the enemy, the meter fills slightly. If the apes choose to progress from here, they ride to the top of the area with the elevator, where there is a solid piece of ground with a Steel Keg on it. The item can be used to defeat a Sneek on a wheel, which is orbited by a pair of green Buzzes. The letter N stands on a raised piece of ground nearby, which is followed by another Steel Keg and an additional raised area of the ground with two red Buzzes flying over it. The Kongs can carry the barrel past the Buzzes to be able to defeat another Sneek that runs on a wheel with it, who is placed nearby. After they defeat it, filling up some of the meter, they can head down a ledge with a trapdoor following it. After they drop down an additional ledge, they reach another Steel Keg that can be used to fight a Sneek on a wheel that is surrounded by a pair of red Buzzes. | ||
| Line 22: | Line 21: | ||
Once they defeat the foe, therefore filling the meter, that can head onto a higher part of the ground, where they can find a Sneek and an [[Blast Barrel|Auto-Fire Barrel]] that can be used to blast them onto an elevator that moves in a horizontal path under a Sneek on a wheel. They can defeat it by using a Steel Barrel placed on a ledge to the right. They can progress farther into the level if they travel to the east, where they can find a rope with another Sneek on a wheel near the top of it. The wheel can be jumped on to reach a piece of ground ground with a Steel Keg on it. They can throw the barrel at the rat to defeat it, thus filling a small portion of the meter. After the two friends travel over a locked trapdoor, they encounter two Re-Koils hopping over a Banana Bunch. Nearby, they can find a Sneek on a wheel that is surrounded by a couple of red Buzzes. On a higher piece of the ground, they can find a Steel Keg that they can use to defeat the Sneek. An elevator moves to the right of the barrel that can aid the heroes in accessing a higher part of the mill. Here, they can find a Steel Keg and a closed door. | Once they defeat the foe, therefore filling the meter, that can head onto a higher part of the ground, where they can find a Sneek and an [[Blast Barrel|Auto-Fire Barrel]] that can be used to blast them onto an elevator that moves in a horizontal path under a Sneek on a wheel. They can defeat it by using a Steel Barrel placed on a ledge to the right. They can progress farther into the level if they travel to the east, where they can find a rope with another Sneek on a wheel near the top of it. The wheel can be jumped on to reach a piece of ground ground with a Steel Keg on it. They can throw the barrel at the rat to defeat it, thus filling a small portion of the meter. After the two friends travel over a locked trapdoor, they encounter two Re-Koils hopping over a Banana Bunch. Nearby, they can find a Sneek on a wheel that is surrounded by a couple of red Buzzes. On a higher piece of the ground, they can find a Steel Keg that they can use to defeat the Sneek. An elevator moves to the right of the barrel that can aid the heroes in accessing a higher part of the mill. Here, they can find a Steel Keg and a closed door. | ||
A Sneek on a small wheel is suspended above this area, and two red Buzzes circle it. Once the heroes defeat the rat, the nearby door opens, but only if the heroes are successful in filling the meter. On the other side of the door, the primates can find a trapdoor that they can break through to fall farther down into the mill. As they fall downwards, they crash through several trapdoors found previously in the level. After breaking through the final trapdoor, they land back near the beginning of the level, where a once-closed door is now open. On the other side of the door, they can find a long room with an [[Animal Crate]] containing Parry the Parallel Bird. They can use the animal to collect a long, straight line of bananas above them. The [[Animal Friend]] can also defeat a Booty Bird on the way, and once this foe is defeated, they are given the letter G. If the heroes travel farther ahead, they pass a Sneek and a red Buzz that flies high in the air. They must jump under it if they want to keep Parry from hitting it. A [[No Animal Sign]] follows the Buzz, and when it is passed, Parry disappears in exchange for a blue [[Extra Life Balloon]]. The [[Level Flag]] is ahead of here, and when the heroes raise it, the level is completed. | A Sneek on a small wheel is suspended above this area, and two red Buzzes circle it. Once the heroes defeat the rat, the nearby door opens, but only if the heroes are successful in filling the meter. On the other side of the door, the primates can find a trapdoor that they can break through to fall farther down into the mill. As they fall downwards, they crash through several trapdoors found previously in the level. After breaking through the final trapdoor, they land back near the beginning of the level, where a once-closed door is now open. On the other side of the door, they can find a long room with an [[Animal Crate]] containing Parry the Parallel Bird. They can use the animal to collect a long, straight line of bananas above them. The [[Animal Friend]] can also defeat a Booty Bird on the way, and once this foe is defeated, they are given the letter G. If the heroes travel farther ahead, they pass a Sneek and a red Buzz that flies high in the air. They must jump under it if they want to keep Parry from hitting it. A [[No Animal Sign]] follows the Buzz, and when it is passed, Parry disappears in exchange for a blue [[Extra Life Balloon]]. The [[Level Flag]] is ahead of here, and when the heroes raise it, the level is completed. | ||
| Line 33: | Line 31: | ||
==Objects== | ==Objects== | ||
The following objects appear in the following quantities: | The following objects appear in the following quantities: | ||
<gallery> | <gallery> | ||
DK Barrel.png|[[DK Barrel]] (1){{footnote|main|a}} | DK Barrel.png|[[DK Barrel]] (1){{footnote|main|a}} | ||
</gallery> | </gallery> | ||
{{footnote|note|a|Appears right after the first Sneek on a Wheel}} | {{footnote|note|a|Appears right after the first Sneek on a Wheel}} | ||
| Line 48: | Line 44: | ||
*'''G:''' After the Kongs free Parry, they must continue as Parry follows a trail of bananas leading up to a Booty Bird containing the letter G. | *'''G:''' After the Kongs free Parry, they must continue as Parry follows a trail of bananas leading up to a Booty Bird containing the letter G. | ||
{{br}} | {{br}} | ||
===DK Coin=== | ===DK Coin=== | ||
[[File:Squeals Wheels GBA Koin.png|thumb|The location of Squeals on Wheels' Koin, in the Game Boy Advance version]] | [[File:Squeals Wheels GBA Koin.png|thumb|The location of Squeals on Wheels' Koin, in the Game Boy Advance version]] | ||
Just before the letter N, the Kongs must use Steel Barrels to defeat another Sneek on a wheel and a green Buzz. On the wheel, Kiddy must perform [[team up]] and throw Dixie to the upper-right to reach an elevated path. At the end, they encounter a [[Koin]] and a Steel Barrel in front of it. The Kongs must pick up the Steel Barrel and throw it at the wall behind the Koin, causing it to bounce off into the Koin and defeat it. The Kongs are then rewarded a [[DK Coin]]. | Just before the letter N, the Kongs must use Steel Barrels to defeat another Sneek on a wheel and a green Buzz. On the wheel, Kiddy must perform [[team up]] and throw Dixie to the upper-right to reach an elevated path. At the end, they encounter a [[Koin]] and a Steel Barrel in front of it. The Kongs must pick up the Steel Barrel and throw it at the wall behind the Koin, causing it to bounce off into the Koin and defeat it. The Kongs are then rewarded a [[DK Coin]]. | ||
{{br}} | {{br}} | ||
==Bonus Levels== | ==Bonus Levels== | ||
{{multiframe|[[File:Squeals Wheels Bonus Level 1.png|200px]] [[File:Squeals Wheels Bonus Level 2.png|200px]]|size=420|The first and second Bonus Levels respectively}} | {{multiframe|[[File:Squeals Wheels Bonus Level 1.png|200px]] [[File:Squeals Wheels Bonus Level 2.png|200px]]|size=420|The first and second Bonus Levels respectively}} | ||
*'''''Collect the Stars!''''': To the left of the letter O, the Kongs must pick up a Steel Barrel and go up a wooden elevator platform with it. As they go up, the Kongs must throw the Steel Barrel at a Sneek on a wheel. The Kongs must then jump on its wheel to reach a high ledge, where they can find a [[Bonus Barrel]]. In the | Squeals on Wheels has two [[Bonus Level]]s, listed by type: | ||
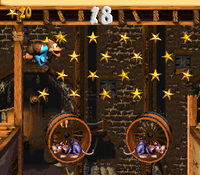
*'''''Collect the Stars!''''': To the left of the letter O, the Kongs must pick up a Steel Barrel and go up a wooden elevator platform with it. As they go up, the Kongs must throw the Steel Barrel at a Sneek on a wheel. The Kongs must then jump on its wheel to reach a high ledge, where they can find a [[Bonus Barrel]]. In the Bonus Level, the Kongs have 20 seconds to collect 20 [[star (Donkey Kong franchise)|star]]s. To do so, the Kongs must jump on two wheels, each with a Sneek in them, suspended in midair. After the Kongs collect every star, the [[Bonus Coin (Donkey Kong franchise)|Bonus Coin]] appears on the platform to the right. | |||
*'''''Grab 15 Bananas!''''': Right after the Star Barrel, the Kongs encounter two Sneeks on wheels. From the lower wheel, Kiddy must throw Dixie to the higher wheel and then continue down a ledge with a Bonus Barrel in a gap in the wall at the end. In the Bonus Level, the Kongs have 30 seconds to collect 15 [[green banana]]s. Similar to the first Bonus Level, the Kongs must jump from two wheels in midair to collect the green bananas for the Bonus Coin to appear at the right platform. | *'''''Grab 15 Bananas!''''': Right after the Star Barrel, the Kongs encounter two Sneeks on wheels. From the lower wheel, Kiddy must throw Dixie to the higher wheel and then continue down a ledge with a Bonus Barrel in a gap in the wall at the end. In the Bonus Level, the Kongs have 30 seconds to collect 15 [[green banana]]s. Similar to the first Bonus Level, the Kongs must jump from two wheels in midair to collect the green bananas for the Bonus Coin to appear at the right platform. | ||
| Line 65: | Line 64: | ||
Squeals Wheels DKC3 first Sneek.png|The Kongs encounter the first Sneek | Squeals Wheels DKC3 first Sneek.png|The Kongs encounter the first Sneek | ||
Squeals Wheels DKC3 red Buzz.png|Dixie holding a Steel Barrel under a red Buzz and a Sneek | Squeals Wheels DKC3 red Buzz.png|Dixie holding a Steel Barrel under a red Buzz and a Sneek | ||
Squeals Wheels DKC3 shot 2.png|The Kongs climb a rope shortly before the Star Barrel. | |||
Squeals Wheels DKC3 shot 3.png|The Kongs earn a Blue Balloon after Parry crosses the No Animal Sign. | |||
Squeals Wheels DKC3 shot 4.png|Dixie walks on a rolling barrel | Squeals Wheels DKC3 shot 4.png|Dixie walks on a rolling barrel | ||
Squeals Wheels DKC3 first Bonus Barrel.png|The Kongs reach the first Bonus Barrel | Squeals Wheels DKC3 first Bonus Barrel.png|The Kongs reach the first Bonus Barrel | ||
| Line 87: | Line 88: | ||
==Names in other languages== | ==Names in other languages== | ||
{{foreign names | {{foreign names | ||
| | |Jpn=スクイール ホイール | ||
| | |JpnR=Sukuīru Hoīru | ||
| | |JpnM=Squeal Wheel | ||
|Spa=Ratas Sobre Ruedas | |Spa=Ratas Sobre Ruedas | ||
|SpaM=Rats on Wheels | |SpaM=Rats on Wheels | ||
| | |Fre=Roues Des Couineurs | ||
| | |FreM=Wheels of Squeakers | ||
|Ger=Allerlei Geschrei | |Ger=Allerlei Geschrei | ||
|GerM=Various Screams | |GerM=Various Screams | ||
| Line 101: | Line 102: | ||
==Trivia== | ==Trivia== | ||
*[[List of Donkey Kong Country 3: Dixie Kong's Double Trouble! pre-release and unused content|Late previews]] of the game show that Squeals on Wheels would have been in [[Lake Orangatanga]], while [[Murky Mill]] was originally in Kremwood Forest.<ref>''Nintendo Power'' Volume 90 | *[[List of Donkey Kong Country 3: Dixie Kong's Double Trouble! pre-release and unused content|Late previews]] of the game show that Squeals on Wheels would have been in [[Lake Orangatanga]], while [[Murky Mill]] was originally in Kremwood Forest.<ref>{{cite|date=November 1996|publisher=Nintendo of America|language=en-us|title=''Nintendo Power'' Volume 90|page=26 and 28-31}}</ref><ref>{{cite|title=''Nintendo Power'' Volume 91|page=55|quote='''The Pitfalls of Writing on the Kremling Kutting-Edge''' Last month's Donkey Kong Country 3 review gave you exclusive tips for the first half of the game. Since that time, Rare's game developers have made a few modifications to the software. The levels Squeals on Wheels, located in Lake Orangatanga, and Murky Mill, found in Murky Forest''{{sic}}'', have traded places. This switch is a lucky break, since many game players like to collect extra lives in Murky Mill. Now you can do this near the beginning of the game. Nintendo Power will continue to keep you posted on any additional changes prior to the release of the game.|publisher=Nintendo of America|language=en-us}}</ref> | ||
==References== | ==References== | ||
Latest revision as of 16:59, January 7, 2025
| Level | |
|---|---|
| Squeals on Wheels | |
| |
| Level code | 2 - 3 |
| World | Kremwood Forest |
| Game | Donkey Kong Country 3: Dixie Kong's Double Trouble! |
| Music track | Mill Fever |
| << Directory of levels (SNES) >> | |
| << Directory of levels (GBA) >> | |
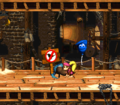
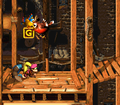
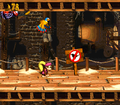
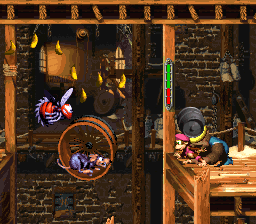
Squeals on Wheels is the eighth level of Donkey Kong Country 3: Dixie Kong's Double Trouble! It is also the third area of Kremwood Forest. The name of the level may be derived from Meals on Wheels. Squeals on Wheels is the last level in the game to take place within a mill. The level features Sneeks moving on large wheels, and Dixie and Kiddy are required to defeat one or two Sneeks for a nearby door to open. If a Sneek is not defeated, the nearby meter is red, but if the Sneek is defeated, the meter turns green. Unlike other levels, the level exit is located near the start, but is blocked off by a door that does not open unless the Kongs defeat every Sneek in the level, so they must travel to the top of the mill and defeat every Sneek along the way. Other enemies in the level include both green and red Buzzes, Re-Koils and a Booty Bird. Parry the Parallel Bird makes its first level appearance in Squeals on Wheels, where its Animal Crate is found during the last part of the level. Parry assists the Kongs by collecting items in the air. If the Kongs take Parry past its No Animal Sign, they are rewarded with a Blue Balloon.
Layout[edit]
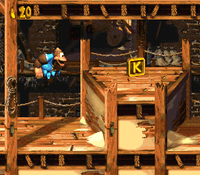
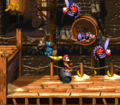
The Kongs begin the level on a flat pathway leading to a few bananas that hang along the ceiling and a Steel Keg that can be used to defeat a Sneek running on a small wheel. A Banana Bunch hovers above the mechanism. Once the Sneek is defeated, a meter on a nearby pole fills up, causing a nearby door to open and allow the primates to journey farther. The apes find a DK Barrel ahead of them after they reach the other side of the door. A Sneek and a rope are located near the barrel, and another door is placed to the right of them. The door cannot be opened until every Sneek in the level is defeated. If the heroes head to the top of the banana-covered rope, they reach a Banana Bunch and a solid area of ground with a Re-Koil on it. A wheel is suspended in the air nearby, and a Sneek runs along it, who can be defeated with a nearby Steel Keg. After they defeat it, a small section of a bar hanging on a pole turns green, indicating that the Kongs are closer to opening the next door, which is located farther ahead. Once the primates climb over a raised piece of ground with the letter K on it, they find another Steel Keg that can be used to defeat a Sneek on a wheel that is guarded by a red Buzz. A ledge is near here with a Re-Koil on top of it. Using an elevator to the right of the bouncing enemy, the Kongs are able to reach a higher area of the mill, where they can find another Sneek on the wheel being protected by two red Buzzes. The foe can be defeated with the Steel Keg placed under it. As with the previous Sneeks, some of a nearby meter fills up when this Sneek is defeated. The heroes can find a few ledges nearby with a Re-Koil on the edge of one of them.
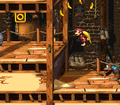
A platform with a Steel Keg on it is raised over the pathway ahead of the ledges. The Kongs can use the barrel to defeat another Sneek on a wheel, which is surrounded by a red Buzz. After the rat is defeated and the meter is filled, they can use the wheel to land on a high area of ground farther into the level, where a locked trapdoor and a Re-Koil are located. Once the apes pass a nearby Sneek, they can reach another raised piece of ground with a Steel Keg on it and the letter O above it. A rope hangs to the right of the letter O, while an additional room is located to the left of it. In this room, the Kongs can find elevator that is able to lift them to another Sneek-holding wheel. After they defeat the foe and fill some of the meter as a result, they can head back to the previously-mentioned rope to reach a higher part of the mill. Here, they can find a locked trapdoor with a Sneek on a wheel above it. The Sneek can be defeated with a nearby Steel Keg that stands next to a closed door. Once the primates beat this enemy, the closed door opens and the meter empties, if they have defeated the previous Sneeks on wheels as well. The level's Star Barrel and another Steel Keg are immediately after the door.
The Steel Keg can be used to defeat two Sneeks ahead, who both run on wheels, which can be jumped on to reach a hidden area containing a Bonus Barrel. Ahead of the two wheels, the heroes can find a Re-Koil, another DK Barrel, and a lone Sneek that walks down a slanted platform. The Kongs can find an additional Steel Keg and an elevator ahead of here. The elevator can lift them to a Sneek on a wheel that is guarded by two red Buzzes. After they beat the enemy, the meter fills slightly. If the apes choose to progress from here, they ride to the top of the area with the elevator, where there is a solid piece of ground with a Steel Keg on it. The item can be used to defeat a Sneek on a wheel, which is orbited by a pair of green Buzzes. The letter N stands on a raised piece of ground nearby, which is followed by another Steel Keg and an additional raised area of the ground with two red Buzzes flying over it. The Kongs can carry the barrel past the Buzzes to be able to defeat another Sneek that runs on a wheel with it, who is placed nearby. After they defeat it, filling up some of the meter, they can head down a ledge with a trapdoor following it. After they drop down an additional ledge, they reach another Steel Keg that can be used to fight a Sneek on a wheel that is surrounded by a pair of red Buzzes.
Once they defeat the foe, therefore filling the meter, that can head onto a higher part of the ground, where they can find a Sneek and an Auto-Fire Barrel that can be used to blast them onto an elevator that moves in a horizontal path under a Sneek on a wheel. They can defeat it by using a Steel Barrel placed on a ledge to the right. They can progress farther into the level if they travel to the east, where they can find a rope with another Sneek on a wheel near the top of it. The wheel can be jumped on to reach a piece of ground ground with a Steel Keg on it. They can throw the barrel at the rat to defeat it, thus filling a small portion of the meter. After the two friends travel over a locked trapdoor, they encounter two Re-Koils hopping over a Banana Bunch. Nearby, they can find a Sneek on a wheel that is surrounded by a couple of red Buzzes. On a higher piece of the ground, they can find a Steel Keg that they can use to defeat the Sneek. An elevator moves to the right of the barrel that can aid the heroes in accessing a higher part of the mill. Here, they can find a Steel Keg and a closed door.
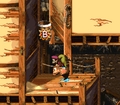
A Sneek on a small wheel is suspended above this area, and two red Buzzes circle it. Once the heroes defeat the rat, the nearby door opens, but only if the heroes are successful in filling the meter. On the other side of the door, the primates can find a trapdoor that they can break through to fall farther down into the mill. As they fall downwards, they crash through several trapdoors found previously in the level. After breaking through the final trapdoor, they land back near the beginning of the level, where a once-closed door is now open. On the other side of the door, they can find a long room with an Animal Crate containing Parry the Parallel Bird. They can use the animal to collect a long, straight line of bananas above them. The Animal Friend can also defeat a Booty Bird on the way, and once this foe is defeated, they are given the letter G. If the heroes travel farther ahead, they pass a Sneek and a red Buzz that flies high in the air. They must jump under it if they want to keep Parry from hitting it. A No Animal Sign follows the Buzz, and when it is passed, Parry disappears in exchange for a blue Extra Life Balloon. The Level Flag is ahead of here, and when the heroes raise it, the level is completed.
Enemies[edit]
Objects[edit]
The following objects appear in the following quantities:
a - Appears right after the first Sneek on a Wheel
Items[edit]
K-O-N-G Letters[edit]
- K: After passing the second Sneek on a wheel, the Kongs approach a raised platform with the letter K.
- O: The letter O is on a raised platform next to the second rope in the level.
- N: After the Star Barrel, the Kongs eventually encounter a Sneek guarded by a Buzz. The letter N is on a raised platform to the left.
- G: After the Kongs free Parry, they must continue as Parry follows a trail of bananas leading up to a Booty Bird containing the letter G.
DK Coin[edit]
Just before the letter N, the Kongs must use Steel Barrels to defeat another Sneek on a wheel and a green Buzz. On the wheel, Kiddy must perform team up and throw Dixie to the upper-right to reach an elevated path. At the end, they encounter a Koin and a Steel Barrel in front of it. The Kongs must pick up the Steel Barrel and throw it at the wall behind the Koin, causing it to bounce off into the Koin and defeat it. The Kongs are then rewarded a DK Coin.
Bonus Levels[edit]
Squeals on Wheels has two Bonus Levels, listed by type:
- Collect the Stars!: To the left of the letter O, the Kongs must pick up a Steel Barrel and go up a wooden elevator platform with it. As they go up, the Kongs must throw the Steel Barrel at a Sneek on a wheel. The Kongs must then jump on its wheel to reach a high ledge, where they can find a Bonus Barrel. In the Bonus Level, the Kongs have 20 seconds to collect 20 stars. To do so, the Kongs must jump on two wheels, each with a Sneek in them, suspended in midair. After the Kongs collect every star, the Bonus Coin appears on the platform to the right.
- Grab 15 Bananas!: Right after the Star Barrel, the Kongs encounter two Sneeks on wheels. From the lower wheel, Kiddy must throw Dixie to the higher wheel and then continue down a ledge with a Bonus Barrel in a gap in the wall at the end. In the Bonus Level, the Kongs have 30 seconds to collect 15 green bananas. Similar to the first Bonus Level, the Kongs must jump from two wheels in midair to collect the green bananas for the Bonus Coin to appear at the right platform.
Warp Barrel[edit]
After going through the first door, Kiddy must throw Dixie at the top-left corner to enter a hidden Warp Barrel, which takes them to the Level Flag.
Gallery[edit]
Super Nintendo Entertainment System[edit]
Game Boy Advance[edit]
Names in other languages[edit]
| Language | Name | Meaning | Notes |
|---|---|---|---|
| Japanese | スクイール ホイール[?] Sukuīru Hoīru |
Squeal Wheel | |
| French | Roues Des Couineurs[?] | Wheels of Squeakers | |
| German | Allerlei Geschrei[?] | Various Screams | |
| Italian | Cavie su Ruote[?] | Guinea Pigs on Wheels | |
| Spanish | Ratas Sobre Ruedas[?] | Rats on Wheels |
Trivia[edit]
- Late previews of the game show that Squeals on Wheels would have been in Lake Orangatanga, while Murky Mill was originally in Kremwood Forest.[1][2]
References[edit]
- ^ November 1996. Nintendo Power Volume 90. Nintendo of America (American English). Page 26 and 28-31.
- ^ "The Pitfalls of Writing on the Kremling Kutting-Edge Last month's Donkey Kong Country 3 review gave you exclusive tips for the first half of the game. Since that time, Rare's game developers have made a few modifications to the software. The levels Squeals on Wheels, located in Lake Orangatanga, and Murky Mill, found in Murky Forest[sic], have traded places. This switch is a lucky break, since many game players like to collect extra lives in Murky Mill. Now you can do this near the beginning of the game. Nintendo Power will continue to keep you posted on any additional changes prior to the release of the game." – Nintendo Power Volume 91. Nintendo of America (American English). Page 55.
