Space Storm Galaxy: Difference between revisions
TPIRFanSteve (talk | contribs) No edit summary |
|||
| (35 intermediate revisions by 18 users not shown) | |||
| Line 1: | Line 1: | ||
{{ | {{course infobox | ||
|image=[[File:Space_Storm_Galaxy.png|250px]] | |image=[[File:Space_Storm_Galaxy.png|250px]] | ||
|area=[[World 5 (Super Mario Galaxy 2)|World 5]] | |area=[[World 5 (Super Mario Galaxy 2)|World 5]] | ||
|boss=None | |boss=None | ||
| | |comets=[[Green Comet]] | ||
| | |missions=[[Follow Me, Bob-omb]]<br>[[To the Top of Topman's Tower]]<br>[[C'mere, Topman]]<br>[[#Green Star 1|Green Star 1]]<br>[[#Green Star 2|Green Star 2]]<br>[[#Green Star 3|Green Star 3]] | ||
|stars=[[File:Smg2_icon_powerstar.png|20px]][[File:Smg2_icon_powerstar.png|20px]][[File:Smg2_icon_powerstar.png|20px]][[File:Smg2_icon_greencomet.png|20px]][[File:Smg2_icon_greencomet.png|20px]][[File:Smg2_icon_greencomet.png|20px]] | |stars=[[File:Smg2_icon_powerstar.png|20px]][[File:Smg2_icon_powerstar.png|20px]][[File:Smg2_icon_powerstar.png|20px]][[File:Smg2_icon_greencomet.png|20px]][[File:Smg2_icon_greencomet.png|20px]][[File:Smg2_icon_greencomet.png|20px]] | ||
|unlock=Defeat [[Bowser]] in [[Bowser's Gravity Gauntlet]] | |unlock=Defeat [[Bowser]] in [[Bowser's Gravity Gauntlet]] | ||
|icon=A small section of the [[#Abandoned Rocketship Planet|Abandoned Rocketship Planet]] surrounded by several gray stormclouds | |icon=A small section of the [[#Abandoned Rocketship Planet|Abandoned Rocketship Planet]] surrounded by several gray stormclouds | ||
| | |more=[[Bowser's Gravity Gauntlet|<<]] [[Slipsand Galaxy|>>]] | ||
}} | }} | ||
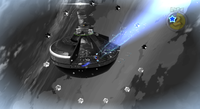
'''Space Storm Galaxy''' is a galaxy in the game ''[[Super Mario Galaxy 2]]''. It is located in [[World 5 (Super Mario Galaxy 2)|World 5]]. The level revolves around mechanical objects and is somewhat based off the [[Dreadnought Galaxy]] and the [[Buoy Base Galaxy]] from ''[[Super Mario Galaxy]]''. The galaxy has an abandoned rocketship-like object and a tower shaped like a [[Topman]] similar to [[Buoy Base Galaxy]]. Switches that slow down time first appear here. [[Bob-omb]]s, [[Spiky Topman|Spiky Topmen]], and [[Topman|Topmen]] are common enemies in the galaxy. The main obstacle in this galaxy is electricity, with [[Amp]]s and electric fences all around the area. There is also a new enemy called the [[ | '''Space Storm Galaxy''' is a galaxy in the game ''[[Super Mario Galaxy 2]]''. It is located in [[World 5 (Super Mario Galaxy 2)|World 5]]. The level revolves around mechanical objects and is somewhat based off the [[Dreadnought Galaxy]] and the [[Buoy Base Galaxy]] from ''[[Super Mario Galaxy]]''. The galaxy has an abandoned rocketship-like object and a tower shaped like a [[Topman]] similar to [[Buoy Base Galaxy]]. Switches that slow down time first appear here. [[Bob-omb]]s, [[Spiky Topman|Spiky Topmen]], and [[Topman|Topmen]] are common enemies in the galaxy, and this is also the only galaxy in the game where Topmen appear. Notably, their leader, [[Topmaniac]], is absent. The main obstacle in this galaxy is electricity, with [[Amp]]s and electric fences all around the area. There is also a new enemy called the [[Zap Nozzle]], which shoots electrical currents that home in on [[Mario]]. | ||
There are no [[Prankster Comet]]s in the galaxy until the player unlocks the Green Stars. | There are no [[Prankster Comet]]s in the galaxy until the player unlocks the Green Stars. | ||
==Planets/Areas== | ==Planets/Areas== | ||
{{conjecture|subsections=yes}} | |||
===Starting Planets=== | ===Starting Planets=== | ||
[[File:SMG2 Space Storm Starting Planets.png|200px|thumb | [[File:SMG2 Space Storm Starting Planets.png|200px|thumb|Mario on one of the {{conjectural|Starting Planets|planets}}.]] | ||
Those two planets are large, glass spheres with a [[Pull Star]]s in each of them. A couple of [[Big Amp]]s surround the second planet. Five Pull Stars and a [[Launch Star]] are found at the top of the planet. During the second mission, the Pull Stars and | Those two planets are large, glass spheres with a [[Pull Star]]s in each of them. A couple of [[Big Amp|Zap Ball]]s surround the second planet. Five Pull Stars and a [[Launch Star]] that they orbit in a pentagon formation are found at the top of the planet. During the second mission, the Pull Stars and Zap Balls are moving fast, and the Pull Star leading to the Blue Star Capsule Planet is missing, so [[Mario]] will have to use the Pull star inside it to get to the latter planetoid. A [[blue switch (Super Mario Galaxy)|blue switch]] will be found on the second Pull Star planet to slow them down. There is also a [[1-Up Mushroom]] behind the first one. | ||
{{br}} | {{br}} | ||
===Abandoned | ===Abandoned Rocket Ship Planet=== | ||
{{multiple image | {{multiple image | ||
|align=left | |align=left | ||
| Line 31: | Line 29: | ||
|image2=Space Storm Galaxy SMG2 early.png | |image2=Space Storm Galaxy SMG2 early.png | ||
|caption2=Mario on the Abandoned Rocketship Planet. | |caption2=Mario on the Abandoned Rocketship Planet. | ||
|width2= | |width2=195 | ||
}} | }} | ||
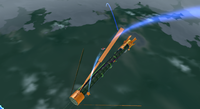
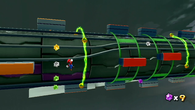
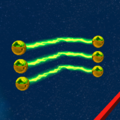
This cylindrical planet looks like a rocket ship because of the several "wings" it has on the sides. There are a lot of electric fences on the planet | This cylindrical planet looks like a rocket ship because of the several "wings" it has on the sides. It is visited only in the first mission after Mario leaves the Starting Planet, and its gravity is toroidal, meaning he cannot fall off. There are a lot of electric fences on the planet; most are stationary, but a few of them encircle the planet. There are orange platforms that move around the planet as well. The [[Comet Medal]] is located on here and is dangerously close to an electric fence. [[Mario]] should perform a [[Long Jump]] to get it. The [[Launch Star]] here will take the player to the Bob-omb Planet. | ||
{{br|left}} | {{br|left}} | ||
===Bob-omb Planet=== | ===Bob-omb Planet=== | ||
[[File:SMG2 Space Storm Approaching the Bobomb Planet.png|200px|thumb | [[File:SMG2 Space Storm Approaching the Bobomb Planet.png|200px|thumb|Mario approaching the {{conjectural|Bob-omb Planet|planet}}.]] | ||
[[File:SMG2 Bob-Omb Planet.png|200px|thumb|left|Top: Mario on the surface of {{conjectural|Bob-omb Planet|planet}}. <br> Bottom: Mario inside the {{conjectural|Bob-omb Planet|planet}}.]] | [[File:SMG2 Bob-Omb Planet.png|200px|thumb|left|Top: Mario on the surface of {{conjectural|Bob-omb Planet|planet}}. <br> Bottom: Mario inside the {{conjectural|Bob-omb Planet|planet}}.]] | ||
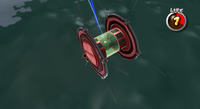
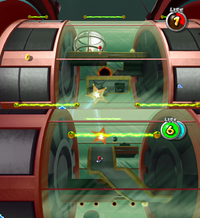
This planet is shaped like a spool of thread. The middle of the planet is glass and the player can see through it. Electric fences are the main hazards on the planet. Inside the planet is a machine that spawns [[Bob-omb]]s. The player must lure the Bob-omb to the cage blocking the entrance, blowing it up. A [[Life Mushroom]] can be found here. There is a [[Tip Network]] in the outer part of the planet. The [[Launch Star]] inside the planet will take the player to the Topman Planet. Two Black Holes are found on either side of the planet but they don't seem to serve a purpose. | This planet is shaped like a spool of thread. The middle of the planet is glass and the player can see through it. Electric fences are the main hazards on the planet. Inside the planet is a machine that spawns [[Bob-omb]]s. The player must lure the Bob-omb to the cage blocking the entrance, blowing it up. A [[Life Mushroom]] can be found here. There is a [[Tip Network]] in the outer part of the planet. The [[Launch Star]] inside the planet will take the player to the Topman Planet. Two Black Holes are found on either side of the planet but they don't seem to serve a purpose, as the spots they inhabit at the ends of the planet are blocked off by walls that Mario cannot scale, even with his [[Wall Jump]]. | ||
{{br}} | {{br}} | ||
| Line 51: | Line 49: | ||
|image2=SMG2 Space Storm Topman Planet.png | |image2=SMG2 Space Storm Topman Planet.png | ||
|caption2=At the Topman Planet. | |caption2=At the Topman Planet. | ||
|width2= | |width2=195 | ||
}} | }} | ||
This is a long, metallic grey planet with several holes surrounded by electric fences. There is a [[Bob-omb]] spawner on here which can be used to summon Bob-ombs to destroy the numerous cages. Regular and [[Spiky Topman|Spiky Topmen]] continuously spawn on this planet. The Electric Field Area is located next to this planet. During the [[#C'mere Topman|C'mere Topman]] mission | This is a long, metallic grey planet with several holes surrounded by electric fences, with the beginning marking a [[Checkpoint]]. There is a [[Bob-omb]] spawner on here which can be used to summon Bob-ombs to destroy the numerous cages. Regular and [[Spiky Topman|Spiky Topmen]] continuously spawn on this planet. The Electric Field Area is located next to this planet. During the [[#C'mere Topman|C'mere Topman]] mission, a [[Gearmo (silver)|silver Gearmo]] will appear, asking Mario to bring him a [[Spiky Topman]]; if the plumber is successful, the Gearmo will reward him with a [[Power Star]]. | ||
{{br|left}} | {{br|left}} | ||
===Electric Field Area=== | ===Electric Field Area=== | ||
[[File:SMG2 Space Storm Electric Field.png|200px|thumb | [[File:SMG2 Space Storm Electric Field.png|200px|thumb|Mario, in the dangerous {{conjectural|Electric Field Area|area}}.]] | ||
This area is located directly after the Topman Planet. It is located high above the [[#Bob-omb Planet|Bob-omb Planet]]. This area is full of [[Big Amp]]s and [[ | This area is located directly after the Topman Planet. It is located high above the [[#Bob-omb Planet|Bob-omb Planet]]. This area is full of [[Big Amp|Zap Ball]]s and [[Zap Nozzle]]s. The player must navigate through the planet by the use of [[Pull Star]]s. At the end of the planet is an electric fence guarding a [[Power Star]]. If Mario is hit by any of the electricity then he will fall. As Mario traverses this area, the player can see the Glass Spool Planet below. | ||
{{br}} | {{br}} | ||
===Topman's Tower=== | ===Topman's Tower=== | ||
[[File:SMG2 Topmans Tower Blue Switch.png|left|thumb|200px|A blue switch on the planet.]] | |||
{{multiple image | {{multiple image | ||
|align=right | |align=right | ||
|direction=vertical | |direction=vertical | ||
|width=200 | |width=200 | ||
|image1=SMG2 Space Storm Topmans Tower Overview.png | |image1=SMG2 Space Storm Topmans Tower Overview.png | ||
|image2=SMG2 Space Storm Slowed Topmans Tower.png | |image2=SMG2 Space Storm Slowed Topmans Tower.png | ||
| | |footer=An overview of Topman's Tower | ||
}} | }} | ||
This is a metallic tower that slightly resembles an upside-down top. It is almost identical to the [[Buoy Base Galaxy#Buoy Base|Buoy Base]] from the [[Buoy Base Galaxy]], featuring a very similar appearance and many of the same obstacles and enemies, some of which now move very rapidly. Enemies here include different types of Topmen, [[Amp]]s and [[Thwomp]]s. At the bottom of the planet, different sections of the floor spin very rapidly in opposing directions. [[Water Shooter]]s are located at the bottom as well and shoot water at a rapid pace. A pool of lava surrounds about a half of the tower. There are also a lot of blue switches here that will slow down the enemies and obstacles so they can proceed to the top with ease. The player will need to kill two Spiky Topmen at the top. This will make a Spring Topman appear which the player can use to get the [[Power Star]]. | This is a metallic tower that slightly resembles an upside-down top. It is almost identical to the [[Buoy Base Galaxy#Buoy Base|Buoy Base]] fortress from the [[Buoy Base Galaxy]], featuring a very similar appearance and many of the same obstacles and enemies, some of which now move very rapidly. Enemies here include different types of Topmen, [[Amp]]s and [[Thwomp]]s. At the bottom of the planet, different sections of the floor spin very rapidly in opposing directions. [[Water Shooter]]s are located at the bottom as well and shoot water at a rapid pace. A pool of lava surrounds about a half of the tower. There are also a lot of blue switches here that will slow down the enemies and obstacles so they can proceed to the top with ease. The player will need to kill two Spiky Topmen at the top. This will make a [[Spring Topman]] appear which the player can use to get the [[Power Star]]. If Mario kills the Spring Topman, a replacement will be summoned. | ||
{{br}} | |||
==Enemies== | ==Enemies== | ||
<gallery> | |||
SMG2 Big Amp.png|[[Big Amp|Zap Ball]]s | |||
SMG2 Electric Fence Close Up.png|[[Electric rail]]s | |||
SMG Bob-Omb Artwork.png|[[Bob-omb]]s | |||
Topmini.png|[[Topmini]]s | |||
SpikyTopman.png|[[Spiky Topman|Spiky Topmen]] | |||
ElectricPressure.png|[[Zap Nozzle]]s | |||
Spring Topman.png|[[Spring Topman|Spring Topmen]] | |||
SMG Thwomp Artwork.png|[[Thwomp]]s | |||
AmpSMG.png|[[Amp]]s | |||
Sentry Beam.png|[[Spring Vault]] | |||
Watershooter.png|[[Water Shooter]]s | |||
Fizzlit.png|[[Fizzlit]] | |||
</gallery> | |||
==Missions== | ==Missions== | ||
{| | {{SMG missions table|sortable=yes | ||
| | |mission1=[[Follow Me, Bob-omb]] | ||
|image1=[[File:SMG2 Space Storm Follow Me Bobomb.png|200px]] | |||
|summary1=This mission's objective is to navigate the galaxy. | |||
|mission2=[[To the Top of Topman's Tower]] | |||
|image2=[[File:SMG2 Space Storm To the Top of Topmans Tower.png|200px]] | |||
|summary2=This mission's objective is to climb the Topman's Tower. | |||
|mission3=[[C'mere, Topman]] | |||
|This mission's objective is to navigate the galaxy. | |image3=[[File:SMG2 Space Storm Cmere Topman.png|200px]] | ||
| | |summary3=This mission's objective is to lure a [[Topman]] to the [[Gearmo (silver)|silver Gearmo]]. | ||
}} | |||
|This mission's objective is to climb the Topman's Tower. | |||
| | |||
|This mission's objective is to lure a [[Topman]] to | |||
===Green Stars=== | ===Green Stars=== | ||
====Green Star 1==== | ====Green Star 1==== | ||
[[File:SMG2 Space Storm Green Star 1.png|thumb|200px|[[Luigi]] near the first Green Star.]] | [[File:SMG2 Space Storm Green Star 1.png|thumb|200px|[[Luigi]] near the first Green Star.]] | ||
The player | The player must replay the [[Follow Me, Bob-omb]] mission. The first [[Green Star]] is located on the Starting Planets. The player has to use the [[Pull Star]]s next to the [[Launch Star]] to reach the highest point possible. The player will need to perform a [[Star Spin]] to nab the first Green Star. | ||
;Planets Visited | ;Planets Visited | ||
<gallery> | |||
SMG2 Space Storm Starting Planets.png|[[Space Storm Galaxy#Starting Planets|Starting Planets]] | |||
</gallery> | |||
;Enemies | |||
<gallery> | |||
SMG2 Big Amp.png|[[Big Amp|Zap Ball]]s | |||
</gallery> | |||
{{br|left}} | {{br|left}} | ||
====Green Star 2==== | ====Green Star 2==== | ||
[[File:SMG2 Space Storm Green Star 2.png|thumb|200px|Luigi near the second Green Star.]] | [[File:SMG2 Space Storm Green Star 2.png|thumb|200px|Luigi near the second Green Star.]] | ||
The player | The player must replay the [[To the Top of Topman's Tower]] mission. This Green Star is found on the Topman's Tower. To get it, the player must make their way to the part of the tower with the [[Thwomp]]s. From there, they should notice a small green and black path surrounded by red borders. The player must go down this path to find the Green Star. An alternate way to get this star is if the player performs a backward somersault and simply Wall Jumps off the first gate, followed by a spin to land back onto the top of the gate platform. | ||
;Planets Visited | ;Planets Visited | ||
<gallery> | |||
SMG2 Space Storm Starting Planets.png|[[Space Storm Galaxy#Starting Planets|Starting Planets]] | |||
SMG2 Space Storm Topmans Tower Overview.png|[[Space Storm Galaxy#Topman's Tower|Topman's Tower]] | |||
</gallery> | |||
;Enemies | ;Enemies | ||
<gallery> | |||
SMG2 Big Amp.png|[[Big Amp|Zap Ball]]s | |||
SMG Thwomp Artwork.png|[[Thwomp]]s | |||
Watershooter.png|[[Water Shooter]]s | |||
</gallery> | |||
{{br|left}} | {{br|left}} | ||
====Green Star 3==== | ====Green Star 3==== | ||
[[File:SMG2 Space Storm Green Star 3.png|thumb|200px|Luigi near the final Green Star.]] | [[File:SMG2 Space Storm Green Star 3.png|thumb|200px|Luigi near the final Green Star.]] | ||
The player | The player must replay the [[To the Top of Topman's Tower]] mission again. To get this Green Star, the player must make their way to the Topman's Tower. From then, the player will need to hit the lever to open the first gate. After the first gate has been opened, the player will need to enter it and make their way to a set of [[Water Shooter]]s. From there, they need to make their way to the one on the farthest right side. The player will need to let the Water Shooter trap them inside a bubble. The player will continue to travel inside the bubble and eventually get the final Green Star. | ||
;Planets Visited | ;Planets Visited | ||
<gallery> | |||
SMG2 Space Storm Starting Planets.png|[[Space Storm Galaxy#Starting Planets|Starting Planets]] | |||
SMG2 Space Storm Topmans Tower Overview.png|[[Space Storm Galaxy#Topman's Tower|Topman's Tower]] | |||
</gallery> | |||
;Enemies | ;Enemies | ||
<gallery> | |||
SMG2 Big Amp.png|[[Big Amp|Zap Ball]]s | |||
Watershooter.png|[[Water Shooter]]s | |||
</gallery> | |||
==Music== | ==Music== | ||
{{media table | {{media table | ||
| | |file1=Space Storm Galaxy Super Mario Galaxy 2.oga | ||
|title1=Space Storm Galaxy Super Mario Galaxy 2 | |||
| | |||
|description1=Space Storm Galaxy soundtrack (full version). [[Battle Belt Galaxy]] from this game also shares this theme. | |description1=Space Storm Galaxy soundtrack (full version). [[Battle Belt Galaxy]] from this game also shares this theme. | ||
|length1= | |length1=0:30 | ||
}} | }} | ||
==Prima Official Game Guide description== | |||
*"''The Space Storm Galaxy is a collection of derelict battle stations and [[Pull Star]]s. You spend a lot of time hanging out over nothing but a great void, so keep a steady hand on those Pull Stars!''" | |||
==Names in other languages== | ==Names in other languages== | ||
| Line 157: | Line 161: | ||
|Jap=イナズマの雲海ギャラクシー | |Jap=イナズマの雲海ギャラクシー | ||
|JapR=Inazuma no Unkai Gyarakushī | |JapR=Inazuma no Unkai Gyarakushī | ||
|JapM= | |JapM=Sea of Lightning Clouds Galaxy | ||
|Spa=Galaxia Estación Eléctrica | |Spa=Galaxia Estación Eléctrica | ||
|SpaM=Electric Station Galaxy | |SpaM=Electric Station Galaxy | ||
|FreA=Galaxie de la Nébuleuse orageuse | |FreA=Galaxie de la Nébuleuse orageuse | ||
|FreAM=Stormy Nebula Galaxy | |FreAM=Stormy Nebula Galaxy | ||
| | |FreE=Satellite survolté | ||
| | |FreEM=Over-volted satellite | ||
|Ger=Raumwirbel-Galaxie | |Ger=Raumwirbel-Galaxie | ||
|GerM=Space Vortex Galaxy | |GerM=Space Vortex Galaxy | ||
| Line 171: | Line 175: | ||
|ChiR=Shǎndiàn Yúnhǎi Yínhé | |ChiR=Shǎndiàn Yúnhǎi Yínhé | ||
|ChiM=storming cloud galaxy | |ChiM=storming cloud galaxy | ||
|Kor=선더 스페이스 갤럭시 | |||
|KorR=Seondeo Seupeiseu Gaelleoksi | |||
|KorM=Thunder Space Galaxy | |||
}} | }} | ||
==Trivia== | ==Trivia== | ||
*In the first mission, this galaxy shares the same music as the [[Battle Belt Galaxy]]. However, in the second mission, it shares the music of the [[Buoy Base Galaxy]] from the first game instead. | *In the first mission, this galaxy shares the same music as the [[Battle Belt Galaxy]]. However, in the second mission, it shares the music of the [[Buoy Base Galaxy]] from the first game instead. | ||
{{SMG2}} | {{SMG2 missions}} | ||
[[Category:Fortresses]] | |||
[[Category:Galaxies]] | [[Category:Galaxies]] | ||
[[Category:Super Mario Galaxy 2 | [[Category:Super Mario Galaxy 2 locations]] | ||
[[de:Raumwirbel-Galaxie]] | [[de:Raumwirbel-Galaxie]] | ||
Latest revision as of 20:31, December 29, 2024
| Space Storm Galaxy | |
|---|---|
| |
| Area | World 5 |
| How to unlock | Defeat Bowser in Bowser's Gravity Gauntlet |
| Boss(es) | None |
| Comet(s) | Green Comet |
| Mission(s) | Follow Me, Bob-omb To the Top of Topman's Tower C'mere, Topman Green Star 1 Green Star 2 Green Star 3 |
| Stars | |
| Galaxy icon | A small section of the Abandoned Rocketship Planet surrounded by several gray stormclouds |
| << >> | |
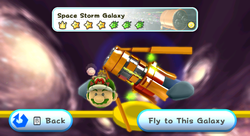
Space Storm Galaxy is a galaxy in the game Super Mario Galaxy 2. It is located in World 5. The level revolves around mechanical objects and is somewhat based off the Dreadnought Galaxy and the Buoy Base Galaxy from Super Mario Galaxy. The galaxy has an abandoned rocketship-like object and a tower shaped like a Topman similar to Buoy Base Galaxy. Switches that slow down time first appear here. Bob-ombs, Spiky Topmen, and Topmen are common enemies in the galaxy, and this is also the only galaxy in the game where Topmen appear. Notably, their leader, Topmaniac, is absent. The main obstacle in this galaxy is electricity, with Amps and electric fences all around the area. There is also a new enemy called the Zap Nozzle, which shoots electrical currents that home in on Mario.
There are no Prankster Comets in the galaxy until the player unlocks the Green Stars.
Planets/Areas[edit]
The titles of the following subsections are conjectural unless otherwise noted; an official name for each section's subject has not been found, so it has been given a fitting title by the editors. If an acceptable name is found for a given section, then that section should be changed to the new title.
Starting Planets[edit]
Those two planets are large, glass spheres with a Pull Stars in each of them. A couple of Zap Balls surround the second planet. Five Pull Stars and a Launch Star that they orbit in a pentagon formation are found at the top of the planet. During the second mission, the Pull Stars and Zap Balls are moving fast, and the Pull Star leading to the Blue Star Capsule Planet is missing, so Mario will have to use the Pull star inside it to get to the latter planetoid. A blue switch will be found on the second Pull Star planet to slow them down. There is also a 1-Up Mushroom behind the first one.
Abandoned Rocket Ship Planet[edit]
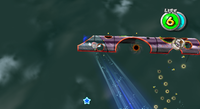
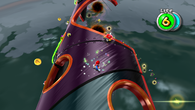
This cylindrical planet looks like a rocket ship because of the several "wings" it has on the sides. It is visited only in the first mission after Mario leaves the Starting Planet, and its gravity is toroidal, meaning he cannot fall off. There are a lot of electric fences on the planet; most are stationary, but a few of them encircle the planet. There are orange platforms that move around the planet as well. The Comet Medal is located on here and is dangerously close to an electric fence. Mario should perform a Long Jump to get it. The Launch Star here will take the player to the Bob-omb Planet.
Bob-omb Planet[edit]
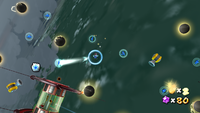
This planet is shaped like a spool of thread. The middle of the planet is glass and the player can see through it. Electric fences are the main hazards on the planet. Inside the planet is a machine that spawns Bob-ombs. The player must lure the Bob-omb to the cage blocking the entrance, blowing it up. A Life Mushroom can be found here. There is a Tip Network in the outer part of the planet. The Launch Star inside the planet will take the player to the Topman Planet. Two Black Holes are found on either side of the planet but they don't seem to serve a purpose, as the spots they inhabit at the ends of the planet are blocked off by walls that Mario cannot scale, even with his Wall Jump.
Topman Planet[edit]
This is a long, metallic grey planet with several holes surrounded by electric fences, with the beginning marking a Checkpoint. There is a Bob-omb spawner on here which can be used to summon Bob-ombs to destroy the numerous cages. Regular and Spiky Topmen continuously spawn on this planet. The Electric Field Area is located next to this planet. During the C'mere Topman mission, a silver Gearmo will appear, asking Mario to bring him a Spiky Topman; if the plumber is successful, the Gearmo will reward him with a Power Star.
Electric Field Area[edit]
This area is located directly after the Topman Planet. It is located high above the Bob-omb Planet. This area is full of Zap Balls and Zap Nozzles. The player must navigate through the planet by the use of Pull Stars. At the end of the planet is an electric fence guarding a Power Star. If Mario is hit by any of the electricity then he will fall. As Mario traverses this area, the player can see the Glass Spool Planet below.
Topman's Tower[edit]
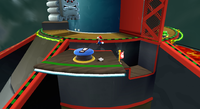
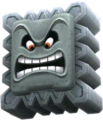
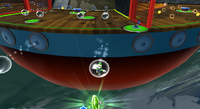
This is a metallic tower that slightly resembles an upside-down top. It is almost identical to the Buoy Base fortress from the Buoy Base Galaxy, featuring a very similar appearance and many of the same obstacles and enemies, some of which now move very rapidly. Enemies here include different types of Topmen, Amps and Thwomps. At the bottom of the planet, different sections of the floor spin very rapidly in opposing directions. Water Shooters are located at the bottom as well and shoot water at a rapid pace. A pool of lava surrounds about a half of the tower. There are also a lot of blue switches here that will slow down the enemies and obstacles so they can proceed to the top with ease. The player will need to kill two Spiky Topmen at the top. This will make a Spring Topman appear which the player can use to get the Power Star. If Mario kills the Spring Topman, a replacement will be summoned.
Enemies[edit]
Missions[edit]
| Mission | Image | Summary
|
|---|---|---|
| Follow Me, Bob-omb | 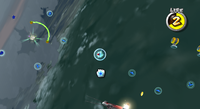 |
This mission's objective is to navigate the galaxy. |
| To the Top of Topman's Tower | 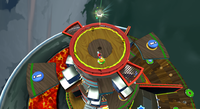 |
This mission's objective is to climb the Topman's Tower. |
| C'mere, Topman |  |
This mission's objective is to lure a Topman to the silver Gearmo. |
Green Stars[edit]
Green Star 1[edit]
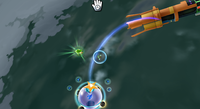
The player must replay the Follow Me, Bob-omb mission. The first Green Star is located on the Starting Planets. The player has to use the Pull Stars next to the Launch Star to reach the highest point possible. The player will need to perform a Star Spin to nab the first Green Star.
- Planets Visited
- Enemies
Green Star 2[edit]
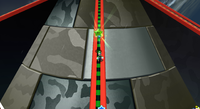
The player must replay the To the Top of Topman's Tower mission. This Green Star is found on the Topman's Tower. To get it, the player must make their way to the part of the tower with the Thwomps. From there, they should notice a small green and black path surrounded by red borders. The player must go down this path to find the Green Star. An alternate way to get this star is if the player performs a backward somersault and simply Wall Jumps off the first gate, followed by a spin to land back onto the top of the gate platform.
- Planets Visited
- Enemies
Green Star 3[edit]
The player must replay the To the Top of Topman's Tower mission again. To get this Green Star, the player must make their way to the Topman's Tower. From then, the player will need to hit the lever to open the first gate. After the first gate has been opened, the player will need to enter it and make their way to a set of Water Shooters. From there, they need to make their way to the one on the farthest right side. The player will need to let the Water Shooter trap them inside a bubble. The player will continue to travel inside the bubble and eventually get the final Green Star.
- Planets Visited
- Enemies
Music[edit]
| File info 0:30 |
Prima Official Game Guide description[edit]
- "The Space Storm Galaxy is a collection of derelict battle stations and Pull Stars. You spend a lot of time hanging out over nothing but a great void, so keep a steady hand on those Pull Stars!"
Names in other languages[edit]
| Language | Name | Meaning | Notes |
|---|---|---|---|
| Japanese | イナズマの雲海ギャラクシー[?] Inazuma no Unkai Gyarakushī |
Sea of Lightning Clouds Galaxy | |
| Chinese | 閃電雲海銀河[?] Shǎndiàn Yúnhǎi Yínhé |
storming cloud galaxy | |
| French (NOA) | Galaxie de la Nébuleuse orageuse[?] | Stormy Nebula Galaxy | |
| French (NOE) | Satellite survolté[?] | Over-volted satellite | |
| German | Raumwirbel-Galaxie[?] | Space Vortex Galaxy | |
| Italian | Galassia Bufera Spaziale[?] | Space Storm Galaxy | |
| Korean | 선더 스페이스 갤럭시[?] Seondeo Seupeiseu Gaelleoksi |
Thunder Space Galaxy | |
| Spanish | Galaxia Estación Eléctrica[?] | Electric Station Galaxy |
Trivia[edit]
- In the first mission, this galaxy shares the same music as the Battle Belt Galaxy. However, in the second mission, it shares the music of the Buoy Base Galaxy from the first game instead.

