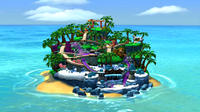
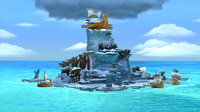
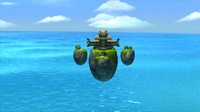
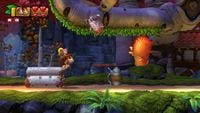
Donkey Kong Country: Tropical Freeze: Difference between revisions
Tag: Mobile edit |
m (Text replacement - "(\| *)Jap([RMCN\d]* *=)" to "$1Jpn$2") |
||
| (227 intermediate revisions by 71 users not shown) | |||
| Line 1: | Line 1: | ||
{{FA}} | {{FA}} | ||
{{italic title}} | {{italic title}} | ||
{{ | {{about|the [[List of games by date#2014|2014]] [[Wii U]] game|the [[Nintendo Switch]] version|[[Donkey Kong Country: Tropical Freeze (Nintendo Switch)]]}} | ||
|image=[[File:DKC- | {{game infobox | ||
|developer=[[Retro Studios]]<br> [[Monster Games]]<ref> | |image=[[File:DKC-TF box.jpeg|200px]] | ||
|developer=[[Retro Studios]]<br> [[Monster Games]]<ref>{{cite|author=Reeves, Ben|url=www.gameinformer.com/games/donkey_kong_country_tropical_freeze/b/wii_u/archive/2013/12/24/nintendo-answers-our-donkey-kong-country-tropical-freeze-questions.aspx?PostPageIndex=2|title=Nintendo Answers Our Burning Questions|date=December 24, 2013|accessdate=May 28, 2024}}</ref> <br> [[Nintendo SPD|Nintendo SPD Group No. 3]] | |||
|publisher=[[Nintendo]] | |publisher=[[Nintendo]] | ||
| | |release='''Wii U (original release):'''<br>{{flag list|Japan|February 13, 2014|USA|February 21, 2014<ref>{{cite|url=www.nintendo.com/us/nintendo-direct/10-01-2013/|title=Nintendo Direct 10.01.2013 - Nintendo Official Site|publisher=Nintendo.com|language=en-us|accessdate=May 28, 2024}}</ref>|Europe|February 21, 2014<ref>http://www.youtube.com/watch?v=CnBM6dDIQnc</ref>|Australia|February 22, 2014<ref name="nintendoau">{{cite|archive=web.archive.org/web/20131219180433/http://www.nintendo.com.au/index.php?action=news&nid=3097|deadlink=y|title=NINTENDO UNVEILS NEW DETAILS ON MARIO KART 8 AND SUPER SMASH BROS.|publisher=Nintendo.com|language=en-us|accessdate=May 28, 2024}}</ref>|Brazil|March 20, 2014<ref>{{cite|url=www.reinodocogumelo.com/2014/03/lancamento-oficial-de-donkey-kong.html|title=Lançamento oficial de Donkey Kong Country: Tropical Freeze no Brasil deve acontecer em 20 de março|author=Bonamin, Kadu|date=March 2, 2014|publisher=Reino do Cogumelo|accessdate=May 28, 2024}}</ref>}} '''Wii U ([[Nintendo Selects#Wii U|Nintendo Selects]]):'''<br>{{flag list|USA|March 11, 2016|Europe|April 15, 2016|Australia|December 1, 2016<ref>{{cite|author=Nintendo Australia|date=November 14, 2016|deadlink=y|archive=web.archive.org/web/20161117145750/http://www.nintendo.com.au/tis-the-season-for-an-exclusive-wii-u-bundle-of-family-fun|title=‘Tis the season for an exclusive Wii U bundle of family fun!|publisher=Nintendo of Australia|language=en-au|accessdate=May 28, 2024}}</ref>}} | ||
|genre=Platformer | |languages={{languages|en_us=y|en_gb=y|fr_fr=y|fr_ca=y|es_es=y|es_latam=y|de=y|it=y|jp=y}} | ||
|modes=Single player, | |genre=[[Genre#Platform|Platformer]] | ||
|ratings={{ratings|esrb=E|pegi=3|cero=A|acb=G|usk=0}} | |modes=Single-player, multiplayer | ||
|ratings={{ratings|esrb=E|pegi=3|cero=A|acb=G|usk=0|fpb=pg}} | |||
|platforms=[[Wii U]] | |platforms=[[Wii U]] | ||
| | |format={{format|wiiu=1|wiiudl=1}} | ||
|input={{input|wiiu=1|wiiusideways=1|wiiununchuk=1|wiiupro=1}} | |input={{input|wiiu=1|wiiusideways=1|wiiununchuk=1|wiiupro=1}} | ||
|serials={{flag list|Japan|WUP-ARKJ-JPN|USA|WUP-P-ARKE-USA-0}} | |||
}} | }} | ||
'''''Donkey Kong Country: Tropical Freeze''''' | '''''Donkey Kong Country: Tropical Freeze''''' is a side-scrolling {{wp|2.5D}} [[Genre#Platform|platform]] game developed by [[Retro Studios]] and [[Monster Games]] for the [[Wii U]]. It is the fifth game in the [[Donkey Kong Country (series)|''Donkey Kong Country'' series]] and a direct sequel to ''[[Donkey Kong Country Returns]]''. It follows the adventure of [[Donkey Kong]] and his partner [[Kong]]s as they travel back to [[Donkey Kong Island]] after the [[Snowmads]], an organization of {{wp|Vikings}}-like seafarers, invaded it and sent them away. Throughout their journey, the Kongs must overcome six islands seized by Snowmads. Most levels feature classic platforming where the Kongs need to jump, roll, climb and swing to get to the end of an area, but some levels are traversed in a vehicle such as a [[Mine Cart]] or a [[Rocket Barrel]]. For the first time in the series, the camera angle can change dynamically in some levels where [[Blast Barrel]]s or [[Mine Cart|mine cart]]s are found, showing more areas and perspectives of the scenery. ''Donkey Kong Country: Tropical Freeze'' is the first title in the series to feature more than two playable characters, with [[Diddy Kong]], [[Dixie Kong]] and [[Cranky Kong]] acting as companions of Donkey Kong who provide him additional abilities. The name "Tropical Freeze" is a pun on the term "tropical breeze". | ||
The game was originally slated for release during November 2013 before being pushed back to December 6; it was later pushed back again to February 2014.<ref> | The game was originally slated for release during November 2013 before being pushed back to December 6; it was later pushed back again to February 2014.<ref>{{cite|url=www.gamespot.com/articles/donkey-kong-country-tropical-freeze-delayed/1100-6415162|title=Donkey Kong Country: Tropical Freeze delayed|author=Makuch, Eddie|date=October 1, 2013|publisher=GameSpot|accessdate=May 28, 2024}}</ref> The downloadable version of the game requires approximately 11.3 GB of free space on the console. In North America, the digital version of the game was removed from the [[Nintendo eShop#Wii U|Nintendo eShop]] shortly before the release of the [[Nintendo Switch]] version,<ref>{{cite|author=Kim, Matt|date=April 30, 2018|deadlink=y|archive=web.archive.org/web/20180501233046/https://www.usgamer.net/articles/donkey-kong-country-tropical-freeze-abruptly-disappears-from-wii-u-eshop-ahead-of-switch-release|title=''Tropical Freeze'' Abruptly Disappears From Wii U eShop Ahead of Switch Release|publisher=USGamer|accessdate=May 28. 2024}}</ref> leaving the original game only available in retail in that region. However, the game remained available digitally in other regions until the closure of the Nintendo eShop for the Wii U. | ||
''Donkey Kong Country: Tropical Freeze'' was praised for its visuals | ''Donkey Kong Country: Tropical Freeze'' was praised for its colorful visuals, large environments, variety, and improvements made to the ''Donkey Kong Country'' formula, although its high level of difficulty received some criticism. A [[Donkey Kong Country: Tropical Freeze (Nintendo Switch)|port]] was released for the Nintendo Switch in May 2018. | ||
A [[Donkey Kong Country: Tropical Freeze (Nintendo Switch)|port]] was released for the | |||
==Story== | ==Story== | ||
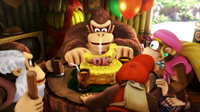
[[File:DKCTF story1.png|thumb|left|200px|The Kongs together celebrating Donkey Kong's birthday]] | [[File:DKCTF story1.png|thumb|left|200px|The Kongs together celebrating Donkey Kong's birthday]] | ||
The story begins at [[DK's Tree House|Donkey Kong's hut]], where the Kongs are celebrating his birthday, with a banana-themed cake. One of the balloons detaches from the exterior of the house and drifts out towards the ocean where a fleet of [[Snowmad]] ships are stationed. Far away from the island, a [[Pointy Tucks]] | The story begins at [[DK's Tree House|Donkey Kong's hut]], where the Kongs are celebrating his birthday, with a banana-themed cake. One of the balloons detaches from the exterior of the house and drifts out towards the ocean where a fleet of [[Snowmad]] ships are stationed. Far away from the island, a [[Pointy Tucks]] spots the balloon through a telescope, traces it back to Donkey Kong's hut, and relays its discovery to the Snowmads' leader, shrouded in a dark silhouette, who orders his subordinates to bring him an enchanted [[Horn (object)|horn]]. He blows into the horn, creating an entity known as an [[ice dragon]]. | ||
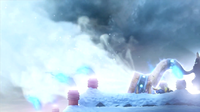
[[File:DKCTF story2.png | [[File:DKCTF story2.png|200px|thumb|Lord Fredrik blowing the enchanted horn]] | ||
Meanwhile, back at Donkey Kong's hut, Diddy Kong is briefly shown blowing a noisemaker. Right as Donkey Kong is about to blow out the candle on his cake, a gust of wind extinguishes the candle, to Donkey Kong's surprise, and a snowflake blows in and lands on the tip of the candle. Donkey Kong turns away angry as he hears an uproar. The Kongs walk out on the front deck to investigate. The ice dragon swoops in on Donkey Kong Island, generating strong winds that blows the Kongs away to the [[Lost Mangroves]]. With the Kong family disposed of, the Snowmads invade the island as their command ship stations itself on top of its [[Volcano]] and the ice dragon causes it to enter a state of perpetual winter. | |||
Meanwhile, back at Donkey Kong's hut, Diddy is briefly shown blowing a | |||
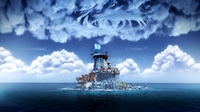
After traversing across five islands, the Kongs return to Donkey Kong Island. The Kongs make their way through the frozen fortress until they encounter the leader of the Snowmads, [[Lord Fredrik]], who challenges the Kongs to a final battle deep within the volcano. After a long battle, Donkey Kong delivers the final punch to Lord Fredrik, who is sent flying out from the roof of the Snowmads' ship, destroying it. The Kongs go out of the ship remains and look to see Lord Fredrik crashing into the remainder of the Snowmad ships out at sea | [[File: DKCTF story3.PNG|thumb|200px|Donkey Kong Island, now frozen over]] | ||
After traversing across five islands, the Kongs return to Donkey Kong Island. The Kongs make their way through the frozen fortress until they encounter the leader of the Snowmads, [[Lord Fredrik]], who challenges the Kongs to a final battle deep within the volcano. After a long battle, Donkey Kong delivers the final punch to Lord Fredrik, who is sent flying out from the roof of the Snowmads' ship, destroying it. The Kongs go out of the ship remains and look to see Lord Fredrik crashing into the remainder of the Snowmad ships out at sea. With the Snowmads defeated, Donkey Kong catches Lord Fredrik's horn and blows into it. This causes a breeze of flowers to carry the Kongs to the bottom of the island. The Kongs celebrate as the breeze of flowers flutter around Donkey Kong Island, melting all of the ice and snow and restoring the island to its original state. | |||
In an epilogue cutscene after the credits, the Kongs discover a wrapped present on their front lawn, which they open. Inside the box is a small relic that serves as the final key to unlocking Secret Seclusion. | In an epilogue cutscene after the credits, the Kongs discover a wrapped present on their front lawn, which they open. Inside the box is a small relic that serves as the final key to unlocking Secret Seclusion. | ||
| Line 38: | Line 39: | ||
====Basic gameplay==== | ====Basic gameplay==== | ||
[[File:DynamiteDash3.jpg|thumb|220px|Donkey Kong uses a ground pound action to break a [[Cracked Block]].]] | [[File:DynamiteDash3.jpg|thumb|220px|Donkey Kong uses a ground pound action to break a [[Cracked Block]].]] | ||
The gameplay of the title is very similar to that of its predecessor, ''[[Donkey Kong Country Returns]]''. The Kongs are able to walk, run, [[jump]], [[Roll Attack|roll]], [[Ground Pound|pound the ground]], as well as climb [[vine]] | The gameplay of the title is very similar to that of its predecessor, ''[[Donkey Kong Country Returns]]''. The Kongs are able to walk, run, [[jump]], [[Roll Attack|roll]], [[Ground Pound|pound the ground]], as well as climb [[swinging vine|vines]] and [[rope]]s. By jumping, the Kongs can stomp on various enemies and defeat them; however, some enemies cover their top-sides with shields or sharp objects, making them troublesome or dangerous to stomp on. Stomping on at least three enemies in a row grants the player one [[Banana Coin]] for each enemy stomped thereafter. The players start earning [[Extra Life Balloon|Red Balloons]] if they achieve a combo of eight or more enemy stomps. | ||
The Kongs can perform [[Ground Pound]]s in various places to break unsound structures (such as crates and cracked blocks), revealing items or secret paths underground. The move can also be executed near some enemies to stun and neutralize them temporarily. Likewise, ground-pounding can be used to empty [[Item Container]]s, which are found in the immediate background. | The Kongs can perform [[Hand Slap|Ground Pound]]s in various places to break unsound structures (such as crates and cracked blocks), revealing items or secret paths underground. The move can also be executed near some enemies to stun and neutralize them temporarily. Likewise, ground-pounding can be used to empty [[Item Container]]s, which are found in the immediate background. | ||
The Kongs can also roll to knock out enemies. Donkey Kong can perform this move on a short distance. Rolling confers high momentum, and if Donkey Kong jumps while rolling, he will gain longer distance than usual. If he rolls off the edge of a platform, he can quickly hop in mid-air, providing extra distance. | The Kongs can also roll to knock out enemies. Donkey Kong can perform this move on a short distance. Rolling confers high momentum, and if Donkey Kong jumps while rolling, he will gain longer distance than usual. If he rolls off the edge of a platform, he can quickly hop in mid-air, providing extra distance. | ||
| Line 49: | Line 50: | ||
====Vehicles==== | ====Vehicles==== | ||
In specific levels of the game, Donkey Kong and co. are able to ride different vehicles. One such vehicle is the [[Mine Cart]], which carries the characters along rail tracks that cannot be trodden by foot. As the Mine Cart moves automatically, the Kongs can duck inside the vehicle or jump with it in order to dodge obstacles. Another is the [[Rocket Barrel]], which is necessary to fly across wide chasms and normally has to be navigated through a series of hazards and enemies. It can be risen up or let to fall down. Lastly, there is [[Rambi | In specific levels of the game, Donkey Kong and co. are able to ride different vehicles. One such vehicle is the [[Mine Cart]], which carries the characters along rail tracks that cannot be trodden by foot. As the Mine Cart moves automatically, the Kongs can duck inside the vehicle or jump with it in order to dodge obstacles. Another is the [[Rocket Barrel]], which is necessary to fly across wide chasms and normally has to be navigated through a series of hazards and enemies. It can be risen up or let to fall down. Lastly, there is [[Rambi]] (who is categorized as a "vehicle" in the game's instruction manual<ref>{{cite|url=www.nintendo.com/consumer/downloads/manual-WiiU-Donkey_Kong_Country_Tropical_Freeze.pdf|title=''Donkey Kong Country: Tropical Freeze'' instruction manual|format=PDF|page=15}}</ref>), a powerful [[Animal Friend]] who can charge into enemies and defeat them. Otherwise invincible to most enemies even when standing still, he is vulnerable to lightning, fire enemies, or any other object protected by flames. | ||
====Level map and bonuses==== | ====Level map and bonuses==== | ||
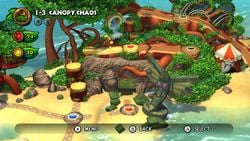
[[File:DKCTF map.jpg|thumb | [[File:DKCTF map.jpg|thumb|250px|The Kongs progress through an island map. They head towards an incomplete level, marked by a red pad. On the bottom left lies a blue pad, the level of which has had its goal reached.]] | ||
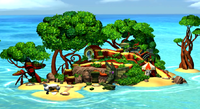
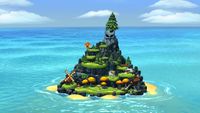
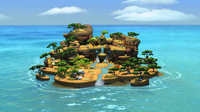
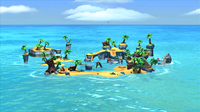
The game features a total of 63 levels (including boss and | The game features a total of 63 levels (including boss and hidden temple stages and excluding [[Funky's Fly 'n' Buy]] stations), grouped in seven island. On the world map, islands are seen from an aerial viewpoint and feature a system of routes that connect levels. Once players complete a level, they open a new path or crossroad. Paths are normally navigated on foot, but [[Blast Barrel]]s are sometimes used for taking shortcuts; [[Donkey Kong Island (world)|Donkey Kong Island]]'s map navigation, on the other hand, is entirely provided by [[Barrel Cannon]]s. Warping from an island to another is always released via Blast Barrels. | ||
On the map, non-boss levels are marked with circular pads, whilst boss stages are associated with star-shaped pads. Level pads light in several colors on different conditions: red pads mean their levels have not been completed yet; blue pads mean their levels have been finished at least once. Additionally, green pads relate to levels which have been completed on [[Donkey Kong Country: Tropical Freeze#Hard Mode|Hard Mode]]. Unlit/black pads are inaccessible, and switch to red when the paths that lead to them are unlocked. | On the map, non-boss levels are marked with circular pads, whilst boss stages are associated with star-shaped pads. Level pads light in several colors on different conditions: red pads mean their levels have not been completed yet; blue pads mean their levels have been finished at least once. Additionally, green pads relate to levels which have been completed on [[Donkey Kong Country: Tropical Freeze#Hard Mode|Hard Mode]]. Unlit/black pads are inaccessible, and switch to red when the paths that lead to them are unlocked. | ||
On each island, the Kongs | On each island, the Kongs encounter a shop run by [[Funky Kong]], which is always marked with white pads. The shop, [[Funky's Fly 'n' Buy]], offers items that can turn helpful for the Kongs, in exchange for [[Banana Coin]]s. The price for each item stays the same on the course of the game. Alongside items, which include balloons [[Extra Life Balloon|of]] [[Green Balloon|all]] [[Blue Balloon|sorts]], [[DK Barrel|Kong Barrels]], and [[Heart Boost]]s, the shop also displays a [[Capsule Toy Machine]], which contains collectible toy figures representing characters from the game. Each of them costs five Banana Coins and can be obtained by chance. As the players progress through the game, more toy figures become available in the shop. | ||
An odd number of [[Puzzle Piece (Donkey Kong Country series)|Puzzle Pieces]] (5, 7, or 9), as well as four [[ | An odd number of [[Puzzle Piece (Donkey Kong Country series)|Puzzle Pieces]] (5, 7, or 9), as well as four [[KONG Letters]], are spread in each level, excluding boss levels for both and Hidden Kong Temple levels for the latter. Puzzle Pieces unlock various concept artworks in a select Image Gallery, while KONG Letters are compulsory for unlocking hidden temple stages; each world aside from the [[Secret Seclusion|last one]] contains one of these stages. While some Puzzle Pieces are scattered throughout a level in different areas, some appear only after collecting a certain group of items. Bonus Stages dedicated to collecting these items are often featured within levels, and yield Puzzle Pieces after completion. These bonus stages can usually be accessed through hidden [[Blast Barrel]]s or passages blocked by [[Snowflake Shield]]s. | ||
Finishing all levels of the game (including the Hidden Kong Temple ones) and collecting all of the | Finishing all the levels of the game (including the Hidden Kong Temple ones) and collecting all of the KONG letters in the non-boss/temple levels are amongst the requirements for full, 200% [[completion]] of the game. | ||
===Menu=== | ===Menu=== | ||
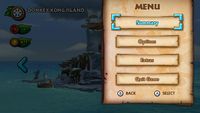
[[File:DKCTF map menu.jpg|thumb|The map menu]] | [[File:DKCTF map menu.jpg|thumb|The map menu]] | ||
On the map, the player can access a menu where they can select several items from a list. These items and their corresponding actions are presented in the following table. | On the map, the player can access a menu where they can select several items from a list. These items and their corresponding actions are presented in the following table. | ||
{|class="wikitable" | |||
{| class="wikitable" | |||
|- | |- | ||
|align="center"|'''Summary''' | |align="center"|'''Summary''' | ||
|Allows the player to view a summary of their progress on the island where they are currently located. The summary lists all unlocked levels on that island and shows whether the KONG letters and Puzzle Pieces have been collected, as well as the best medal obtained in [[Donkey Kong Country: Tropical Freeze#Time Attack|Time Attack]] mode for each level. | |Allows the player to view a summary of their progress on the island where they are currently located. The summary lists all the unlocked levels on that island and shows whether the KONG letters and Puzzle Pieces have been collected, as well as the best medal obtained in [[Donkey Kong Country: Tropical Freeze#Time Attack|Time Attack]] mode for each level. | ||
|- | |- | ||
|align="center"|'''Options''' | |align="center"|'''Options''' | ||
| Line 78: | Line 78: | ||
|{{main|List of extras in Donkey Kong Country: Tropical Freeze}} | |{{main|List of extras in Donkey Kong Country: Tropical Freeze}} | ||
Allows the player to view a group of galleries where extra content can be unlocked. The Image Gallery is composed of artwork showing various concepts and ideas considered during the development of the game. Each piece of artwork is unlocked after all Puzzle Pieces are collected in a certain stage. The Music Gallery contains music used in the game. Each set of music pertains to one of the six main islands of the game and can be unlocked by beating the boss of its corresponding island. Dioramas that represent the six main islands of the game are unlocked the same way. | Allows the player to view a group of galleries where extra content can be unlocked. The Image Gallery is composed of artwork showing various concepts and ideas considered during the development of the game. Each piece of artwork is unlocked after all the Puzzle Pieces are collected in a certain stage. The Music Gallery contains music used in the game. Each set of music pertains to one of the six main islands of the game and can be unlocked by beating the boss of its corresponding island. Dioramas that represent the six main islands of the game are unlocked the same way. | ||
|- | |- | ||
|align="center"|'''Quit Game''' | |align="center"|'''Quit Game''' | ||
| Line 89: | Line 89: | ||
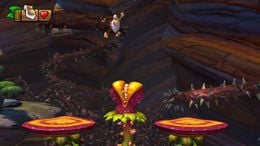
Dixie Kong can execute the [[Helicopter Spin]] with her ponytail and propel herself upward in midair. Using her ponytail, she is also able to swim against strong currents, accessing potentially secret areas. Cranky harnesses the [[Cane Bounce]] by using his iconic rigid cane to combat or overcome some obstacles that could be dangerous to stomp on, such as urchins and thorns. The Cane Bounce can be seen as a substitute to Dixie Kong's Helicopter Twirl, as Cranky can bounce off the ground with his cane and take off to increased heights. With the inclusion of more than two playable characters in the game, a premiere feature in the series, the variety of [[DK Barrel|Kong Barrel]]s has been invigorated. Players can stumble upon Diddy, Dixie, or Cranky barrels, each displaying their name abbreviations – DD, DX, and CK respectively. These barrels usually appear to contain only one character, whereas the other spins like a roulette and constantly switch the partner inside, each time indicated by the before-mentioned abbreviations. In the standard mode of play, Donkey Kong can only carry one partner at the time; a partner freed from a Kong Barrel will replace the one that is currently on Donkey Kong's back. If the character in the chosen barrel is already seated on Donkey Kong, the characters can regenerate their health bar upon destroying the barrel. | Dixie Kong can execute the [[Helicopter Spin]] with her ponytail and propel herself upward in midair. Using her ponytail, she is also able to swim against strong currents, accessing potentially secret areas. Cranky harnesses the [[Cane Bounce]] by using his iconic rigid cane to combat or overcome some obstacles that could be dangerous to stomp on, such as urchins and thorns. The Cane Bounce can be seen as a substitute to Dixie Kong's Helicopter Twirl, as Cranky can bounce off the ground with his cane and take off to increased heights. With the inclusion of more than two playable characters in the game, a premiere feature in the series, the variety of [[DK Barrel|Kong Barrel]]s has been invigorated. Players can stumble upon Diddy, Dixie, or Cranky barrels, each displaying their name abbreviations – DD, DX, and CK respectively. These barrels usually appear to contain only one character, whereas the other spins like a roulette and constantly switch the partner inside, each time indicated by the before-mentioned abbreviations. In the standard mode of play, Donkey Kong can only carry one partner at the time; a partner freed from a Kong Barrel will replace the one that is currently on Donkey Kong's back. If the character in the chosen barrel is already seated on Donkey Kong, the characters can regenerate their health bar upon destroying the barrel. | ||
A new feature in this game that is adjacent to the partner system is the [[Kong POW]] attack, which turns all the enemies on-screen into [[item]]s. In multiplayer, the move can be used if both players press a button at the same time. This move can only be performed when 100 [[banana]]s have been collected, as well as when there is a partner by Donkey Kong's side.<ref name="nintendoau"/> | |||
====Underwater mechanics==== | ====Underwater mechanics==== | ||
[[File:Air bubbles.jpg|thumb|260px | [[File:Air bubbles.jpg|thumb|260px|Donkey Kong is low on air and rushes towards a column of rising air bubbles. Air bubbles gush out of various stage decorations and replenish the Kongs' air supply.]] | ||
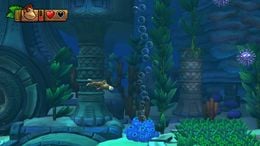
The game also presents | The game also presents underwater levels, which were absent in ''Donkey Kong Country Returns''. Rather than using the ''[[Super Mario (series)|Mario]]''-styled controls present in the original trilogy, swimming is now handled similarly to the [[New Play Control!]] version of ''[[New Play Control! Donkey Kong Jungle Beat|Donkey Kong Jungle Beat]]'', where instead of pressing the jump button to gain momentum, the player has to move the {{button|Stick}} stick / {{button|wiiu|Pad}} buttons. The Kongs are now given a gauge with limited air while underwater, requiring them to seek out air bubbles to fill it and survive. Their air gauge will also fill up if the Kongs enter an underwater [[Barrel Cannon]], and will remain filled for as long as they stay inside the barrel. A [[Corkscrew (Donkey Kong Country: Tropical Freeze)|Corkscrew]] attack has been added, which can be used to defeat certain enemies or collapse less durable structures while underwater. | ||
====Plucking ability==== | ====Plucking ability==== | ||
[[File:Bramble Scramble Handle.jpg|thumb|260px|left|The Kongs try to pluck an [[Item Handle]] out of the ground. Item Handles hide not only items, as their name suggests, but also Barrel Cannons. In some cases, they even affect the environment upon getting pulled.]] | [[File:Bramble Scramble Handle.jpg|thumb|260px|left|The Kongs try to pluck an [[Item Handle]] out of the ground. Item Handles hide not only items, as their name suggests, but also Barrel Cannons. In some cases, they even affect the environment upon getting pulled.]] | ||
In a vast number of areas in the game, players will encounter orange handles fixed on the surface of platforms. | In a vast number of areas in the game, players will encounter orange handles fixed on the surface of platforms. While standing atop these handles, the Kongs can grip and pull them to uncover hidden objects, which can be either bonuses or [[Barrel Cannon]]s that launch them to other spots. When pulled, some handles cause certain phenomenons that manipulate the environment. | ||
The plucking function is used transport objects, such as [[barrel]]s, [[DK Barrel]]s, and [[Watermelon Fuse Bomb]]s, the most common in the game. Some can be found directly on the ground and can be picked up, but others are located under handles. The player can also haul enemies, specifically those that are relatively small and wear orange helmets, like [[Tuff Fluff]]s and [[Tuff Tucks]]. Portable items and enemies are sometimes necessary to destroy hindrances, [[Burlap Hanging Sack|bags with precious content]], and tough foes. | The plucking function is used transport objects, such as [[barrel]]s, [[DK Barrel]]s, and [[Watermelon Fuse Bomb]]s, the most common in the game. Some can be found directly on the ground and can be picked up, but others are located under handles. The player can also haul enemies, specifically those that are relatively small and wear orange helmets, like [[Tuff Fluff]]s and [[Tuff Tucks]]. Portable items and enemies are sometimes necessary to destroy hindrances, [[Burlap Hanging Sack|bags with precious content]], and tough foes. | ||
Producer [[Kensuke Tanabe]] stated that the ability to pick up enemies and throw them, and overall the plucking capability, was inspired from ''[[Super Mario Bros. 2]]'', which he directed.<ref> | Producer [[Kensuke Tanabe]] stated that the ability to pick up enemies and throw them, and overall the plucking capability, was inspired from ''[[Super Mario Bros. 2]]'', which he directed.<ref>{{cite|url=www.youtube.com/watch?v=7b9FnSvEQxE|title=Wii U Developer Direct - ''Donkey Kong Country: Tropical Freeze'' @E3 2013|publisher=YouTube|accessdate=May 28, 2024|language=en-us}}</ref> | ||
{{br}} | {{br}} | ||
===Single-player modes=== | ===Single-player modes=== | ||
====Time Attack==== | ====Time Attack==== | ||
[[File:TimeAttack 2 DKCTF.jpg|thumb | [[File:TimeAttack 2 DKCTF.jpg|thumb|260px|]] | ||
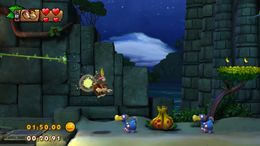
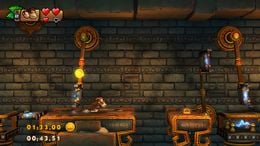
A mode originating in ''Returns'', Time Attack of any level can be accessed only after the player has beaten the level in question at least once. It is available on single-player and is a completely optional mode, meaning it does not unlock extra content in the game, nor contribute to its completion percentage. | A mode originating in ''Returns'', Time Attack of any level can be accessed only after the player has beaten the level in question at least once. It is available on single-player and is a completely optional mode, meaning it does not unlock extra content in the game, nor contribute to its completion percentage. | ||
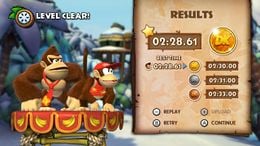
[[File:Golden medal DKCTF.jpg|thumb|left|260px|The Kongs achieve a shiny gold medal and a new best time after playing in Time Attack mode.]] | [[File:Golden medal DKCTF.jpg|thumb|left|260px|The Kongs achieve a shiny gold medal and a new best time after playing in Time Attack mode.]] | ||
Before entering Time Attack, players are given the option to select a type of [[DK Barrel|Kong Barrel]] for the course of the chosen stage. During Time Attack, players have to guide the Kongs to the level's finish barrel in the fastest time possible. Three-time limits are set during the course, each corresponding to one of the gold, silver, and bronze medals. Should the Kongs reach their destination | Before entering Time Attack, players are given the option to select a type of [[DK Barrel|Kong Barrel]] for the course of the chosen stage. During Time Attack, players have to guide the Kongs to the level's finish barrel in the fastest time possible. Three-time limits are set during the course, each corresponding to one of the gold, silver, and bronze medals. Should the Kongs reach their destination within one of these time limits, they are rewarded with the medal accordingly. A special shiny gold medal can be obtained if the Kongs finish the level at a particular time within the standard gold medal time limit. The milestone times for shiny gold medals are never displayed nor made clear. | ||
[[File:TimeAttack 1 DKCTF.jpg|thumb | [[File:TimeAttack 1 DKCTF.jpg|thumb|260px|]] | ||
Checkpoint booths are not present during Time Attack. As such, every time they lose their health in a level, players are prompted to restart the stage with the count reset to zero. Unlike in other modes of the game, the Kongs do not lose a life after their health bar has been drained completely. | |||
Checkpoint booths are not present during Time Attack. As such, every time they | |||
Additionally, if the Kongs finish a level in Time Attack mode without taking damage, their achieved medal will be accompanied by a heart icon. This icon is permanent until they achieve a better time. | Additionally, if the Kongs finish a level in Time Attack mode without taking damage, their achieved medal will be accompanied by a heart icon. This icon is permanent until they achieve a better time. | ||
Despite Checkpoint Booths being unavailable during Time Attack, [[Professor Chops]] makes an appearance as a referee. During every race, he first shows up at the beginning, waving a small green flag in the rhythm of the countdown. After the Kongs break the finish barrel, he springs on the scene with a chequered flag, indicating the race has been terminated. | Despite Checkpoint Booths being unavailable during Time Attack, [[Professor Chops]] makes an appearance as a referee. During every race, he first shows up at the beginning, waving a small green flag in the rhythm of the countdown. After the Kongs break the finish barrel, he springs on the scene with a chequered flag, indicating the race has been terminated. | ||
=====Time Attack Leaderboards===== | =====Time Attack Leaderboards===== | ||
If connected to the Internet and signed into Nintendo Network, players are granted the possibility to upload their Time Attack records on a worldwide leaderboard. These records are associated with their Nintendo Network IDs. The global Time Attack rank of any level in the game can be accessed by selecting the "LEADERBOARDS" section on the Time Attack menu. The rank displays other player's time records on | If connected to the Internet and signed into [[Nintendo Network]], players are granted the possibility to upload their Time Attack records on a worldwide leaderboard. These records are associated with their Nintendo Network IDs. The global Time Attack rank of any level in the game can be accessed by selecting the "LEADERBOARDS" section on the Time Attack menu. The rank displays other player's time records on said levels, as well as the Kong partner used and, occasionally, a replay of their progress to be observed. | ||
====Hard Mode==== | ====Hard Mode==== | ||
[[File:Chomp-DKCTF.jpg|thumb | [[File:Chomp-DKCTF.jpg|thumb|260px|Cranky Kong travels alone on Hard Mode. Note the single heart in his health meter.]] | ||
When players have collected all the | When players have collected all the KONG Letters in the game and have subsequently completed every level, an additional game mode, Hard Mode, is unlocked. Hard Mode can only be played with one Kong, marking the only occasion in the game aside from multiplayer sessions when one can take full control of Diddy, Dixie, or Cranky. The characters are given a single heart to go along the selected level, and have to reach the goal in it without checkpoints and without taking damage at all in order to complete the stage. In order to complete the game 200%, every level in the game has to be finished in Hard Mode. During Hard Mode, the KONG Letters of each level are recolored from red to blue; collecting them again in this mode replaces the red star icon next to a chosen level's name (marking that all letters have been previously obtained there) with a blue one, although it is not necessary for 200% completion. Upon completing Hard Mode, a message appears saying, "You've achieved 200%! Hard mode? That wasn't so hard!" and new images are unlocked in the [[List of extras in Donkey Kong Country: Tropical Freeze|Extras]] menu. | ||
===Multi-player=== | ===Multi-player=== | ||
The game features a co-operative two-player mode, where the first player is always Donkey Kong and the other can select either Diddy, Dixie, or Cranky to play as. The second player can independently control their Kong, but may choose to climb on Donkey Kong's back and perform joint actions, allowing player one to move both Kongs at once like in single-player mode while the other player makes use of their character's abilities. This includes the ability to use the [[popgun]] as Dixie and Cranky and perform ranged attacks. During multi-player, Kong Barrels are displayed as generic DK Barrels, akin to previous iterations. Should one player lose a life, the other can take the lead; however, the former can be found and redeemed inside the nearest DK Barrel. | The game features a co-operative two-player mode, where the first player is always Donkey Kong and the other can select either Diddy, Dixie, or Cranky to play as. The second player can independently control their Kong, but may choose to climb on Donkey Kong's back and perform joint actions, allowing player one to move both Kongs at once like in single-player mode while the other player makes use of their character's abilities. This includes the ability to use the [[popgun]] as Dixie and Cranky and perform ranged attacks. During multi-player, Kong Barrels are displayed as generic DK Barrels, akin to the previous iterations. Should one player lose a life, the other can take the lead; however, the former can be found and redeemed inside the nearest DK Barrel. | ||
==Controls== | ==Controls== | ||
| Line 138: | Line 133: | ||
The game can be played with either the [[Wii U#Wii U GamePad|Wii U GamePad]], the [[Wii#Wii Remote|Wii Remote]] alone and held horizontally, or the Wii Remote held vertically and connected to a [[Wii#Nunchuk|Nunchuk]]. | The game can be played with either the [[Wii U#Wii U GamePad|Wii U GamePad]], the [[Wii#Wii Remote|Wii Remote]] alone and held horizontally, or the Wii Remote held vertically and connected to a [[Wii#Nunchuk|Nunchuk]]. | ||
{|class="wikitable dk"style="width:100%; text-align:center" | |||
{|class=" | |||
!style="background:#bb8855" colspan=5|Solo and co-op modes | !style="background:#bb8855" colspan=5|Solo and co-op modes | ||
|- | |- | ||
| Line 161: | Line 155: | ||
|- | |- | ||
|Jump | |Jump | ||
|rowspan=8 | |rowspan=8 colspan=2|{{button|wiiu|A}} / {{button|wiiu|B}} | ||
|rowspan=8|{{button|wii|2}} | |rowspan=8|{{button|wii|2}} | ||
|rowspan=8|{{button|wii|A}} | |rowspan=8|{{button|wii|A}} | ||
| Line 205: | Line 198: | ||
|- | |- | ||
|style="background:#f5deb3"|Kong POW | |style="background:#f5deb3"|Kong POW | ||
|style="background:#f5deb3" | |style="background:#f5deb3" colspan=2|{{button|wiiu|L}} / {{button|wiiu|R}} | ||
|style="background:#f5deb3"|{{button|wii|A}} | |style="background:#f5deb3"|{{button|wii|A}} | ||
|style="background:#f5deb3"|{{button|wii|C}} | |style="background:#f5deb3"|{{button|wii|C}} | ||
| Line 233: | Line 225: | ||
|} | |} | ||
{{multiple image | {{multiple image | ||
|align=center | |||
|width=200 | |||
|image1=TeachingHowToCorkscrew.jpg|200px | |||
|caption1=[[Professor Chops]] appears from behind a rock to teach the player how to perform a [[Corkscrew (Donkey Kong Country: Tropical Freeze)|Corkscrew]] attack. This is the button combination for the [[Wii U#Wii U GamePad|Wii U GamePad]] primary control scheme. | |||
|image2=Water Skip DKCTF.jpg|200px | |||
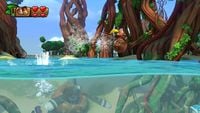
|caption2=The Kongs can skip water by performing a continuous [[Kong Roll]] on its surface. | |||
}} | |||
==Characters== | ==Characters== | ||
===Playable characters=== | ===Playable characters=== | ||
''Donkey Kong Country: Tropical Freeze'' has four playable characters (five in the Nintendo Switch port), making it the ''Donkey Kong Country'' game with the most playable characters. | ''Donkey Kong Country: Tropical Freeze'' has four playable characters (five in the Nintendo Switch port), making it the ''Donkey Kong Country'' game with the most playable characters. | ||
{|class="wikitable dk"width=100% | |||
{|class=" | |||
|- | |- | ||
!Character | !Character | ||
!style="width:60%"|Description | !style="width:60%"|Description | ||
!{{color | !{{color link|navy|Kong POW}} Ability | ||
|-align="center" | |-align="center" | ||
|[[File:Donkey Kong Artwork - Donkey Kong Country Tropical Freeze.png|110px]]<br>'''[[Donkey Kong]]''' | |[[File:Donkey Kong Artwork - Donkey Kong Country Tropical Freeze.png|110px]]<br>'''[[Donkey Kong]]''' | ||
|style="text-align:left"| | |style="text-align:left"| | ||
Donkey Kong is the character the single or first player always controls | Donkey Kong is the character the single or first player always controls. He is able to water skip when rolling with another Kong on top of him. Underwater, Donkey Kong is able to charge at enemies to defeat them. | ||
|N/A | |N/A | ||
|-align="center" | |-align="center" | ||
|[[File:Diddy Kong Artwork - Donkey Kong Country Tropical Freeze.png|90px]]<br>'''[[Diddy Kong]]''' | |[[File:Diddy Kong Artwork - Donkey Kong Country Tropical Freeze.png|90px]]<br>'''[[Diddy Kong]]''' | ||
|style="text-align:left"| | |style="text-align:left"| | ||
His jetpack allows him to hover in midair and get speed boosts underwater | His jetpack allows him to hover in midair and get speed boosts underwater. His Peanut [[Popgun]] can be used to shoot and stun or distract enemies for a brief moment. | ||
|Turns enemies into [[Extra Life Balloon|Red Balloon]]s, which add [[Extra Life|lives]]. | |Turns enemies into [[Extra Life Balloon|Red Balloon]]s, which add [[Extra Life|lives]]. | ||
|-align="center" | |-align="center" | ||
|[[File:Dixie Kong - Donkey Kong Country Tropical Freeze.png|90px]]<br>'''[[Dixie Kong]]''' | |[[File:Dixie Kong - Donkey Kong Country Tropical Freeze.png|90px]]<br>'''[[Dixie Kong]]''' | ||
|style="text-align:left"| | |style="text-align:left"| | ||
Her ponytail allows her to get a short lift or fall slowly in midair. Underwater, her hair can also be used as a propeller, conferring more agility in her swimming; secret exits can be found with her hair as well, by going through currents. Her Gumball | Her ponytail allows her to get a short lift or fall slowly in midair. Underwater, her hair can also be used as a propeller, conferring more agility in her swimming; secret exits can be found with her hair as well, by going through currents. Her Gumball Popgun can shoot bubble gums at enemies. | ||
|Turns enemies into [[Gold Heart]]s, which allow extra hits from enemies. | |Turns enemies into [[Gold Heart]]s, which allow extra hits from enemies. | ||
|-align="center" | |-align="center" | ||
|[[File:Cranky Kong Artwork - Donkey Kong Country Tropical Freeze.png|170px]]<br>'''[[Cranky Kong]]''' | |[[File:Cranky Kong Artwork - Donkey Kong Country Tropical Freeze.png|170px]]<br>'''[[Cranky Kong]]''' | ||
|style="text-align:left"| | |style="text-align:left"| | ||
His cane can be used to defeat hard-to-stomp enemies, and as a pogo stick in order to jump higher and on spikes. Also with his cane, he can whack enemies underwater. His | His cane can be used to defeat hard-to-stomp enemies, and as a pogo stick in order to jump higher and on spikes. Also with his cane, he can whack enemies underwater. His popgun shoots dentures at enemies. | ||
|Turns enemies into [[Banana Coin]]s, which can be used to purchase items in [[Funky's Fly 'n' Buy]]. | |Turns enemies into [[Banana Coin]]s, which can be used to purchase items in [[Funky's Fly 'n' Buy]]. | ||
|} | |} | ||
===Supporting characters=== | ===Supporting characters=== | ||
{|class=" | {|class="wikitable dk"width=100% | ||
|- | |- | ||
!style="width:20%"|Character | !style="width:20%"|Character | ||
| Line 284: | Line 275: | ||
|Runs the checkpoint booths in each level as he did in ''Donkey Kong Country Returns''. He no longer offers the [[Super Kong]] option, which does not reappear in the game. | |Runs the checkpoint booths in each level as he did in ''Donkey Kong Country Returns''. He no longer offers the [[Super Kong]] option, which does not reappear in the game. | ||
|-align="center" | |-align="center" | ||
|[[File:Rambi DKCR.png|140px]]<br>'''[[Rambi | |[[File:Rambi DKCR.png|140px]]<br>'''[[Rambi]]''' | ||
|Rambi retains his role as the sole ridable [[Animal Friend]]. He can bash into enemies easier than the Kongs and can break some walls or other big objects that the Kongs cannot normally break. He can also defeat enemies by just walking into them. He is affected by lightning and runs away as he bumps into fiery enemies. | |Rambi retains his role as the sole ridable [[Animal Friend]]. He can bash into enemies easier than the Kongs and can break some walls or other big objects that the Kongs cannot normally break. He can also defeat enemies by just walking into them. He is affected by lightning and runs away as he bumps into fiery enemies. | ||
|-align="center" | |-align="center" | ||
|[[File:Squawks DKCTF.png|120px]]<br>'''[[Squawks | |[[File:Squawks DKCTF.png|120px]]<br>'''[[Squawks]]''' | ||
|colspan="3"|Squawks is once again a hireable character, who will sit in the corner of the screen and warn the player if [[Puzzle Piece (Donkey Kong Country series)|Puzzle Pieces]] are nearby during a stage if placed in the inventory for a level.<ref> | |colspan="3"|Squawks is once again a hireable character, who will sit in the corner of the screen and warn the player if [[Puzzle Piece (Donkey Kong Country series)|Puzzle Pieces]] are nearby during a stage if placed in the inventory for a level.<ref>{{cite|deadlink=y|title=''Donkey Kong Country: Tropical Freeze'' - World Map & Funky Kong (Wii U Gameplay)|archive=web.archive.org/web/20140121201347/http://www.youtube.com/watch?v=7YtBdw87YG8&gl=US&hl=en|publisher=YouTube|accessdate=May 28, 2024|language=en}}</ref> | ||
|} | |} | ||
===Bosses=== | ===Bosses=== | ||
Each boss of this game is faced at the end of one of the six main [[world]]s. The Kongs have to deliver nine hits to a boss enemy in order to defeat him; after every three hits, the boss will anger and morph into another phase, usually changing color to reflect this. As the final blow is struck, the player is given the chance to punch the boss and knock him out violently by repeatedly pressing the buttons shown on screen. | Each boss of this game is faced at the end of one of the six main [[world]]s. The Kongs have to deliver nine hits to a boss enemy in order to defeat him; after every three hits, the boss will anger and morph into another phase, usually changing color to reflect this. As the final blow is struck, the player is given the chance to punch the boss and knock him out violently by repeatedly pressing the buttons shown on screen. | ||
{|class="wikitable dk" width=100% | |||
{|class=" | |||
|- | |- | ||
!Image | !Image | ||
| Line 301: | Line 291: | ||
!Level appearance | !Level appearance | ||
|- | |- | ||
| align="center" |[[File:DKCTF Pompy.png|100px]] | |align="center"|[[File:DKCTF Pompy.png|100px]] | ||
|style="text-align:center"|[[Pompy | |style="text-align:center"|[[Pompy]] | ||
|An enormous | |An enormous sea lion and the first boss of the game. The enemy repeatedly skates down a half-pipe arena in a circus tent, attempting different stunts to attack the Kongs. These include jumping high up in the air and diving back down onto the arena, or doing barrel rolls. During his first and third attack phases, Pompy retreats in the foreground pond and sends aquatic enemies, such as [[Green Finley]]s, [[Sea Urchin]]s, and [[Gordo]]s, bouncing on the arena. Occasionally, he employs several [[Big Sphen]]s as extra obstacles during the course of the battle, skating on their bellies in Pompy's tow. | ||
|Big Top Bop | |[[Big Top Bop]] | ||
|- | |- | ||
| align="center" |[[File:Skowl1.jpg|100px]] | |align="center"|[[File:Skowl1.jpg|100px]] | ||
|style="text-align:center"|[[Skowl | |style="text-align:center"|[[Skowl]] | ||
|A giant owl and the leader of the [[Hootz]] platoon. His main attack set includes scattering sharp feather missiles, charging onto the Kongs with his sharp talons, creating strong gusts with his wings, and spawning small owl minions, some of which can be thrown back at the enemy to damage him. As the battlefield ascends into the sky, Skowl attempts new attack techniques. | |A giant owl and the leader of the [[Hootz]] platoon. His main attack set includes scattering sharp feather missiles, charging onto the Kongs with his sharp talons, creating strong gusts with his wings, and spawning small owl minions, some of which can be thrown back at the enemy to damage him. As the battlefield ascends into the sky, Skowl attempts new attack techniques. | ||
|Mountaintop Tussle | |[[Mountaintop Tussle]] | ||
|- | |- | ||
| align="center" |[[File:Ba-boom kong 02 595.png|100px]] | |align="center"|[[File:Ba-boom kong 02 595.png|100px]] | ||
|style="text-align:center"|[[Ba-Boom | |style="text-align:center"|[[Ba-Boom]] | ||
|A trio of mischievous baboon brothers. Their repertoire of attacks consists of throwing [[Watermelon Fuse Bomb]]s | |A trio of mischievous baboon brothers. Their repertoire of attacks consists of throwing [[Watermelon Fuse Bomb]]s and swinging on a rope towards the Kongs, usually spinning a hammer in an attempt to hurt them. Ba-Boom will also try a rolling dash attack, changing direction as they collide with the arena margins. After two members of the trio are defeated, the third will summon specters of himself and attack in the same manner as before. | ||
|Triple Trouble | |[[Triple Trouble]] | ||
|- | |- | ||
| align="center" |[[File:Fugu 01.png|100px]] | |align="center"|[[File:Fugu 01.png|100px]] | ||
|style="text-align:center"|[[Fugu | |style="text-align:center"|[[Fugu]] | ||
|A | |A pufferfish capable of growing in size. He attempts to suck in the Kongs by inhaling large quantities of water, then pushes them onto the [[Hermit Crab|hermit crabs]] on the walls by puffing the water back. He usually also exhales [[green fish]], which can be bounced back at the boss to deal damage. Likewise, his rear side is exposed and can be occasionally rammed into with a [[Corkscrew (Donkey Kong Country: Tropical Freeze)|corkscrew]]. During his third phase, Fugu will swell enough to cover half of the battle area. | ||
|Fugu Face-Off | |[[Fugu Face-Off]] | ||
|- | |- | ||
| align="center" |[[File:Bashmaster. | |align="center"|[[File:DKCTF Artwork Bashmaster.png|100px]] | ||
|style="text-align:center"|[[Bashmaster | |style="text-align:center"|[[Bashmaster]] | ||
| | |A large bipedal polar bear that wields a mallet. His most basic attack is a powerful blow with his weapon, which momentarily gets stuck on the ground, allowing the Kongs to use it as a platform and stomp on the boss's head. Bashmaster is able to leap from the scene and crash back on the arena, tilting it abruptly while also sending icy shock waves. Often, Bashmaster creates columns of icy blocks that he sends sliding on the battlefield. These blocks can be pounded and destroyed, and some contain [[Banana Coin]]s and [[Watermelon Fuse Bomb]]s, the latter having to be thrown at the boss to damage him. | ||
|Punch Bowl | |[[Punch Bowl]] | ||
|- | |- | ||
| align="center" |[[File:SnowmadLeader.jpg|100px]] | |align="center"|[[File:SnowmadLeader.jpg|100px]] | ||
|style="text-align:center"|[[Lord Fredrik | |style="text-align:center"|[[Lord Fredrik]] | ||
|The final boss, titled the king of all Snowmads. He is fought on a basalt field surrounded by lava. Lord Fredrik uses his [[Horn (object)|horn]] to summon [[ice dragon]]s and icy balls, some of them | |The final boss, titled the king of all Snowmads. He is fought on a basalt field surrounded by lava. Lord Fredrik uses his [[Horn (object)|horn]] to summon [[ice dragon]]s and icy balls, some of them containing [[Tuff Tucks]] and [[Tuff Fluff]]s that can be thrown back at the boss to damage him. Likewise, Fredrik faces the Kongs directly by charging and attempting to ram his Viking horns into the protagonists; while running, his back is exposed to stomp attacks, needed to damage the boss. He will also pound the ground and temporarily sink patches of basalt in the lava. | ||
|Volcano Dome | |[[Volcano Dome]] | ||
|} | |} | ||
{{br}} | {{br}} | ||
| Line 335: | Line 325: | ||
===Enemies=== | ===Enemies=== | ||
====Snowmads==== | ====Snowmads==== | ||
{|class="wikitable dk" width=100% | |||
{|class=" | !colspan=5 style="background:saddlebrown;color:white"align=center|'''Tucks''' | ||
! colspan=5 style="background:saddlebrown;color:white" align=center | '''Tucks''' | |||
|- | |- | ||
!Image | !Image | ||
| Line 345: | Line 334: | ||
!Last level appearance | !Last level appearance | ||
|- | |- | ||
| align="center" |[[File:Tucks DKCTF.png|100px]] | |align="center"|[[File:Tucks DKCTF.png|100px]]<br>[[File:Bouncy Tucks.png|100px]] | ||
|style="text-align:center"|[[Tucks]] | |style="text-align:center"|[[Tucks]] | ||
|A | |A enemy that simply roams back and forth on ground areas. It can be defeated by any signs of attack, including stomping and rolling. Bare Tucks that bounce on springy surfaces appear in [[Windmill Hills]] and [[Jelly Jamboree]]. | ||
| align="center" |[[Mangrove Cove]] | |align="center"|[[Mangrove Cove]] | ||
| align="center" |[[Crazy Clouds]] | |align="center"|[[Crazy Clouds]] | ||
|- | |- | ||
| align="center" |[[File:Speedy tucks.png|100px]] | |align="center"|[[File:Speedy tucks.png|100px]] | ||
|style="text-align:center"|[[Speedy Tucks]] | |style="text-align:center"|[[Speedy Tucks]] | ||
|A variant of Tucks that tries to attack the Kongs by charging into them. Speedy Tuckses can be knocked down with any attack. | |A variant of Tucks that tries to attack the Kongs by charging into them. Speedy Tuckses can be knocked down with any attack. | ||
| align="center" |[[Twilight Terror]] (seen in the background, loading fish with a Tucks)<br>[[Shoal Atoll]] (encountered as an obstacle) | |align="center"|[[Twilight Terror]] (seen in the background, loading fish with a Tucks)<br>[[Shoal Atoll]] (encountered as an obstacle) | ||
| align="center" |[[Slippy Spikes]] | |align="center"|[[Slippy Spikes]] | ||
|- | |- | ||
| align="center" |[[File:Tuff tucks.png|100px]] | |align="center"|[[File:Tuff tucks.png|100px]] | ||
|style="text-align:center"|[[Tuff Tucks]] | |style="text-align:center"|[[Tuff Tucks]] | ||
| | |An enemy which temporarily flips over when jumped on. In this state, it can then be picked up, carried, and hurled by the Kongs to attack other enemies or break fragile walls that hide secrets. | ||
| align="center" |[[Mangrove Cove]] | |align="center"|[[Mangrove Cove]] | ||
| align="center" |[[Rocket Rails]] | |align="center"|[[Rocket Rails]] | ||
|- | |- | ||
| align="center" |[[File:Tuff speedy tucks.png|100px]] | |align="center"|[[File:Tuff speedy tucks.png|100px]] | ||
|style="text-align:center"|[[Tenacious Tucks]] | |style="text-align:center"|[[Tenacious Tucks]] | ||
|A combination of Tuff Tucks and Speedy Tucks | |A combination of Tuff Tucks and Speedy Tucks; the enemy actively tries to attack the Kongs while being protected by an orange helmet. | ||
| align="center" |[[ | |align="center"|[[Volcano Dome]] | ||
| align="center" |[[ | |align="center"|[[Volcano Dome]] | ||
|- | |- | ||
| align="center" |[[File:Viking Art2 - Donkey Kong Country Tropical Freeze.png|100px]] | |align="center"|[[File:Viking Art2 - Donkey Kong Country Tropical Freeze.png|100px]] | ||
|style="text-align:center"|[[Pointy Tucks]] | |style="text-align:center"|[[Pointy Tucks]] | ||
| | |An enemy that wears a viking helmet, making it invulnerable to jump attacks. The enemy can be defeated with any other attack method. | ||
| align="center" |[[Shipwreck Shore]] | |align="center"|[[Shipwreck Shore]] | ||
| align="center" |[[Icicle Arsenal]] | |align="center"|[[Icicle Arsenal]] | ||
|- | |- | ||
| align="center" |[[File:Trench tuck.png|100px]] | |align="center"|[[File:Trench tuck.png|100px]] | ||
|style="text-align:center"|[[Trench Tucks]] | |style="text-align:center"|[[Trench Tucks]] | ||
|A Pointy Tucks that carries a | |A Pointy Tucks that carries a shield to push the Kongs back. The enemy can be defeated by rolling into it from behind. | ||
| align="center" |[[Frantic Fields]] | |align="center"|[[Frantic Fields]] | ||
| align="center" |[[Meltdown Mayhem]] | |align="center"|[[Meltdown Mayhem]] | ||
|- | |- | ||
| align="center" |[[File:Viking Art4 - Donkey Kong Country Tropical Freeze.png|100px]] | |align="center"|[[File:Viking Art4 - Donkey Kong Country Tropical Freeze.png|100px]] | ||
|style="text-align:center"|[[Archy]] | |style="text-align:center"|[[Archy]] | ||
| | |An enemy that shoots fish from a bow. The fish follow a straight line in the air and can be stomped on. The Archy can be also stomped on, as well as rolled into. | ||
| align="center" |[[Canopy Chaos]] | |align="center"|[[Canopy Chaos]] | ||
| align="center" |[[Icicle Arsenal]] | |align="center"|[[Icicle Arsenal]] | ||
|- | |- | ||
| align="center" |[[File:Fire archy.png|100px]] | |align="center"|[[File:Fire archy.png|100px]] | ||
|style="text-align:center"|[[Archy (fire)]] | |style="text-align:center"|[[Archy (fire)]] | ||
|A variety of the regular Archy. It shoots flaming fishbones instead of carnal fish, which cannot be jumped on. Nonetheless, fire | |A variety of the regular Archy. It shoots flaming fishbones instead of carnal fish, which cannot be jumped on. Nonetheless, Archies (fire) can be defeated the same as normal Archies. | ||
| align="center" |[[Scorch 'n' Torch]] | |align="center"|[[Scorch 'n' Torch]] | ||
| align="center" |[[Icicle Arsenal]] | |align="center"|[[Icicle Arsenal]] | ||
|- | |- | ||
| align="center" |[[File:Boom bird.png|100px]] | |align="center"|[[File:Boom bird.png|100px]] | ||
|style="text-align:center"|[[Boom Bird]] | |style="text-align:center"|[[Boom Bird]] | ||
|A red-colored penguin that carries a [[Watermelon Fuse Bomb]] on its back. It can be defeated by any means of attack. | |A red-colored penguin that carries a [[Watermelon Fuse Bomb]] on its back. It can be defeated by any means of attack. As soon as the bomb drops on the ground, its fuse starts to burn and will explode after a short time. | ||
| align="center" |[[Cannon Canyon]] | |align="center"|[[Cannon Canyon]] | ||
| align="center" |[[Icicle Arsenal]] | |align="center"|[[Icicle Arsenal]] | ||
|- | |- | ||
| align="center" |[[File:Painguin Tucks.png|100px]] | |align="center"|[[File:Painguin Tucks.png|100px]] | ||
|style="text-align:center"|[[Painguin Tucks]] | |style="text-align:center"|[[Painguin Tucks]] | ||
| | |An enemy that tries to attack the Kongs with a spear. It can be taken out by jumping on its head or rolling into it from behind. | ||
| align="center" |[[Mangrove Cove]] | |align="center"|[[Mangrove Cove]] | ||
| align="center" |[[Rocket Rails]] | |align="center"|[[Rocket Rails]] | ||
|- | |- | ||
| align="center" |[[File:Papa Painguin closeup.png|100px]] | |align="center"|[[File:Papa Painguin closeup.png|100px]] | ||
|style="text-align:center"|[[Papa Painguin]] | |style="text-align:center"|[[Papa Painguin]] | ||
|A Painguin Tucks wearing a thorny helmet. Both ends of its spear are sharp | |A Painguin Tucks wearing a thorny helmet. Both ends of its spear are sharp, making the enemy initially devoid of vulnerable spots. The Kongs can stun the Papa Painguin with a ground pound and make it drop its spear, then roll into the enemy from either side to defeat it. | ||
| align="center" |[[Deep Keep]] | |align="center"|[[Deep Keep]] | ||
| align="center" |[[Rocket Rails]] | |align="center"|[[Rocket Rails]] | ||
|- | |- | ||
| align="center" |[[File:Soary DKCTF.png|100px]] | |align="center"|[[File:Soary DKCTF.png|100px]] | ||
|style="text-align:center"|[[Soary]] | |style="text-align:center"|[[Soary]] | ||
| | |An enemy that flies towards the Kongs in a straight line. They can be defeated with a stomp. | ||
| align="center" |[[Alpine Incline]] | |align="center"|[[Alpine Incline]] | ||
| align="center" |[[Slippy Spikes]] | |align="center"|[[Slippy Spikes]] | ||
|- | |- | ||
| align="center" |[[File: | |align="center"|[[File:Big sphen.png|100px]] | ||
|style="text-align:center"|[[ | |style="text-align:center"|[[Big Sphen]] | ||
| | |A large enemy that carries a blowing horn and uses it to shoot icy fish as a means of attack. These fish slide down on the ground and can be taken out with a stomp. Big Sphens themselves can be defeated with three stomps or three roll attacks. | ||
| align="center" |[[ | |align="center"|[[Big Top Bop]] | ||
| align="center" |[[ | |align="center"|[[Slippy Spikes]] | ||
|- | |- | ||
| align="center" |[[File: | |align="center"|[[File:DKCTF Pengaccha 1-go.jpg|100px]] | ||
|style="text-align:center"|[[ | |style="text-align:center"|[[Pengatcha 1-gō]] | ||
|A | |A large robotic vehicle operated by a Speedy Tucks, used in various ways to hinder the Kongs. | ||
| align="center" |[[ | |align="center"|[[Reckless Ride]] | ||
| align="center" |[[ | |align="center"|[[Reckless Ride]] | ||
|- | |- | ||
! colspan=5 style="background:saddlebrown;color:white" align=center | '''Fluffs''' | !colspan=5 style="background:saddlebrown;color:white"align=center|'''Fluffs''' | ||
|- | |- | ||
!Image | !Image | ||
| Line 437: | Line 426: | ||
!Last level appearance | !Last level appearance | ||
|- | |- | ||
| align="center" |[[File:Viking Art7 - Donkey Kong Country Tropical Freeze.png|100px]] | |align="center"|[[File:Viking Art7 - Donkey Kong Country Tropical Freeze.png|100px]] | ||
|style="text-align:center"|[[Fluff]] | |style="text-align:center"|[[Fluff (enemy)|Fluff]] | ||
| | |Enemies that constantly leap from side to side and can be defeated with any attack technique. | ||
| align="center" |[[Mangrove Cove]] | |align="center"|[[Mangrove Cove]] | ||
| align="center" |[[Dynamite Dash]] | |align="center"|[[Dynamite Dash]] | ||
|- | |- | ||
| align="center" |[[File:Tuff fluff.png|85px]] | |align="center"|[[File:Tuff fluff.png|85px]] | ||
|style="text-align:center"|[[Tuff Fluff]] | |style="text-align:center"|[[Tuff Fluff]] | ||
|A Fluff | |A variation of Fluff that, like Tuff Tucks, flips over temporarily when jumped on and can be used as a throwing object. | ||
| align="center" |[[Horn Top Hop]] | |align="center"|[[Horn Top Hop]] | ||
| align="center" |[[ | |align="center"|[[Volcano Dome]] | ||
|- | |- | ||
| align="center" |[[File:Harey.png|120px]] | |align="center"|[[File:Harey.png|120px]] | ||
|style="text-align:center"|[[Harey]] | |style="text-align:center"|[[Harey]] | ||
|A | |A large enemy that creates sharp ice waves on the ground that can damage the Kongs. They can be defeated by jumping or rolling into them three times. | ||
| align="center" |[[Reckless Ride]] | |align="center"|[[Reckless Ride]] | ||
| align="center" |[[Homecoming Hijinxs]] | |align="center"|[[Homecoming Hijinxs]] | ||
|- | |- | ||
| align="center" |[[File:Harold.png|100px]] | |align="center"|[[File:Harold.png|100px]] | ||
|style="text-align:center"|[[Harold (enemy)|Harold]] | |style="text-align:center"|[[Harold (enemy)|Harold]] | ||
| | |An enemy similar to Hareys that continuously throws [[Watermelon Fuse Bomb]]s at the Kongs. Before they detonate, the bombs can be passed back at the Harold to defeat it. | ||
| align="center" |[[Sea Stack Attack]] | |align="center"|[[Sea Stack Attack]] | ||
| align="center" |[[Rocket Rails]] | |align="center"|[[Rocket Rails]] | ||
|- | |- | ||
! colspan=5 style="background:saddlebrown;color:white" align=center | '''Hootzes''' | !colspan=5 style="background:saddlebrown;color:white"align=center|'''Hootzes''' | ||
|- | |- | ||
!Image | !Image | ||
| Line 469: | Line 458: | ||
!Last level appearance | !Last level appearance | ||
|- | |- | ||
| align="center" |[[File:Owl Snowmad Artwork - Donkey Kong Country Tropical Freeze.png|100px]] | |align="center"|[[File:Owl Snowmad Artwork - Donkey Kong Country Tropical Freeze.png|100px]] | ||
|style="text-align:center"|[[Hootz]] | |style="text-align:center"|[[Hootz]] | ||
|Owl-like enemies that fly around in set patterns and can be defeated in any way | |Owl-like enemies that fly around in set patterns and can be defeated in any way. | ||
| align="center" |[[Trunk Twister]] | |align="center"|[[Trunk Twister]] | ||
| align="center" |[[Crazy Clouds]] | |align="center"|[[Crazy Clouds]] | ||
|- | |- | ||
| align="center" |[[File:Hot hootz.png|100px]] | |align="center"|[[File:Hot hootz.png|100px]] | ||
|style="text-align:center"|[[Hot Hootz]] | |style="text-align:center"|[[Hot Hootz]] | ||
|An orange Hootz that engulfs itself periodically with fire | |An orange Hootz that engulfs itself periodically with fire and conveys it into a fireball, sending it towards the Kongs' current position. Except when they are shrouded in flames, Hot Hootzes can be knocked down with any attack method. | ||
| align="center" |[[Swinger Flinger]] | |align="center"|[[Swinger Flinger]] | ||
| align="center" |[[Crazy Clouds]] | |align="center"|[[Crazy Clouds]] | ||
|- | |- | ||
| align="center" |[[File:Puffton enemy.png|100px]] | |align="center"|[[File:Puffton enemy.png|100px]] | ||
|style="text-align:center"|[[Puffton]] | |style="text-align:center"|[[Puffton]] | ||
|An | |An large Hootz that takes three stomp or roll attacks to defeat. | ||
| align="center" |[[Windmill Hills]] | |align="center"|[[Windmill Hills]] | ||
| align="center" |[[Crazy Clouds]] | |align="center"|[[Crazy Clouds]] | ||
|- | |- | ||
| align="center" |[[File:Tuffton DKCTF.png|100px]] | |align="center"|[[File:Tuffton DKCTF.png|100px]] | ||
|style="text-align:center"|[[Tuffton]] | |style="text-align:center"|[[Tuffton]] | ||
| | |Puffton variants that wear a helmet, which protects them from stomp attacks but can be used as platforms. | ||
| align="center" |[[Windmill Hills]] (seen in the level's introduction)<br>[[Horn Top Hop]] (encountered as an obstacle) | |align="center"|[[Windmill Hills]] (seen in the level's introduction)<br>[[Horn Top Hop]] (encountered as an obstacle) | ||
| align="center" |[[Slippy Spikes]] | |align="center"|[[Slippy Spikes]] | ||
|- | |- | ||
| align="center" |[[File:Blue hootz.png|100px]] | |align="center"|[[File:Blue hootz.png|100px]] | ||
|style="text-align:center"|[[Blue Hootz]] | |style="text-align:center"|[[Blue Hootz]] | ||
|A | |A small enemy constantly covered in blue flames. It can only be defeated with a throwable object. | ||
| align="center" |[[Zip-Line Shrine]] | |align="center"|[[Zip-Line Shrine]] | ||
| align="center" |[[Crazy Clouds]] | |align="center"|[[Crazy Clouds]] | ||
|- | |- | ||
! colspan=5 style="background:saddlebrown;color:white" align=center | '''Waldoughs''' | !colspan=5 style="background:saddlebrown;color:white"align=center|'''Waldoughs''' | ||
|- | |- | ||
!Image | !Image | ||
| Line 507: | Line 496: | ||
!Last level appearance | !Last level appearance | ||
|- | |- | ||
| align="center" |[[File:Viking Art8 - Donkey Kong Country Tropical Freeze.png|100px]] | |align="center"|[[File:Viking Art8 - Donkey Kong Country Tropical Freeze.png|100px]] | ||
|style="text-align:center"|[[Waldough]] | |style="text-align:center"|[[Waldough]] | ||
|A large | |A large enemy that can be jumped on (or rolled into) three times to defeat. | ||
| align="center" |[[Mangrove Cove]] | |align="center"|[[Mangrove Cove]] | ||
| align="center" |[[Meltdown Mayhem]] | |align="center"|[[Meltdown Mayhem]] | ||
|- | |- | ||
| align="center" |[[File:Walnut dkctf.png|100px]] | |align="center"|[[File:Walnut dkctf.png|100px]] | ||
|style="text-align:center"|[[Walnut]] | |style="text-align:center"|[[Walnut]] | ||
|A Waldough that wears a | |A Waldough that wears a helmet on its head, preventing jump attacks. They can be defeated with three [[Cane Bounce]]s or three roll attacks from the front or back. | ||
| align="center" |[[Mountain Mania]] | |align="center"|[[Mountain Mania]] | ||
| align="center" |[[Meltdown Mayhem]] | |align="center"|[[Meltdown Mayhem]] | ||
|- | |- | ||
| align="center" |[[File:Viking Artwork - DKC Tropical Freeze.png|100px]] | |align="center"|[[File:Viking Artwork - DKC Tropical Freeze.png|100px]] | ||
|style="text-align:center"|[[Walbrick]] | |style="text-align:center"|[[Walbrick]] | ||
|An armored | |An armored enemy that is invulnerable to jump and frontal roll attacks. Although its back is not covered, the Walbrick immediately turns around if the Kongs attempt to attack it from behind. Jumping on a Walbrick stuns it, allowing the Kongs to attack its back side with a roll attack. Three roll attacks are required to defeat the enemy. | ||
| align="center" |[[ | |align="center"|[[Big Top Bop]] | ||
| align="center" |[[Blurry Flurry]] | |align="center"|[[Blurry Flurry]] | ||
|- | |- | ||
| align="center" |[[File:Viking Art5 - Donkey Kong Country Tropical Freeze.png|100px]] | |align="center"|[[File:Viking Art5 - Donkey Kong Country Tropical Freeze.png|100px]] | ||
|style="text-align:center"|[[Chum Chucker Charlie]] | |style="text-align:center"|[[Chum Chucker Charlie]] | ||
| | |An enemy that attacks the Kongs by tossing fish at them. It takes three jump or roll attacks to defeat, and can also be taken out directly with a thrown object. | ||
| align="center" |[[Fruity Factory]] | |align="center"|[[Fruity Factory]] | ||
| align="center" |[[Icicle Arsenal]] | |align="center"|[[Icicle Arsenal]] | ||
|- | |- | ||
| align="center" |[[File:Viking Art1 - Donkey Kong Country Tropical Freeze.png|100px]] | |align="center"|[[File:Viking Art1 - Donkey Kong Country Tropical Freeze.png|100px]] | ||
|style="text-align:center"|[[Fish Poker Pops]] | |style="text-align:center"|[[Fish Poker Pops]] | ||
| | |An enemy that cannot be jumped on and carries large stick weapon with two puffer fish tucked on its sides. As the Kongs approach the Fish Poker Pops, it rises the weapon in the air to attack; in this stance, it can be attacked by rolling into it from the front. | ||
| align="center" |[[Spinning Spines]] | |align="center"|[[Spinning Spines]] | ||
| align="center" |[[Rocket Rails]] | |align="center"|[[Rocket Rails]] | ||
|- | |- | ||
! colspan=5 style="background:saddlebrown;color:white" align=center | '''Other''' | !colspan=5 style="background:saddlebrown;color:white"align=center|'''Other''' | ||
|- | |- | ||
!Image | !Image | ||
| Line 545: | Line 534: | ||
!Last level appearance | !Last level appearance | ||
|- | |- | ||
| align="center" |[[File:Lemmington dkctf.png|100px]] | |align="center"|[[File:Lemmington dkctf.png|100px]] | ||
|style="text-align:center"|[[Lemmington]] | |style="text-align:center"|[[Lemmington]] | ||
| | |An enemy that uses a spiky wheel to move along various surfaces. While upside-down or on a vertical surface, Lemmingtons can be defeated by pounding the surface they are on. | ||
| align="center" |[[Horn Top Hop]] | |align="center"|[[Horn Top Hop]] | ||
| align="center" |[[Icicle Arsenal]] | |align="center"|[[Icicle Arsenal]] | ||
|- | |- | ||
| align="center" |[[File:Ice dragon.png|100px]] | |align="center"|[[File:Ice dragon.png|100px]] | ||
|style="text-align:center"|[[Ice dragon]] | |style="text-align:center"|[[Ice dragon]] | ||
| | |Enemies released from Lord Fredrik's horn that fly out and plummet on the ground shortly after. As they crash, they freeze the patch of ground they fell onto, creating a slippery surface. | ||
| align="center" |[[ | |align="center"|[[Volcano Dome]] | ||
| align="center" |[[ | |align="center"|[[Volcano Dome]] | ||
|} | |} | ||
{{br}} | {{br}} | ||
====Domestic enemies and other obstacles==== | ====Domestic enemies and other obstacles==== | ||
{|class="wikitable dk" width=100% | |||
!colspan=5 style="background:saddlebrown;color:white"align=center|'''General enemies''' | |||
{|class=" | |||
! colspan=5 style="background:saddlebrown;color:white" align=center | '''General enemies''' | |||
|- | |- | ||
!Image | !Image | ||
| Line 571: | Line 558: | ||
!Last level appearance | !Last level appearance | ||
|- | |- | ||
| align="center" |[[File:Blue finley.png|100px]]<br>[[File:Red finley.png|100px]]<br>[[File:Green finley.png|100px]] | |align="center"|[[File:Blue finley.png|100px]]<br>[[File:Red finley.png|100px]]<br>[[File:Green finley.png|100px]] | ||
|style="text-align:center"|[[Finley]] | |style="text-align:center"|[[Finley]] | ||
|Finleys are regular fish enemies that follow set patterns when swimming. They are harmful if touched, but vulnerable to [[Corkscrew (Donkey Kong Country: Tropical Freeze)|Corkscrew]] attacks or Cranky Kong's cane swipes. Finleys are divided into [[Blue Finley|Blue]] and [[Red Finley]]s, with the former moving more slowly. A distinct [[Green Finley|Green]] type also exists, though it behaves differently by leaping out of the water. | |Finleys are regular fish enemies that follow set patterns when swimming. They are harmful if touched, but vulnerable to [[Corkscrew (Donkey Kong Country: Tropical Freeze)|Corkscrew]] attacks or Cranky Kong's cane swipes. Finleys are divided into [[Blue Finley|Blue]] and [[Red Finley]]s, with the former moving more slowly. A distinct [[Green Finley|Green]] type also exists, though it behaves differently by leaping out of the water. | ||
| align="center" |[[Mangrove Cove]] | |align="center"|[[Mangrove Cove]] | ||
| align="center" |[[Rocket Rails]] | |align="center"|[[Rocket Rails]] | ||
|- | |- | ||
| align="center" |[[File:Gargantuan Gills.png|100px]] | |align="center"|[[File:Gargantuan Gills.png|100px]] | ||
|style="text-align:center"|[[ | |style="text-align:center"|[[Horror Gills]] | ||
|A family of enormous fish predators that can only be encountered in vehicle-riding sequences of the game. Most of them roam around savannah waters while keeping their dorsal sides over the surface, potentially crashing their upper appendages into the Kongs. Other actively seek to attack the characters by jumping out of the water. A few of them remove part of the railtrack in [[High Tide Ride]]. | |A family of enormous fish predators that can only be encountered in vehicle-riding sequences of the game. Most of them roam around savannah waters while keeping their dorsal sides over the surface, potentially crashing their upper appendages into the Kongs. Other actively seek to attack the characters by jumping out of the water. A few of them remove part of the railtrack in [[High Tide Ride]]. | ||
| align="center" |[[Twilight Terror]] | |align="center"|[[Twilight Terror]] | ||
| align="center" |[[High Tide Ride]] | |align="center"|[[High Tide Ride]] | ||
|- | |- | ||
| align="center" |[[File:Gordo DKCTF.png|100px]] | |align="center"|[[File:Gordo DKCTF.png|100px]] | ||
|style="text-align:center"|[[Gordo]] | |style="text-align:center"|[[Gordo]] | ||
|A considerably larger and tougher fish than a Finley, but one that otherwise behaves the same. It can only be destroyed with three consequent [[Corkscrew (Donkey Kong Country: Tropical Freeze)|Corkscrew]] moves, or three cane attacks from Cranky. | |A considerably larger and tougher fish than a Finley, but one that otherwise behaves the same. It can only be destroyed with three consequent [[Corkscrew (Donkey Kong Country: Tropical Freeze)|Corkscrew]] moves, or three cane attacks from Cranky. | ||
| align="center" |[[Shipwreck Shore]] | |align="center"|[[Shipwreck Shore]] | ||
| align="center" |[[Rocket Rails]] | |align="center"|[[Rocket Rails]] | ||
|- | |- | ||
| align="center" |[[File:Snaggles.png|130px]] | |align="center"|[[File:Snaggles.png|130px]] | ||
|style="text-align:center"|[[Snaggles]] | |style="text-align:center"|[[Snaggles]] | ||
|Snaggles resemble great white sharks and are aggressive, despite their goofy look. They are capable of leaping high above the water as they try to snatch the Kongs. Under the water, Snaggles chase the characters, trying to attack them. They can be defeated with throwable objects or with Cranky's cane. | |Snaggles resemble great white sharks and are aggressive, despite their goofy look. They are capable of leaping high above the water as they try to snatch the Kongs. Under the water, Snaggles chase the characters, trying to attack them. They can be defeated with throwable objects or with Cranky's cane. | ||
| align="center" |[[Shipwreck Shore]] | |align="center"|[[Shipwreck Shore]] | ||
| align="center" |[[Rockin' Relics]] | |align="center"|[[Rockin' Relics]] | ||
|- | |- | ||
| align="center" |[[File:DKCTF Super Snaggles.png|130px]] | |align="center"|[[File:DKCTF Super Snaggles.png|130px]] | ||
|style="text-align:center"|[[Yellow Snaggles]] | |style="text-align:center"|[[Yellow Snaggles]] | ||
|An ochre-colored variation of Snaggles that is not able to leap from the water. Nonetheless, it behaves the same underwater, as it tries to bite the Kongs. Yellow Snaggles can only be taken out using Cranky's cane. | |An ochre-colored variation of Snaggles that is not able to leap from the water. Nonetheless, it behaves the same underwater, as it tries to bite the Kongs. Yellow Snaggles can only be taken out using Cranky's cane. | ||
| align="center" |[[Shoal Atoll]] | |align="center"|[[Shoal Atoll]] | ||
| align="center" |[[Panicky Paddles]] | |align="center"|[[Panicky Paddles]] | ||
|- | |- | ||
! colspan=5 style="background:saddlebrown;color:white" align=center | '''Lost Mangroves enemies''' | ! colspan=5 style="background:saddlebrown;color:white"align=center|'''Lost Mangroves enemies''' | ||
|- | |- | ||
!Image | !Image | ||
| Line 609: | Line 596: | ||
!Last level appearance | !Last level appearance | ||
|- | |- | ||
| align="center" |[[File:Dozy.png|80px]] | |align="center"|[[File:Dozy.png|80px]] | ||
|style="text-align:center"|[[Dozy]] | |style="text-align:center"|[[Dozy]] | ||
|A bird foe that walks from side to side. The Kongs can get damage from this enemy if they simply head into it. Dozies can be brought down using any means of attack. | |A bird foe that walks from side to side. The Kongs can get damage from this enemy if they simply head into it. Dozies can be brought down using any means of attack. | ||
| align="center" |[[Mangrove Cove]] | |align="center"|[[Mangrove Cove]] | ||
| align="center" |[[Busted Bayou]] | |align="center"|[[Busted Bayou]] | ||
|- | |- | ||
| align="center" |[[File:Mimic dkctf.png|80px]] | |align="center"|[[File:Mimic dkctf.png|80px]] | ||
|style="text-align:center"|[[Mimic]] | |style="text-align:center"|[[Mimic]] | ||
|A mysterious enemy hiding inside a bush and waiting to surprise attack the Kongs. Upon spotting them, Mimics walk in their direction, but soon turn out to stroll aimlessly. They can be defeated by any attack method. | |A mysterious enemy hiding inside a bush and waiting to surprise attack the Kongs. Upon spotting them, Mimics walk in their direction, but soon turn out to stroll aimlessly. They can be defeated by any attack method. | ||
| align="center" |[[Busted Bayou]] | |align="center"|[[Busted Bayou]] | ||
| align="center" |[[Busted Bayou]] | |align="center"|[[Busted Bayou]] | ||
|- | |- | ||
| align="center" |[[File:Big mimic.png|100px]] | |align="center"|[[File:Big mimic.png|100px]] | ||
|style="text-align:center"|[[Large Mimic]] | |style="text-align:center"|[[Large Mimic]] | ||
|A mere bigger variation of Mimic. It can be defeated by any means of attack. | |A mere bigger variation of Mimic. It can be defeated by any means of attack. | ||
| align="center" |[[Busted Bayou]] | |align="center"|[[Busted Bayou]] | ||
| align="center" |[[Busted Bayou]] | |align="center"|[[Busted Bayou]] | ||
|- | |- | ||
| align="center" |[[File:Monocle.PNG|80px]] | |align="center"|[[File:Monocle.PNG|80px]] | ||
|style="text-align:center"|[[Monocle Monica]] | |style="text-align:center"|[[Monocle Monica]] | ||
|A pink dragonfly-looking enemy wearing a monocle. It is very similar to Hot Hootz, in that it also flies by following set routes. Monocle Monicas can be knocked down by stomps and thrown objects. | |A pink dragonfly-looking enemy wearing a monocle. It is very similar to Hot Hootz, in that it also flies by following set routes. Monocle Monicas can be knocked down by stomps and thrown objects. | ||
| align="center" |[[Shipwreck Shore]] | |align="center"|[[Shipwreck Shore]] | ||
| align="center" |[[Busted Bayou]] | |align="center"|[[Busted Bayou]] | ||
|- | |- | ||
| align="center" |[[File:Punchy Paddy dkctf.png|85px]] | |align="center"|[[File:Punchy Paddy dkctf.png|85px]] | ||
|style="text-align:center"|[[Punchy Paddy]] | |style="text-align:center"|[[Punchy Paddy]] | ||
|A grasshopper enemy that comports by hopping up and down. It can be defeated using any attack, but can be dangerous if it lands on the Kongs. | |A grasshopper enemy that comports by hopping up and down. It can be defeated using any attack, but can be dangerous if it lands on the Kongs. | ||
| align="center" |[[Mangrove Cove]] | |align="center"|[[Mangrove Cove]] | ||
| align="center" |[[Busted Bayou]] | |align="center"|[[Busted Bayou]] | ||
|- | |- | ||
| align="center" |[[File:Sour dodo.png|80px]] | |align="center"|[[File:Sour dodo.png|80px]] | ||
|style="text-align:center"|[[Sour Dodo]] | |style="text-align:center"|[[Sour Dodo]] | ||
|A blue-feathered variant of Dozy, which deliberately runs into the Kongs upon spotting them. It is vulnerable to any attacks. | |A blue-feathered variant of Dozy, which deliberately runs into the Kongs upon spotting them. It is vulnerable to any attacks. | ||
| align="center" |[[Mangrove Cove]] | |align="center"|[[Mangrove Cove]] | ||
| align="center" |[[Busted Bayou]] | |align="center"|[[Busted Bayou]] | ||
|- | |- | ||
| align="center" |[[File:DKCTF Thug Slug.png|80px]] | |align="center"|[[File:DKCTF Thug Slug.png|80px]] | ||
|style="text-align:center"|[[Thug Slug]] | |style="text-align:center"|[[Thug Slug]] | ||
|A slug enemy. It sticks to any platform, crawling on all of its sides. Thug Slugs can be defeated anyhow. | |A slug enemy. It sticks to any platform, crawling on all of its sides. Thug Slugs can be defeated anyhow. | ||
| align="center" |[[Canopy Chaos]] | |align="center"|[[Canopy Chaos]] | ||
| align="center" |[[Trunk Twister]] | |align="center"|[[Trunk Twister]] | ||
|- | |- | ||
| align="center" |[[File:Wild Wendell.png|100px]] | |align="center"|[[File:Wild Wendell.png|100px]] | ||
|style="text-align:center"|[[Wild Wendell]] | |style="text-align:center"|[[Wild Wendell]] | ||
|A turtle-resembling foe that wears aviator goggles. When on dry land, should the player stomp this enemy, it retracts within its shell, which can afterwards be transported and hurled into other foes. Wild Wendells can also be found floating on water; in this stance, they can be defeated with a [[Corkscrew (Donkey Kong Country: Tropical Freeze)|Corkscrew]] move from the beneath the surface of the water. | |A turtle-resembling foe that wears aviator goggles. When on dry land, should the player stomp this enemy, it retracts within its shell, which can afterwards be transported and hurled into other foes. Wild Wendells can also be found floating on water; in this stance, they can be defeated with a [[Corkscrew (Donkey Kong Country: Tropical Freeze)|Corkscrew]] move from the beneath the surface of the water. | ||
| align="center" |[[Mangrove Cove]] | |align="center"|[[Mangrove Cove]] | ||
| align="center" |[[Canopy Chaos]] | |align="center"|[[Canopy Chaos]] | ||
|- | |- | ||
! colspan=5 style="background:saddlebrown;color:white" align=center | '''Autumn Heights enemies''' | !colspan=5 style="background:saddlebrown;color:white"align=center|'''Autumn Heights enemies''' | ||
|- | |- | ||
!Image | !Image | ||
| Line 665: | Line 652: | ||
!Last level appearance | !Last level appearance | ||
|- | |- | ||
| align="center" |[[File:CheekyChesterDKCTF.png|100px]] | |align="center"|[[File:CheekyChesterDKCTF.png|100px]] | ||
|style="text-align:center"|[[Cheesy Chester]] | |style="text-align:center"|[[Cheesy Chester]] | ||
|A rat enemy, first seen strolling on its back feet, then walking on all fours as it spots the Kongs, moving considerably faster. Cheesy Chesters | |A rat enemy, first seen strolling on its back feet, then walking on all fours as it spots the Kongs, moving considerably faster. Cheesy Chesters deal damage to the Kongs when bumping into them, but are also vulnerable to any attack. | ||
| align="center" |[[Windmill Hills]] | |align="center"|[[Windmill Hills]] | ||
| align="center" |[[Rodent Ruckus]] | |align="center"|[[Rodent Ruckus]] | ||
|- | |- | ||
| align="center" |[[File:Schnautzel.png|100px]] | |align="center"|[[File:Schnautzel.png|100px]] | ||
|style="text-align:center"|[[Schnautzel]] | |style="text-align:center"|[[Schnautzel]] | ||
|A fiery wild boar. After setting their aim for the Kongs, Schnautzels shoot fireballs from their large snouts at them. Three stomps (or, alternatively, three roll attacks), as well as a barrel, can knock them out. | |A fiery wild boar. After setting their aim for the Kongs, Schnautzels shoot fireballs from their large snouts at them. Three stomps (or, alternatively, three roll attacks), as well as a barrel, can knock them out. | ||
| align="center" |[[Windmill Hills]] | |align="center"|[[Windmill Hills]] | ||
| align="center" |[[Horn Top Hop]] | |align="center"|[[Horn Top Hop]] | ||
|- | |- | ||
! colspan=5 style="background:saddlebrown;color:white" align=center | '''Bright Savannah enemies''' | !colspan=5 style="background:saddlebrown;color:white"align=center|'''Bright Savannah enemies''' | ||
|- | |- | ||
!Image | !Image | ||
| Line 685: | Line 672: | ||
!Last level appearance | !Last level appearance | ||
|- | |- | ||
| align="center" |[[File:Buffaloafer.png|100px]] | |align="center"|[[File:Buffaloafer.png|100px]] | ||
|style="text-align:center"|[[Buffaloafer]] | |style="text-align:center"|[[Buffaloafer]] | ||
|A massive and strong buffalo that rams its large horns into the characters in an attempt to harm them. It will fling the Kongs up in the air if they simply hop on its back. Despite this, there are several ways to defeat a Buffaloafer: it can be lured into an abyss and fall, or it can accidentally hit a wall (or collide with the Kongs' roll attacks) and turn upside down, leaving its vulnerable spot, the belly, unprotected. Buffaloafers can also be quickly defeated with three Cane Bounces from Cranky. | |A massive and strong buffalo that rams its large horns into the characters in an attempt to harm them. It will fling the Kongs up in the air if they simply hop on its back. Despite this, there are several ways to defeat a Buffaloafer: it can be lured into an abyss and fall, or it can accidentally hit a wall (or collide with the Kongs' roll attacks) and turn upside down, leaving its vulnerable spot, the belly, unprotected. Buffaloafers can also be quickly defeated with three Cane Bounces from Cranky. | ||
| align="center" |[[Baobab Bonanza]] | |align="center"|[[Baobab Bonanza]] | ||
| align="center" |[[Bramble Scramble (Donkey Kong Country: Tropical Freeze)|Bramble Scramble]] | |align="center"|[[Bramble Scramble (Donkey Kong Country: Tropical Freeze)|Bramble Scramble]] | ||
|- | |- | ||
| align="center" |[[File:Carnivorous plant.png|100px]] | |align="center"|[[File:Carnivorous plant.png|100px]] | ||
|style="text-align:center"|[[Chompette]] | |style="text-align:center"|[[Chompette]] | ||
|A steadfast creature with a thorny stem. It grows above pits and continuously chomps air. Only its fangs are dangerous, but the plant can be bounced on safely when its mouth is closed. Carnivorous plants can be defeated with three roll attacks, three Cane Bounces, or a thrown object. | |A steadfast creature with a thorny stem. It grows above pits and continuously chomps air. Only its fangs are dangerous, but the plant can be bounced on safely when its mouth is closed. Carnivorous plants can be defeated with three roll attacks, three Cane Bounces, or a thrown object. | ||
| align="center" |[[Bramble Scramble (Donkey Kong Country: Tropical Freeze)|Bramble Scramble]] | |align="center"|[[Bramble Scramble (Donkey Kong Country: Tropical Freeze)|Bramble Scramble]] | ||
| align="center" |[[Bramble Scramble (Donkey Kong Country: Tropical Freeze)|Bramble Scramble]] | |align="center"|[[Bramble Scramble (Donkey Kong Country: Tropical Freeze)|Bramble Scramble]] | ||
|- | |- | ||
| align="center" |[[File:Flaming falling pole.png|100px]] | |align="center"|[[File:Flaming falling pole.png|100px]] | ||
|style="text-align:center"|[[Screaming Pillar|Flaming Falling Totem Pole]] | |style="text-align:center"|[[Screaming Pillar|Flaming Falling Totem Pole]] | ||
|A dormant stone pillar that becomes awake as soon as it senses the Kongs being close. Afterwards, it topples on the ground and passes out, crushing the Kongs or any other creature if they remain where the pillar falls. The primates can mount on the back of the collapsed obstacle and pound it three times to break it. | |A dormant stone pillar that becomes awake as soon as it senses the Kongs being close. Afterwards, it topples on the ground and passes out, crushing the Kongs or any other creature if they remain where the pillar falls. The primates can mount on the back of the collapsed obstacle and pound it three times to break it. | ||
| align="center" |[[Scorch 'n' Torch]] | |align="center"|[[Scorch 'n' Torch]] | ||
| align="center" |[[Scorch 'n' Torch]] | |align="center"|[[Scorch 'n' Torch]] | ||
|- | |- | ||
| align="center" |[[File:Giant Spiked Nuts.png|100px]] | |align="center"|[[File:Giant Spiked Nuts.png|100px]] | ||
|style="text-align:center"|[[Giant Spiked Nut]] | |style="text-align:center"|[[Giant Spiked Nut]] | ||
|Large thorny fruits falling from baobabs and rolling on the ground. They are dangerous to touch and completely indestructible, although Cranky Kong can [[Cane Bounce|bounce on them with his cane]] without getting hurt. | |Large thorny fruits falling from baobabs and rolling on the ground. They are dangerous to touch and completely indestructible, although Cranky Kong can [[Cane Bounce|bounce on them with his cane]] without getting hurt. | ||
| align="center" |[[Baobab Bonanza]] | |align="center"|[[Baobab Bonanza]] | ||
| align="center" |[[Baobab Bonanza]] | |align="center"|[[Baobab Bonanza]] | ||
|- | |- | ||
| align="center" |[[File:Hanging TNT.png|100px]] | |align="center"|[[File:Hanging TNT.png|100px]] | ||
|style="text-align:center"|[[Hanging TNT]] | |style="text-align:center"|[[Hanging TNT]] | ||
|Explosive clusters suspended with a rope. They detonate when touched by the Kongs or a throwable object. | |Explosive clusters suspended with a rope. They detonate when touched by the Kongs or a throwable object. | ||
| align="center" |[[Cannon Canyon]] | |align="center"|[[Cannon Canyon]] | ||
| align="center" |[[Cannon Canyon]] | |align="center"|[[Cannon Canyon]] | ||
|- | |- | ||
| align="center" |[[File:Porcupal dkctf.png|100px]] | |align="center"|[[File:Porcupal dkctf.png|100px]] | ||
|style="text-align:center"|[[Porcupal]] | |style="text-align:center"|[[Porcupal]] | ||
|A fiery porcupine enemy that engulfs itself in flames and startles its bristles to defend itself from the Kongs. Porcupal's flames eventually go out, and its bristles settle down its back, becoming vulnerable to any sign of attack. Even while under the fire, Porcupals can be knocked out with [[Water Sack]]s. | |A fiery porcupine enemy that engulfs itself in flames and startles its bristles to defend itself from the Kongs. Porcupal's flames eventually go out, and its bristles settle down its back, becoming vulnerable to any sign of attack. Even while under the fire, Porcupals can be knocked out with [[Water Sack]]s. | ||
| align="center" |[[Frantic Fields]] | |align="center"|[[Frantic Fields]] | ||
| align="center" |[[Bramble Scramble (Donkey Kong Country: Tropical Freeze)|Bramble Scramble]] | |align="center"|[[Bramble Scramble (Donkey Kong Country: Tropical Freeze)|Bramble Scramble]] | ||
|- | |- | ||
| align="center" |[[File:Swooper Dooper.png|100px]] | |align="center"|[[File:Swooper Dooper.png|100px]] | ||
|style="text-align:center"|[[Swooper Dooper]] | |style="text-align:center"|[[Swooper Dooper]] | ||
|A peculiar | |A peculiar secretarybird enemy that swoops continuously, trying to attack the Kongs. It can be destroyed by any attack. | ||
| align="center" |[[Grassland Groove]] | |align="center"|[[Grassland Groove]] | ||
| align="center" |[[Bramble Scramble (Donkey Kong Country: Tropical Freeze)|Bramble Scramble]] | |align="center"|[[Bramble Scramble (Donkey Kong Country: Tropical Freeze)|Bramble Scramble]] | ||
|- | |- | ||
| align="center" |[[File:Whoosh.png|100px]] | |align="center"|[[File:Whoosh.png|100px]] | ||
|style="text-align:center"|[[Tornado#Donkey Kong Country: Tropical Freeze|Tornado]] | |style="text-align:center"|[[Tornado#Donkey Kong Country: Tropical Freeze|Tornado]] | ||
|Unbeatable natural hazards that traverse a patch of ground. When facing the Kongs, they block their path, but when facing the opposite direction, they fling them forward. | |Unbeatable natural hazards that traverse a patch of ground. When facing the Kongs, they block their path, but when facing the opposite direction, they fling them forward. | ||
| align="center" |[[Frantic Fields]] | |align="center"|[[Frantic Fields]] | ||
| align="center" |[[Frantic Fields]] | |align="center"|[[Frantic Fields]] | ||
|- | |- | ||
! colspan=5 style="background:saddlebrown;color:white" align=center | '''Sea Breeze Cove enemies''' | !colspan=5 style="background:saddlebrown;color:white"align=center|'''Sea Breeze Cove enemies''' | ||
|- | |- | ||
!Image | !Image | ||
| Line 741: | Line 728: | ||
!Last level appearance | !Last level appearance | ||
|- | |- | ||
| align="center" |[[File:Electrified anemone.png|100px]] | |align="center"|[[File:Electrified anemone.png|100px]] | ||
|style="text-align:center"|[[Electrified Anemone]] | |style="text-align:center"|[[Electrified Anemone]] | ||
|Colonies of electrically charged anemones coat underwater surfaces in dark areas. They usually hide items, but are harmful and indestructible. However, Electrified Anemones are sensible to light and will retract whenever their area is floodlit by luminescent fish. | |Colonies of electrically charged anemones coat underwater surfaces in dark areas. They usually hide items, but are harmful and indestructible. However, Electrified Anemones are sensible to light and will retract whenever their area is floodlit by luminescent fish. | ||
| align="center" |[[Amiss Abyss]] | |align="center"|[[Amiss Abyss]] | ||
| align="center" |[[Amiss Abyss]] | |align="center"|[[Amiss Abyss]] | ||
|- | |- | ||
| align="center" |[[File:Fritz grin.png|100px]] | |align="center"|[[File:Fritz grin.png|100px]] | ||
|style="text-align:center"|[[Fritz]] | |style="text-align:center"|[[Fritz]] | ||
|An underwater enemy that resembles an eel. Fritz releases shock waves around itself, and then swiftly teleports to another close area. When not electrically charged, it can be destroyed by any attack method that can be approached underwater, including a [[Corkscrew (Donkey Kong Country: Tropical Freeze)|Corkscrew]] move. | |An underwater enemy that resembles an eel. Fritz releases shock waves around itself, and then swiftly teleports to another close area. When not electrically charged, it can be destroyed by any attack method that can be approached underwater, including a [[Corkscrew (Donkey Kong Country: Tropical Freeze)|Corkscrew]] move. | ||
| align="center" |[[Deep Keep]] | |align="center"|[[Deep Keep]] | ||
| align="center" |[[Shoal Atoll]] | |align="center"|[[Shoal Atoll]] | ||
|- | |- | ||
| align="center" |[[File:Greenfish DKCTF.png|100px]] | |align="center"|[[File:Greenfish DKCTF.png|100px]] | ||
|style="text-align:center"|[[Green fish]] | |style="text-align:center"|[[Green fish]] | ||
|The spikeless blowfish that Fugu summons during his battle. Green fish are exhaled by the boss enemy and used to attack the primates. However, they can be deflected with [[Corkscrew (Donkey Kong Country: Tropical Freeze)|Corkscrew]] moves or cane swings and sent back to their master, who gets hit and subsequently damaged. | |The spikeless blowfish that Fugu summons during his battle. Green fish are exhaled by the boss enemy and used to attack the primates. However, they can be deflected with [[Corkscrew (Donkey Kong Country: Tropical Freeze)|Corkscrew]] moves or cane swings and sent back to their master, who gets hit and subsequently damaged. | ||
| align="center" |[[ | |align="center"|[[Fugu Face-Off]] | ||
| align="center" |[[ | |align="center"|[[Fugu Face-Off]] | ||
|- | |- | ||
| align="center" |[[File:Jellyfish DKCTF.png|100px]] | |align="center"|[[File:No image.png|100px]] | ||
|style="text-align:center"|[[Hermit crab]] | |||
|Colored hermit crabs that appear as obstacles which can harm the player. | |||
|align="center"|[[Fugu Face-Off]] | |||
|align="center"|[[Fugu Face-Off]] | |||
|- | |||
|align="center"|[[File:Jellyfish DKCTF.png|100px]] | |||
|style="text-align:center"|[[Jellyfish]] | |style="text-align:center"|[[Jellyfish]] | ||
|Almost invulnerable enemies that can be found swimming either vertically or around stones. They are not affected by any of the Kongs' direct attacks, and will shock them with electricity upon contact. Jellyfish only perish if the heroes perform a Kong POW nearby. | |Almost invulnerable enemies that can be found swimming either vertically or around stones. They are not affected by any of the Kongs' direct attacks, and will shock them with electricity upon contact. Jellyfish only perish if the heroes perform a Kong POW nearby. | ||
| align="center" |[[Deep Keep]] (seen in the level's introduction)<br>[[Amiss Abyss]] (encountered as an obstacle) | |align="center"|[[Deep Keep]] (seen in the level's introduction)<br>[[Amiss Abyss]] (encountered as an obstacle) | ||
| align="center" |[[Amiss Abyss]] | |align="center"|[[Amiss Abyss]] | ||
|- | |- | ||
| align="center" |[[File:Mama saw.png|100px]] | |align="center"|[[File:Mama saw.png|100px]] | ||
|style="text-align:center"|[[Mama Saw]] | |style="text-align:center"|[[Mama Saw]] | ||
|A small, chubby sawfish enemy that swims from side to side. Its spiky frontal saw is harmful for the Kongs, but its rear is not. A [[Corkscrew (Donkey Kong Country: Tropical Freeze)|Corkscrew]] attack can be performed on that spot to defeat the enemy. | |A small, chubby sawfish enemy that swims from side to side. Its spiky frontal saw is harmful for the Kongs, but its rear is not. A [[Corkscrew (Donkey Kong Country: Tropical Freeze)|Corkscrew]] attack can be performed on that spot to defeat the enemy. | ||
| align="center" |[[Irate Eight]] | |align="center"|[[Irate Eight]] | ||
| align="center" |[[Shoal Atoll]] | |align="center"|[[Shoal Atoll]] | ||
|- | |- | ||
| align="center" |[[File:Proximity mine.png|100px]] | |align="center"|[[File:Proximity mine.png|100px]] | ||
|style="text-align:center"|[[Proximity | |style="text-align:center"|[[Proximity mine]] | ||
|Objects found afloat in the water. They will start to flash as they are approached, and will eventually explode. Their shrapnel can injure any character, such as the Kongs and enemies. | |Objects found afloat in the water. They will start to flash as they are approached, and will eventually explode. Their shrapnel can injure any character, such as the Kongs and enemies. | ||
| align="center" |[[Irate Eight]] | |align="center"|[[Irate Eight]] | ||
| align="center" |[[Shoal Atoll]] | |align="center"|[[Shoal Atoll]] | ||
|- | |- | ||
| align="center" |[[File:Pufftup DKCTF.png|100px]] | |align="center"|[[File:Pufftup DKCTF.png|100px]] | ||
|style="text-align:center"|[[Pufftup]] | |style="text-align:center"|[[Pufftup]] | ||
|A pufferfish that inflates itself periodically. In this state, the spikes on its body are revealed and can injure the Kongs. While inflated, the Pufftups are only vulnerable | |A pufferfish that inflates itself periodically. In this state, the spikes on its body are revealed and can injure the Kongs. While inflated, the Pufftups are only vulnerable to Cranky's cane. They eventually deflate themselves, becoming exposed to any sign of attack. | ||
| align="center" |[[Amiss Abyss]] | |align="center"|[[Amiss Abyss]] | ||
| align="center" |[[Shoal Atoll]] | |align="center"|[[Shoal Atoll]] | ||
|- | |- | ||
| align="center" |[[File:SeaUrchin DKCTF.png|100px]] | |align="center"|[[File:SeaUrchin DKCTF.png|100px]] | ||
|style="text-align:center"|[[Sea Urchin]] | |style="text-align:center"|[[Sea Urchin]] | ||
| | |Obstacles that are typically moved around by currents. Due to their thorns, they can only be defeated with Cranky's cane swing. | ||
| align="center" |[[ | |align="center"|[[Big Top Bop]] | ||
| align="center" |[[ | |align="center"|[[Fugu Face-Off]] | ||
|- | |||
|align="center"|[[File:DKCTF tentacle.jpg|100px]] | |||
|style="text-align:center"|[[Sting Tentacle]] | |||
|Long, thin hazards that protrude from various surfaces, swaying slowly from side to side. They can be taken out using Cranky's cane. | |||
|align="center"|[[Current Capers]] | |||
|align="center"|[[Current Capers]] | |||
|- | |- | ||
| align="center" |[[File:Watcha.png|100px]] | |align="center"|[[File:Watcha.png|100px]] | ||
|style="text-align:center"|[[Squiddicus]] | |style="text-align:center"|[[Squiddicus]] | ||
|An enormous | |An enormous cephalopod that impedes the Kongs in the level, Irate Eight. The Kongs have to dodge his spike-covered arms, which the monster tries to slip through tight gaps and tunnels. The creature also leaves a deadly cloud of ink that the Kongs would have to survive. | ||
| align="center" |[[Irate Eight]] | |align="center"|[[Irate Eight]] | ||
| align="center" |[[Irate Eight]] | |align="center"|[[Irate Eight]] | ||
|- | |- | ||
! colspan=5 style="background:saddlebrown;color:white" align=center | '''Juicy Jungle enemies''' | !colspan=5 style="background:saddlebrown;color:white"align=center|'''Juicy Jungle enemies''' | ||
|- | |- | ||
!Image | !Image | ||
| Line 803: | Line 802: | ||
!Last level appearance | !Last level appearance | ||
|- | |- | ||
| align="center" |[[File:Bouncelisk.png|100px]] | |align="center"|[[File:Bouncelisk.png|100px]] | ||
|style="text-align:center"|[[Bouncelisk]] | |style="text-align:center"|[[Bouncelisk]] | ||
|A lizard foe that slithers on its path while transporting a bouncy round fruit with its tail. The Kongs can use this fruit as improvised trampoline, in order to reach high areas or items. Nonetheless, Bouncelisk are still dangerous. A roll attack can defeat them. | |A lizard foe that slithers on its path while transporting a bouncy round fruit with its tail. The Kongs can use this fruit as improvised trampoline, in order to reach high areas or items. Nonetheless, Bouncelisk are still dangerous. A roll attack can defeat them. | ||
| align="center" |[[Harvest Hazards]] | |align="center"|[[Harvest Hazards]] | ||
| align="center" |[[Jammin' Jams]] | |align="center"|[[Jammin' Jams]] | ||
|- | |- | ||
| align="center" |[[File:Bucky dkctf.png|100px]] | |align="center"|[[File:Bucky dkctf.png|100px]] | ||
|style="text-align:center"|[[Bucky]] | |style="text-align:center"|[[Bucky]] | ||
|A yellow caterpillar enemy that clings to any surface, in the manner of Thug Slugs. Buckies leave trails of toxic gas behind, and when hanging down the ceiling, they release big, dangerous bubbles that descend slowly. Any attack method is effective against these enemies, but only when they are encountered normally; only barrels are apt to defeat upside down Buckies. | |A yellow caterpillar enemy that clings to any surface, in the manner of Thug Slugs. Buckies leave trails of toxic gas behind, and when hanging down the ceiling, they release big, dangerous bubbles that descend slowly. Any attack method is effective against these enemies, but only when they are encountered normally; only barrels are apt to defeat upside down Buckies. | ||
| align="center" |[[Harvest Hazards]] | |align="center"|[[Harvest Hazards]] | ||
| align="center" |[[Harvest Hazards]] | |align="center"|[[Harvest Hazards]] | ||
|- | |- | ||
| align="center" |[[File:Buzzy in-game.png|100px]] | |align="center"|[[File:Buzzy in-game.png|100px]] | ||
|style="text-align:center"|[[Buzzy]] | |style="text-align:center"|[[Buzzy]] | ||
|A grouchy bee that flies towards the Kongs when tempted to do so. It is a potentially dangerous enemy indeed, but it can be jumped on. | |A grouchy bee that flies towards the Kongs when tempted to do so. It is a potentially dangerous enemy indeed, but it can be jumped on. | ||
| align="center" |[[Spinning Spines]] | |align="center"|[[Spinning Spines]] | ||
| align="center" |[[Beehive Brawl]] | |align="center"|[[Beehive Brawl]] | ||
|- | |- | ||
| align="center" |[[File:Chompy1.png|100px]] | |align="center"|[[File:Chompy1.png|100px]] | ||
|style="text-align:center"|[[Chompasaurus]] | |style="text-align:center"|[[Chompasaurus]] | ||
|A flytrap beast that is able to crawl on the ground. Chompasauruses can also be found sticked to ceilings. They can use their long and stretchy tongues to hunt for prey. The Kongs can also get stuck to the tongue and end up inside the mouth of the beast. However, the Kongs can punch the Chompasaurus from inside repeatedly and destroy the enemy, freeing themselves. A Chompasaurus can also be defeated with three stomps on its head, or with a single barrel tossed at it. | |A flytrap beast that is able to crawl on the ground. Chompasauruses can also be found sticked to ceilings. They can use their long and stretchy tongues to hunt for prey. The Kongs can also get stuck to the tongue and end up inside the mouth of the beast. However, the Kongs can punch the Chompasaurus from inside repeatedly and destroy the enemy, freeing themselves. A Chompasaurus can also be defeated with three stomps on its head, or with a single barrel tossed at it. | ||
| align="center" |[[Reckless Ride]] (seen in the background)<br>[[Fruity Factory]] (encountered as an obstacle) | |align="center"|[[Reckless Ride]] (seen in the background)<br>[[Fruity Factory]] (encountered as an obstacle) | ||
| align="center" |[[Beehive Brawl]] | |align="center"|[[Beehive Brawl]] | ||
|- | |- | ||
| align="center" |[[File:Punch Piranhas.png|100px]] | |align="center"|[[File:Punch Piranhas.png|100px]] | ||
|style="text-align:center"|[[Punch Piranha]]s | |style="text-align:center"|[[Punch Piranha]]s | ||
|Small predator fish encountered in the jungle's punch ponds. They quickly hunt anything dropped in their waters, including the Kongs. Punch Piranhas cannot be defeated. | |Small predator fish encountered in the jungle's punch ponds. They quickly hunt anything dropped in their waters, including the Kongs. Punch Piranhas cannot be defeated. | ||
| align="center" |[[ | |align="center"|[[Punch Bowl]] | ||
| align="center" |[[ | |align="center"|[[Punch Bowl]] | ||
|- | |- | ||
| align="center" |[[File:Toucan't.png|100px]] | |align="center"|[[File:Toucan't.png|100px]] | ||
|style="text-align:center"|[[Toucan't]] | |style="text-align:center"|[[Toucan't]] | ||
|A small toucan-like foe that constantly rolls a thorny and seemingly pungent berry down a path. At set intervals, the berry releases a substance that launches the Toucan't upward, letting the Kongs pass beneath it while heeding the berry. A single stomp can defeat a Toucan't. | |A small toucan-like foe that constantly rolls a thorny and seemingly pungent berry down a path. At set intervals, the berry releases a substance that launches the Toucan't upward, letting the Kongs pass beneath it while heeding the berry. A single stomp can defeat a Toucan't. | ||
| align="center" |[[Harvest Hazards]] (seen in the level's introduction)<br>[[Panicky Paddles]] (encountered as an obstacle) | |align="center"|[[Harvest Hazards]] (seen in the level's introduction)<br>[[Panicky Paddles]] (encountered as an obstacle) | ||
| align="center" |[[Jammin' Jams]] | |align="center"|[[Jammin' Jams]] | ||
|- | |- | ||
! colspan=5 style="background:saddlebrown;color:white" align=center | '''Donkey Kong Island enemies''' | !colspan=5 style="background:saddlebrown;color:white"align=center|'''Donkey Kong Island enemies''' | ||
|- | |- | ||
!Image | !Image | ||
| Line 847: | Line 846: | ||
!Last level appearance | !Last level appearance | ||
|- | |- | ||
| align="center" |[[File:Electroid.png|100px]] | |align="center"|[[File:Electroid.png|100px]] | ||
|style="text-align:center"|[[Electroid]] | |style="text-align:center"|[[Electroid (enemy)|Electroid]] | ||
|A small, electric enemy. Electroids follow conductible wires, but can also often be found standing underneath metallic pressure platforms, waiting to electrocute the Kongs. Electroids are invincible. | |A small, electric enemy. Electroids follow conductible wires, but can also often be found standing underneath metallic pressure platforms, waiting to electrocute the Kongs. Electroids are invincible. | ||
| align="center" |[[Frozen Frenzy (level)|Frozen Frenzy]] | |align="center"|[[Frozen Frenzy (level)|Frozen Frenzy]] | ||
| align="center" |[[Frozen Frenzy (level)|Frozen Frenzy]] | |align="center"|[[Frozen Frenzy (level)|Frozen Frenzy]] | ||
|- | |- | ||
| align="center" |[[File:Snowball DKCTF.png|100px]] | |align="center"|[[File:Snowball DKCTF.png|100px]] | ||
|style="text-align:center"|[[Snowball]]s | |style="text-align:center"|[[Snowball]]s | ||
|Hazards usually encountered in mid-air, as they are shot by bombards. They also spring in the air when their platforms get flipped by large objects. They are dangerous and have to be dodged. | |Hazards usually encountered in mid-air, as they are shot by bombards. They also spring in the air when their platforms get flipped by large objects. They are dangerous and have to be dodged. | ||
| align="center" |[[Blurry Flurry]] | |align="center"|[[Blurry Flurry]] | ||
| align="center" |[[Blurry Flurry]] | |align="center"|[[Blurry Flurry]] | ||
|- | |- | ||
| align="center" |[[File:Snowflake.png|100px]] | |align="center"|[[File:Snowflake.png|100px]] | ||
|style="text-align:center"|[[Snowflake]] | |style="text-align:center"|[[Snowflake]] | ||
|Icy obstacles cluttered in rows. They drop down from the sky and float along a set path in the air. While dangerous to touch, they can be destroyed with any projectile or with a [[Cane Bounce]]. | |Icy obstacles cluttered in rows. They drop down from the sky and float along a set path in the air. While dangerous to touch, they can be destroyed with any projectile or with a [[Cane Bounce]]. | ||
| align="center" |[[Forest Folly]] | |align="center"|[[Forest Folly]] | ||
| align="center" |[[Forest Folly]] | |align="center"|[[Forest Folly]] | ||
|} | |} | ||
===Miscellaneous=== | ===Miscellaneous=== | ||
Several ''Donkey Kong Country Returns'' enemies, such as [[Big Squeekly]], [[Skittler]]s and [[Mugly]], | Several ''Donkey Kong Country Returns'' enemies, such as [[Big Squeekly]], [[Skittler]]s, and [[Mugly]], make cameo appearances frozen in ice. The former two are found in the levels [[Blurry Flurry]] and [[Forest Folly]] respectively, while Mugly can be seen at the bottom of the [[Donkey Kong Island (world)|Donkey Kong Island]] diorama. In addition, a [[Snippys]] can be seen on the title screen. | ||
{|class="wikitable dk"width=100% | |||
{|class=" | |||
!Image | !Image | ||
!Name | !Name | ||
!Description | !Description | ||
|- | |- | ||
| align="center" |[[File: | |align="center"|[[File:CatfishRenderDKCTF.png|100px]] | ||
|style="text-align:center"|[[ | |style="text-align:center"|[[Don Zunāna]] | ||
|A giant fish that can be found sleeping near the beginning of [[Amiss Abyss]]. If the Kongs wake it up, it destroys a wall on the right that prevents them from swimming further. | |A giant fish that can be found sleeping near the beginning of [[Amiss Abyss]]. If the Kongs wake it up, it destroys a wall on the right that normally prevents them from swimming further. | ||
|} | |} | ||
{{br}} | {{br}} | ||
| Line 882: | Line 880: | ||
==Objects== | ==Objects== | ||
Below is a table containing notable objects found in the game. A collectible is a gameplay element that can be collected and stored to a specific counter. Usually, when this counter reaches a certain number or magnitude, a special gameplay-related event will take place. A projectile represents an item that can be picked up and thrown at enemies or other elements. Vehicles refer to certain apparatuses that are used as mandatory ways of locomotion during select levels of the game. | Below is a table containing notable objects found in the game. A collectible is a gameplay element that can be collected and stored to a specific counter. Usually, when this counter reaches a certain number or magnitude, a special gameplay-related event will take place. A projectile represents an item that can be picked up and thrown at enemies or other elements. Vehicles refer to certain apparatuses that are used as mandatory ways of locomotion during select levels of the game. | ||
===Collectables=== | ===Collectables=== | ||
{|class=" | {|class="wikitable dk"width=100% | ||
|- | |- | ||
!Image | !Image | ||
| Line 890: | Line 887: | ||
!Description | !Description | ||
|- | |- | ||
| align="center" |[[File:BananaDKCR.png|60px]] | |align="center"|[[File:BananaDKCR.png|60px]] | ||
|style="text-align:center"|[[Banana]] | |style="text-align:center"|[[Banana]] | ||
|Bananas are the most | |Bananas are the most common items in the game. They are usually found floating in the air and arranged in straight or circular patterns. However, some can be revealed upon pulling Item Handles. Sometimes, bananas in a particular group can be collected to reveal Puzzle Pieces and other items. When a total of one hundred bananas are acquired, the player earns an extra life and the [[Kong POW]] move is enabled. The main goal of Bonus Areas is collecting items, including mostly bananas. | ||
|- | |- | ||
| align="center" |[[File:Banana Bunch DKCTF.jpg|100px]][[File: | |align="center"|[[File:Banana Bunch DKCTF.jpg|100px]][[File:DKCTF Banana Bunch Screenshot.png|100px]] | ||
|style="text-align:center"|[[ | |style="text-align:center"|[[Banana Bunch]] | ||
|A | |A cluster of five or ten bananas. Although common, Banana Bunches are rarer than singular bananas. | ||
|- | |- | ||
| align="center" |[[File:Banana Coin - Donkey Kong Country Tropical Freeze.png|100px]] | |align="center"|[[File:Banana Coin - Donkey Kong Country Tropical Freeze.png|100px]] | ||
|style="text-align:center"|[[Banana Coin]] | |style="text-align:center"|[[Banana Coin]] | ||
|Banana Coins represent the currency in the game. They are rather frequent and can be obtained either by usual ways, or by performing a task such as collecting a set of bananas. Likewise, stomping three or more enemies in a row also grants the players Banana Coins. Using Banana Coins, the player can purchase goodies from Funky Kong's shop. | |Banana Coins represent the currency in the game. They are rather frequent and can be obtained either by usual ways, or by performing a task such as collecting a set of bananas. Likewise, stomping three or more enemies in a row also grants the players Banana Coins. Using Banana Coins, the player can purchase goodies from Funky Kong's shop. | ||
|- | |- | ||
| align="center" |[[File:Heart DKCTF.png|100px]] | |align="center"|[[File:Heart DKCTF.png|100px]] | ||
|style="text-align:center"|[[Heart (item)|Heart]] | |style="text-align:center"|[[Heart (item)|Heart]] | ||
|Hearts compose the Kongs' health meter. If they get damaged once and therefore lose one point from their meter, they can replenish it with one heart found along the way. | |Hearts compose the Kongs' health meter. If they get damaged once and therefore lose one point from their meter, they can replenish it with one heart found along the way. | ||
|- | |- | ||
| align="center" |[[File:Red Balloon - Donkey Kong Country Tropical Freeze.png|48px]] | |align="center"|[[File:Red Balloon - Donkey Kong Country Tropical Freeze.png|48px]] | ||
|style="text-align:center"|[[ | |style="text-align:center"|[[Red Balloon]] | ||
|Red Balloons grant supplementary tries for the player. A few can be found floating in the air, but they can mostly be acquired by performing tasks. After the character stomps on eight enemies in a row, he stops receiving Banana Coins and gets rewarded Red Balloons instead. | |Red Balloons grant supplementary tries for the player. A few can be found floating in the air, but they can mostly be acquired by performing tasks. After the character stomps on eight enemies in a row, he stops receiving Banana Coins and gets rewarded Red Balloons instead. | ||
|- | |- | ||
| align="center" |[[File:Letter K Artwork - Donkey Kong Country Tropical Freeze.png|100px]] | |align="center"|[[File:Letter K Artwork - Donkey Kong Country Tropical Freeze.png|100px]] | ||
|style="text-align:center"|[[ | |style="text-align:center"|[[KONG Letters]] | ||
|These are precious square pieces, each having one of the letters "K", "O", "N" and "G" printed on them. In conclusion, there are four of these items in each level of the game (excluding bonus and boss levels), and are placed orderly in each stage to spell the word "KONG". Their sole role in the game is to unlock the bonus levels of each world, given that all the | |These are precious square pieces, each having one of the letters "K", "O", "N" and "G" printed on them. In conclusion, there are four of these items in each level of the game (excluding bonus and boss levels), and are placed orderly in each stage to spell the word "KONG". Their sole role in the game is to unlock the bonus levels of each world, given that all the KONG Letters of the respective world are collected. | ||
|- | |- | ||
| align="center" |[[File:Puzzle Piece DKCTF.png|100px]] | |align="center"|[[File:Puzzle Piece DKCTF.png|100px]] | ||
|style="text-align:center"|[[Puzzle Piece (Donkey Kong Country series)|Puzzle Piece]] | |style="text-align:center"|[[Puzzle Piece (Donkey Kong Country series)|Puzzle Piece]] | ||
|Puzzle Pieces, as items, do not affect gameplay in any way, and only unlock concept artwork available by accessing the "Extras" menu. As challenge creators, they are a great factor of gameplay, as they are usually placed in the most secretive zones - for example, behind walls that stand between the player and actual paths; they also appear after completing a bonus stage, or after collecting occasional sets of bananas. | |Puzzle Pieces, as items, do not affect gameplay in any way, and only unlock concept artwork available by accessing the "Extras" menu. As challenge creators, they are a great factor of gameplay, as they are usually placed in the most secretive zones - for example, behind walls that stand between the player and actual paths; they also appear after completing a bonus stage, or after collecting occasional sets of bananas. | ||
|- | |- | ||
| align="center" |[[File:Air bubble.png|100px]] | |align="center"|[[File:Air bubble.png|100px]] | ||
|style="text-align:center"|[[Bubble|Air | |style="text-align:center"|[[Bubble|Air bubble]] | ||
|Air | |Air bubbles are generated by sunken diving helmets. While underwater, the Kongs have an air gauge that gradually depletes. They should pop air bubbles to gain and restore air. | ||
|- | |- | ||
| align="center" |[[File:Slot machine barrel.png|100px]] | |align="center"|[[File:Slot machine barrel.png|100px]] | ||
|style="text-align:center"|[[Slot Machine Barrel]] | |style="text-align:center"|[[Slot Machine Barrel]] | ||
|The main objective of most levels is to hit the Slot Machine Barrel. It contains a roulette that decides what prize will the barrel reveal upon getting destroyed. The roulette only activates when the Kongs are very close to the Slot Machine Barrel. | |The main objective of most levels is to hit the Slot Machine Barrel. It contains a roulette that decides what prize will the barrel reveal upon getting destroyed. The roulette only activates when the Kongs are very close to the Slot Machine Barrel. | ||
|- | |- | ||
| align="center" |[[File:Relic DKCTF.png|100px]] | |align="center"|[[File:Relic DKCTF.png|100px]] | ||
|style="text-align:center"|[[Mysterious | |style="text-align:center"|[[Mysterious relic]] | ||
|Mysterious | |Mysterious relics are similar to [[Rare Orb]]s from the previous game; they are required to access a secret world, [[Secret Seclusion]]. Six of them are obtained by completing the temple levels in the game, while the seventh and final one is obtained after beating the game. | ||
|} | |} | ||
===Projectiles=== | ===Projectiles=== | ||
{|class=" | {|class="wikitable dk"width=100% | ||
|- | |- | ||
!Image | !Image | ||
| Line 938: | Line 935: | ||
!Description | !Description | ||
|- | |- | ||
| align="center" |[[File:Barrel dkctf.png|100px]] | |align="center"|[[File:Barrel dkctf.png|100px]] | ||
|style="text-align:center"|[[Barrel]] | |style="text-align:center"|[[Barrel]] | ||
|Donkey Kong's signature object is present in this game. It can be heaved and carried by any Kong until the player decides to let it loose, which means to make the Kong throw it. After being thrown, the barrel rolls on the ground and knocks out every foe in its path until it smashes into a wall. | |Donkey Kong's signature object is present in this game. It can be heaved and carried by any Kong until the player decides to let it loose, which means to make the Kong throw it. After being thrown, the barrel rolls on the ground and knocks out every foe in its path until it smashes into a wall. | ||
|- | |- | ||
| align="center" |[[File:Partners Barrels - Donkey Kong Country Tropical Freeze.png|100px]] | |align="center"|[[File:Partners Barrels - Donkey Kong Country Tropical Freeze.png|100px]] | ||
|style="text-align:center"|[[DK Barrel|Kong Barrel]] | |style="text-align:center"|[[DK Barrel|Kong Barrel]] | ||
|Kong Barrels are more common than regular barrels. In the standard game mode and Time Trial mode, Kong Barrels contain either Diddy, Dixie, or Cranky Kong, each character having unique powers. If Donkey Kong lacks a partner, he can redeem him by throwing and breaking such barrels (otherwise, these barrels are empty) if he encounters them. As weapons, Kong Barrels function differently from regular barrels, in that they break instantly upon contact with any platform, without rolling. In Hard Mode, since the player can only make use of one character, all Kong Barrels are empty and useful only as weapons. | |Kong Barrels are more common than regular barrels. In the standard game mode and Time Trial mode, Kong Barrels contain either Diddy, Dixie, or Cranky Kong, each character having unique powers. If Donkey Kong lacks a partner, he can redeem him by throwing and breaking such barrels (otherwise, these barrels are empty) if he encounters them. As weapons, Kong Barrels function differently from regular barrels, in that they break instantly upon contact with any platform, without rolling. In Hard Mode, since the player can only make use of one character, all Kong Barrels are empty and useful only as weapons. | ||
|- | |- | ||
| align="center" |[[File:Watermelon fuse bomb.png|100px]] | |align="center"|[[File:Watermelon fuse bomb.png|100px]] | ||
|style="text-align:center"|[[Watermelon Fuse Bomb]] | |style="text-align:center"|[[Watermelon Fuse Bomb]] | ||
|Bombs that take the form of spherical melons are called Watermelon Fuse Bombs. After pulling certain Item Handles, the Kong extracts such explosives from the ground; enemies called Boom Birds, as well as Harolds, wield these bombs and can be considered sources of explosives too. Watermelon Fuse Bombs can be carried and hurled just like barrels, but they detonate after several moments of fuse burning. Their explosions can take out groups of enemies and/or cracked surfaces and blocks. | |Bombs that take the form of spherical melons are called Watermelon Fuse Bombs. After pulling certain Item Handles, the Kong extracts such explosives from the ground; enemies called Boom Birds, as well as Harolds, wield these bombs and can be considered sources of explosives too. Watermelon Fuse Bombs can be carried and hurled just like barrels, but they detonate after several moments of fuse burning. Their explosions can take out groups of enemies and/or cracked surfaces and blocks. | ||
|- | |- | ||
| align="center" |[[File:Water Sacks.png|100px]] | |align="center"|[[File:Water Sacks.png|100px]] | ||
|style="text-align:center"|[[Water Sack]] | |style="text-align:center"|[[Water Sack]] | ||
|Water Sacks are found in stacks on the ground. They can be picked up and thrown one at a time. As such, they hurt any enemy that gets hit, but they also extinguish fiery enemies or spots due to being water holders. | |Water Sacks are found in stacks on the ground. They can be picked up and thrown one at a time. As such, they hurt any enemy that gets hit, but they also extinguish fiery enemies or spots due to being water holders. | ||
| Line 956: | Line 953: | ||
===Miscellaneous=== | ===Miscellaneous=== | ||
{|class=" | {|class="wikitable dk"width=100% | ||
|- | |- | ||
!Image | !Image | ||
| Line 962: | Line 959: | ||
!Description | !Description | ||
|- | |- | ||
| align="center" |[[File:Barrel Cannon - Donkey Kong Country Tropical Freeze.png|70px]]<br>[[File:Skull barrel cannon.png|100px]] | |align="center"|[[File:Barrel Cannon - Donkey Kong Country Tropical Freeze.png|70px]]<br>[[File:Skull barrel cannon.png|100px]] | ||
|style="text-align:center"|[[Barrel Cannon]] | |style="text-align:center"|[[Barrel Cannon]] | ||
|A levitating cannon, shaped like a barrel. Barrel Cannons fire the Kongs across long distances, doing so at the player's signal. Common Barrel Cannons feature a white arrow imprinted on them. A type of Barrel Cannon that self-destructs as it blasts the Kongs features a skull and crossbones symbol instead. | |A levitating cannon, shaped like a barrel. Barrel Cannons fire the Kongs across long distances, doing so at the player's signal. Common Barrel Cannons feature a white arrow imprinted on them. A type of Barrel Cannon that self-destructs as it blasts the Kongs features a skull and crossbones symbol instead. | ||
|- | |- | ||
| align="center" |[[File:Blast barrel.png|100px]]<br>[[File:Skull blast barrel.png|100px]] | |align="center"|[[File:Blast barrel.png|100px]]<br>[[File:Skull blast barrel.png|100px]] | ||
|style="text-align:center"|[[Blast Barrel]] | |style="text-align:center"|[[Blast Barrel]] | ||
|A floating barrel-shaped cannon. It will automatically shoot the Kongs shortly after they mount it, without the player's input. The barrel is marked by the white outline of an explosion; Blast Barrels that self-destruct also display a skull inside the outline. | |A floating barrel-shaped cannon. It will automatically shoot the Kongs shortly after they mount it, without the player's input. The barrel is marked by the white outline of an explosion; Blast Barrels that self-destruct also display a skull inside the outline. | ||
|- | |- | ||
| align="center" |[[File:Bell.png|100px]] | |align="center"|[[File:Bell.png|100px]] | ||
|style="text-align:center"|[[Bell (Donkey Kong Country: Tropical Freeze)|Bells]] | |style="text-align:center"|[[Bell (Donkey Kong Country: Tropical Freeze)|Bells]] | ||
|Bells come in various shapes, sizes, and colors. Usually, they are used to produce items. This can be done by ground-pounding or performing a similar action in front of one, or by knocking it with Rambi, depending on the situation. However, only the silver bells found in [[Wing Ding]] are mandatory to use, as they act as switches that reveal part of the path ahead. | |Bells come in various shapes, sizes, and colors. Usually, they are used to produce items. This can be done by ground-pounding or performing a similar action in front of one, or by knocking it with Rambi, depending on the situation. However, only the silver bells found in [[Wing Ding]] are mandatory to use, as they act as switches that reveal part of the path ahead. | ||
|- | |- | ||
| align="center" |[[File:Burlap hanging sack.png|100px]] | |align="center"|[[File:Burlap hanging sack.png|100px]] | ||
|style="text-align:center"|[[Burlap Hanging Sack]] | |style="text-align:center"|[[Burlap Hanging Sack]] | ||
|A heavy sack made of cloth that lies hanged with a long rope. The rope's upper end is never seen. Hanging sacks can be broken open with projectiles to reveal treasures. | |A heavy sack made of cloth that lies hanged with a long rope. The rope's upper end is never seen. Hanging sacks can be broken open with projectiles to reveal treasures. | ||
|- | |- | ||
| align="center" |[[File:Climbing grass.png|100px]] | |align="center"|[[File:Climbing grass.png|100px]] | ||
|style="text-align:center"|[[Climbing | |style="text-align:center"|[[Climbing grass]] | ||
|Vegetation wrapped on walls, ceilings, and platforms. It can be grasped and used to escalate said surfaces. | |Vegetation wrapped on walls, ceilings, and platforms. It can be grasped and used to escalate said surfaces. | ||
|- | |- | ||
| align="center" |[[File:Collapsible Underwater Grass.png|100px]] | |align="center"|[[File:Collapsible Underwater Grass.png|100px]] | ||
|style="text-align:center"|[[Collapsible Underwater Grass]] | |style="text-align:center"|[[Collapsible Underwater Grass]] | ||
|Underwater grassy plants that retract their stems to reveal items when approached. | |Underwater grassy plants that retract their stems to reveal items when approached. | ||
|- | |- | ||
| align="center" |[[File:Cracked block.png|100px]] | |align="center"|[[File:Cracked block.png|100px]] | ||
|style="text-align:center"|[[Cracked Block]] | |style="text-align:center"|[[Cracked Block]] | ||
|Cracked Blocks are fragile, blocky objects that usually contain items. The Kongs can mount these blocks and break them with three consecutive ground pounds in order to obtain the items inside, if any. | |Cracked Blocks are fragile, blocky objects that usually contain items. The Kongs can mount these blocks and break them with three consecutive ground pounds in order to obtain the items inside, if any. | ||
|- | |- | ||
| align="center" |[[File:Flying banana.png]] | |align="center"|[[File:Flying banana.png]] | ||
|style="text-align:center"|[[Flying | |style="text-align:center"|[[Flying banana]] | ||
|Entities conducting long trails of [[banana]]s. They hide under Item Handles, and once pulled out of the ground, they quickly start flying above the Kongs. They hold prizes, which they will reveal only after all bananas from their trails are collected. Flying | |Entities conducting long trails of [[banana]]s. They hide under Item Handles, and once pulled out of the ground, they quickly start flying above the Kongs. They hold prizes, which they will reveal only after all bananas from their trails are collected. Flying bananas leave the screen after a few moments. | ||
|- | |- | ||
| align="center" |[[File:Container1.png|100px]]<br>[[File:Container2.png|100px]]<br>[[File:Container3.png|70px]] | |align="center"|[[File:Container1.png|100px]]<br>[[File:Container2.png|100px]]<br>[[File:Container3.png|70px]] | ||
|style="text-align:center"|[[Item Container]]s | |style="text-align:center"|[[Item Container]]s | ||
|Objects that come in many different shapes and sizes. If pounded, they collapse and reveal collectibles of great diversity (Banana Bunches, Red Balloons, Puzzle Pieces etc.) | |Objects that come in many different shapes and sizes. If pounded, they collapse and reveal collectibles of great diversity (Banana Bunches, Red Balloons, Puzzle Pieces, etc.) | ||
|- | |- | ||
| align="center" |[[File:Item handle.png]] | |align="center"|[[File:Item handle.png]] | ||
|style="text-align:center"|[[Item Handle]] | |style="text-align:center"|[[Item Handle]] | ||
|Item Handles are levers that are always stuck to the ground. They can be pulled upwards, but not all of them have the same role. Most of them keep items of all sorts underground, and after the Kongs exert a force on them, they reveal the items. Nevertheless, other handles are essential to the gameplay, since they bring about events such as the creation of platforms. | |Item Handles are levers that are always stuck to the ground. They can be pulled upwards, but not all of them have the same role. Most of them keep items of all sorts underground, and after the Kongs exert a force on them, they reveal the items. Nevertheless, other handles are essential to the gameplay, since they bring about events such as the creation of platforms. | ||
|- | |- | ||
| align="center" |[[File:Jelly block.png|100px]] | |align="center"|[[File:Jelly block.png|100px]] | ||
|style="text-align:center"|Jelly | |style="text-align:center"|Jelly block | ||
|Jelly | |Jelly blocks are large and highly elastic objects on which the Kongs can bounce. When they are encountered in rows, they usually contain items. To get them out of a jelly block, the Kongs have to bounce on any other adjacent jelly block. These bouncy mold objects come in three colors: purple (regular), green (with higher elasticity, thus offering better bouncing capabilities), and blue (causing a moving structure to work as soon as they are pressed). | ||
|- | |- | ||
| align="center" |[[File:Portal.jpg|100px]] | |align="center"|[[File:Portal.jpg|100px]] | ||
|style="text-align:center"|Portal | |style="text-align:center"|Portal | ||
|Portals are found in a few levels, in areas which are accessible only with the use of one character's powers, such as Dixie Kong's ponytail twirl or Cranky's cane bounce. They are formed by glowing rune stones arranged in a circular pattern, and lead to hidden Slot Barrel Machines, opening the path to secret levels. | |Portals are found in a few levels, in areas which are accessible only with the use of one character's powers, such as Dixie Kong's ponytail twirl or Cranky's cane bounce. They are formed by glowing rune stones arranged in a circular pattern, and lead to hidden Slot Barrel Machines, opening the path to secret levels. | ||
|- | |- | ||
| align="center" |[[File:Purple flower platforms.png|100px]] | |align="center"|[[File:Purple flower platforms.png|100px]] | ||
|style="text-align:center"|[[Purple Flower Platform]] | |style="text-align:center"|[[Purple Flower Platform]] | ||
|A large plant that has grown high above the ground. Its flower faces the sky above and can be stepped on, but will tilt under the Kongs' weight. It would soon wither and let the characters slip off, reverting to its initial state after a while. | |A large plant that has grown high above the ground. Its flower faces the sky above and can be stepped on, but will tilt under the Kongs' weight. It would soon wither and let the characters slip off, reverting to its initial state after a while. | ||
|- | |- | ||
| align="center" |[[File:Rambi box.png|100px]] | |align="center"|[[File:Rambi box.png|100px]] | ||
|style="text-align:center"|[[Animal | |style="text-align:center"|[[Animal crate|Rambi Crate]] | ||
|A small crate identified by the rhino head clipped onto it. It can be hopped on and pounded to break it, revealing [[Rambi | |A small crate identified by the rhino head clipped onto it. It can be hopped on and pounded to break it, revealing [[Rambi]]. | ||
|- | |- | ||
| align="center" |[[File:Wooden spinning platform.png|100px]]<br>[[File:Stone spinning platform.png|100px]] | |align="center"|[[File:Wooden spinning platform.png|100px]]<br>[[File:Stone spinning platform.png|100px]] | ||
|style="text-align:center"|[[Spinning Platform]] | |style="text-align:center"|[[Spinning Platform]] | ||
|A rotatable surface that is hidden amongst the usual ground. Spinning Platforms hide pits that transport the heroes either into bonus areas or merely into hidden areas that contain loot. They can be rotated with a ground pound. | |A rotatable surface that is hidden amongst the usual ground. Spinning Platforms hide pits that transport the heroes either into bonus areas or merely into hidden areas that contain loot. They can be rotated with a ground pound. | ||
|- | |- | ||
| align="center" |[[File:Snowflakeshield.jpg|100px]] | |align="center"|[[File:Vine.png|40px]] | ||
|style="text-align:center"|[[Swinging vine]] | |||
|A long and narrow plant hanging from the ceiling. Vines are encountered motionless or swinging, and can be climbed to reach higher areas, or jumped from one to another to pass wide pits. | |||
|- | |||
|align="center"|[[File:Snowflakeshield.jpg|100px]] | |||
|style="text-align:center"|[[Snowflake Shield]] | |style="text-align:center"|[[Snowflake Shield]] | ||
|An object that is usually found blocking access to hidden areas and, sometimes, even the main path. They can be destroyed with a throwable object or with Rambi. | |An object that is usually found blocking access to hidden areas and, sometimes, even the main path. They can be destroyed with a throwable object or with Rambi. | ||
|- | |- | ||
| align="center" |[[File:Spring platform.png|100px]] | |align="center"|[[File:Spring platform.png|100px]] | ||
|style="text-align:center"|[[Spring Platform]] | |style="text-align:center"|[[Spring Platform]] | ||
|A wooden contraption floating on water. It has two springs underneath. When pounded, this platform will press the springs and launch the Kongs up. | |A wooden contraption floating on water. It has two springs underneath. When pounded, this platform will press the springs and launch the Kongs up. | ||
|- | |- | ||
| align="center" |[[File:DKCTF VenusTrapPlatform.jpg|100px]] | |align="center"|[[File:DKCTF VenusTrapPlatform.jpg|100px]] | ||
|style="text-align:center"|[[Venus Trap Platform]] | |style="text-align:center"|[[Venus Trap Platform]] | ||
|An upside-down carnivorous plant with a leaf crown serving as a platform. When the Kongs or an enemy walk under the plant, it drops down in an attempt to attack them. While down, the Kongs can jump on the plant's platform and rise along with it as the plant retreats to its initial position. | |An upside-down carnivorous plant with a leaf crown serving as a platform. When the Kongs or an enemy walk under the plant, it drops down in an attempt to attack them. While down, the Kongs can jump on the plant's platform and rise along with it as the plant retreats to its initial position. | ||
|- | |- | ||
|align="center"|[[File:Vine-triggered platform.png|100px]] | |||
| align="center" |[[File:Vine-triggered platform.png|100px]] | |||
|style="text-align:center"|[[Vine-Triggered Platform]] | |style="text-align:center"|[[Vine-Triggered Platform]] | ||
|A platform that normally stays in a vertical position, but drops horizontally whenever the Kongs tension its vine connected underneath. The platform reveals collectibles whenever it drops down. It is timed, however, and will go back to its vertical position after a while. | |A platform that normally stays in a vertical position, but drops horizontally whenever the Kongs tension its vine connected underneath. The platform reveals collectibles whenever it drops down. It is timed, however, and will go back to its vertical position after a while. | ||
|- | |- | ||
| align="center" |[[File:Zip-line vine.png|100px]] | |align="center"|[[File:Zip-line vine.png|100px]] | ||
|style="text-align:center"|[[Zip-Line Vine]] | |style="text-align:center"|[[Zip-Line Vine]] | ||
|A straight, slightly inclined vine traced across the screen. The Kongs can grab the vine and slide along it, being able to jump or drop from it at any time. | |A straight, slightly inclined vine traced across the screen. The Kongs can grab the vine and slide along it, being able to jump or drop from it at any time. | ||
| Line 1,048: | Line 1,045: | ||
===Vehicles=== | ===Vehicles=== | ||
{|class=" | {|class="wikitable dk"width=100% | ||
|- | |- | ||
!Image | !Image | ||
| Line 1,054: | Line 1,051: | ||
!Description | !Description | ||
|- | |- | ||
| align="center" |[[File:DKCTF Mine Cart.png|100px]] | |align="center"|[[File:DKCTF Mine Cart.png|100px]] | ||
|style="text-align:center"|[[Mine Cart|Mine Cart]] | |style="text-align:center"|[[Mine Cart|Mine Cart]] | ||
|Mine Carts make up the main gameplay gimmick in a few levels, as they transport the Kongs on rail tracks. Players can jump over dangerous gaps or other obstacles while their character is in the Mine Cart. It moves forward automatically, requiring the player to dodge every hazard on the way in time. In [[Sawmill Thrill]], the Mine Cart is temporarily replaced with a [[Log Canoe]]; in addition to having the properties of the Mine Cart, the object can also float on water and be used as a boat. | |Mine Carts make up the main gameplay gimmick in a few levels, as they transport the Kongs on rail tracks. Players can jump over dangerous gaps or other obstacles while their character is in the Mine Cart. It moves forward automatically, requiring the player to dodge every hazard on the way in time. In [[Sawmill Thrill]], the Mine Cart is temporarily replaced with a [[Log Canoe]]; in addition to having the properties of the Mine Cart, the object can also float on water and be used as a boat. | ||
|- | |- | ||
| align="center" |[[File:Rocket Barrel DKCTF.png|100px]] | |align="center"|[[File:Rocket Barrel DKCTF.png|100px]] | ||
|style="text-align:center"|[[Rocket Barrel]] | |style="text-align:center"|[[Rocket Barrel]] | ||
|An aerodynamic machine very similar in concept with the mine cart, the rocket barrel moves forward at a constant velocity. It transports the Kongs throughout very steep tunnels or over wide chasms, using its fuel power. It can only be controlled to ascend or descend. | |An aerodynamic machine very similar in concept with the mine cart, the rocket barrel moves forward at a constant velocity. It transports the Kongs throughout very steep tunnels or over wide chasms, using its fuel power. It can only be controlled to ascend or descend. | ||
| Line 1,070: | Line 1,067: | ||
'''''Note:''''' tracks succeeded by an asterisk (*) in the following table are given their titles in ''[[Super Smash Bros. for Wii U]]''. | '''''Note:''''' tracks succeeded by an asterisk (*) in the following table are given their titles in ''[[Super Smash Bros. for Wii U]]''. | ||
{|width=99% cellspacing=0 border=2 cellpadding=3 style="border-collapse:collapse; background:wheat;border:saddlebrown" | {|width=99% cellspacing=0 border=2 cellpadding=3 style="border-collapse:collapse; background:wheat;border:saddlebrown" | ||
! colspan=5 style="background:saddlebrown;color:white" align=center | <big>Worlds and levels</big> | !colspan=5 style="background:saddlebrown;color:white" align=center|<big>Worlds and levels</big> | ||
|- | |- | ||
! colspan=7 style="background:#BB8855" align=center | [[Lost Mangroves]] | !colspan=7 style="background:#BB8855" align=center|[[Lost Mangroves]] | ||
|- align=center | |- align=center | ||
!style="background:burlywood" width=5%|Level number | !style="background:burlywood" width=5%|Level number | ||
| Line 1,081: | Line 1,077: | ||
!style="background:burlywood" width=30%|Music theme(s) | !style="background:burlywood" width=30%|Music theme(s) | ||
|- | |- | ||
|align="center" | 1-1 || align="center" | [[Mangrove Cove]] || Align="center" | 9 || align="center" | "Mangrove Cove"<br>"Mangrove Cove Underwater" | |align="center"|1-1||align="center"|[[Mangrove Cove]]||Align="center"|9||align="center"|"Mangrove Cove"<br>"Mangrove Cove Underwater" | ||
|- style=background:#FFF8DC | |-style=background:#FFF8DC | ||
|align="center" | 1-2 || align="center" | [[Shipwreck Shore]] || align="center" | 9 || align="center" | "Shipwreck Shore" | |align="center"|1-2||align="center"|[[Shipwreck Shore]]||align="center"|9||align="center"|"Shipwreck Shore" | ||
|- | |- | ||
|align="center" | 1-3 || align="center" | [[Canopy Chaos]] ||align="center" | 7 ||align="center" | "Mangrove Swing" | |align="center"|1-3||align="center"|[[Canopy Chaos]]||align="center"|7||align="center"|"Mangrove Swing" | ||
|- style=background:#FFF8DC | |-style=background:#FFF8DC | ||
|align="center" | 1-4 || align="center" | [[Trunk Twister]] || align="center" | 5 ||align="center" | {{conjectural|Trunk Twister theme}} | |align="center"|1-4||align="center"|[[Trunk Twister]]||align="center"|5||align="center"|{{conjectural|Trunk Twister theme}} | ||
|- | |- | ||
|align="center" | 1-A || align="center" | [[Zip-Line Shrine]] || align="center" | 5 ||align="center" | A cover of "Jungle Hijinxs" from ''Donkey Kong Country Returns'', very similar in tone to "Jungle Jitter" from the [[Game Boy Advance]] version of ''[[Donkey Kong Country 3 | |align="center"|1-A||align="center"|[[Zip-Line Shrine]]||align="center"|5||align="center"|A cover of "Jungle Hijinxs" from ''Donkey Kong Country Returns'', very similar in tone to "Jungle Jitter" from the [[Game Boy Advance]] version of ''[[Donkey Kong Country 3 (Game Boy Advance)|Donkey Kong Country 3]]'' | ||
|- style=background:#FFF8DC | |-style=background:#FFF8DC | ||
|align="center" | 1-B || align="center" | [[Busted Bayou]] ||align="center" | 9 ||align="center" | {{conjectural|Busted Bayou theme}} | |align="center"|1-B||align="center"|[[Busted Bayou]]||align="center"|9||align="center"|{{conjectural|Busted Bayou theme}} | ||
|- | |- | ||
|align="center" | 1-K || align="center" | [[Swinger Flinger]] ||align="center" | 5 ||align="center" | A rearrangement of "King of Cling" from ''Donkey Kong Country Returns'' | |align="center"|1-K||align="center"|[[Swinger Flinger]]||align="center"|5||align="center"|A rearrangement of "King of Cling" from ''Donkey Kong Country Returns'' | ||
|- style=background:#FFF8DC | |-style=background:#FFF8DC | ||
|align="center" | 1-BOSS || align="center" | BOSS LEVEL: [[Big Top Bop]] ||align="center" | 0 ||align="center" | {{conjectural|Big Top Bop theme}} | |align="center"|1-BOSS||align="center"|BOSS LEVEL: [[Big Top Bop]]||align="center"|0||align="center"|{{conjectural|Big Top Bop theme}} | ||
|- | |- | ||
! colspan=5 style="background:#BB8855" align=center | [[Autumn Heights]] | !colspan=5 style="background:#BB8855"align=center|[[Autumn Heights]] | ||
|- align=center | |-align=center | ||
!style="background:burlywood" width=5%|Level number | !style="background:burlywood"width=5%|Level number | ||
!style="background:burlywood" width=35%|Level name | !style="background:burlywood"width=35%|Level name | ||
!style="background:burlywood" width=10%|Puzzle Pieces | !style="background:burlywood"width=10%|Puzzle Pieces | ||
!style="background:burlywood" width=30%|Music theme | !style="background:burlywood"width=30%|Music theme | ||
|- | |- | ||
|align="center" | 2-1 || align="center" | [[Windmill Hills]] || align="center" | 9 || align="center" | "Windmill Hills" | |align="center"|2-1||align="center"|[[Windmill Hills]]||align="center"|9||align="center"|"Windmill Hills" | ||
|- style=background:#FFF8DC | |-style=background:#FFF8DC | ||
|align="center" | 2-2 || align="center" | [[Mountain Mania]] || align="center" | 7 || align="center" | {{conjectural|Mountain Mania theme}} | |align="center"|2-2||align="center"|[[Mountain Mania]]||align="center"|7||align="center"|{{conjectural|Mountain Mania theme}} | ||
|- | |- | ||
|align="center" | 2-3 || align="center" | [[Horn Top Hop]] || align="center" | 5 || align="center" | {{conjectural|Horn Top Hop theme}}, with several variations depending on the location of the player in the level | |align="center"|2-3||align="center"|[[Horn Top Hop]]||align="center"|5||align="center"|{{conjectural|Horn Top Hop theme}}, with several variations depending on the location of the player in the level | ||
|- style=background:#FFF8DC | |-style=background:#FFF8DC | ||
|align="center" | 2-4 || align="center" | [[Sawmill Thrill]] || align="center" | 5 || align="center" | "Sawmill Thrill" | |align="center"|2-4||align="center"|[[Sawmill Thrill]]||align="center"|5||align="center"|"Sawmill Thrill" | ||
|- | |- | ||
|align="center" | 2-5 || align="center" | [[Alpine Incline]] || align="center" | 5 || align="center" | "Alpine Incline" | |align="center"|2-5||align="center"|[[Alpine Incline]]||align="center"|5||align="center"|"Alpine Incline" | ||
|- style=background:#FFF8DC | |-style=background:#FFF8DC | ||
|align="center" | 2-6 || align="center" | [[Wing Ding]] || align="center" | 5 || align="center" | {{conjectural|Wing Ding theme}} | |align="center"|2-6||align="center"|[[Wing Ding]]||align="center"|5||align="center"|{{conjectural|Wing Ding theme}} | ||
|- | |- | ||
|align="center" | 2-A || align="center" | [[Crumble Cavern]] || align="center" | 7 || align="center" | {{conjectural|"Cave Dweller Concert Returns"}} | |align="center"|2-A||align="center"|[[Crumble Cavern]]||align="center"|7||align="center"|{{conjectural|"Cave Dweller Concert Returns"}} | ||
|- style=background:#FFF8DC | |-style=background:#FFF8DC | ||
|align="center" | 2-B || align="center" | [[Rodent Ruckus]] || align="center" | 5 || align="center" | "Rodent Ruckus" | |align="center"|2-B||align="center"|[[Rodent Ruckus]]||align="center"|5||align="center"|"Rodent Ruckus"<br>A cover of "Mine Menace" from ''Donkey Kong Country Returns'' | ||
|- | |- | ||
|align="center" | 2-K || align="center" | [[Bopopolis]] || align="center" | 5 || align="center" | "Swinger Flinger" * | |align="center"|2-K||align="center"|[[Bopopolis]]||align="center"|5||align="center"|"Swinger Flinger" * | ||
|- style=background:#FFF8DC | |-style=background:#FFF8DC | ||
|align="center" | 2-BOSS || align="center" | BOSS LEVEL: [[Mountaintop Tussle]] || align="center" | 0 || align="center" | {{conjectural|Mountaintop Tussle theme}} | |align="center"|2-BOSS||align="center"|BOSS LEVEL: [[Mountaintop Tussle]]||align="center"|0||align="center"|{{conjectural|Mountaintop Tussle theme}} | ||
|- | |- | ||
! colspan=5 style="background:#BB8855" align=center | [[Bright Savannah]] | !colspan=5 style="background:#BB8855"align=center|[[Bright Savannah]] | ||
|- align=center | |-align=center | ||
!style="background:burlywood" width=5%|Level number | !style="background:burlywood"width=5%|Level number | ||
!style="background:burlywood" width=35%|Level name | !style="background:burlywood"width=35%|Level name | ||
!style="background:burlywood" width=10%|Puzzle Pieces | !style="background:burlywood"width=10%|Puzzle Pieces | ||
!style="background:burlywood" width=30%|Music theme(s) | !style="background:burlywood"width=30%|Music theme(s) | ||
|- | |- | ||
|align="center" | 3-1 ||align="center" | [[Grassland Groove]] || align="center" | 9 || align="center" | {{conjectural|Grassland Groove theme}} | |align="center"|3-1||align="center"|[[Grassland Groove]]||align="center"|9||align="center"|{{conjectural|Grassland Groove theme}} | ||
|- style=background:#FFF8DC | |-style=background:#FFF8DC | ||
|align="center" | 3-2 || align="center" | [[Baobab Bonanza]] || align="center" | 7 || align="center" | "Baobab Bonanza" | |align="center"|3-2||align="center"|[[Baobab Bonanza]]||align="center"|7||align="center"|"Baobab Bonanza" | ||
|- | |- | ||
|align="center" | 3-3 || align="center" | [[Frantic Fields]] || align="center" | 5 || align="center" | {{conjectural|"Run, Rambi! Run! Returns"}} | |align="center"|3-3||align="center"|[[Frantic Fields]]||align="center"|5||align="center"|{{conjectural|"Run, Rambi! Run! Returns"}} | ||
|- style=background:#FFF8DC | |-style=background:#FFF8DC | ||
|align="center" | 3-4 || align="center" | [[Scorch 'n' Torch]] || align="center" | 7 || align="center" | "Scorch 'n' Torch" | |align="center"|3-4||align="center"|[[Scorch 'n' Torch]]||align="center"|7||align="center"|"Scorch 'n' Torch" | ||
|- | |- | ||
|align="center" | 3-5 || align="center" | [[Twilight Terror]] || align="center" | 5 || align="center" | A cover of "Stickerbush Symphony" from ''[[Donkey Kong Country 2: Diddy's Kong Quest|Donkey Kong Country 2]]''<br>"Twilight Terror" | |align="center"|3-5||align="center"|[[Twilight Terror]]||align="center"|5||align="center"|A cover of "Stickerbush Symphony" from ''[[Donkey Kong Country 2: Diddy's Kong Quest|Donkey Kong Country 2]]''<br>"Twilight Terror" | ||
|- style=background:#FFF8DC | |-style=background:#FFF8DC | ||
|align="center" | 3-6 || align="center" | [[Cannon Canyon]] || align="center" | 5 || align="center" | "Savannah Pop" | |align="center"|3-6||align="center"|[[Cannon Canyon]]||align="center"|5||align="center"|"Savannah Pop" | ||
|- | |- | ||
|align="center" | 3-A || align="center" | [[Rickety Rafters]] || align="center" | 5 || align="center" | "Savannah Pop" | |align="center"|3-A||align="center"|[[Rickety Rafters]]||align="center"|5||align="center"|"Savannah Pop" | ||
|- style=background:#FFF8DC | |-style=background:#FFF8DC | ||
|align="center" | 3-B || align="center" | [[Bramble Scramble (Donkey Kong Country: Tropical Freeze)|Bramble Scramble]] || align="center" | 7 || align="center" | "Savannah Pop" | |align="center"|3-B||align="center"|[[Bramble Scramble (Donkey Kong Country: Tropical Freeze)|Bramble Scramble]]||align="center"|7||align="center"|"Savannah Pop" | ||
|- | |- | ||
|align="center" | 3-K || align="center" | [[Precarious Pendulums]] || align="center" | 5 || align="center" | A rearrangement of "King of Cling" from ''Donkey Kong Country Returns'' | |align="center"|3-K||align="center"|[[Precarious Pendulums]]||align="center"|5||align="center"|A rearrangement of "King of Cling" from ''Donkey Kong Country Returns'' | ||
|- style=background:#FFF8DC | |-style=background:#FFF8DC | ||
|align="center" | 3-BOSS || align="center" | BOSS LEVEL: [[Triple Trouble]] || align="center" | 0 || align="center" | {{conjectural|Triple Trouble theme}} | |align="center"|3-BOSS||align="center"|BOSS LEVEL: [[Triple Trouble]]||align="center"|0||align="center"|{{conjectural|Triple Trouble theme}} | ||
|- | |- | ||
! colspan=5 style="background:#BB8855" align=center | [[Sea Breeze Cove]] | !colspan=5 style="background:#BB8855"align=center|[[Sea Breeze Cove]] | ||
|- align=center | |-align=center | ||
!style="background:burlywood" width=5%|Level number | !style="background:burlywood"width=5%|Level number | ||
!style="background:burlywood" width=35%|Level name | !style="background:burlywood"width=35%|Level name | ||
!style="background:burlywood" width=10%|Puzzle Pieces | !style="background:burlywood"width=10%|Puzzle Pieces | ||
!style="background:burlywood" width=30%|Music theme(s) | !style="background:burlywood"width=30%|Music theme(s) | ||
|- | |- | ||
|align="center" | 4-1 || align="center" | [[Deep Keep]] || align="center" | 7 || align="center" | "Deep Keep"<br>"Funky Waters"<br>"Aquatic Ambiance Returns" (''DKC:TF'' version) | |align="center"|4-1||align="center"|[[Deep Keep]]||align="center"|7||align="center"|"Deep Keep"<br>"Funky Waters"<br>"Aquatic Ambiance Returns" (''DKC:TF'' version) | ||
|- style=background:#FFF8DC | |-style=background:#FFF8DC | ||
|align="center" | 4-2 || align="center" | [[High Tide Ride]] || align="center" | 5 || align="center" | A remixed version of the title screen theme | |align="center"|4-2||align="center"|[[High Tide Ride]]||align="center"|5||align="center"|A remixed version of the title screen theme | ||
|- | |- | ||
|align="center" | 4-3 || align="center" | [[Amiss Abyss]] || align="center" | 9 || align="center" | {{conjectural|"Cave Dweller Concert Returns"}}<br>"Funky Waters" | |align="center"|4-3||align="center"|[[Amiss Abyss]]||align="center"|9||align="center"|{{conjectural|"Cave Dweller Concert Returns"}}<br>"Funky Waters" | ||
|- style=background:#FFF8DC | |-style=background:#FFF8DC | ||
|align="center" | 4-4 || align="center" | [[Irate Eight]] || align="center" | 5 || align="center" | A cover of "Lockjaw's Saga" from ''Donkey Kong Country 2''<br>"Irate Eight" | |align="center"|4-4||align="center"|[[Irate Eight]]||align="center"|5||align="center"|A cover of "Lockjaw's Saga" from ''Donkey Kong Country 2''<br>"Irate Eight" | ||
|- | |- | ||
|align="center" | 4-5 || align="center" | [[Sea Stack Attack]] || align="center" | 7 ||align="center" | "Mangrove Swing" | |align="center"|4-5||align="center"|[[Sea Stack Attack]]||align="center"|7||align="center"|"Mangrove Swing" | ||
|- style=background:#FFF8DC | |-style=background:#FFF8DC | ||
|align="center" | 4-6 || align="center" | [[Current Capers]] || align="center" | 5 ||align="center" | "Aquatic Ambiance Returns" (''DKC:TF'' version) | |align="center"|4-6||align="center"|[[Current Capers]]||align="center"|5||align="center"|"Aquatic Ambiance Returns" (''DKC:TF'' version) | ||
|- | |- | ||
|align="center" | 4-A || align="center" | [[Rockin' Relics]] || align="center" | 9 ||align="center" | A cover of "Lockjaw's Saga" from ''Donkey Kong Country 2'' | |align="center"|4-A||align="center"|[[Rockin' Relics]]||align="center"|9||align="center"|A cover of "Lockjaw's Saga" from ''Donkey Kong Country 2'' | ||
|- style=background:#FFF8DC | |-style=background:#FFF8DC | ||
|align="center" | 4-B || align="center" | [[Shoal Atoll]] || align="center" | 5 || align="center" | "Aquatic Ambiance Returns" (''DKC:TF'' version) | |align="center"|4-B||align="center"|[[Shoal Atoll]]||align="center"|5||align="center"|"Aquatic Ambiance Returns" (''DKC:TF'' version) | ||
|- | |- | ||
|align="center" | 4-K || align="center" | [[Spinning Spines]] || align="center" | 5 || align="center" | "Swinger Flinger" * | |align="center"|4-K||align="center"|[[Spinning Spines]]||align="center"|5||align="center"|"Swinger Flinger" * | ||
|- style=background:#FFF8DC | |-style=background:#FFF8DC | ||
|align="center" | 4-BOSS || align="center" | BOSS LEVEL: [[Fugu Face-Off]] || align="center" | 0 || align="center" | {{conjectural|Fugu Face-Off theme}} | |align="center"|4-BOSS||align="center"|BOSS LEVEL: [[Fugu Face-Off]]||align="center"|0||align="center"|{{conjectural|Fugu Face-Off theme}} | ||
|- | |- | ||
! colspan=5 style="background:#BB8855" align=center | [[Juicy Jungle]] | !colspan=5 style="background:#BB8855"align=center|[[Juicy Jungle]] | ||
|- align=center | |-align=center | ||
!style="background:burlywood" width=5%|Level number | !style="background:burlywood"width=5%|Level number | ||
!style="background:burlywood" width=35%|Level name | !style="background:burlywood"width=35%|Level name | ||
!style="background:burlywood" width=10%|Puzzle Pieces | !style="background:burlywood"width=10%|Puzzle Pieces | ||
!style="background:burlywood" width=30%|Music theme(s) | !style="background:burlywood"width=30%|Music theme(s) | ||
|- | |- | ||
|align="center" | 5-1 || align="center" | [[Harvest Hazards]] || align="center" | 7 || align="center" | "Swing Juice" | |align="center"|5-1||align="center"|[[Harvest Hazards]]||align="center"|7||align="center"|"Swing Juice" | ||
|- style=background:#FFF8DC | |-style=background:#FFF8DC | ||
|align="center" | 5-2 || align="center" | [[Reckless Ride]] || align="center" | 5 || align="center" | "Swing Juice"<br>A cover of "Mine Menace" from ''Donkey Kong Country Returns'' | |align="center"|5-2||align="center"|[[Reckless Ride]]||align="center"|5||align="center"|"Swing Juice"<br>A cover of "Mine Menace" from ''Donkey Kong Country Returns'' | ||
|- | |- | ||
|align="center" | 5-3 || align="center" | [[Fruity Factory]] || align="center" | 5 || align="center" | "Juicy Groove" | |align="center"|5-3||align="center"|[[Fruity Factory]]||align="center"|5||align="center"|"Juicy Groove" | ||
|- style=background:#FFF8DC | |-style=background:#FFF8DC | ||
|align="center" | 5-4 || align="center" | [[Panicky Paddles]] || align="center" | 9 || align="center" | "Swing Juice"<br>An underwater cover of "Swing Juice" | |align="center"|5-4||align="center"|[[Panicky Paddles]]||align="center"|9||align="center"|"Swing Juice"<br>An underwater cover of "Swing Juice" | ||
|- | |- | ||
|align="center" | 5-5 || align="center" | [[Jelly Jamboree]] || align="center" | 7 ||align="center" | "Fruit Bounce" | |align="center"|5-5||align="center"|[[Jelly Jamboree]]||align="center"|7||align="center"|"Fruit Bounce" | ||
|- style=background:#FFF8DC | |-style=background:#FFF8DC | ||
|align="center" | 5-6 || align="center" | [[Frosty Fruits]] || align="center" | 5 || align="center" | "Frosty Fruits"<br>A cover of "In a Snowbound Land" from ''Donkey Kong Country 2'' | |align="center"|5-6||align="center"|[[Frosty Fruits]]||align="center"|5||align="center"|"Frosty Fruits"<br>A cover of "In a Snowbound Land" from ''Donkey Kong Country 2'' | ||
|- | |- | ||
|align="center" | 5-A || align="center" | [[Beehive Brawl]] || align="center" | 7 || align="center" | "Fruit Bounce" | |align="center"|5-A||align="center"|[[Beehive Brawl]]||align="center"|7||align="center"|"Fruit Bounce" | ||
|- style=background:#FFF8DC | |-style=background:#FFF8DC | ||
|align="center" | 5-B || align="center" | [[Jammin' Jams]] || align="center" | 5 ||align="center" | {{conjectural|Jammin' Jams theme}} | |align="center"|5-B||align="center"|[[Jammin' Jams]]||align="center"|5||align="center"|{{conjectural|Jammin' Jams theme}} | ||
|- | |- | ||
|align="center" | 5-K || align="center" | [[Platform Problems]] || align="center" | 5 || align="center" | A rearrangement of "King of Cling" from ''Donkey Kong Country Returns'' | |align="center"|5-K||align="center"|[[Platform Problems]]||align="center"|5||align="center"|A rearrangement of "King of Cling" from ''Donkey Kong Country Returns'' | ||
|- style=background:#FFF8DC | |-style=background:#FFF8DC | ||
|align="center" | 5-BOSS || align="center" | BOSS LEVEL: [[Punch Bowl]] || align="center" | 0 || align="center" | {{conjectural|Punch Bowl theme}} | |align="center"|5-BOSS||align="center"|BOSS LEVEL: [[Punch Bowl]]||align="center"|0||align="center"|{{conjectural|Punch Bowl theme}} | ||
|- | |- | ||
! colspan=5 style="background:#BB8855" align=center | [[Donkey Kong Island (world)|Donkey Kong Island]] | !colspan=5 style="background:#BB8855"align=center|[[Donkey Kong Island (world)|Donkey Kong Island]] | ||
|- align=center | |-align=center | ||
!style="background:burlywood" width=5%|Level number | !style="background:burlywood"width=5%|Level number | ||
!style="background:burlywood" width=35%|Level name | !style="background:burlywood"width=35%|Level name | ||
!style="background:burlywood" width=10%|Puzzle Pieces | !style="background:burlywood"width=10%|Puzzle Pieces | ||
!style="background:burlywood" width=30%|Music theme | !style="background:burlywood"width=30%|Music theme | ||
|- | |- | ||
|align="center" | 6-1 || align="center" | [[Homecoming Hijinxs]] || align="center" | | |align="center"|6-1||align="center"|[[Homecoming Hijinxs]]||align="center"|5||align="center"|"Snowmads Theme" | ||
|- style=background:#FFF8DC | |-style=background:#FFF8DC | ||
|align="center" | 6-2 || align="center" | [[Seashore War]] || align="center" | 5 || align="center" | "Seashore War" | |align="center"|6-2||align="center"|[[Seashore War]]||align="center"|5||align="center"|"Seashore War" | ||
|- | |- | ||
|align="center" | 6-3 || align="center" | [[Aqueduct Assault]] || align="center" | 5 || align="center" | {{conjectural|Aqueduct Assault theme}} | |align="center"|6-3||align="center"|[[Aqueduct Assault]]||align="center"|5||align="center"|{{conjectural|Aqueduct Assault theme}} | ||
|- style=background:#FFF8DC | |-style=background:#FFF8DC | ||
|align="center" | 6-4 || align="center" | [[Blurry Flurry]] || align="center" | 7 || align="center" | A cover of "Mine Menace" from ''Donkey Kong Country Returns'' | |align="center"|6-4||align="center"|[[Blurry Flurry]]||align="center"|7||align="center"|A cover of "Mine Menace" from ''Donkey Kong Country Returns'' | ||
|- | |- | ||
|align="center" | 6-5 || align="center" | [[Forest Folly]] || align="center" | 5 ||align="center" | "Freezie Breezie" | |align="center"|6-5||align="center"|[[Forest Folly]]||align="center"|5||align="center"|"Freezie Breezie" | ||
|- style=background:#FFF8DC | |-style=background:#FFF8DC | ||
|align="center" | 6-6 || align="center" | [[Cliffside Slide]] || align="center" | | |align="center"|6-6||align="center"|[[Cliffside Slide]]||align="center"|5||align="center"|"Snowmads Theme" | ||
|- | |- | ||
|align="center" | 6-7 || align="center" | [[Frozen Frenzy (level)|Frozen Frenzy]] || align="center" | 5 || align="center" | "Frozen Frenzy" | |align="center"|6-7||align="center"|[[Frozen Frenzy (level)|Frozen Frenzy]]||align="center"|5||align="center"|"Frozen Frenzy" | ||
|- style=background:#FFF8DC | |-style=background:#FFF8DC | ||
|align="center" | 6-8 || align="center" | [[Meltdown Mayhem]] || align="center" | 5 ||align="center" | "Snowmads Theme" | |align="center"|6-8||align="center"|[[Meltdown Mayhem]]||align="center"|5||align="center"|"Snowmads Theme" | ||
|- | |- | ||
|align="center" | 6-A || align="center" | [[Dynamite Dash]] || align="center" | 5 || align="center" | A remix of {{conjectural|"Run, Rambi! Run! Returns"}} | |align="center"|6-A||align="center"|[[Dynamite Dash]]||align="center"|5||align="center"|A remix of {{conjectural|"Run, Rambi! Run! Returns"}} | ||
|- style=background:#FFF8DC | |-style=background:#FFF8DC | ||
|align="center" | 6-B || align="center" | [[Icicle Arsenal]] || align="center" | | |align="center"|6-B||align="center"|[[Icicle Arsenal]]||align="center"|7||align="center"|"Freezie Breezie" | ||
|- | |- | ||
|align="center" | 6-K || align="center" | [[Slippy Spikes]] || align="center" | 5 || align="center" | "Swinger Flinger" * | |align="center"|6-K||align="center"|[[Slippy Spikes]]||align="center"|5||align="center"|"Swinger Flinger" * | ||
|- style=background:#FFF8DC | |-style=background:#FFF8DC | ||
|align="center" | 6-BOSS || align="center" | BOSS LEVEL: [[Volcano Dome]] || align="center" | 0 || align="center" | {{conjectural|Volcano Dome theme}} | |align="center"|6-BOSS||align="center"|BOSS LEVEL: [[Volcano Dome]]||align="center"|0||align="center"|{{conjectural|Volcano Dome theme}} | ||
|- | |- | ||
! colspan=5 style="background:#BB8855" align=center | [[Secret Seclusion]] | !colspan=5 style="background:#BB8855"align=center|[[Secret Seclusion]] | ||
|- align=center | |-align=center | ||
!style="background:burlywood" width=5%|Level number | !style="background:burlywood"width=5%|Level number | ||
!style="background:burlywood" width=35%|Level name | !style="background:burlywood"width=35%|Level name | ||
!style="background:burlywood" width=10%|Puzzle Pieces | !style="background:burlywood"width=10%|Puzzle Pieces | ||
!style="background:burlywood" width=30%|Music theme | !style="background:burlywood"width=30%|Music theme | ||
|- | |- | ||
|align="center" | 7-1 || align="center" | [[Levitation Station]] || align="center" | 5 || align="center" | An extended cover of the ending theme from ''[[Donkey Kong Jr. (game)|Donkey Kong Jr.]]'' | |align="center"|7-1||align="center"|[[Levitation Station]]||align="center"|5||align="center"|An extended cover of the ending theme from ''[[Donkey Kong Jr. (game)|Donkey Kong Jr.]]'' | ||
|- style=background:#FFF8DC | |-style=background:#FFF8DC | ||
|align="center" | 7-2 || align="center" | [[Rocket Rails]] || align="center" | 5 || align="center" | An extended cover of the ending theme from ''[[Donkey Kong Jr. (game)|Donkey Kong Jr.]]'' | |align="center"|7-2||align="center"|[[Rocket Rails]]||align="center"|5||align="center"|An extended cover of the ending theme from ''[[Donkey Kong Jr. (game)|Donkey Kong Jr.]]'' | ||
|- | |- | ||
|align="center" | 7-3 || align="center" | [[Crazy Clouds]] || align="center" | 5 || align="center" | An extended cover of the ending theme from ''[[Donkey Kong Jr. (game)|Donkey Kong Jr.]]'' | |align="center"|7-3||align="center"|[[Crazy Clouds]]||align="center"|5||align="center"|An extended cover of the ending theme from ''[[Donkey Kong Jr. (game)|Donkey Kong Jr.]]'' | ||
|} | |} | ||
<br> | <br> | ||
{{multiple image | {{multiple image | ||
|align=center | |||
|width=200 | |||
|image1=Lost Mangroves.png|200px | |||
|caption1=Lost Mangroves | |||
|image2=Autumn Heights.jpg|200px | |||
|caption2=Autumn Heights | |||
|image3=Bright Savannah.png|200px | |||
|caption3=Bright Savannah | |||
|image4=Sea Breeze Cove.png|200px | |||
|caption4=Sea Breeze Cove | |||
|image5=Juicy Jungle.png|200px | |||
|caption5=Juicy Jungle | |||
}} | |||
<br> | <br> | ||
{{multiple image | {{multiple image | ||
|align=center | |||
|width=200 | |||
|footer=<center>'''The worlds seen in the game'''</center> | |||
|image1=DonkeyKongIsland DKCTF.png|200px | |||
|caption1=Donkey Kong Island | |||
|image2=SecretSeclusion.png|200px | |||
|caption2=Secret Seclusion | |||
}} | }} | ||
{{br}} | {{br}} | ||
| Line 1,280: | Line 1,276: | ||
[[File:DKCTFvalentine1.jpg|thumb|left|One of the eleven ''Donkey Kong Country: Tropical Freeze'' Valentine's Day greeting cards shared by Nintendo on their Facebook page]] | [[File:DKCTFvalentine1.jpg|thumb|left|One of the eleven ''Donkey Kong Country: Tropical Freeze'' Valentine's Day greeting cards shared by Nintendo on their Facebook page]] | ||
[[File:Fellowkids2.jpg|thumb|One of Cranky Kong's image macros posted by Nintendo of America on their Twitter]] | [[File:Fellowkids2.jpg|thumb|One of Cranky Kong's image macros posted by Nintendo of America on their Twitter]] | ||
On February 7, 2014, Nintendo launched the Banana Mania Contest for residents of Canada. In a video posted on YouTube and presented by Canadian actor {{wp|Ajay Fry}}, they were challenged to guess how many bananas are in a solid block of ice for a chance to win a four day trip to the {{wp|Whistler Blackcomb}} ski resort, as well as a Wii U Deluxe Set system bundled with ''Donkey Kong Country: Tropical Freeze'', a Wii Remote controller and a | On February 7, 2014, Nintendo launched the Banana Mania Contest for residents of Canada. In a video posted on YouTube and presented by Canadian actor {{wp|Ajay Fry}}, they were challenged to guess how many bananas are in a solid block of ice for a chance to win a four day trip to the {{wp|Whistler Blackcomb}} ski resort, as well as a Wii U Deluxe Set system bundled with ''Donkey Kong Country: Tropical Freeze'', a Wii Remote controller and a Nunchuk.<ref>{{cite|deadlink=y|archive=web.archive.org/web/20140308170012/https://www.nintendo.com/whatsnew/detail/eIqYyZoTaCEwwvrZI6Jp_T_sZ5fcKgq9|title=Banana Mania Contest {{!}} Concours Fan de bananes|publisher=Nintendo.com|language=en-us|accessdate=May 28, 2024}}</ref> | ||
One week before the game's initial launch, on February 13, 2014, Nintendo celebrated {{wp|Valentine's Day}} on their official Facebook page by posting various Donkey Kong-themed greeting cards. The photographs contain affectionate captions with word plays, and are accompanied by artwork for the game.<ref>Nintendo | One week before the game's initial launch, on February 13, 2014, Nintendo celebrated {{wp|Valentine's Day}} on their official Facebook page by posting various Donkey Kong-themed greeting cards. The photographs contain affectionate captions with word plays, and are accompanied by artwork for the game.<ref>{{cite|author=Nintendo of America|date=February 13, 2014|url=www.facebook.com/pg/Nintendo/photos/?tab=album&album_id=585002551584202 ''Donkey Kong Country: Tropical Freeze'' Valentines] (photo album|publisher=Facebook|accessdate=May 28, 2024}}</ref> | ||
On the day of the game's initial release, Nintendo of America pretended to make a deal with [[Cranky Kong]] to let him lead their Twitter account and post tweets. Over the course of the day, the character would interact with fans by answering questions, as well as using {{wp|image macro}}s of himself, parodying similar Internet memes in an attempt to approach the youth culture.<ref> | On the day of the game's initial release, Nintendo of America pretended to make a deal with [[Cranky Kong]] to let him lead their Twitter account and post tweets. Over the course of the day, the character would interact with fans by answering questions, as well as using {{wp|image macro}}s of himself, parodying similar Internet memes in an attempt to approach the youth culture.<ref>{{cite|url=www.nintendolife.com/news/2014/02/feature_when_cranky_kong_took_on_twitter|title=Feature: When Cranky Kong Took On Twitter|author=Whitehead, Thomas|date=February 21, 2014|publisher=Nintendo Life|accessdate=May 28, 2024}}</ref> However, the marketing campaign was mostly met with negativity from the fans. The final tweet attributed to Cranky Kong is the game's launch trailer.<ref>{{cite|author=NintendoAmerica|date=February 20, 2014|url=x.com/NintendoAmerica/status/436666584073900032|title=I need a nap. Go do something useful like watching the new trailer for #DKCTF!|publisher=X|accessdate=May 28, 2024}}</ref> | ||
On the [[Play Nintendo]] website, the game is the subject of one of the questions in | On the [[Play Nintendo]] website, the game is the subject of one of the questions in [[Nintendo Selects Trivia Quiz|a skill quiz]] on [[Nintendo Selects]] games. The website also features several other activities focused entirely on the game, but these are promotions for the Nintendo Switch version. | ||
{{br}} | {{br}} | ||
==Reception== | ==Reception== | ||
The game was primarily praised by critics for its graphics, with Thomas Whitehead of Nintendo Life describing the series' upgrade to HD visuals as "impressive" and the game, a "visual achievement". He found the game to have engaging stages as well as fresh and eccentric environments, distinctly bringing out [[Autumn Heights]] and [[Bright Savannah]] as examples. He also found the game to have personality and overall attention to detail, conferred by character design and humorous animation, and opined that the game has charm, partially attributed to David Wise's soundtrack, whom he described as an "expert ear".<ref>Whitehead, Thomas | The game was primarily praised by critics for its graphics, with Thomas Whitehead of Nintendo Life describing the series' upgrade to HD visuals as "impressive" and the game, a "visual achievement". He found the game to have engaging stages as well as fresh and eccentric environments, distinctly bringing out [[Autumn Heights]] and [[Bright Savannah]] as examples. He also found the game to have personality and overall attention to detail, conferred by character design and humorous animation, and opined that the game has charm, partially attributed to David Wise's soundtrack, whom he described as an "expert ear".<ref>{{cite|author=Whitehead, Thomas|date=February 17, 2014|url=www.nintendolife.com/reviews/wiiu/donkey_kong_country_tropical_freeze|title=Review of ''Donkey Kong Country: Tropical Freeze''|publisher=Nintendo Life|accessdate=May 28, 2024}}</ref> | ||
Jose Otero from IGN distinguished the game from other two-dimensional platformers for a sense of scale and journey, accomplished by what Otero opines as a brisk variety in level design. He liked what he saw as a realistic sense of weight in the playable characters, commenting that it affects their movements. The game was once again praised for attention to detail, and he opined ''Donkey Kong Country: Tropical Freeze'' to have tantalizing backgrounds and a dynamic camera enhancing the player's perspective. He also believed that the game's issue of being very difficult is softened by the large amount of extra lives that can be collected. Otero likewise praised the boss fights as unique, and considered the punching segment at the end of each one as a "cool-payoff" and an homage to ''[[Donkey Kong Jungle Beat]]''. Conversely, he criticized the use of the GamePad, which he felt was underused.<ref>{{cite|author=Otero, Jose|date=February 17, 2014|url=www.ign.com/articles/2014/02/17/donkey-kong-country-tropical-freeze-review|title=''Donkey Kong Country: Tropical Freeze'' review|publisher=IGN|accessdate=May 28, 2024}}</ref> | |||
Chris Carter of Destructoid complimented the HD visuals and regarded the game as one of the best-looking games in the [[Wii U]] library. He opined that David Wise's contribution is a step-up from the soundtrack of ''Donkey Kong Country Returns''. He also lauded the game's swimming mechanics and large amount of what he believed to be painstakingly-crafted levels.<ref>{{cite|author=Carter, Chris|date=February 17, 2014|url=www.destructoid.com/reviews/review-donkey-kong-country-tropical-freeze|title=Review: ''Donkey Kong Country: Tropical Freeze''|publisher=Destructoid|accessdate=May 28, 2024}}</ref> | |||
Danielle Riendeau of Polygon appreciated the game as a rewarding experience, in spite of its difficulty. In effect, Riendeau likened the reward to playing the game itself, believing it to have "imaginative layouts" and a perfect balance between new enemies and energetic platforming. The co-op play was praised as a fun and chaotic experience.<ref>{{cite|author=Riendeau, Danielle|date=February 17, 2014|url=www.polygon.com/2014/2/17/5417926/donkey-kong-country-tropical-freeze-review-summer-boy|title=''Donkey Kong Country: Tropical Freeze'' Review: Summer Boy|publisher=Polygon|accessdate=May 28, 2024}}</ref> | |||
{| | Mark Walton of GameSpot strayed from praising the game's visuals and directed criticism towards the level design. He implied that the game is a downgrade from its predecessors for staying too close to the formula without maintaining the same quality ("your journey gets very familiar, very quickly"). He commented on what he opined as a lack of flow and inventiveness, which he claims to define the best 2D platformers. In particular, Walton was displeased by the game's difficulty, naming it a frustrating and cheap experience based on trial and error. However, he complimented the bosses and vehicle-riding sections, which in his view were unique, unusual, and contrasted with the "monotonous" levels.<ref>{{cite|author=Walton, Mark|date=February 17, 2014|url=www.gamespot.com/reviews/donkey-kong-country-tropical-freeze-review/1900-6415667|title=''Donkey Kong Country: Tropical Freeze'' review—Frozen in Time|publisher=GameSpot|accessdate=May 28, 2024}}</ref> | ||
!colspan="4" style="font-size:120%; text-align: center; background-color:silver"|Reviews | {| class="wikitable reviews" | ||
!colspan="4"style="font-size:120%; text-align: center; background-color:silver"|Reviews | |||
|-style="background-color:#E6E6E6;" | |-style="background-color:#E6E6E6;" | ||
|Reviewer, Publication | |Reviewer, Publication | ||
| Line 1,307: | Line 1,302: | ||
|Comment | |Comment | ||
|- | |- | ||
|Thomas Whitehead, [ | |Thomas Whitehead, [https://www.nintendolife.com/reviews/wiiu/donkey_kong_country_tropical_freeze Nintendo Life] | ||
|9/10 | |9/10 | ||
|align="left"|'' | |align="left"|"''Donkey Kong Country: Tropical Freeze utilises the Wii U’s graphical capabilities beautifully, with levels both stunning in design and looks, and impressive set-pieces that never skip a frame and can test any gamer’s skills. As a single player experience it is near flawless, but the precision of the level design can lead the often fun multiplayer into moments of chaos.''" | ||
|- | |- | ||
|Jose Otero, [ | |Jose Otero, [https://www.ign.com/articles/2014/02/17/donkey-kong-country-tropical-freeze-review IGN] | ||
|9.0/10 | |9.0/10 | ||
|align="left"|'' | |align="left"|"''Donkey Kong Country Tropical Freeze is a fun and challenging platformer that isn’t afraid to make you work hard.''" | ||
|- | |- | ||
|Chris Carter, [https://www.destructoid.com/review-donkey-kong-country-tropical-freeze-270430.phtml Destructoid] | |Chris Carter, [https://www.destructoid.com/review-donkey-kong-country-tropical-freeze-270430.phtml Destructoid] | ||
|10/10 | |10/10 | ||
|align="left"|'' | |align="left"|"''10s aren't perfect, since nothing is, but they come as close as you could get in a given genre. The new leader to beat in its sector, we're talking pure ecstasy.''" | ||
|- | |- | ||
|Danielle Riendeau, [https://www.polygon.com/2014/2/17/5417926/donkey-kong-country-tropical-freeze-review-summer-boy Polygon] | |Danielle Riendeau, [https://www.polygon.com/2014/2/17/5417926/donkey-kong-country-tropical-freeze-review-summer-boy Polygon] | ||
|8.5/10 | |8.5/10 | ||
|align="left"|'' | |align="left"|"''Donkey Kong Country: Tropical Freeze could've easily been a me-too sequel. Its much-loved predecessor reinvigorated the series and did so much with the 2D framework that Retro could've released a bunch of new stages and called it a day. But Tropical Freeze adds intelligently to the formula, with new characters that imbue subtle nuance to the gameplay, a better-tuned challenge level and an increased emphasis on replay value. These features make Tropical Freeze consistently worth coming back to, and mark it as a high point for the series.''" | ||
|- | |- | ||
|Mark Walton, [https://www.gamespot.com/reviews/donkey-kong-country-tropical-freeze-review/1900-6415667/ GameSpot] | |Mark Walton, [https://www.gamespot.com/reviews/donkey-kong-country-tropical-freeze-review/1900-6415667/ GameSpot] | ||
|6/10 | |6/10 | ||
|align="left"|''"If the regular levels were as inventive as the boss battles, then Tropical Freeze would be a surefire hit, or at least a game that demands more of your attention. […] As it stands, this a | |align="left"|''"If the regular levels were as inventive as the boss battles, then Tropical Freeze would be a surefire hit, or at least a game that demands more of your attention. […] As it stands, this a{{sic}} sometimes fun but mostly uninspired and unimaginative entry in the Donkey Kong series."'' | ||
|- | |- | ||
!colspan="4" style="background-color:silver; font-size:120%; text-align: center;"|Aggregators | !colspan="4"style="background-color:silver; font-size:120%; text-align: center;"|Aggregators | ||
|-style="background-color:#E6E6E6;" | |-style="background-color:#E6E6E6;" | ||
|colspan=2|Compiler | |colspan=2|Compiler | ||
| Line 1,333: | Line 1,328: | ||
|- | |- | ||
|colspan=2|Metacritic | |colspan=2|Metacritic | ||
|colspan=2 style="background-color:LimeGreen"|[ | |colspan=2 style="background-color:LimeGreen"|[https://www.metacritic.com/game/wii-u/donkey-kong-country-tropical-freeze 83%] | ||
|- | |- | ||
|colspan=2|GameRankings | |colspan=2|GameRankings | ||
| Line 1,339: | Line 1,334: | ||
|} | |} | ||
{{br}} | {{br}} | ||
===Sales=== | ===Sales=== | ||
In the | In the United States, ''Tropical Freeze'' sold more than 130,000 units (both digital and physical copies) in its first eight days on the market according to Nintendo and the US sales analysis firm NPD.<ref>{{cite|author=Matos, Xav De|date=March 13, 2014|url=www.engadget.com/2014/03/13/donkey-kong-country-tropical-freeze-sales-reach-130k-in-eight-d|title=''Donkey Kong Country: Tropical Freeze'' sales reach 130K in eight days|publisher=Engadget|accessdate=May 28, 2024}}</ref> In Japan, the Wii U version sold 43,301 units for its first week and went on to sell a total of 120,086 copies according to Media Create data.<ref>{{cite|url=sites.google.com/site/gamedatalibrary/games-by-platform/wii-u|title=Games Data Library|accessdate=May 28, 2024}}</ref>{{dead link}} | ||
{{br}} | {{br}} | ||
| Line 1,348: | Line 1,342: | ||
<gallery> | <gallery> | ||
Kongs Swingin' Art - Donkey Kong Country Tropical Freeze.png|[[Donkey Kong]] swinging on a vine with [[Diddy Kong]], [[Dixie Kong]], and [[Cranky Kong]] | Kongs Swingin' Art - Donkey Kong Country Tropical Freeze.png|[[Donkey Kong]] swinging on a vine with [[Diddy Kong]], [[Dixie Kong]], and [[Cranky Kong]] | ||
Viking Art3 - Donkey Kong Country Tropical Freeze.png|[[Pointy Tucks]] | |||
Viking Art3 - Donkey Kong Country Tropical Freeze.png|[[Pointy | |||
Viking Art6 - Donkey Kong Country Tropical Freeze.png|[[Hootz]] | Viking Art6 - Donkey Kong Country Tropical Freeze.png|[[Hootz]] | ||
Viking Ship - Donkey Kong Country Tropical Freeze.png|[[Snowmad]] ship | Viking Ship - Donkey Kong Country Tropical Freeze.png|[[Snowmad]] ship | ||
| Line 1,357: | Line 1,350: | ||
{{main-media}} | {{main-media}} | ||
{{media table | {{media table | ||
| | |file1=DKCTFTitleMusic.oga | ||
|title1=Title theme | |||
| | |file2=DKCTF Credits.oga | ||
| | |title2=Credits theme. Contains arrangements of the tracks that play in [[Wing Ding]] and [[Jammin' Jams]], and of "Stickerbush Symphony" as well | ||
| | |||
}} | }} | ||
| Line 1,368: | Line 1,359: | ||
{{main|List of Donkey Kong Country: Tropical Freeze staff}} | {{main|List of Donkey Kong Country: Tropical Freeze staff}} | ||
{{main|List of Donkey Kong Country: Tropical Freeze (Nintendo Switch) staff}} | {{main|List of Donkey Kong Country: Tropical Freeze (Nintendo Switch) staff}} | ||
The game's producers were [[Michael Kelbaugh]] from Retro Studios and [[Satoru Iwata]], [[Kensuke Tanabe]], and [[Risa Tabata]] from Nintendo of Japan, all of whom were previously involved in the production of ''Donkey Kong Country Returns''. [[Shigeru Miyamoto]]'s involvement as the game's supervisor was less significant than during the development of the previous game.<ref>{{cite|author=Parish, Jeremy|deadlink=y|archive=web.archive.org/web/20130629214421/http://www.usgamer.net/articles/donkey-kong-country-tropical-freeze-full-e3-interview|title=''Donkey Kong Country Tropical Freeze'' Full E3 Interview|publisher=USgamer|date=June 27, 2013|accessdate=May 28, 2024}}</ref> The game's art direction was lead by [[Vince Joly]] like its predecessor, and [[Stephen Dupree]] was the lead game designer. | |||
''Donkey Kong Country: Tropical Freeze'' notably marks the return of long-time ''Donkey Kong Country'' composer [[David Wise]], whose last soundtrack for the series was for the [[Game Boy Advance]] version of ''[[Donkey Kong Country 3: Dixie Kong's Double Trouble!]]'' in 2005. Wise was specifically brought on board by Retro Studios president Michael Kelbaugh.<ref>{{cite|author=Terry, Stefan|date=March 5, 2014|deadlink=y|archive=web.archive.org/web/20160309095458/http://www.gamnesia.com/news/david-wise-explains-how-he-got-his-job-on-tropical-freeze#.VJWbOP-ABA|title=David Wise Explains How He Got His Job on ''Tropical Freeze''|publisher=Gamnesia|accessdate=May 28, 2024}}</ref> | |||
''Donkey Kong Country: Tropical Freeze'' notably marks the return of long-time ''Donkey Kong Country'' composer [[David Wise]], whose last soundtrack for the series was for the [[Game Boy Advance]] version of ''[[Donkey Kong Country 3: Dixie Kong's Double Trouble!]]'' in 2005. Wise was specifically brought on board by Retro Studios president Michael Kelbaugh.<ref>Terry, Stefan | |||
==Development and release== | ==Development and release== | ||
The game was first announced during a Nintendo Direct presentation at E3 2013, where it was revealed that [[Kensuke Tanabe]] was the main director of the game. He was also responsible for the inclusion of the new "pluck" ability, which was inspired by the mechanics of ''[[Super Mario Bros. 2]]''. The game was announced to be released in November of that same year, before being pushed back to December 6th in order to be released in time for the holiday season. Finally, during the October 2013 Nintendo Direct, Satoru Iwata announced that ''Tropical Freeze'' would be delayed to February 2014 in order to optimize the gaming experience, but the specific date would not be revealed until December 7th at the VGX Awards.<ref> | The game was first announced during a Nintendo Direct presentation at E3 2013, where it was revealed that [[Kensuke Tanabe]] was the main director of the game. He was also responsible for the inclusion of the new "pluck" ability, which was inspired by the mechanics of ''[[Super Mario Bros. 2]]''. The game was announced to be released in November of that same year, before being pushed back to December 6th in order to be released in time for the holiday season. Finally, during the October 2013 Nintendo Direct, Satoru Iwata announced that ''Tropical Freeze'' would be delayed to February 2014 in order to optimize the gaming experience, but the specific date would not be revealed until December 7th at the VGX Awards.<ref>{{cite|url=www.gamespot.com/articles/donkey-kong-country-tropical-freeze-delayed/1100-6415162|title=''Donkey Kong Country: Tropical Freeze'' delayed|publisher=GameSpot|accessdate=May 28, 2024|date=October 1, 2013|author=Makuch, Eddie}}</ref> | ||
The game's soundtrack was produced by returning composer [[David Wise]] (who had previously worked on the soundtrack for the previous ''[[Donkey Kong Country]]'' games except for ''Returns''), with some help from Daisuke Matsuoka, Minako Hamano, Shinji Ushiroda, and Riyu Tamura. The team was supervised by Kenji Yamamoto, who had provided the soundtrack for ''[[Donkey Kong Country Returns]]''. | The game's soundtrack was produced by returning composer [[David Wise]] (who had previously worked on the soundtrack for the previous ''[[Donkey Kong Country (series)|Donkey Kong Country]]'' games except for ''Returns''), with some help from Daisuke Matsuoka, Minako Hamano, Shinji Ushiroda, and Riyu Tamura. The team was supervised by Kenji Yamamoto, who had provided the soundtrack for ''[[Donkey Kong Country Returns]]''. | ||
==Pre-release and unused content== | ==Pre-release and unused content== | ||
[[File:Mangrove steam ship by vonkoz-d77e4im.jpg|thumb|300px|The steamboat, next to a screenshot of [[Trunk Twister]], where part of it can be seen in the backdrop | [[File:Mangrove steam ship by vonkoz-d77e4im.jpg|thumb|300px|The steamboat, next to a screenshot of [[Trunk Twister]], where part of it can be seen in the backdrop]] | ||
===Unused ideas=== | |||
According to creative director [[Vince Joly]], more [[Animal Friend]]s were intended to appear in this game, including [[Enguarde]]. However, the development team decided against adding them as they felt that the playable Kongs provided enough character variety and gameplay mechanics on their own.<ref>{{cite|author=NE_Brian|date=January 21, 2023|url=nintendoeverything.com/donkey-kong-country-tropical-freeze-almost-brought-back-enguarde|title=Donkey Kong Country: Tropical Freeze almost brought back Enguarde|publisher=Nintendo Everything|accessdate=May 28, 2024|archive=web.archive.org/web/20230121050400/https://nintendoeverything.com/donkey-kong-country-tropical-freeze-almost-brought-back-enguarde}}</ref> | |||
===Early build=== | ===Early build=== | ||
The HUD in E3 2013 footage of the game was slightly different from the final version | The HUD in E3 2013 footage of the game was slightly different from the final version, as the health counter lacked the wooden plank graphic behind the hearts and the Kong POW meter was not shown or implemented.<ref>{{cite|url=www.youtube.com/watch?v=DueE8vJXpo8|title=Wii U - ''Donkey Kong Country: Tropical Freeze'' E3 Trailer|author=Nintendo of America|language=en-us|date=Juen 11, 2013|publisher=YouTube|accessdate=May 28, 2024}}</ref> | ||
Additionally, in the E3 2013 demo, the level [[Cannon Canyon]] | Additionally, the [[Autumn Heights|second]] and [[Bright Savannah|third world]]s are swapped in internal data, which can be seen in the E3 2013 demo, where the level [[Cannon Canyon]] (known as "Cannon Canyons") was located in the second world rather than the third. | ||
===Level template=== | ===Level template=== | ||
A steamboat model was built to serve as the basis for all mechanical structures present in Lost Mangroves. The steamboat itself is not fully used in the game, but a few instances appear in [[Trunk Twister]].<ref>{{ | A steamboat model was built to serve as the basis for all mechanical structures present in Lost Mangroves. The steamboat itself is not fully used in the game, but a few instances appear in [[Trunk Twister]].<ref>{{cite|quote=This is one of the very first assets I made for Donkey Kong Country Tropical Freeze. It became the basis for all of the structures in the Mangrove Island […] I'm pretty happy with this piece and even though it is an early one and not fully featured in the game (you can see it in a few instances in Trunk Twister). I am happy its pieces got so much use throughout the game!|author=Eric Kozlowsky|url=landofkoz.blogspot.com/2014/02/its-on-like-kong.html|title=It's on like Kong!|date=February 27, 2014|language=en|publisher=Land of KoZ|accessdate=May 28, 2024}}</ref> | ||
===Concept artwork=== | ===Concept artwork=== | ||
The game contains unlockable concept artwork, a full list of which can be seen [[List of extras in Donkey Kong Country: Tropical Freeze#Images|here]] complete with indications on which concepts have been used and which were not. Below are several examples of artwork with concepts that were not implemented in the final game. | |||
Below | |||
{{multiple image | {{multiple image | ||
|align=center | |||
|width=200 | |||
|image1=AutumnHeights art5.png|200px | |||
|caption1=Beavers positioned between the paddles of a mill wheel | |||
|image2=BrightSavannah art6.png|200px | |||
|caption2=Donkey Kong using a {{wp|kiwi}} bird to carefully go down a bramble-filled descent | |||
|image3=JuicyJungle art3.png|200px | |||
|caption3=Anthropomorphic pigs living and working in [[Juicy Jungle]]. In the game, the factory of the jungle is entirely automatic. | |||
|image4=SecretSeclusion art2.png|200px | |||
|caption4=Donkey Kong traversing a moon world | |||
|image5=SecretSeclusion art8.png|200px | |||
|caption5=A large caterpillar cook inside a kitchen or food storage | |||
}} | |||
==Glitches== | ==Glitches== | ||
=== | ===Inaccessible level=== | ||
[[ | Prior to update Version 1.1.0, the level 3-4: [[Scorch 'n' Torch]] would have a chance to not open after the completion of 3-3 [[Frantic Fields]]. On April 3, 2014, an update was released to fix this issue.<ref>{{cite|url=en-americas-support.nintendo.com/app/answers/detail/a_id/5511|title=How to Update Donkey Kong Country: Tropical Freeze (Wii U)|publisher=Nintendo.com|language=en-us|accessdate=May 28, 2024}}</ref> | ||
[[File: | ===Levitating DK=== | ||
[[File:LevitatingMonkey.png|thumb|200px|DK being pushed against the reforming blocks]] | |||
In [[Levitation Station]], if DK jumps towards a block as it is forming, he may hang in the air beside it until it is ready to return to the background.<ref>{{cite|url=youtu.be/pzwDrmbkLaE?t=5m52s|timestamp=05:52|title=''Donkey Kong Country Tropical Freeze'' - Part 42: "BONUS 1: Above the Clouds"|author=MasaeAnela|date=November 29, 2015|publisher=YouTube|accessdate=May 28, 2024}}</ref> | |||
=== | ===Pompy flying sideways=== | ||
When a | When fighting Pompy using Donkey Kong and Cranky Kong as a partner, it is possible to hit Pompy just after the cutscene ends. Using Cranky Kong's Cane Bounce just before Pompy begins rolling will cause him to fly sideways with an inexplicable splash in the water underneath.<ref>{{cite|url=youtu.be/sE0adpPuspI?t=813|title=Funky Mode 100% Speedrun in 2:21:54 [Donkey Kong Country: Tropical Freeze|timestamp=00:13:33|publisher=YouTube|author=movefish|date=June 11, 2019|accessdate=May 28, 2024}}</ref> | ||
=== | ===Schnautzel falls into background=== | ||
[[File:Schnautzel Glitch.jpg|200px|thumb|left|The glitch as performed in the Switch version]] | |||
{{br | When a player finds a [[Schnautzel]] near a [[Tuff Fluff]] in [[Horn Top Hop]], they need to make sure they that it is slightly facing the background and keep rolling into it or throw another enemy at it. If done correctly, the Schnautzel is knocked out falling into the background instead of the foreground. This glitch can be done in both versions of the game. | ||
{{br}} | |||
==References to other media== | ==References to other media== | ||
*''[[Donkey Kong (game)|Donkey Kong]]'': Donkey Kong's 8-bit sprite, holding a Wii U GamePad, appears at the end of Aqueduct Assault stage. | *''[[Donkey Kong (game)|Donkey Kong]]'': Donkey Kong's 8-bit sprite, holding a Wii U GamePad, appears at the end of Aqueduct Assault stage. | ||
*''[[Donkey Kong Jr. (game)|Donkey Kong Jr.]]'': The levels in Secret Seclusion feature music that originated from this game. | *''[[Donkey Kong Jr. (game)|Donkey Kong Jr.]]'': The levels in Secret Seclusion feature music that originated from this game. | ||
*''[[Donkey Kong 3]]'': At the second checkpoint of Fruity Factory, the background features a replica of the | *''[[Donkey Kong 3]]'': At the second checkpoint of Fruity Factory, the background features a replica of the [[greenhouse (blue)|blue greenhouse]]. | ||
*''[[Super Mario Bros. 3]]'': A [[tank]] resembling those from [[Bowser]]'s military forces, originating in the said game, can be seen in the background of Frosty Fruits. | *''[[metroidwiki:Metroid (series)|Metroid]]'' series: [[List of fighters debuting in Super Smash Bros.#Samus|Samus Aran]]'s {{iw|metroidwiki|Gunship}} appears in the background of [[Busted Bayou]]. | ||
*''[[Donkey Kong Country]]'': The music theme "Aquatic Ambience"<ref> | *''[[Super Mario Bros. 3]]'': A [[tank]] resembling those from [[Bowser]]'s military forces, originating in the said game, can be seen in the background of Frosty Fruits. A [[P-Wing]] emblem can be found on the side of a plane in the level [[Trunk Twister]]. | ||
*''[[Donkey Kong Country 2: Diddy's Kong Quest]]'': Dixie Kong returns from this game which marked her first appearance. A bramble level, a swamp level and a beehive level return. The music theme Lockjaw Saga is covered.<ref>http://www.youtube.com/watch?v=tNU24BWDdUY</ref> Part of the music in the Frosty Fruit level contains a cover version of "In a Snowbound Land" music from this game. The music theme Stickerbush Symphony is covered. Part of the music in the level Frantic Fields contains a cover version of "Run, Rambi! Run!" from this game. One of Dixie Kong's idle animations in multiplayer involves her playing some air guitar could be a possible reference to her playing her electric guitar from this game. <ref> | *''[[Donkey Kong Country]]'': The music theme "Aquatic Ambience"<ref>{{cite|url=www.youtube.com/watch?v=rbCM1XMa-Ew|title=5 Music Tracks from Donkey Kong Country: Tropical Freeze's Soundtrack (Including Aquatic Ambiance!)|publisher=YouTube|author=GameXplain|date=January 23, 2014|accessdate=May 28, 2024}}</ref> is covered. In the Canopy Chaos level, Cranky's record player from this game can be found and when ground pounded in front of it, it plays this games' title theme.<ref>{{cite|url=www.youtube.com/watch?v=1rqLtJbofQk|title=Top 10 Moments in Donkey Kong Country: Tropical Freeze|author=officialnintendomag|date=February 5, 2014|publisher=YouTube|accessdate=May 28, 2024}}</ref> The music theme "Jungle Groove" has two covers: one during the loading screens between levels and another during some levels. Part of the music in the level Frozen Frenzy contains a cover version of the music theme "Fear Factory". Part of the music in the Crumble Cavern level contains a cover version of "Cave Dweller Concert" from this game. A small section of the bonus theme, "Bonus Room Blitz", plays when clearing a stage. | ||
*''[[Donkey Kong Country 2: Diddy's Kong Quest]]'': Dixie Kong returns from this game which marked her first appearance. A bramble level, a swamp level and a beehive level return. The music theme Lockjaw Saga is covered.<ref>{{cite|deadlink=y|archive=web.archive.org/web/20140127091024/http://www.youtube.com/watch?v=tNU24BWDdUY&gl=US&hl=en|author=GameXplain|publisher=YouTube|date=January 25, 2014|accessdate=May 28, 2024}}</ref> Part of the music in the Frosty Fruit level contains a cover version of "In a Snowbound Land" music from this game. The music theme Stickerbush Symphony is covered. Part of the music in the level Frantic Fields contains a cover version of "Run, Rambi! Run!" from this game. One of Dixie Kong's idle animations in multiplayer involves her playing some air guitar could be a possible reference to her playing her electric guitar from this game. <ref>{{cite|url=www.youtube.com/watch?v=nwlLKpmlhpE|title=Cool Bits - Donkey Kong Country: Tropical Freeze's Idle Animation Secrets - 3DS, Partners, & More!|author=GameXplain|publisher=YouTube|date=February 11, 2014|accessdate=May 28, 2024}}</ref> | |||
*''[[Donkey Kong Country 3: Dixie Kong's Double Trouble!]]'': Water skipping and lightning from [[Lightning Lookout]] return. | *''[[Donkey Kong Country 3: Dixie Kong's Double Trouble!]]'': Water skipping and lightning from [[Lightning Lookout]] return. | ||
*''[[Donkey Kong Country (television series)|Donkey Kong Country]]'' television series: Exclusively in the [[Nintendo Switch]] version's Funky mode, upon leaving the shop every once in a while, [[Tawks]] will utter "''Give 'em the old banana slamma, dude!''", referencing Donkey Kong's catchphrase from the animated series.<ref>Nintendo Life | *''[[Donkey Kong Country (television series)|Donkey Kong Country]]'' television series: Exclusively in the [[Nintendo Switch]] version's Funky mode, upon leaving the shop every once in a while, [[Tawks]] will utter "''Give 'em the old banana slamma, dude!''", referencing Donkey Kong's catchphrase from the animated series.<ref>{{cite|author=Nintendo Life|date=April 25, 2018|url=www.youtube.com/watch?v=K_yaJjLiS_8|title=Weird ''Donkey Kong Country: Tropical Freeze'' Switch TV Show Easter Egg|publisher=YouTube|accessdate=May 28, 2024}}</ref> | ||
*''[[Mario Kart Wii]]'': Funky Kong's | *''[[Mario Kart Wii]]'': Funky Kong's [[emblem]] from this game reappears on a plane in the background of [[Big Top Bop]]. | ||
*''[[Donkey Kong Country Returns]]'': The levels in Secret Seclusion have a remix of the music from the single Golden Temple stage in this game (which itself was remixed from ''Donkey Kong Jr.''). Also, the design of Donkey Kong Island is based on its appearance in this game; all of the worlds from this game can be seen. Finally, a number of sound effects from this game are used. In the level Blurry Flurry, Mega Squeekly has a cameo still alive in the background while frozen solid in an iceberg.<ref> | *''[[Donkey Kong Country Returns]]'': Being the direct sequel to this installment, the gameplay is similar to its predecessor. The levels in Secret Seclusion have a remix of the music from the single Golden Temple stage in this game (which itself was remixed from ''Donkey Kong Jr.''). Also, the design of Donkey Kong Island is based on its appearance in this game; all of the worlds from this game can be seen. Finally, a number of sound effects from this game are used. In the level Blurry Flurry, Mega Squeekly has a cameo still alive in the background while frozen solid in an iceberg.<ref>{{cite|url=www.youtube.com/watch?v=OLSZnXbBMOE|title=Donkey Kong Country Tropical Freeze: 6-4 Blurry Flurry Hard Mode DK|date=February 25, 2014|publisher=YouTube|author=NintendoProductions|accessdate=May 28, 2024|language=en}}</ref> The giant Eyeball from Handy Hazards makes a cameo in the background of the level "Frozen Frenzy" frozen in place.<ref>{{cite|url=www.youtube.com/watch?v=dn70PCdGIJE|title= Donkey Kong Country: Tropical Freeze - 100% Walkthrough - 6-7 Frozen Frenzy (Puzzle Pieces and KONG)|author=Zephiel610|date=February 25, 2014|publisher=YouTube|accessdate=May 28, 2024}}</ref> [[Mugly]] makes a cameo in the diorama of [[Donkey Kong Island]] frozen under the ground. Also, one of the logos seen in the cockpit of the plane Donkey Kong crashes into at the beginning of the game has the logo for this game. [[Snippys|Snaps]], an enemy from this game, makes a cameo on the title screen. | ||
**''[[Donkey Kong Country Returns 3D]]'': The Crash Guard, Green Balloon, and Portable DK Barrels originated in this game. Also, this is one of the games Donkey Kong plays on his Nintendo 3DS during his idle animation. He is heard in [[Cranky Kong's Shop]], as well as activating a secret path in a level. | |||
*''[[Super Mario 3D Land]]'': One of the games Donkey Kong plays on his [[Nintendo 3DS]] during his idle animation is this game. During the animation, he can be heard passing a [[Goomba]] and collecting a [[coin]]. | *''[[Super Mario 3D Land]]'': One of the games Donkey Kong plays on his [[Nintendo 3DS]] during his idle animation is this game. During the animation, he can be heard passing a [[Goomba]] and collecting a [[coin]]. | ||
*''[[Mario Kart 7]]'': Donkey Kong sometimes plays it during his idle animation. He is heard playing as himself, picking up a [[Super Leaf]] item, and avoiding a [[Green Shell]]. | *''[[Mario Kart 7]]'': Donkey Kong sometimes plays it during his idle animation. He is heard playing as himself, picking up a [[Super Leaf]] item, and avoiding a [[Green Shell]]. | ||
==References in later games== | ==References in later games== | ||
*''[[Super Smash Bros. for Wii U]]'': A number of Snowmads appear as [[Trophy (Super Smash Bros. series)|Trophies]]. Additionally, the music that plays in [[Mangrove Cove]] and in every second Kong Temple level are playable in the [[Jungle Hijinxs (stage)|Jungle Hijinxs]] stage under the names "Mangrove Cove" and "Swinger Flinger". | *''[[Super Smash Bros. for Wii U]]'': A number of Snowmads appear as [[Trophy (Super Smash Bros. series)|Trophies]]. Additionally, the music that plays in [[Mangrove Cove]] and in every second Kong Temple level are playable in the [[Jungle Hijinxs (stage)|Jungle Hijinxs]] stage under the names "Mangrove Cove" and "Swinger Flinger". | ||
*''[[Super Smash Bros. Ultimate]]'': [[Lord Fredrik]] appears as a [[Spirit (Super Smash Bros. Ultimate)|spirit]], and Dixie Kong's spirit uses her artwork from ''Donkey Kong Country: Tropical Freeze''. | *''[[Super Smash Bros. Ultimate]]'': [[Lord Fredrik]] appears as a [[Spirit (Super Smash Bros. Ultimate)|spirit]], and Dixie Kong's spirit uses her artwork from ''Donkey Kong Country: Tropical Freeze''. | ||
*''[[Mario Kart Tour]]'': Funky Kong and Dixie Kong's artworks are reused in this game. Dixie Kong's emblem in this game is derived from the design of the [[DK Barrel|Dixie Kong Barrel]]. | |||
==Trivia== | |||
*The game features a variety of idle animations depending on the character combination in use, featuring a larger variety than all of its four predecessors: | |||
**'''Donkey Kong alone:''' Briefly scratches his armpit after a short time. If the player waits a little longer, he will look around and start playing a blue [[Nintendo 3DS#Nintendo 3DS XL|Nintendo 3DS XL]], with the game being either ''[[Super Mario 3D Land]]'', ''[[Mario Kart 7]]'', ''{{iw|nookipedia|Animal Crossing: New Leaf}}'', and ''[[Donkey Kong Country Returns 3D]]''. In the Nintendo Switch port's Funky Mode, he plays a Nintendo Switch instead. | |||
**'''Diddy Kong alone:''' Diddy's animations are all in a random order. He might remove his cap and sing dramatically, or stretch while making one of three different yawning noises. | |||
**'''Dixie Kong alone:''' Dixie's animations are all in random order. She will either do a handstand, (using one of three different voice clips each time), or play air-guitar as a reference to ''Donkey Kong Country 2: Diddy's Kong Quest''. | |||
**'''Cranky Kong alone:''' Cranky only has one animation. He will stand in place, using his cane to dig in his ear briefly. | |||
**'''DK and Diddy:''' Diddy will help Donkey check to see if the coast is clear, and then sit on his back, constantly switching which of his shoulders to grip as he watches him play. | |||
**'''DK and Dixie:''' Dixie will help Donkey look around just like Diddy. When he starts playing the 3DS, Dixie will start grooming DK. | |||
**'''DK and Cranky:''' Unlike the other partners, Cranky does not help DK check if the coast is clear. As Donkey Kong plays his 3DS, Cranky will show disinterest in watching and read a newspaper instead. | |||
*During the in-game cutscenes, the character animations depend on which character(s) are being used (e.g. Dixie slowing her fall with her ponytail and Cranky rolling a few times before falling, as opposed to Diddy simply crashing into the ground). | |||
*This is the first original ''Donkey Kong Country'' game to be reissued for a handheld console that is also a home console (in this case, the Nintendo Switch). | |||
*The game's plot bears a strong resemblance to that of [[Donkey Kong in: Banana Day 24]], a ''[[Club Nintendo (magazine)|Club Nintendo]]'' comic released exclusively in Germany. | |||
*This is the first ''Donkey Kong Country'' game since ''[[Donkey Kong Country 3: Dixie Kong's Double Trouble!]]'' in which the [[banana hoard]] does not appear, although it is mentioned in the [[Wii U]] [[Nintendo eShop#Wii U|Nintendo eShop]] description.<ref>{{cite|quote=Help Donkey Kong and his friends save their home and banana hoard from marauding Vikings in the Donkey Kong Country™: Tropical Freeze game from Retro Studios.|deadlink=y|archive=web.archive.org/web/20160303104400/https://www.nintendo.com/games/detail/donkey-kong-country-tropical-freeze-wii-u|title=''Donkey Kong Country: Tropical Freeze''|publisher=Nintendo.com|language=en-us|accessdate=May 28, 2024}}</ref> | |||
==Names in other languages== | ==Names in other languages== | ||
{{foreign names | {{foreign names | ||
| | |Jpn=ドンキーコングトロピカルフリーズ | ||
| | |JpnR=Donkī Kongu Toropikaru Furīzu | ||
| | |JpnM=Donkey Kong Tropical Freeze | ||
}} | }} | ||
== | ==References== | ||
<references/> | |||
==External links== | ==External links== | ||
*[ | {{NIWA|Nookipedia=List of Animal Crossing references in other media#Donkey Kong Country: Tropical Freeze|StrategyWiki=1}} | ||
*[ | {{TCRF|Donkey Kong Country: Tropical Freeze (Wii U)}} | ||
*[https://www.youtube.com/watch?v=vXZIR9XC6-I&feature=player_embedded E3 2013 Trailer] | |||
*[https://www.youtube.com/watch?v=DueE8vJXpo8 Extended E3 2013 Trailer] | |||
*[http://donkeykong.nintendo.com/tropical-freeze/ Official North American website] | *[http://donkeykong.nintendo.com/tropical-freeze/ Official North American website] | ||
*[http://www.nintendo.co.uk/Games/Wii-U/Donkey-Kong-Country-Tropical-Freeze-765383.html Official United Kingdom website] | *[http://www.nintendo.co.uk/Games/Wii-U/Donkey-Kong-Country-Tropical-Freeze-765383.html Official United Kingdom website] | ||
*[ | *[https://www.nintendo.co.jp/wiiu/arkj/index.html Official Japanese website] | ||
{{DKCTF}} | {{DKCTF}} | ||
{{ | {{Donkey Kong games}} | ||
{{Wii U}} | {{Wii U}} | ||
[[Category:Donkey Kong Country: Tropical Freeze|*]] | [[Category:Donkey Kong Country: Tropical Freeze|*]] | ||
[[Category:Games]] | [[Category:Games]] | ||
[[Category:Platforming | [[Category:Platforming games]] | ||
[[Category:Wii U | [[Category:Wii U games]] | ||
[[Category:2014 games]] | [[Category:2014 games]] | ||
[[Category:Games with | [[Category:Games with Nintendo Network]] | ||
[[Category:Nintendo Selects]] | [[Category:Nintendo Selects]] | ||
[[de:Donkey Kong Country: Tropical Freeze (Wii U)]] | |||
[[it:Donkey Kong Country: Tropical Freeze]] | |||
Latest revision as of 11:46, January 7, 2025
- This article is about the 2014 Wii U game. For the Nintendo Switch version, see Donkey Kong Country: Tropical Freeze (Nintendo Switch).
| Donkey Kong Country: Tropical Freeze | |||||||||||||
|---|---|---|---|---|---|---|---|---|---|---|---|---|---|
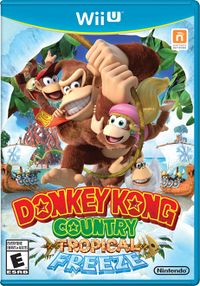 For alternate box art, see the game's gallery. | |||||||||||||
| Developer | Retro Studios Monster Games[1] Nintendo SPD Group No. 3 | ||||||||||||
| Publisher | Nintendo | ||||||||||||
| Platform(s) | Wii U | ||||||||||||
| Release date | Wii U (original release): Wii U (Nintendo Selects): | ||||||||||||
| Language(s) | English (United Kingdom) English (United States) French (France) French (Canada) German Spanish (Spain) Spanish (Latin America) Italian Japanese | ||||||||||||
| Genre | Platformer | ||||||||||||
| Rating(s) |
| ||||||||||||
| Mode(s) | Single-player, multiplayer | ||||||||||||
| Format | Wii U: | ||||||||||||
| Input | Wii U: | ||||||||||||
| Serial code(s) | |||||||||||||
Donkey Kong Country: Tropical Freeze is a side-scrolling 2.5D platform game developed by Retro Studios and Monster Games for the Wii U. It is the fifth game in the Donkey Kong Country series and a direct sequel to Donkey Kong Country Returns. It follows the adventure of Donkey Kong and his partner Kongs as they travel back to Donkey Kong Island after the Snowmads, an organization of Vikings-like seafarers, invaded it and sent them away. Throughout their journey, the Kongs must overcome six islands seized by Snowmads. Most levels feature classic platforming where the Kongs need to jump, roll, climb and swing to get to the end of an area, but some levels are traversed in a vehicle such as a Mine Cart or a Rocket Barrel. For the first time in the series, the camera angle can change dynamically in some levels where Blast Barrels or mine carts are found, showing more areas and perspectives of the scenery. Donkey Kong Country: Tropical Freeze is the first title in the series to feature more than two playable characters, with Diddy Kong, Dixie Kong and Cranky Kong acting as companions of Donkey Kong who provide him additional abilities. The name "Tropical Freeze" is a pun on the term "tropical breeze".
The game was originally slated for release during November 2013 before being pushed back to December 6; it was later pushed back again to February 2014.[7] The downloadable version of the game requires approximately 11.3 GB of free space on the console. In North America, the digital version of the game was removed from the Nintendo eShop shortly before the release of the Nintendo Switch version,[8] leaving the original game only available in retail in that region. However, the game remained available digitally in other regions until the closure of the Nintendo eShop for the Wii U.
Donkey Kong Country: Tropical Freeze was praised for its colorful visuals, large environments, variety, and improvements made to the Donkey Kong Country formula, although its high level of difficulty received some criticism. A port was released for the Nintendo Switch in May 2018.
Story[edit]
The story begins at Donkey Kong's hut, where the Kongs are celebrating his birthday, with a banana-themed cake. One of the balloons detaches from the exterior of the house and drifts out towards the ocean where a fleet of Snowmad ships are stationed. Far away from the island, a Pointy Tucks spots the balloon through a telescope, traces it back to Donkey Kong's hut, and relays its discovery to the Snowmads' leader, shrouded in a dark silhouette, who orders his subordinates to bring him an enchanted horn. He blows into the horn, creating an entity known as an ice dragon.
Meanwhile, back at Donkey Kong's hut, Diddy Kong is briefly shown blowing a noisemaker. Right as Donkey Kong is about to blow out the candle on his cake, a gust of wind extinguishes the candle, to Donkey Kong's surprise, and a snowflake blows in and lands on the tip of the candle. Donkey Kong turns away angry as he hears an uproar. The Kongs walk out on the front deck to investigate. The ice dragon swoops in on Donkey Kong Island, generating strong winds that blows the Kongs away to the Lost Mangroves. With the Kong family disposed of, the Snowmads invade the island as their command ship stations itself on top of its Volcano and the ice dragon causes it to enter a state of perpetual winter.
After traversing across five islands, the Kongs return to Donkey Kong Island. The Kongs make their way through the frozen fortress until they encounter the leader of the Snowmads, Lord Fredrik, who challenges the Kongs to a final battle deep within the volcano. After a long battle, Donkey Kong delivers the final punch to Lord Fredrik, who is sent flying out from the roof of the Snowmads' ship, destroying it. The Kongs go out of the ship remains and look to see Lord Fredrik crashing into the remainder of the Snowmad ships out at sea. With the Snowmads defeated, Donkey Kong catches Lord Fredrik's horn and blows into it. This causes a breeze of flowers to carry the Kongs to the bottom of the island. The Kongs celebrate as the breeze of flowers flutter around Donkey Kong Island, melting all of the ice and snow and restoring the island to its original state.
In an epilogue cutscene after the credits, the Kongs discover a wrapped present on their front lawn, which they open. Inside the box is a small relic that serves as the final key to unlocking Secret Seclusion.
Gameplay[edit]
Returning elements[edit]
Basic gameplay[edit]
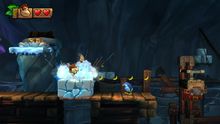
The gameplay of the title is very similar to that of its predecessor, Donkey Kong Country Returns. The Kongs are able to walk, run, jump, roll, pound the ground, as well as climb vines and ropes. By jumping, the Kongs can stomp on various enemies and defeat them; however, some enemies cover their top-sides with shields or sharp objects, making them troublesome or dangerous to stomp on. Stomping on at least three enemies in a row grants the player one Banana Coin for each enemy stomped thereafter. The players start earning Red Balloons if they achieve a combo of eight or more enemy stomps.
The Kongs can perform Ground Pounds in various places to break unsound structures (such as crates and cracked blocks), revealing items or secret paths underground. The move can also be executed near some enemies to stun and neutralize them temporarily. Likewise, ground-pounding can be used to empty Item Containers, which are found in the immediate background.
The Kongs can also roll to knock out enemies. Donkey Kong can perform this move on a short distance. Rolling confers high momentum, and if Donkey Kong jumps while rolling, he will gain longer distance than usual. If he rolls off the edge of a platform, he can quickly hop in mid-air, providing extra distance.
Diddy Kong returns as a playable partner for Donkey Kong and is the first Kong partner to be encountered in the game. Using his Barrel Jet, he can help Donkey Kong hover across pits and other obstacles for a short time. Diddy wields two popguns which can fire peanuts. Upon getting shot out of the weapon, the peanuts bounce on the ground swiftly until smashing into a wall or an enemy, bearing a minimal effect on the latter. If hit by a peanut, some enemies become stunned for a brief moment, although tougher enemies, like bosses, are not affected at all. The popguns can only be used in multiplayer or on Hard Mode. If controlled independently, Diddy will cause small tremors on the ground by firing his popguns, forming an ability called the Popgun Pound that is equivalent to the other Kongs' ground pound.
The health meter of the Kongs is measured in hearts which can be lost upon getting touched by an enemy and the like. In order to restore them, the Kongs have to collect Heart items found along the way. Red Balloons add more tries to the game. If all lives are lost, the players receive a game over and are prompted to restart the game from where their progress was last saved.
Vehicles[edit]
In specific levels of the game, Donkey Kong and co. are able to ride different vehicles. One such vehicle is the Mine Cart, which carries the characters along rail tracks that cannot be trodden by foot. As the Mine Cart moves automatically, the Kongs can duck inside the vehicle or jump with it in order to dodge obstacles. Another is the Rocket Barrel, which is necessary to fly across wide chasms and normally has to be navigated through a series of hazards and enemies. It can be risen up or let to fall down. Lastly, there is Rambi (who is categorized as a "vehicle" in the game's instruction manual[9]), a powerful Animal Friend who can charge into enemies and defeat them. Otherwise invincible to most enemies even when standing still, he is vulnerable to lightning, fire enemies, or any other object protected by flames.
Level map and bonuses[edit]
The game features a total of 63 levels (including boss and hidden temple stages and excluding Funky's Fly 'n' Buy stations), grouped in seven island. On the world map, islands are seen from an aerial viewpoint and feature a system of routes that connect levels. Once players complete a level, they open a new path or crossroad. Paths are normally navigated on foot, but Blast Barrels are sometimes used for taking shortcuts; Donkey Kong Island's map navigation, on the other hand, is entirely provided by Barrel Cannons. Warping from an island to another is always released via Blast Barrels.
On the map, non-boss levels are marked with circular pads, whilst boss stages are associated with star-shaped pads. Level pads light in several colors on different conditions: red pads mean their levels have not been completed yet; blue pads mean their levels have been finished at least once. Additionally, green pads relate to levels which have been completed on Hard Mode. Unlit/black pads are inaccessible, and switch to red when the paths that lead to them are unlocked.
On each island, the Kongs encounter a shop run by Funky Kong, which is always marked with white pads. The shop, Funky's Fly 'n' Buy, offers items that can turn helpful for the Kongs, in exchange for Banana Coins. The price for each item stays the same on the course of the game. Alongside items, which include balloons of all sorts, Kong Barrels, and Heart Boosts, the shop also displays a Capsule Toy Machine, which contains collectible toy figures representing characters from the game. Each of them costs five Banana Coins and can be obtained by chance. As the players progress through the game, more toy figures become available in the shop.
An odd number of Puzzle Pieces (5, 7, or 9), as well as four KONG Letters, are spread in each level, excluding boss levels for both and Hidden Kong Temple levels for the latter. Puzzle Pieces unlock various concept artworks in a select Image Gallery, while KONG Letters are compulsory for unlocking hidden temple stages; each world aside from the last one contains one of these stages. While some Puzzle Pieces are scattered throughout a level in different areas, some appear only after collecting a certain group of items. Bonus Stages dedicated to collecting these items are often featured within levels, and yield Puzzle Pieces after completion. These bonus stages can usually be accessed through hidden Blast Barrels or passages blocked by Snowflake Shields.
Finishing all the levels of the game (including the Hidden Kong Temple ones) and collecting all of the KONG letters in the non-boss/temple levels are amongst the requirements for full, 200% completion of the game.
Menu[edit]
On the map, the player can access a menu where they can select several items from a list. These items and their corresponding actions are presented in the following table.
| Summary | Allows the player to view a summary of their progress on the island where they are currently located. The summary lists all the unlocked levels on that island and shows whether the KONG letters and Puzzle Pieces have been collected, as well as the best medal obtained in Time Attack mode for each level. |
| Options | Allows the player to configure settings such as sound volume and button mapping. They can also use the "Add/Drop Players" function to establish the number of players and their controllers. |
| Extras |
Allows the player to view a group of galleries where extra content can be unlocked. The Image Gallery is composed of artwork showing various concepts and ideas considered during the development of the game. Each piece of artwork is unlocked after all the Puzzle Pieces are collected in a certain stage. The Music Gallery contains music used in the game. Each set of music pertains to one of the six main islands of the game and can be unlocked by beating the boss of its corresponding island. Dioramas that represent the six main islands of the game are unlocked the same way. |
| Quit Game | Quits the game. A message window is displayed beforehand, asking the player to confirm they want to leave. |
New features[edit]
Kong partners[edit]
Donkey Kong Country: Tropical Freeze features more playable characters than Donkey Kong Country Returns. The additional characters are Dixie Kong and Cranky Kong.
Dixie Kong can execute the Helicopter Spin with her ponytail and propel herself upward in midair. Using her ponytail, she is also able to swim against strong currents, accessing potentially secret areas. Cranky harnesses the Cane Bounce by using his iconic rigid cane to combat or overcome some obstacles that could be dangerous to stomp on, such as urchins and thorns. The Cane Bounce can be seen as a substitute to Dixie Kong's Helicopter Twirl, as Cranky can bounce off the ground with his cane and take off to increased heights. With the inclusion of more than two playable characters in the game, a premiere feature in the series, the variety of Kong Barrels has been invigorated. Players can stumble upon Diddy, Dixie, or Cranky barrels, each displaying their name abbreviations – DD, DX, and CK respectively. These barrels usually appear to contain only one character, whereas the other spins like a roulette and constantly switch the partner inside, each time indicated by the before-mentioned abbreviations. In the standard mode of play, Donkey Kong can only carry one partner at the time; a partner freed from a Kong Barrel will replace the one that is currently on Donkey Kong's back. If the character in the chosen barrel is already seated on Donkey Kong, the characters can regenerate their health bar upon destroying the barrel.
A new feature in this game that is adjacent to the partner system is the Kong POW attack, which turns all the enemies on-screen into items. In multiplayer, the move can be used if both players press a button at the same time. This move can only be performed when 100 bananas have been collected, as well as when there is a partner by Donkey Kong's side.[4]
Underwater mechanics[edit]
The game also presents underwater levels, which were absent in Donkey Kong Country Returns. Rather than using the Mario-styled controls present in the original trilogy, swimming is now handled similarly to the New Play Control! version of Donkey Kong Jungle Beat, where instead of pressing the jump button to gain momentum, the player has to move the stick /
![]() buttons. The Kongs are now given a gauge with limited air while underwater, requiring them to seek out air bubbles to fill it and survive. Their air gauge will also fill up if the Kongs enter an underwater Barrel Cannon, and will remain filled for as long as they stay inside the barrel. A Corkscrew attack has been added, which can be used to defeat certain enemies or collapse less durable structures while underwater.
buttons. The Kongs are now given a gauge with limited air while underwater, requiring them to seek out air bubbles to fill it and survive. Their air gauge will also fill up if the Kongs enter an underwater Barrel Cannon, and will remain filled for as long as they stay inside the barrel. A Corkscrew attack has been added, which can be used to defeat certain enemies or collapse less durable structures while underwater.
Plucking ability[edit]
In a vast number of areas in the game, players will encounter orange handles fixed on the surface of platforms. While standing atop these handles, the Kongs can grip and pull them to uncover hidden objects, which can be either bonuses or Barrel Cannons that launch them to other spots. When pulled, some handles cause certain phenomenons that manipulate the environment.
The plucking function is used transport objects, such as barrels, DK Barrels, and Watermelon Fuse Bombs, the most common in the game. Some can be found directly on the ground and can be picked up, but others are located under handles. The player can also haul enemies, specifically those that are relatively small and wear orange helmets, like Tuff Fluffs and Tuff Tucks. Portable items and enemies are sometimes necessary to destroy hindrances, bags with precious content, and tough foes.
Producer Kensuke Tanabe stated that the ability to pick up enemies and throw them, and overall the plucking capability, was inspired from Super Mario Bros. 2, which he directed.[10]
Single-player modes[edit]
Time Attack[edit]
A mode originating in Returns, Time Attack of any level can be accessed only after the player has beaten the level in question at least once. It is available on single-player and is a completely optional mode, meaning it does not unlock extra content in the game, nor contribute to its completion percentage.
Before entering Time Attack, players are given the option to select a type of Kong Barrel for the course of the chosen stage. During Time Attack, players have to guide the Kongs to the level's finish barrel in the fastest time possible. Three-time limits are set during the course, each corresponding to one of the gold, silver, and bronze medals. Should the Kongs reach their destination within one of these time limits, they are rewarded with the medal accordingly. A special shiny gold medal can be obtained if the Kongs finish the level at a particular time within the standard gold medal time limit. The milestone times for shiny gold medals are never displayed nor made clear.
Checkpoint booths are not present during Time Attack. As such, every time they lose their health in a level, players are prompted to restart the stage with the count reset to zero. Unlike in other modes of the game, the Kongs do not lose a life after their health bar has been drained completely.
Additionally, if the Kongs finish a level in Time Attack mode without taking damage, their achieved medal will be accompanied by a heart icon. This icon is permanent until they achieve a better time.
Despite Checkpoint Booths being unavailable during Time Attack, Professor Chops makes an appearance as a referee. During every race, he first shows up at the beginning, waving a small green flag in the rhythm of the countdown. After the Kongs break the finish barrel, he springs on the scene with a chequered flag, indicating the race has been terminated.
Time Attack Leaderboards[edit]
If connected to the Internet and signed into Nintendo Network, players are granted the possibility to upload their Time Attack records on a worldwide leaderboard. These records are associated with their Nintendo Network IDs. The global Time Attack rank of any level in the game can be accessed by selecting the "LEADERBOARDS" section on the Time Attack menu. The rank displays other player's time records on said levels, as well as the Kong partner used and, occasionally, a replay of their progress to be observed.
Hard Mode[edit]
When players have collected all the KONG Letters in the game and have subsequently completed every level, an additional game mode, Hard Mode, is unlocked. Hard Mode can only be played with one Kong, marking the only occasion in the game aside from multiplayer sessions when one can take full control of Diddy, Dixie, or Cranky. The characters are given a single heart to go along the selected level, and have to reach the goal in it without checkpoints and without taking damage at all in order to complete the stage. In order to complete the game 200%, every level in the game has to be finished in Hard Mode. During Hard Mode, the KONG Letters of each level are recolored from red to blue; collecting them again in this mode replaces the red star icon next to a chosen level's name (marking that all letters have been previously obtained there) with a blue one, although it is not necessary for 200% completion. Upon completing Hard Mode, a message appears saying, "You've achieved 200%! Hard mode? That wasn't so hard!" and new images are unlocked in the Extras menu.
Multi-player[edit]
The game features a co-operative two-player mode, where the first player is always Donkey Kong and the other can select either Diddy, Dixie, or Cranky to play as. The second player can independently control their Kong, but may choose to climb on Donkey Kong's back and perform joint actions, allowing player one to move both Kongs at once like in single-player mode while the other player makes use of their character's abilities. This includes the ability to use the popgun as Dixie and Cranky and perform ranged attacks. During multi-player, Kong Barrels are displayed as generic DK Barrels, akin to the previous iterations. Should one player lose a life, the other can take the lead; however, the former can be found and redeemed inside the nearest DK Barrel.
Controls[edit]
Note: moves marked with the color blue are only utilised while the characters are underwater.
The game can be played with either the Wii U GamePad, the Wii Remote alone and held horizontally, or the Wii Remote held vertically and connected to a Nunchuk.
| Solo and co-op modes | ||||
|---|---|---|---|---|
| Action(s) | (primary controls) |
(secondary controls) |
(held horizontally) |
|
| Walk | ||||
| Run | ||||
| Crouch | ||||
| Swim | ||||
| Jump | ||||
| Barrel Jet hover (playing as/having Diddy) | ||||
| Helicopter Spin (playing as/having Dixie) | ||||
| Cane Bounce (playing as/having Cranky) | ||||
| Swim Boost | ||||
| Jet Blast (playing as/having Diddy) | ||||
| Ponytail Propeller (playing as/having Dixie) | ||||
| Cane attack (playing as/having Cranky) | ||||
| Ground Pound (while standing) | Shaking |
Shaking | ||
| Roll Attack (while moving) | ||||
| Kong Roll (while moving and having a partner) | ||||
| Shoot popgun | ||||
| Corkscrew | ||||
| Grab | ||||
| Hold | ||||
| Pluck | ||||
| Kong POW | ||||
| Enter pause menu | ||||
| Enter HOME Menu | ||||
| Co-op mode only | ||||
| Pick up partner (for player 1) | ||||
| Mount/dismount Donkey Kong (for player 2) | ||||
Characters[edit]
Playable characters[edit]
Donkey Kong Country: Tropical Freeze has four playable characters (five in the Nintendo Switch port), making it the Donkey Kong Country game with the most playable characters.
| Character | Description | Kong POW Ability |
|---|---|---|
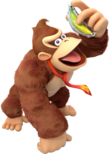 Donkey Kong |
Donkey Kong is the character the single or first player always controls. He is able to water skip when rolling with another Kong on top of him. Underwater, Donkey Kong is able to charge at enemies to defeat them. |
N/A |
 Diddy Kong |
His jetpack allows him to hover in midair and get speed boosts underwater. His Peanut Popgun can be used to shoot and stun or distract enemies for a brief moment. |
Turns enemies into Red Balloons, which add lives. |
 Dixie Kong |
Her ponytail allows her to get a short lift or fall slowly in midair. Underwater, her hair can also be used as a propeller, conferring more agility in her swimming; secret exits can be found with her hair as well, by going through currents. Her Gumball Popgun can shoot bubble gums at enemies. |
Turns enemies into Gold Hearts, which allow extra hits from enemies. |
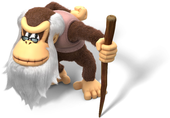 Cranky Kong |
His cane can be used to defeat hard-to-stomp enemies, and as a pogo stick in order to jump higher and on spikes. Also with his cane, he can whack enemies underwater. His popgun shoots dentures at enemies. |
Turns enemies into Banana Coins, which can be used to purchase items in Funky's Fly 'n' Buy. |
Supporting characters[edit]
| Character | Role | ||
|---|---|---|---|
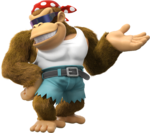 Funky Kong |
Runs the Funky's Fly 'n' Buy shop, which sells various items in exchange for Banana Coins, similarly to Cranky Kong's Shop from the previous installment. | ||
 Professor Chops |
Runs the checkpoint booths in each level as he did in Donkey Kong Country Returns. He no longer offers the Super Kong option, which does not reappear in the game. | ||
 Rambi |
Rambi retains his role as the sole ridable Animal Friend. He can bash into enemies easier than the Kongs and can break some walls or other big objects that the Kongs cannot normally break. He can also defeat enemies by just walking into them. He is affected by lightning and runs away as he bumps into fiery enemies. | ||
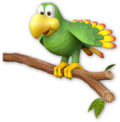 Squawks |
Squawks is once again a hireable character, who will sit in the corner of the screen and warn the player if Puzzle Pieces are nearby during a stage if placed in the inventory for a level.[11] | ||
Bosses[edit]
Each boss of this game is faced at the end of one of the six main worlds. The Kongs have to deliver nine hits to a boss enemy in order to defeat him; after every three hits, the boss will anger and morph into another phase, usually changing color to reflect this. As the final blow is struck, the player is given the chance to punch the boss and knock him out violently by repeatedly pressing the buttons shown on screen.
| Image | Name | Description | Level appearance |
|---|---|---|---|

|
Pompy | An enormous sea lion and the first boss of the game. The enemy repeatedly skates down a half-pipe arena in a circus tent, attempting different stunts to attack the Kongs. These include jumping high up in the air and diving back down onto the arena, or doing barrel rolls. During his first and third attack phases, Pompy retreats in the foreground pond and sends aquatic enemies, such as Green Finleys, Sea Urchins, and Gordos, bouncing on the arena. Occasionally, he employs several Big Sphens as extra obstacles during the course of the battle, skating on their bellies in Pompy's tow. | Big Top Bop |

|
Skowl | A giant owl and the leader of the Hootz platoon. His main attack set includes scattering sharp feather missiles, charging onto the Kongs with his sharp talons, creating strong gusts with his wings, and spawning small owl minions, some of which can be thrown back at the enemy to damage him. As the battlefield ascends into the sky, Skowl attempts new attack techniques. | Mountaintop Tussle |

|
Ba-Boom | A trio of mischievous baboon brothers. Their repertoire of attacks consists of throwing Watermelon Fuse Bombs and swinging on a rope towards the Kongs, usually spinning a hammer in an attempt to hurt them. Ba-Boom will also try a rolling dash attack, changing direction as they collide with the arena margins. After two members of the trio are defeated, the third will summon specters of himself and attack in the same manner as before. | Triple Trouble |
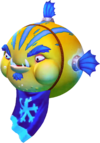
|
Fugu | A pufferfish capable of growing in size. He attempts to suck in the Kongs by inhaling large quantities of water, then pushes them onto the hermit crabs on the walls by puffing the water back. He usually also exhales green fish, which can be bounced back at the boss to deal damage. Likewise, his rear side is exposed and can be occasionally rammed into with a corkscrew. During his third phase, Fugu will swell enough to cover half of the battle area. | Fugu Face-Off |
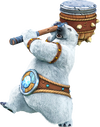
|
Bashmaster | A large bipedal polar bear that wields a mallet. His most basic attack is a powerful blow with his weapon, which momentarily gets stuck on the ground, allowing the Kongs to use it as a platform and stomp on the boss's head. Bashmaster is able to leap from the scene and crash back on the arena, tilting it abruptly while also sending icy shock waves. Often, Bashmaster creates columns of icy blocks that he sends sliding on the battlefield. These blocks can be pounded and destroyed, and some contain Banana Coins and Watermelon Fuse Bombs, the latter having to be thrown at the boss to damage him. | Punch Bowl |
|
Lord Fredrik | The final boss, titled the king of all Snowmads. He is fought on a basalt field surrounded by lava. Lord Fredrik uses his horn to summon ice dragons and icy balls, some of them containing Tuff Tucks and Tuff Fluffs that can be thrown back at the boss to damage him. Likewise, Fredrik faces the Kongs directly by charging and attempting to ram his Viking horns into the protagonists; while running, his back is exposed to stomp attacks, needed to damage the boss. He will also pound the ground and temporarily sink patches of basalt in the lava. | Volcano Dome |
Enemies[edit]
Snowmads[edit]
| Tucks | ||||
|---|---|---|---|---|
| Image | Name | Description | First level appearance | Last level appearance |
|
Tucks | A enemy that simply roams back and forth on ground areas. It can be defeated by any signs of attack, including stomping and rolling. Bare Tucks that bounce on springy surfaces appear in Windmill Hills and Jelly Jamboree. | Mangrove Cove | Crazy Clouds |

|
Speedy Tucks | A variant of Tucks that tries to attack the Kongs by charging into them. Speedy Tuckses can be knocked down with any attack. | Twilight Terror (seen in the background, loading fish with a Tucks) Shoal Atoll (encountered as an obstacle) |
Slippy Spikes |

|
Tuff Tucks | An enemy which temporarily flips over when jumped on. In this state, it can then be picked up, carried, and hurled by the Kongs to attack other enemies or break fragile walls that hide secrets. | Mangrove Cove | Rocket Rails |

|
Tenacious Tucks | A combination of Tuff Tucks and Speedy Tucks; the enemy actively tries to attack the Kongs while being protected by an orange helmet. | Volcano Dome | Volcano Dome |
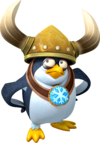
|
Pointy Tucks | An enemy that wears a viking helmet, making it invulnerable to jump attacks. The enemy can be defeated with any other attack method. | Shipwreck Shore | Icicle Arsenal |
|
Trench Tucks | A Pointy Tucks that carries a shield to push the Kongs back. The enemy can be defeated by rolling into it from behind. | Frantic Fields | Meltdown Mayhem |

|
Archy | An enemy that shoots fish from a bow. The fish follow a straight line in the air and can be stomped on. The Archy can be also stomped on, as well as rolled into. | Canopy Chaos | Icicle Arsenal |

|
Archy (fire) | A variety of the regular Archy. It shoots flaming fishbones instead of carnal fish, which cannot be jumped on. Nonetheless, Archies (fire) can be defeated the same as normal Archies. | Scorch 'n' Torch | Icicle Arsenal |
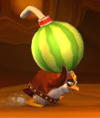
|
Boom Bird | A red-colored penguin that carries a Watermelon Fuse Bomb on its back. It can be defeated by any means of attack. As soon as the bomb drops on the ground, its fuse starts to burn and will explode after a short time. | Cannon Canyon | Icicle Arsenal |

|
Painguin Tucks | An enemy that tries to attack the Kongs with a spear. It can be taken out by jumping on its head or rolling into it from behind. | Mangrove Cove | Rocket Rails |

|
Papa Painguin | A Painguin Tucks wearing a thorny helmet. Both ends of its spear are sharp, making the enemy initially devoid of vulnerable spots. The Kongs can stun the Papa Painguin with a ground pound and make it drop its spear, then roll into the enemy from either side to defeat it. | Deep Keep | Rocket Rails |
| Soary | An enemy that flies towards the Kongs in a straight line. They can be defeated with a stomp. | Alpine Incline | Slippy Spikes | |

|
Big Sphen | A large enemy that carries a blowing horn and uses it to shoot icy fish as a means of attack. These fish slide down on the ground and can be taken out with a stomp. Big Sphens themselves can be defeated with three stomps or three roll attacks. | Big Top Bop | Slippy Spikes |

|
Pengatcha 1-gō | A large robotic vehicle operated by a Speedy Tucks, used in various ways to hinder the Kongs. | Reckless Ride | Reckless Ride |
| Fluffs | ||||
| Image | Name | Description | First level appearance | Last level appearance |

|
Fluff | Enemies that constantly leap from side to side and can be defeated with any attack technique. | Mangrove Cove | Dynamite Dash |

|
Tuff Fluff | A variation of Fluff that, like Tuff Tucks, flips over temporarily when jumped on and can be used as a throwing object. | Horn Top Hop | Volcano Dome |
|
Harey | A large enemy that creates sharp ice waves on the ground that can damage the Kongs. They can be defeated by jumping or rolling into them three times. | Reckless Ride | Homecoming Hijinxs |
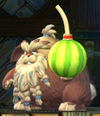
|
Harold | An enemy similar to Hareys that continuously throws Watermelon Fuse Bombs at the Kongs. Before they detonate, the bombs can be passed back at the Harold to defeat it. | Sea Stack Attack | Rocket Rails |
| Hootzes | ||||
| Image | Name | Description | First level appearance | Last level appearance |

|
Hootz | Owl-like enemies that fly around in set patterns and can be defeated in any way. | Trunk Twister | Crazy Clouds |

|
Hot Hootz | An orange Hootz that engulfs itself periodically with fire and conveys it into a fireball, sending it towards the Kongs' current position. Except when they are shrouded in flames, Hot Hootzes can be knocked down with any attack method. | Swinger Flinger | Crazy Clouds |

|
Puffton | An large Hootz that takes three stomp or roll attacks to defeat. | Windmill Hills | Crazy Clouds |

|
Tuffton | Puffton variants that wear a helmet, which protects them from stomp attacks but can be used as platforms. | Windmill Hills (seen in the level's introduction) Horn Top Hop (encountered as an obstacle) |
Slippy Spikes |

|
Blue Hootz | A small enemy constantly covered in blue flames. It can only be defeated with a throwable object. | Zip-Line Shrine | Crazy Clouds |
| Waldoughs | ||||
| Image | Name | Description | First level appearance | Last level appearance |

|
Waldough | A large enemy that can be jumped on (or rolled into) three times to defeat. | Mangrove Cove | Meltdown Mayhem |
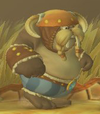
|
Walnut | A Waldough that wears a helmet on its head, preventing jump attacks. They can be defeated with three Cane Bounces or three roll attacks from the front or back. | Mountain Mania | Meltdown Mayhem |

|
Walbrick | An armored enemy that is invulnerable to jump and frontal roll attacks. Although its back is not covered, the Walbrick immediately turns around if the Kongs attempt to attack it from behind. Jumping on a Walbrick stuns it, allowing the Kongs to attack its back side with a roll attack. Three roll attacks are required to defeat the enemy. | Big Top Bop | Blurry Flurry |

|
Chum Chucker Charlie | An enemy that attacks the Kongs by tossing fish at them. It takes three jump or roll attacks to defeat, and can also be taken out directly with a thrown object. | Fruity Factory | Icicle Arsenal |
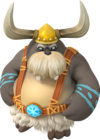
|
Fish Poker Pops | An enemy that cannot be jumped on and carries large stick weapon with two puffer fish tucked on its sides. As the Kongs approach the Fish Poker Pops, it rises the weapon in the air to attack; in this stance, it can be attacked by rolling into it from the front. | Spinning Spines | Rocket Rails |
| Other | ||||
| Image | Name | Description | First level appearance | Last level appearance |

|
Lemmington | An enemy that uses a spiky wheel to move along various surfaces. While upside-down or on a vertical surface, Lemmingtons can be defeated by pounding the surface they are on. | Horn Top Hop | Icicle Arsenal |
| Ice dragon | Enemies released from Lord Fredrik's horn that fly out and plummet on the ground shortly after. As they crash, they freeze the patch of ground they fell onto, creating a slippery surface. | Volcano Dome | Volcano Dome | |
Domestic enemies and other obstacles[edit]
| General enemies | ||||
|---|---|---|---|---|
| Image | Name | Description | First level appearance | Last level appearance |
  
|
Finley | Finleys are regular fish enemies that follow set patterns when swimming. They are harmful if touched, but vulnerable to Corkscrew attacks or Cranky Kong's cane swipes. Finleys are divided into Blue and Red Finleys, with the former moving more slowly. A distinct Green type also exists, though it behaves differently by leaping out of the water. | Mangrove Cove | Rocket Rails |

|
Horror Gills | A family of enormous fish predators that can only be encountered in vehicle-riding sequences of the game. Most of them roam around savannah waters while keeping their dorsal sides over the surface, potentially crashing their upper appendages into the Kongs. Other actively seek to attack the characters by jumping out of the water. A few of them remove part of the railtrack in High Tide Ride. | Twilight Terror | High Tide Ride |

|
Gordo | A considerably larger and tougher fish than a Finley, but one that otherwise behaves the same. It can only be destroyed with three consequent Corkscrew moves, or three cane attacks from Cranky. | Shipwreck Shore | Rocket Rails |
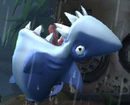
|
Snaggles | Snaggles resemble great white sharks and are aggressive, despite their goofy look. They are capable of leaping high above the water as they try to snatch the Kongs. Under the water, Snaggles chase the characters, trying to attack them. They can be defeated with throwable objects or with Cranky's cane. | Shipwreck Shore | Rockin' Relics |

|
Yellow Snaggles | An ochre-colored variation of Snaggles that is not able to leap from the water. Nonetheless, it behaves the same underwater, as it tries to bite the Kongs. Yellow Snaggles can only be taken out using Cranky's cane. | Shoal Atoll | Panicky Paddles |
| Lost Mangroves enemies | ||||
| Image | Name | Description | First level appearance | Last level appearance |

|
Dozy | A bird foe that walks from side to side. The Kongs can get damage from this enemy if they simply head into it. Dozies can be brought down using any means of attack. | Mangrove Cove | Busted Bayou |

|
Mimic | A mysterious enemy hiding inside a bush and waiting to surprise attack the Kongs. Upon spotting them, Mimics walk in their direction, but soon turn out to stroll aimlessly. They can be defeated by any attack method. | Busted Bayou | Busted Bayou |

|
Large Mimic | A mere bigger variation of Mimic. It can be defeated by any means of attack. | Busted Bayou | Busted Bayou |

|
Monocle Monica | A pink dragonfly-looking enemy wearing a monocle. It is very similar to Hot Hootz, in that it also flies by following set routes. Monocle Monicas can be knocked down by stomps and thrown objects. | Shipwreck Shore | Busted Bayou |

|
Punchy Paddy | A grasshopper enemy that comports by hopping up and down. It can be defeated using any attack, but can be dangerous if it lands on the Kongs. | Mangrove Cove | Busted Bayou |

|
Sour Dodo | A blue-feathered variant of Dozy, which deliberately runs into the Kongs upon spotting them. It is vulnerable to any attacks. | Mangrove Cove | Busted Bayou |

|
Thug Slug | A slug enemy. It sticks to any platform, crawling on all of its sides. Thug Slugs can be defeated anyhow. | Canopy Chaos | Trunk Twister |

|
Wild Wendell | A turtle-resembling foe that wears aviator goggles. When on dry land, should the player stomp this enemy, it retracts within its shell, which can afterwards be transported and hurled into other foes. Wild Wendells can also be found floating on water; in this stance, they can be defeated with a Corkscrew move from the beneath the surface of the water. | Mangrove Cove | Canopy Chaos |
| Autumn Heights enemies | ||||
| Image | Name | Description | First level appearance | Last level appearance |

|
Cheesy Chester | A rat enemy, first seen strolling on its back feet, then walking on all fours as it spots the Kongs, moving considerably faster. Cheesy Chesters deal damage to the Kongs when bumping into them, but are also vulnerable to any attack. | Windmill Hills | Rodent Ruckus |

|
Schnautzel | A fiery wild boar. After setting their aim for the Kongs, Schnautzels shoot fireballs from their large snouts at them. Three stomps (or, alternatively, three roll attacks), as well as a barrel, can knock them out. | Windmill Hills | Horn Top Hop |
| Bright Savannah enemies | ||||
| Image | Name | Description | First level appearance | Last level appearance |

|
Buffaloafer | A massive and strong buffalo that rams its large horns into the characters in an attempt to harm them. It will fling the Kongs up in the air if they simply hop on its back. Despite this, there are several ways to defeat a Buffaloafer: it can be lured into an abyss and fall, or it can accidentally hit a wall (or collide with the Kongs' roll attacks) and turn upside down, leaving its vulnerable spot, the belly, unprotected. Buffaloafers can also be quickly defeated with three Cane Bounces from Cranky. | Baobab Bonanza | Bramble Scramble |
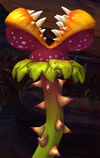
|
Chompette | A steadfast creature with a thorny stem. It grows above pits and continuously chomps air. Only its fangs are dangerous, but the plant can be bounced on safely when its mouth is closed. Carnivorous plants can be defeated with three roll attacks, three Cane Bounces, or a thrown object. | Bramble Scramble | Bramble Scramble |
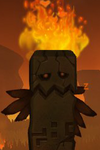
|
Flaming Falling Totem Pole | A dormant stone pillar that becomes awake as soon as it senses the Kongs being close. Afterwards, it topples on the ground and passes out, crushing the Kongs or any other creature if they remain where the pillar falls. The primates can mount on the back of the collapsed obstacle and pound it three times to break it. | Scorch 'n' Torch | Scorch 'n' Torch |

|
Giant Spiked Nut | Large thorny fruits falling from baobabs and rolling on the ground. They are dangerous to touch and completely indestructible, although Cranky Kong can bounce on them with his cane without getting hurt. | Baobab Bonanza | Baobab Bonanza |
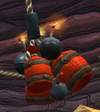
|
Hanging TNT | Explosive clusters suspended with a rope. They detonate when touched by the Kongs or a throwable object. | Cannon Canyon | Cannon Canyon |

|
Porcupal | A fiery porcupine enemy that engulfs itself in flames and startles its bristles to defend itself from the Kongs. Porcupal's flames eventually go out, and its bristles settle down its back, becoming vulnerable to any sign of attack. Even while under the fire, Porcupals can be knocked out with Water Sacks. | Frantic Fields | Bramble Scramble |

|
Swooper Dooper | A peculiar secretarybird enemy that swoops continuously, trying to attack the Kongs. It can be destroyed by any attack. | Grassland Groove | Bramble Scramble |
|
Tornado | Unbeatable natural hazards that traverse a patch of ground. When facing the Kongs, they block their path, but when facing the opposite direction, they fling them forward. | Frantic Fields | Frantic Fields |
| Sea Breeze Cove enemies | ||||
| Image | Name | Description | First level appearance | Last level appearance |

|
Electrified Anemone | Colonies of electrically charged anemones coat underwater surfaces in dark areas. They usually hide items, but are harmful and indestructible. However, Electrified Anemones are sensible to light and will retract whenever their area is floodlit by luminescent fish. | Amiss Abyss | Amiss Abyss |
|
Fritz | An underwater enemy that resembles an eel. Fritz releases shock waves around itself, and then swiftly teleports to another close area. When not electrically charged, it can be destroyed by any attack method that can be approached underwater, including a Corkscrew move. | Deep Keep | Shoal Atoll |

|
Green fish | The spikeless blowfish that Fugu summons during his battle. Green fish are exhaled by the boss enemy and used to attack the primates. However, they can be deflected with Corkscrew moves or cane swings and sent back to their master, who gets hit and subsequently damaged. | Fugu Face-Off | Fugu Face-Off |

|
Hermit crab | Colored hermit crabs that appear as obstacles which can harm the player. | Fugu Face-Off | Fugu Face-Off |
|
Jellyfish | Almost invulnerable enemies that can be found swimming either vertically or around stones. They are not affected by any of the Kongs' direct attacks, and will shock them with electricity upon contact. Jellyfish only perish if the heroes perform a Kong POW nearby. | Deep Keep (seen in the level's introduction) Amiss Abyss (encountered as an obstacle) |
Amiss Abyss |

|
Mama Saw | A small, chubby sawfish enemy that swims from side to side. Its spiky frontal saw is harmful for the Kongs, but its rear is not. A Corkscrew attack can be performed on that spot to defeat the enemy. | Irate Eight | Shoal Atoll |

|
Proximity mine | Objects found afloat in the water. They will start to flash as they are approached, and will eventually explode. Their shrapnel can injure any character, such as the Kongs and enemies. | Irate Eight | Shoal Atoll |

|
Pufftup | A pufferfish that inflates itself periodically. In this state, the spikes on its body are revealed and can injure the Kongs. While inflated, the Pufftups are only vulnerable to Cranky's cane. They eventually deflate themselves, becoming exposed to any sign of attack. | Amiss Abyss | Shoal Atoll |

|
Sea Urchin | Obstacles that are typically moved around by currents. Due to their thorns, they can only be defeated with Cranky's cane swing. | Big Top Bop | Fugu Face-Off |

|
Sting Tentacle | Long, thin hazards that protrude from various surfaces, swaying slowly from side to side. They can be taken out using Cranky's cane. | Current Capers | Current Capers |
| Squiddicus | An enormous cephalopod that impedes the Kongs in the level, Irate Eight. The Kongs have to dodge his spike-covered arms, which the monster tries to slip through tight gaps and tunnels. The creature also leaves a deadly cloud of ink that the Kongs would have to survive. | Irate Eight | Irate Eight | |
| Juicy Jungle enemies | ||||
| Image | Name | Description | First level appearance | Last level appearance |

|
Bouncelisk | A lizard foe that slithers on its path while transporting a bouncy round fruit with its tail. The Kongs can use this fruit as improvised trampoline, in order to reach high areas or items. Nonetheless, Bouncelisk are still dangerous. A roll attack can defeat them. | Harvest Hazards | Jammin' Jams |

|
Bucky | A yellow caterpillar enemy that clings to any surface, in the manner of Thug Slugs. Buckies leave trails of toxic gas behind, and when hanging down the ceiling, they release big, dangerous bubbles that descend slowly. Any attack method is effective against these enemies, but only when they are encountered normally; only barrels are apt to defeat upside down Buckies. | Harvest Hazards | Harvest Hazards |
|
Buzzy | A grouchy bee that flies towards the Kongs when tempted to do so. It is a potentially dangerous enemy indeed, but it can be jumped on. | Spinning Spines | Beehive Brawl |

|
Chompasaurus | A flytrap beast that is able to crawl on the ground. Chompasauruses can also be found sticked to ceilings. They can use their long and stretchy tongues to hunt for prey. The Kongs can also get stuck to the tongue and end up inside the mouth of the beast. However, the Kongs can punch the Chompasaurus from inside repeatedly and destroy the enemy, freeing themselves. A Chompasaurus can also be defeated with three stomps on its head, or with a single barrel tossed at it. | Reckless Ride (seen in the background) Fruity Factory (encountered as an obstacle) |
Beehive Brawl |

|
Punch Piranhas | Small predator fish encountered in the jungle's punch ponds. They quickly hunt anything dropped in their waters, including the Kongs. Punch Piranhas cannot be defeated. | Punch Bowl | Punch Bowl |

|
Toucan't | A small toucan-like foe that constantly rolls a thorny and seemingly pungent berry down a path. At set intervals, the berry releases a substance that launches the Toucan't upward, letting the Kongs pass beneath it while heeding the berry. A single stomp can defeat a Toucan't. | Harvest Hazards (seen in the level's introduction) Panicky Paddles (encountered as an obstacle) |
Jammin' Jams |
| Donkey Kong Island enemies | ||||
| Image | Name | Description | First level appearance | Last level appearance |

|
Electroid | A small, electric enemy. Electroids follow conductible wires, but can also often be found standing underneath metallic pressure platforms, waiting to electrocute the Kongs. Electroids are invincible. | Frozen Frenzy | Frozen Frenzy |

|
Snowballs | Hazards usually encountered in mid-air, as they are shot by bombards. They also spring in the air when their platforms get flipped by large objects. They are dangerous and have to be dodged. | Blurry Flurry | Blurry Flurry |

|
Snowflake | Icy obstacles cluttered in rows. They drop down from the sky and float along a set path in the air. While dangerous to touch, they can be destroyed with any projectile or with a Cane Bounce. | Forest Folly | Forest Folly |
Miscellaneous[edit]
Several Donkey Kong Country Returns enemies, such as Big Squeekly, Skittlers, and Mugly, make cameo appearances frozen in ice. The former two are found in the levels Blurry Flurry and Forest Folly respectively, while Mugly can be seen at the bottom of the Donkey Kong Island diorama. In addition, a Snippys can be seen on the title screen.
| Image | Name | Description |
|---|---|---|
|
Don Zunāna | A giant fish that can be found sleeping near the beginning of Amiss Abyss. If the Kongs wake it up, it destroys a wall on the right that normally prevents them from swimming further. |
Objects[edit]
Below is a table containing notable objects found in the game. A collectible is a gameplay element that can be collected and stored to a specific counter. Usually, when this counter reaches a certain number or magnitude, a special gameplay-related event will take place. A projectile represents an item that can be picked up and thrown at enemies or other elements. Vehicles refer to certain apparatuses that are used as mandatory ways of locomotion during select levels of the game.
Collectables[edit]
| Image | Item | Description |
|---|---|---|

|
Banana | Bananas are the most common items in the game. They are usually found floating in the air and arranged in straight or circular patterns. However, some can be revealed upon pulling Item Handles. Sometimes, bananas in a particular group can be collected to reveal Puzzle Pieces and other items. When a total of one hundred bananas are acquired, the player earns an extra life and the Kong POW move is enabled. The main goal of Bonus Areas is collecting items, including mostly bananas. |
|
Banana Bunch | A cluster of five or ten bananas. Although common, Banana Bunches are rarer than singular bananas. |

|
Banana Coin | Banana Coins represent the currency in the game. They are rather frequent and can be obtained either by usual ways, or by performing a task such as collecting a set of bananas. Likewise, stomping three or more enemies in a row also grants the players Banana Coins. Using Banana Coins, the player can purchase goodies from Funky Kong's shop. |

|
Heart | Hearts compose the Kongs' health meter. If they get damaged once and therefore lose one point from their meter, they can replenish it with one heart found along the way. |
| Red Balloon | Red Balloons grant supplementary tries for the player. A few can be found floating in the air, but they can mostly be acquired by performing tasks. After the character stomps on eight enemies in a row, he stops receiving Banana Coins and gets rewarded Red Balloons instead. | |

|
KONG Letters | These are precious square pieces, each having one of the letters "K", "O", "N" and "G" printed on them. In conclusion, there are four of these items in each level of the game (excluding bonus and boss levels), and are placed orderly in each stage to spell the word "KONG". Their sole role in the game is to unlock the bonus levels of each world, given that all the KONG Letters of the respective world are collected. |

|
Puzzle Piece | Puzzle Pieces, as items, do not affect gameplay in any way, and only unlock concept artwork available by accessing the "Extras" menu. As challenge creators, they are a great factor of gameplay, as they are usually placed in the most secretive zones - for example, behind walls that stand between the player and actual paths; they also appear after completing a bonus stage, or after collecting occasional sets of bananas. |

|
Air bubble | Air bubbles are generated by sunken diving helmets. While underwater, the Kongs have an air gauge that gradually depletes. They should pop air bubbles to gain and restore air. |

|
Slot Machine Barrel | The main objective of most levels is to hit the Slot Machine Barrel. It contains a roulette that decides what prize will the barrel reveal upon getting destroyed. The roulette only activates when the Kongs are very close to the Slot Machine Barrel. |
|
Mysterious relic | Mysterious relics are similar to Rare Orbs from the previous game; they are required to access a secret world, Secret Seclusion. Six of them are obtained by completing the temple levels in the game, while the seventh and final one is obtained after beating the game. |
Projectiles[edit]
| Image | Item | Description |
|---|---|---|

|
Barrel | Donkey Kong's signature object is present in this game. It can be heaved and carried by any Kong until the player decides to let it loose, which means to make the Kong throw it. After being thrown, the barrel rolls on the ground and knocks out every foe in its path until it smashes into a wall. |

|
Kong Barrel | Kong Barrels are more common than regular barrels. In the standard game mode and Time Trial mode, Kong Barrels contain either Diddy, Dixie, or Cranky Kong, each character having unique powers. If Donkey Kong lacks a partner, he can redeem him by throwing and breaking such barrels (otherwise, these barrels are empty) if he encounters them. As weapons, Kong Barrels function differently from regular barrels, in that they break instantly upon contact with any platform, without rolling. In Hard Mode, since the player can only make use of one character, all Kong Barrels are empty and useful only as weapons. |
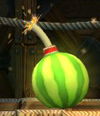
|
Watermelon Fuse Bomb | Bombs that take the form of spherical melons are called Watermelon Fuse Bombs. After pulling certain Item Handles, the Kong extracts such explosives from the ground; enemies called Boom Birds, as well as Harolds, wield these bombs and can be considered sources of explosives too. Watermelon Fuse Bombs can be carried and hurled just like barrels, but they detonate after several moments of fuse burning. Their explosions can take out groups of enemies and/or cracked surfaces and blocks. |

|
Water Sack | Water Sacks are found in stacks on the ground. They can be picked up and thrown one at a time. As such, they hurt any enemy that gets hit, but they also extinguish fiery enemies or spots due to being water holders. |
Miscellaneous[edit]
| Image | Item | Description |
|---|---|---|
 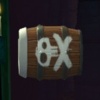
|
Barrel Cannon | A levitating cannon, shaped like a barrel. Barrel Cannons fire the Kongs across long distances, doing so at the player's signal. Common Barrel Cannons feature a white arrow imprinted on them. A type of Barrel Cannon that self-destructs as it blasts the Kongs features a skull and crossbones symbol instead. |
|
Blast Barrel | A floating barrel-shaped cannon. It will automatically shoot the Kongs shortly after they mount it, without the player's input. The barrel is marked by the white outline of an explosion; Blast Barrels that self-destruct also display a skull inside the outline. |
|
Bells | Bells come in various shapes, sizes, and colors. Usually, they are used to produce items. This can be done by ground-pounding or performing a similar action in front of one, or by knocking it with Rambi, depending on the situation. However, only the silver bells found in Wing Ding are mandatory to use, as they act as switches that reveal part of the path ahead. |
|
Burlap Hanging Sack | A heavy sack made of cloth that lies hanged with a long rope. The rope's upper end is never seen. Hanging sacks can be broken open with projectiles to reveal treasures. |
| Climbing grass | Vegetation wrapped on walls, ceilings, and platforms. It can be grasped and used to escalate said surfaces. | |
| Collapsible Underwater Grass | Underwater grassy plants that retract their stems to reveal items when approached. | |

|
Cracked Block | Cracked Blocks are fragile, blocky objects that usually contain items. The Kongs can mount these blocks and break them with three consecutive ground pounds in order to obtain the items inside, if any. |

|
Flying banana | Entities conducting long trails of bananas. They hide under Item Handles, and once pulled out of the ground, they quickly start flying above the Kongs. They hold prizes, which they will reveal only after all bananas from their trails are collected. Flying bananas leave the screen after a few moments. |
  
|
Item Containers | Objects that come in many different shapes and sizes. If pounded, they collapse and reveal collectibles of great diversity (Banana Bunches, Red Balloons, Puzzle Pieces, etc.) |

|
Item Handle | Item Handles are levers that are always stuck to the ground. They can be pulled upwards, but not all of them have the same role. Most of them keep items of all sorts underground, and after the Kongs exert a force on them, they reveal the items. Nevertheless, other handles are essential to the gameplay, since they bring about events such as the creation of platforms. |
|
Jelly block | Jelly blocks are large and highly elastic objects on which the Kongs can bounce. When they are encountered in rows, they usually contain items. To get them out of a jelly block, the Kongs have to bounce on any other adjacent jelly block. These bouncy mold objects come in three colors: purple (regular), green (with higher elasticity, thus offering better bouncing capabilities), and blue (causing a moving structure to work as soon as they are pressed). |
|
Portal | Portals are found in a few levels, in areas which are accessible only with the use of one character's powers, such as Dixie Kong's ponytail twirl or Cranky's cane bounce. They are formed by glowing rune stones arranged in a circular pattern, and lead to hidden Slot Barrel Machines, opening the path to secret levels. |

|
Purple Flower Platform | A large plant that has grown high above the ground. Its flower faces the sky above and can be stepped on, but will tilt under the Kongs' weight. It would soon wither and let the characters slip off, reverting to its initial state after a while. |
|
Rambi Crate | A small crate identified by the rhino head clipped onto it. It can be hopped on and pounded to break it, revealing Rambi. |
| Spinning Platform | A rotatable surface that is hidden amongst the usual ground. Spinning Platforms hide pits that transport the heroes either into bonus areas or merely into hidden areas that contain loot. They can be rotated with a ground pound. | |
| Swinging vine | A long and narrow plant hanging from the ceiling. Vines are encountered motionless or swinging, and can be climbed to reach higher areas, or jumped from one to another to pass wide pits. | |
|
Snowflake Shield | An object that is usually found blocking access to hidden areas and, sometimes, even the main path. They can be destroyed with a throwable object or with Rambi. |
| Spring Platform | A wooden contraption floating on water. It has two springs underneath. When pounded, this platform will press the springs and launch the Kongs up. | |
|
Venus Trap Platform | An upside-down carnivorous plant with a leaf crown serving as a platform. When the Kongs or an enemy walk under the plant, it drops down in an attempt to attack them. While down, the Kongs can jump on the plant's platform and rise along with it as the plant retreats to its initial position. |

|
Vine-Triggered Platform | A platform that normally stays in a vertical position, but drops horizontally whenever the Kongs tension its vine connected underneath. The platform reveals collectibles whenever it drops down. It is timed, however, and will go back to its vertical position after a while. |
| Zip-Line Vine | A straight, slightly inclined vine traced across the screen. The Kongs can grab the vine and slide along it, being able to jump or drop from it at any time. |
Vehicles[edit]
| Image | Item | Description |
|---|---|---|

|
Mine Cart | Mine Carts make up the main gameplay gimmick in a few levels, as they transport the Kongs on rail tracks. Players can jump over dangerous gaps or other obstacles while their character is in the Mine Cart. It moves forward automatically, requiring the player to dodge every hazard on the way in time. In Sawmill Thrill, the Mine Cart is temporarily replaced with a Log Canoe; in addition to having the properties of the Mine Cart, the object can also float on water and be used as a boat. |

|
Rocket Barrel | An aerodynamic machine very similar in concept with the mine cart, the rocket barrel moves forward at a constant velocity. It transports the Kongs throughout very steep tunnels or over wide chasms, using its fuel power. It can only be controlled to ascend or descend. |
Worlds and levels[edit]
The game has seven total islands, consisting of six "main" islands and one secret island (Secret Seclusion), which serve as the game's worlds. Each island has 6-8 levels (at least two are optional), a Key Temple, a Funky's Fly 'n' Buy, and a boss level at the end. Some levels have a secret exit, and by reaching it, the Kongs unlock an alternate path from the world map that leads to another level.
The table below lists all of the worlds and levels in the game, including their respective music theme(s) and a number of Puzzle Pieces. Since not every musical composition in the game has been given an official name, several of the ones shown are either described as arrangements from past Donkey Kong games, or merely marked as conjectural with a pointy line.
Note: tracks succeeded by an asterisk (*) in the following table are given their titles in Super Smash Bros. for Wii U.
| Worlds and levels | ||||||
|---|---|---|---|---|---|---|
| Lost Mangroves | ||||||
| Level number | Level name | Puzzle Pieces | Music theme(s) | |||
| 1-1 | Mangrove Cove | 9 | "Mangrove Cove" "Mangrove Cove Underwater" | |||
| 1-2 | Shipwreck Shore | 9 | "Shipwreck Shore" | |||
| 1-3 | Canopy Chaos | 7 | "Mangrove Swing" | |||
| 1-4 | Trunk Twister | 5 | Trunk Twister theme | |||
| 1-A | Zip-Line Shrine | 5 | A cover of "Jungle Hijinxs" from Donkey Kong Country Returns, very similar in tone to "Jungle Jitter" from the Game Boy Advance version of Donkey Kong Country 3 | |||
| 1-B | Busted Bayou | 9 | Busted Bayou theme | |||
| 1-K | Swinger Flinger | 5 | A rearrangement of "King of Cling" from Donkey Kong Country Returns | |||
| 1-BOSS | BOSS LEVEL: Big Top Bop | 0 | Big Top Bop theme | |||
| Autumn Heights | ||||||
| Level number | Level name | Puzzle Pieces | Music theme | |||
| 2-1 | Windmill Hills | 9 | "Windmill Hills" | |||
| 2-2 | Mountain Mania | 7 | Mountain Mania theme | |||
| 2-3 | Horn Top Hop | 5 | Horn Top Hop theme, with several variations depending on the location of the player in the level | |||
| 2-4 | Sawmill Thrill | 5 | "Sawmill Thrill" | |||
| 2-5 | Alpine Incline | 5 | "Alpine Incline" | |||
| 2-6 | Wing Ding | 5 | Wing Ding theme | |||
| 2-A | Crumble Cavern | 7 | "Cave Dweller Concert Returns" | |||
| 2-B | Rodent Ruckus | 5 | "Rodent Ruckus" A cover of "Mine Menace" from Donkey Kong Country Returns | |||
| 2-K | Bopopolis | 5 | "Swinger Flinger" * | |||
| 2-BOSS | BOSS LEVEL: Mountaintop Tussle | 0 | Mountaintop Tussle theme | |||
| Bright Savannah | ||||||
| Level number | Level name | Puzzle Pieces | Music theme(s) | |||
| 3-1 | Grassland Groove | 9 | Grassland Groove theme | |||
| 3-2 | Baobab Bonanza | 7 | "Baobab Bonanza" | |||
| 3-3 | Frantic Fields | 5 | "Run, Rambi! Run! Returns" | |||
| 3-4 | Scorch 'n' Torch | 7 | "Scorch 'n' Torch" | |||
| 3-5 | Twilight Terror | 5 | A cover of "Stickerbush Symphony" from Donkey Kong Country 2 "Twilight Terror" | |||
| 3-6 | Cannon Canyon | 5 | "Savannah Pop" | |||
| 3-A | Rickety Rafters | 5 | "Savannah Pop" | |||
| 3-B | Bramble Scramble | 7 | "Savannah Pop" | |||
| 3-K | Precarious Pendulums | 5 | A rearrangement of "King of Cling" from Donkey Kong Country Returns | |||
| 3-BOSS | BOSS LEVEL: Triple Trouble | 0 | Triple Trouble theme | |||
| Sea Breeze Cove | ||||||
| Level number | Level name | Puzzle Pieces | Music theme(s) | |||
| 4-1 | Deep Keep | 7 | "Deep Keep" "Funky Waters" "Aquatic Ambiance Returns" (DKC:TF version) | |||
| 4-2 | High Tide Ride | 5 | A remixed version of the title screen theme | |||
| 4-3 | Amiss Abyss | 9 | "Cave Dweller Concert Returns" "Funky Waters" | |||
| 4-4 | Irate Eight | 5 | A cover of "Lockjaw's Saga" from Donkey Kong Country 2 "Irate Eight" | |||
| 4-5 | Sea Stack Attack | 7 | "Mangrove Swing" | |||
| 4-6 | Current Capers | 5 | "Aquatic Ambiance Returns" (DKC:TF version) | |||
| 4-A | Rockin' Relics | 9 | A cover of "Lockjaw's Saga" from Donkey Kong Country 2 | |||
| 4-B | Shoal Atoll | 5 | "Aquatic Ambiance Returns" (DKC:TF version) | |||
| 4-K | Spinning Spines | 5 | "Swinger Flinger" * | |||
| 4-BOSS | BOSS LEVEL: Fugu Face-Off | 0 | Fugu Face-Off theme | |||
| Juicy Jungle | ||||||
| Level number | Level name | Puzzle Pieces | Music theme(s) | |||
| 5-1 | Harvest Hazards | 7 | "Swing Juice" | |||
| 5-2 | Reckless Ride | 5 | "Swing Juice" A cover of "Mine Menace" from Donkey Kong Country Returns | |||
| 5-3 | Fruity Factory | 5 | "Juicy Groove" | |||
| 5-4 | Panicky Paddles | 9 | "Swing Juice" An underwater cover of "Swing Juice" | |||
| 5-5 | Jelly Jamboree | 7 | "Fruit Bounce" | |||
| 5-6 | Frosty Fruits | 5 | "Frosty Fruits" A cover of "In a Snowbound Land" from Donkey Kong Country 2 | |||
| 5-A | Beehive Brawl | 7 | "Fruit Bounce" | |||
| 5-B | Jammin' Jams | 5 | Jammin' Jams theme | |||
| 5-K | Platform Problems | 5 | A rearrangement of "King of Cling" from Donkey Kong Country Returns | |||
| 5-BOSS | BOSS LEVEL: Punch Bowl | 0 | Punch Bowl theme | |||
| Donkey Kong Island | ||||||
| Level number | Level name | Puzzle Pieces | Music theme | |||
| 6-1 | Homecoming Hijinxs | 5 | "Snowmads Theme" | |||
| 6-2 | Seashore War | 5 | "Seashore War" | |||
| 6-3 | Aqueduct Assault | 5 | Aqueduct Assault theme | |||
| 6-4 | Blurry Flurry | 7 | A cover of "Mine Menace" from Donkey Kong Country Returns | |||
| 6-5 | Forest Folly | 5 | "Freezie Breezie" | |||
| 6-6 | Cliffside Slide | 5 | "Snowmads Theme" | |||
| 6-7 | Frozen Frenzy | 5 | "Frozen Frenzy" | |||
| 6-8 | Meltdown Mayhem | 5 | "Snowmads Theme" | |||
| 6-A | Dynamite Dash | 5 | A remix of "Run, Rambi! Run! Returns" | |||
| 6-B | Icicle Arsenal | 7 | "Freezie Breezie" | |||
| 6-K | Slippy Spikes | 5 | "Swinger Flinger" * | |||
| 6-BOSS | BOSS LEVEL: Volcano Dome | 0 | Volcano Dome theme | |||
| Secret Seclusion | ||||||
| Level number | Level name | Puzzle Pieces | Music theme | |||
| 7-1 | Levitation Station | 5 | An extended cover of the ending theme from Donkey Kong Jr. | |||
| 7-2 | Rocket Rails | 5 | An extended cover of the ending theme from Donkey Kong Jr. | |||
| 7-3 | Crazy Clouds | 5 | An extended cover of the ending theme from Donkey Kong Jr. | |||
Marketing[edit]
- For images related to these promotional materials, see Gallery:Donkey Kong Country: Tropical Freeze.
On February 7, 2014, Nintendo launched the Banana Mania Contest for residents of Canada. In a video posted on YouTube and presented by Canadian actor Ajay Fry, they were challenged to guess how many bananas are in a solid block of ice for a chance to win a four day trip to the Whistler Blackcomb ski resort, as well as a Wii U Deluxe Set system bundled with Donkey Kong Country: Tropical Freeze, a Wii Remote controller and a Nunchuk.[12]
One week before the game's initial launch, on February 13, 2014, Nintendo celebrated Valentine's Day on their official Facebook page by posting various Donkey Kong-themed greeting cards. The photographs contain affectionate captions with word plays, and are accompanied by artwork for the game.[13]
On the day of the game's initial release, Nintendo of America pretended to make a deal with Cranky Kong to let him lead their Twitter account and post tweets. Over the course of the day, the character would interact with fans by answering questions, as well as using image macros of himself, parodying similar Internet memes in an attempt to approach the youth culture.[14] However, the marketing campaign was mostly met with negativity from the fans. The final tweet attributed to Cranky Kong is the game's launch trailer.[15]
On the Play Nintendo website, the game is the subject of one of the questions in a skill quiz on Nintendo Selects games. The website also features several other activities focused entirely on the game, but these are promotions for the Nintendo Switch version.
Reception[edit]
The game was primarily praised by critics for its graphics, with Thomas Whitehead of Nintendo Life describing the series' upgrade to HD visuals as "impressive" and the game, a "visual achievement". He found the game to have engaging stages as well as fresh and eccentric environments, distinctly bringing out Autumn Heights and Bright Savannah as examples. He also found the game to have personality and overall attention to detail, conferred by character design and humorous animation, and opined that the game has charm, partially attributed to David Wise's soundtrack, whom he described as an "expert ear".[16]
Jose Otero from IGN distinguished the game from other two-dimensional platformers for a sense of scale and journey, accomplished by what Otero opines as a brisk variety in level design. He liked what he saw as a realistic sense of weight in the playable characters, commenting that it affects their movements. The game was once again praised for attention to detail, and he opined Donkey Kong Country: Tropical Freeze to have tantalizing backgrounds and a dynamic camera enhancing the player's perspective. He also believed that the game's issue of being very difficult is softened by the large amount of extra lives that can be collected. Otero likewise praised the boss fights as unique, and considered the punching segment at the end of each one as a "cool-payoff" and an homage to Donkey Kong Jungle Beat. Conversely, he criticized the use of the GamePad, which he felt was underused.[17]
Chris Carter of Destructoid complimented the HD visuals and regarded the game as one of the best-looking games in the Wii U library. He opined that David Wise's contribution is a step-up from the soundtrack of Donkey Kong Country Returns. He also lauded the game's swimming mechanics and large amount of what he believed to be painstakingly-crafted levels.[18]
Danielle Riendeau of Polygon appreciated the game as a rewarding experience, in spite of its difficulty. In effect, Riendeau likened the reward to playing the game itself, believing it to have "imaginative layouts" and a perfect balance between new enemies and energetic platforming. The co-op play was praised as a fun and chaotic experience.[19]
Mark Walton of GameSpot strayed from praising the game's visuals and directed criticism towards the level design. He implied that the game is a downgrade from its predecessors for staying too close to the formula without maintaining the same quality ("your journey gets very familiar, very quickly"). He commented on what he opined as a lack of flow and inventiveness, which he claims to define the best 2D platformers. In particular, Walton was displeased by the game's difficulty, naming it a frustrating and cheap experience based on trial and error. However, he complimented the bosses and vehicle-riding sections, which in his view were unique, unusual, and contrasted with the "monotonous" levels.[20]
| Reviews | |||
|---|---|---|---|
| Reviewer, Publication | Score | Comment | |
| Thomas Whitehead, Nintendo Life | 9/10 | "Donkey Kong Country: Tropical Freeze utilises the Wii U’s graphical capabilities beautifully, with levels both stunning in design and looks, and impressive set-pieces that never skip a frame and can test any gamer’s skills. As a single player experience it is near flawless, but the precision of the level design can lead the often fun multiplayer into moments of chaos." | |
| Jose Otero, IGN | 9.0/10 | "Donkey Kong Country Tropical Freeze is a fun and challenging platformer that isn’t afraid to make you work hard." | |
| Chris Carter, Destructoid | 10/10 | "10s aren't perfect, since nothing is, but they come as close as you could get in a given genre. The new leader to beat in its sector, we're talking pure ecstasy." | |
| Danielle Riendeau, Polygon | 8.5/10 | "Donkey Kong Country: Tropical Freeze could've easily been a me-too sequel. Its much-loved predecessor reinvigorated the series and did so much with the 2D framework that Retro could've released a bunch of new stages and called it a day. But Tropical Freeze adds intelligently to the formula, with new characters that imbue subtle nuance to the gameplay, a better-tuned challenge level and an increased emphasis on replay value. These features make Tropical Freeze consistently worth coming back to, and mark it as a high point for the series." | |
| Mark Walton, GameSpot | 6/10 | "If the regular levels were as inventive as the boss battles, then Tropical Freeze would be a surefire hit, or at least a game that demands more of your attention. […] As it stands, this a[sic] sometimes fun but mostly uninspired and unimaginative entry in the Donkey Kong series." | |
| Aggregators | |||
| Compiler | Platform / Score | ||
| Metacritic | 83% | ||
| GameRankings | 84.46% | ||
Sales[edit]
In the United States, Tropical Freeze sold more than 130,000 units (both digital and physical copies) in its first eight days on the market according to Nintendo and the US sales analysis firm NPD.[21] In Japan, the Wii U version sold 43,301 units for its first week and went on to sell a total of 120,086 copies according to Media Create data.[22][dead link]
Gallery[edit]
- For this subject's image gallery, see Gallery:Donkey Kong Country: Tropical Freeze.
Donkey Kong swinging on a vine with Diddy Kong, Dixie Kong, and Cranky Kong
Snowmad ship
Media[edit]
- For a complete list of media for this subject, see List of Donkey Kong Country: Tropical Freeze media.
| File info |
| File info |
Staff[edit]
- Main article: List of Donkey Kong Country: Tropical Freeze staff
- Main article: List of Donkey Kong Country: Tropical Freeze (Nintendo Switch) staff
The game's producers were Michael Kelbaugh from Retro Studios and Satoru Iwata, Kensuke Tanabe, and Risa Tabata from Nintendo of Japan, all of whom were previously involved in the production of Donkey Kong Country Returns. Shigeru Miyamoto's involvement as the game's supervisor was less significant than during the development of the previous game.[23] The game's art direction was lead by Vince Joly like its predecessor, and Stephen Dupree was the lead game designer.
Donkey Kong Country: Tropical Freeze notably marks the return of long-time Donkey Kong Country composer David Wise, whose last soundtrack for the series was for the Game Boy Advance version of Donkey Kong Country 3: Dixie Kong's Double Trouble! in 2005. Wise was specifically brought on board by Retro Studios president Michael Kelbaugh.[24]
Development and release[edit]
The game was first announced during a Nintendo Direct presentation at E3 2013, where it was revealed that Kensuke Tanabe was the main director of the game. He was also responsible for the inclusion of the new "pluck" ability, which was inspired by the mechanics of Super Mario Bros. 2. The game was announced to be released in November of that same year, before being pushed back to December 6th in order to be released in time for the holiday season. Finally, during the October 2013 Nintendo Direct, Satoru Iwata announced that Tropical Freeze would be delayed to February 2014 in order to optimize the gaming experience, but the specific date would not be revealed until December 7th at the VGX Awards.[25]
The game's soundtrack was produced by returning composer David Wise (who had previously worked on the soundtrack for the previous Donkey Kong Country games except for Returns), with some help from Daisuke Matsuoka, Minako Hamano, Shinji Ushiroda, and Riyu Tamura. The team was supervised by Kenji Yamamoto, who had provided the soundtrack for Donkey Kong Country Returns.
Pre-release and unused content[edit]
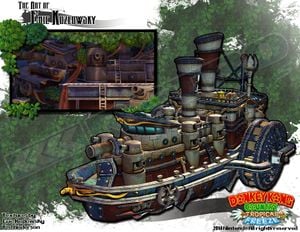
Unused ideas[edit]
According to creative director Vince Joly, more Animal Friends were intended to appear in this game, including Enguarde. However, the development team decided against adding them as they felt that the playable Kongs provided enough character variety and gameplay mechanics on their own.[26]
Early build[edit]
The HUD in E3 2013 footage of the game was slightly different from the final version, as the health counter lacked the wooden plank graphic behind the hearts and the Kong POW meter was not shown or implemented.[27]
Additionally, the second and third worlds are swapped in internal data, which can be seen in the E3 2013 demo, where the level Cannon Canyon (known as "Cannon Canyons") was located in the second world rather than the third.
Level template[edit]
A steamboat model was built to serve as the basis for all mechanical structures present in Lost Mangroves. The steamboat itself is not fully used in the game, but a few instances appear in Trunk Twister.[28]
Concept artwork[edit]
The game contains unlockable concept artwork, a full list of which can be seen here complete with indications on which concepts have been used and which were not. Below are several examples of artwork with concepts that were not implemented in the final game.
Glitches[edit]
Inaccessible level[edit]
Prior to update Version 1.1.0, the level 3-4: Scorch 'n' Torch would have a chance to not open after the completion of 3-3 Frantic Fields. On April 3, 2014, an update was released to fix this issue.[29]
Levitating DK[edit]
In Levitation Station, if DK jumps towards a block as it is forming, he may hang in the air beside it until it is ready to return to the background.[30]
Pompy flying sideways[edit]
When fighting Pompy using Donkey Kong and Cranky Kong as a partner, it is possible to hit Pompy just after the cutscene ends. Using Cranky Kong's Cane Bounce just before Pompy begins rolling will cause him to fly sideways with an inexplicable splash in the water underneath.[31]
Schnautzel falls into background[edit]
When a player finds a Schnautzel near a Tuff Fluff in Horn Top Hop, they need to make sure they that it is slightly facing the background and keep rolling into it or throw another enemy at it. If done correctly, the Schnautzel is knocked out falling into the background instead of the foreground. This glitch can be done in both versions of the game.
References to other media[edit]
- Donkey Kong: Donkey Kong's 8-bit sprite, holding a Wii U GamePad, appears at the end of Aqueduct Assault stage.
- Donkey Kong Jr.: The levels in Secret Seclusion feature music that originated from this game.
- Donkey Kong 3: At the second checkpoint of Fruity Factory, the background features a replica of the blue greenhouse.
- Metroid series: Samus Aran's Gunship appears in the background of Busted Bayou.
- Super Mario Bros. 3: A tank resembling those from Bowser's military forces, originating in the said game, can be seen in the background of Frosty Fruits. A P-Wing emblem can be found on the side of a plane in the level Trunk Twister.
- Donkey Kong Country: The music theme "Aquatic Ambience"[32] is covered. In the Canopy Chaos level, Cranky's record player from this game can be found and when ground pounded in front of it, it plays this games' title theme.[33] The music theme "Jungle Groove" has two covers: one during the loading screens between levels and another during some levels. Part of the music in the level Frozen Frenzy contains a cover version of the music theme "Fear Factory". Part of the music in the Crumble Cavern level contains a cover version of "Cave Dweller Concert" from this game. A small section of the bonus theme, "Bonus Room Blitz", plays when clearing a stage.
- Donkey Kong Country 2: Diddy's Kong Quest: Dixie Kong returns from this game which marked her first appearance. A bramble level, a swamp level and a beehive level return. The music theme Lockjaw Saga is covered.[34] Part of the music in the Frosty Fruit level contains a cover version of "In a Snowbound Land" music from this game. The music theme Stickerbush Symphony is covered. Part of the music in the level Frantic Fields contains a cover version of "Run, Rambi! Run!" from this game. One of Dixie Kong's idle animations in multiplayer involves her playing some air guitar could be a possible reference to her playing her electric guitar from this game. [35]
- Donkey Kong Country 3: Dixie Kong's Double Trouble!: Water skipping and lightning from Lightning Lookout return.
- Donkey Kong Country television series: Exclusively in the Nintendo Switch version's Funky mode, upon leaving the shop every once in a while, Tawks will utter "Give 'em the old banana slamma, dude!", referencing Donkey Kong's catchphrase from the animated series.[36]
- Mario Kart Wii: Funky Kong's emblem from this game reappears on a plane in the background of Big Top Bop.
- Donkey Kong Country Returns: Being the direct sequel to this installment, the gameplay is similar to its predecessor. The levels in Secret Seclusion have a remix of the music from the single Golden Temple stage in this game (which itself was remixed from Donkey Kong Jr.). Also, the design of Donkey Kong Island is based on its appearance in this game; all of the worlds from this game can be seen. Finally, a number of sound effects from this game are used. In the level Blurry Flurry, Mega Squeekly has a cameo still alive in the background while frozen solid in an iceberg.[37] The giant Eyeball from Handy Hazards makes a cameo in the background of the level "Frozen Frenzy" frozen in place.[38] Mugly makes a cameo in the diorama of Donkey Kong Island frozen under the ground. Also, one of the logos seen in the cockpit of the plane Donkey Kong crashes into at the beginning of the game has the logo for this game. Snaps, an enemy from this game, makes a cameo on the title screen.
- Donkey Kong Country Returns 3D: The Crash Guard, Green Balloon, and Portable DK Barrels originated in this game. Also, this is one of the games Donkey Kong plays on his Nintendo 3DS during his idle animation. He is heard in Cranky Kong's Shop, as well as activating a secret path in a level.
- Super Mario 3D Land: One of the games Donkey Kong plays on his Nintendo 3DS during his idle animation is this game. During the animation, he can be heard passing a Goomba and collecting a coin.
- Mario Kart 7: Donkey Kong sometimes plays it during his idle animation. He is heard playing as himself, picking up a Super Leaf item, and avoiding a Green Shell.
References in later games[edit]
- Super Smash Bros. for Wii U: A number of Snowmads appear as Trophies. Additionally, the music that plays in Mangrove Cove and in every second Kong Temple level are playable in the Jungle Hijinxs stage under the names "Mangrove Cove" and "Swinger Flinger".
- Super Smash Bros. Ultimate: Lord Fredrik appears as a spirit, and Dixie Kong's spirit uses her artwork from Donkey Kong Country: Tropical Freeze.
- Mario Kart Tour: Funky Kong and Dixie Kong's artworks are reused in this game. Dixie Kong's emblem in this game is derived from the design of the Dixie Kong Barrel.
Trivia[edit]
- The game features a variety of idle animations depending on the character combination in use, featuring a larger variety than all of its four predecessors:
- Donkey Kong alone: Briefly scratches his armpit after a short time. If the player waits a little longer, he will look around and start playing a blue Nintendo 3DS XL, with the game being either Super Mario 3D Land, Mario Kart 7, Animal Crossing: New Leaf, and Donkey Kong Country Returns 3D. In the Nintendo Switch port's Funky Mode, he plays a Nintendo Switch instead.
- Diddy Kong alone: Diddy's animations are all in a random order. He might remove his cap and sing dramatically, or stretch while making one of three different yawning noises.
- Dixie Kong alone: Dixie's animations are all in random order. She will either do a handstand, (using one of three different voice clips each time), or play air-guitar as a reference to Donkey Kong Country 2: Diddy's Kong Quest.
- Cranky Kong alone: Cranky only has one animation. He will stand in place, using his cane to dig in his ear briefly.
- DK and Diddy: Diddy will help Donkey check to see if the coast is clear, and then sit on his back, constantly switching which of his shoulders to grip as he watches him play.
- DK and Dixie: Dixie will help Donkey look around just like Diddy. When he starts playing the 3DS, Dixie will start grooming DK.
- DK and Cranky: Unlike the other partners, Cranky does not help DK check if the coast is clear. As Donkey Kong plays his 3DS, Cranky will show disinterest in watching and read a newspaper instead.
- During the in-game cutscenes, the character animations depend on which character(s) are being used (e.g. Dixie slowing her fall with her ponytail and Cranky rolling a few times before falling, as opposed to Diddy simply crashing into the ground).
- This is the first original Donkey Kong Country game to be reissued for a handheld console that is also a home console (in this case, the Nintendo Switch).
- The game's plot bears a strong resemblance to that of Donkey Kong in: Banana Day 24, a Club Nintendo comic released exclusively in Germany.
- This is the first Donkey Kong Country game since Donkey Kong Country 3: Dixie Kong's Double Trouble! in which the banana hoard does not appear, although it is mentioned in the Wii U Nintendo eShop description.[39]
Names in other languages[edit]
| Language | Name | Meaning | Notes |
|---|---|---|---|
| Japanese | ドンキーコングトロピカルフリーズ[?] Donkī Kongu Toropikaru Furīzu |
Donkey Kong Tropical Freeze |
References[edit]
- ^ Reeves, Ben (December 24, 2013). Nintendo Answers Our Burning Questions. Retrieved May 28, 2024.
- ^ Nintendo Direct 10.01.2013 - Nintendo Official Site. Nintendo.com (American English). Retrieved May 28, 2024.
- ^ http://www.youtube.com/watch?v=CnBM6dDIQnc
- ^ a b NINTENDO UNVEILS NEW DETAILS ON MARIO KART 8 AND SUPER SMASH BROS.. Nintendo.com (American English). Archived December 19, 2013, 18:04:33 UTC from the original via Wayback Machine. Retrieved May 28, 2024.
- ^ Bonamin, Kadu (March 2, 2014). Lançamento oficial de Donkey Kong Country: Tropical Freeze no Brasil deve acontecer em 20 de março. Reino do Cogumelo. Retrieved May 28, 2024.
- ^ Nintendo Australia (November 14, 2016). ‘Tis the season for an exclusive Wii U bundle of family fun!. Nintendo of Australia (Australian English). Archived November 17, 2016, 14:57:50 UTC from the original via Wayback Machine. Retrieved May 28, 2024.
- ^ Makuch, Eddie (October 1, 2013). Donkey Kong Country: Tropical Freeze delayed. GameSpot. Retrieved May 28, 2024.
- ^ Kim, Matt (April 30, 2018). Tropical Freeze Abruptly Disappears From Wii U eShop Ahead of Switch Release. USGamer. Archived May 1, 2018, 23:30:46 UTC from the original via Wayback Machine. Retrieved May 28. 2024.
- ^ Donkey Kong Country: Tropical Freeze instruction manual (PDF). Page 15.
- ^ Wii U Developer Direct - Donkey Kong Country: Tropical Freeze @E3 2013. YouTube (American English). Retrieved May 28, 2024.
- ^ Donkey Kong Country: Tropical Freeze - World Map & Funky Kong (Wii U Gameplay). YouTube (English). Archived January 21, 2014, 20:13:47 UTC from the original via Wayback Machine. Retrieved May 28, 2024.
- ^ Banana Mania Contest | Concours Fan de bananes. Nintendo.com (American English). Archived March 8, 2014, 17:00:12 UTC from the original via Wayback Machine. Retrieved May 28, 2024.
- ^ Nintendo of America (February 13, 2014). Facebook. Retrieved May 28, 2024.
- ^ Whitehead, Thomas (February 21, 2014). Feature: When Cranky Kong Took On Twitter. Nintendo Life. Retrieved May 28, 2024.
- ^ NintendoAmerica (February 20, 2014). I need a nap. Go do something useful like watching the new trailer for #DKCTF!. X. Retrieved May 28, 2024.
- ^ Whitehead, Thomas (February 17, 2014). Review of Donkey Kong Country: Tropical Freeze. Nintendo Life. Retrieved May 28, 2024.
- ^ Otero, Jose (February 17, 2014). Donkey Kong Country: Tropical Freeze review. IGN. Retrieved May 28, 2024.
- ^ Carter, Chris (February 17, 2014). Review: Donkey Kong Country: Tropical Freeze. Destructoid. Retrieved May 28, 2024.
- ^ Riendeau, Danielle (February 17, 2014). Donkey Kong Country: Tropical Freeze Review: Summer Boy. Polygon. Retrieved May 28, 2024.
- ^ Walton, Mark (February 17, 2014). Donkey Kong Country: Tropical Freeze review—Frozen in Time. GameSpot. Retrieved May 28, 2024.
- ^ Matos, Xav De (March 13, 2014). Donkey Kong Country: Tropical Freeze sales reach 130K in eight days. Engadget. Retrieved May 28, 2024.
- ^ Games Data Library. Retrieved May 28, 2024.
- ^ Parish, Jeremy (June 27, 2013). Donkey Kong Country Tropical Freeze Full E3 Interview. USgamer. Archived June 29, 2013, 21:44:21 UTC from the original via Wayback Machine. Retrieved May 28, 2024.
- ^ Terry, Stefan (March 5, 2014). David Wise Explains How He Got His Job on Tropical Freeze. Gamnesia. Archived March 9, 2016, 09:54:58 UTC from the original via Wayback Machine. Retrieved May 28, 2024.
- ^ Makuch, Eddie (October 1, 2013). Donkey Kong Country: Tropical Freeze delayed. GameSpot. Retrieved May 28, 2024.
- ^ NE_Brian (January 21, 2023). Donkey Kong Country: Tropical Freeze almost brought back Enguarde. Nintendo Everything. Retrieved May 28, 2024. (Archived January 21, 2023, 05:04:00 UTC via Wayback Machine.)
- ^ Nintendo of America (Juen 11, 2013). Wii U - Donkey Kong Country: Tropical Freeze E3 Trailer. YouTube (American English). Retrieved May 28, 2024.
- ^ "This is one of the very first assets I made for Donkey Kong Country Tropical Freeze. It became the basis for all of the structures in the Mangrove Island […] I'm pretty happy with this piece and even though it is an early one and not fully featured in the game (you can see it in a few instances in Trunk Twister). I am happy its pieces got so much use throughout the game!" – Eric Kozlowsky (February 27, 2014). It's on like Kong!. Land of KoZ (English). Retrieved May 28, 2024.
- ^ How to Update Donkey Kong Country: Tropical Freeze (Wii U). Nintendo.com (American English). Retrieved May 28, 2024.
- ^ MasaeAnela (November 29, 2015). Donkey Kong Country Tropical Freeze - Part 42: "BONUS 1: Above the Clouds" (05:52). YouTube. Retrieved May 28, 2024.
- ^ movefish (June 11, 2019). Funky Mode 100% Speedrun in 2:21:54 [Donkey Kong Country: Tropical Freeze (00:13:33). YouTube. Retrieved May 28, 2024.
- ^ GameXplain (January 23, 2014). 5 Music Tracks from Donkey Kong Country: Tropical Freeze's Soundtrack (Including Aquatic Ambiance!). YouTube. Retrieved May 28, 2024.
- ^ officialnintendomag (February 5, 2014). Top 10 Moments in Donkey Kong Country: Tropical Freeze. YouTube. Retrieved May 28, 2024.
- ^ GameXplain (January 25, 2014). YouTube. Archived January 27, 2014, 09:10:24 UTC from the original via Wayback Machine. Retrieved May 28, 2024.
- ^ GameXplain (February 11, 2014). Cool Bits - Donkey Kong Country: Tropical Freeze's Idle Animation Secrets - 3DS, Partners, & More!. YouTube. Retrieved May 28, 2024.
- ^ Nintendo Life (April 25, 2018). Weird Donkey Kong Country: Tropical Freeze Switch TV Show Easter Egg. YouTube. Retrieved May 28, 2024.
- ^ NintendoProductions (February 25, 2014). Donkey Kong Country Tropical Freeze: 6-4 Blurry Flurry Hard Mode DK. YouTube (English). Retrieved May 28, 2024.
- ^ Zephiel610 (February 25, 2014). Donkey Kong Country: Tropical Freeze - 100% Walkthrough - 6-7 Frozen Frenzy (Puzzle Pieces and KONG). YouTube. Retrieved May 28, 2024.
- ^ "Help Donkey Kong and his friends save their home and banana hoard from marauding Vikings in the Donkey Kong Country™: Tropical Freeze game from Retro Studios." – Donkey Kong Country: Tropical Freeze. Nintendo.com (American English). Archived March 3, 2016, 10:44:00 UTC from the original via Wayback Machine. Retrieved May 28, 2024.
External links[edit]
- E3 2013 Trailer
- Extended E3 2013 Trailer
- Official North American website
- Official United Kingdom website
- Official Japanese website
