Present Room: Difference between revisions
(Undo revision 2693045 by Stoopidkoopa (talk) Source?) Tag: Undo |
m (Removing this actual section wasn't really that necessary; restoring.) |
||
| (43 intermediate revisions by 18 users not shown) | |||
| Line 1: | Line 1: | ||
[[File:Present_Room.png|thumb|Mario's Present Room | [[File:Present_Room.png|thumb|[[Mario]]'s Present Room]] | ||
The '''Present Room''' is a special room accessible in ''[[Mario Party 4]]''. The player can view presents gained from | The '''Present Room''' is a special room accessible in ''[[Mario Party 4]]''. The player can view presents gained from winning against the host of a [[board (Mario Party series)|board]] in the game's Story Mode. The Present Room consists of nine miniature rooms. Each room except the [[minigame]] room belongs to a playable character. Presents in the minigame room can be obtained by meeting requirements in certain minigames. The presents obtained differ from room to room. | ||
== | ==List of rooms== | ||
{|class= | {|class="wikitable" style="width:100%" | ||
|colspan=3 align=center|{{anchor|Mario's Present Room|[[File:MarioPresentRoom4.png|150px]]<br>'''[[Mario]]'s Present Room'''}} | |||
|- | |- | ||
! | !Present | ||
! | !In-game description | ||
! | !How to win the present | ||
|- | |- | ||
|Mario doll | |||
| | |''This is a Mario doll. He's everyone's favorite hero. Even Luigi's!'' | ||
|Complete [[Koopa's Seaside Soiree]] with Mario. | |||
| | |||
|- | |- | ||
|Mario's refrigerator | |||
| | |''This is Mario's refrigerator. There's always leftover pasta inside.'' | ||
|Complete [[Boo's Haunted Bash]] with Mario. | |||
| | |||
|- | |- | ||
|Mario's sofa | |||
| | |''This is Mario's sofa. He folds it out into a bed when guests come.'' | ||
|Complete [[Toad's Midway Madness]] with Mario. | |||
| | |||
|- | |- | ||
|Mario's table | |||
|''This is Mario's table. It's very cute and round, just like Mario!'' | |||
|Complete [[Shy Guy's Jungle Jam]] with Mario. | |||
| | |||
|- | |- | ||
|Mario's television | |||
|''This is Mario's television. It rarely works, but he rarely uses it!'' | |||
|Complete [[Goomba's Greedy Gala]] with Mario. | |||
| | |||
|- | |- | ||
|[[Bowser]] vase | |||
| | |''This is a Bowser vase. Flowers always seem to wilt the moment they go in.'' | ||
|Complete [[Bowser's Gnarly Party]] with Mario. | |||
|- | |- | ||
|colspan=3 align=center|{{anchor|Luigi's Present Room|[[File:LuigiPresentRoom4.png|150px]]<br>'''[[Luigi]]'s Present Room'''}} | |||
|- | |- | ||
![[File: | !Present | ||
| | !In-game description | ||
!How to win the present | |||
|- | |||
|Luigi doll | |||
|''This is a Luigi doll. He's the world's most unlikely hero, and Mario knows it!'' | |||
|Complete Koopa's Seaside Soiree with Luigi. | |||
|- | |||
| | |Luigi's chair | ||
|''This is Luigi's chair. It's not very comfortable, but it sure looks neat!'' | |||
|Complete Boo's Haunted Bash with Luigi. | |||
|- | |||
|Luigi's table | |||
|''This is Luigi's table. It's fashionable, but not very functional. Like Luigi!'' | |||
|Complete Toad's Midway Madness with Luigi. | |||
|- | |||
|Luigi's dumbbell | |||
|''This is Luigi's dumbbell. Luigi can't actually lift it. It's just for show.'' | |||
|Complete Shy Guy's Jungle Jam with Luigi. | |||
|- | |||
|Luigi's airbike | |||
|''This is Luigi's airbike. It shows you how many calories he's burned--zero!'' | |||
|Complete Goomba's Greedy Gala with Luigi. | |||
|- | |||
|Bowser television | |||
|''This is a Bowser television. It only shows infomercials. Evil!'' | |||
|Complete Bowser's Gnarly Party with Luigi. | |||
|- | |||
|colspan=3 align=center|{{anchor|Peach's Present Room|[[File:PeachPresentRoom4.png|150px]]<br>'''[[Princess Peach|Peach]]'s Present Room'''}} | |||
|- | |||
!Present | |||
!In-game description | |||
!How to win the present | |||
|- | |||
|Peach doll | |||
|''This is a Peach doll. It looks just like our lovely, danger-prone heroine.'' | |||
|Complete Koopa's Seaside Soiree with Peach. | |||
|- | |||
|Peach's treasure chest | |||
|''This is Peach's treasure chest. It's where she keeps all of her coins.'' | |||
|Complete Boo's Haunted Bash with Peach. | |||
|- | |||
|Peach's chair | |||
|''This is Peach's chair. It is gorgeous and refined, just like Peach.'' | |||
|Complete Toad's Midway Madness with Peach. | |||
|- | |||
|Peach's clock | |||
|''This is Peach's clock. It was bought the day Peach was born.'' | |||
|Complete Shy Guy's Jungle Jam with Peach. | |||
|- | |||
|Peach's table | |||
|''This is Peach's table. It's perfect for afternoon tea and scones. Mmmm...'' | |||
|Complete Goomba's Greedy Gala with Peach. | |||
|- | |||
|Bowser picture | |||
|''This is a picture of Bowser. [[Koopa Kid]] made her hang it up. Ugh!'' | |||
|Complete Bowser's Gnarly Party with Peach. | |||
|- | |||
|colspan=3 align=center|{{anchor|Yoshi's Present Room|[[File:YoshiPresentRoom4.png|150px]]<br>'''[[Yoshi]]'s Present Room'''}} | |||
|- | |||
!Present | |||
!In-game description | |||
!How to win the present | |||
|- | |||
|Yoshi doll | |||
|''This is a Yoshi doll. Isn't he just the cutest hero EVER? Well? Isn't he!?'' | |||
|Complete Koopa's Seaside Soiree with Yoshi. | |||
|- | |||
|Yoshi's shoes | |||
|''Those are Yoshi's shoes. It looks like they were just polished. Shiny!'' | |||
|Complete Boo's Haunted Bash with Yoshi. | |||
|- | |||
|[[Yoshi's Egg|Yoshi's egg]] | |||
|''This is Yoshi's egg. It looks like it's about to hatch! But what's inside?'' | |||
|Complete Toad's Midway Madness with Yoshi. | |||
|- | |||
|Yoshi's table | |||
|''This is Yoshi's table. It's mostly used for serving fresh [[fruit]].'' | |||
|Complete Shy Guy's Jungle Jam with Yoshi. | |||
|- | |||
|Yoshi's computer | |||
|''This is Yoshi's computer. It looks goofy, but it's really top of the line!'' | |||
|Complete Goomba's Greedy Gala with Yoshi. | |||
|- | |||
|Bowser lamp | |||
|''This is a Bowser lamp. It shines with an eerily sinister light... So hypnotic!'' | |||
|Complete Bowser's Gnarly Party with Yoshi. | |||
|- | |||
|colspan=3 align=center|{{anchor|Wario's Present Room|[[File:WarioPresentRoom4.png|150px]]<br>'''[[Wario]]'s Present Room'''}} | |||
|- | |||
!Present | |||
!In-game description | |||
!How to win the present | |||
|- | |||
|Wario doll | |||
|''This is a Wario doll. He might be a little too disgusting to be a hero.'' | |||
|Complete Koopa's Seaside Soiree with Wario. | |||
|- | |||
|Wario's burger | |||
|''This is Wario's hamburger. Wario can polish it off in one bite.'' | |||
|Complete Boo's Haunted Bash with Wario. | |||
|- | |||
|[[Wario Bike|Wario's motorbike]] | |||
|''This is Wario's motorbike. He lost his license, so he's not going anywhere.'' | |||
|Complete Toad's Midway Madness with Wario. | |||
|- | |||
|Wario's recliner | |||
|''This is Wario's recliner. It's got a vicious massage function.'' | |||
|Complete Shy Guy's Jungle Jam with Wario. | |||
|- | |||
|Wario's chest | |||
|''This is Wario's chest. Sure, it looks flashy, but it's totally empty.'' | |||
|Complete Goomba's Greedy Gala with Wario. | |||
|- | |||
|Bowser clock | |||
|''This is a Bowser clock. It's always thirteen minutes slow. Freakish!'' | |||
|Complete Bowser's Gnarly Party with Wario. | |||
|- | |||
|colspan=3 align=center|{{anchor|Donkey Kong's Present Room|[[File:DonkeyKongPresentRoom4.png|150px]]<br>'''[[Donkey Kong]]'s Present Room'''}} | |||
|- | |||
!Present | |||
!In-game description | |||
!How to win the present | |||
|- | |||
|Donkey Kong doll | |||
|''This is a Donkey Kong doll. He's our hero from the jungle.'' | |||
|Complete Koopa's Seaside Soiree with Donkey Kong. | |||
|- | |||
|Donkey Kong's box | |||
|''This is Donkey Kong's box. It contains Donkey Kong's treasures.'' | |||
|Complete Boo's Haunted Bash with Donkey Kong. | |||
|- | |||
|[[DK Barrel|Donkey Kong's barrel]] | |||
|''This is Donkey Kong's barrel. It seems to be empty right now. Poor DK...'' | |||
|Complete Toad's Midway Madness with Donkey Kong. | |||
|- | |||
|Donkey Kong's stand | |||
|''This is Donkey Kong's stand. It can hold up to five [[banana]]s.'' | |||
|Complete Shy Guy's Jungle Jam with Donkey Kong. | |||
|- | |||
|Donkey Kong's tree | |||
|''This is Donkey Kong's tree. He takes good care of it.'' | |||
|Complete Goomba's Greedy Gala with Donkey Kong. | |||
|- | |||
|Bowser object | |||
|''This is a Bowser...object. It's quite, um, eye-catching...but what is it?'' | |||
|Complete Bowser's Gnarly Party with Donkey Kong. | |||
|- | |||
|colspan=3 align=center|{{anchor|Daisy's Present Room|[[File:DaisyPresentRoom4.png|150px]]<br>'''[[Princess Daisy|Daisy]]'s Present Room'''}} | |||
|- | |||
!Present | |||
!In-game description | |||
!How to win the present | |||
|- | |||
|Daisy doll | |||
|''This is a Daisy doll. She's our fresh-faced heroine.'' | |||
|Complete Koopa's Seaside Soiree with Daisy. | |||
|- | |||
|Daisy's side table | |||
|''This is Daisy's side table. Don't peek in her journal! She won't like it.'' | |||
|Complete Boo's Haunted Bash with Daisy. | |||
|- | |||
|Daisy's bed | |||
|''This is Daisy's bed. It looks hard, but it's really good for the spine.'' | |||
|Complete Toad's Midway Madness with Daisy. | |||
|- | |||
|Daisy's table | |||
|''This is Daisy's table. I think [[Goomba]] made it for her.'' | |||
|Complete Shy Guy's Jungle Jam with Daisy. | |||
|- | |||
|Daisy's flowers | |||
|''These are Daisy's flowers. She picks them herself.'' | |||
|Complete Goomba's Greedy Gala with Daisy. | |||
|- | |||
|Bowser teapot | |||
|''This is a Bowser teapot. It bubbles like [[lava|magma]].'' | |||
|Complete Bowser's Gnarly Party with Daisy. | |||
|- | |||
|colspan=3 align=center|{{anchor|Waluigi's Present Room|[[File:WaluigiPresentRoom4.png|150px]]<br>'''[[Waluigi]]'s Present Room'''}} | |||
|- | |||
!Present | |||
!In-game description | |||
!How to win the present | |||
|- | |||
|Waluigi doll | |||
|''This is a Waluigi doll. It looks like it's plotting an evil new scheme!'' | |||
|Complete Koopa's Seaside Soiree with Waluigi. | |||
|- | |||
|Waluigi's chair | |||
|''This is Waluigi's chair. It's simple, functional and tricky!'' | |||
|Complete Boo's Haunted Bash with Waluigi. | |||
|- | |||
|Waluigi's calendar | |||
|''This is Waluigi's calendar. Every day is Sunday?!'' | |||
|Complete Toad's Midway Madness with Waluigi. | |||
|- | |||
|Waluigi's shower | |||
|''This is Waluigi's shower. It has good pressure...and spits flame!!'' | |||
|Complete Shy Guy's Jungle Jam with Waluigi. | |||
|- | |||
|Waluigi's shelf | |||
|''This is Waluigi's shelf. It seems to be in good repair.'' | |||
|Complete Goomba's Greedy Gala with Waluigi. | |||
|- | |||
|Bowser bath | |||
|''This is a Bowser bath. The water is always 1,000 degrees!'' | |||
|Complete Bowser's Gnarly Party with Waluigi. | |||
|- | |||
|colspan=3 align=center|{{anchor|Waluigi's Present Room|[[File:Minigames.png|150px]]<br>'''Minigame Present Room'''}} | |||
|- | |||
!Present | |||
!In-game description | |||
!How to win the present | |||
|- | |||
|[[Toad]] plate | |||
|''This is a Toad plate. It's perfect for every occasion.'' | |||
|Clear 40 pieces in [[Jigsaw Jitters]] within three minutes. | |||
|- | |||
|[[Goomba]] plate | |||
|''This is a Goomba plate. It flies when you throw it!'' | |||
|Get through 15 or more pages in [[Booksquirm]] or in Challenge Booksquirm. | |||
|- | |||
|[[Shy Guy]] plate | |||
|''This is a Shy Guy plate. It possesses a mysterious shine.'' | |||
|Reach the goal within one minute 30 seconds (NTSC)/one minute 40 seconds (PAL) in [[Dungeon Duos]]. | |||
|- | |||
|[[Boo]] plate | |||
|''This is a Boo plate. It usually holds blood oranges.'' | |||
|Stay underwater for seven seconds or more in [[Take a Breather]]. | |||
|- | |||
|[[Koopa (species)|Koopa]] plate | |||
|''This is a Koopa plate. It's as polished as a mirror and as hard as a shell.'' | |||
|Reach the goal within 45 seconds in [[Right Oar Left?]] | |||
|- | |||
|[[Bowser]] plate | |||
|''This is a Bowser plate. It's perfect for a burnt steak.'' | |||
|Reach the goal within 60 seconds in [[Mario Medley]]. | |||
|- | |||
|Toad's teapot | |||
|''This is Toad's teapot. It's easy to use and holds lots of water.'' | |||
|Clear 30 pieces in Jigsaw Jitters within two minutes. | |||
|- | |||
|Birthday cake | |||
|''This is a birthday cake. It's covered in sweet, yummy frosting.'' | |||
|Clear [[Beach Volley Folly]] in Battle Mode. | |||
|- | |||
|Goomba's clock | |||
|''This is Goomba's clock. It gains about five minutes every day.'' | |||
|Knock down 100 "dominoes" or more in [[Domination]]. | |||
|- | |||
|Boo's picture frame | |||
|''This is Boo's picture frame. It holds quite a spirited picture!'' | |||
|Reach the goal within 10 seconds in [[Mario Speedwagons]]. | |||
|- | |||
|Toad's teacups | |||
|''These are Toad's teacups. They're made of fine [[Mushroom Kingdom]] porcelain.'' | |||
|Clear 20 pieces in Jigsaw Jitters within one minute. | |||
|} | |} | ||
If the player manages to acquire all items for each respective area of the Present Room, the Party Star trophy will be obtained. | |||
If the player manages to acquire all items for each respective area of the Present Room, | |||
==The " | ==The "very final surprise" (Story Mode ending)== | ||
[[File:Mp4 Peach ending 1.png|thumb|150px|left|Peach (right) is startled after encountering what just happened after the lights went out as well as noticing a bright light beam immediately appearing between her and Toad.]] | [[File:Mp4 Peach ending 1.png|thumb|150px|left|Peach (right) is startled after encountering what just happened after the lights went out as well as noticing a bright light beam immediately appearing between her and Toad.]] | ||
[[File:Mp4 Peach constellation.png|thumb|150px | [[File:Mp4 Peach constellation.png|thumb|150px|That bright light is one of the Stars, and it reveals a constellation to complete the respective character's part of the Present Room. In this case, this is the constellation for Peach's area of said room.]] | ||
When the player has prevailed in acquiring all the presents for a certain character in ''Mario Party 4''{{'}}s Story Mode, Toad appears to make an announcement toward them that there | When the player has prevailed in acquiring all the presents for a certain character in ''Mario Party 4''{{'}}s Story Mode, Toad appears to make an announcement toward them that there is one final surprise waiting to be revealed. However, this is not anything ordinary—the revelation process requires the lights to be turned out, followed by a beam of light that just appears from above shining between Toad and the character that the player used to complete their respective Story Mode process. That beam of light, which Toad points upwards to, is actually one of the [[Star (Mario Party series)|Star]]s that the player has acquired throughout their entire process. The same Star proceeds to reveal the final surprise: a constellation resembling the character the player was using to officially complete their respective area of the Present Room. | ||
When the player visits the Present Room itself afterwards, they can view that character's said constellation that was just revealed by tilting Up on the | When the player visits the Present Room itself afterwards, they can view that character's said constellation that was just revealed by tilting Up on the Control Stick while viewing the character's completed area of the Present Room. | ||
{{br}} | {{br}} | ||
==Gallery== | |||
<gallery> | |||
Welcome to Present Room MP4.png|[[Shy Guy]] welcomes the player to the Present Room. | |||
</gallery> | |||
==Trivia== | ==Trivia== | ||
[[File:Waluigi's Calendar.png|thumb|Waluigi's calendar]] | [[File:Waluigi's Calendar.png|thumb|Waluigi's calendar]] | ||
*According to the in-game description, every day | *Bowser’s clock being described as 13 minutes slow is a reference to the common {{wp|triskaidekaphobia|superstition that 13 is an unlucky number}}. | ||
*If the camera is hacked for free viewing, it is possible to see that Daisy's journal is | *According to the in-game description, every day on Waluigi's calendar is Sunday. This is not true as the calendar displays other days of the week (of January 2002) as well as Sunday, just like a normal calendar. | ||
*If the camera is hacked for free viewing, it is possible to see that Daisy's journal is actually the Japanese box art for ''[[Mario Party 2]]''.<ref>{{cite|url=www.suppermariobroth.com/post/154638606655/in-the-present-room-in-mario-party-4-the|title=Post by Supper Mario Broth|quote=In the Present Room in Mario Party 4, the description of Daisy’s side table warns not to peek in her journal. Zooming in reveals that her journal is actually a Japanese copy of Mario Party 2.|publisher=Supper Mario Broth|date=December 18, 2016|accessdate=May 1, 2024}}</ref> | |||
==References== | ==References== | ||
<references/> | <references/> | ||
{{MP4}} | |||
[[Category: | [[Category:Locations]] | ||
[[Category:Mario Party 4]] | [[Category:Mario Party 4]] | ||
Latest revision as of 13:37, November 3, 2024
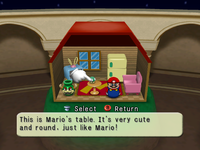
The Present Room is a special room accessible in Mario Party 4. The player can view presents gained from winning against the host of a board in the game's Story Mode. The Present Room consists of nine miniature rooms. Each room except the minigame room belongs to a playable character. Presents in the minigame room can be obtained by meeting requirements in certain minigames. The presents obtained differ from room to room.
List of rooms[edit]
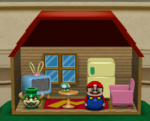 Mario's Present Room | ||
| Present | In-game description | How to win the present |
|---|---|---|
| Mario doll | This is a Mario doll. He's everyone's favorite hero. Even Luigi's! | Complete Koopa's Seaside Soiree with Mario. |
| Mario's refrigerator | This is Mario's refrigerator. There's always leftover pasta inside. | Complete Boo's Haunted Bash with Mario. |
| Mario's sofa | This is Mario's sofa. He folds it out into a bed when guests come. | Complete Toad's Midway Madness with Mario. |
| Mario's table | This is Mario's table. It's very cute and round, just like Mario! | Complete Shy Guy's Jungle Jam with Mario. |
| Mario's television | This is Mario's television. It rarely works, but he rarely uses it! | Complete Goomba's Greedy Gala with Mario. |
| Bowser vase | This is a Bowser vase. Flowers always seem to wilt the moment they go in. | Complete Bowser's Gnarly Party with Mario. |
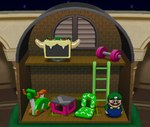 Luigi's Present Room | ||
| Present | In-game description | How to win the present |
| Luigi doll | This is a Luigi doll. He's the world's most unlikely hero, and Mario knows it! | Complete Koopa's Seaside Soiree with Luigi. |
| Luigi's chair | This is Luigi's chair. It's not very comfortable, but it sure looks neat! | Complete Boo's Haunted Bash with Luigi. |
| Luigi's table | This is Luigi's table. It's fashionable, but not very functional. Like Luigi! | Complete Toad's Midway Madness with Luigi. |
| Luigi's dumbbell | This is Luigi's dumbbell. Luigi can't actually lift it. It's just for show. | Complete Shy Guy's Jungle Jam with Luigi. |
| Luigi's airbike | This is Luigi's airbike. It shows you how many calories he's burned--zero! | Complete Goomba's Greedy Gala with Luigi. |
| Bowser television | This is a Bowser television. It only shows infomercials. Evil! | Complete Bowser's Gnarly Party with Luigi. |
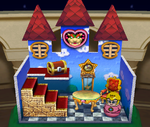 Peach's Present Room | ||
| Present | In-game description | How to win the present |
| Peach doll | This is a Peach doll. It looks just like our lovely, danger-prone heroine. | Complete Koopa's Seaside Soiree with Peach. |
| Peach's treasure chest | This is Peach's treasure chest. It's where she keeps all of her coins. | Complete Boo's Haunted Bash with Peach. |
| Peach's chair | This is Peach's chair. It is gorgeous and refined, just like Peach. | Complete Toad's Midway Madness with Peach. |
| Peach's clock | This is Peach's clock. It was bought the day Peach was born. | Complete Shy Guy's Jungle Jam with Peach. |
| Peach's table | This is Peach's table. It's perfect for afternoon tea and scones. Mmmm... | Complete Goomba's Greedy Gala with Peach. |
| Bowser picture | This is a picture of Bowser. Koopa Kid made her hang it up. Ugh! | Complete Bowser's Gnarly Party with Peach. |
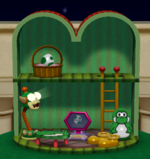 Yoshi's Present Room | ||
| Present | In-game description | How to win the present |
| Yoshi doll | This is a Yoshi doll. Isn't he just the cutest hero EVER? Well? Isn't he!? | Complete Koopa's Seaside Soiree with Yoshi. |
| Yoshi's shoes | Those are Yoshi's shoes. It looks like they were just polished. Shiny! | Complete Boo's Haunted Bash with Yoshi. |
| Yoshi's egg | This is Yoshi's egg. It looks like it's about to hatch! But what's inside? | Complete Toad's Midway Madness with Yoshi. |
| Yoshi's table | This is Yoshi's table. It's mostly used for serving fresh fruit. | Complete Shy Guy's Jungle Jam with Yoshi. |
| Yoshi's computer | This is Yoshi's computer. It looks goofy, but it's really top of the line! | Complete Goomba's Greedy Gala with Yoshi. |
| Bowser lamp | This is a Bowser lamp. It shines with an eerily sinister light... So hypnotic! | Complete Bowser's Gnarly Party with Yoshi. |
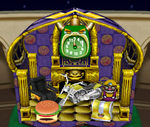 Wario's Present Room | ||
| Present | In-game description | How to win the present |
| Wario doll | This is a Wario doll. He might be a little too disgusting to be a hero. | Complete Koopa's Seaside Soiree with Wario. |
| Wario's burger | This is Wario's hamburger. Wario can polish it off in one bite. | Complete Boo's Haunted Bash with Wario. |
| Wario's motorbike | This is Wario's motorbike. He lost his license, so he's not going anywhere. | Complete Toad's Midway Madness with Wario. |
| Wario's recliner | This is Wario's recliner. It's got a vicious massage function. | Complete Shy Guy's Jungle Jam with Wario. |
| Wario's chest | This is Wario's chest. Sure, it looks flashy, but it's totally empty. | Complete Goomba's Greedy Gala with Wario. |
| Bowser clock | This is a Bowser clock. It's always thirteen minutes slow. Freakish! | Complete Bowser's Gnarly Party with Wario. |
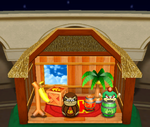 Donkey Kong's Present Room | ||
| Present | In-game description | How to win the present |
| Donkey Kong doll | This is a Donkey Kong doll. He's our hero from the jungle. | Complete Koopa's Seaside Soiree with Donkey Kong. |
| Donkey Kong's box | This is Donkey Kong's box. It contains Donkey Kong's treasures. | Complete Boo's Haunted Bash with Donkey Kong. |
| Donkey Kong's barrel | This is Donkey Kong's barrel. It seems to be empty right now. Poor DK... | Complete Toad's Midway Madness with Donkey Kong. |
| Donkey Kong's stand | This is Donkey Kong's stand. It can hold up to five bananas. | Complete Shy Guy's Jungle Jam with Donkey Kong. |
| Donkey Kong's tree | This is Donkey Kong's tree. He takes good care of it. | Complete Goomba's Greedy Gala with Donkey Kong. |
| Bowser object | This is a Bowser...object. It's quite, um, eye-catching...but what is it? | Complete Bowser's Gnarly Party with Donkey Kong. |
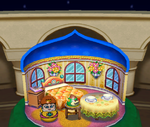 Daisy's Present Room | ||
| Present | In-game description | How to win the present |
| Daisy doll | This is a Daisy doll. She's our fresh-faced heroine. | Complete Koopa's Seaside Soiree with Daisy. |
| Daisy's side table | This is Daisy's side table. Don't peek in her journal! She won't like it. | Complete Boo's Haunted Bash with Daisy. |
| Daisy's bed | This is Daisy's bed. It looks hard, but it's really good for the spine. | Complete Toad's Midway Madness with Daisy. |
| Daisy's table | This is Daisy's table. I think Goomba made it for her. | Complete Shy Guy's Jungle Jam with Daisy. |
| Daisy's flowers | These are Daisy's flowers. She picks them herself. | Complete Goomba's Greedy Gala with Daisy. |
| Bowser teapot | This is a Bowser teapot. It bubbles like magma. | Complete Bowser's Gnarly Party with Daisy. |
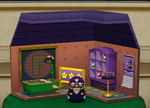 Waluigi's Present Room | ||
| Present | In-game description | How to win the present |
| Waluigi doll | This is a Waluigi doll. It looks like it's plotting an evil new scheme! | Complete Koopa's Seaside Soiree with Waluigi. |
| Waluigi's chair | This is Waluigi's chair. It's simple, functional and tricky! | Complete Boo's Haunted Bash with Waluigi. |
| Waluigi's calendar | This is Waluigi's calendar. Every day is Sunday?! | Complete Toad's Midway Madness with Waluigi. |
| Waluigi's shower | This is Waluigi's shower. It has good pressure...and spits flame!! | Complete Shy Guy's Jungle Jam with Waluigi. |
| Waluigi's shelf | This is Waluigi's shelf. It seems to be in good repair. | Complete Goomba's Greedy Gala with Waluigi. |
| Bowser bath | This is a Bowser bath. The water is always 1,000 degrees! | Complete Bowser's Gnarly Party with Waluigi. |
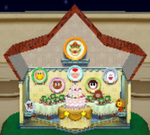 Minigame Present Room | ||
| Present | In-game description | How to win the present |
| Toad plate | This is a Toad plate. It's perfect for every occasion. | Clear 40 pieces in Jigsaw Jitters within three minutes. |
| Goomba plate | This is a Goomba plate. It flies when you throw it! | Get through 15 or more pages in Booksquirm or in Challenge Booksquirm. |
| Shy Guy plate | This is a Shy Guy plate. It possesses a mysterious shine. | Reach the goal within one minute 30 seconds (NTSC)/one minute 40 seconds (PAL) in Dungeon Duos. |
| Boo plate | This is a Boo plate. It usually holds blood oranges. | Stay underwater for seven seconds or more in Take a Breather. |
| Koopa plate | This is a Koopa plate. It's as polished as a mirror and as hard as a shell. | Reach the goal within 45 seconds in Right Oar Left? |
| Bowser plate | This is a Bowser plate. It's perfect for a burnt steak. | Reach the goal within 60 seconds in Mario Medley. |
| Toad's teapot | This is Toad's teapot. It's easy to use and holds lots of water. | Clear 30 pieces in Jigsaw Jitters within two minutes. |
| Birthday cake | This is a birthday cake. It's covered in sweet, yummy frosting. | Clear Beach Volley Folly in Battle Mode. |
| Goomba's clock | This is Goomba's clock. It gains about five minutes every day. | Knock down 100 "dominoes" or more in Domination. |
| Boo's picture frame | This is Boo's picture frame. It holds quite a spirited picture! | Reach the goal within 10 seconds in Mario Speedwagons. |
| Toad's teacups | These are Toad's teacups. They're made of fine Mushroom Kingdom porcelain. | Clear 20 pieces in Jigsaw Jitters within one minute. |
If the player manages to acquire all items for each respective area of the Present Room, the Party Star trophy will be obtained.
The "very final surprise" (Story Mode ending)[edit]
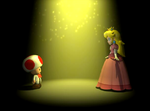
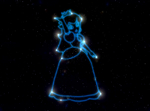
When the player has prevailed in acquiring all the presents for a certain character in Mario Party 4's Story Mode, Toad appears to make an announcement toward them that there is one final surprise waiting to be revealed. However, this is not anything ordinary—the revelation process requires the lights to be turned out, followed by a beam of light that just appears from above shining between Toad and the character that the player used to complete their respective Story Mode process. That beam of light, which Toad points upwards to, is actually one of the Stars that the player has acquired throughout their entire process. The same Star proceeds to reveal the final surprise: a constellation resembling the character the player was using to officially complete their respective area of the Present Room.
When the player visits the Present Room itself afterwards, they can view that character's said constellation that was just revealed by tilting Up on the Control Stick while viewing the character's completed area of the Present Room.
Gallery[edit]
Shy Guy welcomes the player to the Present Room.
Trivia[edit]
- Bowser’s clock being described as 13 minutes slow is a reference to the common superstition that 13 is an unlucky number.
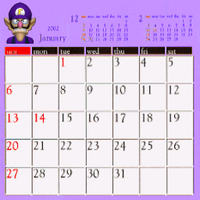
- According to the in-game description, every day on Waluigi's calendar is Sunday. This is not true as the calendar displays other days of the week (of January 2002) as well as Sunday, just like a normal calendar.
- If the camera is hacked for free viewing, it is possible to see that Daisy's journal is actually the Japanese box art for Mario Party 2.[1]
References[edit]
- ^ "In the Present Room in Mario Party 4, the description of Daisy’s side table warns not to peek in her journal. Zooming in reveals that her journal is actually a Japanese copy of Mario Party 2." – December 18, 2016. Post by Supper Mario Broth. Supper Mario Broth. Retrieved May 1, 2024.
