Mario Sports Superstars: Difference between revisions
Mario4Ever (talk | contribs) mNo edit summary |
No edit summary |
||
| (150 intermediate revisions by 53 users not shown) | |||
| Line 1: | Line 1: | ||
{{italic title}} | {{italic title}} | ||
{{ | {{FA}} | ||
|image=[[File:MarioSportsSuperstarsAmiiboBoxart. | {{game infobox | ||
|developer=[[Bandai Namco Entertainment|Bandai Namco Studios]] | |image=[[File:MarioSportsSuperstarsAmiiboBoxart.jpg|250px]] | ||
|developer=[[Bandai Namco Entertainment|Bandai Namco Studios]]<br>[[Camelot Software Planning]]<br>Hexadrive | |||
|publisher=[[Nintendo]] | |publisher=[[Nintendo]] | ||
| | |release={{flag list|Europe|March 10, 2017|Australia|March 11, 2017|USA|March 24, 2017|Japan|March 30, 2017|HK|March 30, 2017|ROC|March 30, 2017|South Korea|July 13, 2017}} | ||
|languages={{languages|en_us=y|en_gb=y|fr_fr=y|fr_ca=y|es_es=y|es_latam=y|de=y|it=y|nl=y|jp=y|kr=y}} | |||
|genre=Sports | |genre=Sports | ||
|modes=Single player, local multiplayer, online multiplayer | |modes=Single player, local multiplayer, online multiplayer | ||
|platforms=[[Nintendo 3DS]] | |platforms=[[Nintendo 3DS]] | ||
|ratings={{ratings|esrb=e|pegi=3|acb=g}} | |ratings={{ratings|esrb=e|pegi=3|acb=g|usk=0|grac=all|gsrr=g}} | ||
| | |format={{format|3ds=1|3dsdl=1}} | ||
|input={{input|3ds=1}} | |input={{input|3ds=1}} | ||
|serials={{flag list|USA|CTR-AUNE-USA}} | |||
}} | }} | ||
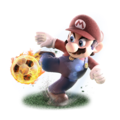
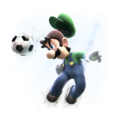
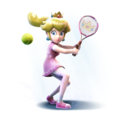
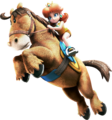
'''''Mario Sports Superstars''''' is a ''[[Mario (franchise)|Mario]]'' sports title for the [[Nintendo 3DS]]. It features a variety of sports in which [[Mario]] and many other characters from the ''Mario'' universe can compete, including soccer | '''''Mario Sports Superstars''''' is a ''[[Super Mario (franchise)|Super Mario]]'' sports title for the [[Nintendo 3DS]]. It features a variety of sports in which [[Mario]] and many other characters from the ''Super Mario'' universe can compete, including soccer, baseball, tennis, golf, and horse racing. Horse racing is the only new sport in the ''Super Mario'' sports spin-offs, while the rest of the sports have seen stand-alone games prior to ''Mario Sports Superstars''. The game supports local multiplayer and is able to support two, four, or six players depending on the sport played, though this title is one of the few multiplayer-oriented ''Super Mario'' titles to not feature Download Play. Players could additionally play against opponents over [[Nintendo Network]], either worldwide against random opponents or with their friends. However, the service was terminated on April 8, 2024, making the game no longer playable online.<ref name=Shutdown> {{cite|author=@NintendoAmerica|language=en-us|date=October 4, 2023|title=As of early April 2024, online play and other functionality that uses online communication will end service for Nintendo 3DS and Wii U software. Thank you very much for your continued support of our products.|url=x.com/NintendoAmerica/status/1709418623566020975|publisher=X|accessdate=February 17, 2024}}</ref><ref name=ShutdownUpdate> {{cite|author=@NintendoAmerica|language=en-us|date=January 23, 2024|title=Update: as of 4/8, online play and other functionality that uses online communication will end service for Nintendo 3DS and Wii U software. Thank you very much for your continued support of our products.|url=x.com/NintendoAmerica/status/1749963072998166670|publisher=X|accessdate=February 17, 2024}}</ref> | ||
The game is primarily developed by [[Bandai Namco Entertainment|Bandai Namco Studios]], with [[Camelot Software Planning]], the main developer for the ''Mario Tennis'' and ''Mario Golf'' series, contributing the golf and tennis portions of the game. The game | The game is primarily developed by [[Bandai Namco Entertainment|Bandai Namco Studios]], with [[Camelot Software Planning]], the main developer for the ''Mario Tennis'' and ''Mario Golf'' series, contributing the golf and tennis portions of the game. The game required 6,589 blocks (843.3 MB) of free space if players wished to download the title off the [[Nintendo eShop]] until March 27, 2023. The game is compatible with [[amiibo]], and a new ''Mario Sports Superstars'' line of blind-packaged amiibo cards were released for the game. Those who purchased one of the "initial run" copies of ''Mario Sports Superstars'' at retail received a free, randomly selected amiibo card from that line. | ||
==Gameplay== | ==Gameplay== | ||
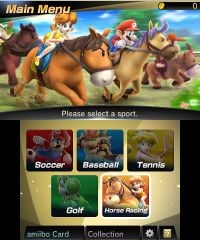
[[File:MarioSportsSuperstars4.jpeg|thumb|left|The main menu for ''Mario Sports Superstars''.]] | [[File:MarioSportsSuperstars4.jpeg|thumb|left|The main menu for ''Mario Sports Superstars''.]] | ||
In a similar manner to another sports compilation, ''[[Mario Sports Mix]]'', each sport plays out as its own separate mode. The tennis and golf sports play similarly to ''[[Mario Tennis: Ultra Smash]]'' and ''[[Mario Golf: World Tour]]'' | In a similar manner to another sports compilation, ''[[Mario Sports Mix]]'', each sport plays out as its own separate mode. The tennis and golf sports play similarly to ''[[Mario Tennis: Ultra Smash]]'' and ''[[Mario Golf: World Tour]]''. Each mode has its own tournament mode, a three-tier system that has eight participating players in total, catered to single players. Three cups are available, with the first cup being the [[Mushroom Cup]], the second being the [[Flower Cup]] and the third being the [[Star Cup]]. Completing the Star Cup unlocks the [[Special Cup|Champion's Cup]], and completing said cup unlocks Star versions of playable characters, who have increased stats.<ref>{{cite|language=ja|date=February 9, 2017|url=www.nintendo.com/jp/topics/article/c8353a58-e9e6-11e6-9aaf-063b7ac45a6d|title=新シリーズのamiiboカードも同時発売!|publisher=Nintendo|accessdate=June 25, 2024}}</ref> The player needs to unlock Star characters for each sport individually. Each sport has its own training mode as well, where players can practice shots or techniques freely. | ||
Alongside the main sports modes, additional tabs on the main menu screen include "amiibo Card", "Collection", a settings icon, and a manual icon. | Alongside the main sports modes, additional tabs on the main menu screen include "amiibo Card", "Collection", a settings icon, and a manual icon. | ||
| Line 24: | Line 27: | ||
[[Coin]]s can be earned when a task is completed, such as winning a match in exhibition or winning tournaments or finding crates with coins inside them in horse racing. They are used to buy randomly packaged cards in the shop. | [[Coin]]s can be earned when a task is completed, such as winning a match in exhibition or winning tournaments or finding crates with coins inside them in horse racing. They are used to buy randomly packaged cards in the shop. | ||
{{br}} | {{br}} | ||
===Sports=== | ===Sports=== | ||
====Soccer (Football in | ====Soccer (Football in British English)==== | ||
[[File:Soccer Gameplay MSS.png|thumb|[[Mario]] dribbling a ball in soccer.]] | [[File:Soccer Gameplay MSS.png|thumb|[[Mario]] dribbling a ball in soccer.]] | ||
A sport previously playable in the [[Mario Strikers (series)|''Mario Strikers'' series]]. Unlike that series and as in the actual sport, players participate in 11-vs-11 matches. Teams are composed of a designated team captain, who represents the team with their shield emblem, an assistant captain, who is another team captain character as an ally, a goalie (either [[Boom Boom]] or [[Pom Pom]]), and the rest are supporting generic characters such as [[Koopa Troopa]]s or [[Shy Guy]]s, which are filled out with only one type of character. Prior to beginning a match, players can adjust placement of their entire team in various formations. On the top screen, team members are identified by specific HUD circular markers underneath them, and on the Touch Screen, by their team's color. Both captains are represented by icons of their faces and are displayed in their current position while the generic characters are represented by dots. Once players select their team and formation, players have the option to save the team as "My Team", which allows for ease of access if players have a select favorite team they wish to use in future games. During the middle of the match, players can change their team formation as they wish, including when a half-time is called. | |||
As in the ''Mario Strikers'' games, the object is to kick the ball into the opponent's goal, overcoming the opposing team members and their goalie, who attempts to block balls, within the designated pseudo 90-minute time limit (the speed of the time limit goes up depending on the settings, but generally speaking, having the highest time setting, 15-minute matches, causes the time limit to slow down). Halfway through the match, at the 45-minute mark, players halt the game and are taken to a screen that records the current progress of both teams. Afterward, the losing team initiates the kick, and the game continues, with the team's goals reversed until the 90-minute mark is reached. Whichever team has the most goals by the end of the match wins the game. Whenever a goal is scored, a replay of the shot is shown. Players can skip the replay if they wish or change the angle from which it is shown. The opposing team captains then get possession of the ball and start off in the middle of the field, beginning the play again. | |||
Unlike in those games, however, players have more control options and strategies available to them to accommodate the actual sport's additional rules. For example, players on the defense can attempt to steal the ball in possession from other players via slide-kicks, pressure defending with their team via the {{button|3ds|Y}} or by themselves with {{button|3ds|B}} (per the default Type A control scheme), or by simply running into the ball. Players who possess the ball may attempt to dodge confrontations by sliding around holding {{button|3ds|L}} by default. However, if the character in possession of the ball is struck with a slide-kick without the ball being touched, a foul is called and the player who is hit by the slide-kicking player earns a free kick, which depends on the orientation where the foul was initiated. There are now {{wp|Throw-in|throw-ins}} if the ball rolls out of bounds, and if this happens in the area adjacent to the goalie, a {{wp|corner kick}} is initiated instead. If the opponent team knocks the ball into their opponent's goal side, a goal kick is initiated in which the goalie kicks the ball back onto the field. When kicking into the goal, players may press and hold the button to charge up their shots; a meter is represented below the character to indicate how powerful the shot will be. Certain types of passes also have their own power meter that indicates the power of the pass. Players can additionally perform an extra technique of kicks if {{button|3ds|R}} is held and a corresponding button is pressed, such as lobbing a pass with {{button|3ds|R}} + {{button|3ds|Y}}. | |||
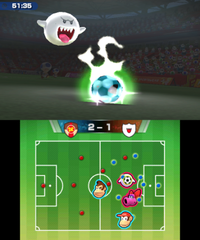
[[File:MSS NinUK 11.png|thumb|left|Boo performing a Special Shot.]] | [[File:MSS NinUK 11.png|thumb|left|Boo performing a Special Shot.]] | ||
Powerful Special Shots can be performed by captain | Powerful Special Shots can be performed by the captain and assistant captain when the ball starts to sparkle. Each Special Shot has a unique visual effect that varies with the character. Team captains may also pass the ball using their Special Combo Shot move to another captain when the ball is glowing as well. All actions are tied to a character's stamina, which is represented by a blue arrow above the controlled character. The more a character plays and dashes across the field, the more stamina is lost. Characters who have a lowered stamina bar have weaker passes, shots, and speed. Players replenish stamina when they do not partake in any action. | ||
In multiplayer mode, up to four players can play this sport in local multiplayer, while only two players can play in online play. However, if two players are playing, either in local or online multiplayer, they cannot choose to be on the same team up against a computer player controlling the other team. | In multiplayer mode, up to four players can play this sport in local multiplayer, while only two players can play in online play. However, if two players are playing, either in local or online multiplayer, they cannot choose to be on the same team up against a computer player controlling the other team. | ||
Prior to beginning a match in Exhibition mode, players can adjust the following settings: | Prior to beginning a match in Exhibition mode, players can adjust the following settings: | ||
*'''COM skill level:''' Players can select from Beginner, Intermediate, Advanced, and Pro skill levels. The Pro skill level is unlocked when players clear Champion's Cup. | *'''COM skill level:''' Players can select from Beginner, Intermediate, Advanced, and Pro skill levels. The Pro skill level is unlocked when players clear Champion's Cup. | ||
*'''Special Shots:''' Players can enable or disable Special Shots. | *'''Special Shots:''' Players can enable or disable Special Shots. | ||
*'''Total Time:''' Players can adjust the total time of the match from approximately 5, 7, 10, or 15 minutes | *'''Total Time:''' Players can adjust the total time of the match from approximately 5, 7, 10, or 15 minutes, which affects the potential frequency of Special Shots and the speed of the in-game clock. | ||
*'''Extra Time:''' Players can play in an extra period of the game ends in a tie or disable the feature. | *'''Extra Time:''' Players can play in an extra period of the game ends in a tie or disable the feature. | ||
*'''Penalty Kicks:''' This can decide the game by penalty kicks of the game is tied, if toggled on. | *'''Penalty Kicks:''' This can decide the game by penalty kicks of the game is tied, if toggled on. | ||
{{br|left}} | |||
====Baseball==== | ====Baseball==== | ||
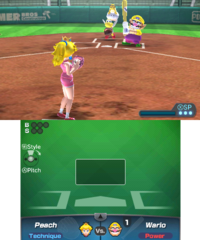
[[File:MSS NinUK 4.png|thumb|left|Pitching against [[Yoshi]]'s team in baseball.]] | [[File:MSS NinUK 4.png|thumb|left|Pitching against [[Yoshi]]'s team in baseball.]] | ||
Baseball involves two teams of nine characters against each other, similar to the [[Mario Baseball (series)|''Mario Baseball'']] series, as well as having various elements and gameplay mechanics taken from that series. Players need to select a team captain, as well as selecting an assistant captain, similar to how soccer plays out. The seven slots can then be individually filled with the player's choice, from a pool of generic characters such as Koopas, Toads, etc | Baseball involves two teams of nine characters against each other, similar to the [[Mario Baseball (series)|''Mario Baseball'']] series, as well as having various elements and gameplay mechanics taken from that series. Players need to select a team captain, as well as selecting an assistant captain, similar to how soccer plays out. The seven slots can then be individually filled with the player's choice, from a pool of generic characters such as Koopas, Toads, etc. unlike the soccer, where the player's team is homogeneous with a single species. Team members hold a bat that has their team captain's logo and design on them, unlike the ''Mario Baseball'' series, where they all had their own individual bats. Just like in soccer, players can save their favorite team and formation as "My Team" once their team is fully constructed for ease of access if players wish to use said team again. | ||
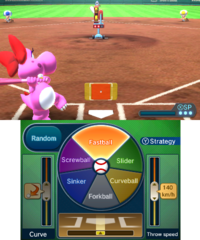
Players play in two positions of baseball; the team on offense takes turns within their members to bat the ball while the team on the defense pitches and covers the outfield. Players on the pitching mound can pitch using various methods, such as | Players play in two positions of baseball; the team on offense takes turns within their members to bat the ball while the team on the defense pitches and covers the outfield. Players on the pitching mound can pitch using various methods, such as fastballs, forkballs, and screwballs to throw batting players off. Pitching has slightly different controls than the ones in the ''Mario Baseball'' series. Meters and HUD are used to time pitches and their type rather than pure button-inputs; to pitch a ball, players can sort through different pitch methods and time the spinning meter with the designated colored sweet spots within ten seconds. Players who bat earn strikes if the pitched ball goes over the home plate and they either do not hit the ball or miss the ball. A ball is called when the pitched ball does not cross over the plate; however, if the batting attempts to swing at such balls, a strike is called. Three strikes mean the player is out. If the batting player hits the ball and it lands on the foul zone, the player must rebat the ball at a cost of the strike, though it does not earn an out if they hit in a foul zone over three strikes. If there are four ball penalties, the batting player gets to walk the base. If the pitched ball hits the batting player, the batting player also gets a free walk to the base. Pitchers have stamina; more hits from the opposing team depletes stamina quicker. Over time, the pitching meter moves faster, meaning it is harder to hit the sweet spot markers correctly. Characters who tire out have very fast spinning meters, and are encouraged to switch to another character so players can be more accurate timing their pitches. | ||
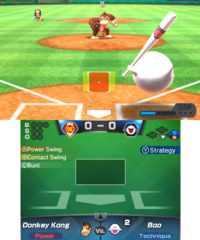
[[File:Baseball MSS.png|thumb|[[Boo]] batting against [[Donkey Kong]].]] | [[File:Baseball MSS.png|thumb|[[Boo]] batting against [[Donkey Kong]].]] | ||
| Line 58: | Line 62: | ||
Prior to beginning a match in Exhibition mode, players can adjust the following settings: | Prior to beginning a match in Exhibition mode, players can adjust the following settings: | ||
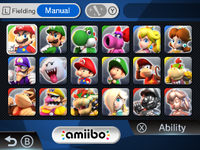
*'''Fielding:''' By default, fielding is set to auto, meaning the AI controls the outfielders when the ball is struck. Semi-auto fielding means that the player can control their outfielders somewhat, such as directing them where to throw the ball, while manual fielding indicates that players assume total control of the outfielders with some exceptions. | *'''Fielding:''' By default, fielding is set to auto, meaning the AI controls the outfielders when the ball is struck. Semi-auto fielding means that the player can control their outfielders somewhat, such as directing them where to throw the ball, while manual fielding indicates that players assume total control of the outfielders with some exceptions. | ||
*'''COM skill level:''' Players can select from Beginner, Intermediate, Advanced, and Pro skill levels. The Pro skill level is unlocked when players clear Champion's Cup. | *'''COM skill level:''' Players can select from Beginner, Intermediate, Advanced, and Pro skill levels. The Pro skill level is unlocked when players clear Champion's Cup. | ||
| Line 70: | Line 73: | ||
====Tennis==== | ====Tennis==== | ||
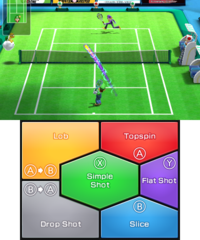
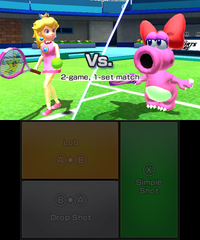
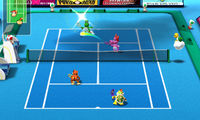
[[File:Tennis MSS.png|thumb|left|[[Luigi]] playing tennis against [[Waluigi]]. The bottom screen has HUD detailing the types of shots and button inputs required, with HUD being similar to ''Mario Tennis Open''.]] | [[File:Tennis MSS.png|thumb|left|[[Luigi]] playing tennis against [[Waluigi]]. The bottom screen has HUD detailing the types of shots and button inputs required, with HUD being similar to ''Mario Tennis Open''.]] | ||
Tennis plays very similarly to the ''Mario Tennis'' series, with elements and mechanics of the game taken from the two most recent installments | Tennis plays very similarly to the [[Mario Tennis (series)|''Mario Tennis'' series]], with elements and mechanics of the game taken from the two most recent installments before ''Mario Sports Superstars''{{'}}s release; ''[[Mario Tennis Open]]'' and ''[[Mario Tennis: Ultra Smash]]''. Players can participate in either singles, one-on-one tennis or doubles, 2-vs-2 tennis. [[Chance Shot]]s, Jump Shots, and the Ultra Smash make a return. This mode retains the touch screen functionality from ''Mario Tennis Open'', where players can view controls for specific shots, as well as the bottom screen indicating what button combination to use to perform specific Chance Shots or to counter specific Chance Shots. Players can opt to play in Simple mode, where Chance Shots are turned off. | ||
Tennis gameplay is as follows: players first serve a ball before it goes into play, where the speed of the serve depends on the height where it is hit from; players serve the ball the fastest when the ball is hit at its apex. Characters have different timing for serving their fastest shots, and the character's ability to serve is dependent on their power and spin; characters who have greater power can serve balls at quicker speeds, while characters who have a better ability to curve make it more difficult to return the ball. While receiving the ball, players need to wait until the ball bounces once; if they hit the serve before the ball bounces, a foul is called and the serving player receives a point. If the ball hits the square directly across the player, a fault is called and the player needs to serve the ball again. If players get another fault, they receive a double fault and the receiving player earns a point. If the ball hits the net while it is served, the server needs to retry the serve, but without any penalty. | Tennis gameplay is as follows: players first serve a ball before it goes into play, where the speed of the serve depends on the height where it is hit from; players serve the ball the fastest when the ball is hit at its apex. Characters have different timing for serving their fastest shots, and the character's ability to serve is dependent on their power and spin; characters who have greater power can serve balls at quicker speeds, while characters who have a better ability to curve make it more difficult to return the ball. While receiving the ball, players need to wait until the ball bounces once; if they hit the serve before the ball bounces, a foul is called and the serving player receives a point. If the ball hits the square directly across the player, a fault is called and the player needs to serve the ball again. If players get another fault, they receive a double fault and the receiving player earns a point. If the ball hits the net while it is served, the server needs to retry the serve, but without any penalty. Receiving players can perform a [[Taunt]] to increase the power of their next shot. | ||
[[File:MarioSportsSuperstarsScreenshot22.png|thumb|[[Princess Peach]] serving against [[Birdo]].]] | [[File:MarioSportsSuperstarsScreenshot22.png|thumb|[[Princess Peach]] serving against [[Birdo]].]] | ||
| Line 89: | Line 92: | ||
Prior to beginning a match in Exhibition mode, players can adjust the following settings: | Prior to beginning a match in Exhibition mode, players can adjust the following settings: | ||
*'''Hand:''' Players can choose to play with either a right-handed player or a left-handed player. | *'''Hand:''' Players can choose to play with either a right-handed player or a left-handed player. | ||
*'''COM skill level:''' Players can select from Beginner, Intermediate, Advanced, Pro, and Ace skill levels. The Ace skill level is unlocked when players clear Champion's Cup. | *'''COM skill level:''' Players can select from Beginner, Intermediate, Advanced, Pro, and Ace skill levels. The Ace skill level is unlocked when players clear Champion's Cup. | ||
| Line 98: | Line 100: | ||
====Golf==== | ====Golf==== | ||
[[File:MSS NinUK 16.png|thumb|left|[[Rosalina]] golfing. The bottom screen displays ball contact, types of spins, and the power meter on the top.]] | [[File:MSS NinUK 16.png|thumb|left|[[Rosalina]] golfing. The bottom screen displays ball contact, types of spins, and the power meter on the top.]] | ||
Very similar to the ''Mario Golf'' series, players can golf on one of the many courses. Much of the graphics, HUD, elements, and mechanics are taken from the latest iteration of the ''Mario Golf'' series, ''Mario Golf: World Tour'', including the bottom screen that includes information such as ball contact, ball spin, and the power meter. Players can either play two modes: Stroke Play, which players can golf for 9 holes or Ring Challenge in training mode, where | Very similar to the ''[[Mario Golf (series)|Mario Golf]]'' series, players can golf on one of the many courses. Much of the graphics, HUD, elements, and mechanics are taken from the latest iteration of the ''Mario Golf'' series, ''[[Mario Golf: World Tour]]'', including the bottom screen that includes information such as ball contact, ball spin, and the power meter. Players can either play two modes: Stroke Play, in which players can golf for 9 holes, or Ring Challenge in training mode, where they need to send the ball through large rings dotted across the course. This mode lacks Match Play from previous installments, meaning that the only way players can play against the computer player is if they are randomly selected on tournament modes. | ||
In golf, players need to sink the ball into a [[hole]] within a set number of shots, which is dependent on the course. Players are recommended to score at least a [[ | In golf, players need to sink the ball into a [[hole]] within a set number of shots, which is dependent on the course. Players are recommended to score at least a [[par]], which means the player has taken the number of strokes required for the ball to go into the hole. If players achieve less strokes than required, they earn better scores, such as a [[birdie]]. However, if players take more strokes than required to sink the ball into the hole, it worsens their overall score, and thus are called [[bogey]]s. | ||
Golf uses a power meter to determine power and control of the ball. Players need to time the rising of the bar, which determines the power of the shot, as well as the descending, which determines the accuracy of the shot. If players hit outside the marked boundaries of the power meter the time it descends for accuracy purposes, | Golf uses a power meter to determine power and control of the ball. Players need to time the rising of the bar, which determines the power of the shot, as well as the descending, which determines the accuracy of the shot. If players hit outside the marked boundaries of the power meter the time it descends for accuracy purposes, they whiff the shot, often costing a stroke. Players can get perfect accuracy if the bar hits the sweet spot of the meter; if the bar is stopped outside the sweet spot, the ball veers in the direction the bar is stopped at. In other words, if the bar is stopped to the area left of the sweet spot, the ball curves towards that direction, causing some inaccuracy within the shot. Additionally, players can adjust the trajectory of the ball (which is indicated by arrows rising and falling on the main screen) by changing the area of ball contact, indicated by the bottom screen. Hitting the ball in the upper regions decreases height, while hitting the ball left or right causes the ball to curve left or right depending on the direction hit, often used to bypass obstacles such as trees. Players can opt for the "easy" option, where they need to manually input only the rising of the bar while the game automatically times the lowering of the bar for accuracy. However, this method is not perfect and may result in mishits, especially if the sweet spot is very low. | ||
In addition, players need to take in account of the environment, which causes the ball to behave in different ways. Wind can change the ball's trajectory, and the speed of the wind as well as the direction it blows in depends on how affected the ball gets. Balls that have higher trajectories are more affected by the wind. The ball's lie is also affected by the ground it is on. If the ball is on the [[ | In addition, players need to take in account of the environment, which causes the ball to behave in different ways. Wind can change the ball's trajectory, and the speed of the wind as well as the direction it blows in depends on how affected the ball gets. Balls that have higher trajectories are more affected by the wind. The ball's lie is also affected by the ground it is on. If the ball is on the [[fairway]], there are no added penalties to the ball. However, if the ball lies in [[rough]] or [[bunker]]s, the power and accuracy of the ball is affected depending on how severe the terrain is. Topology of the course can also affect the ball's trajectory, where, often, more powerful, higher shots are needed to send the ball to higher elevations. Rain reduces power and spin of the shots, and players need to opt for significantly more power when they are putting the ball. | ||
[[File:Putting MSS.png|thumb|[[Baby Luigi]] putting on the | [[File:Putting MSS.png|thumb|[[Baby Luigi]] putting on the green.]] | ||
Different clubs have different purposes, and players can swap between clubs any time for varying needs. Woods, represented by "W", send the ball flying further at the cost of accuracy while irons, represented by "I", forgo ball drive in favor of accuracy. Sand wedges, represented by "SW" are used to get balls out of bunkers. Hybrids, represented by "H", are a mix between woods and irons and are used for compromising purposes between irons and woods. Pitching wedges, represented by "PW", are used to send balls flying higher and shorter than irons. If the ball is sent too far or not far enough, players can adjust drive distance by pressing {{button|3ds|l}} and {{button|3ds|r}} for guidelines on where to lower or increase power of the shot. As well as having different clubs, players can opt for Power shots or approach shots. Power shots have a limited use per round, but can send the ball flying even further and are used typically to aim for lower strokes on | Different clubs have different purposes, and players can swap between clubs any time for varying needs. Woods, represented by "W", send the ball flying further at the cost of accuracy, while irons, represented by "I", forgo ball drive in favor of accuracy. Sand wedges, represented by "SW", are most often used to get balls out of bunkers. Hybrids, represented by "H", are a mix between woods and irons and are used for compromising purposes between irons and woods. Pitching wedges, represented by "PW", are used to send balls flying higher and shorter than irons. If the ball is sent too far or not far enough, players can adjust drive distance by pressing {{button|3ds|l}} and {{button|3ds|r}} for guidelines on where to lower or increase power of the shot. As well as having different clubs, players can opt for Power shots or approach shots. Power shots have a limited use per round, but can send the ball flying even further and are used typically to aim for lower strokes on par 4 or 5 holes. If players align the bar in the power meter perfectly whenever a power shot is used, they save a power shot. Approach shots are made when players are near the green, which are weak shots used to knock balls close to the hole. | ||
When players are on the [[ | When players are on the [[green]], they can putt the ball into the hole, using one of three putters depending on the distance to the hole. In this case, players need to time only the rising of the power meter to make putts, where higher bars are stronger putts. Players who putt too weak cannot make the ball into the hole, while too powerful putts send the ball past the hole. Grids on the putting screen indicate topology of the course. Slopes are represented by white balls rolling on the grid, indicating the direction it will roll in. Slopes that are steeper are indicated by quicker rolling balls, and therefore, players need to adjust their position more the steeper the slope is. Downhill slopes are indicated by red on the grid, while uphill slopes are colored blue. Players need to putt harder for uphill slopes and weaker for downhill. | ||
Different types of spins return from ''Mario Golf: Toadstool Tour'', where players can activate them as soon after they | Different types of spins return from ''Mario Golf: Toadstool Tour'', where players can activate them as soon after they stop the power meter a second time if they are using manual rather than auto. Topspins send the ball forward, while backspins either brake the ball or send the ball backward depending on the height the ball falls from and the speed of the shot. Players can perform a topspin if {{button|3ds|a}} is hit twice, while performing a backspin if {{button|3ds|b}} is hit twice. Players can use more powerful spins for a longer effect if alternate buttons are pressed; they can perform a super topspin if {{button|3ds|a}} is hit first and then {{button|3ds|b}}, while a super backspin is performed if {{button|3ds|b}} is pressed first and then {{button|3ds|a}}. | ||
Up to four players can play golf, both in local and online multiplayer. However, requiring more players to play requires more cartridges and game systems, which emulates ''[[Mario Golf: World Tour]]'' | Up to four players can play golf, both in local and online multiplayer. However, requiring more players to play requires more cartridges and game systems, which emulates ''[[Mario Golf: World Tour]]''{{'}}s requirement of playing with more players rather than a single player controlling all characters and thus can pass the controller to other players as ''[[Mario Golf (Nintendo 64)|Mario Golf]]'' for the Nintendo 64, ''[[Mario Golf: Toadstool Tour]]'', and ''[[Mario Golf: Advance Tour]]'' handle in their multiplayer. | ||
Prior to beginning a match in Stroke Play mode, players can adjust the following settings: | Prior to beginning a match in Stroke Play mode, players can adjust the following settings: | ||
*'''Swing:''' Players can choose to play with either a right-handed or left-handed player. This reverses a fade or draw trajectory. | |||
*'''Swing:''' Players can choose to play with either a right-handed | |||
*'''Holes:''' Players can play with 9, 6, or 3 holes. | *'''Holes:''' Players can play with 9, 6, or 3 holes. | ||
*'''Shuffle:''' When turned on, this plays on holes in a random order. When turned off, this plays holes in a set order. | *'''Shuffle:''' When turned on, this plays on holes in a random order. When turned off, this plays holes in a set order. | ||
| Line 127: | Line 128: | ||
====Horse Racing==== | ====Horse Racing==== | ||
[[File:MSS NinUK 21.png|thumb|[[Birdo]] in horse racing.]] | [[File:MSS NinUK 21.png|thumb|[[Birdo]] in horse racing.]] | ||
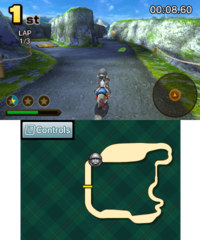
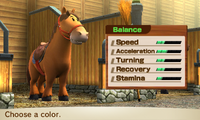
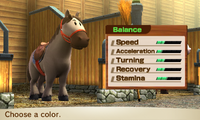
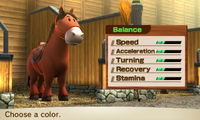
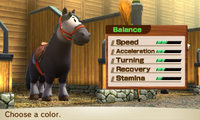
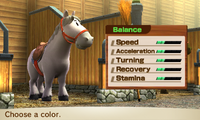
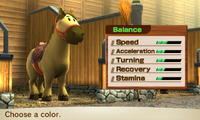
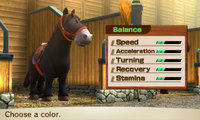
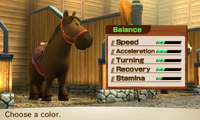
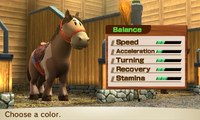
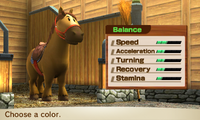
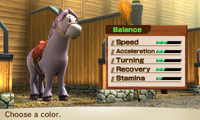
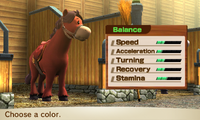
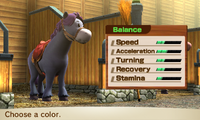
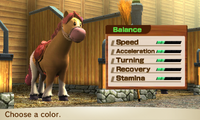
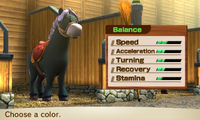
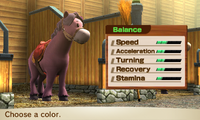
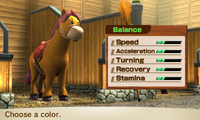
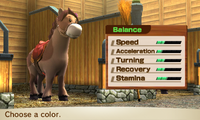
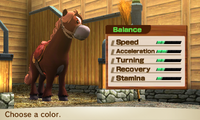
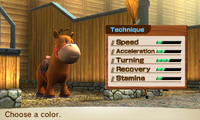
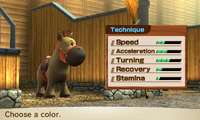
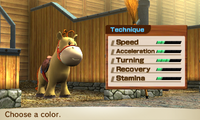
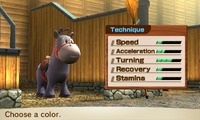
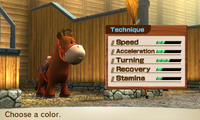
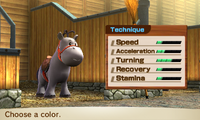
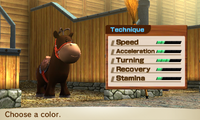
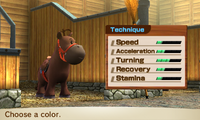
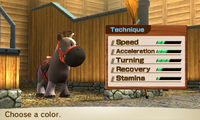
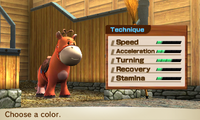
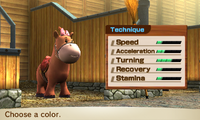
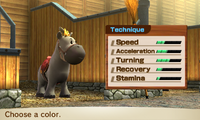
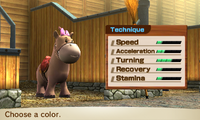
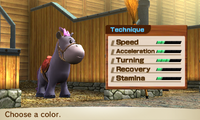
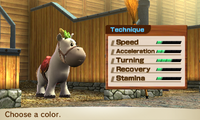
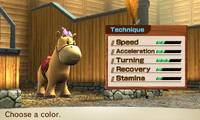
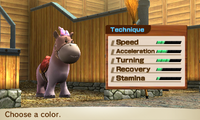
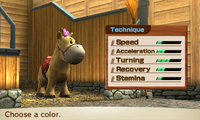
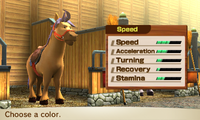
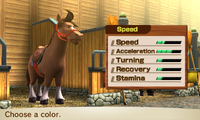
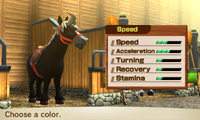
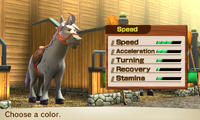
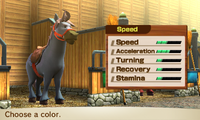
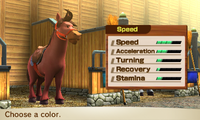
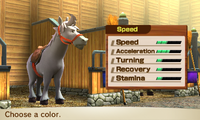
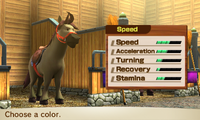
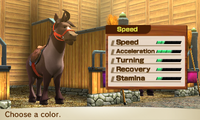
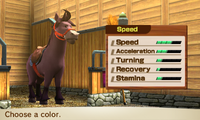
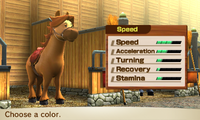
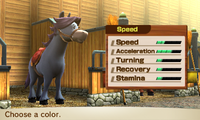
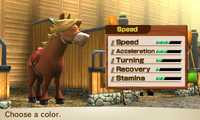
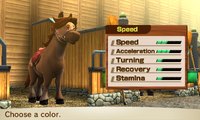
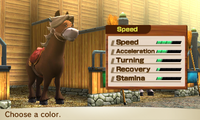
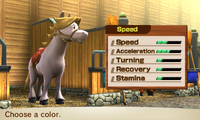
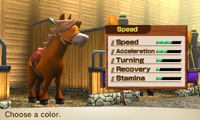
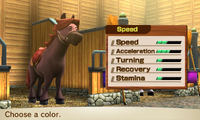
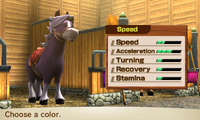
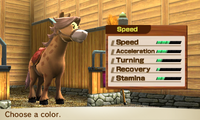
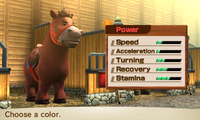
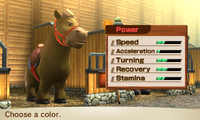
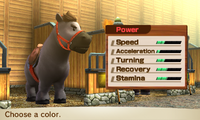
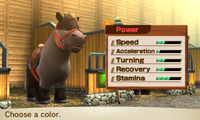
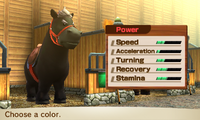
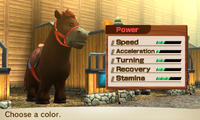
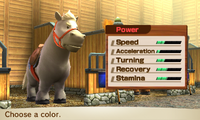
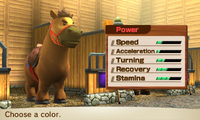
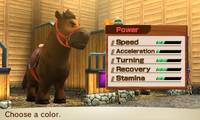
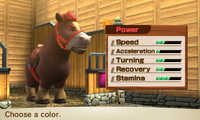
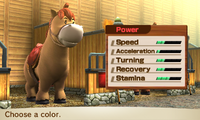
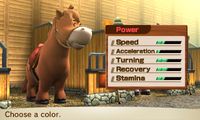
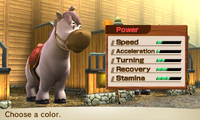
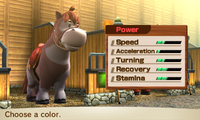
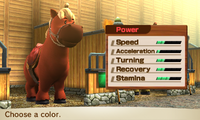
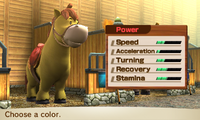
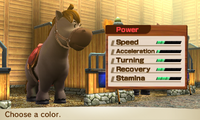
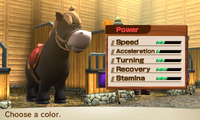
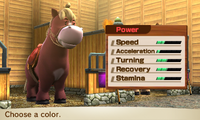
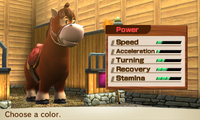
Characters race each other saddleback on [[horse]]s as they leap over hazards and dodge obstacles, a sport entirely new to the ''Mario'' | Characters race each other saddleback on [[horse]]s as they leap over hazards and dodge obstacles, a sport entirely new to the ''Super Mario'' franchise. Before players start up their game, they can choose and customize their horse. The first option is selecting a male or female horse, and players can then choose a type of horse from four different types and builds: balance, technique, speed, and power. Players can then select horses from a variety of colors, all which have different stats from one another; after that has been selected, players can choose to name their horse. When players have a horse in their stable, they can choose to release it any time; however this removes all bond progress made with the horse. Up to 16 different horses may be kept in a stable. | ||
Players can groom, pet, and feed horses, which betters their mood. Horses with higher mood rating, indicated by ♪, start out with more parts of the Star Dash meter filled prior to starting the race. When feeding and petting the horse, each horse has a specific food they like, dislike, and each horse has an area they love and hate being petted on; the preferences for what a horse likes is randomly selected and players find out only when the horse reacts to the food and petting in a certain way. The available food choices are grass, which all horses can enjoy and players have an infinite number of regular grass, carrots, apples, corn, lettuce, and barley, and players can pet their horse either on the head, the neck, the belly, or the rear. Feeding the correct item and petting the horse in the right spots increases their mood substantially. Reward food such as candy, sugar, and honey may be occasionally found; horses love all three types of these reward items and feeding them reward foods substantially increases their mood. Players can additionally find better versions of grass, carrots, apples, corn, lettuce, and barley, and feeding not only the food the horse likes improves their mood but a higher quality feed substantially betters their mood. | Players can groom, pet, and feed horses, which betters their mood. Horses with higher mood rating, indicated by ♪, start out with more parts of the Star Dash meter filled prior to starting the race. When feeding and petting the horse, each horse has a specific food they like, dislike, and each horse has an area they love and hate being petted on; the preferences for what a horse likes is randomly selected and players find out only when the horse reacts to the food and petting in a certain way. The available food choices are grass, which all horses can enjoy and players have an infinite number of regular grass, carrots, apples, corn, lettuce, and barley, and players can pet their horse either on the head, the neck, the belly, or the rear. Feeding the correct item and petting the horse in the right spots increases their mood substantially. Reward food such as candy, sugar, and honey may be occasionally found; horses love all three types of these reward items and feeding them reward foods substantially increases their mood. Players can additionally find better versions of grass, carrots, apples, corn, lettuce, and barley, and feeding not only the food the horse likes improves their mood but a higher quality feed substantially betters their mood. | ||
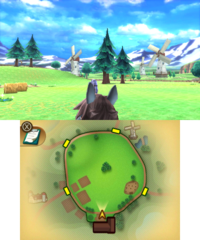
[[File:Horse Racing Stable.png|thumb|left|Walking the horse in a field in stable mode.]] | [[File:Horse Racing Stable.png|thumb|left|Walking the horse in a field in stable mode.]] | ||
During stable mode when players are in control of their horse once they are out on the field, players control and view their horse in a first person perspective. In the field, players can find areas of interest by walking around on their horse on the field. Players can approach various areas of interest indicated by sparkling grass or flowers. In sparkling grass, players can either see their horse eat the grass, which has a chance of improving their mood once the walk is done, or find a wooden ? crate, which has either a regular accessory, feed, or coins. If players find a | During stable mode when players are in control of their horse once they are out on the field, players control and view their horse in a first person perspective. In the field, players can find areas of interest by walking around on their horse on the field. Players can approach various areas of interest indicated by sparkling grass or flowers. In sparkling grass, players can either see their horse eat the grass, which has a chance of improving their mood once the walk is done, or find a wooden ? crate, which has either a regular accessory, feed, or coins. If players find a [[small bird]] in the grass, they receive a Mario Token, where 20 of them can be found; when players find all 20 Mario Tokens, they unlock the Mario Token Crown head accessory. If players find a rabbit on the grass, they receive a rarer item, such as a rarer accessory or a reward food. If players have a greater bond rating for their horse, the rarer items and higher quality feed will be easier to find during walking around the field and outings. If players interact with sparkling flowers or a sparkling pool of water, they both increase the chance of improving the horse's mood once the walk is done. Players can take their horses to an outing on the first track of each of the four themed tracks on this game. Players can receive items during the outing by running past the ? crate icons, where they can receive feed, coins, or rare items; additionally, these outings can improve a horse's mood. | ||
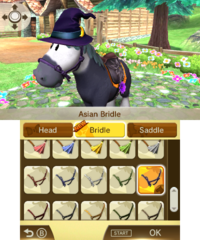
Players can decorate their horse with any accessory they have unlocked, including their saddle, hats, and the bridle. Accessories do not change a horse's stats, as they serve for aesthetic purposes only. Accessories have a certain theme and color for each set: for example, players have five different types of Witch's Hats, each in their own color. Accessories can come in series: players can obtain, for example, Gorgeous Crowns, Gorgeous Bridles, and Gorgeous Saddles to decorate their horse with a specific theme. When players obtain more accessories, the rate of acquiring accessories becomes exponentially more difficult and rarer to obtain. Players have a chance of obtaining rare Mario-themed hat accessories when they take their horse out for an outing. In facing off against more difficult CPUs, CPUs decorate their horse with accessories and are more elaborately decorated the harder the difficulty is; the type of decoration is also dependent on the character used. In the hardest difficulty, Pro, CPUs decorate their horses with the rare, complete set of accessories. | Players can decorate their horse with any accessory they have unlocked, including their saddle, hats, and the bridle. Accessories do not change a horse's stats, as they serve for aesthetic purposes only. Accessories have a certain theme and color for each set: for example, players have five different types of Witch's Hats, each in their own color. Accessories can come in series: players can obtain, for example, Gorgeous Crowns, Gorgeous Bridles, and Gorgeous Saddles to decorate their horse with a specific theme. When players obtain more accessories, the rate of acquiring accessories becomes exponentially more difficult and rarer to obtain. Players have a chance of obtaining rare Mario-themed hat accessories when they take their horse out for an outing. In facing off against more difficult CPUs, CPUs decorate their horse with accessories and are more elaborately decorated the harder the difficulty is; the type of decoration is also dependent on the character used. In the hardest difficulty, Pro, CPUs decorate their horses with the rare, complete set of accessories. | ||
| Line 141: | Line 142: | ||
Prior to beginning a match in Free Race mode, players can adjust the following settings: | Prior to beginning a match in Free Race mode, players can adjust the following settings: | ||
*'''Star Dash:''' This toggles Star Dash on or off. | *'''Star Dash:''' This toggles Star Dash on or off. | ||
*'''Number of Laps:''' Players can play with 1, 2, or 3 laps. | *'''Number of Laps:''' Players can play with 1, 2, or 3 laps. | ||
| Line 148: | Line 148: | ||
===Training=== | ===Training=== | ||
Each sport has its own training modes. In order to unlock Pink Gold Peach, players need to complete the sport's respective ring challenge mode on Hard difficulty. When players complete it, as well as Pink Gold Peach being unlocked, players unlock a Pro version of the mode, where players aim for the highest score. The type of training is dependent on the sport played, which is outlined by the following. | Each sport has its own training modes. In order to unlock Pink Gold Peach, players need to complete the sport's respective ring challenge mode on Hard difficulty. When players complete it, as well as Pink Gold Peach being unlocked, players unlock a Pro version of the mode, where players aim for the highest score. The type of training is dependent on the sport played, which is outlined by the following. All five sports have Ring Challenges, while tennis additionally has a Rally Challenge. | ||
====Soccer==== | ====Soccer==== | ||
{ | {{content description | ||
| | |image1=[[File:Soccer-RingChallenge.png|200px]] | ||
|name1=Ring Challenge | |||
|description1=Players need to shoot the ball past dummies made out of [[Rotating Block]]s and into the rings to score a set amount points within the posted time limit. Higher difficulties require more rings to be shot through; Hard difficulty has a goalie that attempts to deflect shots. | |||
|image2=[[File:Soccer-FreeTraining.png|200px]] | |||
|name2=Free Training | |||
| | |description2=Players can choose captains, their team, and play in a field ([[Village Stadium]]) where the only opponent is the goalie. Players have an infinite amount of special shots they can use. | ||
| | }} | ||
| | |||
====Baseball==== | ====Baseball==== | ||
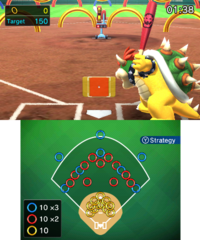
{ | {{content description | ||
| | |image1=[[File:Baseball-RingChallenge.png|200px]] | ||
|name1=Ring Challenge | |||
|description1=Players need to hit the ball through colored rings on the outfield. Yellow rings are worth 10 points, red rings are worth 20 points, and blue rings are worth 30 points. In higher difficulties, players need to shoot through more rings within an increased, compensated time limit. | |||
|image2=[[File:Baseball-BattingPractice.png|200px]] | |||
|name2=Batting Practice | |||
| | |description2=Players can use a pitching machine to practice batting. Here, they can adjust pitching speed, the type of pitch, and the different types of orientations of the ball when pitched. | ||
| | |image3=[[File:Baseball-PitchingPractice.png|200px]] | ||
|name3=Pitching Practice | |||
| | |description3=Players can practice pitching against a selected opponent's team of their choice, with an infinite amount of special move pitches. In this mode, fielding is set to automatic, meaning the computer controls the fielders if the ball is hit, | ||
| | }} | ||
| | |||
====Tennis==== | ====Tennis==== | ||
{ | {{content description | ||
| | |image1=[[File:Tennis-RingChallenge.png|200px]] | ||
|name1=Ring Challenge | |||
|description1=Playing very similarly to the [[Ring Shot]] minigame of previous ''Mario Tennis'' entries, especially ''[[Mario Tennis Open]]'', players hit balls through rings on the Grass Court; to complete this mode, players need to earn a certain amount of points within the time limit. Smaller rings are worth more points, and red rings are worth twice the amount as yellow rings. In harder difficulties, players need to lob or drop shot the ball to pass through some trickier rings. | |||
|image2=[[File:Tennis-RallyChallenge.png|200px]] | |||
|name2=Rally Challenge | |||
| | |description2=Players need to hit the ball over the court without hitting the Bowser panels. Players have three lives, and they lose a life whenever the ball hits the Bowser panel, if they fail to rally the ball back, or if they are body shot by the ball. Players lose the game if they lose all lives. In higher difficulties, more Bowser panels cover the court, as well as needing to rally the ball back more times. | ||
| | }} | ||
| | |||
====Golf==== | ====Golf==== | ||
{ | {{content description | ||
| | |image1=[[File:Golf-RingChallenge.png|200px]] | ||
|name1=Ring Challenge | |||
|description1=Players need to hit through a ring and land on the designated target areas near the [[hole]]. Landing closer to the hole causes the player to earn more points. However, if players miss the ring completely, they do not earn any points; additionally, players do not earn points if the ball does not land on the target areas. In harder difficulties, players contend with trickier lies, as well as putting the ball into the target areas while accounting for the topology of the course. | |||
|image2=[[File:Golf-ShotPractice.png|200px]] | |||
|name2=Shot Practice | |||
| | |description2=Players need to hit the ball onto the designated glowing circle. Harder difficulties have trickier lies, stronger wind, and more sloped areas. | ||
| | |image3=[[File:Golf-ApproachPractice.png|200px]] | ||
|name3=Approach Practice | |||
| | |description3=Very similar to Shot Practice, except players are closer to holes and use approach shots to land the ball on the designated glowing circle. | ||
| | |image4=[[File:Golf-PuttingPractice.png|200px]] | ||
|name4=Putting Practice | |||
| | |description4=Very similar to Shot Practice, except players put the ball close to the hole onto the glowing circle. Higher difficulties of this training has more inclined slopes and farther away holes. | ||
| | }} | ||
| | |||
====Horse Racing==== | ====Horse Racing==== | ||
{ | {{content description | ||
| | |image1=[[File:HorseRacing-RingChallenge.png|200px]] | ||
|name1=Ring Challenge | |||
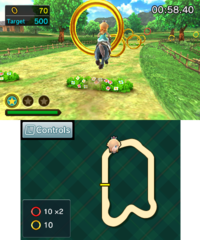
|description1=Players need to steer their horses through rings on the tracks within either the time limit or one lap around the track. In this mode, players have infinite stamina and one use of the Star Dash technique. Collecting rings while the players are Star Dashing doubles the output. Red rings are rarer and are worth twice the amount of yellow rings. In higher difficulties, players take on more difficult tracks as well as an increased ring amount they need to collect. | |||
|image2=[[File:HorseRacing-FreeTraining.png|200px]] | |||
|name2=Free Training | |||
| | |description2=Players can practice on any track they can choose without opponent racers. | ||
| | }} | ||
| | |||
===Stats=== | ===Stats=== | ||
''Mario Sports Superstars'' keeps track of stats depending on the sport. The following is the list of all stats and the following descriptions. | ''Mario Sports Superstars'' keeps track of stats depending on the sport. The following is the list of all stats and the following descriptions. | ||
*'''With People Nearby:''' The game keeps track of matches, wins, losses, draws, and the win percent when playing with local multiplayer options. | *'''With People Nearby:''' The game keeps track of matches, wins, losses, draws, and the win percent when playing with local multiplayer options. | ||
*'''With Friends Online:''' Similar to the previous stat, except it deals with the player's friends online. | *'''With Friends Online:''' Similar to the previous stat, except it deals with the player's friends online. | ||
| Line 238: | Line 222: | ||
''Mario Sports Superstars'' introduces its own line of amiibo cards, where each character receives 5 cards based on the sports of the game. There are 90 cards in total. The amiibo cards are blindly packaged separately in sets of five for US$4.99 (AUS$7.99$) each, similar to the [[nookipedia:amiibo|''Animal Crossing'']] line of amiibo cards. While Star characters can normally be unlocked when Champion's Cup in tournament mode is won, Star characters can be unlocked immediately through tapping the corresponding character on the card. amiibo cards can be used for players to power up to unlock superstar versions of the character on the card. Three stats specific for the sport are displayed on the card. The red bars indicate the stats characters start with, while the blue bars display the stats of a starred character and the yellow display the stats of a superstar character. Any stats with blue arrows facing to the left means that the stats are decreased when a certain stat is increased; this stat hindrance mirrors starred characters in the ''Mario Golf'' series, where their drive increases at the cost of impact. | ''Mario Sports Superstars'' introduces its own line of amiibo cards, where each character receives 5 cards based on the sports of the game. There are 90 cards in total. The amiibo cards are blindly packaged separately in sets of five for US$4.99 (AUS$7.99$) each, similar to the [[nookipedia:amiibo|''Animal Crossing'']] line of amiibo cards. While Star characters can normally be unlocked when Champion's Cup in tournament mode is won, Star characters can be unlocked immediately through tapping the corresponding character on the card. amiibo cards can be used for players to power up to unlock superstar versions of the character on the card. Three stats specific for the sport are displayed on the card. The red bars indicate the stats characters start with, while the blue bars display the stats of a starred character and the yellow display the stats of a superstar character. Any stats with blue arrows facing to the left means that the stats are decreased when a certain stat is increased; this stat hindrance mirrors starred characters in the ''Mario Golf'' series, where their drive increases at the cost of impact. | ||
Unlike the ''Animal Crossing'' amiibo cards, the ''Mario Sports Superstars'' amiibo | Unlike the ''Animal Crossing'' amiibo cards, the ''Mario Sports Superstars'' amiibo cards only work specifically for ''Mario Sports Superstars'', thus do not work or recognized as a generic amiibo in other games. (e.g: Daisy in Horse Racing does not unlock Daisy Yoshi in ''[[Poochy & Yoshi's Woolly World]]'' or Birdo in Golf does not unlock a Birdo costume in ''[[Super Mario Maker]]''). Additionally, amiibo cards can be used to unlock new gear for characters to use, which is displayed on the card. | ||
===Collection=== | ===Collection=== | ||
{{main|List of Mario Sports Superstars digital cards}} | {{main|List of Mario Sports Superstars digital cards}} | ||
{{main|Sound Test}} | {{main|Sound Test}} | ||
This mode is mostly related to the digital card collection, however also allows access to the [[Sound Test]] and staff credits. Players can access the shop, where they can buy packs of digital amiibo cards with coins earned in-game. These cards are randomized which allows for doubles. Players can buy a 3-card pack for 300 coins, a 10-card pack for 1000 coins, or a 3 card pack with no doubles with 100 double cards. amiibo can also be used to purchase | This mode is mostly related to the digital card collection, however also allows access to the [[Sound Test]] and staff credits. Players can access the shop, where they can buy packs of digital amiibo cards with coins earned in-game. These cards are randomized which allows for doubles. Players can buy a 3-card pack for 300 coins, a 10-card pack for 1000 coins, or a 3 card pack with no doubles with 100 double cards. One amiibo can also be used to purchase one 3 card packs with doubles per day, having up to three different amiibo taps per day. | ||
The collection album displays cards the player has owned, as well as organizing them with 18 categories: Super Rare, Rare | The collection album displays cards the player has owned, as well as organizing them with 18 categories: Super Rare, Rare Soccer, Rare Baseball, Rare Tennis, Rare Golf, Rare Horse Racing, Normal Soccer, Normal Baseball, Normal Tennis, Normal Golf, Normal Horse Racing, Sub Character, Pro Soccer Gear, Pro Baseball Gear, Pro Tennis Gear, Pro Golf Gear, Pro Horse Symbols, and Horse. There are a total of 324 digital cards to collect. | ||
===Road to Superstar=== | ===Road to Superstar=== | ||
[[File:MarioSportsSuperstarsScreenshot3.png|thumb|The Road to Superstar minigame.]] | [[File:MarioSportsSuperstarsScreenshot3.png|thumb|The Road to Superstar minigame.]] | ||
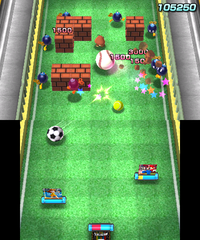
This minigame can be played when players tap three amiibo cards. The minigame seems to be inspired from | This minigame can be played when players tap three amiibo cards. The minigame seems to be inspired from {{iw|wikipedia|Breakout (video game)|''Breakout''}}, where players use their selected amiibo cards to deflect various gear themed after the sports they are designed, with each gear projectile having a different property. Prior to beginning this mode, players can adjust placement of their three cards on a grid. Players need to destroy [[Brick Block]]s and defeat enemies (or wait until the enemies walk offscreen) to proceed through the stage. When an enemy or opponent projectile touches a card, it gets knocked over and leaves an opening; players can quickly prop the card back up by tapping the {{button|3ds|a}} button. Players can also change direction of the ball by holding the corresponding shoulder button, as well as increase the speed of the left and right movement of the cards by pressing the corresponding button. Players lose their projectile if the projectile passes through the cards; if players lose all available projectiles on the field, they lose the game and need to start over. If players lose the game three times in a row, they can activate Assist Mode, which places Brick Blocks on the bottom screen, though this mode halves the score obtained. Players can use a Special Attack technique if the projectiles hit the card enough times and the meter is filled out; cards closer to the top earn their Special Attack far more quickly. Once the meter is filled out, the Special Attack technique is used as soon as the projectile hits the card with the maxed out meter. The Special Attack increases the size of the projectile and destroys [[Empty Block]]s and defeats [[Shy Guy]]s in one hit. If a projectile is lost, a [[Goomba]] or [[Bone Goomba]] may occasionally appear carrying the gear: defeating this Goomba allows access to the projectile again. Players then defeat a mid-boss, a variety of the [[Hammer Bro]] species, before facing the boss of the stage, who is dependent on the progress of the player. Defeating this boss and completing this mode bestows a "Superstar" status to their character, greatly increasing all of the stats, moreso than a Star character. This is then scanned onto the amiibo card using the card's read/write capabilities. A high score is recorded as well, and if players have more projectiles after the completion of this mode, this also increases the high score of the player. | ||
===Settings=== | ===Settings=== | ||
Players can adjust various settings to their liking when the icon is tapped on the main menu. The following is a list of all settings. | Players can adjust various settings to their liking when the icon is tapped on the main menu. The following is a list of all settings. | ||
;Common | ;Common | ||
*'''BGM:''' Players can toggle the background music on or off. This does not turn off menu music and some jingles, however; turning off the music includes turning off the post-hole music from ''[[Mario Golf World Tour]]'' where originally in that game, post-hole music would still play even if the music is turned off. Players can still listen to music in the sound test even if the music is turned off. | *'''BGM:''' Players can toggle the background music on or off. This does not turn off menu music and some jingles, however; turning off the music includes turning off the post-hole music from ''[[Mario Golf: World Tour]]'' where originally in that game, post-hole music would still play even if the music is turned off. Players can still listen to music in the sound test even if the music is turned off. | ||
*'''Send Play Data:''' This sends play data to Nintendo via the use of Nintendo Network services. | *'''Send Play Data:''' This sends play data to Nintendo via the use of Nintendo Network services. | ||
*'''Blacklist:''' This deletes the list of players that players added in order to not have a match with them. | *'''Blacklist:''' This deletes the list of players that players added in order to not have a match with them. | ||
;Soccer | ;Soccer | ||
*'''Controls:''' This changes the control inputs of soccer to Type A, Type B, and Type C, all which have different control types. | *'''Controls:''' This changes the control inputs of soccer to Type A, Type B, and Type C, all which have different control types. | ||
;Baseball | ;Baseball | ||
*'''Speed:''' This changes the display unit of pitching speed from either km/h (kilometers per hour) or mph (miles per hour). | *'''Speed:''' This changes the display unit of pitching speed from either km/h (kilometers per hour) or mph (miles per hour). | ||
;Golf | ;Golf | ||
*'''Distance:''' This changes the distance display unit from either meters or yards. | *'''Distance:''' This changes the distance display unit from either meters or yards. | ||
*'''Putter:''' This changes the putter display unit from either meters or yards. | *'''Putter:''' This changes the putter display unit from either meters or yards. | ||
*'''Wind Speed:''' This changes the display unit of wind speed from either m/s (meters per second) or mph (miles per hour). | *'''Wind Speed:''' This changes the display unit of wind speed from either m/s (meters per second) or mph (miles per hour). | ||
;Horse Racing | ;Horse Racing | ||
*'''Distance:''' This changes the distance of the tracks from either meters or yards. | *'''Distance:''' This changes the distance of the tracks from either meters or yards. | ||
| Line 275: | Line 254: | ||
==Controls== | ==Controls== | ||
Each sport uses its own control scheme, and the controls often depend on the specific situation the players are in. | Each sport uses its own control scheme, and the controls often depend on the specific situation the players are in. | ||
===Soccer=== | ===Soccer=== | ||
{| | {|class=wikitable style="text-align:center;margin:0 auto"width=50% | ||
|- | |- | ||
!colspan=4 align="center" | !colspan=4 align="center"|Attack | ||
|- | |- | ||
!width=25% | !width=25%|Command | ||
!width=8% | !width=8%|Input (Type A) | ||
!width=8% | !width=8%|Input (Type B) | ||
!width=8% | !width=8%|Input (Type C) | ||
|- | |- | ||
! Move | !Move | ||
|{{button|3ds|Stick}} / {{button|3ds|Pad}} | |{{button|3ds|Stick}} / {{button|3ds|Pad}} | ||
|{{button|3ds|Stick}} / {{button|3ds|Pad}} | |{{button|3ds|Stick}} / {{button|3ds|Pad}} | ||
|{{button|3ds|Stick}} / {{button|3ds|Pad}} | |{{button|3ds|Stick}} / {{button|3ds|Pad}} | ||
|- | |- | ||
! Shoot | !Shoot | ||
|{{button|3ds|A}} | |{{button|3ds|A}} | ||
|{{button|3ds|Y}} | |{{button|3ds|Y}} | ||
|{{button|3ds|A}} | |{{button|3ds|A}} | ||
|- | |- | ||
! Special Shot | !Special Shot | ||
|{{button|3ds|A}} → {{button|3ds|A}} | |{{button|3ds|A}} → {{button|3ds|A}} | ||
|{{button|3ds|Y}} → {{button|3ds|Y}} | |{{button|3ds|Y}} → {{button|3ds|Y}} | ||
|{{button|3ds|A}} → {{button|3ds|A}} | |{{button|3ds|A}} → {{button|3ds|A}} | ||
|- | |- | ||
! Short Pass | !Short Pass | ||
|{{button|3ds|B}} | |{{button|3ds|B}} | ||
|{{button|3ds|B}} | |{{button|3ds|B}} | ||
|{{button|3ds|B}} | |{{button|3ds|B}} | ||
|- | |- | ||
! Long Pass Centering | !Long Pass Centering | ||
|{{button|3ds|Y}} | |{{button|3ds|Y}} | ||
|{{button|3ds|A}} | |{{button|3ds|A}} | ||
|{{button|3ds|Y}} | |{{button|3ds|Y}} | ||
|- | |- | ||
! Special Combo Shot | !Special Combo Shot | ||
|{{button|3ds|Y}} → {{button|3ds|Y}} | |{{button|3ds|Y}} → {{button|3ds|Y}} | ||
|{{button|3ds|A}} → {{button|3ds|A}} | |{{button|3ds|A}} → {{button|3ds|A}} | ||
|{{button|3ds|Y}} → {{button|3ds|Y}} | |{{button|3ds|Y}} → {{button|3ds|Y}} | ||
|- | |- | ||
! Through Pass | !Through Pass | ||
|{{button|3ds|X}} | |{{button|3ds|X}} | ||
|{{button|3ds|X}} | |{{button|3ds|X}} | ||
|{{button|3ds|X}} | |{{button|3ds|X}} | ||
|- | |- | ||
! Dash | !Dash | ||
|{{button|3ds|L}} | |{{button|3ds|L}} | ||
|{{button|3ds|R}} | |{{button|3ds|R}} | ||
|{{button|3ds|R}} | |{{button|3ds|R}} | ||
|- | |- | ||
! Technique | !Technique | ||
|{{button|3ds|R}} | |{{button|3ds|R}} | ||
|{{button|3ds|L}} | |{{button|3ds|L}} | ||
|{{button|3ds|L}} | |{{button|3ds|L}} | ||
|- | |- | ||
!colspan=4 align="center" | !colspan=4 align="center"|Fielding | ||
|- | |- | ||
!width=25% | !width=25%|Command | ||
!width=8% | !width=8%|Input (Type A) | ||
!width=8% | !width=8%|Input (Type B) | ||
!width=8% | !width=8%|Input (Type C) | ||
|- | |- | ||
! Move | !Move | ||
|{{button|3ds|Stick}} / {{button|3ds|Pad}} | |{{button|3ds|Stick}} / {{button|3ds|Pad}} | ||
|{{button|3ds|Stick}} / {{button|3ds|Pad}} | |{{button|3ds|Stick}} / {{button|3ds|Pad}} | ||
|{{button|3ds|Stick}} / {{button|3ds|Pad}} | |{{button|3ds|Stick}} / {{button|3ds|Pad}} | ||
|- | |- | ||
! Slide | !Slide | ||
|{{button|3ds|A}} | |{{button|3ds|A}} | ||
|{{button|3ds|A}} | |{{button|3ds|A}} | ||
|{{button|3ds|Y}} | |{{button|3ds|Y}} | ||
|- | |- | ||
! Pressure | !Pressure | ||
|{{button|3ds|B}} | |{{button|3ds|B}} | ||
|{{button|3ds|B}} | |{{button|3ds|B}} | ||
|{{button|3ds|B}} | |{{button|3ds|B}} | ||
|- | |- | ||
! Pressure Defense | !Pressure Defense | ||
|{{button|3ds|Y}} | |{{button|3ds|Y}} | ||
|{{button|3ds|Y}} | |{{button|3ds|Y}} | ||
|{{button|3ds|A}} | |{{button|3ds|A}} | ||
|- | |- | ||
! Goalkeeper Lunge | !Goalkeeper Lunge | ||
|{{button|3ds|X}} | |{{button|3ds|X}} | ||
|{{button|3ds|X}} | |{{button|3ds|X}} | ||
|{{button|3ds|X}} | |{{button|3ds|X}} | ||
|- | |- | ||
! Dash | !Dash | ||
|{{button|3ds|L}} | |{{button|3ds|L}} | ||
|{{button|3ds|R}} | |{{button|3ds|R}} | ||
|{{button|3ds|R}} | |{{button|3ds|R}} | ||
|- | |- | ||
! Change Player | !Change Player | ||
|{{button|3ds|R}} | |{{button|3ds|R}} | ||
|{{button|3ds|L}} | |{{button|3ds|L}} | ||
| Line 375: | Line 353: | ||
===Baseball=== | ===Baseball=== | ||
{| | {|class=wikitable style="text-align:center;margin:0 auto"width=50% | ||
|- | |- | ||
!colspan=2 align="center" | !colspan=2 align="center"|Batting | ||
|- | |- | ||
!width=25% | !width=25%|Command | ||
!width=25% | !width=25%|Input | ||
|- | |- | ||
! Move Swing Zone | !Move Swing Zone | ||
|{{button|3ds|Stick}} | |{{button|3ds|Stick}} | ||
|- | |- | ||
! Time | !Time | ||
|{{button|3ds|Padup}} | |{{button|3ds|Padup}} | ||
|- | |- | ||
! Bunt | !Bunt | ||
|{{button|3ds|Padright}} / {{button|3ds|Paddown}} / {{button|3ds|Padleft}} | |{{button|3ds|Padright}} / {{button|3ds|Paddown}} / {{button|3ds|Padleft}} | ||
|- | |- | ||
! Power Swing | !Power Swing | ||
|{{button|3ds|A}} | |{{button|3ds|A}} | ||
|- | |- | ||
! Contact Swing | !Contact Swing | ||
|{{button|3ds|B}} | |{{button|3ds|B}} | ||
|- | |- | ||
! Strategy | !Strategy | ||
|{{button|3ds|Y}} | |{{button|3ds|Y}} | ||
|- | |- | ||
! Special Move | !Special Move | ||
|{{button|3ds|X}} | |{{button|3ds|X}} | ||
|- | |- | ||
! Change Batting Stance | !Change Batting Stance | ||
|{{button|3ds|L}} / {{button|3ds|R}} | |{{button|3ds|L}} / {{button|3ds|R}} | ||
|- | |- | ||
!colspan=2 align="center" | !colspan=2 align="center"|Pitcher | ||
|- | |- | ||
!width=25% | !width=25%|Command | ||
!width=25% | !width=25%|Input | ||
|- | |- | ||
! Change Pitch Location | !Change Pitch Location | ||
|{{button|3ds|Stick}} | |{{button|3ds|Stick}} | ||
|- | |- | ||
! Fastball | !Fastball | ||
|{{button|3ds|Padup}} | |{{button|3ds|Padup}} | ||
|- | |- | ||
! Screwball | !Screwball | ||
|{{button|3ds|Padright}} | |{{button|3ds|Padright}} | ||
|- | |- | ||
! Sinker | !Sinker | ||
|{{button|3ds|Padright}} + {{button|3ds|Paddown}} | |{{button|3ds|Padright}} + {{button|3ds|Paddown}} | ||
|- | |- | ||
! Forkball | !Forkball | ||
|{{button|3ds|Paddown}} | |{{button|3ds|Paddown}} | ||
|- | |- | ||
! Curveball | !Curveball | ||
|{{button|3ds|Padleft}} + {{button|3ds|Paddown}} | |{{button|3ds|Padleft}} + {{button|3ds|Paddown}} | ||
|- | |- | ||
! Slider | !Slider | ||
|{{button|3ds|Padleft}} | |{{button|3ds|Padleft}} | ||
|- | |- | ||
! Pitch | !Pitch | ||
|{{button|3ds|A}} | |{{button|3ds|A}} | ||
|- | |- | ||
! Pickoff Attempt | !Pickoff Attempt | ||
|{{button|3ds|B}} | |{{button|3ds|B}} | ||
|- | |- | ||
! Strategy | !Strategy | ||
|{{button|3ds|Y}} | |{{button|3ds|Y}} | ||
|- | |- | ||
! Special Move | !Special Move | ||
|{{button|3ds|X}} | |{{button|3ds|X}} | ||
|- | |- | ||
! Change Pitch (Counterclockwise) | !Change Pitch (Counterclockwise) | ||
|{{button|3ds|L}} | |{{button|3ds|L}} | ||
|- | |- | ||
! Change Pitch (Clockwise) | !Change Pitch (Clockwise) | ||
|{{button|3ds|R}} | |{{button|3ds|R}} | ||
|- | |- | ||
!colspan=2 align="center" | !colspan=2 align="center"|Baserunning | ||
|- | |- | ||
!width=25% | !width=25%|Command | ||
!width=25% | !width=25%|Input | ||
|- | |- | ||
! Advance to Base | !Advance to Base | ||
|{{button|3ds|A}} | |{{button|3ds|A}} | ||
|- | |- | ||
! Return to Base | !Return to Base | ||
|{{button|3ds|B}} | |{{button|3ds|B}} | ||
|- | |- | ||
! Advance Runners | !Advance Runners | ||
|{{button|3ds|L}} | |{{button|3ds|L}} | ||
|- | |- | ||
! Return Runners | !Return Runners | ||
|{{button|3ds|R}} | |{{button|3ds|R}} | ||
|- | |- | ||
!colspan=2 align="center" | !colspan=2 align="center"|Defense | ||
|- | |- | ||
!width=25% | !width=25%|Command | ||
!width=25% | !width=25%|Input | ||
|- | |- | ||
! Move | !Move | ||
|{{button|3ds|Stick}} / {{button|3ds|Pad}} | |{{button|3ds|Stick}} / {{button|3ds|Pad}} | ||
|- | |- | ||
! Throw to 3rd Base | !Throw to 3rd Base | ||
|{{button|3ds|A}} | |{{button|3ds|A}} | ||
|- | |- | ||
! Throw to 2nd Base | !Throw to 2nd Base | ||
|{{button|3ds|B}} | |{{button|3ds|B}} | ||
|- | |- | ||
! Throw to 1st Base | !Throw to 1st Base | ||
|{{button|3ds|Y}} | |{{button|3ds|Y}} | ||
|- | |- | ||
! Throw Home | !Throw Home | ||
|{{button|3ds|X}} | |{{button|3ds|X}} | ||
|- | |- | ||
! Choose Player to Control | !Choose Player to Control | ||
|{{button|3ds|L}} | |{{button|3ds|L}} | ||
|- | |- | ||
! Throw to Cutoff Man | !Throw to Cutoff Man | ||
|{{button|3ds|R}} | |{{button|3ds|R}} | ||
|} | |} | ||
===Tennis=== | ===Tennis=== | ||
{| | {|class=wikitable style="text-align:center;margin:0 auto"width=50% | ||
|- | |- | ||
!colspan=2 align="center" | !colspan=2 align="center"|Before Serve | ||
|- | |- | ||
!width=25% | !width=25%|Command | ||
!width=25% | !width=25%|Input | ||
|- | |- | ||
! Move | !Move | ||
|{{button|3ds|Stick}} / {{button|3ds|Pad}} | |{{button|3ds|Stick}} / {{button|3ds|Pad}} | ||
|- | |- | ||
! Topspin | !Topspin | ||
|{{button|3ds|A}} | |{{button|3ds|A}} | ||
|- | |- | ||
! Slice | !Slice | ||
|{{button|3ds|B}} | |{{button|3ds|B}} | ||
|- | |- | ||
! Flat Shot | !Flat Shot | ||
|{{button|3ds|Y}} | |{{button|3ds|Y}} | ||
|- | |- | ||
! Simple Shot | !Simple Shot | ||
|{{button|3ds|X}} | |{{button|3ds|X}} | ||
|- | |- | ||
! Change Shot Panel | !Change Shot Panel | ||
|{{button|3ds|L}} / {{button|3ds|R}} | |{{button|3ds|L}} / {{button|3ds|R}} | ||
|- | |- | ||
!colspan=2 align="center" | !colspan=2 align="center"|During Rally | ||
|- | |- | ||
! Move | !Move | ||
|{{button|3ds|Stick}} / {{button|3ds|Pad}} | |{{button|3ds|Stick}} / {{button|3ds|Pad}} | ||
|- | |- | ||
! Topspin | !Topspin | ||
|{{button|3ds|A}} | |{{button|3ds|A}} | ||
|- | |- | ||
! Slice | !Slice | ||
|{{button|3ds|B}} | |{{button|3ds|B}} | ||
|- | |- | ||
! Flat Shot | !Flat Shot | ||
|{{button|3ds|Y}} | |{{button|3ds|Y}} | ||
|- | |- | ||
! Simple Shot | !Simple Shot | ||
|{{button|3ds|X}} | |{{button|3ds|X}} | ||
|- | |- | ||
! Cancel Charge | !Cancel Charge | ||
|{{button|3ds|L}} | |{{button|3ds|L}} | ||
|- | |- | ||
! Leap Shot | !Leap Shot | ||
|{{button|3ds|R}} | |{{button|3ds|R}} | ||
|- | |- | ||
! Jump Shot | !Jump Shot | ||
|Press corresponding button twice. | |Press corresponding button twice. | ||
|} | |} | ||
===Golf=== | ===Golf=== | ||
{| | {|class=wikitable style="text-align:center;margin:0 auto"width=50% | ||
!width=25%|Command | |||
!width=25%|Input | |||
|- | |- | ||
!Shot Direction | |||
! Shot Direction | |||
|{{button|3ds|Stick}} | |{{button|3ds|Stick}} | ||
|- | |- | ||
! Change Clubs | !Change Clubs | ||
|{{button|3ds|Padupdown}} | |{{button|3ds|Padupdown}} | ||
|- | |- | ||
! Shot Direction | !Shot Direction | ||
|{{button|3ds|Padleftright}} | |{{button|3ds|Padleftright}} | ||
|- | |- | ||
! Start Shot | !Start Shot | ||
|{{button|3ds|A}} | |{{button|3ds|A}} | ||
|- | |- | ||
! Cancel | !Cancel | ||
|{{button|3ds|B}} | |{{button|3ds|B}} | ||
|- | |- | ||
! Shot Type | !Shot Type | ||
|{{button|3ds|Y}} | |{{button|3ds|Y}} | ||
|- | |- | ||
! Change Camera | !Change Camera | ||
|{{button|3ds|X}} | |{{button|3ds|X}} | ||
|- | |- | ||
! Range Marker: Stronger | !Range Marker: Stronger | ||
|{{button|3ds|L}} | |{{button|3ds|L}} | ||
|- | |- | ||
! Range Marker: Weaker | !Range Marker: Weaker | ||
|{{button|3ds|R}} | |{{button|3ds|R}} | ||
|} | |} | ||
===Horse Racing=== | ===Horse Racing=== | ||
{| | {|class=wikitable style="text-align:center;margin:0 auto"width=50% | ||
!width=25%|Command | |||
!width=25% | !width=25%|Input | ||
!width=25% | |||
|- | |- | ||
! Turn | !Turn | ||
|{{button|3ds|Stick}} / {{button|3ds|Pad}} | |{{button|3ds|Stick}} / {{button|3ds|Pad}} | ||
|- | |- | ||
! Jump | !Jump | ||
|{{button|3ds|A}} | |{{button|3ds|A}} | ||
|- | |- | ||
! Dash | !Dash | ||
|{{button|3ds|B}} | |{{button|3ds|B}} | ||
|- | |- | ||
! Slow Down | !Slow Down | ||
|{{button|3ds|Y}} | |{{button|3ds|Y}} | ||
|- | |- | ||
! Star Dash | !Star Dash | ||
|{{button|3ds|X}} | |{{button|3ds|X}} | ||
|- | |- | ||
! Controls and Map Details | !Controls and Map Details | ||
|{{button|3ds|L}} | |{{button|3ds|L}} | ||
|- | |- | ||
! Change Camera | !Change Camera | ||
|{{button|3ds|R}} | |{{button|3ds|R}} | ||
|} | |} | ||
| Line 613: | Line 588: | ||
===Captains=== | ===Captains=== | ||
[[File:MSSBaseballCSS.png|thumb|Baseball character select screen.]] | [[File:MSSBaseballCSS.png|thumb|Baseball character select screen.]] | ||
There are 18 captains playable in this game | There are 18 captains playable in this game, two of whom have to be unlocked first. In soccer and baseball, team captains are represented by their unique shield emblem whenever a game starts. In team-oriented games, such as soccer and baseball, players can additionally choose an assistant captain from the pool of team captains. Assistant captains are also able to pull off the same special shots that team captains can. | ||
{| class="wikitable | <gallery widths=64px heights=64px perrow=6> | ||
CSP MSS Mario.png|[[Mario]] | |||
CSP MSS Luigi.png|[[Luigi]] | |||
CSP MSS Yoshi.png|[[Yoshi]] | |||
CSP MSS Birdo.png|[[Birdo]] | |||
CSP MSS Peach.png|[[Princess Peach|Peach]] | |||
CSP MSS Daisy.png|[[Princess Daisy|Daisy]] | |||
CSP MSS Waluigi.png|[[Waluigi]] | |||
CSP MSS Boo.png|[[Boo]] | |||
CSP MSS Baby Mario.png|[[Baby Mario]] | |||
CSP MSS Baby Luigi.png|[[Baby Luigi]] | |||
CSP MSS Diddy Kong.png|[[Diddy Kong]] | |||
CSP MSS Bowser Jr.png|[[Bowser Jr.]] | |||
CSP MSS Donkey Kong.png|[[Donkey Kong]] | |||
CSP MSS Wario.png|[[Wario]] | |||
CSP MSS Bowser.png|[[Bowser]] | |||
CSP MSS Rosalina.png|[[Rosalina]] | |||
CSP MSS Metal Mario.png|[[Metal Mario]] (unlockable) | |||
CSP MSS Pink Gold Peach.png|[[Pink Gold Peach]] (unlockable) | |||
</gallery> | |||
====Unlocking criteria==== | |||
Listed below is the method by which players can unlock the unlockable captains. Similarly to ''[[Mario Party: Star Rush]]'', the characters can be unlocked by tapping in their corresponding [[amiibo|amiibo cards]], and like ''[[Mario Sports Mix]]'', when a character is unlocked, they are only done so for the sport within which the criteria was filled. | |||
{|class="wikitable"style="margin:auto;width:60em;max-width:100%;text-align:center" | |||
|- | |- | ||
!colspan=2| | !colspan=2|Unlocking criteria for these participants | ||
|- | |- | ||
!Metal Mario | |||
|[[ | |Win the [[Star Cup]], or tap in a Metal Mario [[List of Mario Sports Superstars amiibo cards|amiibo card]] | ||
|- | |- | ||
!Pink Gold Peach | |||
!Pink Gold Peach | |||
|Complete Ring Challenge in training on Hard difficulty, or tap in a Pink Gold Peach [[List of Mario Sports Superstars amiibo cards|amiibo card]] | |Complete Ring Challenge in training on Hard difficulty, or tap in a Pink Gold Peach [[List of Mario Sports Superstars amiibo cards|amiibo card]] | ||
|} | |} | ||
| Line 676: | Line 628: | ||
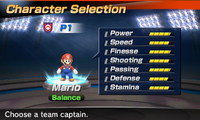
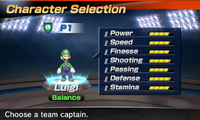
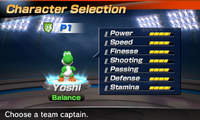
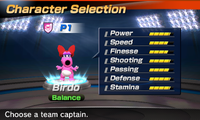
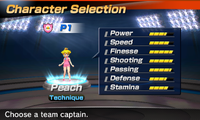
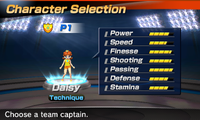
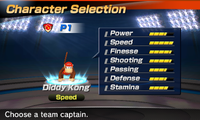
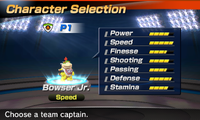
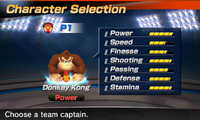
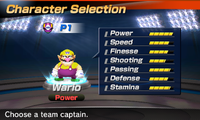
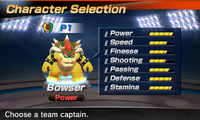
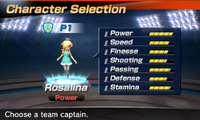
Three of the five sports have characters that belong in the same four character types, with tennis and golf being the exceptions; their disparities are outlined in their respective sections. | Three of the five sports have characters that belong in the same four character types, with tennis and golf being the exceptions; their disparities are outlined in their respective sections. | ||
*<span style="color:limegreen">'''Balance'''</span> characters have well-rounded stats. They can fit in any position but they do not excel at any stat in particular. | *<span style="color:limegreen">'''Balance'''</span> characters have well-rounded stats. They can fit in any position but they do not excel at any stat in particular. | ||
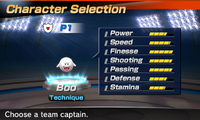
*<span style="color:DodgerBlue">'''Technique'''</span> characters focus on accuracy and control. | *<span style="color:DodgerBlue">'''Technique'''</span> characters focus on accuracy and control. | ||
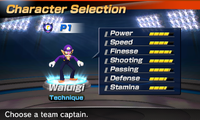
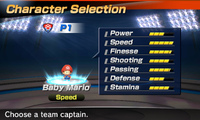
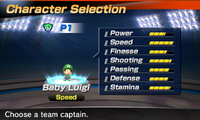
*<span style="color:Goldenrod">'''Speed'''</span> characters have high agility and maneuver quickly. | *<span style="color:Goldenrod">'''Speed'''</span> characters have high agility and maneuver quickly. | ||
*<span style="color:Crimson">'''Power'''</span> characters emphasize on strong shots that can either send balls flying further or shoot balls at higher top speeds. In horse racing, they emphasize on stamina instead. | *<span style="color:Crimson">'''Power'''</span> characters emphasize on strong shots that can either send balls flying further or shoot balls at higher top speeds. In horse racing, they emphasize on stamina instead. | ||
{{br}} | |||
{|class="wikitable" style="margin:auto; text-align:center;" | {|class="wikitable"style="margin:auto; text-align:center;" | ||
|- | |- | ||
!Rectangle | !Rectangle | ||
| Line 706: | Line 657: | ||
*'''Power''': The speed of the ball when the character kicks it. Characters with a higher power stat have higher ball velocities. | *'''Power''': The speed of the ball when the character kicks it. Characters with a higher power stat have higher ball velocities. | ||
*'''Speed''': The agility of the character in the field. Characters with a higher speed stat move around quicker. | *'''Speed''': The agility of the character in the field. Characters with a higher speed stat move around quicker. | ||
*'''Finesse'''<ref name="Scanning amiibo Cards" | *'''Finesse'''<ref name="Scanning amiibo Cards"/>: The accuracy of shots of the ball. Characters with a higher technique stat are more accurate. | ||
{|border=1 cellspacing=0 cellpadding=3 style="border:1px solid black; border-collapse:collapse"width=100% | |||
{| border=1 cellspacing=0 cellpadding=3 style="border:1px solid black; border-collapse:collapse" width =100% | |||
|- | |- | ||
!colspan=8 align="center" style=background:lightgray|Starting captains | !colspan=8 align="center"style=background:lightgray|Starting captains | ||
|- | |- | ||
! colspan=2 width=25% style="background:#87FF87" | Mario | !colspan=2 width=25% style="background:#87FF87"|Mario | ||
! colspan=2 width=25% style="background:#87FF87" | Luigi | !colspan=2 width=25% style="background:#87FF87"|Luigi | ||
! colspan=2 width=25% style="background:#87FF87" | Yoshi | !colspan=2 width=25% style="background:#87FF87"|Yoshi | ||
! colspan=2 width=25% style="background:#87FF87" | Birdo | !colspan=2 width=25% style="background:#87FF87"|Birdo | ||
|- | |- | ||
|colspan=2 align=center|[[File:Mario-Stats-Soccer MSS.png|200px]] | |colspan=2 align=center|[[File:Mario-Stats-Soccer MSS.png|200px]] | ||
| Line 722: | Line 672: | ||
|colspan=2 align=center|[[File:Birdo-Stats-Soccer MSS.png|200px]] | |colspan=2 align=center|[[File:Birdo-Stats-Soccer MSS.png|200px]] | ||
|- | |- | ||
|'''Type''' || Balance | |'''Type'''||Balance | ||
|'''Type''' || Balance | |'''Type'''||Balance | ||
|'''Type''' || Balance | |'''Type'''||Balance | ||
|'''Type''' || Balance | |'''Type'''||Balance | ||
|- | |- | ||
|colspan=2|{{ | |colspan=2|{{MSSuperstars stats | ||
|FirstStatsName=Power | |FirstStatsName=Power | ||
|FirstStatsN=7 | |FirstStatsN=7 | ||
| Line 741: | Line 691: | ||
|ThirdStatsSS=9 | |ThirdStatsSS=9 | ||
}} | }} | ||
|colspan=2|{{ | |colspan=2|{{MSSuperstars stats | ||
|FirstStatsName=Power | |FirstStatsName=Power | ||
|FirstStatsN=7 | |FirstStatsN=7 | ||
| Line 755: | Line 705: | ||
|ThirdStatsSS=9 | |ThirdStatsSS=9 | ||
}} | }} | ||
|colspan=2|{{ | |colspan=2|{{MSSuperstars stats | ||
|FirstStatsName=Power | |FirstStatsName=Power | ||
|FirstStatsN=7 | |FirstStatsN=7 | ||
| Line 769: | Line 719: | ||
|ThirdStatsSS=8 | |ThirdStatsSS=8 | ||
}} | }} | ||
|colspan=2|{{ | |colspan=2|{{MSSuperstars stats | ||
|FirstStatsName=Power | |FirstStatsName=Power | ||
|FirstStatsN=7 | |FirstStatsN=7 | ||
| Line 784: | Line 734: | ||
}} | }} | ||
|- | |- | ||
! colspan=2 width=25% style="background:#87D2FF" | Peach | !colspan=2 width=25% style="background:#87D2FF"|Peach | ||
! colspan=2 width=25% style="background:#87D2FF" | Daisy | !colspan=2 width=25% style="background:#87D2FF"|Daisy | ||
! colspan=2 width=25% style="background:#87D2FF" | Waluigi | !colspan=2 width=25% style="background:#87D2FF"|Waluigi | ||
! colspan=2 width=25% style="background:#87D2FF" | Boo | !colspan=2 width=25% style="background:#87D2FF"|Boo | ||
|- | |- | ||
|colspan=2 align=center|[[File:Peach-Stats-Soccer MSS.png|200px]] | |colspan=2 align=center|[[File:Peach-Stats-Soccer MSS.png|200px]] | ||
| Line 794: | Line 744: | ||
|colspan=2 align=center|[[File:Boo-Stats-Soccer MSS.png|200px]] | |colspan=2 align=center|[[File:Boo-Stats-Soccer MSS.png|200px]] | ||
|- | |- | ||
|'''Type''' || Technique | |'''Type'''||Technique | ||
|'''Type''' || Technique | |'''Type'''||Technique | ||
|'''Type''' || Technique | |'''Type'''||Technique | ||
|'''Type''' || Technique | |'''Type'''||Technique | ||
|- | |- | ||
|colspan=2|{{ | |colspan=2|{{MSSuperstars stats | ||
|FirstStatsName=Power | |FirstStatsName=Power | ||
|FirstStatsN=6 | |FirstStatsN=6 | ||
| Line 813: | Line 763: | ||
|ThirdStatsSS=10 | |ThirdStatsSS=10 | ||
}} | }} | ||
|colspan=2|{{ | |colspan=2|{{MSSuperstars stats | ||
|FirstStatsName=Power | |FirstStatsName=Power | ||
|FirstStatsN=7 | |FirstStatsN=7 | ||
| Line 827: | Line 777: | ||
|ThirdStatsSS=10 | |ThirdStatsSS=10 | ||
}} | }} | ||
|colspan=2|{{ | |colspan=2|{{MSSuperstars stats | ||
|FirstStatsName=Power | |FirstStatsName=Power | ||
|FirstStatsN=7 | |FirstStatsN=7 | ||
| Line 841: | Line 791: | ||
|ThirdStatsSS=10 | |ThirdStatsSS=10 | ||
}} | }} | ||
|colspan=2|{{ | |colspan=2|{{MSSuperstars stats | ||
|FirstStatsName=Power | |FirstStatsName=Power | ||
|FirstStatsN=6 | |FirstStatsN=6 | ||
| Line 856: | Line 806: | ||
}} | }} | ||
|- | |- | ||
! colspan=2 width=25% style="background:#FFFF87" | Baby Mario | !colspan=2 width=25% style="background:#FFFF87"|Baby Mario | ||
! colspan=2 width=25% style="background:#FFFF87" | Baby Luigi | !colspan=2 width=25% style="background:#FFFF87"|Baby Luigi | ||
! colspan=2 width=25% style="background:#FFFF87" | Diddy Kong | !colspan=2 width=25% style="background:#FFFF87"|Diddy Kong | ||
! colspan=2 width=25% style="background:#FFFF87" | Bowser Jr. | !colspan=2 width=25% style="background:#FFFF87"|Bowser Jr. | ||
|- | |- | ||
|colspan=2 align=center|[[File:BabyMario-Stats-Soccer MSS.png|200px]] | |colspan=2 align=center|[[File:BabyMario-Stats-Soccer MSS.png|200px]] | ||
| Line 866: | Line 816: | ||
|colspan=2 align=center|[[File:BowserJr-Stats-Soccer MSS.png|200px]] | |colspan=2 align=center|[[File:BowserJr-Stats-Soccer MSS.png|200px]] | ||
|- | |- | ||
|'''Type''' || Speed | |'''Type'''||Speed | ||
|'''Type''' || Speed | |'''Type'''||Speed | ||
|'''Type''' || Speed | |'''Type'''||Speed | ||
|'''Type''' || Speed | |'''Type'''||Speed | ||
|- | |- | ||
|colspan=2|{{ | |colspan=2|{{MSSuperstars stats | ||
|FirstStatsName=Power | |FirstStatsName=Power | ||
|FirstStatsN=6 | |FirstStatsN=6 | ||
| Line 885: | Line 835: | ||
|ThirdStatsSS=8 | |ThirdStatsSS=8 | ||
}} | }} | ||
|colspan=2|{{ | |colspan=2|{{MSSuperstars stats | ||
|FirstStatsName=Power | |FirstStatsName=Power | ||
|FirstStatsN=5 | |FirstStatsN=5 | ||
| Line 899: | Line 849: | ||
|ThirdStatsSS=9 | |ThirdStatsSS=9 | ||
}} | }} | ||
|colspan=2|{{ | |colspan=2|{{MSSuperstars stats | ||
|FirstStatsName=Power | |FirstStatsName=Power | ||
|FirstStatsN=6 | |FirstStatsN=6 | ||
| Line 913: | Line 863: | ||
|ThirdStatsSS=9 | |ThirdStatsSS=9 | ||
}} | }} | ||
|colspan=2|{{ | |colspan=2|{{MSSuperstars stats | ||
|FirstStatsName=Power | |FirstStatsName=Power | ||
|FirstStatsN=7 | |FirstStatsN=7 | ||
| Line 928: | Line 878: | ||
}} | }} | ||
|- | |- | ||
! colspan=2 width=25% style="background:#FF8787" | Donkey Kong | !colspan=2 width=25% style="background:#FF8787"|Donkey Kong | ||
! colspan=2 width=25% style="background:#FF8787" | Wario | !colspan=2 width=25% style="background:#FF8787"|Wario | ||
! colspan=2 width=25% style="background:#FF8787" | Bowser | !colspan=2 width=25% style="background:#FF8787"|Bowser | ||
! colspan=2 width=25% style="background:#FF8787" | Rosalina | !colspan=2 width=25% style="background:#FF8787"|Rosalina | ||
|- | |- | ||
|colspan=2 align=center|[[File:DonkeyKong-Stats-Soccer MSS.png|200px]] | |colspan=2 align=center|[[File:DonkeyKong-Stats-Soccer MSS.png|200px]] | ||
| Line 938: | Line 888: | ||
|colspan=2 align=center|[[File:Rosalina-Stats-Soccer MSS.png|200px]] | |colspan=2 align=center|[[File:Rosalina-Stats-Soccer MSS.png|200px]] | ||
|- | |- | ||
|'''Type''' || Power | |'''Type'''||Power | ||
|'''Type''' || Power | |'''Type'''||Power | ||
|'''Type''' || Power | |'''Type'''||Power | ||
|'''Type''' || Power | |'''Type'''||Power | ||
|- | |- | ||
|colspan=2|{{ | |colspan=2|{{MSSuperstars stats | ||
|FirstStatsName=Power | |FirstStatsName=Power | ||
|FirstStatsN=8 | |FirstStatsN=8 | ||
| Line 957: | Line 907: | ||
|ThirdStatsSS=8 | |ThirdStatsSS=8 | ||
}} | }} | ||
|colspan=2|{{ | |colspan=2|{{MSSuperstars stats | ||
|FirstStatsName=Power | |FirstStatsName=Power | ||
|FirstStatsN=8 | |FirstStatsN=8 | ||
| Line 971: | Line 921: | ||
|ThirdStatsSS=7 | |ThirdStatsSS=7 | ||
}} | }} | ||
|colspan=2| | |colspan=2|{{MSSuperstars stats | ||
{{ | |||
|FirstStatsName=Power | |FirstStatsName=Power | ||
|FirstStatsN=8 | |FirstStatsN=8 | ||
| Line 986: | Line 935: | ||
|ThirdStatsSS=7 | |ThirdStatsSS=7 | ||
}} | }} | ||
|colspan=2|{{ | |colspan=2|{{MSSuperstars stats | ||
|FirstStatsName=Power | |FirstStatsName=Power | ||
|FirstStatsN=8 | |FirstStatsN=8 | ||
| Line 1,001: | Line 950: | ||
}} | }} | ||
|} | |} | ||
{{br}} | |||
{|border=1 cellspacing=0 cellpadding=3 style="border:1px solid black; border-collapse:collapse"width=100% | |||
{| border=1 cellspacing=0 cellpadding=3 style="border:1px solid black; border-collapse:collapse" width =100% | |||
|- | |- | ||
!colspan=8 align="center" style=background:lightgray|Unlockable captains | !colspan=8 align="center"style=background:lightgray|Unlockable captains | ||
|- | |- | ||
! colspan=2 width=25% style="background:#FF8787" | Metal Mario | !colspan=2 width=25% style="background:#FF8787"|Metal Mario | ||
! colspan=2 width=25% style="background:#FF8787" | Pink Gold Peach | !colspan=2 width=25% style="background:#FF8787"|Pink Gold Peach | ||
|- | |- | ||
|colspan=2 align=center|[[File:MetalMario-Stats-Soccer MSS.png|200px]] | |colspan=2 align=center|[[File:MetalMario-Stats-Soccer MSS.png|200px]] | ||
|colspan=2 align=center|[[File:PinkGoldPeach-Stats-Soccer MSS.png|200px]] | |colspan=2 align=center|[[File:PinkGoldPeach-Stats-Soccer MSS.png|200px]] | ||
|- | |- | ||
|'''Type''' || Power | |'''Type'''||Power | ||
|'''Type''' || Power | |'''Type'''||Power | ||
|- | |- | ||
|colspan=2|{{ | |colspan=2|{{MSSuperstars stats | ||
|FirstStatsName=Power | |FirstStatsName=Power | ||
|FirstStatsN=9 | |FirstStatsN=9 | ||
| Line 1,031: | Line 978: | ||
|ThirdStatsSS=8 | |ThirdStatsSS=8 | ||
}} | }} | ||
|colspan=2|{{ | |colspan=2|{{MSSuperstars stats | ||
|FirstStatsName=Power | |FirstStatsName=Power | ||
|FirstStatsN=9 | |FirstStatsN=9 | ||
| Line 1,048: | Line 995: | ||
====Baseball==== | ====Baseball==== | ||
*'''Velocity'''<ref name="Scanning amiibo Cards">Mon Amiibo | *'''Velocity''':<ref name="Scanning amiibo Cards">{{cite|author=Mon Amiibo|date=March 11, 2017|title=''Mario Sports Superstars'' - Scanning amiibo Cards|language=en|url=www.youtube.com/watch?v=xgFO34dRo5k|publisher=YouTube|accessdate=March 11, 2017}}</ref> The pitching speed of the character. Characters with a higher velocity stat have faster ball pitching speeds. | ||
*'''Power''': The strength of the character. Characters with a higher power stat can send balls flying farther away more easily. | *'''Power''': The strength of the character. Characters with a higher power stat can send balls flying farther away more easily. | ||
*'''Speed''': The agility of the character. Characters with a higher speed stat move more quickly in the outfield as well as running bases. | *'''Speed''': The agility of the character. Characters with a higher speed stat move more quickly in the outfield as well as running bases. | ||
{|border=1 cellspacing=0 cellpadding=3 style="border:1px solid black; border-collapse:collapse"width=100% | |||
{| border=1 cellspacing=0 cellpadding=3 style="border:1px solid black; border-collapse:collapse" width =100% | |||
|- | |- | ||
!colspan=8 align="center" style=background:lightgray|Starting captains | !colspan=8 align="center"style=background:lightgray|Starting captains | ||
|- | |- | ||
! colspan=2 width=25% style="background:#87FF87" | Mario | !colspan=2 width=25% style="background:#87FF87"|Mario | ||
! colspan=2 width=25% style="background:#87FF87" | Luigi | !colspan=2 width=25% style="background:#87FF87"|Luigi | ||
! colspan=2 width=25% style="background:#87FF87" | Yoshi | !colspan=2 width=25% style="background:#87FF87"|Yoshi | ||
! colspan=2 width=25% style="background:#87FF87" | Birdo | !colspan=2 width=25% style="background:#87FF87"|Birdo | ||
|- | |- | ||
|colspan=2 align=center|[[File:Mario-Stats-Baseball MSS.png|200px]] | |colspan=2 align=center|[[File:Mario-Stats-Baseball MSS.png|200px]] | ||
| Line 1,066: | Line 1,012: | ||
|colspan=2 align=center|[[File:Birdo-Stats-Baseball MSS.png|200px]] | |colspan=2 align=center|[[File:Birdo-Stats-Baseball MSS.png|200px]] | ||
|- | |- | ||
|'''Type''' || Balance | |'''Type'''||Balance | ||
|'''Type''' || Balance | |'''Type'''||Balance | ||
|'''Type''' || Balance | |'''Type'''||Balance | ||
|'''Type''' || Balance | |'''Type'''||Balance | ||
|- | |- | ||
|colspan=2|{{ | |colspan=2|{{MSSuperstars stats | ||
|FirstStatsName=Velocity | |FirstStatsName=Velocity | ||
|FirstStatsN=4 | |FirstStatsN=4 | ||
| Line 1,085: | Line 1,031: | ||
|ThirdStatsSS=7 | |ThirdStatsSS=7 | ||
}} | }} | ||
|colspan=2|{{ | |colspan=2|{{MSSuperstars stats | ||
|FirstStatsName=Velocity | |FirstStatsName=Velocity | ||
|FirstStatsN=4 | |FirstStatsN=4 | ||
| Line 1,099: | Line 1,045: | ||
|ThirdStatsSS=6 | |ThirdStatsSS=6 | ||
}} | }} | ||
|colspan=2|{{ | |colspan=2|{{MSSuperstars stats | ||
|FirstStatsName=Velocity | |FirstStatsName=Velocity | ||
|FirstStatsN=4 | |FirstStatsN=4 | ||
| Line 1,113: | Line 1,059: | ||
|ThirdStatsSS=9 | |ThirdStatsSS=9 | ||
}} | }} | ||
|colspan=2|{{ | |colspan=2|{{MSSuperstars stats | ||
|FirstStatsName=Velocity | |FirstStatsName=Velocity | ||
|FirstStatsN=4 | |FirstStatsN=4 | ||
| Line 1,128: | Line 1,074: | ||
}} | }} | ||
|- | |- | ||
! colspan=2 width=25% style="background:#87D2FF" | Peach | !colspan=2 width=25% style="background:#87D2FF"|Peach | ||
! colspan=2 width=25% style="background:#87D2FF" | Daisy | !colspan=2 width=25% style="background:#87D2FF"|Daisy | ||
! colspan=2 width=25% style="background:#87D2FF" | Waluigi | !colspan=2 width=25% style="background:#87D2FF"|Waluigi | ||
! colspan=2 width=25% style="background:#87D2FF" | Boo | !colspan=2 width=25% style="background:#87D2FF"|Boo | ||
|- | |- | ||
|colspan=2 align=center|[[File:Peach-Stats-Baseball MSS.png|200px]] | |colspan=2 align=center|[[File:Peach-Stats-Baseball MSS.png|200px]] | ||
| Line 1,143: | Line 1,084: | ||
|colspan=2 align=center|[[File:Boo-Stats-Baseball MSS.png|200px]] | |colspan=2 align=center|[[File:Boo-Stats-Baseball MSS.png|200px]] | ||
|- | |- | ||
|colspan=2|{{ | |'''Type'''||Technique | ||
|'''Type'''||Technique | |||
|'''Type'''||Technique | |||
|'''Type'''||Technique | |||
|- | |||
|colspan=2|{{MSSuperstars stats | |||
|FirstStatsName=Velocity | |FirstStatsName=Velocity | ||
|FirstStatsN=4 | |FirstStatsN=4 | ||
| Line 1,157: | Line 1,103: | ||
|ThirdStatsSS=6 | |ThirdStatsSS=6 | ||
}} | }} | ||
|colspan=2|{{ | |colspan=2|{{MSSuperstars stats | ||
|FirstStatsName=Velocity | |FirstStatsName=Velocity | ||
|FirstStatsN=4 | |FirstStatsN=4 | ||
| Line 1,171: | Line 1,117: | ||
|ThirdStatsSS=6 | |ThirdStatsSS=6 | ||
}} | }} | ||
|colspan=2|{{ | |colspan=2|{{MSSuperstars stats | ||
|FirstStatsName=Velocity | |FirstStatsName=Velocity | ||
|FirstStatsN=4 | |FirstStatsN=4 | ||
| Line 1,185: | Line 1,131: | ||
|ThirdStatsSS=8 | |ThirdStatsSS=8 | ||
}} | }} | ||
|colspan=2|{{ | |colspan=2|{{MSSuperstars stats | ||
|FirstStatsName=Velocity | |FirstStatsName=Velocity | ||
|FirstStatsN=4 | |FirstStatsN=4 | ||
| Line 1,200: | Line 1,146: | ||
}} | }} | ||
|- | |- | ||
! colspan=2 width=25% style="background:#FFFF87" | Baby Mario | !colspan=2 width=25% style="background:#FFFF87"|Baby Mario | ||
! colspan=2 width=25% style="background:#FFFF87" | Baby Luigi | !colspan=2 width=25% style="background:#FFFF87"|Baby Luigi | ||
! colspan=2 width=25% style="background:#FFFF87" | Diddy Kong | !colspan=2 width=25% style="background:#FFFF87"|Diddy Kong | ||
! colspan=2 width=25% style="background:#FFFF87" | Bowser Jr. | !colspan=2 width=25% style="background:#FFFF87"|Bowser Jr. | ||
|- | |- | ||
|colspan=2 align=center|[[File:BabyMario-Stats-Baseball MSS.png|200px]] | |colspan=2 align=center|[[File:BabyMario-Stats-Baseball MSS.png|200px]] | ||
| Line 1,210: | Line 1,156: | ||
|colspan=2 align=center|[[File:BowserJr-Stats-Baseball MSS.png|200px]] | |colspan=2 align=center|[[File:BowserJr-Stats-Baseball MSS.png|200px]] | ||
|- | |- | ||
|'''Type''' || Speed | |'''Type'''||Speed | ||
|'''Type''' || Speed | |'''Type'''||Speed | ||
|'''Type''' || Speed | |'''Type'''||Speed | ||
|'''Type''' || Speed | |'''Type'''||Speed | ||
|- | |- | ||
|colspan=2|{{ | |colspan=2|{{MSSuperstars stats | ||
|FirstStatsName=Velocity | |FirstStatsName=Velocity | ||
|FirstStatsN=6 | |FirstStatsN=6 | ||
| Line 1,229: | Line 1,175: | ||
|ThirdStatsSS=7 | |ThirdStatsSS=7 | ||
}} | }} | ||
|colspan=2|{{ | |colspan=2|{{MSSuperstars stats | ||
|FirstStatsName=Velocity | |FirstStatsName=Velocity | ||
|FirstStatsN=6 | |FirstStatsN=6 | ||
| Line 1,243: | Line 1,189: | ||
|ThirdStatsSS=7 | |ThirdStatsSS=7 | ||
}} | }} | ||
|colspan=2|{{ | |colspan=2|{{MSSuperstars stats | ||
|FirstStatsName=Velocity | |FirstStatsName=Velocity | ||
|FirstStatsN=6 | |FirstStatsN=6 | ||
| Line 1,257: | Line 1,203: | ||
|ThirdStatsSS=9 | |ThirdStatsSS=9 | ||
}} | }} | ||
|colspan=2|{{ | |colspan=2|{{MSSuperstars stats | ||
|FirstStatsName=Velocity | |FirstStatsName=Velocity | ||
|FirstStatsN=6 | |FirstStatsN=6 | ||
| Line 1,272: | Line 1,218: | ||
}} | }} | ||
|- | |- | ||
! colspan=2 width=25% style="background:#FF8787" | Donkey Kong | !colspan=2 width=25% style="background:#FF8787"|Donkey Kong | ||
! colspan=2 width=25% style="background:#FF8787" | Wario | !colspan=2 width=25% style="background:#FF8787"|Wario | ||
! colspan=2 width=25% style="background:#FF8787" | Bowser | !colspan=2 width=25% style="background:#FF8787"|Bowser | ||
! colspan=2 width=25% style="background:#FF8787" | Rosalina | !colspan=2 width=25% style="background:#FF8787"|Rosalina | ||
|- | |- | ||
|colspan=2 align=center|[[File:DonkeyKong-Stats-Baseball MSS.png|200px]] | |colspan=2 align=center|[[File:DonkeyKong-Stats-Baseball MSS.png|200px]] | ||
| Line 1,282: | Line 1,228: | ||
|colspan=2 align=center|[[File:Rosalina-Stats-Baseball MSS.png|200px]] | |colspan=2 align=center|[[File:Rosalina-Stats-Baseball MSS.png|200px]] | ||
|- | |- | ||
|'''Type''' || Power | |'''Type'''||Power | ||
|'''Type''' || Power | |'''Type'''||Power | ||
|'''Type''' || Power | |'''Type'''||Power | ||
|'''Type''' || Power | |'''Type'''||Power | ||
|- | |- | ||
|colspan=2|{{ | |colspan=2|{{MSSuperstars stats | ||
|FirstStatsName=Velocity | |FirstStatsName=Velocity | ||
|FirstStatsN=4 | |FirstStatsN=4 | ||
| Line 1,301: | Line 1,247: | ||
|ThirdStatsSS=4 | |ThirdStatsSS=4 | ||
}} | }} | ||
|colspan=2|{{ | |colspan=2|{{MSSuperstars stats | ||
|FirstStatsName=Velocity | |FirstStatsName=Velocity | ||
|FirstStatsN=4 | |FirstStatsN=4 | ||
| Line 1,315: | Line 1,261: | ||
|ThirdStatsSS=5 | |ThirdStatsSS=5 | ||
}} | }} | ||
|colspan=2|{{ | |colspan=2|{{MSSuperstars stats | ||
|FirstStatsName=Velocity | |FirstStatsName=Velocity | ||
|FirstStatsN=4 | |FirstStatsN=4 | ||
| Line 1,329: | Line 1,275: | ||
|ThirdStatsSS=7 | |ThirdStatsSS=7 | ||
}} | }} | ||
|colspan=2|{{ | |colspan=2|{{MSSuperstars stats | ||
|FirstStatsName=Velocity | |FirstStatsName=Velocity | ||
|FirstStatsN=4 | |FirstStatsN=4 | ||
| Line 1,344: | Line 1,290: | ||
}} | }} | ||
|} | |} | ||
{{br}} | |||
{|border=1 cellspacing=0 cellpadding=3 style="border:1px solid black; border-collapse:collapse"width=100% | |||
{| border=1 cellspacing=0 cellpadding=3 style="border:1px solid black; border-collapse:collapse" width =100% | |||
|- | |- | ||
!colspan=8 align="center" style=background:lightgray|Unlockable captains | !colspan=8 align="center"style=background:lightgray|Unlockable captains | ||
|- | |- | ||
! colspan=2 width=25% style="background:#FF8787" | Metal Mario | !colspan=2 width=25% style="background:#FF8787"|Metal Mario | ||
! colspan=2 width=25% style="background:#FF8787" | Pink Gold Peach | !colspan=2 width=25% style="background:#FF8787"|Pink Gold Peach | ||
|- | |- | ||
|colspan=2 align=center|[[File:MetalMario-Stats-Baseball MSS.png|200px]] | |colspan=2 align=center|[[File:MetalMario-Stats-Baseball MSS.png|200px]] | ||
|colspan=2 align=center|[[File:PinkGoldPeach-Stats-Baseball MSS.png|200px]] | |colspan=2 align=center|[[File:PinkGoldPeach-Stats-Baseball MSS.png|200px]] | ||
|- | |- | ||
|colspan=2|{{ | |'''Type'''||Power | ||
|'''Type'''||Power | |||
|- | |||
|colspan=2|{{MSSuperstars stats | |||
|FirstStatsName=Velocity | |FirstStatsName=Velocity | ||
|FirstStatsN=4 | |FirstStatsN=4 | ||
| Line 1,374: | Line 1,318: | ||
|ThirdStatsSS=8 | |ThirdStatsSS=8 | ||
}} | }} | ||
|colspan=2|{{ | |colspan=2|{{MSSuperstars stats | ||
|FirstStatsName=Velocity | |FirstStatsName=Velocity | ||
|FirstStatsN=4 | |FirstStatsN=4 | ||
| Line 1,392: | Line 1,336: | ||
====Tennis==== | ====Tennis==== | ||
Notably, tennis uses more character types than in some of the other sports, as it uses character types already established in the [[Mario Tennis (series)|''Mario Tennis'' series]]. | Notably, tennis uses more character types than in some of the other sports, as it uses character types already established in the [[Mario Tennis (series)|''Mario Tennis'' series]]. | ||
*<span style="color:limegreen">'''All-Around'''</span> characters have well-rounded stats. They can fit in any position but they do not excel at any stat in particular. | *<span style="color:limegreen">'''All-Around'''</span> characters have well-rounded stats. They can fit in any position but they do not excel at any stat in particular. | ||
*<span style="color:Goldenrod">'''Speed'''</span> characters have high agility and move around place to place quickly. | *<span style="color:Goldenrod">'''Speed'''</span> characters have high agility and move around place to place quickly. | ||
| Line 1,399: | Line 1,342: | ||
*<span style="color:MediumOrchid">'''Tricky'''</span> characters specialize on making shots with a strong curve, making them more difficult to predict. | *<span style="color:MediumOrchid">'''Tricky'''</span> characters specialize on making shots with a strong curve, making them more difficult to predict. | ||
*<span style="color:Crimson">'''Power'''</span> characters emphasize on strong shots that can shoot balls at higher top speeds. | *<span style="color:Crimson">'''Power'''</span> characters emphasize on strong shots that can shoot balls at higher top speeds. | ||
The following lists an explanation for the stats of each character: | The following lists an explanation for the stats of each character: | ||
*'''Power''': The stroke power of the character. Characters with higher power stats send the ball more quickly across the court. | *'''Power''': The stroke power of the character. Characters with higher power stats send the ball more quickly across the court. | ||
*'''Speed''': The agility of the character. Characters with higher speed stats can move around the court more quickly. | *'''Speed''': The agility of the character. Characters with higher speed stats can move around the court more quickly. | ||
*'''Spin''': The ability of the ball to curve. Characters with higher spin have balls that have stronger curves. | *'''Spin''': The ability of the ball to curve. Characters with higher spin have balls that have stronger curves. | ||
{|border=1 cellspacing=0 cellpadding=3 style="border:1px solid black; border-collapse:collapse"width=100% | |||
{| border=1 cellspacing=0 cellpadding=3 style="border:1px solid black; border-collapse:collapse" width =100% | |||
|- | |- | ||
!colspan=8 align="center" style=background:lightgray|Starting captains | !colspan=8 align="center"style=background:lightgray|Starting captains | ||
|- | |- | ||
! colspan=2 width=25% style="background:#87FF87" | Mario | !colspan=2 width=25% style="background:#87FF87"|Mario | ||
! colspan=2 width=25% style="background:#87FF87" | Luigi | !colspan=2 width=25% style="background:#87FF87"|Luigi | ||
! colspan=2 width=25% style="background:#FFFF87" | Yoshi | !colspan=2 width=25% style="background:#FFFF87"|Yoshi | ||
! colspan=2 width=25% style="background:#FFFF87" | Birdo | !colspan=2 width=25% style="background:#FFFF87"|Birdo | ||
|- | |- | ||
|colspan=2 align="center"|[[File:Character - Mario (Tennis).png|111px]] | |colspan=2 align="center"|[[File:Character - Mario (Tennis).png|111px]] | ||
| Line 1,420: | Line 1,360: | ||
|colspan=2 align="center"|[[File:Character - Birdo (Tennis).png|111px]] | |colspan=2 align="center"|[[File:Character - Birdo (Tennis).png|111px]] | ||
|- | |- | ||
|'''Type''' || All-Around | |'''Type'''||All-Around | ||
|'''Type''' || All-Around | |'''Type'''||All-Around | ||
|'''Type''' || Speed | |'''Type'''||Speed | ||
|'''Type''' || Speed | |'''Type'''||Speed | ||
|- | |- | ||
|colspan=2|{{ | |colspan=2|{{MSSuperstars stats | ||
|FirstStatsName=Power | |FirstStatsName=Power | ||
|FirstStatsN=6 | |FirstStatsN=6 | ||
| Line 1,439: | Line 1,379: | ||
|ThirdStatsSS=3 | |ThirdStatsSS=3 | ||
}} | }} | ||
|colspan=2|{{ | |colspan=2|{{MSSuperstars stats | ||
|FirstStatsName=Power | |FirstStatsName=Power | ||
|FirstStatsN=5 | |FirstStatsN=5 | ||
| Line 1,453: | Line 1,393: | ||
|ThirdStatsSS=4 | |ThirdStatsSS=4 | ||
}} | }} | ||
|colspan=2|{{ | |colspan=2|{{MSSuperstars stats | ||
|FirstStatsName=Power | |FirstStatsName=Power | ||
|FirstStatsN=4 | |FirstStatsN=4 | ||
| Line 1,467: | Line 1,407: | ||
|ThirdStatsSS=5 | |ThirdStatsSS=5 | ||
}} | }} | ||
|colspan=2|{{ | |colspan=2|{{MSSuperstars stats | ||
|FirstStatsName=Power | |FirstStatsName=Power | ||
|FirstStatsN=4 | |FirstStatsN=4 | ||
| Line 1,482: | Line 1,422: | ||
}} | }} | ||
|- | |- | ||
! colspan=2 width=25% style="background:#87D2FF" | Peach | !colspan=2 width=25% style="background:#87D2FF"|Peach | ||
! colspan=2 width=25% style="background:#87FF87" | Daisy | !colspan=2 width=25% style="background:#87FF87"|Daisy | ||
! colspan=2 width=25% style="background:#ffca6f" | Waluigi | !colspan=2 width=25% style="background:#ffca6f"|Waluigi | ||
! colspan=2 width=25% style="background:#ff9fff" | Boo | !colspan=2 width=25% style="background:#ff9fff"|Boo | ||
|- | |- | ||
|colspan=2 align="center"|[[File:Character - Peach (Tennis).png|111px]] | |colspan=2 align="center"|[[File:Character - Peach (Tennis).png|111px]] | ||
| Line 1,492: | Line 1,432: | ||
|colspan=2 align="center"|[[File:Character - Boo (Tennis).png|111px]] | |colspan=2 align="center"|[[File:Character - Boo (Tennis).png|111px]] | ||
|- | |- | ||
|'''Type''' || Technical | |'''Type'''||Technical | ||
|'''Type''' || All-Around | |'''Type'''||All-Around | ||
|'''Type''' || Defensive | |'''Type'''||Defensive | ||
|'''Type''' || Tricky | |'''Type'''||Tricky | ||
|- | |- | ||
|colspan=2|{{ | |colspan=2|{{MSSuperstars stats | ||
|FirstStatsName=Power | |FirstStatsName=Power | ||
|FirstStatsN=3 | |FirstStatsN=3 | ||
| Line 1,511: | Line 1,451: | ||
|ThirdStatsSS=5 | |ThirdStatsSS=5 | ||
}} | }} | ||
|colspan=2|{{ | |colspan=2|{{MSSuperstars stats | ||
|FirstStatsName=Power | |FirstStatsName=Power | ||
|FirstStatsN=4 | |FirstStatsN=4 | ||
| Line 1,525: | Line 1,465: | ||
|ThirdStatsSS=4 | |ThirdStatsSS=4 | ||
}} | }} | ||
|colspan=2|{{ | |colspan=2|{{MSSuperstars stats | ||
|FirstStatsName=Power | |FirstStatsName=Power | ||
|FirstStatsN=4 | |FirstStatsN=4 | ||
| Line 1,539: | Line 1,479: | ||
|ThirdStatsSS=4 | |ThirdStatsSS=4 | ||
}} | }} | ||
|colspan=2|{{ | |colspan=2|{{MSSuperstars stats | ||
|FirstStatsName=Power | |FirstStatsName=Power | ||
|FirstStatsN=3 | |FirstStatsN=3 | ||
| Line 1,554: | Line 1,494: | ||
}} | }} | ||
|- | |- | ||
! colspan=2 width=25% style="background:#FFFF87" | Baby Mario | !colspan=2 width=25% style="background:#FFFF87"|Baby Mario | ||
! colspan=2 width=25% style="background:#87D2FF" | Baby Luigi | !colspan=2 width=25% style="background:#87D2FF"|Baby Luigi | ||
! colspan=2 width=25% style="background:#FFFF87" | Diddy Kong | !colspan=2 width=25% style="background:#FFFF87"|Diddy Kong | ||
! colspan=2 width=25% style="background:#ff9fff" | Bowser Jr. | !colspan=2 width=25% style="background:#ff9fff"|Bowser Jr. | ||
|- | |- | ||
|colspan=2 align="center"|[[File:Character - Baby Mario (Tennis).png|111px]] | |colspan=2 align="center"|[[File:Character - Baby Mario (Tennis).png|111px]] | ||
| Line 1,564: | Line 1,504: | ||
|colspan=2 align="center"|[[File:Character - Bowser Jr (Tennis).png|111px]] | |colspan=2 align="center"|[[File:Character - Bowser Jr (Tennis).png|111px]] | ||
|- | |- | ||
|'''Type''' || Speed | |'''Type'''||Speed | ||
|'''Type''' || Technical | |'''Type'''||Technical | ||
|'''Type''' || Speed | |'''Type'''||Speed | ||
|'''Type''' || Tricky | |'''Type'''||Tricky | ||
|- | |- | ||
|colspan=2|{{ | |colspan=2|{{MSSuperstars stats | ||
|FirstStatsName=Power | |FirstStatsName=Power | ||
|FirstStatsN=5 | |FirstStatsN=5 | ||
| Line 1,583: | Line 1,523: | ||
|ThirdStatsSS=4 | |ThirdStatsSS=4 | ||
}} | }} | ||
|colspan=2|{{ | |colspan=2|{{MSSuperstars stats | ||
|FirstStatsName=Power | |FirstStatsName=Power | ||
|FirstStatsN=5 | |FirstStatsN=5 | ||
| Line 1,597: | Line 1,537: | ||
|ThirdStatsSS=5 | |ThirdStatsSS=5 | ||
}} | }} | ||
|colspan=2|{{ | |colspan=2|{{MSSuperstars stats | ||
|FirstStatsName=Power | |FirstStatsName=Power | ||
|FirstStatsN=5 | |FirstStatsN=5 | ||
| Line 1,611: | Line 1,551: | ||
|ThirdStatsSS=8 | |ThirdStatsSS=8 | ||
}} | }} | ||
|colspan=2|{{ | |colspan=2|{{MSSuperstars stats | ||
|FirstStatsName=Power | |FirstStatsName=Power | ||
|FirstStatsN=3 | |FirstStatsN=3 | ||
| Line 1,626: | Line 1,566: | ||
}} | }} | ||
|- | |- | ||
! colspan=2 width=25% style="background:#FF8787" | Donkey Kong | !colspan=2 width=25% style="background:#FF8787"|Donkey Kong | ||
! colspan=2 width=25% style="background:#FF8787" | Wario | !colspan=2 width=25% style="background:#FF8787"|Wario | ||
! colspan=2 width=25% style="background:#FF8787" | Bowser | !colspan=2 width=25% style="background:#FF8787"|Bowser | ||
! colspan=2 width=25% style="background:#ff9fff" | Rosalina | !colspan=2 width=25% style="background:#ff9fff"|Rosalina | ||
|- | |- | ||
|colspan=2 align="center"|[[File:Character - Donkey Kong (Tennis).png|111px]] | |colspan=2 align="center"|[[File:Character - Donkey Kong (Tennis).png|111px]] | ||
| Line 1,636: | Line 1,576: | ||
|colspan=2 align="center"|[[File:Character - Rosalina (Tennis).png|111px]] | |colspan=2 align="center"|[[File:Character - Rosalina (Tennis).png|111px]] | ||
|- | |- | ||
|'''Type''' || Power | |'''Type'''||Power | ||
|'''Type''' || Power | |'''Type'''||Power | ||
|'''Type''' || Power | |'''Type'''||Power | ||
|'''Type''' || Tricky | |'''Type'''||Tricky | ||
|- | |- | ||
|colspan=2|{{ | |colspan=2|{{MSSuperstars stats | ||
|FirstStatsName=Power | |FirstStatsName=Power | ||
|FirstStatsN=7 | |FirstStatsN=7 | ||
| Line 1,655: | Line 1,595: | ||
|ThirdStatsSS=3 | |ThirdStatsSS=3 | ||
}} | }} | ||
|colspan=2|{{ | |colspan=2|{{MSSuperstars stats | ||
|FirstStatsName=Power | |FirstStatsName=Power | ||
|FirstStatsN=7 | |FirstStatsN=7 | ||
| Line 1,669: | Line 1,609: | ||
|ThirdStatsSS=3 | |ThirdStatsSS=3 | ||
}} | }} | ||
|colspan=2|{{ | |colspan=2|{{MSSuperstars stats | ||
|FirstStatsName=Power | |FirstStatsName=Power | ||
|FirstStatsN=8 | |FirstStatsN=8 | ||
| Line 1,683: | Line 1,623: | ||
|ThirdStatsSS=3 | |ThirdStatsSS=3 | ||
}} | }} | ||
|colspan=2|{{ | |colspan=2|{{MSSuperstars stats | ||
|FirstStatsName=Power | |FirstStatsName=Power | ||
|FirstStatsN=6 | |FirstStatsN=6 | ||
| Line 1,698: | Line 1,638: | ||
}} | }} | ||
|} | |} | ||
{{br}} | |||
{|border=1 cellspacing=0 cellpadding=3 style="border:1px solid black; border-collapse:collapse"width=100% | |||
{| border=1 cellspacing=0 cellpadding=3 style="border:1px solid black; border-collapse:collapse" width =100% | |||
|- | |- | ||
!colspan=8 align="center" style=background:lightgray|Unlockable captains | !colspan=8 align="center"style=background:lightgray|Unlockable captains | ||
|- | |- | ||
! colspan=2 width=25% style="background:#FF8787" | Metal Mario | !colspan=2 width=25% style="background:#FF8787"|Metal Mario | ||
! colspan=2 width=25% style="background:#FF8787" | Pink Gold Peach | !colspan=2 width=25% style="background:#FF8787"|Pink Gold Peach | ||
|- | |- | ||
|colspan=2 align="center"|[[File:Character - Metal Mario (Tennis).png|111px]] | |colspan=2 align="center"|[[File:Character - Metal Mario (Tennis).png|111px]] | ||
|colspan=2 align="center"|[[File:Character - Pink Gold Peach (Tennis).png|111px]] | |colspan=2 align="center"|[[File:Character - Pink Gold Peach (Tennis).png|111px]] | ||
|- | |- | ||
|'''Type''' || Power | |'''Type'''||Power | ||
|'''Type''' || Power | |'''Type'''||Power | ||
|- | |- | ||
|colspan=2|{{ | |colspan=2|{{MSSuperstars stats | ||
|FirstStatsName=Power | |FirstStatsName=Power | ||
|FirstStatsN=7 | |FirstStatsN=7 | ||
| Line 1,728: | Line 1,666: | ||
|ThirdStatsSS=3 | |ThirdStatsSS=3 | ||
}} | }} | ||
|colspan=2|{{ | |colspan=2|{{MSSuperstars stats | ||
|FirstStatsName=Power | |FirstStatsName=Power | ||
|FirstStatsN=6 | |FirstStatsN=6 | ||
| Line 1,748: | Line 1,686: | ||
Characters additionally have different height trajectories. Characters who hit balls at higher elevations are more affected by wind than characters who hit their balls lower. However, higher trajectories allow characters to scale higher elevations more efficiently as well as hitting over trees more effectively. | Characters additionally have different height trajectories. Characters who hit balls at higher elevations are more affected by wind than characters who hit their balls lower. However, higher trajectories allow characters to scale higher elevations more efficiently as well as hitting over trees more effectively. | ||
*'''Power''': The character's ability to send the ball. Characters with higher drive stats send balls at greater distances. | *'''Power''': The character's ability to send the ball. Characters with higher drive stats send balls at greater distances. | ||
*'''Control''': The accuracy of the character. Characters with higher control stats have overall better accuracy, and if the accuracy bar does not align properly, they receive less penalty. | *'''Control''': The accuracy of the character. Characters with higher control stats have overall better accuracy, and if the accuracy bar does not align properly, they receive less penalty. | ||
*'''Sweet Spot''': The size of the sweet spot markers. Characters with higher sweet spot stats are less likely to whiff the ball when aiming for accuracy, especially in roughs and bunkers. | *'''Sweet Spot''': The size of the sweet spot markers. Characters with higher sweet spot stats are less likely to whiff the ball when aiming for accuracy, especially in roughs and bunkers. | ||
{|border=1 cellspacing=0 cellpadding=3 style="border:1px solid black; border-collapse:collapse"width=100% | |||
{| border=1 cellspacing=0 cellpadding=3 style="border:1px solid black; border-collapse:collapse" width =100% | |||
|- | |- | ||
!colspan=8 align="center" style=background:lightgray|Starting captains | !colspan=8 align="center"style=background:lightgray|Starting captains | ||
|- | |- | ||
! colspan=2 width=25% style="background:#87FF87" | Mario | !colspan=2 width=25% style="background:#87FF87"|Mario | ||
! colspan=2 width=25% style="background:#87D2FF" | Luigi | !colspan=2 width=25% style="background:#87D2FF"|Luigi | ||
! colspan=2 width=25% style="background:#87FF87" | Yoshi | !colspan=2 width=25% style="background:#87FF87"|Yoshi | ||
! colspan=2 width=25% style="background:#87D2FF" | Birdo | !colspan=2 width=25% style="background:#87D2FF"|Birdo | ||
|- | |- | ||
|colspan=2 align=center|[[File:Mario-Stats-Golf MSS.png|200px]] | |colspan=2 align=center|[[File:Mario-Stats-Golf MSS.png|200px]] | ||
| Line 1,767: | Line 1,703: | ||
|colspan=2 align=center|[[File:Birdo-Stats-Golf MSS.png|200px]] | |colspan=2 align=center|[[File:Birdo-Stats-Golf MSS.png|200px]] | ||
|- | |- | ||
|'''Drive''' || 220 yards | |'''Drive'''||220 yards | ||
|'''Drive''' || 209 yards | |'''Drive'''||209 yards | ||
|'''Drive''' || 212 yards | |'''Drive'''||212 yards | ||
|'''Drive''' || 217 yards | |'''Drive'''||217 yards | ||
|- | |- | ||
|'''Trajectory''' || Straight | |'''Trajectory'''||Straight | ||
|'''Trajectory''' || Fade | |'''Trajectory'''||Fade | ||
|'''Trajectory''' || Straight | |'''Trajectory'''||Straight | ||
|'''Trajectory''' || Fade | |'''Trajectory'''||Fade | ||
|- | |- | ||
|'''Height''' || High | |'''Height'''||High | ||
|'''Height''' || Low | |'''Height'''||Low | ||
|'''Height''' || Medium | |'''Height'''||Medium | ||
|'''Height''' || Medium-High | |'''Height'''||Medium-High | ||
|- | |- | ||
|colspan=2|{{ | |colspan=2|{{MSSuperstars stats | ||
|FirstStatsName=Power | |FirstStatsName=Power | ||
|FirstStatsN=3 | |FirstStatsN=3 | ||
| Line 1,796: | Line 1,732: | ||
|ThirdStatsSS=2 | |ThirdStatsSS=2 | ||
}} | }} | ||
|colspan=2|{{ | |colspan=2|{{MSSuperstars stats | ||
|FirstStatsName=Power | |FirstStatsName=Power | ||
|FirstStatsN=1 | |FirstStatsN=1 | ||
| Line 1,810: | Line 1,746: | ||
|ThirdStatsSS=7 | |ThirdStatsSS=7 | ||
}} | }} | ||
|colspan=2|{{ | |colspan=2|{{MSSuperstars stats | ||
|FirstStatsName=Power | |FirstStatsName=Power | ||
|FirstStatsN=2 | |FirstStatsN=2 | ||
| Line 1,824: | Line 1,760: | ||
|ThirdStatsSS=5 | |ThirdStatsSS=5 | ||
}} | }} | ||
|colspan=2|{{ | |colspan=2|{{MSSuperstars stats | ||
|FirstStatsName=Power | |FirstStatsName=Power | ||
|FirstStatsN=2 | |FirstStatsN=2 | ||
| Line 1,839: | Line 1,775: | ||
}} | }} | ||
|- | |- | ||
! colspan=2 width=25% style="background:#87FF87" | Peach | !colspan=2 width=25% style="background:#87FF87"|Peach | ||
! colspan=2 width=25% style="background:#FF8787" | Daisy | !colspan=2 width=25% style="background:#FF8787"|Daisy | ||
! colspan=2 width=25% style="background:#FF8787" | Waluigi | !colspan=2 width=25% style="background:#FF8787"|Waluigi | ||
! colspan=2 width=25% style="background:#FF8787" | Boo | !colspan=2 width=25% style="background:#FF8787"|Boo | ||
|- | |- | ||
|colspan=2 align=center|[[File:Peach-Stats-Golf MSS.png|200px]] | |colspan=2 align=center|[[File:Peach-Stats-Golf MSS.png|200px]] | ||
| Line 1,849: | Line 1,785: | ||
|colspan=2 align=center|[[File:Boo-Stats-Golf MSS.png|200px]] | |colspan=2 align=center|[[File:Boo-Stats-Golf MSS.png|200px]] | ||
|- | |- | ||
|'''Drive''' || 206 | |'''Drive'''||206 yards | ||
|'''Drive''' || 218 | |'''Drive'''||218 yards | ||
|'''Drive''' || 210 | |'''Drive'''||210 yards | ||
|'''Drive''' || 213 | |'''Drive'''||213 yards | ||
|- | |- | ||
|'''Trajectory''' || Straight | |'''Trajectory'''||Straight | ||
|'''Trajectory''' || Draw | |'''Trajectory'''||Draw | ||
|'''Trajectory''' || Draw | |'''Trajectory'''||Draw | ||
|'''Trajectory''' || Draw | |'''Trajectory'''||Draw | ||
|- | |- | ||
|'''Height''' || Medium-Low | |'''Height'''||Medium-Low | ||
|'''Height''' || Very High | |'''Height'''||Very High | ||
|'''Height''' || Medium | |'''Height'''||Medium | ||
|'''Height''' || Medium-Low | |'''Height'''||Medium-Low | ||
|- | |- | ||
|colspan=2|{{ | |colspan=2|{{MSSuperstars stats | ||
|FirstStatsName=Power | |FirstStatsName=Power | ||
|FirstStatsN=1 | |FirstStatsN=1 | ||
| Line 1,878: | Line 1,814: | ||
|ThirdStatsSS=8 | |ThirdStatsSS=8 | ||
}} | }} | ||
|colspan=2|{{ | |colspan=2|{{MSSuperstars stats | ||
|FirstStatsName=Power | |FirstStatsName=Power | ||
|FirstStatsN=2 | |FirstStatsN=2 | ||
| Line 1,892: | Line 1,828: | ||
|ThirdStatsSS=2 | |ThirdStatsSS=2 | ||
}} | }} | ||
|colspan=2|{{ | |colspan=2|{{MSSuperstars stats | ||
|FirstStatsName=Power | |FirstStatsName=Power | ||
|FirstStatsN=2 | |FirstStatsN=2 | ||
| Line 1,906: | Line 1,842: | ||
|ThirdStatsSS=6 | |ThirdStatsSS=6 | ||
}} | }} | ||
|colspan=2|{{ | |colspan=2|{{MSSuperstars stats | ||
|FirstStatsName=Power | |FirstStatsName=Power | ||
|FirstStatsN=2 | |FirstStatsN=2 | ||
| Line 1,921: | Line 1,857: | ||
}} | }} | ||
|- | |- | ||
! colspan=2 width=25% style="background:#87FF87" | Baby Mario | !colspan=2 width=25% style="background:#87FF87"|Baby Mario | ||
! colspan=2 width=25% style="background:#87D2FF" | Baby Luigi | !colspan=2 width=25% style="background:#87D2FF"|Baby Luigi | ||
! colspan=2 width=25% style="background:#FF8787" | Diddy Kong | !colspan=2 width=25% style="background:#FF8787"|Diddy Kong | ||
! colspan=2 width=25% style="background:#87FF87" | Bowser Jr. | !colspan=2 width=25% style="background:#87FF87"|Bowser Jr. | ||
|- | |- | ||
|colspan=2 align=center|[[File:BabyMario-Stats-Golf MSS.png|200px]] | |colspan=2 align=center|[[File:BabyMario-Stats-Golf MSS.png|200px]] | ||
| Line 1,931: | Line 1,867: | ||
|colspan=2 align=center|[[File:BowserJr-Stats-Golf MSS.png|200px]] | |colspan=2 align=center|[[File:BowserJr-Stats-Golf MSS.png|200px]] | ||
|- | |- | ||
|'''Drive''' || 207 yards | |'''Drive'''||207 yards | ||
|'''Drive''' || 205 yards | |'''Drive'''||205 yards | ||
|'''Drive''' || 216 yards | |'''Drive'''||216 yards | ||
|'''Drive''' || 215 yards | |'''Drive'''||215 yards | ||
|- | |- | ||
|'''Trajectory''' || Straight | |'''Trajectory'''||Straight | ||
|'''Trajectory''' || Fade | |'''Trajectory'''||Fade | ||
|'''Trajectory''' || Draw | |'''Trajectory'''||Draw | ||
|'''Trajectory''' || Straight | |'''Trajectory'''||Straight | ||
|- | |- | ||
|'''Height''' || Medium-High | |'''Height'''||Medium-High | ||
|'''Height''' || Very Low | |'''Height'''||Very Low | ||
|'''Height''' || Slight High | |'''Height'''||Slight High | ||
|'''Height''' || Slight Low | |'''Height'''||Slight Low | ||
|- | |- | ||
|colspan=2|{{ | |colspan=2|{{MSSuperstars stats | ||
|FirstStatsName=Power | |FirstStatsName=Power | ||
|FirstStatsN=1 | |FirstStatsN=1 | ||
| Line 1,960: | Line 1,896: | ||
|ThirdStatsSS=8 | |ThirdStatsSS=8 | ||
}} | }} | ||
|colspan=2|{{ | |colspan=2|{{MSSuperstars stats | ||
|FirstStatsName=Power | |FirstStatsName=Power | ||
|FirstStatsN=1 | |FirstStatsN=1 | ||
| Line 1,974: | Line 1,910: | ||
|ThirdStatsSS=9 | |ThirdStatsSS=9 | ||
}} | }} | ||
|colspan=2|{{ | |colspan=2|{{MSSuperstars stats | ||
|FirstStatsName=Power | |FirstStatsName=Power | ||
|FirstStatsN=2 | |FirstStatsN=2 | ||
| Line 1,988: | Line 1,924: | ||
|ThirdStatsSS=3 | |ThirdStatsSS=3 | ||
}} | }} | ||
|colspan=2|{{ | |colspan=2|{{MSSuperstars stats | ||
|FirstStatsName=Power | |FirstStatsName=Power | ||
|FirstStatsN=2 | |FirstStatsN=2 | ||
| Line 2,003: | Line 1,939: | ||
}} | }} | ||
|- | |- | ||
! colspan=2 width=25% style="background:#FF8787" | Donkey Kong | !colspan=2 width=25% style="background:#FF8787"|Donkey Kong | ||
! colspan=2 width=25% style="background:#87D2FF" | Wario | !colspan=2 width=25% style="background:#87D2FF"|Wario | ||
! colspan=2 width=25% style="background:#87D2FF" | Bowser | !colspan=2 width=25% style="background:#87D2FF"|Bowser | ||
! colspan=2 width=25% style="background:#87D2FF" | Rosalina | !colspan=2 width=25% style="background:#87D2FF"|Rosalina | ||
|- | |- | ||
|colspan=2 align=center|[[File:DonkeyKong-Stats-Golf MSS.png|200px]] | |colspan=2 align=center|[[File:DonkeyKong-Stats-Golf MSS.png|200px]] | ||
| Line 2,013: | Line 1,949: | ||
|colspan=2 align=center|[[File:Rosalina-Stats-Golf MSS.png|200px]] | |colspan=2 align=center|[[File:Rosalina-Stats-Golf MSS.png|200px]] | ||
|- | |- | ||
|'''Drive''' || 224 yards | |'''Drive'''||224 yards | ||
|'''Drive''' || 214 yards | |'''Drive'''||214 yards | ||
|'''Drive''' || 230 yards | |'''Drive'''||230 yards | ||
|'''Drive''' || 226 yards | |'''Drive'''||226 yards | ||
|- | |- | ||
|'''Trajectory''' || Draw | |'''Trajectory'''||Draw | ||
|'''Trajectory''' || Fade | |'''Trajectory'''||Fade | ||
|'''Trajectory''' || Fade | |'''Trajectory'''||Fade | ||
|'''Trajectory''' || Fade | |'''Trajectory'''||Fade | ||
|- | |- | ||
|'''Height''' || Slight Low | |'''Height'''||Slight Low | ||
|'''Height''' || Very Low | |'''Height'''||Very Low | ||
|'''Height''' || Medium | |'''Height'''||Medium | ||
|'''Height''' || Very High | |'''Height'''||Very High | ||
|- | |- | ||
|colspan=2|{{ | |colspan=2|{{MSSuperstars stats | ||
|FirstStatsName=Power | |FirstStatsName=Power | ||
|FirstStatsN=3 | |FirstStatsN=3 | ||
| Line 2,042: | Line 1,978: | ||
|ThirdStatsSS=1 | |ThirdStatsSS=1 | ||
}} | }} | ||
|colspan=2|{{ | |colspan=2|{{MSSuperstars stats | ||
|FirstStatsName=Power | |FirstStatsName=Power | ||
|FirstStatsN=2 | |FirstStatsN=2 | ||
| Line 2,056: | Line 1,992: | ||
|ThirdStatsSS=4 | |ThirdStatsSS=4 | ||
}} | }} | ||
|colspan=2|{{ | |colspan=2|{{MSSuperstars stats | ||
|FirstStatsName=Power | |FirstStatsName=Power | ||
|FirstStatsN=4 | |FirstStatsN=4 | ||
| Line 2,070: | Line 2,006: | ||
|ThirdStatsSS=0 | |ThirdStatsSS=0 | ||
}} | }} | ||
|colspan=2|{{ | |colspan=2|{{MSSuperstars stats | ||
|FirstStatsName=Power | |FirstStatsName=Power | ||
|FirstStatsN=3 | |FirstStatsN=3 | ||
| Line 2,085: | Line 2,021: | ||
}} | }} | ||
|} | |} | ||
{{br}} | |||
{|border=1 cellspacing=0 cellpadding=3 style="border:1px solid black; border-collapse:collapse"width=100% | |||
{| border=1 cellspacing=0 cellpadding=3 style="border:1px solid black; border-collapse:collapse" width =100% | |||
|- | |- | ||
!colspan=8 align="center" style=background:lightgray|Unlockable captains | !colspan=8 align="center"style=background:lightgray|Unlockable captains | ||
|- | |- | ||
! colspan=2 width=25% style="background:#FF8787" | Metal Mario | !colspan=2 width=25% style="background:#FF8787"|Metal Mario | ||
! colspan=2 width=25% style="background:#87FF87" | Pink Gold Peach | !colspan=2 width=25% style="background:#87FF87"|Pink Gold Peach | ||
|- | |- | ||
|colspan=2 align=center|[[File:MetalMario-Stats-Golf MSS.png|200px]] | |colspan=2 align=center|[[File:MetalMario-Stats-Golf MSS.png|200px]] | ||
|colspan=2 align=center|[[File:PinkGoldPeach-Stats-Golf MSS.png|200px]] | |colspan=2 align=center|[[File:PinkGoldPeach-Stats-Golf MSS.png|200px]] | ||
|- | |- | ||
|'''Drive''' || 228 yards | |'''Drive'''||228 yards | ||
|'''Drive''' || 222 yards | |'''Drive'''||222 yards | ||
|- | |- | ||
|'''Trajectory''' || Draw | |'''Trajectory'''||Draw | ||
|'''Trajectory''' || Straight | |'''Trajectory'''||Straight | ||
|- | |- | ||
|'''Height''' || Very High | |'''Height'''||Very High | ||
|'''Height''' || High Medium | |'''Height'''||High Medium | ||
|- | |- | ||
|colspan=2|{{ | |colspan=2|{{MSSuperstars stats | ||
|FirstStatsName=Power | |FirstStatsName=Power | ||
|FirstStatsN=3 | |FirstStatsN=3 | ||
| Line 2,121: | Line 2,055: | ||
|ThirdStatsSS=0 | |ThirdStatsSS=0 | ||
}} | }} | ||
|colspan=2|{{ | |colspan=2|{{MSSuperstars stats | ||
|FirstStatsName=Power | |FirstStatsName=Power | ||
|FirstStatsN=3 | |FirstStatsN=3 | ||
| Line 2,139: | Line 2,073: | ||
====Horse Racing==== | ====Horse Racing==== | ||
*'''Speed''': The top speed of the horse. Characters who have higher speed stats have faster horses. | *'''Speed''': The top speed of the horse. Characters who have higher speed stats have faster horses. | ||
*'''Recovery'''<ref name="Scanning amiibo Cards" | *'''Recovery''':<ref name="Scanning amiibo Cards"/> The endurance of the horse. Characters who have higher stamina stats have horses that tire out more slowly. | ||
*'''Turning'''<ref name="Scanning amiibo Cards" | *'''Turning''':<ref name="Scanning amiibo Cards"/> The maneuverability of the horse. Characters who have higher control stats can move their horses more easily. | ||
Note: Due to the process of selecting the horse first and then the character, the default all-around horse is used to illustrate stat differences. The green bars in the screenshots indicate the horse's stat while the yellow bars indicate the character's stats added on top of the horse. | Note: Due to the process of selecting the horse first and then the character, the default all-around horse is used to illustrate stat differences. The green bars in the screenshots indicate the horse's stat while the yellow bars indicate the character's stats added on top of the horse. | ||
{|border=1 cellspacing=0 cellpadding=3 style="border:1px solid black; border-collapse:collapse"width=100% | |||
{| border=1 cellspacing=0 cellpadding=3 style="border:1px solid black; border-collapse:collapse" width =100% | |||
|- | |- | ||
!colspan=8 align="center" style=background:lightgray|Starting captains | !colspan=8 align="center"style=background:lightgray|Starting captains | ||
|- | |- | ||
! colspan=2 width=25% style="background:#87FF87" | Mario | !colspan=2 width=25% style="background:#87FF87"|Mario | ||
! colspan=2 width=25% style="background:#87FF87" | Luigi | !colspan=2 width=25% style="background:#87FF87"|Luigi | ||
! colspan=2 width=25% style="background:#87FF87" | Yoshi | !colspan=2 width=25% style="background:#87FF87"|Yoshi | ||
! colspan=2 width=25% style="background:#87FF87" | Birdo | !colspan=2 width=25% style="background:#87FF87"|Birdo | ||
|- | |- | ||
|colspan=2 align=center|[[File:Mario-Stats-HorseRacing MSS.png|200px]] | |colspan=2 align=center|[[File:Mario-Stats-HorseRacing MSS.png|200px]] | ||
| Line 2,158: | Line 2,090: | ||
|colspan=2 align=center|[[File:Birdo-Stats-HorseRacing MSS.png|200px]] | |colspan=2 align=center|[[File:Birdo-Stats-HorseRacing MSS.png|200px]] | ||
|- | |- | ||
|'''Type''' || Balance | |'''Type'''||Balance | ||
|'''Type''' || Balance | |'''Type'''||Balance | ||
|'''Type''' || Balance | |'''Type'''||Balance | ||
|'''Type''' || Balance | |'''Type'''||Balance | ||
|- | |- | ||
|colspan=2|{{ | |colspan=2|{{MSSuperstars stats | ||
|FirstStatsName=Speed | |FirstStatsName=Speed | ||
|FirstStatsN=4 | |FirstStatsN=4 | ||
| Line 2,177: | Line 2,109: | ||
|ThirdStatsSS=8 | |ThirdStatsSS=8 | ||
}} | }} | ||
|colspan=2|{{ | |colspan=2|{{MSSuperstars stats | ||
|FirstStatsName=Speed | |FirstStatsName=Speed | ||
|FirstStatsN=5 | |FirstStatsN=5 | ||
| Line 2,191: | Line 2,123: | ||
|ThirdStatsSS=8 | |ThirdStatsSS=8 | ||
}} | }} | ||
|colspan=2|{{ | |colspan=2|{{MSSuperstars stats | ||
|FirstStatsName=Speed | |FirstStatsName=Speed | ||
|FirstStatsN=4 | |FirstStatsN=4 | ||
| Line 2,205: | Line 2,137: | ||
|ThirdStatsSS=8 | |ThirdStatsSS=8 | ||
}} | }} | ||
|colspan=2|{{ | |colspan=2|{{MSSuperstars stats | ||
|FirstStatsName=Speed | |FirstStatsName=Speed | ||
|FirstStatsN=4 | |FirstStatsN=4 | ||
| Line 2,220: | Line 2,152: | ||
}} | }} | ||
|- | |- | ||
! colspan=2 width=25% style="background:#87D2FF" | Peach | !colspan=2 width=25% style="background:#87D2FF"|Peach | ||
! colspan=2 width=25% style="background:#87D2FF" | Daisy | !colspan=2 width=25% style="background:#87D2FF"|Daisy | ||
! colspan=2 width=25% style="background:#87D2FF" | Waluigi | !colspan=2 width=25% style="background:#87D2FF"|Waluigi | ||
! colspan=2 width=25% style="background:#87D2FF" | Boo | !colspan=2 width=25% style="background:#87D2FF"|Boo | ||
|- | |- | ||
|colspan=2 align=center|[[File:Peach-Stats-HorseRacing MSS.png|200px]] | |colspan=2 align=center|[[File:Peach-Stats-HorseRacing MSS.png|200px]] | ||
| Line 2,230: | Line 2,162: | ||
|colspan=2 align=center|[[File:Boo-Stats-HorseRacing MSS.png|200px]] | |colspan=2 align=center|[[File:Boo-Stats-HorseRacing MSS.png|200px]] | ||
|- | |- | ||
|'''Type''' || Technique | |'''Type'''||Technique | ||
|'''Type''' || Technique | |'''Type'''||Technique | ||
|'''Type''' || Technique | |'''Type'''||Technique | ||
|'''Type''' || Technique | |'''Type'''||Technique | ||
|- | |- | ||
|colspan=2|{{ | |colspan=2|{{MSSuperstars stats | ||
|FirstStatsName=Speed | |FirstStatsName=Speed | ||
|FirstStatsN=3 | |FirstStatsN=3 | ||
| Line 2,250: | Line 2,182: | ||
}} | }} | ||
|colspan=2| | |colspan=2| | ||
{{ | {{MSSuperstars stats | ||
|FirstStatsName=Speed | |FirstStatsName=Speed | ||
|FirstStatsN=4 | |FirstStatsN=4 | ||
| Line 2,264: | Line 2,196: | ||
|ThirdStatsSS=10 | |ThirdStatsSS=10 | ||
}} | }} | ||
|colspan=2|{{ | |colspan=2|{{MSSuperstars stats | ||
|FirstStatsName=Speed | |FirstStatsName=Speed | ||
|FirstStatsN=3 | |FirstStatsN=3 | ||
| Line 2,278: | Line 2,210: | ||
|ThirdStatsSS=10 | |ThirdStatsSS=10 | ||
}} | }} | ||
|colspan=2|{{ | |colspan=2|{{MSSuperstars stats | ||
|FirstStatsName=Speed | |FirstStatsName=Speed | ||
|FirstStatsN=4 | |FirstStatsN=4 | ||
| Line 2,293: | Line 2,225: | ||
}} | }} | ||
|- | |- | ||
! colspan=2 width=25% style="background:#FFFF87" | Baby Mario | !colspan=2 width=25% style="background:#FFFF87"|Baby Mario | ||
! colspan=2 width=25% style="background:#FFFF87" | Baby Luigi | !colspan=2 width=25% style="background:#FFFF87"|Baby Luigi | ||
! colspan=2 width=25% style="background:#FFFF87" | Diddy Kong | !colspan=2 width=25% style="background:#FFFF87"|Diddy Kong | ||
! colspan=2 width=25% style="background:#FFFF87" | Bowser Jr. | !colspan=2 width=25% style="background:#FFFF87"|Bowser Jr. | ||
|- | |- | ||
|colspan=2 align=center|[[File:BabyMario-Stats-HorseRacing MSS.png|200px]] | |colspan=2 align=center|[[File:BabyMario-Stats-HorseRacing MSS.png|200px]] | ||
| Line 2,303: | Line 2,235: | ||
|colspan=2 align=center|[[File:BowserJr-Stats-HorseRacing MSS.png|200px]] | |colspan=2 align=center|[[File:BowserJr-Stats-HorseRacing MSS.png|200px]] | ||
|- | |- | ||
|'''Type''' || Speed | |'''Type'''||Speed | ||
|'''Type''' || Speed | |'''Type'''||Speed | ||
|'''Type''' || Speed | |'''Type'''||Speed | ||
|'''Type''' || Speed | |'''Type'''||Speed | ||
|- | |- | ||
|colspan=2|{{ | |colspan=2|{{MSSuperstars stats | ||
|FirstStatsName=Speed | |FirstStatsName=Speed | ||
|FirstStatsN=6 | |FirstStatsN=6 | ||
| Line 2,322: | Line 2,254: | ||
|ThirdStatsSS=6 | |ThirdStatsSS=6 | ||
}} | }} | ||
|colspan=2|{{ | |colspan=2|{{MSSuperstars stats | ||
|FirstStatsName=Speed | |FirstStatsName=Speed | ||
|FirstStatsN=6 | |FirstStatsN=6 | ||
| Line 2,336: | Line 2,268: | ||
|ThirdStatsSS=6 | |ThirdStatsSS=6 | ||
}} | }} | ||
|colspan=2|{{ | |colspan=2|{{MSSuperstars stats | ||
|FirstStatsName=Speed | |FirstStatsName=Speed | ||
|FirstStatsN=5 | |FirstStatsN=5 | ||
| Line 2,350: | Line 2,282: | ||
|ThirdStatsSS=6 | |ThirdStatsSS=6 | ||
}} | }} | ||
|colspan=2|{{ | |colspan=2|{{MSSuperstars stats | ||
|FirstStatsName=Speed | |FirstStatsName=Speed | ||
|FirstStatsN=5 | |FirstStatsN=5 | ||
| Line 2,365: | Line 2,297: | ||
}} | }} | ||
|- | |- | ||
! colspan=2 width=25% style="background:#FF8787" | Donkey Kong | !colspan=2 width=25% style="background:#FF8787"|Donkey Kong | ||
! colspan=2 width=25% style="background:#FF8787" | Wario | !colspan=2 width=25% style="background:#FF8787"|Wario | ||
! colspan=2 width=25% style="background:#FF8787" | Bowser | !colspan=2 width=25% style="background:#FF8787"|Bowser | ||
! colspan=2 width=25% style="background:#FF8787" | Rosalina | !colspan=2 width=25% style="background:#FF8787"|Rosalina | ||
|- | |- | ||
|colspan=2 align=center|[[File:DonkeyKong-Stats-HorseRacing MSS.png|200px]] | |colspan=2 align=center|[[File:DonkeyKong-Stats-HorseRacing MSS.png|200px]] | ||
| Line 2,375: | Line 2,307: | ||
|colspan=2 align=center|[[File:Rosalina-Stats-HorseRacing MSS.png|200px]] | |colspan=2 align=center|[[File:Rosalina-Stats-HorseRacing MSS.png|200px]] | ||
|- | |- | ||
|'''Type''' || Power | |'''Type'''||Power | ||
|'''Type''' || Power | |'''Type'''||Power | ||
|'''Type''' || Power | |'''Type'''||Power | ||
|'''Type''' || Power | |'''Type'''||Power | ||
|- | |- | ||
|colspan=2|{{ | |colspan=2|{{MSSuperstars stats | ||
|FirstStatsName=Speed | |FirstStatsName=Speed | ||
|FirstStatsN=4 | |FirstStatsN=4 | ||
| Line 2,394: | Line 2,326: | ||
|ThirdStatsSS=7 | |ThirdStatsSS=7 | ||
}} | }} | ||
|colspan=2|{{ | |colspan=2|{{MSSuperstars stats | ||
|FirstStatsName=Speed | |FirstStatsName=Speed | ||
|FirstStatsN=4 | |FirstStatsN=4 | ||
| Line 2,408: | Line 2,340: | ||
|ThirdStatsSS=7 | |ThirdStatsSS=7 | ||
}} | }} | ||
|colspan=2|{{ | |colspan=2|{{MSSuperstars stats | ||
|FirstStatsName=Speed | |FirstStatsName=Speed | ||
|FirstStatsN=3 | |FirstStatsN=3 | ||
| Line 2,422: | Line 2,354: | ||
|ThirdStatsSS=7 | |ThirdStatsSS=7 | ||
}} | }} | ||
|colspan=2|{{ | |colspan=2|{{MSSuperstars stats | ||
|FirstStatsName=Speed | |FirstStatsName=Speed | ||
|FirstStatsN=4 | |FirstStatsN=4 | ||
| Line 2,437: | Line 2,369: | ||
}} | }} | ||
|} | |} | ||
{{br}} | |||
{|border=1 cellspacing=0 cellpadding=3 style="border:1px solid black; border-collapse:collapse"width=100% | |||
{| border=1 cellspacing=0 cellpadding=3 style="border:1px solid black; border-collapse:collapse" width =100% | |||
|- | |- | ||
!colspan=8 align="center" style=background:lightgray|Unlockable captains | !colspan=8 align="center"style=background:lightgray|Unlockable captains | ||
|- | |- | ||
! colspan=2 width=25% style="background:#FF8787" | Metal Mario | !colspan=2 width=25% style="background:#FF8787"|Metal Mario | ||
! colspan=2 width=25% style="background:#FF8787" | Pink Gold Peach | !colspan=2 width=25% style="background:#FF8787"|Pink Gold Peach | ||
|- | |- | ||
|colspan=2 align=center|[[File:MetalMario-Stats-HorseRacing MSS.png|200px]] | |colspan=2 align=center|[[File:MetalMario-Stats-HorseRacing MSS.png|200px]] | ||
|colspan=2 align=center|[[File:PinkGoldPeach-Stats-HorseRacing MSS.png|200px]] | |colspan=2 align=center|[[File:PinkGoldPeach-Stats-HorseRacing MSS.png|200px]] | ||
|- | |- | ||
|'''Type''' || Power | |'''Type'''||Power | ||
|'''Type''' || Power | |'''Type'''||Power | ||
|- | |- | ||
|colspan=2|{{ | |colspan=2|{{MSSuperstars stats | ||
|FirstStatsName=Speed | |FirstStatsName=Speed | ||
|FirstStatsN=4 | |FirstStatsN=4 | ||
| Line 2,467: | Line 2,397: | ||
|ThirdStatsSS=7 | |ThirdStatsSS=7 | ||
}} | }} | ||
|colspan=2|{{ | |colspan=2|{{MSSuperstars stats | ||
|FirstStatsName=Speed | |FirstStatsName=Speed | ||
|FirstStatsN=4 | |FirstStatsN=4 | ||
| Line 2,484: | Line 2,414: | ||
===Supporting characters=== | ===Supporting characters=== | ||
In team sports, baseball and soccer, players can select various generic characters to fill out team slots. These generic characters have their own stats and attributes which can be used to tactfully cover up team weaknesses and enhance strengths. What sets them apart from team captains is their inability to perform special shots. In baseball, players can select from a variety of supporting characters; however, in soccer, when players select a type of generic character, all generic characters in the sport are the same species. The only exceptions are Boom Boom and Pom Pom, who can be chosen separately as goalies in soccer. | In team sports, baseball and soccer, players can select various generic characters to fill out team slots. These generic characters have their own stats and attributes which can be used to tactfully cover up team weaknesses and enhance strengths. What sets them apart from team captains is their inability to perform special shots. In baseball, players can select from a variety of supporting characters; however, in soccer, when players select a type of generic character, all generic characters in the sport are the same species. The only exceptions are [[Boom Boom]] and [[Pom Pom]], who can be chosen separately as goalies in soccer. This game marks the first time [[Bone Goomba]]s and [[Stone Spike]]s are playable. | ||
====Soccer==== | ====Soccer==== | ||
{| class="wikitable" border=1 cellspacing=0 cellpadding=3 style="border:1px solid black; border-collapse:collapse" width =100% | {|class="wikitable"border=1 cellspacing=0 cellpadding=3 style="border:1px solid black; border-collapse:collapse"width=100% | ||
|- | |- | ||
!colspan=2 align="center" style=background:lightgray|Teammates | !colspan=2 align="center"style=background:lightgray|Teammates | ||
|- | |- | ||
!colspan=2 width=25%| [[Toad (species)|Toads]] | !colspan=2 width=25%|[[Toad (species)|Toads]] | ||
|- | |- | ||
!width=25%| [[Toad (species)|Red Toad]] | !width=25%|[[File:CSP MSS Toads-Red.png]]<br>[[Toad (species)|Red Toad]] | ||
!width=25%| [[Toad (species)|Blue Toad]] | !width=25%|[[File:CSP MSS Toads-Blue.png]]<br>[[Toad (species)|Blue Toad]] | ||
|- | |- | ||
|align=center|[[File:ToadRed-Stats-Soccer MSS.png|200px]] | |align=center|[[File:ToadRed-Stats-Soccer MSS.png|200px]] | ||
|align=center|[[File:ToadBlue-Stats-Soccer MSS.png|200px]] | |align=center|[[File:ToadBlue-Stats-Soccer MSS.png|200px]] | ||
|- | |- | ||
!colspan=2 width=25%| [[Koopa Troopa]]s | !colspan=2 width=25%|[[Koopa Troopa]]s | ||
|- | |- | ||
! width=25%| [[Red Koopa Troopa]] | !width=25%|[[File:CSP MSS KoopaTroopas-Red.png]]<br>[[Koopa Troopa|Red Koopa Troopa]] | ||
! width=25%| [[Koopa Troopa]] | !width=25%|[[File:CSP MSS KoopaTroopas.png]]<br>[[Koopa Troopa]] | ||
|- | |- | ||
|align=center|[[File:KoopaTroopaRed-Stats-Soccer MSS.png|200px]] | |align=center|[[File:KoopaTroopaRed-Stats-Soccer MSS.png|200px]] | ||
|align=center|[[File:KoopaTroopa-Stats-Soccer MSS.png|200px]] | |align=center|[[File:KoopaTroopa-Stats-Soccer MSS.png|200px]] | ||
|- | |- | ||
!colspan=2 width=25%| [[Magikoopa]]s | !colspan=2 width=25%|[[Magikoopa]]s | ||
|- | |- | ||
! width=25%| [[Magikoopa]] | !width=25%|[[File:CSP MSS Magikoopas.png]]<br>[[Magikoopa]] | ||
! width=25%| [[Yellow Magikoopa]] | !width=25%|[[File:CSP MSS Magikoopas-Yellow.png]]<br>[[Yellow Magikoopa]] | ||
|- | |- | ||
|align=center|[[File:Magikoopa-Stats-Soccer MSS.png|200px]] | |align=center|[[File:Magikoopa-Stats-Soccer MSS.png|200px]] | ||
|align=center|[[File:MagikoopaYellow-Stats-Soccer MSS.png|200px]] | |align=center|[[File:MagikoopaYellow-Stats-Soccer MSS.png|200px]] | ||
|- | |- | ||
!colspan=2 width=25%| [[Shy Guy]]s | !colspan=2 width=25%|[[Shy Guy]]s | ||
|- | |- | ||
! width=25%| [[Shy Guy]] | !width=25%|[[File:CSP MSS ShyGuys.png]]<br>[[Shy Guy]] | ||
! width=25%| [[Yellow Shy Guy]] | !width=25%|[[File:CSP MSS ShyGuys-Yellow.png]]<br>[[Shy Guy|Yellow Shy Guy]] | ||
|- | |- | ||
|align=center|[[File:ShyGuy-Stats-Soccer MSS.png|200px]] | |align=center|[[File:ShyGuy-Stats-Soccer MSS.png|200px]] | ||
|align=center|[[File:ShyGuyYellow-Stats-Soccer MSS.png|200px]] | |align=center|[[File:ShyGuyYellow-Stats-Soccer MSS.png|200px]] | ||
|- | |- | ||
!colspan=2 width=25%| [[Flying Squirrel Mario|Flying Squirrel Toad]]s / [[Penguin Mario|Penguin Toads]] | !colspan=2 width=25%|[[Flying Squirrel Mario|Flying Squirrel Toad]]s / [[Penguin Mario|Penguin Toads]] | ||
|- | |- | ||
! width=25%| [[Flying Squirrel Mario|Yellow Flying Squirrel Toad]] | !width=25%|[[File:CSP MSS FlyingSquirrelToads-Yellow.png]]<br>[[Flying Squirrel Mario|Yellow Flying Squirrel Toad]] | ||
! width=25%| [[Penguin Mario|Blue Penguin | !width=25%|[[File:CSP MSS PenguinToads-Blue.png]]<br>[[Penguin Mario|Blue Penguin Toad]] | ||
|- | |- | ||
|align=center|[[File:FlyingSquirrelToadYellow-Stats-Soccer MSS.png|200px]] | |align=center|[[File:FlyingSquirrelToadYellow-Stats-Soccer MSS.png|200px]] | ||
|align=center|[[File:PenguinToadBlue-Stats-Soccer MSS.png|200px]] | |align=center|[[File:PenguinToadBlue-Stats-Soccer MSS.png|200px]] | ||
|- | |- | ||
!colspan=2 width=25%| [[Goomba]]s | !colspan=2 width=25%|[[Goomba]]s | ||
|- | |- | ||
! width=25%| [[Goomba]] | !width=25%|[[File:CSP MSS Goombas.png]]<br>[[Goomba]] | ||
! width=25%| [[Bone Goomba]] | !width=25%|[[File:CSP MSS Goombas-Bone.png]]<br>[[Bone Goomba]] | ||
|- | |- | ||
|align=center|[[File:Goomba-Stats-Soccer MSS.png|200px]] | |align=center|[[File:Goomba-Stats-Soccer MSS.png|200px]] | ||
|align=center|[[File:GoombaBone-Stats-Soccer MSS.png|200px]] | |align=center|[[File:GoombaBone-Stats-Soccer MSS.png|200px]] | ||
|- | |- | ||
!colspan=2 width=25%| [[Hammer Bro | !colspan=2 width=25%|[[Hammer Bro]]s. | ||
|- | |- | ||
! width=25%| [[Hammer Bro]] | !width=25%|[[File:CSP MSS Hammer Bros.png]]<br>[[Hammer Bro]] | ||
! width=25%| [[Boomerang Bro]] | !width=25%|[[File:CSP MSS BoomerangBros.png]]<br>[[Boomerang Bro]] | ||
|- | |- | ||
|align=center|[[File:BroHammer-Stats-Soccer MSS.png|200px]] | |align=center|[[File:BroHammer-Stats-Soccer MSS.png|200px]] | ||
|align=center|[[File:BroBoomerang-Stats-Soccer MSS.png|200px]] | |align=center|[[File:BroBoomerang-Stats-Soccer MSS.png|200px]] | ||
|- | |- | ||
!colspan=2 width=25%| [[ | !colspan=2 width=25%|[[Spike]]s | ||
|- | |- | ||
! width=25%| [[Spike]] | !width=25%|[[File:CSP MSS Spikes.png]]<br>[[Spike]] | ||
! width=25%| [[Stone Spike]] | !width=25%|[[File:CSP MSS Spikes-Stone.png]]<br>[[Stone Spike]] | ||
|- | |- | ||
|align=center|[[File:Spike-Stats-Soccer MSS.png|200px]] | |align=center|[[File:Spike-Stats-Soccer MSS.png|200px]] | ||
|align=center|[[File:SpikeStone-Stats-Soccer MSS.png|200px]] | |align=center|[[File:SpikeStone-Stats-Soccer MSS.png|200px]] | ||
|} | |} | ||
{{br}} | |||
{|class="wikitable"border=1 cellspacing=0 cellpadding=3 style="border:1px solid black; border-collapse:collapse"width=100% | |||
{| class="wikitable" border=1 cellspacing=0 cellpadding=3 style="border:1px solid black; border-collapse:collapse" width =100% | |||
|- | |- | ||
!colspan=2 align="center" style=background:lightgray|Goalies | !colspan=2 align="center"style=background:lightgray|Goalies | ||
|- | |- | ||
!width=25%| [[ | !width=25%|[[File:CSP MSS BoomBoom-Goalie.png]]<br>[[Boom Boom]] | ||
!width=25%| [[Pom Pom]] | !width=25%|[[File:CSP MSS PomPom-Goalie.png]]<br>[[Pom Pom]] | ||
|- | |- | ||
|align=center|[[File:BoomBoom-Stats-Soccer MSS.png|200px]] | |align=center|[[File:BoomBoom-Stats-Soccer MSS.png|200px]] | ||
| Line 2,572: | Line 2,498: | ||
====Baseball==== | ====Baseball==== | ||
{| border=1 cellspacing=0 cellpadding=3 style="border:1px solid black; border-collapse:collapse" width =100% | {|border=1 cellspacing=0 cellpadding=3 style="border:1px solid black; border-collapse:collapse"width=100% | ||
|- | |- | ||
!colspan=8 align="center" style=background:lightgray|Teammates | !colspan=8 align="center"style=background:lightgray|Teammates | ||
|- | |- | ||
! colspan=2 width=25% style="background:#87FF87" | [[Toad (species)|Red Toad]] | !colspan=2 width=25% style="background:#87FF87"|[[File:CSP MSS Toad-Red.png]]<br>[[Toad (species)|Red Toad]] | ||
! colspan=2 width=25% style="background:#87FF87" | [[Toad (species)|Blue Toad]] | !colspan=2 width=25% style="background:#87FF87"|[[File:CSP MSS Toad-Blue.png]]<br>[[Toad (species)|Blue Toad]] | ||
! colspan=2 width=25% style="background:#87FF87" | [[Toad (species)|Yellow Toad]] | !colspan=2 width=25% style="background:#87FF87"|[[File:CSP MSS Toad-Yellow.png]]<br>[[Toad (species)|Yellow Toad]] | ||
! colspan=2 width=25% style="background:#87FF87" | [[Toad (species)|Green Toad]] | !colspan=2 width=25% style="background:#87FF87"|[[File:CSP MSS Toad-Green.png]]<br>[[Toad (species)|Green Toad]] | ||
|- | |- | ||
|colspan=2 align=center|[[File:ToadRed-Stats-Baseball MSS.png|200px]] | |colspan=2 align=center|[[File:ToadRed-Stats-Baseball MSS.png|200px]] | ||
| Line 2,586: | Line 2,512: | ||
|colspan=2 align=center|[[File:ToadGreen-Stats-Baseball MSS.png|200px]] | |colspan=2 align=center|[[File:ToadGreen-Stats-Baseball MSS.png|200px]] | ||
|- | |- | ||
|'''Type''' || Balance | |'''Type'''||Balance | ||
|'''Type''' || Balance | |'''Type'''||Balance | ||
|'''Type''' || Balance | |'''Type'''||Balance | ||
|'''Type''' || Balance | |'''Type'''||Balance | ||
|- | |- | ||
! colspan=2 width=25% style="background:#87FF87" | [[Red Koopa Troopa]] | !colspan=2 width=25% style="background:#87FF87"|[[File:CSP MSS KoopaTroopa-Red.png]]<br>[[Koopa Troopa|Red Koopa Troopa]] | ||
! colspan=2 width=25% style="background:#87FF87" | [[Blue Koopa Troopa]] | !colspan=2 width=25% style="background:#87FF87"|[[File:CSP MSS KoopaTroopa-Blue.png]]<br>[[Koopa Troopa|Blue Koopa Troopa]] | ||
! colspan=2 width=25% style="background:#87FF87" | [[Yellow Koopa Troopa]] | !colspan=2 width=25% style="background:#87FF87"|[[File:CSP MSS KoopaTroopa-Yellow.png]]<br>[[Koopa Troopa|Yellow Koopa Troopa]] | ||
! colspan=2 width=25% style="background:#87FF87" | [[Koopa Troopa]] | !colspan=2 width=25% style="background:#87FF87"|[[File:CSP MSS KoopaTroopa.png]]<br>[[Koopa Troopa]] | ||
|- | |- | ||
|colspan=2 align=center|[[File:KoopaTroopaRed-Stats-Baseball MSS.png|200px]] | |colspan=2 align=center|[[File:KoopaTroopaRed-Stats-Baseball MSS.png|200px]] | ||
| Line 2,601: | Line 2,527: | ||
|colspan=2 align=center|[[File:KoopaTroopa-Stats-Baseball MSS.png|200px]] | |colspan=2 align=center|[[File:KoopaTroopa-Stats-Baseball MSS.png|200px]] | ||
|- | |- | ||
|'''Type''' || Balance | |'''Type'''||Balance | ||
|'''Type''' || Balance | |'''Type'''||Balance | ||
|'''Type''' || Balance | |'''Type'''||Balance | ||
|'''Type''' || Balance | |'''Type'''||Balance | ||
|- | |- | ||
! colspan=2 width=25% style="background:#87D2FF" | [[Red Magikoopa]] | !colspan=2 width=25% style="background:#87D2FF"|[[File:CSP MSS Magikoopa-Red.png]]<br>[[Red Magikoopa]] | ||
! colspan=2 width=25% style="background:#87D2FF" | [[Magikoopa]] | !colspan=2 width=25% style="background:#87D2FF"|[[File:CSP MSS Magikoopa.png]]<br>[[Magikoopa]] | ||
! colspan=2 width=25% style="background:#87D2FF" | [[Yellow Magikoopa]] | !colspan=2 width=25% style="background:#87D2FF"|[[File:CSP MSS Magikoopa-Yellow.png]]<br>[[Yellow Magikoopa]] | ||
! colspan=2 width=25% style="background:#87D2FF" | [[Green Magikoopa]] | !colspan=2 width=25% style="background:#87D2FF"|[[File:CSP MSS Magikoopa-Green.png]]<br>[[Green Magikoopa]] | ||
|- | |- | ||
|colspan=2 align=center|[[File:MagikoopaRed-Stats-Baseball MSS.png|200px]] | |colspan=2 align=center|[[File:MagikoopaRed-Stats-Baseball MSS.png|200px]] | ||
| Line 2,616: | Line 2,542: | ||
|colspan=2 align=center|[[File:MagikoopaGreen-Stats-Baseball MSS.png|200px]] | |colspan=2 align=center|[[File:MagikoopaGreen-Stats-Baseball MSS.png|200px]] | ||
|- | |- | ||
|'''Type''' || Technique | |'''Type'''||Technique | ||
|'''Type''' || Technique | |'''Type'''||Technique | ||
|'''Type''' || Technique | |'''Type'''||Technique | ||
|'''Type''' || Technique | |'''Type'''||Technique | ||
|- | |- | ||
! colspan=2 width=25% style="background:#87D2FF" | [[Paratroopa]] | !colspan=2 width=25% style="background:#87D2FF"|[[File:CSP MSS Paratroopa.png]]<br>[[Koopa Paratroopa|Paratroopa]] | ||
! colspan=2 width=25% style="background:#87D2FF" | [[Blue Paratroopa]] | !colspan=2 width=25% style="background:#87D2FF"|[[File:CSP MSS Paratroopa-Blue.png]]<br>[[Koopa Paratroopa|Blue Paratroopa]] | ||
! colspan=2 width=25% style="background:#87D2FF" | [[Yellow Paratroopa]] | !colspan=2 width=25% style="background:#87D2FF"|[[File:CSP MSS Paratroopa-Yellow.png]]<br>[[Koopa Paratroopa|Yellow Paratroopa]] | ||
! colspan=2 width=25% style="background:#87D2FF" | [[Green Paratroopa]] | !colspan=2 width=25% style="background:#87D2FF"|[[File:CSP MSS Paratroopa-Green.png]]<br>[[Koopa Paratroopa|Green Paratroopa]] | ||
|- | |- | ||
|colspan=2 align=center|[[File:Paratroopa-Stats-Baseball MSS.png|200px]] | |colspan=2 align=center|[[File:Paratroopa-Stats-Baseball MSS.png|200px]] | ||
| Line 2,631: | Line 2,557: | ||
|colspan=2 align=center|[[File:ParatroopaGreen-Stats-Baseball MSS.png|200px]] | |colspan=2 align=center|[[File:ParatroopaGreen-Stats-Baseball MSS.png|200px]] | ||
|- | |- | ||
|'''Type''' || Technique | |'''Type'''||Technique | ||
|'''Type''' || Technique | |'''Type'''||Technique | ||
|'''Type''' || Technique | |'''Type'''||Technique | ||
|'''Type''' || Technique | |'''Type'''||Technique | ||
|- | |- | ||
! colspan=2 width=25% style="background:#FFFF87" | [[Shy Guy]] | !colspan=2 width=25% style="background:#FFFF87"|[[File:CSP MSS ShyGuy.png]]<br>[[Shy Guy]] | ||
! colspan=2 width=25% style="background:#FFFF87" | [[Blue Shy Guy]] | !colspan=2 width=25% style="background:#FFFF87"|[[File:CSP MSS ShyGuy-Blue.png]]<br>[[Shy Guy|Blue Shy Guy]] | ||
! colspan=2 width=25% style="background:#FFFF87" | [[Yellow Shy Guy]] | !colspan=2 width=25% style="background:#FFFF87"|[[File:CSP MSS ShyGuy-Yellow.png]]<br>[[Shy Guy|Yellow Shy Guy]] | ||
! colspan=2 width=25% style="background:#FFFF87" | [[Green Shy Guy]] | !colspan=2 width=25% style="background:#FFFF87"|[[File:CSP MSS ShyGuy-Green.png]]<br>[[Shy Guy|Green Shy Guy]] | ||
|- | |- | ||
|colspan=2 align=center|[[File:ShyGuy-Stats-Baseball MSS.png|200px]] | |colspan=2 align=center|[[File:ShyGuy-Stats-Baseball MSS.png|200px]] | ||
| Line 2,646: | Line 2,572: | ||
|colspan=2 align=center|[[File:ShyGuyGreen-Stats-Baseball MSS.png|200px]] | |colspan=2 align=center|[[File:ShyGuyGreen-Stats-Baseball MSS.png|200px]] | ||
|- | |- | ||
|'''Type''' || Speed | |'''Type'''||Speed | ||
|'''Type''' || Speed | |'''Type'''||Speed | ||
|'''Type''' || Speed | |'''Type'''||Speed | ||
|'''Type''' || Speed | |'''Type'''||Speed | ||
|- | |- | ||
! colspan=2 width=25% style="background:#FFFF87" | [[Flying Squirrel Mario|Yellow Flying Squirrel Toad]] | !colspan=2 width=25% style="background:#FFFF87"|[[File:CSP MSS FlyingSquirrelToad-Yellow.png]]<br>[[Flying Squirrel Mario|Yellow Flying Squirrel Toad]] | ||
! colspan=2 width=25% style="background:#FFFF87" | [[Flying Squirrel Mario|Blue Flying Squirrel Toad]] | !colspan=2 width=25% style="background:#FFFF87"|[[File:CSP MSS FlyingSquirrelToad-Blue.png]]<br>[[Flying Squirrel Mario|Blue Flying Squirrel Toad]] | ||
! colspan=2 width=25% style="background:#FFFF87" | [[Penguin Mario|Yellow Penguin Toad]] | !colspan=2 width=25% style="background:#FFFF87"|[[File:CSP MSS PenguinToad-Yellow.png]]<br>[[Penguin Mario|Yellow Penguin Toad]] | ||
! colspan=2 width=25% style="background:#FFFF87" | [[Penguin Mario|Blue Penguin Toad]] | !colspan=2 width=25% style="background:#FFFF87"|[[File:CSP MSS PenguinToad-Blue.png]]<br>[[Penguin Mario|Blue Penguin Toad]] | ||
|- | |- | ||
|colspan=2 align=center|[[File:FlyingSquirrelToadYellow-Stats-Baseball MSS.png|200px]] | |colspan=2 align=center|[[File:FlyingSquirrelToadYellow-Stats-Baseball MSS.png|200px]] | ||
| Line 2,661: | Line 2,587: | ||
|colspan=2 align=center|[[File:PenguinToadBlue-Stats-Baseball MSS.png|200px]] | |colspan=2 align=center|[[File:PenguinToadBlue-Stats-Baseball MSS.png|200px]] | ||
|- | |- | ||
|'''Type''' || Speed | |'''Type'''||Speed | ||
|'''Type''' || Speed | |'''Type'''||Speed | ||
|'''Type''' || Speed | |'''Type'''||Speed | ||
|'''Type''' || Speed | |'''Type'''||Speed | ||
|- | |- | ||
! colspan=2 width=25% style="background:#FF8787" | [[Goomba]] | !colspan=2 width=25% style="background:#FF8787"|[[File:CSP MSS Goomba.png]]<br>[[Goomba]] | ||
! colspan=2 width=25% style="background:#FF8787" | [[Hammer Bro]] | !colspan=2 width=25% style="background:#FF8787"|[[File:CSP MSS HammerBro.png]]<br>[[Hammer Bro]] | ||
! colspan=2 width=25% style="background:#FF8787" | [[Fire Bro]] | !colspan=2 width=25% style="background:#FF8787"|[[File:CSP MSS FireBro.png]]<br>[[Fire Bro]] | ||
! colspan=2 width=25% style="background:#FF8787" | [[Boomerang Bro]] | !colspan=2 width=25% style="background:#FF8787"|[[File:CSP MSS BoomerangBro.png]]<br>[[Boomerang Bro]] | ||
|- | |- | ||
|colspan=2 align=center|[[File:Goomba-Stats-Baseball MSS.png|200px]] | |colspan=2 align=center|[[File:Goomba-Stats-Baseball MSS.png|200px]] | ||
| Line 2,676: | Line 2,602: | ||
|colspan=2 align=center|[[File:BroBoomerang-Stats-Baseball MSS.png|200px]] | |colspan=2 align=center|[[File:BroBoomerang-Stats-Baseball MSS.png|200px]] | ||
|- | |- | ||
|'''Type''' || Power | |'''Type'''||Power | ||
|'''Type''' || Power | |'''Type'''||Power | ||
|'''Type''' || Power | |'''Type'''||Power | ||
|'''Type''' || Power | |'''Type'''||Power | ||
|- | |- | ||
! colspan=2 width=25% style="background:#FF8787" | [[Boom Boom]] | !colspan=2 width=25% style="background:#FF8787"|[[File:CSP MSS BoomBoom.png]]<br>[[Boom Boom]] | ||
! colspan=2 width=25% style="background:#FF8787" | [[Pom Pom]] | !colspan=2 width=25% style="background:#FF8787"|[[File:CSP MSS PomPom.png]]<br>[[Pom Pom]] | ||
! colspan=2 width=25% style="background:#FF8787" | [[Spike]] | !colspan=2 width=25% style="background:#FF8787"|[[File:CSP MSS Spike.png]]<br>[[Spike]] | ||
! colspan=2 width=25% style="background:#FF8787" | [[Stone Spike]] | !colspan=2 width=25% style="background:#FF8787"|[[File:CSP MSS Spike-Stone.png]]<br>[[Stone Spike]] | ||
|- | |- | ||
|colspan=2 align=center|[[File:BoomBoom-Stats-Baseball MSS.png|200px]] | |colspan=2 align=center|[[File:BoomBoom-Stats-Baseball MSS.png|200px]] | ||
| Line 2,691: | Line 2,617: | ||
|colspan=2 align=center|[[File:SpikeStone-Stats-Baseball MSS.png|200px]] | |colspan=2 align=center|[[File:SpikeStone-Stats-Baseball MSS.png|200px]] | ||
|- | |- | ||
|'''Type''' || Power | |'''Type'''||Power | ||
|'''Type''' || Power | |'''Type'''||Power | ||
|'''Type''' || Power | |'''Type'''||Power | ||
|'''Type''' || Power | |'''Type'''||Power | ||
|} | |} | ||
===Horses=== | ===Horses=== | ||
The following is a gallery of available [[horse]]s and their stats in the Horse Racing mode. | The following is a gallery of available [[horse]]s and their stats in the Horse Racing mode. | ||
====Balance==== | ====Balance==== | ||
=====Male===== | =====Male===== | ||
| Line 2,819: | Line 2,744: | ||
====Enemies==== | ====Enemies==== | ||
These enemies are weak enemies, serving as the primary obstacles for the stage. All enemies are either required to defeat or wander offscreen to proceed. Enemies can flip cards over, but when enemies touch a card, they are defeated as well. | These enemies are weak enemies, serving as the primary obstacles for the stage. All enemies are either required to defeat or wander offscreen to proceed. Enemies can flip cards over, but when enemies touch a card, they are defeated as well. | ||
{|class=wikitable cellspacing=0 cellpadding=3 width=100% border=1 style="font-style:Arial;border-collapsible:collapse;text-align:center" | {|class=wikitable cellspacing=0 cellpadding=3 width=100% border=1 style="font-style:Arial;border-collapsible:collapse;text-align:center" | ||
|- | |- | ||
| Line 2,843: | Line 2,767: | ||
====Mid-bosses==== | ====Mid-bosses==== | ||
These bosses are all varieties of a bro, who must take several hits to be defeated. All of these mid-bosses have their own projectile and attack pattern. They also appear with a variety of other enemies, such as Shy Guys or Koopa Troopas. | These bosses are all varieties of a bro, who must take several hits to be defeated. All of these mid-bosses have their own projectile and attack pattern. They also appear with a variety of other enemies, such as Shy Guys or Koopa Troopas. | ||
{|class=wikitable cellspacing=0 cellpadding=3 width=100% border=1 style="font-style:Arial;border-collapsible:collapse;text-align:center" | {|class=wikitable cellspacing=0 cellpadding=3 width=100% border=1 style="font-style:Arial;border-collapsible:collapse;text-align:center" | ||
|- | |- | ||
| Line 2,858: | Line 2,781: | ||
|align=left|Fire Bro tosses three fire balls at a time to the player, where they bounce erratically. | |align=left|Fire Bro tosses three fire balls at a time to the player, where they bounce erratically. | ||
|} | |} | ||
====Bosses==== | ====Bosses==== | ||
These are the bosses of the stage, indicated by the incoming siren and boss alert signals. They have considerably more health than any enemy in the game, and the type of boss that spawns is dependent on the player's progress. All bosses have a rage mode, where once a considerable portion of their health is depleted, they change up their attack patterns to be for the more difficult. Once the boss of the stage is defeated, the player wins and is awarded the Superstar status to all characters who have completed it. | These are the bosses of the stage, indicated by the incoming siren and boss alert signals. They have considerably more health than any enemy in the game, and the type of boss that spawns is dependent on the player's progress. All bosses have a rage mode, where once a considerable portion of their health is depleted, they change up their attack patterns to be for the more difficult. Once the boss of the stage is defeated, the player wins and is awarded the Superstar status to all characters who have completed it. | ||
{|class=wikitable cellspacing=0 cellpadding=3 width=100% border=1 style="font-style:Arial;border-collapsible:collapse;text-align:center" | {|class=wikitable cellspacing=0 cellpadding=3 width=100% border=1 style="font-style:Arial;border-collapsible:collapse;text-align:center" | ||
|- | |- | ||
| Line 2,874: | Line 2,795: | ||
|align=left|Pom Pom throws her boomerangs in a similar fashion to the Boomerang Bros. When in rage mode after a portion of her health is depleted, she creates copies of herself and tosses more boomerangs. | |align=left|Pom Pom throws her boomerangs in a similar fashion to the Boomerang Bros. When in rage mode after a portion of her health is depleted, she creates copies of herself and tosses more boomerangs. | ||
|- | |- | ||
|[[File:RTS BigMagikoopa.png|200px]]<br>[[ | |[[File:RTS BigMagikoopa.png|200px]]<br>[[Big Magikoopa]] | ||
|align=left|Big Magikoopa uses a variety of magical effects to attack, such as spawning [[Bullet Bill]]s and a large variety of other enemies to assist it. | |align=left|Big Magikoopa uses a variety of magical effects to attack, such as spawning [[Bullet Bill]]s and a large variety of other enemies to assist it. | ||
|- | |- | ||
|[[File:RTS BigMagikoopaYellow.png|200px]]<br>[[ | |[[File:RTS BigMagikoopaYellow.png|200px]]<br>[[Big Magikoopa|Yellow Big Magikoopa]] | ||
|align=left|Yellow Big Magikoopa behaves similarly to Big Magikoopa, except that it uses many [[Amp]]s to attack rather than Bullet Bills. | |align=left|Yellow Big Magikoopa behaves similarly to Big Magikoopa, except that it uses many [[Amp]]s to attack rather than Bullet Bills. | ||
|- | |- | ||
|[[File:RTS MegaSpike.png|200px]]<br>[[ | |[[File:RTS MegaSpike.png|200px]]<br>[[Mega Spike]] | ||
|align=left|Mega Spike attacks by either throwing its [[Spiked Ball]]s at the player or by stomping on the region where the player is located. When it is angry after a certain amount of health is depleted, it spawns more Spiked Balls at the player. | |align=left|Mega Spike attacks by either throwing its [[Spike Ball|Spiked Ball]]s at the player or by stomping on the region where the player is located. When it is angry after a certain amount of health is depleted, it spawns more Spiked Balls at the player. | ||
|- | |- | ||
|[[File:RTS MegaSpikeStone.png|200px]]<br>[[ | |[[File:RTS MegaSpikeStone.png|200px]]<br>[[Mega Stone Spike]] | ||
|align=left|Mega Stone Spike has similar attack patterns to Mega Spike, except it tosses stone | |align=left|Mega Stone Spike has similar attack patterns to Mega Spike, except it tosses stone Spiked Balls at the player, and when it is angry after a certain amount of health has been depleted, these balls can split into three. | ||
|- | |- | ||
|[[File:RTS BoomBoomPomPom.png|200px]]<br>[[Boom Boom]] and [[Pom Pom]] | |[[File:RTS BoomBoomPomPom.png|200px]]<br>[[Boom Boom]] and [[Pom Pom]] | ||
| Line 2,892: | Line 2,813: | ||
===Other=== | ===Other=== | ||
These characters either serve as background characters or as referees. Toad is seen giving tutorials to players in tennis and golf modes of the game while he sits as the referee in tennis. Lakitu serves as the referee in soccer, serves as the umpire in baseball, appears when players hit their ball into deep water in golf (as an [[Out of Bounds]] penalty), and retrieves balls in tennis if players are hit with a body shot. | These characters either serve as background characters or as referees. Toad is seen giving tutorials to players in tennis and golf modes of the game while he sits as the referee in tennis. Lakitu serves as the referee in soccer, serves as the umpire in baseball, appears when players hit their ball into deep water in golf (as an [[Out of Bounds]] penalty), and retrieves balls in tennis if players are hit with a body shot. | ||
*[[Goomba]]s | *[[Goomba]]s | ||
*[[Koopa Troopa]]s | *[[Koopa Troopa]]s | ||
*[[Lakitu]] | *[[Lakitu]] | ||
*[[Luma | *[[Luma]]s | ||
*[[Koopa Paratroopa|Paratroopa]]s | |||
*[[Shy Guy]]s | *[[Shy Guy]]s | ||
*[[Toad]] | *[[Toad]] | ||
*[[Toad (species)| | *[[Toad (species)|Toad]]s | ||
==Locations== | ==Locations== | ||
| Line 2,906: | Line 2,826: | ||
===Soccer fields=== | ===Soccer fields=== | ||
{| class=sortable | {|class="wikitable sortable" align=center width=50% style="text-align:center" | ||
|- | |- | ||
!width=15% |Picture | !width=15%|Picture | ||
!width=15% |Stadium | !width=15%|Stadium | ||
|- | |- | ||
|[[File:Village Stadium Day.png|150px]][[File:Village Stadium Night.png|150px]] | |[[File:Village Stadium Day.png|150px]][[File:Village Stadium Night.png|150px]] | ||
| Line 2,925: | Line 2,845: | ||
===Baseball stadiums=== | ===Baseball stadiums=== | ||
{| class=sortable | {|class="wikitable sortable" align=center width=50% style="text-align:center" | ||
|- | |- | ||
!width=15% |Picture | !width=15%|Picture | ||
!width=15% |Stadium | !width=15%|Stadium | ||
|- | |- | ||
|[[File:Country Field Day.png|150px]][[File:Country Field Night.png|150px]] | |[[File:Country Field Day.png|150px]][[File:Country Field Night.png|150px]] | ||
| Line 2,944: | Line 2,864: | ||
===Tennis courts=== | ===Tennis courts=== | ||
{| class=sortable | {|class="wikitable sortable" align=center width=100% style="text-align:center" | ||
|- | |- | ||
!width=15% |Picture | !width=15%|Picture | ||
!width=15% |Court | !width=15%|Court | ||
!width=15% |Bounce | !width=15%|Bounce | ||
!width=15% |Ball Speed | !width=15%|Ball Speed | ||
|- | |- | ||
|[[File:Grass Court MSS Overview.png|200px]] | |[[File:Grass Court MSS Overview.png|200px]] | ||
| Line 2,973: | Line 2,893: | ||
===Golf courses=== | ===Golf courses=== | ||
{| class=sortable | {|class="wikitable sortable" align=center width=100% style="text-align:center" | ||
|- | |- | ||
!width=15% |Image | !width=15%|Image | ||
!width=15% |Name | !width=15%|Name | ||
!width=15% |Holes | !width=15%|Holes | ||
!width=15% |Par | !width=15%|Par | ||
|- | |- | ||
|[[File:MarioGolfMSS.png|200px]] | |[[File:MarioGolfMSS.png|200px]] | ||
| Line 3,003: | Line 2,923: | ||
===Horse racing tracks=== | ===Horse racing tracks=== | ||
There are 12 race tracks based on four areas. Green Farm, Cobalt Lake, and Yellow Leaves Hill are all initially available in Exhibition mode while the Sky Peak courses are unlocked when players clear the [[Star Cup]]. When players go on outings with their horse in the stable mode, they ride their horse on the first track of each respective course. | There are 12 race tracks based on four areas. Green Farm, Cobalt Lake, and Yellow Leaves Hill are all initially available in Exhibition mode while the Sky Peak courses are unlocked when players clear the [[Star Cup]]. When players go on outings with their horse in the stable mode, they ride their horse on the first track of each respective course. | ||
{|class="wikitable"cellpadding="0"style="margin: 0 auto;text-align: center"width=100% | |||
{| class="wikitable" cellpadding="0" style="margin: 0 auto;text-align: center" width =100% | |||
!colspan=3|Green Farm | !colspan=3|Green Farm | ||
|- | |- | ||
| Line 3,047: | Line 2,966: | ||
==Gear== | ==Gear== | ||
As ''[[Mario Tennis Open]]'' and ''[[Mario Golf: World Tour]]'', ''Mario Sports Superstars'' has a gear system; unlike those games however, ''Mario'' characters can change their gear rather than being tied exclusively to [[Mii]]s. Gear can be unlocked when players scan an amiibo card in, with the corresponding gear being listed on the amiibo card. Gear can be unlocked for all sports, and they are additionally unlocked when players buy their corresponding digital card from the shop. Unlike the aforementioned games, however, different gear is tied to a specific character and they serve for aesthetic purposes only. | As ''[[Mario Tennis Open]]'' and ''[[Mario Golf: World Tour]]'', ''Mario Sports Superstars'' has a gear system; unlike those games however, ''Super Mario'' characters can change their gear rather than being tied exclusively to [[Mii]]s. Gear can be unlocked when players scan an amiibo card in, with the corresponding gear being listed on the amiibo card. Gear can be unlocked for all sports, and they are additionally unlocked when players buy their corresponding digital card from the shop. Unlike the aforementioned games, however, different gear is tied to a specific character and they serve for aesthetic purposes only. | ||
<center> | <center> | ||
{|class="wikitable" style="width:50%; text-align:center" | {|class="wikitable"style="width:50%; text-align:center" | ||
!rowspan=2 width=16%|Character | !rowspan=2 width=16%|Character | ||
|- | |- | ||
| Line 3,171: | Line 3,089: | ||
|[[File:Card ProHorse Symbol Luma Symbol.png|100px]] | |[[File:Card ProHorse Symbol Luma Symbol.png|100px]] | ||
|- | |- | ||
|[[File:CSP MSS Metal Mario.png]]<br>[[ | |[[File:CSP MSS Metal Mario.png]]<br>[[Metal Mario]] | ||
|[[File:Card ProSoccer Gear FireFlowerMetal Ball.png|100px]] | |[[File:Card ProSoccer Gear FireFlowerMetal Ball.png|100px]] | ||
|[[File:Card ProBaseball Gear FireFlowerMetal Bat.png|100px]] | |[[File:Card ProBaseball Gear FireFlowerMetal Bat.png|100px]] | ||
| Line 3,198: | Line 3,116: | ||
==Reception== | ==Reception== | ||
===Critical reception=== | ===Critical reception=== | ||
''Mario Sports Superstars'' received generally mixed reviews, with the game currently scoring a | ''Mario Sports Superstars'' received generally mixed reviews, with the game currently scoring a 62 on Metacritic based on 44 reviews<ref>{{cite|language=en|url=www.metacritic.com/game/3ds/mario-sports-superstars|title=''Mario Sports Superstars''|publisher=Metacritic|accessdate=June 25, 2024}}</ref> and a 55.85% on GameRankings based on 20 reviews.<ref>{{cite|deadlink=y|archive=web.archive.org/web/20170809195638/http://www.gamerankings.com/3ds/195478-mario-sports-superstars/index.html|title=''Mario Sports Superstars''|publisher=GameRankings|language=en|accessdate=June 25, 2024|archivedate=August 9, 2017}}</ref> The game was generally praised for being fun to play, especially with friends. Horse Racing in particular received praise for being the most in-depth sport of the five, with the amount of objects to customize the horse and maintenance of the horse. However, the biggest criticisms of the game was the overall lack of content for each sport, especially compared to the previous installments of the ''Mario Tennis'' and ''Mario Golf'' series for each respective sport, and because of the lack of content, the game does not have staying power. Another common criticism is the amount of content reused from previous ''Super Mario'' sports titles, especially ''Mario Tennis'' and ''Mario Golf'' games. Additionally, the sports were criticized for their more realistic elements compared to previous entries where ''Super Mario'' elements were more abundant. | ||
Daan Koopman of Nintendo World Report gave the game a 5.5 out of 10, calling the game "Competent and playable, but not really a superstar."<ref>{{cite|author=Koopman, Daan|language=en|date=March 8, 2017|url=www.nintendoworldreport.com/review/44266/mario-sports-superstars-3ds-review|title=Review of ''Mario Sports Superstars''|publisher=Nintendo World Report|accessdate=June 25, 2024}}</ref> He has noted that the game has a strange focus on realism, stating "When compared to other Mario sports titles, this game plays it straightforward and focused. There are a few special moves, but their role feels more as a way to show that this is still a Super Mario game. Outside of that, it feels like a collection of sports sims. Even the Mario & Sonic games offer more of a light-hearted atmosphere." Koopman commented how it is easy to get into a game, and thus competently put together, but the sports have a lot of reused assets save for Soccer and Horse Racing, which he commented are the "most component". Koopman has called baseball a "disappointment", stating that "Baseball in Mario Sports Superstars is basically pressing the A button repeatedly, as either the batter or pitcher.", criticizing the AI entirely controlling the outfielding, though complimenting the fun designs of the team and stadiums. In closing, he summarized his review by stating, "Where Mario Sports Superstars ultimately falters is it simply didn’t do much to stand out. I’m sure that some will get enjoyment out of this game, but the lack of charm made me not motivated to play it." | |||
Conor McMahon of NintendoLife gave the game a 5 out of 10, stating that the game is mediocre and that while the game is not a terrible game - in fact it offers variety and a convenient package for fans who want the game into one package - the game does not do much and does not offer a definitive version of anything.<ref>{{cite|language=en|author=McMahon, Conor|date=March 8, 2017|url=www.nintendolife.com/reviews/3ds/mario_sports_superstars|title=Review: ''Mario Sports Superstars''|publisher=Nintendo Life|accessdate=June 25, 2024}}</ref> McMahon notes that while the game "tries to offer something for everyone by fleshing out each event, and while this is an admirable pursuit for sure", it states how the game starts to feel too familiar by the time players are ready to play the game. McMahon has contrasted the game's soccer to ''[[Mario Strikers Charged]]'', another ''Super Mario'' franchise game around soccer, stating that "It's a far-cry from Mario Strikers Charged, reigning in the madness for a pretty solid simulation of the real thing, with a decent amount of options to play around with." McMahon was not impressed by Tennis and Golf, comparing unfavorably the iteration offered by this game to past installments of the ''Mario Tennis'' and ''Mario Golf'' series, feeling that it is too familiar and that they never rise above the standards established. As Koopman, McMahon praised the Horse Racing, calling it the most substantial game mode of the 5 sports. | |||
{| | Nick Gillham of God is a Geek gave the lowest score, a 4 out of 10,<ref>{{cite|author=Gillham, Nick|date=March 8, 2017|url=www.godisageek.com/reviews/mario-sports-superstars-review/|title=''Mario Sports Superstars'' Review|publisher=God is a Geek|accessdate=March 25, 2017|archive=web.archive.org/web/20170310111917/http://www.godisageek.com/reviews/mario-sports-superstars-review|language=en}}</ref> stating that the game wanted to be like the ''[[Super Smash Bros. (series)|Super Smash Bros.]]'' of sports games, but ends up being a ''{{wp|PlayStation All-Stars Battle Royale}}'' instead, citing the lack of substance in the modes and calling the game a "jack of all trades, master of none", and compared the bitter feeling of the game to "licking a [[Nintendo Switch|Switch]] cartridge", referencing [http://kotaku.com/nintendo-switch-cartridges-taste-so-bad-1792869498 the press attention] of the bitter substance, Denatonium Benzoate, added to Nintendo Switch cartridges to prevent small children from putting the cartridge in their mouths. Gillham has commented on the easy difficulty of the AI, claiming that he won soccer without pressing the shoot button and racking up double-digit scores. Gillham has criticized the amiibo restricted modes, such as Road to Superstar, stating that the mode is not available without a specific series amiibo card and locking the mode away is "an unforgivable decision". Gillham has also criticized how there is no Download Play option with the game, making the game "an expensive affair". | ||
!colspan="3" style="font-size:120%; text-align: center; background-color:silver"|Reviews | {| class="wikitable reviews" | ||
!colspan="3"style="font-size:120%; text-align: center; background-color:silver"|Reviews | |||
|-style="background-color:#E6E6E6" | |-style="background-color:#E6E6E6" | ||
|Reviewer, Publication | |Reviewer, Publication | ||
| Line 3,235: | Line 3,152: | ||
|- | |- | ||
|Metacritic | |Metacritic | ||
|colspan=2 style="background-color:gold"|[http://www.metacritic.com/game/3ds/mario-sports-superstars | |colspan=2 style="background-color:gold"|[http://www.metacritic.com/game/3ds/mario-sports-superstars 62] | ||
|- | |- | ||
|GameRankings | |GameRankings | ||
|colspan=2|[http://www.gamerankings.com/3ds/195478-mario-sports-superstars/index.html | |colspan=2|[https://web.archive.org/web/20170809195638/http://www.gamerankings.com/3ds/195478-mario-sports-superstars/index.html 55.85%] | ||
|} | |} | ||
{{br}} | {{br}} | ||
==[[Nintendo eShop]] description== | ==[[Nintendo eShop]] description== | ||
'' | ;American English version | ||
<blockquote>''Five full-on sports–Soccer, Tennis, Golf, and Horse Racing–bring the challenge and depth you demand to Nintendo 3DS™ systems. Take on friends and rivals in local or online multiplayer*, hone skills in training, or tackle single-player tournaments. Whether you pick Mario, Waluigi, or one of sixteen others, you're on the road to superstardom!'' | |||
''Before long, you'll have mastered the ins and outs of each sport: learn when to use an infield shift in Baseball, change your team's formation in Soccer, and more. Even Horse Racing is surprisingly deep! Build a stable of horses and train them well to win the day in the first-ever horse races in series history. But remember: these aren't normal sports–they're Mario Sports. Expected unexpected thrills and power up to stomp the competition.'' | |||
''*Additional games and systems required for multiplayer mode. Sold separately.''</blockquote> | |||
;British and Australian English versions | |||
<blockquote>''Become a Superstar – it's Mario Sports time!'' | |||
''Take to the field with an all-star line-up in Mario Sports Superstars, an action-packed selection of supercharged sports. Set your squad of Super Mario favourites on the road to superstardom in five of the world's most popular sports, and compete with others nearby and online!'' | |||
''Tear up the turf in 11-a-side Football matches, slug it out in Baseball, get on the green in Golf and own the court in Tennis. For something a bit different, saddle up and get ready for some fast-paced Horse Racing! These are full-scale sports, featuring layers of depth, strategy and real-world authenticity.''</blockquote> | |||
==Gallery== | ==Gallery== | ||
{{ | {{main-gallery}} | ||
<gallery> | |||
Mario Soccer ver2 - MarioSportsSuperstars.png|[[Mario]] (Soccer) | |||
Luigi Soccer - MarioSportsSuperstars.png|[[Luigi]] (Soccer) | |||
Peach Tennis - MarioSportsSuperstars.png|[[Princess Peach|Peach]] (Tennis) | |||
Daisy Equestrian - MarioSportsSuperstars.png|[[Princess Daisy|Daisy]] (Horse racing) | |||
Yoshi Golf - MarioSportsSuperstars.png|[[Yoshi]] (Golf) | |||
Mario Sports Superstars - Bowser alt.png|[[Bowser]] (Baseball) | |||
</gallery> | |||
==Media== | |||
{{main-media|st=Sound Test}} | |||
{{media table | |||
|file1=MSS Soundtrack Main Menu.oga | |||
|title1=Mario Sports Superstars | |||
|description1='''Main Menu''', the main menu music. | |||
|length1=0:30 | |||
|file2=MSS Soundtrack Baseball - Menu.oga | |||
|title2=Mario Sports Superstars | |||
|description2='''Baseball Menu''', the baseball menu music. | |||
|length2=0:30 | |||
|file3=MSS Soundtrack Golf - Menu.oga | |||
|title3=Mario Sports Superstars | |||
|description3='''Golf Menu''', the golf menu music. | |||
|length3=0:30 | |||
|file4=MSS Soundtrack Horse Racing - Menu.oga | |||
|title4=Mario Sports Superstars | |||
|description4='''Horse Racing Menu''', the horse racing menu music. | |||
|length4=0:30 | |||
|file5=MSS Soundtrack Soccer - Menu.oga | |||
|title5=Mario Sports Superstars | |||
|description5='''Soccer Menu''', the soccer menu music. | |||
|length5=0:30 | |||
|file6=MSS Soundtrack Tennis - Menu.oga | |||
|title6=Mario Sports Superstars | |||
|description6='''Tennis Menu''', the tennis menu music. | |||
|length6=0:30 | |||
|file7=MSS Soundtrack Big Field Home Team.oga | |||
}} | |||
==References to other games== | ==References to other games== | ||
| Line 3,261: | Line 3,218: | ||
*''[[Mario Golf: Toadstool Tour]]'': Various character artwork have been reused for golf amiibo cards. | *''[[Mario Golf: Toadstool Tour]]'': Various character artwork have been reused for golf amiibo cards. | ||
*''[[Mario Kart: Double Dash!!]]'': Bowser's voice clips are reused from this game in tennis and horse racing. | *''[[Mario Kart: Double Dash!!]]'': Bowser's voice clips are reused from this game in tennis and horse racing. | ||
*''[[Mario Power Tennis]]'': Character select screen voice clips have been reused. Metal Mario's voice clips and Pink Gold Peach's voice clips are filtered variations of Mario | *''[[Mario Power Tennis]]'': Character select screen voice clips have been reused. Metal Mario's voice clips and Pink Gold Peach's voice clips are filtered variations of Mario and Peach's voice clips from ''Mario Power Tennis'' respectively. Various character artwork have been reused for tennis amiibo cards. | ||
*''[[Donkey Kong Jungle Beat]]'': Donkey Kong's artwork is reused for his baseball amiibo card. | *''[[Donkey Kong Jungle Beat]]'': Donkey Kong's artwork is reused for his baseball amiibo card. | ||
*''[[Dance Dance Revolution: Mario Mix]]'': Bowser's artwork is reused for his soccer amiibo card. | |||
*[[Mario Baseball (series)|''Mario Baseball'' series]]: Various character animations for baseball have been remade from these games. Various character artwork have been reused for baseball amiibo cards. | *[[Mario Baseball (series)|''Mario Baseball'' series]]: Various character animations for baseball have been remade from these games. Various character artwork have been reused for baseball amiibo cards. | ||
*''[[Mario Party 7]]'': Birdo's artwork is reused for her soccer amiibo card. | *''[[Mario Party 7]]'': Birdo's artwork is reused for her soccer amiibo card. | ||
*''[[Mario Party 8]]'': Various character artwork have been reused for soccer amiibo cards. | *''[[Mario Party 8]]'': Various character artwork have been reused for soccer amiibo cards. | ||
*''[[DK: Jungle Climber]]'': Diddy Kong's artwork is reused for his soccer amiibo card. | |||
*''[[Mario & Sonic at the Olympic Games]]'': Daisy's artwork is reused for her soccer amiibo card. | *''[[Mario & Sonic at the Olympic Games]]'': Daisy's artwork is reused for her soccer amiibo card. | ||
*''[[New Super Mario Bros. Wii]]'': Toads in the [[Penguin Mario|Penguin Suit]] power-up are selectable characters. | *''[[New Super Mario Bros. Wii]]'': Toads in the [[Penguin Mario|Penguin Suit]] power-up are selectable characters. | ||
*''[[Donkey Kong Country Returns]]'': Donkey Kong's artwork is reused for his soccer amiibo card. | |||
*''[[Mario Sports Mix]]'': Peach's artwork is reused for her soccer amiibo card. | *''[[Mario Sports Mix]]'': Peach's artwork is reused for her soccer amiibo card. | ||
*''[[Mario Tennis Open]]'': Graphics, animations, voices, and sound effects have been reused from this game. Various character artwork have been reused for tennis amiibo cards. | *''[[Mario Tennis Open]]'': Graphics, animations, voices, and sound effects have been reused from this game. Various character artwork have been reused for tennis amiibo cards. | ||
*''[[New Super Mario Bros. U]]'': Toads in the [[Flying Squirrel Mario|Flying Squirrel]] power-up are selectable characters. | *''[[New Super Mario Bros. U]]'': Toads in the [[Flying Squirrel Mario|Flying Squirrel]] power-up are selectable characters. | ||
*''[[Super Mario 3D World]]'': Luigi's artwork is reused for his soccer amiibo card. | *''[[Super Mario 3D World]]'': Luigi's artwork is reused for his soccer amiibo card. | ||
*''[[Mario Golf: World Tour]]'': Graphics, animations, voices, sound effects, and UI elements have been reused from this game. Various artwork have been reused for golf amiibo cards. | *''[[Mario Golf: World Tour]]'': The game runs on the same engine used in this game. Graphics, animations, voices, sound effects, and UI elements have been reused from this game. Various artwork have been reused for golf amiibo cards. | ||
*''[[Mario Kart 8]]'': Baby Mario and Baby Luigi's voice clips are reused from this game. | *''[[Mario Kart 8]]'': Baby Mario and Baby Luigi's voice clips are reused from this game. | ||
*''[[Mario Party 10]]'': Rosalina's artwork is reused for her golf amiibo card. | *''[[Mario Party 10]]'': Rosalina's artwork is reused for her golf amiibo card. | ||
*''[[Mario Tennis: Ultra Smash]]'': Jump shots and the Ultra Smash, features first introduced in this game, return in the tennis mode. Some of the UI is taken from this game. Rosalina's artwork is reused for her tennis amiibo card. | *''[[Mario Tennis: Ultra Smash]]'': Jump shots and the Ultra Smash, features first introduced in this game, return in the tennis mode. Some of the UI is taken from this game. Rosalina's artwork is reused for her tennis amiibo card. | ||
==References in later games== | |||
*''[[Mario Tennis Aces]]'': Decorative character shield emblems designed after their character trait are inspired from the shield emblems used in this game. | |||
*''[[Super Mario Party]]'': The horses reappear in the minigame [[Fiddler on the Hoof]]. | |||
*''[[Super Smash Bros. Ultimate]]'': "Kingdom Stadium: Night" and "Country Field: away team" are selectable music tracks on ''Super Mario''-franchise stages except for ''Mario Kart''-themed stages. | |||
==Names in other languages== | |||
{{foreign names | |||
|Jap=マリオスポーツ スーパースターズ<ref>{{cite|language=ja|url=www.youtube.com/watch?v=Z-x10GhaL7E|title=オールスーパースター! マリオスポーツ スーパースターズ 実況プレイ Part 10|author=ロコモコ|publisher=YouTube|date=November 20, 2017|accessdate=June 25, 2024}}</ref> | |||
|JapR=Mariosupōtsu sūpāsutāzu | |||
|JapM=Mario Sports Superstars | |||
}} | |||
==References== | ==References== | ||
| Line 3,284: | Line 3,254: | ||
==External links== | ==External links== | ||
*[http://mariosportssuperstars.nintendo.com/ Official US site] | *[http://mariosportssuperstars.nintendo.com/ Official US site] | ||
*[https://www.nintendo.co.jp/3ds/aunj/ Official Japanese site] | |||
{{Mario Sports Superstars}} | {{Mario Sports Superstars}} | ||
{{ | {{Super Mario games}} | ||
{{3DS}} | |||
[[Category:Games]] | [[Category:Games]] | ||
[[Category:Sports | [[Category:Sports games]] | ||
[[Category:Nintendo 3DS | [[Category:Nintendo 3DS games]] | ||
[[Category:2017 games]] | [[Category:2017 games]] | ||
[[Category:Mario Sports Superstars]] | [[Category:Mario Sports Superstars|*]] | ||
[[Category:Amiibo-compatible games]] | |||
[[Category:Games with Nintendo Network]] | |||
[[it:Mario Sports Superstars]] | |||
[[de:Mario Sports Superstars]] | |||
Latest revision as of 02:02, October 10, 2024
| Mario Sports Superstars | |||||||||||||
|---|---|---|---|---|---|---|---|---|---|---|---|---|---|
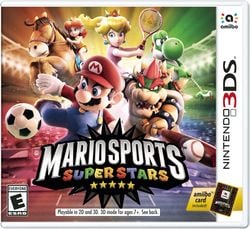 For alternate box art, see the game's gallery. | |||||||||||||
| Developer | Bandai Namco Studios Camelot Software Planning Hexadrive | ||||||||||||
| Publisher | Nintendo | ||||||||||||
| Platform(s) | Nintendo 3DS | ||||||||||||
| Release date | |||||||||||||
| Language(s) | English (United Kingdom) English (United States) French (France) French (Canada) German Spanish (Spain) Spanish (Latin America) Italian Dutch Japanese Korean | ||||||||||||
| Genre | Sports | ||||||||||||
| Rating(s) |
| ||||||||||||
| Mode(s) | Single player, local multiplayer, online multiplayer | ||||||||||||
| Format | Nintendo 3DS: | ||||||||||||
| Input | Nintendo 3DS:
| ||||||||||||
| Serial code(s) | |||||||||||||
Mario Sports Superstars is a Super Mario sports title for the Nintendo 3DS. It features a variety of sports in which Mario and many other characters from the Super Mario universe can compete, including soccer, baseball, tennis, golf, and horse racing. Horse racing is the only new sport in the Super Mario sports spin-offs, while the rest of the sports have seen stand-alone games prior to Mario Sports Superstars. The game supports local multiplayer and is able to support two, four, or six players depending on the sport played, though this title is one of the few multiplayer-oriented Super Mario titles to not feature Download Play. Players could additionally play against opponents over Nintendo Network, either worldwide against random opponents or with their friends. However, the service was terminated on April 8, 2024, making the game no longer playable online.[1][2]
The game is primarily developed by Bandai Namco Studios, with Camelot Software Planning, the main developer for the Mario Tennis and Mario Golf series, contributing the golf and tennis portions of the game. The game required 6,589 blocks (843.3 MB) of free space if players wished to download the title off the Nintendo eShop until March 27, 2023. The game is compatible with amiibo, and a new Mario Sports Superstars line of blind-packaged amiibo cards were released for the game. Those who purchased one of the "initial run" copies of Mario Sports Superstars at retail received a free, randomly selected amiibo card from that line.
Gameplay
In a similar manner to another sports compilation, Mario Sports Mix, each sport plays out as its own separate mode. The tennis and golf sports play similarly to Mario Tennis: Ultra Smash and Mario Golf: World Tour. Each mode has its own tournament mode, a three-tier system that has eight participating players in total, catered to single players. Three cups are available, with the first cup being the Mushroom Cup, the second being the Flower Cup and the third being the Star Cup. Completing the Star Cup unlocks the Champion's Cup, and completing said cup unlocks Star versions of playable characters, who have increased stats.[3] The player needs to unlock Star characters for each sport individually. Each sport has its own training mode as well, where players can practice shots or techniques freely.
Alongside the main sports modes, additional tabs on the main menu screen include "amiibo Card", "Collection", a settings icon, and a manual icon.
Coins can be earned when a task is completed, such as winning a match in exhibition or winning tournaments or finding crates with coins inside them in horse racing. They are used to buy randomly packaged cards in the shop.
Sports
Soccer (Football in British English)
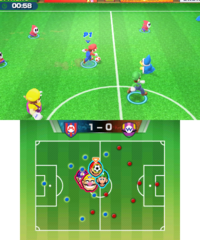
A sport previously playable in the Mario Strikers series. Unlike that series and as in the actual sport, players participate in 11-vs-11 matches. Teams are composed of a designated team captain, who represents the team with their shield emblem, an assistant captain, who is another team captain character as an ally, a goalie (either Boom Boom or Pom Pom), and the rest are supporting generic characters such as Koopa Troopas or Shy Guys, which are filled out with only one type of character. Prior to beginning a match, players can adjust placement of their entire team in various formations. On the top screen, team members are identified by specific HUD circular markers underneath them, and on the Touch Screen, by their team's color. Both captains are represented by icons of their faces and are displayed in their current position while the generic characters are represented by dots. Once players select their team and formation, players have the option to save the team as "My Team", which allows for ease of access if players have a select favorite team they wish to use in future games. During the middle of the match, players can change their team formation as they wish, including when a half-time is called.
As in the Mario Strikers games, the object is to kick the ball into the opponent's goal, overcoming the opposing team members and their goalie, who attempts to block balls, within the designated pseudo 90-minute time limit (the speed of the time limit goes up depending on the settings, but generally speaking, having the highest time setting, 15-minute matches, causes the time limit to slow down). Halfway through the match, at the 45-minute mark, players halt the game and are taken to a screen that records the current progress of both teams. Afterward, the losing team initiates the kick, and the game continues, with the team's goals reversed until the 90-minute mark is reached. Whichever team has the most goals by the end of the match wins the game. Whenever a goal is scored, a replay of the shot is shown. Players can skip the replay if they wish or change the angle from which it is shown. The opposing team captains then get possession of the ball and start off in the middle of the field, beginning the play again.
Unlike in those games, however, players have more control options and strategies available to them to accommodate the actual sport's additional rules. For example, players on the defense can attempt to steal the ball in possession from other players via slide-kicks, pressure defending with their team via the or by themselves with
(per the default Type A control scheme), or by simply running into the ball. Players who possess the ball may attempt to dodge confrontations by sliding around holding
by default. However, if the character in possession of the ball is struck with a slide-kick without the ball being touched, a foul is called and the player who is hit by the slide-kicking player earns a free kick, which depends on the orientation where the foul was initiated. There are now throw-ins if the ball rolls out of bounds, and if this happens in the area adjacent to the goalie, a corner kick is initiated instead. If the opponent team knocks the ball into their opponent's goal side, a goal kick is initiated in which the goalie kicks the ball back onto the field. When kicking into the goal, players may press and hold the button to charge up their shots; a meter is represented below the character to indicate how powerful the shot will be. Certain types of passes also have their own power meter that indicates the power of the pass. Players can additionally perform an extra technique of kicks if
is held and a corresponding button is pressed, such as lobbing a pass with
+
.
Powerful Special Shots can be performed by the captain and assistant captain when the ball starts to sparkle. Each Special Shot has a unique visual effect that varies with the character. Team captains may also pass the ball using their Special Combo Shot move to another captain when the ball is glowing as well. All actions are tied to a character's stamina, which is represented by a blue arrow above the controlled character. The more a character plays and dashes across the field, the more stamina is lost. Characters who have a lowered stamina bar have weaker passes, shots, and speed. Players replenish stamina when they do not partake in any action.
In multiplayer mode, up to four players can play this sport in local multiplayer, while only two players can play in online play. However, if two players are playing, either in local or online multiplayer, they cannot choose to be on the same team up against a computer player controlling the other team.
Prior to beginning a match in Exhibition mode, players can adjust the following settings:
- COM skill level: Players can select from Beginner, Intermediate, Advanced, and Pro skill levels. The Pro skill level is unlocked when players clear Champion's Cup.
- Special Shots: Players can enable or disable Special Shots.
- Total Time: Players can adjust the total time of the match from approximately 5, 7, 10, or 15 minutes, which affects the potential frequency of Special Shots and the speed of the in-game clock.
- Extra Time: Players can play in an extra period of the game ends in a tie or disable the feature.
- Penalty Kicks: This can decide the game by penalty kicks of the game is tied, if toggled on.
Baseball
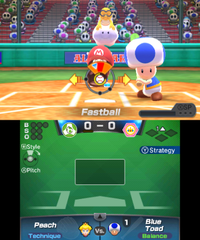
Baseball involves two teams of nine characters against each other, similar to the Mario Baseball series, as well as having various elements and gameplay mechanics taken from that series. Players need to select a team captain, as well as selecting an assistant captain, similar to how soccer plays out. The seven slots can then be individually filled with the player's choice, from a pool of generic characters such as Koopas, Toads, etc. unlike the soccer, where the player's team is homogeneous with a single species. Team members hold a bat that has their team captain's logo and design on them, unlike the Mario Baseball series, where they all had their own individual bats. Just like in soccer, players can save their favorite team and formation as "My Team" once their team is fully constructed for ease of access if players wish to use said team again.
Players play in two positions of baseball; the team on offense takes turns within their members to bat the ball while the team on the defense pitches and covers the outfield. Players on the pitching mound can pitch using various methods, such as fastballs, forkballs, and screwballs to throw batting players off. Pitching has slightly different controls than the ones in the Mario Baseball series. Meters and HUD are used to time pitches and their type rather than pure button-inputs; to pitch a ball, players can sort through different pitch methods and time the spinning meter with the designated colored sweet spots within ten seconds. Players who bat earn strikes if the pitched ball goes over the home plate and they either do not hit the ball or miss the ball. A ball is called when the pitched ball does not cross over the plate; however, if the batting attempts to swing at such balls, a strike is called. Three strikes mean the player is out. If the batting player hits the ball and it lands on the foul zone, the player must rebat the ball at a cost of the strike, though it does not earn an out if they hit in a foul zone over three strikes. If there are four ball penalties, the batting player gets to walk the base. If the pitched ball hits the batting player, the batting player also gets a free walk to the base. Pitchers have stamina; more hits from the opposing team depletes stamina quicker. Over time, the pitching meter moves faster, meaning it is harder to hit the sweet spot markers correctly. Characters who tire out have very fast spinning meters, and are encouraged to switch to another character so players can be more accurate timing their pitches.
If the batting player hits the ball successfully without causing the ball to go in the foul zone (the areas to the left and right of the diamond, marked by lines), they can run towards the three bases in a specific order, until the fielders throw the ball into the fielders manning the bases. If the fielders catch a fly ball, the runner is out, and if there are multiple runners, they need to progress back towards their previous base. Fly balls can additionally be caught even in foul zones, and if they are caught before they bounce, the batter is out. Any runner who is tagged by a fielder before they reach a base is also considered out. Players earn points for their team if they circumnavigate the baseball diamond by touching all bases and reaching the home plate while avoiding receiving an out. If a batter receives a home-run, which means to send the ball out of bounds within the fair zone, they, alongside any additional base runners earn free points. Captains can use Star Skill-like abilities, such as Bowser using a fiery swing to knock the ball further away to possibly score home-runs. If runners are on bases, they have the option to steal a base while a pitcher is pitching. However, if the outfielder tags them before they can steal a base, they are considered out. Batting players have the option to bunt the ball as well. Bunting is a very slow and weak technique that can guarantee a hit, but, if done incorrectly, they either receive a foul if the ball rolls out of bounds or outfielders can pick up the ball and tag the bunter out.
Baseball games are split into innings, which players can set up to 9 innings. Once three outs are received for the batting team, both teams swap positions, where the defensive team now bats while the batting team goes to the outfield. Whichever team has the most points by the end of the last inning wins the game.
Up to two players can play this sport, both in local and online multiplayer, where they both are required to be in their own teams.
Prior to beginning a match in Exhibition mode, players can adjust the following settings:
- Fielding: By default, fielding is set to auto, meaning the AI controls the outfielders when the ball is struck. Semi-auto fielding means that the player can control their outfielders somewhat, such as directing them where to throw the ball, while manual fielding indicates that players assume total control of the outfielders with some exceptions.
- COM skill level: Players can select from Beginner, Intermediate, Advanced, and Pro skill levels. The Pro skill level is unlocked when players clear Champion's Cup.
- Special Moves: Players can enable or disable Special Moves.
- Innings: Players can adjust the number of innings for a period from 3, 5, 7, or 9 innings.
- Batting Turn: This determines the order of which players bats or fields first. When "First" is chosen, the player is the first one that bats; when "Second" is chosen, the CPU bats first.
- Mercy Rule: When on, the game ends early as soon as a player receives a 10-run lead.
- Extra Innings: If on, three extra innings will be played if there is a tie.
Tennis
Tennis plays very similarly to the Mario Tennis series, with elements and mechanics of the game taken from the two most recent installments before Mario Sports Superstars's release; Mario Tennis Open and Mario Tennis: Ultra Smash. Players can participate in either singles, one-on-one tennis or doubles, 2-vs-2 tennis. Chance Shots, Jump Shots, and the Ultra Smash make a return. This mode retains the touch screen functionality from Mario Tennis Open, where players can view controls for specific shots, as well as the bottom screen indicating what button combination to use to perform specific Chance Shots or to counter specific Chance Shots. Players can opt to play in Simple mode, where Chance Shots are turned off.
Tennis gameplay is as follows: players first serve a ball before it goes into play, where the speed of the serve depends on the height where it is hit from; players serve the ball the fastest when the ball is hit at its apex. Characters have different timing for serving their fastest shots, and the character's ability to serve is dependent on their power and spin; characters who have greater power can serve balls at quicker speeds, while characters who have a better ability to curve make it more difficult to return the ball. While receiving the ball, players need to wait until the ball bounces once; if they hit the serve before the ball bounces, a foul is called and the serving player receives a point. If the ball hits the square directly across the player, a fault is called and the player needs to serve the ball again. If players get another fault, they receive a double fault and the receiving player earns a point. If the ball hits the net while it is served, the server needs to retry the serve, but without any penalty. Receiving players can perform a Taunt to increase the power of their next shot.
After the serve, players need to rebound the ball until their opponent cannot return the ball or if they hit the ball out. Players can choose from four basic types of shots: simple, topspin, slice, and flat, depending on the button they hit to rebound the ball. Simple shots are activated with players press . Intended for beginning players, simple shots are weak shots, but can be any type of the three latter shots. They can also activate any Chance Shot, but these Chance Shots are weaker than when manually inputted. Topsins are indicated by a red outline and are activated when the player hits
; they are high shots that bounce high, and they are more powerful than slices, but weaker than flat shots. Slices are indicated by a blue outline are activated when the player hits
; they are low and weak shots that curve the ball moreso than other shots. Flats leave a purple outline and are the fastest shots but are the most difficult to control. They are activated when the player hits
.
Players can input more advanced shots by hitting two buttons in conjunction rather than one; these shots cannot be used in serves. Lobs can be performed if the player hits then
. Lobs are very high shots, indicated by their yellow outline, that can fly over a net player, but can open up opportunities for a Smash Chance Shot for the opposing player. If players press
then
, they can perform a Drop Shot. Indicated by a white outline, Drop Shots are very slow and low shots that end up near the net; this tactic is used to force players up to the net. If a ball is out of the player's reach, the player can attempt a lunge to hit the ball. However, this usually results in an Ultra Smash opportunity for the opponent.
Chance Shots, first introduced in Mario Tennis Open, are more powerful versions of the aforementioned types of shots and are activated when the opposing player makes a bad return. When this occurs, an icon representing the Chance Shot appears on the player's side of the court, where the player needs to move over it and perform the type of shot represented by the icon and color. The color of the Chance Shot corresponds to the type of shot that will be activated: for example, red Chance Shots represent a topspin Chance Shot, so pressing or
over this Chance Shot causes a fiery topspin that knocks players back. Players can counter Chance Shots with an appropriate counter; for example, if the opponent uses a topspin Chance Shot, players need to correctly deflect it with a slice; otherwise, the player may do a bad return and set up opposing players for an Ultra Smash.
Players can press the shot button twice to perform a Jump Shot, first introduced in Mario Tennis: Ultra Smash. These cause the character to leap to return higher shots. They are stronger than grounded shots, but they have a loss of control. If the opposing player messes up, either by lunging at the ball or using the wrong button input of countering a Chance Shot, a special type of shot gets triggered, causing the ball to fly high and the Chance Shot area to exhibit special effect. If players use the input for the Jump Shot at the moment this Chance Shot appears, they can leap to execute an Ultra Smash, the most powerful shot in the game.
Points are earned when the opposing player fails to return the ball within two bounces or if the opposing player get hits by the ball (called a Body Shot). If the player who hits the ball hits it outside of the defined boundaries, an out is called and the opposing player earns a point. A replay is then played to show the last few moves before the point is scored. Players can view the replay, skip the replay, or change camera angles of the replay for other perspectives. A special animation plays whenever the Ultra Smash is executed to earn a point. Points are earned in increments of 15, 30, and 40. When a point is earned when a player or team is at 40, they win a game or a break point. If both players or teams have 40 points, then a Deuce is called and whichever player manages to have an advantage of two points wins the game/set point. If both players or teams win the same amount of games into a set point, a Tiebreaker is called. During a Tiebreaker, whichever player scores 7 points wins the set/match point. A game set is won when players earn the required amount of game points. Players eventually win the match when they earn the amount of set points required.
Up to four players can play tennis in local multiplayer and in online multiplayer with friends, where players can opt to change orientations with their team prior to starting the match if they choose to select to play in doubles, and unlike soccer and baseball, human players can choose to face off against a team of CPU players. In playing against randoms online, singles are the only option, thus making only up to two players possible in playing against random online players.
Prior to beginning a match in Exhibition mode, players can adjust the following settings:
- Hand: Players can choose to play with either a right-handed player or a left-handed player.
- COM skill level: Players can select from Beginner, Intermediate, Advanced, Pro, and Ace skill levels. The Ace skill level is unlocked when players clear Champion's Cup.
- Sets: Players can adjust the number of sets with 1, 3, or 5 sets.
- Games: Players can adjust the number of games with 2, 4, or 6 games.
- Play Style: When players play with Standard play style enabled, they play with Chance and Jump Shots. When selected on the Simple play style, Jump and Chance Shots are disabled.
Golf
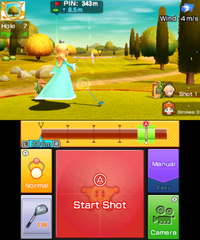
Very similar to the Mario Golf series, players can golf on one of the many courses. Much of the graphics, HUD, elements, and mechanics are taken from the latest iteration of the Mario Golf series, Mario Golf: World Tour, including the bottom screen that includes information such as ball contact, ball spin, and the power meter. Players can either play two modes: Stroke Play, in which players can golf for 9 holes, or Ring Challenge in training mode, where they need to send the ball through large rings dotted across the course. This mode lacks Match Play from previous installments, meaning that the only way players can play against the computer player is if they are randomly selected on tournament modes.
In golf, players need to sink the ball into a hole within a set number of shots, which is dependent on the course. Players are recommended to score at least a par, which means the player has taken the number of strokes required for the ball to go into the hole. If players achieve less strokes than required, they earn better scores, such as a birdie. However, if players take more strokes than required to sink the ball into the hole, it worsens their overall score, and thus are called bogeys.
Golf uses a power meter to determine power and control of the ball. Players need to time the rising of the bar, which determines the power of the shot, as well as the descending, which determines the accuracy of the shot. If players hit outside the marked boundaries of the power meter the time it descends for accuracy purposes, they whiff the shot, often costing a stroke. Players can get perfect accuracy if the bar hits the sweet spot of the meter; if the bar is stopped outside the sweet spot, the ball veers in the direction the bar is stopped at. In other words, if the bar is stopped to the area left of the sweet spot, the ball curves towards that direction, causing some inaccuracy within the shot. Additionally, players can adjust the trajectory of the ball (which is indicated by arrows rising and falling on the main screen) by changing the area of ball contact, indicated by the bottom screen. Hitting the ball in the upper regions decreases height, while hitting the ball left or right causes the ball to curve left or right depending on the direction hit, often used to bypass obstacles such as trees. Players can opt for the "easy" option, where they need to manually input only the rising of the bar while the game automatically times the lowering of the bar for accuracy. However, this method is not perfect and may result in mishits, especially if the sweet spot is very low.
In addition, players need to take in account of the environment, which causes the ball to behave in different ways. Wind can change the ball's trajectory, and the speed of the wind as well as the direction it blows in depends on how affected the ball gets. Balls that have higher trajectories are more affected by the wind. The ball's lie is also affected by the ground it is on. If the ball is on the fairway, there are no added penalties to the ball. However, if the ball lies in rough or bunkers, the power and accuracy of the ball is affected depending on how severe the terrain is. Topology of the course can also affect the ball's trajectory, where, often, more powerful, higher shots are needed to send the ball to higher elevations. Rain reduces power and spin of the shots, and players need to opt for significantly more power when they are putting the ball.
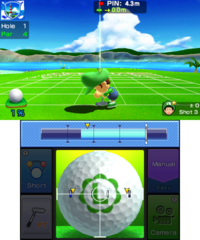
Different clubs have different purposes, and players can swap between clubs any time for varying needs. Woods, represented by "W", send the ball flying further at the cost of accuracy, while irons, represented by "I", forgo ball drive in favor of accuracy. Sand wedges, represented by "SW", are most often used to get balls out of bunkers. Hybrids, represented by "H", are a mix between woods and irons and are used for compromising purposes between irons and woods. Pitching wedges, represented by "PW", are used to send balls flying higher and shorter than irons. If the ball is sent too far or not far enough, players can adjust drive distance by pressing and
for guidelines on where to lower or increase power of the shot. As well as having different clubs, players can opt for Power shots or approach shots. Power shots have a limited use per round, but can send the ball flying even further and are used typically to aim for lower strokes on par 4 or 5 holes. If players align the bar in the power meter perfectly whenever a power shot is used, they save a power shot. Approach shots are made when players are near the green, which are weak shots used to knock balls close to the hole.
When players are on the green, they can putt the ball into the hole, using one of three putters depending on the distance to the hole. In this case, players need to time only the rising of the power meter to make putts, where higher bars are stronger putts. Players who putt too weak cannot make the ball into the hole, while too powerful putts send the ball past the hole. Grids on the putting screen indicate topology of the course. Slopes are represented by white balls rolling on the grid, indicating the direction it will roll in. Slopes that are steeper are indicated by quicker rolling balls, and therefore, players need to adjust their position more the steeper the slope is. Downhill slopes are indicated by red on the grid, while uphill slopes are colored blue. Players need to putt harder for uphill slopes and weaker for downhill.
Different types of spins return from Mario Golf: Toadstool Tour, where players can activate them as soon after they stop the power meter a second time if they are using manual rather than auto. Topspins send the ball forward, while backspins either brake the ball or send the ball backward depending on the height the ball falls from and the speed of the shot. Players can perform a topspin if is hit twice, while performing a backspin if
is hit twice. Players can use more powerful spins for a longer effect if alternate buttons are pressed; they can perform a super topspin if
is hit first and then
, while a super backspin is performed if
is pressed first and then
.
Up to four players can play golf, both in local and online multiplayer. However, requiring more players to play requires more cartridges and game systems, which emulates Mario Golf: World Tour's requirement of playing with more players rather than a single player controlling all characters and thus can pass the controller to other players as Mario Golf for the Nintendo 64, Mario Golf: Toadstool Tour, and Mario Golf: Advance Tour handle in their multiplayer.
Prior to beginning a match in Stroke Play mode, players can adjust the following settings:
- Swing: Players can choose to play with either a right-handed or left-handed player. This reverses a fade or draw trajectory.
- Holes: Players can play with 9, 6, or 3 holes.
- Shuffle: When turned on, this plays on holes in a random order. When turned off, this plays holes in a set order.
- Tee Position: If the setting is on "Regular", the game starts from tees closer to the hole. Selecting "Back" starts the game with tees farther from the hole, while "Tournament" starts with the farthest, most difficult tee.
- Flight Path: This toggles flight path on or off.
- Wind: Players can adjust the general wind speed with weak, strong, or random. Higher wind speeds buffet balls around more.
Horse Racing
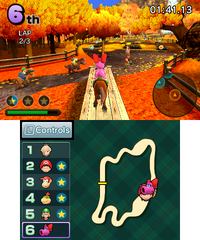
Characters race each other saddleback on horses as they leap over hazards and dodge obstacles, a sport entirely new to the Super Mario franchise. Before players start up their game, they can choose and customize their horse. The first option is selecting a male or female horse, and players can then choose a type of horse from four different types and builds: balance, technique, speed, and power. Players can then select horses from a variety of colors, all which have different stats from one another; after that has been selected, players can choose to name their horse. When players have a horse in their stable, they can choose to release it any time; however this removes all bond progress made with the horse. Up to 16 different horses may be kept in a stable.
Players can groom, pet, and feed horses, which betters their mood. Horses with higher mood rating, indicated by ♪, start out with more parts of the Star Dash meter filled prior to starting the race. When feeding and petting the horse, each horse has a specific food they like, dislike, and each horse has an area they love and hate being petted on; the preferences for what a horse likes is randomly selected and players find out only when the horse reacts to the food and petting in a certain way. The available food choices are grass, which all horses can enjoy and players have an infinite number of regular grass, carrots, apples, corn, lettuce, and barley, and players can pet their horse either on the head, the neck, the belly, or the rear. Feeding the correct item and petting the horse in the right spots increases their mood substantially. Reward food such as candy, sugar, and honey may be occasionally found; horses love all three types of these reward items and feeding them reward foods substantially increases their mood. Players can additionally find better versions of grass, carrots, apples, corn, lettuce, and barley, and feeding not only the food the horse likes improves their mood but a higher quality feed substantially betters their mood.
During stable mode when players are in control of their horse once they are out on the field, players control and view their horse in a first person perspective. In the field, players can find areas of interest by walking around on their horse on the field. Players can approach various areas of interest indicated by sparkling grass or flowers. In sparkling grass, players can either see their horse eat the grass, which has a chance of improving their mood once the walk is done, or find a wooden ? crate, which has either a regular accessory, feed, or coins. If players find a small bird in the grass, they receive a Mario Token, where 20 of them can be found; when players find all 20 Mario Tokens, they unlock the Mario Token Crown head accessory. If players find a rabbit on the grass, they receive a rarer item, such as a rarer accessory or a reward food. If players have a greater bond rating for their horse, the rarer items and higher quality feed will be easier to find during walking around the field and outings. If players interact with sparkling flowers or a sparkling pool of water, they both increase the chance of improving the horse's mood once the walk is done. Players can take their horses to an outing on the first track of each of the four themed tracks on this game. Players can receive items during the outing by running past the ? crate icons, where they can receive feed, coins, or rare items; additionally, these outings can improve a horse's mood.
Players can decorate their horse with any accessory they have unlocked, including their saddle, hats, and the bridle. Accessories do not change a horse's stats, as they serve for aesthetic purposes only. Accessories have a certain theme and color for each set: for example, players have five different types of Witch's Hats, each in their own color. Accessories can come in series: players can obtain, for example, Gorgeous Crowns, Gorgeous Bridles, and Gorgeous Saddles to decorate their horse with a specific theme. When players obtain more accessories, the rate of acquiring accessories becomes exponentially more difficult and rarer to obtain. Players have a chance of obtaining rare Mario-themed hat accessories when they take their horse out for an outing. In facing off against more difficult CPUs, CPUs decorate their horse with accessories and are more elaborately decorated the harder the difficulty is; the type of decoration is also dependent on the character used. In the hardest difficulty, Pro, CPUs decorate their horses with the rare, complete set of accessories.
After everything has been set up, players can choose to race their horse among other opponents. As well as having speed, control, and acceleration stats, horses have stamina and recovery of stamina, where players can replenish their stamina through collecting carrots or staying close to other players. Each character has different ratings of stamina and recovery; characters who have higher stamina and higher recovery means that they can speed up the horse more via , tire out more slowly, and their stamina replenishes more quickly. Collecting stars throughout the track fills the bar for the Star Dash technique, where, if fully filled out with five stars, players can use it to get a speed boost. Up to three Star Dash meters can be filled out. Double jumps can be performed to reach higher items that cannot be reached with single jumps.[4] Horses travel faster when they are in a pack, in a phenomenon known as the Herd Effect, so stray players such as those far in the lead travel slower than when together; additionally, the Herd Effect causes stamina to replenish more quickly.[4]
Up to six players can participate in this sport, both in local and online multiplayer, making this sport being able to support the most players out of all sports. Players can use their personal horses kept in their stable saved in their data of the game.
Prior to beginning a match in Free Race mode, players can adjust the following settings:
- Star Dash: This toggles Star Dash on or off.
- Number of Laps: Players can play with 1, 2, or 3 laps.
- Number of Racers: Players can play with 2, 3, 4, 5, or 6 racers.
- COM Level: This determines the level of CPU opponent racers, from Beginner, Intermediate, Advanced, and Pro. The Pro difficulty level is unlocked when players clear the Champion's Cup in tournament mode.
Training
Each sport has its own training modes. In order to unlock Pink Gold Peach, players need to complete the sport's respective ring challenge mode on Hard difficulty. When players complete it, as well as Pink Gold Peach being unlocked, players unlock a Pro version of the mode, where players aim for the highest score. The type of training is dependent on the sport played, which is outlined by the following. All five sports have Ring Challenges, while tennis additionally has a Rally Challenge.
Soccer
| Image | Name | Description
|
|---|---|---|
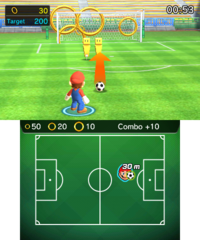 |
Ring Challenge | Players need to shoot the ball past dummies made out of Rotating Blocks and into the rings to score a set amount points within the posted time limit. Higher difficulties require more rings to be shot through; Hard difficulty has a goalie that attempts to deflect shots. |
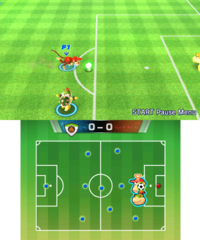 |
Free Training | Players can choose captains, their team, and play in a field (Village Stadium) where the only opponent is the goalie. Players have an infinite amount of special shots they can use. |
Baseball
Tennis
| Image | Name | Description
|
|---|---|---|
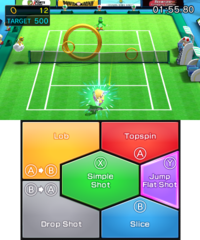 |
Ring Challenge | Playing very similarly to the Ring Shot minigame of previous Mario Tennis entries, especially Mario Tennis Open, players hit balls through rings on the Grass Court; to complete this mode, players need to earn a certain amount of points within the time limit. Smaller rings are worth more points, and red rings are worth twice the amount as yellow rings. In harder difficulties, players need to lob or drop shot the ball to pass through some trickier rings. |
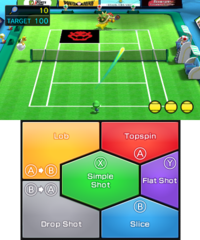 |
Rally Challenge | Players need to hit the ball over the court without hitting the Bowser panels. Players have three lives, and they lose a life whenever the ball hits the Bowser panel, if they fail to rally the ball back, or if they are body shot by the ball. Players lose the game if they lose all lives. In higher difficulties, more Bowser panels cover the court, as well as needing to rally the ball back more times. |
Golf
| Image | Name | Description
|
|---|---|---|
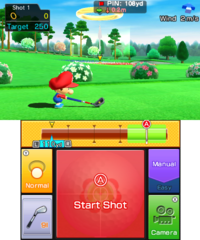 |
Ring Challenge | Players need to hit through a ring and land on the designated target areas near the hole. Landing closer to the hole causes the player to earn more points. However, if players miss the ring completely, they do not earn any points; additionally, players do not earn points if the ball does not land on the target areas. In harder difficulties, players contend with trickier lies, as well as putting the ball into the target areas while accounting for the topology of the course. |
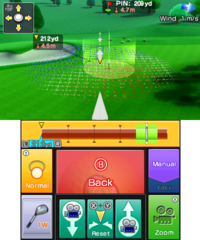 |
Shot Practice | Players need to hit the ball onto the designated glowing circle. Harder difficulties have trickier lies, stronger wind, and more sloped areas. |
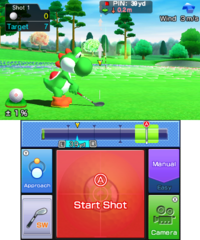 |
Approach Practice | Very similar to Shot Practice, except players are closer to holes and use approach shots to land the ball on the designated glowing circle. |
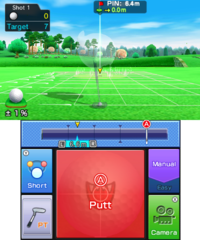 |
Putting Practice | Very similar to Shot Practice, except players put the ball close to the hole onto the glowing circle. Higher difficulties of this training has more inclined slopes and farther away holes. |
Horse Racing
Stats
Mario Sports Superstars keeps track of stats depending on the sport. The following is the list of all stats and the following descriptions.
- With People Nearby: The game keeps track of matches, wins, losses, draws, and the win percent when playing with local multiplayer options.
- With Friends Online: Similar to the previous stat, except it deals with the player's friends online.
- With Players Worldwide: Similar to the previous stats, except it records playings with randoms worldwide. The game additionally keeps track of the rating score, which is used for matchmaking purposes online. The Best Rating score keeps track of the player's peak rating.
- Tournament: This menu keeps track of the total number of trophies won from completing tournaments.
- General Stats: In soccer, total play time, total matches, total victories, total goals, total special shots, and total special combos are recorded. In baseball, total innings played, total runs, total runs allowed, scoreless innings in a row, total home runs, total base hits, total special moves used, and total dead ball fouls are recorded. In tennis, total play time, matches played, matches won, singles win percent, doubles win percent, points won percent, service aces, and smash aces are recorded. In golf, total play time, total rounds, overall victories, greens-in-regulation rate, average putts per hole, drives-in-fairway rate, Birdie-or-better rate, and Eagle-or-better rate are recorded. In horse racing, total course laps, total races, 1st place finishes, Star Dashes used, and time in herd are recorded.
amiibo card
- Main article: List of Mario Sports Superstars amiibo cards
Mario Sports Superstars introduces its own line of amiibo cards, where each character receives 5 cards based on the sports of the game. There are 90 cards in total. The amiibo cards are blindly packaged separately in sets of five for US$4.99 (AUS$7.99$) each, similar to the Animal Crossing line of amiibo cards. While Star characters can normally be unlocked when Champion's Cup in tournament mode is won, Star characters can be unlocked immediately through tapping the corresponding character on the card. amiibo cards can be used for players to power up to unlock superstar versions of the character on the card. Three stats specific for the sport are displayed on the card. The red bars indicate the stats characters start with, while the blue bars display the stats of a starred character and the yellow display the stats of a superstar character. Any stats with blue arrows facing to the left means that the stats are decreased when a certain stat is increased; this stat hindrance mirrors starred characters in the Mario Golf series, where their drive increases at the cost of impact.
Unlike the Animal Crossing amiibo cards, the Mario Sports Superstars amiibo cards only work specifically for Mario Sports Superstars, thus do not work or recognized as a generic amiibo in other games. (e.g: Daisy in Horse Racing does not unlock Daisy Yoshi in Poochy & Yoshi's Woolly World or Birdo in Golf does not unlock a Birdo costume in Super Mario Maker). Additionally, amiibo cards can be used to unlock new gear for characters to use, which is displayed on the card.
Collection
- Main article: List of Mario Sports Superstars digital cards
- Main article: Sound Test
This mode is mostly related to the digital card collection, however also allows access to the Sound Test and staff credits. Players can access the shop, where they can buy packs of digital amiibo cards with coins earned in-game. These cards are randomized which allows for doubles. Players can buy a 3-card pack for 300 coins, a 10-card pack for 1000 coins, or a 3 card pack with no doubles with 100 double cards. One amiibo can also be used to purchase one 3 card packs with doubles per day, having up to three different amiibo taps per day.
The collection album displays cards the player has owned, as well as organizing them with 18 categories: Super Rare, Rare Soccer, Rare Baseball, Rare Tennis, Rare Golf, Rare Horse Racing, Normal Soccer, Normal Baseball, Normal Tennis, Normal Golf, Normal Horse Racing, Sub Character, Pro Soccer Gear, Pro Baseball Gear, Pro Tennis Gear, Pro Golf Gear, Pro Horse Symbols, and Horse. There are a total of 324 digital cards to collect.
Road to Superstar
This minigame can be played when players tap three amiibo cards. The minigame seems to be inspired from Breakout, where players use their selected amiibo cards to deflect various gear themed after the sports they are designed, with each gear projectile having a different property. Prior to beginning this mode, players can adjust placement of their three cards on a grid. Players need to destroy Brick Blocks and defeat enemies (or wait until the enemies walk offscreen) to proceed through the stage. When an enemy or opponent projectile touches a card, it gets knocked over and leaves an opening; players can quickly prop the card back up by tapping the button. Players can also change direction of the ball by holding the corresponding shoulder button, as well as increase the speed of the left and right movement of the cards by pressing the corresponding button. Players lose their projectile if the projectile passes through the cards; if players lose all available projectiles on the field, they lose the game and need to start over. If players lose the game three times in a row, they can activate Assist Mode, which places Brick Blocks on the bottom screen, though this mode halves the score obtained. Players can use a Special Attack technique if the projectiles hit the card enough times and the meter is filled out; cards closer to the top earn their Special Attack far more quickly. Once the meter is filled out, the Special Attack technique is used as soon as the projectile hits the card with the maxed out meter. The Special Attack increases the size of the projectile and destroys Empty Blocks and defeats Shy Guys in one hit. If a projectile is lost, a Goomba or Bone Goomba may occasionally appear carrying the gear: defeating this Goomba allows access to the projectile again. Players then defeat a mid-boss, a variety of the Hammer Bro species, before facing the boss of the stage, who is dependent on the progress of the player. Defeating this boss and completing this mode bestows a "Superstar" status to their character, greatly increasing all of the stats, moreso than a Star character. This is then scanned onto the amiibo card using the card's read/write capabilities. A high score is recorded as well, and if players have more projectiles after the completion of this mode, this also increases the high score of the player.
Settings
Players can adjust various settings to their liking when the icon is tapped on the main menu. The following is a list of all settings.
- Common
- BGM: Players can toggle the background music on or off. This does not turn off menu music and some jingles, however; turning off the music includes turning off the post-hole music from Mario Golf: World Tour where originally in that game, post-hole music would still play even if the music is turned off. Players can still listen to music in the sound test even if the music is turned off.
- Send Play Data: This sends play data to Nintendo via the use of Nintendo Network services.
- Blacklist: This deletes the list of players that players added in order to not have a match with them.
- Soccer
- Controls: This changes the control inputs of soccer to Type A, Type B, and Type C, all which have different control types.
- Baseball
- Speed: This changes the display unit of pitching speed from either km/h (kilometers per hour) or mph (miles per hour).
- Golf
- Distance: This changes the distance display unit from either meters or yards.
- Putter: This changes the putter display unit from either meters or yards.
- Wind Speed: This changes the display unit of wind speed from either m/s (meters per second) or mph (miles per hour).
- Horse Racing
- Distance: This changes the distance of the tracks from either meters or yards.
Controls
Each sport uses its own control scheme, and the controls often depend on the specific situation the players are in.
Soccer
| Attack | |||
|---|---|---|---|
| Command | Input (Type A) | Input (Type B) | Input (Type C) |
| Move | |||
| Shoot | |||
| Special Shot | |||
| Short Pass | |||
| Long Pass Centering | |||
| Special Combo Shot | |||
| Through Pass | |||
| Dash | |||
| Technique | |||
| Fielding | |||
| Command | Input (Type A) | Input (Type B) | Input (Type C) |
| Move | |||
| Slide | |||
| Pressure | |||
| Pressure Defense | |||
| Goalkeeper Lunge | |||
| Dash | |||
| Change Player | |||
Baseball
| Batting | |
|---|---|
| Command | Input |
| Move Swing Zone | |
| Time | |
| Bunt | |
| Power Swing | |
| Contact Swing | |
| Strategy | |
| Special Move | |
| Change Batting Stance | |
| Pitcher | |
| Command | Input |
| Change Pitch Location | |
| Fastball | |
| Screwball | |
| Sinker | |
| Forkball | |
| Curveball | |
| Slider | |
| Pitch | |
| Pickoff Attempt | |
| Strategy | |
| Special Move | |
| Change Pitch (Counterclockwise) | |
| Change Pitch (Clockwise) | |
| Baserunning | |
| Command | Input |
| Advance to Base | |
| Return to Base | |
| Advance Runners | |
| Return Runners | |
| Defense | |
| Command | Input |
| Move | |
| Throw to 3rd Base | |
| Throw to 2nd Base | |
| Throw to 1st Base | |
| Throw Home | |
| Choose Player to Control | |
| Throw to Cutoff Man | |
Tennis
| Before Serve | |
|---|---|
| Command | Input |
| Move | |
| Topspin | |
| Slice | |
| Flat Shot | |
| Simple Shot | |
| Change Shot Panel | |
| During Rally | |
| Move | |
| Topspin | |
| Slice | |
| Flat Shot | |
| Simple Shot | |
| Cancel Charge | |
| Leap Shot | |
| Jump Shot | Press corresponding button twice. |
Golf
| Command | Input |
|---|---|
| Shot Direction | |
| Change Clubs | |
| Shot Direction | |
| Start Shot | |
| Cancel | |
| Shot Type | |
| Change Camera | |
| Range Marker: Stronger | |
| Range Marker: Weaker |
Horse Racing
| Command | Input |
|---|---|
| Turn | |
| Jump | |
| Dash | |
| Slow Down | |
| Star Dash | |
| Controls and Map Details | |
| Change Camera |
Characters
Captains
There are 18 captains playable in this game, two of whom have to be unlocked first. In soccer and baseball, team captains are represented by their unique shield emblem whenever a game starts. In team-oriented games, such as soccer and baseball, players can additionally choose an assistant captain from the pool of team captains. Assistant captains are also able to pull off the same special shots that team captains can.
Metal Mario (unlockable)
Pink Gold Peach (unlockable)
Unlocking criteria
Listed below is the method by which players can unlock the unlockable captains. Similarly to Mario Party: Star Rush, the characters can be unlocked by tapping in their corresponding amiibo cards, and like Mario Sports Mix, when a character is unlocked, they are only done so for the sport within which the criteria was filled.
| Unlocking criteria for these participants | |
|---|---|
| Metal Mario | Win the Star Cup, or tap in a Metal Mario amiibo card |
| Pink Gold Peach | Complete Ring Challenge in training on Hard difficulty, or tap in a Pink Gold Peach amiibo card |
Captain stats
Each of the captains' types are represented by specific colors, names, and emblem shape. As each sport plays differently, these characters have different stats depending on the sport, but have similar general strengths throughout the sports. For example, Bowser is a Power-type character in soccer, and although baseball has different stats than soccer, power is still his strongest stat in that sport.
Three of the five sports have characters that belong in the same four character types, with tennis and golf being the exceptions; their disparities are outlined in their respective sections.
- Balance characters have well-rounded stats. They can fit in any position but they do not excel at any stat in particular.
- Technique characters focus on accuracy and control.
- Speed characters have high agility and maneuver quickly.
- Power characters emphasize on strong shots that can either send balls flying further or shoot balls at higher top speeds. In horse racing, they emphasize on stamina instead.
| Rectangle | Meaning |
|---|---|
| Value of the stat not reachable by the character | |
| Value of the stat reached by the normal, star and superstar versions of the character | |
| Value of the stat reached by the normal version of the character, but not by their star and superstar version | |
| Value of the stat reached by the star and superstar versions of the character | |
| Value of the stat reached only by the superstar version of the character |
Soccer
- Power: The speed of the ball when the character kicks it. Characters with a higher power stat have higher ball velocities.
- Speed: The agility of the character in the field. Characters with a higher speed stat move around quicker.
- Finesse[5]: The accuracy of shots of the ball. Characters with a higher technique stat are more accurate.
| Unlockable captains | |||||||||||||||
|---|---|---|---|---|---|---|---|---|---|---|---|---|---|---|---|
| Metal Mario | Pink Gold Peach | ||||||||||||||

|
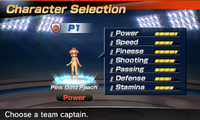
| ||||||||||||||
| Type | Power | Type | Power | ||||||||||||
|
| ||||||||||||||
Baseball
- Velocity:[5] The pitching speed of the character. Characters with a higher velocity stat have faster ball pitching speeds.
- Power: The strength of the character. Characters with a higher power stat can send balls flying farther away more easily.
- Speed: The agility of the character. Characters with a higher speed stat move more quickly in the outfield as well as running bases.
| Starting captains | |||||||||||||||||||||||||||||||
|---|---|---|---|---|---|---|---|---|---|---|---|---|---|---|---|---|---|---|---|---|---|---|---|---|---|---|---|---|---|---|---|
| Mario | Luigi | Yoshi | Birdo | ||||||||||||||||||||||||||||
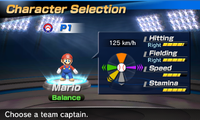
|
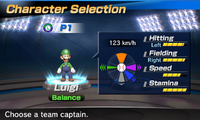
|
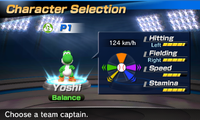
|
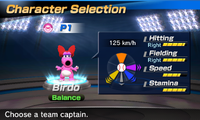
| ||||||||||||||||||||||||||||
| Type | Balance | Type | Balance | Type | Balance | Type | Balance | ||||||||||||||||||||||||
|
|
|
| ||||||||||||||||||||||||||||
| Peach | Daisy | Waluigi | Boo | ||||||||||||||||||||||||||||
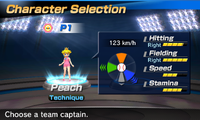
|
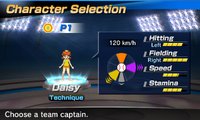
|
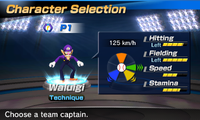
|
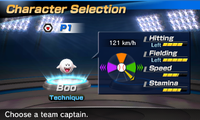
| ||||||||||||||||||||||||||||
| Type | Technique | Type | Technique | Type | Technique | Type | Technique | ||||||||||||||||||||||||
|
|
|
| ||||||||||||||||||||||||||||
| Baby Mario | Baby Luigi | Diddy Kong | Bowser Jr. | ||||||||||||||||||||||||||||
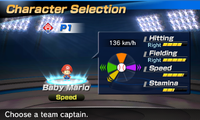
|
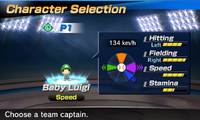
|
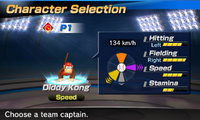
|
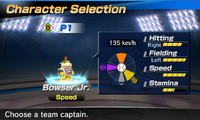
| ||||||||||||||||||||||||||||
| Type | Speed | Type | Speed | Type | Speed | Type | Speed | ||||||||||||||||||||||||
|
|
|
| ||||||||||||||||||||||||||||
| Donkey Kong | Wario | Bowser | Rosalina | ||||||||||||||||||||||||||||
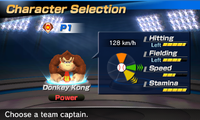
|
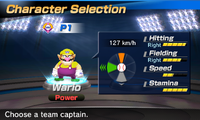
|
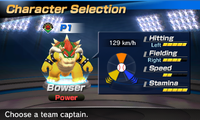
|
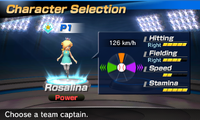
| ||||||||||||||||||||||||||||
| Type | Power | Type | Power | Type | Power | Type | Power | ||||||||||||||||||||||||
|
|
|
| ||||||||||||||||||||||||||||
| Unlockable captains | |||||||||||||||
|---|---|---|---|---|---|---|---|---|---|---|---|---|---|---|---|
| Metal Mario | Pink Gold Peach | ||||||||||||||
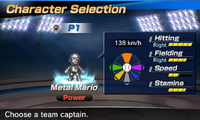
|
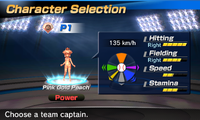
| ||||||||||||||
| Type | Power | Type | Power | ||||||||||||
|
| ||||||||||||||
Tennis
Notably, tennis uses more character types than in some of the other sports, as it uses character types already established in the Mario Tennis series.
- All-Around characters have well-rounded stats. They can fit in any position but they do not excel at any stat in particular.
- Speed characters have high agility and move around place to place quickly.
- Technical characters focus on accuracy and control.
- Defensive characters have high reach that allow them to reach balls with greater ease.
- Tricky characters specialize on making shots with a strong curve, making them more difficult to predict.
- Power characters emphasize on strong shots that can shoot balls at higher top speeds.
The following lists an explanation for the stats of each character:
- Power: The stroke power of the character. Characters with higher power stats send the ball more quickly across the court.
- Speed: The agility of the character. Characters with higher speed stats can move around the court more quickly.
- Spin: The ability of the ball to curve. Characters with higher spin have balls that have stronger curves.
| Starting captains | |||||||||||||||||||||||||||||||
|---|---|---|---|---|---|---|---|---|---|---|---|---|---|---|---|---|---|---|---|---|---|---|---|---|---|---|---|---|---|---|---|
| Mario | Luigi | Yoshi | Birdo | ||||||||||||||||||||||||||||
|
|
|
| ||||||||||||||||||||||||||||
| Type | All-Around | Type | All-Around | Type | Speed | Type | Speed | ||||||||||||||||||||||||
|
|
|
| ||||||||||||||||||||||||||||
| Peach | Daisy | Waluigi | Boo | ||||||||||||||||||||||||||||
|
|
|
| ||||||||||||||||||||||||||||
| Type | Technical | Type | All-Around | Type | Defensive | Type | Tricky | ||||||||||||||||||||||||
|
|
|
| ||||||||||||||||||||||||||||
| Baby Mario | Baby Luigi | Diddy Kong | Bowser Jr. | ||||||||||||||||||||||||||||
|
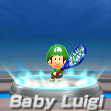
|
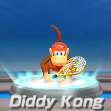
|
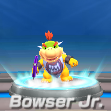
| ||||||||||||||||||||||||||||
| Type | Speed | Type | Technical | Type | Speed | Type | Tricky | ||||||||||||||||||||||||
|
|
|
| ||||||||||||||||||||||||||||
| Donkey Kong | Wario | Bowser | Rosalina | ||||||||||||||||||||||||||||
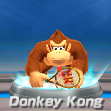
|
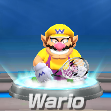
|
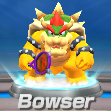
|
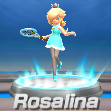
| ||||||||||||||||||||||||||||
| Type | Power | Type | Power | Type | Power | Type | Tricky | ||||||||||||||||||||||||
|
|
|
| ||||||||||||||||||||||||||||
| Unlockable captains | |||||||||||||||
|---|---|---|---|---|---|---|---|---|---|---|---|---|---|---|---|
| Metal Mario | Pink Gold Peach | ||||||||||||||
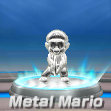
|
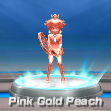
| ||||||||||||||
| Type | Power | Type | Power | ||||||||||||
|
| ||||||||||||||
Golf
In golf, characters are organized by their shot path tendency type, using three types of shot path tendencies. Assuming that all golfers are right-handed, characters with a fade hit their balls towards the left and curves to the right while characters who have a draw hit their balls to the right and curves to the left. Left-handed players have the opposite tendency of right-handed players. Characters with a straight shot hit their balls with no curve, and this is not affected by a change in their dominant hand.
Characters additionally have different height trajectories. Characters who hit balls at higher elevations are more affected by wind than characters who hit their balls lower. However, higher trajectories allow characters to scale higher elevations more efficiently as well as hitting over trees more effectively.
- Power: The character's ability to send the ball. Characters with higher drive stats send balls at greater distances.
- Control: The accuracy of the character. Characters with higher control stats have overall better accuracy, and if the accuracy bar does not align properly, they receive less penalty.
- Sweet Spot: The size of the sweet spot markers. Characters with higher sweet spot stats are less likely to whiff the ball when aiming for accuracy, especially in roughs and bunkers.
| Starting captains | |||||||||||||||||||||||||||||||
|---|---|---|---|---|---|---|---|---|---|---|---|---|---|---|---|---|---|---|---|---|---|---|---|---|---|---|---|---|---|---|---|
| Mario | Luigi | Yoshi | Birdo | ||||||||||||||||||||||||||||
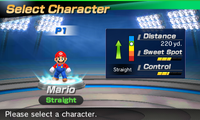
|
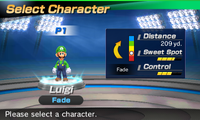
|
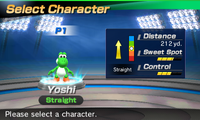
|
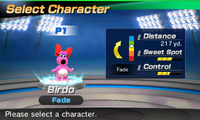
| ||||||||||||||||||||||||||||
| Drive | 220 yards | Drive | 209 yards | Drive | 212 yards | Drive | 217 yards | ||||||||||||||||||||||||
| Trajectory | Straight | Trajectory | Fade | Trajectory | Straight | Trajectory | Fade | ||||||||||||||||||||||||
| Height | High | Height | Low | Height | Medium | Height | Medium-High | ||||||||||||||||||||||||
|
|
|
| ||||||||||||||||||||||||||||
| Peach | Daisy | Waluigi | Boo | ||||||||||||||||||||||||||||
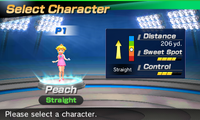
|
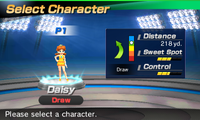
|
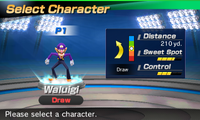
|
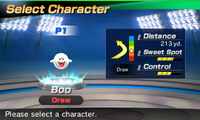
| ||||||||||||||||||||||||||||
| Drive | 206 yards | Drive | 218 yards | Drive | 210 yards | Drive | 213 yards | ||||||||||||||||||||||||
| Trajectory | Straight | Trajectory | Draw | Trajectory | Draw | Trajectory | Draw | ||||||||||||||||||||||||
| Height | Medium-Low | Height | Very High | Height | Medium | Height | Medium-Low | ||||||||||||||||||||||||
|
|
|
| ||||||||||||||||||||||||||||
| Baby Mario | Baby Luigi | Diddy Kong | Bowser Jr. | ||||||||||||||||||||||||||||
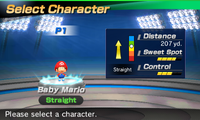
|
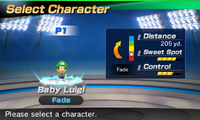
|

|
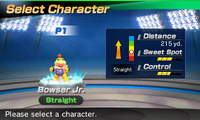
| ||||||||||||||||||||||||||||
| Drive | 207 yards | Drive | 205 yards | Drive | 216 yards | Drive | 215 yards | ||||||||||||||||||||||||
| Trajectory | Straight | Trajectory | Fade | Trajectory | Draw | Trajectory | Straight | ||||||||||||||||||||||||
| Height | Medium-High | Height | Very Low | Height | Slight High | Height | Slight Low | ||||||||||||||||||||||||
|
|
|
| ||||||||||||||||||||||||||||
| Donkey Kong | Wario | Bowser | Rosalina | ||||||||||||||||||||||||||||
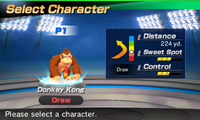
|
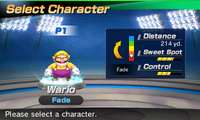
|
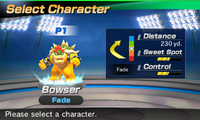
|
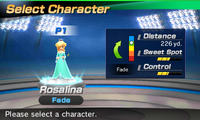
| ||||||||||||||||||||||||||||
| Drive | 224 yards | Drive | 214 yards | Drive | 230 yards | Drive | 226 yards | ||||||||||||||||||||||||
| Trajectory | Draw | Trajectory | Fade | Trajectory | Fade | Trajectory | Fade | ||||||||||||||||||||||||
| Height | Slight Low | Height | Very Low | Height | Medium | Height | Very High | ||||||||||||||||||||||||
|
|
|
| ||||||||||||||||||||||||||||
| Unlockable captains | |||||||||||||||
|---|---|---|---|---|---|---|---|---|---|---|---|---|---|---|---|
| Metal Mario | Pink Gold Peach | ||||||||||||||

|
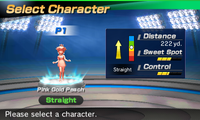
| ||||||||||||||
| Drive | 228 yards | Drive | 222 yards | ||||||||||||
| Trajectory | Draw | Trajectory | Straight | ||||||||||||
| Height | Very High | Height | High Medium | ||||||||||||
|
| ||||||||||||||
Horse Racing
- Speed: The top speed of the horse. Characters who have higher speed stats have faster horses.
- Recovery:[5] The endurance of the horse. Characters who have higher stamina stats have horses that tire out more slowly.
- Turning:[5] The maneuverability of the horse. Characters who have higher control stats can move their horses more easily.
Note: Due to the process of selecting the horse first and then the character, the default all-around horse is used to illustrate stat differences. The green bars in the screenshots indicate the horse's stat while the yellow bars indicate the character's stats added on top of the horse.
| Starting captains | |||||||||||||||||||||||||||||||
|---|---|---|---|---|---|---|---|---|---|---|---|---|---|---|---|---|---|---|---|---|---|---|---|---|---|---|---|---|---|---|---|
| Mario | Luigi | Yoshi | Birdo | ||||||||||||||||||||||||||||
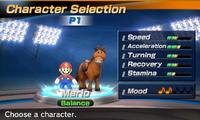
|
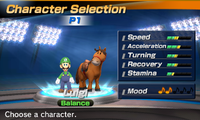
|
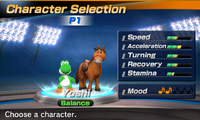
|
| ||||||||||||||||||||||||||||
| Type | Balance | Type | Balance | Type | Balance | Type | Balance | ||||||||||||||||||||||||
|
|
|
| ||||||||||||||||||||||||||||
| Peach | Daisy | Waluigi | Boo | ||||||||||||||||||||||||||||
|
|
|
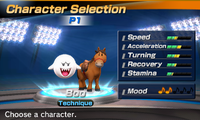
| ||||||||||||||||||||||||||||
| Type | Technique | Type | Technique | Type | Technique | Type | Technique | ||||||||||||||||||||||||
|
|
|
| ||||||||||||||||||||||||||||
| Baby Mario | Baby Luigi | Diddy Kong | Bowser Jr. | ||||||||||||||||||||||||||||
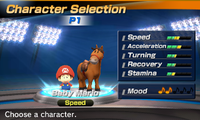
|
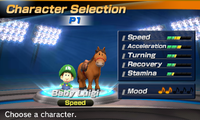
|
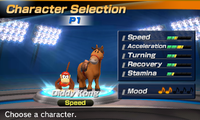
|
| ||||||||||||||||||||||||||||
| Type | Speed | Type | Speed | Type | Speed | Type | Speed | ||||||||||||||||||||||||
|
|
|
| ||||||||||||||||||||||||||||
| Donkey Kong | Wario | Bowser | Rosalina | ||||||||||||||||||||||||||||
|
|
|
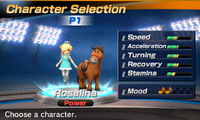
| ||||||||||||||||||||||||||||
| Type | Power | Type | Power | Type | Power | Type | Power | ||||||||||||||||||||||||
|
|
|
| ||||||||||||||||||||||||||||
| Unlockable captains | |||||||||||||||
|---|---|---|---|---|---|---|---|---|---|---|---|---|---|---|---|
| Metal Mario | Pink Gold Peach | ||||||||||||||
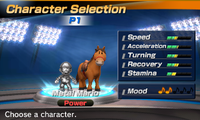
|
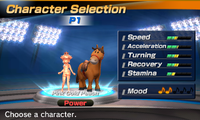
| ||||||||||||||
| Type | Power | Type | Power | ||||||||||||
|
| ||||||||||||||
Supporting characters
In team sports, baseball and soccer, players can select various generic characters to fill out team slots. These generic characters have their own stats and attributes which can be used to tactfully cover up team weaknesses and enhance strengths. What sets them apart from team captains is their inability to perform special shots. In baseball, players can select from a variety of supporting characters; however, in soccer, when players select a type of generic character, all generic characters in the sport are the same species. The only exceptions are Boom Boom and Pom Pom, who can be chosen separately as goalies in soccer. This game marks the first time Bone Goombas and Stone Spikes are playable.
Soccer
| Teammates | |
|---|---|
| Toads | |
 Red Toad |
 Blue Toad |
|
|
| Koopa Troopas | |
 Red Koopa Troopa |
 Koopa Troopa |
|
|
| Magikoopas | |
 Magikoopa |
 Yellow Magikoopa |
|
|
| Shy Guys | |
 Shy Guy |
 Yellow Shy Guy |
|
|
| Flying Squirrel Toads / Penguin Toads | |
 Yellow Flying Squirrel Toad |
 Blue Penguin Toad |
|
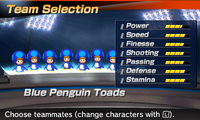
|
| Goombas | |
 Goomba |
 Bone Goomba |
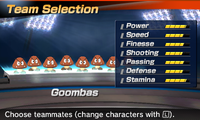
|
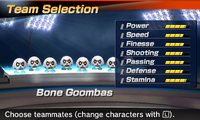
|
| Hammer Bros. | |
 Hammer Bro |
 Boomerang Bro |
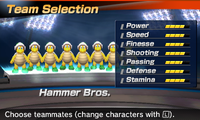
|
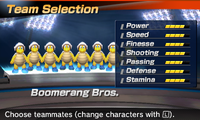
|
| Spikes | |
 Spike |
 Stone Spike |
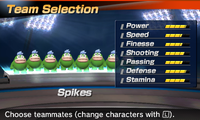
|
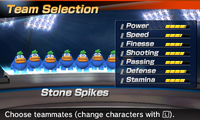
|
| Goalies | |
|---|---|
Boom Boom |
Pom Pom |
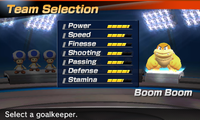
|
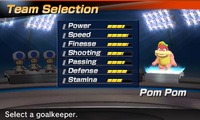
|
Baseball
| Teammates | |||||||
|---|---|---|---|---|---|---|---|
 Red Toad |
 Blue Toad |
 Yellow Toad |
 Green Toad | ||||
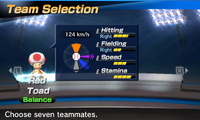
|
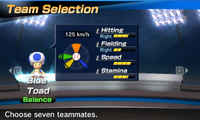
|
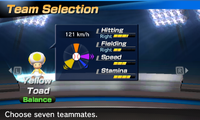
|
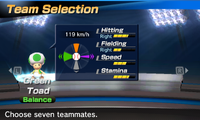
| ||||
| Type | Balance | Type | Balance | Type | Balance | Type | Balance |
 Red Koopa Troopa |
 Blue Koopa Troopa |
 Yellow Koopa Troopa |
 Koopa Troopa | ||||
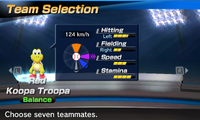
|
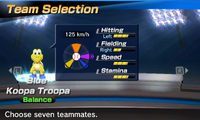
|
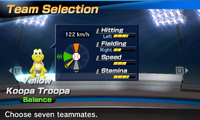
|
| ||||
| Type | Balance | Type | Balance | Type | Balance | Type | Balance |
 Red Magikoopa |
 Magikoopa |
 Yellow Magikoopa |
 Green Magikoopa | ||||
|
|
|
| ||||
| Type | Technique | Type | Technique | Type | Technique | Type | Technique |
 Paratroopa |
 Blue Paratroopa |
 Yellow Paratroopa |
 Green Paratroopa | ||||

|
|
|
| ||||
| Type | Technique | Type | Technique | Type | Technique | Type | Technique |
 Shy Guy |
 Blue Shy Guy |
 Yellow Shy Guy |
 Green Shy Guy | ||||
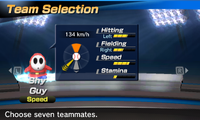
|
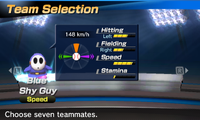
|
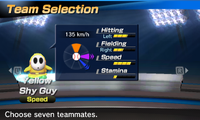
|
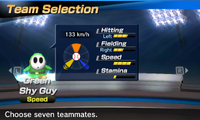
| ||||
| Type | Speed | Type | Speed | Type | Speed | Type | Speed |
 Yellow Flying Squirrel Toad |
 Blue Flying Squirrel Toad |
 Yellow Penguin Toad |
 Blue Penguin Toad | ||||
|
|
|
| ||||
| Type | Speed | Type | Speed | Type | Speed | Type | Speed |
 Goomba |
 Hammer Bro |
 Fire Bro |
 Boomerang Bro | ||||
|
|
|
| ||||
| Type | Power | Type | Power | Type | Power | Type | Power |
 Boom Boom |
 Pom Pom |
 Spike |
 Stone Spike | ||||
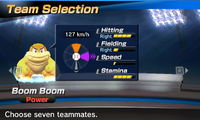
|
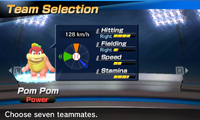
|
|
| ||||
| Type | Power | Type | Power | Type | Power | Type | Power |
Horses
The following is a gallery of available horses and their stats in the Horse Racing mode.
Balance
Male
Female
Technique
Male
Female
Speed
Male
Female
Power
Male
Female
Road to Superstar enemies
Enemies
These enemies are weak enemies, serving as the primary obstacles for the stage. All enemies are either required to defeat or wander offscreen to proceed. Enemies can flip cards over, but when enemies touch a card, they are defeated as well.
| Enemy | Description |
|---|---|
Goomba |
These enemies can be defeated in one shot. Occasionally, they may appear with a lost projectile on top of them; defeating them earns the lost projectile back. They can appear in towers as well, sometimes mixed in with Bone Goombas. |
Bone Goomba |
Bone Goombas behave identically to regular Goombas. |
Shy Guy |
Shy Guys come in many different colors and take two hits to defeat them. However, if the projectile is powered up with a Special Attack, they take only one hit to defeat. As Goombas, they can appear as towers as well. Some Shy Guys stand on top of blocks, where they jump down after everything else has been defeated. |
Koopa Troopa |
Koopa Troopas come in a variety of colors, but all behave the same way. Defeating a Koopa Troopa gives it access to its shell, which functions as the other projectiles. |
Bob-omb |
When struck, Bob-ombs sit and explode, blowing up any blocks and enemies nearby. |
Mid-bosses
These bosses are all varieties of a bro, who must take several hits to be defeated. All of these mid-bosses have their own projectile and attack pattern. They also appear with a variety of other enemies, such as Shy Guys or Koopa Troopas.
| Enemy | Description |
|---|---|
 Hammer Bro |
Hammer Bro tosses a variety of hammers at the player. |
 Boomerang Bro |
Boomerang Bro tosses two boomerangs at the player. These boomerangs travel in a straight line and back, meaning they can hit players from the back. |
 Fire Bro |
Fire Bro tosses three fire balls at a time to the player, where they bounce erratically. |
Bosses
These are the bosses of the stage, indicated by the incoming siren and boss alert signals. They have considerably more health than any enemy in the game, and the type of boss that spawns is dependent on the player's progress. All bosses have a rage mode, where once a considerable portion of their health is depleted, they change up their attack patterns to be for the more difficult. Once the boss of the stage is defeated, the player wins and is awarded the Superstar status to all characters who have completed it.
| Enemy | Description |
|---|---|
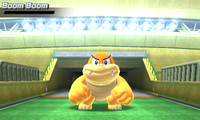 Boom Boom |
Boom Boom attacks by going in his shell and spinning around. Any card that gets by his shell gets knocked over. He can also summon other enemies to assist him. |
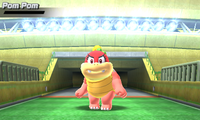 Pom Pom |
Pom Pom throws her boomerangs in a similar fashion to the Boomerang Bros. When in rage mode after a portion of her health is depleted, she creates copies of herself and tosses more boomerangs. |
 Big Magikoopa |
Big Magikoopa uses a variety of magical effects to attack, such as spawning Bullet Bills and a large variety of other enemies to assist it. |
 Yellow Big Magikoopa |
Yellow Big Magikoopa behaves similarly to Big Magikoopa, except that it uses many Amps to attack rather than Bullet Bills. |
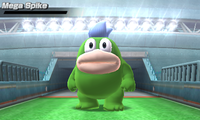 Mega Spike |
Mega Spike attacks by either throwing its Spiked Balls at the player or by stomping on the region where the player is located. When it is angry after a certain amount of health is depleted, it spawns more Spiked Balls at the player. |
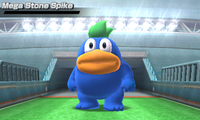 Mega Stone Spike |
Mega Stone Spike has similar attack patterns to Mega Spike, except it tosses stone Spiked Balls at the player, and when it is angry after a certain amount of health has been depleted, these balls can split into three. |
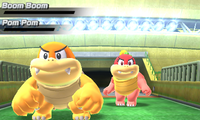 Boom Boom and Pom Pom |
Appearing simultaneously, Boom Boom attacks by spinning in his shell towards the player while Pom Pom tosses boomerangs at them. Pom Pom has less HP than Boom Boom, and when she is defeated, Boom Boom uses a different attack pattern. In this attack pattern, he spawns spinning shells in a similar fashion to how Triple Green Shells are spawned, which he can kick them towards the player. |
Other
These characters either serve as background characters or as referees. Toad is seen giving tutorials to players in tennis and golf modes of the game while he sits as the referee in tennis. Lakitu serves as the referee in soccer, serves as the umpire in baseball, appears when players hit their ball into deep water in golf (as an Out of Bounds penalty), and retrieves balls in tennis if players are hit with a body shot.
Locations
Each sport has four locations (with horse racing having three courses based on the four locations) that players can play on. All unlockable locations are unlocked by completing the sport's respective Star Cups. Each location correspond to the cup it is on; for example, the Grass Court in Tennis is played on the Mushroom Cup. In soccer and baseball, all locations barring the unlockable stadiums have day and night variants of them.
Soccer fields
| Picture | Stadium |
|---|---|
 
|
Village Stadium |
 
|
City Stadium |
 
|
Kingdom Stadium |
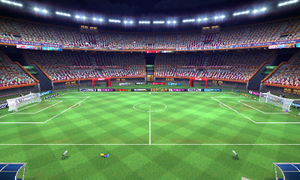
|
Grand Stadium (unlockable) |
Baseball stadiums
| Picture | Stadium |
|---|---|
 
|
Country Field |
 
|
Town Park |
 
|
Big Field |
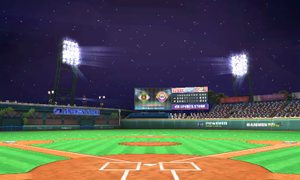
|
Harbor Park (unlockable) |
Tennis courts
| Picture | Court | Bounce | Ball Speed |
|---|---|---|---|
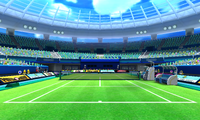
|
Grass Court | ★ | ★★★ |
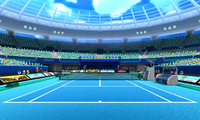
|
Hard Court | ★★★ | ★★ |
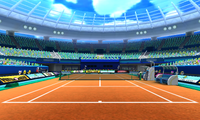
|
Clay Court | ★ | ★ |
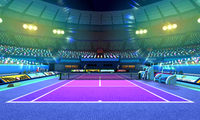
|
Night Court (unlockable) | ★★ | ★★★★ |
Golf courses
| Image | Name | Holes | Par |
|---|---|---|---|
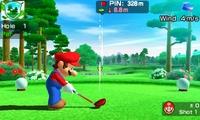
|
Emerald Woods | 9 | 36 |
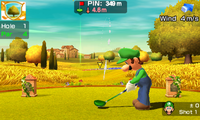
|
Gold Links | 9 | 36 |
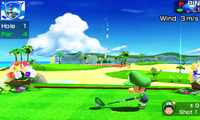
|
Crystal Beach | 9 | 36 |
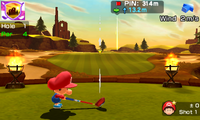
|
Wild Valley (unlockable) | 9 | 36 |
Horse racing tracks
There are 12 race tracks based on four areas. Green Farm, Cobalt Lake, and Yellow Leaves Hill are all initially available in Exhibition mode while the Sky Peak courses are unlocked when players clear the Star Cup. When players go on outings with their horse in the stable mode, they ride their horse on the first track of each respective course.
| Green Farm | ||
|---|---|---|
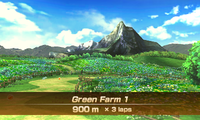 Green Farm 1 |
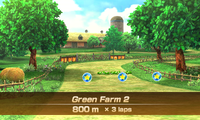 Green Farm 2 |
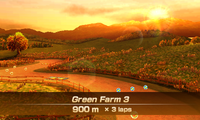 Green Farm 3 |
| 900m | 800m | 900m |
| Cobalt Lake | ||
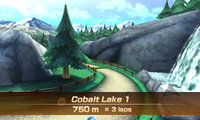 Cobalt Lake 1 |
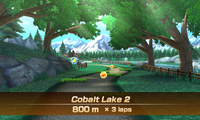 Cobalt Lake 2 |
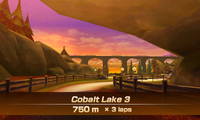 Cobalt Lake 3 |
| 750m | 800m | 750m |
| Yellow Leaves Hill | ||
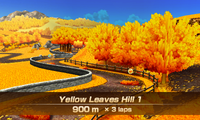 Yellow Leaves Hill 1 |
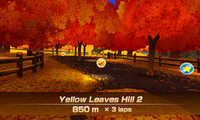 Yellow Leaves Hill 2 |
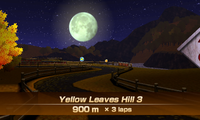 Yellow Leaves Hill 3 |
| 900m | 850m | 900m |
| Sky Peak (unlockable) | ||
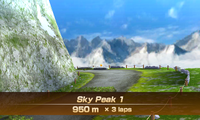 Sky Peak 1 |
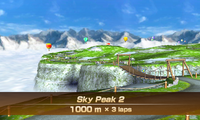 Sky Peak 2 |
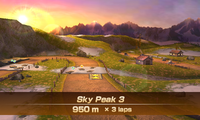 Sky Peak 3 |
| 950m | 1000m | 950m |
Gear
As Mario Tennis Open and Mario Golf: World Tour, Mario Sports Superstars has a gear system; unlike those games however, Super Mario characters can change their gear rather than being tied exclusively to Miis. Gear can be unlocked when players scan an amiibo card in, with the corresponding gear being listed on the amiibo card. Gear can be unlocked for all sports, and they are additionally unlocked when players buy their corresponding digital card from the shop. Unlike the aforementioned games, however, different gear is tied to a specific character and they serve for aesthetic purposes only.
| Character | |||||
|---|---|---|---|---|---|
| Soccer | Baseball | Tennis | Golf | Horse Racing | |
 Mario |
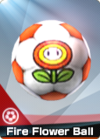
|
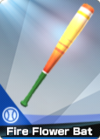
|

|

|

|
 Luigi |
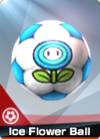
|

|

|

|

|
 Yoshi |

|

|
|
|
|
 Birdo |
|
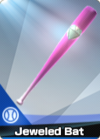
|

|

|

|
 Peach |

|

|

|

|

|
 Daisy |
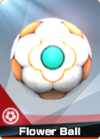
|

|

|

|

|
 Waluigi |
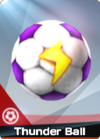
|
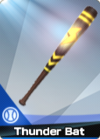
|

|

|

|
 Boo |
|

|

|

|
|
 Baby Mario |
|
|
|
|

|
 Baby Luigi |
|
|
|
|

|
 Diddy Kong |
|

|
|

|
|
 Bowser Jr. |
|
|
|
|
|
 Donkey Kong |
|
|
|

|
|
 Wario |
|
|
|

|
|
 Bowser |
|
|

|

|
|
 Rosalina |
|
|
|
|
|
 Metal Mario |
|
|

|

|

|
 Pink Gold Peach |

|

|

|

|

|
Horse accessories
- Main article: List of horse accessories in Mario Sports Superstars
Players can unlock decorative accessories for their horses in stable mode whenever they find ? crates on the field or randomly receive them during outings. These accessories come in three types of categories: hats, bridles, and saddles. These accessories do not change stats, as they serve for aesthetics only. Accessories typically come in sets of five, and in these sets of five are different colored versions of the same accessory. Players can potentially unlock rarer accessories when they come across a rabbit in the grass or if they receive them from an outing. These accessories are usually part of a series, like the Asian Bridle or the Gorgeous Crown. One accessory, the Mario Token Crown, is unlocked when 20 Mario Tokens are found; these are collected when players come across white birds in grass. During an outing, players may find a very rare Mario-themed accessory, such as Mario's Hat or Peach's Crown, all which are hats.
Staff
- Main article: List of Mario Sports Superstars staff
Mario Sports Superstars is co-developed by Bandai Namco Studios and Camelot Software Planning and is published by Nintendo. Bandai Namco is the primary developer for most of the game, while the tennis and golf portions are credited to Camelot, who are responsible for the Mario Tennis and Mario Golf series. Music of the whole game was composed by Motoi Sakuraba.
Reception
Critical reception
Mario Sports Superstars received generally mixed reviews, with the game currently scoring a 62 on Metacritic based on 44 reviews[6] and a 55.85% on GameRankings based on 20 reviews.[7] The game was generally praised for being fun to play, especially with friends. Horse Racing in particular received praise for being the most in-depth sport of the five, with the amount of objects to customize the horse and maintenance of the horse. However, the biggest criticisms of the game was the overall lack of content for each sport, especially compared to the previous installments of the Mario Tennis and Mario Golf series for each respective sport, and because of the lack of content, the game does not have staying power. Another common criticism is the amount of content reused from previous Super Mario sports titles, especially Mario Tennis and Mario Golf games. Additionally, the sports were criticized for their more realistic elements compared to previous entries where Super Mario elements were more abundant.
Daan Koopman of Nintendo World Report gave the game a 5.5 out of 10, calling the game "Competent and playable, but not really a superstar."[8] He has noted that the game has a strange focus on realism, stating "When compared to other Mario sports titles, this game plays it straightforward and focused. There are a few special moves, but their role feels more as a way to show that this is still a Super Mario game. Outside of that, it feels like a collection of sports sims. Even the Mario & Sonic games offer more of a light-hearted atmosphere." Koopman commented how it is easy to get into a game, and thus competently put together, but the sports have a lot of reused assets save for Soccer and Horse Racing, which he commented are the "most component". Koopman has called baseball a "disappointment", stating that "Baseball in Mario Sports Superstars is basically pressing the A button repeatedly, as either the batter or pitcher.", criticizing the AI entirely controlling the outfielding, though complimenting the fun designs of the team and stadiums. In closing, he summarized his review by stating, "Where Mario Sports Superstars ultimately falters is it simply didn’t do much to stand out. I’m sure that some will get enjoyment out of this game, but the lack of charm made me not motivated to play it."
Conor McMahon of NintendoLife gave the game a 5 out of 10, stating that the game is mediocre and that while the game is not a terrible game - in fact it offers variety and a convenient package for fans who want the game into one package - the game does not do much and does not offer a definitive version of anything.[9] McMahon notes that while the game "tries to offer something for everyone by fleshing out each event, and while this is an admirable pursuit for sure", it states how the game starts to feel too familiar by the time players are ready to play the game. McMahon has contrasted the game's soccer to Mario Strikers Charged, another Super Mario franchise game around soccer, stating that "It's a far-cry from Mario Strikers Charged, reigning in the madness for a pretty solid simulation of the real thing, with a decent amount of options to play around with." McMahon was not impressed by Tennis and Golf, comparing unfavorably the iteration offered by this game to past installments of the Mario Tennis and Mario Golf series, feeling that it is too familiar and that they never rise above the standards established. As Koopman, McMahon praised the Horse Racing, calling it the most substantial game mode of the 5 sports.
Nick Gillham of God is a Geek gave the lowest score, a 4 out of 10,[10] stating that the game wanted to be like the Super Smash Bros. of sports games, but ends up being a PlayStation All-Stars Battle Royale instead, citing the lack of substance in the modes and calling the game a "jack of all trades, master of none", and compared the bitter feeling of the game to "licking a Switch cartridge", referencing the press attention of the bitter substance, Denatonium Benzoate, added to Nintendo Switch cartridges to prevent small children from putting the cartridge in their mouths. Gillham has commented on the easy difficulty of the AI, claiming that he won soccer without pressing the shoot button and racking up double-digit scores. Gillham has criticized the amiibo restricted modes, such as Road to Superstar, stating that the mode is not available without a specific series amiibo card and locking the mode away is "an unforgivable decision". Gillham has also criticized how there is no Download Play option with the game, making the game "an expensive affair".
| Reviews | ||
|---|---|---|
| Reviewer, Publication | Score | Comment |
| Daan Koopman, Nintendo World Report |
5.5/10 | "Where Mario Sports Superstars ultimately falters is it simply didn’t do much to stand out. I’m sure that some will get enjoyment out of this game, but the lack of charm made me not motivated to play it. " |
| Conor McMahon, NintendoLife |
5/10 | "By offering five games in one it fails to offer a definitive version of anything, and even a pretty decent take on horse racing isn't worth the price of admission unless you're planning on really diving into the other sports as well. As a multiplayer title it could be fun to climb the ranks online, but as a single player experience it's totally functional yet painfully lifeless. It's laid out the groundwork, but Sports Superstars just needs to take a few more risks." |
| Nick Gillham, God is a Geek |
4/10 | " After this it might be high time for Mario to put his sportsing behind him and stick to regaling kids with stories of his adventures, rather than his sporting achievements." |
| Dominic Leighton, TheSixthAxis | 6/10 | "Mario Sports Superstars should feel like a generous package, but each of the different sports feel lightweight or stripped back, and ultimately a touch forgettable, despite the inherent charm of Mario and his friends." |
| Aggregators | ||
| Compiler | Platform / Score | |
| Metacritic | 62 | |
| GameRankings | 55.85% | |
Nintendo eShop description
- American English version
Five full-on sports–Soccer, Tennis, Golf, and Horse Racing–bring the challenge and depth you demand to Nintendo 3DS™ systems. Take on friends and rivals in local or online multiplayer*, hone skills in training, or tackle single-player tournaments. Whether you pick Mario, Waluigi, or one of sixteen others, you're on the road to superstardom!
Before long, you'll have mastered the ins and outs of each sport: learn when to use an infield shift in Baseball, change your team's formation in Soccer, and more. Even Horse Racing is surprisingly deep! Build a stable of horses and train them well to win the day in the first-ever horse races in series history. But remember: these aren't normal sports–they're Mario Sports. Expected unexpected thrills and power up to stomp the competition.
*Additional games and systems required for multiplayer mode. Sold separately.
- British and Australian English versions
Become a Superstar – it's Mario Sports time!
Take to the field with an all-star line-up in Mario Sports Superstars, an action-packed selection of supercharged sports. Set your squad of Super Mario favourites on the road to superstardom in five of the world's most popular sports, and compete with others nearby and online!
Tear up the turf in 11-a-side Football matches, slug it out in Baseball, get on the green in Golf and own the court in Tennis. For something a bit different, saddle up and get ready for some fast-paced Horse Racing! These are full-scale sports, featuring layers of depth, strategy and real-world authenticity.
Gallery
- For this subject's image gallery, see Gallery:Mario Sports Superstars.
Media
- For a complete list of media for this subject, see List of Mario Sports Superstars media. For this subject's sound test, see Sound Test.
| File info 0:30 |
| File info 0:30 |
| File info 0:30 |
| File info 0:30 |
| File info 0:30 |
| File info 0:30 |
| File info |
References to other games
- Wario World: Wario's artwork is reused for his soccer amiibo card.
- Mario Golf: Toadstool Tour: Various character artwork have been reused for golf amiibo cards.
- Mario Kart: Double Dash!!: Bowser's voice clips are reused from this game in tennis and horse racing.
- Mario Power Tennis: Character select screen voice clips have been reused. Metal Mario's voice clips and Pink Gold Peach's voice clips are filtered variations of Mario and Peach's voice clips from Mario Power Tennis respectively. Various character artwork have been reused for tennis amiibo cards.
- Donkey Kong Jungle Beat: Donkey Kong's artwork is reused for his baseball amiibo card.
- Dance Dance Revolution: Mario Mix: Bowser's artwork is reused for his soccer amiibo card.
- Mario Baseball series: Various character animations for baseball have been remade from these games. Various character artwork have been reused for baseball amiibo cards.
- Mario Party 7: Birdo's artwork is reused for her soccer amiibo card.
- Mario Party 8: Various character artwork have been reused for soccer amiibo cards.
- DK: Jungle Climber: Diddy Kong's artwork is reused for his soccer amiibo card.
- Mario & Sonic at the Olympic Games: Daisy's artwork is reused for her soccer amiibo card.
- New Super Mario Bros. Wii: Toads in the Penguin Suit power-up are selectable characters.
- Donkey Kong Country Returns: Donkey Kong's artwork is reused for his soccer amiibo card.
- Mario Sports Mix: Peach's artwork is reused for her soccer amiibo card.
- Mario Tennis Open: Graphics, animations, voices, and sound effects have been reused from this game. Various character artwork have been reused for tennis amiibo cards.
- New Super Mario Bros. U: Toads in the Flying Squirrel power-up are selectable characters.
- Super Mario 3D World: Luigi's artwork is reused for his soccer amiibo card.
- Mario Golf: World Tour: The game runs on the same engine used in this game. Graphics, animations, voices, sound effects, and UI elements have been reused from this game. Various artwork have been reused for golf amiibo cards.
- Mario Kart 8: Baby Mario and Baby Luigi's voice clips are reused from this game.
- Mario Party 10: Rosalina's artwork is reused for her golf amiibo card.
- Mario Tennis: Ultra Smash: Jump shots and the Ultra Smash, features first introduced in this game, return in the tennis mode. Some of the UI is taken from this game. Rosalina's artwork is reused for her tennis amiibo card.
References in later games
- Mario Tennis Aces: Decorative character shield emblems designed after their character trait are inspired from the shield emblems used in this game.
- Super Mario Party: The horses reappear in the minigame Fiddler on the Hoof.
- Super Smash Bros. Ultimate: "Kingdom Stadium: Night" and "Country Field: away team" are selectable music tracks on Super Mario-franchise stages except for Mario Kart-themed stages.
Names in other languages
| Language | Name | Meaning | Notes |
|---|---|---|---|
| Japanese | マリオスポーツ スーパースターズ[11] Mariosupōtsu sūpāsutāzu |
Mario Sports Superstars |
References
- ^ @NintendoAmerica (October 4, 2023). As of early April 2024, online play and other functionality that uses online communication will end service for Nintendo 3DS and Wii U software. Thank you very much for your continued support of our products.. X (American English). Retrieved February 17, 2024.
- ^ @NintendoAmerica (January 23, 2024). Update: as of 4/8, online play and other functionality that uses online communication will end service for Nintendo 3DS and Wii U software. Thank you very much for your continued support of our products.. X (American English). Retrieved February 17, 2024.
- ^ February 9, 2017. 新シリーズのamiiboカードも同時発売!. Nintendo (Japanese). Retrieved June 25, 2024.
- ^ a b Nintendo. Mario Sports Superstars Horse Racing. Retrieved February 10, 2017.
- ^ a b c d Mon Amiibo (March 11, 2017). Mario Sports Superstars - Scanning amiibo Cards. YouTube (English). Retrieved March 11, 2017.
- ^ Mario Sports Superstars. Metacritic (English). Retrieved June 25, 2024.
- ^ Mario Sports Superstars. GameRankings (English). Archived August 9, 2017 from the original via Wayback Machine. Retrieved June 25, 2024.
- ^ Koopman, Daan (March 8, 2017). Review of Mario Sports Superstars. Nintendo World Report (English). Retrieved June 25, 2024.
- ^ McMahon, Conor (March 8, 2017). Review: Mario Sports Superstars. Nintendo Life (English). Retrieved June 25, 2024.
- ^ Gillham, Nick (March 8, 2017). Mario Sports Superstars Review. God is a Geek (English). Retrieved March 25, 2017. (Archived March 10, 2017, 11:19:17 UTC via Wayback Machine.)
- ^ ロコモコ (November 20, 2017). オールスーパースター! マリオスポーツ スーパースターズ 実況プレイ Part 10. YouTube (Japanese). Retrieved June 25, 2024.
External links
| Mario Sports Superstars | |||
|---|---|---|---|
| Characters | Team captains | Mario • Luigi • Yoshi • Birdo • Princess Peach • Princess Daisy • Waluigi • Boo • Baby Mario • Baby Luigi • Diddy Kong • Bowser Jr. • Donkey Kong • Wario • Bowser • Rosalina | |
| Unlockable captains | Metal Mario • Pink Gold Peach | ||
| Sidekicks | Boom Boom • Boomerang Bro • Bone Goomba • Fire Bro • Goomba • Hammer Bro • Koopa Troopa • Magikoopa • Paratroopa • Pom Pom • Shy Guy • Spike • Stone Spike • Toad | ||
| Road to Superstar enemies | Amp • Big Magikoopa • Bob-omb • Boom Boom • Boomerang Bro • Bone Goomba • Bullet Bill • Fire Bro • Goomba • Goomba Tower • Hammer Bro • Koopa Troopa • Mega Spike • Mega Stone Spike • Pom Pom • Shy Guy • Shy Guy Tower • Spike • Spiked Ball • Stone Spike • Yellow Big Magikoopa | ||
| Other characters and species | Lakitu • Small bird • Toad | ||
| Locations | Soccer fields | City Stadium • Grand Stadium • Kingdom Stadium • Village Stadium | |
| Baseball stadiums | Big Field • Country Field • Town Park • Harbor Park | ||
| Tennis courts | Hard Court • Clay Court • Grass Court • Night Court | ||
| Golf courses | Crystal Beach • Emerald Woods • Gold Links • Wild Valley | ||
| Horse racing tracks | Mushroom Cup | Green Farm 1 • Green Farm 2 • Green Farm 3 | |
| Flower Cup | Cobalt Lake 1 • Cobalt Lake 2 • Cobalt Lake 3 | ||
| Star Cup | Yellow Leaves Hill 1 • Yellow Leaves Hill 2 • Yellow Leaves Hill 3 | ||
| Champion's Cup | Sky Peak 1 • Sky Peak 2 • Sky Peak 3 | ||
| Other | Amiibo cards • Digital cards • Chance Shot • Gallery • List of golfing terms • Horse • Horse accessories • Herd Effect • Media • Power Shot • Sound Test • Staff • Star Dash | ||
| Super Mario games | |||
|---|---|---|---|
| Platformers | Super Mario series | Main | Super Mario Bros. (1985, NES) • Super Mario Bros.: The Lost Levels (1986, FDS) • Super Mario Bros. 2 (1988, NES) • Super Mario Bros. 3 (1988, NES) • Super Mario Land (1989, GB) • Super Mario World (1990, SNES) • Super Mario Land 2: 6 Golden Coins (1992, GB) • Super Mario 64 (1996, N64) • Super Mario Sunshine (2002, GCN) • New Super Mario Bros. (2006, DS) • Super Mario Galaxy (2007, Wii) • New Super Mario Bros. Wii (2009, Wii) • Super Mario Galaxy 2 (2010, Wii) • Super Mario 3D Land (2011, 3DS) • New Super Mario Bros. 2 (2012, 3DS) • New Super Mario Bros. U (2012, Wii U) • Super Mario 3D World (2013, Wii U) • Super Mario Maker (2015, Wii U) • Super Mario Run (2016, iOS/iPadOS/Android) • Super Mario Odyssey (2017, Switch) • Super Mario Maker 2 (2019, Switch) • Super Mario Bros. Wonder (2023, Switch) |
| Reissues | VS. Super Mario Bros. (1986, VS) • Super Mario Bros. (1986, G&W) • All Night Nippon: Super Mario Bros. (1986, FDS) • Super Mario Bros. (1989, NGW) • Super Mario Bros. 3 (1990, NGW) • Super Mario World (1991, NGW) • Super Mario All-Stars (1993, SNES) • Super Mario All-Stars + Super Mario World (1994, SNES) • BS Super Mario USA (1996, SNES) • BS Super Mario Collection (1997, SNES) • Super Mario Bros. Deluxe (1999, GBC) • Super Mario Advance (2001, GBA) • Super Mario World: Super Mario Advance 2 (2001, GBA) • Super Mario Advance 4: Super Mario Bros. 3 (2003, GBA) • Classic NES Series (2004-2005, GBA) • Super Mario 64 DS (2004, DS) • Super Mario All-Stars Limited Edition (2010, Wii) • Super Mario Maker for Nintendo 3DS (2016, 3DS) • New Super Mario Bros. U Deluxe (2019, Switch) • Super Mario 3D All-Stars (2020, Switch) • Game & Watch: Super Mario Bros. (2020, G&W) • Super Mario 3D World + Bowser's Fury (2021, Switch) | ||
| Related games | Super Mario Bros. Special (1986, computer) • Wario Land: Super Mario Land 3 (1994, GB) • Super Mario World 2: Yoshi's Island (1995, SNES) • New Super Luigi U (2013, Wii U) • Captain Toad: Treasure Tracker (2014, Wii U) • Super Mario Bros. 35 (2020, Switch) • Bowser's Fury (2021, Switch) | ||
| Canceled games | Super Mario's Wacky Worlds (CD-i) • Mario Takes America (CD-i) • VB Mario Land (VB) • Super Mario 64 2 (N64DD) | ||
| Donkey Kong series | Donkey Kong (1981, arcade) • Donkey Kong (1994, GB) | ||
| Mario vs. Donkey Kong series | Mario vs. Donkey Kong (2004, GBA) • Mario vs. Donkey Kong 2: March of the Minis (2006, DS) • Mario vs. Donkey Kong: Minis March Again! (2009, DSiWare) • Mario vs. Donkey Kong: Mini-Land Mayhem! (2010, DS) • Mario and Donkey Kong: Minis on the Move (2013, 3DS) • Mario vs. Donkey Kong: Tipping Stars (2015, 3DS/Wii U) • Mini Mario & Friends: amiibo Challenge (2016, 3DS/Wii U) | ||
| Mario Bros. series | Mario Bros. (1983, arcade) • Mario Bros. Special (1984, computer) • Punch Ball Mario Bros. (1984, computer) • Mario Clash (1995, VB) | ||
| Wrecking Crew series | VS. Wrecking Crew (1984, VS) • Wrecking Crew (1985, NES) • Wrecking Crew '98 (1998, SFC) | ||
| Other | Mario Bros. (1983, G&W) • Mario's Cement Factory (1983, G&W) • Mario & Wario (1993, SNES) • Hotel Mario (1994, CD-i) • Super Princess Peach (2005, DS) • Princess Peach: Showtime! (2024, Switch) | ||
| Reissues | Crazy Kong (1981, arcade) • Donkey Kong (1982, G&W) • Donkey Kong (1982, tabletop) • Mario Bros. Returns (1988, FDS) • Donkey Kong (1994, NGW) • Yoshi's Island: Super Mario Advance 3 (2002, GBA) • Donkey Kong/Donkey Kong Junior/Mario Bros. (2004, arcade) • Virtual Console (2006-2016, Wii/3DS/Wii U) • Captain Toad: Treasure Tracker (2018, Switch/3DS) • Mario vs. Donkey Kong (2024, Switch) | ||
| Tech demos | Super Mario 128 (2000, GCN) • New Super Mario Bros. Mii (2011, Wii U) | ||
| Mario Kart series | Main | Super Mario Kart (1992, SNES) • Mario Kart 64 (1996, N64) • Mario Kart: Super Circuit (2001, GBA) • Mario Kart: Double Dash!! (2003, GCN) • Mario Kart DS (2005, DS) • Mario Kart Wii (2008, Wii) • Mario Kart 7 (2011, 3DS) • Mario Kart 8 (2014, Wii U) • Mario Kart Tour (2019, iOS/iPadOS/Android) | |
| Arcade | Mario Kart Arcade GP (2005, arcade) • Mario Kart Arcade GP 2 (2007, arcade) • Mario Kart Arcade GP DX (2013, arcade) • Mario Kart Arcade GP VR (2017, arcade) | ||
| Other | Mario Kart Live: Home Circuit (2020, Switch) | ||
| Ports | Mario Kart 8 Deluxe (2017, Switch) | ||
| Mario Party series | Main | Mario Party (1998, N64) • Mario Party 2 (1999, N64) • Mario Party 3 (2000, N64) • Mario Party 4 (2002, GCN) • Mario Party 5 (2003, GCN) • Mario Party 6 (2004, GCN) • Mario Party 7 (2005, GCN) • Mario Party 8 (2007, Wii) • Mario Party 9 (2012, Wii) • Mario Party 10 (2015, Wii U) • Super Mario Party (2018, Switch) • Mario Party Superstars (2021, Switch) • Super Mario Party Jamboree (2024, Switch) | |
| Handheld | Mario Party Advance (2005, GBA) • Mario Party DS (2007, DS) • Mario Party: Island Tour (2013, 3DS) • Mario Party: Star Rush (2016, 3DS) • Mario Party: The Top 100 (2017, 3DS) | ||
| Arcade | Super Mario Fushigi no Korokoro Party (2004, arcade) • Super Mario Fushigi no Korokoro Party 2 (2005, arcade) • Mario Party Fushigi no Korokoro Catcher (2009, arcade) • Mario Party Kurukuru Carnival (2012, arcade) • Mario Party Fushigi no Korokoro Catcher 2 (2013, arcade) • Mario Party Challenge World (2016, arcade) | ||
| Other | Mario Party 4 (2002, Adobe Flash) • Mario Party-e (2003, GBA) | ||
| Sports games | Mario Golf series | Golf (1984, NES) • Stroke & Match Golf (1984, VS. System) • Golf: Japan Course (1987, FDS) • Golf: U.S. Course (1987, FDS) • Golf (1989, GB) • NES Open Tournament Golf (1991, NES) • Mario Golf (1999, N64) • Mario Golf (1999, GBC) • Mobile Golf (2001, GBC) • Mario Golf: Toadstool Tour (2003, GCN) • Mario Golf: Advance Tour (2004, GBA) • Mario Golf: World Tour (2014, 3DS) • Mario Golf: Super Rush (2021, Switch) | |
| Mario Tennis series | Mario's Tennis (1995, VB) • Mario Tennis (2000, N64) • Mario Tennis (2000, GBC) • Mario Power Tennis (2004, GCN) • Mario Tennis: Power Tour (2005, GBA) (Bicep Pump [Unknown, Adobe Flash] • Reflex Rally [Unknown, Adobe Flash]) • Mario Tennis Open (2012, 3DS) • Mario Tennis: Ultra Smash (2015, Wii U) • Mario Tennis Aces (2018, Switch) | ||
| Super Mario Stadium series | Mario Superstar Baseball (2005, GCN) • Mario Super Sluggers (2008, Wii) | ||
| Mario Strikers series | Super Mario Strikers (2005, GCN) • Mario Strikers Charged (2007, Wii) • Mario Strikers: Battle League (2022, Switch) | ||
| Famicom Grand Prix series | Famicom Grand Prix: F1 Race (1987, FDS) • Famicom Grand Prix II: 3D Hot Rally (1988, FDS) | ||
| Other | Donkey Kong Hockey (1984, G&W) • Baseball (1989, GB) • Super Mario Race (1992, GwB) • Easy Racer (1996, SNES) • Mario Hoops 3-on-3 (2006, DS) • Mario Sports Mix (2010, Wii) • Mario Sports Superstars (2017, 3DS) • LEGO Super Mario Goal (2024, Sky Italia) | ||
| Canceled games | Super Mario Spikers (Wii) | ||
| Role-playing games | Paper Mario series | Paper Mario (2000, N64) • Paper Mario: The Thousand-Year Door (2004, GCN) • Super Paper Mario (2007, Wii) • Paper Mario: Sticker Star (2012, 3DS) • Paper Mario: Color Splash (2016, Wii U) • Paper Mario: The Origami King (2020, Switch) | |
| Mario & Luigi series | Mario & Luigi: Superstar Saga (2003, GBA) • Mario & Luigi: Partners in Time (2005, DS) • Mario & Luigi: Bowser's Inside Story (2009, DS) • Mario & Luigi: Dream Team (2013, 3DS) • Mario & Luigi: Paper Jam (2015, 3DS) • Mario & Luigi: Brothership (2024, Switch) | ||
| Other | Super Mario RPG: Legend of the Seven Stars (1996, SNES) | ||
| Remakes | Mario & Luigi: Superstar Saga + Bowser's Minions (2017, 3DS) • Mario & Luigi: Bowser's Inside Story + Bowser Jr.'s Journey (2018, 3DS) • Super Mario RPG (2023, Switch) • Paper Mario: The Thousand-Year Door (2024, Switch) | ||
| Dr. Mario series | Main | Dr. Mario (1990, NES/GB) • Dr. Mario 64 (2001, N64) • Dr. Mario Online Rx (2008, WiiWare) • Dr. Mario Express (2008, DSiWare) • Dr. Luigi (2013, Wii U) • Dr. Mario: Miracle Cure (2015, 3DS) • Dr. Mario World (2019, iOS/iPadOS/Android) | |
| Other | Dr. Mario (1993, GwB) | ||
| Remakes | Tetris & Dr. Mario (1994, SNES) • Nintendo Puzzle Collection (2003, GCN) • Dr. Mario & Puzzle League (2005, GBA) | ||
| Luigi's Mansion series | Main | Luigi's Mansion (2001, GCN) • Luigi's Mansion: Dark Moon (2013, 3DS) • Luigi's Mansion 3 (2019, Switch) | |
| Arcade | Luigi's Mansion Arcade (2015, arcade) | ||
| Remakes | Luigi's Mansion (2018, 3DS) • Luigi's Mansion 2 HD (2024, Switch) | ||
| Educational games | Mario Discovery Series | Mario is Missing! (1992, MS-DOS) • Mario is Missing! (1993, SNES) • Mario is Missing! (1993, NES) • Mario's Time Machine (1993, MS-DOS) • Mario's Time Machine (1993, SNES) • Mario's Time Machine (1994, NES) • Mario's Early Years! Fun with Letters (1993, MS-DOS/SNES) • Mario's Early Years! Fun with Numbers (1994, MS-DOS/SNES) • Mario's Early Years! Preschool Fun (1994, MS-DOS/SNES) | |
| Mario Teaches Typing series | Mario Teaches Typing (1991, MS-DOS) • Mario Teaches Typing 2 (1996, MS-DOS) | ||
| Other | Family BASIC (1984, FC) • Super Mario Bros. & Friends: When I Grow Up (1991, MS-DOS) | ||
| Ports | Mario's Early Years! CD-ROM Collection (1995, MS-DOS) | ||
| Art utilities | Mario Artist series | Mario Artist: Paint Studio (1999, N64DD) • Mario Artist: Talent Studio (2000, N64DD) • Mario Artist: Communication Kit (2000, N64DD) • Mario Artist: Polygon Studio (2000, N64DD) | |
| Other | I am a teacher: Super Mario Sweater (1986, FDS) • Super Mario Bros. Print World (1991, MS-DOS) • Mario Paint (1992, SNES) • Super Mario Collection Screen Saver (1997, PC) • Mario no Photopi (1998, N64) • Mario Family (2001, GBC) | ||
| Miscellaneous | Picross series | Mario's Picross (1995, GB) • Mario's Super Picross (1995, SFC) • Picross 2 (1996, GB) • Picross NP Vol. 6 (2000, SFC) | |
| LCD handhelds | Mario's Bombs Away (1983, G&W) • Mario's Egg Catch (1990, SMBW) • Luigi's Hammer Toss (1990, SMBW) • Princess Toadstool's Castle Run (1990, SMBW) • Mario the Juggler (1991, G&W) | ||
| Pinball | Pinball (1984, NES) • Super Mario Bros. (1992, arcade) • Super Mario Bros. Mushroom World (1992, arcade) • Mario Pinball Land (2004, GBA) | ||
| Arcade | Mario Roulette (1991, arcade) • Piccadilly Circus: Super Mario Bros. 3 (1991, arcade) • Mario World (1991, arcade) • Terebi Denwa: Super Mario World (1992, arcade) • Super Mario World Popcorn (1992, arcade) • Pika Pika Mario (1992, arcade) • Janken Fukubiki: Super Mario World (1992, arcade) • Koopa Taiji (1993, arcade) • Būbū Mario (1993, arcade) • Mario Undōkai (1993, arcade) • Super Mario World (1993, arcade) • Super Mario Kart: Doki Doki Race (1994, arcade) • Mario Bowl (1995, arcade) • Super Mario Attack (1996, arcade) • Super Donkey Kong 2 Swanky no Bonus Slot (1996, arcade) • Donkey Kong (1996, arcade) • Mario Kart 64 (1996, arcade) • Super Mario 64 (1997, arcade) • Super Mario Bros. 3 (Unknown, arcade) • Super Mario World (Unknown, arcade) • Guru Guru Mario (Unknown, arcade) • Dokidoki Mario Chance! (2003, arcade) • Super Mario Fushigi no Janjan Land (2003, arcade) • New Super Mario Bros. Wii Coin World (2011, arcade) | ||
| Browser | Mario Net Quest (1997, Adobe Shockwave) • Mario's Memory Madness (1998, Adobe Shockwave) • Crazy Counting (1999, Adobe Shockwave) • Dinky Rinky (1999, Adobe Shockwave) • Goodness Rakes (1999, Adobe Shockwave) • Melon Mayhem (1999, Adobe Shockwave) • Nomiss (1999, Adobe Shockwave) • Wario's Whack Attack (1998, Adobe Shockwave) • The Lab (The Bookshelf • The Drafting Table • PolterCue • Ask Madame Clairvoya) (2001, Adobe Flash) • Mario Trivia (Unknown, Adobe Flash) • Mario Memory (Unknown, Adobe Flash) • Virus Attack! (Unknown, Adobe Flash) • Mini-Mario Factory Game! (2004, Adobe Flash) • Bill Bounce (2004, Adobe Flash) • Mario Party 7 Bon Voyage Quiz (2005, Adobe Flash) • Super Mario Strikers (2005, Adobe Flash) • Dr. Mario Vitamin Toss (2005, Adobe Flash) • Bowser's Lair Hockey (2005, Adobe Flash) • Heads-Up (2005, Adobe Flash) • Parasol Fall (2005, Adobe Flash) • Dribble Skillz (2006, Adobe Flash) • Superstar Shootout (2006, Adobe Flash) • Cannon Kaos (2006, Adobe Flash) • 1-Up Hunt! (2006, Adobe Flash) • Super Paper Mario Memory Match (2007, Adobe Flash) • Are You Smarter Than Mario? (2008, Adobe Flash) • Play Nintendo activities (2014–present) | ||
| DSiWare applications | Mario Calculator (2009, DSiWare) • Mario Clock (2009, DSiWare) | ||
| Other games | Alleyway (1989, GB) • Yoshi's Safari (1993, SNES) • UNDAKE30 Same Game (1995, SFC) • Mario's Game Gallery (1995, MS-DOS) • Mario's FUNdamentals (1998, Windows) • Yakuman DS (2005, DS) | ||
| Tech demos | NDDEMO (2001, GCN) • Mario's Face (Unknown, DS) | ||
| Crossovers | Game & Watch Gallery series | Game & Watch Gallery (1997, GB) • Game & Watch Gallery 2 (1997, GB) • Game & Watch Gallery 3 (1999, GBC) • Game & Watch Gallery 4 (2002, GBA) | |
| Super Smash Bros. series | Super Smash Bros. (1999, N64) • Super Smash Bros. Melee (2001, GCN) • Super Smash Bros. Brawl (2008, Wii) • Super Smash Bros. for Nintendo 3DS (2014, 3DS) • Super Smash Bros. for Wii U (2014, Wii U) • Super Smash Bros. Ultimate (2018, Switch) | ||
| Itadaki Street series | Itadaki Street DS (2007, DS) • Fortune Street (2011, Wii) | ||
| Mario & Sonic series | Mario & Sonic at the Olympic Games (2007, Wii) • Mario & Sonic at the Olympic Games (2008, DS) • Mario & Sonic at the Olympic Winter Games (2009, Wii) • Mario & Sonic at the Olympic Winter Games (2009, DS) • Mario & Sonic at the London 2012 Olympic Games (2011, Wii) • Mario & Sonic at the London 2012 Olympic Games (2012, 3DS) • Mario & Sonic at the Sochi 2014 Olympic Winter Games (2013, Wii U) • Mario & Sonic at the Rio 2016 Olympic Games (2016, Wii U) • Mario & Sonic at the Rio 2016 Olympic Games (2016, 3DS) • Mario & Sonic at the Rio 2016 Olympic Games Arcade Edition (2016, arcade) • Mario & Sonic at the Olympic Games Tokyo 2020 (2019, Switch) • Mario & Sonic at the Olympic Games Tokyo 2020 - Arcade Edition (2020, arcade) | ||
| NES Remix series | Main | NES Remix (2013, Wii U) • NES Remix 2 (2014, Wii U) | |
| Reissues | NES Remix Pack (2014, Wii U) • Ultimate NES Remix (2014, 3DS) | ||
| Mario + Rabbids series | Mario + Rabbids Kingdom Battle (2017, Switch) • Mario + Rabbids Sparks of Hope (2022, Switch) | ||
| Other | Excitebike: Bun Bun Mario Battle (1997, SNES) • NBA Street V3 (2005, GCN) • Dance Dance Revolution: Mario Mix (2005, GCN) • SSX on Tour (2005, GCN) • Tetris DS (2006, DS) • Captain Rainbow (2008, Wii) • Art Style: PiCTOBiTS (2009, DSiWare) • Nintendo Land (2012, Wii U) • Puzzle & Dragons: Super Mario Bros. Edition (2015, 3DS) • Nintendo World Championships: NES Edition (2024, Switch) | ||
| Nintendo 3DS games | |
|---|---|
| Super Mario franchise | Super Mario 3D Land (2011) • Mario Kart 7 (2011) • Mario Tennis Open (2012) • New Super Mario Bros. 2 (2012) • Paper Mario: Sticker Star (2012) • Luigi's Mansion: Dark Moon (2013) • Mario & Luigi: Dream Team (2013) • Mario Party: Island Tour (2013) • Mario Golf: World Tour (2014) • Mario vs. Donkey Kong: Tipping Stars (2015) • Mario & Luigi: Paper Jam (2015) • Mario Party: Star Rush (2016) • Super Mario Maker for Nintendo 3DS (2016) • Mario Sports Superstars (2017) • Mario & Luigi: Superstar Saga + Bowser's Minions (2017) • Mario Party: The Top 100 (2017) • Captain Toad: Treasure Tracker (2018) • Luigi's Mansion (2018) • Mario & Luigi: Bowser's Inside Story + Bowser Jr.'s Journey (2018) |
| Donkey Kong franchise | Donkey Kong Country Returns 3D (2013) |
| Yoshi franchise | Yoshi's New Island (2014) • Poochy & Yoshi's Woolly World (2017) |
| Wario franchise | WarioWare Gold (2018) |
| Nintendo eShop | Club Nintendo Picross (2012) • Photos with Mario (2013) • Mario and Donkey Kong: Minis on the Move (2013) • Club Nintendo Picross+ (2014) • Nintendo Badge Arcade (2014) • Dr. Mario: Miracle Cure (2015) • Mini Mario & Friends: amiibo Challenge (2016) • Virtual Console games (2011–2016) |
| Crossovers | Mario & Sonic at the London 2012 Olympic Games (2012) • Sonic Lost World (2013) • Super Smash Bros. for Nintendo 3DS (2014) • Ultimate NES Remix (2014) • Puzzle & Dragons: Super Mario Bros. Edition (2015) • Rhythm Heaven Megamix (2015) • Skylanders: SuperChargers Racing (2015) • Mario & Sonic at the Rio 2016 Olympic Games (2016) • Minecraft: New Nintendo 3DS Edition (2017) |
| Home menu | AR Games • StreetPass Mii Plaza |
