Super Smash Bros. Melee: Difference between revisions
No edit summary |
|||
| (465 intermediate revisions by more than 100 users not shown) | |||
| Line 1: | Line 1: | ||
{{italic title}} | {{italic title}} | ||
{{FA}} | {{FA}} | ||
{{ | {{redirect|Melee|the weapon from [[Mario + Rabbids Kingdom Battle]]|[[List of weapons in Mario + Rabbids Kingdom Battle#Melee|List of weapons in Mario + Rabbids Kingdom Battle § Melee]]}} | ||
|image=[[File: | {{game infobox | ||
|developer=[[HAL | |image=[[File:SSBM cover art.jpg|250px]] | ||
|developer=[[HAL Laboratory]] | |||
|publisher=[[Nintendo]] | |publisher=[[Nintendo]] | ||
| | |release='''Original release:'''<br>{{flag list|Japan|November 21, 2001<ref name=SSBB>''Super Smash Bros. Brawl'' {{iw|smashwiki|Chronicle}}</ref>|USA|December 3, 2001<ref name=SSBB/>|Europe|May 24, 2002|Australia|May 31, 2002|South Korea|2002<ref>http://scanlines16.com/en/collection/smash-brothers-dx-kor/</ref>}} '''[[Player's Choice]]:'''<br>{{flag list|Europe|April 4, 2003|Australia|April 4, 2003|USA|2003}} | ||
|genre=[[ | |languages={{languages|en_us=y|es_es=y|fr_fr=y|de=y|it=y|jp=y}} | ||
|genre=[[Genre#Fighting|Fighting]] | |||
|modes=1-4 players simultaneous | |modes=1-4 players simultaneous | ||
|ratings={{ratings|esrb=T| | |ratings={{ratings|esrb=T|usk=6|acb=g8+|grac=All|classind=14|elspa=11+|pegi=3<!-- The Player's Choice edition was rated by PEGI. -->|sell=all}} | ||
|platforms=[[Nintendo GameCube]] | |platforms=[[Nintendo GameCube]] | ||
| | |format={{format|gcn=1}} | ||
|input={{input| | |input={{input|gcn=1}} | ||
|serials={{flag list|Japan|DOL-GALJ-JPN}} | |||
}} | }} | ||
'''''Super Smash Bros. Melee''''' | '''''{{iw|smashwiki|Super Smash Bros. Melee}}''''' is a [[Genre#Fighting|fighting]] game for the [[Nintendo GameCube]]. This is the second installment in the [[Super Smash Bros. (series)|''Super Smash Bros.'' series]] and is the sequel to ''[[Super Smash Bros.]]'' for the [[Nintendo 64]]. Various characters from [[Nintendo]]'s popular franchises battle on different stages, also taken from the Nintendo franchises. Many major characters of the [[Super Mario (franchise)|''Super Mario'' franchise]] make an appearance. The game's major focus is the multiplayer mode, while still offering a number of single-player modes. | ||
==Gameplay== | ==Gameplay== | ||
In ''Super Smash Bros. Melee'', up to four | In ''Super Smash Bros. Melee'', up to four {{iw|smashwiki|fighter}}s battle on a side-view {{iw|smashwiki|stage}} with invisible boundaries on each side. When a player hits these boundaries, the player is {{iw|smashwiki|KO|knocked out}}. ''Super Smash Bros. Melee'' and other games in the series rely on {{iw|smashwiki|damage}} percentage: Whenever a player is hit, they get a certain amount of percent damage. The maximum damage that can be dealt to a player is 999%. The higher the damage percentage is, the easier it is for the player to be knocked out. | ||
===General actions=== | ===General actions=== | ||
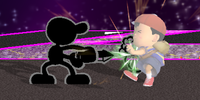
[[File:Mrgamewatchmovea. | [[File:Mrgamewatchmovea.png|left|thumb|[[Mr. Game & Watch]] uses his {{iw|smashwiki|neutral special move}} to attack Ness.]] | ||
Players move around on the stages using the GameCube | Players move around on the stages using the {{iw|smashwiki|GameCube controller}}'s {{iw|smashwiki|control stick}}, and can jump by pulling it up, or pressing the {{iw|smashwiki|X button|X}} or {{iw|smashwiki|Y button}}s. Characters can jump once, though some can perform a {{iw|smashwiki|double jump}} in the air. By moving the {{button|gcn|Stick}} down, the player can {{iw|smashwiki|Crouching|crouch}} or move a layer down on the stage. | ||
A basic attack is performed with the {{ | A basic attack is performed with the {{iw|smashwiki|A button}}. When moving the {{button|gcn|Stick}} into a direction, the player can attack upwards and downwards, or to either side. These attacks are usually weak and inflict minimal damage. When the {{button|gcn|A}} button is pressed repeatedly, the character performs a {{iw|smashwiki|natural combo}}, a fast sequence of weak attacks. When the {{button|gcn|Stick}} is titled fast and the {{button|gcn|A}} button is pressed in time, the player can perform a smash attack. These are very powerful, chargeable attacks, which cause a lot of damage. | ||
===Character special moves=== | ===Character special moves=== | ||
[[File:SuperJumpPunch.jpg|thumb | {{main-wiki|SmashWiki|Special move}} | ||
[[File:SuperJumpPunch.jpg|thumb|Mario using his [[Super Jump Punch]] special move.]] | |||
All characters have their own own set of {{iw|smashwiki|special move}}s, which are performed with the {{button|gcn|B}} button, known as a {{iw|smashwiki|neutral special move}}. Moving the {{button|gcn|Stick}} in a certain direction performs the {{iw|smashwiki|Side special move|side special}}, {{iw|smashwiki|Up special move|up special}}, or {{iw|smashwiki|down special move}} accordingly. The special moves are influenced by the character's individual personality, and have various effects, from doing more damage than with a normal attack, attacking from a distance, or repelling {{iw|smashwiki|projectile}}s. The up special move of most fighters involve moving into the air, making it possible to perform third jump as a {{iw|smashwiki|recovery}} to avoid touching the {{iw|smashwiki|blast line}} and being KO'd. | |||
===Item use=== | ===Item use=== | ||
[[File:Falcon parasol.jpg|thumb|left| | {{main-wiki|SmashWiki|Item}} | ||
[[File:Falcon parasol.jpg|thumb|left|Captain Falcon using a [[Parasol]].]] | |||
Items have various effects, and some trigger by themselves. They appear on the stage randomly, available for characters to use. Characters next to an item can pick it up by pressing {{button|gcn|A}}. Some items have effects that are activated upon interaction. Other items can be used as weapons, which are usable with the {{button|gcn|A}} button, or can be thrown by pressing it again with either the {{iw|smashwiki|Z button|Z}}, {{iw|smashwiki|L button|L}}, or {{iw|smashwiki|R button}}s. A character can take damage from being hit by an item. | |||
===Shielding=== | ===Shielding=== | ||
[[File:Kirby shield.jpg|thumb | [[File:Kirby shield.jpg|thumb|[[Kirby]] using his shield.]] | ||
When pressing the {{button|gcn|L}} or {{button|gcn|R}} triggers, or the {{button|gcn|Z}} button, the character's | When pressing the {{button|gcn|L}} or {{button|gcn|R}} triggers, or the {{button|gcn|Z}} button, the character's {{iw|smashwiki|shield}} is activated. These can prevent any kind of attack from a character, except {{iw|smashwiki|grab}}bing, or items. With precise timing, shield can reflect any items thrown and most projectile attacks. More powerful ones such as Samus' fully charged charge shot, however, will merely be absorbed by the shield. Yoshi's shield takes on the form of a [[Yoshi's Egg]], while all other fighters use a bubble-shaped shield. A shield has decreased power every time it is used, and when the shield breaks, the character will be unable to move for a certain period of time. The longer the player waits before using the shield, the stronger it becomes. The thickness of a shield depends on how hard the player presses on the {{button|gcn|L}} or {{button|gcn|R}} triggers, or {{button|gcn|Z}}. Thicker shields have a shorter duration but erode slower from damage, whilst thinner shields erode more from damage but significantly less from time duration. Light characters may even be knocked out by the shield break. | ||
===Grabbing and throwing=== | ===Grabbing and throwing=== | ||
Players are able to grab other characters and hold them | Players are able to grab other characters and hold them, to hit the character while they are incapable of either protecting themselves or fighting back. A character can be thrown in any direction, or smashed to the ground. Other characters can be damaged when a character is thrown at them. A character can be grabbed by pressing {{button|gcn|Z}}, or {{button|gcn|L}} and {{button|gcn|R}} in combination with {{button|gcn|A}}, if the player is next to them. The grabbed character can be attacked using the {{button|gcn|Z}} or {{button|gcn|A}} buttons, as well as thrown in a direction by tilting the {{button|gcn|Stick}}. It is possible to break free from a grab, unlike in ''Super Smash Bros.'' Players with less damage can escape from a grab more easily. | ||
===Other actions=== | ===Other actions=== | ||
In | In {{iw|smashwiki|Mode#1-P Mode|1-P Mode}}, the player can use the {{button|gcn|C}} to zoom the camera in or out. In {{iw|smashwiki|Versus Mode#In Super Smash Bros. Melee|VS mode}}, it is possible to move {{button|gcn|C}} in any direction, allowing the player to perform uncharged smash attacks easily. A character can {{iw|smashwiki|taunt}} if the player presses {{button|gcn|Padup}}. Some fighters can perform a {{iw|smashwiki|meteor smash}}, which sends opponents falling downwards, and the effectiveness of a meteor smash depends on how strong it is. | ||
==Fighting modes== | ==Fighting modes== | ||
{{main-wiki|SmashWiki|Mode}} | |||
{{multiple image | {{multiple image | ||
|align=right | |align=right | ||
| Line 57: | Line 57: | ||
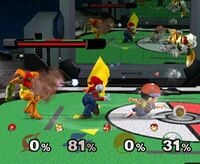
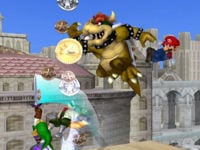
|footer=The Coin Battle mode. | |footer=The Coin Battle mode. | ||
}} | }} | ||
There are four standard fighting modes in ''Super Smash Bros. Melee''. These can be freely chosen in VS mode. The regular matches in | There are four standard fighting modes in ''Super Smash Bros. Melee''. These can be freely chosen in VS mode. The regular matches in 1-P mode only feature {{iw|smashwiki|Stock}} matches, but the {{iw|smashwiki|event match}}es have different {{iw|smashwiki|rules}}. Any match that ends in a tie between two or more players causes a {{iw|smashwiki|Sudden Death}}, a quick battle where the fighters (at 300% damage each) battle until only one of them remains. | ||
===Time=== | ===Time=== | ||
Players gain points by knocking out other players, and lose points by getting knocked out. When the | {{main-wiki|SmashWiki|Time}} | ||
Players gain points by knocking out other players, and lose points by getting knocked out. When the {{iw|smashwiki|match timer}} runs out, the player with the most points wins. The player can set the option of whether {{iw|smashwiki|self-destruct}}s cause players to lose zero, one, or two points. There is an unlockable function that displays the player's points during battle. Time is used by default in VS but rarely in 1-P Mode. | |||
===Stock=== | ===Stock=== | ||
Players have a set number of lives. | {{main-wiki|SmashWiki|Stock}} | ||
Players have a set number of lives. A character loses a life whenever they are knocked out. The last player standing wins. Setting a time limit is optional. The player with the most lives by the end is the winner. This mode is featured throughout {{iw|smashwiki|Classic Mode (SSBM)|Classic}} and {{iw|smashwiki|All-Star Mode|All-Star}}, both of which always have a set time limit. | |||
===Coin=== | ===Coin=== | ||
Players have to collect | {{iw|smashwiki|Coin Battle}} | ||
Players have to collect {{iw|smashwiki|Smash Coins and Bills}}, which appear by hitting an opponent. If a player gets knocked out, they will lose half of their coins. The player with the most coins by when times out is the winner. Coin mode is rarely used in the event matches of 1-P Mode, but is also available in VS matches. | |||
===Bonus=== | ===Bonus=== | ||
Players get points for their fighting style. There are 249 different kinds of bonus points | {{iw|smashwiki|Bonus (mode)}} | ||
Players get points for their fighting style. There are 249 different kinds of bonus points, listed {{iw|smashwiki|List of bonuses#Super Smash Bros. Melee|here}}. When the time limit has run out, the player with the most points wins. Most bonuses also have humorous names. | |||
==Playable characters== | ==Playable characters== | ||
{{multiple image | {{multiple image | ||
|align= | |align=right | ||
|direction=horizontal | |direction=horizontal | ||
|image1=CharacterSelect-SSBMelee.png | |image1=CharacterSelect-SSBMelee.png | ||
| Line 82: | Line 83: | ||
|image2=SSBM.jpg | |image2=SSBM.jpg | ||
|width2=200 | |width2=200 | ||
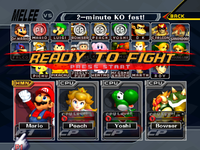
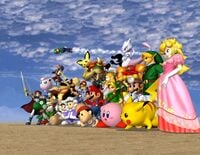
|caption2= | |caption2=Group art of the full cast, excluding Sheik. | ||
}} | }} | ||
{{main|List of fighters debuting in Super Smash Bros. Melee}} | |||
''Super Smash Bros. Melee'' contains a total of 25 playable {{iw|smashwiki|fighter}}s (26 including {{iw|smashwiki|Zelda (SSBM)|Zelda}}'s alter ego, {{iw|smashwiki|Sheik (SSBM)|Sheik}}); the 12 original characters return for this game, while 13 more have been added. 14 characters (15 including Sheik) are available by default, while 11 more can be unlocked. Seven of the fighters represent the ''[[Super Mario (franchise)|Super Mario]]'' franchise and its sub-universes, being [[Mario]], [[Luigi]], [[Princess Peach|Peach]], [[Bowser]], [[Dr. Mario]], [[Yoshi]], and [[Donkey Kong]]. | |||
Characters in ''italics'' are newcomers. | |||
{{br|right}} | |||
|} | |||
===Default characters=== | ===Default characters=== | ||
{| | {|class="wikitable"width=100% | ||
!rowspan=2 width=12%|Character | |||
!rowspan=2 width=12%|Series | |||
!rowspan=2 width=50%|Description | |||
!colspan=4 width=25%|Special moves | |||
|- | |- | ||
! | !Standard | ||
! | !Forward | ||
! | !Up | ||
! | !Down | ||
|- | |- | ||
|[[File:Ssbmmario.jpg|75px]]<br>{{iw|smashwiki|Mario (SSBM)|Mario}} | |||
|''{{iw|smashwiki|Mario (universe)|Super Mario}}'' | |||
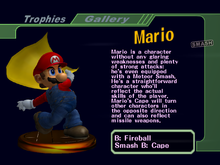
|[[Mario]] is a balanced character with a variety of moves. He attacks quickly, but {{iw|smashwiki|jump}}s low and has average {{iw|smashwiki|recovery}}. His backwards {{iw|smashwiki|throw}} can throw almost farther than any other character's throws. His [[Cape]] helps deflect oncoming {{iw|smashwiki|attack}}s and shoots whatever is being shot at him back to his opponent. | |||
| | |{{iw|smashwiki|Fireball}} ([[Fireball|article]]) | ||
|[[Mario | |{{iw|smashwiki|Cape}} ([[Cape|article]]) | ||
|{{iw|smashwiki|Super Jump Punch}} ([[Super Jump Punch|article]]) | |||
|{{iw|smashwiki|Mario Tornado}} ([[Mario Tornado|article]]) | |||
|- | |- | ||
|[[Mario | |[[File:Ssbmbowser.jpg|75px]]<br>''{{iw|smashwiki|Bowser (SSBM)|Bowser}}'' | ||
|''Super Mario'' | |||
|[[Bowser]] is the {{iw|smashwiki|weight|heaviest}} and one of the slowest characters. He has powerful attacks, and he can use his weight to crush whomever he {{iw|smashwiki|grab}}s. Bowser is one of the first villains to be playable in the series. His Fire Breath move burns his enemies down. | |||
|{{iw|smashwiki|Fire Breath}} ([[Fire Breath|article]]) | |||
|{{iw|smashwiki|Koopa Klaw}} ([[Koopa Klaw|article]]) | |||
|{{iw|smashwiki|Whirling Fortress}} ([[Whirling Fortress|article]]) | |||
|{{iw|smashwiki|Bowser Bomb}} ([[Bowser Bomb (move)|article]]) | |||
|- | |- | ||
|[[Mario | |[[File:Ssbmpeach.jpg|75px]]<br>''{{iw|smashwiki|Peach (SSBM)|Peach}}'' | ||
|''Super Mario'' | |||
|[[Princess Peach|Peach]] has a unique {{iw|smashwiki|recovery}} that makes her slowly [[Floating Jump|float]] in the desired direction briefly. For her {{iw|smashwiki|forward smash}}, Peach swings either a golf club, a tennis racket, or a frying pan. | |||
|{{iw|smashwiki|Toad (move)|Toad}} ([[Toad (move)|article]]) | |||
|{{iw|smashwiki|Peach Bomber}} ([[Peach Bomber|article]]) | |||
|{{iw|smashwiki|Peach Parasol}} ([[Peach Parasol (move)|article]]) | |||
|{{iw|smashwiki|Vegetable}} ([[Vegetable (move)|article]]) | |||
|- | |- | ||
|[[ | |[[File:Ssbmyoshi.jpg|75px]]<br>{{iw|smashwiki|Yoshi (SSBM)|Yoshi}} | ||
|''{{iw|smashwiki|Yoshi (universe)|Yoshi}}'' | |||
|[[Yoshi]] is a heavy fighter with average {{iw|smashwiki|Dashing|speed}}, though he is rather weak, unlike other heavyweights. Yoshi uniquely uses a [[Yoshi's Egg]] for {{iw|smashwiki|shield}}ing, but he is also the only fighter who cannot jump out of shielding. Yoshi lacks a third jump, but he can jump very high. | |||
|{{iw|smashwiki|Egg Lay}} ([[Egg Lay|article]]) | |||
|{{iw|smashwiki|Egg Roll}} ([[Egg Roll (move)|article]]) | |||
|{{iw|smashwiki|Egg Throw}} ([[Egg Throw|article]]) | |||
|{{iw|smashwiki|Yoshi Bomb}} ([[Yoshi Bomb|article]]) | |||
|- | |- | ||
|[[File:Ssbmdonkeykong.jpg|75px]]<br>{{iw|smashwiki|Donkey Kong (SSBM)|Donkey Kong}} | |||
|''{{iw|smashwiki|Donkey Kong (universe)|Donkey Kong}}'' | |||
|[[Donkey Kong]] is a strong, heavy, and agile character. When grabbing opponents, he can carry them for a short distance before throwing them. | |||
| | |{{iw|smashwiki|Giant Punch}} ([[Giant Punch|article]]) | ||
|[[ | |{{iw|smashwiki|Headbutt}} ([[Headbutt|article]]) | ||
|{{iw|smashwiki|Spinning Kong}} ([[Spinning Kong|article]]) | |||
|{{iw|smashwiki|Hand Slap}} ([[Hand Slap|article]]) | |||
|- | |- | ||
|[[ | |[[File:Captain Falcon Melee art.jpg|75px]]<br>{{iw|smashwiki|Captain Falcon (SSBM)|Captain Falcon}} | ||
|''{{iw|fzerowiki|F-Zero (series)|F-Zero}}'' | |||
|[[List of fighters debuting in Super Smash Bros.#Captain Falcon|Captain Falcon]] can {{iw|smashwiki|dashing|run faster}} than any other character. His attacks are quick, and a few are particularly powerful, particularly his {{iw|smashwiki|Knee Smash}}, {{iw|smashwiki|up smash}}, and Falcon Punch. | |||
|{{iw|smashwiki|Falcon Punch}} | |||
|{{iw|smashwiki|Raptor Boost}} | |||
|{{iw|smashwiki|Falcon Dive}} | |||
|{{iw|smashwiki|Falcon Kick}} | |||
|- | |- | ||
|[[ | |[[File:MeleeFox.jpg|75px]]<br>{{iw|smashwiki|Fox}} | ||
|''{{iw|lylatwiki|Star Fox (series)|Star Fox}}'' | |||
|[[Fox]] is a fast and strong character. He falls very fast, and his {{iw|smashwiki|List of firearms#Blaster|Blaster}} can {{iw|smashwiki|damage}} enemies without stopping them. | |||
|{{iw|smashwiki|Blaster (Fox)|Blaster}} | |||
|{{iw|smashwiki|Fox Illusion}} | |||
|{{iw|smashwiki|Fire Fox}} | |||
|{{iw|smashwiki|Reflector (Fox)|Reflector}} | |||
|- | |- | ||
|[[ | |[[File:Ssbmiceclimbers.jpg|75px]]<br>''{{iw|smashwiki|Ice Climbers (SSBM)|Ice Climbers}}'' | ||
|''{{iw|smashwiki|Ice Climber (universe)|Ice Climber}}'' | |||
|The [[List of fighters debuting in Super Smash Bros. Melee#Ice Climbers|Ice Climbers]] fight as a pair. The player takes control of a Ice Climber and a {{iw|smashwiki|Artificial intelligence|computer player}} of the partner, who generally follows the player's {{iw|smashwiki|move}}s. By changing colors, the player can choose between controlling Popo or Nana. The Ice Climbers have a {{iw|smashwiki|range|low reach}}. A few of their attacks are powerful, as well as their grab. | |||
|{{iw|smashwiki|Ice Shot}} | |||
|{{iw|smashwiki|Squall Hammer}} | |||
|{{iw|smashwiki|Belay}} | |||
|{{iw|smashwiki|Blizzard}} | |||
|- | |- | ||
|[[File:Ssbmness.jpg|75px]]<br>{{iw|smashwiki|Ness (SSBM)|Ness}} | |||
|''{{iw|wikibound|EarthBound (series)|EarthBound}}'' | |||
|[[List of fighters debuting in Super Smash Bros.#Ness|Ness]] is a slow character who relies on his {{iw|smashwiki|PK|PSI attacks}}. He uses a baseball bat and a yo-yo in his {{iw|smashwiki|smash attack}}s. His recovery uniquely involves directing the ball of lightning to hit himself, catapulting himself towards the stage. He also uses his PSI Magnet to recover damage with certain enemy projectiles. | |||
| | |{{iw|smashwiki|PK Flash}} | ||
| | |{{iw|smashwiki|PK Fire}} | ||
|{{iw|smashwiki|PK Thunder}} | |||
|{{iw|smashwiki|PSI Magnet}} | |||
|- | |- | ||
|[[ | |[[File:Ssbmkirby.jpg|75px]]<br>{{iw|smashwiki|Kirby (SSBM)|Kirby}} | ||
|''{{iw|wikirby|Kirby (series)|Kirby}}'' | |||
|[[Kirby]] is a light and fairly slow character with weak attacks. He can jump in midair five times. Kirby can swallow a fighter to copy their {{iw|smashwiki|neutral special move}}. | |||
|{{iw|smashwiki|Inhale|Swallow}} | |||
|{{iw|smashwiki|Hammer (move)|Hammer}} | |||
|{{iw|smashwiki|Final Cutter}} | |||
|{{iw|smashwiki|Stone}} | |||
|- | |- | ||
|[[ | |[[File:MeleeSamus.jpg|75px]]<br>{{iw|smashwiki|Samus}} | ||
|''{{iw|metroidwiki|Metroid (series)|Metroid}}'' | |||
|[[Samus]] is a heavy character with powerful attacks. Her {{iw|smashwiki|Grapple Beam}} is slow, but can grab characters from farther distances. Samus can {{iw|smashwiki|charge}} a shot, which becomes more powerful the longer it is charged. | |||
|{{iw|smashwiki|Charge Shot}} | |||
|{{iw|smashwiki|Missile}} | |||
|{{iw|smashwiki|Screw Attack}} | |||
|{{iw|smashwiki|Bomb (Samus)|Bomb}} | |||
|- | |- | ||
|[[ | |[[File:Zeldaart.jpg|75px]]<br>''{{iw|smashwiki|Zelda (SSBM)|Zelda}}'' | ||
|''{{iw|zeldawiki|The Legend of Zelda (Series)|The Legend of Zelda}}'' | |||
|[[List of fighters debuting in Super Smash Bros. Melee#Zelda|Zelda]] is a slow-moving character. Her attacks are fairly powerful, but the strongest attacks have a weak range. Zelda can transform herself into her alter-ego, {{iw|zeldawiki|Sheik}}. | |||
|{{iw|smashwiki|Nayru's Love}} | |||
|{{iw|smashwiki|Din's Fire}} | |||
|{{iw|smashwiki|Farore's Wind}} | |||
|{{iw|smashwiki|Transform}} | |||
|- | |- | ||
|[[File:MeleeShiek.jpg|75px]]<br>''{{iw|smashwiki|Sheik (SSBM)|Sheik}}'' | |||
|''The Legend of Zelda'' | |||
|[[List of fighters debuting in Super Smash Bros. Melee#Sheik|Sheik]] is {{iw|zeldawiki|Princess Zelda|Zelda}}'s alter-ego. Sheik moves faster compared to Zelda, attacks {{iw|smashwiki|rapid}}ly and can perform {{iw|smashwiki|combo}}s effectively, but lacks many powerful moves. Zelda can transform into Sheik at any point during the match and vice versa, though the player can be Sheik at the start of the battle by holding down {{button|gcn|A}} on the controller. | |||
| | |{{iw|smashwiki|Needle Storm}} | ||
| | |{{iw|smashwiki|Chain}} | ||
|{{iw|smashwiki|Vanish}} | |||
|{{iw|smashwiki|Transform}} | |||
|- | |- | ||
|[[ | |[[File:MeleeLink.jpg|75px]]<br>{{iw|smashwiki|Link (SSBM)|Link}} | ||
|''The Legend of Zelda'' | |||
|[[Link]] is a character of high {{iw|smashwiki|weight}}, medium strength, and slow movement. Many of his attacks involve the use of his {{iw|smashwiki|List of swords#Master Sword|sword}}. | |||
|{{iw|smashwiki|Hero's Bow|Bow}} | |||
|{{iw|smashwiki|Boomerang}} | |||
|{{iw|smashwiki|Spin Attack}} | |||
|{{iw|smashwiki|Bomb (Link)|Bomb}} | |||
|- | |- | ||
|[[ | |[[File:MeleePikachu.jpg|75px]]<br>{{iw|smashwiki|Pikachu (SSBM)|Pikachu}} | ||
|''{{iw|bulbapedia|Pokémon}}'' | |||
|[[List of fighters debuting in Super Smash Bros.#Pikachu|Pikachu]] is fast and light. It uses its {{iw|bulbapedia|Electric (type)|electric}} attacks to damage opponents. Pikachu's {{iw|smashwiki|recovery}} can uniquely be used twice, provided that the second recovery is in a different direction. | |||
|{{iw|smashwiki|Thunder Jolt}} | |||
|{{iw|smashwiki|Skull Bash}} | |||
|{{iw|smashwiki|Quick Attack}} | |||
|{{iw|smashwiki|Thunder (Pokémon)|Thunder}} | |||
|} | |||
===Unlockable characters=== | |||
{|class="wikitable"width=100% | |||
|- | |- | ||
| | !rowspan=2 width=12%|Character | ||
!rowspan=2 width=12%|Series | |||
!rowspan=2 width=39%|Description | |||
!rowspan=2 width=20%|How to unlock | |||
!colspan=4 width=25%|Special moves | |||
|- | |- | ||
! | !Standard | ||
! | !Forward | ||
!Up | |||
!Down | |||
|- | |- | ||
|[[ | |[[File:MeleeJigglypuff.jpg|75px]]<br>{{iw|smashwiki|Jigglypuff (SSBM)|Jigglypuff}} | ||
|''{{iw|bulbapedia|Pokémon}}'' | |||
|[[List of fighters debuting in Super Smash Bros.#Jigglypuff|Jigglypuff]] is {{iw|smashwiki|Weight|light}} and has a few powerful attacks. It can jump five times in mid-air and has faster {{iw|smashwiki|air speed}} than the other characters, whilst having the slowest {{iw|smashwiki|Dashing|movement on ground}}. | |||
| | |||
*Clear {{iw|smashwiki|Classic Mode (SSBM)|Classic}} or {{iw|smashwiki|Adventure (SSBM)|Adventure}} with any character | |||
*Play 50 {{iw|smashwiki|Versus Mode#In Super Smash Bros. Melee|Melee}} matches | |||
|{{iw|smashwiki|Rollout}} | |||
|{{iw|smashwiki|Pound}} | |||
|{{iw|smashwiki|Sing}} | |||
|{{iw|smashwiki|Rest}} | |||
|- | |- | ||
|[[ | |[[File:MeleeDr.Mario.jpg|75px]]<br>''{{iw|smashwiki|Dr. Mario (SSBM)|Dr. Mario}}'' | ||
|''{{iw|smashwiki|Mario (universe)|Super Mario}}'' | |||
|[[Dr. Mario]] is very similar to [[Mario]]. His attacks have different effects (usually {{iw|smashwiki|electric}} instead of {{iw|smashwiki|flame}}) but function like {{iw|smashwiki|Mario (SSBM)|Mario}}'s. Most of Dr. Mario's attacks are stronger than Mario's, though he moves slower. | |||
| | |||
*Clear Classic or Adventure mode with Mario without {{iw|smashwiki|continue}}s | |||
*Play 100 Melee matches | |||
|{{iw|smashwiki|Megavitamins}} ([[Capsule|article]]) | |||
|{{iw|smashwiki|Super Sheet}} ([[Super Sheet|article]]) | |||
|{{iw|smashwiki|Super Jump Punch}} ([[Super Jump Punch|article]]) | |||
|{{iw|smashwiki|Dr. Tornado}} ([[Dr. Tornado|article]]) | |||
|- | |- | ||
|[[ | |[[File:Pichuart.jpg|75px]]<br>''{{iw|smashwiki|Pichu (SSBM)|Pichu}}'' | ||
|''Pokémon'' | |||
|[[List of fighters debuting in Super Smash Bros. Melee#Pichu|Pichu]] has moves that are similar to {{iw|smashwiki|Pikachu (SSBM)|Pikachu}}'s. Pichu is the lighest fighter. Like Pikachu, it moves and attacks quickly. Whenever it uses an electric attack, Pichu will inflict damage to itself. | |||
| | |||
*Complete {{iw|smashwiki|Event 37: Legendary Pokémon}} | |||
*Play 200 Melee matches | |||
|{{iw|smashwiki|Thunder Jolt}} | |||
|{{iw|smashwiki|Skull Bash}} | |||
|{{iw|smashwiki|Agility}} | |||
|{{iw|smashwiki|Thunder (Pokémon)|Thunder}} | |||
|- | |- | ||
|[[File:Falco Melee art.jpg|75px]]<br>''{{iw|smashwiki|Falco (SSBM)|Falco}}'' | |||
|''{{iw|smashwiki|Star Fox (universe)|Star Fox}}'' | |||
|[[List of fighters debuting in Super Smash Bros. Melee#Falco|Falco]]'s moves are similar to Fox's. Falco is slower than Fox, though he jumps higher and has a longer {{iw|smashwiki|reach}}. Falco's Blaster fires more slowly, but it can stun enemies. | |||
| | | | ||
| | *Clear 100-Man Melee | ||
*Play 300 Melee matches | |||
|{{iw|smashwiki|Blaster (Falco)|Blaster}} | |||
|{{iw|smashwiki|Falco Phantasm}} | |||
|{{iw|smashwiki|Fire Bird}} | |||
|{{iw|smashwiki|Reflector (Falco)|Reflector}} | |||
|- | |- | ||
|[[ | |[[File:MeleeMarth.jpg|75px]]<br>''{{iw|smashwiki|Marth (SSBM)|Marth}}'' | ||
|''{{iw|fireemblem|Fire Emblem (series)|Fire Emblem}}'' | |||
|[[List of fighters debuting in Super Smash Bros. Melee#Marth|Marth]] is a fast character with average strength and {{iw|smashwiki|weight}}. He uses a {{iw|smashwiki|List of swords#Falchion|sword}} to attack, and he has one of the longest reaches compared to other fighters. Marth is known for his very good air attacks that can easily string together. Marth's attacks are strongest at the tip of the sword. | |||
| | |||
*Use the fourteen default characters in either Classic or Adventure modes, or Vs. Melee matches. | |||
*Play 400 Melee matches | |||
|{{iw|smashwiki|Shield Breaker}} | |||
|{{iw|smashwiki|Dancing Blade}} | |||
|{{iw|smashwiki|Dolphin Slash}} | |||
|{{iw|smashwiki|Counter}} | |||
|- | |- | ||
|[[ | |[[File:Young Link.jpg|75px]]<br>''{{iw|smashwiki|Young Link (SSBM)|Young Link}}'' | ||
| | |''The Legend of Zelda'' | ||
|[[ | |[[Link#Super Smash Bros. Melee|Young Link]]'s moves are similar to Link's. Compared to Link, Young Link is weaker, lighter, and he is faster. He also has the ability to [[Wall Jump]]. | ||
| | |||
*Clear Classic or Adventure mode with ten characters, including Link and Zelda/Sheik | |||
*Play 500 Melee matches | |||
|{{iw|smashwiki|Fire Bow}} | |||
|{{iw|smashwiki|Boomerang}} | |||
|{{iw|smashwiki|Spin Attack}} | |||
|{{iw|smashwiki|Bomb (Link)|Bomb}} | |||
|- | |- | ||
|[[File:GanondorfMelee.jpg|75px]]<br>''{{iw|smashwiki|Ganondorf (SSBM)|Ganondorf}}'' | |||
|''The Legend of Zelda'' | |||
|[[List of fighters debuting in Super Smash Bros. Melee#Ganondorf|Ganondorf]]'s attacks are similar to {{iw|smashwiki|Captain Falcon (SSBM)|Captain Falcon}}'s. However, Ganondorf is very slow and fairly {{iw|smashwiki|Weight|heavy}}, and his attacks inflict the most {{iw|smashwiki|knockback}}. Ganondorf has a unique special attack when pressing {{button|gcn|A}} and moving {{button|gcn|Stick}} upwards, different from a {{iw|smashwiki|smash attack}}. | |||
| | | | ||
| | *Complete {{iw|smashwiki|Event 29: Triforce Gathering}} | ||
*Play 600 Melee matches | |||
|{{iw|smashwiki|Warlock Punch}} | |||
|{{iw|smashwiki|Gerudo Dragon}} | |||
|{{iw|smashwiki|Dark Dive}} | |||
|{{iw|smashwiki|Wizard's Foot}} | |||
|- | |- | ||
|[[ | |[[File:Mewtwo.jpg|75px]]<br>''{{iw|smashwiki|Mewtwo (SSBM)|Mewtwo}}'' | ||
|''Pokémon'' | |||
|[[List of fighters debuting in Super Smash Bros. Melee#Mewtwo|Mewtwo]] is a slow character with strong grab and some powerful {{iw|smashwiki|throw}}s. Mewtwo's low weight is attributed to how it hovers above ground. | |||
| | |||
*Play a combined total of 20 hours of Melee matches | |||
*Play 700 Melee matches | |||
|{{iw|smashwiki|Shadow Ball}} | |||
|{{iw|smashwiki|Confusion}} | |||
|{{iw|smashwiki|Teleport}} | |||
|{{iw|smashwiki|Disable}} | |||
|- | |- | ||
|[[ | |[[File:Ssbmluigi.jpg|75px]]<br>{{iw|smashwiki|Luigi (SSBM)|Luigi}} | ||
|''Super Mario'' | |||
|[[Luigi]] is a character with average weight and speed and strength that is above average. His moves have many similarities to Mario's. He jumps high, but has slow {{iw|smashwiki|air speed}} and low {{iw|smashwiki|traction}}. | |||
| | |||
*Finish the first stage of Adventure mode with ##:#2:## on the timer | |||
*Play 800 Melee matches | |||
|{{iw|smashwiki|Fireball}} ([[Green Fireball|article]]) | |||
|{{iw|smashwiki|Green Missile}} ([[Green Missile|article]]) | |||
|{{iw|smashwiki|Super Jump Punch}} ([[Super Jump Punch|article]]) | |||
|{{iw|smashwiki|Luigi Cyclone}} ([[Luigi Cyclone|article]]) | |||
|- | |- | ||
|[[ | |[[File:Roy1.jpg|75px]]<br>''{{iw|smashwiki|Roy (SSBM)|Roy}}'' | ||
|''Fire Emblem'' | |||
|[[List of fighters debuting in Super Smash Bros. Melee#Roy|Roy]] is similar to Marth. Compared to Marth, Roy's attacks are strongest at the base of his sword, and his aerial attacks inflict low damage. | |||
| | |||
*Complete Classic or Adventure mode with Marth without continuing | |||
*Play 900 Melee matches | |||
|{{iw|smashwiki|Flare Blade}} | |||
|{{iw|smashwiki|Double-Edge Dance}} | |||
|{{iw|smashwiki|Blazer}} | |||
|{{iw|smashwiki|Counter}} | |||
|- | |- | ||
|[[File:Mr.GameandWatchart.jpg|75px]]<br>''{{iw|smashwiki|Mr. Game & Watch (SSBM)|Mr. Game & Watch}}'' | |||
|{{iw|smashwiki|Game & Watch (universe)|Game & Watch}} | |||
| | |All of [[Mr. Game & Watch]]'s attacks are based on different [[Game & Watch]] games. His speed and strength are average, but his {{iw|smashwiki|weight}} is low due to his 2D appearance. | ||
| | | | ||
*Clear Classic, Adventure or Target Smash with every other character | |||
*Play 1,000 Melee matches | |||
|{{iw|smashwiki|Chef}} | |||
|{{iw|smashwiki|Judge}} | |||
|{{iw|smashwiki|Fire}} | |||
|{{iw|smashwiki|Oil Panic}} | |||
|} | |||
==Stages== | |||
There are 29 selectable stages in total, eighteen of which are available by default, while the other eleven are unlockable. Three of these stages return from ''[[Super Smash Bros.]]'' | |||
===Default stages=== | |||
{|class="wikitable sortable"style="text-align:center" | |||
|- | |- | ||
| | !width=17%|Stage | ||
!width=83%|Description | |||
|- | |- | ||
|[[ | |[[File:Ssbm-nd-iceclimbersstage.jpg|100px]]<br>{{iw|smashwiki|Icicle Mountain| Infinite Glacier:<br>Icicle Mountain}} | ||
|align=left|Icicle Mountain is a stage that scrolls up and down at different speeds. It has many different small platforms to jump on, similarly as in ''{{iw|nwiki|Ice Climber}}''. | |||
|- | |- | ||
|[[ | |[[File:Princess Peach's Castle Melee.png|100px]]<br>{{iw|smashwiki|Princess Peach's Castle|Mushroom Kingdom:<br>Princess Peach's Castle}} | ||
|align=left|[[Princess Peach's Castle (Super Smash Bros. Melee)|Princess Peach's Castle]] takes place on the roof of the [[Peach's Castle|castle of the same name]] Some hovering {{iw|smashwiki|platform}}s appear on either side of the small tower. Switches can be activated, making [[? Block]]s appear. A [[Bomber Bill|Banzai Bill]] is sometimes launched into the castle, causing an explosion. | |||
|- | |- | ||
|[[File:Kongo Jungle Melee.png|100px]]<br>{{iw|smashwiki|Kongo Falls|DK Island:<br>Kongo Jungle}} | |||
|align=left|[[Kongo Falls|Kongo Jungle]] is set on logs over a waterfall. A small platform also appears to the right, and sometimes logs are falling down the waterfall, creating temporary platforms. Below the stage is a [[Barrel Cannon]] which shoots out characters in a random direction when they fall into it. | |||
|- | |- | ||
|[[ | |[[File:Great Bay Melee.png|100px]]<br>{{iw|smashwiki|Great Bay| Termina:<br>Great Bay}} | ||
|align=left|The Great Bay stage, based on ''{{iw|zeldawiki|The Legend of Zelda: Majora's Mask}}'', has two platforms fixed in the water and a swimming stone. The {{iw|zeldawiki|Giant Turtle}} sometimes rises from the water, and it can be used as an additional platform until sinking back into the water. {{iw|smashwiki|Tingle}} is also seen on the stage with a giant balloon, and is forming another platform. | |||
|- | |- | ||
|[[ | |[[File:Yoshi's Story Melee.png|100px]]<br>{{iw|smashwiki|Yoshi's Story|Yoshi's Island:<br>Yoshi's Story}} | ||
|align=left|[[Yoshi's Story (stage)|Yoshi's Story]] features elements of the [[Yoshi's Story|game of the same name]]. [[Yoshi's Island (location)|Yoshi's Island]] is in the center, and three smaller platforms are hovering above it. It also has a cloud moving below it to catch falling characters. [[Fly Guy]]s fly by occasionally, carrying {{iw|smashwiki|Food}}. | |||
|- | |- | ||
|[[ | |[[File:Fountain of Dreams Melee.png|100px]]<br>{{iw|smashwiki|Fountain of Dreams|Dream Land:<br>Fountain of Dreams}} | ||
|align=left|The Fountain of Dreams stage, from the {{iw|wikirby|Kirby (series)|''Kirby'' series}} has a fountain that forms a big platform in the middle with three smaller hovering platforms above it, with its height varying. | |||
|- | |- | ||
|[[File:Zelda'sCorneria.png|100px]]<br>{{iw|smashwiki|Corneria| Lylat System:<br>Corneria}} | |||
|align=left|The Corneria stage, from the {{iw|lylatwiki|Star Fox (series)|''Star Fox'' series}}, takes place on the {{iw|smashwiki|Great Fox}}. {{iw|smashwiki|Arwing}}s fly by at certain intervals to shoot at the combatants. | |||
| | |||
| | |||
| | |||
|- | |- | ||
|[[ | |[[File:Melee Rainbow Cruise.jpg|100px]]<br>{{iw|smashwiki|Rainbow Cruise|Mushroom Kingdom:<br>Rainbow Cruise}} | ||
|align=left|[[Rainbow Cruise]] (NTSC)/Rainbow Ride (PAL) is a moving stage with different environments based on [[Rainbow Ride]] from ''[[Super Mario 64]]''. It starts on a floating ship, which falls down after a certain time, and players have to move on over the various platforms. | |||
|- | |- | ||
|[[ | |[[File:Jungle Japes Melee.png|100px]]<br>{{iw|smashwiki|Jungle Japes|DK Island:<br>Jungle Japes}} | ||
|align=left|[[Jungle Japes (stage)|Jungle Japes]] is set on a river, with three ledges made of wood with a house and a toilet house found on them. The players fight on these platforms. [[Klaptrap]]s jump out of the water occasionally, damaging fighters on contact. | |||
|- | |- | ||
|[[ | |[[File:Hyruletemple.jpg|100px]]<br>{{iw|smashwiki|Temple|Hyrule:<br>Temple}} | ||
|align=left|The Temple is the largest stage. It is based mainly on the {{iw|zeldawiki|Palace}}s in ''{{iw|zeldawiki|Zelda II: The Adventure of Link}}''. The stage has several different platforms and a tunnel system. | |||
|- | |- | ||
|[[File:Melee Yoshi's Island.jpg|100px]]<br>{{iw|smashwiki|Yoshi's Island (SSBM)|Yoshi's Island:<br>Yoshi's Island}} | |||
|align=left|[[Yoshi's Island (Super Smash Bros. Melee)|Yoshi's Island]] features a setting based on ''{{iw|smashwiki|Super Mario World}}''. The area is enclosed by a slope on the one side and a [[Warp Pipe]] on the other. In the middle, there is a hole with [[Rotating Block]]s above it, and two groups of Rotating Blocks float on the stage to serve as additional platforms. | |||
|- | |- | ||
|[[ | |[[File:Greengreens.jpg|100px]]<br>{{iw|smashwiki|Green Greens|Dream Land:<br>Green Greens}} | ||
|align=left|Green Greens, a stage from the ''Kirby'' series, consists of three separated grass platforms. {{iw|smashwiki|Whispy Woods}} sometimes tries to blow away the characters, and {{iw|smashwiki|Apple}}s sometimes fall from him. There are {{iw|smashwiki|Block}}s and {{iw|smashwiki|Block#Bomb Blocks|Bomb Block}}s that commonly fall from the sky in between the platforms. | |||
|- | |- | ||
|[[ | |[[File:Venom.jpg|100px]]<br>{{iw|smashwiki|Venom|Lylat System:<br>Venom}} | ||
|align=left|Venom is similar to Corneria, aside from taking place in the {{iw|lylatwiki|Venom|setting of the same name}} and having the Great Fox face frontward while the characters fight on it. | |||
|- | |- | ||
|[[ | |[[File:SSBB Brinstar Stage.png|100px]]<br>{{iw|smashwiki|Brinstar|Planet Zebes:<br>Brinstar}} | ||
|align=left|Brinstar consists of several platforms that are held together by organic material or other objects. These connections can be destroyed, causing some of the platforms to hover in the air. Acid sometimes rises from below, burning the characters on contact but also restoring broken connections. | |||
|- | |- | ||
|[[File:Melee Onett.jpg|100px]]<br>{{iw|smashwiki|Onett|Eagleland:<br>Onett}} | |||
|align=left|In Onett from ''{{iw|wikibound|EarthBound}}'', the battle takes place on a few houses in the village and a nearby tree. Cars drive by and hit characters when they do not avoid them. There are warning signs announcing the cars. The platforms of the drug store in the middle can collapse, but restore themselves after a certain time. | |||
| | |||
|- | |- | ||
|[[ | |[[File:Mute City.jpg|100px]]<br>{{iw|smashwiki|Mute City|F-Zero Grand Prix:<br>Mute City}} | ||
|align=left|Mute City takes place on a large ''F-Zero'' race track. There is a small platform hovering in the middle, and it goes down at intervals, exposing the road. {{iw|smashwiki|F-Zero Racers}} will sometimes race into the players, but can also be destroyed. | |||
|- | |- | ||
|[[ | |[[File:Melee Pokemon Stadium.jpg|100px]]<br>{{iw|smashwiki|Pokémon Stadium|Kanto:<br>Pokémon Stadium}} | ||
|align=left|The Pokémon Stadium looks like a simple stage with two floating platforms. The stage will change at regular intervals into one of four different terrains: {{iw|bulbapedia|Water (type)|Water}}, {{iw|bulbapedia|Fire (type)|Fire}}, {{iw|bulbapedia|Rock (type)|Rock}}, and {{iw|bulbapedia|Grass (type)|Grass}}, all having different obstacles. | |||
|- | |- | ||
|[[ | |[[File:SSBM Mushroom Kingdom.png|100px]]<br>{{iw|smashwiki|Mushroom Kingdom (SSBM)|Mushroom<br>Kingdom}} | ||
|align=left|The [[Mushroom Kingdom (Super Smash Bros. Melee)|Mushroom Kingdom]] stage features an environment based on ''{{iw|smashwiki|Super Mario Bros.}}'' It has objects like [[Brick Block]]s and [[? Block]]s, which contain items, as well as falling platforms above two gaps. | |||
|} | |||
===Unlockable stages=== | |||
{|class="wikitable sortable"style="text-align:center" | |||
!width=15%|Image | |||
!width=17%|Stage | |||
!width=18%|How to unlock | |||
!width=50%|Description | |||
|- | |- | ||
|[[File:FlatZone-Melee.png|100px]] | |||
|{{iw|smashwiki|Flat Zone|Superflat World:<br>Flat Zone}} | |||
| | |Clear {{iw|smashwiki|Classic Mode (SSBM)|Classic}}, {{iw|smashwiki|Adventure Mode (SSBM)|Adventure}}, or {{iw|smashwiki|All-Star Mode|All-Star}} with Mr. Game & Watch. | ||
| | |align=left|The Flat Zone modeled after a {{iw|nwiki|Game & Watch}} system. Wrenches, buckets, and other tools fall from the top occasionally. Oil can spill over the ground and make it hard for characters to move. Some platforms vanish and reappear at different places. | ||
|- | |- | ||
|[[ | |[[File:Brinstar Depths Melee.png|100px]] | ||
|{{iw|smashwiki|Brinstar Depths|Planet Zebes:<br>Brinstar Depths}} | |||
|Play 50 {{iw|smashwiki|Versus Mode#In Super Smash Bros. Melee|Melee matches}} | |||
|align=left|Unlike Brinstar, this ''{{iw|metroidwiki|Metroid (series)|Metroid}}'' stage features a large round rock platform found inside a spherical cage covered in embedded spikes. There are few floating rocks, which players can jump onto at any time. From time to time, Kraid slashes the large platform which causes it to rotate in any direction, exposing a different side of it. | |||
|- | |- | ||
|[[ | |[[File:Ssbmstagesfourside.jpg|100px]] | ||
|{{iw|smashwiki|Fourside|Eagleland:<br>Fourside}} | |||
|Play 100 Melee matches | |||
|align=left|This ''{{iw|wikibound|EarthBound (series)|EarthBound}}'' stage takes place high on the skyscrapers of {{iw|wikibound|Fourside}}, with wide gaps appearing between them. There is a {{iw|wikibound|UFO}} that occasionally shows up on the screen and can be used as a platform. | |||
|- | |- | ||
|[[ | |[[File:Ssbmstagesbigblue.jpg|100px]] | ||
|{{iw|smashwiki|Big Blue|F-Zero Grand Prix:<br>Big Blue}} | |||
|Play 150 Melee matches | |||
|align=left|Big Blue is a side-scrolling stage that takes place on top of {{iw|smashwiki|F-Zero Racer}}s. Due to the high speed of the vehicles, any fighters that touch the road almost immediately hit the {{iw|smashwiki|blast line}} on the left side, knocking them out. | |||
|- | |- | ||
|[[File:Melee Poke Floats.jpg|100px]] | |||
|{{iw|smashwiki|Poké Floats|Kanto Skies:<br>Poké Floats}} | |||
| | |Play 200 Melee matches | ||
| | |align=left|Poké Floats takes place on giant floating {{iw|bulbapedia|Pokémon (species)|Pokémon}} balloons in the skies of {{iw|bulbapedia|Kanto}}. Players jump from one balloon by the time the others vanish. | ||
|- | |- | ||
|[[ | |[[File:SSBM-Mario2.jpg|100px]] | ||
|{{iw|smashwiki|Mushroom Kingdom II|Mushroom<br>Kingdom II}} | |||
|Obtain the Birdo Trophy | |||
|align=left|[[Mushroom Kingdom II]] is based on a setting from ''{{iw|smashwiki|Super Mario Bros. 2}}''. Logs occasionally down the waterfall, creating temporary platforms. A {{iw|smashwiki|Pidgit}} flies in occasionally, creating another platform, and a {{iw|smashwiki|Birdo}} sometimes appears to spit {{iw|smashwiki|egg}}s at the characters. | |||
|- | |- | ||
|[[ | |[[File:Battlefield-Melee.png|100px]] | ||
|{{iw|smashwiki|Battlefield (SSBM)|Special Stages:<br>Battlefield}} | |||
|Clear All-Star for the first time | |||
|align=left|Battlefield takes place in space, featuring a big platform and three smaller platforms above it. The only hazards are the gaps on each end of the stage. | |||
|- | |- | ||
|[[ | |[[File:Final Destination Melee.png|100px]] | ||
|{{iw|smashwiki|Final Destination (SSBM)|Special Stages:<br>Final Destination}} | |||
|Clear {{iw|smashwiki|Event 51: The Showdown}} | |||
|align=left|Final Destination does not have any features. It is where {{iw|smashwiki|Master Hand}} and {{iw|smashwiki|Crazy Hand}} are fought. | |||
|- | |- | ||
|[[File:SSB Dream Land.png|100px]] | |||
|{{iw|smashwiki|Dream Land|Past Stages:<br>Dream Land}} | |||
| | |Clear {{iw|smashwiki|Target Smash!|Target Test}} with every character | ||
| | |align=left|Dream Land is a stage returning from ''Super Smash Bros.'' The only feature is {{iw|smashwiki|Whispy Woods}}, who occasionally blows a harsh wind in a random direction. | ||
|- | |- | ||
|[[ | |[[File:SSBM Yoshi's Island N64.png|100px]] | ||
|- | |{{iw|smashwiki|Super Happy Tree|Past Stages:<br>Yoshi's Island}} | ||
|[[ | |Hit Sandbag at least 1,325 feet (400 meters) in Home-Run Contest | ||
|align=left|[[Super Happy Tree (stage)|Yoshi's Island]] is a stage returning from ''Super Smash Bros.'' It has a big platform with the [[Super Happy Tree]] in the background, three other smaller floating platforms above, and three temporarily cloud platform at the edges that vanish when stood on for too long. | |||
|- | |- | ||
|[[File:N64 Kongo Jungle Melee.png|100px]] | |||
|{{iw|smashwiki|Kongo Jungle|Past Stages:<br>Kongo Jungle}} | |||
|Clear {{iw|smashwiki|15-Minute Smash|15-Minute Melee}} | |||
|align=left|[[Kongo Jungle (Super Smash Bros.)|Kongo Jungle]] is a stage returning from ''Super Smash Bros.'' It is made out of a large wooden platform with several smaller, sometimes floating ones around it. A [[Barrel Cannon]] is underneath the arena. | |||
|} | |} | ||
== | ==Items== | ||
{| width=100% | {|class="wikitable sortable"width=100% | ||
!width=12%|Image | |||
!width=12%|Name | |||
!width=12%|Series | |||
!width=64%|Description | |||
|- | |- | ||
|[[File:Trophy116.png|75px]] | |||
|{{iw|smashwiki|Barrel}} | |||
|''{{iw|smashwiki|Super Smash Bros. (universe)|Super Smash Bros.}}'' | |||
|The Barrel contains a single random {{iw|smashwiki|item}}, which can be released by destroying the barrel. When thrown to the ground, the barrel rolls onward to hit players. | |||
|- | |- | ||
|[[File:Trophy113.png|75px]] | |||
|{{iw|smashwiki|Barrel Cannon}} | |||
|''{{iw|smashwiki|Donkey Kong (universe)|Donkey Kong}}'' | |||
| | |The [[Barrel Cannon]] can trap a character inside. The barrel rotates and fires them out at a certain angle, depending on when the player presses a button. The Barrel Cannon vanishes shortly after appearing on the stage. | ||
|- | |- | ||
|[[ | |[[File:Trophy94.png|75px]] | ||
|{{iw|smashwiki|Beam Sword}} | |||
|''Super Smash Bros.'' | |||
|The Beam Sword can be used to hit other characters. It is powerful, but the hits are rather slow. | |||
|- | |- | ||
|[[ | |[[File:Trophy103.png|75px]] | ||
|{{iw|smashwiki|Bob-omb}} | |||
|''{{iw|smashwiki|Mario (universe)|Super Mario}}'' | |||
|The [[Bob-omb]] can be thrown at another character to cause an explosion. The Bob-omb walks around after being left on the ground for a few seconds. It explodes either from contact with a character or surface or after a certain amount of time. | |||
|- | |- | ||
|[[ | |[[File:Trophy111.png|75px]] | ||
|{{iw|smashwiki|Bunny Hood}} | |||
|''{{iw|smashwiki|The Legend of Zelda (Series)|The Legend of Zelda}}'' | |||
|The {{iw|zeldawiki|Bunny Hood}} makes a character {{iw|smashwiki|Dashing|faster}} and capable of {{iw|smashwiki|jump}}ing higher. | |||
|- | |- | ||
|[[File:Trophy117.png|75px]] | |||
|{{iw|smashwiki|Capsule}} | |||
|''Super Smash Bros.'' | |||
| | |The Capsule contains one small item. It can be thrown easily and sometimes explodes when hitting the wall or a character. | ||
|- | |- | ||
|[[ | |[[File:Trophy112.png|75px]] | ||
|{{iw|smashwiki|Cloaking Device}} | |||
|''{{iw|smashwiki|Perfect Dark (universe)|Perfect Dark}}'' | |||
|The Cloaking Device makes the player invisible. They are still damaged regardless of being {{iw|smashwiki|clear}} and harder to hit, but invisible characters do not have increased {{iw|smashwiki|damage}} percentages. | |||
|- | |- | ||
|[[ | |[[File:Trophy115.png|75px]] | ||
|{{iw|smashwiki|Crate}} | |||
|''Super Smash Bros.'' | |||
|The Crate contains three different random items. A Crate sometimes explodes when hit. | |||
|- | |- | ||
|[[ | |[[File:Trophy118.png|75px]] | ||
|{{iw|smashwiki|Egg}} | |||
|''Super Smash Bros.'' | |||
|The Egg contains one item, similarly to a Capsule. It can contain either a weapon or Food, depending on the stage. An Egg can also explode. | |||
|- | |- | ||
|[[File:Trophy96.png|75px]] | |||
|{{iw|smashwiki|Fan}} | |||
|''Super Smash Bros.'' | |||
| | |The Fan can be used to smack other characters with. The Fan does not inflict much damage per hit. | ||
|- | |- | ||
|[[ | |[[File:Trophy100.png|75px]] | ||
|{{iw|smashwiki|Flipper}} | |||
|''{{iw|smashwiki|Balloon Fight (universe)|Balloon Fight}}'' | |||
|When thrown, the Flipper remains in place, attack others on contact as well as repelling projectiles. | |||
|- | |- | ||
|[[ | |[[File:Trophy91.png|75px]] | ||
|{{iw|smashwiki|Fire Flower}} | |||
|''Super Mario'' | |||
|The [[Fire Flower]] can shoot a stream of {{iw|smashwiki|Flame|fire}}, similarly to {{iw|smashwiki|Bowser (SSBM)|Bowser}}'s {{iw|smashwiki|Fire Breath}}. | |||
|- | |- | ||
|[[ | |[[File:Trophy85.png|75px]] | ||
|{{iw|smashwiki|Food}} | |||
|''Super Smash Bros.'' | |||
|The player's damage meter is reduced by a small amount, depending on which food they ate. | |||
|- | |- | ||
|[[File:Trophy101.png|75px]] | |||
|{{iw|smashwiki|Freezie}} | |||
|''Super Mario'' | |||
| | |The [[Freezie]] glides along the stage and can fall off edges. It can freeze other players into an ice block on contact, though fiery attacks will return the characters to normal. | ||
|- | |- | ||
|[[ | |[[File:Trophy98.png|75px]] | ||
|{{iw|smashwiki|Green Shell}} | |||
|''Super Mario'' | |||
|When thrown, the [[Green Shell]] slides along the ground, being able to hit multiple characters. | |||
|- | |- | ||
|[[ | |[[File:Trophy97.png|75px]] | ||
|{{iw|smashwiki|Hammer (item)|Hammer}} | |||
|''{{iw|smashwiki|Donkey Kong (universe)|Donkey Kong}}'' | |||
|A massive [[hammer]] from ''[[Donkey Kong (game)|Donkey Kong]]'' that can inflict lots of damage unto whomever it hits | |||
|- | |- | ||
|[[ | |[[File:Trophy87.png|75px]] | ||
|{{iw|smashwiki|Heart Container}} | |||
|''The Legend of Zelda'' | |||
|The {{iw|zeldawiki|Heart Container}} reduces the player's damage meter by 100%. | |||
|- | |- | ||
|[[File:Trophy95.png|75px]] | |||
|{{iw|smashwiki|Home-Run Bat}} | |||
|''Super Smash Bros.'' | |||
| | |Using a Home-Run Bat while performing a {{iw|smashwiki|smash attack}} can instantly knock out whomever it hits. The Home-Run Bat is the item used in {{iw|smashwiki|Home-Run Contest}}. | ||
| | |||
|- | |- | ||
|[[File:Trophy92.png|75px]] | |||
|{{iw|smashwiki|Lip's Stick}} | |||
|''{{iw|smashwiki|Panel de Pon (universe)|Panel de Pon}}'' | |||
|The character hit by Lip's Stick gets a flower on their head, which is doing continuous little damage. The more often a character is hit, the bigger the flower grows, and the more damage it will do. | |||
| | |||
| | |||
| | |||
|- | |- | ||
|[[ | |[[File:Trophy86.png|75px]] | ||
|{{iw|smashwiki|Maxim Tomato}} | |||
|''{{iw|smashwiki|Kirby (universe)|Kirby}}'' | |||
|A {{iw|wikirby|Maxim Tomato}} can be picked up to reduce the player's damage meter by 50%. | |||
|- | |- | ||
|[[File:Trophy110.png|75px]] | |||
|{{iw|smashwiki|Metal Box}} | |||
|''Super Mario'' | |||
| | |Hitting a Metal Box gives the player metallic properties, making them heavier. Metallic characters are more resistant to {{iw|smashwiki|knockback}} but are less effective at performing their {{iw|smashwiki|recovery}}. | ||
| | |||
|- | |- | ||
|[[ | |[[File:SSBM Motionsensorbomb.png|75px]] | ||
|{{iw|smashwiki|Motion-Sensor Bomb}} | |||
|''GoldenEye 007'' / ''Perfect Dark'' | |||
|The Motion-Sensor Bomb can be placed on any surface, and it explodes on contact. | |||
|- | |- | ||
|[[ | |[[File:Trophy102.png|75px]] | ||
|{{iw|smashwiki|Mr. Saturn}} | |||
|''{{iw|smashwiki|EarthBound (universe)|EarthBound}}'' | |||
|A {{iw|wikibound|Mr. Saturn}} can be thrown at a character several times, though it does not inflict much damage. | |||
|- | |- | ||
|[[ | |[[File:Trophy108.png|75px]] | ||
|{{iw|smashwiki|Parasol}} | |||
|''Kirby'' | |||
|The {{iw|wikirby|Parasol}} can hit other characters. A character holding a parasol while falling glides down slowly. | |||
|- | |- | ||
|[[File:Trophy114.png|75px]] | |||
|{{iw|smashwiki|Party Ball}} | |||
|''Super Smash Bros.'' | |||
| | |When a Party Ball opens, it releases several items, commonly Food or Bob-ombs. | ||
|- | |- | ||
|[[ | |[[File:Trophy106.png|75px]] | ||
|{{iw|smashwiki|Poison Mushroom}} | |||
|''Super Mario'' | |||
|A [[Poison Mushroom]] shrinks a player temporarily. Any shrunken character is weaker and more vulnerable to being {{iw|smashwiki|KO}}'d, though they are more flexible and evasive. | |||
|- | |- | ||
|[[ | |[[File:Trophy120.png|75px]] | ||
|{{iw|smashwiki|Poké Ball}} | |||
|''Pokémon'' | |||
|When the {{iw|bulbapedia|Poké Ball}} is opened, a [[bulbapedia:Pokémon (species)|Pokémon]] appears. Most Pokémon attack the opponents of its user, though some attack all players within their range. | |||
|- | |- | ||
|[[ | |[[File:Trophy89.png|75px]] | ||
|{{iw|smashwiki|Ray Gun}} | |||
|''Super Smash Bros.'' | |||
|The Ray Gun can shoot up to 14 laser projectiles. | |||
|- | |- | ||
|[[File:Trophy99.png|75px]] | |||
|{{iw|smashwiki|Red Shell}} | |||
|''Super Mario'' | |||
| | |The [[Red Shell]] is much like the Green Shell, except it homes in on characters and does not fall off the stage. | ||
|- | |- | ||
|[[ | |[[File:Trophy109.png|75px]] | ||
|{{iw|smashwiki|Screw Attack}} | |||
|''{{iw|smashwiki|Metroid (universe)|Metroid}}'' | |||
|If a is holding the {{iw|metroidwiki|Screw Attack}} in their hand, they jump similarly to {{iw|smashwiki|Samus (SSBM)|Samus}}' {{iw|smashwiki|Screw Attack (move)|Screw Attack move}}. Any character hit by a Screw Attack take damages and also performs said type of jump. | |||
|- | |- | ||
|[[ | |[[File:Trophy107.png|75px]] | ||
|{{iw|smashwiki|Super Star|Starman}} | |||
|''Super Mario'' | |||
|The [[Super Star|Starman]] grants players temporary {{iw|smashwiki|invincibility}}, protecting them from all forms of damage, hits, and {{iw|smashwiki|grab}}s. The {{iw|smashwiki|blast line}} is the only obstacle that the Starman does not protect against. | |||
|- | |- | ||
|[[ | |[[File:Trophy93.png|75px]] | ||
|{{iw|smashwiki|Star Rod}} | |||
|''Kirby'' | |||
|The {{iw|wikirby|Star Rod}} can shoot a limited number of star projectiles. | |||
|- | |- | ||
|[[File:Trophy105.png|75px]] | |||
|{{iw|smashwiki|Super Mushroom}} | |||
|''Super Mario'' | |||
| | |The opposite of a Poison Mushroom, the [[Super Mushroom]] makes the player larger, stronger, and harder to KO. Their large size makes them easier to hit and less flexible. | ||
|- | |- | ||
|[[ | |[[File:Trophy90.png|75px]] | ||
| | |{{iw|smashwiki|Super Scope}} | ||
| | |Super Famicom/SNES peripheral | ||
| | |The {{iw|nwiki|Super Scope}} shoots out a limited number of small energy balls, or up to three big energy balls if {{iw|smashwiki|charge}}d. | ||
| | |||
|- | |- | ||
|[[File:Trophy88.png|75px]] | |||
|{{iw|smashwiki|Warp Star}} | |||
|''Kirby'' | |||
|When picked up, a {{iw|wikirby|Warp Star}} flies a character up into the air and crashes right down, creating an explosion that damages other players. By tilting the {{button|gcn|Stick}} while in the air, the player can take influence on the landing point. | |||
|} | |} | ||
== | ===Poké Ball Pokémon=== | ||
Like in the previous game, several {{iw|bulbapedia|Pokémon|id=species}} can be released from the {{iw|bulbapedia|Poké Ball}} item. This time, they come from the ''Pokémon'' series' [[bulbapedia:Generation I|first]] and [[bulbapedia:Generation II|second]] generations. Each uses a different move from the series. {{iw|bulbapedia|Legendary Pokémon}} appear far less commonly and tend to have more spectacular effects. {{iw|bulbapedia|Mythical Pokémon}} are rarer still, but only give a substantial point bonus rather than attacking. | |||
{|class="wikitable" | |||
{| class= | !width=15%|Pokémon | ||
!width=68%|Description | |||
|- | |||
!colspan=2|Common | |||
|- | |- | ||
|align=center|[[File:Bellossom.png|150px]]<br>[[bulbapedia:Bellossom (Pokémon)|Bellossom]] | |||
|A Flower Pokémon, it uses [[Bulbapedia:Sweet Scent (move)|Sweet Scent]] to put nearby opponents to sleep. | |||
|- | |- | ||
|[[File: | |align=center|[[File:Blastoise.png|150px]]<br>[[bulbapedia:Blastoise (Pokémon)|Blastoise]] | ||
|A Shellfish Pokémon, it uses [[Bulbapedia:Hydro Pump (move)|Hydro Pump]] to push opponents with gushes of water; however, this also slowly moves itself backwards. | |||
| | |||
|- | |- | ||
|[[File: | |align=center|[[File:Chansey.png|150px]]<br>[[bulbapedia:Chansey (Pokémon)|Chansey]] | ||
|An Egg Pokémon, it uses [[Bulbapedia:Soft-Boiled (move)|Softboiled]]<!--Spelling in the Pokémon series at the time--> to scatter [[egg]]s across the field, which can be eaten to reduce damage or broken to reveal items or explosions. | |||
| | |||
|- | |- | ||
|[[File: | |align=center|[[File:Charizard.png|150px]]<br>[[bulbapedia:Charizard (Pokémon)|Charizard]] | ||
|A Flame Pokémon, it uses [[Bulbapedia:Flamethrower (move)|Flamethrower]] to shoot short-range plumes of fire on either side of it back-and-forth. | |||
| | |||
|- | |- | ||
|[[File: | |align=center|[[File:Chikorita.png|150px]]<br>[[bulbapedia:Chikorita (Pokémon)|Chikorita]] | ||
|A Leaf Pokémon, it uses [[Bulbapedia:Razor Leaf (move)|Razor Leaf]] to launch a series of cutting leaves in a forward horizontal line. | |||
| | |||
|- | |- | ||
|[[File: | |align=center|[[File:Clefairy.png|150px]]<br>[[bulbapedia:Clefairy (Pokémon)|Clefairy]] | ||
|A Fairy Pokémon, it uses [[Bulbapedia:Metronome (move)|Metronome]] to [[Bulbapedia:Explosion (move)|explode]], [[Bulbapedia:Fire Spin (move)|summon fire]], [[Bulbapedia:Gust (move)|summon a whirlwind]], or [[Bulbapedia:Blizzard (move)|summon frosty air]]. | |||
| | |||
|- | |- | ||
|[[File: | |align=center|[[File:Cyndaquil.png|150px]]<br>[[bulbapedia:Cyndaquil (Pokémon)|Cyndaquil]] | ||
|A Fire Mouse Pokémon, it uses [[Bulbapedia:Flamethrower (move)|Flamethrower]] similar to Charizard, but only in one direction and while airborn. It can be knocked off-stage. | |||
| | |||
|- | |- | ||
|[[File: | |align=center|[[File:Electrode.png|150px]]<br>[[bulbapedia:Electrode (Pokémon)|Electrode]] | ||
|A Ball Pokémon that uses [[Bulbapedia:Explosion (move)|Explosion]] to charge itself before blowing up, launching away anyone near it, including the summoner. | |||
| | |||
|- | |- | ||
|[[File: | |align=center|[[File:Goldeen.png|150px]]<br>[[bulbapedia:Goldeen (Pokémon)|Goldeen]] | ||
|A Goldfish Pokémon, it uses [[Bulbapedia:Splash (move)|Splash]] to flop around ineffectually. | |||
| | |||
|- | |- | ||
|[[File: | |align=center|[[File:Marill.png|150px]]<br>[[bulbapedia:Marill (Pokémon)|Marill]] | ||
|An AquaMouse Pokémon, it uses [[Bulbapedia:Tackle (move)|Tackle]] to run in one direction, plowing through anyone in its way, only turning if it hits a wall. | |||
| | |||
|- | |- | ||
|[[File: | |align=center|[[File:Porygon2.png|150px]]<br>[[bulbapedia:Porygon2 (Pokémon)|Porygon2]] | ||
|A Virtual Pokémon, it uses [[Bulbapedia:Tackle (move)|Tackle]] like Marill, but at a much shorter distance and higher speed, which heavily knocks back anyone caught in it. | |||
| | |||
|- | |- | ||
|[[File: | |align=center|[[File:Scizor.png|150px]]<br>[[bulbapedia:Scizor (Pokémon)|Scizor]] | ||
|A Scissors Pokémon, it uses [[Bulbapedia:Metal Claw (move)|Metal Claw]] to dash forward with its claws out before leaping from the stage, launching opponents it hits upwards. | |||
| | |||
|- | |- | ||
|[[File: | |align=center|[[File:Snorlax.png|150px]]<br>[[bulbapedia:Snorlax (Pokémon)|Snorlax]] | ||
|A Sleeping Pokémon, it uses [[Bulbapedia:Body Slam (move)|Body Slam]] to make itself huge and fall through the stage from above where it was called. | |||
| | |||
|- | |- | ||
|[[File: | |align=center|[[File:Staryu.png|150px]]<br>[[bulbapedia:Staryu (Pokémon)|Staryu]] | ||
|A StarShape Pokémon, it uses [[Bulbapedia:Swift (move)|Swift]] to fire a horizontal barrage of stars at opponents while following them horizontally. It functionally replaces its evolution [[bulbapedia:Starmie (Pokémon)|Starmie]] from the previous game. | |||
| | |||
|- | |- | ||
|[[File: | |align=center|[[File:Togepi.png|150px]]<br>[[bulbapedia:Togepi (Pokémon)|Togepi]] | ||
|[[ | |A Spike Ball Pokémon, it uses [[Bulbapedia:Metronome (move)|Metronome]] to [[Bulbapedia:Night Shade (move)|darken the stage]], [[Bulbapedia:Magnitude (move)|lodge opponents into the ground]], [[Bulbapedia:Sing (move)|put opponents to sleep]], [[Bulbapedia:Ice Beam (move)|freeze opponents]], or [[Bulbapedia:Leech Seed (move)|infect opponents with parasitic flowers]]. | ||
| | |||
|- | |- | ||
|[[File: | |align=center|[[File:Unown.png|150px]]<br>[[bulbapedia:Unown (Pokémon)|Unown]] | ||
|A Symbol Pokémon, it uses [[Bulbapedia:Take Down (move)|Take Down]] to fly across the battlefield rapidly with a horde of others. It functionally replaces [[bulbapedia:Beedrill (Pokémon)|Beedrill]] from the previous game. | |||
| | |||
|- | |- | ||
|[[File: | |align=center|[[File:Venusaur SSBM.png|150px]]<br>[[bulbapedia:Venusaur (Pokémon)|Venusaur]] | ||
|A Seed Pokémon, it uses [[Bulbapedia:Earthquake (move)|Earthquake]] to stomp the ground and knock away any opponent near its large body. | |||
| | |||
|- | |- | ||
|[[File: | |align=center|[[File:Weezing.png|150px]]<br>[[bulbapedia:Weezing (Pokémon)|Weezing]] | ||
|A Poison Gas Pokémon, it uses [[Bulbapedia:Smog (move)|Smog]] to emit damaging gas from its body while floating in place. It functionally replaces its pre-evolution [[bulbapedia:Koffing (Pokémon)|Koffing]] from the previous game. | |||
| | |||
|- | |- | ||
|[[File: | |align=center|[[File:Wobbuffet.png|150px]]<br>[[bulbapedia:Wobbuffet (Pokémon)|Wobbuffet]] | ||
|A Patient Pokémon, it uses [[Bulbapedia:Counter (move)|Counter]] to recoil damage onto anyone who attacks it, including the summoner. | |||
| | |||
|- | |- | ||
! | !colspan=2|Legendary | ||
|- | |- | ||
|[[File: | |align=center|[[File:Articuno.png|150px]]<br>[[bulbapedia:Articuno (Pokémon)|Articuno]] | ||
|A Freeze Pokémon, it uses [[Bulbapedia:Icy Wind (move)|Icy Wind]] to freeze and launch anyone caught in the frosty energy it emits. | |||
| | |||
|- | |- | ||
|[[File: | |align=center|[[File:Entei.png|150px]]<br>[[bulbapedia:Entei (Pokémon)|Entei]] | ||
|A Volcano Pokémon, it uses [[Bulbapedia:Fire Blast (move)|Fire Blast]] to surround itself with an enormous pillar of flame that burns opponents who touch it. | |||
| | |||
|- | |- | ||
|[[File: | |align=center|[[File:Ho-oh.png|150px]]<br>[[bulbapedia:Ho-oh (Pokémon)|Ho-oh]] | ||
|A Rainbow Pokémon, it uses [[Bulbapedia:Sacred Fire (move)|Sacred Fire]] to create a large plume of fire where it flies. | |||
| | |||
|- | |- | ||
|[[File: | |align=center|[[File:Lugia Melee.png|150px]]<br>[[bulbapedia:Lugia (Pokémon)|Lugia]] | ||
|A Diving Pokémon, it uses [[Bulbapedia:Aeroblast (move)|Aeroblast]] to fire a whirlwind-like beam that snakes across the stage. | |||
| | |||
|- | |- | ||
|[[File: | |align=center|[[File:Moltres.png|150px]]<br>[[bulbapedia:Moltres (Pokémon)|Moltres]] | ||
|A Flame Pokémon, it uses [[Bulbapedia:Sky Attack (move)|Sky Attack]] to fly in place, harming anyone that touches its fiery body, before flying away. | |||
| | |||
|- | |- | ||
|[[File: | |align=center|[[File:Raikou.png|150px]]<br>[[bulbapedia:Raikou (Pokémon)|Raikou]] | ||
|A Thunder Pokémon, it uses [[Bulbapedia:Spark (move)|Spark]] to surround itself with a pillar of electricity. | |||
| | |||
|- | |- | ||
|[[File: | |align=center|[[File:Suicune.png|150px]]<br>[[bulbapedia:Suicune (Pokémon)|Suicune]] | ||
|An Aurora Pokémon, it uses [[Bulbapedia:Blizzard (move)|Blizzard]] to summon a frosty twister around itself. | |||
| | |||
|- | |- | ||
|[[File: | |align=center|[[File:Zapdos Melee.png|150px]]<br>[[bulbapedia:Zapdos (Pokémon)|Zapdos]] | ||
|An Electric Pokémon, it uses [[Bulbapedia:Thunder Shock (move)|ThunderShock]]<!--Spelling in the Pokémon series at the time--> to emit a shower of sparks around itself. | |||
| | |||
|- | |- | ||
!colspan=2|Mythical | |||
|- | |- | ||
|[[File: | |align=center|[[File:Celebi.png|150px]]<br>[[bulbapedia:Celebi (Pokémon)|Celebi]] | ||
|A TimeTravel Pokémon, it only begins appearing once everything in the game is unlocked, and even then exceedingly rarely. It does not use any move, but gives a large point bonus if found. | |||
| | |||
|- | |- | ||
|[[File: | |align=center|[[File:Mew.png|150px]]<br>[[bulbapedia:Mew (Pokémon)|Mew]] | ||
|A New Specie<!--Spelling in the Pokémon series at the time--> Pokémon, it does not use any move, but gives a large point bonus if found. | |||
| | |||
|} | |} | ||
== | ==Enemies== | ||
{| class=sortable | The enemies appear in Adventure Mode, though they may rarely spawn from carrier items in {{iw|smashwiki|Versus Mode}}. | ||
{|class="wikitable sortable"width=100% | |||
!width=12%|Image | |||
!width=12%|Name | |||
!width=12%|Series | |||
!width=12%|Stage | |||
!width=52%|Description | |||
|- | |- | ||
| | |||
|[[Goomba]] | |||
|''{{iw|smashwiki|Mario (universe)|Super Mario}}'' | |||
|[[Mushroom Kingdom (Adventure Mode)|Mushroom Kingdom]] | |||
|Much like in the [[Super Mario (series)|''Super Mario'' series]], the mushroom-like {{iw|smashwiki|Goomba}}s walk back and forth, damage fighters on touch, and can be defeated by either attacking them or simply jumping on top of them. | |||
|- | |- | ||
| | |||
|[[Koopa Paratroopa]] | |||
|''Super | |''Super Mario'' | ||
| | |Mushroom Kingdom | ||
|{{iw|smashwiki|Koopa Paratroopa}}s are winged variants of Koopa Troopas, flying in a set pattern mid-air. Dealing enough damage or jumping on them will cause them to lose their wings, turning into regular Koopa Troopas. | |||
|- | |- | ||
| | |||
|[[Koopa Troopa]] | |||
|'' | |''Super Mario'' | ||
|The | |Mushroom Kingdom | ||
|The turtle-like {{iw|smashwiki|Koopa Troopa}}s act similarly to Goombas, but will retreat into [[Koopa Shell|their shell]] when dealt enough damage or jumped upon. This shell can be picked up and thrown like an item. | |||
|- | |- | ||
|[[File:SSBM Like Like.png|180px]] | |||
|{{iw|smashwiki|Like Like}} | |||
| | |''{{iw|smashwiki|The Legend of Zelda (universe)|The Legend of Zelda}}'' | ||
|{{iw|smashwiki|Underground Maze}} | |||
| | |{{iw|zeldawiki|Like Like}}s are gelatinous tube creatures that can swallow characters whole, inflicting damage continuously until the fighter breaks free. | ||
|'' | |||
|The | |||
| | |||
| | |||
| | |||
| | |||
| | |||
|- | |- | ||
|[[File:Octorokmelee.gif|100px]] | |||
|{{iw|smashwiki|Octorok}} | |||
|'' | |''The Legend of Zelda'' | ||
| | |Underground Maze | ||
|{{iw|zeldawiki|Octorok}}s are purple octopus-like enemies also in the Underground Maze. Their attack is to spit rocks at the fighters. | |||
|- | |- | ||
|[[File:Redeadmelee.jpg|180px]] | |||
|{{iw|smashwiki|ReDead}} | |||
|'' | |''The Legend of Zelda'' | ||
| | |Underground Maze | ||
|{{iw|zeldawiki|ReDead}}s are zombie-like creatures that leap on a fighter to attack and drain away their health while attached to them. ReDeads can be shaken off by mashing the controller buttons, but they continue walking around afterward. After enough hits, ReDeads lie down on the ground, with a chance of dropping a trophy, though they reanimate shortly after. The ReDeads of Adventure mode are colored a light brown, but those that can appear from container items are dark brown. | |||
|- | |- | ||
|[[File:SSBM Polar Bear.png|180px]] | |||
|{{iw|smashwiki|Polar Bear}} | |||
|'' | |''{{iw|smashwiki|Ice Climber (universe)|Ice Climber}}'' | ||
| | |{{iw|smashwiki|Icicle Mountain}} | ||
|Polar Bears move back and forth, but the fighter can knock them away with a few smaller hits or one powerful hit. | |||
|- | |- | ||
|[[File:TopiMelee.png|180px]] | |||
|{{iw|smashwiki|Topi}} | |||
|''Ice Climber'' | |||
|Icicle Mountain | |||
| | |They are blue fur seals that move back and forth, like the Polar Bars. They are round yetis with white fur coats in not only {{wp|Western world|Western}} releases of ''Super Smash Bros. Melee'' but also ''Ice Climber''. | ||
| | |||
| | |||
| | |||
|'' | |||
| | |||
| | |||
| | |||
|} | |} | ||
== | ==1-P Mode== | ||
===Classic | ===Classic=== | ||
[[File:ClassicIntro-SSBMelee.png|thumb | {{main-wiki|SmashWiki|Classic Mode (SSBM)}}} | ||
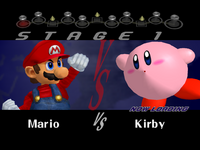
[[File:ClassicIntro-SSBMelee.png|thumb|[[Mario]] faces [[Kirby]] in stage 1.]] | |||
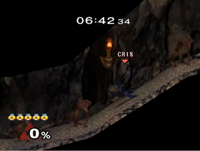
Classic is based on the {{iw|smashwiki|1P Game}} from the game's predecessor, ''Super Smash Bros.'' Unlike the previous game, the opponents and the stage are chosen at random, but the matches retain a consistent pattern. For setup, the player has to choose the {{iw|smashwiki|difficulty}} (Very Easy, Easy, Normal, Hard, or Very Hard) and their number of {{iw|smashwiki|stock}} (1 - 5). All battles are in stock mode, with the opponents having one life, and a five-minute {{iw|smashwiki|match timer}} that costs the player a stock if it runs out. There are three {{iw|smashwiki|Bonus Stage}}s, where winning is optional. If the players loses all of their stock, they are given the option to {{iw|smashwiki|continue}} to regain all stock, though they lose several points in the process. In any setting except for Very Easy, the player will have to pay coins for the Continue. The players' scores are saved after every stage. They get awarded points for the time remaining when a battle ends, as well as for the damage they dealt. They also get {{iw|smashwiki|List of bonuses#Super Smash Bros. Melee|bonuses}}, just as in the {{iw|smashwiki|Bonus (mode)|Bonus mode}}. The scores are saved separately for each character, and there is also a total score for all characters combined. | |||
All battles are in stock mode, with the opponents having one life, and a five-minute | {{br}} | ||
{|class=wikitable width=100% | |||
!colspan=2|Classic Mode | |||
{| | |||
|- | |- | ||
!width=15%|Stage 1 | |||
!width=15% | Stage 1 | |||
|The player fights a single opponent. | |The player fights a single opponent. | ||
|- | |- | ||
| Line 795: | Line 843: | ||
|A team of the player and an ally fight against a team of two opponents. | |A team of the player and an ally fight against a team of two opponents. | ||
|- | |- | ||
!Bonus Stage 1: | !Bonus Stage 1: {{iw|smashwiki|Target Smash!|Break the Targets!}} | ||
|The player has to hit | |The player has to hit every {{iw|smashwiki|target}} within two minutes. Each character has their own arena for the target test. | ||
|- | |- | ||
!Stage 4 | !Stage 4 | ||
| | |The player fights a single opponent. | ||
|- | |- | ||
!Stage 5 | !Stage 5 | ||
|A team of the player and two allies fight a | |A team of the player and two allies fight a giant opponent. | ||
|- | |- | ||
!Bonus Stage 2: | !Bonus Stage 2: {{iw|smashwiki|Snag the Trophies}} | ||
| | |Up to three falling {{iw|smashwiki|Trophy|Trophies}} can be collected by hitting them into their collection spot while they fall. | ||
|- | |- | ||
!Stage 7 | !Stage 7 | ||
|The player fights a single opponent. When the player plays on the Hard setting or above, the opponent's CPU will | |The player fights a single opponent. When the player plays on the Hard setting or above, the opponent's {{iw|smashwiki|Artificial intelligence|CPU}} will change. The opponent will always escape to the borders of the stage after hitting the player. | ||
|- | |- | ||
!Stage 8 | !Stage 8 | ||
|The player has to fight 10 opponents | |The player has to fight 10 opponents of the same character, all significantly more vulnerable to being {{iw|smashwiki|KO}}'d. | ||
|- | |- | ||
!Bonus Stage 3: | !Bonus Stage 3: {{iw|smashwiki|Race to the Finish (SSBM)|Race to the Finish}} | ||
|The player runs along a tunnel with many doors. They can take any available door to complete the level, but the farther the door the player takes from the beginning, the more [[coin]]s they earn. The time the player has for this varies from character to character, but it is usually around 45 seconds; for some examples, Captain Falcon only has 39 seconds, while Ganondorf has 54 seconds. | |The player runs along a tunnel with many doors. They can take any available door to complete the level, but the farther the door the player takes from the beginning, the more [[coin]]s they earn. The time the player has for this varies from character to character, but it is usually around 45 seconds; for some examples, Captain Falcon only has 39 seconds, while Ganondorf has 54 seconds. | ||
|- | |- | ||
!Stage 10 | !Stage 10 | ||
|The player has to fight one opponent, like in Stages 1 and 4, but the opponent is metal, as if | |The player has to fight one opponent, like in Stages 1 and 4, but the opponent is metal, as if they grabbed a Metal Box. The battle is held on the Battlefield stage. | ||
|- | |- | ||
!Stage 11 | !Stage 11 | ||
|The player has to fight [[Master Hand]] on the Final Destination stage. Unlike the player, the Master Hand has hit points instead of percentage of damage. The number of hit points varies between the difficulty settings, anywhere from 150 to 360. Additionally, when the player is fighting on the normal or a higher difficulty setting and has finished the other stages of the Classic Mode without using any Continues, [[Crazy Hand]] will appear when Master Hand's HP hits its half. Then the player has to fight both hands at the same time. Crazy Hand starts with the same number of HP as Master Hand did. | |The player has to fight [[Master Hand]] on the Final Destination stage. Unlike the player, the Master Hand has hit points instead of percentage of damage. The number of hit points varies between the difficulty settings, anywhere from 150 to 360. Additionally, when the player is fighting on the normal or a higher difficulty setting and has finished the other stages of the Classic Mode without using any Continues, [[Crazy Hand]] will appear when Master Hand's HP hits its half. Then the player has to fight both hands at the same time. Crazy Hand starts with the same number of HP as Master Hand did. | ||
|} | |} | ||
===Adventure | ====Snag the Trophies==== | ||
[[File:AdventureIntro-SSBMelee.png|thumb | {{main-wiki|smashwiki|Snag the Trophies}} | ||
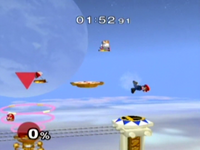
[[File:Collect_the_Trophies.png|thumb|Snag the Trophies!]] | |||
'''Snag the Trophies!''' ('''Grab a Trophy!''' in the PAL version) is the second bonus stage. It features two small round platforms connected to the center by two wires that can be walked on. The player has an opportunity to collect trophies by knocking them into the circles in the center. If the player falls beyond the {{iw|smashwiki|blast line}}s, they can exit prematurely. There is an special bonus for obtaining all three trophies, "Collector." | |||
{{NIWA|SmashWiki=Snag the Trophies}} | |||
{[br}} | |||
===Adventure=== | |||
{{main-wiki|SmashWiki|Adventure Mode (SSBM)}} | |||
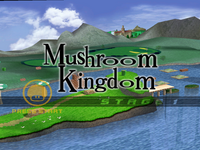
[[File:AdventureIntro-SSBMelee.png|thumb|The Mushroom Kingdom stage intro]] | |||
Adventure takes place in settings based on the {{iw|smashwiki|universe}}s represented in ''Super Smash Bros. Melee''. It features some side-scrolling stages only available in Adventure. Like Classic mode, the player chooses the {{iw|smashwiki|difficulty}} as well as number of {{iw|smashwiki|stock}} for their {{iw|smashwiki|fighter}}. When the player runs out of stock, they can similarly use a continue to regain their stock, at the cost of coins. Players' scores are saved after every stage. They get awarded points for the time remaining by the end of the battle, as well as for the damage inflicted upon opponents. Bonus points can also be received, and special Bonus points are awarded for fulfilling certain objectives, with the ''Super Mario''-related ones being defeating [[Luigi]], [[Metal Mario]] and Metal Luigi, or [[Giga Bowser]]. The scores are saved separately for each character, as well as a combined total score for every character. | |||
The first two stages pertain to ''[[Super Mario (franchise)|Super Mario]]'', and [[Bowser#Size|Giant Bowser]] is featured as the final boss. In harder difficulty settings, Giant Bowser is fought first, followed by [[Giga Bowser]], an alternate form exclusive to the ''Super Smash Bros.'' series. | |||
{{br}} | {{br}} | ||
{|class=wikitable | |||
{| | !colspan=2|Stage 1: {{iw|smashwiki|Mushroom Kingdom (Adventure Mode)|Mushroom Kingdom}} | ||
!colspan=2 | |||
| | |||
|- | |- | ||
|width=30%|'''Part 1''' | |||
| | |[[Mushroom Kingdom (Adventure Mode)|Mushroom Kingdom]] is a side-scrolling level based on the overworld settings in ''[[Super Mario Bros.]]'' It features [[Goomba]]s, [[Koopa Troopa]]s, and [[Koopa Paratroopa]]s as enemies, as well as [[Warp Pipe]]s and [[Brick Block]]s. [[Toad (species)|Toads]] and golf courses are seen in the background. There are ten Yoshis to battle towards the end of the stage. | ||
|- | |- | ||
|'''Part 2''' | |||
| | |The player has to fight a team of Mario and Peach on Princess Peach's Castle. If players have completed the first part with a 2 in the seconds place (XX:X2:XX) on their time counter, Luigi will kick Mario off the castle, taking his place in the battle instead. | ||
|- | |- | ||
!colspan=2 | !colspan=2|Stage 2: {{iw|smashwiki|Kongo Falls|Kongo Jungle}} | ||
|- | |- | ||
|'''Part 1''' | |||
| | |The first part of [[Kongo Falls|Kongo Jungle]] involves fighting two mini-sized Donkey Kongs. | ||
|- | |- | ||
|'''Part 2''' | |||
| | |The second part involves fighting a [[Giant Donkey Kong|Giant DK]]. | ||
|- | |- | ||
!colspan=2 | !colspan=2|Stage 3: {{iw|smashwiki|Underground Maze}} | ||
|- | |- | ||
|'''Part 1''' | |||
| | |The Underground Maze is an underground stage based around {{iw|zeldawiki|The Legend of Zelda (Series)|''The Legend of Zelda'' series}}. There are {{iw|smashwiki|ReDead}}s, {{iw|smashwiki|Like Like}}s, and {{iw|smashwiki|Octorok}}s. The {{iw|smashwiki|Triforce}} is located in one of six random areas, and touching it completes the stage; the five other areas have a {{iw|smashwiki|Master Sword}}, and touching it forces the player to battle a [[Link]] to battle. | ||
|- | |- | ||
|'''Part 2''' | |||
| | |The second part involves fighting {{iw|smashwiki|Zelda (SSBM)|Zelda}} on top of the {{iw|smashwiki|Temple}} | ||
|- | |- | ||
!colspan=2 | !colspan=2|Stage 4: {{iw|smashwiki|Brinstar}} | ||
|- | |- | ||
|'''Part 1''' | |||
| | |The first part involves fighting {{iw|smashwiki|Samus (SSBM)|Samus}}. Defeating Samus activates a self-destruction mechanism. | ||
|- | |- | ||
|'''Part 2''' | |||
| | |For the second part, the player is in a small vertically-scrolling level. The goal is to reach the top to evacuate the exploding planet. If time runs out, they lose a stock. | ||
|- | |- | ||
!colspan=2 | !colspan=2|Stage 5: {{iw|smashwiki|Green Greens}} | ||
|- | |- | ||
|'''Part 1''' | |||
| | |The first part involves battling {{iw|smashwiki|Kirby (SSBM)|Kirby}}. | ||
|- | |- | ||
|'''Part 2''' | |||
| | |After Kirby is defeated, 18 weaker Kirbys appear, each having copied abilities from other fighters, and all of them have to be defeated. | ||
|- | |- | ||
|'''Part 3''' | |||
| | |Optionally, a Giant Kirby is fought if the Kirby team is defeated in under 30 seconds. | ||
|- | |- | ||
!colspan=2 | !colspan=2|Stage 6: {{iw|smashwiki|Corneria}} | ||
|- | |- | ||
|'''Part 1''' | |||
| | |The first part involves battling {{iw|smashwiki|Fox (SSBM)|Fox}}. No Arwings appear in this segment. | ||
|- | |- | ||
|'''Part 2''' | |||
| | |Arwings arrive, with {{iw|lylatwiki|Peppy Hare|Peppy}}, {{iw|lylatwiki|Slippy Toad|Slippy}}, and {{iw|smashwiki|Falco (SSBM)|Falco}} announcing to Fox that they will assist him. Players will then fight Fox again, but more Arwings appear on stage than usual. If Falco is unlocked, he may sometimes be fought instead of Fox. | ||
If Falco is unlocked, he may | |||
Fox | |||
|- | |- | ||
!colspan=2 | !colspan=2|Stage 7: {{iw|smashwiki|Pokémon Stadium}} | ||
|- | |- | ||
|colspan= 2 | |colspan=2|A team of 12 {{iw|smashwiki|Pokémon}}, mainly {{iw|smashwiki|Pikachu (SSBM)|Pikachus}}, are fought at the Pokémon Stadium, in a match with only {{iw|smashwiki|Poké Ball}}s. The team may also have {{iw|smashwiki|Jigglypuff (SSBM)|Jigglypuff}}s and {{iw|smashwiki|Pichu (SSBM)|Pichus}} if they have been unlocked, each. | ||
|- | |- | ||
!colspan=2 | !colspan=2|Stage 8: {{iw|smashwiki|F-Zero Grand Prix}} | ||
|- | |- | ||
|'''Part 1''' | |||
|The | |The first part has a side-scrolling level taking place on Big Blue - Cylinder from ''F-Zero X'' during a GP race. The {{iw|smashwiki|F-Zero Racer}}s approach at set intervals, forcing players to go on a platform hovering above the track to dodge them. | ||
|- | |- | ||
|'''Part 2''' | |||
| | |The second part involves battling {{iw|smashwiki|Captain Falcon (SSBM)|Captain Falcon}} in {{iw|smashwiki|Mute City}}. | ||
|- | |- | ||
!colspan=2 | !colspan=2|Stage 9: {{iw|smashwiki|Onett}} | ||
|- | |- | ||
|colspan= 2 | |colspan=2|Players have to fight three {{iw|smashwiki|Ness (SSBM)|Nesses}} at the Onett stage. {{iw|smashwiki|Mr. Saturn}}s are the only items present in the match. | ||
|- | |- | ||
!colspan=2 | !colspan=2|Stage 10: {{iw|smashwiki|Icicle Mountain}} | ||
|- | |- | ||
|colspan= 2 | |colspan=2|Taking place on a vertically scrolling stage, Icicle Mountain first involves the goal of reaching a certain height of the level. Many {{iw|smashwiki|Topi}}s, {{iw|smashwiki|Polar Bear}}s, and [[Freezie]]s are encountered along the way. If nearly a minute is left on the {{iw|smashwiki|match timer}}, two pairs of {{iw|smashwiki|Ice Climbers (SSBM)|Ice Climbers}} will appear. | ||
|- | |- | ||
!colspan=2 | !colspan=2|Stage 11: {{iw|smashwiki|Battlefield (SSBM)|Battlefield}} | ||
|- | |- | ||
|'''Part 1''' | |||
| | |The first part involves fighting twenty {{iw|smashwiki|Fighting Wire Frames}} in a low-{{iw|smashwiki|gravity}} match. | ||
|- | |- | ||
|'''Part 2''' | |||
| | |The second part involves fighting {{iw|smashwiki|Metal Mario}}, as well as Metal Luigi if Luigi had been unlocked beforehand. Defeating [[Metal Mario]] and Metal Luigi awards the player with 8,000 points. | ||
|- | |- | ||
!colspan=2 | !colspan=2|Stage 12: {{iw|smashwiki|Final Destination (SSBM)|Final Destination}} | ||
|- | |- | ||
|'''Part 1''' | |||
| | |The first play have to fight [[Bowser#Size|Giant Bowser]] on the Final Destination stage. On the Very Easy and Easy skill levels, by default, Giant Bowser will be green (or red if the player is already playing as Green Bowser). However, if the difficulty is set to Normal or higher, Giant Bowser, by default, will use his black palette swap instead (back to green if the player is Black Bowser). | ||
|- | |- | ||
|'''Part 2''' | |||
|If players play on a difficulty setting of Normal or higher, while completing the past stages of the Adventure | |If players play on a difficulty setting of Normal or higher, while completing the past stages of the Adventure mode in less than 18 minutes without using a continue and defeating Bowser in less than one minute, they will have to fight [[Giga Bowser]] as well. Unlike with Crazy Hand, players can use a continue against Giga Bowser and still be able to fight him again. Players earn 100000 points for KOing Giga Bowser, and receive the Giga Bowser trophy as well. | ||
|} | |} | ||
====Unique non-''Super Mario'' stages==== | |||
=====Underground Maze===== | |||
{{main-wiki|SmashWiki|Underground Maze}} | |||
[[File:Underground_Maze.png|thumb|Sheik exploring the Underground Maze]] | |||
The '''Underground Maze''' is the third level of Adventure mode in ''Super Smash Bros. Melee''. It is based on ''The Legend of Zelda'' series. The goal of this level is to find the Triforce, hidden in one of five Battlefield-like areas in the maze. The artifact's location is randomly selected each time Adventure mode is played. The level also features {{iw|zeldawiki|ReDead}}s, {{iw|zeldawiki|Octorok}}s, and {{iw|zeldawiki|Like Like}}s as enemies. If the player comes across a battle area without the Triforce, they will have to fight Link and KO him to proceed. | |||
Once the Underground Maze is completed, the player is sent to the {{iw|smashwiki|Temple}} to battle Princess Zelda. | |||
;Names in other languages | |||
{{foreign names | |||
|Jpn=迷宮 | |||
|JpnR=Meikyū | |||
|JpnM=Labyrinth | |||
}} | |||
=====F-Zero Grand Prix===== | |||
{{main-wiki|smashwiki|F-Zero Grand Prix}} | |||
[[File:SSBM F-Zero Grand Prix.png|thumb|The level F-Zero Grand Prix in ''Super Smash Bros. Melee'']] | |||
The '''F-Zero Grand Prix''' is the eighth stage of Adventure mode in ''Super Smash Bros. Melee''. After defeating the challengers of {{iw|smashwiki|Pokémon Stadium}}, the player will find themselves stampeding across this race track (Big Blue - Cylinder from ''F-Zero X'', specifically) in the Grand Prix, taking place on an F-Zero Grand Prix race. Being a race track, [[F-Zero machine]]s will occasionally zoom through this course, potentially doing severe damage. One several floating platforms can be jumped on to for safety along the way. Somewhere towards the end of the course, the player will use platforms to jump across a large gap in the race track. Since F-Zero machines only hover about a foot over the ground, the hovercars will fly right above the player, rather than under them. After finishing the "race", the player will fight Сaptain Falcon in [[Mute City (Super Smash Bros. Melee)|Mute City]]. | |||
F-Zero Grand Prix is the setting for {{iw|smashwiki|Event 33: Lethal Marathon}}. | |||
;Names in other languages | |||
{{foreign names | |||
|Jpn=F-ZERO グランプリ | |||
|JpnR=F-ZERO Guran Puri | |||
|JpnM=F-Zero Grand Prix | |||
}} | |||
The players' scores are saved after every stage. They get awarded points for the damage they dealt | ===All-Star=== | ||
{{main-wiki|SmashWiki|All-Star Mode}} | |||
The stage that is used is depended on what character plays as player 2. The stages | [[File:AllStarRest-SSBMelee.png|thumb|The rest area]] | ||
All-Star is an unlockable mode. It is unlocked after every {{iw|smashwiki|fighter}} is unlocked. Players have to fight all 25 characters in single-{{iw|smashwiki|stock}} matches. Like the Classic and Adventure modes, the {{iw|smashwiki|difficulty}} setting can be adjusted. The player has only one life for the whole mode. Their {{iw|smashwiki|damage}} percentage does not reset after a battle, but to compensate, the mode has a {{iw|smashwiki|All-Star Rest Area|Rest Area}} that is entered after each battle, and it has up to three {{iw|zeldawiki|Heart Container}}s. If the player is defeated, they can still {{iw|smashwiki|continue}}, but at the cost of points and coins. The first four rounds involve battling a single opponent in their home stage. Rounds five to eight involve fighting two opponents at a time. Rounds nine to twelve involve fighting three opponents. The 13th round involves fighting 25 {{iw|smashwiki|Mr. Game & Watch (SSBM)|Mr. Game & Watches}} in the {{iw|smashwiki|Flat Zone}}, five at a time. The players' scores are saved after every stage. They get awarded points for the damage they dealt. Special Bonus points are awarded for not taking any of the Heart Containers, beating the mode on the Very Hard setting, or beating the mode without losing a life. The scores are saved separately for each character, and there is also a total score for all characters combined. The stage that is used is depended on what character plays as player 2. The stages go as follows: | |||
{| | {|class=wikitable width=35% | ||
|- | |- | ||
! width=15% | P2 Character !! width=20% | Stage | !width=15%|P2 Character!!width=20%|Stage | ||
|- | |- | ||
| Mario || Rainbow Cruise | |Mario||Rainbow Cruise | ||
|- | |- | ||
| Donkey Kong || Kongo Jungle | |Donkey Kong||Kongo Jungle | ||
|- | |- | ||
| Link || Great Bay | |Link||Great Bay | ||
|- | |- | ||
| Samus || Brinstar | |Samus||Brinstar | ||
|- | |- | ||
| Yoshi || Yoshi's Story | |Yoshi||Yoshi's Story | ||
|- | |- | ||
| Kirby || Green Greens | |Kirby||Green Greens | ||
|- | |- | ||
| Fox McCloud || Corneria | |Fox McCloud||Corneria | ||
|- | |- | ||
| Pikachu || Pokémon Stadium | |Pikachu||Pokémon Stadium | ||
|- | |- | ||
| Ness || Onett | |Ness||Onett | ||
|- | |- | ||
| Captain Falcon || Mute City | |Captain Falcon||Mute City | ||
|- | |- | ||
| Bowser || Yoshi's Island | |Bowser||Yoshi's Island | ||
|- | |- | ||
| Princess Peach || Princess Peach's Castle | |Princess Peach||Princess Peach's Castle | ||
|- | |- | ||
| Ice Climbers || Icicle Mountain | |Ice Climbers||Icicle Mountain | ||
|- | |- | ||
| Zelda || Temple | |Zelda||Temple | ||
|- | |- | ||
| Luigi || Mushroom Kingdom | |Luigi||Mushroom Kingdom | ||
|- | |- | ||
| Jigglypuff || Poké Floats | |Jigglypuff||Poké Floats | ||
|- | |- | ||
| Mewtwo || Battlefield | |Mewtwo||Battlefield | ||
|- | |- | ||
| Marth || Fountain of Dreams | |Marth||Fountain of Dreams | ||
|- | |- | ||
| Mr. Game & Watch || Flat Zone | |Mr. Game & Watch||Flat Zone | ||
|- | |- | ||
| Dr. Mario || Mushroom Kingdom 2 | |Dr. Mario||Mushroom Kingdom 2 | ||
|- | |- | ||
| Ganondorf || Brinstar Depths | |Ganondorf||Brinstar Depths | ||
|- | |- | ||
| Falco || Venom | |Falco||Venom | ||
|- | |- | ||
| Young Link || Jungle Japes | |Young Link||Jungle Japes | ||
|- | |- | ||
| Pichu || Fourside | |Pichu||Fourside | ||
|- | |- | ||
|Roy||Final Destination | |||
|} | |} | ||
===Event Match=== | |||
{{main-wiki|smashwiki|Event match}} | |||
{{redirect|Girl Power|the [[Play Nintendo]] gallery also called "Girl power"|[[Nintendo Female Characters List]]}} | |||
!width=2% | # | Event Matches are missions with a certain goal having to be achieved. Several event matches have a predetermined playable character, but a few allow the player to choose theirs. None of the event matches have any recovery items. The following table provides a rules summary of each of the 51 event matches. | ||
{|class=wikitable style="width:100%" | |||
!width=2%|# | |||
!width=20%|Name | |||
!width=15%|Character | |||
!width=16%|Stage | |||
!width=47%|Description | |||
|- | |- | ||
|1 || '''Trouble King''' || Mario || Battlefield || | |1||'''{{iw|smashwiki|Event 1: Trouble King|Trouble King}}'''||Mario||Battlefield||It is a stock match against Bowser, with both him and the player having two stock each. | ||
|- | |- | ||
|2 || '''Lord of the Jungle''' || Giant DK || Kongo Jungle || | |2||'''{{iw|smashwiki|Event 2: Lord of the Jungle|Lord of the Jungle}}'''||Giant DK||Kongo Jungle||It is a stock match against Tiny DK, with both him and the player having two stock each. | ||
|- | |- | ||
|3 || '''Bomb-fest''' || Selectable || Princess Peach's Castle || | |3||'''{{iw|smashwiki|Event 3: Bomb-fest|Bomb-fest}}'''||Selectable||Princess Peach's Castle||It is a stock match against Link and Samus, each having one stock. Link and Samus only use their bomb attacks. The only items are Bob-ombs, Motion Sensor Bombs, and Poké Balls containing Electrodes.<br>Upon winning the event match, the player obtains a trophy of the Motion-Sensor Bomb. | ||
|- | |- | ||
|4 || '''Dino-wrangling''' || Selectable || Yoshi's Story || | |4||'''{{iw|smashwiki|Event 4: Dino-wrangling|Dino-wrangling}}'''||Selectable||Yoshi's Story||A Super Giant Yoshi is fought a stock match; the player starts with three lives and the Giant Yoshi has only one. | ||
|- | |- | ||
|5 || '''Spare Change''' || Ness || Onett || | |5||'''{{iw|smashwiki|Event 5: Spare Change|Spare Change}}'''||Ness||Onett||200 coins have to be obtained while fighting Captain Falcon and avoiding being KO'd. | ||
|- | |- | ||
|6 || '''Kirbys on Parade''' || Selectable || Fountain of Dreams || | |6||'''{{iw|smashwiki|Event 6: Kirbys on Parade|Kirbys on Parade}}'''||Selectable||Fountain of Dreams||It is a stock match against three tiny Kirbys, each having two lives. | ||
|- | |- | ||
|7 || '''Pokémon Battle''' || Selectable || Pokémon Stadium || | |7||'''{{iw|smashwiki|Event 7: Pokémon Battle|Pokémon Battle}}'''||Selectable||Pokémon Stadium||It is a stock match against Pikachu, with both it and the player having two stock each. A difference is that regular attacks do not affect Pikachu, and the only way of doing so is using Poké Balls, the only items appearing in the match. | ||
|- | |- | ||
| | |8||'''{{iw|smashwiki|Event 8: Hot Date on Brinstar|Hot Date on Brinstar}}'''||Selectable||Brinstar||It is a stock match against Samus, with both her and the player having two stock each. The player and Samus begin with 102% and 130% damage, respectively. | ||
|- | |- | ||
| | |9||'''{{iw|smashwiki|Event 9: Hide 'n' Sheik|Hide 'n' Sheik}}'''||Selectable||Great Bay||The player has to fight two Zeldas, each having a single life, and KO one of them while she is Sheik. | ||
|- | |- | ||
| | |10||'''{{iw|smashwiki|Event 10: All-Star Match 1|All-Star Match 1}}'''||Selectable||Yoshi's Island, Jungle Japes, Yoshi's Story, Peach's Castle, Rainbow Cruise || The player, starting with two lives, has to fight Mario, DK, Yoshi, Peach, and Bowser in a row, battling each in a different stage. | ||
|- | |- | ||
| | |11||'''{{iw|smashwiki|Event 11: King of the Mountain|King of the Mountain}}'''||Selectable||Icicle Mountain||The match involves battling two pairs of Ice Climbers while avoiding being KO'd for one minute. | ||
|- | |- | ||
| | |12||'''{{iw|smashwiki|Event 12: Seconds, Anyone?|Seconds, Anyone?}}'''||Selectable||Mute City||The goal is to KO Captain Falcon within seven seconds. Both the player and Captain Falcon start with 100% damage. | ||
|- | |- | ||
| | |13||'''{{iw|smashwiki|Event 13: Yoshi's Egg|Yoshi's Egg}}'''||Yoshi||Rainbow Cruise||The goal is to protect [[Yoshi's Egg]] from Pikachu, Fox, and DK for 55 seconds. | ||
|- | |- | ||
| | |14||'''{{iw|smashwiki|Event 14: Trophy Tussle 1|Trophy Tussle 1}}'''||Selectable||[[Goomba|Goomba Trophy]]||The goal is to fight three randomly chosen opponents, each having two lives, in a 3-minute match. Winning the match unlocks the Goomba trophy. | ||
|- | |- | ||
| | |15||'''{{iw|smashwiki|Event 15: Girl Power|Girl Power}}'''||Selectable||Fountain of Dreams||The match involves battling a giant Peach, Zelda, and Samus, each having two lives. | ||
|- | |- | ||
| | |16||'''{{iw|smashwiki|Event 16: Kirby's Air-raid|Kirby's Air-raid}}'''||Kirby||Corneria||The goal is to KO 10 Kirbys within 38 seconds using Warp Stars only. | ||
|- | |- | ||
| | |17||'''{{iw|smashwiki|Event 17: Bounty Hunters|Bounty Hunters}}'''||Samus||Jungle Japes||The goal is to KO Bowser before Captain Falcon. If Bowser {{iw|smashwiki|self-destruct}}s himself, the player will lose, but not if Captain Falcon does so. | ||
|- | |- | ||
| | |18||'''{{iw|smashwiki|Event 18: Link's Adventure|Link's Adventure}}'''||Link||Temple||The goal is to fight {{iw|smashwiki|Dark Link}}. Both he and the player each begin with two lives. | ||
|- | |- | ||
| | |19||'''{{iw|smashwiki|Event 19: Peach's Peril|Peach's Peril}}'''||Mario||Final Destination||The goal is to protect Peach from Bowser, who has unlimited stock, for one minute. | ||
|- | |- | ||
| | |20||'''{{iw|smashwiki|Event 20: All-Star Match 2|All-Star Match 2}}'''||Selectable||Brinstar, Great Bay, Temple, Mute City, Corneria||The player, starting with two lives, has to fight Samus, Link, Zelda, Captain Falcon, and Fox in a row, battling each in a different stage. | ||
|- | |- | ||
| | |21||'''{{iw|smashwiki|Event 21: Ice Breaker|Ice Breaker}}'''||Selectable||Princess Peach's Castle||Two pairs of Ice Climbers are fought. Both Nanas have to be defeated, though the player loses if they KO either Popo. | ||
|- | |- | ||
| | |22||'''{{iw|smashwiki|Event 22: Super Mario 128|Super Mario 128}}'''||Selectable||Mushroom Kingdom II||The match involves battling 128 tiny Marios, five of whom appear on the stage at a time. | ||
|- | |- | ||
| | |23||'''{{iw|smashwiki|Event 23: Slippy's Invention|Slippy's Invention}}'''||Selectable||Venom||The match involves battling an invisible Fox and Falco, each having two lives. | ||
|- | |- | ||
| | |24||'''{{iw|smashwiki|Event 24: The Yoshi Herd|The Yoshi Herd}}'''||Selectable||Yoshi's Island||The goal is to defeat 30 Yoshis, the last of which is a Giant Yoshi, within 2 minutes. | ||
|- | |- | ||
| | |25||'''{{iw|smashwiki|Event 25: Gargantuans|Gargantuans}}'''||Giant Bowser||Fourside||The goal is to defeat Giant DK. The player has one life, while DK has two. A tiny Mario and tiny Peach both appear as well, each having one stock, and defeating them is optional. | ||
|- | |- | ||
| | |26||'''{{iw|smashwiki|Event 26: Trophy Tussle 2|Trophy Tussle 2}}'''||Selectable||[[bulbapedia:Entei (Pokémon)|Entei Trophy]]||The player has to fight in a 3-minute match against three randomly chosen opponents, each combatant having two lives. The Entei trophy is rewarded for winning. | ||
|- | |- | ||
| | |27||'''{{iw|smashwiki|Event 27: Cold Armor|Cold Armor}}'''||Samus||Brinstar Depths||The match involves fighting three Metal Samuses. The player has only one life, while the opponents each have two lives. | ||
|- | |- | ||
| | |28||'''{{iw|smashwiki|Event 28: Puffballs Unite!|Puffballs Unite!}}'''||Selectable||Green Greens||The goal is to defeat 14 Kirbys, each having a different copied character ability, within two minutes. | ||
|- | |- | ||
| | |29||'''{{iw|smashwiki|Event 29: Triforce Gathering|Triforce Gathering}}'''||Link||Temple||The goal is for the player, who is helped by Zelda, to defeat Ganondorf. Both player and Zelda have one life each, and Ganondorf has two. After winning the event match, Ganondorf is fought in a separate match, where defeating Ganondorf unlocks him as a playable character. | ||
|- | |- | ||
| | |30||'''{{iw|smashwiki|Event 30: All-Star Match 3|All-Star Match 3}}'''||Selectable||Fountain of Dreams, Pokémon Stadium, Onett, Icicle Mountain||The player, starting with two lives, has to fight Kirby, Pikachu, Ness, and the Ice Climbers in a row, battling each in a different stage. | ||
|- | |- | ||
| | |31||'''{{iw|smashwiki|Event 31: Mario Bros. Madness|Mario Bros. Madness}}'''||Selectable||Mushroom Kingdom||The match involves battling Mario and Luigi in a time match. The goal is to earn the most points within two minutes. | ||
|- | |- | ||
| | |32||'''{{iw|smashwiki|Event 32: Target Acquired|Target Acquired}}'''||Falco||Corneria||The player has one minute to KO Jigglypuff as often as possible. The player has to defeat it more often than the Arwings. Jigglypuff starts and reappears each time with 70% damage. | ||
|- | |- | ||
| | |33||'''{{iw|smashwiki|Event 33: Lethal Marathon|Lethal Marathon}}'''||Captain Falcon||F-Zero Grand Prix (Adventure)||The goal is to reach the end within 45 seconds. The stage is at twice the speed than in Adventure mode. | ||
|- | |- | ||
| | |34||'''{{iw|smashwiki|Event 34: Seven Years|Seven Years}}'''||Young Link||Great Bay||The player has to fight Link in a stock match, with both of them having three lives each. | ||
|- | |- | ||
| | |35||'''{{iw|smashwiki|Event 35: Time for a Checkup|Time for a Checkup}}'''||Luigi||Yoshi's Story||The goal is to defeat a team of Dr. Mario and Peach, each having a single life, within two minutes. | ||
|- | |- | ||
| | |36||'''{{iw|smashwiki|Event 36: Space Travelers|Space Travelers}}'''||Ness||Fourside, Battlefield||The goal is to defeat Samus, Kirby, Fox, Captain Falcon, and Falco in a row. The first three are fought on Fourside, and the other two on the Battlefield stage. The player and every opponent have one life each. | ||
|- | |- | ||
| | |37||'''{{iw|smashwiki|Event 37: Legendary Pokémon|Legendary Pokémon}}'''||Selectable||Battlefield||The goal is for the player, with one life, to defeat four giant Fighting Wire Frames, as well as Jigglypuff, each having two lives. Poké Balls are the only items, and they contain either a {{iw|bulbapedia|Legendary Pokémon}} or a {{iw|smashwiki|Wobbuffet}}. Winning the event match initiates a separate battle with Pichu, where defeating Pichu unlocks it as a playable character. | ||
|- | |- | ||
| | |38||'''{{iw|smashwiki|Event 38: Super Mario Bros. 2|Super Mario Bros. 2}}'''||Selectable||Mushroom Kingdom II||The match involves fighting Mario, Luigi, and Peach in a stock battle, with each having two lives. | ||
|- | |- | ||
| | |39||'''{{iw|smashwiki|Event 39: Jigglypuff Live!|Jigglypuff Live!}}'''||Jigglypuff||Pokémon Stadium||The match involves fighting three Jigglypuffs, each having three lives. | ||
|- | |- | ||
| | |40||'''{{iw|smashwiki|Event 40: All-Star Match 4|All-Star Match 4}}'''||Selectable||Temple, Mushroom Kingdom II, Poké Floats, Final Destination, Flat Zone||The player, starting with two lives, has to fight Marth, Luigi, Jigglypuff, Mewtwo, and Mr. Game & Watch in a row, battling each in a different stage. | ||
|- | |- | ||
| | |41||'''{{iw|smashwiki|Event 41: En Garde!|En Garde!}}'''||Marth||Temple||The player has to fight Link in a stock match, with both of them start with two lives each. | ||
|- | |- | ||
| | |42||'''{{iw|smashwiki|Event 42: Trouble King 2|Trouble King 2}}'''||Luigi||Poké Floats||A Giant Bowser is fought in a stock match, with both him and the player having two lives. Bowser is given a huge {{iw|smashwiki|handicap}}, which allows him to quickly KO the player. | ||
|- | |- | ||
| | |43||'''{{iw|smashwiki|Event 43: Birds of Prey|Birds of Prey}}'''||Fox||Big Blue||The match involves battling a team of Captain Falcon and Falco, each having two lives. | ||
|- | |- | ||
| | |44||'''{{iw|smashwiki|Event 44: Mewtwo Strikes!|Mewtwo Strikes!}}'''||Selectable||Battlefield||The match involves battling Zelda in a stock battle. After a time of 15 seconds, Mewtwo appears and has to be defeated, whilst defeating Zelda causes the player to lose. | ||
|- | |- | ||
| | |45||'''{{iw|smashwiki|Event 45: Game & Watch Forever!|Game & Watch Forever!}}'''||Mr. Game & Watch||Flat Zone||The goal is to defeat 25 Mr. Game & Watches, three of which appear on stage at a given time. The player starts with three stock. Winning the event match unlocks the Game & Watch trophy. | ||
|- | |- | ||
| | |46||'''{{iw|smashwiki|Event 46: Fire Emblem Pride|Fire Emblem Pride}}'''||Selectable||Temple||It is a stock match against Marth and Roy, who are on a team, each having three lives. | ||
|- | |- | ||
| | |47||'''{{iw|smashwiki|Event 47: Trophy Tussle 3|Trophy Tussle 3}}'''||Selectable||Majora's Mask Trophy||It is a 3-minute match against three randomly chosen opponents, each combatant having two lives. Completing the event match unlocks the Majora's Mask trophy. | ||
|- | |- | ||
| | |48||'''{{iw|smashwiki|Event 48: Pikachu and Pichu|Pikachu and Pichu}}'''||Selectable||Dream Land (Past Stage)||The goal is for the player, starting with two lives, to defeat two Pichus. They are defended by a Pikachu which respawns when defeated. | ||
|- | |- | ||
| | |49||'''{{iw|smashwiki|Event 49: All-Star Match Deluxe|All-Star Match Deluxe}}'''||Selectable||Mushroom Kingdom, Venom, Pokémon Stadium, Great Bay, Temple, Final Destination||The player, starting with two lives, has to fight Dr. Mario, Falco, Pichu, Young Link, Roy, and Ganondorf in a row, battling each in a different stage. | ||
|- | |- | ||
| | |50||'''{{iw|smashwiki|Event 50: Final Destination Match|Final Destination Match}}'''||Selectable||Final Destination||The match involves the player, who has one life only, battling {{iw|smashwiki|Master Hand}} and {{iw|smashwiki|Crazy Hand}}, each having 300 HP. | ||
|- | |- | ||
|51||'''{{iw|smashwiki|Event 51; The Showdown|The Showdown}}'''||Selectable||Final Destination||The match involves battling [[Giga Bowser]], [[Ganondorf]], and [[Mewtwo]], each having three lives. Winning the match unlocks both the Final Destination stage and trophy. | |||
|} | |} | ||
More event matches can be unlocked by winning a certain number of the previous ones and unlocking additional characters. | |||
{| | {|class="wikitable"style="width:100%" | ||
|- | |- | ||
!Events # | !Events # | ||
!Unlocked | !Unlocked by | ||
|- | |- | ||
|11 - 15 || Winning at least 6 of the event matches #1 - 10 | |11 - 15||Winning at least 6 of the event matches #1 - 10 | ||
|- | |- | ||
|16 - 20 || Winning at least 10 of the event matches #1 - 15 | |16 - 20||Winning at least 10 of the event matches #1 - 15 | ||
|- | |- | ||
|21 - 25 || Winning at least 16 of the event matches #1 - 20 | |21 - 25||Winning at least 16 of the event matches #1 - 20 | ||
|- | |- | ||
|26 - 29 || Winning at least 22 of the event matches #1 - 25 | |26 - 29||Winning at least 22 of the event matches #1 - 25 | ||
|- | |- | ||
|30 || Winning at least 27 of the event matches #1 - 29 | |30||Winning at least 27 of the event matches #1 - 29 | ||
|- | |- | ||
|31 - 39 || Complete 27 out of the 30 events and unlock [[Jigglypuff]], [[Luigi]], [[Dr. Mario]], [[Young Link]], and [[Falco | |31 - 39||Complete 27 out of the 30 events and unlock [[smashwiki:Jigglypuff (SSBM)|Jigglypuff]], [[Luigi]], [[Dr. Mario]], [[smashwiki:Young Link (SSBM)|Young Link]], and [[smashwiki:Falco (SSBM)|Falco]]. | ||
|- | |- | ||
|40 - 50 || Complete the first 39 events and unlock all the rest of unlockable characters (including: [[Marth]], [[Roy ( | |40 - 50||Complete 27 of the first 39 events and unlock all the rest of unlockable characters (including: [[smashwiki:Marth (SSBM)|Marth]], [[smashwiki:Roy (SSBM)|Roy]], [[smashwiki:Ganondorf (SSBM)|Ganondorf]], [[smashwiki:Pichu (SSBM)|Pichu]], [[smashwiki:Mewtwo (SSBM)|Mewtwo]], and [[smashwiki:Mr. Game & Watch (SSBM)|Mr. Game & Watch]]). | ||
|- | |- | ||
|51 || Winning all event matches #1 - 50 | |51||Winning all event matches #1 - 50 | ||
|} | |} | ||
By playing in event matches, the player's record for each event is saved. Most events are stock matches, and in those the time the player needs to clear the event is saved as a record. For the few events in the Time setting, e. g. Event #31: Mario Bros. Madness and #32: Target Acquired, the number of KOs the player achieves is stored instead. | By playing in event matches, the player's record for each event is saved. Most events are stock matches, and in those the time the player needs to clear the event is saved as a record. For the few events in the Time setting, e. g. Event #31: Mario Bros. Madness and #32: Target Acquired, the number of KOs the player achieves is stored instead. | ||
===Stadium=== | ===Stadium=== | ||
{{main-wiki|SmashWiki|Stadium}} | |||
In the Stadium, special minigames are available. Each minigame opens the way to unlock one of the Past Stages from the original ''Super Smash Bros.'' | In the Stadium, special minigames are available. Each minigame opens the way to unlock one of the Past Stages from the original ''Super Smash Bros.'' | ||
* '''Target Test''': Here the player can play the [[Break the Targets!]] test, as it appears in Classic mode, separately. There is no time limit in this mode, | *'''[[smashwiki:Target Smash!|Target Test]]''': Here the player can play the [[Break the Targets!]] test, as it appears in Classic mode, separately. There is no time limit in this mode, unlike in Classic mode. | ||
* ''' | *'''{{iw|smashwiki|Home-Run Contest}}''': The goal of the Home-Run Contest is to throw the [[Sandbag]] as far as possible. The player gets a [[Home-Run Bat]] to do this. The player has ten seconds to damage the Sandbag before hitting it, so that it will fly farther away. | ||
* '''[[Multi-Man | *'''[[smashwiki:Multi-Man Smash|Multi-Man Melee]]''': In this special mode the goal is to fight [[Fighting Wire Frames]]. | ||
* '''10-Man Melee''': The player has to KO 10 Wire Frames in the fastest time possible. | *'''[[smashwiki:10-Man Smash|10-Man Melee]]''': The player has to KO 10 Wire Frames in the fastest time possible. | ||
* '''100-Man Melee''': The player has to KO 100 Wire Frames in the fastest time possible. When winning, the player can unlock [[Falco Lombardi]]. | *'''[[smashwiki:100-Man Smash|100-Man Melee]]''': The player has to KO 100 Wire Frames in the fastest time possible. When winning, the player can unlock [[Falco Lombardi]]. | ||
* '''3-Minute Melee''': The player has 3 minutes to KO as many Wire Frames as possible. | *'''[[smashwiki:3-Minute Smash|3-Minute Melee]]''': The player has 3 minutes to KO as many Wire Frames as possible. | ||
* '''15-Minute Melee''': The player has 15 minutes to KO as many Wire Frames as possible. When winning, the player can unlock the Past [[Kongo Jungle (Super Smash Bros.)|Kongo Jungle]] stage. | *'''[[smashwiki:15-Minute Smash|15-Minute Melee]]''': The player has 15 minutes to KO as many Wire Frames as possible. When winning, the player can unlock the Past [[Kongo Jungle (Super Smash Bros.)|Kongo Jungle]] stage. | ||
* '''Endless Melee''': The player has an unlimited amount of time to KO as many Wire Frames as possible. | *'''[[smashwiki:Endless Smash|Endless Melee]]''': The player has an unlimited amount of time to KO as many Wire Frames as possible. | ||
* '''Cruel Melee''': As in ''Endless Melee'', there is an unlimited amount of time. However, there are no items, the Wire Frames are harder to KO, and the player can get KO'd | *'''[[smashwiki:Cruel mode|Cruel Melee]]''': As in ''Endless Melee'', there is an unlimited amount of time. However, there are no items, the Wire Frames are harder to KO, and the player can get KO'd easily at low damage percentages. | ||
===Training | ===Training=== | ||
The player can practice here. There are no rules such as Stock or Time, and the opponent can be controlled either by the Training menu, and set to actions such as walking and standing, or by a human player. Items can be created to practice with them specially. When the player performs standard combos here, the | {{main-wiki|SmashWiki|Training Mode}} | ||
The player can practice here. There are no rules such as Stock or Time, and the opponent can be controlled either by the Training menu, and set to actions such as walking and standing, or by a human player. Items can be created to practice with them specially. When the player performs standard combos here, the maximum number of combos is saved for each playable character, and the player can unlock several Trophies when getting a high number of them. | |||
==VS | ==VS. Mode== | ||
{{main-wiki|SmashWiki|Versus Mode}} | |||
===Melee=== | ===Melee=== | ||
[[File:MarioJump-SSBMelee.png|thumb | [[File:MarioJump-SSBMelee.png|thumb|[[Mario]] in midjump]] | ||
Melee mode allows players to set up the battles entirely for themselves. They can freely choose their characters, the stage, and have a variety of modes to play in. When using names, records are saved for the Melee mode which can be viewed in the Data menu. Up to four players can join the fight, either human or CPU-controlled players. It is possible to only let CPU players fight against each other. | Melee mode allows players to set up the battles entirely for themselves. They can freely choose their characters, the stage, and have a variety of modes to play in. When using names, records are saved for the Melee mode which can be viewed in the Data menu. Up to four players can join the fight, either human or CPU-controlled players. It is possible to only let CPU players fight against each other. | ||
| Line 1,159: | Line 1,224: | ||
The CPU levels range from 1 to 9, with 9 being the most advanced AI. An optional handicap mode also ranges from 1 to 9. The handicap determines how fast a character is knocked out by other fighters, items, and the stage environment. When characters have a high handicap, they are more resistant to stage hazards, and can easily KO opponents with lower handicaps. Whereas, for the low handicapped characters, they can be sent flying (even get KO'd) pretty easily by stage hazards, and will have a very hard time KOing higher handicapped players. If the handicap is set to "Auto", all players will start with a handicap of 5. With the "Auto" handicap setting, the winner of the next match will get their handicap lowered, while the loser will get their handicap heightened. On a side note, unlike in ''Super Smash Bros.'', CPU players can have their handicaps adjusted in this game. | The CPU levels range from 1 to 9, with 9 being the most advanced AI. An optional handicap mode also ranges from 1 to 9. The handicap determines how fast a character is knocked out by other fighters, items, and the stage environment. When characters have a high handicap, they are more resistant to stage hazards, and can easily KO opponents with lower handicaps. Whereas, for the low handicapped characters, they can be sent flying (even get KO'd) pretty easily by stage hazards, and will have a very hard time KOing higher handicapped players. If the handicap is set to "Auto", all players will start with a handicap of 5. With the "Auto" handicap setting, the winner of the next match will get their handicap lowered, while the loser will get their handicap heightened. On a side note, unlike in ''Super Smash Bros.'', CPU players can have their handicaps adjusted in this game. | ||
[[File: | [[File:SSBM Camera Mode.png|thumb|left|The character selection screen in the camera mode (see [[#Special Melee|Special Melee]]).]] | ||
In the optional team battle mode, players can set up to three teams. The characters in the team work together and win or lose the match together. In Coin, Bonus, and Time mode, the points of each team are added and compared. In Stock mode, after a player of the team has been defeated, they can press {{button|gcn|Start}} to rejoin the battle, but takes away a life from one of their teammates. Optionally, the Friendly Fire option can be set, which makes it possible for teammates to (accidentally) hurt each other with their attacks. | In the optional team battle mode, players can set up to three teams. The characters in the team work together and win or lose the match together. In Coin, Bonus, and Time mode, the points of each team are added and compared. In Stock mode, after a player of the team has been defeated, they can press {{button|gcn|Start}} to rejoin the battle, but takes away a life from one of their teammates. Optionally, the Friendly Fire option can be set, which makes it possible for teammates to (accidentally) hurt each other with their attacks. | ||
| Line 1,169: | Line 1,234: | ||
After all preferences have been set, the players get onto the stage selection screen, which once again allows players to choose a random stage to play on. When all competing human players hold {{button|gcn|L}}+{{button|gcn|R}} when a stage is selected, the stage's alternate music track will play during battle, if it is available. When players are playing as Zelda and hold {{button|gcn|A}} after a stage has been selected, they will start the battle as Sheik. | After all preferences have been set, the players get onto the stage selection screen, which once again allows players to choose a random stage to play on. When all competing human players hold {{button|gcn|L}}+{{button|gcn|R}} when a stage is selected, the stage's alternate music track will play during battle, if it is available. When players are playing as Zelda and hold {{button|gcn|A}} after a stage has been selected, they will start the battle as Sheik. | ||
The pre-match countdown from 3 by the announcer, cheering for characters by the crowd, and unique on-screen appearances for each playable fighter are absent. Instead, the announcer says, "Ready... Go!" at the start of a match, and when the match ends in a tie, the announcer says, "Sudden Death... Go!" at the start of a sudden death match, and all fighters share the same animation of a trophy coming to life. In Time matches, the announcer counts down from 5 during the last five seconds before shouting, "Time!" | |||
As the battle ends, the players get to the battle results screen, where they can view their KO scores, a list of their bonus points, and special statistics about their movements. These lists are available in all the VS Game Modes, except for Camera Mode and Stamina Mode. | As the battle ends, the players get to the battle results screen, where they can view their KO scores, a list of their bonus points, and special statistics about their movements. These lists are available in all the VS Game Modes, except for Camera Mode and Stamina Mode. | ||
===Tournament | ===Tournament Melee=== | ||
{{main-wiki|SmashWiki|Tournament Mode (SSBM)}} | |||
'''Tournament''': In this mode, played as a single-elimination tournament, the winner of a battle passes on to the next round CPU-only matches can be skipped. The number of combatants per battle ranges from 2 to 4. The number of entrants is selected and can be up to 64. It is selected how many humans are among the competing players. The stage selection mode is selected; "Single Random" chooses a stage at random on that every match of the tournament is played, "Always Different" chooses a new random stage for each battle, "Choose First" lets the player select the stage for the tournament in the beginning and "Choose All" lets the player choose a new stage for each match of the tournament. The level of additional computer opponents can be set from 1 to 9, applied to all, or to a random value applied to each CPU player. The rules settings for the battles have the same choices as the VS mode. Each player chooses their character and the tournament begins. | '''Tournament''': In this mode, played as a single-elimination tournament, the winner of a battle passes on to the next round CPU-only matches can be skipped. The number of combatants per battle ranges from 2 to 4. The number of entrants is selected and can be up to 64. It is selected how many humans are among the competing players. The stage selection mode is selected; "Single Random" chooses a stage at random on that every match of the tournament is played, "Always Different" chooses a new random stage for each battle, "Choose First" lets the player select the stage for the tournament in the beginning and "Choose All" lets the player choose a new stage for each match of the tournament. The level of additional computer opponents can be set from 1 to 9, applied to all, or to a random value applied to each CPU player. The rules settings for the battles have the same choices as the VS mode. Each player chooses their character and the tournament begins. | ||
'''Winner out/Loser out''': This mode is for human players only. A number of players fight against each other. The winner or the loser of the match, depending on the setting, gives his controller to the next player waiting for his turn to come. This continues endlessly, until the mode is | '''Winner out/Loser out''': This mode is for human players only. A number of players fight against each other. The winner or the loser of the match, depending on the setting, gives his controller to the next player waiting for his turn to come. This continues endlessly, until the mode is canceled. Players are free to change their characters while the tournament is ongoing. When they hold down {{button|gcn|L}} and {{button|gcn|R}}, their character image changes to a [[bulbapedia:Ditto (Pokémon)|Ditto]], the placeholder for a random character. Here, too, the number of combatants per battle ranges from 2 to 4, and the number of entrants can be up to 64. The stage selection mode has the same options as in the regular tournament. | ||
===Special Melee=== | ===Special Melee=== | ||
{{main-wiki|SmashWiki|Special Smash}} | |||
This mode offers a couple of different rules settings for the Melee mode. Any records (such as amount of KOs) are not counted. | This mode offers a couple of different rules settings for the Melee mode. Any records (such as amount of KOs) are not counted. | ||
{|class="wikitable"style="text-align:center" | |||
{| | !colspan=2 style="font-size:120%" align=center|Special Melee modes | ||
!colspan=2 style=" | |||
|- | |- | ||
!width=20% | Name | !width=20%|Name | ||
!width=80%|Description | |||
|- | |- | ||
|Camera Mode || In this mode, the players can take screenshots. These screenshots are saved on the memory card. The number of blocks a screenshot takes is defined by how many objects are visible on it. | |Camera Mode||In this mode, the players can take screenshots. These screenshots are saved on the memory card. The number of blocks a screenshot takes is defined by how many objects are visible on it. | ||
|- | |- | ||
|Stamina Mode || As it is seen at the Master Hand in Classic mode, players have 150 HP instead of percentage of damage. The player gets KO'd if their HP hits 0. The amount of HP the players start with, however, cannot be changed. | |Stamina Mode||As it is seen at the Master Hand in Classic mode, players have 150 HP instead of percentage of damage. The player gets KO'd if their HP hits 0. The amount of HP the players start with, however, cannot be changed. | ||
|- | |- | ||
|Super Sudden Death || All players start with 300% damage. This will cause them to be knocked out almost instantly when hit by a strong attack. | |Super Sudden Death||All players start with 300% damage. This will cause them to be knocked out almost instantly when hit by a strong attack. | ||
|- | |- | ||
|Giant Melee || All players are giant, as if they had taken Super Mushrooms. Handicaps | |Giant Melee||All players are giant, as if they had taken Super Mushrooms. Handicaps do not work properly for this game mode. | ||
|- | |- | ||
|Tiny Melee || All players are tiny, as if they had taken Poison Mushrooms. Handicaps | |Tiny Melee||All players are tiny, as if they had taken Poison Mushrooms. Handicaps do not work properly for this game mode. | ||
|- | |- | ||
|Invisible Melee || All players are invisible, as if they had Cloaking Devices. | |Invisible Melee||All players are invisible, as if they had Cloaking Devices. | ||
|- | |- | ||
|Fixed Camera Mode || The camera is zoomed out as far as possible, showing the whole stage, and does not move during the battle. | |Fixed Camera Mode||The camera is zoomed out as far as possible, showing the whole stage, and does not move during the battle. | ||
|- | |- | ||
|Single-Button Mode || Only the {{button|gcn|Stick}} and the {{button|gcn|A}} button work in this mode, allowing only basic attacks. This mode is designed for beginners, but it renders the {{button|gcn|Y}} and {{button|gcn|X}} buttons useless. The {{button|gcn|C}} can still be used. | |Single-Button Mode||Only the {{button|gcn|Stick}} and the {{button|gcn|A}} button work in this mode, allowing only basic attacks. This mode is designed for beginners, but it renders the {{button|gcn|Y}} and {{button|gcn|X}} buttons useless. The {{button|gcn|C}} can still be used. | ||
|- | |- | ||
|Lightning Melee || In this mode, the game plays a lot faster, making it hard for players | |Lightning Melee||In this mode, the game plays a lot faster, making it hard for players to execute and react on attacks. | ||
|- | |- | ||
|Slo-Mo Melee||The opposite of Lightning Melee. The game is a lot slower, making it easier to execute and react on attacks. | |||
|} | |} | ||
==Trophies== | ==Trophies== | ||
{{Main| | {{Main|List of trophies in Super Smash Bros. Melee}} | ||
[[File:TrophyGallery.png|thumb| | [[File:TrophyGallery.png|thumb|upright=1.1|Viewing a trophy]] | ||
Trophies can be collected in | [[Trophy (Super Smash Bros. series)|Trophies]] can be collected in 1-P Mode, won in the {{iw|smashwiki|Lottery}}, or acquired on special events, such as playing a certain number of matches in VS mode. There are 290 trophies in the game (293 in the Japanese version, 292 in the PAL version), with several of them representing the ''Super Mario'' franchise. Each of the playable characters have three trophies: One explains the character's backstory in the game they originated from, and is collected by completing Classic mode, while other two explain their background in the game itself. These trophies can be collected by completing the Adventure and All-Star mode with them, or by completing a sufficient amount of VS mode matches with the respective character. | ||
{{br}} | |||
==Unlockable features== | ==Unlockable features== | ||
Unlocking a secret character always involves fulfilling a certain criteria and then defeating them in a single-{{iw|smashwiki|stock}}. All unlockable characters have a unique method of being unlocked, or alternately from playing a certain number of matches in the VS mode. | |||
{| class=sortable | {|class="wikitable sortable"style="text-align:center" | ||
!Character | !Character | ||
!First unlock method | !First unlock method | ||
! | !Number of VS matches | ||
|- | |- | ||
|Jigglypuff | |Jigglypuff | ||
|Completing | |Completing Classic or Adventure with any character. | ||
|50 | |50 | ||
|- | |- | ||
|Dr. Mario | |Dr. Mario | ||
|Completing | |Completing Classic or Adventure with Mario without using a continue. | ||
|100 | |100 | ||
|- | |- | ||
| Line 1,234: | Line 1,301: | ||
|- | |- | ||
|Falco | |Falco | ||
|Completing the 100-Man Melee | |Completing the 100-Man Melee | ||
|300 | |300 | ||
|- | |- | ||
|Marth | |Marth | ||
|Completing | |Completing or failing Classic or Adventure mode with all default characters or playing as every default character in VS. Mode. | ||
|400 | |400 | ||
|- | |- | ||
|Young Link | |Young Link | ||
|Completing | |Completing Classic or Adventure with ten different characters. | ||
|500 | |500 | ||
|- | |- | ||
|Ganondorf | |Ganondorf | ||
|Completing Event Match #29 | |Completing Event Match #29 | ||
|600 | |600 | ||
|- | |- | ||
|Mewtwo | |Mewtwo | ||
|Playing in | |Playing in VS. Mode for 20 hours with one controller, ten hours with two controllers, six hours with three controllers or four hours with four controllers. | ||
|700 | |700 | ||
|- | |- | ||
|Luigi | |Luigi | ||
|Finishing the first stage of | |Finishing the first stage of Adventure with a XX:X2:XX on the countdown timer, then defeating Luigi in the battle on Princess Peach's Castle, and then fighting him again after completing Adventure. | ||
|800 | |800 | ||
|- | |- | ||
|Roy | |Roy | ||
|Completing | |Completing Classic or Adventure with Marth without using a continue. | ||
|900 | |900 | ||
|- | |- | ||
|Mr. Game & Watch | |Mr. Game & Watch | ||
|Completing | |Completing Classic, Adventure, or Break the Targets with all other 24 characters. | ||
|1000 | |1000 | ||
|} | |} | ||
There is only one method to unlock the stages, and the player does not have to unlock them by an additional battle like the characters. | There is only one method to unlock the stages, and the player does not have to unlock them by an additional battle like the characters. | ||
{| class=sortable | {|class="wikitable sortable"style="text-align:center" | ||
!Stage | !Stage | ||
!How to unlock | !How to unlock | ||
|- | |- | ||
| | |Battlefield | ||
|Beating the All-Star mode | |Beating the All-Star mode | ||
|- | |- | ||
|Brinstar Depths | |Brinstar Depths | ||
|Playing 50 VS matches | |Playing 50 VS matches | ||
|- | |- | ||
|Fourside | |Fourside | ||
|Playing 100 VS matches | |Playing 100 VS matches | ||
|- | |- | ||
|Big Blue | |Big Blue | ||
|Playing 150 VS matches | |Playing 150 VS matches | ||
|- | |- | ||
|Poké Floats | |Poké Floats | ||
|Playing 200 VS matches | |Playing 200 VS matches | ||
|- | |- | ||
|Dream Land | |Dream Land | ||
|Beating the Target Test with all 25 characters | |Beating the Target Test with all 25 characters | ||
|- | |- | ||
|Final Destination | |Final Destination | ||
|Beating Event Match #51 | |Beating Event Match #51 | ||
|- | |- | ||
|Flat Zone | |Flat Zone | ||
|Beating the Classic Mode with Mr. Game & Watch | |Beating the Classic Mode with Mr. Game & Watch | ||
|- | |- | ||
|Kongo Jungle | |Kongo Jungle | ||
|Beating the 15-Minute Melee | |Beating the 15-Minute Melee | ||
|- | |- | ||
|Mushroom Kingdom II | |Mushroom Kingdom II | ||
| Line 1,301: | Line 1,368: | ||
|- | |- | ||
|Yoshi's Island | |Yoshi's Island | ||
|Getting the Sandbag over the 400 meter/1,325 feet mark at the | |Getting the Sandbag over the 400 meter/1,325 feet mark at the Home-Run Contest. | ||
|} | |} | ||
| Line 1,307: | Line 1,374: | ||
Each stage has a track from the game it is from, and some stages also have alternate music tracks which are not necessarily from the game the stage is from. The alternate music is heard more rarely than the regular one. However, the player can force the game to play a stage's alternate music by holding {{button|gcn|L}} or {{button|gcn|R}} when selecting a stage on the stage selection screen. If more than one player is playing, however, every player has to do this action to get the alternate music. | Each stage has a track from the game it is from, and some stages also have alternate music tracks which are not necessarily from the game the stage is from. The alternate music is heard more rarely than the regular one. However, the player can force the game to play a stage's alternate music by holding {{button|gcn|L}} or {{button|gcn|R}} when selecting a stage on the stage selection screen. If more than one player is playing, however, every player has to do this action to get the alternate music. | ||
When all stages are unlocked, the player gains access to the Sound Test, where the player can play all music tracks and voices from the game, and might occasionally hear an alternate music track in the menu. Also, if the player uses sound test and then opens the trophy gallery, whichever song was played last in sound test is played in the trophy gallery. | When all stages are unlocked, the player gains access to the Sound Test, where the player can play all music tracks and voices from the game, and might occasionally hear an alternate music track in the menu. Also, if the player uses sound test and then opens the trophy gallery, whichever song was played last in sound test is played in the trophy gallery. However, the music has to loop, or else it will not be played in the trophy gallery. | ||
An orchestrated version of the game's soundtrack was released as a special CD known as [[Super Smash Bros. Melee: Smashing...Live!]]. | An orchestrated version of the game's soundtrack was released as a special CD known as [[Super Smash Bros. Melee: Smashing...Live!]]. | ||
==Critical reception== | ==Critical reception== | ||
''Super Smash Bros. Melee'' received very positive reviews from most critics. The game came in sixth for two [http://www.gamefaqs.com/ GameFAQs] events: the Best...Game...Ever contest and as a poll for the 100 best games ever. [[Nintendo Power]] named ''Super Smash Bros. Melee'' the 16th best game ever to appear on a Nintendo console, and "Game of the Year" in 2001. [http://www.ign.com IGN] gave ''Super Smash Bros. Melee'' a rating of 9.6 out of 10, and ranked it as the 3rd best Nintendo GameCube game, out of all GameCube games released to date. Electronic Gaming Monthly gave the game a 9.5 out of 10, and it was ranked 92nd on the Electronic Gaming Monthly's "Top 200 Games of Their Time" list. In fact, it was ranked as the 3rd best Video Game of all time during the 2001 Penny Arcade Award Ceremony. | Like its predecessor, ''Super Smash Bros. Melee'' received very positive reviews from most critics. The game came in sixth for two [http://www.gamefaqs.com/ GameFAQs] events: the Best...Game...Ever contest and as a poll for the 100 best games ever. [[Nintendo Power]] named ''Super Smash Bros. Melee'' the 16th best game ever to appear on a Nintendo console, and "Game of the Year" in 2001. [http://www.ign.com IGN] gave ''Super Smash Bros. Melee'' a rating of 9.6 out of 10, and ranked it as the 3rd best Nintendo GameCube game, out of all GameCube games released to date. Electronic Gaming Monthly gave the game a 9.5 out of 10, and it was ranked 92nd on the Electronic Gaming Monthly's "Top 200 Games of Their Time" list. In fact, it was ranked as the 3rd best Video Game of all time during the 2001 Penny Arcade Award Ceremony. | ||
It was praised for its increased number of modes and characters, as well as improved graphics. The inclusion of the Adventure | It was praised for its increased number of modes and characters, as well as improved graphics. The inclusion of the Adventure mode and Event Match was highly complimented. Overall, the game's critical reception was very positive, and the game still continues to be a gamer favorite, being frequently played at tournaments alongside more traditional fighting games such as ''[[:Category:Street Fighter series|Street Fighter]]''. | ||
{|class="wikitable reviews" | |||
''Super Smash Bros. Melee'' is the best selling game for the [[Nintendo GameCube]], selling about 7.09 million copies worldwide, as of December 31, 2009. | !colspan="4"style="font-size:120%;text-align:center;background-color:silver;"|Reviews | ||
|-style="background-color:#E6E6E6" | |||
|Release | |||
|Reviewer, Publication | |||
|Score | |||
|Comment | |||
|- | |||
|[[Nintendo GameCube]] | |||
|Tom "Mugwum" Bramwell,<br>[https://web.archive.org/web/20020604032523/https://www.eurogamer.net/content/r_ssbm_gc Eurogamer] | |||
|10/10 | |||
|''Overall it's an exotic cocktail of entertainment for Nintendo fans, who will slurp up every last drop, and if you want to talk about longevity, I've had this game on import for about six months and I still haven't finished it. People talk about killer apps and games that sell systems, and if you can put aside any preconceptions of this as a kiddie title or a game for beat 'em up virgins only, then you will have one of the finest videogames ever to issue forth from the caring hands of a developer. One to be remembered, and definitely one to own.'' | |||
|- | |||
|Nintendo GameCube | |||
|Bryn "hardcore_pawn" Williams,<br>[https://web.archive.org/web/20020209221933/http://www.gamespy.com/reviews/december01/ssbmgc/ Gamespy] | |||
|9/10 | |||
|''here is no doubt that Super Smash Bros. Melee is one the top games on the GameCube and will be a huge hit this Christmas. But does it really do that much more than the original [[Nintendo 64|N64]] [[Super Smash Bros.|title]]? In terms of design, control and gameplay, it doesn't. Instead, Super Smash Bros. Melee adds, adds and adds some more fun to the already superb original game. The extra attention to detail, characters, sights and sounds are a Nintendo enthusiasts' wet dream. Be assured that all those people you call friends that stare at the TV screen in total disbelief and utter confusion at the carnage they are witnessing will soon be sniffing around that spare joypad, wondering how they can get in on the action. HAL and Nintendo have done a stellar job at bringing a massive amount of in-depth fun to the GameCube. This is one game you won't put down until every technique, option and secret has been revealed.'' | |||
|- | |||
|Nintendo GameCube | |||
|Miguel Lopez,<br>[https://web.archive.org/web/20011217165244/https://www.gamespot.com/gamespot/stories/reviews/0,10867,2829090,00.html/ GameSpot] | |||
|8.9/10 | |||
|''Super Smash Bros. Melee has clearly been designed to appeal, foremost, to Nintendo's die-hard fans. Those who are familiar with the company's long and illustrious history will no doubt enjoy the game much more than the casual passerby. Judged on its own merits, though, Nintendo's spastic tribute to itself stands quite strong as one of the most engaging multiplayer games available for any console platform. Nintendo's last console was especially strong in the multiplayer department, and, if games like Melee are any indication, the GameCube seems like it will be too. Super Smash Bros. Melee is simply a huge game that, while best enjoyed in the company of others, will also keep the lone, die-hard fan busy for a good, long while.'' | |||
|- | |||
!colspan="4"style="font-size:120%;text-align:center;background-color:silver;"|Aggregators | |||
|-style="background-color:#E6E6E6" | |||
|colspan=2|Compiler | |||
|colspan=2|{{nw|Platform / Score}} | |||
|- | |||
|colspan=2|Metacritic | |||
|colspan=2 style="background-color:LimeGreen"|[https://www.metacritic.com/game/gamecube/super-smash-bros-melee 92] | |||
|- | |||
|colspan=2|GameRankings | |||
|colspan=2|[https://www.gamerankings.com/gamecube/516492-super-smash-bros-melee/index.html 90.52%] | |||
|} | |||
===Sales=== | |||
''Super Smash Bros. Melee'' is the best-selling game for the [[Nintendo GameCube]], selling about 7.09 million copies worldwide, as of December 31, 2009. | |||
==Media== | ==Media== | ||
{{media | {{main|List of Super Smash Bros. Melee media}} | ||
{{media table | |||
| | |file1=SSBM Menu.oga | ||
| | |title1=Menu theme | ||
|description1=Theme that plays in the menu of the game. | |description1=Theme that plays in the menu of the game. | ||
|length1= | |length1=0:30 | ||
|file2=SSBM Princess Peach's Castle.oga | |||
|title2=Princess Peach's Castle | |||
|length2=0:30 | |||
|file3=SSBM Rainbow Cruise.oga | |||
|title3=Rainbow Cruise | |||
|length3=0:30 | |||
}} | }} | ||
==Staff== | ==Staff== | ||
{{main|List of Super Smash Bros. Melee staff}} | {{main|List of Super Smash Bros. Melee staff}} | ||
===Voice actors=== | ===Voice actors=== | ||
{| | {|class="wikitable sortable"style="text-align:center" | ||
!Characters | |||
! | !Voice actor | ||
!Voice | |||
|- | |- | ||
|Mario, Luigi, Dr. Mario | |Mario, Luigi, Dr. Mario | ||
| Line 1,343: | Line 1,448: | ||
|- | |- | ||
|Link | |Link | ||
| | |{{wp|Nobuyuki Hiyama}} | ||
|- | |- | ||
|Kirby, Ness | |Kirby, Ness | ||
| | |{{wp|Makiko Ohmoto}} | ||
|- | |- | ||
|Yoshi | |Yoshi | ||
| Line 1,352: | Line 1,457: | ||
|- | |- | ||
|Fox McCloud | |Fox McCloud | ||
| | |{{wp|Shinobu Satouchi}} | ||
|- | |- | ||
|Fox McCloud (cutscene) | |Fox McCloud (cutscene) | ||
| | |{{wp|Steve Malpass}} | ||
|- | |- | ||
|Pikachu | |Pikachu | ||
| | |{{wp|Ikue Ōtani|Ikue Ohtani}} | ||
|- | |- | ||
|Captain Falcon | |Captain Falcon | ||
| | |{{wp|Ryo Horikawa}} | ||
|- | |||
|Jigglypuff (English) | |||
|{{wp|Rachael Lillis}} | |||
|- | |- | ||
|Jigglypuff | |Jigglypuff (Japanese) | ||
| | |{{wp|Mika Kanai}} | ||
|- | |||
|Jigglypuff (French) | |||
|Guylaine Gibert | |||
|- | |- | ||
| | |Jigglypuff (German) | ||
| | |Mara Winzer | ||
|- | |- | ||
|Ganondorf | |Ganondorf | ||
| Line 1,373: | Line 1,484: | ||
|- | |- | ||
|Popo, Nana | |Popo, Nana | ||
| | |{{wp|Sanae Kobayashi}} | ||
|- | |- | ||
|Zelda, Sheik | |Zelda, Sheik | ||
| | |{{wp|Jun Mizusawa}} | ||
|- | |- | ||
|Young Link | |Young Link | ||
| | |{{wp|Fujiko Takimoto}} | ||
|- | |- | ||
|Falco Lombardi | |Falco Lombardi | ||
| | |{{wp|Hisao Egawa}} | ||
|- | |- | ||
|Falco Lombardi (cutscene) | |Falco Lombardi (cutscene) | ||
| | |{{wp|Ben Cullum}} | ||
|- | |- | ||
|Pichu | |Pichu | ||
| | |{{wp|Satomi Koorogi}} | ||
|- | |- | ||
|Mewtwo | |Mewtwo | ||
| | |{{wp|Masachika Ichimura}} | ||
|- | |- | ||
|Marth | |Marth | ||
| | |{{wp|Hikaru Midorikawa}} | ||
|- | |- | ||
|Roy | |Roy | ||
| | |{{wp|Jun Fukuyama}} | ||
|- | |- | ||
|Announcer, Master Hand, Crazy Hand | |Announcer, Master Hand, Crazy Hand | ||
| Line 1,403: | Line 1,514: | ||
|} | |} | ||
==Pre-release and unused content | ==Pre-release and unused content== | ||
{{main|List of Super Smash Bros. Melee pre-release and unused content}} | {{main|List of Super Smash Bros. Melee pre-release and unused content}} | ||
Through the use of an Action Replay, many unused/unfinished stages can be found. The first is a large, gray stage with the background appearing to be some kind of pub. The music is the same as used on [[Fox McCloud]] and [[Falco Lombardi]]'s stage [[Corneria]]. This is assumed to be a test stage because of its name, which on the debug menu is TEST. There are three other stages, "AKANEIA" (a possible predecessor to [[Castle Siege]] from ''[[Super Smash Bros. Brawl]]'', a home world for Fire Emblem) "10-2", and "Dummy", which all crash the game when loaded. The last stage | Through the use of an Action Replay, many unused/unfinished stages can be found. The first is a large, gray stage with the background appearing to be some kind of pub. The music is the same as used on [[Fox|Fox McCloud]] and [[Falco Lombardi]]'s stage [[Corneria]]. This is assumed to be a test stage because of its name, which on the debug menu is TEST. There are three other stages, "AKANEIA" (a possible predecessor to [[Castle Siege]] from ''[[Super Smash Bros. Brawl]]'', a home world for ''Fire Emblem''), "10-2", and "Dummy", which all crash the game when loaded. The last stage is named IceTop, which simply loads Icicle Mountain except without music. | ||
==Glitches== | ==Glitches== | ||
{{main|List of | {{main|List of Super Smash Bros. Melee glitches}} | ||
=== | ===Ice Climbers freeze=== | ||
To perform this glitch, the player should select the [[List of fighters debuting in Super Smash Bros. Melee#Ice Climbers|Ice Climbers]], and while wall walking up to the opponent, have the partner grab the opponent. Right as the opponent is grabbed, the main Ice Climber needs to perform Side+B, resulting in the opponent being frozen in place. They can be unfrozen by using a Screw Attack. This does not seem to cause any damage to the disc. | |||
===Infinite Super Scope=== | |||
There is an in-game glitch to get an infinite [[Super Scope]] that will never run out of bullets. It is obtained by shooting fifteen small shots then two charged shots and during charging of the third shot the player must get hit, that will result in an infinite Super Scope. If the player throws the scope, it will disappear. | |||
==References to other games== | |||
*''[[Donkey Kong (game)|Donkey Kong]]'' - [[Donkey Kong]]'s red costume is a reference to his original sprite from this game. The [[Hammer]] returns as an item in this game. [[Mario]]'s blue costume resembles his original sprite from this game. | |||
*''[[Mario Bros. (game)|Mario Bros.]]'' - Mario's blue-hatted costume resembles his artwork and arcade sprites from this game. A [[Freezie]] appears in this game as an item and a collectible trophy. Mario's green costume resembles [[Luigi]]'s artwork from this game. | |||
*''[[Wrecking Crew]]'' - Mario's white and black costume is based on [[Foreman Spike]]'s outfit. [[Eggplant Man]] appears as a trophy. Luigi's red and pink costume is based off his colors in this game. | |||
*''[[Super Mario Bros.]]'' - The stage [[Mushroom Kingdom (Super Smash Bros. Melee)|Mushroom Kingdom]] is based on levels from ''Super Mario Bros.'' Many enemies appear in ''Super Smash Bros. Melee''{{'}}s Mushroom Kingdom in Adventure mode, as well as trophies. One of Luigi's alternate colorations is based off of his colors in this game, including having yellow skin. One of [[Princess Peach|Peach]]'s alternate colorations is based off of her colors in this game. One of [[Bowser]]'s alternate colorations is based off his appearance from the international cover of this game. | |||
*''[[Super Mario Bros.: The Lost Levels]]'' - The [[Poison Mushroom]] makes its first ''Smash Bros.'' appearance as an item in this game. | |||
*''[[Super Mario Bros. 2]]'' - The stage [[Mushroom Kingdom II]] is based on [[Subcon]], the setting of ''Super Mario Bros. 2''. [[Birdo]] and [[Pidgit]] appear as stage elements, as well as trophies. Peach's down special move, [[Vegetable (move)|Vegetable]], originated from this game, as well as her ability to float. | |||
*''[[Super Mario Land]]'' - Peach's yellow costume is based off of [[Princess Daisy]]. Princess Daisy also appears as a trophy. | |||
*''[[Super Mario Bros. 3]]'' - The alternate music for [[Yoshi's Island (Super Smash Bros. Melee)|Yoshi's Island]] is an arrangement of the overworld theme and the theme for [[Grass Land]]. [[Raccoon Mario]] appears in the form of a collectible trophy. Bowser's down special move, [[Bowser Bomb (move)|Bowser Bomb]], is based on the ground pound-type move he uses in this game. | |||
*''[[Dr. Mario (game)|Dr. Mario]]'' - [[Dr. Mario]] appears in this game as a playable character. His standard special move, [[Capsule|Megavitamin]], originated from this game. [[Virus]]es appear as a collectible trophy. | |||
*''[[Super Mario World]]'' - The stage Yoshi's Island is based on the [[Yoshi's Island (location)#Super Mario World|Yoshi's Island]] levels from this game. [[Bomber Bill|Banzai Bill]] and [[Fishin' Lakitu]] appear as background elements. The Banzai Bill appears as a trophy. Mario's side special move is the [[Cape]], which he could use to reflect projectiles. His and Luigi's down special move, [[Mario Tornado]] and [[Luigi Cyclone]], are reminiscent of the [[Spin Jump]] from this game. The [[Koopa Clown Car]] appears as a trophy. Also, a trophy of Mario riding [[Yoshi]] is collectible in the Japanese version of the game. | |||
*''[[Super Mario Land 2: 6 Golden Coins]]'' - Mario's yellow and purple costume is based off of [[Wario]]. Wario also appears as a trophy. | |||
*''[[Super Mario World 2: Yoshi's Island]]'' - Many of Yoshi's moves come from this game. His second jump is the [[Flutter Jump]], a technique that originated in this game. [[Baby Mario]] and [[Baby Bowser]] appear as trophies. | |||
*[[Mario Kart (series)|''Mario Kart'' series]] - A [[kart|racing kart]] appears in the form of a trophy. | |||
*''[[Donkey Kong Country]]'' - Donkey Kong's down special move, [[Hand Slap]], originated from this game. Some of Donkey Kong's animations are references to animations he performs in ''Donkey Kong Country''. Also, Donkey Kong's victory theme is an orchestration of the tune that plays when he wins in a [[Bonus Area]] or defeats a boss. [[Kongo Falls|Kongo Jungle]], a stage based on the first area of ''Donkey Kong Country'', appears. [[Klaptrap]]s appear on the Kongo Jungle and [[Jungle Japes (stage)|Jungle Japes]] stages, and as a trophy. A [[Barrel Cannon]] is used as an item in this game, as well as a stage element on the Kongo Jungle stage and a trophy. [[King K. Rool]] appears in the form of a trophy. | |||
*''[[Super Mario RPG: Legend of the Seven Stars]]'' - Peach cycles through a [[Frying Pan|frying pan]] in her forward smash, a weapon she first uses in this game. Her neutral attack is based on her [[Super Slap]] move in this game. Bowser's side tilt is reminiscent of the second hit of his [[Drill Claw]] move, and his side special, [[Koopa Klaw]], is reminiscent of the first hit of his Drill Claw move. | |||
*''[[Super Mario 64]]'' - Many of Mario's moves, animations, and voice clips are recycled in ''Super Smash Bros. Melee''. Luigi has the same moves and voice clips as Mario in ''Super Mario 64'', but his voice clips are higher-pitched versions of Mario's from ''Super Mario 64''. [[Metal Mario]] returns as an opponent in Adventure mode. Metal Mario also appears as a trophy. The [[Cap Block|Metal Box]] returns in this game as an item and in the form of a collectible trophy, and [[Peach's Castle]] appears as a [[Princess Peach's Castle (Super Smash Bros. Melee)|stage]]. Princess Peach's Castle also appears as a trophy. [[Rainbow Cruise]] appears as a stage, which is based on the [[Rainbow Ride]] course from this game. One of [[Kirby]]'s [[wikirby:Stone|Stone]] forms is based on the Thwomp design first used in this game. One of Princess Peach's [[smashwiki:File:Peach-Victory2-SSBM.gif|victory poses]] has her ending in a pose similar to how she appears on her castle's [[Media:Peach's Castle 64.png| stained glass portrait]] in this game. | |||
*''[[Yoshi's Story]]'' - The stage [[Super Happy Tree (stage)|Yoshi's Island]] returns from the original ''[[Super Smash Bros.]]'', which is based on ''Yoshi's Story'' that features the [[Super Happy Tree]] and other characters in the background. There is another stage based on ''Yoshi's Story'', which is [[Yoshi's Story (stage)|also named after it]]. [[Fly Guy|Flying Shy Guy]], [[Pak E. Derm]], and [[Raphael the Raven]] appear as trophies. Yoshi's voice clips are derived from this game. Also, Yoshi's victory theme is an arrangement of the main theme of ''Yoshi's Story''. The various colors of Yoshi, including respective shoe colors, originate from this game. | |||
*[[Mario Golf (series)|''Mario Golf'' series]] - Peach cycles through a golf club in her forward smash. [[Plum]], a character who appeared in the first ''[[Mario Golf (Nintendo 64)|Mario Golf]]'' game, appears as a trophy. | |||
*''[[Donkey Kong 64]]'' - The music for Kongo Jungle is an arrangement of the [[DK Rap]]. [[Jungle Japes (stage)|Jungle Japes]], a stage based on [[Jungle Japes|the area of the same name]], is playable in ''Super Smash Bros. Melee''. | |||
*[[Mario Tennis (series)|''Mario Tennis'' series]] - Peach cycles through a tennis racket in her forward smash. [[Waluigi]], who debuted in the first ''[[Mario Tennis (N64)|Mario Tennis]]'' game, appears as a trophy. | |||
*''[[Luigi's Mansion]]'' - A trophy of Luigi holding the [[Poltergust 3000]] is collectible. | |||
==={{ | ==References in later media== | ||
*''[[Paper Mario: The Thousand-Year Door]]'' - In the Spanish version of the original game, [[Rawk Hawk]] in his debut when taunting his opponents upon losing specifically references ''Melee'' when telling them they are better off playing that for "fighting" (in every other version, he simply says they are better off playing video games without specifying any specific games). | |||
*''[[Donkey Konga]]'': The opening theme from ''Super Smash Bros. Melee'' reappears as a track in the PAL version of this game. | |||
*''[[Super Smash Bros. Brawl]]'' - One of the names that appears when the player presses the "Random Name" button when naming their custom stage is "Melee". ''Super Smash Bros. Melee''{{'}}s opening theme and menu theme have been arranged for this game. The original menu theme also directly reappears in this game, along with the [[Final Destination]], [[Battlefield]], [[Giga Bowser]], and [[Fighting Wire Frames|Multi-Man Melee]] 1 themes. | |||
*''[[Super Mario 3D World]]'' - There is a [[Mystery House]] known as [[Mystery House Melee]], where the objective is to fight several enemies in a row. | |||
*''[[Super Smash Bros. for Nintendo 3DS]]'' / ''[[Super Smash Bros. for Wii U|Wii U]]'': An arrangement of ''Super Smash Bros. Melee''{{'}}s Battlefield theme appears in both games on the Final Destination stage. The Multi-Man Melee 2, [[Metal Mario]]/Luigi battle, and [[Trophy (Super Smash Bros. series)|trophy]] menu themes also appear in the latter game alongside previous arrangements from ''Super Smash Bros. Brawl''. | |||
*''[[Super Smash Bros. Ultimate]]'' - Luigi is seen doing the Green Missile in this game's {{file link|Super Smash Bros. Ultimate - panoramic.png|panorama group artwork}}, which is also what he did in {{file link|SSBM.jpg|''Melee''{{'}}s group artwork}}. [[Yoshi]]'s new [[Final Smash]] is a reference to his appearance in ''Super Smash Bros. Melee''{{'}}s opening. [[Giga Bowser]] returns as a boss in Classic Mode and Adventure Mode: World of Light. | |||
*''[[The Super Mario Bros. Movie]]'' - Bowser's back-up plan upon Peach rejecting him is to launch an explosive [[Bomber Bill]] onto the roof of her castle, like the [[Princess Peach's Castle (Super Smash Bros. Melee)|stage]] from this game. | |||
==Gallery== | ==Gallery== | ||
{{ | {{main-gallery}} | ||
<gallery> | |||
Mario SSBM art.png|[[Mario]] | |||
Donkey Kong Artwork - Super Smash Bros. Melee.jpg|[[Donkey Kong]] | |||
Link SSBM art.png|[[Link]] | |||
Ice climbers.jpg|[[Ice Climbers]] | |||
Princess Peach's Castle Melee.png|[[Princess Peach's Castle (Super Smash Bros. Melee)|Princess Peach's Castle]] | |||
SSBM.png|The game's logo. | |||
</gallery | SSBM Logo J.png|The Japanese game's logo. | ||
</gallery> | |||
== | ==Names in other languages== | ||
{{ | {{foreign names | ||
| | |Jpn={{ruby|大|だい}}{{ruby|乱|らん}}{{ruby|闘|とう}}スマッシュブラザーズ{{ruby|DX|デラックス}} | ||
| | |JpnR=Dairantō Sumasshu Burazāzu Derakkusu | ||
| | |JpnM=Great Fray Smash Bros. Deluxe | ||
|Kor=대난투 스매시브라더스 DX | |Kor=대난투 스매시브라더스 DX | ||
|KorR=Daenantu Seumaesi Beuradeoseu DX | |KorR=Daenantu Seumaesi Beuradeoseu DX | ||
|KorM=Great | |KorM=Great Fray Smash Bros. Deluxe | ||
}} | |||
==Trivia== | ==Trivia== | ||
{{NIWA| | {{NIWA|Bulbapedia=1|FZeroWiki=1|FireEmblem=1|LylatWiki=1|MetroidWiki=Metroid in Super Smash Bros. Melee|NWiki=1|Nookipedia=1|Pikipedia=1|SmashWiki=1|StrategyWiki=1|WiKirby=1|WikiBound=1|ZeldaWiki=1}} | ||
*In Classic Mode, for some unknown reason, the player never fights against [[Ganondorf]] or [[Roy (Fire Emblem)|Roy]]. Ganondorf appears only as a teammate in Classic Mode, while Roy never appears at all as a CPU player. In addition, Zelda is never a teammate for the player in that game mode. Also, the player only fights [[Mr. Game & Watch]] in the multi-man battle. | |||
*''Super Smash Bros. Melee'' is not only the first in its franchise to be Teen-rated, but it's also the first time that any of those Nintendo characters that appear in-game, with the exception of ''[[:Category:Fire Emblem series|Fire Emblem]]'' characters, appeared in a game rated Teen or a foreign equivalent. | |||
* In Classic Mode, for some unknown reason, the player never fights against [[Ganondorf]] or [[Roy (Fire Emblem)|Roy]]. | *There were three versions of this game released in the NTSC format. The first version was 1.0 NTSC DOL-GALE 0-00, which was the original version with the words "Nintendo's best in 4-player action" labeled on the front. The second version was 1.1 NTSC DOL-GALE 0-01, which was the [[Player's Choice]] version. The last version was 1.2 NTSC DOL-GALE 0-02, which had the words "Best Seller" labeled on the front. While the first two had the original "Official Nintendo Seal of Quality" labeled on the boxes and the discs, the last version had Nintendo's revised "[[Official Nintendo Seal]]" on the box due to the patch being released after December of 2003. Despite this, the seal on the updated disc still says "Official Nintendo Seal of Quality". The instruction booklet was additionally not revised for the last version, retaining the original seal on the copyright page. Each newer version had different patches and gameplay improvements. | ||
*This is the first GameCube game appearance for all of the playable characters excluding Mario, Luigi, and Bowser, whose first appearance in a GameCube game was ''[[Luigi's Mansion]]''. | |||
**However, Mario and Bowser were not playable on the GameCube until this game, making Luigi the only playable character in ''Super Smash Bros. Melee'' to be playable in a previous GameCube game, as ''Luigi's Mansion'' was released before ''Melee''. | |||
* ''Super Smash Bros. Melee'' is the first in its franchise to be rated | |||
* | ==References== | ||
<references/> | |||
{{SSBM}} | {{SSBM}} | ||
{{ | {{Super Mario games}} | ||
{{ | {{GCN}} | ||
[[Category:Super Smash Bros. Melee|*]] | [[Category:Super Smash Bros. Melee|*]] | ||
[[Category:Games]] | [[Category:Games]] | ||
[[Category: | [[Category:Nintendo GameCube games]] | ||
[[Category:2001 games]] | [[Category:2001 games]] | ||
[[Category:2002 games]] | [[Category:2002 games]] | ||
[[Category:Player's Choice]] | [[Category:Player's Choice]] | ||
[[Category:Crossover games]] | |||
[[Category:HAL Laboratory games]] | |||
[[de:Super Smash Bros. Melee]] | |||
[[it:Super Smash Bros. Melee]] | |||
Latest revision as of 19:46, January 20, 2025
- "Melee" redirects here. For the weapon from Mario + Rabbids Kingdom Battle, see List of weapons in Mario + Rabbids Kingdom Battle § Melee.
| Super Smash Bros. Melee | |||||||||||||||||
|---|---|---|---|---|---|---|---|---|---|---|---|---|---|---|---|---|---|
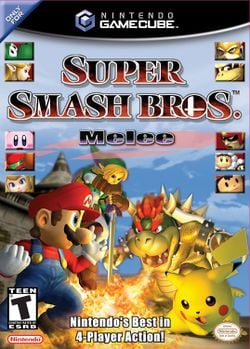 For alternate box art, see the game's gallery. | |||||||||||||||||
| Developer | HAL Laboratory | ||||||||||||||||
| Publisher | Nintendo | ||||||||||||||||
| Platform(s) | Nintendo GameCube | ||||||||||||||||
| Release date | Original release: Player's Choice: | ||||||||||||||||
| Language(s) | English (United States) French (France) German Spanish (Spain) Italian Japanese | ||||||||||||||||
| Genre | Fighting | ||||||||||||||||
| Rating(s) |
| ||||||||||||||||
| Mode(s) | 1-4 players simultaneous | ||||||||||||||||
| Format | Nintendo GameCube:
| ||||||||||||||||
| Input | Nintendo GameCube:
| ||||||||||||||||
| Serial code(s) | |||||||||||||||||
Super Smash Bros. Melee is a fighting game for the Nintendo GameCube. This is the second installment in the Super Smash Bros. series and is the sequel to Super Smash Bros. for the Nintendo 64. Various characters from Nintendo's popular franchises battle on different stages, also taken from the Nintendo franchises. Many major characters of the Super Mario franchise make an appearance. The game's major focus is the multiplayer mode, while still offering a number of single-player modes.
Gameplay[edit]
In Super Smash Bros. Melee, up to four fighters battle on a side-view stage with invisible boundaries on each side. When a player hits these boundaries, the player is knocked out. Super Smash Bros. Melee and other games in the series rely on damage percentage: Whenever a player is hit, they get a certain amount of percent damage. The maximum damage that can be dealt to a player is 999%. The higher the damage percentage is, the easier it is for the player to be knocked out.
General actions[edit]
Players move around on the stages using the GameCube controller's control stick, and can jump by pulling it up, or pressing the X or Y buttons. Characters can jump once, though some can perform a double jump in the air. By moving the ![]() down, the player can crouch or move a layer down on the stage.
down, the player can crouch or move a layer down on the stage.
A basic attack is performed with the A button. When moving the ![]() into a direction, the player can attack upwards and downwards, or to either side. These attacks are usually weak and inflict minimal damage. When the
into a direction, the player can attack upwards and downwards, or to either side. These attacks are usually weak and inflict minimal damage. When the ![]() button is pressed repeatedly, the character performs a natural combo, a fast sequence of weak attacks. When the
button is pressed repeatedly, the character performs a natural combo, a fast sequence of weak attacks. When the ![]() is titled fast and the
is titled fast and the ![]() button is pressed in time, the player can perform a smash attack. These are very powerful, chargeable attacks, which cause a lot of damage.
button is pressed in time, the player can perform a smash attack. These are very powerful, chargeable attacks, which cause a lot of damage.
Character special moves[edit]
- SmashWiki article: Special move
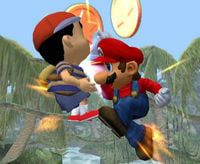
All characters have their own own set of special moves, which are performed with the ![]() button, known as a neutral special move. Moving the
button, known as a neutral special move. Moving the ![]() in a certain direction performs the side special, up special, or down special move accordingly. The special moves are influenced by the character's individual personality, and have various effects, from doing more damage than with a normal attack, attacking from a distance, or repelling projectiles. The up special move of most fighters involve moving into the air, making it possible to perform third jump as a recovery to avoid touching the blast line and being KO'd.
in a certain direction performs the side special, up special, or down special move accordingly. The special moves are influenced by the character's individual personality, and have various effects, from doing more damage than with a normal attack, attacking from a distance, or repelling projectiles. The up special move of most fighters involve moving into the air, making it possible to perform third jump as a recovery to avoid touching the blast line and being KO'd.
Item use[edit]
- SmashWiki article: Item
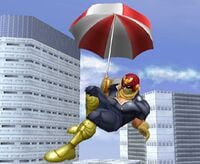
Items have various effects, and some trigger by themselves. They appear on the stage randomly, available for characters to use. Characters next to an item can pick it up by pressing ![]() . Some items have effects that are activated upon interaction. Other items can be used as weapons, which are usable with the
. Some items have effects that are activated upon interaction. Other items can be used as weapons, which are usable with the ![]() button, or can be thrown by pressing it again with either the Z, L, or R buttons. A character can take damage from being hit by an item.
button, or can be thrown by pressing it again with either the Z, L, or R buttons. A character can take damage from being hit by an item.
Shielding[edit]
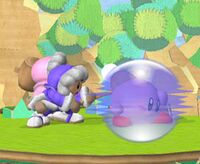
When pressing the ![]() or
or ![]() triggers, or the
triggers, or the ![]() button, the character's shield is activated. These can prevent any kind of attack from a character, except grabbing, or items. With precise timing, shield can reflect any items thrown and most projectile attacks. More powerful ones such as Samus' fully charged charge shot, however, will merely be absorbed by the shield. Yoshi's shield takes on the form of a Yoshi's Egg, while all other fighters use a bubble-shaped shield. A shield has decreased power every time it is used, and when the shield breaks, the character will be unable to move for a certain period of time. The longer the player waits before using the shield, the stronger it becomes. The thickness of a shield depends on how hard the player presses on the
button, the character's shield is activated. These can prevent any kind of attack from a character, except grabbing, or items. With precise timing, shield can reflect any items thrown and most projectile attacks. More powerful ones such as Samus' fully charged charge shot, however, will merely be absorbed by the shield. Yoshi's shield takes on the form of a Yoshi's Egg, while all other fighters use a bubble-shaped shield. A shield has decreased power every time it is used, and when the shield breaks, the character will be unable to move for a certain period of time. The longer the player waits before using the shield, the stronger it becomes. The thickness of a shield depends on how hard the player presses on the ![]() or
or ![]() triggers, or
triggers, or ![]() . Thicker shields have a shorter duration but erode slower from damage, whilst thinner shields erode more from damage but significantly less from time duration. Light characters may even be knocked out by the shield break.
. Thicker shields have a shorter duration but erode slower from damage, whilst thinner shields erode more from damage but significantly less from time duration. Light characters may even be knocked out by the shield break.
Grabbing and throwing[edit]
Players are able to grab other characters and hold them, to hit the character while they are incapable of either protecting themselves or fighting back. A character can be thrown in any direction, or smashed to the ground. Other characters can be damaged when a character is thrown at them. A character can be grabbed by pressing ![]() , or
, or ![]() and
and ![]() in combination with
in combination with ![]() , if the player is next to them. The grabbed character can be attacked using the
, if the player is next to them. The grabbed character can be attacked using the ![]() or
or ![]() buttons, as well as thrown in a direction by tilting the
buttons, as well as thrown in a direction by tilting the ![]() . It is possible to break free from a grab, unlike in Super Smash Bros. Players with less damage can escape from a grab more easily.
. It is possible to break free from a grab, unlike in Super Smash Bros. Players with less damage can escape from a grab more easily.
Other actions[edit]
In 1-P Mode, the player can use the ![]() to zoom the camera in or out. In VS mode, it is possible to move
to zoom the camera in or out. In VS mode, it is possible to move ![]() in any direction, allowing the player to perform uncharged smash attacks easily. A character can taunt if the player presses
in any direction, allowing the player to perform uncharged smash attacks easily. A character can taunt if the player presses ![]() . Some fighters can perform a meteor smash, which sends opponents falling downwards, and the effectiveness of a meteor smash depends on how strong it is.
. Some fighters can perform a meteor smash, which sends opponents falling downwards, and the effectiveness of a meteor smash depends on how strong it is.
Fighting modes[edit]
- SmashWiki article: Mode
There are four standard fighting modes in Super Smash Bros. Melee. These can be freely chosen in VS mode. The regular matches in 1-P mode only feature Stock matches, but the event matches have different rules. Any match that ends in a tie between two or more players causes a Sudden Death, a quick battle where the fighters (at 300% damage each) battle until only one of them remains.
Time[edit]
- SmashWiki article: Time
Players gain points by knocking out other players, and lose points by getting knocked out. When the match timer runs out, the player with the most points wins. The player can set the option of whether self-destructs cause players to lose zero, one, or two points. There is an unlockable function that displays the player's points during battle. Time is used by default in VS but rarely in 1-P Mode.
Stock[edit]
- SmashWiki article: Stock
Players have a set number of lives. A character loses a life whenever they are knocked out. The last player standing wins. Setting a time limit is optional. The player with the most lives by the end is the winner. This mode is featured throughout Classic and All-Star, both of which always have a set time limit.
Coin[edit]
Coin Battle Players have to collect Smash Coins and Bills, which appear by hitting an opponent. If a player gets knocked out, they will lose half of their coins. The player with the most coins by when times out is the winner. Coin mode is rarely used in the event matches of 1-P Mode, but is also available in VS matches.
Bonus[edit]
Bonus (mode) Players get points for their fighting style. There are 249 different kinds of bonus points, listed here. When the time limit has run out, the player with the most points wins. Most bonuses also have humorous names.
Playable characters[edit]
- Main article: List of fighters debuting in Super Smash Bros. Melee
Super Smash Bros. Melee contains a total of 25 playable fighters (26 including Zelda's alter ego, Sheik); the 12 original characters return for this game, while 13 more have been added. 14 characters (15 including Sheik) are available by default, while 11 more can be unlocked. Seven of the fighters represent the Super Mario franchise and its sub-universes, being Mario, Luigi, Peach, Bowser, Dr. Mario, Yoshi, and Donkey Kong.
Characters in italics are newcomers.
Default characters[edit]
| Character | Series | Description | Special moves | |||
|---|---|---|---|---|---|---|
| Standard | Forward | Up | Down | |||
 Mario |
Super Mario | Mario is a balanced character with a variety of moves. He attacks quickly, but jumps low and has average recovery. His backwards throw can throw almost farther than any other character's throws. His Cape helps deflect oncoming attacks and shoots whatever is being shot at him back to his opponent. | Fireball (article) | Cape (article) | Super Jump Punch (article) | Mario Tornado (article) |
 Bowser |
Super Mario | Bowser is the heaviest and one of the slowest characters. He has powerful attacks, and he can use his weight to crush whomever he grabs. Bowser is one of the first villains to be playable in the series. His Fire Breath move burns his enemies down. | Fire Breath (article) | Koopa Klaw (article) | Whirling Fortress (article) | Bowser Bomb (article) |
 Peach |
Super Mario | Peach has a unique recovery that makes her slowly float in the desired direction briefly. For her forward smash, Peach swings either a golf club, a tennis racket, or a frying pan. | Toad (article) | Peach Bomber (article) | Peach Parasol (article) | Vegetable (article) |
 Yoshi |
 Yoshi is a heavy fighter with average speed, though he is rather weak, unlike other heavyweights. Yoshi uniquely uses a Yoshi's Egg for shielding, but he is also the only fighter who cannot jump out of shielding. Yoshi lacks a third jump, but he can jump very high. | Egg Lay (article) | Egg Roll (article) | Egg Throw (article) | Yoshi Bomb (article) |
 Donkey Kong |
 Donkey Kong is a strong, heavy, and agile character. When grabbing opponents, he can carry them for a short distance before throwing them. | Giant Punch (article) | Headbutt (article) | Spinning Kong (article) | Hand Slap (article) |
 Captain Falcon |
F-Zero | Captain Falcon can run faster than any other character. His attacks are quick, and a few are particularly powerful, particularly his Knee Smash, up smash, and Falcon Punch. | Falcon Punch | Raptor Boost | Falcon Dive | Falcon Kick |
 Fox |
Star Fox | Fox is a fast and strong character. He falls very fast, and his Blaster can damage enemies without stopping them. | Blaster | Fox Illusion | Fire Fox | Reflector |
 Ice Climbers |
Ice Climber | The Ice Climbers fight as a pair. The player takes control of a Ice Climber and a computer player of the partner, who generally follows the player's moves. By changing colors, the player can choose between controlling Popo or Nana. The Ice Climbers have a low reach. A few of their attacks are powerful, as well as their grab. | Ice Shot | Squall Hammer | Belay | Blizzard |
 Ness |
EarthBound | Ness is a slow character who relies on his PSI attacks. He uses a baseball bat and a yo-yo in his smash attacks. His recovery uniquely involves directing the ball of lightning to hit himself, catapulting himself towards the stage. He also uses his PSI Magnet to recover damage with certain enemy projectiles. | PK Flash | PK Fire | PK Thunder | PSI Magnet |
 Kirby |
 Kirby is a light and fairly slow character with weak attacks. He can jump in midair five times. Kirby can swallow a fighter to copy their neutral special move. | Swallow | Hammer | Final Cutter | Stone |
 Samus |
Metroid | Samus is a heavy character with powerful attacks. Her Grapple Beam is slow, but can grab characters from farther distances. Samus can charge a shot, which becomes more powerful the longer it is charged. | Charge Shot | Missile | Screw Attack | Bomb |
 Zelda |
The Legend of Zelda | Zelda is a slow-moving character. Her attacks are fairly powerful, but the strongest attacks have a weak range. Zelda can transform herself into her alter-ego, Sheik. | Nayru's Love | Din's Fire | Farore's Wind | Transform |
 Sheik |
The Legend of Zelda | Sheik is Zelda's alter-ego. Sheik moves faster compared to Zelda, attacks rapidly and can perform combos effectively, but lacks many powerful moves. Zelda can transform into Sheik at any point during the match and vice versa, though the player can be Sheik at the start of the battle by holding down |
Needle Storm | Chain | Vanish | Transform |
 Link |
The Legend of Zelda | Link is a character of high weight, medium strength, and slow movement. Many of his attacks involve the use of his sword. | Bow | Boomerang | Spin Attack | Bomb |
 Pikachu |
Pokémon | Pikachu is fast and light. It uses its electric attacks to damage opponents. Pikachu's recovery can uniquely be used twice, provided that the second recovery is in a different direction. | Thunder Jolt | Skull Bash | Quick Attack | Thunder |
Unlockable characters[edit]
| Character | Series | Description | How to unlock | Special moves | |||
|---|---|---|---|---|---|---|---|
| Standard | Forward | Up | Down | ||||
 Jigglypuff |
Pokémon | Jigglypuff is light and has a few powerful attacks. It can jump five times in mid-air and has faster air speed than the other characters, whilst having the slowest movement on ground. | Rollout | Pound | Sing | Rest | |
 Dr. Mario |
Super Mario | Dr. Mario is very similar to Mario. His attacks have different effects (usually electric instead of flame) but function like Mario's. Most of Dr. Mario's attacks are stronger than Mario's, though he moves slower. |
|
Megavitamins (article) | Super Sheet (article) | Super Jump Punch (article) | Dr. Tornado (article) |
 Pichu |
Pokémon | Pichu has moves that are similar to Pikachu's. Pichu is the lighest fighter. Like Pikachu, it moves and attacks quickly. Whenever it uses an electric attack, Pichu will inflict damage to itself. |
|
Thunder Jolt | Skull Bash | Agility | Thunder |
 Falco |
Star Fox | Falco's moves are similar to Fox's. Falco is slower than Fox, though he jumps higher and has a longer reach. Falco's Blaster fires more slowly, but it can stun enemies. |
|
Blaster | Falco Phantasm | Fire Bird | Reflector |
 Marth |
Fire Emblem | Marth is a fast character with average strength and weight. He uses a sword to attack, and he has one of the longest reaches compared to other fighters. Marth is known for his very good air attacks that can easily string together. Marth's attacks are strongest at the tip of the sword. |
|
Shield Breaker | Dancing Blade | Dolphin Slash | Counter |
 Young Link |
The Legend of Zelda | Young Link's moves are similar to Link's. Compared to Link, Young Link is weaker, lighter, and he is faster. He also has the ability to Wall Jump. |
|
Fire Bow | Boomerang | Spin Attack | Bomb |
 Ganondorf |
The Legend of Zelda | Ganondorf's attacks are similar to Captain Falcon's. However, Ganondorf is very slow and fairly heavy, and his attacks inflict the most knockback. Ganondorf has a unique special attack when pressing |
|
Warlock Punch | Gerudo Dragon | Dark Dive | Wizard's Foot |
 Mewtwo |
Pokémon | Mewtwo is a slow character with strong grab and some powerful throws. Mewtwo's low weight is attributed to how it hovers above ground. |
|
Shadow Ball | Confusion | Teleport | Disable |
 Luigi |
Super Mario | Luigi is a character with average weight and speed and strength that is above average. His moves have many similarities to Mario's. He jumps high, but has slow air speed and low traction. |
|
Fireball (article) | Green Missile (article) | Super Jump Punch (article) | Luigi Cyclone (article) |
 Roy |
Fire Emblem | Roy is similar to Marth. Compared to Marth, Roy's attacks are strongest at the base of his sword, and his aerial attacks inflict low damage. |
|
Flare Blade | Double-Edge Dance | Blazer | Counter |
 Mr. Game & Watch |
Game & Watch | All of Mr. Game & Watch's attacks are based on different Game & Watch games. His speed and strength are average, but his weight is low due to his 2D appearance. |
|
Chef | Judge | Fire | Oil Panic |
Stages[edit]
There are 29 selectable stages in total, eighteen of which are available by default, while the other eleven are unlockable. Three of these stages return from Super Smash Bros.
Default stages[edit]
| Stage | Description |
|---|---|
 Infinite Glacier: Icicle Mountain |
Icicle Mountain is a stage that scrolls up and down at different speeds. It has many different small platforms to jump on, similarly as in Ice Climber. |
 Mushroom Kingdom: Princess Peach's Castle |
Princess Peach's Castle takes place on the roof of the castle of the same name Some hovering platforms appear on either side of the small tower. Switches can be activated, making ? Blocks appear. A Banzai Bill is sometimes launched into the castle, causing an explosion. |
 DK Island: Kongo Jungle |
Kongo Jungle is set on logs over a waterfall. A small platform also appears to the right, and sometimes logs are falling down the waterfall, creating temporary platforms. Below the stage is a Barrel Cannon which shoots out characters in a random direction when they fall into it. |
 Termina: Great Bay |
The Great Bay stage, based on The Legend of Zelda: Majora's Mask, has two platforms fixed in the water and a swimming stone. The Giant Turtle sometimes rises from the water, and it can be used as an additional platform until sinking back into the water. Tingle is also seen on the stage with a giant balloon, and is forming another platform. |
 Yoshi's Island: Yoshi's Story |
Yoshi's Story features elements of the game of the same name. Yoshi's Island is in the center, and three smaller platforms are hovering above it. It also has a cloud moving below it to catch falling characters. Fly Guys fly by occasionally, carrying Food. |
 Dream Land: Fountain of Dreams |
The Fountain of Dreams stage, from the Kirby series has a fountain that forms a big platform in the middle with three smaller hovering platforms above it, with its height varying. |
 Lylat System: Corneria |
The Corneria stage, from the Star Fox series, takes place on the Great Fox. Arwings fly by at certain intervals to shoot at the combatants. |
 Mushroom Kingdom: Rainbow Cruise |
Rainbow Cruise (NTSC)/Rainbow Ride (PAL) is a moving stage with different environments based on Rainbow Ride from Super Mario 64. It starts on a floating ship, which falls down after a certain time, and players have to move on over the various platforms. |
 DK Island: Jungle Japes |
Jungle Japes is set on a river, with three ledges made of wood with a house and a toilet house found on them. The players fight on these platforms. Klaptraps jump out of the water occasionally, damaging fighters on contact. |
 Hyrule: Temple |
The Temple is the largest stage. It is based mainly on the Palaces in Zelda II: The Adventure of Link. The stage has several different platforms and a tunnel system. |
 Yoshi's Island: Yoshi's Island |
Yoshi's Island features a setting based on Super Mario World. The area is enclosed by a slope on the one side and a Warp Pipe on the other. In the middle, there is a hole with Rotating Blocks above it, and two groups of Rotating Blocks float on the stage to serve as additional platforms. |
 Dream Land: Green Greens |
Green Greens, a stage from the Kirby series, consists of three separated grass platforms. Whispy Woods sometimes tries to blow away the characters, and Apples sometimes fall from him. There are Blocks and Bomb Blocks that commonly fall from the sky in between the platforms. |
 Lylat System: Venom |
Venom is similar to Corneria, aside from taking place in the setting of the same name and having the Great Fox face frontward while the characters fight on it. |
 Planet Zebes: Brinstar |
Brinstar consists of several platforms that are held together by organic material or other objects. These connections can be destroyed, causing some of the platforms to hover in the air. Acid sometimes rises from below, burning the characters on contact but also restoring broken connections. |
 Eagleland: Onett |
In Onett from EarthBound, the battle takes place on a few houses in the village and a nearby tree. Cars drive by and hit characters when they do not avoid them. There are warning signs announcing the cars. The platforms of the drug store in the middle can collapse, but restore themselves after a certain time. |
 F-Zero Grand Prix: Mute City |
Mute City takes place on a large F-Zero race track. There is a small platform hovering in the middle, and it goes down at intervals, exposing the road. F-Zero Racers will sometimes race into the players, but can also be destroyed. |
 Kanto: Pokémon Stadium |
The Pokémon Stadium looks like a simple stage with two floating platforms. The stage will change at regular intervals into one of four different terrains: Water, Fire, Rock, and Grass, all having different obstacles. |
 Mushroom Kingdom |
The Mushroom Kingdom stage features an environment based on Super Mario Bros. It has objects like Brick Blocks and ? Blocks, which contain items, as well as falling platforms above two gaps. |
Unlockable stages[edit]
| Image | Stage | How to unlock | Description |
|---|---|---|---|

|
Superflat World: Flat Zone |
Clear Classic, Adventure, or All-Star with Mr. Game & Watch. | The Flat Zone modeled after a Game & Watch system. Wrenches, buckets, and other tools fall from the top occasionally. Oil can spill over the ground and make it hard for characters to move. Some platforms vanish and reappear at different places. |

|
Planet Zebes: Brinstar Depths |
Play 50 Melee matches | Unlike Brinstar, this Metroid stage features a large round rock platform found inside a spherical cage covered in embedded spikes. There are few floating rocks, which players can jump onto at any time. From time to time, Kraid slashes the large platform which causes it to rotate in any direction, exposing a different side of it. |

|
Eagleland: Fourside |
Play 100 Melee matches | This EarthBound stage takes place high on the skyscrapers of Fourside, with wide gaps appearing between them. There is a UFO that occasionally shows up on the screen and can be used as a platform. |

|
F-Zero Grand Prix: Big Blue |
Play 150 Melee matches | Big Blue is a side-scrolling stage that takes place on top of F-Zero Racers. Due to the high speed of the vehicles, any fighters that touch the road almost immediately hit the blast line on the left side, knocking them out. |

|
Kanto Skies: Poké Floats |
Play 200 Melee matches | Poké Floats takes place on giant floating Pokémon balloons in the skies of Kanto. Players jump from one balloon by the time the others vanish. |

|
Mushroom Kingdom II |
Obtain the Birdo Trophy | Mushroom Kingdom II is based on a setting from Super Mario Bros. 2. Logs occasionally down the waterfall, creating temporary platforms. A Pidgit flies in occasionally, creating another platform, and a Birdo sometimes appears to spit eggs at the characters. |

|
Special Stages: Battlefield |
Clear All-Star for the first time | Battlefield takes place in space, featuring a big platform and three smaller platforms above it. The only hazards are the gaps on each end of the stage. |

|
Special Stages: Final Destination |
Clear Event 51: The Showdown | Final Destination does not have any features. It is where Master Hand and Crazy Hand are fought. |

|
Past Stages: Dream Land |
Clear Target Test with every character | Dream Land is a stage returning from Super Smash Bros. The only feature is Whispy Woods, who occasionally blows a harsh wind in a random direction. |

|
Past Stages: Yoshi's Island |
Hit Sandbag at least 1,325 feet (400 meters) in Home-Run Contest | Yoshi's Island is a stage returning from Super Smash Bros. It has a big platform with the Super Happy Tree in the background, three other smaller floating platforms above, and three temporarily cloud platform at the edges that vanish when stood on for too long. |

|
Past Stages: Kongo Jungle |
Clear 15-Minute Melee | Kongo Jungle is a stage returning from Super Smash Bros. It is made out of a large wooden platform with several smaller, sometimes floating ones around it. A Barrel Cannon is underneath the arena. |
Items[edit]
| Image | Name | Series | Description |
|---|---|---|---|

|
Barrel | Super Smash Bros. | The Barrel contains a single random item, which can be released by destroying the barrel. When thrown to the ground, the barrel rolls onward to hit players. |

|
Barrel Cannon | Donkey Kong | The Barrel Cannon can trap a character inside. The barrel rotates and fires them out at a certain angle, depending on when the player presses a button. The Barrel Cannon vanishes shortly after appearing on the stage. |

|
Beam Sword | Super Smash Bros. | The Beam Sword can be used to hit other characters. It is powerful, but the hits are rather slow. |

|
Bob-omb | Super Mario | The Bob-omb can be thrown at another character to cause an explosion. The Bob-omb walks around after being left on the ground for a few seconds. It explodes either from contact with a character or surface or after a certain amount of time. |

|
Bunny Hood | The Legend of Zelda | The Bunny Hood makes a character faster and capable of jumping higher. |

|
Capsule | Super Smash Bros. | The Capsule contains one small item. It can be thrown easily and sometimes explodes when hitting the wall or a character. |

|
Cloaking Device | Perfect Dark | The Cloaking Device makes the player invisible. They are still damaged regardless of being clear and harder to hit, but invisible characters do not have increased damage percentages. |

|
Crate | Super Smash Bros. | The Crate contains three different random items. A Crate sometimes explodes when hit. |

|
Egg | Super Smash Bros. | The Egg contains one item, similarly to a Capsule. It can contain either a weapon or Food, depending on the stage. An Egg can also explode. |

|
Fan | Super Smash Bros. | The Fan can be used to smack other characters with. The Fan does not inflict much damage per hit. |

|
Flipper | Balloon Fight | When thrown, the Flipper remains in place, attack others on contact as well as repelling projectiles. |

|
Fire Flower | Super Mario | The Fire Flower can shoot a stream of fire, similarly to Bowser's Fire Breath. |

|
Food | Super Smash Bros. | The player's damage meter is reduced by a small amount, depending on which food they ate. |

|
Freezie | Super Mario | The Freezie glides along the stage and can fall off edges. It can freeze other players into an ice block on contact, though fiery attacks will return the characters to normal. |

|
Green Shell | Super Mario | When thrown, the Green Shell slides along the ground, being able to hit multiple characters. |

|
Hammer | Donkey Kong | A massive hammer from Donkey Kong that can inflict lots of damage unto whomever it hits |

|
Heart Container | The Legend of Zelda | The Heart Container reduces the player's damage meter by 100%. |

|
Home-Run Bat | Super Smash Bros. | Using a Home-Run Bat while performing a smash attack can instantly knock out whomever it hits. The Home-Run Bat is the item used in Home-Run Contest. |

|
Lip's Stick | Panel de Pon | The character hit by Lip's Stick gets a flower on their head, which is doing continuous little damage. The more often a character is hit, the bigger the flower grows, and the more damage it will do. |

|
Maxim Tomato | Kirby | A Maxim Tomato can be picked up to reduce the player's damage meter by 50%. |

|
Metal Box | Super Mario | Hitting a Metal Box gives the player metallic properties, making them heavier. Metallic characters are more resistant to knockback but are less effective at performing their recovery. |

|
Motion-Sensor Bomb | GoldenEye 007 / Perfect Dark | The Motion-Sensor Bomb can be placed on any surface, and it explodes on contact. |

|
Mr. Saturn | EarthBound | A Mr. Saturn can be thrown at a character several times, though it does not inflict much damage. |

|
Parasol | Kirby | The Parasol can hit other characters. A character holding a parasol while falling glides down slowly. |

|
Party Ball | Super Smash Bros. | When a Party Ball opens, it releases several items, commonly Food or Bob-ombs. |

|
Poison Mushroom | Super Mario | A Poison Mushroom shrinks a player temporarily. Any shrunken character is weaker and more vulnerable to being KO'd, though they are more flexible and evasive. |

|
Poké Ball | Pokémon | When the Poké Ball is opened, a Pokémon appears. Most Pokémon attack the opponents of its user, though some attack all players within their range. |

|
Ray Gun | Super Smash Bros. | The Ray Gun can shoot up to 14 laser projectiles. |

|
Red Shell | Super Mario | The Red Shell is much like the Green Shell, except it homes in on characters and does not fall off the stage. |

|
Screw Attack | Metroid | If a is holding the Screw Attack in their hand, they jump similarly to Samus' Screw Attack move. Any character hit by a Screw Attack take damages and also performs said type of jump. |

|
Starman | Super Mario | The Starman grants players temporary invincibility, protecting them from all forms of damage, hits, and grabs. The blast line is the only obstacle that the Starman does not protect against. |

|
Star Rod | Kirby | The Star Rod can shoot a limited number of star projectiles. |

|
Super Mushroom | Super Mario | The opposite of a Poison Mushroom, the Super Mushroom makes the player larger, stronger, and harder to KO. Their large size makes them easier to hit and less flexible. |

|
Super Scope | Super Famicom/SNES peripheral | The Super Scope shoots out a limited number of small energy balls, or up to three big energy balls if charged. |

|
Warp Star | Kirby | When picked up, a Warp Star flies a character up into the air and crashes right down, creating an explosion that damages other players. By tilting the |
Poké Ball Pokémon[edit]
Like in the previous game, several Pokémon can be released from the Poké Ball item. This time, they come from the Pokémon series' first and second generations. Each uses a different move from the series. Legendary Pokémon appear far less commonly and tend to have more spectacular effects. Mythical Pokémon are rarer still, but only give a substantial point bonus rather than attacking.
| Pokémon | Description |
|---|---|
| Common | |
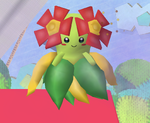 Bellossom |
A Flower Pokémon, it uses Sweet Scent to put nearby opponents to sleep. |
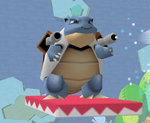 Blastoise |
A Shellfish Pokémon, it uses Hydro Pump to push opponents with gushes of water; however, this also slowly moves itself backwards. |
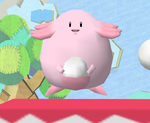 Chansey |
An Egg Pokémon, it uses Softboiled to scatter eggs across the field, which can be eaten to reduce damage or broken to reveal items or explosions. |
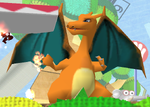 Charizard |
A Flame Pokémon, it uses Flamethrower to shoot short-range plumes of fire on either side of it back-and-forth. |
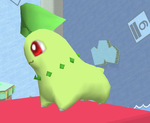 Chikorita |
A Leaf Pokémon, it uses Razor Leaf to launch a series of cutting leaves in a forward horizontal line. |
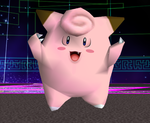 Clefairy |
A Fairy Pokémon, it uses Metronome to explode, summon fire, summon a whirlwind, or summon frosty air. |
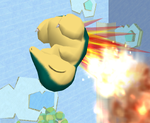 Cyndaquil |
A Fire Mouse Pokémon, it uses Flamethrower similar to Charizard, but only in one direction and while airborn. It can be knocked off-stage. |
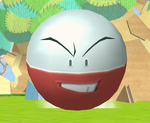 Electrode |
A Ball Pokémon that uses Explosion to charge itself before blowing up, launching away anyone near it, including the summoner. |
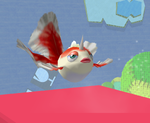 Goldeen |
A Goldfish Pokémon, it uses Splash to flop around ineffectually. |
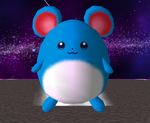 Marill |
An AquaMouse Pokémon, it uses Tackle to run in one direction, plowing through anyone in its way, only turning if it hits a wall. |
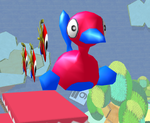 Porygon2 |
A Virtual Pokémon, it uses Tackle like Marill, but at a much shorter distance and higher speed, which heavily knocks back anyone caught in it. |
 Scizor |
A Scissors Pokémon, it uses Metal Claw to dash forward with its claws out before leaping from the stage, launching opponents it hits upwards. |
 Snorlax |
A Sleeping Pokémon, it uses Body Slam to make itself huge and fall through the stage from above where it was called. |
 Staryu |
A StarShape Pokémon, it uses Swift to fire a horizontal barrage of stars at opponents while following them horizontally. It functionally replaces its evolution Starmie from the previous game. |
 Togepi |
A Spike Ball Pokémon, it uses Metronome to darken the stage, lodge opponents into the ground, put opponents to sleep, freeze opponents, or infect opponents with parasitic flowers. |
 Unown |
A Symbol Pokémon, it uses Take Down to fly across the battlefield rapidly with a horde of others. It functionally replaces Beedrill from the previous game. |
 Venusaur |
A Seed Pokémon, it uses Earthquake to stomp the ground and knock away any opponent near its large body. |
 Weezing |
A Poison Gas Pokémon, it uses Smog to emit damaging gas from its body while floating in place. It functionally replaces its pre-evolution Koffing from the previous game. |
 Wobbuffet |
A Patient Pokémon, it uses Counter to recoil damage onto anyone who attacks it, including the summoner. |
| Legendary | |
 Articuno |
A Freeze Pokémon, it uses Icy Wind to freeze and launch anyone caught in the frosty energy it emits. |
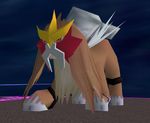 Entei |
A Volcano Pokémon, it uses Fire Blast to surround itself with an enormous pillar of flame that burns opponents who touch it. |
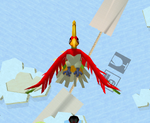 Ho-oh |
A Rainbow Pokémon, it uses Sacred Fire to create a large plume of fire where it flies. |
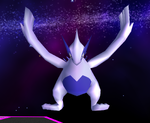 Lugia |
A Diving Pokémon, it uses Aeroblast to fire a whirlwind-like beam that snakes across the stage. |
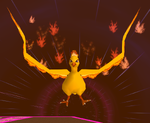 Moltres |
A Flame Pokémon, it uses Sky Attack to fly in place, harming anyone that touches its fiery body, before flying away. |
 Raikou |
A Thunder Pokémon, it uses Spark to surround itself with a pillar of electricity. |
 Suicune |
An Aurora Pokémon, it uses Blizzard to summon a frosty twister around itself. |
 Zapdos |
An Electric Pokémon, it uses ThunderShock to emit a shower of sparks around itself. |
| Mythical | |
 Celebi |
A TimeTravel Pokémon, it only begins appearing once everything in the game is unlocked, and even then exceedingly rarely. It does not use any move, but gives a large point bonus if found. |
 Mew |
A New Specie Pokémon, it does not use any move, but gives a large point bonus if found. |
Enemies[edit]
The enemies appear in Adventure Mode, though they may rarely spawn from carrier items in Versus Mode.
| Image | Name | Series | Stage | Description |
|---|---|---|---|---|
| Goomba | Super Mario | Mushroom Kingdom | Much like in the Super Mario series, the mushroom-like Goombas walk back and forth, damage fighters on touch, and can be defeated by either attacking them or simply jumping on top of them. | |
| Koopa Paratroopa | Super Mario | Mushroom Kingdom | Koopa Paratroopas are winged variants of Koopa Troopas, flying in a set pattern mid-air. Dealing enough damage or jumping on them will cause them to lose their wings, turning into regular Koopa Troopas. | |
| Koopa Troopa | Super Mario | Mushroom Kingdom | The turtle-like Koopa Troopas act similarly to Goombas, but will retreat into their shell when dealt enough damage or jumped upon. This shell can be picked up and thrown like an item. | |
|
Like Like | The Legend of Zelda | Underground Maze | Like Likes are gelatinous tube creatures that can swallow characters whole, inflicting damage continuously until the fighter breaks free. |

|
Octorok | The Legend of Zelda | Underground Maze | Octoroks are purple octopus-like enemies also in the Underground Maze. Their attack is to spit rocks at the fighters. |
|
ReDead | The Legend of Zelda | Underground Maze | ReDeads are zombie-like creatures that leap on a fighter to attack and drain away their health while attached to them. ReDeads can be shaken off by mashing the controller buttons, but they continue walking around afterward. After enough hits, ReDeads lie down on the ground, with a chance of dropping a trophy, though they reanimate shortly after. The ReDeads of Adventure mode are colored a light brown, but those that can appear from container items are dark brown. |
|
Polar Bear | Ice Climber | Icicle Mountain | Polar Bears move back and forth, but the fighter can knock them away with a few smaller hits or one powerful hit. |
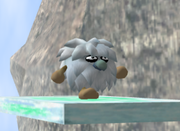
|
Topi | Ice Climber | Icicle Mountain | They are blue fur seals that move back and forth, like the Polar Bars. They are round yetis with white fur coats in not only Western releases of Super Smash Bros. Melee but also Ice Climber. |
1-P Mode[edit]
Classic[edit]
- SmashWiki article: Classic Mode (SSBM)}
Classic is based on the 1P Game from the game's predecessor, Super Smash Bros. Unlike the previous game, the opponents and the stage are chosen at random, but the matches retain a consistent pattern. For setup, the player has to choose the difficulty (Very Easy, Easy, Normal, Hard, or Very Hard) and their number of stock (1 - 5). All battles are in stock mode, with the opponents having one life, and a five-minute match timer that costs the player a stock if it runs out. There are three Bonus Stages, where winning is optional. If the players loses all of their stock, they are given the option to continue to regain all stock, though they lose several points in the process. In any setting except for Very Easy, the player will have to pay coins for the Continue. The players' scores are saved after every stage. They get awarded points for the time remaining when a battle ends, as well as for the damage they dealt. They also get bonuses, just as in the Bonus mode. The scores are saved separately for each character, and there is also a total score for all characters combined.
| Classic Mode | |
|---|---|
| Stage 1 | The player fights a single opponent. |
| Stage 2 | A team of the player and an ally fight against a team of two opponents. |
| Bonus Stage 1: Break the Targets! | The player has to hit every target within two minutes. Each character has their own arena for the target test. |
| Stage 4 | The player fights a single opponent. |
| Stage 5 | A team of the player and two allies fight a giant opponent. |
| Bonus Stage 2: Snag the Trophies | Up to three falling Trophies can be collected by hitting them into their collection spot while they fall. |
| Stage 7 | The player fights a single opponent. When the player plays on the Hard setting or above, the opponent's CPU will change. The opponent will always escape to the borders of the stage after hitting the player. |
| Stage 8 | The player has to fight 10 opponents of the same character, all significantly more vulnerable to being KO'd. |
| Bonus Stage 3: Race to the Finish | The player runs along a tunnel with many doors. They can take any available door to complete the level, but the farther the door the player takes from the beginning, the more coins they earn. The time the player has for this varies from character to character, but it is usually around 45 seconds; for some examples, Captain Falcon only has 39 seconds, while Ganondorf has 54 seconds. |
| Stage 10 | The player has to fight one opponent, like in Stages 1 and 4, but the opponent is metal, as if they grabbed a Metal Box. The battle is held on the Battlefield stage. |
| Stage 11 | The player has to fight Master Hand on the Final Destination stage. Unlike the player, the Master Hand has hit points instead of percentage of damage. The number of hit points varies between the difficulty settings, anywhere from 150 to 360. Additionally, when the player is fighting on the normal or a higher difficulty setting and has finished the other stages of the Classic Mode without using any Continues, Crazy Hand will appear when Master Hand's HP hits its half. Then the player has to fight both hands at the same time. Crazy Hand starts with the same number of HP as Master Hand did. |
Snag the Trophies[edit]
- smashwiki article: Snag the Trophies
Snag the Trophies! (Grab a Trophy! in the PAL version) is the second bonus stage. It features two small round platforms connected to the center by two wires that can be walked on. The player has an opportunity to collect trophies by knocking them into the circles in the center. If the player falls beyond the blast lines, they can exit prematurely. There is an special bonus for obtaining all three trophies, "Collector."
{[br}}
Adventure[edit]
- SmashWiki article: Adventure Mode (SSBM)
Adventure takes place in settings based on the universes represented in Super Smash Bros. Melee. It features some side-scrolling stages only available in Adventure. Like Classic mode, the player chooses the difficulty as well as number of stock for their fighter. When the player runs out of stock, they can similarly use a continue to regain their stock, at the cost of coins. Players' scores are saved after every stage. They get awarded points for the time remaining by the end of the battle, as well as for the damage inflicted upon opponents. Bonus points can also be received, and special Bonus points are awarded for fulfilling certain objectives, with the Super Mario-related ones being defeating Luigi, Metal Mario and Metal Luigi, or Giga Bowser. The scores are saved separately for each character, as well as a combined total score for every character.
The first two stages pertain to Super Mario, and Giant Bowser is featured as the final boss. In harder difficulty settings, Giant Bowser is fought first, followed by Giga Bowser, an alternate form exclusive to the Super Smash Bros. series.
| Stage 1: Mushroom Kingdom | |
|---|---|
| Part 1 | Mushroom Kingdom is a side-scrolling level based on the overworld settings in Super Mario Bros. It features Goombas, Koopa Troopas, and Koopa Paratroopas as enemies, as well as Warp Pipes and Brick Blocks. Toads and golf courses are seen in the background. There are ten Yoshis to battle towards the end of the stage. |
| Part 2 | The player has to fight a team of Mario and Peach on Princess Peach's Castle. If players have completed the first part with a 2 in the seconds place (XX:X2:XX) on their time counter, Luigi will kick Mario off the castle, taking his place in the battle instead. |
| Stage 2: Kongo Jungle | |
| Part 1 | The first part of Kongo Jungle involves fighting two mini-sized Donkey Kongs. |
| Part 2 | The second part involves fighting a Giant DK. |
| Stage 3: Underground Maze | |
| Part 1 | The Underground Maze is an underground stage based around The Legend of Zelda series. There are ReDeads, Like Likes, and Octoroks. The Triforce is located in one of six random areas, and touching it completes the stage; the five other areas have a Master Sword, and touching it forces the player to battle a Link to battle. |
| Part 2 | The second part involves fighting Zelda on top of the Temple |
| Stage 4: Brinstar | |
| Part 1 | The first part involves fighting Samus. Defeating Samus activates a self-destruction mechanism. |
| Part 2 | For the second part, the player is in a small vertically-scrolling level. The goal is to reach the top to evacuate the exploding planet. If time runs out, they lose a stock. |
| Stage 5: Green Greens | |
| Part 1 | The first part involves battling Kirby. |
| Part 2 | After Kirby is defeated, 18 weaker Kirbys appear, each having copied abilities from other fighters, and all of them have to be defeated. |
| Part 3 | Optionally, a Giant Kirby is fought if the Kirby team is defeated in under 30 seconds. |
| Stage 6: Corneria | |
| Part 1 | The first part involves battling Fox. No Arwings appear in this segment. |
| Part 2 | Arwings arrive, with Peppy, Slippy, and Falco announcing to Fox that they will assist him. Players will then fight Fox again, but more Arwings appear on stage than usual. If Falco is unlocked, he may sometimes be fought instead of Fox. |
| Stage 7: Pokémon Stadium | |
| A team of 12 Pokémon, mainly Pikachus, are fought at the Pokémon Stadium, in a match with only Poké Balls. The team may also have Jigglypuffs and Pichus if they have been unlocked, each. | |
| Stage 8: F-Zero Grand Prix | |
| Part 1 | The first part has a side-scrolling level taking place on Big Blue - Cylinder from F-Zero X during a GP race. The F-Zero Racers approach at set intervals, forcing players to go on a platform hovering above the track to dodge them. |
| Part 2 | The second part involves battling Captain Falcon in Mute City. |
| Stage 9: Onett | |
| Players have to fight three Nesses at the Onett stage. Mr. Saturns are the only items present in the match. | |
| Stage 10: Icicle Mountain | |
| Taking place on a vertically scrolling stage, Icicle Mountain first involves the goal of reaching a certain height of the level. Many Topis, Polar Bears, and Freezies are encountered along the way. If nearly a minute is left on the match timer, two pairs of Ice Climbers will appear. | |
| Stage 11: Battlefield | |
| Part 1 | The first part involves fighting twenty Fighting Wire Frames in a low-gravity match. |
| Part 2 | The second part involves fighting Metal Mario, as well as Metal Luigi if Luigi had been unlocked beforehand. Defeating Metal Mario and Metal Luigi awards the player with 8,000 points. |
| Stage 12: Final Destination | |
| Part 1 | The first play have to fight Giant Bowser on the Final Destination stage. On the Very Easy and Easy skill levels, by default, Giant Bowser will be green (or red if the player is already playing as Green Bowser). However, if the difficulty is set to Normal or higher, Giant Bowser, by default, will use his black palette swap instead (back to green if the player is Black Bowser). |
| Part 2 | If players play on a difficulty setting of Normal or higher, while completing the past stages of the Adventure mode in less than 18 minutes without using a continue and defeating Bowser in less than one minute, they will have to fight Giga Bowser as well. Unlike with Crazy Hand, players can use a continue against Giga Bowser and still be able to fight him again. Players earn 100000 points for KOing Giga Bowser, and receive the Giga Bowser trophy as well. |
Unique non-Super Mario stages[edit]
Underground Maze[edit]
- SmashWiki article: Underground Maze
The Underground Maze is the third level of Adventure mode in Super Smash Bros. Melee. It is based on The Legend of Zelda series. The goal of this level is to find the Triforce, hidden in one of five Battlefield-like areas in the maze. The artifact's location is randomly selected each time Adventure mode is played. The level also features ReDeads, Octoroks, and Like Likes as enemies. If the player comes across a battle area without the Triforce, they will have to fight Link and KO him to proceed.
Once the Underground Maze is completed, the player is sent to the Temple to battle Princess Zelda.
- Names in other languages
| Language | Name | Meaning | Notes |
|---|---|---|---|
| Japanese | 迷宮[?] Meikyū |
Labyrinth |
F-Zero Grand Prix[edit]
- smashwiki article: F-Zero Grand Prix
The F-Zero Grand Prix is the eighth stage of Adventure mode in Super Smash Bros. Melee. After defeating the challengers of Pokémon Stadium, the player will find themselves stampeding across this race track (Big Blue - Cylinder from F-Zero X, specifically) in the Grand Prix, taking place on an F-Zero Grand Prix race. Being a race track, F-Zero machines will occasionally zoom through this course, potentially doing severe damage. One several floating platforms can be jumped on to for safety along the way. Somewhere towards the end of the course, the player will use platforms to jump across a large gap in the race track. Since F-Zero machines only hover about a foot over the ground, the hovercars will fly right above the player, rather than under them. After finishing the "race", the player will fight Сaptain Falcon in Mute City.
F-Zero Grand Prix is the setting for Event 33: Lethal Marathon.
- Names in other languages
| Language | Name | Meaning | Notes |
|---|---|---|---|
| Japanese | F-ZERO グランプリ[?] F-ZERO Guran Puri |
F-Zero Grand Prix |
All-Star[edit]
- SmashWiki article: All-Star Mode
All-Star is an unlockable mode. It is unlocked after every fighter is unlocked. Players have to fight all 25 characters in single-stock matches. Like the Classic and Adventure modes, the difficulty setting can be adjusted. The player has only one life for the whole mode. Their damage percentage does not reset after a battle, but to compensate, the mode has a Rest Area that is entered after each battle, and it has up to three Heart Containers. If the player is defeated, they can still continue, but at the cost of points and coins. The first four rounds involve battling a single opponent in their home stage. Rounds five to eight involve fighting two opponents at a time. Rounds nine to twelve involve fighting three opponents. The 13th round involves fighting 25 Mr. Game & Watches in the Flat Zone, five at a time. The players' scores are saved after every stage. They get awarded points for the damage they dealt. Special Bonus points are awarded for not taking any of the Heart Containers, beating the mode on the Very Hard setting, or beating the mode without losing a life. The scores are saved separately for each character, and there is also a total score for all characters combined. The stage that is used is depended on what character plays as player 2. The stages go as follows:
| P2 Character | Stage |
|---|---|
| Mario | Rainbow Cruise |
| Donkey Kong | Kongo Jungle |
| Link | Great Bay |
| Samus | Brinstar |
| Yoshi | Yoshi's Story |
| Kirby | Green Greens |
| Fox McCloud | Corneria |
| Pikachu | Pokémon Stadium |
| Ness | Onett |
| Captain Falcon | Mute City |
| Bowser | Yoshi's Island |
| Princess Peach | Princess Peach's Castle |
| Ice Climbers | Icicle Mountain |
| Zelda | Temple |
| Luigi | Mushroom Kingdom |
| Jigglypuff | Poké Floats |
| Mewtwo | Battlefield |
| Marth | Fountain of Dreams |
| Mr. Game & Watch | Flat Zone |
| Dr. Mario | Mushroom Kingdom 2 |
| Ganondorf | Brinstar Depths |
| Falco | Venom |
| Young Link | Jungle Japes |
| Pichu | Fourside |
| Roy | Final Destination |
Event Match[edit]
- smashwiki article: Event match
- "Girl Power" redirects here. For the Play Nintendo gallery also called "Girl power", see Nintendo Female Characters List.
Event Matches are missions with a certain goal having to be achieved. Several event matches have a predetermined playable character, but a few allow the player to choose theirs. None of the event matches have any recovery items. The following table provides a rules summary of each of the 51 event matches.
| # | Name | Character | Stage | Description |
|---|---|---|---|---|
| 1 | Trouble King | Mario | Battlefield | It is a stock match against Bowser, with both him and the player having two stock each. |
| 2 | Lord of the Jungle | Giant DK | Kongo Jungle | It is a stock match against Tiny DK, with both him and the player having two stock each. |
| 3 | Bomb-fest | Selectable | Princess Peach's Castle | It is a stock match against Link and Samus, each having one stock. Link and Samus only use their bomb attacks. The only items are Bob-ombs, Motion Sensor Bombs, and Poké Balls containing Electrodes. Upon winning the event match, the player obtains a trophy of the Motion-Sensor Bomb. |
| 4 | Dino-wrangling | Selectable | Yoshi's Story | A Super Giant Yoshi is fought a stock match; the player starts with three lives and the Giant Yoshi has only one. |
| 5 | Spare Change | Ness | Onett | 200 coins have to be obtained while fighting Captain Falcon and avoiding being KO'd. |
| 6 | Kirbys on Parade | Selectable | Fountain of Dreams | It is a stock match against three tiny Kirbys, each having two lives. |
| 7 | Pokémon Battle | Selectable | Pokémon Stadium | It is a stock match against Pikachu, with both it and the player having two stock each. A difference is that regular attacks do not affect Pikachu, and the only way of doing so is using Poké Balls, the only items appearing in the match. |
| 8 | Hot Date on Brinstar | Selectable | Brinstar | It is a stock match against Samus, with both her and the player having two stock each. The player and Samus begin with 102% and 130% damage, respectively. |
| 9 | Hide 'n' Sheik | Selectable | Great Bay | The player has to fight two Zeldas, each having a single life, and KO one of them while she is Sheik. |
| 10 | All-Star Match 1 | Selectable | Yoshi's Island, Jungle Japes, Yoshi's Story, Peach's Castle, Rainbow Cruise | The player, starting with two lives, has to fight Mario, DK, Yoshi, Peach, and Bowser in a row, battling each in a different stage. |
| 11 | King of the Mountain | Selectable | Icicle Mountain | The match involves battling two pairs of Ice Climbers while avoiding being KO'd for one minute. |
| 12 | Seconds, Anyone? | Selectable | Mute City | The goal is to KO Captain Falcon within seven seconds. Both the player and Captain Falcon start with 100% damage. |
| 13 | Yoshi's Egg | Yoshi | Rainbow Cruise | The goal is to protect Yoshi's Egg from Pikachu, Fox, and DK for 55 seconds. |
| 14 | Trophy Tussle 1 | Selectable | Goomba Trophy | The goal is to fight three randomly chosen opponents, each having two lives, in a 3-minute match. Winning the match unlocks the Goomba trophy. |
| 15 | Girl Power | Selectable | Fountain of Dreams | The match involves battling a giant Peach, Zelda, and Samus, each having two lives. |
| 16 | Kirby's Air-raid | Kirby | Corneria | The goal is to KO 10 Kirbys within 38 seconds using Warp Stars only. |
| 17 | Bounty Hunters | Samus | Jungle Japes | The goal is to KO Bowser before Captain Falcon. If Bowser self-destructs himself, the player will lose, but not if Captain Falcon does so. |
| 18 | Link's Adventure | Link | Temple | The goal is to fight Dark Link. Both he and the player each begin with two lives. |
| 19 | Peach's Peril | Mario | Final Destination | The goal is to protect Peach from Bowser, who has unlimited stock, for one minute. |
| 20 | All-Star Match 2 | Selectable | Brinstar, Great Bay, Temple, Mute City, Corneria | The player, starting with two lives, has to fight Samus, Link, Zelda, Captain Falcon, and Fox in a row, battling each in a different stage. |
| 21 | Ice Breaker | Selectable | Princess Peach's Castle | Two pairs of Ice Climbers are fought. Both Nanas have to be defeated, though the player loses if they KO either Popo. |
| 22 | Super Mario 128 | Selectable | Mushroom Kingdom II | The match involves battling 128 tiny Marios, five of whom appear on the stage at a time. |
| 23 | Slippy's Invention | Selectable | Venom | The match involves battling an invisible Fox and Falco, each having two lives. |
| 24 | The Yoshi Herd | Selectable | Yoshi's Island | The goal is to defeat 30 Yoshis, the last of which is a Giant Yoshi, within 2 minutes. |
| 25 | Gargantuans | Giant Bowser | Fourside | The goal is to defeat Giant DK. The player has one life, while DK has two. A tiny Mario and tiny Peach both appear as well, each having one stock, and defeating them is optional. |
| 26 | Trophy Tussle 2 | Selectable | Entei Trophy | The player has to fight in a 3-minute match against three randomly chosen opponents, each combatant having two lives. The Entei trophy is rewarded for winning. |
| 27 | Cold Armor | Samus | Brinstar Depths | The match involves fighting three Metal Samuses. The player has only one life, while the opponents each have two lives. |
| 28 | Puffballs Unite! | Selectable | Green Greens | The goal is to defeat 14 Kirbys, each having a different copied character ability, within two minutes. |
| 29 | Triforce Gathering | Link | Temple | The goal is for the player, who is helped by Zelda, to defeat Ganondorf. Both player and Zelda have one life each, and Ganondorf has two. After winning the event match, Ganondorf is fought in a separate match, where defeating Ganondorf unlocks him as a playable character. |
| 30 | All-Star Match 3 | Selectable | Fountain of Dreams, Pokémon Stadium, Onett, Icicle Mountain | The player, starting with two lives, has to fight Kirby, Pikachu, Ness, and the Ice Climbers in a row, battling each in a different stage. |
| 31 | Mario Bros. Madness | Selectable | Mushroom Kingdom | The match involves battling Mario and Luigi in a time match. The goal is to earn the most points within two minutes. |
| 32 | Target Acquired | Falco | Corneria | The player has one minute to KO Jigglypuff as often as possible. The player has to defeat it more often than the Arwings. Jigglypuff starts and reappears each time with 70% damage. |
| 33 | Lethal Marathon | Captain Falcon | F-Zero Grand Prix (Adventure) | The goal is to reach the end within 45 seconds. The stage is at twice the speed than in Adventure mode. |
| 34 | Seven Years | Young Link | Great Bay | The player has to fight Link in a stock match, with both of them having three lives each. |
| 35 | Time for a Checkup | Luigi | Yoshi's Story | The goal is to defeat a team of Dr. Mario and Peach, each having a single life, within two minutes. |
| 36 | Space Travelers | Ness | Fourside, Battlefield | The goal is to defeat Samus, Kirby, Fox, Captain Falcon, and Falco in a row. The first three are fought on Fourside, and the other two on the Battlefield stage. The player and every opponent have one life each. |
| 37 | Legendary Pokémon | Selectable | Battlefield | The goal is for the player, with one life, to defeat four giant Fighting Wire Frames, as well as Jigglypuff, each having two lives. Poké Balls are the only items, and they contain either a Legendary Pokémon or a Wobbuffet. Winning the event match initiates a separate battle with Pichu, where defeating Pichu unlocks it as a playable character. |
| 38 | Super Mario Bros. 2 | Selectable | Mushroom Kingdom II | The match involves fighting Mario, Luigi, and Peach in a stock battle, with each having two lives. |
| 39 | Jigglypuff Live! | Jigglypuff | Pokémon Stadium | The match involves fighting three Jigglypuffs, each having three lives. |
| 40 | All-Star Match 4 | Selectable | Temple, Mushroom Kingdom II, Poké Floats, Final Destination, Flat Zone | The player, starting with two lives, has to fight Marth, Luigi, Jigglypuff, Mewtwo, and Mr. Game & Watch in a row, battling each in a different stage. |
| 41 | En Garde! | Marth | Temple | The player has to fight Link in a stock match, with both of them start with two lives each. |
| 42 | Trouble King 2 | Luigi | Poké Floats | A Giant Bowser is fought in a stock match, with both him and the player having two lives. Bowser is given a huge handicap, which allows him to quickly KO the player. |
| 43 | Birds of Prey | Fox | Big Blue | The match involves battling a team of Captain Falcon and Falco, each having two lives. |
| 44 | Mewtwo Strikes! | Selectable | Battlefield | The match involves battling Zelda in a stock battle. After a time of 15 seconds, Mewtwo appears and has to be defeated, whilst defeating Zelda causes the player to lose. |
| 45 | Game & Watch Forever! | Mr. Game & Watch | Flat Zone | The goal is to defeat 25 Mr. Game & Watches, three of which appear on stage at a given time. The player starts with three stock. Winning the event match unlocks the Game & Watch trophy. |
| 46 | Fire Emblem Pride | Selectable | Temple | It is a stock match against Marth and Roy, who are on a team, each having three lives. |
| 47 | Trophy Tussle 3 | Selectable | Majora's Mask Trophy | It is a 3-minute match against three randomly chosen opponents, each combatant having two lives. Completing the event match unlocks the Majora's Mask trophy. |
| 48 | Pikachu and Pichu | Selectable | Dream Land (Past Stage) | The goal is for the player, starting with two lives, to defeat two Pichus. They are defended by a Pikachu which respawns when defeated. |
| 49 | All-Star Match Deluxe | Selectable | Mushroom Kingdom, Venom, Pokémon Stadium, Great Bay, Temple, Final Destination | The player, starting with two lives, has to fight Dr. Mario, Falco, Pichu, Young Link, Roy, and Ganondorf in a row, battling each in a different stage. |
| 50 | Final Destination Match | Selectable | Final Destination | The match involves the player, who has one life only, battling Master Hand and Crazy Hand, each having 300 HP. |
| 51 | The Showdown | Selectable | Final Destination | The match involves battling Giga Bowser, Ganondorf, and Mewtwo, each having three lives. Winning the match unlocks both the Final Destination stage and trophy. |
More event matches can be unlocked by winning a certain number of the previous ones and unlocking additional characters.
| Events # | Unlocked by |
|---|---|
| 11 - 15 | Winning at least 6 of the event matches #1 - 10 |
| 16 - 20 | Winning at least 10 of the event matches #1 - 15 |
| 21 - 25 | Winning at least 16 of the event matches #1 - 20 |
| 26 - 29 | Winning at least 22 of the event matches #1 - 25 |
| 30 | Winning at least 27 of the event matches #1 - 29 |
| 31 - 39 | Complete 27 out of the 30 events and unlock Jigglypuff, Luigi, Dr. Mario, Young Link, and Falco. |
| 40 - 50 | Complete 27 of the first 39 events and unlock all the rest of unlockable characters (including: Marth, Roy, Ganondorf, Pichu, Mewtwo, and Mr. Game & Watch). |
| 51 | Winning all event matches #1 - 50 |
By playing in event matches, the player's record for each event is saved. Most events are stock matches, and in those the time the player needs to clear the event is saved as a record. For the few events in the Time setting, e. g. Event #31: Mario Bros. Madness and #32: Target Acquired, the number of KOs the player achieves is stored instead.
Stadium[edit]
- SmashWiki article: Stadium
In the Stadium, special minigames are available. Each minigame opens the way to unlock one of the Past Stages from the original Super Smash Bros.
- Target Test: Here the player can play the Break the Targets! test, as it appears in Classic mode, separately. There is no time limit in this mode, unlike in Classic mode.
- Home-Run Contest: The goal of the Home-Run Contest is to throw the Sandbag as far as possible. The player gets a Home-Run Bat to do this. The player has ten seconds to damage the Sandbag before hitting it, so that it will fly farther away.
- Multi-Man Melee: In this special mode the goal is to fight Fighting Wire Frames.
- 10-Man Melee: The player has to KO 10 Wire Frames in the fastest time possible.
- 100-Man Melee: The player has to KO 100 Wire Frames in the fastest time possible. When winning, the player can unlock Falco Lombardi.
- 3-Minute Melee: The player has 3 minutes to KO as many Wire Frames as possible.
- 15-Minute Melee: The player has 15 minutes to KO as many Wire Frames as possible. When winning, the player can unlock the Past Kongo Jungle stage.
- Endless Melee: The player has an unlimited amount of time to KO as many Wire Frames as possible.
- Cruel Melee: As in Endless Melee, there is an unlimited amount of time. However, there are no items, the Wire Frames are harder to KO, and the player can get KO'd easily at low damage percentages.
Training[edit]
- SmashWiki article: Training Mode
The player can practice here. There are no rules such as Stock or Time, and the opponent can be controlled either by the Training menu, and set to actions such as walking and standing, or by a human player. Items can be created to practice with them specially. When the player performs standard combos here, the maximum number of combos is saved for each playable character, and the player can unlock several Trophies when getting a high number of them.
VS. Mode[edit]
- SmashWiki article: Versus Mode
Melee[edit]
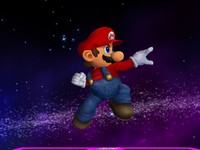
Melee mode allows players to set up the battles entirely for themselves. They can freely choose their characters, the stage, and have a variety of modes to play in. When using names, records are saved for the Melee mode which can be viewed in the Data menu. Up to four players can join the fight, either human or CPU-controlled players. It is possible to only let CPU players fight against each other.
Players choose their characters from the selection screen, and human players can set names for their characters to be displayed above the characters' heads during battle, and also recognizing the battle for their individual Melee Records rating. Multiple players can choose the same character to play as, and the characters then come in alternate outfits for each player. Each character has at least three alternate outfits for the team color red, blue, and green, but there can be up to six different costumes. Some costumes feature gimmicks; for example, one of Peach's costumes looks like Daisy, and Mario has an outfit in Wario's colors. When the same characters are on a team, they appear in different shadings.
The CPU levels range from 1 to 9, with 9 being the most advanced AI. An optional handicap mode also ranges from 1 to 9. The handicap determines how fast a character is knocked out by other fighters, items, and the stage environment. When characters have a high handicap, they are more resistant to stage hazards, and can easily KO opponents with lower handicaps. Whereas, for the low handicapped characters, they can be sent flying (even get KO'd) pretty easily by stage hazards, and will have a very hard time KOing higher handicapped players. If the handicap is set to "Auto", all players will start with a handicap of 5. With the "Auto" handicap setting, the winner of the next match will get their handicap lowered, while the loser will get their handicap heightened. On a side note, unlike in Super Smash Bros., CPU players can have their handicaps adjusted in this game.
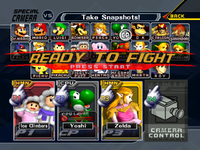
In the optional team battle mode, players can set up to three teams. The characters in the team work together and win or lose the match together. In Coin, Bonus, and Time mode, the points of each team are added and compared. In Stock mode, after a player of the team has been defeated, they can press ![]() to rejoin the battle, but takes away a life from one of their teammates. Optionally, the Friendly Fire option can be set, which makes it possible for teammates to (accidentally) hurt each other with their attacks.
to rejoin the battle, but takes away a life from one of their teammates. Optionally, the Friendly Fire option can be set, which makes it possible for teammates to (accidentally) hurt each other with their attacks.
The battle mode can be set to Time, Stock, Coin, and Bonus. For Time, Coin, and Bonus, the time limit can be set, and is 2 minutes by default. It can range from 1 minute to 99 minutes, or no time limit at all. The default Stock level is 3, the maximum number of lives is 99. Optionally, a time limit can be set for the Stock mode too. After it has run out, the player with the most lives remaining wins. For the Time mode, it can be determined how many points a player loses when doing a self-destruct. It can either be 1 (default), 2, or 0 points.
A special score display can be unlocked by reaching a total of 5000 KOs in VS mode. It displays the players' current score in Time Mode during the battle, which they would only know after the battle's end otherwise. Another optional setting is the Damage ratio, ranging from 0.5 to 2, default being 1. The higher it is, the faster do all players fly from the screen when hit by stage hazards or other fighters. Lastly, it can be decided whether players are allowed to pause the battle by hitting Start. Turning this off also prevents players from resetting the battle while it is paused by pressing ![]() +
+![]() +
+![]() +
+![]() .
.
On the Item Switch, the player can turn off specific items, change the chance of items appearing, or turn off items entirely. It can also be set which player is to select a stage for the next battle. By default, everyone can move the cursor and select a stage. It is also possible to allow only the loser of the last match to select, or to let the players select stages in turns, or to make the stage selected by the computer, either in a set order, or completely at random. When players have unlocked all the stages, except for the Past Stages, they can alter the random stage selection to exclude certain stages from the random routine.
After all preferences have been set, the players get onto the stage selection screen, which once again allows players to choose a random stage to play on. When all competing human players hold ![]() +
+![]() when a stage is selected, the stage's alternate music track will play during battle, if it is available. When players are playing as Zelda and hold
when a stage is selected, the stage's alternate music track will play during battle, if it is available. When players are playing as Zelda and hold ![]() after a stage has been selected, they will start the battle as Sheik.
after a stage has been selected, they will start the battle as Sheik.
The pre-match countdown from 3 by the announcer, cheering for characters by the crowd, and unique on-screen appearances for each playable fighter are absent. Instead, the announcer says, "Ready... Go!" at the start of a match, and when the match ends in a tie, the announcer says, "Sudden Death... Go!" at the start of a sudden death match, and all fighters share the same animation of a trophy coming to life. In Time matches, the announcer counts down from 5 during the last five seconds before shouting, "Time!"
As the battle ends, the players get to the battle results screen, where they can view their KO scores, a list of their bonus points, and special statistics about their movements. These lists are available in all the VS Game Modes, except for Camera Mode and Stamina Mode.
Tournament Melee[edit]
- SmashWiki article: Tournament Mode (SSBM)
Tournament: In this mode, played as a single-elimination tournament, the winner of a battle passes on to the next round CPU-only matches can be skipped. The number of combatants per battle ranges from 2 to 4. The number of entrants is selected and can be up to 64. It is selected how many humans are among the competing players. The stage selection mode is selected; "Single Random" chooses a stage at random on that every match of the tournament is played, "Always Different" chooses a new random stage for each battle, "Choose First" lets the player select the stage for the tournament in the beginning and "Choose All" lets the player choose a new stage for each match of the tournament. The level of additional computer opponents can be set from 1 to 9, applied to all, or to a random value applied to each CPU player. The rules settings for the battles have the same choices as the VS mode. Each player chooses their character and the tournament begins.
Winner out/Loser out: This mode is for human players only. A number of players fight against each other. The winner or the loser of the match, depending on the setting, gives his controller to the next player waiting for his turn to come. This continues endlessly, until the mode is canceled. Players are free to change their characters while the tournament is ongoing. When they hold down ![]() and
and ![]() , their character image changes to a Ditto, the placeholder for a random character. Here, too, the number of combatants per battle ranges from 2 to 4, and the number of entrants can be up to 64. The stage selection mode has the same options as in the regular tournament.
, their character image changes to a Ditto, the placeholder for a random character. Here, too, the number of combatants per battle ranges from 2 to 4, and the number of entrants can be up to 64. The stage selection mode has the same options as in the regular tournament.
Special Melee[edit]
- SmashWiki article: Special Smash
This mode offers a couple of different rules settings for the Melee mode. Any records (such as amount of KOs) are not counted.
| Special Melee modes | |
|---|---|
| Name | Description |
| Camera Mode | In this mode, the players can take screenshots. These screenshots are saved on the memory card. The number of blocks a screenshot takes is defined by how many objects are visible on it. |
| Stamina Mode | As it is seen at the Master Hand in Classic mode, players have 150 HP instead of percentage of damage. The player gets KO'd if their HP hits 0. The amount of HP the players start with, however, cannot be changed. |
| Super Sudden Death | All players start with 300% damage. This will cause them to be knocked out almost instantly when hit by a strong attack. |
| Giant Melee | All players are giant, as if they had taken Super Mushrooms. Handicaps do not work properly for this game mode. |
| Tiny Melee | All players are tiny, as if they had taken Poison Mushrooms. Handicaps do not work properly for this game mode. |
| Invisible Melee | All players are invisible, as if they had Cloaking Devices. |
| Fixed Camera Mode | The camera is zoomed out as far as possible, showing the whole stage, and does not move during the battle. |
| Single-Button Mode | Only the |
| Lightning Melee | In this mode, the game plays a lot faster, making it hard for players to execute and react on attacks. |
| Slo-Mo Melee | The opposite of Lightning Melee. The game is a lot slower, making it easier to execute and react on attacks. |
Trophies[edit]
- Main article: List of trophies in Super Smash Bros. Melee
Trophies can be collected in 1-P Mode, won in the Lottery, or acquired on special events, such as playing a certain number of matches in VS mode. There are 290 trophies in the game (293 in the Japanese version, 292 in the PAL version), with several of them representing the Super Mario franchise. Each of the playable characters have three trophies: One explains the character's backstory in the game they originated from, and is collected by completing Classic mode, while other two explain their background in the game itself. These trophies can be collected by completing the Adventure and All-Star mode with them, or by completing a sufficient amount of VS mode matches with the respective character.
Unlockable features[edit]
Unlocking a secret character always involves fulfilling a certain criteria and then defeating them in a single-stock. All unlockable characters have a unique method of being unlocked, or alternately from playing a certain number of matches in the VS mode.
| Character | First unlock method | Number of VS matches |
|---|---|---|
| Jigglypuff | Completing Classic or Adventure with any character. | 50 |
| Dr. Mario | Completing Classic or Adventure with Mario without using a continue. | 100 |
| Pichu | Beating Event Match #37 | 200 |
| Falco | Completing the 100-Man Melee | 300 |
| Marth | Completing or failing Classic or Adventure mode with all default characters or playing as every default character in VS. Mode. | 400 |
| Young Link | Completing Classic or Adventure with ten different characters. | 500 |
| Ganondorf | Completing Event Match #29 | 600 |
| Mewtwo | Playing in VS. Mode for 20 hours with one controller, ten hours with two controllers, six hours with three controllers or four hours with four controllers. | 700 |
| Luigi | Finishing the first stage of Adventure with a XX:X2:XX on the countdown timer, then defeating Luigi in the battle on Princess Peach's Castle, and then fighting him again after completing Adventure. | 800 |
| Roy | Completing Classic or Adventure with Marth without using a continue. | 900 |
| Mr. Game & Watch | Completing Classic, Adventure, or Break the Targets with all other 24 characters. | 1000 |
There is only one method to unlock the stages, and the player does not have to unlock them by an additional battle like the characters.
| Stage | How to unlock |
|---|---|
| Battlefield | Beating the All-Star mode |
| Brinstar Depths | Playing 50 VS matches |
| Fourside | Playing 100 VS matches |
| Big Blue | Playing 150 VS matches |
| Poké Floats | Playing 200 VS matches |
| Dream Land | Beating the Target Test with all 25 characters |
| Final Destination | Beating Event Match #51 |
| Flat Zone | Beating the Classic Mode with Mr. Game & Watch |
| Kongo Jungle | Beating the 15-Minute Melee |
| Mushroom Kingdom II | Getting the Birdo or Pidgit Trophies. |
| Yoshi's Island | Getting the Sandbag over the 400 meter/1,325 feet mark at the Home-Run Contest. |
Soundtrack[edit]
Each stage has a track from the game it is from, and some stages also have alternate music tracks which are not necessarily from the game the stage is from. The alternate music is heard more rarely than the regular one. However, the player can force the game to play a stage's alternate music by holding ![]() or
or ![]() when selecting a stage on the stage selection screen. If more than one player is playing, however, every player has to do this action to get the alternate music.
when selecting a stage on the stage selection screen. If more than one player is playing, however, every player has to do this action to get the alternate music.
When all stages are unlocked, the player gains access to the Sound Test, where the player can play all music tracks and voices from the game, and might occasionally hear an alternate music track in the menu. Also, if the player uses sound test and then opens the trophy gallery, whichever song was played last in sound test is played in the trophy gallery. However, the music has to loop, or else it will not be played in the trophy gallery.
An orchestrated version of the game's soundtrack was released as a special CD known as Super Smash Bros. Melee: Smashing...Live!.
Critical reception[edit]
Like its predecessor, Super Smash Bros. Melee received very positive reviews from most critics. The game came in sixth for two GameFAQs events: the Best...Game...Ever contest and as a poll for the 100 best games ever. Nintendo Power named Super Smash Bros. Melee the 16th best game ever to appear on a Nintendo console, and "Game of the Year" in 2001. IGN gave Super Smash Bros. Melee a rating of 9.6 out of 10, and ranked it as the 3rd best Nintendo GameCube game, out of all GameCube games released to date. Electronic Gaming Monthly gave the game a 9.5 out of 10, and it was ranked 92nd on the Electronic Gaming Monthly's "Top 200 Games of Their Time" list. In fact, it was ranked as the 3rd best Video Game of all time during the 2001 Penny Arcade Award Ceremony.
It was praised for its increased number of modes and characters, as well as improved graphics. The inclusion of the Adventure mode and Event Match was highly complimented. Overall, the game's critical reception was very positive, and the game still continues to be a gamer favorite, being frequently played at tournaments alongside more traditional fighting games such as Street Fighter.
| Reviews | |||
|---|---|---|---|
| Release | Reviewer, Publication | Score | Comment |
| Nintendo GameCube | Tom "Mugwum" Bramwell, Eurogamer |
10/10 | Overall it's an exotic cocktail of entertainment for Nintendo fans, who will slurp up every last drop, and if you want to talk about longevity, I've had this game on import for about six months and I still haven't finished it. People talk about killer apps and games that sell systems, and if you can put aside any preconceptions of this as a kiddie title or a game for beat 'em up virgins only, then you will have one of the finest videogames ever to issue forth from the caring hands of a developer. One to be remembered, and definitely one to own. |
| Nintendo GameCube | Bryn "hardcore_pawn" Williams, Gamespy |
9/10 | here is no doubt that Super Smash Bros. Melee is one the top games on the GameCube and will be a huge hit this Christmas. But does it really do that much more than the original N64 title? In terms of design, control and gameplay, it doesn't. Instead, Super Smash Bros. Melee adds, adds and adds some more fun to the already superb original game. The extra attention to detail, characters, sights and sounds are a Nintendo enthusiasts' wet dream. Be assured that all those people you call friends that stare at the TV screen in total disbelief and utter confusion at the carnage they are witnessing will soon be sniffing around that spare joypad, wondering how they can get in on the action. HAL and Nintendo have done a stellar job at bringing a massive amount of in-depth fun to the GameCube. This is one game you won't put down until every technique, option and secret has been revealed. |
| Nintendo GameCube | Miguel Lopez, GameSpot |
8.9/10 | Super Smash Bros. Melee has clearly been designed to appeal, foremost, to Nintendo's die-hard fans. Those who are familiar with the company's long and illustrious history will no doubt enjoy the game much more than the casual passerby. Judged on its own merits, though, Nintendo's spastic tribute to itself stands quite strong as one of the most engaging multiplayer games available for any console platform. Nintendo's last console was especially strong in the multiplayer department, and, if games like Melee are any indication, the GameCube seems like it will be too. Super Smash Bros. Melee is simply a huge game that, while best enjoyed in the company of others, will also keep the lone, die-hard fan busy for a good, long while. |
| Aggregators | |||
| Compiler | Platform / Score | ||
| Metacritic | 92 | ||
| GameRankings | 90.52% | ||
Sales[edit]
Super Smash Bros. Melee is the best-selling game for the Nintendo GameCube, selling about 7.09 million copies worldwide, as of December 31, 2009.
Media[edit]
- Main article: List of Super Smash Bros. Melee media
| File info 0:30 |
| File info 0:30 |
| File info 0:30 |
Staff[edit]
- Main article: List of Super Smash Bros. Melee staff
Voice actors[edit]
| Characters | Voice actor |
|---|---|
| Mario, Luigi, Dr. Mario | Charles Martinet |
| Princess Peach | Jen Taylor |
| Link | Nobuyuki Hiyama |
| Kirby, Ness | Makiko Ohmoto |
| Yoshi | Kazumi Totaka |
| Fox McCloud | Shinobu Satouchi |
| Fox McCloud (cutscene) | Steve Malpass |
| Pikachu | Ikue Ohtani |
| Captain Falcon | Ryo Horikawa |
| Jigglypuff (English) | Rachael Lillis |
| Jigglypuff (Japanese) | Mika Kanai |
| Jigglypuff (French) | Guylaine Gibert |
| Jigglypuff (German) | Mara Winzer |
| Ganondorf | Takashi Nagasako |
| Popo, Nana | Sanae Kobayashi |
| Zelda, Sheik | Jun Mizusawa |
| Young Link | Fujiko Takimoto |
| Falco Lombardi | Hisao Egawa |
| Falco Lombardi (cutscene) | Ben Cullum |
| Pichu | Satomi Koorogi |
| Mewtwo | Masachika Ichimura |
| Marth | Hikaru Midorikawa |
| Roy | Jun Fukuyama |
| Announcer, Master Hand, Crazy Hand | Dean Harrington |
Pre-release and unused content[edit]
Through the use of an Action Replay, many unused/unfinished stages can be found. The first is a large, gray stage with the background appearing to be some kind of pub. The music is the same as used on Fox McCloud and Falco Lombardi's stage Corneria. This is assumed to be a test stage because of its name, which on the debug menu is TEST. There are three other stages, "AKANEIA" (a possible predecessor to Castle Siege from Super Smash Bros. Brawl, a home world for Fire Emblem), "10-2", and "Dummy", which all crash the game when loaded. The last stage is named IceTop, which simply loads Icicle Mountain except without music.
Glitches[edit]
- Main article: List of Super Smash Bros. Melee glitches
Ice Climbers freeze[edit]
To perform this glitch, the player should select the Ice Climbers, and while wall walking up to the opponent, have the partner grab the opponent. Right as the opponent is grabbed, the main Ice Climber needs to perform Side+B, resulting in the opponent being frozen in place. They can be unfrozen by using a Screw Attack. This does not seem to cause any damage to the disc.
Infinite Super Scope[edit]
There is an in-game glitch to get an infinite Super Scope that will never run out of bullets. It is obtained by shooting fifteen small shots then two charged shots and during charging of the third shot the player must get hit, that will result in an infinite Super Scope. If the player throws the scope, it will disappear.
References to other games[edit]
- Donkey Kong - Donkey Kong's red costume is a reference to his original sprite from this game. The Hammer returns as an item in this game. Mario's blue costume resembles his original sprite from this game.
- Mario Bros. - Mario's blue-hatted costume resembles his artwork and arcade sprites from this game. A Freezie appears in this game as an item and a collectible trophy. Mario's green costume resembles Luigi's artwork from this game.
- Wrecking Crew - Mario's white and black costume is based on Foreman Spike's outfit. Eggplant Man appears as a trophy. Luigi's red and pink costume is based off his colors in this game.
- Super Mario Bros. - The stage Mushroom Kingdom is based on levels from Super Mario Bros. Many enemies appear in Super Smash Bros. Melee's Mushroom Kingdom in Adventure mode, as well as trophies. One of Luigi's alternate colorations is based off of his colors in this game, including having yellow skin. One of Peach's alternate colorations is based off of her colors in this game. One of Bowser's alternate colorations is based off his appearance from the international cover of this game.
- Super Mario Bros.: The Lost Levels - The Poison Mushroom makes its first Smash Bros. appearance as an item in this game.
- Super Mario Bros. 2 - The stage Mushroom Kingdom II is based on Subcon, the setting of Super Mario Bros. 2. Birdo and Pidgit appear as stage elements, as well as trophies. Peach's down special move, Vegetable, originated from this game, as well as her ability to float.
- Super Mario Land - Peach's yellow costume is based off of Princess Daisy. Princess Daisy also appears as a trophy.
- Super Mario Bros. 3 - The alternate music for Yoshi's Island is an arrangement of the overworld theme and the theme for Grass Land. Raccoon Mario appears in the form of a collectible trophy. Bowser's down special move, Bowser Bomb, is based on the ground pound-type move he uses in this game.
- Dr. Mario - Dr. Mario appears in this game as a playable character. His standard special move, Megavitamin, originated from this game. Viruses appear as a collectible trophy.
- Super Mario World - The stage Yoshi's Island is based on the Yoshi's Island levels from this game. Banzai Bill and Fishin' Lakitu appear as background elements. The Banzai Bill appears as a trophy. Mario's side special move is the Cape, which he could use to reflect projectiles. His and Luigi's down special move, Mario Tornado and Luigi Cyclone, are reminiscent of the Spin Jump from this game. The Koopa Clown Car appears as a trophy. Also, a trophy of Mario riding Yoshi is collectible in the Japanese version of the game.
- Super Mario Land 2: 6 Golden Coins - Mario's yellow and purple costume is based off of Wario. Wario also appears as a trophy.
- Super Mario World 2: Yoshi's Island - Many of Yoshi's moves come from this game. His second jump is the Flutter Jump, a technique that originated in this game. Baby Mario and Baby Bowser appear as trophies.
- Mario Kart series - A racing kart appears in the form of a trophy.
- Donkey Kong Country - Donkey Kong's down special move, Hand Slap, originated from this game. Some of Donkey Kong's animations are references to animations he performs in Donkey Kong Country. Also, Donkey Kong's victory theme is an orchestration of the tune that plays when he wins in a Bonus Area or defeats a boss. Kongo Jungle, a stage based on the first area of Donkey Kong Country, appears. Klaptraps appear on the Kongo Jungle and Jungle Japes stages, and as a trophy. A Barrel Cannon is used as an item in this game, as well as a stage element on the Kongo Jungle stage and a trophy. King K. Rool appears in the form of a trophy.
- Super Mario RPG: Legend of the Seven Stars - Peach cycles through a frying pan in her forward smash, a weapon she first uses in this game. Her neutral attack is based on her Super Slap move in this game. Bowser's side tilt is reminiscent of the second hit of his Drill Claw move, and his side special, Koopa Klaw, is reminiscent of the first hit of his Drill Claw move.
- Super Mario 64 - Many of Mario's moves, animations, and voice clips are recycled in Super Smash Bros. Melee. Luigi has the same moves and voice clips as Mario in Super Mario 64, but his voice clips are higher-pitched versions of Mario's from Super Mario 64. Metal Mario returns as an opponent in Adventure mode. Metal Mario also appears as a trophy. The Metal Box returns in this game as an item and in the form of a collectible trophy, and Peach's Castle appears as a stage. Princess Peach's Castle also appears as a trophy. Rainbow Cruise appears as a stage, which is based on the Rainbow Ride course from this game. One of Kirby's Stone forms is based on the Thwomp design first used in this game. One of Princess Peach's victory poses has her ending in a pose similar to how she appears on her castle's stained glass portrait in this game.
- Yoshi's Story - The stage Yoshi's Island returns from the original Super Smash Bros., which is based on Yoshi's Story that features the Super Happy Tree and other characters in the background. There is another stage based on Yoshi's Story, which is also named after it. Flying Shy Guy, Pak E. Derm, and Raphael the Raven appear as trophies. Yoshi's voice clips are derived from this game. Also, Yoshi's victory theme is an arrangement of the main theme of Yoshi's Story. The various colors of Yoshi, including respective shoe colors, originate from this game.
- Mario Golf series - Peach cycles through a golf club in her forward smash. Plum, a character who appeared in the first Mario Golf game, appears as a trophy.
- Donkey Kong 64 - The music for Kongo Jungle is an arrangement of the DK Rap. Jungle Japes, a stage based on the area of the same name, is playable in Super Smash Bros. Melee.
- Mario Tennis series - Peach cycles through a tennis racket in her forward smash. Waluigi, who debuted in the first Mario Tennis game, appears as a trophy.
- Luigi's Mansion - A trophy of Luigi holding the Poltergust 3000 is collectible.
References in later media[edit]
- Paper Mario: The Thousand-Year Door - In the Spanish version of the original game, Rawk Hawk in his debut when taunting his opponents upon losing specifically references Melee when telling them they are better off playing that for "fighting" (in every other version, he simply says they are better off playing video games without specifying any specific games).
- Donkey Konga: The opening theme from Super Smash Bros. Melee reappears as a track in the PAL version of this game.
- Super Smash Bros. Brawl - One of the names that appears when the player presses the "Random Name" button when naming their custom stage is "Melee". Super Smash Bros. Melee's opening theme and menu theme have been arranged for this game. The original menu theme also directly reappears in this game, along with the Final Destination, Battlefield, Giga Bowser, and Multi-Man Melee 1 themes.
- Super Mario 3D World - There is a Mystery House known as Mystery House Melee, where the objective is to fight several enemies in a row.
- Super Smash Bros. for Nintendo 3DS / Wii U: An arrangement of Super Smash Bros. Melee's Battlefield theme appears in both games on the Final Destination stage. The Multi-Man Melee 2, Metal Mario/Luigi battle, and trophy menu themes also appear in the latter game alongside previous arrangements from Super Smash Bros. Brawl.
- Super Smash Bros. Ultimate - Luigi is seen doing the Green Missile in this game's panorama group artwork, which is also what he did in Melee's group artwork. Yoshi's new Final Smash is a reference to his appearance in Super Smash Bros. Melee's opening. Giga Bowser returns as a boss in Classic Mode and Adventure Mode: World of Light.
- The Super Mario Bros. Movie - Bowser's back-up plan upon Peach rejecting him is to launch an explosive Bomber Bill onto the roof of her castle, like the stage from this game.
Gallery[edit]
- For this subject's image gallery, see Gallery:Super Smash Bros. Melee.
Names in other languages[edit]
| Language | Name | Meaning | Notes |
|---|---|---|---|
| Japanese | Dairantō Sumasshu Burazāzu Derakkusu |
Great Fray Smash Bros. Deluxe | |
| Korean | 대난투 스매시브라더스 DX[?] Daenantu Seumaesi Beuradeoseu DX |
Great Fray Smash Bros. Deluxe |
Trivia[edit]
- In Classic Mode, for some unknown reason, the player never fights against Ganondorf or Roy. Ganondorf appears only as a teammate in Classic Mode, while Roy never appears at all as a CPU player. In addition, Zelda is never a teammate for the player in that game mode. Also, the player only fights Mr. Game & Watch in the multi-man battle.
- Super Smash Bros. Melee is not only the first in its franchise to be Teen-rated, but it's also the first time that any of those Nintendo characters that appear in-game, with the exception of Fire Emblem characters, appeared in a game rated Teen or a foreign equivalent.
- There were three versions of this game released in the NTSC format. The first version was 1.0 NTSC DOL-GALE 0-00, which was the original version with the words "Nintendo's best in 4-player action" labeled on the front. The second version was 1.1 NTSC DOL-GALE 0-01, which was the Player's Choice version. The last version was 1.2 NTSC DOL-GALE 0-02, which had the words "Best Seller" labeled on the front. While the first two had the original "Official Nintendo Seal of Quality" labeled on the boxes and the discs, the last version had Nintendo's revised "Official Nintendo Seal" on the box due to the patch being released after December of 2003. Despite this, the seal on the updated disc still says "Official Nintendo Seal of Quality". The instruction booklet was additionally not revised for the last version, retaining the original seal on the copyright page. Each newer version had different patches and gameplay improvements.
- This is the first GameCube game appearance for all of the playable characters excluding Mario, Luigi, and Bowser, whose first appearance in a GameCube game was Luigi's Mansion.
- However, Mario and Bowser were not playable on the GameCube until this game, making Luigi the only playable character in Super Smash Bros. Melee to be playable in a previous GameCube game, as Luigi's Mansion was released before Melee.
References[edit]
- ^ a b Super Smash Bros. Brawl Chronicle
- ^ http://scanlines16.com/en/collection/smash-brothers-dx-kor/
| Nintendo GameCube games | |
|---|---|
| Super Mario franchise | Luigi's Mansion (2001) • Super Mario Sunshine (2002) • Mario Party 4 (2002) • Mario Golf: Toadstool Tour (2003) • Mario Kart: Double Dash!! (2003) • Mario Party 5 (2003) • Paper Mario: The Thousand-Year Door (2004) • Mario Power Tennis (2004) • Mario Party 6 (2004) • Dance Dance Revolution: Mario Mix (2005) • Mario Superstar Baseball (2005) • Mario Party 7 (2005) • Super Mario Strikers (2005) |
| Donkey Kong franchise | Donkey Konga (2003) • Donkey Konga 2 (2004) • Donkey Kong Jungle Beat (2004) • Donkey Konga 3 JP (2005) |
| Wario franchise | Wario World (2003) • WarioWare, Inc.: Mega Party Game$! (2003) |
| Other | Super Mario 128 (2000, demo) • Super Smash Bros. Melee (2001) • Nintendo Puzzle Collection (2003) • NBA Street V3 (2005) • SSX on Tour (Nintendo Village) (2005) • Donkey Kong Racing (cancelled) • Diddy Kong Racing Adventure (cancelled) |
