Gallery:Super Mario Bros. 3: Difference between revisions
m (→Enemies) |
|||
| (732 intermediate revisions by more than 100 users not shown) | |||
| Line 1: | Line 1: | ||
{{italic title}} | {{italic title}} | ||
== | This is a gallery of images for the game ''[[Super Mario Bros. 3]]''. For a gallery of images released with the remake included in ''[[Super Mario All-Stars]]'', see [[Gallery:Super Mario All-Stars|Gallery:''Super Mario All-Stars'']]. For a gallery of images released with the remake included in ''[[Super Mario Advance 4: Super Mario Bros. 3]]'', see [[Gallery:Super Mario Advance 4: Super Mario Bros. 3|Gallery:''Super Mario Advance 4: Super Mario Bros. 3'']]. For a gallery of images of ''[[The Adventures of Super Mario Bros. 3]]'', see [[Gallery:The Adventures of Super Mario Bros. 3|Gallery:''The Adventures of Super Mario Bros. 3'']]. | ||
==Logos== | |||
<gallery widths="190"> | |||
Logo JP - Super Mario Bros 3.png|Japanese logo | |||
SMB3 - logo.png|International logo | |||
SMB3.png|International logo (New) | |||
Logo EN (alt) - Super Mario Bros. 3.png|Alternate International logo | |||
SMB3 Logo JP in-game.png|Japanese in-game logo | |||
SMB3 In-game Logo.png|International in-game logo | |||
</gallery> | |||
==Artwork== | |||
===Key artwork and wallpapers=== | |||
<gallery> | |||
SMB3 NES - Group art.png|Box artwork | |||
SMB3 Cover Artwork.png|Box artwork | |||
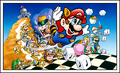
Air Assault.jpg|Key artwork of an [[airship]] | |||
Kotabe SMB3 Sketch.png|Key artwork of an airship | |||
SMB3Art2.png|Key artwork of an airship{{footnote|main|90}} | |||
SMB3 My Nintendo wallpaper smartphone.png|[[My Nintendo]] wallpaper released for the [[Super Mario Bros. 35th Anniversary|''Super Mario Bros.'' 35th Anniversary]] | |||
SMB3 My Nintendo wallpaper desktop.png|My Nintendo wallpaper released for the ''Super Mario Bros.'' 35th Anniversary | |||
</gallery> | |||
===Locations=== | |||
<gallery> | |||
Grass Land scene SMB3.jpg|[[Grass Land]]{{footnote|main|90}} | |||
Desert Hill.jpg|[[Desert Land]]{{footnote|main|90}} | |||
Sea Side.jpg|[[Water Land]]{{footnote|main|90}} | |||
SMB3 Giant Land Artwork.jpg|[[Giant Land]]{{footnote|main|90}} | |||
Sky Land.jpg|[[Sky Land]]{{footnote|main|90}} | |||
Iced Land.jpg|[[Ice Land]]{{footnote|main|90}} | |||
Pipe Land scene SMB3.jpg|[[Pipe Land]]{{footnote|main|90}} | |||
Dark Land.jpg|[[Dark Land]]{{footnote|main|90}} | |||
</gallery> | |||
===Mario=== | ===Mario=== | ||
<gallery> | |||
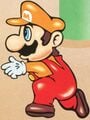
SMB3 Mario Guide.jpg|[[Mario]]{{footnote|main|90}} | |||
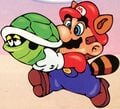
Kotabe Mario Shell Sketch.png|Mario carrying a [[Koopa Shell|shell]] | |||
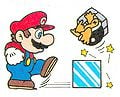
ShellToss SMB3.png|Mario [[Shell Toss|tossing a shell]] | |||
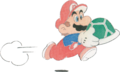
SMB3 Mario Stomping Green Shell.jpg|Mario [[jump]]ing off of a shell | |||
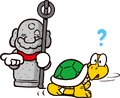
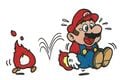
GoombaShoeMarioSpinyOriginal.png|Mario (with [[Goomba's Shoe|Goomba's shoe]]){{footnote|main|90}} | |||
GoombaShoeMarioSpiny.png|Mario (with Goomba's shoe){{footnote|main|90}} | |||
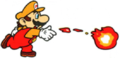
SMB3 Famicom - Fire Mario.png|[[Fire Mario]] ([[Family Computer|Famicom]]) | |||
SMB3 NES - Fire Mario.png|Fire Mario ([[Nintendo Entertainment System|NES]]) | |||
Fire Mario SMB3 Alt.jpg|Fire Mario{{footnote|main|91}} | |||
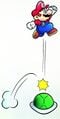
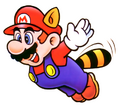
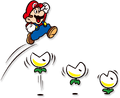
SMB3 - Raccoon Mario.png|[[Raccoon Mario]] [[fly]]ing | |||
SMB3 Raccoon Mario Artwork F40A.png|Raccoon Mario flying{{footnote|main|24}} | |||
Raccoon Mario (Flying) - Super Mario Bros 3.png|Raccoon Mario flying | |||
SMB3 Mario Portal Raccoon Mario Artwork.png|Raccoon Mario flying{{footnote|main|20}} | |||
RaccoonMario Demonstration SMB3.png|Raccoon Mario performing a tail attack | |||
SMB3 Raccoon Mario Artwork 3 F40A.png|Raccoon Mario performing a tail attack{{footnote|main|24}} | |||
Raccoon Mario jumping SMB3 art.jpg|Raccoon Mario jumping | |||
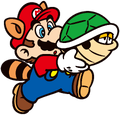
RaccoonMario GreenShell SMB3.png|Raccoon Mario carrying a shell | |||
RaccoonMario GreenShell SMB3 Alt.jpg|Raccoon Mario carrying a shell{{footnote|main|91}} | |||
SMB3 Raccoon Mario Artwork 2 F40A.png|Raccoon Mario carrying a shell{{footnote|main|24}} | |||
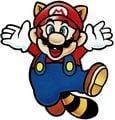
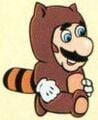
</gallery | Tanooki Mario SMB3 art.png|[[Tanooki Mario]] | ||
SMB3 Mario Portal Tanooki Mario Artwork.png|Tanooki Mario{{footnote|main|20}} | |||
Tanooki Mario SMB3 Alt.jpg|Tanooki Mario{{footnote|main|91}} | |||
Tanooki Mario flying SMB3 artwork.jpg|Tanooki Mario flying{{footnote|main|90}} | |||
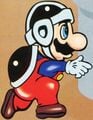
Statue Mario Artwork.png|[[Statue Mario]] | |||
SMB3 F40A Statue Mario Artwork.png|Statue Mario{{footnote|main|24}} | |||
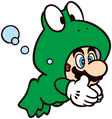
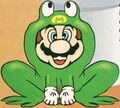
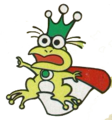
Frog Mario SMB3 art.png|[[Frog Mario]] [[swim]]ming | |||
SMB3 Mario Portal Frog Mario Artwork.png|Frog Mario swimming{{footnote|main|20}} | |||
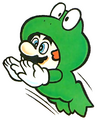
Frog Mario alternate Super Mario Bros 3.png|Frog Mario jumping | |||
Frog Mario into Pipe SMB3 artwork.jpg|Frog Mario swimming into a [[Warp Pipe]]{{footnote|main|90}} | |||
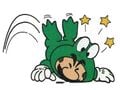
Frog Mario hurt SMB3 art.jpg|Frog Mario hurt{{footnote|main|90}} | |||
Frog Mario SMB3 Alt.jpg|Frog Mario{{footnote|main|91}} | |||
Hammer Mario SMB3.png|[[Hammer Mario]] | |||
SMB3 F40A Hammer Mario Artwork.png|Hammer Mario{{footnote|main|24}} | |||
Hammer Mario Artwork - Super Mario Bros 3.png|Hammer Mario{{footnote|main|90}} | |||
Hammer Mario SMB3 Alt.jpg|Hammer Mario{{footnote|main|91}} | |||
</gallery> | |||
=== | ===Luigi and non-playable characters=== | ||
<gallery> | |||
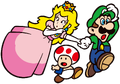
SMB3 - Luigi Peach and Toad.png|[[Princess Peach|Princess Toadstool]], [[Toad (species)|Toad]], and [[Luigi]] | |||
SMB3 F40A Toadstool Toad Luigi Artwork.png|Princess Toadstool, Toad, and Luigi{{footnote|main|24}} | |||
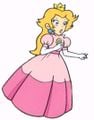
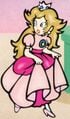
Smb3 peach NEW.jpg|Princess Toadstool | |||
</gallery></ | Princess Toadstool SMB3 Alt.jpg|Princess Toadstool{{footnote|main|91}} | ||
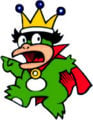
SMB3 MushroomKing.jpg|[[Kings|King]] of [[Water Land]] | |||
SMB3Art3.png|King of Water Land{{footnote|main|90}} | |||
</gallery> | |||
===Enemies and obstacles=== | |||
<gallery> | |||
SMB3 GoombaSquish.jpg|[[Goomba|Little Goomba]]{{footnote|main|90}} | |||
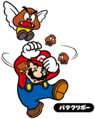
SMB3 Paragoomba.png|[[Paragoomba|Para-Goomba]] | |||
Paragoomba SMB3 art.png|Para-Goomba | |||
SMB3 F40A Paragoomba Artwork.png|Para-Goomba{{footnote|main|24}} | |||
ParagoombawithMicrogoombas.jpg|Para-Goomba and [[Mini Goomba|Mugger Micro-Goombas]] | |||
SMB3 Mario Portal Paragoomba Artwork.png|Para-Goomba and Mugger Micro-Goombas{{footnote|main|20}} | |||
SMB3 Paragoomba & Micro-Goombas Artwork F40A.png|Para-Goomba and Micro-Goombas{{footnote|main|24}} | |||
PDMGNintendoPower.png|[[Pile Driver Micro-Goomba]]{{footnote|main|90}} | |||
Koopa-Troopa-9.png|[[Koopa Troopa|Green Koopa Troopa]] | |||
SMB3 DryBones.jpg|[[Dry Bones]] | |||
SMB3 F40A Dry Bones Artwork.png|Dry Bones{{footnote|main|24}} | |||
SMB3 Boomerang Bros Artwork.jpg|[[Boomerang Bro]]ther | |||
SMB3 F40A Boomerang Brother Artwork.png|Boomerang Brother{{footnote|main|24}} | |||
FireBros.jpg|[[Fire Bro]]ther | |||
SMB3 F40A Fire Brother Artwork.png|Fire Brother{{footnote|main|24}} | |||
SMB3 SledgeBro.jpg|[[Sledge Bro]]ther | |||
SMB3 F40A Sledge Brother Artwork.png|Sledge Brother{{footnote|main|24}} | |||
SMB3 Buzzy Beetle.png|[[Buzzy Beetle|Upside-down Buzzy Beetle]] | |||
SMB3 F40A Upsidedown Buzzy Beetles Artwork.png|Upside-down Buzzy Beetles{{footnote|main|24}} | |||
SMB3 BusterBeetle.jpg|[[Buster Beetle]] | |||
MariokickSMB3.jpg|Buster Beetle{{footnote|main|90}} | |||
SMB3 Parabeetle.jpg|[[Para-Beetle]]s | |||
SMB3 F40A Para Beetles Artwork.png|Para-Beetles{{footnote|main|24}} | |||
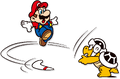
Lakitu Artwork - Super Mario Bros 3.png|[[Lakitu]] and [[Spiny Egg]]s | |||
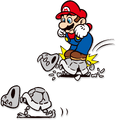
Rocky wrench.jpg|[[Rocky Wrench]] | |||
SMB3 F40A Rocky Wrench Artwork.png|Rocky Wrench{{footnote|main|24}} | |||
Nintendo Power Rocky Wrench artwork.png|Rocky Wrench{{footnote|main|90}} | |||
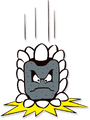
SMB3 Spike.jpg|[[Spike]] | |||
SMB3 F40A Spike Artwork.png|Spike{{footnote|main|24}} | |||
SMB3 VenusFireTrap.jpg|[[Fire Piranha Plant|Venus Fire Trap]] | |||
SMB3 F40A Venus Fire Trap Artwork.png|Venus Fire Trap{{footnote|main|24}} | |||
SMB3 Ptooie.jpg|[[Ptooie]] | |||
SMB3 F40A Ptooie Artwork.png|Ptooie{{footnote|main|24}} | |||
SSBU Nipper Plant Spirit.png|[[Nipper Plant|Walking Piranha]] | |||
SMB3 NipperPlant.jpg|Walking Piranhas | |||
SMB3 F40A Walking Piranhas Artwork.png|Walking Piranhas{{footnote|main|24}} | |||
SMB3 Muncher.jpg|[[Muncher]]s | |||
SMB3 F40A Munchers Artwork.png|Munchers{{footnote|main|24}} | |||
SMB3 Roto-Disc.jpg|[[Roto-Disc]]s | |||
SMB3 F40A Roto Discs Artwork.png|Roto-Discs{{footnote|main|24}} | |||
FireSnake.jpg|[[Fire Snake|Firesnake]] | |||
SMB3 F40A Firesnake Artwork.png|Firesnake{{footnote|main|24}} | |||
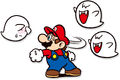
SMB3Boo.jpg|[[Boo|"Boo" Diddly]] | |||
SMB3 Boos Artwork.jpg|"Boo" Diddlys | |||
SMB3 F40A Boos Artwork.png|"Boo" Diddlys{{footnote|main|24}} | |||
SMB3 Stretch.jpg|[[Stretch]] | |||
SMB3 F40A Stretch Artwork.png|Stretch{{footnote|main|24}} | |||
SMB3 Thwomp.jpg|[[Thwomp]] | |||
SMB3 F40A Thwomp Artwork.png|Thwomp{{footnote|main|24}} | |||
SMB3 Angry Sun Artwork.jpg|[[Angry Sun]]{{footnote|main|90}} | |||
SMB3 Chain Chomp Artwork.jpg|[[Chain Chomp]] | |||
SMB3 F40A Chain Chomp Artwork.png|Chain Chomp{{footnote|main|24}} | |||
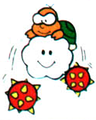
Bloopernanny.jpg|[[Blooper Nanny|Bloober with kids]] | |||
SMB3 F40A Blooper Nanny Artwork.png|Bloober with kids{{footnote|main|24}} | |||
SMB3 LavaLotus.jpg|[[Lava Lotus]] | |||
SMB3 F40A Lava Lotus Artwork.png|Lava Lotus{{footnote|main|24}} | |||
BossBass SMB3.jpg|[[Big Cheep Cheep|Boss Bass]] with a [[Baby Cheep]]{{footnote|main|90}} | |||
SpinyCheepCheep.jpg|[[Spiny Cheep Cheep|Spiny Cheep-Cheep]] | |||
SMB3 F40A Spiny Cheep Cheep Artwork.png|Spiny Cheep-Cheep{{footnote|main|24}} | |||
SMB3 Jelectro.jpg|[[Jelectro]] | |||
SMB3 F40A Jelectro Artwork.png|Jelectro{{footnote|main|24}} | |||
SMW Art - Bob ombs.png|[[Bob-omb]]s | |||
SMB3 F40A Bobombs Artwork.png|Bob-ombs{{footnote|main|24}} | |||
SMB3 HotFoot.jpg|[[Hot Foot]] | |||
Hot Foot burns Mario SMB3 artwork.jpg|Hot Foot{{footnote|main|90}} | |||
SMB3 Artwork Hot Foot.png|Hot Foot{{footnote|main|24}} | |||
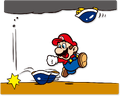
SMB3 FireChomp.jpg|[[Flame Chomp|Fire Chomp]] | |||
SMB3 F40A Fire Chomp Artwork.png|Fire Chomp{{footnote|main|24}} | |||
SMB3 Hand Trap.jpg|[[Hand Trap]]{{footnote|main|90}} | |||
Tweester.jpg|[[Tornado]] | |||
</gallery> | |||
===Bosses=== | ===Bosses=== | ||
<gallery> | |||
Boom Boom SMB3 artwork.jpg|[[Boom Boom]] | |||
Boom Boom MP Artwork.png|Boom Boom{{footnote|main|20}} | |||
SMB3 F40A Boom Boom Artwork.png|Boom Boom{{footnote|main|24}} | |||
Boom Boom Wings Artwork - Super Mario Bros 3.png|Boom Boom{{footnote|main|90}} | |||
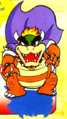
LarryKoopa SMB3.jpg|[[Larry|Larry Koopa]] | |||
SMB3 F40A Larry Artwork.png|Larry Koopa{{footnote|main|24}} | |||
SMB3 MortonKoopaJr.jpg|[[Morton|Morton Koopa Jr.]] | |||
SMB3 F40A Morton Artwork.png|Morton Koopa Jr.{{footnote|main|24}} | |||
SMB3 WendyO.Koopa.jpg|[[Wendy|Wendy O. Koopa]] | |||
SMB3 F40A Wendy Artwork.png|Wendy O. Koopa{{footnote|main|24}} | |||
File: | CandyRing SMB3.png|Wendy O. Koopa{{footnote|main|90}} | ||
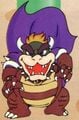
File: | SMB3 IggyKoopa.jpg|[[Iggy|Iggy Koopa]] | ||
</gallery></ | SMB3 F40A Iggy Artwork.png|Iggy Koopa{{footnote|main|24}} | ||
SMB3 RoyKoopa.jpg|[[Roy|Roy Koopa]] | |||
SMB3 F40A Roy Artwork.png|Roy Koopa{{footnote|main|24}} | |||
SMB3 LemmyKoopa.jpg|[[Lemmy|Lemmy Koopa]] | |||
SMB3 F40A Lemmy Artwork.png|Lemmy Koopa{{footnote|main|24}} | |||
SMB3 Lemmy Koopa Tossing Magical Ball Artwork.jpg|Lemmy Koopa{{footnote|main|90}} | |||
SMB3 LudwigVonKoopa.jpg|[[Ludwig|Ludwig von Koopa]] | |||
SMB3 F40A Ludwig Artwork.png|Ludwig von Koopa{{footnote|main|24}} | |||
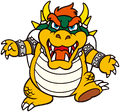
Bowser SMB3 artwork.jpg|[[Bowser]] | |||
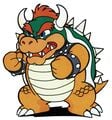
SMB3 Bowser.png|Bowser | |||
SMB3 Mario Portal Bowser Artwork.png|Bowser{{footnote|main|20}} | |||
SMB3 Bowser Artwork F40A.png|Bowser{{footnote|main|24}} | |||
CapeBowserSMB3.png|Bowser | |||
Bowser SMB3 alt artwork.jpg|Bowser{{footnote|main|90}} | |||
Bowser SMB3 Alt.jpg|Bowser{{footnote|main|91}} | |||
</gallery> | |||
===Items and objects=== | |||
<gallery> | |||
Smb3 super leaf.png|[[Super Leaf]] | |||
SMB3Art1.jpg|[[Directional Lift]]{{footnote|main|90}} | |||
</gallery> | |||
{{footnote|note|90|This artwork was first released in the ''Super Mario Bros. 3 Strategy Guide'' (1990) published by [[Nintendo|Nintendo of America]] in Redmond, WA. Illustrations are attributed to [[Makikazu Ohmori]] and [[Hideaki Ito]].}} | |||
{{footnote|note|91|This artwork was first released in ''Club Nintendo'' (Vol.3 Is. 6, 1991) published by [[Nintendo|Nintendo Co., Ltd.]] in Novara, NO. Illustrations are attributed to | |||
Catalyst Publishing and Nintendo, Co. Ltd.}} | |||
{{footnote|note|20|This artwork was first released on the [https://www.nintendo.com/jp/character/mario/history/smb3/index.html Mario Portal page for ''Super Mario Bros. 3''] in 2020 as part of the [[Super Mario Bros. 35th Anniversary|''Super Mario Bros.'' 35th Anniversary]].}} | |||
{{footnote|note|24|This artwork was first released on the [https://www.nintendo.com/jp/famicom/software/smb3 Famicom 40th Anniversary page for ''Super Mario Bros. 3''] on February 13, 2024.}} | |||
==Sprites== | |||
===Mario and Luigi=== | |||
====In-level sprites==== | |||
<gallery class="rawsize x2" style="--bg:#B5EBF2;--bg1:#9290FF;--bg2:#FFCCC5;--bg3:#4240FF;--bg4:#F7D8A5;--bg5:#B3F3CC;--bg6:#C0DFFF;" widths=64px heights=64px> | |||
SMB3 Smallmario.png|[[Small Mario]] | |||
Small Mario SMB3.gif|Small Mario walking | |||
SMB3 Small Mario in Goomba's Shoe.png|Small Mario (with [[Goomba's Shoe|Goomba's shoe]]) | |||
SMB3-InvincibleMarioSprite.gif|[[Invincible Mario|Invincible Small Mario]] ([[:File:SMB3 Player flash diagram.png|alternatives]]) | |||
Super Mario SMB3.png|[[Super Mario (form)|Super Mario]]{{class|bg1}} | |||
SMB3 Mario bonked intro.png|Super Mario (intro){{class|bg1}} | |||
SMB3 Mario look up intro.png|Super Mario (intro){{class|bg1}} | |||
SMB3 Mario swim credits.png|Super Mario (credits){{class|bg1}} | |||
Super Star Mario SMB3.gif|Invincible Super Mario ([[:File:SMB3 Player flash diagram.png|alternatives]]){{class|bg1}} | |||
Fire Mario SMB3 Sprite.png|[[Fire Mario]]{{class|bg2}} | |||
SMB3 Sprite Fire Mario (Jump).png|Fire Mario jumping{{class|bg2}} | |||
Super Star Fire Mario SMB3.gif|Invincible Fire Mario ([[:File:SMB3 Player flash diagram.png|alternatives]]){{class|bg2}} | |||
Raccoon Mario SMB3.png|[[Raccoon Mario]]{{class|bg3}} | |||
Raccoon Mario Walk SMB3.gif|Raccoon Mario walking{{class|bg3}} | |||
Raccoon Mario Fly SMB3.gif|Raccoon Mario flying{{class|bg3}} | |||
Super Star Raccoon Mario SMB3.gif|Invincible Raccoon Mario ([[:File:SMB3 Player flash diagram.png|alternatives]]){{class|bg3}} | |||
Frog Mario SMB3 Sprite.png|[[Frog Mario]]{{class|bg4}} | |||
SMB3 Sprite Frog Mario (Swim).png|Frog Mario [[swim]]ming{{class|bg4}} | |||
SMB3FrogMarioFront.png|Frog Mario ([[List of Super Mario Bros. 3 pre-release and unused content|unused]]){{class|bg4}} | |||
Super Star Frog Mario SMB3.gif|Invincible Frog Mario ([[:File:SMB3 Player flash diagram.png|alternatives]]){{class|bg4}} | |||
Tanooki Mario SMB3 Sprite.png|[[Tanooki Mario]]{{class|bg5}} | |||
Tanooki Mario SMB3 Jumping.png|Tanooki Mario jumping{{class|bg5}} | |||
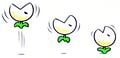
Tanooki Mario Floating SMB3.gif|Tanooki Mario floating{{class|bg5}} | |||
Tanooki Mario Sprite SMB3 Running.png|Tanooki Mario turning{{class|bg5}} | |||
Super Star Tanooki Mario SMB3.gif|Invincible Tanooki Mario ([[:File:SMB3 Player flash diagram.png|alternatives]]){{class|bg5}} | |||
Statue mario.png|[[Statue Mario]]{{class|bg5}} | |||
Tanooki Mario Statue SMB3.gif|Tanooki Mario switching to Statue Mario{{class|bg5}} | |||
Hammer Mario SMB3 Sprite.png|[[Hammer Mario]]{{class|bg6}} | |||
Hammer Mario Walking SMB3.gif|Hammer Mario walking{{class|bg6}} | |||
SMB3 Sprite Hammer Mario (Dash).png|Hammer Mario jumping while [[dash]]ing{{class|bg6}} | |||
Hammer Mario Duck SMB3.png|Hammer Mario ducking{{class|bg6}} | |||
SMB3 Hammer Mario Sliding.png|Hammer Mario sliding{{class|bg6}} | |||
Hammer Mario Rolling SMB3.gif|Hammer Mario spinning in the air{{class|bg6}} | |||
Super Star Hammer Mario SMB3.gif|Invincible Hammer Mario ([[:File:SMB3 Player flash diagram.png|alternatives]]){{class|bg6}} | |||
SMB3BattleMode-Mario.png|Mario ([[Mario Bros. (Super Mario Bros. 3)|Battle Mode]]){{class|blackbg}} | |||
SMB3 Small Luigi Sprite.png|[[Small Mario|Small Luigi]] | |||
SMB3 Sprite Invincible Small Luigi.gif|[[Invincible Mario|Invincible Small Luigi]] ([[:File:SMB3 Player flash diagram.png|alternatives]]) | |||
Super Luigi SMB3 sprite.png|[[Super Mario (form)|Super Luigi]]{{class|bg1}} | |||
LuigiwalkgreenshellSMB3.gif|Super Luigi walking while holding something{{class|bg1}} | |||
SMB3 Raccoon Luigi Sprite.png|[[Raccoon Mario|Raccoon Luigi]]{{class|bg3}} | |||
MBSMB3 Luigi.png|Luigi (Battle Mode){{class|blackbg}} | |||
SMB3BattleMode-Luigi.png|Luigi (Battle Mode){{class|blackbg}} | |||
</gallery> | |||
====Overworld map sprites==== | |||
<gallery style="--bg:#B5EBF2;--bg1:#9290FF;--bg2:#FFCCC5;--bg3:#4240FF;--bg4:#F7D8A5;--bg5:#B3F3CC;--bg6:#C0DFFF;" widths=64px heights=64px> | |||
SMB3-NES-SmallMarioMap.png|[[Small Mario]] | |||
SMB3MapMarioLeft.gif|Small Mario ([[List of Super Mario Bros. 3 pre-release and unused content|unused]]) | |||
SMB3MapMarioUp.gif|Small Mario (unused) | |||
SMB3-NES-SuperMarioMap.png|[[Super Mario (form)|Super Mario]]{{class|bg1}} | |||
SMB3-NES-FireMarioMap.png|[[Fire Mario]]{{class|bg2}} | |||
Raccoon_Mario_Map_SMB3.gif|[[Raccoon Mario]]{{class|bg3}} | |||
MarioPWingSMB3.gif|Raccoon Mario (with [[P-Wing]]){{class|bg3}} | |||
SMB3-NES-FrogMarioMap.png|[[Frog Mario]]{{class|bg4}} | |||
SMB3-NES-TanookiMarioMap.png|[[Tanooki Mario]]{{class|bg5}} | |||
SMB3-NES-HammerMarioMap.png|[[Hammer Mario]]{{class|bg6}} | |||
SMB3 Sprite Small Luigi (Map).png|[[Small Mario|Small Luigi]] | |||
SMB3-NES-SuperLuigiMap.png|[[Super Mario (form)|Super Luigi]]{{class|bg1}} | |||
</gallery> | |||
====Minigame lobby==== | |||
<gallery class="blackbg" widths=64px heights=64px> | |||
SMB3MinigameSmallMario.png|[[Small Mario]] | |||
SMB3MinigameSuperMario.png|[[Super Mario (form)|Super Mario]] | |||
SMB3 Minigame lobby Raccoon Mario.png|[[Raccoon Mario]] | |||
SMB3 Minigame lobby Small Luigi.png|Small Luigi | |||
SMB3 Minigame lobby Super Luigi.png|Super Luigi | |||
SMB3 Minigame lobby Raccoon Luigi.png|Raccoon Luigi | |||
</gallery> | |||
===Non-playable characters=== | |||
<gallery class="rawsize x2" widths=64px heights=64px style="--bg:#B5EBF2;--bg1:#9290FF;--bg2:#FFCCC5;--bg3:#4240FF;--bg4:#F7D8A5;--bg5:#B3F3CC;--bg6:#C0DFFF"> | |||
PrincessCryingR.png|[[Princess Peach|Princess Toadstool]]{{class|blackbg}} | |||
PeachSMB3Sprite.png|Princess Toadstool{{class|blackbg}} | |||
SMB3Peach.gif|Princess Toadstool{{class|blackbg}} | |||
SMB3 Princess letter.png|Princess Toadstool ([[letter]]){{class|whitebg}} | |||
PeachSMB3Message.gif|Princess Toadstool (letter){{class|whitebg}} | |||
ToadSMB3.png|[[Toad (species)|Toad]] | |||
SMB3Toad.gif|Toad | |||
Toad Thanks SMB3.gif|Toad | |||
Mario toadSMB3.png|Toad (game lobby){{class|whitebg}} | |||
SMB3 Grass Land Dog King Sprite.png|[[Kings|King]] of [[Grass Land]] (transformed) | |||
SMB3 King W1 changed crowned.gif|King of Grass Land (transformed) | |||
GrassLandKing.png|King of Grass Land | |||
SMB3 King W1 normal wanded.gif|King of Grass Land | |||
SMB3-NES-DesertKingTransformed.png|King of [[Desert Land]] (transformed){{class|bg1}} | |||
SMB3 King W2 changed.gif|King of Desert Land (transformed){{class|bg1}} | |||
SMB3-NES-DesertKing.png|King of Desert Land{{class|bg1}} | |||
SMB3 King W2 normal wanded.gif|King of Desert Land{{class|bg1}} | |||
SMB3-NES-WaterKingTransformed.png|King of [[Water Land]] (transformed){{class|bg4}} | |||
SMB3 King W3 changed crowned.gif|King of Water Land (transformed){{class|bg4}} | |||
SMB3-NES-WaterKing.png|King of Water Land{{class|bg4}} | |||
SMB3 King W3 normal wanded.gif|King of Water Land{{class|bg4}} | |||
SMB3-NES-GiantKingTransformed.png|King of [[Giant Land]] (transformed){{class|bg5}} | |||
SMB3 King W4 changed crowned.gif|King of Giant Land (transformed){{class|bg5}} | |||
SMB3-NES-GiantKing.png|King of Giant Land{{class|bg5}} | |||
SMB3 King W4 normal wanded.gif|King of Giant Land{{class|bg5}} | |||
SMB3-NES-SkyKingTransformed.png|King of [[Sky Land]] (transformed) | |||
SMB3 King W5 changed crowned.gif|King of Sky Land (transformed) | |||
SMB3-NES-SkyKing.png|King of Sky Land | |||
SMB3 King W5 normal wanded.gif|King of Sky Land | |||
SMB3-NES-IceKingTransformed.png|King of [[Ice Land]] (transformed){{class|bg6}} | |||
SMB3 King W6 changed.gif|King of Ice Land (transformed){{class|bg6}} | |||
SMB3-NES-IceKing.png|King of Ice Land{{class|bg6}} | |||
SMB3 King W6 normal wanded.gif|King of Ice Land{{class|bg6}} | |||
SMB3-NES-PipeKingTransformed.png|King of [[Pipe Land]] (transformed){{class|bg4}} | |||
SMB3 King W7 changed crowned.gif|King of Pipe Land (transformed){{class|bg4}} | |||
SMB3-NES-PipeKing.png|King of Pipe Land{{class|bg4}} | |||
SMB3 King W7 normal wanded.gif|King of Pipe Land{{class|bg4}} | |||
</gallery> | |||
===Enemies=== | ===Enemies=== | ||
<gallery widths=64px heights=64px style="--bg:#B5EBF2;--bg1:#9290FF;--bg2:#FFCCC5;--bg3:#4240FF;--bg4:#F7D8A5;--bg5:#B3F3CC;--bg6:#C0DFFF"> | |||
SMB3 Sprite Goomba.png|[[Goomba|Little Goomba]] | |||
SMB3 Goomba Sprite.gif|Little Goomba | |||
SMB3 Red Goomba.png|Red Goomba | |||
SMB3 Goomba tipped credits.png|Red Goomba (credits){{class|bg4}} | |||
SMB3 Sprite Paragoomba.png|[[Paragoomba|Para-Goomba]] | |||
Ani smb3 paragoomba.gif|Para-Goomba | |||
SMB3 Sprite Paragoomba (Red).png|Red Para-Goomba | |||
Paragoombared.gif|Red Para-Goomba | |||
SMB3 Micro-Goomba.png|[[Mini Goomba|Mugger Micro-Goomba]] | |||
SMB3 Sprite Pile Driver Micro-Goomba.png|[[Pile Driver Micro-Goomba]]{{class|bg1}} | |||
SMB3 Pile Driver Micro-Goomba.gif|Pile Driver Micro-Goomba{{class|bg1}} | |||
SMB3 Sprite Big Goomba.png|[[Big Goomba|Grand Goomba]]{{class|bg5}} | |||
GrandGoombaSMB3.gif|Grand Goomba{{class|bg5}} | |||
SMB3 Shoe Goomba.png|[[Shoe Goomba|Kuribo's Goomba]] | |||
SMB3 Sprite Koopa Troopa (Green).png|[[Koopa Troopa|Green Koopa Troopa]] | |||
Green Koopa SMB3.gif|Green Koopa Troopa | |||
SMB3 Sprite Koopa Troopa (Red).png|Red Koopa Troopa | |||
Red Koopa SMB3.gif|Red Koopa Troopa | |||
SMB3 Koopa Troopa credits.png|Red Koopa Troopa (credits){{class|bg4}} | |||
SMB3 Sprite Koopa Paratroopa (Green).png|[[Koopa Paratroopa|Green Koopa Paratroopa]] | |||
SMB3 KoopaParatroopaGreenL.gif|Green Koopa Paratroopa | |||
SMB3 Red Koopa Paratroopa.png|Red Koopa Paratroopa | |||
SMB3 Sprite Big Koopa Troopa (Green).png|[[Big Koopa Troopa|Green Gargantua Koopa Troopa]]{{class|bg5}} | |||
SMB3 BigKoopaTroopaGreenL.gif|Green Gargantua Koopa Troopa{{class|bg5}} | |||
SMB3 Red Giant Koopa Troopa.png|[[Red Giant Koopa Troopa]]{{class|bg5}} | |||
SMB3 Colossal Koopa Paratroopa.png|[[Big Koopa Paratroopa|Colossal Koopa Paratroopa]]{{class|bg5}} | |||
SMB3 Sprite Dry Bones.png|[[Dry Bones]]{{class|blackbg}} | |||
Calapso Koopa 12.gif|Dry Bones{{class|blackbg}} | |||
Hammer Bro SMB3 NES sprite.png|[[Hammer Bro]]ther | |||
HammerBroSMB3.gif|Hammer Brother | |||
BoomerangBroSMB3.png|[[Boomerang Bro]]ther | |||
SMB3 Sprite Fire Bro.png|[[Fire Bro]]ther{{class|bg2}} | |||
Firebro.gif|Fire Brother{{class|bg2}} | |||
SMB3-SledgeBro sprite.png|[[Sledge Bro]]ther{{class|bg5}} | |||
Buzzy Beetle SMB3.png|[[Buzzy Beetle]]{{class|blackbg}} | |||
BuzzyBeetleDL.gif|Buzzy Beetle{{class|blackbg}} | |||
SMB3 Sprite Upside-down Buzzy Beetle.png|Upside-down Buzzy Beetle{{class|blackbg}} | |||
SMB3 Sprite Buster Beetle.png|[[Buster Beetle]] | |||
BusterBeetleSMB3.gif|Buster Beetle | |||
SMB3 Sprite Para-Beetle.png|[[Para-Beetle]] | |||
ParabeetleSMB3.gif|Para-Beetle | |||
SMB3LakituSprite.png|[[Lakitu]]{{class|bg4}} | |||
SMB3 Sprite Spiny Egg (Green).png|[[Spiny Egg|Green Spiny Egg]]{{class|bg4}} | |||
SMB3 SpinyEgg.gif|Green Spiny Egg{{class|bg4}} | |||
SMB3 Spiny Egg.png|Spiny Egg{{class|bg5}} | |||
SMB3 Sprite Spiny.png|[[Spiny]]{{class|bg5}} | |||
SpinySMB3.gif|Spiny{{class|bg5}} | |||
SMB3 Sprite Upside-down Spiny.png|Upside-down Spiny{{class|blackbg}} | |||
SMB3 Sprite Rocky Wrench.png|[[Rocky Wrench]]{{class|bg3}} | |||
RockyWrenchSMB3.gif|Rocky Wrench{{class|bg3}} | |||
SMB3 Sprite Spike.png|[[Spike]]{{class|bg4}} | |||
SpikeSMB3.gif|Spike{{class|bg4}} | |||
SMB3 Sprite Piranha Plant.png|[[Piranha Plant]] | |||
PiranhaPlantRed.gif|Piranha Plant | |||
SMB3 Sprite Piranha Plant (Green).png|Green Piranha Plant | |||
PiranhaPlant.gif|Green Piranha Plant | |||
SMB3 Venus Fire Trap Red.png|[[Fire Piranha Plant|Venus Fire Trap]] | |||
SMB3 Venus Fire Trap Green.png|Green Venus Fire Trap | |||
SMB3 Red Big Piranha Plant.png|[[Big Piranha Plant|Piranhacus Giganticus]]{{class|bg5}} | |||
SMB3 Green Big Piranha Plant.png|Green Piranhacus Giganticus{{class|bg5}} | |||
SMB3 Sprite Ptooie.png|[[Ptooie]]{{class|bg6}} | |||
PtooieSMB3.gif|Ptooie{{class|bg6}} | |||
SMB3 Nipper Plant.png|[[Nipper Plant|Walking Piranha]] | |||
Fire Nipper Plant.png|[[Fire Nipper Plant|Fiery Walking Piranha]]{{class|bg4}} | |||
SMB3 Sprite Muncher.png|[[Muncher]] | |||
Muncher SMB3.gif|Muncher | |||
SMB3 Frozen Muncher.png|Muncher (frozen){{class|bg6}} | |||
SMB3 Lava Bubble.gif|[[Lava Bubble|Podoboo]]{{class|blackbg}} | |||
SMB3 Sprite Roto-Disc.png|[[Roto-Disc]]{{class|blackbg}} | |||
Rotodisc.gif|Roto-Disc{{class|blackbg}} | |||
BulletBill-SMB3.png|[[Bullet Bill]] | |||
SMB3 Missile Bill.png|[[Bull's-Eye Bill|Missile Bill]]{{class|bg5}} ([[:File:SMB3 Missile Bill flash diagram.png|alternatives]]) | |||
Fire snake.png|[[Fire Snake|Firesnake]]{{class|bg1}} | |||
SMB3Boo.png|[[Boo|"Boo" Diddly]]{{class|blackbg}} | |||
SMB3 Sprite Stretch.png|[[Stretch]]{{class|blackbg}} | |||
StretchSMB3.gif|Stretch{{class|blackbg}} | |||
SMB3 Thwomp sprite.png|[[Thwomp]]{{class|blackbg}} | |||
SMB3 Sprite Angry Sun.png|[[Angry Sun]]{{class|bg1}} | |||
SMB3 Angry Sun Sprite.gif|Angry Sun{{class|bg1}} | |||
SMB3 Sprite Chain Chomp.png|[[Chain Chomp]]{{class|bg2}} | |||
Ani smb3 chainchomp.gif|Chain Chomp{{class|bg2}} | |||
SMB3 Chain Chomp escape.gif|Chain Chomp{{class|bg2}} | |||
SMB3 Sprite Blooper.png|[[Blooper|Bloober]]{{class|bg3}} | |||
SMB3 Blooper.gif|Bloober{{class|bg3}} | |||
SMB3 Sprite Blooper Nanny.png|[[Blooper Nanny|Bloober with kids]]{{class|bg3}} | |||
SMB3 BlooperNanny.gif|Bloober with kids{{class|bg3}} | |||
SMB3 Sprite Scattering Blooper.png|Scattering Bloober{{class|bg3}} | |||
SMB3 BlooperBaby.png|[[Blooper Baby|Bloober Baby]]{{class|bg3}} | |||
SMB3 Sprite Lava Lotus.png|[[Lava Lotus]]{{class|bg3}} | |||
LavaLotus.gif|Lava Lotus{{class|bg3}} | |||
CheepCheepSMB3.png|[[Cheep Cheep|Cheep-Cheep]]{{class|bg4}} | |||
SMB3 Cheep Cheep green.png|Green Cheep-Cheep{{class|bg1}} | |||
SMB3 Big Bertha.png|[[Big Cheep Cheep|Boss Bass]]{{class|bg4}} | |||
SMB3 Boss Bass credits.png|Boss Bass (credits){{class|bg4}} | |||
SMB3 Sprite Big Bertha.png|[[Big Cheep Cheep|Big Bertha]]{{class|bg3}} | |||
SMB3 Baby Cheep.png|[[Baby Cheep]]{{class|bg3}} | |||
SMB3 Spiny Cheep Cheep.png|[[Spiny Cheep Cheep|Spiny Cheep-Cheep]]{{class|bg3}} | |||
SMB3 Sprite Jelectro.png|[[Jelectro]]{{class|bg3}} | |||
Jelectro.gif|Jelectro{{class|bg3}} | |||
SMB3 Sprite Bob-omb.png|[[Bob-omb]] | |||
BobOmbSMB3.gif|Bob-omb | |||
SMB3 BobOmb Keyless.gif|Bob-omb (keyless){{class|blackbg}} | |||
SMB3 Sprite Hot Foot.png|[[Hot Foot]]{{class|blackbg}} | |||
SMB3 Hot Foot.gif|Hot Foot{{class|blackbg}} | |||
SMB3 Fire Chomp.png|[[Flame Chomp|Fire Chomp]] | |||
SMB3 Sidestepper.png|[[Sidestepper|Crab]]{{class|blackbg}} | |||
SMB3 Sidestepper angry.png|Crab{{class|blackbg}} | |||
SMB3 Sidestepper blue.png|Crab{{class|blackbg}} | |||
SMB3 Sidestepper blue angry.png|Crab{{class|blackbg}} | |||
SMB3FighterFly.png|[[Fighter Fly]]{{class|blackbg}} | |||
SMB3FighterFly blue.png|Fighter Fly{{class|blackbg}} | |||
SMB3 FireballEnemy.png|[[Fireball (obstacle)|Fireball]]{{class|blackbg}} | |||
</gallery> | |||
===Obstacles=== | |||
<gallery style="--bg:#B5EBF2;--bg1:#9290FF;--bg2:#FFCCC5;--bg3:#4240FF;--bg4:#F7D8A5;--bg5:#B3F3CC;--bg6:#C0DFFF" widths=64px heights=64px> | |||
SMB3 GrayBowserStatue.png|[[Bowser Statue]]{{class|blackbg}} | |||
SMB3 Candle red.png|[[Candle]]{{class|blackbg}} | |||
SMB3 Candy Ring.png|[[Ring (projectile)|Candy ring]]{{class|blackbg}} | |||
SMB3 Cannon.png|[[Cannon]] | |||
SMB3 Cannon diagonal NE.png|Cannon | |||
SMB3 CannonBall.png|[[Cannonball]] | |||
SMB3 Cannon double NE-SW.png|[[Diagonal cannon]]{{class|bg3}} | |||
SMB3 Cannon double NW-SE.png|Diagonal cannon{{class|bg4}} | |||
SMB3 Cannon big.png|[[Giant cannon]]{{class|blackbg}} | |||
SMB3 GiantCannonBall.png|[[Giant cannonball|Huge bullet]]{{class|blackbg}} | |||
SMB3 Bowser Fireball.gif|[[Bowser's Flame|Koopa's fire]]{{class|blackbg}} | |||
SMB3 Bowser's flame credits.png|Koopa's fire (credits){{class|bg4}} | |||
SMB3 Lava.png|[[Lava]]{{class|blackbg}} | |||
SMB3 Lava.gif|Lava{{class|blackbg}} | |||
SMB3 Koopa Ball.png|[[Magical ball]]{{class|blackbg}} | |||
SMB3 Cannon spinning cardinal.png|[[Quartet-cannon]] | |||
SMB3 Quartet Cannon.gif|Quartet-cannon | |||
SMB3 Quicksand.png|[[Quicksand]]{{class|bg1}} | |||
SMB3 Quicksand.gif|Quicksand{{class|bg1}} | |||
SMB3 Engine horizontal.png|[[Burner|Rocket Engine]] / [[Bill Blaster|Turtle Cannon]] (airship){{class|bg4}} | |||
SMB3 Engine vertical.png|Rocket Engine{{class|bg5}} | |||
SMB3 Burner.png|Rocket Engine{{class|bg5}} | |||
SMB3 Spikes up short gray.png|[[Spike Trap|Spikes]] (fortress){{class|blackbg}} | |||
SMB3 Spikes down short gray.png|Spikes (fortress){{class|blackbg}} | |||
SMB3 Spike Trap.png|Spikes (fortress){{class|blackbg}} | |||
SMB3 Spikes down short teal.png|Spikes (fortress){{class|blackbg}} | |||
SMB3 Spikes up long gray.png|Spikes (desert fortress){{class|blackbg}} | |||
SMB3 Spikes down long gray.png|Spikes (desert fortress){{class|blackbg}} | |||
SMB3 Spikes up long cyan.png|Spikes (underground){{class|blackbg}} | |||
SMB3 Spikes down long cyan.png|Spikes (underground){{class|blackbg}} | |||
SMB3 Stretch platform.png|[[Stretch]] platform{{class|blackbg}} | |||
SMB3 Cannon horizontal.png|[[Stubby cannon]]{{class|blackbg}} | |||
SMB3 Sprite Tornado.png|[[Tornado]]{{class|bg1}} | |||
SMB3 Tornado.gif|Tornado{{class|bg1}} | |||
SMB3 BillBlaster.png|[[Bill Blaster|Turtle Cannon]]{{class|bg5}} | |||
SMB3 Turtle Cannon 2-height.gif|Turtle Cannon{{class|bg5}} | |||
</gallery> | |||
===Bosses=== | |||
<gallery class="blackbg rawsize x2" style="--bg4:#F7D8A5" widths=64px heights=64px> | |||
SMB3 Boom Boom fort normal spikes.png|[[Boom Boom]] | |||
Boomboom.gif|Boom Boom | |||
SMB3 Boom Wing fort.gif|Boom Boom | |||
SMB3LarryKoopaSprite.gif|[[Larry|Larry Koopa]] | |||
SMB3 Larry spin.gif|Larry Koopa | |||
SMB3 Morton walk.gif|[[Morton|Morton Koopa Jr.]] | |||
SMB3 Morton spin.gif|Morton Koopa Jr. | |||
WendySMB3Ani.gif|[[Wendy|Wendy O. Koopa]] | |||
SMB3 Wendy spin.gif|Wendy O. Koopa | |||
IggySMB3Ani.gif|[[Iggy|Iggy Koopa]] | |||
SMB3 Iggy spin.gif|Iggy Koopa | |||
SMB3 Roy Sprite.gif|[[Roy|Roy Koopa]] | |||
SMB3 Roy spin.gif|Roy Koopa | |||
LemmySMB3Ani.gif|[[Lemmy|Lemmy Koopa]] | |||
SMB3 Lemmy spin.gif|Lemmy Koopa | |||
LudwigSMB3Ani.gif|[[Ludwig|Ludwig von Koopa]] | |||
SMB3 Ludwig spin.gif|Ludwig von Koopa | |||
BowserSMB3.png|[[Bowser]] | |||
SMB3 Bowser credits.png|Bowser (credits){{class|bg4}} | |||
</gallery> | |||
===Items=== | |||
<gallery style="--bg:#B5EBF2;--bg1:#9290FF;--bg2:#FFCCC5;--bg3:#4240FF;--bg4:#F7D8A5;--bg5:#B3F3CC;--bg6:#C0DFFF" widths=64px heights=64px> | |||
SMB3 Coin tile normal.png|[[Coin]] | |||
SMB3 Coin Sprite.gif|Coin | |||
SMB3 FrozenCoin.png|[[Frozen Coin]]{{class|bg6}} | |||
SMB3 Silver Coin.png|[[Blue Coin]] | |||
SMB3 1-up.png|[[1-Up Mushroom]] | |||
SMB3 Green Shell Sprite.png|[[Koopa Shell|Green Koopa Shell]] | |||
Green Koopa Shell SMB3.gif|Green Koopa Shell | |||
SMB3 Red Shell Sprite.png|[[Koopa Shell|Red Koopa Shell]] | |||
Red shell smb3.gif|Red Koopa Shell | |||
Giant Green Shell SMB3 sprite.png|Green [[big shell|Giant Shell]]{{class|bg5}} | |||
Giant Red Shell SMB3 sprite.png|Red Giant Shell{{class|bg5}} | |||
SMB3BuzzyShell.png|[[Buzzy Shell]]{{class|blackbg}} | |||
SMB3 Buzzy Shell cave.gif|Buzzy Shell{{class|blackbg}} | |||
SMB3SpinyShell.png|[[Spiny Shell (red)|Spiny Shell]]{{class|bg5}} | |||
SMB3 Spiny Shell land.gif|Spiny Shell{{class|bg5}} | |||
SMB3 Ice Block.png|[[White Block]]{{class|bg4}} | |||
SMB3 White Block tile.gif|White Block ([[:File:SMB3 White Block flash diagram.png|alternatives]]){{class|bg4}} | |||
SMB3 Goomba Shoe.png|[[Goomba's Shoe|Goomba's shoe]] | |||
SMB3 Kuribo's Shoe.gif|Goomba's shoe | |||
PWing Map SMB3.png|[[P-Wing]] | |||
Cloud Map SMB3.png|[[Lakitu's Cloud|Jugem's Cloud]] | |||
Hammer Map SMB3.png|[[Hammer]] | |||
Music Map SMB3.png|[[Music Box]] | |||
Whistle Map SMB3.png|[[Recorder|Magic Whistle]] | |||
Anchor Map SMB3.png|[[Anchor]] | |||
SMB3 Card Goal Mushroom.gif|[[Card]] (Mushroom) | |||
SMB3 Mushroom card.png|Card (Mushroom){{class|blackbg}} | |||
SMB3 Card Mushroom sprite.gif|Card (Mushroom){{class|blackbg}} | |||
SMB3 Card Goal Flower.gif|Card (Flower) | |||
SMB3 Flower card.png|Card (Flower){{class|blackbg}} | |||
SMB3 Card Flower sprite.gif|Card (Flower){{class|blackbg}} | |||
SMB3 Card Goal Star.gif|Card (Star) | |||
SMB3 Star card.png|Card (Star){{class|blackbg}} | |||
SMB3 Card Star sprite.gif|Card (Star){{class|blackbg}} | |||
SMB3 Magic Ball.png|[[Magic ball]]{{class|blackbg}} | |||
Larry's Wand.png|[[Larry]]'s [[Magic Wand]]{{class|blackbg}} | |||
SMB3 Magic Wand spin Larry.gif|Larry's Magic Wand{{class|blackbg}} | |||
SMB3 Magic Wand flash Larry.gif|Larry's Magic Wand ([[:File:SMB3 Wand flash diagram.png|alternatives]]){{class|blackbg}} | |||
</gallery> | |||
===Power-ups=== | |||
<gallery style="--bg:#B5EBF2" widths=64px heights=64px> | |||
Mushroomsmb3.png|[[Super Mushroom]] | |||
SMB3 Fire Flower sprite land.png|[[Fire Flower]] | |||
Fire Flower-SMB3-sprite.png|Fire Flower (inventory) | |||
SMB3-NES-SuperLeaf.png|[[Super Leaf]] | |||
Leaf Map SMB3.png|Super Leaf (inventory) | |||
SMB3 Starman sprite static.png|[[Super Star|Starman]] | |||
SMB3 Star.gif|Starman ([[:File:SMB3 Starman flash diagram.png|alternatives]]) | |||
Frog Map SMB3.png|[[Frog Suit]] | |||
SMB3 Tanooki Suit sprite gameplay.png|[[Tanooki Suit]]{{class|blackbg}} | |||
Tanooki Map SMB3.png|Tanooki Suit (inventory) | |||
SMB3 Hammer Suit Block.png|[[Hammer Suit]]{{class|blackbg}} | |||
HammerSuit Map SMB3.png|Hammer Suit (inventory) | |||
</gallery> | |||
===Objects=== | |||
====Blocks and containers==== | |||
<gallery style="--bg:#B5EBF2;--bg1:#9290FF;--bg2:#FFCCC5;--bg3:#4240FF;--bg4:#F7D8A5;--bg5:#B3F3CC;--bg6:#C0DFFF;" widths=64px heights=64px> | |||
SMB3 Empty Block.png|[[Empty Block]] | |||
SMB3 Big Empty Block sprite bumped.png|Empty Block (large){{class|bg5}} | |||
SMB3 Sprite Vine Block.png|[[Vine|Vine Block]] | |||
SMB3 Brick Block Sprite.png|[[Brick Block|Brick]] | |||
SMB3 Brick tile normal.gif|Brick | |||
SMB3 NES Big Block.png|[[Mega Block|Big Block]]{{class|bg5}} | |||
SMB3 Q Block tile normal.png|[[? Block]] | |||
Ani smb3qblock.gif|? Block | |||
Big Block SMB3.png|[[Mega ? Block]]{{class|bg5}} | |||
SMB3 Hard Block general.png|[[Hard Block]]{{class|blackbg}} | |||
SMB3 Hard Block general bonus.png|Hard Block{{class|blackbg}} | |||
SMB3 Hard Block hills.png|Hard Block | |||
SMB3 Hard Block cave teal.png|Hard Block{{class|blackbg}} | |||
SMB3 Hard Block cave periwinkle.png|Hard Block{{class|blackbg}} | |||
SMB3 Hard Block mushroom house.png|Hard Block (Mushroom House){{class|blackbg}} | |||
SMB3 Wood Block Sprite.png|[[Hard Block|Wood Block]] | |||
SMB3 Wooden Block sprite land.png|Wood Block | |||
SMB3 Cloud Block tile plains.png|[[Cloud Block]] | |||
SMB3 Coral sea pink.png|[[Coral]]{{class|bg3}} | |||
SMB3 Coral sea white.png|Coral{{class|bg3}} | |||
SMB3 Coral giant.png|Coral (large){{class|bg3}} | |||
SMB3 Switch Block standard.png|[[P Switch|Switch Block]] | |||
SMB3 P Switch.gif|Switch Block | |||
SMB3 Jump Block tile.png|[[Note Block|Jump Block]] | |||
Ani smb3noteblock.gif|Jump Block | |||
SMB3 Pink Note Block.png|[[Super Note Block|Magic Note Block]] | |||
SMB3 Magic Note Block tile normal.gif|[[Super Note Block|Magic Note Block]] | |||
SMB3 Donut Lift.png|[[Donut Block|Donut Lift]]{{class|bg4}} | |||
SMB3 Sprite Blue Lift.png|[[Elevator block]]s{{class|blackbg}} | |||
SMB3 Ice.png|[[Ice Block]]{{class|bg6}} | |||
SMB3 Ice Large.png|Ice Block (large){{class|bg6}} | |||
SMB3 Sprite Red Brick.png|[[Brick floor]]{{class|blackbg}} | |||
SMB3 Big chest shut.png|[[Treasure chest]]{{class|blackbg}} | |||
SMB3 Big chest open.png|Treasure chest{{class|blackbg}} | |||
SMB3 Chest sprite land.png|Treasure chest | |||
SMB3 bump block.png|[[Floor (block)|Floor]]{{class|blackbg}} | |||
SMB3BattleMode-POW.png|[[POW Block|POW]]{{class|blackbg}} | |||
SMB3 POW sprite 2.png|POW{{class|blackbg}} | |||
SMB3 POW sprite 3.png|POW{{class|blackbg}} | |||
</gallery> | |||
====Doorways==== | |||
<gallery style="--bg:#B5EBF2;--bg1:#9290FF;--bg2:#FFCCC5;--bg3:#4240FF;--bg4:#F7D8A5;--bg5:#B3F3CC;--bg6:#C0DFFF" widths=64px heights=64px> | |||
SMB3 Magic Door Sprite.png|[[Warp Door|Door]] / [[Magic Door]] | |||
SMB3 Warp Door.png|Door{{class|blackbg}} | |||
SMB3 Door orange.png|Door{{class|blackbg}} | |||
SMB3 Door princess.gif|Door (Bowser's Castle){{class|blackbg}} | |||
SMB3 Door to Princess keep tile.png|Door to Princess Toadstool{{class|blackbg}} | |||
</gallery> | |||
====Pipes==== | |||
<gallery style="--bg:#B5EBF2;--bg1:#9290FF;--bg2:#FFCCC5;--bg3:#4240FF;--bg4:#F7D8A5;--bg5:#B3F3CC;--bg6:#C0DFFF;" widths=64px heights=64px> | |||
WarpPipeSMB3.png|[[Warp Pipe|Pipe]] | |||
SMB3 Pipe bonus vertical.png|Pipe ([[sub-area]]){{class|blackbg}} | |||
SMB3 Pipe desert vertical.png|Pipe (desert){{class|bg1}} | |||
SMB3 Pipe cloud beanstalk vertical.png|Pipe (sky){{class|whitebg}} | |||
SMB3 Pipe sea vertical.png|Pipe (underwater){{class|bg3}} | |||
SMB3 Pipe fort gray vertical.png|Pipe (fortress){{class|blackbg}} | |||
SMB3 Pipe artillery vertical.png|Pipe (airship and artillery) | |||
MegaPipeSMB3.png|[[Warp Pipe|Giant pipe]]{{class|bg5}} | |||
SMB3 Small Pipe.png|[[Small pipe]]{{class|bg4}} | |||
SMB3 Jet Pipe.gif|[[Jet Pipe|Bubble-jet pipe]]{{class|bg3}} | |||
SMB3 Pipe connector.png|Pipe connector{{class|blackbg}} | |||
</gallery> | |||
====Platforms==== | |||
<gallery style="--bg:#B5EBF2;--bg1:#9290FF;--bg2:#FFCCC5;--bg3:#4240FF;--bg4:#F7D8A5;--bg5:#B3F3CC;--bg6:#C0DFFF;" widths=64px heights=64px> | |||
SMB3 Bolt Lift.png|[[Bolt Lift]]{{class|bg4}} | |||
SMB3 Bolt Lift.gif|Bolt Lift{{class|bg4}} | |||
SMB3 Bridge tile standard.png|[[Bridge]] | |||
SMB3 Cloud platform tile 1 blank.png|[[Cloud Lift]]{{class|whitebg}} | |||
SMB3 Cloud platform tile 2 blank.png|Cloud Lift{{class|whitebg}} | |||
SMB3 Conveyor belt.png|[[Conveyor Belt|Conveyor belt]]{{class|blackbg}} | |||
SMB3 Conveyor Belt.gif|Conveyor belt{{class|blackbg}} | |||
SMB3 Conveyor left.gif|Conveyor belt{{class|blackbg}} | |||
SMB3 Directional Lift tile right.png|[[Directional Lift]]{{class|blackbg}} | |||
SMB3 Directional Lift tile left.png|Directional Lift{{class|blackbg}} | |||
SMB3 Directional Lift.png|Directional Lift{{class|blackbg}} | |||
SMB3 Directional Lift tile surprise.png|Directional Lift{{class|blackbg}} | |||
SMB3 Directional Lift sprite right.png|Directional Lift{{class|blackbg}} | |||
SMB3 Directional Lift sprite left.png|Directional Lift{{class|blackbg}} | |||
SMB3 Directional Lift sprite up.png|Directional Lift{{class|blackbg}} | |||
SMB3 Directional Lift sprite shift.png|Directional Lift{{class|blackbg}} | |||
SMB3 Ground title.png|[[Ground (block)|Ground]]{{class|bg4}} | |||
SMB3 Ground plains normal.png|Ground | |||
SMB3 Ground hills normal.png|Ground (ground) | |||
SMB3 Ground cave inside normal.png|Ground (underground){{class|blackbg}} | |||
SMB3 Ground desert normal.png|Ground (desert){{class|bg1}} | |||
SMB3 Ground cloud 1.png|Ground (sky) | |||
SMB3 Ground ice.png|Ground (ice){{class|bg6}} | |||
SMB3 Ground giant.png|Ground (giant){{class|bg5}} | |||
SMB3 Ground sea normal.png|Ground (underwater){{class|bg4}} | |||
SMB3 Ground sea stone.png|Ground (underwater){{class|bg4}} | |||
SMB3 Ground battle.png|Ground (Battle Game){{class|blackbg}} | |||
SMB3 Ground artillery.png|Ground (airship and artillery) | |||
SMB3 Ground lobby.png|Ground (minigame lobby){{class|blackbg}} | |||
SMB3 Island athletic small.png|[[Island]] | |||
SMB3 Island athletic big.png|Island | |||
SMB3Platform.png|[[Lift]] | |||
SMB3 Hanging platform.png|Lift (hanging) | |||
SMB3 Rail.png|[[Track|Rail]] | |||
SMB3 Rail motor athletic.png|Rail motor | |||
SMB3 Rotary Lift.png|[[Rotary Lift]]{{class|bg4}} | |||
SMB3 Rotary Lift A.gif|Rotary Lift{{class|bg4}} | |||
SMB3 Rotary Lift B.gif|Rotary Lift{{class|whitebg}} | |||
SMB3 Semisolid Platform plains orange.png|[[Semisolid Platform]] | |||
SMB3-SemiSolidPlatform.png|Semisolid Platform | |||
SMB3 Semisolid Platform plains blue normal.png|Semisolid Platform | |||
SMB3 Semisolid Platform plains green bonus.png|Semisolid Platform (secret area){{class|blackbg}} | |||
SMB3 Semisolid Platform plains alt.png|Semisolid Platform (ground){{class|bg4}} | |||
SMB3 Semisolid Platform athletic.png|Semisolid platform (athletic) | |||
SMB3 Semisolid Platform goal athletic.png|Semisolid platform (athletic goal){{class|blackbg}} | |||
SMB3 Semisolid Platform desert.png|Semisolid platform (desert){{class|bg1}} | |||
SMB3 Semisolid Platform ice.png|Semisolid platform (ice){{class|bg6}} | |||
SMB3 Crate.png|Semisolid Platform ([[crate]]){{class|bg3}} | |||
SMB3 Slope hills normal.png|[[Slope]] | |||
SMB3 Tank.gif|[[Tank]]{{class|blackbg}} | |||
SMB3 Sprite Waterfall.png|Waterfall{{class|bg5}} | |||
SMB3 Waterfall giant.gif|Waterfall{{class|bg5}} | |||
SMB3 Sprite White Block.png|[[Semisolid Platform|White Block]] | |||
</gallery> | |||
====Other objects==== | |||
<gallery style="--bg:#B5EBF2;--bg1:#9290FF;--bg2:#FFCCC5;--bg3:#4240FF;--bg4:#F7D8A5;--bg5:#B3F3CC;--bg6:#C0DFFF" widths=64px heights=64px> | |||
SMB3 Anchor ship.png|[[Anchor]] | |||
SMB3 Firework Mushroom appear.gif|[[Fireworks]]{{class|blackbg}} | |||
SMB3 Firework Flower appear.gif|Fireworks{{class|blackbg}} | |||
5UPCardRouletteSMB3.gif|Fireworks{{class|blackbg}} | |||
CardRouletteSMB3.gif|[[Goal (Super Mario Bros. 3)|Goal]]{{class|blackbg}} | |||
SMB3 ladders.png|[[Ladder]]{{class|blackbg}} | |||
SMB3 Beanstalk tile general.png|[[Vine]] | |||
SMB3 Vine.gif|Vine | |||
SMB3 Vine Top.png|Vine | |||
SMB3 Tide.gif|[[Water]]{{class|bg5}} | |||
SMB3 Water static general.png|Water{{class|bg5}} | |||
SMB3 Water plains bonus and deep.gif|Water / [[Water tide|Tide]]{{class|blackbg}} | |||
</gallery> | |||
===Background details=== | |||
<gallery style="--bg:#B5EBF2;--bg1:#9290FF;--bg2:#FFCCC5;--bg3:#4240FF;--bg4:#F7D8A5;--bg5:#B3F3CC;--bg6:#C0DFFF;" widths=64px heights=64px> | |||
SMB3 Bush general.png|[[Flower (environmental object)|Bush]] | |||
SMB3 Cactus orange.png|[[Cactus]]{{class|bg1}} | |||
SMB3 Cloud tile title big black.png|Cloud{{class|bg4}} | |||
SMB3 Cloud tile title big red.png|Cloud{{class|bg4}} | |||
SMB3 Cloud tile general.png|Cloud | |||
SMB3 Cloud tile Mushroom.png|Cloud | |||
SMB3 Cloud tile Flower.png|Cloud | |||
SMB3 Cloud tile Star.png|Cloud | |||
SMB3 Cloud tile athletic big.png|Cloud | |||
SMB3 Curtain intro red.png|Curtain{{class|bg4}} | |||
SMB3 Fence airship brown.png|Fence | |||
SMB3 Hanging lamp.png|Hanging lamp{{class|blackbg}} | |||
SMB3 Hills title.png|Hills{{class|bg4}} | |||
SMB3 Hills plains normal.png|Hills | |||
SMB3 Hills plains bonus.png|Hills (secret area){{class|blackbg}} | |||
SMB3 Hills hill normal big.png|Hills | |||
SMB3 Hills hill dark big.png|Hills{{class|blackbg}} | |||
SMB3 Hills hill normal small.png|Hills (small) | |||
SMB3 Hills hill desert small.png|Hills (small){{class|bg1}} | |||
SMB3 Hills hill dark small.png|Hills (small){{class|blackbg}} | |||
SMB3 Hill giant.png|Mountain{{class|bg5}} | |||
SMB3 Pillar castle.png|Pillar{{class|blackbg}} | |||
SMB3 Pyramid bg.png|Pyramid{{class|bg1}} | |||
SMB3 Seaweed.gif|Seaweed{{class|bg3}} | |||
SMB3 Throne JP.png|Throne (Japanese release){{class|blackbg}} | |||
SMB3 Throne U.png|Throne (international releases){{class|blackbg}} | |||
SMB3 Tree orange.png|[[Tree|Palm tree]]{{class|bg1}} | |||
SMB3 Tree green.png|Palm tree{{class|bg1}} | |||
SMB3 Window fort.png|Window (fortress){{class|blackbg}} | |||
</gallery> | |||
===Particle effects=== | |||
<gallery class=graybg widths=64px heights=64px> | |||
SMB3 Puff normal.gif|Puff (changing form) | |||
SMB3 Shine item.gif|Shine (coin and card) | |||
SMB3 Whack normal.gif|Whack (land) ({{file link|SMB3 Tail whip flash diagram.png|alternatives}}) | |||
SMB3 Splash normal.gif|Splash | |||
SMB3 Bubble.gif|Bubble | |||
SMB3 Spray 1.gif|Waterfall spray | |||
SMB3 Explosion enemy land.gif|Enemy explosion (land) ({{file link|SMB3 Explosion flash diagram.png|alternatives}}) | |||
SMB3 Explosion Boom Boom fortress.gif|Miniboss explosion (fortress) ({{file link|SMB3 Explosion flash diagram.png|alternatives}}) | |||
SMB3 Sweat.gif|Boss sweat | |||
</gallery> | |||
===Overworld map icons=== | |||
<gallery class=blackbg widths=64px heights=64px> | |||
Start Space.png|[[Start Space|Start Panel]] (Worlds 1, 2, 3, 4, and 7) | |||
SMB3 Map Stage 1.png|Stage 1 | |||
SMB3 Map Stage 2.png|Stage 2 | |||
SMB3 Map Stage 3.png|Stage 3 | |||
SMB3 Map Stage 4.png|Stage 4 | |||
SMB3 Map Stage 5.png|Stage 5 | |||
SMB3 Map Stage 6.png|Stage 6 | |||
SMB3 Map Stage 7.png|Stage 7 | |||
SMB3 Map Stage 8.png|Stage 8 | |||
SMB3 Map Stage 9.png|Stage 9 | |||
SMB3 Map Stage 10.png|Stage 10 | |||
SMB3 Map Rock 1-3.png|Rock (Worlds 1 and 3) | |||
SMB3 Map Mushroom House 1-3.png|[[Toad House|Mushroom House]] (Worlds 1 and 3) | |||
SMB3 Spade Panel.png|[[Spade Panel]] (Worlds 1, 2, 3, 4, 6, and 7) | |||
SMB3 Locked Door.png|[[Locked Door]] (Worlds 1 and 3) | |||
SMB3 Map Bridge 1-3.png|Bridge (Worlds 1 and 3) | |||
SMB3 Map Pipe 2.png|[[Warp Pipe|Pipe]] (World 2) | |||
SMB3 Map Drawbridge vertical default 3.png|Drawbridge | |||
SMB3 Map Dock 3.png|Dock | |||
SMB3 Map Fort 1-3.png|[[Fortress]] (Worlds 1 and 3) | |||
SMB3 Map Fort wreck 1-3.png|Cleared fortress (Worlds 1 and 3) | |||
CastleSMB3.png|[[Castle]] (Worlds 1 and 3) | |||
SMB3 Map Quicksand 2.gif|Quicksand | |||
SMB3 Map Pyramid 2.png|Pyramid | |||
SMB3 Map Tower 5.png|Tower | |||
SMB3 Map Trap 8.gif|Hand Trap | |||
SMB3 Map Bowser's Castle 8.png|[[Bowser's Castle]] | |||
SMB3 Map Mario position.png|[[Mario]]'s position{{class|graybg}} | |||
SMB3 Map Luigi position.png|[[Luigi]]'s position{{class|graybg}} | |||
SMB3 Map Hammer Bro.gif|[[Hammer Bro]]ther{{class|graybg}} | |||
HammerBro-Map-SMB3.png|Hammer Brother{{class|graybg}} | |||
Pirahna Plant Map SMB3.gif|[[Piranha Plant]]{{class|graybg}} | |||
SMB3 Map Piranha Plant asleep.png|Piranha Plant{{class|graybg}} | |||
AirshipSMB3.gif|[[Airship]]{{class|graybg}} | |||
TankMapSMB3.gif|[[Tank]]{{class|graybg}} | |||
SMB3 Map Ship.gif|Navy{{class|graybg}} | |||
AirForceSMB3.gif|Air Force{{class|graybg}} | |||
SMB3 Map Hand.gif|[[World 8-Hand Traps|Hand]]{{class|graybg}} | |||
Boat.gif|Boat{{class|graybg}} | |||
SMB3 Map Spark.gif|Spark{{class|graybg}} | |||
SMB3 Map Help.gif|Help{{class|graybg}} | |||
SMB3 N-Mark Spade Panel.png|[[N-Mark Spade Panel]]{{class|graybg}} | |||
SMB3 Map Treasure Ship.png|[[Treasure Ship]]{{class|graybg}} | |||
SMB3 White Mushroom House.png|[[Toad House|White Mushroom House]]{{class|graybg}} | |||
SMB3 Map Tornado.gif|[[Tornado]]{{class|graybg}} | |||
SMB3 Map Warp 2.png|Warp indicator{{class|graybg}} | |||
SMB3 Map Warp 3.png|Warp indicator{{class|graybg}} | |||
SMB3 Map Warp 4.png|Warp indicator{{class|graybg}} | |||
SMB3 Map Warp 5.png|Warp indicator{{class|graybg}} | |||
SMB3 Map Warp 6.png|Warp indicator{{class|graybg}} | |||
SMB3 Map Warp 7.png|Warp indicator{{class|graybg}} | |||
SMB3 Map Warp 8.png|Warp indicator{{class|graybg}} | |||
SMB3 Map Stage M.png|Cleared space | |||
SMB3 Map Stage L.png|Cleared space | |||
SMB3 Map Water 2.gif|Water (World 2) | |||
SMB3 Map Hills 1.gif|Hills (World 1) | |||
SMB3 Map Tree 2.gif|Tree (World 2) | |||
SMB3 Map Sand 2.png|Sand | |||
SMB3 Map Flower 4.gif|Flower (World 4) | |||
SMB3 Map Star 5.png|Star | |||
SMB3 Ice.gif|Glacier | |||
SMB3 Map Plant 7.gif|Piranha Plant | |||
SMB3 Map Flame 8.gif|Flame | |||
SMB3 Map Skull 8.gif|Skull | |||
SMB3 Map Mushroom 8.png|Mushroom | |||
SMB3 Map Wall 8.png|Palace wall | |||
</gallery> | |||
===Minigame cards=== | |||
<gallery class="blackbg" widths=64px heights=64px> | |||
Mushroom Spade Panel SMB3 sprite.png|[[Super Mushroom]] (Spade Panel) | |||
Fire Flower Spade Panel SMB3 sprite.png|[[Fire Flower]] (Spade Panel) | |||
Starman Spade Panel SMB3 sprite.png|[[Super Star|Starman]] (Spade Panel) | |||
SMB3 N-Mark Spade Panel game card back.png|Back (N-Mark Spade Panel) | |||
SMB3 N-Mark Spade Panel game card 10 coins.png|10 [[coin]]s (N-Mark Spade Panel) | |||
SMB3 N-Mark Spade Panel game card 20 coins.png|20 coins (N-Mark Spade Panel) | |||
SMB3 N-Mark Spade Panel game card Super Mushroom.png|Super Mushroom (N-Mark Spade Panel) | |||
SMB3 N-Mark Spade Panel game card Fire Flower.png|Fire Flower (N-Mark Spade Panel) | |||
SMB3 N-Mark Spade Panel game card Starman.png|Starman (N-Mark Spade Panel) | |||
SMB3 N-Mark Spade Panel game card 1Up.png|[[Extra life|1Up]] (N-Mark Spade Panel) | |||
SMB3 Unused N-Mark Spade Panel game card 1Up.png|1Up (N-Mark Spade Panel - [[List of Super Mario Bros. 3 pre-release and unused content|unused]]) | |||
SMB3 Card selector N-Mark Spade Panel.png|Selector | |||
</gallery> | |||
===Interface=== | |||
<gallery class=graybg widths=256 heights=32 perrow=4> | |||
SMB3 HUD Japanese.png|Heads-up display (Japanese releases; there is a transparent pixel over the "R" in "WORLD") | |||
SMB3 score bar.png|Heads-up display (international releases; the transparent pixel is now solid black) | |||
SMB3 HUD inventory Japanese.png|Inventory (Japanese releases; the same difference applies. Note the Hammer Suit is solid rather than transparent like the other items.) | |||
SMB3 HUD inventory international.png|Inventory (international releases; the same difference applies) | |||
SMB3 HUD flip map Japanese.gif|Flip animation (Japanese, map screen; the display turns pink before it actually flips) | |||
SMB3 HUD flip map international.gif|Flip animation (international, map screen; the same detail and regional difference applies) | |||
SMB3 HUD flip house Japanese.gif|Flip animation (Japanese, Mushroom House; the display only turns pink once it has flipped) | |||
SMB3 HUD flip house international.gif|Flip animation (international, Mushroom House; the same differences apply) | |||
</gallery> | |||
===Points and 1UPs=== | |||
<gallery style="--bg:#B5EBF2" widths=64px heights=64px> | |||
SMB3 Points 100 land.png|100 [[point]]s | |||
SMB3 Points 200 land.png|200 points | |||
SMB3 Points 400 land.png|400 points | |||
SMB3 Points 800 land.png|800 points | |||
SMB3 Points 1000 land.png|1000 points | |||
SMB3 Points 2000 land.png|2000 points | |||
SMB3 Points 4000 land.png|4000 points | |||
SMB3 Points 8000 land.png|8000 points | |||
SMB3 1up gameplay.png|[[Extra life|1UP]] (gameplay) | |||
SMB3 1up match.png|1UP (stage end or minigame match){{class|blackbg}} | |||
SMB3 2up match.png|2UP (stage end or minigame match){{class|blackbg}} | |||
SMB3 3up match.png|3UP (stage end or minigame match){{class|blackbg}} | |||
SMB3 5up match.png|5UP (stage end or minigame match){{class|blackbg}} | |||
SMB3 1up battle.png|1UP (battle game){{class|blackbg}} | |||
SMB3 2up battle.png|2UP (battle game){{class|blackbg}} | |||
SMB3 3up battle.png|3UP (battle game){{class|blackbg}} | |||
SMB3 5up battle.png|5UP (battle game){{class|blackbg}} | |||
</gallery> | |||
===On-screen text=== | |||
<gallery style="--bg:#B5EBF2" widths=144px heights=32px> | |||
SMB3 Pause land.png|Pause | |||
SMB3 Time-up land.png|Time-up | |||
SMB3 The End.gif|The End{{class|blackbg}} | |||
</gallery> | |||
===Credits images=== | |||
<gallery class=blackbg widths=112 heights=80> | |||
SMB3 Credits map W1.png|World 1: [[Grass Land]] | |||
SMB3 Credits map W2.png|World 2: [[Desert Land|Desert Hill]] | |||
SMB3 Credits map W3.png|World 3: [[Water Land|Ocean Side]] | |||
SMB3 Credits map W4.png|World 4: [[Giant Land|Big Island]] | |||
SMB3 Credits map W5.png|World 5: [[Sky Land|The Sky]] | |||
SMB3 Credits map W6.png|World 6: [[Ice Land|Iced Land]] | |||
SMB3 Credits map W7.png|World 7: [[Pipe Land|Pipe Maze]] | |||
SMB3 Credits map W8.png|World 8: [[Dark Land|Castle of Koopa]] | |||
</gallery> | |||
===Miscellaneous unused graphics=== | |||
<gallery style="--bg:#B5EBF2;--bg1:#9290FF;--bg2:#FFCCC5;--bg3:#4240FF;--bg4:#F7D8A5;--bg5:#B3F3CC;--bg6:#C0DFFF;" widths=64px heights=64px> | |||
SMB3 Unused wobble bridge anim.gif|Bridge (general) | |||
SMB3 Unused particle anim.gif|Particles (general){{class|blackbg}} | |||
SMB3 Unused tide right.gif|Tide (general){{class|bg4}} | |||
SMB3 Unused tide left.gif|Tide (general){{class|bg4}} | |||
SMB3 Unused rocky ceiling.png|Rocky ceiling (general){{class|blackbg}} | |||
SMB3 Unused BG lines.png|Background lines (plains) | |||
SMB3 Unused Clump Bush Sprite.png|Layered bushes (plains and athletic) | |||
SMB3 Unused ceiling slopes hills.png|Slope tiles (hills) | |||
SMB3 Unused ceiling slope NW hills.png|Slope tiles (hills) | |||
SMB3 Unused gradient edge hills.png|Edge tiles (hills) | |||
SMB3 Unused watery slab hills.png|Edge tiles (hills) | |||
SMB3 Unused watery ceiling hills.png|Edge tiles (hills) | |||
SMB3 Unused water hills.png|Water (hills) | |||
SMB3 Early Cloud Sprite.png|Cloud (athletic) | |||
SMB3 Unused table platform.png|Platform (athletic) | |||
SMB3 Unused water athletic.png|Water (athletic and ice) | |||
SMB3 Unused cloud cave.png|Cloud (cave){{class|blackbg}} | |||
SMB3 Unused hills 1 cave.png|Hills (cave){{class|blackbg}} | |||
SMB3 Unused hills 2 cave.png|Hills (cave){{class|blackbg}} | |||
SMB3 Unused sky slope cave.png|Slope tiles (cave){{class|blackbg}} | |||
SMB3 Unused water slopes.png|Slope tiles (cave){{class|blackbg}} | |||
SMB3 Unused water cave.png|Water (cave){{class|blackbg}} | |||
SMB3 Unused bricks 1 desert.png|Bricks (desert){{class|bg1}} | |||
SMB3 Unused bricks 2 desert.png|Bricks (desert){{class|bg1}} | |||
CHB124SMB3UnusedDesertEX.png|Unknown (desert){{class|bg1}} | |||
SMB3SandBlock.png|Block (desert){{class|bg1}} | |||
SMB3SandPillar.png|Pillar (desert){{class|bg1}} | |||
SMB3PipeConnector.png|Pipe connector (desert){{class|bg1}} | |||
SMB3 Unused Platform.png|Platform (desert){{class|bg1}} | |||
SMB3 Unused Chain.png|Chains (desert){{class|bg1}} | |||
SMB3 Unused ladder desert.png|Ladder (desert){{class|bg1}} | |||
SMB3 Unused layered clouds.png|Layered clouds (cloud) | |||
SMB3 Unused gradient clouds.png|Gradient (cloud){{class|whitebg}} | |||
SMB3 Cloud platform tile 1 blue.png|Cloud Lift (cloud){{class|whitebg}} | |||
SMB3 Unused Hard Block clouds.png|Hard Block (cloud){{class|whitebg}} | |||
SMB3 Unused steep rail ice.png|Track (ice){{class|bg6}} | |||
SMB3 Unused plants ice.png|Plants (ice){{class|bg6}} | |||
SMB3 Unused support misc.png|Pillar (miscellaneous){{class|blackbg}} | |||
SMB3 Unused pipe cross 1 misc.png|Pipes (miscellaneous){{class|blackbg}} | |||
SMB3 Unused pipe cross 2 misc.png|Pipes (miscellaneous){{class|blackbg}} | |||
SMB3 Unused rails fort.png|Track (fortress){{class|blackbg}} | |||
SMB3 Unused window fort.png|Window (fortress){{class|blackbg}} | |||
SMB3 Unused lift base fort.png|Elevator block base (fortress){{class|blackbg}} | |||
SMB3 Unused Hard Block fort.png|Hard Block (fortress){{class|blackbg}} | |||
SMB3UnusedDungeon.png|Doorframe top to Princess's chamber (fortress){{class|blackbg}} | |||
SMB3 Unused conveyor artillery.png|Conveyor (airship and artillery) | |||
SMB3 Unused short wood airship.png|Wood (airship) | |||
SMB3 Unused vertical boards airship.png|Wood (airship) | |||
SMB3 Unused circle artillery.png|Unknown (airship and artillery) | |||
SMB3 Unused lower frame airship.png|Metal frame (airship) | |||
SMB3 Unused horizontal frame endings airship.png|Metal frame (airship) | |||
SMB3Beta1.gif|Drills (artillery){{class|blackbg}} | |||
SMB3 Unused propeller artillery.gif|Propeller (artillery){{class|blackbg}} | |||
SMB3 Unused treads artillery.gif|Treads (artillery){{class|blackbg}} | |||
SMB3 Unused tire artillery.gif|Tire (artillery){{class|blackbg}} | |||
SMB3 Unused Q-mark lobby 1.png|? (minigame lobby){{class|blackbg}} | |||
SMB3 Unused Q-mark lobby 2.png|? (minigame lobby){{class|blackbg}} | |||
SMB3 Unused Q-mark lobby 3.png|? (minigame lobby){{class|blackbg}} | |||
SMB3 Unused block lobby 1.png|Block (minigame lobby){{class|blackbg}} | |||
SMB3 Unused block lobby 2.png|Block (minigame lobby){{class|blackbg}} | |||
SMB3ToadStatue.png|Toad statue (castle){{class|blackbg}} | |||
SMB3PBall.png|P crest (castle){{class|blackbg}} | |||
SMB3 Unused brick castle J.png|Bricks (castle, Japan){{class|blackbg}} | |||
SMB3 Unused brick castle U.png|Bricks (castle, international){{class|blackbg}} | |||
SMB3 Unused mound credits.png|Mound (credits){{class|blackbg}} | |||
SMB3Beta2.gif|Underwater propeller (sprite){{class|bg3}} | |||
SMB3 Unused propeller water.png|Unassembled tiles of the underwater propeller{{class|bg3}} | |||
SMB3 Unused pipe sprite 1.png|Desert pipe piece (sprite){{class|bg1}} | |||
SMB3 Unused pipe sprite 2.png|Desert pipe piece (sprite){{class|bg1}} | |||
SMB3 Unused pipe sprite 3.png|Desert pipe piece (sprite){{class|bg1}} | |||
SMB3 Unused Target.png|Target (sprite){{class|bg4}} | |||
</gallery> | |||
==Screenshots== | |||
<gallery> | |||
Super Mario Bros 3 title screen.png|The title screen | |||
SMB3 Title Screen.gif|Animated title screen | |||
Super Mario Bros 3 Empty Block Screenshot.png|World 1-1 | |||
Piranha-Plant.png|World 1-1 | |||
MarioSMB3.png|World 1-1 (Bonus Room) | |||
SMB3 1-2 NES.png|World 1-2 | |||
Invincible raccoon mario.png|World 1-2 | |||
SMB3 1-3 NES.png|World 1-3 | |||
Smb3 coin-heaven.png|World 1-3 (Coin Heaven) | |||
SMB3 World 1-4 Screenshot.png|World 1-4 | |||
Warpwhistleobtained.png|[[Toad House#White Mushroom House|White Mushroom House]] | |||
Magic Note Block SMB3 screenshot.png|World 1-5 | |||
SMB3 Larry.png|World 1 Boss (Larry) | |||
Tornado SuperMarioBros3.png|World 2-Desert | |||
SMB3_Morton.png|World 2 Boss (Morton) | |||
SMB3 Wendy.png|World 3 Boss (Wendy) | |||
SMB3 4-1.png|World 4-1 | |||
SMB3 Roy.png|World 5 Boss (Roy) | |||
SMB3_Lemmy.png|World 6 Boss (Lemmy) | |||
SMB3 World 7-1 Screenshot.png|World 7-1 | |||
SMB3_Ludwig.png|World 7 Boss (Ludwig) | |||
SMB3 Bowser Battle.png|World 8 Boss (Bowser) | |||
SMB3BattleMode.png|Battle Mode | |||
SMB3BattleMode-BonusBlocks.png|Battle Mode ([[? Block|Question Block]] level) | |||
SMB3BattleMode-BonusFountain.png|Battle Mode (Pipe Fountain level) | |||
Super Mario Bros 3 Game Over.png|[[Game Over]] | |||
Starry NES.png | |||
SMB3 Bill Blaster Screenshot.png| | |||
Boomboommario.png| | |||
Firemariopipe.png| | |||
Tacconimario.png| | |||
Tacconimariomap.png| | |||
Tacconimariopipe.png| | |||
Mariojump.png| | |||
</gallery> | |||
===Nintendo Entertainment System - Nintendo Switch Online=== | |||
<gallery> | |||
SMB3- Mario, the quick-change artist!JP.jpg|Japanese introduction of ''[[Nintendo Entertainment System - Nintendo Switch Online#Super Mario Bros. 3: Mario, the quick-change artist!|Super Mario Bros. 3: Mario, the quick-change artist!]]'' | |||
</gallery> | |||
==World maps== | |||
<gallery> | |||
World1SMB3.png|World 1 (Grass Land) | |||
SMB3 Full map World 1.gif|Animated version | |||
World2SMB3.png|World 2 (Desert Land) | |||
SMB3 Full map World 2.gif|Animated version | |||
World3SMB3.png|World 3 (Water Land) | |||
SMB3 Full map World 3 default.gif|Animated version | |||
SMB3 Full map World 3 alternate.gif|Animated alternate version | |||
World4SMB3.png|World 4 (Giant Land) | |||
SMB3 Full map World 4.gif|Animated version | |||
World5SMB3.png|World 5 (Sky Land) | |||
SMB3 Full map World 5a.png|Animated version (land) | |||
SMB3 Full map World 5b.png|Animated version (sky) | |||
Iced Land NES.png|World 6 (Ice Land) | |||
SMB3 Full map World 6.gif|Animated version | |||
World7SMB3.png|World 7 (Pipe Land) | |||
SMB3 Full map World 7.gif|Animated version | |||
Castle of Koopa NES.png|World 8 (Dark Land) | |||
SMB3 Full map World 8a.gif|Animated version (area 1) | |||
SMB3 Full map World 8b.gif|Animated version (area 2) | |||
SMB3 Full map World 8c.gif|Animated version (area 3) | |||
SMB3 Full map World 8d.png|Animated version (area 4) | |||
SMB3 Warp Zone.png|World 9 (Warp Zone) | |||
SMB3 Full map World 9.gif|Animated version | |||
</gallery> | |||
==Box art== | |||
<gallery> | |||
SMB3 Boxart.png|North American box art | |||
SMB3NABackCover.jpg|North American box art (Back) | |||
SMB3-BoxArt.jpg|North American pre-release box art | |||
Mario3rightbros.png|North American box art (Later printing) | |||
SMB3NABackAlternate.jpg|North American box art (Back) alternate version | |||
SMB3 Box CAN.jpg|Canadian box art | |||
SMB3 Box BRA.jpg|Brazilian box art | |||
SMB3 Box SCN.jpg|European/Scandinavian box art | |||
SMB3 Box FRA.jpg|French and Dutch box art | |||
SMB3 Box ESP.jpg|Spanish box art | |||
SMB3 Box ITA.jpg|Italian box art | |||
SMB3 - box art DE.png|German box art | |||
SMB3 - Box DE Classic Series.png|German box art (Classic Series) | |||
SMB3 FC Box.png|Japanese box art | |||
SMB3BackCoverJapan.jpg|Japanese box art (Back) | |||
SMB3 Club Nintendo Reward.png|Wii [[Virtual Console]] | |||
SMB3icon.png|3DS Virtual Console | |||
SMB3iconWiiU.png|Wii U Virtual Console | |||
</gallery> | |||
==Cartridge art== | |||
<gallery> | |||
SMB3 Early Cartridge.jpg|North American cartridge art | |||
SMB3 Cartridge.jpg|North American cartridge art (later printing). It contains [[tcrf:Super Mario Bros. 3/Version Differences#Changes from US PRG0 and US PRG1/EU|some changes from the previous version]]. | |||
FC SMB3.png|Japanese cartridge art | |||
</gallery> | |||
== | ==Miscellaneous== | ||
<gallery> | |||
SMB3 Comics.jpg|The full ''Super Mario Bros. 3 Magazine'' strategy guide series, released as supplements of ''Family Computer Magazine'' | |||
SMB3 Print Ad FRA.jpg|French print ad | |||
NI Super Leaf Wagashi.jpg|Photo of a [[Super Leaf]] shaped {{wp|wagashi}}, to celebrate the 31st anniversary of the Japanese version of the game from Nintendo Co., Ltd.'s Instagram account | |||
Super-mario-bros-3.jpg|"This is MY Mario!" promotional online asset for the [[Super Mario Bros. 35th Anniversary|''Super Mario Bros.'' 35th Anniversary]] (2020) | |||
SMB 35th Anniversary Pin 3.png|Promotional pin representing ''Super Mario Bros. 3'', released for the ''Super Mario Bros.'' 35th Anniversary (2020) | |||
SMB3 Promo Japanese Anniversary.jpg| Promotional display of the game alongside the [[Famicom]], for the ''Super Mario Bros.'' 35th Anniversary (2020) | |||
SuperMarioBros35thAnniversary - Game Collection.jpg|Promotional display of the entire [[Super Mario (series)|''Super Mario'']] series released from 1985 to 2020, for the ''Super Mario Bros.'' 35th Anniversary (2020) | |||
Nintendo Museum Ultra Machine SP.png|Photo of the "Ultra Machine SP" exhibit at the [[Nintendo Museum]] | |||
</gallery> | |||
</gallery | |||
{{Galleries}} | {{Galleries}} | ||
[[Category:Galleries| | {{SMB3}} | ||
[[Category:Galleries]] | |||
[[Category:Super Mario Bros. 3|*]] | |||
[[de:Super Mario Bros. 3/Galerie]] | |||
[[it:Galleria:Super Mario Bros. 3]] | |||
Latest revision as of 01:48, March 18, 2025
This is a gallery of images for the game Super Mario Bros. 3. For a gallery of images released with the remake included in Super Mario All-Stars, see Gallery:Super Mario All-Stars. For a gallery of images released with the remake included in Super Mario Advance 4: Super Mario Bros. 3, see Gallery:Super Mario Advance 4: Super Mario Bros. 3. For a gallery of images of The Adventures of Super Mario Bros. 3, see Gallery:The Adventures of Super Mario Bros. 3.
Logos[edit]

Japanese logo
International logo
International logo (New)

Alternate International logo
Japanese in-game logo

International in-game logo

_-_Super_Mario_Bros._3.png)
Artwork[edit]
Key artwork and wallpapers[edit]
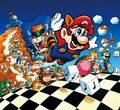
Box artwork
Box artwork

Key artwork of an airship
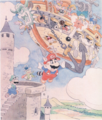
Key artwork of an airship
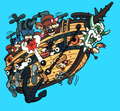
Key artwork of an airship90

My Nintendo wallpaper released for the Super Mario Bros. 35th Anniversary
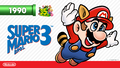
My Nintendo wallpaper released for the Super Mario Bros. 35th Anniversary


Locations[edit]


Mario[edit]
Mario carrying a shell

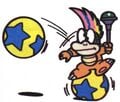
Mario tossing a shell
Mario jumping off of a shell
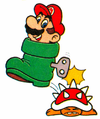
Mario (with Goomba's shoe)90
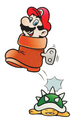
Mario (with Goomba's shoe)90
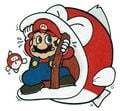
Fire Mario (NES)
Fire Mario91

Raccoon Mario flying24
Raccoon Mario flying

Raccoon Mario flying20

Raccoon Mario performing a tail attack

Raccoon Mario performing a tail attack24
Raccoon Mario jumping

Raccoon Mario carrying a shell
Raccoon Mario carrying a shell91
Raccoon Mario carrying a shell24

Tanooki Mario20
Tanooki Mario91
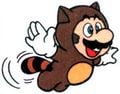
Tanooki Mario flying90
Statue Mario24
Frog Mario swimming20
Frog Mario jumping
Frog Mario hurt90
Frog Mario91

Hammer Mario24
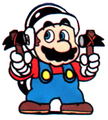
Hammer Mario90
Hammer Mario91


_-_Super_Mario_Bros_3.png)


Luigi and non-playable characters[edit]
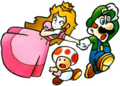
Princess Toadstool, Toad, and Luigi
Princess Toadstool, Toad, and Luigi24
Princess Toadstool
Princess Toadstool91
King of Water Land
King of Water Land90


Enemies and obstacles[edit]
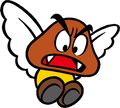
Para-Goomba
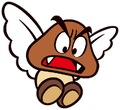
Para-Goomba24
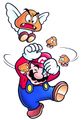
Para-Goomba and Mugger Micro-Goombas
Para-Goomba and Mugger Micro-Goombas20

Para-Goomba and Micro-Goombas24
Dry Bones24
Boomerang Brother24

Fire Brother24

Sledge Brother24
Upside-down Buzzy Beetles24
Buster Beetle90

Para-Beetles24
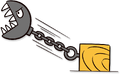
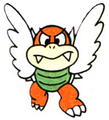
Lakitu and Spiny Eggs

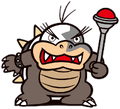
Rocky Wrench24
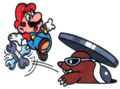
Rocky Wrench90

Spike24

Venus Fire Trap24

Ptooie24
Walking Piranhas
Walking Piranhas24

Munchers24
Roto-Discs24

Firesnake24

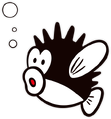
"Boo" Diddlys
"Boo" Diddlys24

Stretch24
Thwomp24
Chain Chomp24

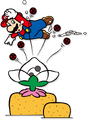
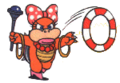
Bloober with kids24
Lava Lotus24
Boss Bass with a Baby Cheep90
Spiny Cheep-Cheep24

Jelectro24

Bob-ombs24
Hot Foot90

Hot Foot24
Fire Chomp24


Bosses[edit]
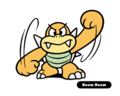
Boom Boom20
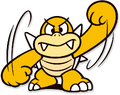
Boom Boom24
Boom Boom90

Larry Koopa24
Morton Koopa Jr.24
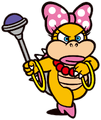
Wendy O. Koopa24
Wendy O. Koopa90

Iggy Koopa24

Roy Koopa24

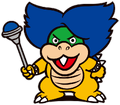
Lemmy Koopa24
Lemmy Koopa90
Ludwig von Koopa24
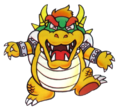
Bowser
Bowser20
Bowser24
Bowser
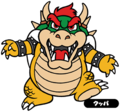
Bowser90
Bowser91


Items and objects[edit]


90 - This artwork was first released in the Super Mario Bros. 3 Strategy Guide (1990) published by Nintendo of America in Redmond, WA. Illustrations are attributed to Makikazu Ohmori and Hideaki Ito.
91 - This artwork was first released in Club Nintendo (Vol.3 Is. 6, 1991) published by Nintendo Co., Ltd. in Novara, NO. Illustrations are attributed to
Catalyst Publishing and Nintendo, Co. Ltd.
20 - This artwork was first released on the Mario Portal page for Super Mario Bros. 3 in 2020 as part of the Super Mario Bros. 35th Anniversary.
24 - This artwork was first released on the Famicom 40th Anniversary page for Super Mario Bros. 3 on February 13, 2024.
Sprites[edit]
Mario and Luigi[edit]
In-level sprites[edit]

Small Mario walking

Small Mario (with Goomba's shoe)

Super Mario (intro)

Super Mario (intro)

Super Mario (credits)

Invincible Super Mario (alternatives)

Fire Mario jumping

Invincible Fire Mario (alternatives)

Raccoon Mario walking

Raccoon Mario flying

Invincible Raccoon Mario (alternatives)

Frog Mario swimming

Frog Mario (unused)

Invincible Frog Mario (alternatives)

Tanooki Mario jumping

Tanooki Mario floating

Tanooki Mario turning

Invincible Tanooki Mario (alternatives)

Tanooki Mario switching to Statue Mario

Hammer Mario walking

Hammer Mario jumping while dashing

Hammer Mario ducking

Hammer Mario sliding

Hammer Mario spinning in the air

Invincible Hammer Mario (alternatives)

Mario (Battle Mode)

Super Luigi walking while holding something

Luigi (Battle Mode)

Luigi (Battle Mode)


Overworld map sprites[edit]


Minigame lobby[edit]

Small Luigi

Super Luigi

Raccoon Luigi
Non-playable characters[edit]

Princess Toadstool

Princess Toadstool

Princess Toadstool (letter)

Princess Toadstool (letter)

Toad

Toad

Toad (game lobby)

King of Grass Land (transformed)

King of Grass Land (transformed)

King of Grass Land

King of Grass Land

King of Desert Land (transformed)

King of Desert Land (transformed)

King of Desert Land

King of Desert Land

King of Water Land (transformed)

King of Water Land (transformed)

King of Water Land

King of Water Land

King of Giant Land (transformed)

King of Giant Land (transformed)

King of Giant Land

King of Giant Land

King of Sky Land (transformed)

King of Sky Land (transformed)

King of Sky Land

King of Sky Land

King of Ice Land (transformed)

King of Ice Land (transformed)

King of Ice Land

King of Ice Land

King of Pipe Land (transformed)

King of Pipe Land (transformed)

King of Pipe Land

King of Pipe Land


Enemies[edit]

Little Goomba

Red Goomba

Red Goomba (credits)

Para-Goomba

Red Para-Goomba

Red Para-Goomba

Pile Driver Micro-Goomba

Grand Goomba

Green Koopa Troopa

Red Koopa Troopa

Red Koopa Troopa

Red Koopa Troopa (credits)

Green Koopa Paratroopa

Red Koopa Paratroopa

Green Gargantua Koopa Troopa

Dry Bones

Hammer Brother

Fire Brother

Buzzy Beetle

Upside-down Buzzy Beetle

Buster Beetle

Para-Beetle

Green Spiny Egg

Spiny Egg

Spiny

Upside-down Spiny

Rocky Wrench

Spike

Piranha Plant

Green Piranha Plant

Green Piranha Plant

Green Venus Fire Trap

Green Piranhacus Giganticus

Ptooie

Muncher

Muncher (frozen)

Roto-Disc

Stretch

Angry Sun

Chain Chomp

Chain Chomp

Bloober

Bloober with kids

Scattering Bloober

Lava Lotus

Green Cheep-Cheep

Boss Bass (credits)

Jelectro

Bob-omb

Bob-omb (keyless)

Hot Foot

Crab

Crab

Crab

Fighter Fly


Obstacles[edit]

Cannon

Diagonal cannon

Koopa's fire (credits)

Lava

Quartet-cannon

Quicksand

Rocket Engine / Turtle Cannon (airship)

Rocket Engine

Rocket Engine

Spikes (fortress)

Spikes (fortress)

Spikes (fortress)

Spikes (fortress)

Spikes (desert fortress)

Spikes (desert fortress)

Spikes (underground)

Spikes (underground)

Stretch platform

Tornado

Turtle Cannon


Bosses[edit]

Boom Boom

Boom Boom

Larry Koopa

Morton Koopa Jr.

Wendy O. Koopa

Iggy Koopa

Roy Koopa

Lemmy Koopa

Ludwig von Koopa

Bowser (credits)


Items[edit]

Coin

Green Koopa Shell

Red Koopa Shell

Green Giant Shell

Red Giant Shell

Buzzy Shell

Spiny Shell

White Block (alternatives)

Goomba's shoe

Card (Mushroom)

Card (Mushroom)

Card (Mushroom)

Card (Flower)

Card (Flower)

Card (Flower)

Card (Star)

Card (Star)

Card (Star)

Larry's Magic Wand

Larry's Magic Wand (alternatives)


Power-ups[edit]

Fire Flower (inventory)

Super Leaf (inventory)

Starman (alternatives)

Tanooki Suit (inventory)

Hammer Suit (inventory)


Objects[edit]
Blocks and containers[edit]

Empty Block (large)

Brick

? Block

Hard Block

Hard Block

Hard Block

Hard Block

Hard Block (Mushroom House)

Wood Block

Coral

Coral (large)

Switch Block

Jump Block

Ice Block (large)

Treasure chest

Treasure chest

POW

POW


Doorways[edit]

Door

Door

Door (Bowser's Castle)

Door to Princess Toadstool
Pipes[edit]

Pipe (sub-area)

Pipe (desert)

Pipe (sky)

Pipe (underwater)

Pipe (fortress)

Pipe (airship and artillery)

Pipe connector


Platforms[edit]

Bolt Lift

Cloud Lift

Conveyor belt

Conveyor belt

Directional Lift

Directional Lift

Directional Lift

Directional Lift

Directional Lift

Directional Lift

Directional Lift

Ground

Ground (ground)

Ground (underground)

Ground (desert)

Ground (sky)

Ground (ice)

Ground (giant)

Ground (underwater)

Ground (underwater)

Ground (Battle Game)

Ground (airship and artillery)

Ground (minigame lobby)

Island

Lift (hanging)

Rail motor

Rotary Lift

Rotary Lift

Semisolid Platform

Semisolid Platform

Semisolid Platform (secret area)

Semisolid Platform (ground)

Semisolid platform (athletic)

Semisolid platform (athletic goal)

Semisolid platform (desert)

Semisolid platform (ice)

Semisolid Platform (crate)

Waterfall

Waterfall


Other objects[edit]

Fireworks

Fireworks

Vine

Vine

Water

Water / Tide


Background details[edit]

Cloud

Cloud

Cloud

Cloud

Cloud

Cloud

Cloud

Curtain

Fence

Hanging lamp

Hills

Hills

Hills (secret area)

Hills

Hills

Hills (small)

Hills (small)

Hills (small)

Mountain

Pillar

Pyramid

Seaweed

Throne (Japanese release)

Throne (international releases)

Palm tree

Window (fortress)


Particle effects[edit]

Puff (changing form)

Shine (coin and card)

Whack (land) (alternatives)

Splash

Bubble

Waterfall spray

Enemy explosion (land) (alternatives)

Miniboss explosion (fortress) (alternatives)

Boss sweat


Overworld map icons[edit]

Start Panel (Worlds 1, 2, 3, 4, and 7)

Stage 1

Stage 2

Stage 3

Stage 4

Stage 5

Stage 6

Stage 7

Stage 8

Stage 9

Stage 10

Rock (Worlds 1 and 3)

Mushroom House (Worlds 1 and 3)

Spade Panel (Worlds 1, 2, 3, 4, 6, and 7)

Locked Door (Worlds 1 and 3)

Bridge (Worlds 1 and 3)

Pipe (World 2)

Drawbridge

Dock

Fortress (Worlds 1 and 3)

Cleared fortress (Worlds 1 and 3)

Castle (Worlds 1 and 3)

Quicksand

Pyramid

Tower

Hand Trap

Mario's position

Luigi's position

Hammer Brother

Piranha Plant

Navy

Air Force

Boat

Spark

Help

Warp indicator

Warp indicator

Warp indicator

Warp indicator

Warp indicator

Warp indicator

Warp indicator

Cleared space

Cleared space

Water (World 2)

Hills (World 1)

Tree (World 2)

Sand

Flower (World 4)

Star

Glacier

Piranha Plant

Flame

Skull

Mushroom

Palace wall


Minigame cards[edit]

Super Mushroom (Spade Panel)

Fire Flower (Spade Panel)

Starman (Spade Panel)

Back (N-Mark Spade Panel)

10 coins (N-Mark Spade Panel)

20 coins (N-Mark Spade Panel)

Super Mushroom (N-Mark Spade Panel)

Fire Flower (N-Mark Spade Panel)

Starman (N-Mark Spade Panel)

1Up (N-Mark Spade Panel)

1Up (N-Mark Spade Panel - unused)

Selector


Interface[edit]

Heads-up display (Japanese releases; there is a transparent pixel over the "R" in "WORLD")

Heads-up display (international releases; the transparent pixel is now solid black)

Inventory (Japanese releases; the same difference applies. Note the Hammer Suit is solid rather than transparent like the other items.)

Inventory (international releases; the same difference applies)

Flip animation (Japanese, map screen; the display turns pink before it actually flips)

Flip animation (international, map screen; the same detail and regional difference applies)

Flip animation (Japanese, Mushroom House; the display only turns pink once it has flipped)

Flip animation (international, Mushroom House; the same differences apply)
Points and 1UPs[edit]

100 points

200 points

400 points

800 points

1000 points

2000 points

4000 points

8000 points

1UP (gameplay)

1UP (stage end or minigame match)

2UP (stage end or minigame match)

3UP (stage end or minigame match)

5UP (stage end or minigame match)

1UP (battle game)

2UP (battle game)

3UP (battle game)

5UP (battle game)
On-screen text[edit]

Pause

Time-up

The End
Credits images[edit]
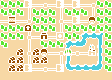
World 1: Grass Land
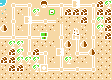
World 2: Desert Hill

World 3: Ocean Side

World 4: Big Island
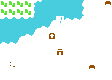
World 5: The Sky
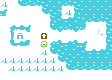
World 6: Iced Land
World 7: Pipe Maze
World 8: Castle of Koopa


Miscellaneous unused graphics[edit]

Bridge (general)

Particles (general)

Tide (general)

Tide (general)

Rocky ceiling (general)

Background lines (plains)

Layered bushes (plains and athletic)

Slope tiles (hills)

Slope tiles (hills)

Edge tiles (hills)

Edge tiles (hills)

Edge tiles (hills)

Water (hills)

Cloud (athletic)

Platform (athletic)

Water (athletic and ice)

Cloud (cave)

Hills (cave)

Hills (cave)

Slope tiles (cave)

Slope tiles (cave)

Water (cave)

Bricks (desert)

Bricks (desert)

Unknown (desert)

Block (desert)

Pillar (desert)

Pipe connector (desert)

Platform (desert)

Chains (desert)

Ladder (desert)

Layered clouds (cloud)

Gradient (cloud)

Cloud Lift (cloud)

Hard Block (cloud)

Track (ice)

Plants (ice)

Pillar (miscellaneous)

Pipes (miscellaneous)

Pipes (miscellaneous)

Track (fortress)

Window (fortress)

Elevator block base (fortress)

Hard Block (fortress)

Doorframe top to Princess's chamber (fortress)

Conveyor (airship and artillery)

Wood (airship)

Wood (airship)

Unknown (airship and artillery)

Metal frame (airship)

Metal frame (airship)

Drills (artillery)

Propeller (artillery)

Treads (artillery)

Tire (artillery)

? (minigame lobby)

? (minigame lobby)

? (minigame lobby)

Block (minigame lobby)

Block (minigame lobby)

Toad statue (castle)

P crest (castle)

Bricks (castle, Japan)

Bricks (castle, international)

Mound (credits)

Underwater propeller (sprite)

Unassembled tiles of the underwater propeller

Desert pipe piece (sprite)

Desert pipe piece (sprite)

Desert pipe piece (sprite)

Target (sprite)


Screenshots[edit]
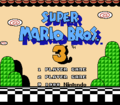
The title screen
Animated title screen
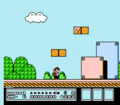
World 1-1
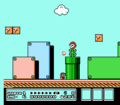
World 1-1
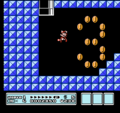
World 1-1 (Bonus Room)
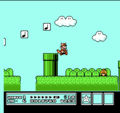
World 1-2
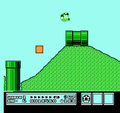
World 1-2
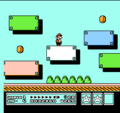
World 1-3
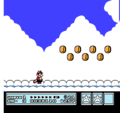
World 1-3 (Coin Heaven)
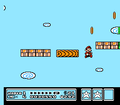
World 1-4
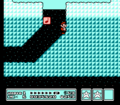
World 1-5
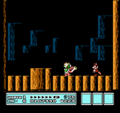
World 1 Boss (Larry)
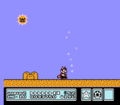
World 2-Desert
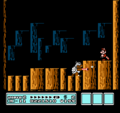
World 2 Boss (Morton)
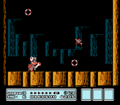
World 3 Boss (Wendy)
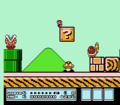
World 4-1
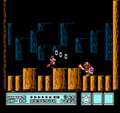
World 5 Boss (Roy)
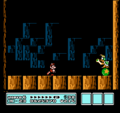
World 6 Boss (Lemmy)
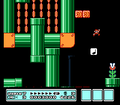
World 7-1
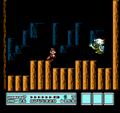
World 7 Boss (Ludwig)
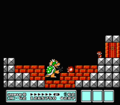
World 8 Boss (Bowser)
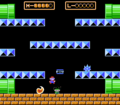
Battle Mode
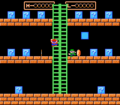
Battle Mode (Question Block level)
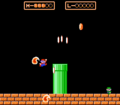
Battle Mode (Pipe Fountain level)
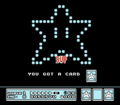
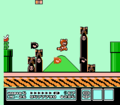
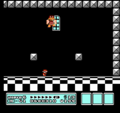

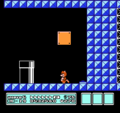
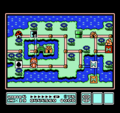
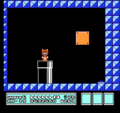
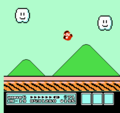


Nintendo Entertainment System - Nintendo Switch Online[edit]
Japanese introduction of Super Mario Bros. 3: Mario, the quick-change artist!

World maps[edit]
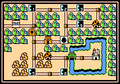
World 1 (Grass Land)
Animated version
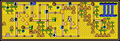
World 2 (Desert Land)

Animated version
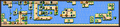
World 3 (Water Land)

Animated version
Animated alternate version
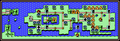
World 4 (Giant Land)
Animated version
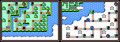
World 5 (Sky Land)
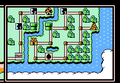
Animated version (land)
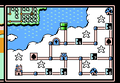
Animated version (sky)
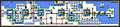
World 6 (Ice Land)

Animated version
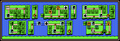
World 7 (Pipe Land)
Animated version
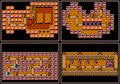
World 8 (Dark Land)
Animated version (area 1)

Animated version (area 2)

Animated version (area 3)
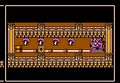
Animated version (area 4)
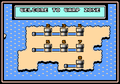
World 9 (Warp Zone)
Animated version


Box art[edit]
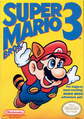
North American box art
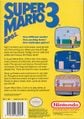
North American box art (Back)
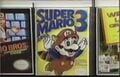
North American pre-release box art

North American box art (Later printing)
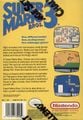
North American box art (Back) alternate version
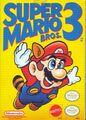
Canadian box art
Brazilian box art
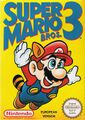
European/Scandinavian box art
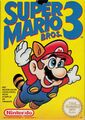
French and Dutch box art
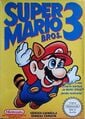
Spanish box art
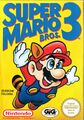
Italian box art

German box art
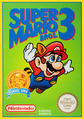
German box art (Classic Series)
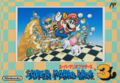
Japanese box art
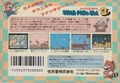
Japanese box art (Back)
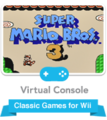
Wii Virtual Console

3DS Virtual Console
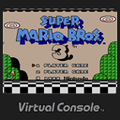
Wii U Virtual Console


Cartridge art[edit]
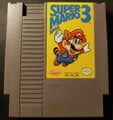
North American cartridge art
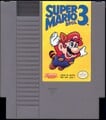
North American cartridge art (later printing). It contains some changes from the previous version.
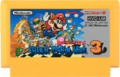
Japanese cartridge art


Miscellaneous[edit]
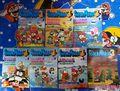
The full Super Mario Bros. 3 Magazine strategy guide series, released as supplements of Family Computer Magazine
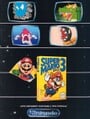
French print ad
Photo of a Super Leaf shaped wagashi, to celebrate the 31st anniversary of the Japanese version of the game from Nintendo Co., Ltd.'s Instagram account
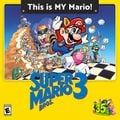
"This is MY Mario!" promotional online asset for the Super Mario Bros. 35th Anniversary (2020)

Promotional pin representing Super Mario Bros. 3, released for the Super Mario Bros. 35th Anniversary (2020)
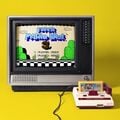
Promotional display of the game alongside the Famicom, for the Super Mario Bros. 35th Anniversary (2020)
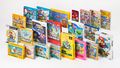
Promotional display of the entire Super Mario series released from 1985 to 2020, for the Super Mario Bros. 35th Anniversary (2020)
Photo of the "Ultra Machine SP" exhibit at the Nintendo Museum


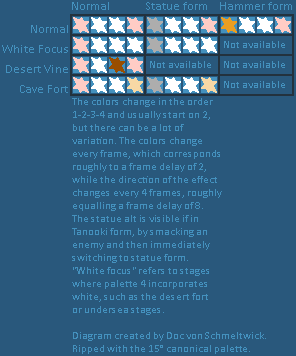
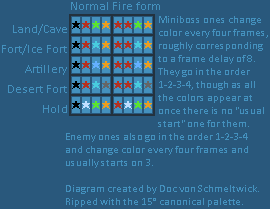
| Super Mario Bros. 3 / Super Mario Advance 4: Super Mario Bros. 3 | ||
|---|---|---|
| Protagonists | Mario • Luigi • Princess Toadstool • Toads • Kings | |
| Bosses | Boom Boom • Big Booa • Fake Bowsera • Koopalings (Larry Koopa • Morton Koopa Jr. • Wendy O. Koopa • Iggy Koopa • Roy Koopa • Lemmy Koopa • Ludwig von Koopa) • Bowser | |
| Items | 1-Up Mushroom • 3-Up Moona • Advance Coina • Anchor • Blue Coin • Boomeranga • Cape Feathera • Card • Coin • e-Coina • Fire Flower • Frog Suit • Goomba's Shoe • Hammer • Hammer Suit • Lakitu's Cloud • Magic ball • Magic Wand • Magic Whistle • Music Box • P-Wing • Poison Mushrooma • Starman • Super Leaf • Super Mushroom • Tanooki Suit • Vegetablea | |
| Objects | Main game | ? Block • Beanstalk • Big Block • Bolt Lift • Brick Block • Brick floor • Buzzy Beetle Shell • Cloud Block • Cloud Lift • Coin Block • Coral • Directional Lift • Donut Lift • Elevator block • Empty Block • Flimsy Lift • Frozen Coin • Giant Shell • Goal • Green Shell • Hidden Block • Ice Block • Jump Block • Lift • Locked Door • Magic Door • Magic Note Block • Magical ball • Mega ? Block • Mushroom Coina • P Warp Door • Quicksand • Red Shell • Rotary Lift • Semisolid Platform • Spiny Shell • Switch Block • Track • Treasure box • Warp Door • Warp Pipe • Waterfall • White Block • Wood Block |
| World-ea | !-Switch • Axe • Balance Lift • Bubble • Control Coin • Dotted-Line Block • Goal Pole • Flipper • Giant Gate • Grass • Jumping Board • Key • Key Door • Power Meter Block • Rock Block • Rotating Block • Roulette Block • Seesaw • Snake platform • Soft sand • Stretch Block • Triangular Block • Vanishing Block | |
| Forms | Small Mario • Super Mario • Fire Mario • Raccoon Mario • Frog Mario • Tanooki Mario (Statue Mario) • Hammer Mario • Invincible Mario • Caped Marioa | |
| Switch Cardsa | 1UP Kinoko ga 3UP Moon ni kawaru! • Blue Green Switch • Luigi Power Up!! • Orange Switch • Sugu ni mantan! Power Meter!! • Teki Power Up! Tokuten x2!! • Timer yukkuri! | |
| Worlds | Grass Land • Desert Land • Water Land • Giant Land • Sky Land • Ice Land • Pipe Land • Dark Land • Warp Zone • World-ea | |
| Locations | e-Coin Castlea • Enemy Course • Panel (N-Mark Spade Panel • Spade Panel • Start Panel) • Toad House • Treasure Ship | |
| Enemies | Main game | Angry Sun • Baby Cheep • Big Bertha • Bloober • Bloober baby • Bloober with kids • Bob-omb • "Boo" Diddly • Boomerang Brother • Boss Bass • Bullet Bill • Buster Beetle • Buzzy Beetle • Chain Chomp • Cheep-Cheep • Colossal Koopa Paratroopa • Dry Bones • Fiery Walking Piranha • Fire Brother • Fire Chomp • Firesnake • Giant Koopa • Goomba • Grand Goomba • Hammer Brother • Hot Foot • Jelectro • Koopa Paratroopa • Koopa Troopa • Kuribo's Goomba • Lakitu • Lava Lotus • Micro-Goomba • Missile Bill • Muncher • Para-Beetle • Para-Goomba • Pile Driver Micro-Goomba • Piranha Plant • Piranhacus Giganticus • Podoboo • Ptooie • Rocky Wrench • Scattering Bloober • Sledge Brother • Spike • Spiny Cheep-Cheep • Spiny • Spiny Egg • Stretch • Thwomp • Venus Fire Trap • Walking Piranha |
| World-ea | Amazing Flyin' Hammer Brother • Big Boo • Bony Beetle • Bowser Statue (Super Mario World) • Bumpty • Chargin' Chuck • Flurry • Goomba (Super Mario World) • Hoopster • Hothead • Jumping Piranha Plant • Lil Sparky • Magikoopa • Monty Mole • Para-Goomba (Super Mario World) • Porcupo • Rip Van Fish • Spike Top • Thwimp • Wiggler | |
| Obstacles | Bowser Statue • Candy ring • Cannon • Cannonball • Diagonal cannon • Falling spikea • Fire-Bara • Giant cannon • Giant cannonball • Lava • Pit • Quartet-cannon • Rocket Engine • Roto-Disc • Spike • Tornado • Turtle Cannon | |
| World-e mini-gamesa | Blue Mushroom House • Orange Mushroom House • Red Mushroom House | |
| Music | Airship BGM • Athletic BGM • Bros. Battle • Fortress Boss • Ground BGM • King of the Koopas • P Switch BGM / Toad's House • Slot Game BGM / Memory Game BGM • World 1 Map (Grass Land) • World 3 Map (Water Land) • World 4 Map (Giant Land) | |
| Miscellaneous | Game Over • Extra life • P-Meter • Time Limit | |
| Further info | Completion • e-Readera • e-Reader cardsa • Gallery (Super Mario Advance 4) • Glitches (Super Mario Advance 4) • Media • Nintendo Music • Pre-release and unused content (Super Mario Advance 4) • Quotes • References • Staff • Unwinnable state | |