MarioWiki:Sandbox: Difference between revisions
No edit summary |
Artfaz82015 (talk | contribs) (returned the page) Tags: Manual revert Disambiguation links |
||
| Line 1: | Line 1: | ||
{{ | {{game infobox | ||
[[Mario]] | |title='''''Mario Dand''''' | ||
[[Luigi]] | |image=[[File:Mario Dand Front (Brasil).png]] | ||
Wii | |developer=Grains' Company<br>[[Nintendo EAD]] | ||
Wii | |publisher=[[Nintendo]], [[HAL Laboratory]] | ||
Wii | |platforms=Wii, Nintendo Switch | ||
|release={{flag list|USA|June 14, 2054|Brazil|June 19, 2054|Mexico|July 15, 2054}} | |||
|end= | |||
|languages={{languages|en_us=y|es_latam=y|pt_br=y}} | |||
|genre=[[Genre#Platform games|Platformer]] | |||
|ratings={{ratings|esrb=E|classind=L}} | |||
|modes=Single player, multiplayer | |||
|format={{format|wii=1|switchd1=1}} | |||
|cabinet= | |||
|arcade_system= | |||
|monitor= | |||
|input={{input|wmsideways=1|switchpro=1}} | |||
|serials={{flag list|USA|HD-JHJKFHG-KJLKDF-USA|Brazil|HD-JHJKFHG-KJLKDF-BRA|Mexico|HD-JHJKFHG-KJLKDF-MEX}} | |||
}} | |||
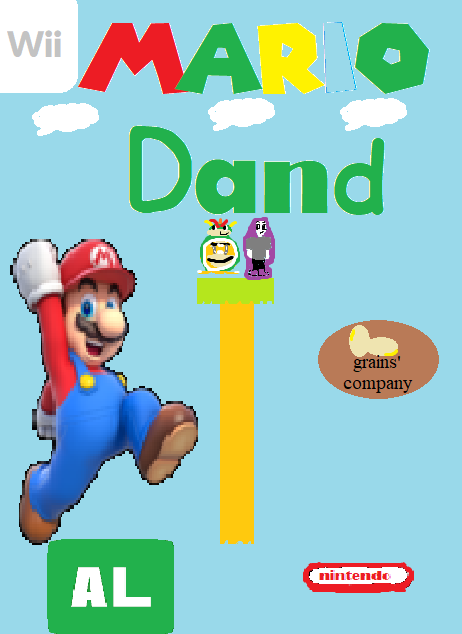
'''''Mario Dand''''' is a [[Genre#Platform games|Platformer]], released in 2054 for the [[Wii]]. Is an "3.5D" game, by FAP Direct. Is very similar to Super paper Mario but doesn’t have a battle system…… | |||
==Story== | |||
The Story is very simple: [[Mario]] needs to save [[Princess Peach]] from [[Bowser]], and his minion Loprinks which has 41 lives. | |||
==Gameplay== | |||
Is the same of Super Paper Mario but with a little change: | |||
*Mario can also teleport to 4D. | |||
===Controls=== | |||
Save for a few abilities, minigames and Tworks, the game is played with the Wii Remote held sideways. | |||
*{{button|wii|Pad}} - Move (in 3D and 4D) / Space-swim | |||
*{{button|wii|Padleftright}} - Move (in 2D) | |||
*{{button|wii|Padupdown}} - Climb | |||
*{{button|wii|Paddown}} - Duck / Enter Warp Pipe / Crouch before Super Jump (as Luigi) / Breathe fire (as Bowser) | |||
*{{button|wii|Padup}} - Interact / Enter doors | |||
*{{Button|wii|a}} - Flip to 3D and 4D (as Mario) | |||
*{{Button|wii|2}} - Jump / Swim | |||
*{{Button|wii|1}} - Use Pixl / Customize your Avatar | |||
*{{Button|wii|1}} + {{Button|wii|2}} - Change character / Swap Pixl / Use item | |||
*{{Button|wii|-}} - See controls | |||
*{{Button|wii|+}} - Pause | |||
*{{button|wii|Wiimote}} (point) - Use Tippi or Tiptron | |||
*{{button|wii|Wiimote}} (shake) - [[Stylish move]] (when stomping an enemy) | |||
In the Nintendo Switch version: | |||
*{{button|switch|pad}} - Move (in 3D and 4D) / Space-swim | |||
*{{button|switch|stick}} - Move (in 2D) | |||
*{{button|switch|Padupdown}} - Climb | |||
*{{button|switch|Paddown}} - Duck / Enter Warp Pipe / Crouch before Super Jump (as Luigi) / Breathe fire (as Bowser) | |||
*{{button|switch|Padup}} - Interact / Enter doors | |||
*{{Button|switch|a}} - Flip to 3D and 4D (as Mario) | |||
*{{Button|switch|b}} - Jump / Swim | |||
*{{Button|switch|x}} - Use Pixl / Customize your Avatar | |||
*{{Button|switch|x}} + {{Button|switch|b}} - Change character / Swap Pixl / Use item | |||
*{{Button|switch|-}} - See controls | |||
*{{Button|switch|+}} - Pause | |||
*{{button|switch|pro}} (point) - Use Tippi or Tiptron | |||
*{{button|switch|pro}} (shake) - [[Stylish move]] (when stomping an enemy) | |||
===Playable characters=== | |||
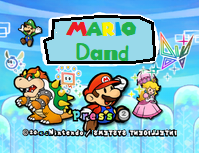
[[File:Mario Dand Start Screen.png|thumb|The title screen with the playable characters.]] | |||
The player controls the five '''Heroes of Light''' in-game. They can be switched to at any time via the {{button|wii|1}} + {{button|wii|2}}({{button|switch|x}} + {{button|switch|b}} in Switch version) menu. The player begins with only Mario or Avatar, recruiting the other heroes as the game progresses and even losing the other characters occasionally. | |||
{|border=1 class="wikitable"style="text-align:center;border-collapse:collapse;background:white;margin:0 auto;" | |||
!Name | |||
!Image | |||
!Ability | |||
!Availability | |||
|- | |||
!width=100px|[[Mario]] | |||
|width=100px|[[File:MarioSprite.png|65x65px]] | |||
|Mario has the ability to [[flip]] between dimensions using {{button|wii|A}}. When Mario flips, everything shifts between 2-D and 3-D, revealing secrets. Most enemies appear only in one dimension, but some can flip between them. | |||
|Always available | |||
|- | |||
!width=100px|[[Princess Peach|Peach]] | |||
|width=100px|[[File:PeachSprite.png|75x75px]] | |||
|Peach can float across gaps with her parasol using {{button|wii|2}}. She can also shield herself with her [[Peach's Parasol|parasol]] by pressing {{button|wii|Paddown}}, which negates damage from almost all attacks. | |||
|Joins during the interlude after [[Lineland|Chapter 1]]; lost after [[Sammer's Kingdom|Chapter 6]]; rejoins in [[Overthere Stair|Chapter 7-3]]; [[:File:PeachTriesToSaveMimi.png|lost]] in [[Castle Bleck Foyer|Chapter 8-2]] and rejoins in [[Castle Bleck Inner Sanctum|8-4]] | |||
|- | |||
!width=100px|[[Bowser]] | |||
|width=100px|[[File:BowserSprite.png|75x75px]] | |||
|Bowser can attack enemies with his [[Fire Breath]] by pressing {{button|wii|Paddown}}. Bowser's attacks deal double-damage. | |||
|Joins after being defeated in [[The Bitlands|Chapter 3-1]]; lost after [[Sammer's Kingdom|Chapter 6]]; rejoins after being defeated in [[Underwhere Road|Chapter 7-2]]; [[:File:BowserCastleBleck.png|lost]] in [[Castle Bleck Entry|Chapter 8-1]] and rejoins in [[Castle Bleck Inner Sanctum|8-4]] | |||
|- | |||
!width=100px|[[Luigi]] | |||
|width=100px|[[File:LuigiSprite.png|75x75px]] | |||
|Luigi can use {{button|wii|Paddown}} to activate his [[Super jump (Super Paper Mario)|super jump]] to shoot upward and reach high places. It is also a double-damage attack. | |||
|Found in [[The Underwhere|Chapter 7-1]] ([[Sammer's Kingdom|Chapter 6]] Interlude); [[:File:Dimentio and Luigi.PNG|lost]] in [[Castle Bleck Interior|Chapter 8-3]] and rejoins in [[Castle Bleck Inner Sanctum|8-4]]; unavailable during the final battle. | |||
|- | |||
!width=100px|Avatar | |||
|width=100px|Not Avaliable | |||
|Avatar has literally every power from each Hero. He can be changed the same way that in Doodres: The Big Adventure!: In the main menu, press the button {{button|wii|1}} ({{button|switch|x}} in Nintendo Switch version) and change according to your way. He replaces Mario. | |||
|Always avaliable | |||
|} | |||
====Character stats==== | |||
{|align="center"cellpadding="8"style="margin:auto;text-align:center;font-family:Comic Sans MS,Chalkboard SE,cursive,sans-serif;border:1px solid lightgray;border-collapse:separate;border-spacing:0 2px;" | |||
|-style="background:lightgray" | |||
!Stat | |||
!colspan="2"width="16%"|Initial value | |||
!colspan="2"width="16%"|Max. value | |||
!colspan=2|Function | |||
|-style="background:#f8f9fa" | |||
![[Flip Meter]] | |||
!colspan=2|[[File:SPM Flip Meter (empty).png]] | |||
!colspan=2|[[File:SPM Flip Meter (full).png]] | |||
| | |||
|style="background:#f8f9fa;font-family:Arial;text-align:left"|A meter that ticks down each second that Mario is in 3-D, dealing 1 damage when depleted. | |||
|-style="background:#efa685" | |||
![[File:SPM Level text.png|140px|link=Level up]] | |||
|colspan=2|1 | |||
|colspan=2|∞ | |||
|style="background:conic-gradient(from -135deg at right,#f8f9fa,#efa685 1deg 90deg,#f8f9fa 90deg) right/100% 20px repeat;"| | |||
|style="background:#f8f9fa;font-family:Arial;text-align:left"|Indicates the player's progress overall. [[Level up]]s alternate between increasing Health by 5 {{hover|HP|Heart Points}} and Attack by 1. | |||
|-style="background:#ef9ac2" | |||
![[File:SPM HP display isolated.png|x48px|link=Heart Point]] | |||
|colspan=2|1 | |||
|colspan=2|{{hover|255|Can be raised to ∞ with HP Plus}} | |||
|style="background:conic-gradient(from -135deg at right,#f8f9fa,#ef9ac2 1deg 90deg,#f8f9fa 90deg) right/100% 20px repeat-y;| | |||
|style="background:#f8f9fa;font-family:Arial;text-align:left"|Denote the character's total health. {{hover|HP|Heart Points}} dropping to zero results in a [[Game Over]]. | |||
|-style="background:#e2758b" | |||
!Attack | |||
|[[File:SPM Luigi Icon.png|40px|Luigi]][[File:SPM Peach Icon.png|40px|Peach]][[File:SPM Mario Icon.png|40px|Mario]]{{br}}1 | |||
|width=6%|[[File:SPM Bowser Icon.png|40px|Bowser]]{{br}}2 | |||
|width=3%|Avatar{{br}}2.5 | |||
|[[File:SPM Luigi Icon.png|40px|Luigi]][[File:SPM Peach Icon.png|40px|Peach]][[File:SPM Mario Icon.png|40px|Mario]]{{br}}{{hover|51|Can be raised to 99 with Power Plus}} | |||
|width=6%|[[File:SPM Bowser Icon.png|40px|Bowser]]{{br}}{{hover|102|Can be raised to 198 with Power Plus}} | |||
|width=3%|Avatar{{br}}{{hover|121|Can be raised to ∞ with Power Plus}} | |||
|style="background:conic-gradient(from -135deg at right,#f8f9fa,#e2758b 1deg 90deg,#f8f9fa 90deg) right/100% 20px repeat-y;"| | |||
|style="background:#f8f9fa;font-family:Arial;text-align:left"|The base damage a character can deal. | |||
|-style="background:#7ea6db" | |||
![[File:SPM Score display isolated.png|72px|link=Score]] | |||
|colspan=2|0 | |||
|colspan=2|∞ | |||
|style="background:conic-gradient(from -135deg at right,#f8f9fa,#7ea6db 1deg 90deg,#f8f9fa 90deg) right/100% 20px repeat-y;"| | |||
|style="background:#f8f9fa; font-family:Arial; text-align:left"|The total amount of points accumulated through the game. | |||
|-style="background:#79c7d6" | |||
!Next Level | |||
|colspan=2|1 | |||
|colspan=2|{{hover|∞|Displays -------- after reaching level 99}} | |||
|style="background:conic-gradient(from -135deg at right, #f8f9fa,#79c7d6 1deg 90deg,#f8f9fa 90deg) right/100% 20px repeat-y;"| | |||
|style="background:#f8f9fa;font-family:Arial;text-align:left"|Indicates the score needed for the next Level up. | |||
|-style="background:#f3d973" | |||
![[File:SPM Coins display isolated.png|link=Coin]] | |||
|colspan=2|0 | |||
|colspan=2|1 | |||
|style="background:conic-gradient(from -135deg at right,#f8f9fa,#f3d973 1deg 90deg,#f8f9fa 90deg) right/100% 20px repeat-y;"| | |||
|style="background:#f8f9fa;font-family:Arial;text-align:left"|Currency dropped by enemies, found in ? Blocks and other places. They are used to purchase items. | |||
|-style="background:#badb85" | |||
!Time Played | |||
|colspan=2|00:00 | |||
|colspan=2|∞:∞ | |||
|style="background:conic-gradient(from -135deg at right,#f8f9fa,#badb85 1deg 90deg,#f8f9fa 90deg) right/100% 20px repeat-y;"| | |||
|style="background:#f8f9fa;font-family:Arial;text-align:left"|Measures for how long the player has played the game. It has no effect on gameplay. | |||
|} | |||
{{br|left}} | |||
===Pixls=== | |||
[[Pixl]]s are beings that give Mario and crew special abilities. There are thirteen in total, four of which are optional. However, only twelve can be carried, since [[Tiptron]] is only available after [[Tippi]] disappears. They set the record for the most allies in the series. Tippi (Tiptron after completion of the game) is always active and thus the player always have two active Pixls (except at certain points). All Pixl abilities are activated using the {{button|wii|1}} button except for Tippi's and Tiptron's, whose abilites are activated by pointing {{button|wii|Wiimote}} at the sensor bar. | |||
{|border=1 width=90% cellpadding=4 style="text-align:center;border-collapse:collapse;margin:0 auto;border:silver" | |||
|-style="background:black;color:white" | |||
!width=8%|Name | |||
!width=8%|Image | |||
!Ability | |||
!width=15%|Location | |||
|- | |||
|[[Tippi]] | |||
|[[File:SPM Tippi.png|75x75px]] | |||
|style="background:white;text-align:left"|Tippi can use her [[tattle]] ability find secrets and areas previously inaccessible without her. She also gives information on characters and enemies and give the crew hints. Tiptron may fill Tippi's role at the end of the game when Tippi permanently leaves Mario and his team. | |||
|style="background:white"|Available from start | |||
|- | |||
|[[Thoreau]] | |||
|[[File:SPM Thoreau Sprite.png|55px]] | |||
|style="background:white;text-align:left"|Thoreau is able to pick up non-spiky enemies and objects and throw them, as well as activate switches from a distance. He resembles a hand. | |||
|style="background:white"|[[Mount Lineland]] | |||
|- | |||
|[[Boomer (Super Paper Mario)|Boomer]] | |||
|[[File:SPM Boomer Sprite.png|60px]] | |||
|style="background:white;text-align:left"|Boomer can turn into a bomb and detonate to destroy blocks or cracks in walls. The blast deals double-damage to enemies. | |||
|style="background:white"|[[Gloam Valley]] | |||
|- | |||
|[[Slim (Pixl)|Slim]] | |||
|[[File:SPM Slim Sprite.png|45px]] | |||
|style="background:white;text-align:left"|Slim allows Mario and crew to turn sideways, and squeeze through tight spaces such as rails. Also, they become invisible and untouchable if they stand still. | |||
|style="background:white"|[[Merlee's Mansion]] | |||
|- | |||
|[[Thudley]] | |||
|[[File:SPM Thudley Sprite.png|35px]] | |||
|style="background:white;text-align:left"|Thudley gives Mario and friends the ability to [[Ground Pound]] in order to destroy blocks and activate large switches. It deals double damage with Mario, Peach and Luigi, and four times the regular damage with Bowser. | |||
|style="background:white"|[[The Tile Pool]] | |||
|- | |||
|[[Carrie]] | |||
|[[File:SPM Carrie Sprite.png|50px]] | |||
|style="background:white;text-align:left"|Carrie is able to turn into a platform that can carry Mario and Co. across dangerous places (such as spikes) to safety. She can also jump on spiked enemies without sustaining damage. | |||
|style="background:white"|[[Fort Francis]] | |||
|- | |||
|[[Fleep]] | |||
|[[File:SPM Fleep Sprite.png|50px]] | |||
|style="background:white;text-align:left"|Fleep can flip objects caught in a different dimension back to its original one. His ability is most often used on shining spots that resemble tears in paper. He can also make enemies dizzy so the player can pass them by. Fleep is also the only Pixl that cannot be used in 3D. | |||
|style="background:white"|[[Planet Blobule]] | |||
|- | |||
|[[Cudge]] | |||
|[[File:SPM Cudge Sprite.png|35px]] | |||
|style="background:white;text-align:left"|Cudge lets Mario and co. use a hammer like in previous ''[[Paper Mario]]'' titles. It can destroy large [[Yellow Block|yellow block]]s and does double damage. He looks like a mallet. | |||
|style="background:white"|[[Gap of Crag]] | |||
|- | |||
|[[Dottie]] | |||
|[[File:SPM Dottie Sprite.png|45px]] | |||
|style="background:white;text-align:left"|Dottie has the ability to shrink the player character, allowing them to enter small spaces and tiny doors, as well as [[Itty Bits]] shops. Enemies do not notice the player, but if Mario and co. touch them they still take damage. | |||
|style="background:white"|[[Floro Caverns]] | |||
|- | |||
|[[Barry]] | |||
|[[File:SPM Barry Sprite.png|45px]] | |||
|style="background:white;text-align:left"|Barry can surround the character with a strong barrier that can harm enemies in its way and counterattack projectiles that enemies such as [[Squig]]s shoot at the player. He is obtained by going back to [[The Bitlands]] after rescuing Tippi and talking to him. | |||
|style="background:white"|[[The Bitlands]] (optional) | |||
|- | |||
|[[Dashell]] | |||
|[[File:SPM Dashell Srite.png|50px]] | |||
|style="background:white;text-align:left"|Dashell provides a speed boost for the party, useful when traveling from place to place. He is obtained by defeating [[Wracktail]] in the [[Flipside Pit of 100 Trials]]. | |||
|style="background:white"|[[Flipside Pit of 100 Trials]] (Room 100) (optional) | |||
|- | |||
|[[Piccolo]] | |||
|[[File:SPM Piccolo Sprite.png|40px]] | |||
|style="background:white;text-align:left"|Piccolo plays music that can cure Mario and his team from any negative status, excluding poison. Using music, she can break blocks with her outline carved in it and can also put the [[Underchomp]] to sleep. She is obtained by completing a side quest from [[Merlee]] after Chapter 5 and unlocking the door in the alleyway of the first floor of [[Flopside]]. | |||
|style="background:white"|[[Flopside]] (optional) | |||
|- | |||
|[[Tiptron]] | |||
|[[File:SPM Tiptron.png|75x75px]] | |||
|style="background:white;text-align:left"|Tiptron is a robotic replica of Tippi that can be bought off of Francis for 999 coins as an additional partner. It replaces [[Tippi]] at the end of the game and has all of the same powers as her, as well as her consciousness. | |||
|style="background:white"|[[Fort Francis]] (optional) | |||
|} | |||
====Catch Cards==== | |||
{{main|Catch Card}} | |||
Catch Cards are collectible items that can be purchased at the card shops [[Catch a Dream]] and [[Fondest Hopes]], located on floor 1 of Flipside and Flopside respectively. For each Caught Card of an enemy, the damage the player inflicts on that enemy increases. Empty Catch Cards can also be purchased and used to trap the nearest enemy on-screen in the Catch Card, effectively turning it into a Caught Card of that enemy. Caught Cards offer information about the character on the card, such as their maximum attack and HP (health points). | |||
====Recipes==== | |||
{{main|List of Saffron and Dyllis recipes}} | |||
At [[Saffron]]'s and [[Dyllis]]' kitchens, [[Sweet Smiles]] and [[Hot Fraun]], located on floor 1 of Flipside and Flopside respectively, the player can give them ingredients to create special meals. Saffron cooks only one ingredient, while Dyllis mixes two ingredients. Usually, items heal more when cooked, though in some cases, their effect completely changes. The [[Dining Specializer]] shows the player different recipes, the number of which can be increased by inserting [[Cooking Disk]]s into the Dining Specializer. In total, 96 different recipes can cooked by Saffron and Dyllis. | |||
====Treasure maps==== | |||
{{main|List of maps in Super Paper Mario}} | |||
Once the player can access B1 in Flopside, they can find [[Flamm]], who sells treasure maps. They can then be viewed in the menu, and they require the player to travel to designated spots across the different accessible dimensions. Treasures are marked with a red "X" on the map, and the player needs to use the Pixl [[Fleep]] to flip the spot marked with the red "X". | |||
===Objects=== | |||
A list of interactive objects that Mario and company can encounter during their quest. | |||
{|width=90% cellspacing=0 border=1 cellpadding=4 style="text-align:center;border-collapse:collapse;margin:0 auto;border:silver;align:center" | |||
|-style="background:black;color:white" | |||
!width=10%|Name | |||
!width=15%|Image | |||
!Effect | |||
|-style="background:linear-gradient(90deg,maroon,olive,green,teal);color:white" | |||
!colspan=3|Navigation objects | |||
|- | |||
|[[Charold]]'s boat | |||
|style="background:#f8f9fa"|[[File:SPM River Twygz.png|192px|Charold's boat]] | |||
|style="background:#f8f9fa" align=left|A [[boat]] which [[Charold]] can use to ferry the player safely across the [[River Twygz]]. | |||
|- | |||
|Colored floor | |||
|style="background:#f8f9fa"|[[File:SPM Colored Floor (blue).png|128px|Blue colored floor]][[File:SPM Colored Floor (red).png|128px|Red colored floor]] | |||
|style="background:#f8f9fa"align=left|Blue and red floating platforms which appear and disappear based on the color of nearby floor switches in [[The Dotwood Tree]]. | |||
|- | |||
|[[Door]] | |||
|style="background:#f8f9fa"|[[File:SPM Door.png|128px|Star Door]] | |||
|style="background:#f8f9fa"align=left|Usually featuring a large star in the center, doors lead between different areas or rooms. The dimensional doors allow access to various locations from the [[Flipside Tower|Flipside]] and [[Flopside Tower]]s. Larger doorways called [[Space Gate]]s require [[Squirps]]' help to unlock. | |||
|- | |||
|Elevator | |||
|style="background:#f8f9fa;"|[[File:SPM Elevator Button.svg|Elevator]] | |||
|style="background:#f8f9fa"align=left|Elevators can be used to traverse between floors in [[Flipside]], [[Flopside]], and [[Fort Francis]]. Red arrow buttons mark the locations of elevators in the former two towns. | |||
|- | |||
|Flipping rectangles | |||
|style="background:#f8f9fa"|[[File:Mount Lineland flipping.PNG|192px|Flipping rectangles]] | |||
|style="background:#f8f9fa"align=left|When standing in the red squares, Mario and co. will be passed off between multiple flipping rectangles before being dropped off at another point. | |||
|- | |||
|Floating rock | |||
|style="background:#f8f9fa"|[[File:SPM Gloam Valley Platform.png|64px|Floating rock]] | |||
|style="background:#f8f9fa"align=left|Rocky platforms from [[Gloam Valley]] which float in the water, but will sink when stood on. | |||
|- | |||
|[[Geyser]]s | |||
|style="background:#f8f9fa"|[[File:SPM Underwhere Geysers.png|192px|Geysers]] | |||
|style="background:#f8f9fa"align=left|Orange water geysers which flow in an area deep below the [[River Twygz]], rising up and down over time. | |||
|- | |||
|[[Trampoline|Jump platform]] | |||
|style="background:#f8f9fa"|[[File:SPM Jump Pad render (blue).png|64px|Blue jump platform]][[File:SPM Jump Pad render (red).png|64px|Red jump platform]] | |||
|style="background:#f8f9fa"align=left|Landing on a jump platform will bounce the playable character up. Blue ones allow the player to retain control during the jump, whilst red ones launch the character towards a fixed location. | |||
|- | |||
|[[Jump-over cloud]] | |||
|style="background:#f8f9fa"|[[File:SPM Jump-over cloud sprite.png|128px|Jump-over cloud]] | |||
|style="background:#f8f9fa"align=left|Large flat clouds with eyes, which function identically to blue jump platforms. One cloud named [[Cyrrus]] can launch Mario and co. much higher once given a [[Red Apple]]. | |||
|- | |||
|[[Ladder]] | |||
|style="background:#CCC"|[[File:SPM Ladders group.png|128px|Lift]] | |||
|style="background:#f8f9fa" align=left|Flat objects which can be climbed to reach higher areas. Some appear from blocks. Bowser is unable to climb these whenever he attempts to. | |||
|- | |||
|[[Lever Switch|Lever]] | |||
|style="background:#f8f9fa"|[[File:SPM Lever (Red).png|x64px|Red's Lever]] [[File:SPM Lever (Green).png|x64px|Green's Lever]] [[File:SPM Lever (water).png|x64px|Water Lever]] | |||
|style="background:#f8f9fa"align=left|Levers which [[Red and Green]] use to operate their bridges, and Mario and co. use to control the water level in the tunnels beneath the [[River Twygz]]. | |||
|- | |||
|[[Lift]] | |||
|style="background:#f8f9fa"|[[File:SPM Lift.png|128px|Lift]] | |||
|style="background:#f8f9fa"align=left|Floating platforms in a variety of sizes that help with navigating certain areas. | |||
|- | |||
|[[Minecart]] | |||
|style="background:#f8f9fa"|[[File:SPM Minecart 2D.png|128px|Minecart]] | |||
|style="background:#f8f9fa"align=left|A wheeled vehicle which can be ridden along the tracks in the [[Floro Caverns]]. | |||
|- | |||
|Red wind | |||
|style="background:#f8f9fa"|[[File:SPM Dotwood Tree Red Winds.png|192px|Red wind]] | |||
|style="background:#f8f9fa"align=left|Rideable winds that can carry the player. | |||
|- | |||
|[[Sign]] | |||
|style="background:#f8f9fa"|[[File:SPM Sign.png|64px|Sign]] | |||
|style="background:#f8f9fa"align=left|Provides helpful information pertaining to the area. Signs near both [[Merlon]] and [[Nolrem]]'s houses list in-game statistics. | |||
|- | |||
|[[Squarp hole]] | |||
|style="background:#f8f9fa"|[[File:SPM Outer Space Squarp Hole.png|192px|Squarp hole]] | |||
|style="background:#f8f9fa"align=left|Kaleidoscopic wormholes used to navigate between areas of [[Outer Space]]. | |||
|- | |||
|[[Warp Pipe]] | |||
|style="background:#f8f9fa"|[[File:WarpPipe.svg|64px|Warp Pipe]] | |||
|style="background:#f8f9fa"align=left|Pipes used for traveling between certain areas. [[Welderberg]] can build blue pipes, which serve as shortcuts to the [[Flipside Pit of 100 Trials|Pit of 100 Trials]] entrances in both Flipside and Flopside, and between the Second Floor of both cities. | |||
|-style="background:linear-gradient(90deg,olive,green,teal,navy);color:white" | |||
!colspan=3|Blocks and containers | |||
|- | |||
|[[! Switch]] | |||
|style="background:#f8f9fa"|[[File:SPM Blue Switch Block.png|64px|Blue ! Switch Block]] [[File:SPM Red Switch Block.png|64px|Red ! Switch Block]] | |||
|style="background:#f8f9fa"align=left|Colored blocks which trigger events when hit or jumped on, often involved in puzzles. Can also be found in the form of pressure-activated switches. | |||
|- | |||
|[[? Block]] | |||
|style="background:#f8f9fa"|[[File:Question Block SPM.png|? Block]] | |||
|style="background:#f8f9fa"align=left|Its contents are released when struck by jumping beneath them, using various [[Pixl]] abilities, or via Bowser's [[Fire Breath]]. Some ? Blocks are [[Hidden Block|hidden]], or disguised as brick blocks. | |||
|- | |||
|[[Brick block]] | |||
|style="background:#f8f9fa"|[[File:SPM Brick Block.png|Brick block]] | |||
|style="background:#f8f9fa"align=left|Can be broken by jumping beneath them, using various Pixl abilities, or via Bowser's Fire Breath. Some are disguised as [[Hard Block]]s, with their true form visible in 3-D. Bricks found in the [[Flipside Pit of 100 Trials|Flipside]] and [[Flopside Pit of 100 Trials|Flopside Pits of 100 Trials]] are indestructible. | |||
|- | |||
|[[Cloud Block]] | |||
|style="background:#f8f9fa"|[[File:SPM Cloud Block.png|64px|Cloud Block]] | |||
|style="background:#f8f9fa"align=left|Cloud-shaped blocks that serve as platforms. They are only found in the skies of [[Mount Lineland]]. | |||
|- | |||
|[[Coin Block]] | |||
|style="background:#f8f9fa"|[[File:SPM Coin Block.png|Coin Block]] | |||
|style="background:#f8f9fa"align=left|Rewards one coin per strike until a certain amount of time passes. They are disguised as brick blocks from the front, with their true form visible in 3-D. | |||
|- | |||
|[[Empty Block]] | |||
|style="background:#f8f9fa"|[[File:SPM Empty Block.png|Empty Block]] | |||
|style="background:#f8f9fa"align=left|The form that a ? Block or Coin Block takes after being struck. It still reacts to hits but cannot be destroyed. | |||
|- | |||
|[[Flip block]] | |||
|style="background:#f8f9fa"|[[File:SPM Flip Block.png|Flip block]] | |||
|style="background:#f8f9fa"align=left|Flat blocks that can flip from 2-D to 3-D or vice versa when hit from below, often used as platforms to reach higher areas. | |||
|- | |||
|[[Gravity Switch]] | |||
|style="background:#f8f9fa"|[[File:SPM Gravity Switch (Flip).png|64px|Gravity Switch (Flip)]][[File:SPM Gravity Switch (Rotate).png|64px|Gravity Switch (Rotate)]] | |||
|style="background:#f8f9fa"align=left|Flat black blocks with white outlines and symbols. When struck these alter the direction of [[gravity]] for the user; gravity either inverts vertically or shifts 90 degrees clockwise based on the arrow symbol. | |||
|- | |||
|[[Heart Pillar]] | |||
|style="background:#f8f9fa"|[[File:SPM Heart Pillar Render.png|64px|Heart Pillar]] | |||
|style="background:#f8f9fa"align=left|Pillars scattered around [[Flipside]] and [[Flopside]], which house the eight [[Pure Hearts]] and must be visited to unlock each [[dimensional door]]. | |||
|- | |||
|[[Fleep|Rift]] | |||
|style="background:#CCC"|[[File:SPM Rift sprite.png|32px|Rift]] | |||
|style="background:#f8f9fa"align=left|Indicators of objects which are hidden from the player. Using [[Fleep]] on a rift will reveal the item or object. Some only appear in certain situations, such as during [[Castle_Bleck_Interior|Chapter 8-3]]. | |||
|- | |||
|[[Save Block]] | |||
|style="background:#f8f9fa"|[[File:SPM Save Block.png|64px|Save Block]] | |||
|style="background:#f8f9fa"align=left|Colorful blocks which open a prompt to save game progress when struck. | |||
|- | |||
|[[Star Block (Super Paper Mario)|Star Block]] | |||
|style="background:#f8f9fa"|[[File:SPM Star Block render.png|64px|Star Block]] | |||
|style="background:#f8f9fa"align=left|Larger blocks found at the end of most levels. Striking one from below begins the '''END OF CHAPTER''' cinematic, before advancing to the next level or returning to [[Flipside]] or [[Flopside]]. | |||
|- | |||
|Stone block | |||
|style="background:#f8f9fa"|[[File:SPM Push Block.png|64px|Stone block]] | |||
|style="background:#f8f9fa"align=left|Large pushable blocks found in the tunnels beneath the [[River Twygz]]. They can be used to reach higher areas while the water is drained. | |||
|- | |||
|[[Grab Block|{{conjectural|Throw block}}]] | |||
|style="background:#f8f9fa"|[[File:SPM Nage Block.png|64px|Throw block]] | |||
|style="background:#f8f9fa"align=left|A throwable block requiring [[Thoreau]]'s ability to lift. These blocks are used in various puzzles. | |||
|- | |||
|[[Treasure chest]] | |||
|style="background:#f8f9fa"|[[File:PMTTYD Treasure Chest Art.png|64px|Treasure chest]] | |||
|style="background:#f8f9fa"align=left|Treasure chests contain Important Things, items, or keys. The bigger variants typically contain [[Pixls]] or items to strengthen the stats of Mario, Peach, Bowser, and Luigi. | |||
|-style="background:linear-gradient(90deg,green,teal,navy,purple);color:white" | |||
!colspan=3|Miscellaneous | |||
|- | |||
|[[Bomb]] | |||
|style="background:#f8f9fa"|[[File:SPM Bomb sprite.png|64px|Bomb]] | |||
|style="background:#f8f9fa"align=left|A bomb that [[Boomer]] can transform into, useful for destroying cracked walls, enemies and other objects. [[Ninjoe]]s and related enemies can transform into decoy bombs when attacked. | |||
|- | |||
|[[Hammer]] | |||
|style="background:#f8f9fa"|[[File:SPM Hammer.png|64px|Hammer]] | |||
|style="background:#f8f9fa"align=left|A hammer summoned when using [[Cudge]]'s ability. This doubles attack power against enemies and can break [[Yellow Block|yellow block]]s. | |||
|- | |||
|[[Dark Prognosticus]] | |||
|style="background:#f8f9fa"|[[File:Spm dark prognosticus.PNG|64px|Dark Prognosticus]] | |||
|style="background:#f8f9fa"align=left|The book of prophecies which [[Count Bleck]] follows to summon the [[Chaos Heart]] and destroy all worlds. | |||
|- | |||
|[[Light Prognosticus]] | |||
|style="background:#f8f9fa"|[[File:SPM Light Prognosticus.png|64px|Light Prognosticus]] | |||
|style="background:#f8f9fa"align=left|A book created by the [[Tribe of Ancients]] to combat the negative fortellings of the Dark Prognosticus. [[Merlon]] uses it to guide Mario and co. towards preventing [[The Void]] from consuming all worlds. | |||
|} | |||
===Shops=== | |||
Spread throughout the dimensions are numerous shops, most of them being run by [[Howzit]]. Some shops are located in tiny houses, called "[[Itty Bits]]". Here, the player can purchase items for coins, sell items, store items, pick up stored items, and earn "Shop Points", which can be obtained every time an item is purchased. After reaching certain milestones with the Shop Points, the player is gifted with special items, reaching from a Cake Mix to a Catch Card of the special rarity class. | |||
===Audience=== | |||
The audience is a group of generic creatures who appear whenever Mario, Peach, Bowser, or Luigi attacks an enemy and does a stylish move, which is done by shaking the [[Wii#Wii Remote|Wii Remote]] when stomping on an enemy. The audience in this game consists of [[Toad (species)|Toad]]s, [[Goomba]]s, [[Koopa Troopa]]s, and [[Shy Guy]]s, only a handful of species from the previous game. They appear on the sides of the screen and say "Nice", "Good", "Great", "Wonderful", and "Excellent". This approval of the Crowd gives the player a higher score than if they had just jumped on the enemy. By doing this, the player can get more points faster. | |||
==Bosses== | |||
'''Bold''' text indicates a chapter boss. | |||
{|border=1 style="width:90%;text-align:center;border-collapse:collapse;background:white;margin:0 auto;border:silver" | |||
|-style="background:black;color:white" | |||
!width=10%|Chapter | |||
!width=20%|Image | |||
!Name | |||
!width=8%|HP | |||
!width=8%|Attack | |||
!width=8%|Defense | |||
!width=8%|Score | |||
!width=15%|Location | |||
|- | |||
|rowspan=2|[[Lineland|Chapter 1]] | |||
|[[File:OChunksSprite.PNG|100px]] | |||
|[[O'Chunks]] (1) | |||
|20 | |||
|1 | |||
|0 | |||
|1000 | |||
|[[Yold Desert]] | |||
|- | |||
|[[File:Fracktail.jpg|100px]] | |||
|'''[[Fracktail]]''' | |||
|??<br>(9 hits) | |||
|1 | |||
|0 | |||
|1000 | |||
|[[Yold Ruins]] | |||
|- | |||
|[[Gloam Valley|Chapter 2]] | |||
|[[File:SPM Mimis True Form Artwork.png|150px]] | |||
|'''[[Mimi]]''' (1) | |||
|??<br>(6 hits) | |||
|1 | |||
|0 | |||
|2000 | |||
|[[Merlee's Basement]] | |||
|- | |||
|rowspan=4|[[The Bitlands|Chapter 3]] | |||
|[[File:BowserSprite.png|100px]] | |||
|[[Bowser]] (1) | |||
|20 | |||
|2 | |||
|1 | |||
|2000 | |||
|[[The Bitlands]] | |||
|- | |||
|[[File:SPMBigBlooper.png|100px]] | |||
|[[Big Blooper (Super Paper Mario)|Big Blooper]] | |||
|??<br>(3 hits) | |||
|2 | |||
|0 | |||
|0 | |||
|[[The Tile Pool]] | |||
|- | |||
|[[File:DimentioIdleSPM.gif|80px]] | |||
|[[Dimentio]] (1) | |||
|30 | |||
|2 | |||
|0 | |||
|1000 | |||
|[[The Dotwood Tree]] | |||
|- | |||
|[[File:FrancisRender.png|120px]] | |||
|'''[[Francis]]''' (1) | |||
|40 | |||
|1 | |||
|0 | |||
|3000 | |||
|[[Fort Francis]] | |||
|- | |||
|rowspan=2|[[Outer Space|Chapter 4]] | |||
|[[File:Mr.LSprite.png|50px]] | |||
|[[Mr. L]] | |||
|40 | |||
|3 | |||
|0 | |||
|2000 | |||
|rowspan=2|[[Whoa Zone]] | |||
|- | |||
|[[File:Brobot.png|150px]] | |||
|'''[[Brobot]]''' | |||
|255 | |||
|4 | |||
|3<br><small>(6 against fire) | |||
|4000 | |||
|- | |||
|rowspan=3|[[Land of the Cragnons|Chapter 5]] | |||
|rowspan=2|[[File:OChunksSprite.PNG|100px]] | |||
|rowspan=2|[[O'Chunks]] (2 & 3) | |||
|40 | |||
|2 | |||
|0 | |||
|2000 | |||
|[[Gap of Crag]] | |||
|- | |||
|60 | |||
|3 | |||
|0 | |||
|4000 | |||
|rowspan=2|[[Floro Caverns]] | |||
|- | |||
|[[File:SPMKingCroacus.png|200px]] | |||
|'''[[King Croacus IV|King Croacus]]''' | |||
|50 | |||
|2 | |||
|0 | |||
|5000 | |||
|- | |||
|rowspan=2|[[Sammer's Kingdom|Chapter 6]] | |||
|[[File:MimiCh6Sprite.png|60px]] | |||
|[[Mimi]] (2) | |||
|25 | |||
|2 | |||
|0 | |||
|4000 | |||
|[[Sammer's Early Duels]] | |||
|- | |||
|[[File:BrobotArt.png|150px]] | |||
|'''[[Brobot L-type]]''' | |||
|64 | |||
|5 | |||
|4<br><small>(8 against fire) | |||
|6000 | |||
|[[World of Nothing]] | |||
|- | |||
|rowspan=3|[[The Underwhere|Chapter 7]] | |||
|[[File:BowserSprite.png|100px]] | |||
|[[Bowser]] (2) | |||
|80 | |||
|8 | |||
|2 | |||
|4000 | |||
|rowspan=2|[[Underwhere Road]] | |||
|- | |||
|[[File:SPMUnderchompSprite.png|200px]] | |||
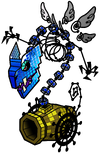
|[[Underchomp]] | |||
|48<br><small>(16 each) | |||
|3 | |||
|4 | |||
|6000 | |||
|- | |||
|[[File:Bonechill.png|100px]] | |||
|'''[[Bonechill]]''' | |||
|80 | |||
|4 | |||
|0 | |||
|7000 | |||
|[[The Overthere]] | |||
|- | |||
|rowspan=6|[[Castle Bleck|Chapter 8]] | |||
|[[File:OChunksSprite.PNG|100px]] | |||
|[[O'Chunks]] (4) | |||
|100 | |||
|4 | |||
|0 | |||
|8000 | |||
|[[Castle Bleck Entry]] | |||
|- | |||
|[[File:FrancisRender.png|120px]] | |||
|[[Francis]] (2){{footnote|main|1}} | |||
|40 | |||
|1 | |||
|0 | |||
|3000 | |||
|rowspan=2|[[Castle Bleck Foyer]] | |||
|- | |||
|[[File:SPM Mimis True Form Artwork.png|150px]] | |||
|[[Mimi]] (3) | |||
|??<br>(6 hits) | |||
|4 | |||
|0 | |||
|8000 | |||
|- | |||
|[[File:DimentioIdleSPM.gif|80px]] | |||
|[[Dimentio]] (2) | |||
|80 | |||
|4 | |||
|0 | |||
|8000 | |||
|[[Castle Bleck Interior]] | |||
|- | |||
|[[File:CountBleckIdleSPM.gif|100px]] | |||
|'''[[Count Bleck]]''' | |||
|150 | |||
|8 | |||
|0 | |||
|8000 | |||
|rowspan=2|[[Castle Bleck Inner Sanctum]] | |||
|- | |||
|[[File:SuperDimentio.jpg|150px]] | |||
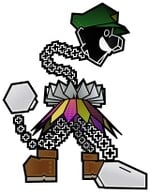
|'''[[Super Dimentio]]''' | |||
|200 | |||
|6 | |||
|0 (head)<br>4 (body) | |||
|9990 | |||
|- | |||
|rowspan=3|Optional | |||
|[[File:SPM Wracktail Catch Card.png|80px]] | |||
|[[Wracktail]] | |||
|??<br>(30 hits) | |||
|10 | |||
|0 | |||
|9990 | |||
|[[Flipside Pit of 100 Trials]] | |||
|- | |||
|[[File:Shadoo Dark Luigi sprite.png|25px|bottom]][[File:Shadoo Dark Bowser sprite.png|80px|bottom]][[File:Shadoo Dark Peach sprite.png|30px|bottom]][[File:Shadoo Dark Mario sprite.png|30px|bottom]] | |||
|[[Shadoo]] | |||
|400<br><small>(100 each) | |||
|10<br><small>(Dark Bowser: 20) | |||
|0<br><small>(Dark Bowser: 4) | |||
|39960<br><small>(9990 each) | |||
|[[Flopside Pit of 100 Trials]] | |||
|- | |||
|[[File:SPM End Boss Sammer Guy Sprite.png|100px]] | |||
|[[Big Sammer Guy|End Boss]] | |||
|99 | |||
|10 | |||
|4 | |||
|5000 | |||
|[[Sammer's Endgame]] | |||
|} | |||
{{footnote|note|1|Francis can only be fought in Chapter 8-2 if the player chooses him when asked about which enemies they hate.}} | |||
==Obstacles== | |||
{|border=1 cellspacing=0 cellpadding=4 style="width:90%;text-align:center;border-collapse:collapse;background:#f8f9fa;margin:0 auto;border:silver;align:center" | |||
|-style="background:black;color:white" | |||
!width=10%|Name | |||
!width=15%|Image | |||
!Description | |||
!width=10%|Locations | |||
|- | |||
|[[Pit|Bottomless pit]] | |||
|style="background:white"|[[File:Bottomlesspitspm.png|128px|Bottomless pit]] | |||
|align="left"|Falling into a pit causes the player to lose 1 HP. | |||
|All locations except:<div class="contentbox mw-collapsible mw-collapsed"data-expandtext="Show locations"data-collapsetext="Hide locations">[[Yold Desert]]<br>[[Yold Ruins]]<br>[[Merlee's Mansion]]<br>[[Merlee's Basement]]<br>[[Outer Space]]<br>[[Planet Blobule]]<br>[[Outer Limits]]<br>[[Whoa Zone]]<br>[[Sammer's Kingdom]]<br>[[World of Nothing]]</div> | |||
|- | |||
|[[Candle]] | |||
|style="background:white"|[[File:candlespm.png|64px|Candle]] | |||
|align=left|Candles which sometimes shoot out flames at the player. | |||
|[[Merlee's Basement]] | |||
|- | |||
|Cracks | |||
|style="background:white; opacity:50%"|[[File:SPM Cracks sprite.png|64px|Cracks]] | |||
|align=left|Walls or other objects with visible cracks in them can be blown up using [[Boomer]]'s ability. When on the ground they can also be broken using [[Thudley]]. | |||
|[[Flipside]]<br>[[Gloam Valley]]<br>[[The Bitlands]]<br>[[Floro Caverns]]<br>[[Castle Bleck Foyer]] | |||
|- | |||
|[[Dark]] | |||
|style="background:white"|[[File:SPM_Darkness.png|100px|Dark]] | |||
|align="left"|Blocks the player's view. Can be temporarily cleared by lighting torches with Bowser's [[Fire Breath]]. | |||
|[[Underwhere Road]] | |||
|- | |||
|Door cage | |||
|style="background:white"|[[File:SPM Door Cage.png|128px|Door cage]] | |||
|align=left|Cages which block access to certain doors until activating something, i.e. using [[Thoreau]] or [[Thudley]] to escape their respective rooms after they join Mario's [[Party member|party]]. | |||
|[[Yold Town]]<br>[[The Tile Pool]]<br>[[Sammer's Kingdom]]<br>[[Overthere Stair]]<br>[[Castle Bleck Interior]] | |||
|- | |||
|[[Electric rail|Electrical barrier]] | |||
|style="background:white"|[[File:Electricwallspm.png|100px|Electrical barrier]] | |||
|align="left"|A moving wall of electricity that will cause the player to lose 1 HP if touched. | |||
|[[Merlee's Mansion]] | |||
|- | |||
|[[Fire Bar]] | |||
|style="background:white"|[[File:Firebar SPM.png|128px|Fire Bar]] | |||
|align="left"|A bar of fire that will cause the player to lose 1 HP if touched. | |||
|[[Yold Ruins]]<br>[[Castle Bleck Foyer]] | |||
|- | |||
|Floro Sapien Scanner | |||
|style="background:white"|[[File:SPM Floro Sapien scanner.png|128px|Scanner]] | |||
|align=left|A processing unit which automatically inspects all visitors to [[King Croacus IV]]'s chambers. Wearing a [[Floro Sprout]] allows Mario and co. to walk through. | |||
|[[Floro Caverns]] | |||
|- | |||
|[[Hedron]] | |||
|style="background:white"|[[File:SPM Outer Limits.PNG|128px|Hedron]] | |||
|align="left"|Rotating walls that will cause the player to take damage on contact. | |||
|[[Outer Limits]] | |||
|- | |||
|[[Key Door|Lock]] | |||
|style="background:white"|[[File:SPM Lock render.png|64px|Lock]] | |||
|align=left|These can be found on certain doors, requiring the appropriate key to be unlocked. | |||
|[[Flipside]]<br>[[Flopside]]<br>[[Yold Ruins]]<br>[[Fort Francis]]<br>[[Woah Zone]]<br>[[Floro Caverns]]<br>[[The Underwhere]]<br>[[The Overthere]]<br>[[Castle Bleck]] | |||
|- | |||
|Passcode keypad | |||
|style="background:white"|[[File:SPM Passcode Keypad (off).png|64px|Passcode keypad (locked)]] [[File:SPM Passcode Keypad (on).png|64px|Passcode keypad (unlocked)]] | |||
|align=left|Keypads which require the correct password to unlock a connected door or safe. | |||
|[[Merlee's Mansion]]<br>[[Fort Francis]] | |||
|- | |||
|[[Piccolo]] stone | |||
|style="background:white"|[[File:SPM Piccolo Block.png|96px|Piccolo block]] | |||
|align=left|Red-tinted stones which are removed when using [[Piccolo]]'s ability nearby, revealing hidden chests. In Flipside, this stone bears her emblem. | |||
|[[Flipside]]<br>[[Flopside]]<br>(3rd Floor) | |||
|- | |||
|[[Stump|Post]] | |||
|style="background:white"|[[File:SPM Post.png|bottom|40px|Post]] [[File:SPM Post (Flipside).png|bottom|40px|Post (Flipside)]] | |||
|align=left|Using [[Thudley]] on these posts can pound them into the ground, or in some cases pull them out. | |||
|[[Flipside]]<br>[[The Tile Pool]]<br>[[Dotwood Tree]] | |||
|- | |||
|[[Quicksand]] | |||
|style="background:white"|[[File:Quicksandspm.png|100px|Quicksand]] | |||
|align="left"|Sand that sinks the player, causing them to lose 1 HP if they sink deep enough. | |||
|[[Yold Desert]]<br>[[Yold Ruins]] | |||
|- | |||
|{{conjectural|Security door}} | |||
|style="background:white"|[[File:Securitydoorspm.png|100px|Security door]] | |||
|align="left"|Fires laser beams if Mario or Bowser attempt to enter. | |||
|[[Fort Francis]] | |||
|- | |||
|[[Spike Trap]] | |||
|style="background:white"|[[File:Spikedtrapspm.png|128px|Spike Trap]] | |||
|align="left"|Pointy obstacles that causes the player to lose 1 HP. | |||
|[[The Dotwood Tree]]<br>[[Fort Francis]]<br>[[The Underwhere]]<br>[[Castle Bleck Foyer]] | |||
|- | |||
|{{conjectural|Spiked ceiling}} | |||
|style="background:white"|[[File:Spikeceilingspm.png|128px|Spiked ceiling]] | |||
|align="left"|Ceiling covered in spikes which will fall gradually. If the player doesn't escape in time, it will cause a Game Over. | |||
|[[Merlee's Mansion]] | |||
|- | |||
|{{conjectural|Trap door}} | |||
|style="background:white"|[[File:Trapdoorspm.png|128px|Trap door]] | |||
|align="left"|Forces the player to fall if they grab the Mushroom hanging by a string. | |||
|[[Merlee's Mansion]]<br>[[Castle Bleck Foyer]] | |||
|- | |||
|[[Yellow Block|Yellow block]] | |||
|style="background:white"|[[File:PMTTYD yellow block.png|64px|Yellow block]] | |||
|align=left|Blocks which require [[Cudge]] to break, often barring access to doors or other objects. Some are disguised from the front, with their true form visible in 3-D. | |||
|[[Gap of Crag]]<br>[[Floro Caverns]]<br>[[Flopside]] | |||
|} | |||
==Side-quests== | |||
===Duel of 100=== | |||
{{main|Duel of 100}} | |||
After completion of the game, the player may return to [[Sammer's Kingdom]] to fully complete the Duel of 100 by defeating all 100 [[Sammer Guy]]s. After the duel, [[King Sammer]] awards the player with [[Catch Card]]s of the [[party member|partners]] from ''[[Paper Mario: The Thousand-Year Door]]''. | |||
===Pits of 100 Trials=== | |||
{{main|Flipside Pit of 100 Trials}} | |||
{{main|Flopside Pit of 100 Trials}} | |||
The pits of 100 Trials are found in the outskirts of [[Flipside]] and [[Flopside]], respectively. The pits each contain 100 rooms, each containing several enemies with one holding the key to the next room. The 100th room of the Flipside Pit contains [[Wracktail]]. The Flopside Pit is similar to the first, but with more powerful dark versions of enemies. It can only be accessed after the Flipside Pit is cleared and must be completed twice to battle the boss, [[Shadoo]]. The prize for completing the Flipside Pit is the [[Pixl]] [[Dashell]], while the Flopside Pit awards cards of the playable characters and their dark versions. | |||
===The Flipside Arcade=== | |||
{{main|Flipside Arcade}} | |||
The Flipside Arcade is found in a [[The Underwhere (bar)|beveragarium]] in Flipside. There, the player may play four minigames, one of which is unlocked via the [[Golden Card]]. | |||
*[[Forget Me Not]] - A card matching game with familiar characters from the game. Missing three times in one round is a game over. | |||
*[[Mansion Patrol]] - A shooting game that involves the character shooting [[Boo]]s to get points. This game marks one of the only appearances of [[Toad (species)|Toads]] in the entire game, other than at the start of the game, where [[Toad]] himself appears. | |||
*[[Tilt Island]] - The player uses the [[Wii#Wii Remote|Wii Remote]] to tilt a small "island" of sorts while collecting food items and dodging enemies. The more items collected, the higher the player's score is. | |||
*[[Hammer Whacker]] (Unlockable with [[Golden Card]]) -The player holds a large hammer and whacks giant shells back at the [[Koopa Striker]], who hits the shells towards the player. | |||
===Piccolo=== | |||
{{main|Piccolo}} | |||
Piccolo is an optional Pixl that can be found in a locked house in Flopside. A series of trade quests must be finished in order to obtain the key. The sidequest is activated by talking to Merlee in Flopside from behind the crystal ball. | |||
==Pre-release and unused content== | |||
''Mario Dand'' was originally developed as a title for the [[Nintendo DS]] under the same name. | |||
*You cannot be 666 in the release of the game, just in version Beta 3.0 (to make this bug you make the Konami code with the [[Wii#Wii Remote|Wii remote]]). | |||
*Originally had to be some of the "FAP-ized" characters for the audience, but were replaced because of being complicated to make animations for all in one month. But one of them still remain for the release of the game. | |||
==Regional differences== | |||
Same of Super Paper Mario, but with more: | |||
*When you name the avatar you can't name it with every bad word or something offensive. | |||
==Glitches== | |||
Same of Super Paper Mario. | |||
==Names in different languages== | |||
{{Foreign names | |||
|jap=マリオダンディ | |||
|japr=Mariodandi | |||
|japm=Mario Dandy | |||
|SpaA=Mario Dandi | |||
|SpaAM=Mario Dandy | |||
|PorA=Mário Dandy | |||
|PorAM=Mario Dandy | |||
}} | |||
==Extra info== | |||
*{{#if:{{a/list|P&YWW}}| | |||
{{#if:| | |||
[[{{#replace:{{#replace:{{a/list|P&YWW}}|'''}}|''}}|{{#ifeq:{{{2}}}|l|{{PAGETITLE|{{a/list|P&YWW}}}}|{{{2}}}}}]] | |||
| | |||
{{PAGETITLE|{{a/list|P&YWW}}}}}} | |||
|P&YWW{{#if:||<sup style="font-weight:normal;font-style:normal">[invalid abbreviation]</sup>{{#switch:{{NAMESPACE}}||Gallery=[[Category:Articles with invalid abbreviations]]}}}}}} | |||
*{{#if:{{a/list|M&LBIS+BJJ}}| | |||
{{#if:l| | |||
[[{{#replace:{{#replace:{{a/list|M&LBIS+BJJ}}|'''}}|''}}|{{#ifeq:l|l|{{PAGETITLE|{{a/list|M&LBIS+BJJ}}}}|l}}]] | |||
| | |||
{{PAGETITLE|{{a/list|M&LBIS+BJJ}}}}}} | |||
|M&LBIS+BJJ{{#if:||<sup style="font-weight:normal;font-style:normal">[invalid abbreviation]</sup>{{#switch:{{NAMESPACE}}||Gallery=[[Category:Articles with invalid abbreviations]]}}}}}} | |||
*{{#if:{{a/list|M&SATSOWG}}| | |||
{{#if:l| | |||
{{PAGETITLE|{{a/list|M&SATSOWG}}}}}} | |||
|M&SATSOWG{{#if:||<sup style="font-weight:normal;font-style:normal">[invalid abbreviation]</sup>{{#switch:{{NAMESPACE}}||Gallery=[[Category:Articles with invalid abbreviations]]}}}}}} | |||
*{{#if:{{a/list|SMSERIES}}| | |||
{{#if:l| | |||
[[{{#replace:{{#replace:{{a/list|SMSERIES}}|'''}}|''}}|{{#ifeq:l|l|{{PAGETITLE|{{a/list|SMSERIES}}}}|l}}]] | |||
| | |||
{{PAGETITLE|{{a/list|SMSERIES}}}}}} | |||
|SMSERIES{{#if:||<sup style="font-weight:normal;font-style:normal">[invalid abbreviation]</sup>{{#switch:{{NAMESPACE}}||Gallery=[[Category:Articles with invalid abbreviations]]}}}}}} | |||
*{{#if:{{a/list|LMSERIES}}| | |||
{{#if:| | |||
[[{{#replace:{{#replace:{{a/list|LMSERIES}}|'''}}|''}}|{{#ifeq:{{{2}}}|l|{{PAGETITLE|{{a/list|LMSERIES}}}}|{{{2}}}}}]] | |||
| | |||
{{PAGETITLE|{{a/list|LMSERIES}}}}}} | |||
|LMSERIES{{#if:||<sup style="font-weight:normal;font-style:normal">[invalid abbreviation]</sup>{{#switch:{{NAMESPACE}}||Gallery=[[Category:Articles with invalid abbreviations]]}}}}}} | |||
*{{#if:{{a/list|YISERIES}}| | |||
{{#if:l| | |||
[[{{#replace:{{#replace:{{a/list|YISERIES}}|'''}}|''}}|{{#ifeq:l|l|{{PAGETITLE|{{a/list|YISERIES}}}}|l}}]] | |||
| | |||
{{PAGETITLE|{{a/list|YISERIES}}}}}} | |||
|YISERIES{{#if:||<sup style="font-weight:normal;font-style:normal">[invalid abbreviation]</sup>{{#switch:{{NAMESPACE}}||Gallery=[[Category:Articles with invalid abbreviations]]}}}}}} | |||
*{{id|King Bowser's Castle|YWW}} | |||
*{{id|Power Shot|MTSERIES}} | |||
*{{id|World 5|NSMB2}} | |||
*[[{{#replace:{{#replace:{{a|World 5|nocheck=y}} ({{a|NSMB2|nocheck=y}})|'''}}|''}}|{{#switch:||a|f|p={{a|World 5|nocheck=y}}}}{{#ifeq:{{{4}}}|s||<nowiki/> {{#switch:{{{3}}}|a={{a|NSMB2|nocheck=y}}|p=({{a|NSMB2|nocheck=y}})|f=for the {{a|NSMB2|nocheck=y}}|}}}}]]{{#ifeq:{{{4}}}|s|<nowiki/> {{#switch:{{{3}}}|a=[[{{#replace:{{#replace:{{a|NSMB2|nocheck=y}}|'''}}|''}}|{{a|NSMB2|nocheck=y}}]]|p=([[{{#replace:{{#replace:{{a|NSMB2|nocheck=y}}|'''}}|''}}|{{a|NSMB2|nocheck=y}}]])|f=for the [[{{#replace:{{#replace:{{a|NSMB2|nocheck=y}}|'''}}|''}}|{{a|NSMB2|nocheck=y}}]]|[[{{#replace:{{#replace:{{a|NSMB2|nocheck=y}}|'''}}|''}}|{{{3}}}]]}}}} | |||
[[Category:Games]] | |||
[[Category:Wii Games]] | |||
[[Category:Platforming games]] | |||
[[Category:Role-playing games]] | |||
This year is the 40th anniversary of Mario. Therefore it will be a big year for Mario. A page on the Mario 40th anniversary will be made as soon as it’s officially announced. | |||
Happy new year. Donkey country returns hd officially release in 15 days. | |||
Latest revision as of 17:52, January 14, 2025
| ''Mario Dand'' | |||||
|---|---|---|---|---|---|
| |||||
| Developer | Grains' Company Nintendo EAD | ||||
| Publisher | Nintendo, HAL Laboratory | ||||
| Platform(s) | Wii, Nintendo Switch | ||||
| Release date | |||||
| Language(s) | English (United States) Spanish (Latin America) Portuguese (Brazil) | ||||
| Genre | Platformer | ||||
| Rating(s) |
| ||||
| Mode(s) | Single player, multiplayer | ||||
| Format | Wii: | ||||
| Input | Wii: Nintendo Switch:
| ||||
| Serial code(s) | |||||
Mario Dand is a Platformer, released in 2054 for the Wii. Is an "3.5D" game, by FAP Direct. Is very similar to Super paper Mario but doesn’t have a battle system……
Story[edit]
The Story is very simple: Mario needs to save Princess Peach from Bowser, and his minion Loprinks which has 41 lives.
Gameplay[edit]
Is the same of Super Paper Mario but with a little change:
- Mario can also teleport to 4D.
Controls[edit]
Save for a few abilities, minigames and Tworks, the game is played with the Wii Remote held sideways.
 - Move (in 3D and 4D) / Space-swim
 - Move (in 2D)
 - Climb
 - Duck / Enter Warp Pipe / Crouch before Super Jump (as Luigi) / Breathe fire (as Bowser)
 - Interact / Enter doors
 - Flip to 3D and 4D (as Mario)
 - Jump / Swim
 - Use Pixl / Customize your Avatar
 +
+  - Change character / Swap Pixl / Use item
 - See controls
 - Pause
 (point) - Use Tippi or Tiptron
 (shake) - Stylish move (when stomping an enemy)
In the Nintendo Switch version:
- Move (in 3D and 4D) / Space-swim
- Move (in 2D)
- Climb
- Duck / Enter Warp Pipe / Crouch before Super Jump (as Luigi) / Breathe fire (as Bowser)
- Interact / Enter doors
- Flip to 3D and 4D (as Mario)
- Jump / Swim
- Use Pixl / Customize your Avatar
+
- Change character / Swap Pixl / Use item
- See controls
- Pause
(point) - Use Tippi or Tiptron
(shake) - Stylish move (when stomping an enemy)
Playable characters[edit]
The player controls the five Heroes of Light in-game. They can be switched to at any time via the ![]() +
+ ![]() (
( +
in Switch version) menu. The player begins with only Mario or Avatar, recruiting the other heroes as the game progresses and even losing the other characters occasionally.
| Name | Image | Ability | Availability |
|---|---|---|---|
| Mario | Mario has the ability to flip between dimensions using |
Always available | |
| Peach | Peach can float across gaps with her parasol using |
Joins during the interlude after Chapter 1; lost after Chapter 6; rejoins in Chapter 7-3; lost in Chapter 8-2 and rejoins in 8-4 | |
| Bowser | Bowser can attack enemies with his Fire Breath by pressing |
Joins after being defeated in Chapter 3-1; lost after Chapter 6; rejoins after being defeated in Chapter 7-2; lost in Chapter 8-1 and rejoins in 8-4 | |
| Luigi | Luigi can use |
Found in Chapter 7-1 (Chapter 6 Interlude); lost in Chapter 8-3 and rejoins in 8-4; unavailable during the final battle. | |
| Avatar | Not Avaliable | Avatar has literally every power from each Hero. He can be changed the same way that in Doodres: The Big Adventure!: In the main menu, press the button |
Always avaliable |
Character stats[edit]
| Stat | Initial value | Max. value | Function | |||||
|---|---|---|---|---|---|---|---|---|
| Flip Meter | A meter that ticks down each second that Mario is in 3-D, dealing 1 damage when depleted. | |||||||
| 1 | ∞ | Indicates the player's progress overall. Level ups alternate between increasing Health by 5 HP and Attack by 1. | ||||||
| 1 | 255 | Denote the character's total health. HP dropping to zero results in a Game Over. | ||||||
| Attack | Avatar2.5 | Avatar121 | The base damage a character can deal. | |||||
| 0 | ∞ | The total amount of points accumulated through the game. | ||||||
| Next Level | 1 | ∞ | Indicates the score needed for the next Level up. | |||||
| 0 | 1 | Currency dropped by enemies, found in ? Blocks and other places. They are used to purchase items. | ||||||
| Time Played | 00:00 | ∞:∞ | Measures for how long the player has played the game. It has no effect on gameplay. | |||||
Pixls[edit]
Pixls are beings that give Mario and crew special abilities. There are thirteen in total, four of which are optional. However, only twelve can be carried, since Tiptron is only available after Tippi disappears. They set the record for the most allies in the series. Tippi (Tiptron after completion of the game) is always active and thus the player always have two active Pixls (except at certain points). All Pixl abilities are activated using the ![]() button except for Tippi's and Tiptron's, whose abilites are activated by pointing
button except for Tippi's and Tiptron's, whose abilites are activated by pointing ![]() at the sensor bar.
at the sensor bar.
| Name | Image | Ability | Location |
|---|---|---|---|
| Tippi | 
|
Tippi can use her tattle ability find secrets and areas previously inaccessible without her. She also gives information on characters and enemies and give the crew hints. Tiptron may fill Tippi's role at the end of the game when Tippi permanently leaves Mario and his team. | Available from start |
| Thoreau | Thoreau is able to pick up non-spiky enemies and objects and throw them, as well as activate switches from a distance. He resembles a hand. | Mount Lineland | |
| Boomer | Boomer can turn into a bomb and detonate to destroy blocks or cracks in walls. The blast deals double-damage to enemies. | Gloam Valley | |
| Slim | Slim allows Mario and crew to turn sideways, and squeeze through tight spaces such as rails. Also, they become invisible and untouchable if they stand still. | Merlee's Mansion | |
| Thudley | Thudley gives Mario and friends the ability to Ground Pound in order to destroy blocks and activate large switches. It deals double damage with Mario, Peach and Luigi, and four times the regular damage with Bowser. | The Tile Pool | |
| Carrie | Carrie is able to turn into a platform that can carry Mario and Co. across dangerous places (such as spikes) to safety. She can also jump on spiked enemies without sustaining damage. | Fort Francis | |
| Fleep | Fleep can flip objects caught in a different dimension back to its original one. His ability is most often used on shining spots that resemble tears in paper. He can also make enemies dizzy so the player can pass them by. Fleep is also the only Pixl that cannot be used in 3D. | Planet Blobule | |
| Cudge | Cudge lets Mario and co. use a hammer like in previous Paper Mario titles. It can destroy large yellow blocks and does double damage. He looks like a mallet. | Gap of Crag | |
| Dottie | Dottie has the ability to shrink the player character, allowing them to enter small spaces and tiny doors, as well as Itty Bits shops. Enemies do not notice the player, but if Mario and co. touch them they still take damage. | Floro Caverns | |
| Barry | Barry can surround the character with a strong barrier that can harm enemies in its way and counterattack projectiles that enemies such as Squigs shoot at the player. He is obtained by going back to The Bitlands after rescuing Tippi and talking to him. | The Bitlands (optional) | |
| Dashell | Dashell provides a speed boost for the party, useful when traveling from place to place. He is obtained by defeating Wracktail in the Flipside Pit of 100 Trials. | Flipside Pit of 100 Trials (Room 100) (optional) | |
| Piccolo | Piccolo plays music that can cure Mario and his team from any negative status, excluding poison. Using music, she can break blocks with her outline carved in it and can also put the Underchomp to sleep. She is obtained by completing a side quest from Merlee after Chapter 5 and unlocking the door in the alleyway of the first floor of Flopside. | Flopside (optional) | |
| Tiptron | 
|
Tiptron is a robotic replica of Tippi that can be bought off of Francis for 999 coins as an additional partner. It replaces Tippi at the end of the game and has all of the same powers as her, as well as her consciousness. | Fort Francis (optional) |
Catch Cards[edit]
- Main article: Catch Card
Catch Cards are collectible items that can be purchased at the card shops Catch a Dream and Fondest Hopes, located on floor 1 of Flipside and Flopside respectively. For each Caught Card of an enemy, the damage the player inflicts on that enemy increases. Empty Catch Cards can also be purchased and used to trap the nearest enemy on-screen in the Catch Card, effectively turning it into a Caught Card of that enemy. Caught Cards offer information about the character on the card, such as their maximum attack and HP (health points).
Recipes[edit]
- Main article: List of Saffron and Dyllis recipes
At Saffron's and Dyllis' kitchens, Sweet Smiles and Hot Fraun, located on floor 1 of Flipside and Flopside respectively, the player can give them ingredients to create special meals. Saffron cooks only one ingredient, while Dyllis mixes two ingredients. Usually, items heal more when cooked, though in some cases, their effect completely changes. The Dining Specializer shows the player different recipes, the number of which can be increased by inserting Cooking Disks into the Dining Specializer. In total, 96 different recipes can cooked by Saffron and Dyllis.
Treasure maps[edit]
- Main article: List of maps in Super Paper Mario
Once the player can access B1 in Flopside, they can find Flamm, who sells treasure maps. They can then be viewed in the menu, and they require the player to travel to designated spots across the different accessible dimensions. Treasures are marked with a red "X" on the map, and the player needs to use the Pixl Fleep to flip the spot marked with the red "X".
Objects[edit]
A list of interactive objects that Mario and company can encounter during their quest.
| Name | Image | Effect |
|---|---|---|
| Navigation objects | ||
| Charold's boat | 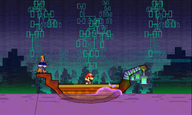
|
A boat which Charold can use to ferry the player safely across the River Twygz. |
| Colored floor | Blue and red floating platforms which appear and disappear based on the color of nearby floor switches in The Dotwood Tree. | |
| Door | 
|
Usually featuring a large star in the center, doors lead between different areas or rooms. The dimensional doors allow access to various locations from the Flipside and Flopside Towers. Larger doorways called Space Gates require Squirps' help to unlock. |
| Elevator | 
|
Elevators can be used to traverse between floors in Flipside, Flopside, and Fort Francis. Red arrow buttons mark the locations of elevators in the former two towns. |
| Flipping rectangles | 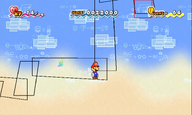
|
When standing in the red squares, Mario and co. will be passed off between multiple flipping rectangles before being dropped off at another point. |
| Floating rock | 
|
Rocky platforms from Gloam Valley which float in the water, but will sink when stood on. |
| Geysers | 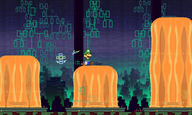
|
Orange water geysers which flow in an area deep below the River Twygz, rising up and down over time. |
| Jump platform |  
|
Landing on a jump platform will bounce the playable character up. Blue ones allow the player to retain control during the jump, whilst red ones launch the character towards a fixed location. |
| Jump-over cloud | Large flat clouds with eyes, which function identically to blue jump platforms. One cloud named Cyrrus can launch Mario and co. much higher once given a Red Apple. | |
| Ladder | 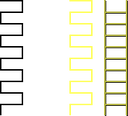
|
Flat objects which can be climbed to reach higher areas. Some appear from blocks. Bowser is unable to climb these whenever he attempts to. |
| Lever |   
|
Levers which Red and Green use to operate their bridges, and Mario and co. use to control the water level in the tunnels beneath the River Twygz. |
| Lift | Floating platforms in a variety of sizes that help with navigating certain areas. | |
| Minecart | 
|
A wheeled vehicle which can be ridden along the tracks in the Floro Caverns. |
| Red wind | 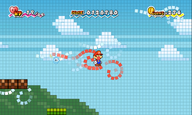
|
Rideable winds that can carry the player. |
| Sign | 
|
Provides helpful information pertaining to the area. Signs near both Merlon and Nolrem's houses list in-game statistics. |
| Squarp hole | 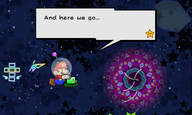
|
Kaleidoscopic wormholes used to navigate between areas of Outer Space. |
| Warp Pipe | 
|
Pipes used for traveling between certain areas. Welderberg can build blue pipes, which serve as shortcuts to the Pit of 100 Trials entrances in both Flipside and Flopside, and between the Second Floor of both cities. |
| Blocks and containers | ||
| ! Switch |  
|
Colored blocks which trigger events when hit or jumped on, often involved in puzzles. Can also be found in the form of pressure-activated switches. |
| ? Block | 
|
Its contents are released when struck by jumping beneath them, using various Pixl abilities, or via Bowser's Fire Breath. Some ? Blocks are hidden, or disguised as brick blocks. |
| Brick block | 
|
Can be broken by jumping beneath them, using various Pixl abilities, or via Bowser's Fire Breath. Some are disguised as Hard Blocks, with their true form visible in 3-D. Bricks found in the Flipside and Flopside Pits of 100 Trials are indestructible. |
| Cloud Block | 
|
Cloud-shaped blocks that serve as platforms. They are only found in the skies of Mount Lineland. |
| Coin Block | 
|
Rewards one coin per strike until a certain amount of time passes. They are disguised as brick blocks from the front, with their true form visible in 3-D. |
| Empty Block | 
|
The form that a ? Block or Coin Block takes after being struck. It still reacts to hits but cannot be destroyed. |
| Flip block | 
|
Flat blocks that can flip from 2-D to 3-D or vice versa when hit from below, often used as platforms to reach higher areas. |
| Gravity Switch |  
|
Flat black blocks with white outlines and symbols. When struck these alter the direction of gravity for the user; gravity either inverts vertically or shifts 90 degrees clockwise based on the arrow symbol. |
| Heart Pillar | 
|
Pillars scattered around Flipside and Flopside, which house the eight Pure Hearts and must be visited to unlock each dimensional door. |
| Rift | Indicators of objects which are hidden from the player. Using Fleep on a rift will reveal the item or object. Some only appear in certain situations, such as during Chapter 8-3. | |
| Save Block | 
|
Colorful blocks which open a prompt to save game progress when struck. |
| Star Block | 
|
Larger blocks found at the end of most levels. Striking one from below begins the END OF CHAPTER cinematic, before advancing to the next level or returning to Flipside or Flopside. |
| Stone block | 
|
Large pushable blocks found in the tunnels beneath the River Twygz. They can be used to reach higher areas while the water is drained. |
| Throw block | 
|
A throwable block requiring Thoreau's ability to lift. These blocks are used in various puzzles. |
| Treasure chest | 
|
Treasure chests contain Important Things, items, or keys. The bigger variants typically contain Pixls or items to strengthen the stats of Mario, Peach, Bowser, and Luigi. |
| Miscellaneous | ||
| Bomb | A bomb that Boomer can transform into, useful for destroying cracked walls, enemies and other objects. Ninjoes and related enemies can transform into decoy bombs when attacked. | |
| Hammer | 
|
A hammer summoned when using Cudge's ability. This doubles attack power against enemies and can break yellow blocks. |
| Dark Prognosticus | 
|
The book of prophecies which Count Bleck follows to summon the Chaos Heart and destroy all worlds. |
| Light Prognosticus | 
|
A book created by the Tribe of Ancients to combat the negative fortellings of the Dark Prognosticus. Merlon uses it to guide Mario and co. towards preventing The Void from consuming all worlds. |
Shops[edit]
Spread throughout the dimensions are numerous shops, most of them being run by Howzit. Some shops are located in tiny houses, called "Itty Bits". Here, the player can purchase items for coins, sell items, store items, pick up stored items, and earn "Shop Points", which can be obtained every time an item is purchased. After reaching certain milestones with the Shop Points, the player is gifted with special items, reaching from a Cake Mix to a Catch Card of the special rarity class.
Audience[edit]
The audience is a group of generic creatures who appear whenever Mario, Peach, Bowser, or Luigi attacks an enemy and does a stylish move, which is done by shaking the Wii Remote when stomping on an enemy. The audience in this game consists of Toads, Goombas, Koopa Troopas, and Shy Guys, only a handful of species from the previous game. They appear on the sides of the screen and say "Nice", "Good", "Great", "Wonderful", and "Excellent". This approval of the Crowd gives the player a higher score than if they had just jumped on the enemy. By doing this, the player can get more points faster.
Bosses[edit]
Bold text indicates a chapter boss.
| Chapter | Image | Name | HP | Attack | Defense | Score | Location |
|---|---|---|---|---|---|---|---|
| Chapter 1 | O'Chunks (1) | 20 | 1 | 0 | 1000 | Yold Desert | |
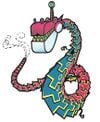
|
Fracktail | ?? (9 hits) |
1 | 0 | 1000 | Yold Ruins | |
| Chapter 2 | 
|
Mimi (1) | ?? (6 hits) |
1 | 0 | 2000 | Merlee's Basement |
| Chapter 3 | Bowser (1) | 20 | 2 | 1 | 2000 | The Bitlands | |

|
Big Blooper | ?? (3 hits) |
2 | 0 | 0 | The Tile Pool | |

|
Dimentio (1) | 30 | 2 | 0 | 1000 | The Dotwood Tree | |

|
Francis (1) | 40 | 1 | 0 | 3000 | Fort Francis | |
| Chapter 4 | Mr. L | 40 | 3 | 0 | 2000 | Whoa Zone | |
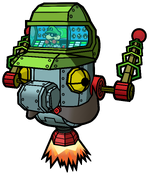
|
Brobot | 255 | 4 | 3 (6 against fire) |
4000 | ||
| Chapter 5 | O'Chunks (2 & 3) | 40 | 2 | 0 | 2000 | Gap of Crag | |
| 60 | 3 | 0 | 4000 | Floro Caverns | |||
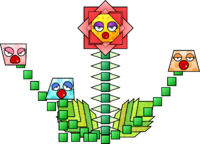
|
King Croacus | 50 | 2 | 0 | 5000 | ||
| Chapter 6 | Mimi (2) | 25 | 2 | 0 | 4000 | Sammer's Early Duels | |
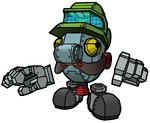
|
Brobot L-type | 64 | 5 | 4 (8 against fire) |
6000 | World of Nothing | |
| Chapter 7 | Bowser (2) | 80 | 8 | 2 | 4000 | Underwhere Road | |
| Underchomp | 48 (16 each) |
3 | 4 | 6000 | |||
|
Bonechill | 80 | 4 | 0 | 7000 | The Overthere | |
| Chapter 8 | O'Chunks (4) | 100 | 4 | 0 | 8000 | Castle Bleck Entry | |

|
Francis (2)1 | 40 | 1 | 0 | 3000 | Castle Bleck Foyer | |

|
Mimi (3) | ?? (6 hits) |
4 | 0 | 8000 | ||

|
Dimentio (2) | 80 | 4 | 0 | 8000 | Castle Bleck Interior | |

|
Count Bleck | 150 | 8 | 0 | 8000 | Castle Bleck Inner Sanctum | |
|
Super Dimentio | 200 | 6 | 0 (head) 4 (body) |
9990 | ||
| Optional | 
|
Wracktail | ?? (30 hits) |
10 | 0 | 9990 | Flipside Pit of 100 Trials |
| Shadoo | 400 (100 each) |
10 (Dark Bowser: 20) |
0 (Dark Bowser: 4) |
39960 (9990 each) |
Flopside Pit of 100 Trials | ||
| End Boss | 99 | 10 | 4 | 5000 | Sammer's Endgame |
1 - Francis can only be fought in Chapter 8-2 if the player chooses him when asked about which enemies they hate.
Obstacles[edit]
| Name | Image | Description | Locations |
|---|---|---|---|
| Bottomless pit | 
|
Falling into a pit causes the player to lose 1 HP. | All locations except: |
| Candle | 
|
Candles which sometimes shoot out flames at the player. | Merlee's Basement |
| Cracks | Walls or other objects with visible cracks in them can be blown up using Boomer's ability. When on the ground they can also be broken using Thudley. | Flipside Gloam Valley The Bitlands Floro Caverns Castle Bleck Foyer | |
| Dark | 
|
Blocks the player's view. Can be temporarily cleared by lighting torches with Bowser's Fire Breath. | Underwhere Road |
| Door cage | 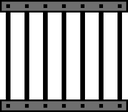
|
Cages which block access to certain doors until activating something, i.e. using Thoreau or Thudley to escape their respective rooms after they join Mario's party. | Yold Town The Tile Pool Sammer's Kingdom Overthere Stair Castle Bleck Interior |
| Electrical barrier | 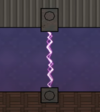
|
A moving wall of electricity that will cause the player to lose 1 HP if touched. | Merlee's Mansion |
| Fire Bar | A bar of fire that will cause the player to lose 1 HP if touched. | Yold Ruins Castle Bleck Foyer | |
| Floro Sapien Scanner | 
|
A processing unit which automatically inspects all visitors to King Croacus IV's chambers. Wearing a Floro Sprout allows Mario and co. to walk through. | Floro Caverns |
| Hedron | 
|
Rotating walls that will cause the player to take damage on contact. | Outer Limits |
| Lock | 
|
These can be found on certain doors, requiring the appropriate key to be unlocked. | Flipside Flopside Yold Ruins Fort Francis Woah Zone Floro Caverns The Underwhere The Overthere Castle Bleck |
| Passcode keypad |  
|
Keypads which require the correct password to unlock a connected door or safe. | Merlee's Mansion Fort Francis |
| Piccolo stone | 
|
Red-tinted stones which are removed when using Piccolo's ability nearby, revealing hidden chests. In Flipside, this stone bears her emblem. | Flipside Flopside (3rd Floor) |
| Post | Using Thudley on these posts can pound them into the ground, or in some cases pull them out. | Flipside The Tile Pool Dotwood Tree | |
| Quicksand | 
|
Sand that sinks the player, causing them to lose 1 HP if they sink deep enough. | Yold Desert Yold Ruins |
| Security door | 
|
Fires laser beams if Mario or Bowser attempt to enter. | Fort Francis |
| Spike Trap | 
|
Pointy obstacles that causes the player to lose 1 HP. | The Dotwood Tree Fort Francis The Underwhere Castle Bleck Foyer |
| Spiked ceiling | Ceiling covered in spikes which will fall gradually. If the player doesn't escape in time, it will cause a Game Over. | Merlee's Mansion | |
| Trap door | 
|
Forces the player to fall if they grab the Mushroom hanging by a string. | Merlee's Mansion Castle Bleck Foyer |
| Yellow block | 
|
Blocks which require Cudge to break, often barring access to doors or other objects. Some are disguised from the front, with their true form visible in 3-D. | Gap of Crag Floro Caverns Flopside |
Side-quests[edit]
Duel of 100[edit]
- Main article: Duel of 100
After completion of the game, the player may return to Sammer's Kingdom to fully complete the Duel of 100 by defeating all 100 Sammer Guys. After the duel, King Sammer awards the player with Catch Cards of the partners from Paper Mario: The Thousand-Year Door.
Pits of 100 Trials[edit]
- Main article: Flipside Pit of 100 Trials
- Main article: Flopside Pit of 100 Trials
The pits of 100 Trials are found in the outskirts of Flipside and Flopside, respectively. The pits each contain 100 rooms, each containing several enemies with one holding the key to the next room. The 100th room of the Flipside Pit contains Wracktail. The Flopside Pit is similar to the first, but with more powerful dark versions of enemies. It can only be accessed after the Flipside Pit is cleared and must be completed twice to battle the boss, Shadoo. The prize for completing the Flipside Pit is the Pixl Dashell, while the Flopside Pit awards cards of the playable characters and their dark versions.
The Flipside Arcade[edit]
- Main article: Flipside Arcade
The Flipside Arcade is found in a beveragarium in Flipside. There, the player may play four minigames, one of which is unlocked via the Golden Card.
- Forget Me Not - A card matching game with familiar characters from the game. Missing three times in one round is a game over.
- Mansion Patrol - A shooting game that involves the character shooting Boos to get points. This game marks one of the only appearances of Toads in the entire game, other than at the start of the game, where Toad himself appears.
- Tilt Island - The player uses the Wii Remote to tilt a small "island" of sorts while collecting food items and dodging enemies. The more items collected, the higher the player's score is.
- Hammer Whacker (Unlockable with Golden Card) -The player holds a large hammer and whacks giant shells back at the Koopa Striker, who hits the shells towards the player.
Piccolo[edit]
- Main article: Piccolo
Piccolo is an optional Pixl that can be found in a locked house in Flopside. A series of trade quests must be finished in order to obtain the key. The sidequest is activated by talking to Merlee in Flopside from behind the crystal ball.
Pre-release and unused content[edit]
Mario Dand was originally developed as a title for the Nintendo DS under the same name.
- You cannot be 666 in the release of the game, just in version Beta 3.0 (to make this bug you make the Konami code with the Wii remote).
- Originally had to be some of the "FAP-ized" characters for the audience, but were replaced because of being complicated to make animations for all in one month. But one of them still remain for the release of the game.
Regional differences[edit]
Same of Super Paper Mario, but with more:
- When you name the avatar you can't name it with every bad word or something offensive.
Glitches[edit]
Same of Super Paper Mario.
Names in different languages[edit]
| Language | Name | Meaning | Notes |
|---|---|---|---|
| Portuguese (NOA) | Mário Dandy | Mario Dandy | |
| Spanish (NOA) | Mario Dandi | Mario Dandy |
Extra info[edit]
- Poochy & Yoshi's Woolly World
- Mario & Luigi: Bowser's Inside Story + Bowser Jr.'s Journey
- Mario & Sonic at the Sochi 2014 Olympic Winter Games
- Super Mario
- Luigi's Mansion
- Yoshi's Island
- King Bowser's Castle
- Power Shot
- World 5
- World 5
This year is the 40th anniversary of Mario. Therefore it will be a big year for Mario. A page on the Mario 40th anniversary will be made as soon as it’s officially announced.
Happy new year. Donkey country returns hd officially release in 15 days.
