Kong-Fused Cliffs: Difference between revisions
(Added French translation and meaning.) |
m (Text replacement - "(\| *)Jap([RMCN\d]* *=)" to "$1Jpn$2") |
||
| (40 intermediate revisions by 25 users not shown) | |||
| Line 1: | Line 1: | ||
{{level | {{level infobox | ||
|image=[[File:Kong-Fused Cliffs.png]] | |||
|image=[[ | |||
|code=6 - 2 | |code=6 - 2 | ||
|world=[[Razor Ridge]] | |||
|game=''[[Donkey Kong Country 3: Dixie Kong's Double Trouble!]] | |game=''[[Donkey Kong Country 3: Dixie Kong's Double Trouble!]] | ||
| | |track=Rockface Rumble | ||
|before=[[Buzzer Barrage|<<]] | |before=[[Buzzer Barrage|<<]] | ||
|after=[[Floodlit Fish|>>]] | |after=[[Floodlit Fish|>>]] | ||
}} | }} | ||
'''Kong-Fused Cliffs''' is the twenty-seventh [[level]] in | '''Kong-Fused Cliffs''' is the twenty-seventh [[level]] in ''[[Donkey Kong Country 3: Dixie Kong's Double Trouble!]]'' It is also the second area of [[Razor Ridge]]. In this cliff level, [[Dixie Kong]] and [[Kiddy Kong]] have to climb up ropes, while the ropes themselves are being burnt from the bottom up; this means they must constantly climb to outpace the flame and ensure their safety. [[Buzz (enemy)|Buzz]] and [[Kopter]] are the only enemies encountered in the stage, serving as obstacles along the climb upward. Some secret areas are found by following [[banana]] trails, leading to acquiring items such as [[KONG Letters|K-O-N-G Letters]], or finding a [[Bonus Barrel]]. | ||
==Layout== | |||
[[File:Kong-Fused Cliffs GBA Star Barrel.png|thumb|left|Kong-Fused Cliffs in the Game Boy Advance version]] | |||
When the level begins, the Kongs should climb up the rope lit up by a small flame. As the flame rises, they need to continue to move upwards. The monkeys, after traveling between thin openings in the mountains, get in a barrel to blast to the letter K and back onto the rope. Higher up, they pass several [[Buzz (enemy)|Buzz]]es and [[Kopter]]s, moving along the sides of the rope. Soon, the monkeys reach the end of the rope and jump to the second rope. This rope leads them to more enemies. Whilst the Kongs climb this rope, Kopters fly in from both sides. Eventually, they reach the letter O and hop over to the level's third rope. As they climb up this rope, they find the [[Star Barrel]]. | |||
About halfway into the level, the apes should continue their journey and climb between a few groups of Buzzes, some circling the area. Soon, they find a Kopter right in their path, so they need to jump into a nearby [[Barrel Cannon]] to blast over it. After passing some more Buzzes, [[Dixie Kong]] and [[Kiddy Kong]] find the letter N to the left. They should jump to the letter and be caught by another Barrel Cannon. The barrel then blasts them back onto the flaming rope. After that, the monkeys avoid a Buzz moving in a C shaped pattern, and later, a group of three Buzzes flying back and fourth through the open area is found. Climbing higher, the apes soon encounter some Kopters hovering towards them. They should maneuver around the rope to dodge the enemies and continue to avoid them the rest of the way. Eventually, the Kongs climb all the way to the highest point in the mountain, where they find a flagpole to the right. Jumping off of the rope before getting burnt, they should raise its flag to end the level. | |||
{{br|left}} | |||
== | ==Enemies== | ||
*[[Buzz (enemy)|Buzz]] | |||
*[[Kopter]] | |||
==Items and objects== | |||
The following items and objects appear in the following quantities: | |||
<gallery> | |||
Banana Bunch DKC SNES.png|[[Banana Bunch]] (2) | |||
Bear Coin.png|[[Bear coin]] (2) | |||
DK Barrel.png|[[DK Barrel]] (3) | |||
</gallery> | |||
===K-O-N-G Letters=== | |||
[[File:Kong-FusedCliffs-GBA-O.png|thumb|The letter O, as seen in the Game Boy Advance version]] | |||
*'''K:''' Collected by jumping into an Arrow Barrel at the beginning of the level. | |||
*'''O:''' Found above two Buzzes circling an area west of the first Bonus Barrel. It becomes unobtainable if the Kongs jump into the Bonus Barrel first. | |||
*'''N:''' A trail of bananas will lead Dixie/Kiddy into the "N" Letter, and an Arrow Barrel is provided to get the heroes back on the rope. | |||
*'''G:''' An Auto-Fire Barrel near some Kopters will launch the heroes into the "G" Letter and two Banana Bunches. | |||
{{br}} | |||
== | ===DK Coin=== | ||
At the end of the rope, right before the ceiling, the Kongs must jump to the left side to land on a cliff with a [[Steel Keg]] on it (alternatively, they can reach it by standing on a nearby wooden platform, then having Kiddy use a [[Team-up]] throw to toss Dixie over the cliff). There is a [[Koin]] hidden inside a tunnel right below the Steel Keg. The Kongs must pick up the item and throw it to the left side, remaining on that very same spot to ensure the hidden Koin is looking up to them. The Steel Keg will hit a near wall and recoil back into the tunnel, defeating Koin. Dixie and Kiddy then must walk into the tunnel to pick up the [[DK Coin]]. | |||
* | |||
==Bonus Levels== | |||
{{multiframe|[[File:Kong-Fused Cliffs Bonus Level 1.png|200px]] [[File:Kong-Fused Cliffs GBA Bonus Level 2.png|200px]]|size=420|The first and second Bonus Levels, respectively}} | |||
Kong-Fused Cliffs has two [[Bonus room|Bonus Levels]], listed by type: | |||
*'''''Find the Coin!''''': Shortly before the letter O, the Kongs climb up the second rope and find a banana on a steep hill to the right. They should get onto the hill and walk up to find a [[Bonus Barrel]], indicated by a trail of bananas near two Buzzes. In the [[Bonus Level]], Dixie and Kiddy have 15 seconds to get the [[Bonus Coin (Donkey Kong franchise)|Bonus Coin]] at the top. They must climb another flaming rope, and as they progress, the Kongs must jump into Arrow Barrels to shoot around some Buzzes in the center of their path. | |||
*'''''Find the Coin!''''': Shortly after the letter N, the Kongs find a trail of bananas to the right. They must jump to the bananas to be caught into a hidden Barrel Cannon, which blasts them into a Bonus Barrel. Like the first Bonus Level, the Kongs have 15 seconds to collect the Bonus Coin at the top. They must climb a rapidly-burning rope while dodging several Kopters descending from the left and right. | |||
== | ==Gallery== | ||
<gallery> | |||
Kong-Fused Cliffs Kopter.png|Kiddy climbing by a Kopter | |||
</gallery> | |||
==Names in | ==Names in other languages== | ||
{{ | {{foreign names | ||
| | |Jpn=ファイヤーロープ パニック | ||
| | |JpnR=Faiyārōpu panikku | ||
| | |JpnM=Fire Rope Panic | ||
|Spa= | |Spa=Kolinas Kong | ||
|SpaM=Kong Hills | |SpaM=Kong Hills, with a "K" instead of a "C" in the word "Colinas" | ||
| | |Fre=Kollines Kong-Fuses | ||
| | |FreM=Kong-Fused Hills | ||
|Ger=Lunten-Lupf | |||
|GerM=Fuse-Lob | |||
|Ita=Occhio alla Miccia | |||
|ItaM=Eye to the Fuse | |||
}} | }} | ||
{{DKC3}} | {{DKC3}} | ||
[[Category:Mountains]] | [[Category:Mountains]] | ||
[[ | [[Category:Donkey Kong Country 3: Dixie Kong's Double Trouble! levels]] | ||
Latest revision as of 11:21, January 7, 2025
| Level | |
|---|---|
| Kong-Fused Cliffs | |
| |
| Level code | 6 - 2 |
| World | Razor Ridge |
| Game | Donkey Kong Country 3: Dixie Kong's Double Trouble! |
| Music track | Rockface Rumble |
| << Directory of levels >> | |
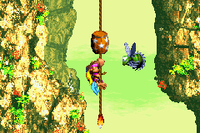
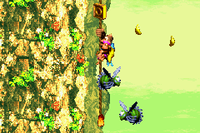
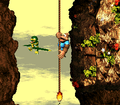
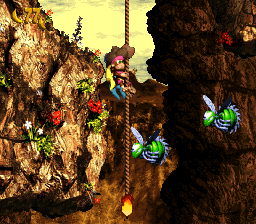
Kong-Fused Cliffs is the twenty-seventh level in Donkey Kong Country 3: Dixie Kong's Double Trouble! It is also the second area of Razor Ridge. In this cliff level, Dixie Kong and Kiddy Kong have to climb up ropes, while the ropes themselves are being burnt from the bottom up; this means they must constantly climb to outpace the flame and ensure their safety. Buzz and Kopter are the only enemies encountered in the stage, serving as obstacles along the climb upward. Some secret areas are found by following banana trails, leading to acquiring items such as K-O-N-G Letters, or finding a Bonus Barrel.
Layout[edit]
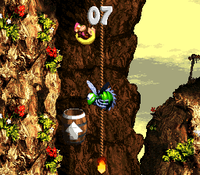
When the level begins, the Kongs should climb up the rope lit up by a small flame. As the flame rises, they need to continue to move upwards. The monkeys, after traveling between thin openings in the mountains, get in a barrel to blast to the letter K and back onto the rope. Higher up, they pass several Buzzes and Kopters, moving along the sides of the rope. Soon, the monkeys reach the end of the rope and jump to the second rope. This rope leads them to more enemies. Whilst the Kongs climb this rope, Kopters fly in from both sides. Eventually, they reach the letter O and hop over to the level's third rope. As they climb up this rope, they find the Star Barrel.
About halfway into the level, the apes should continue their journey and climb between a few groups of Buzzes, some circling the area. Soon, they find a Kopter right in their path, so they need to jump into a nearby Barrel Cannon to blast over it. After passing some more Buzzes, Dixie Kong and Kiddy Kong find the letter N to the left. They should jump to the letter and be caught by another Barrel Cannon. The barrel then blasts them back onto the flaming rope. After that, the monkeys avoid a Buzz moving in a C shaped pattern, and later, a group of three Buzzes flying back and fourth through the open area is found. Climbing higher, the apes soon encounter some Kopters hovering towards them. They should maneuver around the rope to dodge the enemies and continue to avoid them the rest of the way. Eventually, the Kongs climb all the way to the highest point in the mountain, where they find a flagpole to the right. Jumping off of the rope before getting burnt, they should raise its flag to end the level.
Enemies[edit]
Items and objects[edit]
The following items and objects appear in the following quantities:
Banana Bunch (2)
Bear coin (2)
DK Barrel (3)
K-O-N-G Letters[edit]
- K: Collected by jumping into an Arrow Barrel at the beginning of the level.
- O: Found above two Buzzes circling an area west of the first Bonus Barrel. It becomes unobtainable if the Kongs jump into the Bonus Barrel first.
- N: A trail of bananas will lead Dixie/Kiddy into the "N" Letter, and an Arrow Barrel is provided to get the heroes back on the rope.
- G: An Auto-Fire Barrel near some Kopters will launch the heroes into the "G" Letter and two Banana Bunches.
DK Coin[edit]
At the end of the rope, right before the ceiling, the Kongs must jump to the left side to land on a cliff with a Steel Keg on it (alternatively, they can reach it by standing on a nearby wooden platform, then having Kiddy use a Team-up throw to toss Dixie over the cliff). There is a Koin hidden inside a tunnel right below the Steel Keg. The Kongs must pick up the item and throw it to the left side, remaining on that very same spot to ensure the hidden Koin is looking up to them. The Steel Keg will hit a near wall and recoil back into the tunnel, defeating Koin. Dixie and Kiddy then must walk into the tunnel to pick up the DK Coin.
Bonus Levels[edit]
Kong-Fused Cliffs has two Bonus Levels, listed by type:
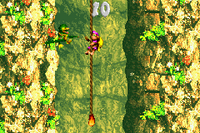
- Find the Coin!: Shortly before the letter O, the Kongs climb up the second rope and find a banana on a steep hill to the right. They should get onto the hill and walk up to find a Bonus Barrel, indicated by a trail of bananas near two Buzzes. In the Bonus Level, Dixie and Kiddy have 15 seconds to get the Bonus Coin at the top. They must climb another flaming rope, and as they progress, the Kongs must jump into Arrow Barrels to shoot around some Buzzes in the center of their path.
- Find the Coin!: Shortly after the letter N, the Kongs find a trail of bananas to the right. They must jump to the bananas to be caught into a hidden Barrel Cannon, which blasts them into a Bonus Barrel. Like the first Bonus Level, the Kongs have 15 seconds to collect the Bonus Coin at the top. They must climb a rapidly-burning rope while dodging several Kopters descending from the left and right.
Gallery[edit]
Names in other languages[edit]
| Language | Name | Meaning | Notes |
|---|---|---|---|
| Japanese | ファイヤーロープ パニック[?] Faiyārōpu panikku |
Fire Rope Panic | |
| French | Kollines Kong-Fuses[?] | Kong-Fused Hills | |
| German | Lunten-Lupf[?] | Fuse-Lob | |
| Italian | Occhio alla Miccia[?] | Eye to the Fuse | |
| Spanish | Kolinas Kong[?] | Kong Hills, with a "K" instead of a "C" in the word "Colinas" |
