Gallery:Mario vs. Donkey Kong: Difference between revisions
LinkTheLefty (talk | contribs) mNo edit summary |
TheRaoul1992 (talk | contribs) |
||
| (10 intermediate revisions by 5 users not shown) | |||
| Line 84: | Line 84: | ||
MvsDK ConveyorBelt.png|[[Conveyor Belt]] | MvsDK ConveyorBelt.png|[[Conveyor Belt]] | ||
MvsDK DonutLift.png|[[Donut Block]] | MvsDK DonutLift.png|[[Donut Block]] | ||
MarioVsDK Door.png|[[Key Door|Door]] | |||
MvsDK Elevator.png|[[Elevator]] | MvsDK Elevator.png|[[Elevator]] | ||
MvsDK SandBlockDKJungle.png|[[Sand block]]s ([[Donkey Kong Jungle (world)|Donkey Kong Jungle]]) | MvsDK SandBlockDKJungle.png|[[Sand block]]s ([[Donkey Kong Jungle (world)|Donkey Kong Jungle]]) | ||
| Line 89: | Line 90: | ||
MvsDK SandBlockMysticForest.png|Sand blocks ([[Mystic Forest]]) | MvsDK SandBlockMysticForest.png|Sand blocks ([[Mystic Forest]]) | ||
MvsDK SandBlockFireMountainPlus.png|Sand blocks ([[Fire Mountain Plus]]) | MvsDK SandBlockFireMountainPlus.png|Sand blocks ([[Fire Mountain Plus]]) | ||
MvsDK TrashCanitem.png|[[ | MvsDK TrashCanitem.png|[[Trash Can|Garbage Can]] | ||
Barrel MvsDK.png|[[Barrel]] | Barrel MvsDK.png|[[Barrel]] | ||
MvsDK Hammer.png|[[Hammer]] | MvsDK Hammer.png|[[Hammer]] | ||
| Line 120: | Line 121: | ||
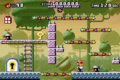
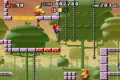
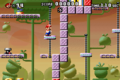
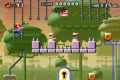
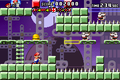
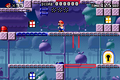
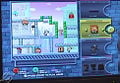
MVDK 1-1 2.png|Second part of [[Level 1-1 (Mario vs. Donkey Kong)|Level 1-1]] | MVDK 1-1 2.png|Second part of [[Level 1-1 (Mario vs. Donkey Kong)|Level 1-1]] | ||
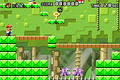
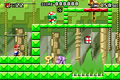
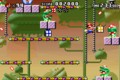
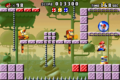
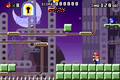
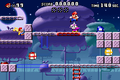
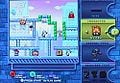
MVDK 1-2 1.png|First part of [[Level 1-2 (Mario vs. Donkey Kong)|Level 1-2]] | MVDK 1-2 1.png|First part of [[Level 1-2 (Mario vs. Donkey Kong)|Level 1-2]] | ||
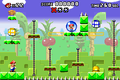
MVDK 1-2 2.png|Second part of [[Level 1-2 (Mario vs. Donkey Kong)|Level 1-2]] | |||
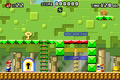
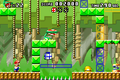
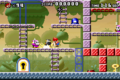
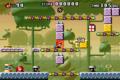
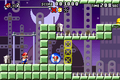
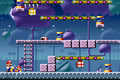
MVDK 1-3 1.png|First part of [[Level 1-3 (Mario vs. Donkey Kong)|Level 1-3]] | MVDK 1-3 1.png|First part of [[Level 1-3 (Mario vs. Donkey Kong)|Level 1-3]] | ||
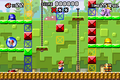
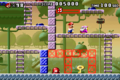
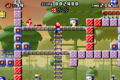
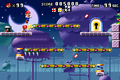
MVDK 1-3 2.png|Second part of [[Level 1-3 (Mario vs. Donkey Kong)|Level 1-3]] | MVDK 1-3 2.png|Second part of [[Level 1-3 (Mario vs. Donkey Kong)|Level 1-3]] | ||
| Line 181: | Line 182: | ||
<gallery heights="80"> | <gallery heights="80"> | ||
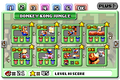
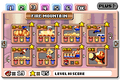
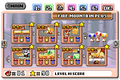
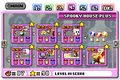
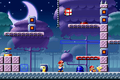
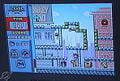
MVDKWorld4.png|[[Spooky House]] level selection screen | MVDKWorld4.png|[[Spooky House]] level selection screen | ||
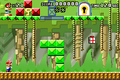
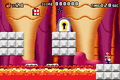
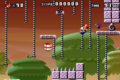
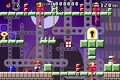
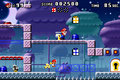
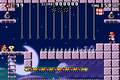
MVDK 4-1 1.png|First part of [[Level | MVDK 4-1 1.png|First part of [[Level 5-1 (Mario vs. Donkey Kong)|Level 4-1]] | ||
MVDK 4-1 2.png|Second part of [[Level | MVDK 4-1 2.png|Second part of [[Level 5-1 (Mario vs. Donkey Kong)|Level 4-1]] | ||
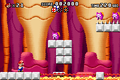
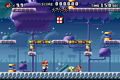
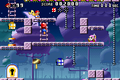
MVDK 4-2 1.png|First part of [[Level | MVDK 4-2 1.png|First part of [[Level 5-2 (Mario vs. Donkey Kong)|Level 4-2]] | ||
MvsDK 4-2.png|Second part of [[Level | MvsDK 4-2.png|Second part of [[Level 5-2 (Mario vs. Donkey Kong)|Level 4-2]] | ||
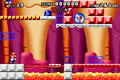
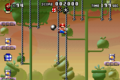
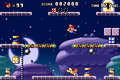
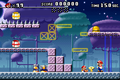
MVDK 4-3 1.png|First part of [[Level | MVDK 4-3 1.png|First part of [[Level 5-3 (Mario vs. Donkey Kong)|Level 4-3]] | ||
MVDK 4-3 2.png|Second part of [[Level | MVDK 4-3 2.png|Second part of [[Level 5-3 (Mario vs. Donkey Kong)|Level 4-3]] | ||
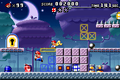
MVDK 4-4 1.png|First part of [[Level | MVDK 4-4 1.png|First part of [[Level 5-4 (Mario vs. Donkey Kong)|Level 4-4]] | ||
MVDK 4-4 2.png|Second part of [[Level | MVDK 4-4 2.png|Second part of [[Level 5-4 (Mario vs. Donkey Kong)|Level 4-4]] | ||
MVDK 4-5 1.png|First part of [[Level | MVDK 4-5 1.png|First part of [[Level 5-5 (Mario vs. Donkey Kong)|Level 4-5]] | ||
MVDK 4 - 5.png|Second part of [[Level | MVDK 4 - 5.png|Second part of [[Level 5-5 (Mario vs. Donkey Kong)|Level 4-5]] | ||
MVDK 4-6 1.png|First part of [[Level | MVDK 4-6 1.png|First part of [[Level 5-6 (Mario vs. Donkey Kong)|Level 4-6]] | ||
MVDK 4-6 2.png|Second part of [[Level | MVDK 4-6 2.png|Second part of [[Level 5-6 (Mario vs. Donkey Kong)|Level 4-6]] | ||
MVDK 4-mm.png|[[Level 4-mm]] | MVDK 4-mm.png|[[Level 5-mm|Level 4-mm]] | ||
SpookyHouseBossFight.png|[[Level 4-DK]] | SpookyHouseBossFight.png|[[Level 5-DK|Level 4-DK]] | ||
MVDK World 4 End.png|End screen of Spooky House | MVDK World 4 End.png|End screen of Spooky House | ||
MVDK World 4 End (No Text).png|End screen of Spooky House (no text) | MVDK World 4 End (No Text).png|End screen of Spooky House (no text) | ||
| Line 202: | Line 203: | ||
<gallery heights="80"> | <gallery heights="80"> | ||
MVDK Mystic Forest Level Select.png|[[Mystic Forest]]'s level selection screen | MVDK Mystic Forest Level Select.png|[[Mystic Forest]]'s level selection screen | ||
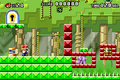
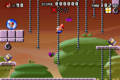
MVDK 5-1 Part 1.png|First part of [[Level | MVDK 5-1 Part 1.png|First part of [[Level 7-1|Level 5-1]] | ||
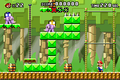
MVDK 5-1 Part 2.png|Second part of Level 5-1 | MVDK 5-1 Part 2.png|Second part of Level 5-1 | ||
MVDK 5-2 Part 1 (1).png|First part of [[Level | MVDK 5-2 Part 1 (1).png|First part of [[Level 7-2|Level 5-2]] | ||
MVDK 5-2 Part 1 (2).png|First part of Level 5-2 | MVDK 5-2 Part 1 (2).png|First part of Level 5-2 | ||
MVDK 5-2 Part 2 (1).png|Second part of Level 5-2 | MVDK 5-2 Part 2 (1).png|Second part of Level 5-2 | ||
MVDK 5-2 Part 2 (2).png|Second part of Level 5-2 | MVDK 5-2 Part 2 (2).png|Second part of Level 5-2 | ||
MVDK 5-3 Part 1.png|First part of [[Level | MVDK 5-3 Part 1.png|First part of [[Level 7-3|Level 5-3]] | ||
MVDK 5-3 Part 2.png|Second part of Level 5-3 | MVDK 5-3 Part 2.png|Second part of Level 5-3 | ||
MVDK 5-4 Part 1 (1).png|First part of [[Level | MVDK 5-4 Part 1 (1).png|First part of [[Level 7-4|Level 5-4]] | ||
MVDK 5-4 Part 1 (2).png|First part of Level 5-4 | MVDK 5-4 Part 1 (2).png|First part of Level 5-4 | ||
MVDK 5-4 Part 2 (1).png|Second part of Level 5-4 | MVDK 5-4 Part 2 (1).png|Second part of Level 5-4 | ||
MVDK 5-4 Part 2 (2).png|Second part of Level 5-4 | MVDK 5-4 Part 2 (2).png|Second part of Level 5-4 | ||
MVDK 5-5 Part 1 (1).png|First part of [[Level | MVDK 5-5 Part 1 (1).png|First part of [[Level 7-5|Level 5-5]] | ||
MVDK 5-5 Part 1 (2).png|First part of Level 5-5 | MVDK 5-5 Part 1 (2).png|First part of Level 5-5 | ||
MVDK 5-5 Part 2 (1).png|Second part of Level 5-5 | MVDK 5-5 Part 2 (1).png|Second part of Level 5-5 | ||
MVDK 5-5 Part 2 (2).png|Second part of Level 5-5 | MVDK 5-5 Part 2 (2).png|Second part of Level 5-5 | ||
MVDK 5-6 Part 1 (1).png|First part of [[Level | MVDK 5-6 Part 1 (1).png|First part of [[Level 7-6|Level 5-6]] | ||
MVDK 5-6 Part 1 (2).png|First part of Level 5-6 | MVDK 5-6 Part 1 (2).png|First part of Level 5-6 | ||
MVDK 5-6 Part 2 (1).png|Second part of Level 5-6 | MVDK 5-6 Part 2 (1).png|Second part of Level 5-6 | ||
MVDK 5-6 Part 2 (2).png|Second part of Level 5-6 | MVDK 5-6 Part 2 (2).png|Second part of Level 5-6 | ||
MVDK 5-MM (1).png|[[Level 5-mm]] | MVDK 5-MM (1).png|[[Level 7-mm|Level 5-mm]] | ||
MVDK 5-MM (2).png|Level 5-mm | MVDK 5-MM (2).png|Level 5-mm | ||
MVDK 5-DK.png|[[Level 5-DK]] | MVDK 5-DK.png|[[Level 7-DK|Level 5-DK]] | ||
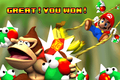
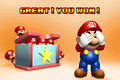
MVDK 5-DK Victory.png|Victory picture after beating Level 5-DK | MVDK 5-DK Victory.png|Victory picture after beating Level 5-DK | ||
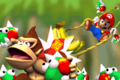
MVDK World 5 End (No Text).png|Victory picture after beating Level 5-DK (no text) | MVDK World 5 End (No Text).png|Victory picture after beating Level 5-DK (no text) | ||
| Line 232: | Line 233: | ||
<gallery heights="80"> | <gallery heights="80"> | ||
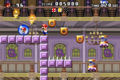
MVDK World 6.png|[[Twilight City]] level selection screen | MVDK World 6.png|[[Twilight City]] level selection screen | ||
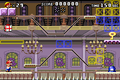
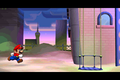
MVDK_6_-_1.png|First part of [[Level | MVDK_6_-_1.png|First part of [[Level 8-1|Level 6-1]] | ||
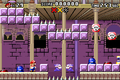
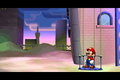
MVDK 6-1 2.png|Second part of Level 6-1 | MVDK 6-1 2.png|Second part of Level 6-1 | ||
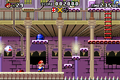
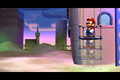
MVDK 6-2 1.png|First part of [[Level | MVDK 6-2 1.png|First part of [[Level 8-2|Level 6-2]] | ||
MVDK 6-2 2.png|Second part of Level 6-2 | MVDK 6-2 2.png|Second part of Level 6-2 | ||
MVDK 6-3 1.png|First part of [[Level | MVDK 6-3 1.png|First part of [[Level 8-3|Level 6-3]] | ||
MVDK 6-3 2.png|Second part of Level 6-3 | MVDK 6-3 2.png|Second part of Level 6-3 | ||
MVDK 6-4 1.png|First part of [[Level | MVDK 6-4 1.png|First part of [[Level 8-4|Level 6-4]] | ||
MVDK 6-4 2.png|Second part of Level 6-4 | MVDK 6-4 2.png|Second part of Level 6-4 | ||
MVDK 6-5 1.png|First part of [[Level | MVDK 6-5 1.png|First part of [[Level 8-5|Level 6-5]] | ||
MVDK 6-5 2.png|Second part of Level 6-5 | MVDK 6-5 2.png|Second part of Level 6-5 | ||
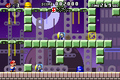
MvsDK_6-6.png|First part of [[Level | MvsDK_6-6.png|First part of [[Level 8-6|Level 6-6]] | ||
MVDK 6-6 2.png|Second part of Level 6-6 | MVDK 6-6 2.png|Second part of Level 6-6 | ||
MVDK 6-mm.png|[[Level 6-mm]] | MVDK 6-mm.png|[[Level 8-mm|Level 6-mm]] | ||
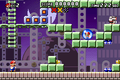
MVDK 6-DK.png|[[Level 6-DK]] | MVDK 6-DK.png|[[Level 8-DK|Level 6-DK]] | ||
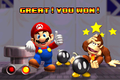
MVDK World 6 End.png|End screen after Level 6-DK | MVDK World 6 End.png|End screen after Level 6-DK | ||
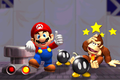
MVDK World 6 End (no text).png|End screen after Level 6-DK without text | MVDK World 6 End (no text).png|End screen after Level 6-DK without text | ||
| Line 252: | Line 253: | ||
====Mario Toy Factory==== | ====Mario Toy Factory==== | ||
<gallery heights="80"> | <gallery heights="80"> | ||
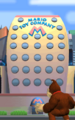
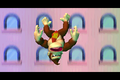
MvsDK W1+.png|[[Mario Toy Factory]] level selection screen | |||
MVDK 1-1+.png|[[Level 1-1+]] | |||
MVDK 1-2+.png|[[Level 1-2+]] | |||
MVDK 1-3+.png|[[Level 1-3+]] | |||
MVDK 1-4+.png|[[Level 1-4+]] | |||
MVDK 1-5+.png|[[Level 1-5+]] | |||
MVDK 1-6+.png|[[Level 1-6+]] | |||
MVDK 1-DK+.png|[[Level 1-DK+]] | |||
Mario Toy Factory End 1.png|End card without text | Mario Toy Factory End 1.png|End card without text | ||
Mario Toy Factory End 2.png|End card with text | Mario Toy Factory End 2.png|End card with text | ||
| Line 295: | Line 296: | ||
<gallery heights="80"> | <gallery heights="80"> | ||
Spooky House Plus.png|[[Spooky House Plus]] level selection screen | Spooky House Plus.png|[[Spooky House Plus]] level selection screen | ||
MVDK Level 4-1+.png|[[Level 4-1+]] | MVDK Level 4-1+.png|[[Level 5-1+|Level 4-1+]] | ||
MVDK Level 4-2+.png|[[Level 4-2+]] | MVDK Level 4-2+.png|[[Level 5-2+|Level 4-2+]] | ||
MVDK Level 4-3+.png|[[Level 4-3+]] | MVDK Level 4-3+.png|[[Level 5-3+|Level 4-3+]] | ||
MVDK Level 4-4+.png|[[Level 4-4+]] | MVDK Level 4-4+.png|[[Level 5-4+|Level 4-4+]] | ||
MVDK Level 4-5+.png|[[Level 4-5+]] | MVDK Level 4-5+.png|[[Level 5-5+|Level 4-5+]] | ||
MVDK Level 4-6+.png|[[Level 4-6+]] | MVDK Level 4-6+.png|[[Level 5-6+|Level 4-6+]] | ||
MVDK Level 4-DK+.png|[[Level 4-DK+]] | MVDK Level 4-DK+.png|[[Level 5-DK+|Level 4-DK+]] | ||
MVDK_4%2B_End_1.png|End screen without text | MVDK_4%2B_End_1.png|End screen without text | ||
MVDK_4%2B_End_2.png|End screen with text | MVDK_4%2B_End_2.png|End screen with text | ||
| Line 309: | Line 310: | ||
<gallery heights="80"> | <gallery heights="80"> | ||
Mario vs. Donkey Kong W-5+ Select.PNG|[[Mystic Forest Plus]] level section screen | Mario vs. Donkey Kong W-5+ Select.PNG|[[Mystic Forest Plus]] level section screen | ||
MVDK 5-1+ - A.PNG|Mario's starting position in [[Level 5-1+]] | MVDK 5-1+ - A.PNG|Mario's starting position in [[Level 7-1+|Level 5-1+]] | ||
MVDK 5-1+ - B.PNG|5-1+ | MVDK 5-1+ - B.PNG|5-1+ | ||
Mario vs. Donkey Kong 5-1+.PNG|5-1+ | Mario vs. Donkey Kong 5-1+.PNG|5-1+ | ||
MVDK 5-2+ - A.PNG|Mario's starting position in [[Level 5-2+]] | MVDK 5-2+ - A.PNG|Mario's starting position in [[Level 7-2+|Level 5-2+]] | ||
MVDK 5-2+ - B.PNG|5-2+ | MVDK 5-2+ - B.PNG|5-2+ | ||
MVDK 5-3+ - A.PNG|Mario's starting position in [[Level 5-3+]] | MVDK 5-3+ - A.PNG|Mario's starting position in [[Level 7-3+|Level 5-3+]] | ||
MVDK 5-3+ - B.PNG|5-3+ | MVDK 5-3+ - B.PNG|5-3+ | ||
MVDK 5-4+ - A.PNG|Mario's starting position in [[Level 5-4+]] | MVDK 5-4+ - A.PNG|Mario's starting position in [[Level 7-4+|Level 5-4+]] | ||
MVDK 5-4+ - B.PNG|5-4+ | MVDK 5-4+ - B.PNG|5-4+ | ||
MVDK 5-5+ - A.PNG|Mario's starting position in [[Level 5-5+]] | MVDK 5-5+ - A.PNG|Mario's starting position in [[Level 7-5+|Level 5-5+]] | ||
MVDK 5-5+ - B.PNG|5-5+ | MVDK 5-5+ - B.PNG|5-5+ | ||
MVDK 5-6+ - A.PNG|Mario's starting position in [[Level 5-6+]] | MVDK 5-6+ - A.PNG|Mario's starting position in [[Level 7-6+|Level 5-6+]] | ||
MVDK 5-6+ - B.PNG|5-6+ | MVDK 5-6+ - B.PNG|5-6+ | ||
MVDK 5-DK+.PNG|[[Level 5-DK+]] | MVDK 5-DK+.PNG|[[Level 7-DK+|Level 5-DK+]] | ||
MVDK 5-DK+ End.png|Victory picture after beating 5-DK+, without text | MVDK 5-DK+ End.png|Victory picture after beating 5-DK+, without text | ||
Mario vs. Donkey Kong 5-DK+ win.PNG|Victory picture after beating 5-DK+, with text | Mario vs. Donkey Kong 5-DK+ win.PNG|Victory picture after beating 5-DK+, with text | ||
| Line 330: | Line 331: | ||
<gallery heights="80"> | <gallery heights="80"> | ||
Twilight City Plus.png|[[Twilight City Plus]] level section screen | Twilight City Plus.png|[[Twilight City Plus]] level section screen | ||
MVDK Level 6-1+.png|[[Level 6-1+]] | MVDK Level 6-1+.png|[[Level 8-1+|Level 6-1+]] | ||
MVDK Level 6-2+.png|[[Level 6-2+]] | MVDK Level 6-2+.png|[[Level 8-2+|Level 6-2+]] | ||
MVDK Level 6-3+.png|[[Level 6-3+]] | MVDK Level 6-3+.png|[[Level 8-3+|Level 6-3+]] | ||
MVDK Level 6-4+.png|[[Level 6-4+]] | MVDK Level 6-4+.png|[[Level 8-4+|Level 6-4+]] | ||
MVDK Level 6-5+.png|[[Level 6-5+]] | MVDK Level 6-5+.png|[[Level 8-5+|Level 6-5+]] | ||
MVDK Level 6-6+.png|[[Level 6-6+]] | MVDK Level 6-6+.png|[[Level 8-6+|Level 6-6+]] | ||
MVDK Level 6-DK+.png|[[Level 6-DK+]] | MVDK Level 6-DK+.png|[[Level 8-DK+|Level 6-DK+]] | ||
MVDK_Twilight_City_Plus_End_1.png|Victory picture after beating 6-DK+, without text | MVDK_Twilight_City_Plus_End_1.png|Victory picture after beating 6-DK+, without text | ||
MVDK_Twilight_City_Plus_End_2.png|Victory picture after beating 6-DK+, with text | MVDK_Twilight_City_Plus_End_2.png|Victory picture after beating 6-DK+, with text | ||
| Line 344: | Line 345: | ||
<gallery heights="80"> | <gallery heights="80"> | ||
MvDK Expert Levels.png|Expert level section screen | MvDK Expert Levels.png|Expert level section screen | ||
MVDK Level x-1.png|[[Level x-1]] | MVDK Level x-1.png|[[Level EX-1|Level x-1]] | ||
MVDK Level x-2.png|[[Level x-2]] | MVDK Level x-2.png|[[Level EX-2|Level x-2]] | ||
MVDK Level x-3.png|[[Level x-3]] | MVDK Level x-3.png|[[Level EX-3|Level x-3]] | ||
MVDK Level x-4.png|[[Level x-4]] | MVDK Level x-4.png|[[Level EX-5|Level x-4]] | ||
MVDK Level x-5.png|[[Level x-5]] | MVDK Level x-5.png|[[Level EX-7|Level x-5]] | ||
MVDK Level x-6.png|[[Level x-6]] | MVDK Level x-6.png|[[Level EX-8|Level x-6]] | ||
MVDK Level x-7.png|[[Level x-7]] | MVDK Level x-7.png|[[Level EX-9|Level x-7]] | ||
MVDK Level x-8.png|[[Level x-8]] | MVDK Level x-8.png|[[Level EX-10|Level x-8]] | ||
MVDK Level x-9.png|[[Level x-9]] | MVDK Level x-9.png|[[Level EX-11|Level x-9]] | ||
MVDK Level x-10.png|[[Level x-10]] | MVDK Level x-10.png|[[Level EX-13|Level x-10]] | ||
MVDK Level x-11.png|[[Level x-11]] | MVDK Level x-11.png|[[Level EX-15|Level x-11]] | ||
MVDK Level x-12.png|[[Level x-12]] | MVDK Level x-12.png|[[Level EX-16|Level x-12]] | ||
</gallery> | </gallery> | ||
| Line 386: | Line 387: | ||
</gallery> | </gallery> | ||
====After [[Level 6-DK]]==== | ====After [[Level 8-DK|Level 6-DK]]==== | ||
<gallery heights="80"> | <gallery heights="80"> | ||
MVDK 6 End 1.png|Mario chasing Donkey Kong. | MVDK 6 End 1.png|Mario chasing Donkey Kong. | ||
| Line 418: | Line 419: | ||
</gallery> | </gallery> | ||
====After [[Level 6-DK+]]==== | ====After [[Level 8-DK+|Level 6-DK+]]==== | ||
<gallery heights="80"> | <gallery heights="80"> | ||
MVDK 6+ End 1.png|Mario continues to chase after Donkey Kong. | MVDK 6+ End 1.png|Mario continues to chase after Donkey Kong. | ||
| Line 469: | Line 470: | ||
MvDKEU cover.jpg|European box art | MvDKEU cover.jpg|European box art | ||
MvDKEU back cover.jpg|European box art (back) | MvDKEU back cover.jpg|European box art (back) | ||
MvsDK Box AU.jpg|Australasian box art | |||
MvsDK Back AU.jpg|Australasian box art (back) | |||
MvsDK JP Cover.jpg|Japanese box art | MvsDK JP Cover.jpg|Japanese box art | ||
MvDKJPN back cover.jpg|Japanese box art (back) | MvDKJPN back cover.jpg|Japanese box art (back) | ||
Latest revision as of 22:03, April 26, 2025
This is a gallery of images for the game Mario vs. Donkey Kong. For a gallery of images released with the Nintendo Switch remake, see here.
Logos
International logo
Japanese logo
Pre-release English logo under the name Mario and Donkey Kong
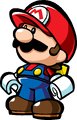
Artwork
Mario hanging from a Monchee
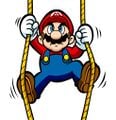
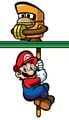
Mario climbing up two ropes
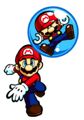
Mario freeing a Mini-Mario
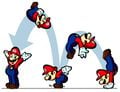
A demonstration of Mario's Handstand

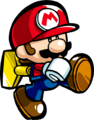
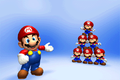
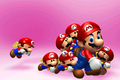
Mario being followed by a line of Mini-Marios
Mario using a Hammer
Mini Mario
Mini Mario

Mini Mario
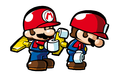
Mini Mario winding another
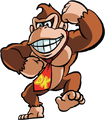
Donkey Kong
Donkey Kong holding his bag of Mini-Marios

A Toad upset


_-_Mario_vs._Donkey_Kong.png)


Sprites and models
Characters

Mario

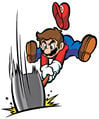
Mario falling and burning.

Mario falling, burning, and then landing.

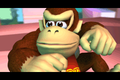
Donkey Kong

The Donkey Kong head that may appear from a Present

Mini-Mario


Enemies

Monchee (falling)

A Cannon firing a Cannonball

Snapjaw

RamRam (flailing)


Objects

Sand blocks (Fire Mountain)

Sand blocks (Mystic Forest)

Sand blocks (Fire Mountain Plus)

Letters

Help Box (English)

Help Box (international)


Screenshots
Title screens
Title screen
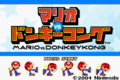
Title screen (Japanese)
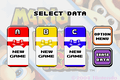
File selection screen
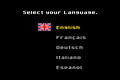
Language selection screen (Europe only)


Worlds
Mario Toy Company
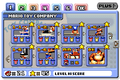
Mario Toy Company level selection screen
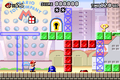
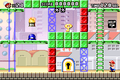
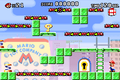
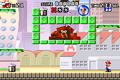
First part of Level 1-1
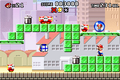
Second part of Level 1-1
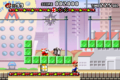
First part of Level 1-2
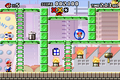
Second part of Level 1-2
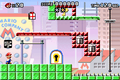
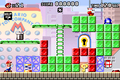
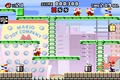
First part of Level 1-3
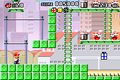
Second part of Level 1-3
First part of Level 1-4
Second part of Level 1-4
First part of Level 1-5
Second part of Level 1-5

First part of Level 1-6
Second part of Level 1-6
End screen of Mario Toy Company
End screen of Mario Toy Company (no text)
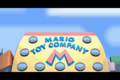
The company's logo


.png)

Donkey Kong Jungle
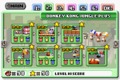
Donkey Kong Jungle level selection screen
First part of Level 2-1

Second part of Level 2-1
First part of Level 2-2
Second part of Level 2-2
First part of Level 2-3
Second part of Level 2-3
First part of Level 2-4
Second part of Level 2-4

First part of Level 2-5

Second part of Level 2-5
First part of Level 2-6
Second part of Level 2-6
End screen of Donkey Kong Jungle
End screen of Donkey Kong Jungle (no text)


.png)
Fire Mountain
Fire Mountain level selection screen
First part of Level 3-1
Second part of Level 3-1

First part of Level 3-2
Second part of Level 3-2
First part of Level 3-3
Second part of Level 3-3

First part of Level 3-4
Second part of Level 3-4
First part of Level 3-5

Second part of Level 3-5
First part of Level 3-6
Second part of Level 3-6
End screen of Fire Mountain
End screen of Fire Mountain (no text)


.png)
Spooky House
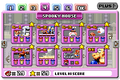
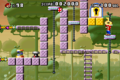
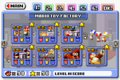
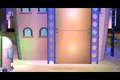
Spooky House level selection screen
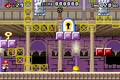
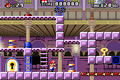
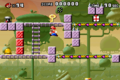
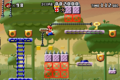
First part of Level 4-1
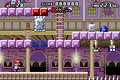
Second part of Level 4-1
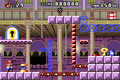
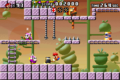
First part of Level 4-2
Second part of Level 4-2
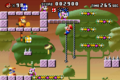
First part of Level 4-3
Second part of Level 4-3

First part of Level 4-4
Second part of Level 4-4
First part of Level 4-5

Second part of Level 4-5
First part of Level 4-6
Second part of Level 4-6

End screen of Spooky House

End screen of Spooky House (no text)


.png)
Mystic Forest
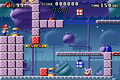
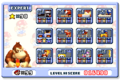
Mystic Forest's level selection screen
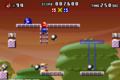
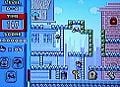
First part of Level 5-1
Second part of Level 5-1
First part of Level 5-2
First part of Level 5-2
Second part of Level 5-2
Second part of Level 5-2
First part of Level 5-3
Second part of Level 5-3
First part of Level 5-4
First part of Level 5-4
Second part of Level 5-4
Second part of Level 5-4
First part of Level 5-5
First part of Level 5-5
Second part of Level 5-5
Second part of Level 5-5
First part of Level 5-6
First part of Level 5-6
Second part of Level 5-6
Second part of Level 5-6
Level 5-mm
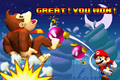
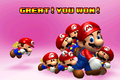
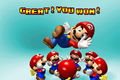
Victory picture after beating Level 5-DK
Victory picture after beating Level 5-DK (no text)


.png)
.png)
.png)
.png)


.png)
.png)
.png)
.png)
.png)
.png)
.png)
.png)
.png)
.png)
.png)
.png)
.png)
.png)


.png)
Twilight City
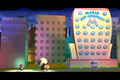
Twilight City level selection screen

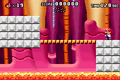
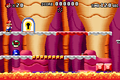
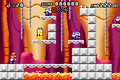
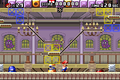
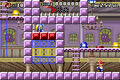
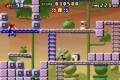
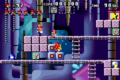
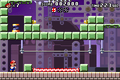
First part of Level 6-1
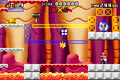
Second part of Level 6-1
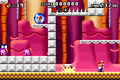
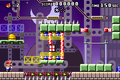
First part of Level 6-2
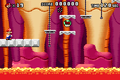
Second part of Level 6-2
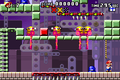
First part of Level 6-3
Second part of Level 6-3
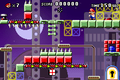
First part of Level 6-4
Second part of Level 6-4
First part of Level 6-5
Second part of Level 6-5

First part of Level 6-6
Second part of Level 6-6
End screen after Level 6-DK
End screen after Level 6-DK without text


.png)
Mario Toy Factory
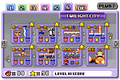
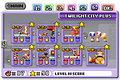
Mario Toy Factory level selection screen
End card without text

End card with text


Donkey Kong Jungle Plus
Donkey Kong Jungle Plus level selection screen
World end screen (no text)

World end screen (with text)


Fire Mountain Plus
Fire Mountain Plus level selection screen
End screen without text
End screen with text


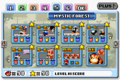
Spooky House Plus
Spooky House Plus level selection screen
End screen without text
End screen with text


Mystic Forest Plus
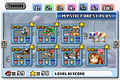
Mystic Forest Plus level section screen
Mario's starting position in Level 5-1+
5-1+
5-1+
Mario's starting position in Level 5-2+
5-2+
Mario's starting position in Level 5-3+
5-3+
Mario's starting position in Level 5-4+
5-4+
Mario's starting position in Level 5-5+
5-5+
Mario's starting position in Level 5-6+
5-6+
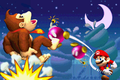
Victory picture after beating 5-DK+, without text
Victory picture after beating 5-DK+, with text


Twilight City Plus
Twilight City Plus level section screen
Victory picture after beating 6-DK+, without text
Victory picture after beating 6-DK+, with text


Expert
Expert level section screen


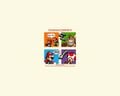
Pre-release screenshots
Donkey Kong Plus screenshot.
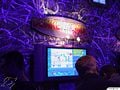
A booth showing Donkey Kong Plus.
Donkey Kong Plus screenshot.
Donkey Kong Plus screenshot.
Donkey Kong Plus screenshot.


Cutscenes
Opening

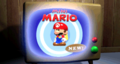
Donkey Kong watching TV.

A program of a Shy Guy hosting the News.
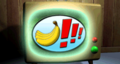
An ad for Bananas.
An ad for Mini-Marios.
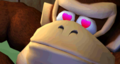
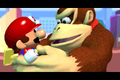
Donkey Kong immediately adores the new toy.
Donkey Kong running off to the toy store.
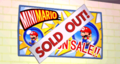
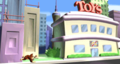
The Toy Store, with a notification stating the Mini-Marios are sold out.
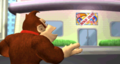
Donkey Kong noticing the Mini-Mario toys are sold out.
Donkey Kong sees the Toy Company, deciding to raid its stock of Mini-Marios.

A group of Toads supervising the Mini-Marios.
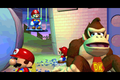
Donkey Kong enters the factory.
Donkey Kong attacks the factory.
Donkey Kong taking the stock of Mini-Marios.
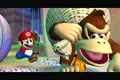
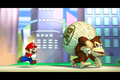
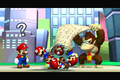
Mario noticing Donkey Kong with a bag full of Mini-Marios.


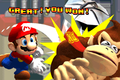
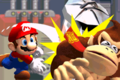
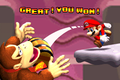
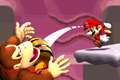
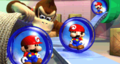
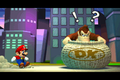
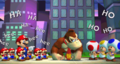
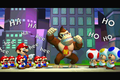
After Level 6-DK
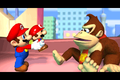
Mario chasing Donkey Kong.
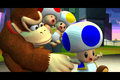
Donkey Kong stopping.
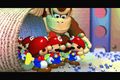
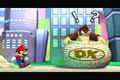
Donkey Kong looking into his sack.
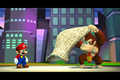
Donkey Kong realizing the sack is empty.
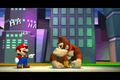
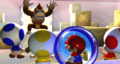
Mario laughing at Donkey Kong.
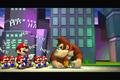
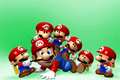
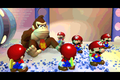
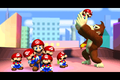
Mario and the Mini-Marios laughing at Donkey Kong.
Mario, the Mini-Marios, and three Toads laughing at Donkey Kong.
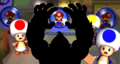
Donkey Kong getting angry.
Donkey Kong grabbing the Toads.

Donkey Kong looking at a tower.
Donkey Kong climbing the tower.
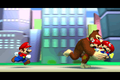
Mario giving chase.
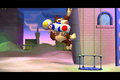
Mario steps onto the elevator.
Mario moves up the tower.


After Donkey Kong (level)
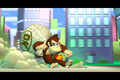
Donkey Kong falls off the tower.
A truck moves into view.
Donkey Kong lands on the truck.
The truck explodes.

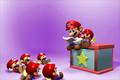
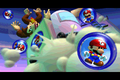
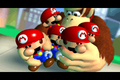
Mini-Marios and Donkey Kong land on the ground.
Donkey Kong looks at the Mini-Marios.
Mario checks on Donkey Kong.
Donkey Kong gathers the Mini-Marios.
Mario chases after Donkey Kong once more.
Mario chases Donkey Kong into the Plus Worlds.


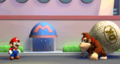
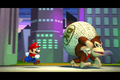
After Level 6-DK+
Mario continues to chase after Donkey Kong.
Donkey Kong stops.
Donkey Kong looks in the bag.
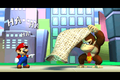
Donkey Kong tries to empty the bag as Mario laughs at him.
Mini-Marios fall out of the bag.
Donkey Kong scoops up the Mini-Marios.
Mario chases after Donkey Kong again.


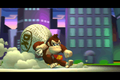
After Donkey Kong Plus

Donkey Kong cries after being defeated
Donkey Kong looks at Mario
Mario is angry
Donkey Kong starts crying again
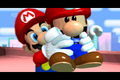
Mario tries to comfort Donkey Kong.
Donkey Kong looks at Mario.
Mario presents a Mini-Mario.
The Mini-Mario speaks to Donkey Kong.
Donkey Kong holds the Mini-Mario.
Everyone is happy.


Credits artwork

Mario and Mini-Marios

Cannon and cannonball

Mario


Box art
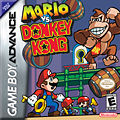
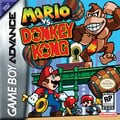
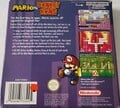
North American box art
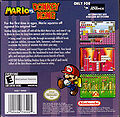
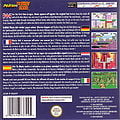
North American box art (back)
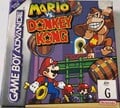
Early North American box art
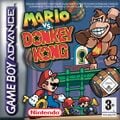
European box art
European box art (back)
Australasian box art
Australasian box art (back)
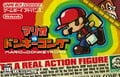
Japanese box art
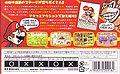
Japanese box art (back)
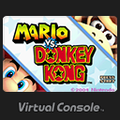
Wii U Virtual Console


Miscellaneous

North American print ad
Wallpaper from the Japanese website
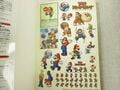
Stickers from a Shogakukan guidebook
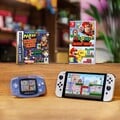
Promotional photograph for the Nintendo Switch remake, showing it alongside the original version


| Mario vs. Donkey Kong (Game Boy Advance) / Mario vs. Donkey Kong (Nintendo Switch) | ||
|---|---|---|
| Characters | Donkey Kong • Mario • Mini-Mario • Toadb | |
| Worlds | Regular worlds | Mario Toy Company • Donkey Kong Jungle • Fire Mountain • Merry Mini-Landb • Spooky House • Slippery Summitb • Mystic Forest • Twilight City • vs. Donkey Kong |
| Plus worlds | Mario Toy Factory • Donkey Kong Jungle Plus • Fire Mountain Plus • Merry Mini-Land Plusb • Spooky House Plus • Slippery Summit Plusb • Mystic Forest Plus • Twilight City Plus • vs. Donkey Kong Plus | |
| Extra world | Expert | |
| Enemies and obstacles | Bat • Bird • Bob-omb • Bob-omb Block • Boo • Brickman • Bucket Man • Candle • Cannon • Falling spike • Fire bird • Fire Shy Guy • Fireball • Ice Blockb • Icicleb • Lava Geyser • Monchee • Ninji • Oil • Podoboo • Polterguy • RamRam • Robo Kikki • Shy Guy • Sir Shovalot • Snapjaw • Spear Guy • Spike • Spiked Barrel • Tane Pakkun • Thwimp • Thwomp • Thwomp Platform • Wire Trap • Wrench Shy Guy | |
| Abilities | Crouch • Handstand / Handstand Jump • Jump • Backflip • Wire Spin • Spring Jump | |
| Items and objects | 1-Up Mushroom • 2 UPa • 3 UPa • 5 UPa • Barrel • Bird Nest • Checkpoint Flagb • Conveyor Belt • Crumble Block • Direction Switch • Donut Block • Door • Elevator • Flower Fanb • Flying keyb • Garbage Can • Girder • Hammer • Help Box • Key • Ladder • Letter Block • Present • Spring • Rope • Color Switch • Toy box • Warp Boxb • Wire | |
| Other | Mini-Mario Factory Game! • Gallery (GBA · Switch) • Mario Toy Company • Plus Mode • Pre-release and unused content • Quotes • Staff (GBA · Switch) • Time Attackb | |