Gallery:Donkey Kong Country 2: Diddy's Kong Quest: Difference between revisions
(→Levels) |
|||
| (62 intermediate revisions by 20 users not shown) | |||
| Line 1: | Line 1: | ||
{{italic title}} | {{italic title}} | ||
This is a gallery of images for the game ''[[Donkey Kong Country 2: Diddy's Kong Quest]]''. | This is a gallery of images for the game ''[[Donkey Kong Country 2: Diddy's Kong Quest]]''. For images related to the [[Game Boy Advance]] [[Donkey Kong Country 2 (Game Boy Advance)|remake]], see [[Gallery:Donkey Kong Country 2 (Game Boy Advance)|here]]. | ||
==Logos== | ==Logos== | ||
<gallery widths="250"heights="150"> | |||
<gallery widths="250" heights="150"> | |||
DKC2 logo.png|International logo | DKC2 logo.png|International logo | ||
DKC2 logo Japanese.png|Japanese logo | DKC2 logo Japanese.png|Japanese logo | ||
</gallery> | </gallery> | ||
==Artwork== | ==Artwork== | ||
===Heroes=== | ===Heroes=== | ||
<gallery> | <gallery> | ||
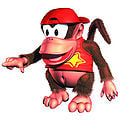
Diddy Kong DKL2 art.png|[[Diddy Kong]] | Diddy Kong DKL2 art.png|[[Diddy Kong]] | ||
| Line 22: | Line 14: | ||
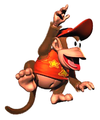
Diddy kong.png|Diddy Kong | Diddy kong.png|Diddy Kong | ||
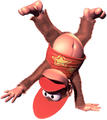
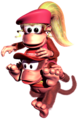
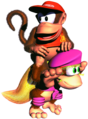
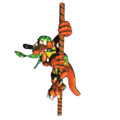
Diddy Cartwheel DKC2.png|Diddy Kong | Diddy Cartwheel DKC2.png|Diddy Kong | ||
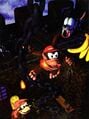
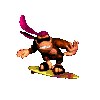
Diddy KannonBall.png|Diddy Kong, throwing a [[Kannonball]] | Diddy DKC2 art.png|Diddy Kong | ||
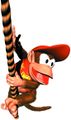
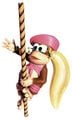
Diddy climbing rope DKC2 art.jpg|Diddy Kong | |||
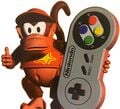
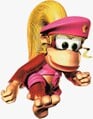
DiddyController.jpg|Diddy Kong holding a [[Super Nintendo Entertainment System|SNES]] controller | |||
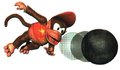
Diddy KannonBall.png|Diddy Kong, throwing a [[Cannonball|Kannonball]] | |||
Dixie Kong DKC2 art.jpg|[[Dixie Kong]] | Dixie Kong DKC2 art.jpg|[[Dixie Kong]] | ||
Dixie6.jpg|Dixie Kong | Dixie6.jpg|Dixie Kong | ||
| Line 30: | Line 25: | ||
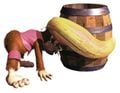
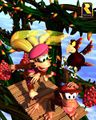
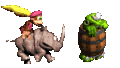
Dixie&Barrel DKC2.jpg|Dixie Kong and a [[Barrel]] | Dixie&Barrel DKC2.jpg|Dixie Kong and a [[Barrel]] | ||
DiddyDKDixie DKC2 art.png|Donkey, Diddy, and Dixie Kong | DiddyDKDixie DKC2 art.png|Donkey, Diddy, and Dixie Kong | ||
DKC2 Diddy and Dixie Controller.jpg|Diddy and Dixie holding a | DKC2 Diddy and Dixie Controller.jpg|Diddy and Dixie holding a SNES controller | ||
DiddyDixieController.jpg|Diddy and Dixie with a SNES controller | |||
DixieDiddy2.png|The Kongs about to perform a [[team up]] move | DixieDiddy2.png|The Kongs about to perform a [[team up]] move | ||
Diddy on Dixie Team-up DKC2.png|The Kongs teaming up | Diddy on Dixie Team-up DKC2.png|The Kongs teaming up | ||
| Line 37: | Line 33: | ||
Diddy Dixie Klobber DKC2.jpg|The Kongs lifting a [[Klobber]] | Diddy Dixie Klobber DKC2.jpg|The Kongs lifting a [[Klobber]] | ||
Diddy Dixie Nintendo Logo.png|The Kongs with a [[Nintendo]] logo | Diddy Dixie Nintendo Logo.png|The Kongs with a [[Nintendo]] logo | ||
DKC2 Diddy Dixie Nintendo Logo.png|The Kongs with a Nintendo logo | |||
DKC2 Mario & Diddy Kong Minecart.jpg|Diddy pushing a [[Minecart]] with [[Mario]] riding in it | |||
</gallery> | </gallery> | ||
===Allies=== | ===Allies=== | ||
====[[Kong | ====[[Kong|Kong Klan]]==== | ||
<gallery> | <gallery> | ||
DKC2 Cranky Kong Artwork.jpg|[[Cranky Kong]] | DKC2 Cranky Kong Artwork.jpg|[[Cranky Kong]] | ||
| Line 60: | Line 53: | ||
Clapper.jpg|[[Clapper]] | Clapper.jpg|[[Clapper]] | ||
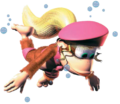
Enguarde DKC.png|[[Enguarde]] | Enguarde DKC.png|[[Enguarde]] | ||
Glimmer.jpg|[[Glimmer]] | Glimmer.jpg|[[Glimmer]] | ||
Rambi DKC.png|[[Rambi]] | Rambi DKC.png|[[Rambi]] | ||
| Line 75: | Line 67: | ||
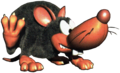
Click-Clack DKC2 frontal artwork.jpg|Click-Clack | Click-Clack DKC2 frontal artwork.jpg|Click-Clack | ||
DK2Flitter.jpg|[[Flitter]] | DK2Flitter.jpg|[[Flitter]] | ||
Flitter alt artwork.png|Flitter | |||
MiniNeckyDKC2.jpg|[[Mini-Necky]] | MiniNeckyDKC2.jpg|[[Mini-Necky]] | ||
Neek.jpg|[[Neek]] | Neek.jpg|[[Neek]] | ||
DKC2 Screech.png|[[Screech]] | Neek DKC2 art.png|Neek | ||
Spiny DKC2 art.png|[[Spiny (Donkey Kong Country 2 | DKC2 Screech.png|[[Screech (Donkey Kong Country 2)|Screech]] | ||
Spiny DKC2 art.png|[[Spiny (Donkey Kong Country 2)|Spiny]] | |||
Zinger DKC2.png|[[Zinger]] | Zinger DKC2.png|[[Zinger]] | ||
</gallery> | </gallery> | ||
| Line 88: | Line 82: | ||
Puftup DKC2 art.png|[[Puftup]] | Puftup DKC2 art.png|[[Puftup]] | ||
Shuri DKC2 art.png|[[Shuri]] | Shuri DKC2 art.png|[[Shuri]] | ||
Snapjaw DKC2 enemy art.png|[[Snapjaw (Donkey Kong Country 2 | Snapjaw DKC2 enemy art.png|[[Snapjaw (Donkey Kong Country 2)|Snapjaw]] | ||
</gallery> | </gallery> | ||
| Line 100: | Line 94: | ||
Kannon jumping.png|Kannon | Kannon jumping.png|Kannon | ||
Klampon.jpg|[[Klampon]] | Klampon.jpg|[[Klampon]] | ||
Klampon alt.png|Klampon | |||
Klank art.png|[[Klank]] | Klank art.png|[[Klank]] | ||
Klinger.png|[[Klinger]] | Klinger.png|[[Klinger]] | ||
| Line 106: | Line 101: | ||
Klobber.jpg|[[Klobber]] | Klobber.jpg|[[Klobber]] | ||
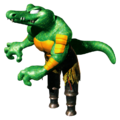
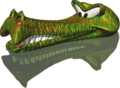
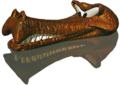
Klomp - Donkey Kong Country 2.png|[[Klomp]] | Klomp - Donkey Kong Country 2.png|[[Klomp]] | ||
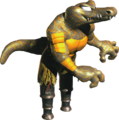
Klubba.png|[[Klubba]] | Klubba DKC2 artwork.png|[[Klubba]] | ||
Krockhead.png|A green [[Krockhead]] | Krockhead.png|A green [[Krockhead]] | ||
DKC2 Brown Krockhead.png|A brown Krockhead | DKC2 Brown Krockhead.png|A brown Krockhead | ||
| Line 115: | Line 110: | ||
Kruncha artwork 2.png|Kruncha | Kruncha artwork 2.png|Kruncha | ||
Kutlass.jpg|[[Kutlass]] | Kutlass.jpg|[[Kutlass]] | ||
DKC2_Kutlass.png|Kutlass | |||
DKC2 Beta-Mr. X Artwork.png|"[[List of Donkey Kong Country 2: Diddy's Kong Quest pre-release and unused content|Mr. X]]" (unused) | DKC2 Beta-Mr. X Artwork.png|"[[List of Donkey Kong Country 2: Diddy's Kong Quest pre-release and unused content|Mr. X]]" (unused) | ||
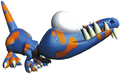
DKC2 Kremlings.png|The [[Kremling]]s | DKC2 Kremlings.png|The [[Kremling]]s | ||
| Line 125: | Line 121: | ||
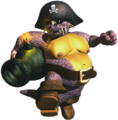
Kudgel.png|[[Kudgel]] | Kudgel.png|[[Kudgel]] | ||
King Zing.png|[[King Zing]] | King Zing.png|[[King Zing]] | ||
DKC2 Kreepy Krow.jpg|[[Kreepy Krow]] | |||
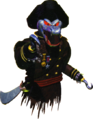
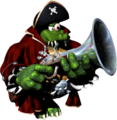
Kaptain K. Rool.png|[[King K. Rool|Kaptain K. Rool]] | Kaptain K. Rool.png|[[King K. Rool|Kaptain K. Rool]] | ||
Kaptain K. Rool DKC2 art.png|Kaptain K. Rool | Kaptain K. Rool DKC2 art.png|Kaptain K. Rool | ||
| Line 135: | Line 132: | ||
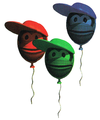
Extra Life Balloons DKC2 artwork.jpg|[[Red Balloon|Extra]] [[Green Balloon|Life]] [[Blue Balloon|Balloon]]s | Extra Life Balloons DKC2 artwork.jpg|[[Red Balloon|Extra]] [[Green Balloon|Life]] [[Blue Balloon|Balloon]]s | ||
DKC2Balloon.png|Extra Life Balloons | DKC2Balloon.png|Extra Life Balloons | ||
KONGletter.png|[[ | KONGletter.png|[[KONG Letters]] | ||
Kremkoin DKC2.png|A [[Kremkoin]] | Kremkoin DKC2.png|A [[Kremkoin]] | ||
</gallery> | </gallery> | ||
| Line 141: | Line 138: | ||
===Objects=== | ===Objects=== | ||
<gallery> | <gallery> | ||
CannonDKC2.png|[[Kannon ( | CannonDKC2.png|[[Cannon|Kannon]] and [[Cannonball|Kannonball]] | ||
Crate.png|[[Crate]] | |||
DKC2 - Treasure Chest.png|[[Treasure Chest]] | |||
Rattly Crate.png|Rattly's [[Animal Crate]] | |||
NoAnimalSign DKC3.png|Squawks' No Animal Sign | |||
Hot Air Balloon DKC2 artwork.jpg|[[Hot Air Balloon]] | |||
Rope DKC2 art.png|[[Rope (ghost)|Rope]] | |||
End of Level Target DKC2 artwork.jpg|[[End of Level Target]] | |||
FunkyBarrel DKC2.png|[[Funky Barrel]] | |||
Check and X Barrels.png|[[Check and X Barrels]] | Check and X Barrels.png|[[Check and X Barrels]] | ||
DKBarrel DKC.png|[[DK Barrel]] | DKBarrel DKC.png|[[DK Barrel]] | ||
InvincibilityBarrel DKC2.png|An [[Invincibility Barrel|Exclamation Point Barrel]] | InvincibilityBarrel DKC2.png|An [[Invincibility Barrel|Exclamation Point Barrel]] | ||
PlusandMinusBarrels DKC2.png|[[Plus and Minus Barrels]] | PlusandMinusBarrels DKC2.png|[[Plus and Minus Barrels]] | ||
Spinner Barrel.png|[[Spinner Barrel|Rotatable Barrel]] | |||
StarBarrel DKC.png|[[Star Barrel]] | StarBarrel DKC.png|[[Star Barrel]] | ||
SteerableBarrel DKC2.png|[[Steerable Barrel]] | SteerableBarrel DKC2.png|[[Steerable Barrel]] | ||
| Line 164: | Line 166: | ||
<gallery> | <gallery> | ||
Diddydixie5.jpg|Diddy Kong and Dixie Kong on ropes | Diddydixie5.jpg|Diddy Kong and Dixie Kong on ropes | ||
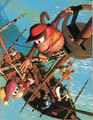
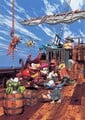
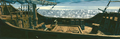
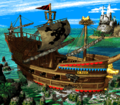
Pirate Ship DKC2 group art.jpg|The | Pirate Ship DKC2 group art.jpg|The Kongs invade [[Gangplank Galleon]] | ||
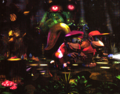
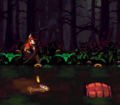
Swamp DKC2 group art.jpg|Artwork of Diddy and Dixie in [[Krem Quay]] | Swamp DKC2 group art.jpg|Artwork of Diddy and Dixie in [[Krem Quay]] | ||
Zinger DKC2 group art.jpg|Artwork of the | Swamp DKC2 group art (alt).jpg|Another image of the heroes in Krem Quay | ||
Zinger DKC2 group art.jpg|Artwork of the Kongs in [[Hornet Hole (Donkey Kong Country 2)|Hornet Hole]] | |||
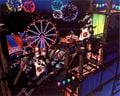
Rickety Race DKC2 group art.jpg|Artwork of the Kongs on a roller coaster | Rickety Race DKC2 group art.jpg|Artwork of the Kongs on a roller coaster | ||
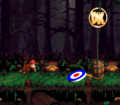
KackleScene.jpg|The | KackleScene.jpg|The Kongs are chased by a [[Kackle]] | ||
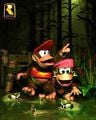
Gangplank Galleon Mast.png|The Kongs climb Gangplank Galleon | Gangplank Galleon Mast.png|The Kongs climb Gangplank Galleon | ||
Group dkc2 05.png|Diddy, Dixie, [[Squawks]], [[Screech]] and several Kremlings | Group dkc2 05.png|Diddy, Dixie, [[Squawks]], [[Screech]] and several Kremlings | ||
| Line 176: | Line 179: | ||
Glimmer and Kongs art.jpg|Diddy and Dixie find sunken treasure underwater | Glimmer and Kongs art.jpg|Diddy and Dixie find sunken treasure underwater | ||
Caged DK DKC2 group art.jpg|Artwork of Diddy Kong and Dixie Kong about to rescue Donkey Kong | Caged DK DKC2 group art.jpg|Artwork of Diddy Kong and Dixie Kong about to rescue Donkey Kong | ||
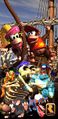
Pirate Ship DKC2 group art (alt).jpg|Group artwork of the Kongs and several enemies on Gangplank Galleon | Pirate Ship DKC2 group art (alt).jpg|Group artwork of the Kongs and several enemies on Gangplank Galleon | ||
GloomyGulchArt.png|Artwork of [[Gloomy Gulch]] | |||
Gloomy Gulch promo 2.png|Artwork of Gloomy Gulch | |||
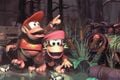
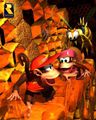
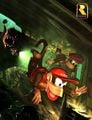
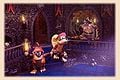
Kroolkeep-art.jpg|Artwork of the Kongs exploring [[K. Rool's Keep]] | Kroolkeep-art.jpg|Artwork of the Kongs exploring [[K. Rool's Keep]] | ||
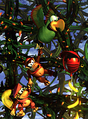
Dkc2vine.jpg|The Kongs blasting through a bramble maze | Dkc2vine.jpg|The Kongs blasting through a bramble maze | ||
Diddy and Dixie DK2 Table of Kongtents.png|Diddy and Dixie holding a [[banana]] in front of a "DK2" logo and [[Kaptain K. Rool]] | Diddy and Dixie DK2 Table of Kongtents.png|Diddy and Dixie holding a [[banana]] in front of a "DK2" logo and [[Kaptain K. Rool]] | ||
SDK2_Guide_Logo.jpg|The Kongs holding a "DK2" logo | |||
Diddy mario 3d render.png|Diddy Kong and [[Mario]] opening a [[Treasure Chest]] | Diddy mario 3d render.png|Diddy Kong and [[Mario]] opening a [[Treasure Chest]] | ||
Operation - Rescue DK.png|Diddy and Dixie scatter their way to rescue DK | Operation - Rescue DK.png|Diddy and Dixie scatter their way to rescue DK | ||
Gangplank Galleon (DKC2).jpg|Diddy and Dixie scatter their way to rescue DK | |||
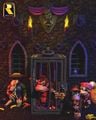
DKC 2 chest magazine art1.jpg|Diddy and Dixie opening a chest | DKC 2 chest magazine art1.jpg|Diddy and Dixie opening a chest | ||
DKC2 chest art 2.jpg|Other half of the | DKC2 chest art 2.jpg|Other half of the previous image, with Crocodile Isle in the background | ||
Kong Kollege artwork.png|Artwork of [[Kong Kollege]] | |||
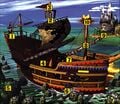
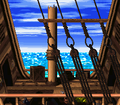
Gangplank_Galleon_DKC2_art.png|Scenery of [[Gangplank Galleon]] | Gangplank_Galleon_DKC2_art.png|Scenery of [[Gangplank Galleon]] | ||
Gangplank Galleon DKC2 artwork.jpg|Artwork of Gangplank Galleon | |||
Gloomy Gulch | Hold Ship DKC2 art.png|Scenery of Gangplank Galleon's hold | ||
Crocodile Cauldron Artwork.png|Scenery of [[Crocodile Cauldron]] | |||
Mine DKC2 art.jpg|Scenery of a mine | |||
Gloomy Gulch DKC2 art.png|Scenery of Gloomy Gulch | |||
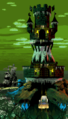
The Flying Krock DKC2 interior art.png|Scenery of [[The Flying Krock]] | |||
</gallery> | </gallery> | ||
| Line 251: | Line 261: | ||
Kremkoin Sprite.gif|Kremkoin | Kremkoin Sprite.gif|Kremkoin | ||
Banana Coin.png|[[Banana Coin]] | Banana Coin.png|[[Banana Coin]] | ||
Letter K.png|[[ | Letter K.png|[[KONG Letters|K]] | ||
Letter O.png|O | Letter O.png|O | ||
Letter N.png|N | Letter N.png|N | ||
| Line 265: | Line 275: | ||
Star Barrel.png|[[Star Barrel]] | Star Barrel.png|[[Star Barrel]] | ||
Barrel Cannon.png|[[Barrel Cannon|Barrel Kannon]] | Barrel Cannon.png|[[Barrel Cannon|Barrel Kannon]] | ||
Rotatable Barrel.png|[[ | Rotatable Barrel.png|[[Spinner Barrel|Rotatable Barrel]] | ||
Steerable Barrel.png|[[Steerable Barrel]] | Steerable Barrel.png|[[Steerable Barrel]] | ||
Bonus Barrel.png|[[Bonus Barrel]] | Bonus Barrel.png|[[Bonus Barrel]] | ||
| Line 296: | Line 306: | ||
End of Level Target.png|[[End of Level Target]] | End of Level Target.png|[[End of Level Target]] | ||
Hot Air Balloon.png|[[Hot Air Balloon]] | Hot Air Balloon.png|[[Hot Air Balloon]] | ||
CannonSprite-DKC2.png|[[ | CannonSprite-DKC2.png|[[Cannon|Kannon]] | ||
Kannonball.png|[[Kannonball]] | Kannonball.png|[[Cannonball|Kannonball]] | ||
Krow Egg DKC2.png|Krow [[Egg]] | Krow Egg DKC2.png|Krow [[Egg]] | ||
NoAnimalSign-Enguarde-DKC2.png|Enguarde's [[No Animal Sign]] | NoAnimalSign-Enguarde-DKC2.png|Enguarde's [[No Animal Sign]] | ||
| Line 306: | Line 316: | ||
Tire DKC2.gif|[[Tire]] | Tire DKC2.gif|[[Tire]] | ||
Treasure Chest DKC2.png|[[Treasure Chest]] | Treasure Chest DKC2.png|[[Treasure Chest]] | ||
Rope DKC2 sprite.png|Rope | |||
</gallery> | </gallery> | ||
| Line 319: | Line 330: | ||
Neek DKC2.png|[[Neek]] | Neek DKC2.png|[[Neek]] | ||
Screech DKC2.png|[[Screech]] | Screech DKC2.png|[[Screech]] | ||
Spiny DKC2.png|[[Spiny (Donkey Kong Country 2 | Spiny DKC2.png|[[Spiny (Donkey Kong Country 2)|Spiny]] | ||
Zinger DKC2 yellow.png|[[Zinger]] | Zinger DKC2 yellow.png|[[Zinger]] | ||
Zinger DKC2 red.png|Zinger | Zinger DKC2 red.png|Zinger | ||
| Line 332: | Line 343: | ||
Puftup DKC2 alt.png|Puftup | Puftup DKC2 alt.png|Puftup | ||
Shuri DKC2.png|[[Shuri]] | Shuri DKC2.png|[[Shuri]] | ||
Snapjaw DKC2 sprite.png|[[Snapjaw (Donkey Kong Country 2 | Snapjaw DKC2 sprite.png|[[Snapjaw (Donkey Kong Country 2)|Snapjaw]] | ||
</gallery> | </gallery> | ||
| Line 372: | Line 383: | ||
</gallery> | </gallery> | ||
=== | ==Backgrounds== | ||
===Levels=== | |||
<gallery> | <gallery> | ||
Ship Deck (DKC2).png|Ship deck | |||
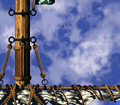
Rigging (DKC2).png|Ship rigging | |||
Hold Ship (DKC2).png|Ship hold | |||
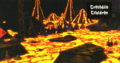
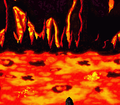
Lava (DKC2).png|Lava | |||
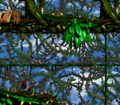
DKC2 Brambles.png|Brambles | |||
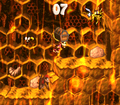
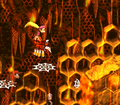
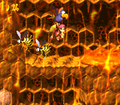
Hive (DKC2).png|Hive | |||
Ice (DKC2).png|Ice | |||
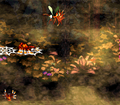
Jungle (DKC2).png|Jungle | |||
</gallery> | |||
===NPCs=== | |||
<gallery> | |||
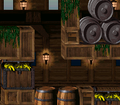
Monkey Museum background NTSC.png|Monkey Museum | |||
Kong Kollege 1.png|Kong Kollege | |||
Bonus Bonanza (SNES).png|Bonus Bonanza | |||
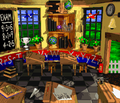
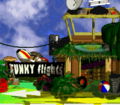
Funky's Flights DKC2 background.png|Funky's Flights II | |||
</gallery> | </gallery> | ||
==Screenshots== | ==Screenshots== | ||
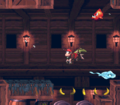
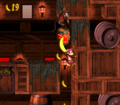
====[[Gangplank Galleon (world)|Gangplank Galleon]]==== | ====[[Gangplank Galleon (world)|Gangplank Galleon]]==== | ||
<gallery> | <gallery> | ||
Gangplank Galleon.png|Map | Gangplank Galleon.png|Map | ||
PiratePanic.png|[[Pirate Panic (Donkey Kong Country 2 | PiratePanic.png|[[Pirate Panic (Donkey Kong Country 2)|Pirate Panic]] | ||
Team-up DKC2.png|Pirate Panic | Team-up DKC2.png|Pirate Panic | ||
1-1Message DKC2.png|Pirate Panic | 1-1Message DKC2.png|Pirate Panic | ||
| Line 405: | Line 414: | ||
1-1RambiBox DKC2.png|Pirate Panic | 1-1RambiBox DKC2.png|Pirate Panic | ||
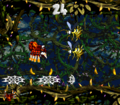
Pirate Panic Bonus Area 1.png|Pirate Panic's first Bonus Area | Pirate Panic Bonus Area 1.png|Pirate Panic's first Bonus Area | ||
Mainbrace Mayhem DKC2.png|[[Mainbrace Mayhem (Donkey Kong Country 2 | Mainbrace Mayhem DKC2.png|[[Mainbrace Mayhem (Donkey Kong Country 2)|Mainbrace Mayhem]] | ||
Gangplank Galley DKC2 shot.png|[[Gangplank Galley (Donkey Kong Country 2 | Gangplank Galley DKC2 shot.png|[[Gangplank Galley (Donkey Kong Country 2)|Gangplank Galley]] | ||
Gangplank Galley DKC2 shot 2.png|Gangplank Galley | Gangplank Galley DKC2 shot 2.png|Gangplank Galley | ||
Gangplank Galley DKC2 shot 3.png|Gangplank Galley | Gangplank Galley DKC2 shot 3.png|Gangplank Galley | ||
Gangplank Galley Bonus Area 2.png|Gangplank Galley's second Bonus Area | Gangplank Galley Bonus Area 2.png|Gangplank Galley's second Bonus Area | ||
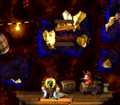
Lockjaw Locker DKC2.png|[[Lockjaw's Locker (Donkey Kong Country 2 | Lockjaw Locker DKC2.png|[[Lockjaw's Locker (Donkey Kong Country 2)|Lockjaw's Locker]] | ||
Topsail Trouble DKC2.png|[[Topsail Trouble (Donkey Kong Country 2 | Topsail Trouble DKC2.png|[[Topsail Trouble (Donkey Kong Country 2)|Topsail Trouble]] | ||
Topsail Trouble DKC2 shot 2.png|Topsail Trouble | Topsail Trouble DKC2 shot 2.png|Topsail Trouble | ||
Topsail Trouble Bonus Level 1.png|Topsail Trouble | Topsail Trouble Bonus Level 1.png|Topsail Trouble | ||
| Line 423: | Line 432: | ||
Hot-Head Hop Bonus Area 1.png|Hot-Head Hop's first Bonus Area | Hot-Head Hop Bonus Area 1.png|Hot-Head Hop's first Bonus Area | ||
Hot-Head Hop Bonus Area 2.png|Hot-Head Hop's second Bonus Area | Hot-Head Hop Bonus Area 2.png|Hot-Head Hop's second Bonus Area | ||
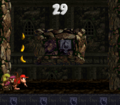
Kannons Klaim DKC2 shot.png|[[Kannon's Klaim (Donkey Kong Country 2 | Kannons Klaim DKC2 shot.png|[[Kannon's Klaim (Donkey Kong Country 2)|Kannon's Klaim]] | ||
Kannons Klaim DKC2 shot 2.png|Kannon's Klaim | Kannons Klaim DKC2 shot 2.png|Kannon's Klaim | ||
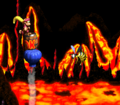
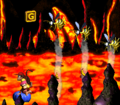
Lava Lagoon.png|[[Lava Lagoon (Donkey Kong Country 2 | Lava Lagoon.png|[[Lava Lagoon (Donkey Kong Country 2)|Lava Lagoon]] | ||
Lava Lagoon DKC2 shot.png|Lava Lagoon | Lava Lagoon DKC2 shot.png|Lava Lagoon | ||
Lava Lagoon DKC2 shot 2.png|Lava Lagoon | Lava Lagoon DKC2 shot 2.png|Lava Lagoon | ||
| Line 435: | Line 444: | ||
Red-Hot Ride DKC2 shot 4.png|Red-Hot Ride | Red-Hot Ride DKC2 shot 4.png|Red-Hot Ride | ||
Red-Hot Ride Bonus Area 2.png|Red-Hot Ride's second Bonus Area | Red-Hot Ride Bonus Area 2.png|Red-Hot Ride's second Bonus Area | ||
SquawksShaftSNES.png|[[Squawks's Shaft (Donkey Kong Country 2 | SquawksShaftSNES.png|[[Squawks's Shaft (Donkey Kong Country 2)|Squawks's Shaft]] | ||
Squawks Shaft DKC2 shot.png|Squawks's Shaft | Squawks Shaft DKC2 shot.png|Squawks's Shaft | ||
Squawks Shaft DKC2 shot 2.png|Squawks's Shaft | Squawks Shaft DKC2 shot 2.png|Squawks's Shaft | ||
| Line 445: | Line 454: | ||
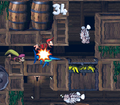
<gallery> | <gallery> | ||
Krem Quay.png|World map | Krem Quay.png|World map | ||
Barrel Bayou.png|[[Barrel Bayou (Donkey Kong Country 2 | Barrel Bayou.png|[[Barrel Bayou (Donkey Kong Country 2)|Barrel Bayou]] | ||
Barrel Bayou DKC2 shot.png|Barrel Bayou | Barrel Bayou DKC2 shot.png|Barrel Bayou | ||
Barrel Bayou DKC2 shot 2.png|Barrel Bayou | Barrel Bayou DKC2 shot 2.png|Barrel Bayou | ||
| Line 452: | Line 461: | ||
Barrel Bayou DKC2 shot 5.png|Barrel Bayou | Barrel Bayou DKC2 shot 5.png|Barrel Bayou | ||
Barrel Bayou Bonus Area 2.png|Barrel Bayou's second Bonus Area | Barrel Bayou Bonus Area 2.png|Barrel Bayou's second Bonus Area | ||
Glimmers Galleon.png|[[Glimmer's Galleon (Donkey Kong Country 2 | Glimmers Galleon.png|[[Glimmer's Galleon (Donkey Kong Country 2)|Glimmer's Galleon]] | ||
Glimmers Galleon DKC2 shot.png|Glimmer's Galleon | Glimmers Galleon DKC2 shot.png|Glimmer's Galleon | ||
Glimmers Galleon DKC2 shot 2.png|Glimmer's Galleon | Glimmers Galleon DKC2 shot 2.png|Glimmer's Galleon | ||
Glimmers Galleon DKC2 shot 3.png|Glimmer's Galleon | Glimmers Galleon DKC2 shot 3.png|Glimmer's Galleon | ||
Krockhead Klamber.png|[[Krockhead Klamber (Donkey Kong Country 2 | Krockhead Klamber.png|[[Krockhead Klamber (Donkey Kong Country 2)|Krockhead Klamber]] | ||
Krockhead Klamber DKC2 shot.png|Krockhead Klamber | Krockhead Klamber DKC2 shot.png|Krockhead Klamber | ||
Krockhead Klamber DKC2 shot 2.png|Krockhead Klamber | Krockhead Klamber DKC2 shot 2.png|Krockhead Klamber | ||
| Line 463: | Line 472: | ||
Krockhead Klamber DKC2 shot 5.png|Krockhead Klamber | Krockhead Klamber DKC2 shot 5.png|Krockhead Klamber | ||
Krockhead Klamber Bonus Area.png|Krockhead Klamber's Bonus Area | Krockhead Klamber Bonus Area.png|Krockhead Klamber's Bonus Area | ||
Rattle Battle.png|[[Rattle Battle (Donkey Kong Country 2 | Rattle Battle.png|[[Rattle Battle (Donkey Kong Country 2)|Rattle Battle]] | ||
Rattle Battle DKC2 shot.png|Rattle Battle | Rattle Battle DKC2 shot.png|Rattle Battle | ||
Rattle Battle DKC2 shot 2.png|Rattle Battle | Rattle Battle DKC2 shot 2.png|Rattle Battle | ||
Rattle Battle Bonus Area 1.png|Rattle Battle | Rattle Battle Bonus Area 1.png|Rattle Battle | ||
Slime Climb.png|[[Slime Climb (Donkey Kong Country 2 | Slime Climb.png|[[Slime Climb (Donkey Kong Country 2)|Slime Climb]] | ||
Slime Climb DKC2 shot.png|Slime Climb | Slime Climb DKC2 shot.png|Slime Climb | ||
Slime Climb DKC2 shot 2.png|Slime Climb | Slime Climb DKC2 shot 2.png|Slime Climb | ||
| Line 473: | Line 482: | ||
Slime Climb DKC2 shot 4.png|Slime Climb | Slime Climb DKC2 shot 4.png|Slime Climb | ||
Slime Climb DKC2 shot 5.png|Slime Climb | Slime Climb DKC2 shot 5.png|Slime Climb | ||
Bramble Blast.png|[[Bramble Blast (Donkey Kong Country 2 | Bramble Blast.png|[[Bramble Blast (Donkey Kong Country 2)|Bramble Blast]] | ||
Bramble Blast DKC2.png|Bramble Blast | Bramble Blast DKC2.png|Bramble Blast | ||
Bramble Blast DKC2 shot 2.png|Bramble Blast | Bramble Blast DKC2 shot 2.png|Bramble Blast | ||
| Line 482: | Line 491: | ||
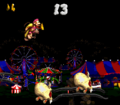
KrazyKremlandPart1.gif|First half | KrazyKremlandPart1.gif|First half | ||
KrazyKremlandPart2.gif|Second half | KrazyKremlandPart2.gif|Second half | ||
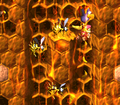
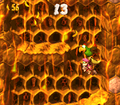
Hornet Hole SNES 1.png|[[Hornet Hole (Donkey Kong Country 2 | Hornet Hole SNES 1.png|[[Hornet Hole (Donkey Kong Country 2)|Hornet Hole]] | ||
Hornet Hole SNES 2.png|Hornet Hole | Hornet Hole SNES 2.png|Hornet Hole | ||
Hornet Hole SNES 3.png|Hornet Hole | Hornet Hole SNES 3.png|Hornet Hole | ||
Target Terror.png|[[Target Terror (Donkey Kong Country 2 | Target Terror.png|[[Target Terror (Donkey Kong Country 2)|Target Terror]] | ||
Target Terror DKC2 shot.png|Target Terror | Target Terror DKC2 shot.png|Target Terror | ||
Target Terror DKC2 shot 2.png|Target Terror | Target Terror DKC2 shot 2.png|Target Terror | ||
Target Terror Bonus Area 2.png|Target Terror's second Bonus Area | Target Terror Bonus Area 2.png|Target Terror's second Bonus Area | ||
Bramble Scramble DKC2 Squitter.png|[[Bramble Scramble (Donkey Kong Country 2 | Bramble Scramble DKC2 Squitter.png|[[Bramble Scramble (Donkey Kong Country 2)|Bramble Scramble]] | ||
Rickety Race.png|[[Rickety Race (Donkey Kong Country 2 | Rickety Race.png|[[Rickety Race (Donkey Kong Country 2)|Rickety Race]] | ||
Rickety Race DKC2 shot.png|Rickety Race | Rickety Race DKC2 shot.png|Rickety Race | ||
Rickety Race DKC2 shot 2.png|Rickety Race | Rickety Race DKC2 shot 2.png|Rickety Race | ||
Rickety Race DKC2 shot 3.png|Rickety Race | Rickety Race DKC2 shot 3.png|Rickety Race | ||
MudholeMarsh.png|[[Mudhole Marsh (Donkey Kong Country 2 | MudholeMarsh.png|[[Mudhole Marsh (Donkey Kong Country 2)|Mudhole Marsh]] | ||
Mudhole Marsh DKC2 shot.png|Mudhole Marsh | Mudhole Marsh DKC2 shot.png|Mudhole Marsh | ||
Mudhole Marsh DKC2 shot 2.png|Mudhole Marsh | Mudhole Marsh DKC2 shot 2.png|Mudhole Marsh | ||
Mudhole Marsh DKC2 shot 3.png|Mudhole Marsh | Mudhole Marsh DKC2 shot 3.png|Mudhole Marsh | ||
Rambi Rumble DKC2 shot.png|[[Rambi Rumble (Donkey Kong Country 2 | Rambi Rumble DKC2 shot.png|[[Rambi Rumble (Donkey Kong Country 2)|Rambi Rumble]] | ||
Rambi Rumble DKC2 shot 2.png|Rambi Rumble | Rambi Rumble DKC2 shot 2.png|Rambi Rumble | ||
Rambi Rumble Bonus Area 1.png|Rambi Rumble's first Bonus Area | Rambi Rumble Bonus Area 1.png|Rambi Rumble's first Bonus Area | ||
| Line 506: | Line 515: | ||
<gallery> | <gallery> | ||
Gloomy Gulch.png|Map | Gloomy Gulch.png|Map | ||
Ghostly Grove DKC2 shot.png|[[Ghostly Grove (Donkey Kong Country 2 | Ghostly Grove DKC2 shot.png|[[Ghostly Grove (Donkey Kong Country 2)|Ghostly Grove]] | ||
Ghostly Grove Bonus Area 1.png|Ghostly Grove's first Bonus Area | Ghostly Grove Bonus Area 1.png|Ghostly Grove's first Bonus Area | ||
Haunted Hall DKC2 shot.png|[[Haunted Hall]] | Haunted Hall DKC2 shot.png|[[Haunted Hall]] | ||
Gusty Glade DKC2 shot.png|[[Gusty Glade (Donkey Kong Country 2 | Gusty Glade DKC2 shot.png|[[Gusty Glade (Donkey Kong Country 2)|Gusty Glade]] | ||
Gusty Glade DKC2 shot 3.png|Gusty Glade | Gusty Glade DKC2 shot 3.png|Gusty Glade | ||
Gusty Glade Bonus Area 1.png|Gusty Glade's first Bonus Area | Gusty Glade Bonus Area 1.png|Gusty Glade's first Bonus Area | ||
Parrot Chute Panic.png|[[Parrot Chute Panic (Donkey Kong Country 2 | Parrot Chute Panic.png|[[Parrot Chute Panic (Donkey Kong Country 2)|Parrot Chute Panic]] | ||
Parrot Chute Panic DKC2 shot.png|Parrot Chute Panic | Parrot Chute Panic DKC2 shot.png|Parrot Chute Panic | ||
Parrot Chute Panic DKC2 shot 2.png|Parrot Chute Panic | Parrot Chute Panic DKC2 shot 2.png|Parrot Chute Panic | ||
Parrot Chute Panic Bonus Area 1.png|Parrot Chute Panic's first Bonus Area | Parrot Chute Panic Bonus Area 1.png|Parrot Chute Panic's first Bonus Area | ||
Web Woods DKC2 shot.png|[[Web Woods (Donkey Kong Country 2 | Web Woods DKC2 shot.png|[[Web Woods (Donkey Kong Country 2)|Web Woods]] | ||
Web Woods DKC2 shot 2.png|Web Woods | Web Woods DKC2 shot 2.png|Web Woods | ||
Web Woods DKC2 shot 3.png|Web Woods | Web Woods DKC2 shot 3.png|Web Woods | ||
| Line 525: | Line 534: | ||
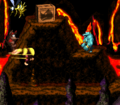
<gallery> | <gallery> | ||
K. Rool's Keep.png|Map | K. Rool's Keep.png|Map | ||
ArcticAbyss.png|[[Arctic Abyss (Donkey Kong Country 2 | ArcticAbyss.png|[[Arctic Abyss (Donkey Kong Country 2)|Arctic Abyss]] | ||
Windy Well.png|[[Windy Well (Donkey Kong Country 2 | Windy Well.png|[[Windy Well (Donkey Kong Country 2)|Windy Well]] | ||
Castle Crush.png|[[Castle Crush]] | Castle Crush.png|[[Castle Crush]] | ||
Castle Crush DKC2 shot.png|Castle Crush | Castle Crush DKC2 shot.png|Castle Crush | ||
Castle Crush Bonus Area 2.png|Castle Crush | Castle Crush Bonus Area 2.png|Castle Crush | ||
Castle Crush Glitch.png|Castle Crush glitch | Castle Crush Glitch.png|Castle Crush glitch | ||
Clappers Cavern.png|[[Clapper's Cavern (Donkey Kong Country 2 | Clappers Cavern.png|[[Clapper's Cavern (Donkey Kong Country 2)|Clapper's Cavern]] | ||
Chain Link Chamber.png|[[Chain Link Chamber (Donkey Kong Country 2 | Chain Link Chamber.png|[[Chain Link Chamber (Donkey Kong Country 2)|Chain Link Chamber]] | ||
Toxic Tower.png|[[Toxic Tower (Donkey Kong Country 2 | Toxic Tower.png|[[Toxic Tower (Donkey Kong Country 2)|Toxic Tower]] | ||
Toxic Tower DKC2 shot.png|Toxic Tower | Toxic Tower DKC2 shot.png|Toxic Tower | ||
Toxic Tower DKC2 shot 2.png|Toxic Tower | Toxic Tower DKC2 shot 2.png|Toxic Tower | ||
| Line 544: | Line 553: | ||
<gallery> | <gallery> | ||
TheFlyingKrock.png|Map | TheFlyingKrock.png|Map | ||
Screechs Sprint DKC2 shot.png|[[Screech's Sprint (Donkey Kong Country 2 | Screechs Sprint DKC2 shot.png|[[Screech's Sprint (Donkey Kong Country 2)|Screech's Sprint]] | ||
Screechs Sprint DKC2 shot 2.png|Screech's Sprint | Screechs Sprint DKC2 shot 2.png|Screech's Sprint | ||
Screechs Sprint Bonus Area.png|Screech's Sprint's Bonus Area | Screechs Sprint Bonus Area.png|Screech's Sprint's Bonus Area | ||
| Line 551: | Line 560: | ||
</gallery> | </gallery> | ||
====[[Lost World (Donkey Kong Country 2 | ====[[Lost World (Donkey Kong Country 2)|Lost World]]==== | ||
<gallery> | <gallery> | ||
Lost World DKC2 Animated Unopened.gif|Map | Lost World DKC2 Animated Unopened.gif|Map | ||
Jungle Jinx.png|[[Jungle Jinx (Donkey Kong Country 2 | Jungle Jinx.png|[[Jungle Jinx (Donkey Kong Country 2)|Jungle Jinx]] | ||
Black Ice Battle DKC2.png|[[Black Ice Battle (Donkey Kong Country 2 | Black Ice Battle DKC2.png|[[Black Ice Battle (Donkey Kong Country 2)|Black Ice Battle]] | ||
Klobber Karnage Bonus Area V1.png|[[Klobber Karnage (Donkey Kong Country 2 | Klobber Karnage Bonus Area V1.png|[[Klobber Karnage (Donkey Kong Country 2)|Klobber Karnage]] (first revision) | ||
Klobber Karnage Bonus Area V2.png|Klobber Karnage (second revision) | Klobber Karnage Bonus Area V2.png|Klobber Karnage (second revision) | ||
Fiery Furnace.png|[[Fiery Furnace (Donkey Kong Country 2 | Fiery Furnace.png|[[Fiery Furnace (Donkey Kong Country 2)|Fiery Furnace]] | ||
Animal Antics DKC2.png|[[Animal Antics (Donkey Kong Country 2 | Animal Antics DKC2.png|[[Animal Antics (Donkey Kong Country 2)|Animal Antics]] | ||
Animal Antics DKC2 shot.png|Animal Antics | Animal Antics DKC2 shot.png|Animal Antics | ||
Animal Antics DKC2 shot 2.png|Animal Antics | Animal Antics DKC2 shot 2.png|Animal Antics | ||
Animal Antics DKC2 shot 3.png|Animal Antics | Animal Antics DKC2 shot 3.png|Animal Antics | ||
Animal Antics Bonus Area.png|Animal Antics's Bonus Area | Animal Antics Bonus Area.png|Animal Antics's Bonus Area | ||
Krocodile Kore Animated.gif|[[Krocodile Kore (Donkey Kong Country 2 | Krocodile Kore Animated.gif|[[Krocodile Kore (Donkey Kong Country 2)|Krocodile Kore]] | ||
Krocodile Kore DKC2.png|Krocodile Kore | Krocodile Kore DKC2.png|Krocodile Kore | ||
</gallery> | </gallery> | ||
| Line 592: | Line 601: | ||
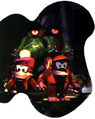
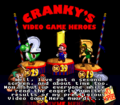
HeroesYoshi.png|Cranky's Video Game Heroes | HeroesYoshi.png|Cranky's Video Game Heroes | ||
DKC2 Ending.png|Ending of ''Donkey Kong Country 2'' | DKC2 Ending.png|Ending of ''Donkey Kong Country 2'' | ||
DKC2DKQJCMDonkeyKong.png|Japanese commercial | |||
DKC2DKQJCMDiddyKongDixieKong.png|Japanese commercial | |||
Cranky Kong DKC2 Japan commercial.png|Japanese commercial | |||
DKC2 commercial.jpg|Japanese commercial | |||
Cranky | |||
Kong | |||
</gallery> | </gallery> | ||
==Box art== | ==Box art== | ||
<gallery> | <gallery> | ||
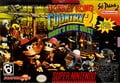
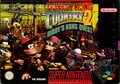
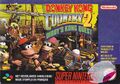
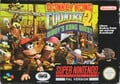
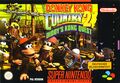
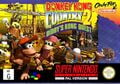
DKC2.jpg|North American box art | DKC2.jpg|North American box art | ||
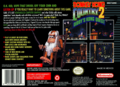
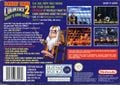
DKC2back.png|North American box art (back) | DKC2back.png|North American box art (back) | ||
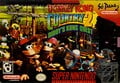
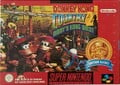
DKC2 PC Cover.jpg|North American box art ([[Player's Choice]]) | DKC2 PC Cover.jpg|North American box art ([[Player's Choice]]) | ||
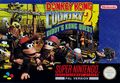
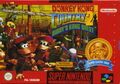
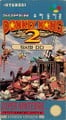
DKC2 PAL cover art.jpg|UK box art | DKC2 SNES Box BRA.jpg|Brazilian box art | ||
DKC2 SNES Box BRA Alt.jpg|Brazilian box art (Alternate) | |||
DKC2 SNES Box EUR.jpg|European box art | |||
DKC2 SNES Box EUR Nintendo Classics.jpg|European box art ([[Nintendo Classics]]) | |||
DKC2 SNES Box SCN.jpg|Scandinavian box art | |||
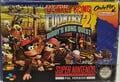
DKC2 PAL cover art.jpg|UK box art | |||
DKC2 PAL cover art back.jpg|UK box art (back) | DKC2 PAL cover art back.jpg|UK box art (back) | ||
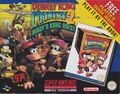
DKC2 SNES Box UK Players Guide.jpg|UK box art (Player's Guide bundle) | DKC2 SNES Box UK Players Guide.jpg|UK box art (Player's Guide bundle) | ||
DKC2 SNES Box FRA.jpg|French and Dutch box art | DKC2 SNES Box FRA.jpg|French and Dutch box art | ||
Nintendo Classics DKC2 Box FR.jpg|French and Dutch box art (Nintendo Classics) | |||
DKC2-Boxart-ita.jpg|Italian box art | |||
DKC2 SNES Box NEAI Nintendo Classics.jpg|Spanish and Italian box art (Nintendo Classics) | |||
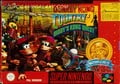
DKC2 SNES Box DE.jpg|German box art | DKC2 SNES Box DE.jpg|German box art | ||
DKC2 SNES Box DE Classic Series.jpg|German box art ( | DKC2 SNES Box DE Classic Series.jpg|German box art (Nintendo Classics) | ||
DKC2 SNES Box AU.jpg|Australasian box art | |||
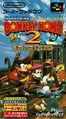
DKC2 SNES Box AU.jpg| | DKC2 Japan cover art.jpg|Japanese box art | ||
DKC2 Japan cover art.jpg|Japanese box art | |||
DKC2 Japan cover art back.jpg|Japanese box art (back) | DKC2 Japan cover art back.jpg|Japanese box art (back) | ||
DKC2 | DKC2 SNES Box KOR.jpg|Korean box art | ||
</gallery> | </gallery> | ||
| Line 688: | Line 635: | ||
<gallery> | <gallery> | ||
Donkey Kong Country 2 Player's Guide.jpg|[[Nintendo Power#Player's Guides|Player's Guide]] | Donkey Kong Country 2 Player's Guide.jpg|[[Nintendo Power#Player's Guides|Player's Guide]] | ||
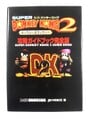
SDK2 Guide.jpg|A [[Super Donkey Kong 2 Guide Book|Japanese guide book]] distributed in the ''[[Famitsu]]'' line | |||
DKC2 Nintendo Power poster.jpg|Poster included with ''[[Nintendo Power]]'' Volume 78 | DKC2 Nintendo Power poster.jpg|Poster included with ''[[Nintendo Power]]'' Volume 78 | ||
DKC2 JPBoxArt Mockup.jpeg|Mockup of the Japanese box art sent to [[Mark Stevenson]] for reference. | DKC2 JPBoxArt Mockup.jpeg|Mockup of the Japanese box art sent to [[Mark Stevenson]] for reference. | ||
| Line 694: | Line 642: | ||
NP issue 79 cards (front).jpg|''Nintendo Power'' Volume 79 trading cards (front) | NP issue 79 cards (front).jpg|''Nintendo Power'' Volume 79 trading cards (front) | ||
NP issue 79 cards (back).jpg|''Nintendo Power'' Volume 79 trading cards (back) | NP issue 79 cards (back).jpg|''Nintendo Power'' Volume 79 trading cards (back) | ||
DKC2 AU NMS KC.jpg|[[List of Donkey Kong Country 2: Diddy's Kong Quest pre-release and unused content|Early]] [[Kremkoin]] | DKC2 AU NMS KC.jpg|[[List of Donkey Kong Country 2: Diddy's Kong Quest pre-release and unused content|Early]] [[Kremkoin]] | ||
DKC2 AU NMS LW.jpg|Alternate version of [[Lost World (Donkey Kong Country 2 | DKC2 AU NMS LW.jpg|Alternate version of [[Lost World (Donkey Kong Country 2)|Lost World]] map | ||
DKC2 AU NMS GO.jpg|Alternate version of [[Game Over]] screen | DKC2 AU NMS GO.jpg|Alternate version of [[Game Over]] screen | ||
DKC2 Print ad BR.jpg|Brazilian print ad | |||
WiiU_VC_DKC2_PAL_NTSC-U_Icon.png|European/American Wii U [[Virtual Console]] HOME Menu icon | |||
DKC2 VC Icon.jpg|Japanese Wii U Virtual Console HOME Menu icon | |||
DKC2 3DS VC Icon.jpg|Japanese [[Nintendo 3DS#New Nintendo 3DS / New Nintendo 3DS XL|New Nintendo 3DS]] Virtual Console HOME Menu icon | |||
</gallery> | </gallery> | ||
{{ | {{galleries}} | ||
{{DKC2}} | {{DKC2}} | ||
[[Category:Galleries]] | [[Category:Galleries]] | ||
[[Category:Donkey Kong Country 2: Diddy's Kong Quest|*]] | [[Category:Donkey Kong Country 2: Diddy's Kong Quest|*]] | ||
[[de:Donkey Kong Country 2: Diddy's Kong Quest/Galerie]] | |||
Latest revision as of 20:17, February 6, 2025
This is a gallery of images for the game Donkey Kong Country 2: Diddy's Kong Quest. For images related to the Game Boy Advance remake, see here.
Logos[edit]
International logo
Japanese logo
Artwork[edit]
Heroes[edit]
Diddy Kong
Diddy Kong
Diddy Kong

Diddy Kong
Diddy Kong
Diddy Kong holding a SNES controller
Diddy Kong, throwing a Kannonball

Dixie Kong
Dixie Kong
Dixie Kong
Dixie Kong
Dixie Kong and a Barrel
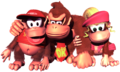
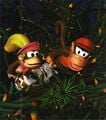
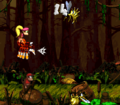
Donkey, Diddy, and Dixie Kong
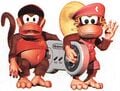
Diddy and Dixie holding a SNES controller
Diddy and Dixie with a SNES controller
The Kongs about to perform a team up move
The Kongs teaming up

The heroes running
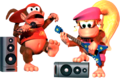
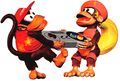
The monkeys playing their instruments

The Kongs lifting a Klobber
The Kongs with a Nintendo logo
The Kongs with a Nintendo logo


Allies[edit]
Kong Klan[edit]
Cranky Kong
The Kong Family


Animal Buddies[edit]


Enemies[edit]
Lazy Landlubbers[edit]
Click-Clack
Flitter
Neek


Submerged Seadogs[edit]


Kremling Kuthroats[edit]
Gray Kaboing
Green Kaboing
Kannon
Klampon
Klinger
A green Krockhead
A brown Krockhead
A submerged green Krockhead
Krook
Kruncha
Kutlass
"Mr. X" (unused)
The Kremlings


Barnacled Bosses[edit]
Kaptain K. Rool


Items[edit]
Extra Life Balloons
A Kremkoin


Objects[edit]
Kannon and Kannonball
Rattly's Animal Crate
Squawks' No Animal Sign


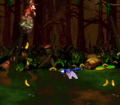
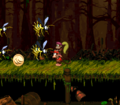
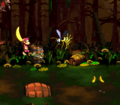
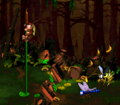
Scenes[edit]
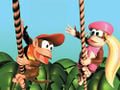
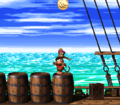
Diddy Kong and Dixie Kong on ropes
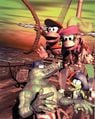
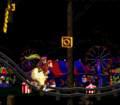
The Kongs invade Gangplank Galleon
Artwork of Diddy and Dixie in Krem Quay
Another image of the heroes in Krem Quay
Artwork of the Kongs in Hornet Hole
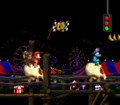
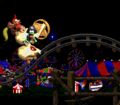
Artwork of the Kongs on a roller coaster

The Kongs are chased by a Kackle
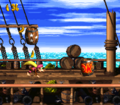
The Kongs climb Gangplank Galleon
The Kongs and Squawks in a bramble maze
Diddy, Dixie, and a Klampon in a castle area
Diddy Kong and Dixie Kong meet Screech
Diddy and Dixie find sunken treasure underwater
Artwork of Diddy Kong and Dixie Kong about to rescue Donkey Kong
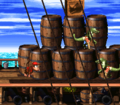
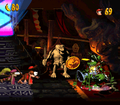
Group artwork of the Kongs and several enemies on Gangplank Galleon
Artwork of Gloomy Gulch
Artwork of Gloomy Gulch
Artwork of the Kongs exploring K. Rool's Keep
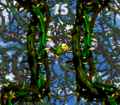
The Kongs blasting through a bramble maze

Diddy and Dixie holding a banana in front of a "DK2" logo and Kaptain K. Rool
The Kongs holding a "DK2" logo
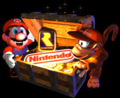
Diddy Kong and Mario opening a Treasure Chest
Diddy and Dixie scatter their way to rescue DK
Diddy and Dixie scatter their way to rescue DK
Diddy and Dixie opening a chest
Other half of the previous image, with Crocodile Isle in the background
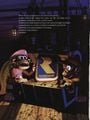
Artwork of Kong Kollege
Scenery of Gangplank Galleon
Artwork of Gangplank Galleon
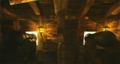
Scenery of Gangplank Galleon's hold
Scenery of Crocodile Cauldron
Scenery of a mine
Scenery of Gloomy Gulch
Scenery of The Flying Krock


.jpg)


.jpg)


.jpg)


Miscellaneous[edit]
Artwork by Steve Mayles, character designer for the Donkey Kong Country series, made in celebration of 25 years since the original release of Donkey Kong Country 2: Diddy's Kong Quest


Sprites[edit]
Characters[edit]
Kong Klan[edit]

Diddy's idle animation

Diddy Kong (P2)

Dixie's walking animation

Dixie Kong (P2)
Funky Kong


Animal Buddies[edit]
Dixie riding Rambi
Rattly

Miscellaneous[edit]

Yoshi

Items[edit]

Banana

Banana Bunch

Kremkoin

O

N

G


Objects[edit]
Barrels[edit]

Dixie Barrel

Rambi Barrel

Rattly Barrel

Squawks Barrel

Squitter Barrel

Krockhead Barrel

Minus Barrel


Other[edit]

Enguarde's Animal Crate

Rambi's Animal Crate

Rattly's Animal Crate

Squawks' Animal Crate

Squitter's Animal Crate

Krow Egg

Enguarde's No Animal Sign

Rambi's No Animal Sign

Rattly's No Animal Sign

Squawks' No Animal Sign

Squitter's No Animal Sign

Rope


Enemies[edit]
Lazy Landlubbers[edit]

Flitter

Mini-Necky (ghost)

Zinger


Submerged Seadogs[edit]

Flotsam

Puftup


Kremling Kuthroats[edit]

Kaboing

Klobber

Klobber

Krockhead

Kruncha

Kruncha

Kutlass


Barnacled Bosses[edit]

Kaptain K. Rool


Backgrounds[edit]
Levels[edit]
Ship deck
Ship rigging
Ship hold
Lava
Brambles
Hive
Ice
Jungle
.png)
.png)
.png)
.png)

.png)
.png)
.png)
NPCs[edit]
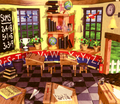
Monkey Museum
Kong Kollege
Bonus Bonanza
Funky's Flights II


.png)

Screenshots[edit]
Gangplank Galleon[edit]
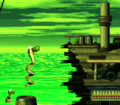
Map
Pirate Panic
Pirate Panic
Pirate Panic
Pirate Panic
Pirate Panic's first Bonus Area
Gangplank Galley
Gangplank Galley
Gangplank Galley's second Bonus Area
Topsail Trouble
Topsail Trouble
Topsail Trouble


Crocodile Cauldron[edit]
Map
Hot-Head Hop's first Bonus Area
Hot-Head Hop's second Bonus Area
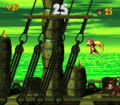
Kannon's Klaim
Lava Lagoon
Lava Lagoon
Lava Lagoon
Lava Lagoon's Bonus Area
Red-Hot Ride
Red-Hot Ride
Red-Hot Ride

Red-Hot Ride's second Bonus Area
Squawks's Shaft
Squawks's Shaft
Squawks's Shaft
Squawks's Shaft's second Bonus Area


Krem Quay[edit]
World map
Barrel Bayou
Barrel Bayou
Barrel Bayou
Barrel Bayou
Barrel Bayou

Barrel Bayou's second Bonus Area
Glimmer's Galleon
Glimmer's Galleon
Glimmer's Galleon
Krockhead Klamber
Krockhead Klamber
Krockhead Klamber
Krockhead Klamber
Krockhead Klamber
Krockhead Klamber's Bonus Area
Rattle Battle
Rattle Battle
Rattle Battle
Slime Climb
Slime Climb
Slime Climb
Slime Climb
Slime Climb
Bramble Blast
Bramble Blast


Krazy Kremland[edit]

First half
Second half
Hornet Hole
Hornet Hole
Target Terror

Target Terror
Target Terror's second Bonus Area
Rickety Race
Rickety Race
Rickety Race
Mudhole Marsh
Mudhole Marsh
Mudhole Marsh
Rambi Rumble
Rambi Rumble's first Bonus Area


Gloomy Gulch[edit]
Map
Ghostly Grove's first Bonus Area
Gusty Glade
Gusty Glade's first Bonus Area
Parrot Chute Panic
Parrot Chute Panic
Parrot Chute Panic's first Bonus Area
Web Woods
Web Woods
Web Woods's first Bonus Area


K. Rool's Keep[edit]
Map

Castle Crush
Castle Crush
Castle Crush glitch
Toxic Tower
Toxic Tower
Toxic Tower
Toxic Tower


The Flying Krock[edit]
Map
Screech's Sprint
Screech's Sprint's Bonus Area
K. Rool Duel (NTSC)
K. Rool Duel (PAL)


Lost World[edit]
Map
Klobber Karnage (first revision)
Klobber Karnage (second revision)
Animal Antics
Animal Antics
Animal Antics
Animal Antics's Bonus Area
Krocodile Kore


NPC locations[edit]


Miscellaneous[edit]
Title screen
Japanese title screen
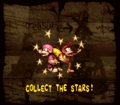
Collect the Stars!
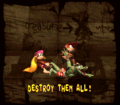
Destroy Them All!

Find the Token!
Pre-release title screen

Pre-release screenshot from Nintendo Power
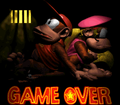
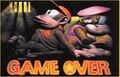
Game over screen
Cranky's Video Game Heroes
Ending of Donkey Kong Country 2
Japanese commercial
Japanese commercial

Japanese commercial

Japanese commercial


Box art[edit]

North American box art
North American box art (back)
North American box art (Player's Choice)
Brazilian box art
Brazilian box art (Alternate)
European box art
European box art (Nintendo Classics)
Scandinavian box art
UK box art
UK box art (back)
UK box art (Player's Guide bundle)
French and Dutch box art
French and Dutch box art (Nintendo Classics)
Italian box art
Spanish and Italian box art (Nintendo Classics)
German box art
German box art (Nintendo Classics)
Australasian box art
Japanese box art
Japanese box art (back)
Korean box art


Miscellaneous[edit]
A Japanese guide book distributed in the Famitsu line
Poster included with Nintendo Power Volume 78
Mockup of the Japanese box art sent to Mark Stevenson for reference.
Concept of Crocodile Isle
Crocodile Isle being designed
Nintendo Power Volume 79 trading cards (front)
Nintendo Power Volume 79 trading cards (back)
Alternate version of Lost World map
Alternate version of Game Over screen
Brazilian print ad
European/American Wii U Virtual Console HOME Menu icon

Japanese Wii U Virtual Console HOME Menu icon

Japanese New Nintendo 3DS Virtual Console HOME Menu icon


.jpg)
.jpg)


| Donkey Kong Country 2: Diddy's Kong Quest (SNES) / Donkey Kong Country 2 (GBA) | ||
|---|---|---|
| Protagonists | Cranky Kong • Diddy Kong • Dixie Kong • Donkey Kong • Funky Kong • Swanky Kong • Wrinkly Kong | |
| Animal Friends | Clapper • Enguarde • Expresso • Glimmer • Quawks • Rambi • Rattly • Squawks • Squitter | |
| Bosses | Krow • Kleever • Kudgel • King Zing • Kreepy Krow • Kerozene • Kaptain K. Rool | |
| Enemies | Cat O' 9 Tails • Click-Clack • Flitter • Flotsam • Kaboing • Kaboom • Kackle • Kannon • Klampon • Klank • Klinger • Kloak • Klobber • Klomp • Klubba • Krockhead • Krook • Kruncha • Kutlass • Lockjaw • Mini-Necky • Neek • Puftup • Screech • Shuri • Snapjaw • Spiny • Zinger | |
| Levels | Gangplank Galleon | Pirate Panic • Mainbrace Mayhem • Gangplank Galley • Lockjaw's Locker • Topsail Trouble • Krow's Nest |
| Crocodile Cauldron | Hot-Head Hop • Kannon's Klaim • Lava Lagoon • Red-Hot Ride • Squawks's Shaft • Kleever's Kiln | |
| Krem Quay | Barrel Bayou • Glimmer's Galleon • Krockhead Klamber • Rattle Battle • Slime Climb • Bramble Blast • Kudgel's Kontest | |
| Krazy Kremland | Hornet Hole • Target Terror • Bramble Scramble • Rickety Race • Mudhole Marsh • Rambi Rumble • King Zing Sting | |
| Gloomy Gulch | Ghostly Grove • Haunted Hall • Gusty Glade • Parrot Chute Panic • Web Woods • Kreepy Krow | |
| K. Rool's Keep | Arctic Abyss • Windy Well • Castle Crush • Clapper's Cavern • Chain Link Chamber • Toxic Tower • Stronghold Showdown | |
| The Flying Krock | Screech's Sprint • K. Rool Duel | |
| Lost World | Jungle Jinx • Black Ice Battle • Klobber Karnage • Fiery Furnace • Animal Antics • Krocodile Kore | |
| Funky's Flights missions | Aerial Loop • Submerged Stint • Kongstruction • Kongnapped • Cool Sounds • Kongnapped 2 • Toxic Kongstruction | |
| Barrels | Animal Barrel • Regular Barrel • Barrel Kannon • Biplane Barrel • Blast Barrel • Bonus Barrel • Diddy & Dixie Barrels • DK Barrel • Exclamation Point Barrel • Golden Barrel • Krockhead Barrel • Plus and Minus Barrels • Rotatable Barrel • Star Barrel • Steerable Barrel • TNT Barrel | |
| Other items and objects | Banana • Banana Bunch • Banana Coin • Extra Life Balloon (red · green · blue) • Hanging vine • Hook • KONG Letters • Kremkoin • Roller Coaster • Rope • Star • Toxic waste | |
| Miscellaneous | Ask Uncle Tusk • Cold Crossword Challenge • Donkey Kong Country 2: Diddy's Kong Quest Original Soundtrack • Donkey Kong Country Trilogy • Gallery • Glitches • Media • Nintendo Music • Pre-release and unused content • Quotes • Staff • Super Donkey Kong 2 Guide Book • Uncle Kong | |