Gallery:Mario Party 2: Difference between revisions
mNo edit summary |
m (Text replacement - "([Cc])olor-link" to "$1olor link") |
||
| (45 intermediate revisions by 11 users not shown) | |||
| Line 64: | Line 64: | ||
MP2 Pirate Land Logo.png|[[Pirate Land]] logo | MP2 Pirate Land Logo.png|[[Pirate Land]] logo | ||
MP2 Western Land Logo.png|[[Western Land]] logo | MP2 Western Land Logo.png|[[Western Land]] logo | ||
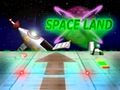
MP2 Space Land Logo.png|[[Space Land]] logo | |||
MP2 Mystery Land Logo.png|[[Mystery Land]] logo | MP2 Mystery Land Logo.png|[[Mystery Land]] logo | ||
MP2 Horror Land Logo.png|[[Horror Land]] logo | MP2 Horror Land Logo.png|[[Horror Land]] logo | ||
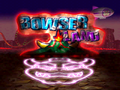
MP2 Bowser Land Logo.png|[[Bowser Land]] logo | MP2 Bowser Land Logo.png|[[Bowser Land]] logo | ||
| Line 71: | Line 71: | ||
===Result logos=== | ===Result logos=== | ||
<gallery> | <gallery widths=130 heights=60> | ||
Pirate Land Results logo.png | Pirate Land Results logo.png | ||
Western Land Results logo.png | Western Land Results logo.png | ||
| Line 82: | Line 82: | ||
===Previews=== | ===Previews=== | ||
<gallery perrow=4> | <gallery widths=64 heights=48 perrow=4> | ||
Pirate Land MP2 Preview.png|[[Pirate Land]] | Pirate Land MP2 Preview.png|[[Pirate Land]] | ||
Western Land MP2 Preview.png|[[Western Land]] | Western Land MP2 Preview.png|[[Western Land]] | ||
| Line 98: | Line 98: | ||
Pirate Land map.png|[[Pirate Land]] | Pirate Land map.png|[[Pirate Land]] | ||
Western Land map.png|[[Western Land]] | Western Land map.png|[[Western Land]] | ||
Space Land map.png|[[Space Land]] | |||
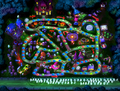
Mystery Land Map Overview.png|[[Mystery Land]] | Mystery Land Map Overview.png|[[Mystery Land]] | ||
HorrorLand MP2.png|[[Horror Land]] at day | HorrorLand MP2.png|[[Horror Land]] at day | ||
Horror Land map (nighttime).png|[[Horror Land]] at night | Horror Land map (nighttime).png|[[Horror Land]] at night | ||
| Line 142: | Line 142: | ||
RedKoopaTroopaMP2.png|[[Red Koopa Troopa]] | RedKoopaTroopaMP2.png|[[Red Koopa Troopa]] | ||
MP2 Boo Model.png|[[Boo]] | MP2 Boo Model.png|[[Boo]] | ||
MP2 Big Boo Sprite.png|[[Big Boo]] | MP2 Big Boo Sprite.png|[[Big Boo (character)|Big Boo]] | ||
Bob-ombMP2.png|[[Bob-omb]] | Bob-ombMP2.png|[[Bob-omb]] | ||
File:PurpleMechaFlyGuyMP2.png|[[Purple Mecha Fly Guy]] | File:PurpleMechaFlyGuyMP2.png|[[Purple Mecha Fly Guy]] | ||
| Line 154: | Line 154: | ||
===Character icons=== | ===Character icons=== | ||
<gallery perrow="6"> | <gallery widths=48 heights=32 perrow="6"> | ||
Mario Party 2 ShotMugs.png|[[Mario]] | Mario Party 2 ShotMugs.png|[[Mario]] | ||
MarioWinningMP2.png|Mario (Win) | MarioWinningMP2.png|Mario (Win) | ||
| Line 176: | Line 176: | ||
===Character mugshots=== | ===Character mugshots=== | ||
<gallery> | <gallery widths=48 heights=32> | ||
Mario's Mario Party Face.png|Mario | Mario's Mario Party Face.png|Mario | ||
Luigi Player Panel sprite.png|Luigi | Luigi Player Panel sprite.png|Luigi | ||
| Line 186: | Line 186: | ||
===Mini-map characters=== | ===Mini-map characters=== | ||
<gallery perrow=6> | <gallery widths=40px heights=40px perrow=6 class="rawsize"> | ||
Pirate Mario Mini-Map.png | Pirate Mario Mini-Map.png | ||
Cowboy Mario Mini-Map.png | Cowboy Mario Mini-Map.png | ||
| Line 226: | Line 226: | ||
===Mini-map sprites=== | ===Mini-map sprites=== | ||
<gallery> | <gallery widths=54 heights=18> | ||
MP12 Mario Mini-Map sprite.png | MP12 Mario Mini-Map sprite.png|[[Mario]] | ||
MP12 Luigi Mini-Map sprite.png | MP12 Luigi Mini-Map sprite.png|[[Luigi]] | ||
MP12 Peach Mini-Map sprite.png | MP12 Peach Mini-Map sprite.png|[[Princess Peach|Peach]] | ||
MP12 Yoshi Mini-Map sprite.png | MP12 Yoshi Mini-Map sprite.png|[[Yoshi]] | ||
MP12 Wario Mini-Map sprite.png | MP12 Wario Mini-Map sprite.png|[[Wario]] | ||
MP12 DK Mini-Map sprite.png | MP12 DK Mini-Map sprite.png|[[Donkey Kong|DK]] | ||
MP12 Toad Mini-Map sprite.png | MP12 Toad Mini-Map sprite.png|[[Toad]] | ||
MP12 Boo Mini-Map sprite.png | </gallery> | ||
MP2 Bank Koopa Mini-Map sprite.png | <gallery widths=54 heights=20 style="display:inline-block"> | ||
MP2 Item Koopa Mini-Map sprite.png | MP12 Boo Mini-Map sprite.png|Boo | ||
MP12 Baby Bowser Mini-Map sprite.png | </gallery> | ||
MP2 Baby Bowser Banker Mini-Map sprite.png | <gallery widths=54 heights=18 style="display:inline-block"> | ||
MP2 Baby Bowser Shopkeeper Mini-Map sprite.png | MP2 Bank Koopa Mini-Map sprite.png|[[Koopa Troopa|Koopa]] (banker) | ||
MP2 Gate Mini-Map sprite.png | MP2 Item Koopa Mini-Map sprite.png|Koopa (shopkeeper) | ||
MP12 Baby Bowser Mini-Map sprite.png|[[Koopa Kid|Baby Bowser]] | |||
MP2 Baby Bowser Banker Mini-Map sprite.png|Baby Bowser (banker) | |||
MP2 Baby Bowser Shopkeeper Mini-Map sprite.png|Baby Bowser (shopkeeper) | |||
MP2 Gate Mini-Map sprite.png|Gate | |||
</gallery> | </gallery> | ||
===Mini-game sprites=== | ===Mini-game sprites=== | ||
<gallery perrow=6> | <gallery widths=48 heights=16 perrow=6> | ||
Mario mini-game icon MP2.png | Mario mini-game icon MP2.png | ||
Luigi mini-game icon MP2.png | Luigi mini-game icon MP2.png | ||
| Line 257: | Line 261: | ||
Wario race mini-game icon MP2.png | Wario race mini-game icon MP2.png | ||
DK race mini-game icon MP2.png | DK race mini-game icon MP2.png | ||
</gallery> | |||
<gallery widths=48 heights=32 perrow=6> | |||
Mario Day at the Races icon MP2.png | Mario Day at the Races icon MP2.png | ||
Luigi Day at the Races icon MP2.png | Luigi Day at the Races icon MP2.png | ||
| Line 266: | Line 272: | ||
===Dialogue portraits=== | ===Dialogue portraits=== | ||
<gallery> | <gallery widths=80px heights=40px> | ||
Toad Dialogue Portrait MP2.png|[[Toad]] | Toad Dialogue Portrait MP2.png|[[Toad]] | ||
Mint Green Toad Dialogue Portrait MP2.png|[[Battle T.|Mini-Game Land Toad]] | Mint Green Toad Dialogue Portrait MP2.png|[[Battle T.|Mini-Game Land Toad]] | ||
| Line 273: | Line 279: | ||
Skeleton Key Dialogue Portrait MP2.png|[[Skeleton Key]] | Skeleton Key Dialogue Portrait MP2.png|[[Skeleton Key]] | ||
Boo Dialogue Portrait MP2-3.png|[[Boo]] | Boo Dialogue Portrait MP2-3.png|[[Boo]] | ||
Big Boo Dialogue Portrait MP2.png|[[Big Boo]] | Big Boo Dialogue Portrait MP2.png|[[Big Boo (character)|Big Boo]] | ||
SnufitMP2.png|[[Snifit (Super Mario 64)|Snufit]] | SnufitMP2.png|[[Snifit (Super Mario 64)|Snufit]] | ||
Mr. I Dialogue Portrait MP2.png|[[Mr. I|Mr. I.]] | Mr. I Dialogue Portrait MP2.png|[[Mr. I|Mr. I.]] | ||
| Line 283: | Line 289: | ||
Sushi Dialogue Portrait MP2.png|[[Sushi]] | Sushi Dialogue Portrait MP2.png|[[Sushi]] | ||
Thwomp Dialogue Portrait MP2.png|[[Thwomp]] | Thwomp Dialogue Portrait MP2.png|[[Thwomp]] | ||
Metallic Blooper Ride Dialogue Portrait MP2.png|[[Blooper]] ride | Metallic Blooper Ride Dialogue Portrait MP2.png|[[Blooper|Bloober]] ride | ||
Alien Dialogue Portrait MP2.png|[[Bob-omb Buddy|Alien]] | Alien Dialogue Portrait MP2.png|[[Bob-omb Buddy|Alien]] | ||
Steamer Dialogue Portrait MP2.png|[[Steamer]] | Steamer Dialogue Portrait MP2.png|[[Steamer]] | ||
| Line 298: | Line 304: | ||
===Chance Time blocks=== | ===Chance Time blocks=== | ||
<gallery> | <gallery widths=48 heights=32> | ||
Mario Chance Time MP2.png|Mario | Mario Chance Time MP2.png|Mario | ||
Luigi Chance Time MP2.png|Luigi | Luigi Chance Time MP2.png|Luigi | ||
| Line 318: | Line 324: | ||
===Board selection markers=== | ===Board selection markers=== | ||
<gallery> | <gallery widths=40 heights=40> | ||
MP2 Character Selection 1P Text.png|First player | MP2 Character Selection 1P Text.png|First player | ||
MP2 Character Selection 2P Text.png|Second player | MP2 Character Selection 2P Text.png|Second player | ||
| Line 327: | Line 333: | ||
===Place markers=== | ===Place markers=== | ||
<gallery> | <gallery widths=40 heights=20> | ||
MP2-3 Board Play 1st Place Marker Test.png|1st place | MP2-3 Board Play 1st Place Marker Test.png|1st place | ||
MP2 Board Play 2nd Place Marker Test.png|2nd place | MP2 Board Play 2nd Place Marker Test.png|2nd place | ||
| Line 335: | Line 341: | ||
===Character selecting hands=== | ===Character selecting hands=== | ||
<gallery> | <gallery widths=48 heights=32> | ||
MP2 Hand P1.png|First player hand | MP2 Hand P1.png|First player hand | ||
MP2 Hand P2.png|Second player hand | MP2 Hand P2.png|Second player hand | ||
| Line 344: | Line 350: | ||
===Skill levels=== | ===Skill levels=== | ||
<gallery> | <gallery widths=40 heights=40> | ||
Easy Mode Mushroom MP2.png | Easy Mode Mushroom MP2.png | ||
Normal Mode Bubble MP2.png | Normal Mode Bubble MP2.png | ||
| Line 352: | Line 358: | ||
===Character turns=== | ===Character turns=== | ||
<gallery widths=" | <gallery widths="250px" heights="28px" perrow="3"> | ||
MP2 Mario Start.png|Mario | MP2 Mario Start.png|Mario | ||
MP2 Luigi Start.png|Luigi | MP2 Luigi Start.png|Luigi | ||
| Line 373: | Line 379: | ||
===Spaces=== | ===Spaces=== | ||
<gallery> | <gallery widths=48 heights=32> | ||
ChanceTimeSpace MP2.png|[[Miracle Space]] | ChanceTimeSpace MP2.png|[[Miracle Space]] | ||
BattleSpace MP2.png|[[Battle Space]] | BattleSpace MP2.png|[[Battle Space]] | ||
| Line 400: | Line 406: | ||
===Dice block numbers=== | ===Dice block numbers=== | ||
<gallery perrow=6> | <gallery widths=40 heights=40 perrow=6> | ||
MP1-2 Number 0.png|0 spaces | MP1-2 Number 0.png|0 spaces | ||
MP1-2 Number 1.png|1 space | MP1-2 Number 1.png|1 space | ||
| Line 416: | Line 422: | ||
===Items=== | ===Items=== | ||
====Sprites==== | ====Sprites==== | ||
<gallery perrow="5"> | <gallery widths=48 heights=32 perrow="5"> | ||
Mushroom MP2-3.png|[[Mushroom]] | Mushroom MP2-3.png|[[Mushroom]] | ||
Skeleton Key MP2.png|[[Skeleton Key]] | Skeleton Key MP2.png|[[Skeleton Key]] | ||
| Line 436: | Line 442: | ||
====Item description icons==== | ====Item description icons==== | ||
<gallery perrow="5"> | <gallery widths=40 heights=40 perrow="5"> | ||
MP2-3 Mushroom.png|Mushroom | MP2-3 Mushroom.png|Mushroom | ||
MP2 Skeleton Key.png|Skeleton Key | MP2 Skeleton Key.png|Skeleton Key | ||
| Line 450: | Line 456: | ||
====Mini-game sprites==== | ====Mini-game sprites==== | ||
<gallery perrow="5"> | <gallery widths=48 heights=32 perrow="5"> | ||
Mushroom mini-game sprite MP2.png|Mushroom | Mushroom mini-game sprite MP2.png|Mushroom | ||
Skeleton Key mini-game sprite MP2.png|Skeleton Key | Skeleton Key mini-game sprite MP2.png|Skeleton Key | ||
| Line 464: | Line 470: | ||
===Transition screens=== | ===Transition screens=== | ||
<gallery> | <gallery widths=64 heights=64> | ||
Toad Transition MP2.png|Toad | Toad Transition MP2.png|Toad | ||
Goomba Transition MP2.png|Goomba | Goomba Transition MP2.png|Goomba | ||
| Line 480: | Line 486: | ||
===Mini-game preview icons=== | ===Mini-game preview icons=== | ||
<gallery> | <gallery widths=128 heights=96> | ||
MP2 Lava Tile Isle Icon.png | MP2 Lava Tile Isle Icon.png|[[Lava Tile Isle]] | ||
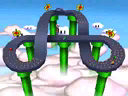
MP2_Hot_Rope_Jump_Icon.png|[[Hot Rope Jump]] | |||
MP2 Shell Shocked Stage 1 Icon.png | MP2 Shell Shocked Stage 1 Icon.png|[[Tread Carefully (minigame)|Shell Shocked]] (Stage 1) | ||
MP2 Shell Shocked Stage 2 Icon.png | MP2 Shell Shocked Stage 2 Icon.png|Shell Shocked (Stage 2) | ||
MP2 Shell Shocked Stage 3 Icon.png | MP2 Shell Shocked Stage 3 Icon.png|Shell Shocked (Stage 3) | ||
MP2 TOAD in the Box Icon.png | MP2 TOAD in the Box Icon.png|[[Toad in the Box|TOAD in the Box]] | ||
MP2 Mecha-Marathon Icon.png | MP2 Mecha-Marathon Icon.png|[[Mecha Marathon|Mecha-Marathon]] | ||
MP2 Roll Call Type 1 Icon.png | MP2 Roll Call Type 1 Icon.png|[[Roll Call (minigame)|Roll Call]] (Type 1) | ||
MP2 Roll Call Type 2 Icon.png | MP2 Roll Call Type 2 Icon.png|Roll Call (Type 2) | ||
MP2 Roll_Call Type 3 Icon.png|Roll Call (Type 3) | |||
MP2 Abandon Ship | MP2 Abandon_Ship_Icon.png|[[Abandon Ship (minigame)|Abandon Ship]] | ||
MP2 Platform Peril Icon.png | MP2 Platform Peril Icon.png|[[Platform Peril]] | ||
MP2 Totem Pole Pound | MP2 Totem_Pole_Pound_Icon.png|[[Totem Pole Pound]] | ||
MP2 Bumper Balls Stage 1 Icon.png | MP2 Bumper Balls Stage 1 Icon.png|[[Bumper Balls]] (Stage 1) | ||
MP2 Bumper Balls Stage 2 Icon.png | MP2 Bumper Balls Stage 2 Icon.png|Bumper Balls (Stage 2) | ||
MP2 Bumper Balls Stage 3 Icon.png | MP2 Bumper Balls Stage 3 Icon.png|Bumper Balls (Stage 3) | ||
MP2_Bombs_Away_Icon.png | MP2_Bombs_Away_Icon.png|[[Bombs Away (minigame)|Bombs Away]] | ||
MP2 Tipsy Tourney Icon.png | MP2 Tipsy Tourney Icon.png|[[Tipsy Tourney]] | ||
MP2_Honeycomb_Havoc_Icon.png | MP2_Honeycomb_Havoc_Icon.png|[[Honeycomb Havoc]] | ||
MP2_Hexagon_Heat_Icon.png | MP2_Hexagon_Heat_Icon.png|[[Hexagon Heat]] | ||
MP2 Skateboard Scamper Icon.png | MP2 Skateboard Scamper Icon.png|[[Skateboard Scamper]] | ||
MP2 Slot Car Derby Course 1 Icon.png | MP2 Slot Car Derby Course 1 Icon.png|[[Slot-Car Derby|Slot Car Derby]] (Course 1) | ||
MP2 Slot Car Derby Course 2 Icon.png | MP2 Slot Car Derby Course 2 Icon.png|Slot Car Derby (Course 2) | ||
MP2 Slot Car Derby Course 3 Icon.png | MP2 Slot Car Derby Course 3 Icon.png|Slot Car Derby (Course 3) | ||
MP2 Shy Guy Says Icon.png | MP2 Shy Guy Says Icon.png|[[Shy Guy Says]] | ||
MP2 Sneak 'n' Snore Icon.png | MP2 Sneak 'n' Snore Icon.png|[[Sneak 'n' Snore]] | ||
MP2 Dizzy Dancing | MP2 Dizzy_Dancing_Icon.png|[[Dizzy Dancing]] | ||
MP2 Tile Driver Icon.png | MP2 Tile Driver Icon.png|[[Tile Driver]] | ||
MP2 Deep Sea Salvage Icon.png | MP2 Deep Sea Salvage Icon.png|{{color link|gold|Deep Sea Salvage}} | ||
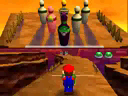
MP2 Bowl Over Icon.png | MP2 Bowl Over Stage 1 Icon.png|[[Bowl Over]] (Stage 1) | ||
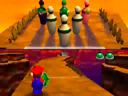
MP2 Crane Game Icon.png | MP2 Bowl Over Stage 2 Icon.png|Bowl Over (Stage 2) | ||
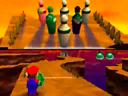
MP2 Move to the Music Icon.png | MP2 Bowl Over Stage 3 Icon.png|Bowl Over (Stage 3) | ||
MP2_BOB-OMB_Barrage_Icon.png | MP2 Crane Game Icon.png|[[Crane Game (minigame)|Crane Game]] | ||
MP2_Look_Away_Icon.png | MP2 Move to the Music Icon.png|[[Move to the Music]] | ||
MP2 Shock, Drop or Roll Icon.png | MP2_BOB-OMB_Barrage_Icon.png|[[Bob-omb Barrage|BOB-OMB Barrage]] | ||
MP2 Lights Out Icon.png | MP2_Look_Away_Icon.png|[[Look Away]] | ||
MP2_Filet_Relay_Icon.png | MP2 Shock, Drop or Roll Icon.png|[[Shock, Drop or Roll]] | ||
MP2_Archer-ival_Icon.png | MP2 Lights Out Icon.png|[[Lights Out]] | ||
MP2_Quicksand_Cache_Icon.png | MP2_Filet_Relay_Icon.png|[[Filet Relay]] | ||
MP2 Rainbow | MP2_Archer-ival_Icon.png|[[Archer-ival]] | ||
MP2_TOAD_Bandstand_Icon.png | MP2_Quicksand_Cache_Icon.png|{{color link|gold|Quicksand Cache}} | ||
MP2 Bobsled Run Icon.png | MP2 Rainbow Run Icon.png|[[Rainbow Run (minigame)|Rainbow Run]] | ||
MP2 Handcar Havoc Icon.png | MP2_TOAD_Bandstand_Icon.png|[[Toad Bandstand|TOAD Bandstand]] | ||
MP2_Balloon_Burst_Icon.png | MP2 Bobsled Run Icon.png|[[Bobsled Run]] | ||
MP2 Sky Pilots Icon.png | MP2 Handcar Havoc Icon.png|[[Handcar Havoc]] | ||
MP2 Speed Hockey Icon.png | MP2_Balloon_Burst_Icon.png|[[Balloon Burst (2 vs. 2)|Balloon Burst]] | ||
MP2 Cake Factory Icon.png | MP2 Sky Pilots Icon.png|[[Sky Pilots]] | ||
MP2_Magnet_Carta_Icon.png | MP2 Speed Hockey Icon.png|[[Speed Hockey]] | ||
MP2 Looney Lumberjacks Icon.png | MP2 Cake Factory Icon.png|[[Cake Factory]] | ||
MP2_Torpedo_Targets_Icon.png | MP2_Magnet_Carta_Icon.png|{{color link|gold|Magnet Carta}} | ||
MP2 Destruction Duet Type 1 Icon.png | MP2 Looney Lumberjacks Icon.png|[[Looney Lumberjacks]] | ||
MP2 Destruction Duet Type 2 Icon.png | MP2_Torpedo_Targets_Icon.png|[[Torpedo Targets]] | ||
MP2 Destruction Duet Type 3 Icon.png | MP2 Destruction Duet Type 1 Icon.png|[[Destruction Duet]] (Type 1) | ||
MP2 Dungeon Dash Icon.png | MP2 Destruction Duet Type 2 Icon.png|Destruction Duet (Type 2) | ||
MP2 Grab Bag Icon.png | MP2 Destruction Duet Type 3 Icon.png|Destruction Duet (Type 3) | ||
MP2 Bumper Balloon Cars Icon.png | MP2 Dungeon Dash Icon.png|[[Dungeon Dash]] | ||
MP2 Rakin' 'em In Icon.png | MP2 Grab Bag Icon.png|[[Grab Bag]] | ||
MP2 Day at the Races Icon.png | MP2 Bumper Balloon Cars Icon.png|[[Bumper Balloon Cars]] | ||
MP2 Face Lift Type 1 Icon.png | MP2 Rakin' 'em In Icon.png|[[Rakin' 'em In]] | ||
MP2 Face Lift Type 2 Icon.png | MP2 Day at the Races Icon.png|[[Day at the Races]] | ||
MP2 Face Lift Type 3 Icon.png | MP2 Face Lift Type 1 Icon.png|[[Face-Lift (minigame)|Face Lift]] (Type 1) | ||
MP2 Face Lift Type 4 Icon.png | MP2 Face Lift Type 2 Icon.png|Face Lift (Type 2) | ||
MP2 Face Lift Type 5 Icon.png | MP2 Face Lift Type 3 Icon.png|Face Lift (Type 3) | ||
MP2 Face Lift Type 6 Icon.png | MP2 Face Lift Type 4 Icon.png|Face Lift (Type 4) | ||
MP2 Crazy Cutters Type 1 Icon.png | MP2 Face Lift Type 5 Icon.png|Face Lift (Type 5) | ||
MP2 Crazy Cutters Type 2 Icon.png | MP2 Face Lift Type 6 Icon.png|Face Lift (Type 6) | ||
MP2 Crazy Cutters Type 3 Icon.png | MP2 Crazy Cutters Type 1 Icon.png|[[Crazy Cutters]] (Type 1) | ||
MP2 Crazy Cutters Type 2 Icon.png|Crazy Cutters (Type 2) | |||
MP2 Crazy Cutters Type 3 Icon.png|Crazy Cutters (Type 3) | |||
MP2 BOWSER Slots Icon.png | MP2_Hot_BOB-OMB_Icon.png|[[Hot Bob-omb|Hot BOB-OMB]] | ||
MP2 Roll Out the Barrels Icon.png | MP2_BOWSER's_Big_Blast_Icon.png|[[Bowser's Big Blast|BOWSER's Big Blast]] | ||
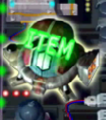
MP2_Coffin_Congestion_Icon.png | MP2 BOWSER Slots Icon.png|[[Bowser Slots|BOWSER Slots]] | ||
MP2 Hammer Slammer Icon.png | MP2 Roll Out the Barrels Icon.png|[[Roll Out the Barrels]] | ||
MP2_Give_Me_a_Brake!_Icon.png | MP2_Coffin_Congestion_Icon.png|[[Coffin Congestion]] | ||
MP2_Mallet-Go-Round_Icon.png | MP2 Hammer Slammer Icon.png|[[Hammer Slammer]] | ||
MP2_Give_Me_a_Brake!_Icon.png|[[Give Me a Brake!]] | |||
MP2_Mallet-Go-Round_Icon.png|[[Mallet-Go-Round]] | |||
MP2 Driver's Ed Course 1 Icon.png|[[Driver's Ed]] (Course 1) | |||
MP2 Driver's Ed Course 2 Icon.png|Driver's Ed (Course 2) | |||
MP2 Driver's Ed Course 3 Icon.png|Driver's Ed (Course 3) | |||
MP2 Driver's Ed Course 4 Icon.png|Driver's Ed (Course 4) | |||
MP2 Driver's Ed Course 5 Icon.png|Driver's Ed (Course 5) | |||
</gallery> | </gallery> | ||
==Screenshots== | ==Screenshots== | ||
===Intro=== | |||
<gallery> | <gallery> | ||
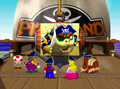
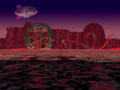
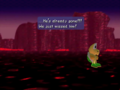
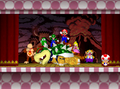
MP2 intro 1.png|The cast arguing over what to call their new land | MP2 intro 1.png|The cast arguing over what to call their new land | ||
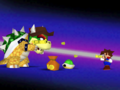
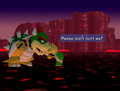
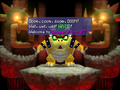
MP2 intro 2.png|Bowser invading Mario Land | MP2 intro 2.png|Bowser invading Mario Land | ||
MP2 title screen.png|Title screen | MP2 title screen.png|Title screen | ||
</gallery> | |||
===Main menu=== | |||
<gallery> | |||
Main Menu MP2.png|Main menu | Main Menu MP2.png|Main menu | ||
Character Selection MP2.png|Character selection screen | Character Selection MP2.png|Character selection screen | ||
</gallery> | |||
===Boards=== | |||
====Pirate Land==== | |||
<gallery> | |||
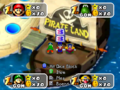
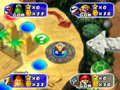
Pirate Land Introduction.png|[[Pirate Land]] | Pirate Land Introduction.png|[[Pirate Land]] | ||
Goomba Barrack Pirate Land.png|Goomba barracks | |||
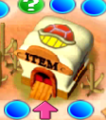
Pirate Land Item Shop.png|Item Shop | |||
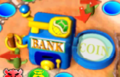
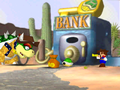
Pirate Land East Koopa Bank.png|East Koopa Bank | |||
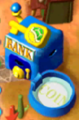
Pirate Land South Koopa Bank.png|South Koopa Bank | |||
MP2 Pirate Land Start BG.png|The introduction's background | |||
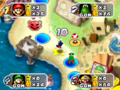
MP2 Pirate Land Intro 1.png|Crossing the bridge in Pirate Land | |||
MP2 Pirate Land Intro 2.png|Players are introduced to Capt. Bowser | |||
MP2 Capt. Bowser sign.png|Bowser sign | |||
MP2 Pirate Land Start.png|The Start of the map | |||
MP2 Pirate Land Map.png|Map of Pirate Land | |||
MP2 Pirate Land Approaches Star.png|Mario reaches the Star space | |||
MP2 Pirate Land Mario Bridge.png|Mario walking towards one of the bridges | |||
MP2 Yoshi Pirate Land Cannonball.png|Yoshi about to be hit by a cannonball | |||
MP2 Pirate Land Yoshi Star.png|Yoshi is awarded with a Star | |||
MP2 Pirate Land Bowser Bomb.png|Capt. Bowser on the board | |||
Pirate Land Treasure Cave BG.png|Treasure cave | |||
Pirate Land Cave Entrance.png|Cave entrance | |||
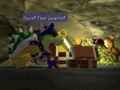
Koopa found treasure.png|[[Koopa Troopa|Koopa]] finding the tresure | |||
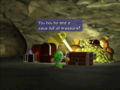
Bowser teasing Pirate Land.png|Bowser teasing Koopa | |||
MP2 Pirate Land Ending.png|Yoshi (the winner of the board) dueling Capt. Bowser | |||
Bowser defeated Pirate Land.png|Bowser defeated | |||
Mario the Superstar! MP2.png|The ending | |||
</gallery> | |||
====Western Land==== | |||
<gallery> | |||
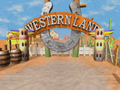
Western Land Introduction.png|[[Western Land]] | Western Land Introduction.png|[[Western Land]] | ||
Western Land Item Shop.png | |||
Western Land West Koopa Bank.png | |||
Western Land East Koopa Bank.png | |||
Goomba Barrack Western Land.png | |||
Koopa and Steamer Ride.png | |||
MP2 Western Land Start BG.png|The introduction's background | |||
MP2 Western Land 2.png|Players are introduced to Bowser the Brash | |||
MP2 Bowser the Brash sign.png | |||
MP2 Western Land Start.png|Start | |||
MP2 Western Land.png|Toad revealing a Koopa Kid in Western Land | |||
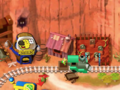
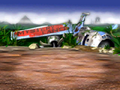
MP2 Western Land Riding Steamer.png|Mario rides the train in Western Land | |||
Hootenany.png|[[Wiggler]] inviting the player to a hootenanny | |||
MP2 Steamer.png|[[Steamer]] | |||
Western Land DK MP2.png|Donkey Kong walking | |||
Koopa Bank Western Land BG.png | |||
Western Town BG.png | |||
Bowser teasing Western Land.png | |||
Western Land Ending Quick Draw BG.png | |||
Quick Draw Showdown.png | |||
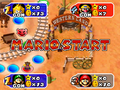
Mario shoots Bowser.png|Mario (the winner of the board) defeats Bowser in a quick draw | |||
</gallery> | |||
====Space Land==== | |||
<gallery> | |||
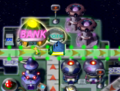
Space Land Introduction.png|[[Space Land]] | Space Land Introduction.png|[[Space Land]] | ||
Space Land Item Shop.png | |||
Space Land South Koopa Bank.png | |||
Space Land North Koopa Bank.png | |||
Goomba Barrack Space Land.png | |||
MP2 Space Land Koopa.png|A Koopa Troopa getting chased | |||
MP2 Space Land Start.png|The introduction's background | |||
Space Land intro.png|The players are introduced to Black Hole Bowser. | |||
MP2 Black Hole Bowser sign.png | |||
MP2 Space Land Countdown.png|[[Yoshi]] watching the countdown | |||
Space Land Countdown 0.png|The countdown reaches zero. | |||
MP2 Space Land Satellite.png|The satellite charging up | |||
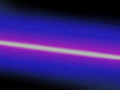
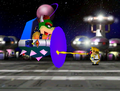
MP2 Space Land Beam.png|[[Donkey Kong]] about to get hit by the Bowser Coin Beam | |||
Space Land Bowser Coin Beam.png|Peach getting hit by the Coin Beam | |||
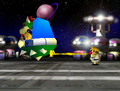
SpaceLandMP2.png|Yoshi about to hit the Dice Block | |||
Space Land Speeding Thwomp.png|[[Mario]] and [[Princess Peach|Peach]] fleeing from a speeding Thwomp | |||
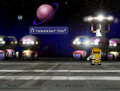
MP2 Space Land Wario Chase.png|[[Wario]] getting chased | |||
Space Land Snifit Patrol Chase.png|The Snifit Patrol chasing a speeding Whomp | |||
Space Patrol MP2 BG.png | |||
Space Land Ending Bg.png | |||
Space Land Begin Evacuation.png|[[Koopa Troopa]]s panicking | |||
Space Land Bowser Attacks.png|Black Hole Bowser attacking a Koopa Troopa | |||
MP2 Space Land DK.png|Donkey Kong (the winner of the board) confronting Bowser | |||
Space Land Bowser Shield.png|Bowser's shield deflecting [[Wario]]'s ray gun | |||
Space Land Bowser Hit.png|Wario (the winner of the board) shoots Bowser from behind. | |||
Space Land Bowser Defeated.png|Bowser is blasted away. | |||
</gallery> | |||
====Mystery Land==== | |||
<gallery> | |||
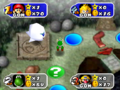
Mystery Land Introduction.png|[[Mystery Land]] | Mystery Land Introduction.png|[[Mystery Land]] | ||
Goomba Barrack Mystery Land.png | |||
Mystery Land Southeastern Koopa Bank.png | |||
Mystery Land Northwestern Koopa Bank.png | |||
Mystery Land Item Shop.png | |||
MP2 Mystery Land Koopa Abduction.png|A Koopa Troopa being abducted | |||
MP2 Mystery Land Start.png|The introduction's background | |||
Mystery Land intro.png|Toad introduces the Bowser Sphinx | |||
MP2 Bowser Sphinx sign.png | |||
MP2 Mystery Land Map.png|Map of Mystery Land | |||
Mystery Land beamed up.png|[[Yoshi]] being beamed up | |||
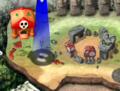
MarioMP2 Mystery Land 65.jpg|[[Mario]] is dropped off in the King Bob-omb ruins area. | |||
MP2 Mystery Land DK.png|DK in the board's second area | |||
MP2 Mystery Land Yoshi Boo.png|Yoshi near this board's Boo | |||
Mystery Land Ruins BG.png | |||
Mystery Land Ruins Entrance BG.png | |||
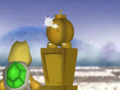
Golden Bob-omb Statue MP2.png | |||
Koopa found statue.png | |||
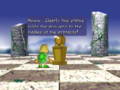
Mystery Land riddle wrong.png|A Koopa Troopa guesses the Bowser Sphinx's riddle incorrectly. | |||
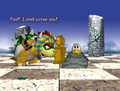
Mystery Land Koopa cursed.png|The Koopa Troopa is cursed. | |||
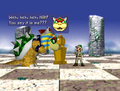
Mystery Land riddle solved.png|Luigi (the winner of the board) solves the riddle. | |||
Sphinx Bowser Defeat BG.png | |||
Bowser riddle cleared.png | |||
Mystery Land Bowser defeated.png|The Bowser Sphinx is defeated, breaking his curse. | |||
Mystery Land Bob-ombs saved.png|The Bob-ombs thank Luigi for saving them. | |||
Bob-omb UFO face.png | |||
UFO flies off.png | |||
</gallery> | |||
====Horror Land==== | |||
<gallery> | |||
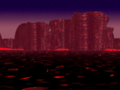
Horror Land Introduction.png|[[Horror Land]] | Horror Land Introduction.png|[[Horror Land]] | ||
Horror Land Item Shop.gif | |||
Horror Land South Koopa Bank.gif | |||
Horror Land East Koopa Bank.gif | |||
Goomba Barrack Horror Land.gif | |||
Horror Land Daytime icon.png | |||
Horror Land Daytime (Homestretch) icon.png | |||
Horror Land Nighttime icon.png | |||
Horror Land Nighttime (Homestretch) icon.png | |||
Koopa Day & Night reaction MP2.gif | |||
MP2 Horror Land Start.png|The introduction's background | |||
Wizard Bowser MP2.png|Wizard Bowser's portrait | |||
MP2 Wizard Bowser sign.png | |||
Mario Party 2 Horror Land.png|[[Mario]] in Horror Land | |||
Mario Party 2 Horror Land Wario.png|[[Wario]] in Horror Land at night | |||
Horror Land Wario and Donkey Chased.png|[[Mr. I|Mr. I.]] using his warp | |||
Horror Land Whomp Path.png|A Whomp blocking a path | |||
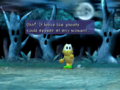
MP2 Big Boo Screenshot.png|[[Luigi]] meeting Big Boo | |||
Big Boo dialog.png|Big Boo dialogue | |||
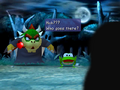
Horror Land Bowser on board.png|Wizard Bowser appears on the board | |||
Horror Land Bowser Coin steal.png|Bowser about to steal all of [[Princess Peach|Peach]]'s Coins | |||
Haunted Forest and the Moon BG.png | |||
Haunted Forest Path BG.png | |||
Koopa lost in forest.png | |||
Horror Land Boo.png|A Koopa Troopa scared by a Boo | |||
Horror Land Stranger.png|The winner of the board confronts Bowser and the Koopa who has been turned into a frog | |||
Wizard Mario dueling Wizard Bowser.png|Mario (the winner of the board) dueling Bowser | |||
MP2 Mario defeats Wizard Bowser.png|Mario defeats Bowser | |||
</gallery> | |||
====Bowser Land==== | |||
<gallery> | |||
Bowser Land Introduction.png|[[Bowser Land]] | Bowser Land Introduction.png|[[Bowser Land]] | ||
Koopa Bowser Parade.png | |||
Bowser Land Item Shop.png | |||
Bowser Land South Bowser Bank.png | |||
Bowser Land West Bowser Bank.png | |||
Bowser Land East Bowser Bank.png | |||
Bowser Land Bowser Shop.png | |||
Goomba Barrack Bowser_Land.png | |||
MP2 Bowser Land Start.png|The introduction's background | |||
Bowser Land Welcoming.png | |||
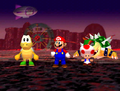
MP2 Bowser Land 2.png|The cast is introduced to Bowser | |||
Bowser Land Luigi pipe.png|[[Luigi]] jumping into a Warp Pipe | |||
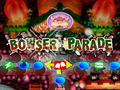
Bowser Parade logo.png | |||
Bowser Event BG MP2.png | |||
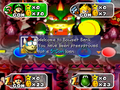
Bowser Parade begins.png|The [[Bowser Parade]] begins | |||
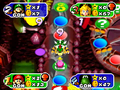
Bowser Parade.png|[[Yoshi]], [[Mario]], and [[Princess Peach|Peach]] are chased by the Bowser Parade | |||
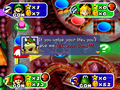
Bowser Bank.png|A [[Bowser Bank]] loaning 5 Coins | |||
Bowser Land Bowser on board.png|Bowser appears on the board. | |||
Bowser Land Bowser coin steal.png|Bowser about to steal all of Yoshi's Coins | |||
Final Battle area MP2 BG.png | |||
Bowser Carnival MP2 BG.png | |||
Koopa Final Act MP2.png | |||
Bowser Land Bowser attacks.png|Bowser attacking a Koopa Troopa | |||
Bowser Land fire breath.png|Mario dodging Bowser's [[Fire Breath]] | |||
Bowser Land Metal Bowser taunt.png|Bowser transforms into [[Metal Mario|Metal Bowser]]. | |||
Bowser Land Toad star.png|Toad gives Mario (the winner of the board) a Star to help fight Metal Bowser. | |||
Metal Bowser.png|Mario prepares to throw Metal Bowser. | |||
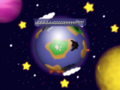
Bowser toss over World.png | |||
Bowser Land Bowser defeated.png|Bowser is defeated. | |||
</gallery> | |||
===Ending=== | |||
<gallery> | |||
MP2 BowserDefeated.png|Bowser defeated | |||
</gallery> | |||
===Other=== | |||
<gallery> | |||
Mini-Game Instructions MP2.png|Mini-Game instructions | Mini-Game Instructions MP2.png|Mini-Game instructions | ||
MP2 Results.png|The results screen | MP2 Results.png|The results screen | ||
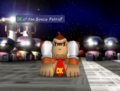
Wario's Bowser.png|Bowser Event | |||
</gallery> | </gallery> | ||
| Line 587: | Line 786: | ||
MP2BackJapan.jpg|Japanese box art (back) | MP2BackJapan.jpg|Japanese box art (back) | ||
MP2WiiUVC.jpg|Wii U [[Virtual Console]] | MP2WiiUVC.jpg|Wii U [[Virtual Console]] | ||
</gallery> | |||
==Cartridge art== | |||
<gallery> | |||
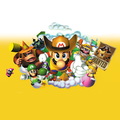
MarioParty2GroupArt1.png|Key Artwork used on the Japanese cartridge | |||
Mario Party 2 American cartridge.jpg|North American cartridge | |||
MP2AUNZCartridge.jpg|Australian cartridge | |||
MP2EUCartridge.jpg|European cartridge | |||
MP2JAPCartridge.jpg|Japanese cartridge | |||
</gallery> | </gallery> | ||
==Miscellaneous== | ==Miscellaneous== | ||
<gallery> | <gallery> | ||
MP2NAPrintAd.png|North American print ad | |||
MP2BRAPrintAd.jpg|Brazil print ad | |||
MP2GERPrintAd.jpg|German print ad | |||
Prima_Guide-MP2.jpg|[[Prima Games]] official guide | Prima_Guide-MP2.jpg|[[Prima Games]] official guide | ||
Mario Party 2 - Japanese ad.png|Japanese advert | Mario Party 2 - Japanese ad.png|Japanese advert | ||
</gallery> | </gallery> | ||
{{Galleries}} | {{Galleries}} | ||
{{MP2}} | {{MP2}} | ||
Latest revision as of 17:38, December 31, 2024
This is a gallery of images for the game Mario Party 2.
Logos[edit]
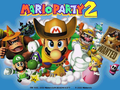
International logo
Japanese Logo

Artwork[edit]
Solo artwork[edit]
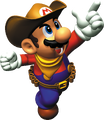
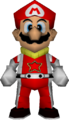
Mario (Western Land outfit)
Luigi (Space Land outfit)

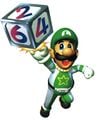
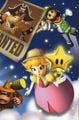
Luigi with a Bob-omb (Space Land outfit)
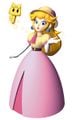
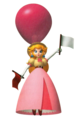
Princess Peach (Mystery Land outfit)
Princess Peach (Mystery Land outfit)
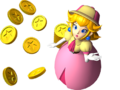
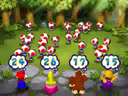
Princess Peach playing Shy Guy Says (Mystery Land outfit)
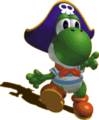
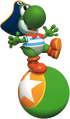
Yoshi (Pirate Land outfit)
Pirate Yoshi playing Bumper Balls
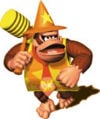
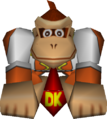
Donkey Kong (Horror Land outfit)

Donkey Kong (Horror Land outfit) (with text)
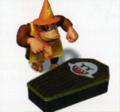
Donkey Kong (Horror Land outfit) playing Coffin Congestion
Wario (Space Land outfit)
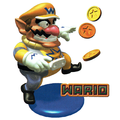
Wario (Space Land outfit) (with text)
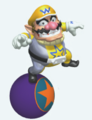
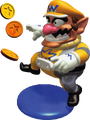
Space Land Wario playing Bumper Balls
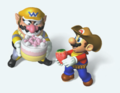
Mario and Wario playing Cake Factory


Non-playable characters[edit]

Koopa Troopa (red)
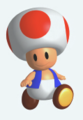
Toad
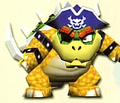
Bowser (Pirate Land outfit)


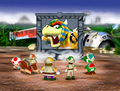
Group artwork[edit]
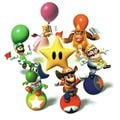
Group picture of all six characters in Mario Party 2
Group art from the box
Group poster
Group art from Japanese cover
Group art


Items[edit]


Sprites and models[edit]
Board logos[edit]
Pirate Land logo

Western Land logo
Space Land logo
Mystery Land logo
Horror Land logo
Bowser Land logo
Result logos[edit]
Previews[edit]

Option Laboratory
Maps[edit]

Horror Land at day
Horror Land at night


.png)

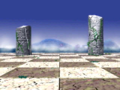
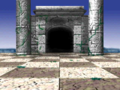
Starting areas[edit]


Models[edit]
Mario (Space Land)
Donkey Kong (Space Land)


Screenshot crops[edit]

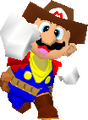
Mario dressed as a captain
Mario dressed as a cowboy
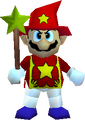
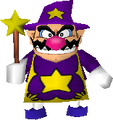
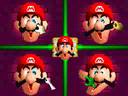
Mario dressed as a wizard
Wario dressed as a wizard
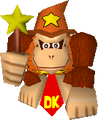
Donkey Kong dressed as a wizard

Toad, Pirate Land outfit

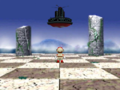
The 1-VS-3 Mini-Game Tree from Mini-Game Park
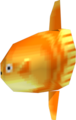
Sunfish


Character icons[edit]

Mario (Win)

Mario (Lose)

Luigi (Win)

Luigi (Lose)

Princess Peach (Win)

Princess Peach (Lose)

Yoshi (Win)

Yoshi (Lose)

Wario (Win)

Wario (Lose)

Donkey Kong (Win)

Donkey Kong (Lose)
Character mugshots[edit]

Mario

Luigi

Peach

Yoshi

Wario

Donkey Kong
Mini-map characters[edit]
Mini-map sprites[edit]

Boo

Koopa (banker)

Koopa (shopkeeper)

Baby Bowser (banker)

Baby Bowser (shopkeeper)

Gate
Mini-game sprites[edit]
Dialogue portraits[edit]

Baby Bowser (Banker)

Baby Bowser (Shopkeeper)

Bloober ride

Koopa Troopa (Banker)

Koopa Troopa (Shopkeeper)

Bowser the Brash

Black Hole Bowser

Bowser Sphinx

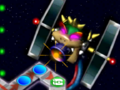
Wizard Bowser

Bowser
Chance Time blocks[edit]

Mario

Luigi

Peach

Yoshi

Wario

Donkey Kong

3 coins →

← 3 coins

20 coins →

← 20 coins

30 coins →

← 30 coins

1 Star →

← 1 Star

↔ all coins

↔ all Stars
Board selection markers[edit]

First player

Second player

Third player

Fourth player

Computer player
Place markers[edit]

1st place

2nd place

3rd place

4th place
Character selecting hands[edit]

First player hand

Second player hand

Third player hand

Fourth player hand

Computer player hand
Skill levels[edit]
Character turns[edit]

Mario

Luigi

Peach

Yoshi

Wario

DK

Bowser
Bowser signs[edit]
Capt. Bowser from Pirate Land
Bowser the Brash from Western Land
Black Hole Bowser from Space Land
Bowser Sphinx from Mystery Land
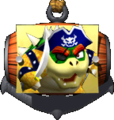
Wizard Bowser from Horror Land
Bowser from Bowser Land


Spaces[edit]
Tutorial icons[edit]


Dice block numbers[edit]

0 spaces

1 space

2 spaces

3 spaces

4 spaces

5 spaces

6 spaces

7 spaces

8 spaces

9 spaces

10 spaces
Items[edit]
Sprites[edit]
Player panels[edit]
Item description icons[edit]

Mushroom

Skeleton Key

Plunder Chest

Dueling Glove

Warp Block

Golden Mushroom

Magic Lamp

Boo Bell

Bowser Suit

Bowser Bomb
Mini-game sprites[edit]

Mushroom

Skeleton Key

Plunder Chest

Dueling Glove

Warp Block

Golden Mushroom

Magic Lamp

Boo Bell

Bowser Suit

Bowser Bomb
Transition screens[edit]

Toad

Goomba

Koopa

Shy Guy

Star

Circle

Square

Question mark

Exclamation mark

Sun

Moon

Bowser


Mini-game preview icons[edit]
Shell Shocked (Stage 1)
Shell Shocked (Stage 2)
Shell Shocked (Stage 3)
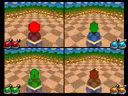
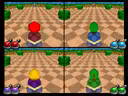
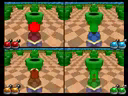
Roll Call (Type 1)
Roll Call (Type 2)
Roll Call (Type 3)
Bumper Balls (Stage 1)
Bumper Balls (Stage 2)
Bumper Balls (Stage 3)
Slot Car Derby (Course 1)
Slot Car Derby (Course 2)
Slot Car Derby (Course 3)
Bowl Over (Stage 1)
Bowl Over (Stage 2)
Bowl Over (Stage 3)
Destruction Duet (Type 1)
Destruction Duet (Type 2)
Destruction Duet (Type 3)
Face Lift (Type 1)
Face Lift (Type 2)
Face Lift (Type 3)
Face Lift (Type 4)
Face Lift (Type 5)
Face Lift (Type 6)
Crazy Cutters (Type 1)
Crazy Cutters (Type 2)
Crazy Cutters (Type 3)
Driver's Ed (Course 1)
Driver's Ed (Course 2)
Driver's Ed (Course 3)
Driver's Ed (Course 4)
Driver's Ed (Course 5)
Screenshots[edit]
Intro[edit]

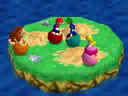
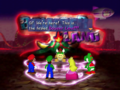
The cast arguing over what to call their new land
Bowser invading Mario Land

Title screen


[edit]
Main menu
Character selection screen


Boards[edit]
Pirate Land[edit]

Goomba barracks
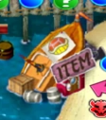
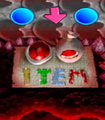
Item Shop
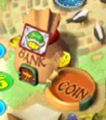
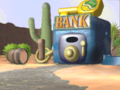
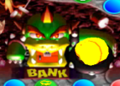
East Koopa Bank

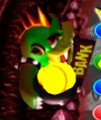
South Koopa Bank
The introduction's background
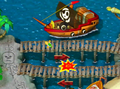
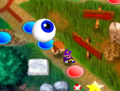
Crossing the bridge in Pirate Land
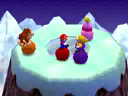
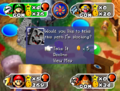
Players are introduced to Capt. Bowser
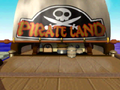
Bowser sign
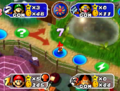
The Start of the map
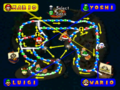
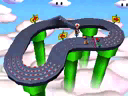
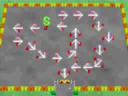
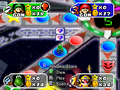
Map of Pirate Land
Mario reaches the Star space
Mario walking towards one of the bridges
Yoshi about to be hit by a cannonball
Yoshi is awarded with a Star
Capt. Bowser on the board
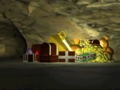
Treasure cave
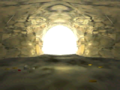
Cave entrance
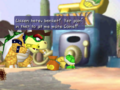
Koopa finding the tresure

Bowser teasing Koopa

Yoshi (the winner of the board) dueling Capt. Bowser
Bowser defeated
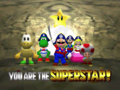
The ending


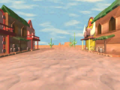
Western Land[edit]

The introduction's background

Players are introduced to Bowser the Brash
Start
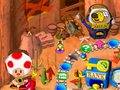
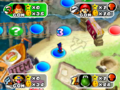
Toad revealing a Koopa Kid in Western Land
Mario rides the train in Western Land

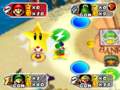
Wiggler inviting the player to a hootenanny

Donkey Kong walking
Mario (the winner of the board) defeats Bowser in a quick draw


Space Land[edit]


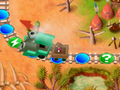
A Koopa Troopa getting chased
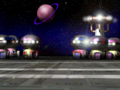
The introduction's background
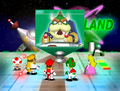
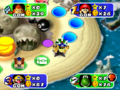
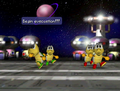
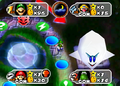
The players are introduced to Black Hole Bowser.
Yoshi watching the countdown
The countdown reaches zero.
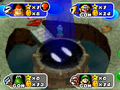
The satellite charging up
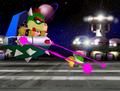
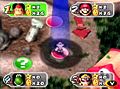
Donkey Kong about to get hit by the Bowser Coin Beam

Peach getting hit by the Coin Beam
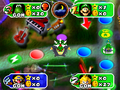
Yoshi about to hit the Dice Block
Wario getting chased
The Snifit Patrol chasing a speeding Whomp
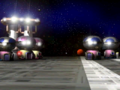
Koopa Troopas panicking
Black Hole Bowser attacking a Koopa Troopa
Donkey Kong (the winner of the board) confronting Bowser
Bowser's shield deflecting Wario's ray gun
Wario (the winner of the board) shoots Bowser from behind.
Bowser is blasted away.


Mystery Land[edit]

A Koopa Troopa being abducted
The introduction's background
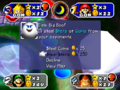
Toad introduces the Bowser Sphinx
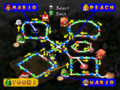
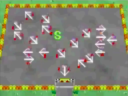
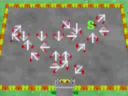
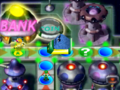
Map of Mystery Land
Yoshi being beamed up
Mario is dropped off in the King Bob-omb ruins area.
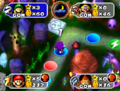
DK in the board's second area
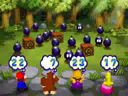
Yoshi near this board's Boo

A Koopa Troopa guesses the Bowser Sphinx's riddle incorrectly.
The Koopa Troopa is cursed.
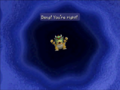
Luigi (the winner of the board) solves the riddle.

The Bowser Sphinx is defeated, breaking his curse.
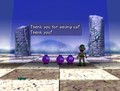
The Bob-ombs thank Luigi for saving them.


Horror Land[edit]


The introduction's background
Wizard Bowser's portrait
Mario in Horror Land
Wario in Horror Land at night
Mr. I. using his warp
A Whomp blocking a path
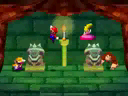
Luigi meeting Big Boo
Big Boo dialogue
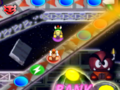
Wizard Bowser appears on the board
Bowser about to steal all of Peach's Coins
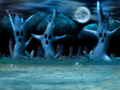
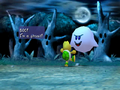
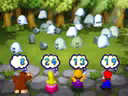
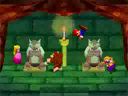
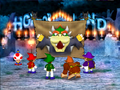
A Koopa Troopa scared by a Boo
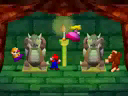
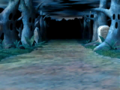
The winner of the board confronts Bowser and the Koopa who has been turned into a frog

Mario (the winner of the board) dueling Bowser
Mario defeats Bowser


Bowser Land[edit]
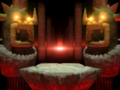
The introduction's background
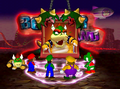
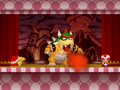
The cast is introduced to Bowser
Luigi jumping into a Warp Pipe

The Bowser Parade begins
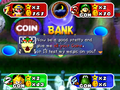
A Bowser Bank loaning 5 Coins
Bowser appears on the board.
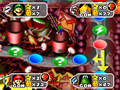
Bowser about to steal all of Yoshi's Coins
Bowser attacking a Koopa Troopa

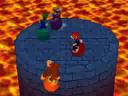
Mario dodging Bowser's Fire Breath
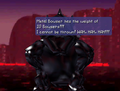
Bowser transforms into Metal Bowser.
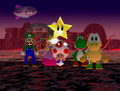
Toad gives Mario (the winner of the board) a Star to help fight Metal Bowser.

Mario prepares to throw Metal Bowser.
Bowser is defeated.


Ending[edit]
Bowser defeated

Other[edit]
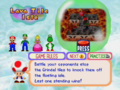
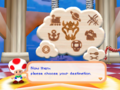
Mini-Game instructions
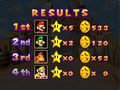
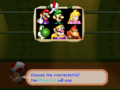
The results screen
Bowser Event


Box art[edit]
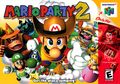
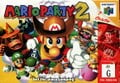
North American box art (front)
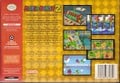
North American box art (back)
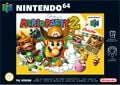
European box art (front)
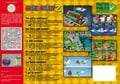
European box art (back)
Australian box art
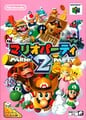
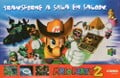
Japanese box art (front)
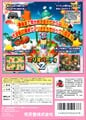
Japanese box art (back)
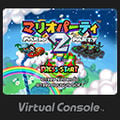
Wii U Virtual Console


Cartridge art[edit]
Key Artwork used on the Japanese cartridge
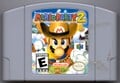
North American cartridge
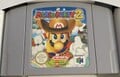
Australian cartridge
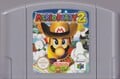
European cartridge
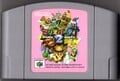
Japanese cartridge


Miscellaneous[edit]
North American print ad
Brazil print ad
German print ad
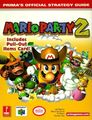
Prima Games official guide
Japanese advert


| Mario Party 2 | |
|---|---|
| Main characters | Mario • Luigi • Princess Peach • Yoshi • Wario • Donkey Kong |
| Other characters | Bowser • Toad • Goomba • Boo • Koopa Troopa • Thwomp • Kamek • Whomp • Big Boo • Mr. I • Mushroom Genie • Steamer • Snifit Patrol • Shy Guy • Sushi • Baby Bowser • Woody • Professor Fungi • Battle T. • Totem Bros. |
| Items | Mushroom • Skeleton Key • Plunder Chest • Dueling Glove • Warp Block • Golden Mushroom • Magic Lamp • Boo Bell • Bowser Suit • Bowser Bomb |
| Spaces | Blue Space • Red Space • Item Space • Happening Space • Battle Space • Bowser Space • Star Space • Chance Time Space • Bank Space |
| Boards | Pirate Land • Western Land • Space Land • Mystery Land • Horror Land • Bowser Land |
| Other | Crazy Counting • Dinky Rinky • Goodness Rakes • Melon Mayhem • Nomiss • Rules Land • Gallery • Mario Land • Media • Minigames • Pre-release and unused content • Quotes • Sound test • Staff |