The 'Shroom:Issue 217/Strategy Wing
Director's Notes
Written by: Hooded Pitohui (talk)
Hello, all of you readers of The 'Shroom! April seems to have brought not just showers, but a little bit of, ah, everything this year, no? It has brought the Awards Committee back together for its annual meetings, so that's pretty neat, at least. You can find the details on that in Anniversary Announcements in Pipe Plaza, but don't head that way until after you've given Strategy Wing a read!
We have a broad selection for you this month, so whether you think Sandslash is an underappreciated cutie, you yearn for the nostalgia of the Toy Time Galaxy, or you need to learn how to fight against a hostile pitcher plant, we have you covered! Plus, I hear Rose snuck into the Party Cube to retrieve something for Killing the Killing Game Roles this month.
In other news, Mario Kart World is on the horizon. Considering some of those jumps and rail grinds and whatnot that the game includes, it could make for a great Strategy Wing section featuring your favorite shortcuts and tricks. As massive as the game looks, I'm sure anyone playing will find some that nobody else knows about! Or perhaps those of you who play could show off your favorite Free Roam photos and talk about your discoveries. Think about that potential over the coming months, and when the game comes out you'll know where to go!
Section of the Month
Ring out the victory bell for Bronzong! Thank you all for voting Pitohui's Pokémon Academy as section of the month last month. I'm glad you enjoyed the edition. I'd like to give a shout out to Sparks (talk), as well, who claimed third twice-over with both the finale to his Just Shapes & Beats walkthrough and the opening boss battle against Gorumbla in his Brothership Boss Battle Guide. Thank you all for the support you show us here in Strategy Wing!
| STRATEGY WING SECTION OF THE MONTH | ||||
|---|---|---|---|---|
| Place | Section | Votes | % | Writer |
| 1st | Pitohui's Pokémon Academy | 5 | 35.71% | Hooded Pitohui (talk) |
| 2nd | Four Steps for a 3D World | 4 | 28.57% | Hooded Pitohui (talk) |
| 3rd | Brothership Boss Battle Guide | 2 | 14.29% | Sparks (talk) |
| 3rd | Just Shapes & Beats: The Groovy Guide | 2 | 14.29% | Sparks (talk) |
Brothership Boss Battle Guide
Konnichiwa (that means "hello" in Japanese) everyone! Welcome to another edition of Brothership Boss Battle Guide! This series aims to thoroughly go over every boss in Mario & Luigi: Brothership, including the optional ones! Last month we covered the ruffian of Rumbla Island, Gorumbla. Being the first boss, he wasn't very interesting, but still a nice introduction to the boss battles of the game.
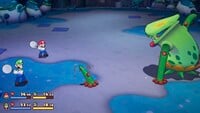
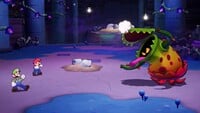
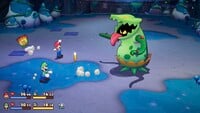
With Spring now in session, plants are blooming and winter is wrapping up, although the next boss of the game is a plant that does not bring peace and joy - Gobblick! On their mission to restore the Lushgreen Sea Great Lighthouse to its former glory, the Mario Bros., as well as Connie and Snoutlet, run into a trio of bad guys feeding Spite Bulbs to a large pitcher plant-like creature named Gobblick. They then task Gobblick to take down Mario and Luigi before exiting. If the Great Lighthouse is to be restored, then Gobblick must be taken down!
Here are the stats of Gobblick!
Gobblick's stats
| Image | Level | Location | HP | POW | DEF | SPD | Type | EXP | Coins | Item(s) |
|---|---|---|---|---|---|---|---|---|---|---|

|
12 | Lushgreen Sea, Great Lighthouse Island | 480 | 43 | 30 | 133 | Normal | 750 | 250 | Gobblick Boots |
| Notes | This enemy will become angry at low health, gaining new attacks and attacking more quickly. This enemy becomes temporarily dizzy after a successful Luigi Logic. | |||||||||
Gobblick's abilities
Unlike Gorumbla, Gobblick does not have unique postures and stances. Initially, Gobblick has three attacks:
- Hammer defense: Gobblick puts one of its arms in the ground in an attempt to attack Mario or Luigi from below. The arm will emerge from the ground 1-3 times at a steady pace before rising directly in front of a character. The speed of the pace varies. Mario or Luigi must hammer Gobblick's arm precisely the moment it emerges, otherwise it will strike a character, damaging them and maybe even inflicting the Trip status effect to them. Countering Gobblick's arm will deal damage back to the boss. If Gobblick uses its right arm, Mario is the target. That means Luigi will be attacked if Gobblick attacks with its left arm.
- Jump defense: Gobblick moves closer to the brothers before spitting out several enemies at them, one at a time. The brothers must avoid the hazards they are thrown. Gobblick can spit out Capnaps, Spikelies and coins. Capnaps can be stomped on and Spikelies will hurt Mario and Luigi if they are stomped on. Collected coins are added to the coin counter. Free money! Sometimes Gobblick might spit out these things at a trajectory that causes them to bounce above Mario and Luigi. If Gobblick lightly taps its belly before spitting, the object will bounce low. If Gobblick raises its arm and strikes its belly hard, then whatever is spit out will bounce high. Like its previous attack, right arm means Mario, while left arm indicates Luigi will be attacked.
- Hammer defense: Gobblick spins one of its arms before attempting to grab Mario or Luigi. If successful, Gobblick will spin them, dealing a solid amount of damage and potentially inflicting them with the Dizzy status effect. Same telegraph method: right arm for Mario and left for Luigi. If Gobblick "growls" before spinning an arm, it will go for the opposite brother.
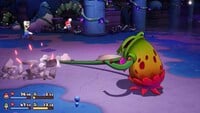
When Gobblick loses half of its HP, it becomes enraged and the lower half of its body turns red. Additionally, Gobblick gains two more attacks:
- Jump defense: Gobblick swings its arms at both Mario and Luigi a few (usually 2-3) times. Both Bros. must jump to dodge. Before swinging, it will ready an arm, signaled by the yellow glow effect. If Gobblick readies its right arm first, Mario will be attacked before Luigi. Conversely, left arm readied first means Luigi will have to jump before Mario.
- Hammer defense: Gobblick moves right in front of a character, and waits. When a drop of saliva from Gobblick's mouth lands on the ground (with an audible impact) Gobblick will lunge at the character to try to eat them. The targeted brother must counter at exactly the moment Gobblick lunges at them. If Gobblick eats Mario or
Luigi, it will heal three times (the amounts each are small, so they add to to a solid amount, around 50 HP). Gobblick then follows up with a bonus attack:
- Jump defense: Gobblick will move and position itself in front of the other character (not right in front of them, a fair distance from them). It will strike its belly with both arms and spit out the eaten character at the other. The damage to the eaten bro occurs when they are spit out, not when they get eaten. The free character must jump over the spit-out bro.
After some time has passed in the battle, the fans in the background will activate, creating a tornado. Luigi gets inspiration for a Luigi Logic! This can only be done if there is a tornado in the background:
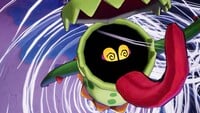
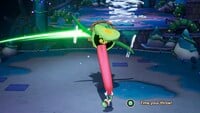
- Luigi Logic: Luigi leaps towards Gobblick, dodging a swipe from the boss before grabbing its tongue. With assistance from Mario, Luigi is able to lift Gobblick off the ground and swing it around in a circle, then Luigi must toss Gobblick to the tornado by pressing
at the right time. If successful, Gobblick will be thrown at the tornado, where it spins rapidly before landing on the ground next to the fans, dizzy. Mario and Luigi will then jump to the background where Gobblick is and continue the fight there. If the Luigi Logic is failed, Gobblick will be thrown awkwardly off the screen. It will then rise up from a nearby chasm and the fight resumes. The tornado will still be there.
Important Note! In the new battlefield when Gobblick performs his "arm swing" attack, he will hit a pile of rocks during the attack. The rocks will be launched to the new background, destroying rubble covering up more fans. Luigi Logic will then be available for use afterwards, but the speed at which Luigi swings Gobblick is inconsistent, making it tougher to perform successfully. If the Luigi Logic is done right, Gobblick will land on the same battlefield Mario and Luigi are on, dizzy. Rubble will then fall on the fans, covering them up again. Any Luigi Logics afterwards will be the exact same thing.
Tips and tricks
Gobblick is definitely a step up from Gorumbla. Newer players may have some trouble with this boss due to its stronger, more difficult to avoid attacks.
Don't worry - It's perfectly safe to jump on Gobblick! It won't try to eat you or anything.
I recommend getting the Picnic Boots and Picnic Hammer for both Mario and Luigi. Conveniently, the Lushgreen Sea, Great Lighthouse merchant sells exactly that, so go find him if your equipment is outdated. He also sells the Slowdown Boots and Soft Hammer. These are only one point stronger than the Picnic stuff, but they have bonuses that make them worth to buy.
- Slowdown Boots reduce the SPEED stat of foes struck by Jump attacks by 30%
- Soft Hammer reduces the DEF stat of enemies hit by Hammer attacks by 30%.
I'm not focused on SPEED myself - it's not my playstyle. If Gobblick is slowed down, it will attack less often than usual. The Soft Hammer is more useful in my opinion, as it reduces the DEF of Gobblick, allowing you to deal more damage! You don't need any of these, you'll be fine if you at least have the Picnic equipment. If you end up purchasing these unique gear, have one character constantly do Jump attacks while the other uses Hammer attacks to constantly debuff Gobblick. Hidden in the Great Lighthouse is a Steady Hammer that is stronger than the previously mentioned ones, so try to find it before battling Gobblick. It's free!
On the defensive side of things, go for Picnic Wear. It has solid defense and you'll need it just in case you take damage. The same merchant also sells Cozy Wear, which increases your defense by 20% if you take damage, so I highly encourage newer players who have trouble avoiding attacks to prioritize Cozy Wear over Picnic Wear. If you don't have enough coins, battle the Capnaps and Spikelies wandering around until you have enough. You'll get some EXP too!
To summarize, at least get the Picnic level of equipment, and try to find the Steady Hammer for more Hammer damage. Cozy Wear is highly recommended for players who have trouble dodging, and both Slowdown Boots and Soft Hammer are nice to have, but aren't necessary. Have whatever accessories you want.
Gobblick is level 12, so match or surpass its level so you won't be underpowered. Bring plenty of items (Mushrooms, Syrup Jars, 1-Up Mushrooms and Refreshing Herbs) too. Syrup Jars are needed now because you finally have Bros. Attacks; be sure to replenish your BP if you constantly use them!
Using lots of Bros. Attacks will make the battle go by quicker, but try to save them for when Gobblick gets Dizzy from a successful Luigi Logic. That way you won't have to resort to using basic attacks at a time where you could be dealing much more damage. If you do have to restore BP, do so when the boss is in its normal state.
Red Shell is meant to be used on strong targets, so prioritize restoring Mario's BP over Luigi's. Green Shell is still a strong attack by itself, but it's tailored to be used against many enemies. Red Shell is much more powerful in this scenario because it is a boss fight.
If a bro happens to become Dizzy, use a Refreshing Herb to cure him! Who knows how long the effect will last if you decide to wait it out.
If you cannot dodge Gobblick's attacks, you can use the Emergency Guard to reduce the damage taken. Be aware that status effects cannot be guarded against, so use this as a last resort if you cannot dodge the attacks at all.
To successfully time the Luigi Logic, press when Gobblick is pointed towards the tornado.
Heal when needed! Try to prioritize healing over using Luigi Logic. Health is more important! Luigi Logic will still be around.
Stomping on any spit-out Capnaps won't do anything. They allow more leniency to dodge timing. Spikelies must be jumped over, otherwise they will hurt the characters that land on them. Try not to focus on getting coins; they're only worth one and you should focus on avoiding the enemies.
For Gobblick's eating attack, try not to swing at the moment the saliva drop lands on the ground. Wait a few moments for when the boss lunges, then counter.
And that's Gobblick! Much more interesting of a fight than Gorumbla, especially with Bros. Attacks now available. With my help, Gobblick won't seem that fierce now! Thank you for reading and be on the lookout for next month's Brothership Boss Battle Guide, where I'll cover Ten in May! Sayonara (that means goodbye in Japanese)!
Four Steps for a 3D World
Written by: Hooded Pitohui (talk)
Hello, all you readers of The 'Shroom, and welcome back to Four Steps for a 3D World, a section I would usually begin with a little overview of the titular four steps! There's no need for that today, however, because the level we'll be looking at builds itself around a different structure.
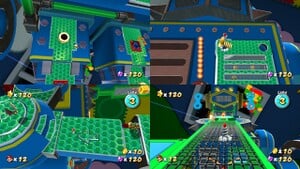
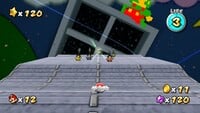
Far off in space, hostile robots invade a fantastical land of toys and sweets... a framing which is certainly entirely unrelated to any hypothetical 'Shroom-sponsored events that may be going on in this very issue... Yes, Toy Time Galaxy's "Heavy Metal Mecha-Bowser" blends child-like whimsy with dangerous Mecha-Bowsers, Sentry Beams, and Fire Shooters, but that isn't all it blends. Throwing together walls with strange gravity, spinning screws, a need for ground pounds, and the Spring Mushroom, this mission has the formidable task of blending a number of elements together, so let's see how it pulls it off.
Entrance
The level begins by depositing Mario or Luigi onto a small planet consisting of a platform and a circular train track with a couple toy trains running on it. The player only needs to hop Mario/Luigi onto a train and ride it to the Launch Star. There's no structural purpose to this planet in this mission, and its removal wouldn't make this individual mission any worse. It's here solely for whimsy, to get the player into the vibes and aesthetics of the Toy Time Galaxy.
It also helps build connections across this galaxy's missions, with the player always starting here outside of the Prankster Comet missions. That isn't relevant to this particular mission, but it does show one way in which Galaxy makes its levels feel more interconnected and expansive despite the linearity of many of its missions. Players see familiar sights, with those sights even changing from mission to mission on occasion.
Gravity Walls and Spinning Screws
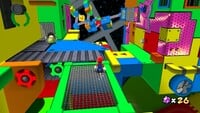
Getting into the mission proper, players find themselves on a somewhat larger planet adorned with colorful spotted walls and bustling with Gearmos, Mecha-Bowsers, and a Sentry Beam. While there is room to explore here and experienced or confident players can take a few alternate routes, walking straight forward past the first Mecha-Bowser puts players into the range of one of the colorful spotted walls, attracting Mario/Luigi to it and causing their feet to stick to it. Putting one of these gravity walls right in a player's easiest and most visible path is a strong, organic way to teach players what they do. A ? Block and stray Star Bits help acclimate players to jumping and walking on these walls, as well as learning how they'll return to solid ground when they leave the walls' range.
A few screws are present in solid ground, with Gearmos scattered around to suggest players give them a spin in case they haven't figured that out on their own. It's a good safety net inclusion, but the shape of the screws themselves is likely, this far into the game at least, to encourage players to try spinning on them anyway. Upon doing so, players learn that spinning on the screws can unlock new paths or produce goodies like Star Bits, giving them incentive to proceed up the far gravity wall towards some prominent screws. This wall isn't as gentle as the first, with a Sentry Beam and a spinning raised platform to contend with, but spinning the gold bolt up here does unlock the path to the Launch Star.
Overall, what we see here is something akin to our classic Introduction and Development steps playing out on one planet with two mechanics. An obstacle-free gravity wall is put right in the player's path immediately after landing so that players can learn how to navigate it, then a few screws are placed around mostly-safe solid ground so players will learn to spin on them for rewards. There's our usual Introduction. After that, players have to run up a slightly more dangerous gravity wall on the other side of the planet to spin a bolt that unlocks the path forward, marking our usual Development step.
Bounding and Pounding
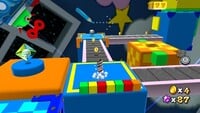
The next planet would usually be home to a Twist section - perhaps, say, run across a gravity wall on a timer or some such. This mission eschews that, though, in favor of introducing an entirely new mechanic. Upon landing on this new planet, the player needs to cross a short conveyor belt to come across a ? Coin which reveals the Spring Mushroom. The lower parts of this planet provide a relatively safe environment to learn how to control Spring Mario/Spring Luigi. There's one Mecha-Bowser around and the risk of falling off, but that's it. Plus, the Mecha-Bowser is slow and easily avoided and may help players learn they can ground-pound in spring form, and solid ground is plentiful to minimize the risk of falling in gaps. A few conveyor belts and a bundle of ? Blocks are used to teach players how to move and how to pull off high jumps in spring form, with a high ledge serving as a skill gate asking players to prove they can move, aim, and make high jumps in spring form.
Past this skill gate, players reach a second portion of the planet with longer conveyor belts, larger gaps in the ground, a split path, a Sentry Beam, and multiple high ledges which need to be traversed to reach the Launch Star. An island in the center has four ? Blocks to lure players into making a risky jump, and one path leads to a pipe where a bonus room challenges players to make a series of spring jumps up collections of brick blocks while breaking as few as possible. The main path tasks players with passing the Sentry Beam and ascending the ledges leading to the Launch Star, with all of these elements coming together to form an area where players are challenged to use their new skills in more difficult ways.
Once again, we have Introduction and Development steps on the same planet, separated into two different sections. The only difference here is that its for the Spring Mushroom.
The Launch Star takes players to a small planet littered with stones which can be broken by a ground pound, with one such stone blocking the way to the launch star. There isn't a lot to this planet; it's just another skill gate. While unlikely with the Mecha-Koopas and a Gearmo which even says ground pounds are effective on them, a player could technically make it to this point without ever trying to ground pond in spring form, so this planet serves to make sure they learn that before moving on.
Bringing It All Together
After all of these lessons and skill gates, finally the level dumps players at the titular Mecha-Bowser (not to be confused with all the little Mecha-Bowsers). Here, it brings all of its lessons together and rewards the player with some neat (ultra-light) storytelling that gives them visible signs of progress. At the base of the towering Mecha-Bowser, players begin with an ascent up its legs, making use of gravity walls to reach and to spin screws. There's little danger in this section, with it feeling like a quick reminder of what was learned earlier.
Now on the robot's central trunk, players face a little more danger from a Fire Bar as they unscrew four screws at the corners of a gravity wall panel. What's neat here is that, when the last bolt is spun, the panel actually slides off and falls away, showing that players are dismantling the robot by undoing these screws. A quick hop into an alcove with normal gravity sees players avoid a Mecha-Bowser (small) and enter a warp pipe to a high portion of the robot.
From here, players climb onto the robot's arm using a gravity wall. Navigating the unique shape of the arm and making it past two Bats, players go on to spin a bolt in the robot's shoulder, both summoning a Launch Star and causing the now-detached arm to fall away from the robot, smoking as it does so. It's a fun to see this little bit of visible progress for applying the lessons learned earlier in the level.
Now at the robot's neck, the player gets to see a few trapped Gearmos beyond the end of a narrow pathway guarded by a Fire Shooter and a Magikoopa. The robot's head serves as a high ledge, and the level offers the player a Spring Mushroom to reach it. Using their experience navigating the conveyor belts while avoiding the Sentry Beam, players get the satisfaction of avoiding the fireballs in this final gauntlet and reaching the robot's head, where a stack of breakable stones encourages them to offer one final spring-boosted ground pound.
At this point, as a reward for navigating with the Spring Mushroom and using it to pull off a ground pound, players are treated to the Mecha-Bowser exploding.
The End
After the explosion, Mario or Luigi are dropped onto the conveyor belt which the Mecha-Bowser robot stood on, with charred-but-free Gearmos around the waiting Power Star. Much like the starting planet, aside from being a solid surface to collect the star on, this final area doesn't do much for the mission's structure. Instead, if offers a chance to bask in the feeling of accomplishment and to claim the prize that comes with it.
That, then, is the mission! Is it a surprise that this mission didn't hew too closely to our four steps? Not at all. This is from a game that came out before Hayashida was a director and before any interviews mention the four step design philosophy, after all. Sure, we've seen it crop up in some missions in older games, but not universally. Does this different structure work against "Heavy Metal Mecha-Bowser"? No, not really. In fact, I wonder if it would be remembered less fondly if it focused entirely on the Spring Mushroom, considering how disliked that power-up is. On the other hand, it might have been possible to make a level with just the gravity walls and screws, though they would probably need to throw in a twist to keep them from getting stale before reaching Mecha-Bowser.
Either way, it's safe to say Mecha-Bowser is the star of the show here, a setpiece that bridges the mechanics and structure of the level with its theme and visual identity. I think so long as they had that, the level would still be fun and memorable even if they focused on just one set of mechanics or the other. You do need that foundation of some sort of evolving mechanic, but you don't necessarily have to stretch it far if you have a way to integrate its lessons with the level's theme.
With that thought, we reach the end of this month's edition. So, with four trapped Gearmos, three robot enemies shooting fire and laser beams, two annoying Bats, and one satisfying setpiece, this has been Four Steps for a 3D World!
Killing the Killing Game Roles
Welcome back, readers, to another edition of Killing the Killing Game Roles, the section where we analyze various player roles from past Mario Boards Killing Games in hope of answering the question, what makes for a good role? By analyzing what's come before, we can discover some tricks and tips that could even help you design your own roles!
Over the last few months, a number of you readers might have been curious about something: what gives me the authority to write towards Killing Game roles? What do I know about role balancing and the hosting experience? Well, in case you weren't aware, I did in fact host a Killing Game! Awards Killing Game 3, to be exact - all the way back in 2019, alongside Hooded Pitohui (talk) (with brief appearances by Lakituthequick (talk) and MsRetroGeek (talk)). Was this a successful game? In some ways, certainly, and in some ways, God no. But it was a game nevertheless, and a game has roles! So I figure it's about time I put my money where my mouth is, grab an AKG3 role, and put it on full display to see if my role creation was up-to-snuff.
Thankfully, I have a notable role for the job.
No, it's not Baba.
AKG3 - Ultimate Monster Salesman
"How can I help you win this KG? I need a monstah to clobbah everybody! We'll send our best straight from NME!"
- King Dedede couldn't be bothered to come to New Wikisville himself, so he sends you, Customer Service, on his behalf. With your skills as a salesman and your extensive knowledge of monsters, surely you'll be able to win this Killing Game and return to a promotion, right?
- As Customer Service, you're quite skilled as a salesman, and can sell anything to anyone without question. During the night, you can take one of your three special items and force another player to buy it. They'll gain the item, and they'll give you their coins. The number of coins you'll receive will be equal to the price of the item you sell in the item shop or the total number of coins carried by the player you sell to, whichever is lower. Uniquely, you begin the game with three items in your inventory already. Three Mistakes, to be exact. They're useless, you can't even eat them! But they have a value of five coins each and are perfect for pawning off on other players.
- Your other ability draws upon your knowledge of monsters from working at NME. You can use items in your inventory to craft monsters, which you can then sell to other players just as you can any other item. You can't use monsters yourself, so get to work selling them! The monsters will sell for the value of the two most valuable items used to craft them plus a bonus of ten coins, allowing you to acquire more coins, so you can buy more items, so you can craft more monsters. The monsters you can create are limited by the recipes you have available to you. Though, as the game goes on and more items are revealed in the shop, more recipes will be revealed to you.
The recipes you currently know are:
Waddle Dee
- Made from any three items
- Release Waddle Dee to walk around the map and look cute! It'll hop around one room for the night, maybe take a nap, and even hug someone if it's not feeling too shy. It'll stay in the room you release it in, and can tell you the next day if it saw anyone pass through the room at any point in the night.
Ice Dragon
- Made from any two items and an Ice Flower
- Place Ice Dragon in a room, and it will stand at sentry wherever you place it for the duration of the night and breathe out unpleasantly cold air. The cold air will fill the room Ice Dragon is in, slowing down all players who pass through without proper dress for cold weather. It can even freeze a player solid, if they stick around too long. Pat its head, and it'll wag its tail at you!
Walky
- Any two items and a Walkie-Talkie
- Place Walky in a room, and this little microphone creature will scream all night long, deafening anyone who happens to walk in. If you wear proper ear protection, it's actually quite friendly! Walky will even sync up with a song if you put music on! Join it for some great karaoke!
Birdon
- Any two items and a Gale Boomerang
- Summon Birdon and it'll safely carry you up or down any expanse, allowing you to jump down multiple stories or go from the ground level of a building up to balconies or rooftops. This feathered friend will gently deposit you on the ground wherever you'd like to land, leaving a few of its colorful feathers behind.
Bomber
- Any two items and a Gooey Bomb
- This explosive friend is one smart bomb! You can leave Bomber in a room, and tell it what to charge at and when to do it! Bomber will follow your instructions as closely as it can, and will explode upon impact. The explosion isn't enough to kill someone, but it can stun them. Or you can use it to knock over heavy objects and turn lighter ones into projectiles which will hurl through the air.
- You're altogether average, which your stats reflect. Your diminutive stature keeps your strength low, but, as a salesman, you have an outstanding social stat.
- FA: You'll need to have coins on hand in case someone comes asking for a refund on a monster. After all, what if they make a purchase with a money-back guarantee? Just to be on the safe side, you can never let your coin count drop down to zero.
Stats
- Strength - 1
- Stealth - 3
- Stamina - 3
- Speed - 3
- Social - 5
The Ultimate Monster Salesman is clearly drawn from Customer Service, the ever-mysterious monster provider found in Kirby: Right Back at Ya! Each of the craftable monsters are enemies found in the Kirby series, in case "Waddle Dee" didn't tip you off. The role was possessed by YoshiFlutterJump, a member no longer around the community. He started out in Peach's Castle before hopping over to Bowser's Castle, meaning both sides of the pre-merge AKG3 cast got to encounter this role. Just what was the Monster Salesman capable of, though, and could any features of this role be revisited today?
General Overview
So before we get into the full logistics of this role, there's a critical centering-point to discuss first: shop items and coins. AKG3 is the only Mario Boards Killing Game to attempt a shop system, where during the night, players could visit the shop, interact with its npc, and purchase items that would be useful for them in the game. To purchase items, players could find coins haphazardly scattered around the map. If you read last month's edition, you'll recall I mentioned the coin distribution across the map when considering the World Adventurer's shell resource system.
Suffice to say, the shop system was overall unsuccessful. Coins were too passive of an incentive, the shop items only saw particular use, and the mechanical function of the npc's was not well-realized. The system did leave some impact on the game - mostly through the user Morgan attempting to romance the shop Toady - but not enough to make pursuing the idea again worthwhile, especially when role abilities already naturally provide so much variety to the gameplay.
With that context in place, the Ultimate Monster Salesman is the role from AKG3 with the most shop interplay. Its abilities require the player to engage with the resource management of the coins and the rotating availability of items from the shop. The Ultimate Monster Salesman also fills a particular niche that is fairly rare in Killing Game: a crafting role. The player collects what is necessary, pairs it together, and creates something entirely new to utilize. The way that this role requires specific materials in recipes is, honestly, not something I've seen in any other KG role (not to say another crafting role like this hasn't happened - I just haven't observed it myself if it has). The closest I can think of is the Ultimate Amalgamator from AKG4, where the player could take dead players' DNA and create new role power combinations with them. Even then, there weren't specific recipes, only nightmarish genetic splicing.
So the Ultimate Monster Salesman is a crafting role that is inherently correlated to the item shop and coin economy. How does it put this combination of traits to real use?
Ability Application
The role really functions in two parts: its forced exchanges and its crafting. We'll focus on the forced exchanges first.
At any point during the night, the Ultimate Monster Salesman can approach another player and require them to trade a Shop Item on-hand, in exchange for the other player's coins. The exchange will occur for however much the item originally cost; if the unwitting recipient doesn't have that much, the Salesman will empty their pocket of everything they own. The goal of this is to ensure that the Salesman has a consistent way to rack in income, alongside the standard coin collection that happens around the map. More coins means more items to purchase from the shop, which means more monsters, which means more ways to pawn off and get paid. A cyclical role, in theory.
The original role doesn't specify that this exchange can only happen once per night, so presumably there'd be an easy way to get rich quick there. Just start jumping to sell the initial Mistakes the first chance you get. What I'm really curious about, though, is if this feedback loop actually worked as intended. When players are capable of simply searching to find coins and then gathering a stack of them organically, the economic exchange becomes a bit less significant. The selling allows the Ultimate Monster Salesman to build up funds quicker, but I'm not sure it has the "shake up the nature of the game" feel that stealing coins in Mario Party would cause.
Then there's the crafting, which is relatively straightforward: three Shop Items, usually one special and two of any other kind, gets you a monster. The crafting aspect is instantaneous, simply shoving the items together to produce the monster. The monsters themselves feel like they have a wide range of application, between environmental disruptions like Ice Dragon and Walky, and map navigation helpers like Birdon. The role indicates that the Ultimate Monster Salesman would unlock more recipes as time went on, but YoshiFlutterJump died before this extended menu was offered. Just thinking back, I'm pretty sure I intended for Nightmare to be summonable. Would've made for one hell of a night condition, without a doubt. For now, all of these are simple, straightforward creatures that have one or two notable uses in specific spaces. Minus the Waddle Dee, arguably, but I think being cute is just as important as blowing up a wall.
What feels fun about how the role starts out is the Mistakes. As the card mentions, they could be sold off immediately for five coins each... or, since they still qualify as Shop Items, you could shove the three together and make a Waddle Dee right there if you wanted. Or, head to the shop, snag an Ice Flower, and use two Mistakes to immediately get yourself an Ice Dragon. The top of the game is a bit of an open door, for the Ultimate Monster Salesman to decide what kind of start they want to make with their abilities.
Environmental Functionality
I would argue that the Ultimate Monster Salesman doesn't have any major environmental considerations needed for it to function. A shop, of course, but they don't need access to water, a place with plants, the like.
There is one significant consideration for the shop, though: ensuring that the Shop Items are on a fair rotation pattern. In AKG3, the shop offered three items any one night, as opposed to every possible item being available at once. This means that any items the recipes require should be available at some point, and likely more than once. That way, the Ultimate Monster Salesman can make the monster they're looking for whenever they want to, generally. Alternatively, if the shop has a standard catalog without rotation, or if the Salesman has special access to the entire item stock no matter the night, this can mitigate the issue of accessibility.
Drawbacks & Balances
The most notable drawback for any role is the Forbidden Action, which is that the Ultimate Monster Salesman can never reach zero total coins in their pocket. Honestly, I don't feel that this FA was ever one that needed to be fully considered. The haphazard nature of the coin system in AKG3 meant that they could be found basically anywhere, and the Ultimate Monster Salesman could force a sale for more at any time anyway. Getting more coins is a breeze for the player, so this FA doesn't do a lot to balance the role mechanics.
The monsters requiring three items total to craft is a notable condition, since three Shop Items were the maximum any player could carry throughout the course of the game. It means that you're sacrificing item space to build up to creature creation, and it also means that once you've made your monster, your inventory is reset back to zero and you have to build back up.
However, there is one aspect of this role's functions that I believe fully shoots it in the foot: the Ultimate Monster Salesman cannot use their own monsters! Instead, they're required to be handed off to be utilized on the map at all. This one detail destroys the infrastructure of this role. Something so focused on resource renewal and gathering materials should have direct benefits to the person committing to it. Otherwise, the feedback loop isn't going to be as satisfying. I know that in KG, accomplices and partnerships exist where the monster could still be utilized in a way that would benefit the Ultimate Monsters Salesman - but there's really no point in making this something to be circumvented to begin with. If I could change exactly one thing about this role right now, it would be this ownership clause.
Player Responsibility
On the player side, they would be responsible for ensuring that their resources are being utilized well, and they're keeping themselves afloat with their income. Again, in the context of how AKG3's shops and coins worked mechanically, this isn't too much of a hassle. If they want to use their monsters in a way that really benefits the Ultimate Monster Salesman, it does become their responsibility to coordinate with another player who'll help them out - that "can't use your own monster" rule is a real dampener for this role's potential.
Host Responsibility
On the host side, this role becomes notably more complicated. The host would have to ensure that relevant Shop Items are accessible, and that the coin economy is functioning in the right way for the Ultimate Monster Salesman to exploit it. They're also responsible not just for the initial monster menu, but the expanded menu for later on the game. Roles that have upgrades innately built into them like this require a great deal of preplanning; improvising a role upgrade on-the-spot can have its own consequences in the long term. Of all the resource management roles, this is probably one of the less intensive ones overall (especially when your ideas can just be copy-pasted from a franchise like Kirby!).
Overall Thoughts
In closing, the Ultimate Monster Salesman misses its mark on what exactly it's aiming to do. While its interplay with crafting and shop mechanics is interesting, it loses the opportunity to be the most fun it can be due to the rules surrounding the monsters. If a role like this were to be done again, I'd first say completely cut away the pointless restriction on who can use the monsters. Then, I'd axe the coin economy and Shop Items. We don't need them to return anytime soon. Instead, I would lean towards recipes that are interpretable and varied in their sources. For instance, if this kind of crafting role were themed around witchcraft and spellcrafting, you could have the player search for "a silver thread". This can be interpretable: a lock of silver hair? A piece of fabric painted silver? A spider's web? Having the recipes' ingredients be more expansive might help to make the puzzle of each recipe more engaging for the player.
Despite its flaws, I remain charmed by the idea of a crafting role requiring gathering ingredients, and I especially like the idea of a monster summoner as a player role in a game. If the concepts can be workshopped further, I think they'd make for an excellent, playful, and dynamic Killing Game role.
That’s all for this month. Tune in next month for more Killing Game goodness!
Pitohui's Pokémon Academy
Written by: Hooded Pitohui (talk)
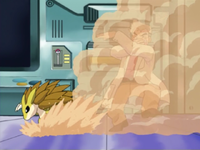
Hello and welcome back, class! Have all of you kept dry in this damp April? Myself, I enjoy these rainy days, and, as they say, April showers bring May flowers. I suspect some among you, however, tire of wiping mud from your shoes and keeping an umbrella nearby. Well, I tell you, you're in good company today, for the Sandslash of the Kanto region are not so fond of an abundance of water either. To better understand these hardy desert-dwelling... m-mouse...? Ah, we'll concern ourselves with the Pokédex's classifications later. For now, we shall make Sandslash the subject of today's lesson.
Before we get underway, though, for those of you just joining us, you can find our course policies and aims in the first box below and a refresher on frequently-used terms in the second box. By all means, skip them if you're already familiar with what we do here!
First, a Smogon University course, this course is not. No, this academy's lessons are designed to get trainers of any stripe thinking about how they can raise their Pokémon, and, as a result, aren't designed to keep up with the widely-accepted metagame for the series. In some cases, the way I've raised my Pokémon may even flies in the face of conventional wisdom. If you're looking for top-tier strategies, do check out Smogon, but if you merely want to get a little deeper into raising Pokémon while still doing things your own way, feel free to use this section as a reference.
Since we all know the importance of citing our sources, I also need to credit the design of some of the tables used in these lectures to Crocodile Dippy, author of the Pocket Handbook which can be found in early editions of Strategy Wing. Additionally, I'd like to give nod to the Bulbagarden Archives, the source of many images in this section.Base Stats: Base stats are the values associated with a particular Pokémon species, and are the same across every individual Pokémon of a given species. You have no influence on them. You can think of them as traits tied to a species. A chimp isn't ever going to be able to get as good as digging as a mole will be, and, likewise, an Abra is never going to have the defensive prowess a Shuckle has.
Individual Values (IVs): Individual values, as their name implies, are associated with individual Pokémon. They range from 0 to 31 in each stat, with 31 being considered a "perfect" IV and higher numbers corresponding to different stats. Magikarp A and Magikarp B will have the same base stats, but they may very well have different IVs. To stick with the animal analogy, one mole may be born with larger claws than another mole, and that first mole is probably going to have an easier time digging through dirt than the latter. Individual values are set in stone, strictly speaking, but you can use Hyper Training (from Generation VII onwards) to functionally get a perfect IV in a stat.
Effort Values (EVs): Effort values are the one thing you can easily change. A Pokémon can earn, primarily through battling, but also through means like the use of certain items or mechanics like Super Training, up to a total of 510 effort values, with up to 252 in any given stat. To finish off the animal analogy, no matter what kind of claws a mole is born with, moles who have more experience digging are probably going to be better at digging than moles which have never dug.
Nature: A Pokémon's nature is, more or a less, a stat modifier with a name meant to make it sound like a Pokémon has some personality. Natures will raise one stat by ten percent and lower another stat by ten percent. Some natures raise and lower the same stat, canceling out the effect and leaving stats unchanged. Natures can be functionally changed with the use of special mint items from Generation VIII onwards.
STAB: STAB stands for Same-Type Attack Bonus, and refers to the boosted power of moves that match the type of the move's user. To illustrate this, consider the case of a Lombre, a dual-type Pokémon which is both a Water-type and a Grass-type. Any Water-type moves Lombre uses will have their power boosted by 1.5x, and any Grass-type moves Lombre uses will, likewise, have their power boosted by 1.5x. (There are circumstances where this does not apply, and, while the 1.5x multiplier is typical, some games use other multipliers.)
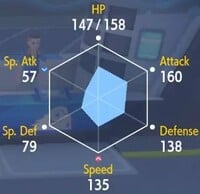
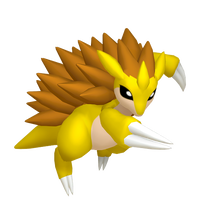
An examination of Sandslash's base stats reveals that Sandslash excels physically, with impressive defense and attack. Both of its special base stats are low enough we can remove them from further consideration. Naturally we'll still want a high IV in special defense, but we don't need to factor it into our planning at this stage. The question we're left with is whether or not Sandslash is better-suited to an offensively-oriented role or a defensively-oriented role. With its defense edging out its attack, and its HP beating out its speed, you may be tempted to conclude it's best to shore up Sandslash's HP, give it some entry hazard moves, and put it in a primarily defensive role. You wouldn't be wrong in your conclusion, either! That is a completely viable direction in which you might take a Sandslash.
However, Sandslash does have another option, one which isn't immediately apparent from its base stats alone. To see this, we need to peek at Sandslash's abilities. Sandslash has two abilities, both of which function only in sandstorm conditions. Its normal ability, Sand Veil, boosts its evasion during a sandstorm. That's somewhat useful, though it's not that reliable. Its hidden ability, Sand Rush, doubles its speed during a sandstorm, which is incredibly useful. This means that, so long as we set up a sandstorm, Sandslash has an effective base speed of 130, putting it in the same rank as Jolteon, Aerodactyl, or Tapu Koko. Naturally, we're going to choose Sand Rush as an ability.
With that kind of speed increase, while a defensive role remains a viable option, we've also opened an offensive niche for Sandslash to fill. Let's see how it does in that niche by raising it to take be a quick-striking hard-hitter.
|
Name: | Sandslash | Base HP: | 75 | |
| Category: | Mouse | Base Attack: | 100 | ||
| Type: | Ground | Base Defense: | 110 | ||
| Abilities: | Sand Veil | Base Special Attack: | 45 | ||
| Sand Rush | Base Special Defense: | 55 | |||
| Base Speed: | 65 | ||||
We'll invest maximally into speed and attack, adding the leftover EVs to defense. You might choose to add them to HP, instead, and that may even work out better for you. I'm going with defense because I want to give Sandslash that little bit of extra cushion against physical attackers.
As for a nature, almost any special attack-lowering nature aside from Careful will do. I'm choosing Jolly to further bolster Sandslash's speed since I have alternative plans to raise its attack and this build emphasizes offenses over its physical defense.
Before moving on to constructing a moveset, I first want to make clear that the following relies on the assumption that a separate Pokémon is setting up the sandstorm. If you do raise a defensively-oriented Sandslash, you might be able to get away with it running Sandstorm, but why do that if another Pokémon can set a sandstorm up more efficiently with an ability?
That disclaimer out of the way, we're going to need to equip Sandslash with a physical STAB move. When it comes to physically-oriented Ground-types, the question isn't "which move should I choose?" so much as it is "is there any reason not to choose Earthquake?". In Sandslash's case, nothing counts against Earthquake, so we'll simply slot it in immediately.
Now, Sandslash's main role here is to quickly launch powerful strikes, and there's an argument to be made for choosing a Rock-type move for broad offensive coverage, including a type Sandslash can't hit with Earthquake (Flying) and a type which Sandslash is weak to (Ice). If you go that route, you'll most likely want Rock Slide or Stone Edge, depending on how much of a hit to accuracy you're willing to tolerate.
I'm going to go in a different direction, however, because Sandslash has access to the coveted Rapid Spin, which is able to clear entry hazards. While access to the move isn't extraordinarily limited, when it's available, it's worth considering, and while Rapid Spin only has 50 base power, Sandslash at least has the right stat spread to make use of it. Add that Sandslash can take a physical hit thanks to its high defense, giving it the time it needs to clear out entry hazards, and there's an argument to be made for running Rapid Spin. As a bonus, it will also raise Sandslash's speed when used, which might come in handy if an opponent tries to dispel Sandslash's weather.
| Earthquake | 
|
The user sets off an earthquake that strikes every Pokémon around it. |
| Rapid Spin | 
|
The user performs a spin attack that can also eliminate the effects of such moves as Bind, Wrap, and Leech Seed. This also boosts the user's Speed stat. |
| Swords Dance | A frenetic dance to uplift the fighting spirit. This sharply boosts the user's Attack stat. | |
| Leech Life | 
|
The user drains the target's blood. The user's HP is restored by up to half the damage taken by the target. |
On the topic of raising stats, this is where we have an opportunity to bolster Sandslash's attack, and we will take that opportunity by slotting in Swords Dance. If Sandslash gets a chance to use this - which is quite possible if a defensively-frail opponent switches out or an opponent tries and fails to dispatch Sandslash with a physical attack - it will have an even easier time sweeping through its foes.
Finally, for a fourth move, we might consider a coverage move. Looking at the three types to which Sandslash is weak (Ice, Water, Grass), they don't share any common weakness. Sandslash has access to Fighting, Rock, and Steel moves to potentially cover Ice; Poison, Flying, and Bug moves to potentially cover Grass, and nothing which can cover Water. Fighting and Rock are both fair choices on their faces, considering they both offer decent offensive coverage. I recommend staying away from Poison and Steel since they're too limited in use. I would normally lump Bug into that latter category as well, except, in Sandslash's case, one of its possible Bug-type moves offers something alluring - HP recovery.
Specifically, Leech Life allows Sandslash to simultaneously do damage and restore its own HP. You can rarely go wrong with non-Rest HP recovery, and Leech Life meshes well with Sandslash's strong physical focus. With 80 base power, being resisted mostly by types Earthquake can cover, and being able to cover one of Sandslash's weaknesses, Leech Life is a solid choice for giving Sandslash a mid-battle pick-me-up.
With that HP-restoring option slotted in, we come to the end of our treatment of Sandslash. Now that you've seen that not all Ground-type Pokémon need be slow, plodding creatures, I'd like you to find another Pokémon - Ground-type or otherwise - which can make use of Sand Rush. In the meanwhile, I'll be writing Professor Westwood about that Pokédex classification. A mouse... really, now...?
An Octet Gazette
Written by: Museful Traveler (talk)
Welcome back to An Octet Gazette, readers of The 'Shroom! We've finished looking at the sixteen jobs across the two (Champions of the Continent excluded) Octopath games, so we're going to be spending the next few months looking at character-specific traits. Before we can get into the nitty gritty, let's establish what separates one traveler from another besides the jobs they take on.
Sixteen Walks of Life
Across the two games in the series, there are sixteen travelers (and three animal companions, but don't worry about them yet). Obviously these travelers are distinguished by their names, musical themes, and stories, but on a game mechanical level, there are four traits innate to individual travelers which give each one some particular niche or set of niches to fill. Jobs and all of their associated skills and Support Skills can be swapped around freely and given to anyone, but the four traits of Path Actions, Talents, Latent Powers, and EX Skills are always tied to a specific traveler.
In this edition, we're going to go over these four traits in broad terms, looking at what purpose game mechanical purpose they fulfill. Once you have this background information, we'll look at pairs of travelers pulled from the first and second game to see how, say, the Concoct Talent of the Apothecary pair changed between the 1st and 2nd game.
Path Actions
Path Actions are, simply put, the method by which travelers interact with the overworld, or more specifically how travelers interact with NPCs in the overworld. They range from moving NPCs so they're no longer blocking a path to obtaining items from NPCs to learning new information about NPCs. They're fairly simple and it should only take three or so sentences to explain each of them as we go along.
In the first game, each traveler gets only one path action, but there is a little bit of flexibility in the system because the first game's path actions are paired counterparts. Four of them are "noble", with each noble action having a "rogue" equal. A traveler with a noble path action can only use it if they meet the level requirement (or, in one case, have enough money to make a purchase), with these level requirements varying from NPC to NPC. Generally, NPCs found later in the game will have higher level requirements, but even early in the game, a couple of NPCs in each settlement will have fairly high level requirements because they guard or hold valuable items. There are no penalties associated with noble actions.
On the other hand, rogue actions function as skill checks. A traveler with access to a rogue path action can attempt to use it at any time, with no level or money requirements attached, but there is a chance that that the action fails (or, in one case, the action starts a battle which can be lost). The higher your level, the greater chance of success. Rogue actions are, in a sense, a shortcut. If you don't want to reach a high enough level or amass enough money to use a noble action, you can get by with its equivalent rogue action so long as you're willing to accept the risk of failure.
The penalty for failure is a hit to the party's reputation. Reputation is stored for every settlement separately and operates on a "five strikes" system. Each time a traveler fails a rogue path action in a given settlement, the party gets a strike. Once the party hits five strikes, the townsfolk won't associate with them, meaning no path actions can be used in that settlement. A bartender in each settlement can restore the party's reputation - for a price, with larger settlements tending to demand a greater price.
The last thing the first game established about Path Actions is that they can modify one another's chances of success or barriers to use. Learning about the townsfolk with actions like Inquire or Scrutinize can, for instance, make it easier to steal from others in the same settlement or lower the prices they charge.
The second game keeps the core of the path action system from the first (down to keeping the original eight actions) while expanding on it by giving every traveler a second, nighttime-exclusive action. These nighttime path actions can fulfill the same objectives as the daytime path actions, but aren't rigidly divided into the noble and rogue categories. Instead, they provide multiple options for getting at the same goal. You can pay up, or you can try to prevail in a special battle. You can reach a high enough level, or you can find a particular ingredient that will do the trick. This kind of flexibility in approach is what the nighttime path actions are built around.
Talents
Talents are more difficult to sum up than the other three character-specific traits, because they have a wider range of effects. Many of them are some kind of passive benefit that will trigger automatically in battles or on the field. Others require you to take a certain action in battle, but will trigger automatically on top of that action. A few are actions unto themselves, and add a completely new mechanic which only a certain traveler can access.
These talents appear in both games, though some get replaced between the two, and others get touch-ups to make them more useful.
Latent Powers
Unlike talents and path actions, Latent Powers are exclusive to Octopath Traveler II, and function as a sort of limit break mechanic. Each traveler's latent power has a unique function, with some augmenting the traveler's abilities in some way, some changing how certain skills act, and others providing access to a sub-menu of special skills.
Latent Powers can only be used when a traveler's Latent Power Gauge is full. Each traveler gets their own gauge and fills or depletes their gauge separately from the rest of the party. The gauge of a given traveler fills when they take damage, when they break a foe (merely reducing a foe's shield points is not enough), or when using certain items. Once the gauge is full, a traveler can use their latent power at any time, which will then drop the gauge back to zero. It's a simple but satisfying system.
EX Skills
Finally, EX Skills, like latent powers, were only introduced in the second game. These are straightforward, simply being skills (attacks) exclusive to a particular character rather than being tied to a job's skill list. Each traveler gets two EX skills.
A traveler can unlock their first EX Skill by finding the Altar tied to their starting job, much like how jobs were unlocked in Shrines in the first game. To unlock their second EX Skill, a traveler must complete their storyline. This is neat because it allows some EX Skills to reflect what a traveler has overcome or mastered in the course of their story. Like everything else, we'll cover the EX Skills of each traveler over the next few months.
Now you know what these four terms refer to, so come back next month and we'll begin actually looking at the individual travelers!
| The 'Shroom: Issue 217 | |
|---|---|
| Staff sections | Staff Notes • The 'Shroom Spotlight • Poochy's Picks • 'Shroomfest • Credits |
| Features | Fake News • Fun Stuff • Palette Swap • Pipe Plaza • Critic Corner • Strategy Wing |


