The 'Shroom:Issue 212/Strategy Wing
Director's Notes
Written by: Hooded Pitohui (talk)
Hello, all you readers of The 'Shroom, and welcome to the penultimate Strategy Wing of the year! Unfortunately, I have been asked to discard my moth costume... Yes, er, there was this business with some guests and the supply closet, and to make a long story short, Shoey tells me we don't have the budget to purchase new brooms if it happens again... I get whacked with janitorial supplies, and yet somehow I end up paying for them...
Costume or no costume, though, the Strategy Wing team has come through again this month. Don't miss out on a penultimate, extra-large Shine Get which features Waluigi Time taking the fight to Bowser in a bid to stop the apocalypse! You know, the one that's months behind schedule? Yeah, don't worry Bowser, we've all been there with those big projects we "keep meaning to get to".
Aside from that, we have the Pokémon, 3D Mario, and Octopath trio you've come to expect here. If you're looking for Mega Man, well, after he saved the world twice already this year, he took a month to rest up, but fret not, Sparks (talk) will return with more of the Blue Bomber's adventures.
Looking to the future, while the year is ending soon, Strategy Wing won't be going anywhere when '24 ticks up to '25, so if you have an idea for a section and want to join the team, you don't need to wait to head to the sign-up page to apply! Whether you'd like to capture your playthrough of a game in writing like Shine Get and our Mega Man sections, want to share some ideas and tips on how to play like Pokémon Academy does, to shed some light on an element of a game like The Anatomy of a Pikmin did, or want to dissect and analyze things like Four Steps, it's all on the table. You can even do something like, say, writing short profiles for enemies. There are no length requirements!
Anyhow, consider joining the team if you feel some inspiration, and enjoy what our writers cooked up for you this month!
Section of the Month
Why, frogs and cranberries, it must be fall! Thank you all very much for voting the Politoed-focused edition of Pokémon Academy section of the month! May that frog bring all of you some nice autumn drizzles. A little further down, but no less worth applauding, Sparks (talk) and Waluigi Time (talk) take a joint third with our two platformer playthrough sections. After Dr. Wily's defeat last month, another boss battle awaits this month, so do keep voting and showing appreciation for the writers who put so much work into building this team each month!
| STRATEGY WING SECTION OF THE MONTH | ||||
|---|---|---|---|---|
| Place | Section | Votes | % | Writer |
| 1st | Pitohui's Pokémon Academy | 5 | 31.25% | Hooded Pitohui (talk) |
| 2nd | Four Steps for a 3D World | 4 | 25.00% | Hooded Pitohui (talk) |
| 3rd | An Overly Detailed and Funny Walkthrough of Mega Man 2 | 3 | 18.75% | Sparks (talk) |
| 3rd | Shine Get | 3 | 18.75% | Waluigi Time (talk) |
Four Steps for a 3D World
Written by: Hooded Pitohui (talk)
Hello, all you readers of The 'Shroom, and welcome back to Four Steps for a 3D World, a section in which we look at levels from a selection of 3D Super Mario titles through the lens of a design philosophy Koichi Hayashida discussed in an interview.
In brief, 3D Mario game levels in certain titles are designed around an introduction that lets a player learn a mechanic in a safe environment, further development that builds on what the player is learning and introduces more complicated aspects of a mechanic, a twist that adds some kind of significant wrinkle or challenge to force players to consider the mechanic from a new angle, and a conclusion which gives players one final satisfying chance to show they've mastered the mechanic. We look at 3D Mario levels and see if they conform to this model while trying to get some insight on how a good level is constructed.
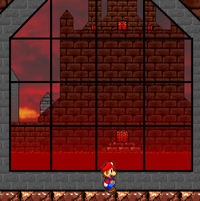
Now, in spite of the usual introduction... I'm going to ask you to mostly discard our usual four steps. This month, we're returning to Super Mario 64, a game far before Hayashida's time, and we're looking at one of the earliest missions in the game, "Chip Off Whomp's Block" from Whomp's Fortress. Whomp's Fortress is an iconic level, even getting a reappearance in Super Mario Galaxy 2, but playing through its first mission, I couldn't see anything resembling the full sequence of four steps we've discussed so often throughout this section. There is no central mechanic that the level tries to impart on players and develop, except possibly maybe (arguably) "basic jumping". I suppose the mission does require more jumping than any of the early missions in Bob-omb Battlefield...
All that said, I still did notice a structure to the level's progression. Rather than the full four steps we know, the mission employs multiple antepiece-setpiece pairings, sometimes offering alternative challenges or methods to bypass them, presumably for the benefit of inexperienced players. For some context, a setpiece, you might say, is a distinct, discrete challenge in a videogame that a player is expected to overcome. An antepiece is a safe version of that same challenge which precedes the setpiece, giving players a chance to familiarize themselves with what they'll be expected to do and the controls to use to pull it off. To draw upon the canonical example, in World 1-1 of the original Super Mario Bros., you can find two sets of staircases with a gap in the middle. There is ground under the gap in the first, allowing the player to fall safely and retry as they try to figure out how to jump the gap. That staircase is the antepiece. The second staircase has a pit that will kill Mario, making it the setpiece which enforces the challenge introduced by the antepiece.
You can also simply think of antepiece-setpiece pairs as similar to our usual Introduction and Development steps. Antepieces are, strictly speaking, thought of as particularly breezy or free of real danger, so in some cases I will switch to using our usual terms, but let's not get caught up on semantics. Instead, let's look at the various antepiece-setpiece pairs in this early mission from Mario's first 3D platforming foray!
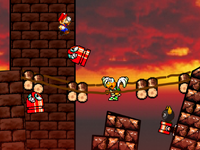
We can see that the stage is establishing a pattern of "less challenging obstacle that teaches the ropes" followed by "more challenging version of the same obstacle". I'd be remiss, though, if I didn't mention the easy bypass for both of these challenges. There is another, steeper slope made of stone that Mario can easily reach and walk up, avoiding the Bomps, platforms, and Thwomps to arrive at the same place. Of course, in a sandbox game, there are many alternate routes creative players can take, but this one feels notable for how easily accessible and prominent it is. If I had to guess, I would say it was put in for the benefit of inexperienced players. After all, this could be as early as the second mission in the game. It wouldn't do to have a young player feel stuck on the second level! You want them to at least be able to have the fun of exploring so they aren't immediately setting the game aside and forgetting about it. It may have rewarded younger players, too, as they became comfortable with jumping around, giving them a nice shortcut to the higher areas of the stage.
Anyway, enough of that aside. Let's turn to a pair of setpiece-antepiece pairs that are intermingled.
There you have it! Our four steps really didn't apply to this level. As you can see, there was no consistent lesson, but a series of mini-lessons, pairs with no real twists to shake things up.
You know, I can't help but think, were this level made today, Nintendo would probably put some poundable posts or switches near the base of the level with a big ground pound symbol on them. That would be the Introduction, maybe ending off with having to pound a switch to unveil the staircase under the Thwomps. Rather than the Piranha Plants, maybe there would be some small, Goomba-esque enemy that must be ground pounded, teaching players to ground pound moving targets in the Development stage. Then the Whomps come in as a Twist, forcing you to wait until they're vulnerable before you can ground pound them. Finally, you demonstrate your mastery in the Conclusion with the Whomp King.
Although... while that could fit our four steps model, it's not really needed, is it? After all, the level is a classic, so it must already be doing something right!
I suppose it goes to show that the four steps aren't the only way to do things! With that lesson in hand, four regular Whomps and Thwomps around, three pushy Bomps, two Piranha Plants on the path, and one boss who won't gravel- er, grovel, this has been Four Steps for a 3D World! See you next month!
Pitohui's Pokémon Academy
Written by: Hooded Pitohui (talk)
Hello and welcome back, class! The daylight hours are running short and cool weather has firmly settled in. I understand this time of year is an adjustment period for many of you photosynthesizers, and I sympathize with your fatigue. That's why, for this session, I thought I might bring a musical accompaniment to soothe your tired selves. As we turn our eyes on Kricketune, do relax and enjoy its melodies. Try to avoid falling into a slumber until after we complete the lesson, however!
As always, for those of you just joining us, you can find our course policies and aims in the first box below and a refresher on frequently-used terms in the second box. By all means, skip them if you're already familiar with what we do here!
First, a Smogon University course, this course is not. No, this academy's lessons are designed to get trainers of any stripe thinking about how they can raise their Pokémon, and, as a result, aren't designed to keep up with the widely-accepted metagame for the series. In some cases, the way I've raised my Pokémon may even flies in the face of conventional wisdom. If you're looking for top-tier strategies, do check out Smogon, but if you merely want to get a little deeper into raising Pokémon while still doing things your own way, feel free to use this section as a reference.
Since we all know the importance of citing our sources, I also need to credit the design of some of the tables used in these lectures to Crocodile Dippy, author of the Pocket Handbook which can be found in early editions of Strategy Wing.Base Stats: Base stats are the values associated with a particular Pokémon species, and are the same across every individual Pokémon of a given species. You have no influence on them. You can think of them as traits tied to a species. A chimp isn't ever going to be able to get as good as digging as a mole will be, and, likewise, an Abra is never going to have the defensive prowess a Shuckle has.
Individual Values (IVs): Individual values, as their name implies, are associated with individual Pokémon. They range from 0 to 31 in each stat, with 31 being considered a "perfect" IV and higher numbers corresponding to different stats. Magikarp A and Magikarp B will have the same base stats, but they may very well have different IVs. To stick with the animal analogy, one mole may be born with larger claws than another mole, and that first mole is probably going to have an easier time digging through dirt than the latter. Individual values are set in stone, strictly speaking, but you can use Hyper Training (from Generation VII onwards) to functionally get a perfect IV in a stat.
Effort Values (EVs): Effort values are the one thing you can easily change. A Pokémon can earn, primarily through battling, but also through means like the use of certain items or mechanics like Super Training, up to a total of 510 effort values, with up to 252 in any given stat. To finish off the animal analogy, no matter what kind of claws a mole is born with, moles who have more experience digging are probably going to be better at digging than moles which have never dug.
Nature: A Pokémon's nature is, more or a less, a stat modifier with a name meant to make it sound like a Pokémon has some personality. Natures will raise one stat by ten percent and lower another stat by ten percent. Some natures raise and lower the same stat, canceling out the effect and leaving stats unchanged. Natures can be functionally changed with the use of special mint items from Generation VIII onwards.
STAB: STAB stands for Same-Type Attack Bonus, and refers to the boosted power of moves that match the type of the move's user. To illustrate this, consider the case of a Lombre, a dual-type Pokémon which is both a Water-type and a Grass-type. Any Water-type moves Lombre uses will have their power boosted by 1.5x, and any Grass-type moves Lombre uses will, likewise, have their power boosted by 1.5x. (There are circumstances where this does not apply, and, while the 1.5x multiplier is typical, some games use other multipliers.)
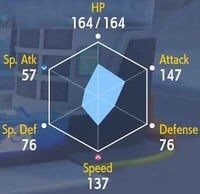
From the outset, we confront a... hard numerical truth, shall we say. Kricketune's base stats are rather poor for a fully-evolved Pokémon. It even falls on the low-end when comparing it exclusively to other Bug-types which evolve at low levels. We won't despair over this fact, however. After all, we have examined a Luvdisc before, and our goal is to make the most of any Pokémon. Looking at what we do have, Kricketune's attack is far and away its highest stat, and its speed is... acceptable for our purposes and certainly higher than its defenses. As such, we'll focus on allowing Kricketune to strike as hard as it possibly can while hopefully having the chance to move first.
With that goal in mind, we'll invest the full 252 EVs into attack and speed, with the leftover 6 going to HP since it's higher than either defensive stat and said defensive stats are tied. Since we aren't making use of special attacks, we can treat it as our dump stat, giving us the option of a Jolly Nature or an Adamant Nature. All of the attack power in the world will do our frail Kricketune no good if its opponent has the first move and knocks it out, so we shall go with a Jolly Nature to raise its speed.

|
Name: | Kricketune | Base HP: | 77 | |
| Category: | Cricket | Base Attack: | 85 | ||
| Type: | Bug | Base Defense: | 51 | ||
| Abilities: | Swarm | Base Special Attack: | 55 | ||
| Technician | Base Special Defense: | 51 | |||
| Base Speed: | 65 | ||||
With stats settled, we turn to evaluating abilities. We have two options, those being Swarm, which increases the power of Kricketune's Bug-type moves by 50% when its health is below one-third of its maximum, or Technician, which boosts by 50% the power of any move with a base power of 60 or less. Of these two, Technician is the best option for us, and for multiple reasons. For one thing, it doesn't force us to gamble on a frail Pokémon surviving a hit. For another, a close look at Kricketune's moveset will reveal its strongest physical Bug-type moves (X-Scissor, Leech Life, and Lunge) to have 80 base power. It also has access to a physical Bug-type move (Bug Bite) with a base power of 60, and when Technician's boost is applied, that base power becomes 90. As you'll note, 90 is greater than 80, so when it comes to giving Kricketune the hardest-hitting STAB move possible, we'd rather have the Technician boost and Bug Bite. Finally, Technician lets us boost some moves of other types, giving a bit of diversity to Kricketune's moveset.
We've firmly established why we want Technician over Swarm, and we've already broached a discussion of a moveset, so let's not tarry in picking out moves. To maximize our Technician boost, we want physical moves with a base power of exactly 60, and Kricketune has two of those. One is the aforementioned Bug Bite. Now, you might ask "is a base power difference of 10 really worth giving up Leech Life, which can provide HP recovery?". That's an astute question. Oftentimes, I would encourage you to at least consider an HP-restoring option over a fairly similar move, but with Kricketune so lacking in defenses, I suspect restoring some HP wouldn't matter. If Kricketune doesn't go down in one hit, it'll likely be weakened enough that Leech Life can't restore it to full HP, and then it will simply go down to the next hit. For that reason, the highest possible power wins out over recovery here.
As for the second move which fits our criteria, we're looking at the always accurate Aerial Ace. Here, you might ask if we'd be better off giving Kricketune a move to cover its weaknesses, but the only physical moves which fit the bill are Brick Break and Trailblaze, both covering its Rock-type weakness. Brick Break has a base power of 75, and Trailblaze a paltry 50, meaning they both pale in comparison to Technician-boosted Aerial Ace. It may not seem like the best move, but you will appreciate on the off-chance you have a casual battle with someone who uses an evasion-raising move such as Minimize!
| Bug Bite | 
|
The user attacks by biting the target. If the target is holding a Berry, the user eats it and gains its effect. |
| Aerial Ace | 
|
The user confounds the target with speed, then slashes. This attack never misses. |
| Sticky Web | The user weaves a sticky net around the opposing team, which lowers their Speed stats upon switching into battle. | |
| Perish Song | Any Pokémon that hears this song faints in three turns, unless it switches out of battle. |
With that, we have... exhausted the list of Technician-optimal moves available to us. At this point, a straightforward approach may be to add Leech Life as a secondary STAB move (it's not like it can hurt, even if its usefulness would be highly situational) and Brick Break (Fighting generally having good offensive match-ups). You can reasonably fill the last two slots with those moves if you wish, but, as I see it, this is an opportunity for fun and experimentation. For that reason, instead, I'm going to add Sticky Web to Kricketune's moveset, lowering the speed of any Pokémon which switch in (with some exceptions, such as Flying-types). It's not impossible that Kricketune can get this off if you correctly anticipate the opponent using a status move or if Kricketune does manage to survive one hit, and it could be quite the nuisance for the opponent.
Continuing with that thought, I then suggest adding a way to force a switch-out. How? Well, Kricketune is a musician, so, for thematic appropriateness, we'll teach it Perish Song, a move afflicting all Pokémon on the field with a counter to being KO'd which is most readily removed by switching them out. Will Kricketune most likely get KO'd immediately after using the move? Yes. Is it unlikely that it will have been able to set up Sticky Web beforehand? Yes. All the same, it's thematic, fun, and could catch an opponent by surprise, so that is what I am suggesting. If you really desire a more practical option, you can use the alternative offensive moves we discussed earlier.
Now, with four moves decided upon and our session wrapping up early, shall we simply sit back and listen to Kricketune's melodies? I assure you that you won't be afflicted with Perish Song in this course! Though elsewhere... well, keep an ear out. That will be all. Since we've had such a focus on music this month, your homework for next month is to investigate the ability Soundproof. I will see you then for our last course session of the year!
Shine Get
Written by: Waluigi Time (talk)
Hello there, 'Shroom readers! Welcome back to Shine Get, where the apocalypse is seven months behind schedule and I'm finally going to cancel it altogether by beating up Bowser now that I've covered everything else to do in Peach's Castle. But, bad news! It's been a good run, but I have to bench Luigi after spending over half of Shine Get getting to cheese all sorts of things with him. You see, Bowser's hiding behind the endless staircase, which is normally broken when you get 32 Shine Sprites (I did this back in Issue 203 after completing Boo's Mansion!). However, if you try to enter that door as Luigi, an angry message from Bowser pops up saying "Your[sic] are not my Rival[sic]! Go Away[sic] and bring Mario!". Luigi goes through the door anyway, but the endless staircase will always activate if you're playing as him no matter how many Shine Sprites you have. I even tried to see if you can break it with F.L.U.D.D., and unfortunately, it doesn't look like you can. But hey, as far as I know this is the only time in the game where playing as Luigi actually matters, besides that one Toad in Lethal Lava Land who addresses you by the right name! Maybe there's others, but I'm not going to spend time running through all those levels again and talking to every Toad, sorry. Anyway, time for Mario to dust off his cap and make his first non-glitched appearance in 9 issues!
So I went back to grab Mario, and I have to admit, it's nice to be hearing his voice clips again, at least. At the top of the endless staircase, there's a Peach portrait that transforms into a Bowser one when you get close, but there's no Dark World-style floor trap, just a hole you jump down, so I guess Bowser just wanted to be theatrical or something. At the bottom of the hole, we get an ominous view of Bowser's Castle and a Sling Star (or a path to the left if you want to chicken out). Let's do this!
Bowser's Castle (The Final Challange[sic])
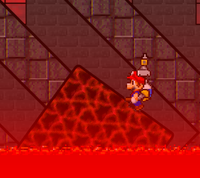
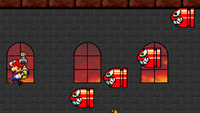
Nothing says climactic final battle like a typo. Don't worry, if you prefer the pause screen over the intro, this is called Bowsers[sic] Castle: The Final Battle instead. You probably know what to expect. It's lava-y, it's castle-y, and there's all kinds of enemies to deal with! It's mostly Bullet Bills and Bullies causing the trouble here. These jumps are already making me miss Luigi. You sure I can't just paint him red? Or grab a Mario cap somewhere, maybe? No? Okay... There's a lot of weird angles, as if the castle itself is falling apart in anticipation of the incoming meteor. Either that, or Bowser hired a lousy architect. Towards the end of the first screen, you'll find the first Red Coin near a set of platforms moving around in circles, because even though the world is about to end, we still have to pick up spare change. Just after that, there's a very big door.
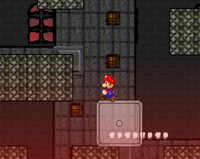
Inside, we find the main hall of Bowser's Castle! Right above the main entrance there's a Star Coin that I can't get yet because it's behind a cage... Anyway, this isn't just an A-to-B platforming challenge, Bowser's pulled out all the stops and there's four doors in each corner of the room. All of them will need to be explored eventually, but to start, I'm going to go with bottom left. This room starts out with a bunch of moving blocks with the same objective that's appeared so many times before, get through without being squished or pushed off into the lava. Then we have a segment with some fire geysers, a breakable wall, then sinking blocks accompanied by Thwomps! The second (at least in the order I'm playing) Red Coin is under one of these Thwomps, and I ended up dying because I got sandwiched between the Thwomp and the lava! But hey, still got the coin. After getting back there, I got up on top of the Thwomps to start heading upward. Then there's a weird part where you have to damage boost by jumping into a sideways fire geyser to get high enough to progress. You might be thinking I'm just missing something, but no! There's a sign right here telling you that's what you have to do! Thankfully, there's a heart just before it, at least. Just after that, there's a red key. Unfortunately, there's no convenient warp to the main hall, so I have to go back the way I came.
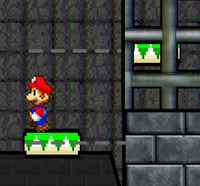
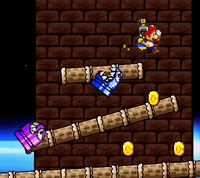
Next up, bottom right. Following some basic platforming, there's a very short-lived Metal Cap to use to get through some lava by a sinking staircase, then jumping up a series of horizontal elevator platforms that go in and out from behind a wall, so you have to time your jumps carefully. It's kind of a neat idea. A little more of the usual platforming with fire geysers and such, and then the second key is right there. Apparently they're called Bowser Keys now, and since I have two of them the cannon in the main room is unlocked. We'll have to see about that a little later. There's some Boos to try and make your escape difficult, but for me they ended up being a non-issue as I made my way upward. Then there's some falling logs going back to the left, but there's the third Red Coin underneath them! It's tricky to grab this without falling down below. I assume you can probably make it work, but I didn't! If you fall, avoid the temptation to just head back the way you came, though. If you stay up on the logs, there's an Invisibility Cap that will make your path back more simple by allowing you to take shortcuts through some cages. More importantly, if you can get back to the main hall in time, you can reach the cage above the main door and grab the Star Coin!
I decided to head upwards in the main hall and check out the cannon. The fourth Red Coin is straight up, so I grabbed that, then went to check out the upper floor. You have to do a diagonal shot and ricochet off the wall to reach it, which is nicely telegraphed by the decorations on the wall, at least. I decided I probably shouldn't go any further though, because my expectations are that I'll either end up stuck somewhere by not exploring the entire main hall first or just miss something.
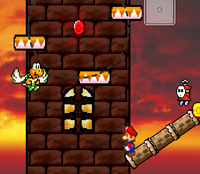
The top left is actually an outdoor section with standard lava platforming. Platforms move around, just don't get roasted on the way. The fifth Red Coin is just above a Koopa Paratroopa close to the end of this section, and the sixth is in a circle of elevator platforms as you climb up a tower. At the top, there's a third Bowser Key! The game doesn't have anything interesting to say when I collect it, but hopefully it'll be useful. Now I hurl Mario off the side of the tower in an attempt to get back to the main hall as fast as possible, hoping he doesn't land in the lava. Guess what, he did, but I didn't die! Also I didn't notice until going back into the main hall that this area uses "Melty Molten Galaxy" instead of the "Koopa's Road" arrangement like the rest of the level so far.
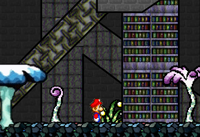
Finally, top right. This one seems normal when oh no falling through the floor aaah! Now I'm in a cave section with... bookcases, for some reason? Either Bowser likes reading in caves, or he really let his library go. There's a caged Toad that I can't do anything with, and then things get weirder and there's a little area filled with Bumpties using the snow tileset. Why is this underground in Bowser's Castle? Who knows! There's an Invisibility Cap here to use to talk to the Toad, though. The Toad claims that this is Bowser's secret lab, he's been trapped here for 3 years, and Bowser was about to experiment on him (why did he wait so long?). Somehow, Mario shares some of his Invisibility Cap with the Toad (going a little too far and making him disappear completely), allowing him to escape. He also reveals that there's an invisible platform in the room, which is suddenly visible now that Mario knows about it. I don't know how that works. Riding the platform to the end nets me the seventh Red Coin, then I jump off and bounce across some Bumpties. Now there's a grassy area, filled with fire geysers, weirdly enough. So I guess Bowser's lab is just full of as many environments as he could cram down here. Just follow along and start going upward, and along the way, the eighth Red Coin is in a corner that's hard to miss. Next the lab takes on a ghost house theme, then desert with pyramid decorations. You get the sense that Runouw just wanted to use all the tilesets one more time? Anyway, it's finally back to Bowser's Castle proper after this with the fourth Bowser Key. Still no interesting message from the game so I have to wonder if those last two were optional or not. One problem though, there's a Star Coin underneath the area with the Bowser Key, and I'm not leaving without that thing! You can't access it from above, and trying to get in from below just makes you fall down into the secret lab again. I poked around, fell down multiple times, died once, and then decided I should probably resort to looking things up on the internet. As it turns out, the game is rude and you need F.L.U.D.D. to make this work, so for now I just went back into the main hall and grabbed the Shine Sprite from the Red Coins. Unfortunately, that throws you out of the level, so now I get to do all of that again! Be right back...
Alright, I'm back and on the upper floor! I only grabbed two of the keys to see what happens, so hopefully I won't regret it. There's two more doors up here, so I decided to go for the left one first. The Rocket Nozzle is in here! Predictably, this whole segment is pretty much just following coins upward. There's one neat jump where you have to drop down and time your rocket boost carefully to get back up before falling in lava, and if I'm remembering correctly I think this happened in the last Bowser level too? So I got to the end and reached the top, and it looks like both doors eventually lead to the same place. Now, on a normal playthrough I could just keep going. But this is a 'Shroom section, so I gotta check out the right side too! This one has the Turbo Nozzle, so you can probably guess that this section makes heavy use of it. Starting off with a Sling Star, it's another vertical section that works by putting you on the opposite side from where you need to be, so you're constantly using the Turbo Nozzle in midair to get where you need to be. From a game design perspective, I prefer the Turbo tower over the Rocket one. It's a more interesting and clever use of the Turbo Nozzle, whereas the Rocket tower is just using it in the same way you've been doing the whole game.
Now for what's at the top! Interestingly, even the game seems to favor taking the Turbo route. There's a repurposed seesaw platform up against a wall blocking another one of those weird invincibility power-ups. The only way to get through is by ramming into it with the Turbo Nozzle, which breaks it. This is the only place in the game where that element appears! Just follow the linear path and eventually you'll come upon some Thwomps. Unfortunately, the power-up doesn't prevent you from getting squashed, but you'll regain all health while it's active. Just after the Thwomps, there's a Hover Nozzle! And now it's time for backtracking woo!! I went back to the top right room in the main hall and hovered over the section of the floor that you fall through to get up into the area with the Star Coin. On the way back up, I decided to see if you can get through the Turbo Nozzle tower while only using the Rocket Nozzle, and you can! Nothing that stands out too much after the Thwomps besides a segment with lots of Bill Blasters. On the next screen, there's even more Bill Blasters! There's a neat part with two of them pointed vertically, so to get up you have to bounce back and forth between them as they fire. Then there's more Big Bullies that have been demoted to regular enemy status. The level design makes them really easy to deal with. Then there's some connected sinking platforms. The big ones are too tall to reach, so you have to jump on smaller ones marked with down arrows that will cause both of them to sink.
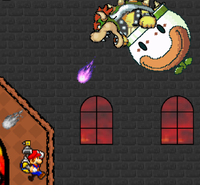
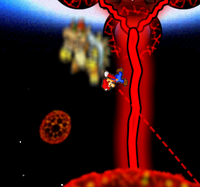
Taking the door at the end of that segment leads to an exterior section with dramatic music, which can only mean Bowser is nearby. As if that wasn't obvious enough, at the top of the tower there's a giant door with red light shining out of it and two health refills. Inside, I encounter Bowser in the Koopa Clown Car! He briefly taunts Mario that he can't stop his master plan and that the meteor is about to launch, then goes on the offense. This version of Bowser has lots of different attacks! He can shoot small fireballs in different colors that signify their trajectories, summon Magikoopa magic that spawns enemies, stomp the floor with the Clown Car, and most importantly, swoop down at Mario while breathing fire. That last one is the most important because it gives an opening to jump on his head. Only the Hover Nozzle is available in this fight, so no cheesing it with rocket boosts, unfortunately. After three hits, the Clown Car explodes and his arms fly off in the death animation! No, it's not excessively gruesome - from offscreen, Bowser tells us that it was a robot made as a diversion, and the meteor is ready to launch! A Sling Star appears along with a pipe back to Peach's Castle, kind of ruining the sense of urgency, along with the opportunity to save.
No sense delaying things. I take the Sling Star and end up in a space-themed section! There's low gravity and everything, which is pretty cool. It's a lot of the usual platforming, but you have to avoid lots of homing Bullet Bills and what's either small meteors or chunks of the giant meteor raining down at you. I gotta say, I'm impressed by Mario's ability to take a meteor to the head mid-flight and keep going. Also, the Rocket and Turbo Nozzles are still disabled here, so no cheesing! At the end, a Sling Star leads to another section which is more of the same but without the Bullet Bills. Towards the end, there's a section where you have to break some blocks while spinning in midair to get farther ahead, so hopefully you've gotten good at that by now, otherwise you'll be falling a long way down! The Sling Star at the end leads to more space platforming, and, well, hope you weren't getting too comfortable with not having Bullet Bills chasing you all the time. Another Star Coin is in this segment on some falling platforms, you can't really miss it. Only one more in the entire game! At the end of this section there's a giant Sling Star, and this one is special because it leads into a cutscene of Mario flying up the tower!
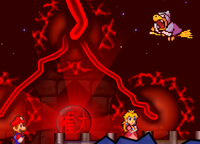
At the top, Mario confronts Bowser once again, while Peach looks on from her cage. Bowser says that the meteor is only minutes away from crashing, and that he was actually worried Mario would be too weak to reach him! He vows to settle their rivalry once and for all using Kamek's magic and the Orb of Power, kicking off the true final battle, complete with "King Bowser" from Super Mario Galaxy playing! At first glance, it appears to be the standard Bowser battle, just in low gravity with meteors raining down on the arena. But that's not the case! When you grab Bowser, Mario starts spinning around, revealing the mines floating around the arena. To damage Bowser, you have to aim him directly at the mines! It's pretty cool! You have a limited time to do it though, because they'll slowly fall back to the platform while spinning. Also, I got Bowser to jump off the edge of the platform once by accident, which was pretty funny. After throwing him into the mines three times, he falls off the edge of the tower.
After the fight is over, Mario lands back on the top of the tower and Peach is magically freed from her cage, apparently. Just as they're about to do whatever they need to do to save the Mushroom Kingdom (it's not really explained), the tower suddenly shakes and Kamek arrives. He finally gives the exposition that the Orb of Power has taken control of Bowser, and it's the Orb that wants to destroy the world, not Bowser. The meteor is close enough now that there's no way to stop it, but Kamek gets the idea to reverse the force field that Bowser made so that the destruction will be contained to Bowser's Castle instead. He fires some magic at it and turns the scary red magic into not scary blue magic, apparently as simple as turning a light switch! Kamek offers Mario and Peach a ride out since everything's about to explode. No explanation for why he turned from "I don't like Bowser but I'm still going to try to kill you" last time we saw him, by the way! Unfortunately, a chunk of meteor knocks Mario off the tower, so Kamek has to save only Peach and then get out of there.
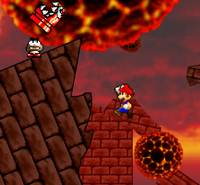
So Mario's on his own now in an autoscrolling escape sequence through the crumbling remains of Bowser's Castle! There's a bunch of enemies here, which, sucks to be them, I guess! They're still trying to kill Mario, so they should probably re-examine their priorities. That's probably why we're not saving them from this doomed structure unlike a certain other video game character I could mention. If you know, you know. The second screen is a little mean, there's a lava lake at the bottom if you fall but it's so far from anything that you can't really save yourself. You're just stuck with certain but not instantaneous death, which is probably worse than if it was just a pit or something! During this part you can see the chunk of the tower with the door to the Bowser robot fight, which is pretty neat. The final screen is a little trickier since it's closer to the lava in contrast, with lots of sinking platforms that take up quite a bit of space. So if you're not careful, you can lose your safe ground pretty easily. There's a Sling Star at the end, which marks victory! A cutscene plays of Mario flying away as the meteor completely annihilates the castle, but is otherwise contained by the force field.
Mario reunites with Peach and Kamek back in front of Peach's Castle. Kamek notes the destruction and then tells Mario that they're still enemies even though he helped him this one time, because of course they are! He flies away and Eddie comes out with some of the other Toads, celebrating Mario's victory. They decide to finally have the party they were going to at the beginning of the game and all head inside. Then the credits roll with cinematics of all the levels we've been to throughout this journey, concluding with a mysterious "The End?". Well, I can confirm that this isn't the end, because I only have 63 Shine Sprites and Star Coins each, and there's 64 total! I'll tackle what awaits beyond Bowser's Castle next month, so see you then for the final edition of Shine Get!
Also, yes, the last two keys were entirely optional. You still have to go to each room for Red Coins and Star Coins, though!
An Octet Gazette
Written by: Museful Traveler (talk)
The pantheon in this land bears many similarities to the pantheon from my home, and yet... So too do differences appear to me the longer I immerse myself in this land's culture. The worshipful here pray not to twelve gods, but to eight, and not so often as the pious across the sea. The peoples of this land speak highly of the ingenuity of mortals, dribbling words from their lips of craftsmen and inventors who will bring revolution to the world. Mere creatures of earth and flesh, wresting their futures from the whims of fate... What will come of it?
Welcome back to An Octet Gazette, readers of The 'Shroom! I know I said last month that we would begin covering the secret jobs this month, but due to some time constraints on my end, the plan has changed. We'll still be covering them, but we'll actually start on them in December. For now, as preparation, we're going to take a look at how you actually acquire jobs and how that process differs between the two games.
Getting A Job Through Divine Intervention
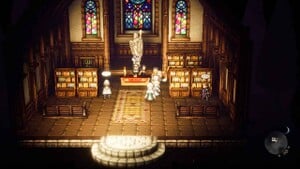
Octopath Traveler takes a simple approach to acquiring and equipping jobs. Every traveler starts out with a default, unchanging job corresponding to their character and narrative role. Every character also has a single slot into which a secondary job can be equipped. This secondary job can be changed out at any time, and skills for that job are retained on a per-character basis as we discussed earlier this year. So, could you, say, have all eight travelers sub-classing as apothecaries at once? Nope! You only get one copy, so to speak, of every job in the game, meaning you can only have a single traveler equip a given sub-job at a time.
As for how you acquire these jobs, well, for the base eight, you get them as a divine gift. Spread throughout Orsterra are twelve hidden shrines, with eight of these shrines, naturally, corresponding to the eight base jobs. Broadly speaking, you'll find those eight shrines on pathways leading to the settlements which host the second chapters of the travelers' stories, so they're not too far into the game. They aren't so hidden that you'll miss out on them, so long as you go off the beaten path now and again. When you find one of these shrines, it's as simple as going up to the statue within and interacting with it. You'll be bequeathed that shrine's job and can go on your merry way.
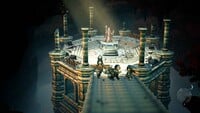
The other four shrines, unsurprisingly, correspond to the four hidden jobs. Just like the others, these shrines are hidden off the beaten path, but these are hidden away in late-game areas, near the settlements that host the Chapter 4s of some of the travelers. The key difference with these shrines is that these shrines house bosses. Each of these shrines houses a god from Orsterra's pantheon, and you have to defeat them in order to acquire their corresponding job. As you'd expect from late-game battles, they're not pushovers, but defeat them and you're golden.
That's all there is to the system in the first game. It's about as simple as could be, but the second game builds upon that system in some interesting ways, so lets turn our attention to it!
Rolling Up Your Sleeves For A Guild Of Some Sort
Let's start with the small change first. In the first game, there was only one copy of any given sub-job, but in Octopath Traveler II, you can obtain up to three copies of each of the default eight jobs. Unlike before, jobs are not some discrete divinely-given gift. Instead, jobs are acquired by earning licenses given out by their corresponding guilds. In practice, this doesn't make a huge difference for the first license you get for each job. The guilds, after all, are found off the beaten path or hidden in settlements around the world, and obtaining the first license is as simple as going in and speaking to the guildmaster.
Obtaining the second and third licenses, however, requires a little more work, and the work they require is guild-specific. The guildmaster offers two quests that must be completed to obtain the extra licenses, one quest for each license. The Clerics Guild, for instance, asks you to track down rare holy items, while the Hunters Guild wants you to defeat certain rare and powerful monsters, and the Thieves Guild tasks you with stealing certain items. It's a slightly more involved process befitting the reward of extra flexibility, and one you don't really need to engage with if you don't need the extra licenses.
While it's a nice system, the most interesting change is to the four secret jobs. There are no guilds for these jobs; unlike in the first game, they are obtained in an entirely different way than the base eight. We'll go over obtaining them and using them in detail as we cover each of them, but have a summary for now. One is earned simply by talking to a certain character (Arkar, who can be found early on), but cannot reach its full potential until various materials are collected. Another is obtained through the completion of two sidequests, one of which involves finding unique rusty weapons (and finding all six is required to unlock the job's full potential). The third is obtained through a boss battle, not entirely unlike the first game, but reaching this boss battle requires that players overcome a series of battles in a dungeon designed to test them. Finally, the fourth is hidden away (moreso than the guilds or shrines of either game) and a puzzle must be solved to receive it. It's a much more varied approach, and the level of effort that must be put in to unlock each job makes them feel quite rewarding.
Ready For The Job Market
That's everything you need to know about acquiring and equipping jobs, but so long as we're discussing shrines and guilds, there are some extra things I can mention. For one, while shrines don't exist in Octopath II, altars fill their niche. Across the land are eight altars corresponding to, you guessed it, the eight base jobs. Bring the corresponding traveler to the altar and interact with the statue within, and you'll unlock one of the two EX skills assigned to that traveler (more details on those will come down the road!).
Guilds, meanwhile, provide more than just licenses. At guilds, you can also get hints as to the location of powerful (and, especially in the case of the Double Tomahawk axe, quite useful) legendary weapons. Be sure to chat with the guildmasters!
That's all for this month. Next month, we get into the secret jobs (really, this time!). See you then!
| The 'Shroom: Issue 212 | |
|---|---|
| Staff sections | Staff Notes • The 'Shroom Spotlight • Poochy's Picks • Awards Director Election • Credits |
| Features | Fake News • Fun Stuff • Palette Swap • Pipe Plaza • Critic Corner • Strategy Wing |
| Specials | Mario And Luigi Brothership Custom Instruction Manual |
