From the Super Mario Wiki, the Mario encyclopedia
Jump to navigationJump to search
Flipside
| Item
|
Icon
|
Location
|
Image
|
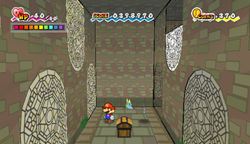
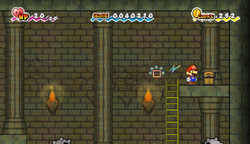
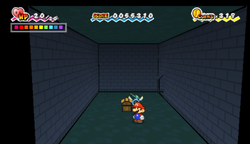
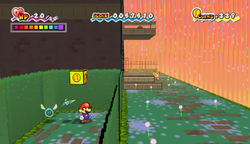
| Cooking Disk R
|

|
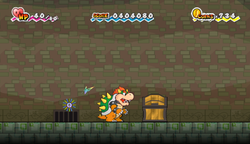
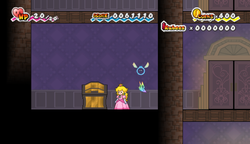
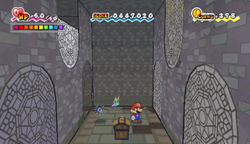
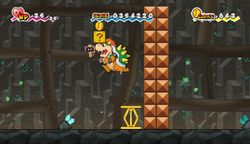
On the 3rd floor of Flipside via the Warp Pipe on the 2nd floor. Use Tippi to uncover a path of invisible Blocks leading to a chest which contains the disk.
|
|
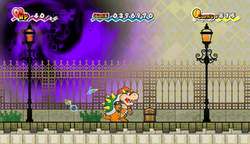
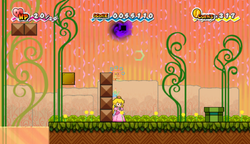
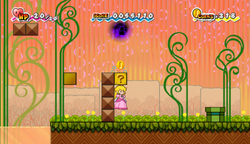
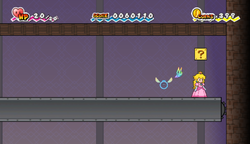
| Gold Bar
|

|
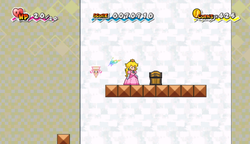
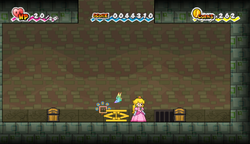
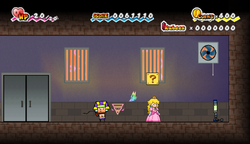
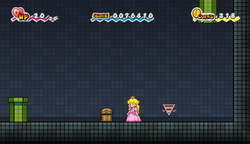
(Map 1), use Fleep on the bush in front of Flipside Tower, 3rd Floor, right next to where Skeet found an unconscious Princess Peach.
|
|
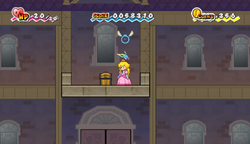
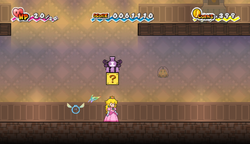
| HP Plus
|

|
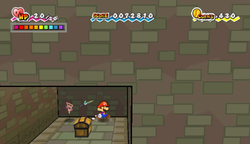
In a large chest after activating two separate ! Switches: first of all the one in Flopside B2 Outskirts, which can only be revealed by using Cudge to destroy the yellow block hiding it; and lastly the one in Flipside B2 Outskirts.
|
|
| Super Card
|

|
- Merlon and Merluvlee, in the chests found in a secret area via a certain hole in the Flipside 1st Floor Outskirts
- InterNed, in 3D in Flipside B1 in a hidden alcove over the water leading to Flimm (and also where Captain Gills lives).
- King Sammer (Map 4), use Fleep on the cursor icon above the door to Flipside Arcade's minigame room.
- Welderberg (Map 2), use Fleep on top of the stained glass window of Merlumina in Mirror Hall from Flipside.
- Merlee, in a chest after using Piccolo near the coloured block in the Flipside 3rd Floor Outskirts.
- InterChet, in the chest in a 3D-accessible area on the other side of Flipside B1 Outskirts via a hole accessible after destroying the giant yellow block in Flopside B1 Outskirts with Cudge.
|
|
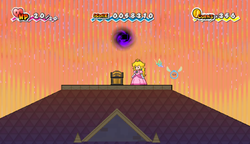
| Ultra Shroom Shake
|

|
(Map 3), use Fleep on the space between the first two windows where Flimm and an Itty Bits are located in Flipside B1.
|
|
Lineland Road
| Item
|
Icon
|
Location
|
Image
|
| Caught Card
|

|
- Squiglet, on a brick block right above Bestovius' house.
- Goomba, in 3D behind a tall pipe in the second area.
- Koopa Troopa, in a secret area via a 3D-accessible path near the Star Block.
|
|
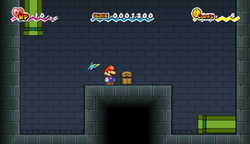
| Fire Burst
|

|
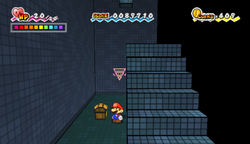
In 3D between the two doors inside Bestovius’ house.
|
|
| Shell Shock
|

|
In 3D next to Bestovius.
|
|
| Shroom Shake (x2)
|

|
- In the chest underground.
- In 3D next to Bestovius.
|
|
| Super Card
|
|
Bestovius (Map 6), use Fleep on the window of Bestovius’ house from outside.
|
|
Hidden Block
| Item
|
Icon
|
Location
|
Image
|
Image (block/s revealed)
|
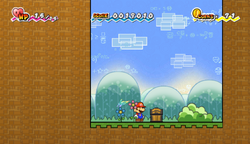
| Mushroom
|

|
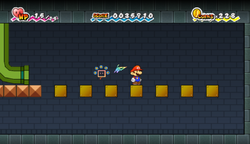
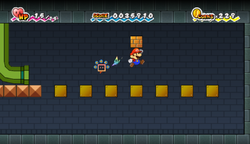
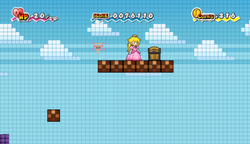
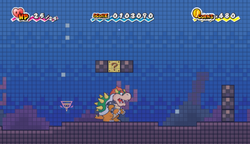
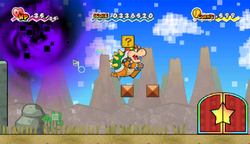
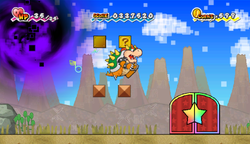
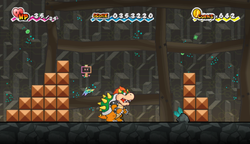
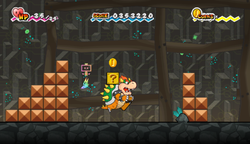
In the third scene, near the end is the group of five blocks (1 ? and 4 brick), this hidden block can be found above the last brick block.
|
|
|
Mount Lineland
| Item
|
Icon
|
Location
|
Image
|
| Caught Card
|
|
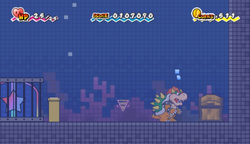
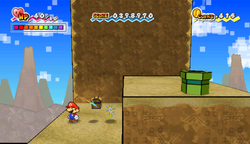
- Paratroopa, in a hidden area via a 3D-accessible path behind the first set of mountain platforms in the first area.
- Boomboxer, on top of Watchitt's house.
|
|
| Golden Leaf
|

|
(Map 7), use Fleep above the very first mountain platform near the Paratroopas.
|
|
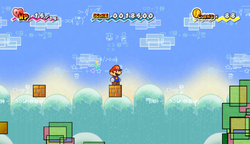
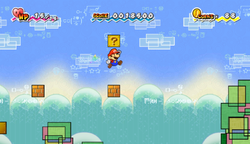
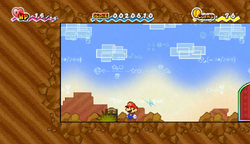
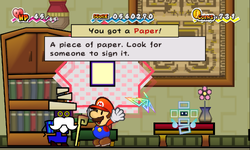
| Paper
|

|
Given by Old Man Watchitt during the Piccolo sidequest.
|
|
| Super Card
|
|
- Red & Green, in 3D behind Green's bed in his house.
- Brobot L-type (Map 8), use Fleep on the “green apple” picture frame inside Green’s house.
|
|
| Thoreau
|

|
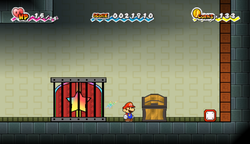
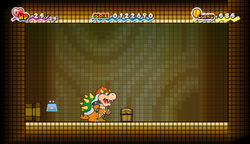
In the room after reaching the end of the second house in Yold Town.
|
|
Yold Desert
| Item
|
Icon
|
Location
|
Image
|
| Caught Card
|
|
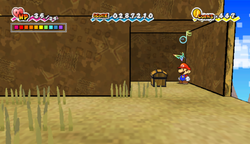
Squig, behind a rock after flipping to 3D near the Boomboxer on brick blocks with a Jawbus nearby, same general area where the red palm tree is located.
|
|
| Courage Shell
|

|
Behind a rock after flipping to 3D near the Bald Clefts in an area with four narrow quicksand rivers in 2D, same general area where the first Yold Signpost is located.
|
|
| Ghost Shroom
|

|
Behind the second rock from the west near two 3-D Goombas, in an area right after the first O’Chunks boss fight.
|
|
| Gold Bar x3
|

|
(Map 9), use Fleep on the big rock near a Cherbil, which in 3D is an arrow pointing right to a hidden path.
|
|
| Super Card
|
|
Fracktail (Map 10), use Fleep above the second Yold Signpost, which contains information about  and and  buttons. buttons.
|
|
Hidden Blocks
| Item
|
Icon
|
Location
|
Image
|
Image (block/s revealed)
|
| Coin (both)
|

|
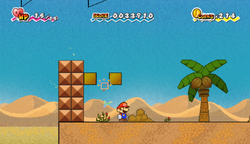
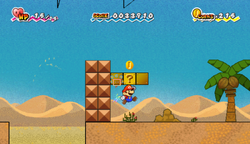
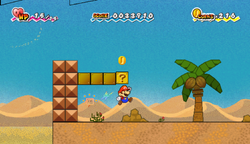
In the third scene, after being dropped from the first flipping rectangles, these two blocks can be found as 2nd and 4th blocks in the 4 block row directly behind Mario.
|
|
|
| 12 Coins
|
|
Same scene, near the end of the scene is a pipe on the block platform. In the room after the pipe is a row of 7 ? Blocks. This hidden block can be found above the fourth one.
|
|
|
Yold Ruins
| Item
|
Icon
|
Location
|
Image
|
| Caught Card
|
|
Buzzy Beetle, in a secret area via a 3D-accessible path near the door to the Spiky Tromp trap area.
|
|
| Life Shroom
|

|
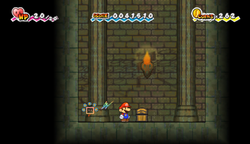
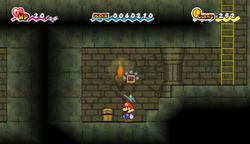
In a chest at the top right end of the second area, past a Squig and down the ladder.
|
|
| Ruins Key
|
|
In the upper part of fourth scene.
|
|
| Super Card
|
|
Merlumina (Map 11), use Fleep on the mural between the second and third pillars in the room where Mario met Merlumina.
|
|
Gloam Valley
| Item
|
Icon
|
Location
|
Image
|
| Boomer
|

|
In the fifth scene, there is a pipe found near the end. By entering it, pushing a ! switch in the first room and defeating a Growmeba in the second one, a chest spawns.
|
|
| Caught Card
|
|
Shlurp and Swooper, in the chests found in an underground area under the Star Block via a 3D-accessible hole
|
|
| Door Key
|

|
In the first scene, there is a pipe found above the exit door. By entering it and defeating the enemies inside, a chest spawns.
|
|
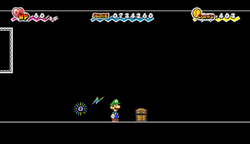
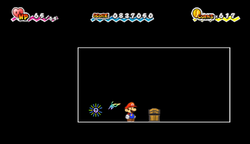
| Shooting Star
|

|
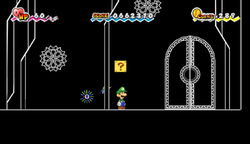
(Map 12), use Fleep on a seven-point star in the background near the Star Block, the one with five rays converging on it.
|
|
| Super Card
|
|
Watchitt, in a 3D-accessible area on the other side of the area with Boomer's chest via a hole in the wall blown up by Boomer.
|
|
Hidden Block
| Item
|
Icon
|
Location
|
Image
|
Image (block/s revealed)
|
| Coin
|
|
In the fifth scene, after crossing the water, there is a ? Block and block collumn. This hidden block is found between said collumn and two brick blocks.
|
|
|
Merlee's Mansion 1
| Item
|
Icon
|
Location
|
Image
|
| Catch Card SP
|

|
(Map 13), use Fleep on the first window eastward from the front door of Merlee's Mansion.
|
|
| Caught Card
|
|
- Cursya, in the chest on the balcony above the front door of Merlee's Mansion.
- Gnip (Map 14), use Fleep on the elongated picture frame, same area where the Gnaw was.
|
|
| Coin
|
|
12 in the Coin Block found in the outside scene, found right away to the left after flipping to 3-D.
|
|
| House Key
|
|
After reaching the room with spike ceiling trap (last door on the second floor of the second room), found at the end of the path above the trap.
|

|
| Slow Flower
|

|
In the room with a spike ceiling trap (accessed by a door on the second floor in the second room of the mansion), after flipping to 3-D and jumping on top of the trap, then flipping back and reaching its east end.
|
|
| Stop Watch
|

|
In the chest on top of Merlee's Mansion.
|
|
Merlee's Mansion 2
| Item
|
Icon
|
Location
|
Image
|
| Caught Card
|
|
Boo, in the chest via a 3D-accessible but bricked-up area above the door to Mimi's office.
|

|
| Coin
|
|
In the middle of the first floor on the first room. This block is required to be hit to progress through the game. Also accessible during the Dimentio chase in chapter 8-3.
|
|
| Mushroom
|
|
In the room behind the door on the second floor. Contents of the block depend on if the group has at least 10 Rubees: If they don't have them, striking this block does nothing. But if they have them, striking this block spawns a Mushroom. Leaving the room respawns the block.
|
|
| Slim
|

|
In the secret section of the first room found after going to west part of the second floor and flipping into 3-D.
|
|
| Super Card
|
|
Mimi (Map 15), use Fleep on the poster with an image of Mimi in her own office.
|
|
Merlee's Basement
| Item
|
Icon
|
Location
|
Image
|
| Shroom Shake
|
|
Behind a 3D-accessible tunnel within Room 8 via a hole in the wall blown up by Boomer.
|
|
| Gold Bar x3
|
|
(Map 16), use Fleep on the intersection between two wooden planks in the center, upper-right direction of a ? Block that contains a regular Mushroom in Room 0.
|
|
| Dried Shroom
|

|
(Map 17), use Fleep on the mirror above the sink inside the women’s restroom.
|
|
The Bitlands
| Item
|
Icon
|
Location
|
Image
|
| Catch Card SP
|
|
- In western background of an area where the first Mega Star is, accessible via the westernmost pipe near a Sproing-Oing and a Piranha Plant, after crossing a moving platform.
- Behind the exit pipe in 3D near exactly 17 visible coins, accessible via the first pipe underground.
|
|
| Caught Card
|
|
- Piranha Plant, in the chest on a platform after jumping along the colored columns.
- Back Cursya (Map 18), use Fleep on the blue column; beware of the Back Cursya when doing so.
|
|
| Ice Storm
|

|
In eastern background of the first area, accessible via a pipe to the west after defeating the Blomeba(s).
|
|
| Super Card
|
|
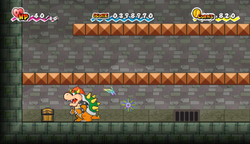
Magikoopa, in a chest in 3D in the secret area via the furthest pipe on the right of the "Warp Zone" pipe trio in the underground area.
|
|
| Thunder Rage
|

|
In the chest via a pipe on the eastern end of the first area.
|
|
| Ultra Shroom Shake
|
|
(Map 19), use Fleep on the median space between 6 visible coins around an assortment of brick blocks shaped like a recurve bow near two Koopa Troopas.
|
|
The Tile Pool
| Item
|
Icon
|
Location
|
Image
|
| Gold Bar
|
|
In a small 3D-accessible area hidden east of the pipe leading to Thudley’s chest, which is located two areas away.
|

|
| Happy Flower
|

|
In the first scene, near the whirlpool. Also accessible during the Dimentio chase in chapter 8-3.
|

|
| Mushroom
|
|
In the first scene, near the beginning. Also accessible during the Dimentio chase in chapter 8-3.
|
|
| Power Plus
|

|
(Map 21), use Fleep on the drawing in a cavern east end of the second area.
|
|
| Super Card
|
|
Big Blooper (Map 20), use Fleep on the second animated kelp in the second area’s background.
|
|
| Thudley
|

|
After going through the pipe near the previous chest and the door at the end of the new scene, a door locks. Enemies in this room must be defeated to make the chest appear.
|
|
The Dotwood Tree
| Item
|
Icon
|
Location
|
Image
|
| Super Card
|
|
- Peach (2), in a chest after defeating the Chain Chomps in an area via a pipe on the right in the tree.
- Dimentio (Map 22), use Fleep on the lone Hard Block in an area patrolled by two Lakitus and where the red winds can be ridden, obtainable only after the first Dimentio boss fight.
|
|
Fort Francis
| Item
|
Icon
|
Location
|
Image
|
| Fort Key
|

|
In the first scene, there is a pipe only visible after reaching the east end and flipping into 3-D. Chest is in the room reached by the said pipe.
|
|
Fort Key
Mushroom
|
|
In the room reached by a outdoor bridge and going past the SecuriMeow.
|
|
Fort Key
Super Shroom
|

|
In the room reach by going past the SecuriMeow and the elevator.
|
|
| Super Card
|
|
|
|
Outer Space
| Item
|
Icon
|
Location
|
Image
|
| Catch Card SP
|
|
In 3D behind an asteroid in the area before the Star Block one, where enemies consist solely of Warpids.
|
|
| Caught Card
|
|
Foton, in 3D behind an asteroid in the second area near a Save Block.
|
|
| Coin
|
|
In the last scene, there is an Squarp hole hidden behind an asteroid. This hole takes Mario into the background, near the pipe. Block is found after entering said pipe.
|
|
Planet Blobule
| Item
|
Icon
|
Location
|
Image
|
| Caught Card
|
|
Hooligon (Map 26), use Fleep on the two objects on Blappy’s table.
|
|
| Space Food
|

|
In 3D behind a tall pipe below the door leading to Blappy.
|
|
| Super Card
|
|
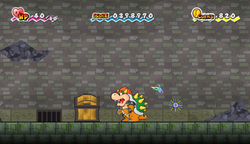
Squirps (Map 25), use Fleep on the outhouse, same place where the Pixl is recruited.
|
|
| Ultra Shroom Shake
|
|
In a small 3D-accessible area under the terrain some distance from a bricked-up door.
|
|
Hidden Blocks
| Item
|
Icon
|
Location
|
Image
|
Image (block/s revealed)
|
| Coin
|
|
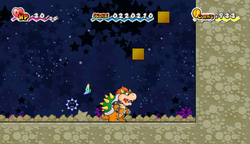
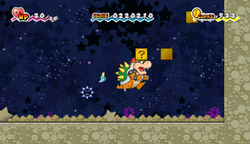
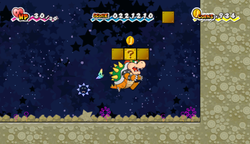
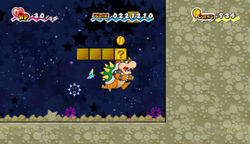
In the first scene, after falling down after second Longator.
|
|
|
| Mushroom
|
|
In the Blollop's house, accessed by a futuristic door in the second scene.
|
|
|
| Speed Flower (1st), Coin (rest)
|

|
In the scene accessed by a first star door in the second scene, near the end.
|
|
|
| 7 Coins
|
|
In the Blarfle's house, accessed by a futuristic door in the scene accessed by a first star door in the second scene.
|
|
|
| 7 Coins
|
|
In the Blappy's house, accessed by a futuristic door in the fourth scene.
|
|
|
Outer Limits
| Item
|
Icon
|
Location
|
Image
|
| Catch Card SP
|
|
Surrounded by brick blocks in top-left corner of the third area.
|
|
| Coin
|
|
30 in the Coin Block found in the scene with Twinkle Mart, right of the sign.
|
|
| Ghost Shroom
|
|
Behind the centre row of brick blocks in the third area.
|
|
| Shooting Star
|
|
Behind the second column of brick blocks in the first area.
|
|
| Super Shroom
|
|
In the first scene, found between three Hedrons.
|
|
| Super Card
|
|
Mr. L (Map 27), use Fleep on the two litter bins at Twinkle Mart.
|
|
Whoa Zone
| Item
|
Icon
|
Location
|
Image
|
| Dimension Key
|

|
- At the end of the fourth scene.
- At the ceiling of the scene with the second locked door.
- In the scene reached by the third door in the room with 90° gravity switches.
|
|
| HP Plus
|
|
(Map 29), use Fleep slightly right of the planet staff on Squirpina XIV’s statue. Revisit is required, after getting the Pure Heart.
|
|
| Super Card
|
|
Brobot (Map 28), use Fleep on the protruding block from the ceiling, in a room with two gravity switches and filled with Tileloids.
|
|
Flopside
| Item
|
Icon
|
Location
|
Image
|
Cooking Disk B
Golden Card
|


|
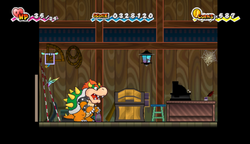
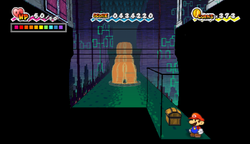
In the chests hidden within The Overthere bar in Flopside B1.
|
|
| Cooking Disk W
|

|
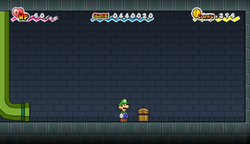
On the 3rd floor of Flopside via the Warp Pipe on the 2nd floor. Use Tippi to uncover a path of invisible Blocks leading to a chest which contains the disk.
|
|
| Cooking Disk Y
|

|
On the table in 3D inside Harold and Gertrude's house on the 1st floor of Flopside.
|
|
| Dried Shroom
|
|
Appears on the table in 3D after purchasing the Mushroom package in Inga's Inn for 10 Coins.
|
|
| Peachy Peach
|

|
Appears on the table in 3D after purchasing the Flower package in Inga's Inn for 20 Coins.
|
|
| Piccolo
|

|
In the house with the locked door in the back part of 1st Floor. Key to it is granted after the trading sidequest available after placing the blue Pure Heart into its pillar.
|
|
| Power Plus
|
|
In a large chest after activating the ! Switch by using Cudge to destroy the yellow block hiding it in Flopside B2 Outskirts.
|
|
| Slimy Shroom
|

|
Appears on the table in 3D after purchasing the Star package in Inga's Inn for 40 Coins.
|
|
| Special Card
|

|
- Barry, in the chest within a secret area via any one of three holes in Flopside B2 Outskirts.
- Piccolo, in the chest inside a 3D-accessible area hidden on the other side behind the seventh Heart Pillar, via a hole on top of the wall in Flopside B1 Outskirts.
|
|
| Super Card
|
|
- O’Chunks (Map 5), use Fleep on the bush in front of Flopside Tower, 3rd Floor.
- Nolrem, in a chest after using Piccolo near the coloured block in the Flopside 3rd Floor Outskirts.
|
|
Downtown of Crag
| Item
|
Icon
|
Location
|
Image
|
| Caught Card
|
|
Moon Cleft, in a small 3D-accessible alcove below the canyon to the right of the first block puzzle.
|
|
| Cooking Disk G
|

|
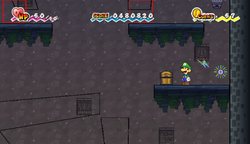
Through a 3D-accessible hole in the east wall where the Save Block is, use Dottie to shrink Mario and go down the pipe on the other side which leads to a flooded room. Enter the other pipe in this room to reach a Whacka, then flip into 3D to reach the chest containing the Cooking Disk.
|
|
| Super Card
|
|
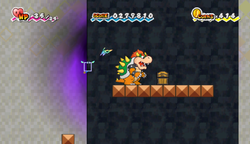
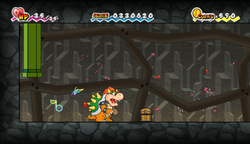
- Bowser (2), in a chest after defeating the two Shlorps underground via a pipe at east end of the second area; beware of the Back Cursya when entering said pipe.
- Muth (Map 30), use Fleep on the tip of the left stone monolith, west of the platform where Mario and co. came out of the cyan door and subsequently fell onto.
- Flint Cragley (Map 31), use Fleep on the rock painting which depicts Cragnons hunting a Muth, in the area where the Star Block is.
|
|
Gap of Crag
| Item
|
Icon
|
Location
|
Image
|
| Caught Card
|
|
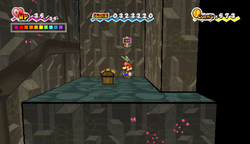
Stone Buzzy, in a hidden chest after gliding over the underground canyon where the Star Block is as Peach and using Mario to flip into 3D.
|
|
| Fire Burst
|
|
(Map 32), use Fleep on the volcanic crater.
|
|
| Mighty Tonic
|

|
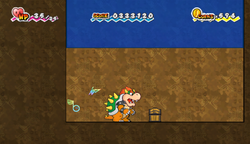
In front of the easternmost pipe in the second area near a Save Block, one Clubba, and a Cragvision set depicting the location of the Fire Tablet right above it.
|
|
| Primordial Fruit
|

|
In 3D behind the second, taller pipe in first area.
|
|
| Ultra Shroom Shake
|
|
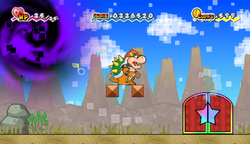
- In the background area eastern opposite end of the volcano entrance, accessible via a pipe on exactly four Hard Blocks.
- (Map 33), use Fleep on the “fire” cave drawing inside the volcano.
|
|
| Water Tablet
|

|
In the first scene, found under the water.
|
|
Hidden Blocks
| Item
|
Icon
|
Location
|
Image
|
Image (block/s revealed)
|
| Mushroom (both)
|
|
In the second scene, left of the rightmost door, above the block platforms.
|
|
|
Floro Caverns 1
| Item
|
Icon
|
Location
|
Image
|
| Caught Card
|
|
Spania, in a small 3D-accessible area under the blocks leading to Monzo.
|
|
| Shooting Star
|
|
(Map 34), use Fleep above the tallest protruding blue crystal in the area where the Star Block is.
|
|
| Shroom Shake
|
|
In a 3D-accessible area on the other side of a camouflaged yellow block which can be destroyed by Cudge, via a piranha-infested pipe right next to the door leading to Hornfels after a minecart ride.
|
|
| Super Card
|
|
Hornfels & Monzo (Map 35), use Fleep on the cluster of purple ores in the minecart area right before the door leading to Monzo.
|
|
Floro Caverns 2
| Item
|
Icon
|
Location
|
Image
|
| Poison Shroom
|

|
(Map 36), use Fleep on the righter cluster of red ores in the room with two Heavy Cursyas, east of the room with two Spanias along with a skull drawing which hides the Cave Key.
|
|
| Super Card
|
|
|
|
Hidden Blocks
| Item
|
Icon
|
Location
|
Image
|
Image (block/s revealed)
|
| Coin, Mushroom
|
|
In the third scene, near the beginning between two stairs made out of hard blocks, left of the group of 3 brick blocks in the air.
|
|
|
| Coin
|
|
Same scene, near the end of the scene, left of the last trampoline, above two brick blocks.
|
|
|
World of Nothing
TBA
The Underwhere
| Item
|
Icon
|
Location
|
Image
|
| Caught Card
|
|
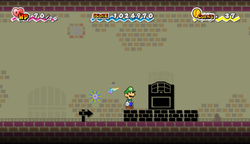
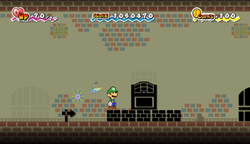
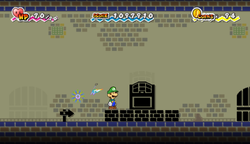
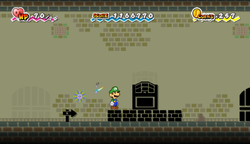
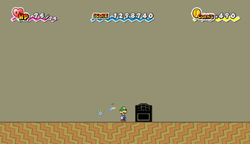
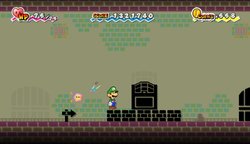
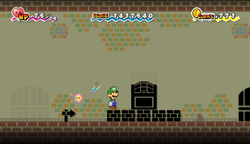
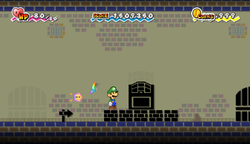
- Dry Bones, in a small alcove in 3D to the left of the moving fountains near when Mario found Luigi.
- Underhand (Map 39), use Fleep in the east bank of River Twygz.
|
|
| Long-Last Shake
|

|
Behind a rock in the same area where Mario found Luigi.
|
|
| Super Card
|
|
- Peach (3), in a chest after defeating the Gigabite in an area via pipes starting from the one next to three Brick Blocks at the top of the second area.
- Jaydes (Map 38), use Fleep on top of the Underwhere fountain.
|
|
| Super Shroom Shake
|

|
On top of a tall pipe at east end of the second area, a flip block may be used to acquire it.
|
|
Underwhere Road
| Item
|
Icon
|
Location
|
Image
|
| Caught Card
|
|
Dark Boo, in the chest on a top-right platform of the second area with the Dark Boos and Underhands.
|
|
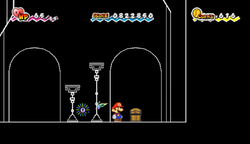
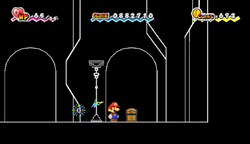
| Super Card
|
|
Underchomp (Map 41), use Fleep slightly left of the light rays near the Star Block.
|
|
| Trial Stew
|

|
(Map 40), use Fleep on the three hags’ fridge near a Save Block.
|
|
Overthere Stair
| Item
|
Icon
|
Location
|
Image
|
| Black Apple
|

|
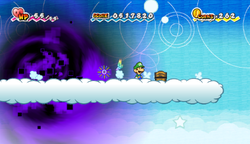
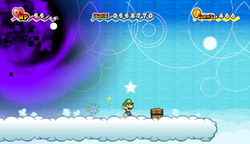
Infinite supply on cloud 53.
|
|
| Blue Apple
|

|
Infinite supply on cloud 33.
|
|
| Caught Card
|
|
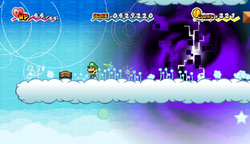
Ruff Puff, in a chest on the left of cloud 34 near exactly 3 Hard Blocks.
|
|
| Gold Bar
|
|
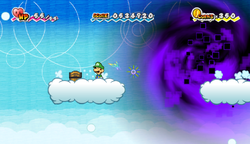
In a chest sitting right on top of the largest structure laden with coins in 3D on cloud 80.
|

|
| Gold Bar x3
|
|
(Map 42), use Fleep on the Yellow Apple tree trunk on cloud 49.
|
|
| Life Shroom
|
|
In a chest on the cloud right under cloud 75, the same cloud where Cyrrus is on.
|
|
| Long-Last Shake
|
|
In a chest on cloud 68 guarded by a Cursya.
|
|
| Pink Apple
|

|
Infinite supply on cloud 51 in 3D.
|
|
| Red Apple
|

|
Infinite supply on cloud 46.
|
|
| Shroom Shake
|
|
In a chest on the cloud patrolled by a Lakitu two clouds away west of cloud 46.
|
|
| Super Card
|
|
- Rawbus, in a chest on the cloud with two Rawbuses, which is on the right next to cloud 25.
- Zombie Shroom, in a chest at the far right of the Star Block by using Luigi to high jump to the roof and go to the other side.
|
|
| Thunder Rage
|
|
In a chest on the east side of cloud 69 guarded by two Skellobits.
|
|
| Yellow Apple
|

|
Infinite supply on cloud 49.
|
|
Hidden Block
| Item
|
Icon
|
Location
|
Image
|
Image (block/s revealed)
|
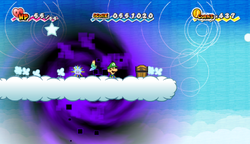
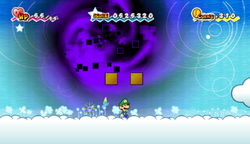
| Ghoul Shroom
|

|
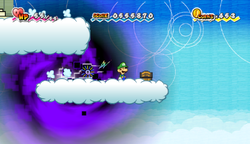
In the third scene, above the cloud 31, between two visible ? Blocks.
|
|
|
The Overthere
| Item
|
Icon
|
Location
|
Image
|
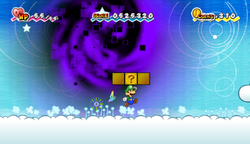
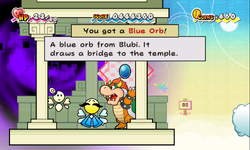
| Blue Orb
|

|
Kept by Blubi, whom the gang finds frozen. Using Bowser's Fire Breath melts the ice and frees him, but when he wakes up he has amnesia. Mario and co. must speak with him until he comes back to his senses, at which point he gives them the orb.
|
|
| Caught Card
|
|
- Skellobit and Skellobomber, in the chests found in an area via a pipe under the first cloud in Overthere Sector 5.
- Spiky Skellobit, in a chest behind the staircase leading to Grambi in 3D.
|
|
| Cooking Disk PU
|

|
In a chest after defeating the Gigabite in an area via a pipe behind the easternmost column in Sector 2.
|
|
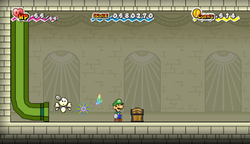
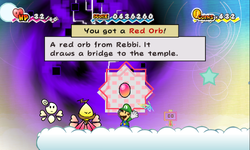
| Red Orb
|

|
Held by Rebbi. He is found in Sector Seven, tired as he battles a group of Skellobits and Skellobombers, but when Mario and company arrives he asks for their help. After they are all defeated, Rebbi rewards Mario and friends with the orb.
|
|
| Shooting Star
|
|
At the top of the infested second structure in Sector 5, across the gap using the first structure with a red ! Switch.
|
|
| Super Card
|
|
- Grambi (Map 43), use Fleep on the top-right corner of the last structural pillar in Sector 5.
- Luvbi (Map 44), use Fleep in between a brick block and the second structure in Sector 8.
- Bonechill (Map 45), use Fleep above the 7th stair from the floor leading to Grambi.
|
|
| Ultra Shroom Shake
|
|
- Given by the escape artist Nimbi inside a chest under Sector 7. Missable if not collected before the Bonechill boss fight.
- In a chest inside the pit far right of Grambi’s palace.
|
|
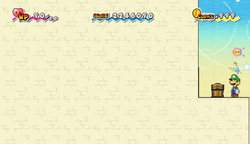
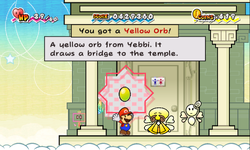
| Yellow Orb
|

|
Held by Yebbi. He is found hiding in a restroom, and when the player talks to him he is worried that it is actually a Skellobit at the door. By telling him that they are a monster, Yebbi states that a monster would never confess their real identity and leaves the restroom. Relieved, Yebbi gives Mario and friends the orb.
|
|
Flipside Pit of 100 Trials
| Item
|
Icon
|
Location
|
Image
|
| Special Card (x9)
|
|
|
|
| Dashell
|

|
In a chest revealed after defeating Wracktail; note that his collection is necessary to activate the pipe leading out of the pit.
|
|
Flopside Pit of 100 Trials
| Item
|
Icon
|
Location
|
Image
|
| Special Card (x17)
|
|
- Dashell, Room 10.
- Goombario, Room 20.
- Kooper, Room 30.
- Bombette, Room 40.
- Parakarry, Room 50.
- Bow, Room 60.
- Watt, Room 70.
- Sushie, Room 80.
- Lakilester, Room 90.
- Mario, Room 100 after defeating Shadoo.
- Dark Mario, Room 100 after defeating Shadoo.
- Peach (1), Room 100 after defeating Shadoo.
- Dark Peach, Room 100 after defeating Shadoo.
- Bowser (1), Room 100 after defeating Shadoo.
- Dark Bowser, Room 100 after defeating Shadoo.
- Luigi, Room 100 after defeating Shadoo.
- Dark Luigi, Room 100 after defeating Shadoo.
|
|
Castle Bleck Entry
| Item
|
Icon
|
Location
|
Image
|
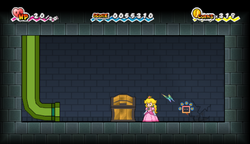
| Castle Bleck Key
|

|
In the scene where Peach was first controllable, there is a pipe at the east end of the scene. Chest is found at the end of the room accessed by said pipe.
|

|
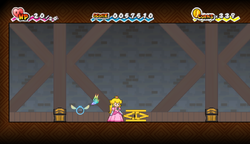
Long-Last Shake
Stop Watch
|
|
In the chests found over the west wall of the area where Peach was first controllable.
|
|
| Special Card
|
|
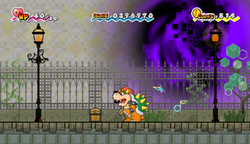
Nastasia (Map 46), use Fleep on the west lamppost fire at the area where Peach was first controllable.
|
|
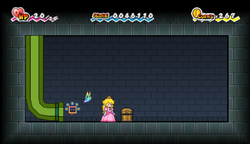
| Ultra Shroom
|

|
At the end of the second stairwell room.
|
|
Castle Bleck Foyer
| Item
|
Icon
|
Location
|
Image
|
Castle Bleck Key
Courage Shell
Life Shroom
|
|
In the chests found in the correct exit pipe room where the first Castle Bleck Key of the chapter is located, left chest.
|
|
| Mistake (x10)
|

|
Appears in the third room after answering fake Merlee’s third question, if option chosen instead of an Amazy Dayzee or Francis.
|
|
| Thunder Rage (x2)
|
|
- Behind the easternmost pipe in an area accessible via the exit pipe under any incorrect red ! Switch configuration.
- Appears in the second room after answering fake Merlee’s second question, if option chosen instead of a Fuzzy or a Hammer Bro.
|
|
| Ultra Shroom Shake
|
|
In a chest within the secret area via a 3D-accessible path beyond exactly one Reversya Cursya, one Heavy Cursya, and one regular Cursya.
|

|
Castle Bleck Interior
| Item
|
Icon
|
Location
|
Image
|
| Castle Bleck Key
|
|
- In the third scene, found at the west end.
- In the seventh scene, in the middle.
- In the ninth scene (the second one with mirrors), after going through the mirror in 3-D, found at the east end.
|
|
| Caught Card (x3)
|
|
- Goomba, in 3D behind a tall pipe, only appears if not collected in Chapter 1-1.
- Boo, within the chest in a small 3D-accessible attic above the door to Mimi's office, if not collected in Chapter 2-3.
- Dark Boo, in the chest on a top-right platform of the second area with the Dark Boos and Underhands, if not collected in Chapter 7-2.
|
|
| Ice Storm
|
|
In a chest at the western end behind the first mirror room.
|
|
| Special Card
|
|
Super Dimentio (Map 47), use Fleep on the third mirror from the west in the second mirror room.
|
|
| Thunder Rage
|
|
In a chest at the eastern end behind the second mirror room, which is also filled with Dimentio clones, further flanked by a ? Block that contains a Super Mushroom.
|

|
Castle Bleck Inner Sanctum
| Item
|
Icon
|
Location
|
Image
|
| Castle Bleck Key
|
|
After reaching the middle of the fourth scene, flipping into 3-D and going through the pipe, the chest is found at the end of the room, accessed by Dottie's ability.
|
|
| Shooting Star
|
|
In a chest at the southeast corridor near a few Goombas and red Koopa Troopas, which is also right in front of a door to the next room.
|
|
| Special Card
|
|
Count Bleck (Map 48) use Fleep on the space somewhere between the last chapter's door and the Star Block upon an eventual revisit.
|
|
| Super Shroom Shake
|
|
In a chest at the southwest corridor near three Pink Fuzzies, which is also on the exact opposite end of the exit located at the northeast corridor.
|
|
| Ultra Shroom Shake
|
|
In a chest behind of the corridor near three Shlorps.
|

|
Sammer's Endgame
| Item
|
Icon
|
TTYD Partners
|
Image
|
| Special Card (x7)
|
|
|
|
Shops


_Treasure_Chest_2.png)
_Block_1.png)
_Treasure_Chest_3.png)
_Block_2.png)
_Treasure_Chest_1.png)
_Treasure_Chest_1.png)
_Block_1.png)
_Block_2.png)
_Treasure_Chest_2.png)


_Treasure_Chest.png)
_Treasure_Chest.png)


