The 'Shroom:Issue 164/Strategy Wing
Director Notes
Written by: Hooded Pitohui (talk)
We have arrived in November, which means that this is our penultimate edition of The 'Shroom for 2020. Next month, we'll close the year off with a bang with a special issue, but I suppose that it fits this strange year to have a strange edition of Strategy Wing for the final regular issue.
I call this a strange edition of our team because things look a little different and a little smaller around here. First and foremost, you'll notice that the old Strategy Wing staple, Pokédex Power, is nowhere to be found. If you're looking for it, I suggest taking a look at Critic Corner, where Anton has fit it snugly into his team! Yoshi876 (talk) writes the section in the style of a review, so it seemed a better fit for the team dedicated to reviews, but that should not discourage you if you want to do a Pokémon section in our team! As you can see with Mach Speed Mayhem, we have plenty of room for folks who want to lay out and analyze the history of (almost) any topic in detail.
You'll also notice that ManKoops (talk) is not here to guide us through the world of Fire Emblem, this month. Worry not! He is still a part of our team and still a writer here. He's taking a break this month, but our chief tactician will return.
Yet, for that which we don't have this month, there's plenty we do! Racing Like the Staff has a special bonus for you long-time readers, Parallax features Bazooka Mario (talk) as its principal writer this month, and... you'll simply have to read the surprises in Mach Speed Mayhem for yourself, because I could not accurately convey to you what it is that the F-Zero anime did this time any better that Superchao (talk) does... As I said, everything is a little strange, but strange doesn't mean "bad." As a matter of fact, I guarantee you'll enjoy the bonuses in our section's this month. With that said, you should go forth and read them!
When you're finish, you ought to think about joining our Strategy Wing team. If you have any topic you'd like to write in detail about, take a look at our Sign-up page! We'd be happy to have you join us as a member of the Strategy Wing Team! Whether you want to follow Parallax's example and provide a guide on a topic you know well or you would like to make your own version of Mach Speed Mayhem to teach us everything about some obscure interest you have, we can find a place for you.
Section of the Month
Yoshi876 (talk) had well-received sections with looks at Shuppet's Pokédex entries and his work evaluating Neo Bowser City's staff kart combination last month! Love was not lost for the introduction to 3D modeling programs provided by Ray Trace (talk) with the assistance of Bazooka Mario (talk), either. Thank you for showing support to our writers with your votes, and please do continue to vote this month!
| STRATEGY WING SECTION OF THE MONTH | ||||
|---|---|---|---|---|
| Place | Section | Votes | % | Writer |
| 1st | Pokédex Power | 8 | 33.33% | Yoshi876 |
| 2nd | Racing Like the Staff | 7 | 29.17% | Yoshi876 |
| 3rd | Parallax | 4 | 16.67% | Ray Trace and Bazooka Mario |
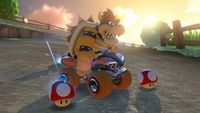
Will Moo Moo Meadow's staff kart combination need to be put out to pasture?
[read more]
The F-Zero anime makes a horrible mess of Zoda... because of course it can...
[read more]
Parallax
Written by: Bazooka Mario (talk) and Ray Trace (talk)
Hello folks. This is Bazooka Mario, but known as 'Zuka in some other circles of the forum and even as "LeftyGreenMario" in other parts. While Ray Trace is under some random complications, I'm here to fill the spot for him. I'll talk about some essential modeling components and then we can do some basic primitive creation in a 3D modeling program. I hope you at least saw the previous 'Shroom section about this, where Ray Trace covered how to navigate a 3D program. We're going to assume you can navigate at least out of a low-poly paper-bag.
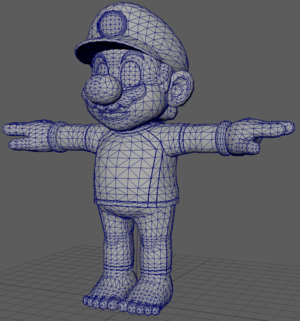
So, what makes up a model you see in the games? You might be familiar with how some fancy show-off tech shows the model's wireframe, which is cool and all, but wouldn't it be nice if you understood what's going on?
A 3D model is a composition of a bunch of elements. Here's a run-down of what each of them is.
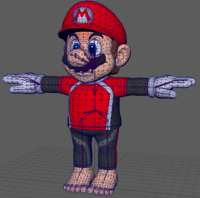
The mesh has additional parts. You might know this from geometry class.
| Image | Description |
|---|---|
|
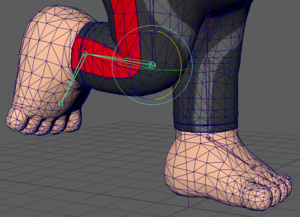
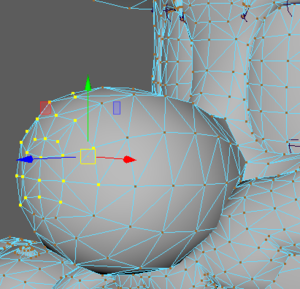
Vertex (plural: vertices): A basic 1-dimensional point on a mesh. This point has normal information and can even store color. Some Nintendo 64 meshes store vertex color, before textures can get bigger and more detailed, but even modern games like Smash Ultimate has a bit of vertex coloration (particularly on the mesh that makes up the skin). |
|
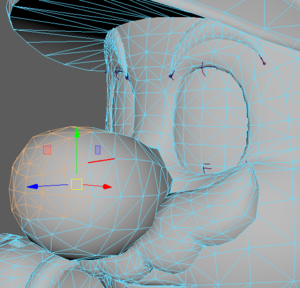
Edge: A line between two vertices. However it is technically possible to have a vertex not connected to anything, and these floating vertices are generally not desirable. Generally, you want vertices to be connected by four edges. |
|
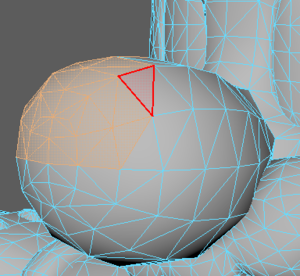
Face: A closed shape made of edges, or made of three or more vertices. A three-sided face is a "tri" and a four-sided face is a "quad". Anything more than four-sides is an "n-gon" ("n" refers to a number above four) and usually has problems with displaying and more. As a side note, your first models will be all quads. This example has begun as mostly quads, but had its quads become triangles when used for a game because it's easier for engines to render triangles (coplanar faces included and all that, don't want to go too much into this). |
|
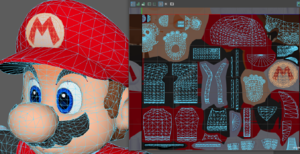
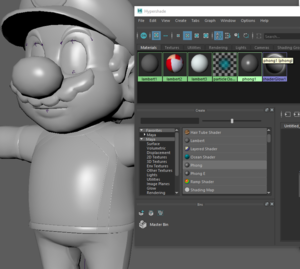
Material: Just a set of information, shaders, that dictates how light interacts with the mesh. You can have a shiny shader or a matte shader. In the example, Mario has the phong shader applied. |
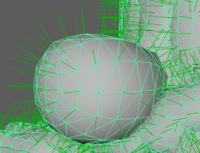
What's a normal? It's not about being typical, like "Mushrooms powering you up is normal". It's a geometry term that dictates what "direction" something is facing. There's more mathematical stuff to this and more in-game applications (backface culling; think of one-sided walls), but it's just how a face lights up. Normals are responsible for how smooth something looks on a mesh. If a mesh looks like a disco ball, the term is "faceted". The display that indicate normals generally look like pincushion.
Anyway this might sound like a bunch of boring stuff, but maybe when LeftyGreenMario talks about it, at least you have a bit better idea of what's going on. Anyway, on to primitive modeling. Primitives are recognizable, simple geometric shapes you can start with when you first begin modeling. Many 3D models you see have likely begun their life as one of these, though it's not the only way to start modeling! Your 3D program should have a basic selection.
Maya
Autodesk Maya has a bunch of tabs, and you'll find the primitives under "poly modeling". You might see this a bit differently if you're using another version of Maya (I'm using Maya 2019), but the general location is the same.
You can also access primitive creation under the "Create" drop-down, and you have access to creating a spiral, a pyramid, a prism, a gear, and a soccer ball. If you want to have easy access to creating those primitives (like if you want to recreate World 2 of New Super Mario Bros.!) you can press ctrl+shift and click on the actions on the drop-down and it'll put them as easy access on the shelf. You can then drag this icon on the shelf with the middle mouse button. And to delete icons, just right click on them and hit delete. This also applies for any quick command you want later on, such as centering an object's pivot, more on that eventually.
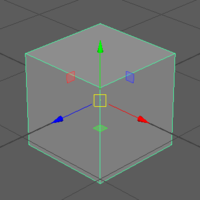
You can click on any icon and Maya will generate a primitive, right smack in the origin (0,0,0) of the scene with the pivot in the center of the mesh. You can manipulate this object in three ways: move, center, resize. You see the three move tools on the left bar of the program, but I find it easy to just remember the hotkeys. W is to set to move. E set to rotate. R set to scale. I am using a QWERTY keyboard, so ideal hotkey locations will differ if you're using another keyboard, but these hotkeys are probably in the upper left part of the keyboard. If you are using AZERTY, Z should probably be move.
Those handles (arrows if you're moving) are colored for a reason. Note that the modeling axes x (left/right) y (up/down), z (forward/backward). Just remember the primary light colors, red, green, blue, in that order. Unfortunately, if you're red-green colorblind, this isn't as helpful. Green should be the y axis, which is pointing up. Some programs/games, however, swap Z and Y (defined by Z-up or Y-up; my settings show Y-up). If you look at the Blender walk-through, the Z axis is oriented up.
Tip! If you like to get a straight edge on a mesh, make a selection of adjacent vertices, edges, or faces and use the scale function! Scale down the appropriate axis and you'll get even lines/flat face. This also applies in 3ds Max and Blender as well.
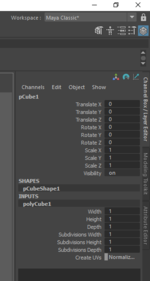
Finally, under the tab labeled Channelbox/layer editor, on the right hand side of the program, you can make some quick edits such as increasing the edges of the mesh (subdivision) or changing the dimensions. They'll differ by primitive, so have fun playing around with those settings.
Manipulating the mesh
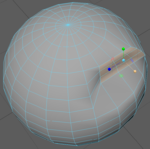
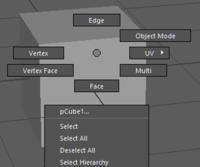
"Object mode" is the default mode you were in when you were just moving, rotating, or scaling that object. If you use Blender, this is a similar concept. Like in Blender, you won't be able to directly manipulate the vertices there. To do so, you can right click and hold right click on the mesh. You'll see more buttons pop up, kinda like Sims commands, called a Marking Menu. You'll see the components of a mesh you want to manipulate, vertex, edge and face (multi lets you manipulate all of them without having to switch with holding right click). Once you pick that mode, you can select the components by clicking or dragging a rectangle selection to pick several. You can double click that mesh to select all components. Once you have made an edit, however, you may find that trying to change the aforementioned inputs will led to unexpected results, so it's best to play with the inputs first before you start directly moving parts of a mesh. But do not fret about determining the exact amount of subdivisions or dimensions you need because you can easily add subdivisions later on and can use the units on the grid to perform precise measurements, if needed.
At this stage, I recall people accidentally enabling the soft select mode by pressing the B hot key (Maya also warns you if you enable soft select through this key). Soft select is better for organic modeling and for higher poly meshes, but I won't get into detail here about for it now.
Unlike in Blender, adding meshes will add separate objects. If you want to merge objects, you have to be in object mode, select the meshes, and use the Combine function. I don't want to go into detail much, but it's under the same shelf you used to create primtives, and it has an icon that looks like two orange boxes in a circle.
If you want to go back to object mode, you can hold right-click and bring up the marking menu.
Make sure you play around with not just the cubes but also the spheres and cylinders, donuts, and more!
3ds Max
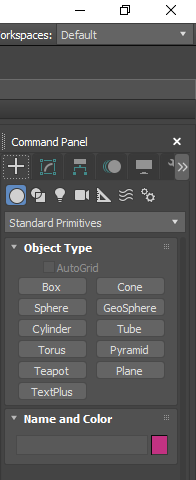
To create primitives in 3ds Max, you want to look at the Command Panel at the right of the program. You'll want to head to the plus sign under that tab, which is called Create. As with Maya, you'll see a list of primitives you can create . As with Maya, there is a create drop-down menu where you can find more objects, under "extended primitives" including, a torus knot. Or a pretzel. You can also access extended primitives in the Command Panel, just check the box labeled "Standard Primitives" above "Object Types".
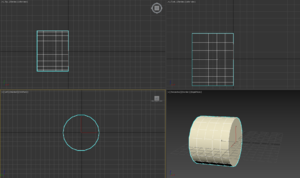
Once you've selected a primitive (a box, say), you have to click and drag on the scene and once you let go, you have to move the mouse a bit to change the shape. I can't be specific because this differs by primitive. For the box, you click and drag to create a base for the box, and once you let go, you move the mouse to determine the height of the box. You can also change settings, shown below the list of objects and displays once you pick an object type; if you want to create an even cube, you just change the settings before you create the mesh. You can change the color and set the name of the object, create a rainbow of cubes or teapots if you want to.
Also, you can create objects on different orientation. Normally, you'd create an object on the grid, but if you change into other views, such as side or front view, you can create primitives in another orientation. This is handy if you want to create objects without rotating them later, such as a creating horizontal pipe for Luigi to walk on. Make sure your other views are enabled, however, it'll help with adjusting the second part of creating a primitive.
You can also change the dimensions after you created a mesh. Select the mesh you want to modify, go back to the initial tab where you found "Create". Right next to the plus sign, you'll find the "Modify" tab, which looks curved line inside a square box. Under Modify, you can find values to change, similar in Maya, where you can change the subdivisions or change the general dimensions of the mesh. Settings will differ by primitive, so it's encouraged you play around with this!
You can also move the mesh around with the hotkeys. As with Maya, W is to set to move. E set to rotate. R set to scale. Don't let that tricky R fool you; R is not for Rotate! If you're allergic to keyboard, you can always right-click on a mesh and the drop-down has options for move, scale, and rotate, among the plethora of other things.
Manipulating the mesh
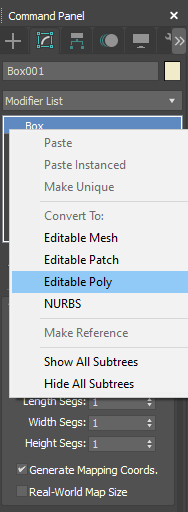
In 3ds Max, you can also directly manipulate the mesh. You should be in the Modify tab. What I like to do is right click on Box, and then choose either "Convert to Editable Mesh" or "Convert to Editable Poly". "Editable poly" is recommended at this stage in modeling since it gives you more options, though it is said that Editable Poly has more of a performance hit. As with Maya, once you convert to editable poly, you can't go back to "Box" and thus cannot change the subdivision count or the length, width, height numbers, but don't worry, this isn't a huge deal once you learn more of what you can do with the tools.
Once you enable Editable Poly, you'll find more options appearing. There's a lot to go through, but just focus on the little icons. Those are your selection modes, and you can pick between vertex, edge, border, polygon, and element. At this point, you don't need to worry about Border, but the rest you can manipulate. The "ignore backfacing" part, you can experiment before I explain, but just ignores any parts that are "facing" away from your view. You'll also notice soft selection, as I've discussed about it in Maya earlier, but again, soft selection is most useful with higher poly modeling and getting an organic shape.
3ds Max, as with Maya and Blender, also has a way of combining/joining meshes. The attach function under Editable Poly easily lets you merge objects.
Anyway, once you selected the parts, you can play with the hotkeys, making selections, and moving with your mouse. You might get some interesting results. And make sure you play around with some more basic primitives, not just cubes. Try out the cylinders and spheres!
Blender
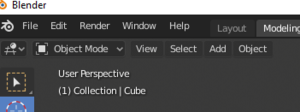
In Blender, you don't need to create a cube primitive since one is already loaded into the screen. By default, you also are probably on the Object Mode, shown on the upper left part of the viewport. I'll be changing to Edit Mode later. Remember, that if you add primitives through Edit Mode, these meshes will be grouped under the same object, but if you add it in Object Mode, they'll be separate and you will edit only the selected object(s) in Edit Mode. Note the (s); you can select two objects and head into Edit Mode and edit both at once; you can also merge (the command is called "join") objects if you're on Object Mode, but on that later. You can select between object and edit mode through that drop-down but Tab is a good hotkey to remember.
If you noticed the little red cursor, it's used for several things, but you can use it as a spawning point for future meshes. You can can adjust this cursor if you open additional settings, which you press with the N hotkey, or find a tiny arrow next to the viewport rotation gizmo.
Anyway, creating an object is simple. There is an Add button on the top left part of the viewport. Just click on it, and select a primitive you want, and then one will spawn depending on where you set the cursor. If you didn't move the cursor, the mesh will spawn inside the cube (this is because the cursor is already centered in the cube). If you're on Object Mode, you can add other elements such as lights, curves, surfaces, cameras, and more, but if you're in edit mode while a mesh is selected, you can add only meshes.
Manipulating the mesh
To edit the mesh itself, you should be in Edit Mode after you selected an object. To make selections, you can use left-mouse click, but you can change the preferences to make it right-mouse click (Edit->Preferences->Keymap). To select all, you hit A and to deselect all, it's Alt+A. If you want to move your selection, you can either select the move button on the left toolbar, or you hit a hotkey. Blender's hotkeys for basic manipulation are completely different from Max or Maya, where G is move, R is rotate, and S is scale. Also note that once you hit that hotkey after making a selection, the selection automatically gets deformed as long as you move the mouse, and you can confirm the deformation with a left click or deconfirm with right click.
You can also switch between manipulators if you press Shift + Spacebar and then you press one of the three, G, R, S, hotkeys or select one of the modes with a mouse.
As with Maya and 3ds Max, your mesh type selection can be changed from select vertices to select edges to select edges. The hotkeys 1, 2, and 3 let you easily switch between those, but you can find them on the top left part of the viewport, in case you're using another hotkey set, such as the Industry Compatible one.
As far as I can tell, based on my limited experience with Blender, I can't confirm if Blender has subdivision and length/height/width inputs (before you make mesh edits) that Maya and 3ds Max have. Solutions I've seen include using loopcuts and using external addons/scripts?
So, this the basics on what a 3D model is and what it's made of. I do hope that after this, you can create primitives and start manipulation. I do hope I have the programs you're using covered, particularly Blender, as it's free and doesn't have the annoying student licenses and prohibitively high costs and such, but Maya is especially important to learn if you're career-minded about 3D modeling. I personally know Maya the most, but I do my best to explain how to get around in the other two. If you have trouble related to navigating the interface, please check the previous tutorial on Strategy Wing in Issue 163, and you can additionally check out the many resources on YouTube that can include an even more in-depth guide on the interface.
Racing Like the Staff
Hello readers and welcome to Racing like the Staff, a section where I do 150cc on different Mario Kart games, but the twist is, I take on the Grand Prix by using the combination that a staff and expert staff member used in that Cup. If you're still a little confused, by this I mean if the track is in the Mushroom Cup, then that's the Cup that I race in. Unfortunately, I don't have copies of the Mario Kart games before Mario Kart 7, so it's only that, 8 and Deluxe that will be getting this treatment.
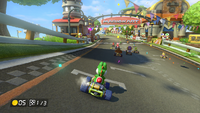
I guess worldwide, November has certainly been one crazy month, and we're barely halfway through it! However, we can resume to some sense of normality as we continue looking at tracks from Mario Kart 8 Deluxe and go to a Wii track that I maybe had a small soft spot for. Moo Moo Meadows is certainly not the most challenging track, but it is definitely one of the most beautiful ones that Mario Kart 8 and Deluxe gave us. Plus, Moo Moos might be one of the cutest things that exist in the Mario universe.
The combination for the staff for Moo Moo Meadows is Princess Daisy with the Varmint, Funky Monster tyres and the Super Glider, and the stats are as follows:
- Speed – Three bars
- Acceleration – Just under four bars
- Weight – Just over three bars
- Handling – Three and a half bars
- Grip – Four and a half bars
Moo Moo Meadows
I'll admit, I was barely expecting anything to come from the Varmint, it wasn't really a bike that I thought I'd gel with, but I immediately shot right up the order to second by the first set of Item Boxes. A Red Shell took out Princess Peach, and by the end of the first lap I looked to be a quarter of the lap up on the rest of the racers. By the time we got to the final lap, I probably would've lapped Cat Peach if she didn't get a Bullet Bill, and I nearly lapped the female Villager.
Mario Circuit
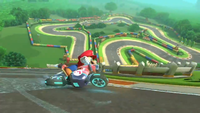
Waluigi initially challenged me for the lead, but I was able to keep ahead of him, but on the second lap in the anti-gravity section, I was hit by a Red Shell, shortly followed by a Spiny Shell, and this allowed him past. Things got a little worse when Baby Luigi glided in front of me, but he soon fell behind, and Princess Peach also took second from me. Thankfully she took herself out on a Banana peel, and I was able to drift past Waluigi just before we got onto the anti-gravity section, and as we left it, he drove into my Green Shell. My lead started opening up by the time I crossed the finish line, but if he had a Red Shell, he could've taken the lead.
Cheep Cheep Beach
Once again, Waluigi was challenging me for the lead, but I made I sure I had it before the first set of Item Boxes. Like on other tracks, I slowly started increasing my lead, and thankfully this wasn't lost, despite being subjected to two Spiny Shells, one on the second lap, and the other on the final lap. However, the final Spiny Shell did dent my lead to enough that if I didn't have the Green Shell as protection, I might've lost first, and possibly second, to Waluigi and Princess Peach.
Toad's Turnpike
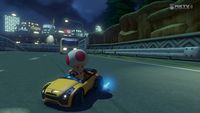
Although I might have had a challenger on Mario Circuit, this race wasn't going to give me one. I thought it might, as one the first lap, a bad drift allowed Princess Peach past, but I overtook her after the bridge section and faced no challenges throughout. At one point, it looked like I might be able to lap the female villager and it took about half a lap for a Spiny Shell that was launched to actually catch up to me.
With last month's debacle of the Bone Rattler, this might be one of the best combinations I've used in this section. Yes, things might've looked a little bit precarious when it came to Mario Circuit, but that was mainly down to items, rather than anything to do with the combination. It was so good on Moo Moo Meadows, I genuinely had to check on Mario Circuit to make sure that I was on 150cc and hadn't accidentally put myself onto 50cc.
The combination for the 200cc staff for Moo Moo Meadows is Baby Daisy with the Bounder, Cyber Slick tyres and the MKTV Parafoil, and the stats are as follows:
- Speed – Just under three bars
- Acceleration – Three bars
- Weight – Just over two bars
- Handling – Just under five bars
- Grip – Two bars
Moo Moo Meadows
I thought I'd made a terrible start, as it looked like I'd only managed to get myself up into eighth position, but then there was a burst of acceleration, and I was right behind Wario and Baby Peach. And Wario was kind enough to take Baby Peach out with a Red Shell for me allowing myself into the lead. I thought on two occasions I might lose the lead, but circumstances always worked in my favour. I ran into a cow, so did Baby Peach, I got hit by a Spiny Shell, Baby Luigi takes Baby Peach out with something. While it was a win for me, it was nowhere close to what I'd just achieved with the Varmint, and Princess Daisy was way out of reach for me to lap.
Mario Circuit
The last time I was on Mario Circuit, it was a little bit of a fight, but this time around, I kept Baby Luigi firmly behind me, at a relatively safe distance, and won the race with no real incidents to record.
Cheep Cheep Beach
I battled with Baby Luigi for the lead, and he initially took it after walloping me with a Red Shell, which also allowed Wario past. However, Wario would stick on the sand, while I dived through the water and I quickly past him, and then I decided to use my Super Horn on Baby Luigi to rub my pass in on him. I slightly regretted this move, as I was then hit by a Spiny Shell, but I kept the lead, and soon picked up a second Super Horn. It looked like I might be able to use it on the final lap, but Lightning took it away, and I was hit a second time. At least I kept the lead though.
Toad's Turnpike
This was such a boring race, literally nothing happened. I don't even think there was a Red Shell at any point.
This combination was fine. Like, I can't really complain seeing as I won all the races, but it didn't outright dominate them. I wouldn't not recommend this combination for people, but there are way better combinations out there than this one.
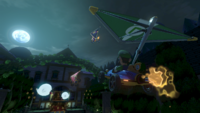
And we have a bonus to this month's section. Years ago, I did Twisted Mansion for the Halloween section, but I could only the 200cc combination for the track, as I didn't have the Mach 8. Well, luck would have it, during this section I unlocked that, so now we can! Just a shame I still don't have the Yoshi Bike!
So, the combination for the staff for Twisted Mansion is Luigi with the Mach 8, Slim tyres and the Super Glider, and the stats are as follows:
- Speed – Four bars
- Acceleration – Just under three bars
- Weight – Just under four bars
- Handling – Just under four bars
- Grip – Two and a half bars
Mario Circuit
SPEED!! That is all I have to say about this race, so many purple drifts, I was rocketing everywhere. After using a Mushroom to get past Mario on the first lap, this combination was a dream to just sail around the track. It was actually quite fun compared to the race at Toad's Turnpike.
Toad Harbour
Baby Daisy rocketed past everyone to take the lead, and while I tried going for the shortcut, we bumped and my trajectory when right off, landing me in the water. This dropped me down to fourth, and then Princess Daisy took herself out on the Red Shell I was aiming to send either Mario or Dry Bowser's way. However, I'd gotten past Mario before the end of the market, and by going the shorter route through the houses, I got past Dry Bowser. Then my Green Shell hit Baby Daisy as we went down the hill, I took the lead and took another dominant win.
Twisted Mansion
Baby Daisy once again proved to be a proper pocket rocket, but after using a Mushroom to get past her, all the other racers were able to do was eat my dust, and Luigi took me to my third dominant win.
Shy Guy Falls
Expecting Baby Daisy to rocket off the start, I managed to close her down, but Mario soon shot past me, although by the first jump I was clear of him. However, Luigi's brother wouldn't go down that easily and on the final lap, took me out with two Red Shells, dropping me to third. Baby Daisy threw me a bone, but taking out Dry Bowser with a Green Shell, and I caught up to Mario on the waterfalls, before taking him out with a Banana. But I messed up on the final corner, and this allowed Mario to take the win.
I messed up on Shy Guy Falls, and I'm not really sure I can actually blame the combination for this, even though I ended up doing it on lap 1 as well when I carried too much speed into the corner. Other than this, this combination was basically a dream come true, and was well worth the wait to cover it. I would've enjoyed driving this when I was first meant to.
Mach Speed Mayhem
Hello, 'Shroom readers, and welcome to one of the wildest articles I'm going to end up writing! All thanks to the insanity that was the F-Zero anime. Yes, we're doing #13: Zoda today! In the games, he's merely one of F-Zero's canonically-evil villains. In the anime... well, we'll find out!
Main Series
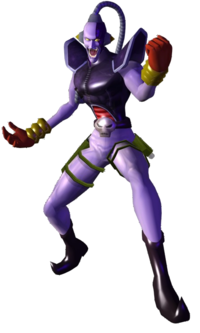
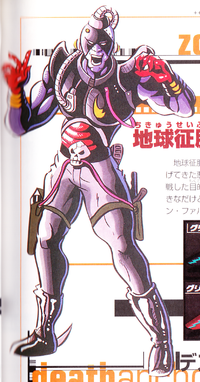
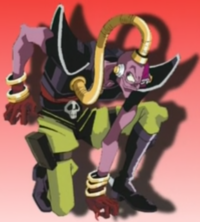
Introduced alongside many others in F-Zero X, Zoda is an international man of mystery. His bio outright calls him the "incarnation of evil", and mentions that he's bent on conquering Earth and is a rival to the superhero combo of Super Arrow and Mrs. Arrow. Outside of that, well... even his bio says that he's an enigma, nobody sure why he's in the Grand Prix! So esoteric. Despite that lack of info, F-Zero GX was very happy to go ahead and give us plenty of new data to work with, as well as modifying his appearance - while X Zoda looks to have some mechanical bits, GX Zoda is clearly entirely organic. First off, his expanded bio! Turns out, that tube on his head is actually a drug tube, pumping adrenaline and dopamine into his body on a regular basis and leaving him with a perpetual high. He's been targeted not just by Super Arrow, but also by Captain Falcon, the good captain wanting the large bounty on Zoda's head. Not a surprise he has one, considering he's only racing to eliminate anyone who stands in the way of his evil plans and to raise money for his evil plans! Did we mention he's evil.
The interviews in GX are a wild ride, both playing Zoda for laughs but also playing him up as a villain - there's a reason he's one of the five that terrifies poor Mr. Zero. He'll alternate between mentioning that he's been booked by plenty of comedy shows and gleefully admitting that he sabotaged the other racers to ensure his victory. He'll flip between getting floored when he learns he has five fans and telling his rivals they'll return home in coffins. He'll go between praising himself as an evil genius live on camera and declaring his intent for world domination. Nowhere is this more apparent than in his reply to his hobbies - "I like to grow flowers. Flowers that kill people!" Heck, he only even wants to control the world because it's what bad guys wanna do. Notably, though, he has respect for the Arrows - he wants them to work for him and join the Dark Side, rather than strike them down. And most interesting of all... Zoda gleefully reveals that he's not actually an alien. His home planet is Earth, as he's a modified, improved human!
Then there's the F-Zero GX story mode. Which... doesn't really do that much for him, honestly. He makes a cameo in the bar in the cutscene before Chapter 3, the bet race, when he's getting into a spat with Super Arrow. He then appears in the bet race itself as one of the twelve entrants; the Death Anchor is one of the stronger machines in the race, but it still doesn't hold up compared to Billy and his infinite boost power. Still, it's a threat - make sure to watch your back with Zoda around. He makes his return alongside the rest of the X cast for the 30-car race in Chapter 7, as one of the top threats this time around! Sure, Black Shadow and Blood Falcon (aka Batman and Robin) might be the biggest issue here, but even if they're out of the way, Zoda is one of those who will remain on your back, eager to swoop in and steal the victory once and for all. Make sure to hold him off!
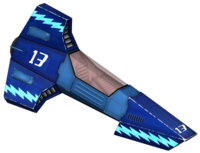
Onto his machine, unlucky number thirteen. The Death Anchor is no ordinary machine - it's actually a modified missile! The Galactic Space Federation created a missile capable of being fired between planets, as the ultimate destructive weapon. Then, the secret society Deathriddle stole it - oops. Rather than just use it as a missile, though, they then proceeded to remodel it and create a dangerous F-Zero machine, giving it to Zoda to use in the Grand Prix. In fact, they didn't even take out the self-destruct device! Not that Zoda knows it's still in there, though...
Stat-wise, its listed stats are an E body, an A boost, and a C grip. In F-Zero X, it holds up pretty well, though it needs some expert play. With the weak body and the mediocre grip, it's easy to crash the Death Anchor, but if you can avoid doing exactly that the sheer boost and top speed power are enough to claim victory. F-Zero GX takes this even further! The body of the Death Anchor is paper thin, the handling is like driving on grease, and the acceleration isn't anything to write home about. But the top speed and boost are top tier, and if you can somehow keep the Death Anchor pointed in the right direction, it'll be easy to jet past everything else to victory! Maybe a missile car DOES have its upsides.
GP Legend series
Strap yourselves in, readers, because you're about to have the ride of your life.
Zoda is completely reinvented for the anime series. His design starts as a version of his GX design with a few cues from his X one, and its own color and style. His connection to the Arrows is jettisoned, making him the archrival to main character Rick Wheeler, instead. And that's just the start - as we go through the anime, it gets a lot more nuts. But let's start at the start, shall we?
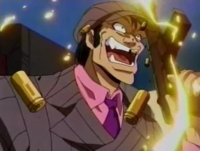
Introduced in the very first episode, Zoda is... a human gangster, complete with pinstrip suit and everything, on the mean streets of New York City. He's opposed by Rick Wheeler, part-time cop and part-time F1 racer, who spends his time chasing down Zoda and his henchmen. In episode 1's flashback, Zoda busts out of jail and is quickly pursued by the fuzz, Rick being the main one to chase him down. During the chase, Zoda gets an idea and knocks off the door of his car, sending it crashing into Rick and putting our hero in cold sleep for a century and a half. When he wakes up, he finds that Zoda was also cryofrozen at some point, and was then busted out of a prison planet by Black Shadow, who took the chance to transform Zoda into the alien-looking hybrid he is now. And so, the basic premise of our series is set up!
For the first half of the series, without any overarching plot, Zoda is the one driving most of the show. He's the big mover and shaker behind Dark Million during the many races and plots of the week, constantly scheming new ways to get money whether through winning races with underhanded trickery and various evil schemes. Sure, Black Shadow makes a couple appearances as his boss, and Miss Killer is presented as his foil and equal rather than his subordinate, but the actual screentime and most of the actions of Dark Million? Fully on Zoda. Of the 24 episodes before the big shift, just under half of them can be summed up as "Zoda's latest evil plan causes the events of the episode." There's not really that much to say on Zoda in them, though. He's evil, he's doing evil plans, he wants to be the big boss and overthrow Black Shadow, that's about it.
Where things really get wild is starting in episodes 25 and 26. In that two-parter, Zoda steals an object of unimaginable power that will define the rest of the series' plot (and was never mentioned before), the Reactor Might. He proceeds to take it to Dark Million's base and set it to explode in his latest attempt to overthrow Black Shadow, who naturally survives. This time, though, Black Shadow isn't taking it lying down, and he returns Zoda's favor by just... jamming the Reactor Might in his stomach and kicking him out. A drained Zoda wanders Mute City as a hobo, remembering better times as the kingpin of NYC, until Rick offers him sympathy. That's enough for Zoda to snap and tap into the Reactor Might's power, swelling up and rampaging across Mute City. It results in a confrontation atop the Mobile Task Force's spaceship, and the reveal that Zoda can now summon tentacles to control machinery, because the Reactor Might can do that I guess.
During that battle, Zoda makes his priorities clear - his rivalry with Rick takes priority over everything else, and he's pissed when Rick says he doesn't feel the same way. However, before he can exhaust his anger on Rick, the Reactor Might runs dry and results in an overloaded Zoda, Black Shadow then taking this chance to show up and drop Zoda through an interdimensional portal. Is this the end of our villain!? No, of course not. Episode 32 has Zoda trapped in Dark Space, an alternate dimension of... well, darkness. And not much else. He gets some new neighbors when Black Shadow drops Captain Falcon, Rick, and nineteen Blood Falcons in there. Zoda takes this chance to attack Rick with a fake copy of his pal Jack Levin, which Rick is unable to shoot, all so that he has the chance to laugh in Rick's face about "WOW YOU CARE ABOUT YOUR FRIENDS? LOSER". The remaining sixteen Blood Falcons then attack him, but Zoda handles them very simply: He uses his chest-embedded Reactor Might to absorb all sixteen, Kirby-style, and consume their power, because it can do that.
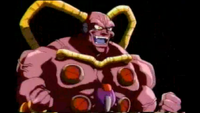
And thus, the world is introduced to... HYPER ZODA!
Yes, Zoda bulks up, completely transforming his body for the rest of the show. He also gives his ride a makeover, the Death Anchor transforming into the Hyper Death Anchor as well. By combining his newfound power with that of Rick Wheeler's and Captain Falcon's, the three of them escape Dark Space, with Captain Falcon ominously declaring that all of this was exactly what Black Shadow wanted.
Hyper Zoda proceeds to rejoin Dark Million, though no longer does he get played for comedy like he did sometimes before his transformation; now he's the jerk who shows up to ruin moments, such as dropping a bomb that re-kills Mighty Gazelle, or telling Blood Falcon to shove off when the latter goes to get a Reactor Might. He also starts getting some interesting bonus points from his Reactor Might; for example, the series explains that Zoda was cryofrozen when he robbed a bank and the police just ambushed him with cryogenics, and happened to sweep up Rick's girlfriend Haruka when she attacked Zoda at the same time. Zoda had forgotten the latter point, but the Reactor Might conveniently activates to remind him, because it can do that. He's surprisingly out of focus for a time, though, the series preferring to focus on Black Shadow's big scale plans for this stretch of episodes.
Episode 41 is where Zoda makes his big moves, and starts to become a main focus again. In that episode, he decides to start planting the seeds of strife, first meeting Rick and using the Reactor Might to transfer Zoda's own memories of Haruka being cryofrozen to Rick's mind, because it can do that. He then takes advantage of the race of the day on Fire Field, above a sea of lava, to use the power of the Reactor Mights (both his and the one in Rick's machine) to attack Black Shadow. The latter doesn't take it kindly, and slams Zoda off the track, into the lava. But surprise! The Reactor Might actually protects Zoda from the lava, and what's more, it lets him combine the Death Anchor with the lava to create a massive fire dragon that attacks Black Shadow and eats his car, because it can do that! Struggling with Miss Killer over who's the new boss, Zoda is ready for a fight.
Two episodes later, he uses the Reactor Might to awaken Miss Killer's missing memories, because of course it can do that, spends the episode tussling with her over the leadership of Dark Million, and then ends it by discovering that Black Shadow is back and completely fine with no explanation beyond "lol you can't kill me", because HE can do that! He then gets to have a solo race, one on one, against Rick, thanks to the machinations of the mysterious Deathborn (as a reminder to readers, Deathborn is actually Black Shadow, somehow). It ends, naturally, in a no contest, with the Reactor Mights causing mass destruction and chaos, because why not at this point?
And then... And then we get Episode 45.
Zoda discovers that intergalactic delivery racers Roger Buster and Draq are making a very strange delivery, one that can add up to a biological weapon - and it appears to have been commissioned by Black Shadow! Zoda uses his two hostages to demand the Mobile Task Force investigate Black Shadow's base on planet Lightning, and joins in midway on his own in order to find out the secrets. When he enters, he discovers archived video footage of... his human form in a capsule? Black Shadow shows up to dramatically reveal... he actually created Zoda here, as a human, and sent him back in time to go defeat Rick Wheeler, Zoda's entire life invented for that purpose! Zoda is filled with rage, but Black Shadow tosses him around, Zoda ultimately unable to accomplish anything in regard to defying his creator, and forced to bide his time so he can throw off anyone who uses him... which doesn't answer the pressing question: Zoda is the reason Rick was cryofrozen and exists in a time to oppose Black Shadow. Why would Black Shadow, scared of Rick Wheeler's potential, create someone and send him back in time to set up the situation that leads to the current threat to Black Shadow?
Oh, but it gets better. The next episode (a recap episode) reveals that Rick was specifically awoken BECAUSE Black Shadow woke up the cryofrozen Zoda, so they assumed he picked Zoda for a reason and woke up someone who was relevant in Zoda's past - in other words, Rick. Thus, because of Rick's Zoda-caused presence in the future, Black Shadow created Zoda and sent him back in time, where they both wound up in cryosleep and thus Black Shadow woke up Zoda to protect himself from Rick who was now in the future because of Zoda... in short, this is an absolutely batshit plot twist that makes zero sense with any amount of thought applied, thrown in solely to do the dramatic "BLACK SHADOW IS RESPONSIBLE FOR ZODA'S ENTIRE LIFE!" reveal. Which is good, but did you really have to make it so fucking overcomplicated? Just have Black Shadow make a Zoda in 2050. He's already weird and eldritch. It really wasn't necessary.
Time travel is very easy to get wrong.
ANYHOW, thankfully for all of our sakes, this particular specific aspect is never mentioned again beyond "Zoda hates Black Shadow for making him". And even that just results in him sneaking around Dark Million's base for a while, challenging Rick to multiple one on one matches, and creating a sword by pulling it out of his Reactor Might, one step below literally pulling it out of his ass. In the penultimate episode, Zoda finally makes his move to gain control of what Black Shadow's true goal was - the Dark Reactor, a device built to be powered by all six Reactor Mights and then crunch the universe to make a new evil one. Black Shadow challenges Zoda to a race to control the Dark Reactor, and it ends about as well for Zoda as you'd expect: namely, Zoda getting tossed into the Dark Reactor so his Reactor Might can power it.
Zoda gets the last laugh, though! During the climatic final showdown, when Rick and Captain Falcon going up against Black Shadow, Rick finds himself wavering, not sure he can do this. It's actually Zoda who gives him the final pep talk he needs, Zoda deciding to get one over on Black Shadow for everything. This helps Rick find the resolve he needs, and put his full power into stopping the Dark Reactor, setting off the chain of events that leads to the iconic Falcon Punch scene! And if you're wondering what happens to Zoda, who was physically inside the Dark Reactor when it exploded... he comes back in the seven years later epilogue, completely fine. Because, one final time... he can do that.
ANYHOW! The anime timeline games. Zoda not only appears in the F-Zero: GP Legend game for GBA, but he even gets one of the short story modes that game includes! It's all about Zoda trying to strike out on his own and become the new boss of evil... and, naturally, it fails, ending with Zoda back in his perpetual status quo of working for Black Shadow. In F-Zero Climax, Zoda appears, but so does Hyper Zoda! Get far enough in the game, and both versions are available as their own racers. Gameplay-wise, the Hyper Death Anchor loses some grip power, but trades off by boosting the body. It doesn't get its own slot, interestingly, instead requiring a button press when selecting the regular Death Anchor.
Climax-bio wise, not much new is given relative to either the anime or the GX bios, though it's a good chance to mention a couple miscellaneous facts about Anime Zoda I didn't have space for. For example, the anime gives him a full name, Zoda Strawberry, as well as a massive sweet tooth that just skyrockets once he becomes Hyper Zoda. In fact, before he started his life of crime, he worked in a cake factory, but his first tendency towards crime was sampling the cakes for himself, getting him fired. You heard it here first, folks. Cakes are a gateway to a criminal career.
Other Information
Zoda has made a number of specific Smash cameos, alongside the general all-X-racer cameos in certain stages. Brawl gives him a trophy, as does Smash 4 - interestingly, Smash 4's trophy for Zoda merges both the main and anime series, talking about how Zoda was transformed by the villainous Black Shadow but holds a rivalry with the heroic Super Arrow. He also shows up as a Spirit fight in Ultimate! In that one, you fight Snake on Mute City SNES. He's got a Lip's Stick, to plant flowers to match Zoda's own headtube, and there's plenty of Motion-Sensor Bombs to reflect the explosive true nature of the Death Anchor. It's a good microcosm of Zoda, Sakurai's team knows their stuff.
Interestingly, there's another Zoda in Nintendo who predates this Zoda; the main villain of the old game Startropics. That Zoda actually is an alien invader, who is repeatedly thwarted by the heroic efforts of Mike Jones. Notably, one of his forms in the second game is big, muscular, and has a pair of horns. Perhaps that's an inspiration in the anime's design of Hyper Zoda? Since it's a fellow Nintendo property, it doesn't seem out of the realm of possibility! That aside, though, we have finally reached the end of Zoda's long article. Here's where I'd tell you to vote, exceeeept December's entry has already been pre-determined, just like last year! I look forward to bringing it to you in a month!
| The 'Shroom: Issue 164 | |
|---|---|
| Staff sections | Staff Notes • The 'Shroom Spotlight • Awards Director Election |
| Features | Fake News • Fun Stuff • Palette Swap • Pipe Plaza • Critic Corner • Strategy Wing |

