Switch (Wario Land 4)

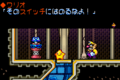
A switch[1] is an object that appears in the game Wario Land 4. A switch appears at the end of every level in the game. When Wario jumps on a switch, the switch will open up to reveal a ticking time bomb, and any solid Frog Blocks will turn transparent, and vice-versa. Wario will then only have a certain amount of time to escape the level by returning to the vortex at the beginning of the stage. If Wario can't escape before the bomb goes off, Wario will lose all the coins he earned in that level and will be thrown back to the main map, making the player start the level all over again. The Switch also appears before the level on the main map. Wario would have to hit that one to open the vortex and enter the level. The times given by the switches vary on the game mode. A complete list of times can be seen in the section below. Switches resemble a blue frog on top of a red base that has a green and yellow trim. When the switch is hit, Wario shouts "Hurry up!" to the player, and an intense tune begins to play, which induces the player to run fast back to the beginning of the level. In the level Fiery Cavern, the switch turns the level into ice. In the Hotel Horror, there are two doors which have a frog sign on it. These doors will only open when the switch is hit.
The switch made a cameo appearance in Densetsu no Stafy 3, where Starfy and Wario must trek through the Undersea Ruins. A switch is found in the middle of the level, opening up a new area.
List of Time Limits
This table is a list of time limits given to complete levels in different game modes. It also includes the times to defeat the in-game bosses.
| Level | Time limits given in different game modes to complete the levels | ||
|---|---|---|---|
| Normal | Hard | S-Hard | |
| Entry Passage | |||
| Hall of Hieroglyphs | 1:00 | 0:15 | 2:30* |
| Spoiled Rotten (boss) | 1:00 | 0:30 | 0:15 |
| Emerald Passage | |||
| Palm Tree Paradise | 1:30 | 0:45 | 4:30* |
| Wildflower Fields | 2:30 | 1:29 | 0:50 |
| Mystic Lake | 3:00 | 2:00 | 1:30 |
| Monsoon Jungle | 4:00 | 2:45 | 2:00 |
| Cractus (boss) | 4:00 | 3:00 | 2:00 |
| Ruby Passage | |||
| The Curious Factory | 3:30 | 2:50 | 2:30 |
| The Toxic Landfill | 5:00 | 3:30 | 2:30 |
| 40 Below Fridge | 4:00 | 3:30 | 2:00 |
| Pinball Zone | 6:00 | 5:15 | 3:30 |
| Cuckoo Condor (boss) | 4:00 | 3:00 | 2:00 |
| Topaz Passage | |||
| Toy Block Tower | 4:00 | 2:30 | 2:00 |
| The Big Board | 3:00 | 2:30 | 2:00 |
| Doodle Woods | 6:00 | 5:15 | 4:00 |
| Domino Row | 4:00 | 3:00 | 2:00 |
| Aerodent (boss) | 4:00 | 3:00 | 2:00 |
| Sapphire Passage | |||
| Crescent Moon Village | 3:30 | 2:45 | 2:00 |
| Arabian Night | 4:00 | 3:00 | 1:30 |
| Fiery Cavern | 5:00 | 4:00 | 2:45 |
| Hotel Horror | 4:00 | 3:15 | 2:00 |
| Catbat (boss) | 4:00 | 3:00 | 2:00 |
| Golden Pyramid | |||
| Golden Passage | 9:30 | 6:00 | 3:00 |
| Golden Diva (boss) | 6:00 | 5:00 | 4:00 |
| *Switch position changes | |||
Gallery
- FrogSwitch.PNG
The three stages of a switch.
- WL4-Ice Switch.PNG
The switch turning the level into ice in the Fiery Cavern.
- WL4-Frog Door.PNG
Door in Hotel Horror.
- WL4 Beta-40 Below Fridge.PNG
Proto screenshot of 40 Below Fridge, which includes the switch.
The switch in Densetsu no Stafy 3.

Media
Names in other languages
Trivia
- A redesign of this switch was intended to appear in Wario Land: Shake It, but was removed in the final version.
References
- ^ Wario Land 4 English instruction booklet, pages 15 & 18.