| align=center colspan="23" bgcolor="#e3d17c" style="font-size:110%;color:black;Template:Radius"|Template:Color-link-piped Enemy moves and other notes
|
| #
|
Name
|
Move(s)
|
AI
|
Notes
|
| 1
|

Bowser (1)
|
- Claw Swipe (1)
- Power Up (Def +1)
- Boosted Claw Swipe (3)
- Fire Breath (10)
|
- 1. Claw Swipe
- 2. Claw Swipe
- 3. Power Up, followed by Boosted Claw Swipe
- 4. Boosted Claw Swipe
- 5. Fire Breath
- 6. Skips turn for rest of battle.
|
- This is Bowser encountered in the beginning of the game.
- This battle is more of a cutscene, as the player has no battle choices to make, no action commands to perform and no luck involved. The player cannot win.
- The game will crash if the player uses a cheat device to defeat Bowser.
|
| 2
|

Jr. Troopa (1)
|
|
- Uses Power Hop if HP is above 1, otherwise he'll use Power Hop.
|
- This is Jr. Troopa, encountered in Mario's first battle with him, in Jr. Troopa's Playground.
- Jr. Troopa does not have a Tattle dialogue, but is given a short description from Goompa.
- Because the Do Nothing option in Strategies is not present, Mario cannot lose to Jr. Troopa.
|
| 3
|

Goomba
|
|
N/A
|
- The player may fight a single Goomba in Shy Guy's Toybox (sent by Kammy Koopa).
|
| 4
|
File:SpikedGoomba PM.png
Spiked Goomba
|
|
N/A
|
N/A
|
| 5
|

Paragoomba
|
|
N/A
|
- Following any jump attack, the Paragoomba loses its wings and becomes a Goomba.
|
| 6
|
File:BlueGoomba.png
Blue Goomba (1)
|
|
N/A
|
- This is Blue Goomba, from the first battle with the Goomba Bros.
|
| 7
|
File:RedGoomba.png
Red Goomba (1)
|
|
N/A
|
- This is Red Goomba, from the first battle with the Goomba Bros.
|
| 8
|
Goomnut Tree
|
- Goomnut Drop (3, Goomba King and Goomba Bros.)
|
N/A
|
- The Goomnut Tree can be hit with any attack (except Fire Flower). The first time the Goomnut Tree is hit, a spiky Goomnut will drop on Goomba King, then Red Goomba (2), then Blue Goomba (2). Any future hits on the tree do nothing.
|
| 9
|

Goomba King
|
- Spin Kick (1)
- Ground Stomp (2)
|
- Ground Stomp can only be used once.
|
|
| 10
|
File:RedGoomba.png
Red Goomba (2)
|
|
N/A
|
- This is Red Goomba from the battle with the Goomba King.
- Red Goomba has a maximum HP of 7, but starts the battle with only 2 HP.
- If Goomba King is defeated, Red Goomba will not take damage when Mario hits the Goomnut Tree.
|
| 11
|
File:BlueGoomba.png
Blue Goomba (2)
|
|
N/A
|
- This is Blue Goomba from the battle with the Goomba King.
- Blue Goomba has a maximum HP of 6, but starts the battle with only 2 HP.
- If either the Goomba King or Red Goomba is defeated, Blue Goomba will not take damage when Mario hits the Goomnut Tree.
|
| 12
|

Magikoopa (1)
|
|
N/A
|
- This is a Magikoopa encountered as a mini-boss before Chapter 1.
- Starts the battle flying on a broomstick.
- If flying, a POW Block or any timed attack (including Hammer Throw) will knock the Magikoopa off of its broom, turning it into a Ground type.
|
| 13
|

Koopa Troopa
|
- Shell Toss (1, first-strike)
- Struggle
- Stand Up
|
- Uses Stuggle if just flipped over, followed by Stand Up the next round. If standing upright, uses Shell Toss.
|
- A jump or Quake attack will flip over a Koopa Troopa.
|
| 14
|

Fuzzy
|
- Kissy-Kissy (1, absorbs HP according to damage, Piercing; immune-zap)
|
N/A
|
- Fuzzies can only be fought until after returning to Koopa Village with Kooper, although the player may fight four Fuzzies in Shy Guy's Toy Box (sent by Kammy Koopa).
|
| 15
|

Paratroopa
|
- Dive Kick (1, first-strike)
|
N/A
|
- Following a jump attack that hits more than once, the Paratroopa loses its wings and becomes a flipped-over Koopa Troopa.
- Following a jump attack that only hits once, the Paratroopa loses its wings and becomes a standing Koopa Troopa.
|
| 16
|

Bob-omb
|
- Hop Attack (1, zap)
- Self Destruct (2, defeats Bob-omb)
|
- If enraged, uses Self Destruct. Otherwise, uses Hop Attack.
|
- Becomes enraged after receiving damage from an attack.
- While enraged, any damage attack will automatically defeat it. However, if the attacker makes direct contact, they will take 1 HP damage.
- While enraged, Dizzy Shell will always defeat the Bob-omb, and Spin Smash will not push it backwards.
- Fire, explosion and electric damage will automatically defeat the Bob-omb.
- Successfully inflicting Power Shock or Mega Shock will automatically defeat a normal Bob-omb, but not an enraged one.
- If an electrified Mario is hit with Hop Attack, Mario will not take damage and the Bob-omb will immediately use Self Destruct.
- Water attacks will make a normal Bob-omb enraged, but they will also make an enraged Bob-omb normal.
- Water Block provides +2 defense against the Self Destruct attack.
|
| 17
|

Bullet Bill
|
- Sacrifice Slam (2, defeats Bullet Bill, zap, first-strike)
|
N/A
|
- If there are no enemies in front of them, and were summoned from Bill Blasters in battle, the player can target any Bullet Bill with Ground attacks.
- Explosion damage will automatically defeat the Bullet Bill.
- If Sacrifice Slam misses Mario, the Bullet Bill will leave the battle, and the player will not earn Star Points.
|
| 18
|

Bill Blaster
|
- Bullet Shot (fires out Bullet Bill)
|
- 1. Skips its turn if Bullet Bill fired out earlier is still present. Otherwise, uses Bullet Shot.
- 2. Skips turn.
- 3. Loops back to 1.
|
- The player can First Strike the Bill Blasters.
- If there no enemies present, the player can target any Bill Blaster with Ground attacks.
|
| 19
|

Bowser???
|
|
N/A
|
- Is immediately replaced with Koopa Bros. when defeated. This does not use Koopa Bros.'s turn, nor cancel out Mario or his partner's possible unused turn.
|
| 20
|
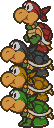
Koopa Bros.
|
- Ninjakoopa Special (2-4, lag-block)
|
N/A
|
- Attack power of Ninjakoopa Special is equal to the number of Ninjakoopa in the stack (2-4).
- The Ninjakoopas themselves cannot be damaged while in the stack.
- Before attacking, Koopa Bros. will wait until all Ninjakoopas not in the stack take their turn.
- Any damage-dealing attack makes the stack unstable. This unstable status is cleared when Koopa Bros. attack.
- While unstable, any attack (including Sleepy Sheep or Fright Jar) is guaranteed to knock over the stack.
- A Thunder Bolt or a damage dealing Bomb attack will knock over the stack without having to make it unstable first.
- While knocked over, all Ninjakoopas that were in the stack will become separated and flipped over.
|
| 21
|

Red Ninjakoopa
|
- Shell Toss (1, lag-block)
- Join Tower
- Struggle
- Get Up
|
- Uses Stuggle if just flipped over, followed by Stand Up the next round.
- If standing upright, uses Join Tower if Koopa Bros. exists (will create a new tower if there are any Ninjakoopas able to join it the next round), otherwise uses Shell Toss.
|
- A jump or quake attack will flip over Red Ninjakoopa.
- If the player successfully inflicts Red Ninjakoopa with Sleep or Dizzy, he will only skip one of his turns, even though a two is displayed.
- When calculating Star Points, the game considers there to have been four enemies at the start of battle.
|
| 22
|

Black Ninjakoopa
|
- Shell Toss (1, lag-block)
- Join Tower
- Struggle
- Get Up
|
- Uses Stuggle if just flipped over, followed by Stand Up the next round.
- If standing upright, uses Join Tower if Koopa Bros. exists (will create a new tower if there are any Ninjakoopas able to join it the next round), otherwise uses Shell Toss.
|
- A jump or quake attack will flip over Black Ninjakoopa.
- If the player successfully inflicts Black Ninjakoopa with Sleep or Dizzy, he will only skip one of his turns, even though a two is displayed.
- When calculating Star Points, the game considers there to have been four enemies at the start of battle.
|
| 23
|

Yellow Ninjakoopa
|
- Shell Toss (1, lag-block)
- Join Tower
- Struggle
- Get Up
|
- Uses Stuggle if just flipped over, followed by Stand Up the next round.
- If standing upright, uses Join Tower if Koopa Bros. exists (will create a new tower if there are any Ninjakoopas able to join it the next round), otherwise uses Shell Toss.
|
- A jump or quake attack will flip over Yellow Ninjakoopa.
- If the player successfully inflicts Yellow Ninjakoopa with Sleep or Dizzy, he will only skip one of his turns, even though a two is displayed.
- When calculating Star Points, the game considers there to have been four enemies at the start of battle.
|
| 24
|

Green Ninjakoopa
|
- Shell Toss (1, lag-block)
- Join Tower
- Struggle
- Get Up
|
- Uses Stuggle if just flipped over, followed by Stand Up the next round.
- If standing upright, uses Join Tower if Koopa Bros. exists (will create a new tower if there are any Ninjakoopas able to join it the next round), otherwise uses Shell Toss.
|
- A jump or quake attack will flip over Green Ninjakoopa.
- If the player successfully inflicts Green Ninjakoopa with Sleep or Dizzy, he will only skip one of his turns, even though a two is displayed.
- When calculating Star Points, the game considers there to have been four enemies at the start of battle.
|
| 25
|
File:Jr. Troop 2.png
Jr. Troopa (2)
|
|
N/A
|
- This is Jr. Troopa, encountered in Mario's second battle with him, in Pleasant Path after Chapter 1.
|
| 26
|

Monty Mole (1)
|
- Rock Toss (2, first-strike)
|
N/A
|
- This is the Monty Mole that is at Mt. Rugged.
- Spin Hammer will not push Monty Mole backwards.
|
| 27
|

Cleft
|
- Spike Charge (2, zap, first-strike)
- Struggle
- Stand Up
|
- Uses Struggle if just flipped over, followed by Struggle the next round, and Stand Up the round after. If standing, uses Spike Charge.
|
- Immune to fire attacks.
- A damage-dealing explosion attack will flip over the Cleft.
- While flipped over, Spin Hammer will not push it backwards.
|
| 28
|

Buzzar
|
- Claw Swoop (3, zap)
- Feather Fling (2)
- Grapple Drop (4, rapid-block)
- High Swoop (4, zap)
- Wind Blast (1-3, Mario/Partner; power-block: 2)
|
- 1. Wind Blast
- 2. Grapple Drop
- 3. Claw Drop
- 4. Grapple Drop
- 5. Feather Fling
- 6. Grapple Drop
- 7. Loop to 1.
For all of the turns:
- If Mario is electrified, High Swoop is used instead of Claw Swoop.
- If Buzzar is shrunk, loop to 3). If not, but he took damage from an electrified Mario the previous round, loop to 1).
|
- Mario can avoid fighting Buzzar by answering "Luigi" to his question. The player must do this every time they pass the bridge, however.
- The player can avoid Grapple Drop in a similar fashion to running from a battle. The dodge meter starts empty and takes thirty button presses to fill completely. If the player fails to avoid the attack, they can still block it by normal by pressing
 just as Mario hits the ground. just as Mario hits the ground.
- High Swoop is Claw Swoop used against an electrified Mario. The blocking is different, however. It can't be dodged, but can be blocked as Buzzar touches Mario's hat.
|
| 29
|

Bandit
|
- Thief Bump (2, steals 10 coins, zap)
|
- If holding coins, Bandit will run away instead of attacking.
|
- Any successful attack will recover stolen coins except for Lakilester's Hurricane and Up & Away. Parakarry's Air Lift will recover coins even if it fails.
- If Mario has less than 10 coins, all of his coins will be stolen.
- Coins aren't stolen if the attack is blocked, the attack doesn't deal damage, Mario is electrified or Bandit is shrunk.
|
| 30
|

Pokey
|
- Timber Attack (2, zap, lag-block)
- Body Shot (2, loses segment, lag-block)
- Head Dive (2, zap)
- Unearth Friend (summons another Pokey in front of it)
|
- If fall of its segments are gone, use Head Dive. Otherwise picks from its other moves. It cannot use Unearth Friend if any segments are lost or there is no space in front of it.
|
- Starts the battle with three segments.
- If attacked with Shell Toss, Power Shell, Fire Shell, or a timed Spin Smash (direct or indirect), it will lose a segment.
- The player may fight two Pokeys in Shy Guy's Toybox (sent by Kammy Koopa).
|
| 31
|
File:Pokey Mummy.PNG
Pokey Mummy
|
- Body Shot (2, Poison - Poor, 3; loses segment, lag-block)
- Head Dive (2, Poison - Good, 3; zap)
|
- If all of its segments are gone, uses Head Dive. Otherwise, uses Body Shot.
|
- Starts the battle with three segments.
- If attacked with Shell Toss, Power Shell, Fire Shell, or a timed Spin Smash (direct or indirect), it will lose a segment.
- Without either the Spike Shield or Feeling Fine badges, Mario will become poisoned for three rounds when jumping on the Pokey Mummy (as well as taking 1 HP damage if Spike Shield isn't equipped).
|
| 32
|
 
Buzzy Beetle
|
- Shell Toss (2, first-strike)
- Ceiling Drop (2, changes to Ground type, first-strike)
- Stand Up
|
- Uses Ceiling Drop if on the ceiling. Uses Stand Up when flipped. Otherwise, uses Shell Toss.
|
- Will start battle either on the ground (most common) or on the ceiling.
- Immune to fire and explosion attacks when not flipped over.
- A jump or quake attack will successfully flip over a Buzzy Beetle.
- Any attack, successful or unsuccessful, will knock a Buzzy Beetle off of the ceiling, also flipping it over.
|
| 33
|
 
Swooper
|
|
N/A
|
- Starts the battle on the ceiling. Any damage dealing attack will change it to a Flying type.
|
| 34
|
File:Stone Chomp.PNG
Stone Chomp
|
|
N/A
|
- The player can First Strike the Stone Chomp that guards the Pyramid Stone.
|
| 35
|
File:Tutankoopa PM.png
Tutankoopa
|
- Shell Heave (3, loses a shell)
- Magic Spell (2, Mario; 2, Partner; lag-block)
- Traitor Spell (2, Tutankoopa; changes from Elevated to Ground)
- Summon Chomp (summons Chomp to join battle)
|
- Tutankoopa always uses Summon Chomp on his first turn, and for his third attack since a Chomp has been defeated.
- If Tutankoopa is not supposed to use Summon Chomp, Tutankoopa uses Shell Heave, unless he is shrunk, he used Shell Heave the previous round, or he is out of shells.
- If Tutankoopa is not supposed to use Summon Chomp or Shell Heave, he randomly uses Magic Spell or Traitor Spell.
- The first time Tutankoopa randomly chooses a spell, it will always be Magic Spell. The second time will always be Traitor Spell.
|
- Tutankoopa starts the battle with 3 shells.
- If Tutankoopa is on the ground, he returns himself to Elevated type before attacking (doesn't use up his turn).
- If Tutankoopa is shrunk, then Traitor Spell will only do 1 damage to himself.
|
| 36
|

Chomp
|
|
N/A
|
- Summoned by Tutankoopa.
- Immune to fire attacks.
- Is defeated automatically when Tutankoopa is defeated (the player won't get Star Points for defeating Chomp in this manner).
|
| 37
|

Piranha Plant
|
- Bite (3, zap, first-strike)
|
N/A
|
N/A
|
| 38
|

Forest Fuzzy
|
- Kissy-Kissy (1, absorbs HP according to damage, Piercing; immune-zap)
- Create Friend (summons another Forest Fuzzy)
|
- Create Fiend is only used if there are less than four enemies present. The new Forest Fuzzy will have full HP.
|
- Water Block does not provide protection against Kissy-Kissy.
|
| 39
|

Bzzap!
|
- Thorn Stab (6, Poison - Fair, 3; zap, first-strike, lag-block)
- Swarm Sting (1, five times, Shrink - Poor, 2; lag-block)
|
N/A
|
- The player can fight two Bzzap!s in Forever Forest by hitting the tree with the beehive in the area with the HP Plus badge.
|
| 40
|

Hyper Goomba
|
- Headbonk (1, zap)
- Charge Up
- Missile-Bonk (8, loses charge, zap)
|
- If charged up, uses Missile-Bonk. Otherwise, randomly picks from Headbonk or Charge Up.
- Hyper Clefts, Hyper Paragoombas and Hyper Goombas tend to use Charge Up on the same round as each other.
|
N/A
|
| 41
|

Hyper Paragoomba
|
- Dive Kick (1, zap)
- Charge Up
- Missile-Dive (8, loses charge, zap)
|
- If charged up, uses Missile-Dive. Otherwise, randomly picks from Dive Kick or Charge Up.
- Hyper Clefts, Hyper Paragoombas and Hyper Goombas tend to use Charge Up on the same round as each other.
|
- Loses its wings and becomes a regular Hyper Goomba when jumped on or hit with a POW Block.
- Following a POW Block or any jump attack, the Hyper Paragoomba loses its wings and becomes a Hyper Goomba.
|
| 42
|

Hyper Cleft
|
- Spike Charge (3, zap, first-strike)
- Charge Up
- Missile-Charge (8, loses charge, zap)
- Struggle
- Stand Up
|
- Uses Struggle if just flipped over, followed by Struggle the next round, and Stand Up the round after.
- If standing upright, uses Missile-Charge if charged up; otherwise, randomly picks from Spike Charge or Charge Up.
- Hyper Clefts, Hyper Paragoombas and Hyper Goombas tend to use Charge Up on the same round as each other.
|
- Immune to fire attacks.
- A damage-dealing explosion attack will flip over the Hyper Cleft.
- While flipped over, Spin Hammer will not push it backwards.
|
| 43
|

Clubba
|
- Heavy Club (3, first-strike)
|
N/A
|
- Clubbas can only be fought until after acquiring the Mystical Key, although the player may fight two Clubbas in Shy Guy's Toy Box (sent by Kammy Koopa).
|
| 44
|

Tubba Blubba (1)
|
- Fist Drop (4)
- Body Crush (6)
- Confused Search
|
- Uses Confused Search if Mario is invisible. Otherwise, randomly chooses between Fist Drop and Body Crush.
|
- This is Tubba Blubba in his invincible form, before he reunites with his heart.
- No attacks have any effect; the player's only option is to run away or make Mario invisible. Confused Search has the same effect as running away.
- If Tubba Blubba (1) is encountered patrolling his hallway, then running away from him will put Mario in the previous room, right by the doors to go back to his hallway.
- If Tubba Blubba (1) is encountered after acquiring the Mystical Key, then running away will put Mario at the entrance to the next closest room out of his castle.
|
| 45
|
File:Tubba'sHeart PM.png
Tubba's Heart
|
- Tackle (6)
- Charge Up
- Swarm Squeeze (12, loses charge)
|
- 1. Charge Up
- 2. Swarm Squeeze
- 3. Charge Up
- 4. Swarm Squeeze
- 5. Tackle
- 6. Loop back to 3).
|
- Only 45 HP damage must be done to Tubba's Heart to end the battle. Reducing its HP to 0 has no special effect.
|
| 46
|
Tubba Blubba (2)
|
- Fist Drop (4, zap)
- Body Crush (6, zap)
|
N/A
|
- This is Tubba Blubba in his "not-invincible" form, after he reunites with his heart.
|
| 47
|
File:Jr. Troop 3.png
Jr. Troopa (3)
|
|
N/A
|
- This is the from of Jr. Troopa encountered in Mario's third battle with him. The player will fight him the first time they head back through Forever Forest with the Super Boots.
|
| 48
|

Gloomba
|
|
N/A
|
N/A
|
| 49
|

Paragloomba
|
- Dive Kick (2, zap, first-strike)
|
N/A
|
- Following a POW Block or any jump attack, the Paragloomba loses its wings and becomes a Gloomba.
|
| 50
|

Spiked Gloomba
|
|
N/A
|
N/A
|
| 51
|

Dark Koopa
|
- Shell Toss (3, first-strike)
- Dizzy Tornado (Dizzy - Good, 2)
- Stand Up
|
- Uses Stand Up if flipped over. If standing upright, randomly uses Shell Toss or Dizzy Tornado.
|
- A jump or quake attack will flip over the Dark Koopa.
- If the Dark Koopa is smiling and running on the spot, it will use Dizzy Tornado next. If it is not smiling, it will use Shell Toss.
|
| 52
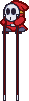
|

Shy Guy
|
- Bump Attack (2, zap)
- Acrobatic Attack (3, zap)
|
N/A
|
- Shy Guys can appear in different colors (red, blue, green yellow, pink), which does not affect anything.
|
| 53
|

Groove Guy
|
- Dash Attack (2, zap)
- Dizzy Dance (Dizzy - Fair, 2; zap)
- Backup Call (summon Shy Guy, Groove Guy or Medi Guy)
|
- Backup Call can only be used if there are less than four enemies present.
- Dizzy Dance isn't used if Mario is dizzy.
|
N/A
|
| 54
|

Sky Guy[1]
|
- Aerial Shot (3, first-strike)
|
N/A
|
- Out of battle, the Sky Guy will perform its First Strike by swooping at Mario.
- The player can also target the Sky Guy's balloons. Doing damage to them will pop them, turning the Sky Guy into a Shy Guy. The balloons cannot be hit with attacks that target multiple enemies.
|
| 55
|
File:Anti Guy2.png
Anti Guy
|
- Bump Attack (10, zap)
- Acrobatic Attack (12, zap)
|
N/A
|
- In Shy Guy's Toy Box, Mario can bribe it with a Lemon Candy, allowing him to skip the battle.
- If Mario makes three mistakes in the quiz against the second Bowser Door in Bowser's Castle, he will have to fight three Anti Guys at once.
- The player can only get coins from the Anti Guy in Shy Guy's Toy Box (making use of the Pay-Off badge).
|
| 56
|
 
Spy Guy
|
- Hammer Smack (2, Command Loss)
- Quick Slingshot (2, first-strike)
|
- Uses Hammer Smack if equipped with a hammer. Uses Quick Slingshot if equipped with a slingshot.
|
- The player can deflect its field attack with a jump or (when wearing Spin Attack badge) spin dash.
- Is equipped with either a hammer or slingshot. A Spy Guy starts the battle with a hammer equipped, unless it is in the front.
- A damage-dealing attack will cause them to switch weapons (unless they are inflicted with Sleep, Dizzy, Shock, Stop).
|
| 57
|

Medi Guy
|
- Swoop (1, zap)
- Heal (restore 4 HP to itself or another ally)
|
- Heal is not used if all enemies are at full health. However, Heal is not necessarily used when there are damaged enemies.
|
N/A
|
| 58
|

Pyro Guy
|
- Fire Bump (4, fiery, zap)
|
N/A
|
- Immune to fire attacks.
- Takes +1 damage from explosion attacks. Takes +2 damage from water and ice attacks.
|
| 59
|

Big Lantern Ghost[2]
|
- Heavy Jump (5, zap)
- Light Beam (2, Mario; 2, Partner)
- Lantern Extinguish (return Lantern's brightness to zero).
|
Starts the following cycle on 4).
- 1. Lantern Extinguish
- 2. Light Beam (works even if Lantern is extinguished)
- 3. Heavy Jump
- 4. If Lantern is at least at brightness level 2, loop to 1). Otherwise, loop to 3).
|
- The player can hit either Big Lantern Ghost's Lantern or his head.
- Hitting the lantern has no effect on Big Lantern Ghost, but each hit raises its brightness level by one. The lantern starts the battle with a brightness level of zero, and can go up to four.
- The player cannot target the Lantern with Tattle, Air Lift, items, or attacks that can target multiple enemies.
- The Player cannot target the head if the Lantern's brightness level is zero or one. Also, since the Lantern is in front of the head, the player cannot hit the head with single-target ground attacks.
- Spin Hammer will not knock the Lantern backwards.
|
| 60
|

Shy Squad
|
- Mob Rush (1 x 1-15, once-zap, lag-block)
|
- If they have received damage from an attack on two different rounds, they will run away.
|
- The number of times the attack hits Mario is equal to the number of members in the squad (1 to 15). There is one member in the squad for each HP remaining. Doing damage knocks away an equal number of Shy Guys.
- Having the Shy Squad run away has the same effect as defeating them.
|
| 61
|
Stilt Guy
|
|
N/A
|
- A quake attack, a timed jump attack, or successfully inflicting a status ailment will knock a Stilt Guy off of its stilts, turning it into a Shy Guy.
|
| 62
|

Shy Stack
|
- Multi-shot (1-4; lag-block)
|
N/A
|
- The attack power of Multi-shot is equal to the number of Shy Guys in the stack (1 to 4). The stack starts with four members.
- If attacked with Shell Toss, Power Shell, or a timed Spin Hammer (whether hit by Mario or pushed enemy), one member will be removed from the stack (to a minimum of one).
- If shrunk, Spin Hammer will not push Shy Stack backwards or knock out a member.
|
| 63
|

General Guy
|
- Bomb Throw (4)
- Lightning Shot (5, Mario; 2, Partner)
|
- Does not use Lightning Shot if Bulb is destroyed or partner is dazed.
|
- Watt is immune to the effects of Lightning Shot.
- When calculating Star Points, the game considers there to have been three enemies at the start of battle.
|
| 64
|
Bulb
|
N/A
|
N/A
|
- This is the lightbulb on General Guy's tank.
- If Bulb is defeated, then General Guy loses his Lightning Shot attack.
- Is defeated automatically when General Guy is defeated.
|
| 65
|

Fuzzipede
|
- Headbonk (3, zap)
- Headbutt (3, Command Loss, zap)
- Recover (4 HP)
|
- Fuzzipede doesn't use Recover if he's on the ceiling or his HP is above 7.
|
- If Watt is not Mario's active partner, then it will be too dark to target Fuzzipede.
- Every time Headbonk or Headbutt is used, Fuzzipede will change its type. It has the following cycle: Elevated, Ceiling, Ceiling, Ground, Ceiling, then the cycle restarts.
- If Fuzzipede is on the ceiling and inflicted with Sleep, Dizzy, Shock, or Stop, then dealing damage will change him to Ground type. If, before he next uses Headbonk or Headbutt, Mario hits him with a timed Spin Hammer, he will change to Elevated type, although a graphical glitch makes it look like he upright on the ceiling. Once he uses Headbonk or Headbutt, he returns to normal.
- Fuzzipede does not have an in-battle Tattle dialogue in the game's coding.
|
| 66
|

Jungle Fuzzy
|
- Kissy-Kissy (2, five times, absorbs HP according to damage, Piercing; rapid-block: 23; immune-zap)
- Create Friend (summons another Jungle Fuzzy)
|
- Create Friend is only used if there are less than four enemies present. The new Jungle Fuzzy will have full HP.
|
- Water Block does not provide any protection against Kissy-Kissy.
|
| 67
|
File:Jungle Guy.PNG
Spear Guy
|
- Spear Stab (3, first-strike)
- Spear Throw (2, turns into Shy Guy)
- Summon Friend (summons another Spear Guy)
|
- Summon Friend can only be used when there are less than four enemies present.
|
- At either the beginning of battle or after its turn, a Spear Guy will point its spear forward if it is in the front, making it no longer top-spiky.
- The spear will always be pointing up if inflicted with Sleep or Dizzy.
- With the spear pointed forward, Mario cannot perform hammer attacks (except for Hammer Throw and the Quake Hammers) without the Spike Shield badge equipped.
- Bombette's Body Slam and Bomb attacks cannot be performed while the spear is pointing forward.
|
| 68
|
File:Hurt Plant.PNG
Hurt Plant
|
- Poison Chomp (2, Poison - Good, 3; zap)
|
N/A
|
- If Mario is poisoned, the Hurt Plant's attack will not re-poison Mario.
|
| 69
|

M. Bush
|
- Poison Bite (3, Poison - Poor, 2; zap)
|
N/A
|
N/A
|
| 70
|
File:Putrid piranha2.PNG
Putrid Piranha
|
- Bite (3, first-strike)
- Poison Breath (2, Poison - Good, 3; lag-block)
|
N/A
|
N/A
|
| 71
|
 
White Magikoopa
|
- Single Heal (5 HP to one enemy)
- Multi-Heal (3 HP to all enemies)
- Magic Blast (3)
- Wand Strike (3)
|
- Only use Multi-Heal if there are at least two enemies not at full HP.
- Only uses Single Heal on an enemy (including itself) that is not at full HP.
- White Magikoopa may not use Single Heal or Multi-Heal when enemies could benefit from it, but it usually does.
- Magic Blast is only used when White Magikoopa is flying; Wand Strike is only used when White Magikoopa is on the ground.
- Tends to run away if alone.
|
- Can be flying on a broomstick or standing on the ground.
- A POW Block or any timed jump attack (excluding Sushie's Belly Flop) will knock a flying White Magikoopa off of its broom, turning it to Ground type.
|
| 72
|

Lava Bubble
|
|
|
|
| 73
|

Spike Top
|
|
|
|
| 74
|
 
Red Magikoopa
|
|
|
|
| 75
|

Lava Piranha (1)
|
|
|
|
| 76
|

Lava Bud (1)
|
|
|
|
| 77
|

Lava Piranha (2)
|
|
|
|
| 78
|

Lava Bud (2)
|
|
|
|
| 79
|

Petit Piranha
|
|
|
|
| 80
|
File:Jr. Troop 4.png
Jr. Troopa (4)
|
|
|
|
| 81
|

Kent C. Koopa
|
|
|
|
| 82
|

Blooper
|
|
|
|
| 83
|
File:Electro Blooper.PNG
Electro Blooper
|
|
|
|
| 84
|
File:Super blooper.PNG
Super Blooper
|
|
|
|
| 85
|

Blooper Baby
|
|
|
|
| 86
|

Crazee Dayzee
|
|
|
|
| 87
|

Monty Mole (2)
|
|
|
|
| 88
|

Ruff Puff
|
|
|
|
| 89
|

Amazy Dayzee
|
|
|
|
| 90
|

Spiny
|
|
|
|
| 91
|

Lakitu
|
|
|
|
| 92
|
File:PMGRMagikoopaFlying.pngFile:PMGRMagikoopaGround.png
Green Magikoopa
|
|
|
|
| 93
|

Spike?
|
|
|
|
| 94
|
 
Yellow Magikoopa
|
|
|
|
| 95
|

Huff N. Puff
|
|
|
|
| 96
|
File:PMTuffPuffSmall.png
Tuff Puff
|
|
|
|
| 97
|
File:Jr. Troop 5 6.png
Jr. Troopa (5)
|
|
|
|
| 98
|

Frost Piranha
|
|
|
|
| 99
|

Gulpit
|
|
|
|
| 100
|
Gulpits' Rocks
|
|
|
|
| 101
|
File:Monstar.PNG
Monstar
|
|
|
|
| 102
|

Duplighost
|
|
|
|
| 103
|

Goombario??? (Duplighost)
|
|
|
|
| 104
|

Kooper??? (Duplighost)
|
|
|
|
| 105
|

Bombette??? (Duplighost)
|
|
|
|
| 106
|

Parakarry??? (Duplighost)
|
|
|
|
| 107
|

Bow??? (Duplighost)
|
|
|
|
| 108
|
File:Watt Paper Mario.png
Watt??? (Duplighost)
|
|
|
|
| 109
|
File:Sushie Paper Mario.png
Sushie??? (Duplighost)
|
|
|
|
| 110
|
Lakilester??? (Duplighost)
|
|
|
|
| 111
|

White Clubba
|
|
|
|
| 112
|
 
Swoopula
|
|
|
|
| 113
|

Gray Magikoopa
|
|
|
|
| 114
|

Crystal King
|
|
|
|
| 115
|
  
Crystal Bit
|
|
|
|
| 116
|
Crystal King (copy)
|
|
|
|
| 117
|

Chan
|
|
|
|
| 118
|

Lee
|
|
|
|
| 119
|
Goombario??? (Lee)
|
|
|
|
| 120
|
Kooper??? (Lee)
|
|
|
|
| 121
|
Bombette??? (Lee)
|
|
|
|
| 122
|
Parakarry??? (Lee)
|
|
|
|
| 123
|
Bow??? (Lee)
|
|
|
|
| 124
|
File:Watt Paper Mario.png
Watt??? (Lee)
|
|
|
|
| 125
|
File:Sushie Paper Mario.png
Sushie??? (Lee)
|
|
|
|
| 126
|
Lakilester??? (Lee)
|
|
|
|
| 127
|

The Master (1)
|
|
|
|
| 128
|

The Master (2)
|
|
|
|
| 129
|
The Master (3)
|
|
|
|
| 130
|

Ember
|
|
|
|
| 131
|

Koopatrol
|
|
|
|
| 132
|

Hammer Bro
|
|
|
|
| 133
|

Magikoopa (2)
|
|
|
|
| 134
|
Magikoopa (copy)
|
|
|
|
| 135
|
 
Bony Beetle
|
|
|
|
| 136
|

Bombshell Bill
|
|
|
|
| 137
|

Bombshell Bill Blaster
|
|
|
|
| 138
|

Dry Bones
|
|
|
|
| 139
|
Jr. Troopa (6)
|
|
|
|
| 140
|
Bowser (2)
|
|
|
|
| 141
|

Bowser (3)
|
|
|
|
| 142
|

Kammy Koopa
|
|
|
|
| 143
|
Bowser (4)
|
|
|
|
| 144 D
|

Albino Dino[3]
|
N/A
|
N/A
|
- Albino Dino appears in the game's coding but is removed from the final draft -- the player will not encounter it during normal gameplay.
|
| 145 D
|
File:DParatroopa.gif
Dark Paratroopa[3]
|
N/A
|
N/A
|
- Dark Paratroopa appears in the game's coding but is removed from the final draft -- the player will not encounter it during normal gameplay.
|


