Chortlebot Challenge: Difference between revisions
Tags: Mobile edit Advanced mobile edit |
No edit summary Tags: Mobile edit Advanced mobile edit |
||
| Line 2: | Line 2: | ||
{{level infobox | {{level infobox | ||
|title=Chortlebot Challenge | |title=Chortlebot Challenge | ||
|image=[[File:Chortlebot Phase 1.png| | |image=[[File:Chortlebot Phase 1.png|250px]] | ||
|code=3-B | |code=3-B | ||
|game=''[[Wario Land: Shake It!]]'' | |game=''[[Wario Land: Shake It!]]'' | ||
Latest revision as of 08:34, September 5, 2024
It has been requested that this article be rewritten and expanded to include more information. Reason: The names in other languages
| Level | |
|---|---|
| Chortlebot Challenge | |

| |
| Level code | 3-B |
| Game | Wario Land: Shake It! |
| Boss | Chortlebot |
| Music track | Chortlebot Challenge |
| << Directory of levels >> | |
- “Chortlebot online. Preparing to take you... offline. HEE. HEE. HEE.”
- —Chortlebot, Wario Land: Shake It!
Chortlebot Challenge is the third boss level in Wario Land: Shake It!, located at the end of Rocking Range. This level takes place inside a circus where Wario battles against Chortlebot.
Layout[edit]
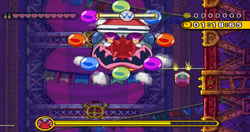
The level starts in a city similar to both Glittertown and Neon City where four to six Merfles use their mystical powers to open the boss door. As Wario goes through the door, spotlights turn on. Chortlebot then appears and laughs maniacally, with colored searchlights surrounding him and the pyrotechnics releasing smoke. Wario screams in horror, and the fight begins.
Chortlebot drifts along, often relying on his attacks. His first attack consists of launching his main weapon, his spiky nose, towards Wario. The nose can also split into two, revealing either two short bars of fire that act as if they were a propeller, or two long ones which can only be avoided. Lastly, he can send beams from below that Wario must avoid by ducking. It takes three hits to stun Chortlebot, and Wario can then bounce on the weak point on Chortlebot's head to damage him; however, after a while, Chortlebot will summon eight multi-colored orbs that produce spikes to launch at Wario.
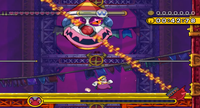
After two deals of damage, Chortlebot will start his second phase. This phase is similar to the first one, except that it takes four hits to stun Chortlebot. After this, Wario can bounce on the weak point on Chortlebot's head to damage him again.
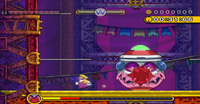
After four deals of damage, Chortlebot will start the third and final phase. This phase is similar to the previous phases, abiet with six hits required to stun Chortlebot. This cycle repeats until he takes seven deals of damage.
After Wario deals enough damage, Chortlebot explodes, and the battle concludes. As a result, Chortlebot's corresponding Boss Emblem (or a diamond in the level's revisits) appears, allowing Wario to collect it.
Missions[edit]
It has been requested that at least one image be uploaded for this section. Remove this notice only after the image(s) have been added. Specifics: Each mission has an icon associated. They should be uploaded and added to this section.
Missions appear only after the first round of the game is completed. Wario can obtain the background music to the battle after all the missions are accomplished.
| Icon | Mission
|
|---|---|
| Beat the stage without taking damage | |
| Beat the enemy before time runs out | |
| Damage Chortlebot twice in a rowa |
a - This only occurs when Chortlebot's weak spot becomes exposed.
Data[edit]
| Given time | Sum of coins |
|---|---|
| 1:30:00 | 10,000 |

