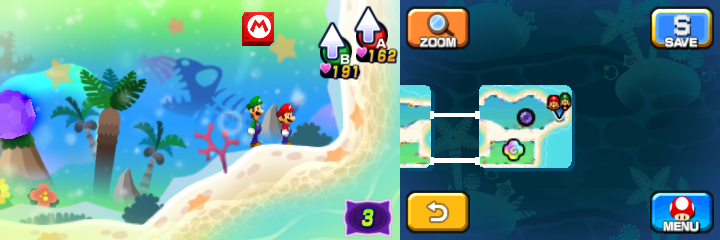
Dreamy Driftwood Shore: Difference between revisions
m (→Names in other languages: Sourcing.) Tag: Reverted |
|||
| (4 intermediate revisions by 4 users not shown) | |||
| Line 23: | Line 23: | ||
MLDTSergeantGuy.png|[[Sergeant Guy]] (boss) | MLDTSergeantGuy.png|[[Sergeant Guy]] (boss) | ||
</gallery> | </gallery> | ||
==Block locations== | |||
===Seadric Dreampoint=== | |||
{|border=1 cellpadding=2 style="text-align: center; border-collapse: collapse; border: 1px solid black; width:100%" | |||
!colspan="3"style="background:orange; height:2em"|[[Dreamy Driftwood Shore]] (Seadric Dreampoint) - 29 Blocks (16 ?, 1 M, 2 L, 10 Attack Piece) | |||
|-style="background:orange; height:2em" | |||
!Item/s | |||
!Location | |||
!Screenshot | |||
|- | |||
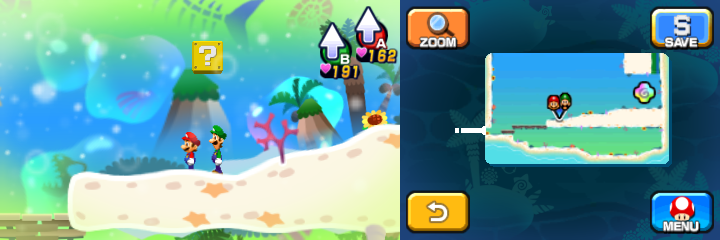
|[[File:MLDTAttackPiece.png]]<br>[[Luiginary Flame]] Attack Piece | |||
|In the first scene, right of the [[Dream Portal]]. | |||
|[[File:Dreamy Driftwood Shore (Seadric Dreampoint) Block 1.png]] | |||
|- | |||
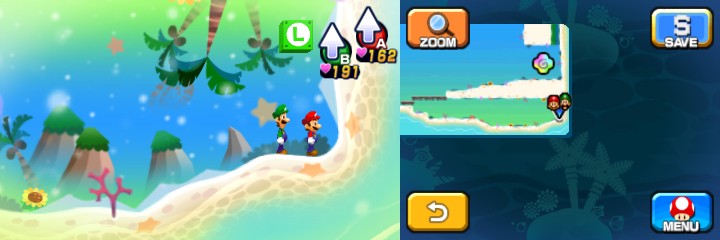
|[[File:MLSS+BM10Coin.png]]<br>10-Coin | |||
|'''NOTE''': Following 10 blocks are available only after returning here with one Dream Egg.<br>In the third scene, near the exit pipe. | |||
|[[File:Dreamy Driftwood Shore (Seadric Dreampoint) Block 2.png]] | |||
|- | |||
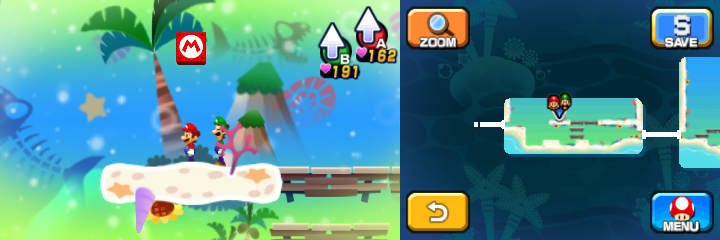
|[[File:MLSS+BM10Coin.png]] [[File:MLPJ50Coin.png]] [[File:MLSS+BM10Coin.png]] [[File:MLDTAttackPiece.png]]<br>10-Coin, [[50-Coin]], 10-Coin, Luiginary Flame Attack Piece | |||
|In the fifth scene, in the east part. The [[Attack_Piece_Block#Mario_.26_Luigi:_Dream_Team|Attack Piece Block]] is reachable only with [[Luiginary Gravity]]. | |||
|[[File:Dreamy Driftwood Shore (Seadric Dreampoint) Blocks 3-6.png]] | |||
|- | |||
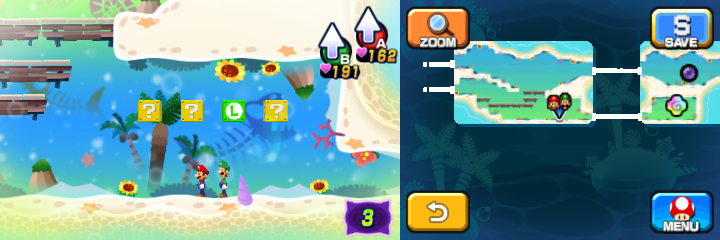
|[[File:MLDTAttackPiece.png]]<br>Luiginary Flame Attack Piece | |||
|In the scene accessed from the west pipe in the fifth scene, in the northwest. Reachable only with Luiginary Gravity. | |||
|[[File:Dreamy Driftwood Shore (Seadric Dreampoint) Block 7.png]] | |||
|- | |||
|[[File:M&LDT Mushroom.png]]<br>Ultra Mushroom | |||
|Same scene, in the "maze" part, in the southeast. Reachable only with Luiginary Gravity. | |||
|[[File:Dreamy Driftwood Shore (Seadric Dreampoint) Block 8.png]] | |||
|- | |||
|[[File:MLDTAttackPiece.png]]<br>Luiginary Flame Attack Piece | |||
|Same scene, same part, in the northwest. Reachable only with Luiginary Gravity. | |||
|[[File:Dreamy Driftwood Shore (Seadric Dreampoint) Block 9.png]] | |||
|- | |||
|[[File:M&LDT Syrup.png]]<br>Supersyrup Jar | |||
|In the sixth scene, right of the second platform. | |||
|[[File:Dreamy Driftwood Shore (Seadric Dreampoint) Block 10.png]] | |||
|- | |||
|[[File:MLDTAttackPiece.png]]<br>Luiginary Flame Attack Piece | |||
|Same scene, above the sixth platform. | |||
|[[File:Dreamy Driftwood Shore (Seadric Dreampoint) Block 11.png]] | |||
|- | |||
|[[File:M&LDT Candy.png]]<br>Super Candy | |||
|'''NOTE''': Following 15 blocks are available only after returning here with two Dream Eggs.<br>In the ninth scene, near the exit pipe. | |||
|[[File:Dreamy Driftwood Shore (Seadric Dreampoint) Block 12.png]] | |||
|- | |||
|[[File:MLDTAttackPiece.png]]<br>Luiginary Flame Attack Piece | |||
|In the tenth scene, in the west. Reachable only with Luiginary Gravity. | |||
|[[File:Dreamy Driftwood Shore (Seadric Dreampoint) Block 13.png]] | |||
|- | |||
|[[File:M&LDT Nut.png]]<br>Super Nut | |||
|In the eleventh scene, in the northwest. Reachable only with Luiginary Gravity. | |||
|[[File:Dreamy Driftwood Shore (Seadric Dreampoint) Block 14.png]] | |||
|- | |||
|[[File:M&LDT Candy.png]] [[File:MLPJ50Coin.png]][[File:MLPJ50Coin.png]][[File:MLPJ50Coin.png]][[File:MLPJ50Coin.png]][[File:MLPJ50Coin.png]][[File:MLPJ50Coin.png]][[File:MLPJ50Coin.png]][[File:MLPJ50Coin.png]][[File:MLPJ50Coin.png]][[File:MLPJ50Coin.png]]<br>Ultra Candy, 10 50-Coins | |||
|In the scene accessed by a green pipe in the ground in the eleventh scene, above the fourth and fifth platforms | |||
|[[File:Dreamy Driftwood Shore (Seadric Dreampoint) Blocks 15-16.png]] | |||
|- | |||
|[[File:MLDTAttackPiece.png]]<br>Luiginary Flame Attack Piece | |||
|Same scene, in the northwest. | |||
|[[File:Dreamy Driftwood Shore (Seadric Dreampoint) Block 17.png]] | |||
|- | |||
|[[File:M&LDT Syrup.png]]<br>Ultrasyrup Jar | |||
|In the twelfth scene, in the northeast. Reachable only with Luiginary Gravity. | |||
|[[File:Dreamy Driftwood Shore (Seadric Dreampoint) Block 18.png]] | |||
|- | |||
|[[File:MLPJ50Coin.png]]<br>50-Coin | |||
|'''NOTE''': Due to block being above spikes and Bros are moving, map is unavailable on the exact location, so image is done by the combining the exact location and the last spot where map is available. Also applies for the next block.<br>In the thirteenth scene, in the middle, in the air. Reachable only with cone Luiginoid Formation, using Spin Jump and Hover Spin techniques. | |||
|[[File:Dreamy Driftwood Shore (Seadric Dreampoint) Block 19.png]] | |||
|- | |||
|[[File:MLPJ50Coin.png]]<br>50-Coin | |||
|Same scene, in the air, after the spike bed. Reachable only with cone Luiginoid Formation, using Spin Jump and Hover Spin techniques. | |||
|[[File:Dreamy Driftwood Shore (Seadric Dreampoint) Block 20.png]] | |||
|- | |||
|[[File:MLSS+BM10Coin.png]] [[File:MLSS+BM10Coin.png]] [[File:MLSS+BM10Coin.png]]<br>10-Coin (all 3) | |||
|In the fourteenth scene, in the southwest. | |||
|[[File:Dreamy Driftwood Shore (Seadric Dreampoint) Blocks 21-23.png]] | |||
|- | |||
|[[File:MLDTAttackPiece.png]]<br>Luiginary Flame Attack Piece | |||
|Same scene, above the previous three. | |||
|[[File:Dreamy Driftwood Shore (Seadric Dreampoint) Block 24.png]] | |||
|- | |||
|[[File:MLDTAttackPiece.png]]<br>Luiginary Flame Attack Piece | |||
|In the fifteenth scene, in the west. | |||
|[[File:Dreamy Driftwood Shore (Seadric Dreampoint) Block 25.png]] | |||
|- | |||
|[[File:MLDTAttackPiece.png]]<br>Luiginary Flame Attack Piece | |||
|Same scene, in the east, reachable after stone block rises. | |||
|[[File:Dreamy Driftwood Shore (Seadric Dreampoint) Block 26.png]] | |||
|- | |||
|[[File:Dream Team Accessory.png]]<br>POW Scarf | |||
|'''NOTE''': Following three blocks are available only after returning here with three Dream Eggs.<br>In the seventeenth scene, above the second platform. | |||
|[[File:Dreamy Driftwood Shore (Seadric Dreampoint) Block 27.png]] | |||
|- | |||
|[[File:M&LDT Candy.png]]<br>Ultra Candy | |||
|In the eighteenth scene, in the lower part reachable from nineteenth scene. | |||
|[[File:Dreamy Driftwood Shore (Seadric Dreampoint) Block 28.png]] | |||
|- | |||
|[[File:M&LDT Mushroom.png]]<br>Ultra Mushroom | |||
|In the twentieth scene, in the northeast. Reachable only with Luiginary Gravity. | |||
|[[File:Dreamy Driftwood Shore (Seadric Dreampoint) Block 29.png]] | |||
|} | |||
===Seabury Dreampoint=== | |||
{|border=1 cellpadding=2 style="text-align: center; border-collapse: collapse; border: 1px solid black; width:100%" | |||
!colspan="3"style="background:orange; height:2em"|Dreamy Driftwood Shore (Seabury Dreampoint) - 3 Blocks (1 ?, 1 M, 1 L) | |||
|-style="background:orange; height:2em" | |||
!Item/s | |||
!Location | |||
!Screenshot | |||
|- | |||
|[[File:MLSS+BM10Coin.png]]<br>10-Coin | |||
|In the first scene, in the middle of the upper part. | |||
|[[File:Dreamy Driftwood Shore (Seabury Dreampoint) Block 1.png]] | |||
|- | |||
|[[File:M&LDT Candy.png]]<br>Ultra Candy | |||
|Same scene, at the end of the lower part. | |||
|[[File:Dreamy Driftwood Shore (Seabury Dreampoint) Block 2.png]] | |||
|- | |||
|[[File:MLSSBMRefreshingHerb.png]]<br>Refreshing Herb | |||
|In the second scene, left of the third platform. | |||
|[[File:Dreamy Driftwood Shore (Seabury Dreampoint) Block 3.png]] | |||
|} | |||
===Pink Pi'illo 1=== | |||
{|border=1 cellpadding=2 style="text-align: center; border-collapse: collapse; border: 1px solid black; width:100%" | |||
!colspan="3"style="background:pink; height:2em"|Dreamy Driftwood Shore (Pink Pi'illo 1) - 5 Blocks (4 ?, 1 L) | |||
|-style="background:pink; height:2em" | |||
!Item/s | |||
!Location | |||
!Screenshot | |||
|- | |||
|[[File:MLSS+BM10Coin.png]] [[File:M&LDT Nut.png]] [[File:MLSS+BM10Coin.png]] [[File:MLSS+BM10Coin.png]][[File:MLSS+BM10Coin.png]][[File:MLSS+BM10Coin.png]][[File:MLSS+BM10Coin.png]][[File:MLSS+BM10Coin.png]][[File:MLSS+BM10Coin.png]][[File:MLSS+BM10Coin.png]][[File:MLSS+BM10Coin.png]][[File:MLSS+BM10Coin.png]][[File:MLSS+BM10Coin.png]]<br>10-Coin, Super Nut, 10-Coin, 10 10-Coins | |||
|In the second scene, near the entrance. | |||
|[[File:Dreamy Driftwood Shore (Pink Pi'illo 1) Blocks 1-4.png]] | |||
|- | |||
|[[File:Dream Team Gloves.png]]<br>Rookie Gloves | |||
|In the first scene, in the upper part reachable from the second scene. | |||
|[[File:Dreamy Driftwood Shore (Pink Pi'illo 1) Block 5.png]] | |||
|} | |||
===Pink Pi'illo 2=== | |||
{|border=1 cellpadding=2 style="text-align: center; border-collapse: collapse; border: 1px solid black; width:100%" | |||
!colspan="3"style="background:pink; height:2em"|Dreamy Driftwood Shore (Pink Pi'illo 2) - 1 ? Block | |||
|-style="background:pink; height:2em" | |||
!Item/s | |||
!Location | |||
!Screenshot | |||
|- | |||
|[[File:Dream Team Accessory.png]]<br>Silver Statue | |||
|In the middle. | |||
|[[File:Dreamy Driftwood Shore (Pink Pi'illo 2) Block.png]] | |||
|} | |||
===Pink Pi'illo 3=== | |||
{|border=1 cellpadding=2 style="text-align: center; border-collapse: collapse; border: 1px solid black; width:100%" | |||
!colspan="3"style="background:pink; height:2em"|Dreamy Driftwood Shore (Pink Pi'illo 3) - 2 ? Blocks | |||
|-style="background:pink; height:2em" | |||
!Item/s | |||
!Location | |||
!Screenshot | |||
|- | |||
|[[File:M&LDT Syrup.png]] [[File:MLSS+BM10Coin.png]][[File:MLSS+BM10Coin.png]][[File:MLSS+BM10Coin.png]][[File:MLSS+BM10Coin.png]][[File:MLSS+BM10Coin.png]][[File:MLSS+BM10Coin.png]][[File:MLSS+BM10Coin.png]][[File:MLSS+BM10Coin.png]][[File:MLSS+BM10Coin.png]][[File:MLSS+BM10Coin.png]]<br>Ultrasyrup Jar, 10 10-Coins | |||
|At the very top. | |||
|[[File:Dreamy Driftwood Shore (Pink Pi'illo 3) Blocks.png]] | |||
|} | |||
==Names in other languages== | ==Names in other languages== | ||
{{foreign names | {{foreign names | ||
|Jap=夢のヒルーネビーチ | |Jap=夢のヒルーネビーチ | ||
|JapR=Yume no Hirūne Bīchi | |JapR=Yume no Hirūne Bīchi | ||
|JapM= Driftwood Shore of Dreams | |JapM=[[Driftwood Shore#Names in other languages|Driftwood Shore]] of Dreams | ||
|Dut= | |||
|FreA= | |||
|FreE=Plage Lidemer onirique | |FreE=Plage Lidemer onirique | ||
|FreEM=Oneiric | |FreEM=Oneiric Dreamy Driftwood | ||
|Ita=Dormiriva onirica | |Ita=Dormiriva onirica | ||
|ItaM=Dreamy Driftwood Shore | |ItaM=Dreamy Driftwood Shore | ||
|Kor= | |||
|Por=Baía das Sestas onírica | |||
|PorM=Oneiric Dreamy Driftwood | |||
|Rus= | |||
|SpaA=Costa Sosiego onírica | |SpaA=Costa Sosiego onírica | ||
|SpaAM=Dreamy | |SpaAM=Dreamy Dreamy Driftwood | ||
|SpaE=Playa Siesta en sueños | |SpaE=Playa Siesta en sueños | ||
|SpaEM=Driftwood Shore in dreams | |SpaEM=Driftwood Shore in dreams | ||
Latest revision as of 11:47, July 31, 2024
| Dreamy Driftwood Shore | |
|---|---|
| |
| First appearance | Mario & Luigi: Dream Team (2013) |
| Greater location | Pi'illo Island |
| Inhabitants | Spinies, Lakitus, Piranha Plants, Nipper Plants, Bloopurns, Dreamcaps R, Dreamcap Captains R |
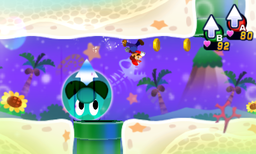
Dreamy Driftwood Shore is the Dream World's version of Driftwood Shore and a location in Mario & Luigi: Dream Team. It is the sixth location visited in the Dream World.
Mario comes here to hide Princess Peach from Antasma and Bowser. Along the way, he meets Seadric, a Seadring, who suggests to hide her deeper in the Dream World through the use of Dream Eggs. Mario collects three Dream Eggs from Seadric's siblings and expands the Dream World, allowing her to have better protection. However, Peach turns out to be a disguised Kamek, who summons the Elite Trio to fight Mario. The trio loses and Mario exits Dreamy Driftwood Shore. The special attack Luiginary Flame is learned here.
Enemies[edit]
Lakitus (background enemy)
Nipper Plants (background enemy)
Private Goomp (boss)
Corporal Paraplonk (boss)
Sergeant Guy (boss)
Block locations[edit]
Seadric Dreampoint[edit]
| Dreamy Driftwood Shore (Seadric Dreampoint) - 29 Blocks (16 ?, 1 M, 2 L, 10 Attack Piece) | ||
|---|---|---|
| Item/s | Location | Screenshot |
Luiginary Flame Attack Piece |
In the first scene, right of the Dream Portal. | 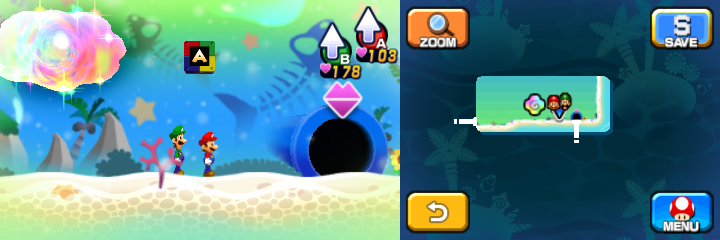
|
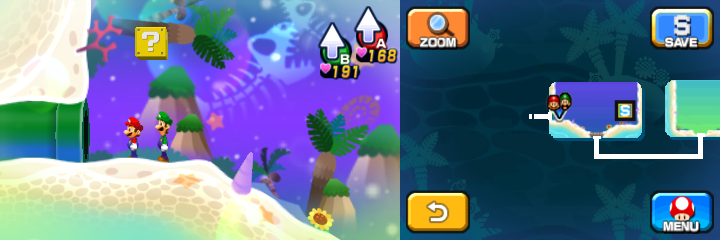
10-Coin |
NOTE: Following 10 blocks are available only after returning here with one Dream Egg. In the third scene, near the exit pipe. |
|
10-Coin, 50-Coin, 10-Coin, Luiginary Flame Attack Piece |
In the fifth scene, in the east part. The Attack Piece Block is reachable only with Luiginary Gravity. | 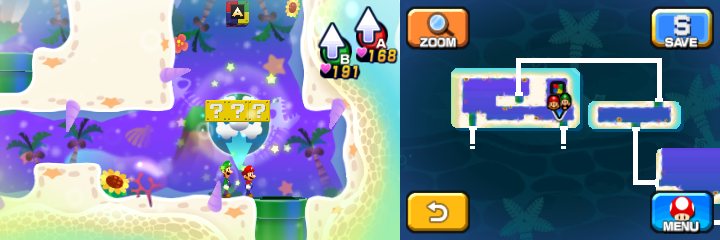
|
Luiginary Flame Attack Piece |
In the scene accessed from the west pipe in the fifth scene, in the northwest. Reachable only with Luiginary Gravity. | 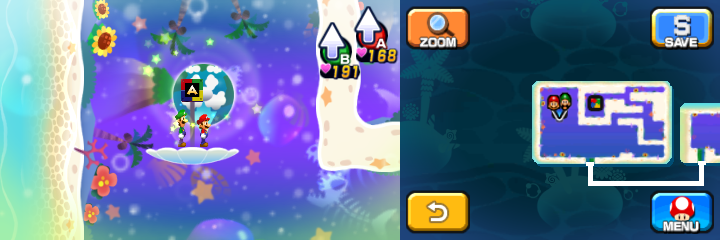
|
Ultra Mushroom |
Same scene, in the "maze" part, in the southeast. Reachable only with Luiginary Gravity. | 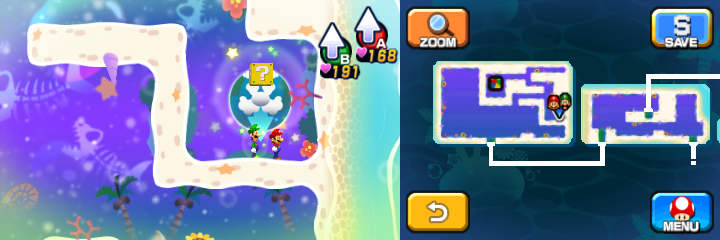
|
Luiginary Flame Attack Piece |
Same scene, same part, in the northwest. Reachable only with Luiginary Gravity. | 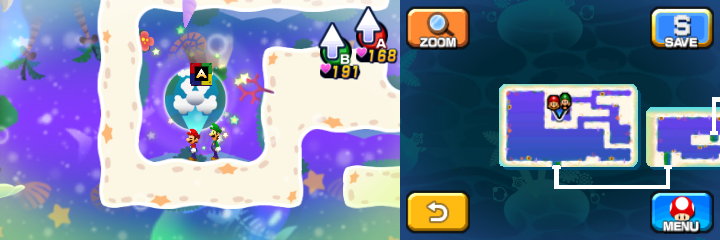
|
Supersyrup Jar |
In the sixth scene, right of the second platform. | 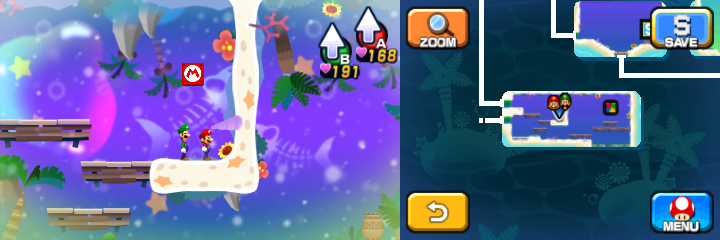
|
Luiginary Flame Attack Piece |
Same scene, above the sixth platform. | 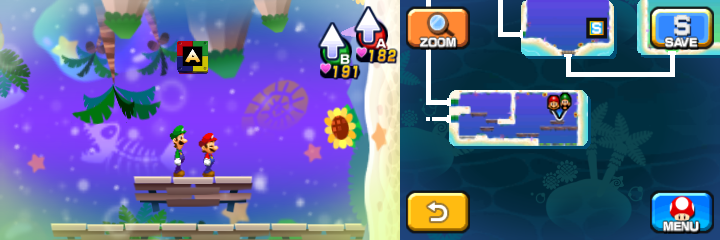
|
Super Candy |
NOTE: Following 15 blocks are available only after returning here with two Dream Eggs. In the ninth scene, near the exit pipe. |
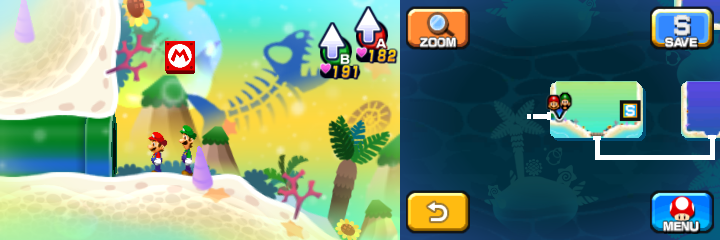
|
Luiginary Flame Attack Piece |
In the tenth scene, in the west. Reachable only with Luiginary Gravity. | 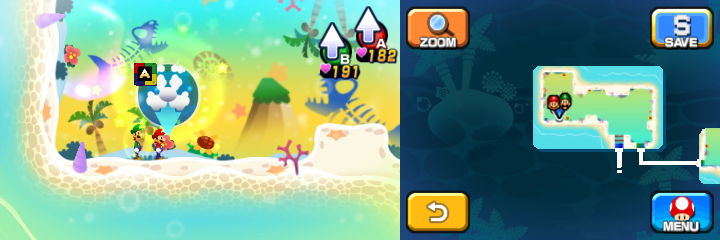
|
Super Nut |
In the eleventh scene, in the northwest. Reachable only with Luiginary Gravity. | 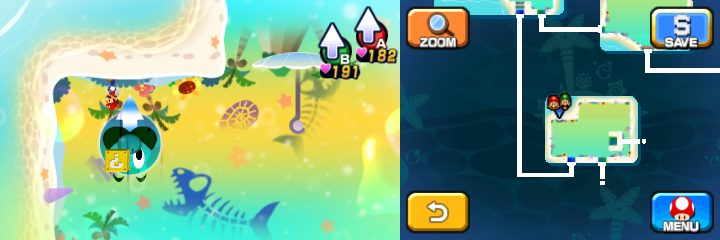
|
Ultra Candy, 10 50-Coins |
In the scene accessed by a green pipe in the ground in the eleventh scene, above the fourth and fifth platforms | 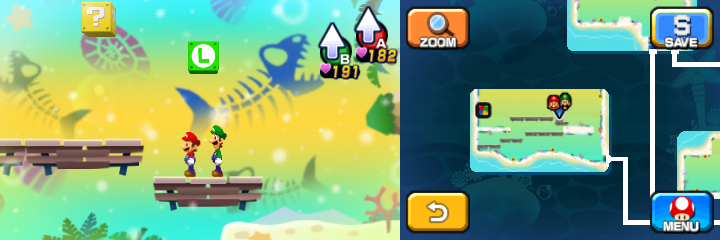
|
Luiginary Flame Attack Piece |
Same scene, in the northwest. | 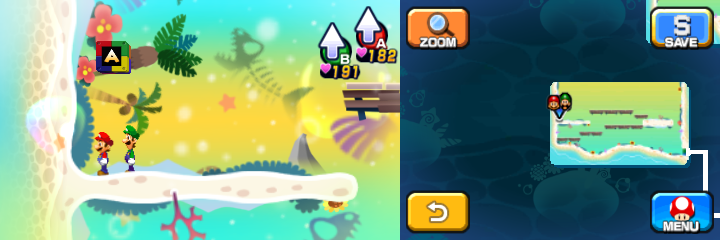
|
Ultrasyrup Jar |
In the twelfth scene, in the northeast. Reachable only with Luiginary Gravity. | 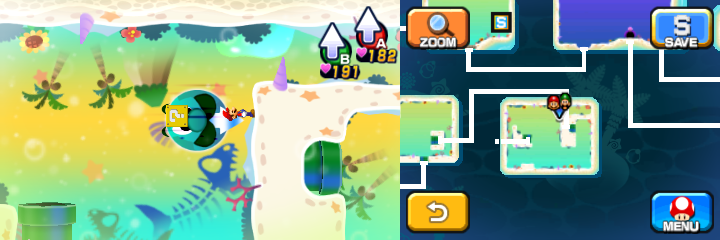
|
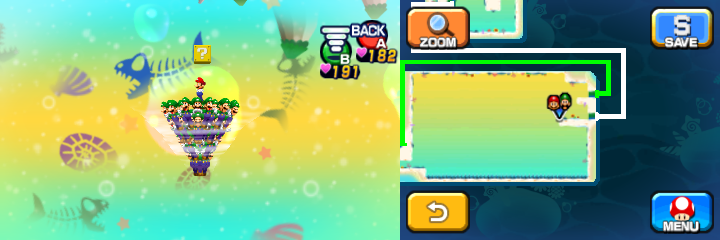
50-Coin |
NOTE: Due to block being above spikes and Bros are moving, map is unavailable on the exact location, so image is done by the combining the exact location and the last spot where map is available. Also applies for the next block. In the thirteenth scene, in the middle, in the air. Reachable only with cone Luiginoid Formation, using Spin Jump and Hover Spin techniques. |
|
50-Coin |
Same scene, in the air, after the spike bed. Reachable only with cone Luiginoid Formation, using Spin Jump and Hover Spin techniques. | 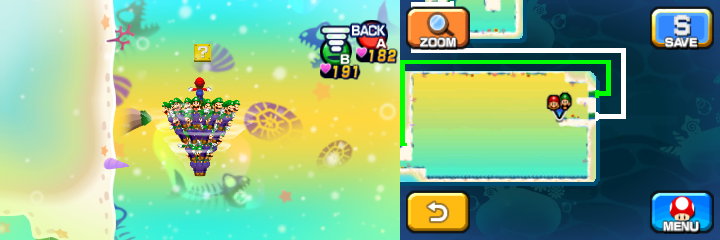
|
10-Coin (all 3) |
In the fourteenth scene, in the southwest. | 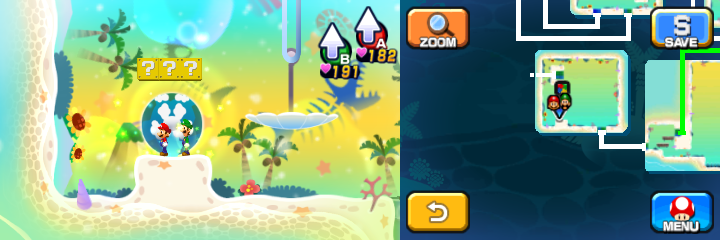
|
Luiginary Flame Attack Piece |
Same scene, above the previous three. | 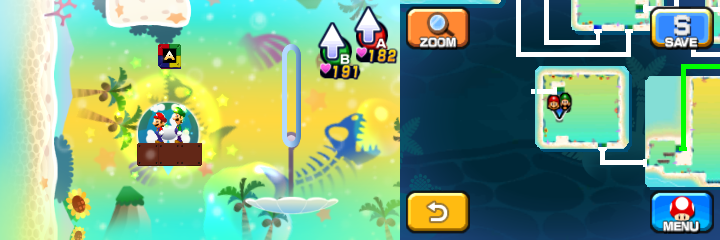
|
Luiginary Flame Attack Piece |
In the fifteenth scene, in the west. | 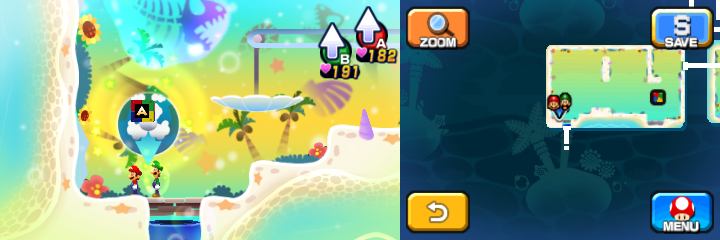
|
Luiginary Flame Attack Piece |
Same scene, in the east, reachable after stone block rises. | 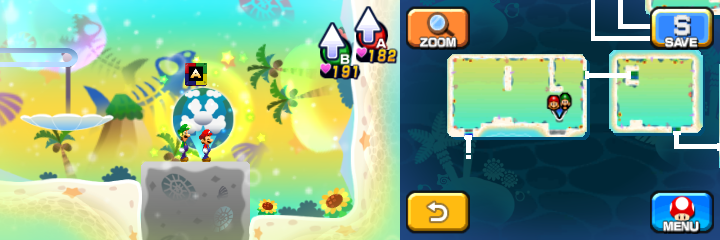
|
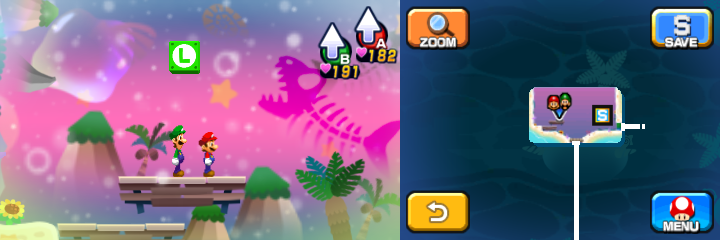
POW Scarf |
NOTE: Following three blocks are available only after returning here with three Dream Eggs. In the seventeenth scene, above the second platform. |
|
Ultra Candy |
In the eighteenth scene, in the lower part reachable from nineteenth scene. | 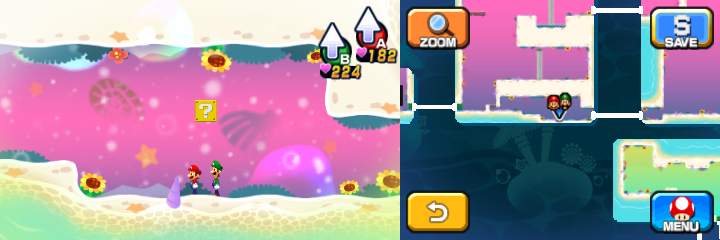
|
Ultra Mushroom |
In the twentieth scene, in the northeast. Reachable only with Luiginary Gravity. | 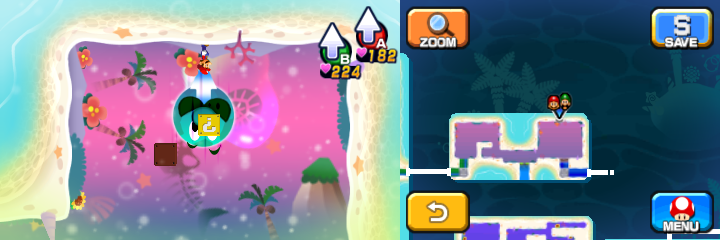
|
Seabury Dreampoint[edit]
Pink Pi'illo 1[edit]
Pink Pi'illo 2[edit]
| Dreamy Driftwood Shore (Pink Pi'illo 2) - 1 ? Block | ||
|---|---|---|
| Item/s | Location | Screenshot |
Silver Statue |
In the middle. | 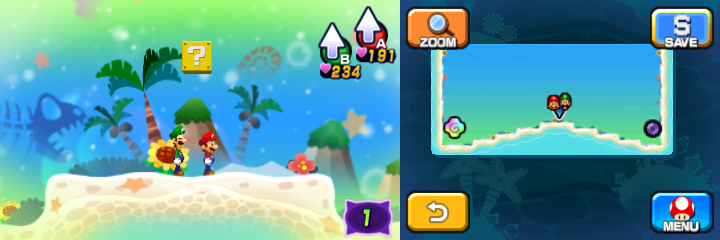
|
Pink Pi'illo 3[edit]
| Dreamy Driftwood Shore (Pink Pi'illo 3) - 2 ? Blocks | ||
|---|---|---|
| Item/s | Location | Screenshot |
Ultrasyrup Jar, 10 10-Coins |
At the very top. | 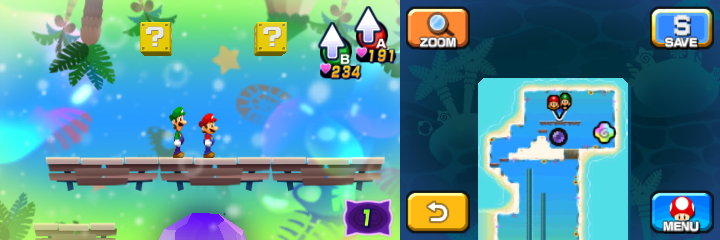
|
Names in other languages[edit]
| Language | Name | Meaning | Notes |
|---|---|---|---|
| Japanese | 夢のヒルーネビーチ[?] Yume no Hirūne Bīchi |
Driftwood Shore of Dreams | |
| French (NOE) | Plage Lidemer onirique[?] | Oneiric Dreamy Driftwood | |
| Italian | Dormiriva onirica[?] | Dreamy Driftwood Shore | |
| Portuguese | Baía das Sestas onírica[?] | Oneiric Dreamy Driftwood | |
| Spanish (NOA) | Costa Sosiego onírica[?] | Dreamy Dreamy Driftwood | |
| Spanish (NOE) | Playa Siesta en sueños[?] | Driftwood Shore in dreams |


