Prism Prison: Difference between revisions
mNo edit summary |
|||
| (19 intermediate revisions by 10 users not shown) | |||
| Line 1: | Line 1: | ||
{{ | {{level infobox | ||
|title=Prism Prison | |title=Prism Prison | ||
|image=[[File: | |image=[[File:Prism Prison.png|250px]] | ||
|code=4-S3 | |code=4-S3 | ||
|game=''[[Wario Land: Shake It!]]'' | |game=''[[Wario Land: Shake It!]]'' | ||
|track=Airytale Castle (before holding a Merfle Barrel)<br>Prism Prison (after freeing a purple Merfle) | |||
|before=[[Riverbloat Rapids|<<]] | |before=[[Riverbloat Rapids|<<]] | ||
|after=>> | |after=>> | ||
}} | }} | ||
'''Prism Prison''' is a secret level in [[Jiggle Jungle]] in the game ''[[Wario Land: Shake It!]]'' It can be accessed | {{quote|This is Prism Prison. This one'll be tough for sure!|[[Merfle|Purple Merfle]]|Wario Land: Shake It!}} | ||
'''Prism Prison''' is a secret level in [[Jiggle Jungle]] in the game ''[[Wario Land: Shake It!]]'' It can be accessed after [[Wario]] finds the [[Secret Map]] in [[Riverbloat Rapids]]. | |||
==Layout== | |||
The level takes place in the sky, with clouds being the main platforms. In the background are floating ruins (similar to those of Babylonian ruins) and rainbows against a pink sky. Many key elements from Airytale Castle including [[Rocket Bucket]]s, spike rotators and conveyor belts make their reappearance here. In the beginning, Wario will have to avoid attacks from two [[Turkeyjerk]]s to enter the castle. He soon needs to maneuver a Rocket Bucket to collect [[coin]]s and reach the launchpad on the other side, in the meantime avoiding spike rotators. Afterwards, he will encounter several [[Pitchfork]]s and columns that can be lifted up when Wario pound the ground. He will have to make best use of them to get coins and treasures. After he exits the castle, he will have to strike several [[Certainy Switch]]es to create roads made of [[Uncertain Block]]s and use the [[Max Fastosity Dasherator]] to break the metallic block, behind which there is a hidden tunnel directed to the treasure and more coins. In the last section, [[Bumbleprod]]s and a [[Peek-a-boom]] are guarding the way to a purple [[Merfle]] caged in a [[Merfle Barrel]]. After Wario frees the Merfle, he must maneuver the Rocket Bucket again to reach the higher platform without touching the spike rotators. The golden enemy, a [[Bandinero]], is right at the highest platform. Eventually, he needs to use the [[Max Fastosity Dasherator]] to run on conveyor belts and topple over to escape the prison before time runs out. | |||
==Missions== | ==Missions== | ||
[[File:WLSI Prism Prison golden enemy.png|thumb|Wario near the level's golden enemy]] | |||
{| class="wikitable" style="text-align:center" | |||
! Icon | |||
! Mission | |||
! Description | |||
|- | |||
{ | | [[File:WLSI! Clock icon.png]] | ||
| style="text-align:left" | ''Finish before the clock hits 2:00:00'' | |||
| style="text-align:left" | After holding a [[Merfle Barrel]], Wario must hurry back to the start of the level within a set time limit of one minute (1:00:00). | |||
|- | |||
| [[File:WLSI! Heart icon.png]] | |||
| style="text-align:left" | ''Beat the stage without taking damage'' | |||
| style="text-align:left" | Wario must clear the level without taking any damage. | |||
|- | |||
| [[File:WLSI! Coin icon.png]] | |||
| style="text-align:left" | ''Collect 72,000 [[coin]]s'' | |||
| style="text-align:left" | Wario must collect at least 72,000 coins, including [[diamond]]s. | |||
|- | |||
| [[File:WLSI! Rocket Bucket icon.png]] | |||
| style="text-align:left" | ''Don't break any [[Rocket Bucket]]s'' | |||
| style="text-align:left" | Wario must clear the level without destroying any Rocket Buckets. | |||
|- | |||
| [[File:WLSI! Golden Bandinero icon.png]] | |||
| style="text-align:left" | ''Defeat the golden enemy'' | |||
| style="text-align:left" | Wario must defeat a lone golden [[Bandinero]]. | |||
|- | |||
| [[File:WLSI! Checkpoint icon.png]] | |||
| style="text-align:left" | ''Beat the stage without using the checkpoint'' | |||
| style="text-align:left" | Wario must clear the level without hitting the [[checkpoint block]]. | |||
|} | |||
==Enemies== | |||
*[[Bandinero]] (red and gold) | |||
*[[Boomdinero]] (silver) | |||
*[[Bumbleprod]] | |||
*[[Floating Bandinero]] | |||
*[[Nosedozer]] | |||
*[[Peek-a-boom]] | |||
*[[Pitchfork]] (blue) | |||
*[[Spike Bar]] | |||
*[[Spike Trap]] | |||
*[[Turkeyjerk]] (brown) | |||
==Treasures== | |||
{| class="wikitable sortable" style="text-align:center" | |||
! rowspan="2" width="5%" | Treasure | |||
! rowspan="2" width="5%" class="unsortable" | Image | |||
! colspan="2" width="30%" | Description | |||
! rowspan="2" width="5%" class="unsortable" | Location image | |||
|- | |||
! width="15%" class="unsortable" | NTSC-U | |||
! width="15%" class="unsortable" | PAL | |||
|- | |||
| Air Guitar | |||
| [[File:WLSItreasure76.png]] | |||
| style="text-align:left" | ''Rock out anywhere and anytime with this nonexistent axe. WHOOOOO!'' | |||
| style="text-align:left" | ''Rock out anywhere and any time with this nonexistent axe. WHOOOOO!'' | |||
| [[File:WLSI Prism Prison chest1.png|200px]] | |||
|- | |||
| Flying Floor Pillow<br><small>Rocket Rug</small> | |||
| [[File:WLSItreasure77.png]] | |||
| colspan="2" style="text-align:left" | ''Seats four and has the smoothest ride in town. Fuel economy, on the other hand...'' | |||
| [[File:WLSI Prism Prison chest2.png|200px]] | |||
|- | |||
| Electric Ukulele | |||
| [[File:WLSItreasure78.png]] | |||
| colspan="2" style="text-align:left" | ''No, not amplified by electricity. It actually just shocks anyone who plays it.'' | |||
| [[File:WLSI Prism Prison chest3.png|200px]] | |||
|} | |||
==Data== | |||
{| class="wikitable" style="text-align:center" | |||
! Given time | |||
! Sum of coins | |||
|- | |||
| 3:00:00 | |||
| 85,090 | |||
|} | |||
==Names in other languages== | ==Names in other languages== | ||
{{foreign names | {{foreign names | ||
| | |Jpn=エアーキングダム | ||
| | |JpnR=Eā Kingudamu | ||
| | |JpnM=Air Kingdom | ||
|Ger=Pastello-Palais | |Ger=Pastello-Palais | ||
|GerM=Pastel Palace}} | |GerM=Pastel Palace | ||
|Ita=Prigione Prisma | |||
|ItaM=Prism Prison | |||
|SpaA=Prisión del Prisma | |||
|SpaAM=Prism Prison | |||
|SpaE=Prisión Prismática | |||
|SpaEM=Prismatic Prison | |||
|Fre=Prison Aérienne | |||
|FreM=Aerial Prison | |||
}} | |||
{{WLSI}} | {{WLSI}} | ||
[[Category:Secret | [[Category:Secret levels]] | ||
[[Category:Wario Land: Shake It! | [[Category:Wario Land: Shake It! levels]] | ||
Latest revision as of 08:27, January 20, 2025
| Level | |
|---|---|
| Prism Prison | |
| |
| Level code | 4-S3 |
| Game | Wario Land: Shake It! |
| Music track | Airytale Castle (before holding a Merfle Barrel) Prism Prison (after freeing a purple Merfle) |
| << Directory of levels >> | |
- “This is Prism Prison. This one'll be tough for sure!”
- —Purple Merfle, Wario Land: Shake It!
Prism Prison is a secret level in Jiggle Jungle in the game Wario Land: Shake It! It can be accessed after Wario finds the Secret Map in Riverbloat Rapids.
Layout[edit]
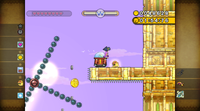
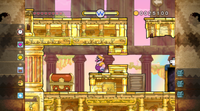
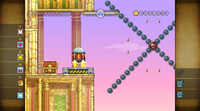
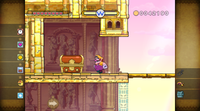
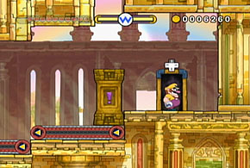
The level takes place in the sky, with clouds being the main platforms. In the background are floating ruins (similar to those of Babylonian ruins) and rainbows against a pink sky. Many key elements from Airytale Castle including Rocket Buckets, spike rotators and conveyor belts make their reappearance here. In the beginning, Wario will have to avoid attacks from two Turkeyjerks to enter the castle. He soon needs to maneuver a Rocket Bucket to collect coins and reach the launchpad on the other side, in the meantime avoiding spike rotators. Afterwards, he will encounter several Pitchforks and columns that can be lifted up when Wario pound the ground. He will have to make best use of them to get coins and treasures. After he exits the castle, he will have to strike several Certainy Switches to create roads made of Uncertain Blocks and use the Max Fastosity Dasherator to break the metallic block, behind which there is a hidden tunnel directed to the treasure and more coins. In the last section, Bumbleprods and a Peek-a-boom are guarding the way to a purple Merfle caged in a Merfle Barrel. After Wario frees the Merfle, he must maneuver the Rocket Bucket again to reach the higher platform without touching the spike rotators. The golden enemy, a Bandinero, is right at the highest platform. Eventually, he needs to use the Max Fastosity Dasherator to run on conveyor belts and topple over to escape the prison before time runs out.
Missions[edit]
| Icon | Mission | Description |
|---|---|---|
| Finish before the clock hits 2:00:00 | After holding a Merfle Barrel, Wario must hurry back to the start of the level within a set time limit of one minute (1:00:00). | |
| Beat the stage without taking damage | Wario must clear the level without taking any damage. | |
| Collect 72,000 coins | Wario must collect at least 72,000 coins, including diamonds. | |
| Don't break any Rocket Buckets | Wario must clear the level without destroying any Rocket Buckets. | |
| Defeat the golden enemy | Wario must defeat a lone golden Bandinero. | |
| Beat the stage without using the checkpoint | Wario must clear the level without hitting the checkpoint block. |
Enemies[edit]
- Bandinero (red and gold)
- Boomdinero (silver)
- Bumbleprod
- Floating Bandinero
- Nosedozer
- Peek-a-boom
- Pitchfork (blue)
- Spike Bar
- Spike Trap
- Turkeyjerk (brown)
Treasures[edit]
Data[edit]
| Given time | Sum of coins |
|---|---|
| 3:00:00 | 85,090 |
Names in other languages[edit]
| Language | Name | Meaning | Notes |
|---|---|---|---|
| Japanese | エアーキングダム[?] Eā Kingudamu |
Air Kingdom | |
| French | Prison Aérienne[?] | Aerial Prison | |
| German | Pastello-Palais[?] | Pastel Palace | |
| Italian | Prigione Prisma[?] | Prism Prison | |
| Spanish (NOA) | Prisión del Prisma[?] | Prism Prison | |
| Spanish (NOE) | Prisión Prismática[?] | Prismatic Prison |
